
IMPORTANT! You must read the Schwinn owner’s manual before taking your first ride.
It contains crucial information about safety, performance, proper use, and maintenance.
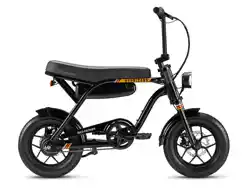
Hurricane
Compact E-Bike
Quick
Start
Guide

You’re just a few steps away from the
joy and freedom of riding. All you have
to do now is assemble your bike. We’ve
prepared this guide to make assembly
as simple as possible so you can get to
the fun part – riding!
Let’s build
your ride!
1
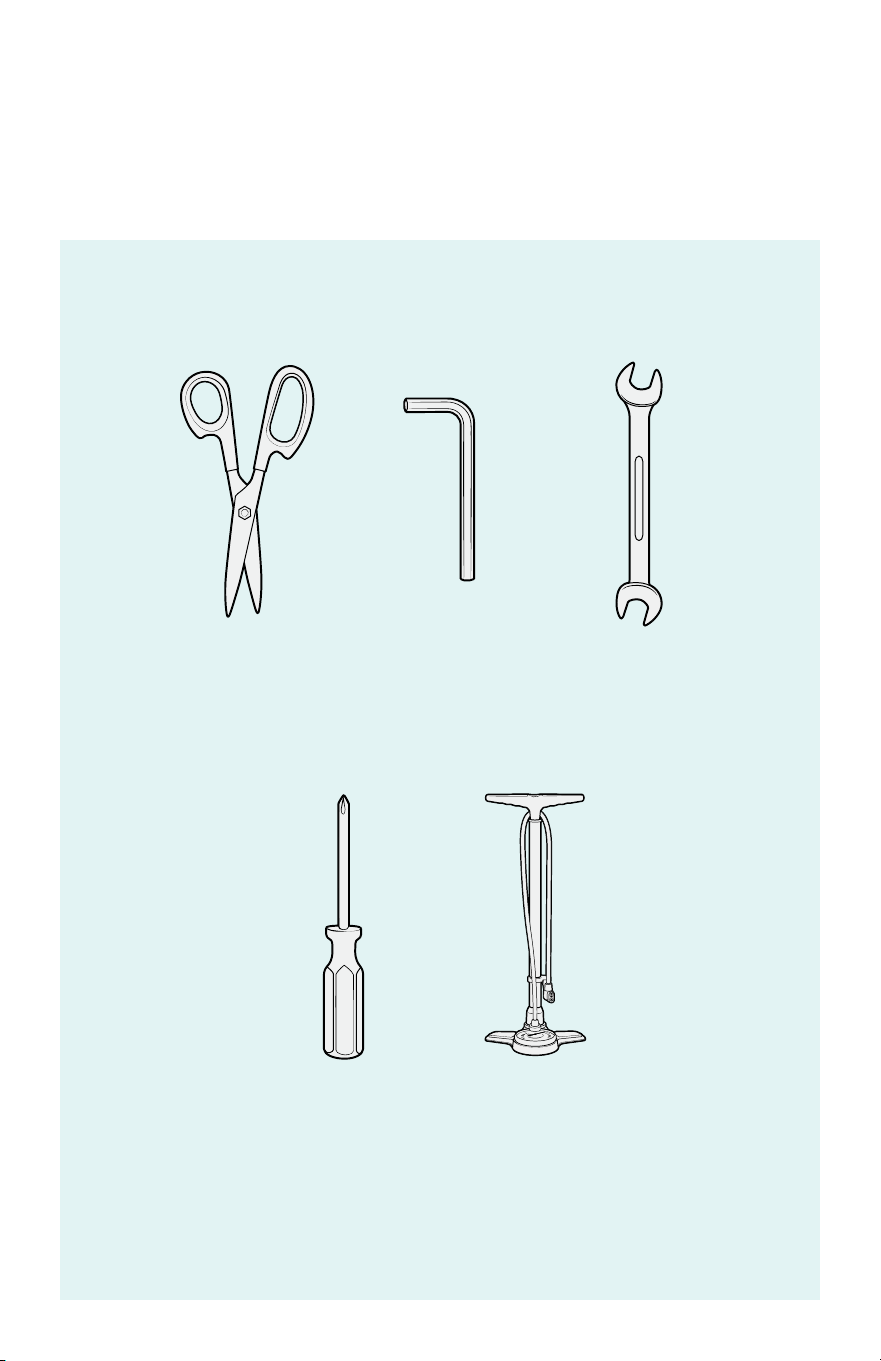
Not all tools are included.
BEFORE YOU BEGIN
Gather necessary
tools for assembly.
SCISSORS 15 mm
WRENCH
(INCLUDED)
PHILLIPS
SCREWDRIVER
AIR PUMP
6 mm
HEX KEY
(INCLUDED)
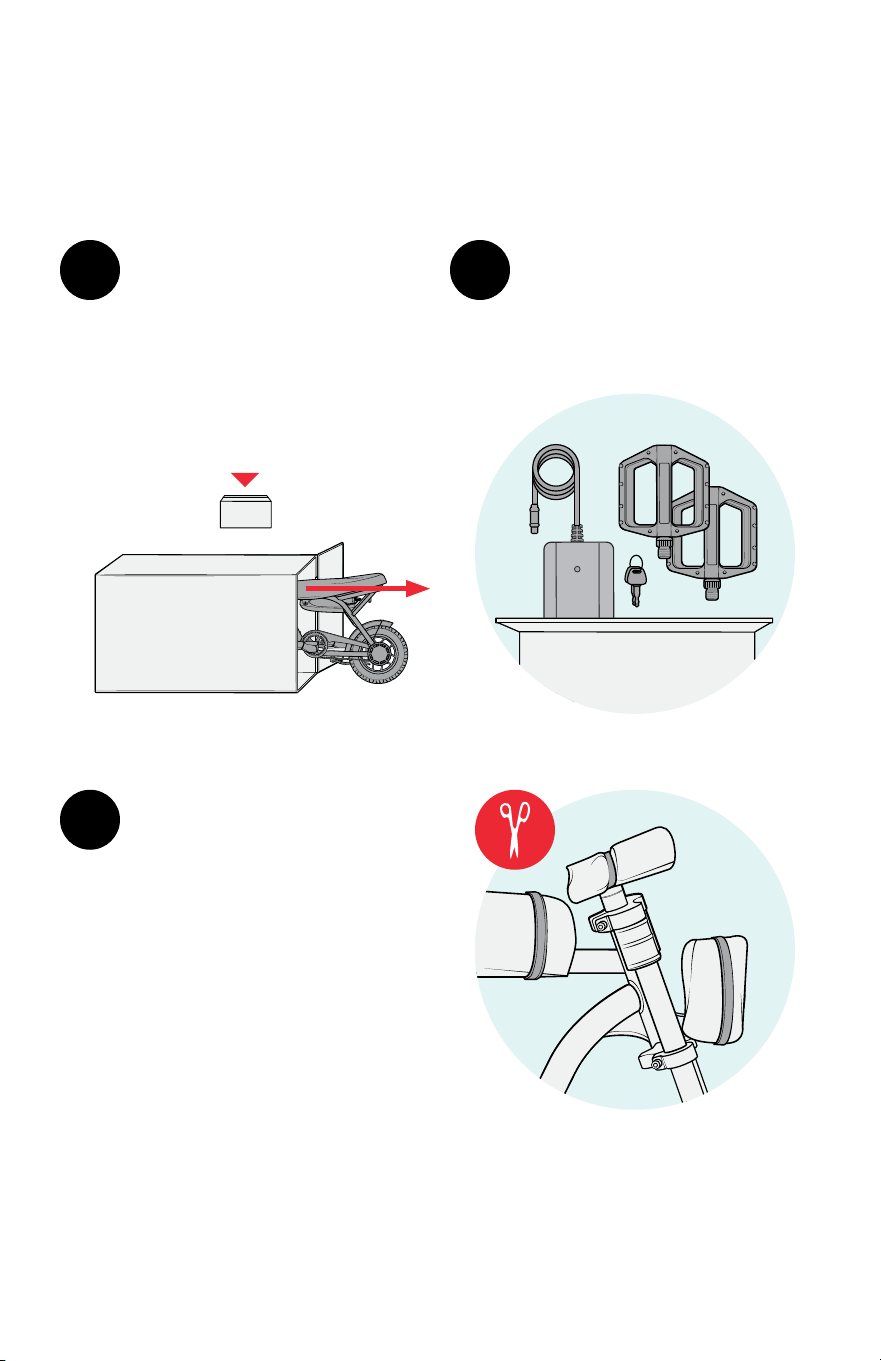
2
Locate the smaller parts
box and unpack the pedals,
charger, and keys, and set
them aside.
3
Carefully remove the
protective packing
materials from the bike.
Cut away from the bike
and parts so you don’t
damage them.
Note: Inspect for shipping
damage and make sure all
parts are included.
Carefully lift each of the
bike parts out of the box.
Note: You may need help
from another person to lift
the bicycle.
1
IMPORTANT!
Do not discard
PARTS
2
Unbox the bicycle.
STEP 1
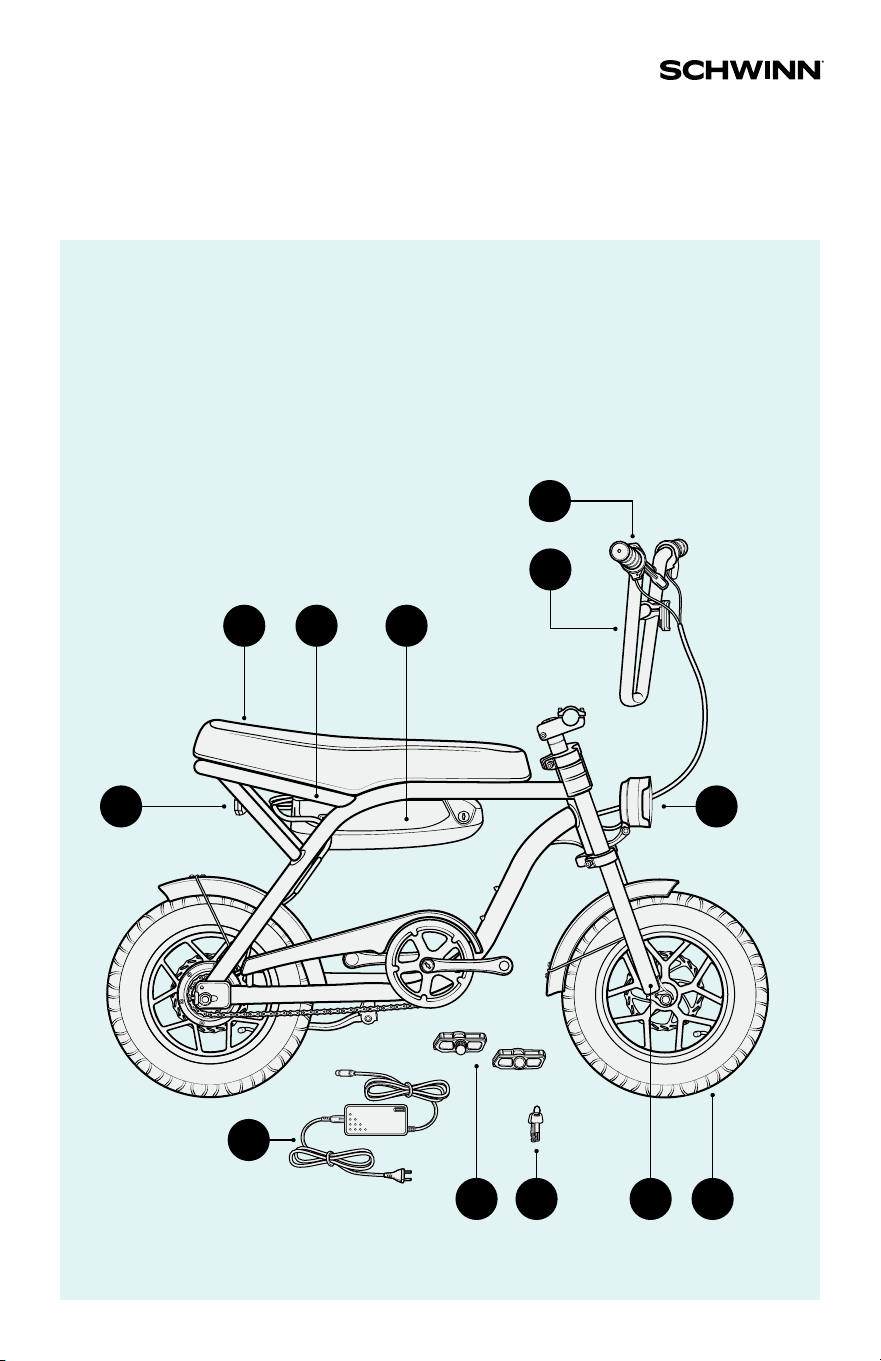
A B C
E
LKJI
D
GF
H
3
Parts Reference
A Seat
B Bike frame
C Battery
D Handlebars
E Throttle
F Rear LED light
G Front LED light
H Battery charger
I Pedals
J Keys
K Fork
L Front wheel
4
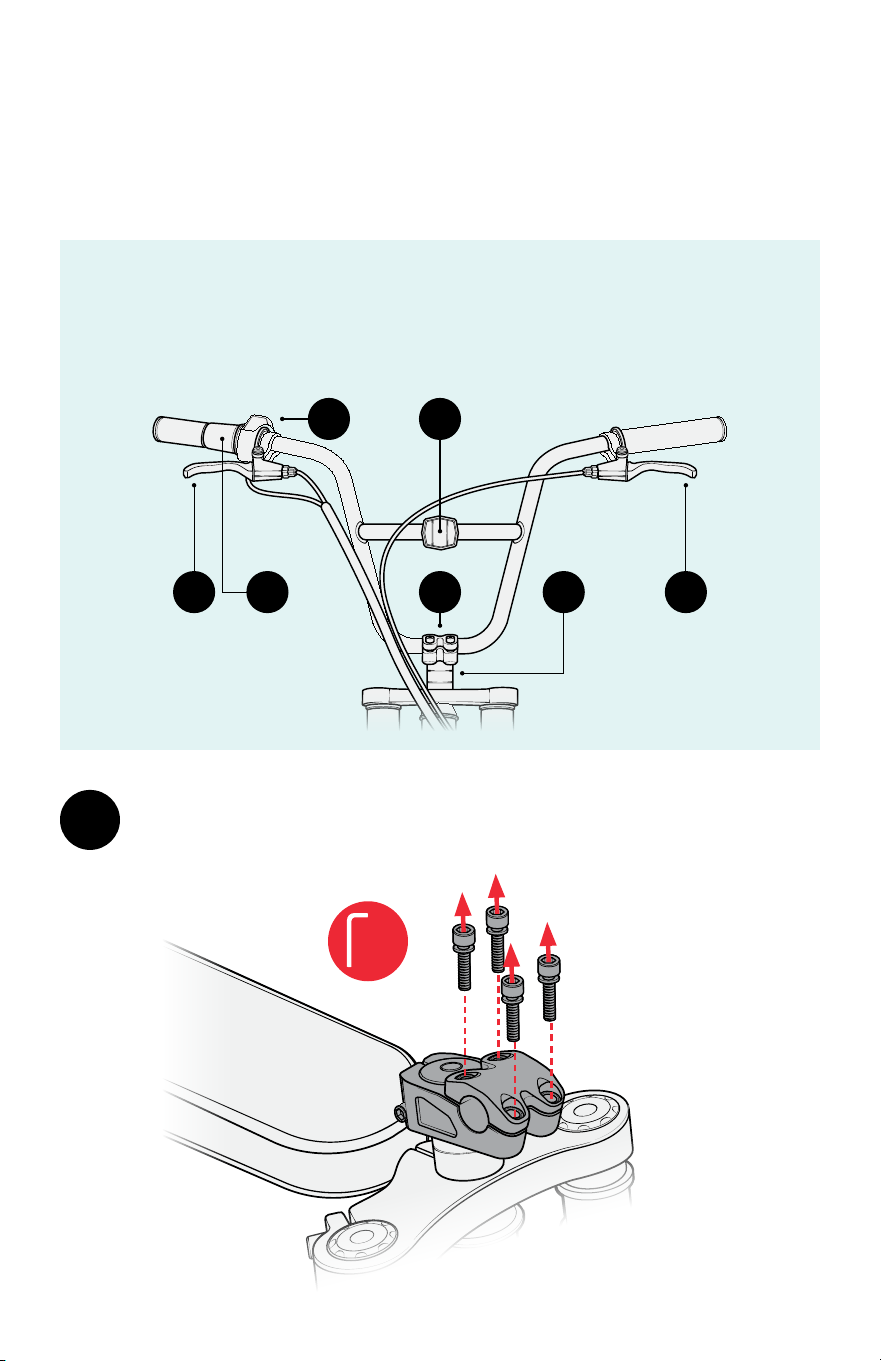
STEP 2
A GB E
DC
F
6
mm
1
Use a 6 mm hex key to remove the four stem face plate bolts.
Set the face plate and bolts aside.
A Rear brake lever
B Throttle
C Battery indicator
D Refl ector
E Faceplate
F Stem
G Front brake lever
Install the handlebars.
5
6
mm
Attach the handlebars by
replacing the face plate on
the stem and partially
tightening the bolts.
3
Lift the handlebars
to a vertical position.
4
THROTTLE
2
Place the center of the handlebars inside the stem and
lay the top of the handlebars against the bike seat.
IMPORTANT! Ensure the cables run cleanly over the
handlebars. When facing the front of the bike, the
throttle should be on your left.
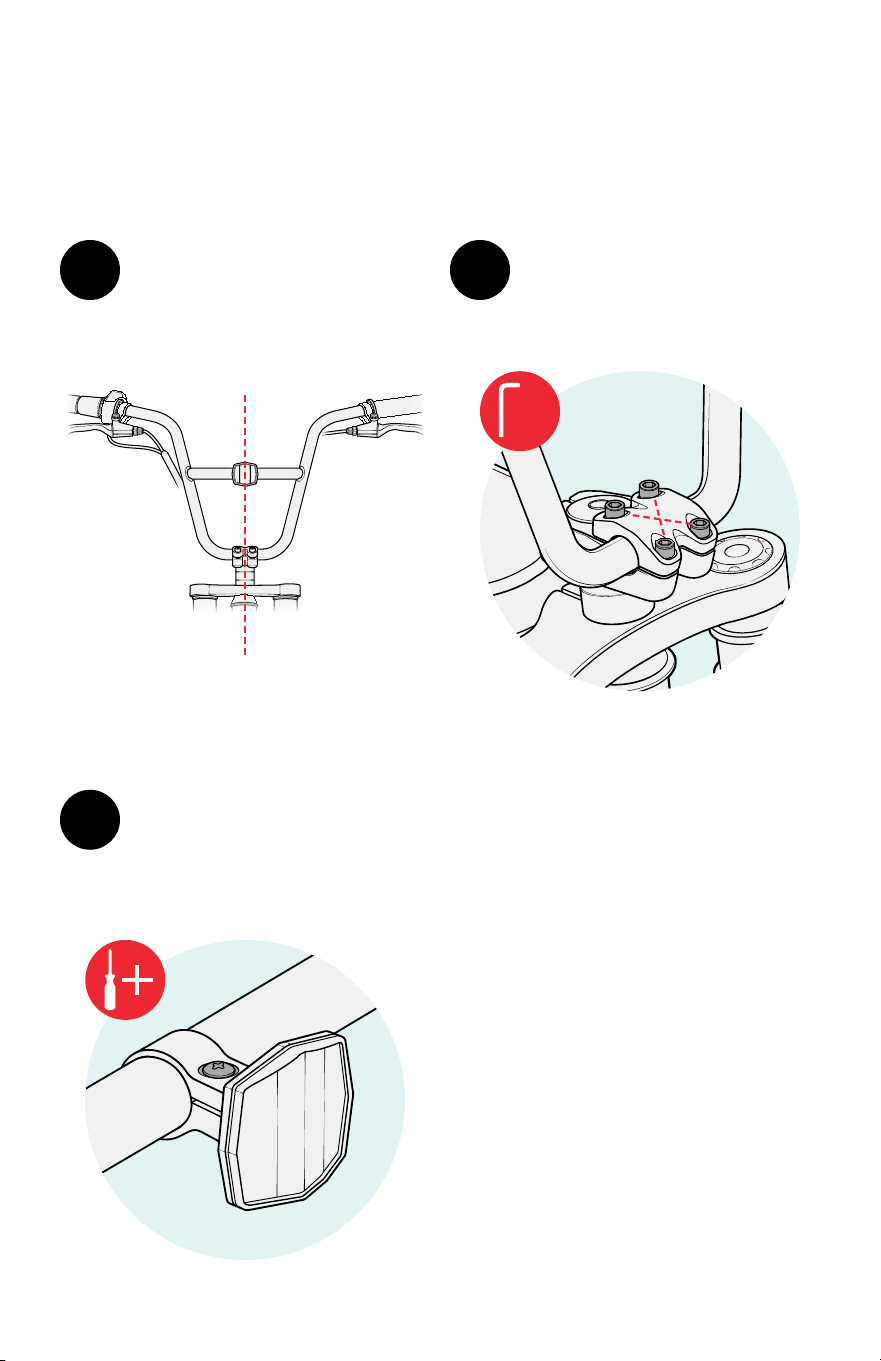
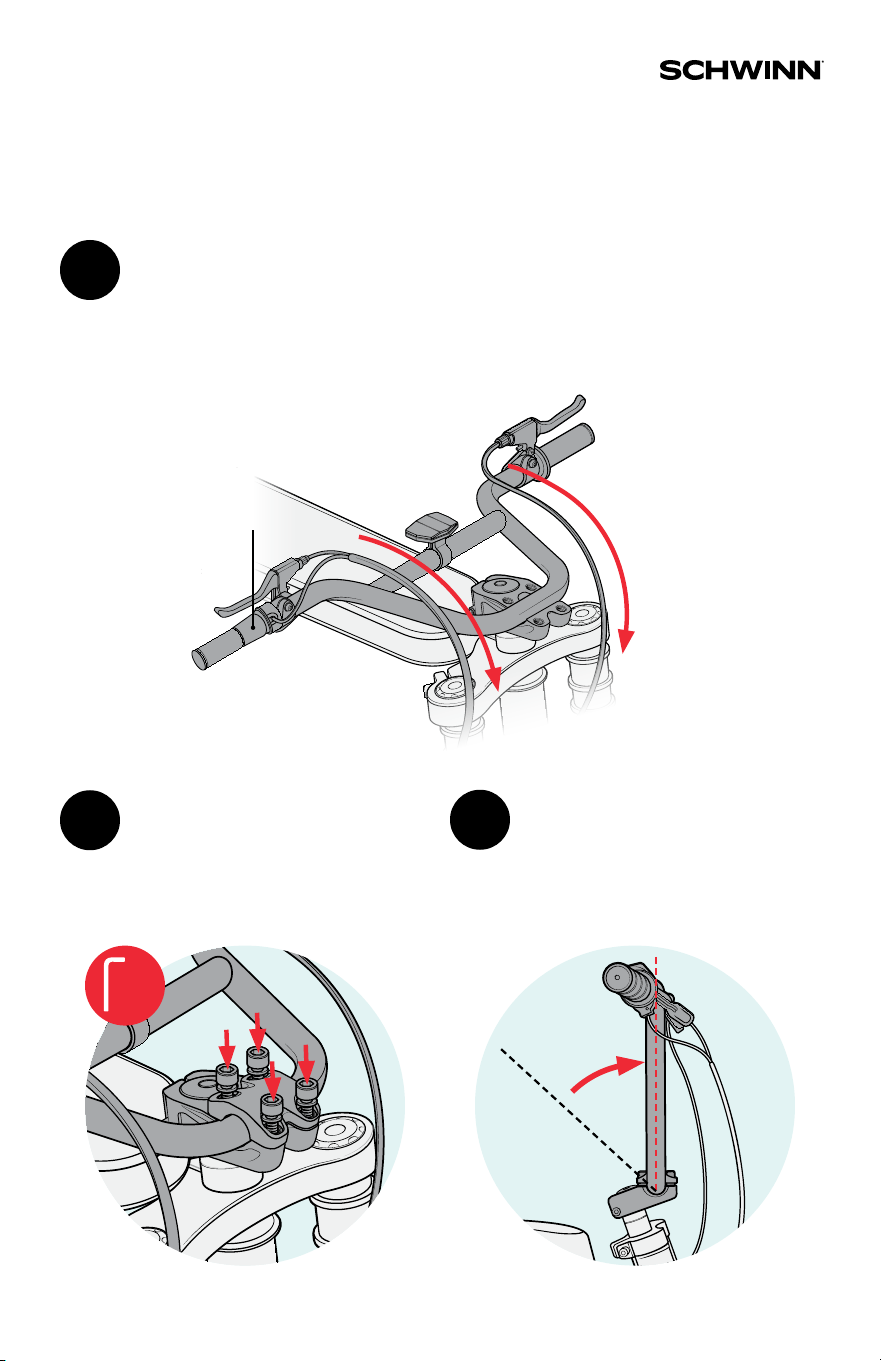
6
STEP 2
Fully tighten the bolts in
an alternating X-pattern.
6
Use a Phillips screwdriver to
tighten the front refl ector
so that it is vertical and
faces forward.
7
5
Ensure the handlebars are
centered in the face plate.
3
4
2
1
6
mm

7
STEP 3
Match each pedal with its
corresponding crank arm.
1
Hand-tighten each pedal
by turning the spindle, then
fully tighten with the 15 mm
open-ended wrench.
2
Note: If hand-tightening the
pedal is di cult, remove it from
the crank, reorient it, and try again.
Do not cross thread the pedals.
IMPORTANT!
Always tighten pedals by
turning the wrench toward
the front of the bike.
TIGHTENTIGHTEN
R
15
mm
Install the pedals.
8
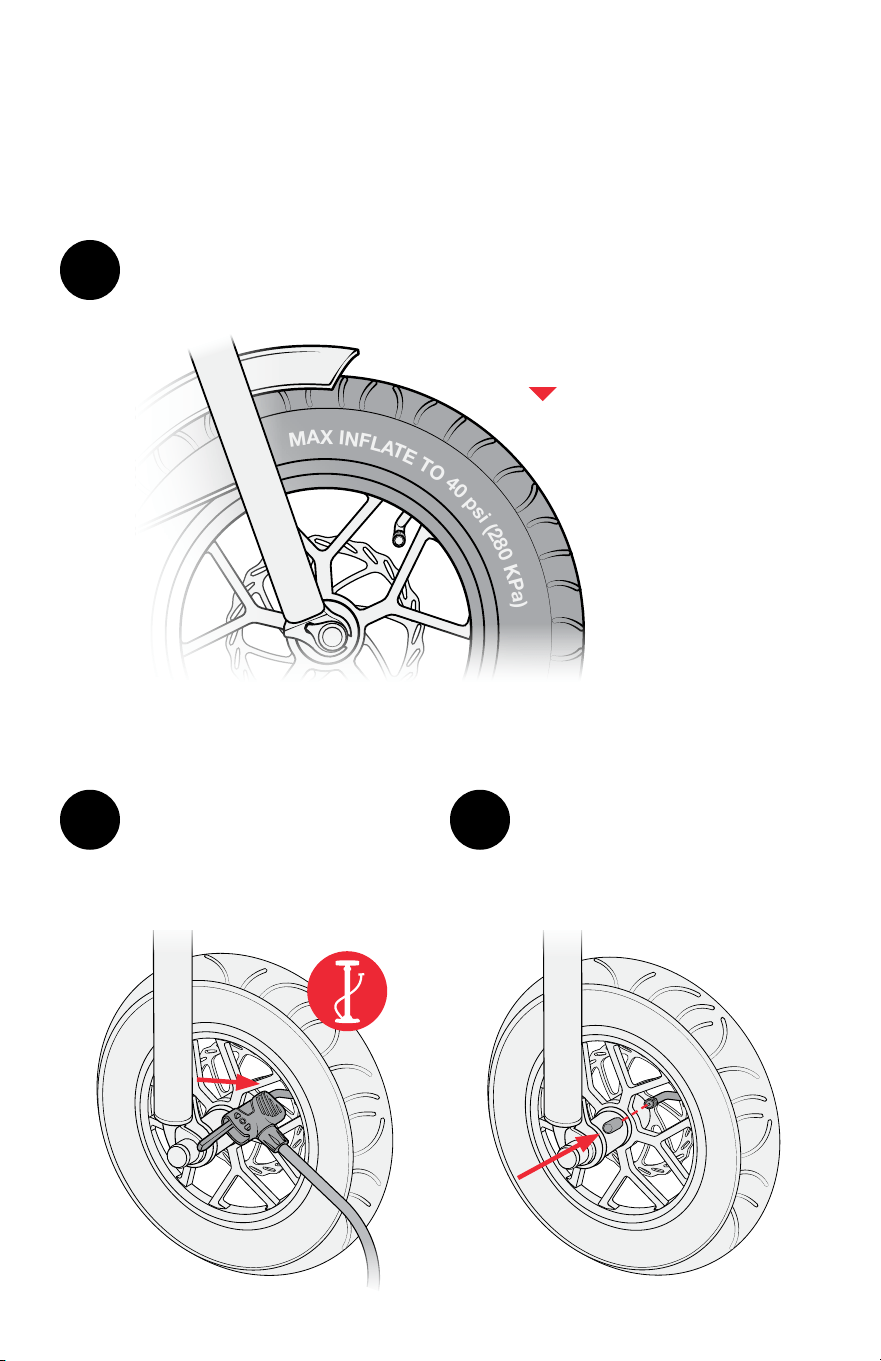
STEP 4
M
A
X
I
N
F
L
A
T
E
T
O
4
0
p
s
i
(
2
8
0
K
P
a
)
IMPORTANT!
Never exceed the
recommended PSI.
Find the recommended PSI printed on the side of the tire.
1
Remove the plastic cap
from the tire valve, attach
the air pump to the open
valve, and infl ate the tire.
2
Replace the plastic cap and
repeat for the other tire.
3
Infl ate the tires.

9
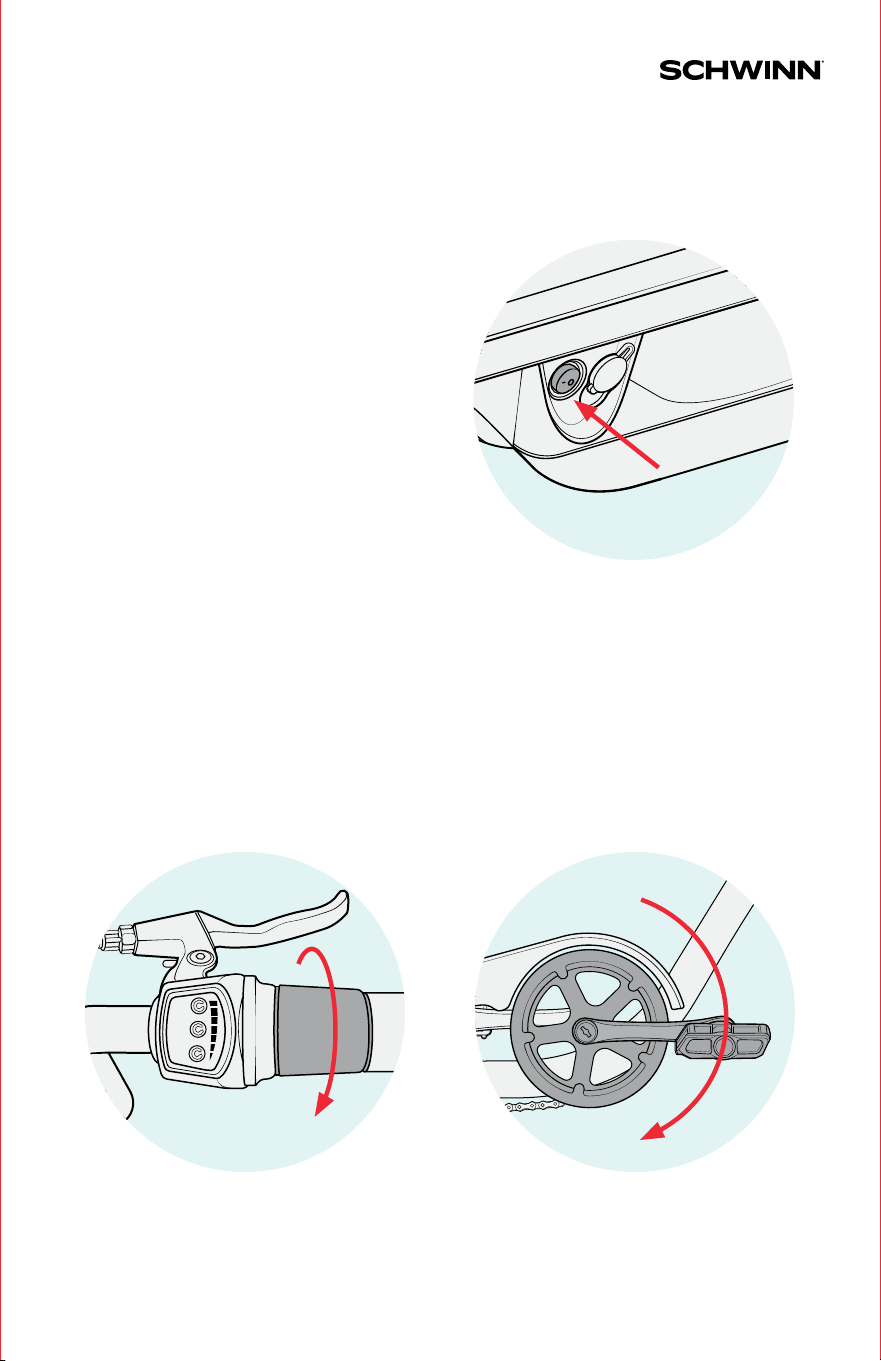
STEP 5
2
The red indicator light
will come on while the
battery is charging. When
the battery is fully charged,
the indicator light will
turn green.
IMPORTANT! Use only the
original Schwinn charger
provided with your e-bike.
Insert the charging cable
into the charging port and
plug the cable into a power
outlet.
1
Charge the battery.
6
hrs

10
1. Check all parts
are secure.
2. Ensure brakes
work properly.
3. Wear your
helmet!
IMPORTANT! You must read the Schwinn owner’s manual before taking your fi rst ride.
It contains crucial information about safety, performance, proper use, and maintenance.
Get ready to ride.
STEP 6
11
STEP 7
rts
es
ly.
THROTTLE
Twist the throttle to
propel the bike forward.
PEDAL ASSIST
Pedal the bike to engage pedal
assist and propel the bike forward.
Sit on the seat, ensure the kickstand
is up, and toggle the power switch
to the ON (-) position. The lights
will come on automatically.
Note: After 15 minutes of nonuse,
the bike will enter sleep mode. To
resume riding, toggle the power
switch OFF (O) and back ON (-).
Power on the bike.
Two ways to go.
STEP 8
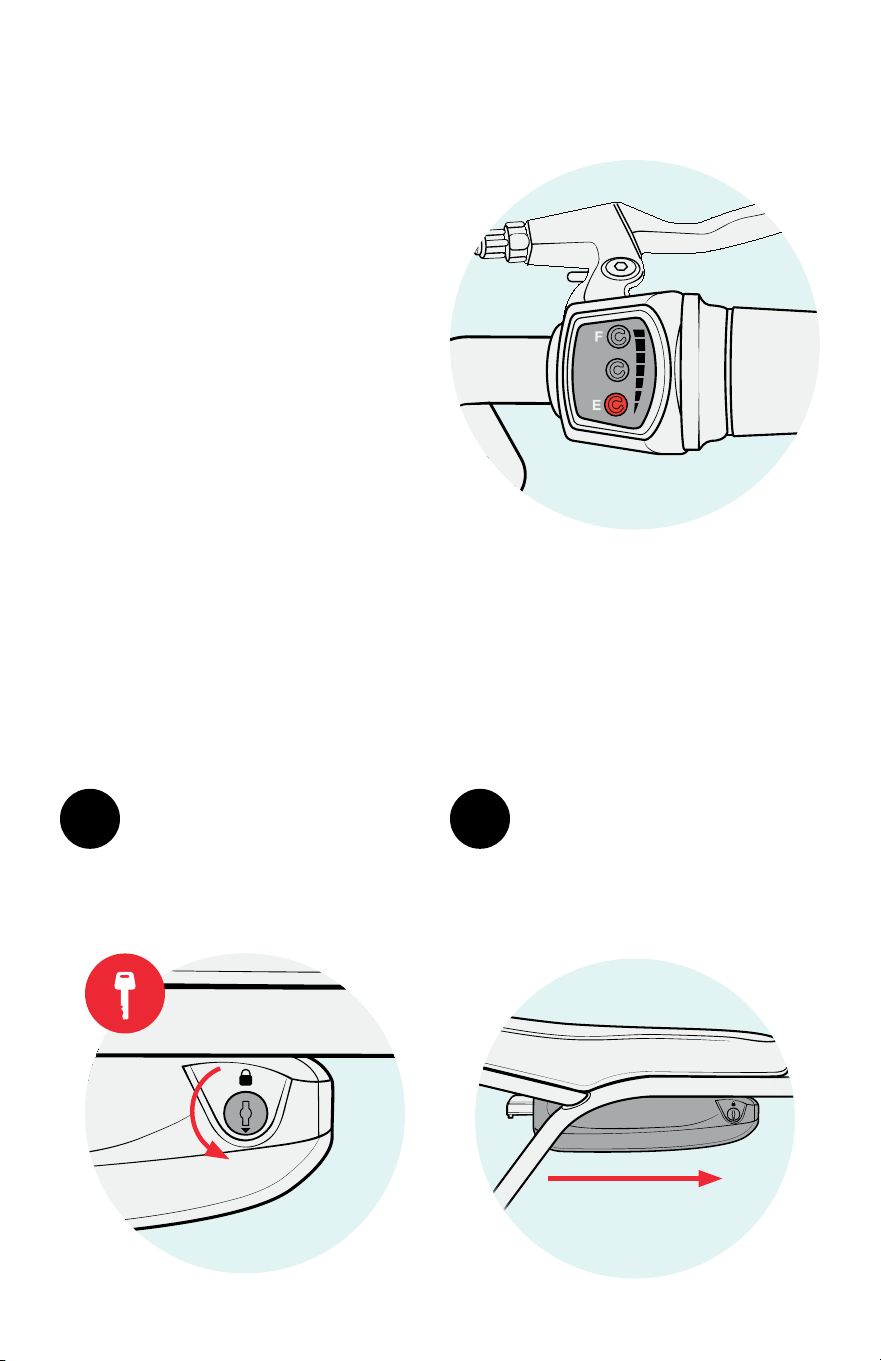
12
To remove the battery,
insert the key into the
lock and turn it to
unlock the battery.
1 2
While supporting the
battery from underneath,
slide it forward to
disengage it from
the battery mount.
Battery Charge Level Display
Battery Removal
The battery can be removed for storage or transport.
The throttle display shows
the current battery charge
level. When the display
shows only a red light, you
must charge the battery
before continuing to ride.
13
2
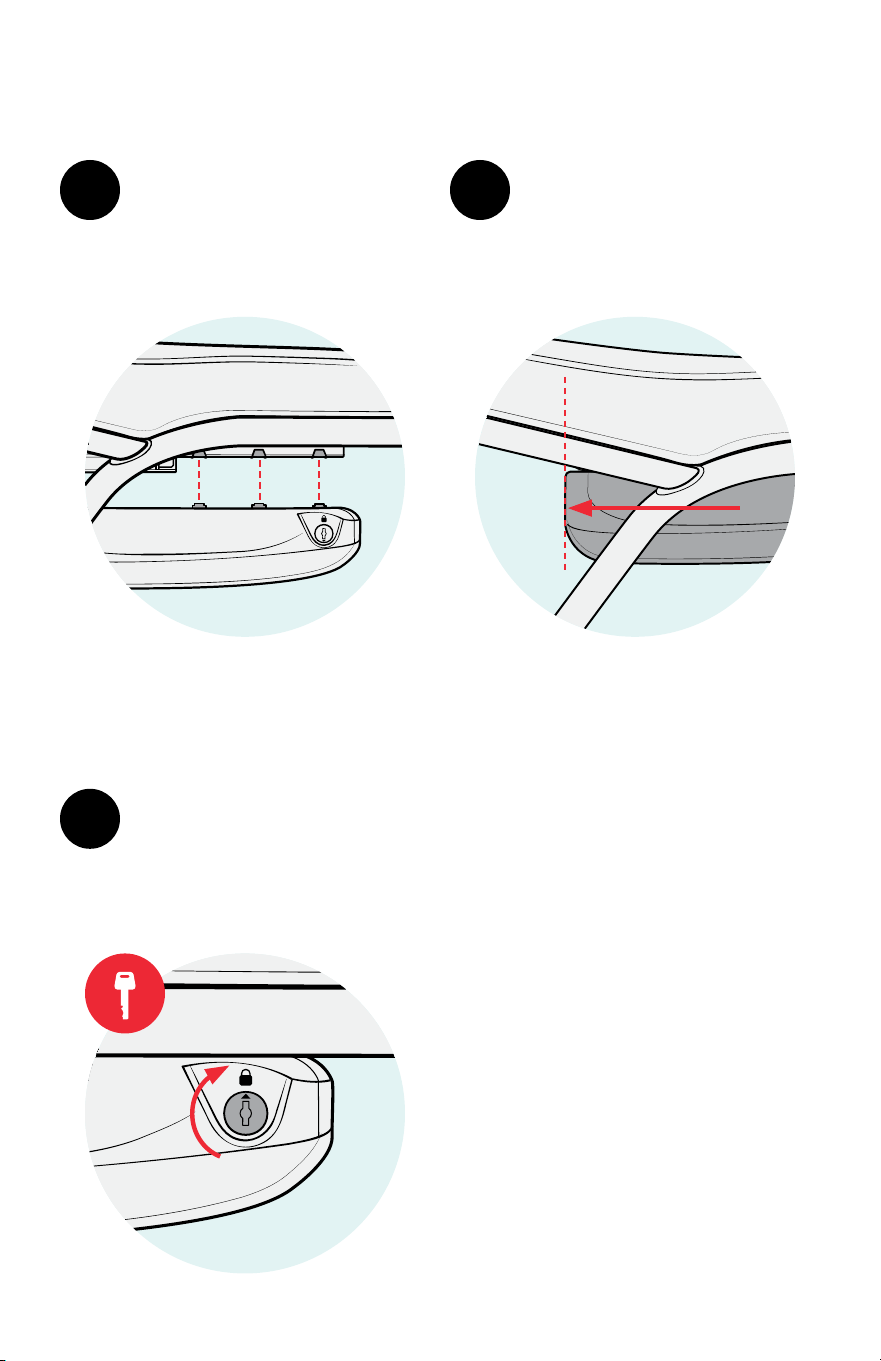
Slide the battery backward
until it is fl ush with the back
of the battery mount.
Line up the tabs on the
top of the battery with
the indentations on the
side of the battery mount.
1
Turn the key to lock the
battery. Ensure the battery
is fully locked before riding
the bike.
3
Note: If the battery is not
completely fl ush with the back
of the battery mount, remove it,
realign the tabs, and try again.
Battery Reinstallation

Roll with us.
1
Register your product
Enjoy worry-free ownership
3
Stay in the know
All things Schwinn right to your inbox
2
Leave a review
You’ll help other riders
4
Share your ride on social
Show o your wheels
A01282-092525
schwinnbikes.com
1-800-626-2811
G
e
t
s
t
a
r
t
e
d