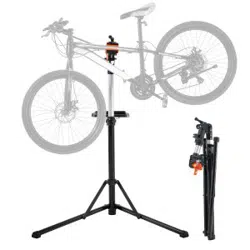
PORTABLE BIKE STAND
SAVE THIS MANUAL: KEEP THIS MANUAL FOR SAFETY WARNINGS, PRECAUTIONS, ASSEMBLY,
OPERATING, INSPECTION, MAINTENANCE AND CLEANING PROCEDURES. WRITE THE PRODUCT’S
SERIAL NUMBER ON THE BACK OF THE MANUAL NEAR THE ASSEMBLY DIAGRAM (OR MONTH
AND YEAR OF PURCHASE IF PRODUCT HAS NO NUMBER)
OWNER’S MANUAL AND SAFETY INSTRUCTIONS
ITEM: 95180
FOR QUESTIONS PLEASE CALL OUR CUSTOMER SUPPORT: 909.628.0880 MON-FRI 9AM TO 3PM PST

IMPORTANT SAFETY INFORMATION
GENERAL SAFETY WARNINGS
Read all safety warnings and instructions. Failure to follow the warnings and instructions may result
in electric shock, re and/or serious injury. Save all warnings and instructions for future reference.
The warnings, precautions, and instructions discussed in this instruction manual cannot cover all possible
conditions and situations that may occur. It must be understood by the operator that common sense and
caution are factors which cannot be built into this product, but must be supplied by the operator. Read
carefully and understand all ASSEMBLY AND OPERATION INSTRUCTIONS before operating. Failure to
follow the safety rules and other basic safety precautions may result in serious personal injury.
1
Keep work area clean and well lit. Cluttered or dark areas invite accidents
DO NOT exceed the maximum extension of the bike mounting tube (B). NOTE: there is a maximum
extension mark on the tube.
DO NOT exceed the maximum load of 66lbs Exceeding the maximum load risks injury and the damage
to bicycle
Inspect all parts of stand prior to each use to ensure safety.
Loose screws must be tightened and defective parts must be replaced to avoid injury or damage.
Ensure that the socket head screws connecting the upper bar are always tight.
ALWAYS put the bicycle work stand on a solid and stable surface to avoid tipping.
ALWAYS ensure the legs are out and the stand is secure prior to use.
NEVER ride the bicycle when it is mounted on a stand.
Keep away from children.
Keep ngers and clothing away from moving parts.
DO NOTmodify, or alter the stand.
To avoid damage to the bicycle, do not squeeze conduit and/or cables with the retaining clamp.
When using the stand for carbon or delicate frames, be careful not to over tighten and damage the bicycle
frame as the clamp exerts a lot of force. Only place the clamp on the seat post to ensure the frame remains
free of damage
DO NOT secure clamp on internal cable housings.
Improper use using this with items other than bicycles, or in other applications may endanger the person
or cause damage.
TECHNICAL SPECIFICATIONS:
MAXIMUM LOAD: 66LBS
BIKE TUBE SIZES: 25-45MM

OPERATION
2
1. Choose your clamping position on the bike - we suggest using the seat tube to avoid frame damage. When
clamping bicycle to frame, set as even a balance as possible to avoid straining clamp and to avoid tipping.
( see comparison of g 1-1)
2. For Carbon and delicate frames, clamp on the seat post (and ensure the stand is stable prior to use).
a. If clamping on the frame, do not clamp on the internal cable housing.
b. If clamping on the frame, ensure the frame is round, or else clamp on the seat post.
4. To stabilize the front wheel, you can attach the front wheel stabilizer. (F) between the handlebars of the
front wheel and the bike mounting tube (B) . (see the g 1- 2).
Release the lever (a) on the head to loosen part (b). You can adjust the bicycle clamp in a full 360 range of
motion. ( please see the g 2-1 ). Lock the lever down to rmly secure the bike in place. Do not crush bike, do
not over tighten, but ensure it is a snug t. Ensure the bike is rmly locked in place prior to use.
To adjust the height, loosen and tighten the release (c) between the supporting tube and the extension tube
(see g 3-1) You can loosen or tighten the release the control joint for the 2 feet to fold or unfold the stand.
(see g 3-1 and g3-2).
FIG. 1-1 FIG. 1-2
FIG. 2-1
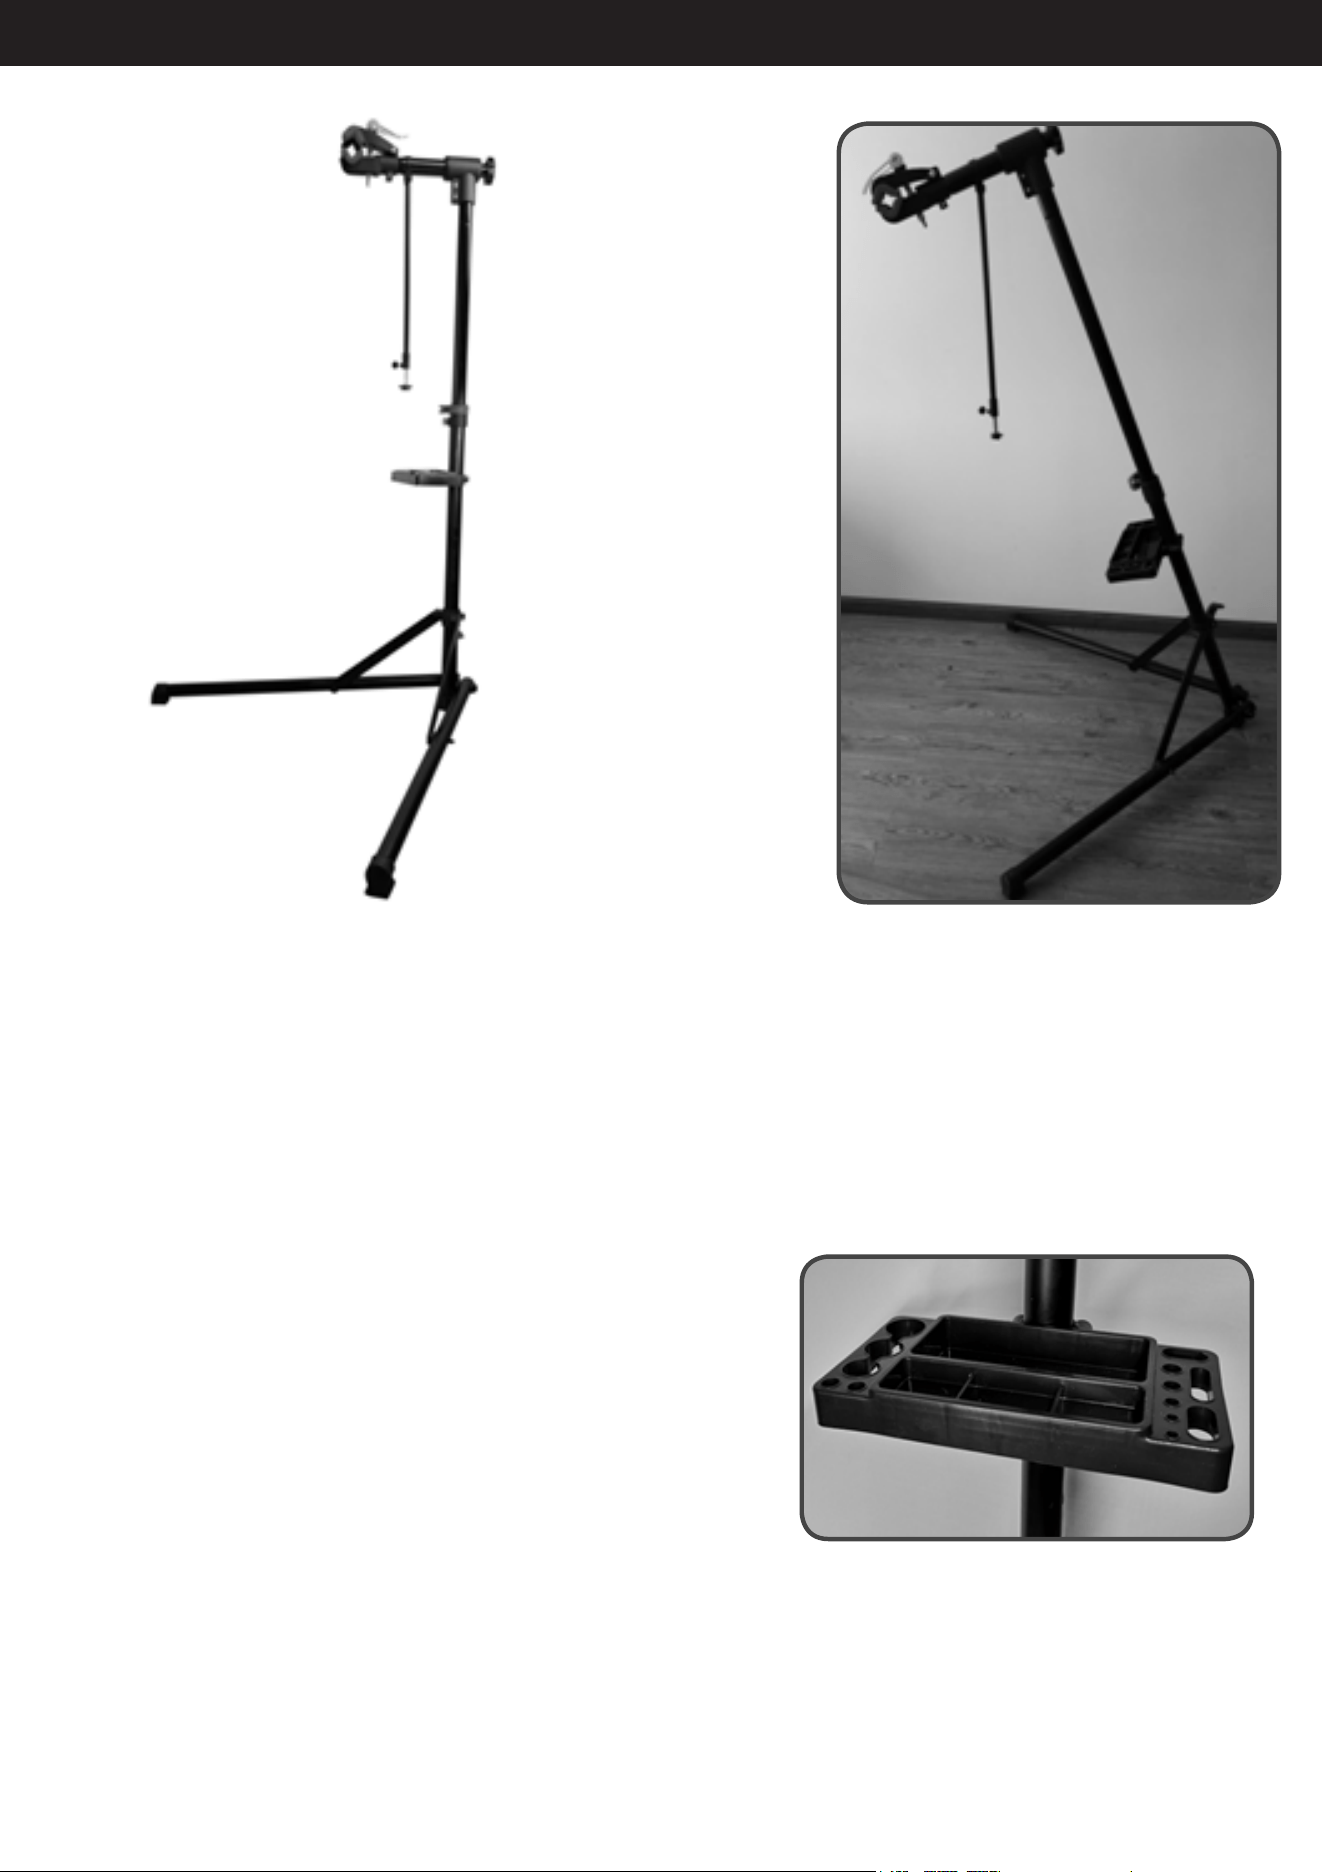
OPERATION
3
TOOLS CONTAINER
To keep the tool shelf upright ( see g 4-1).
FIG. 3-1 FIG. 3-2
FIG. 4-1

4
DISCLAIMER
THE MANUFACTURER AND/OR DISTRIBUTOR HAS PROVIDED THE PARTS LIST AND ASSEMBLY
DIAGRAM IN THIS MANUAL AS A REFERENCE TOOL ONLY. NEITHER THE MANUFACTURER OR
DISTRIBUTOR MAKES ANY REPRESENTATION OR WARRANTY OF ANY KIND TO THE BUYER THAT
HE OR SHE IS QUALIFIED TO MAKE ANY REPAIRS TO THE PRODUCT, OR THAT HE OR SHE IS
QUALIFIED TO REPLACE ANY PARTS OF THE PRODUCT. IN FACT, THE MANUFACTURER AND/OR
DISTRIBUTOR EXPRESSLY STATES THAT ALL REPAIRS AND PARTS REPLACEMENTS SHOULD BE
UNDERTAKEN BY CERTIFIED AND LICENSED TECHNICIANS, AND NOT BY THE BUYER. THE BUYER
ASSUMES ALL RISK AND LIABILITY ARISING OUT OF HIS OR HER REPAIRS TO THE ORIGINAL
PRODUCT OR REPLACEMENT PARTS THERETO, OR ARISING OUT OF HIS OR HER INSTALLATION
OF REPLACEMENT PARTS THERETO.
Record Product’s Serial Number Here:
Note: If product has no serial number, record month and year of purchase instead.
Note: Some parts are listed and shown for illustration purposes only and are not available individually
as replacement parts.
PLEASE READ THE FOLLOWING CAREFULLY
PRODUCT MADE IN CHINA