Notes
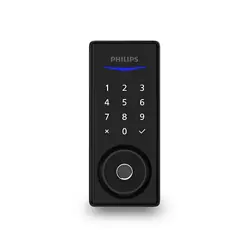
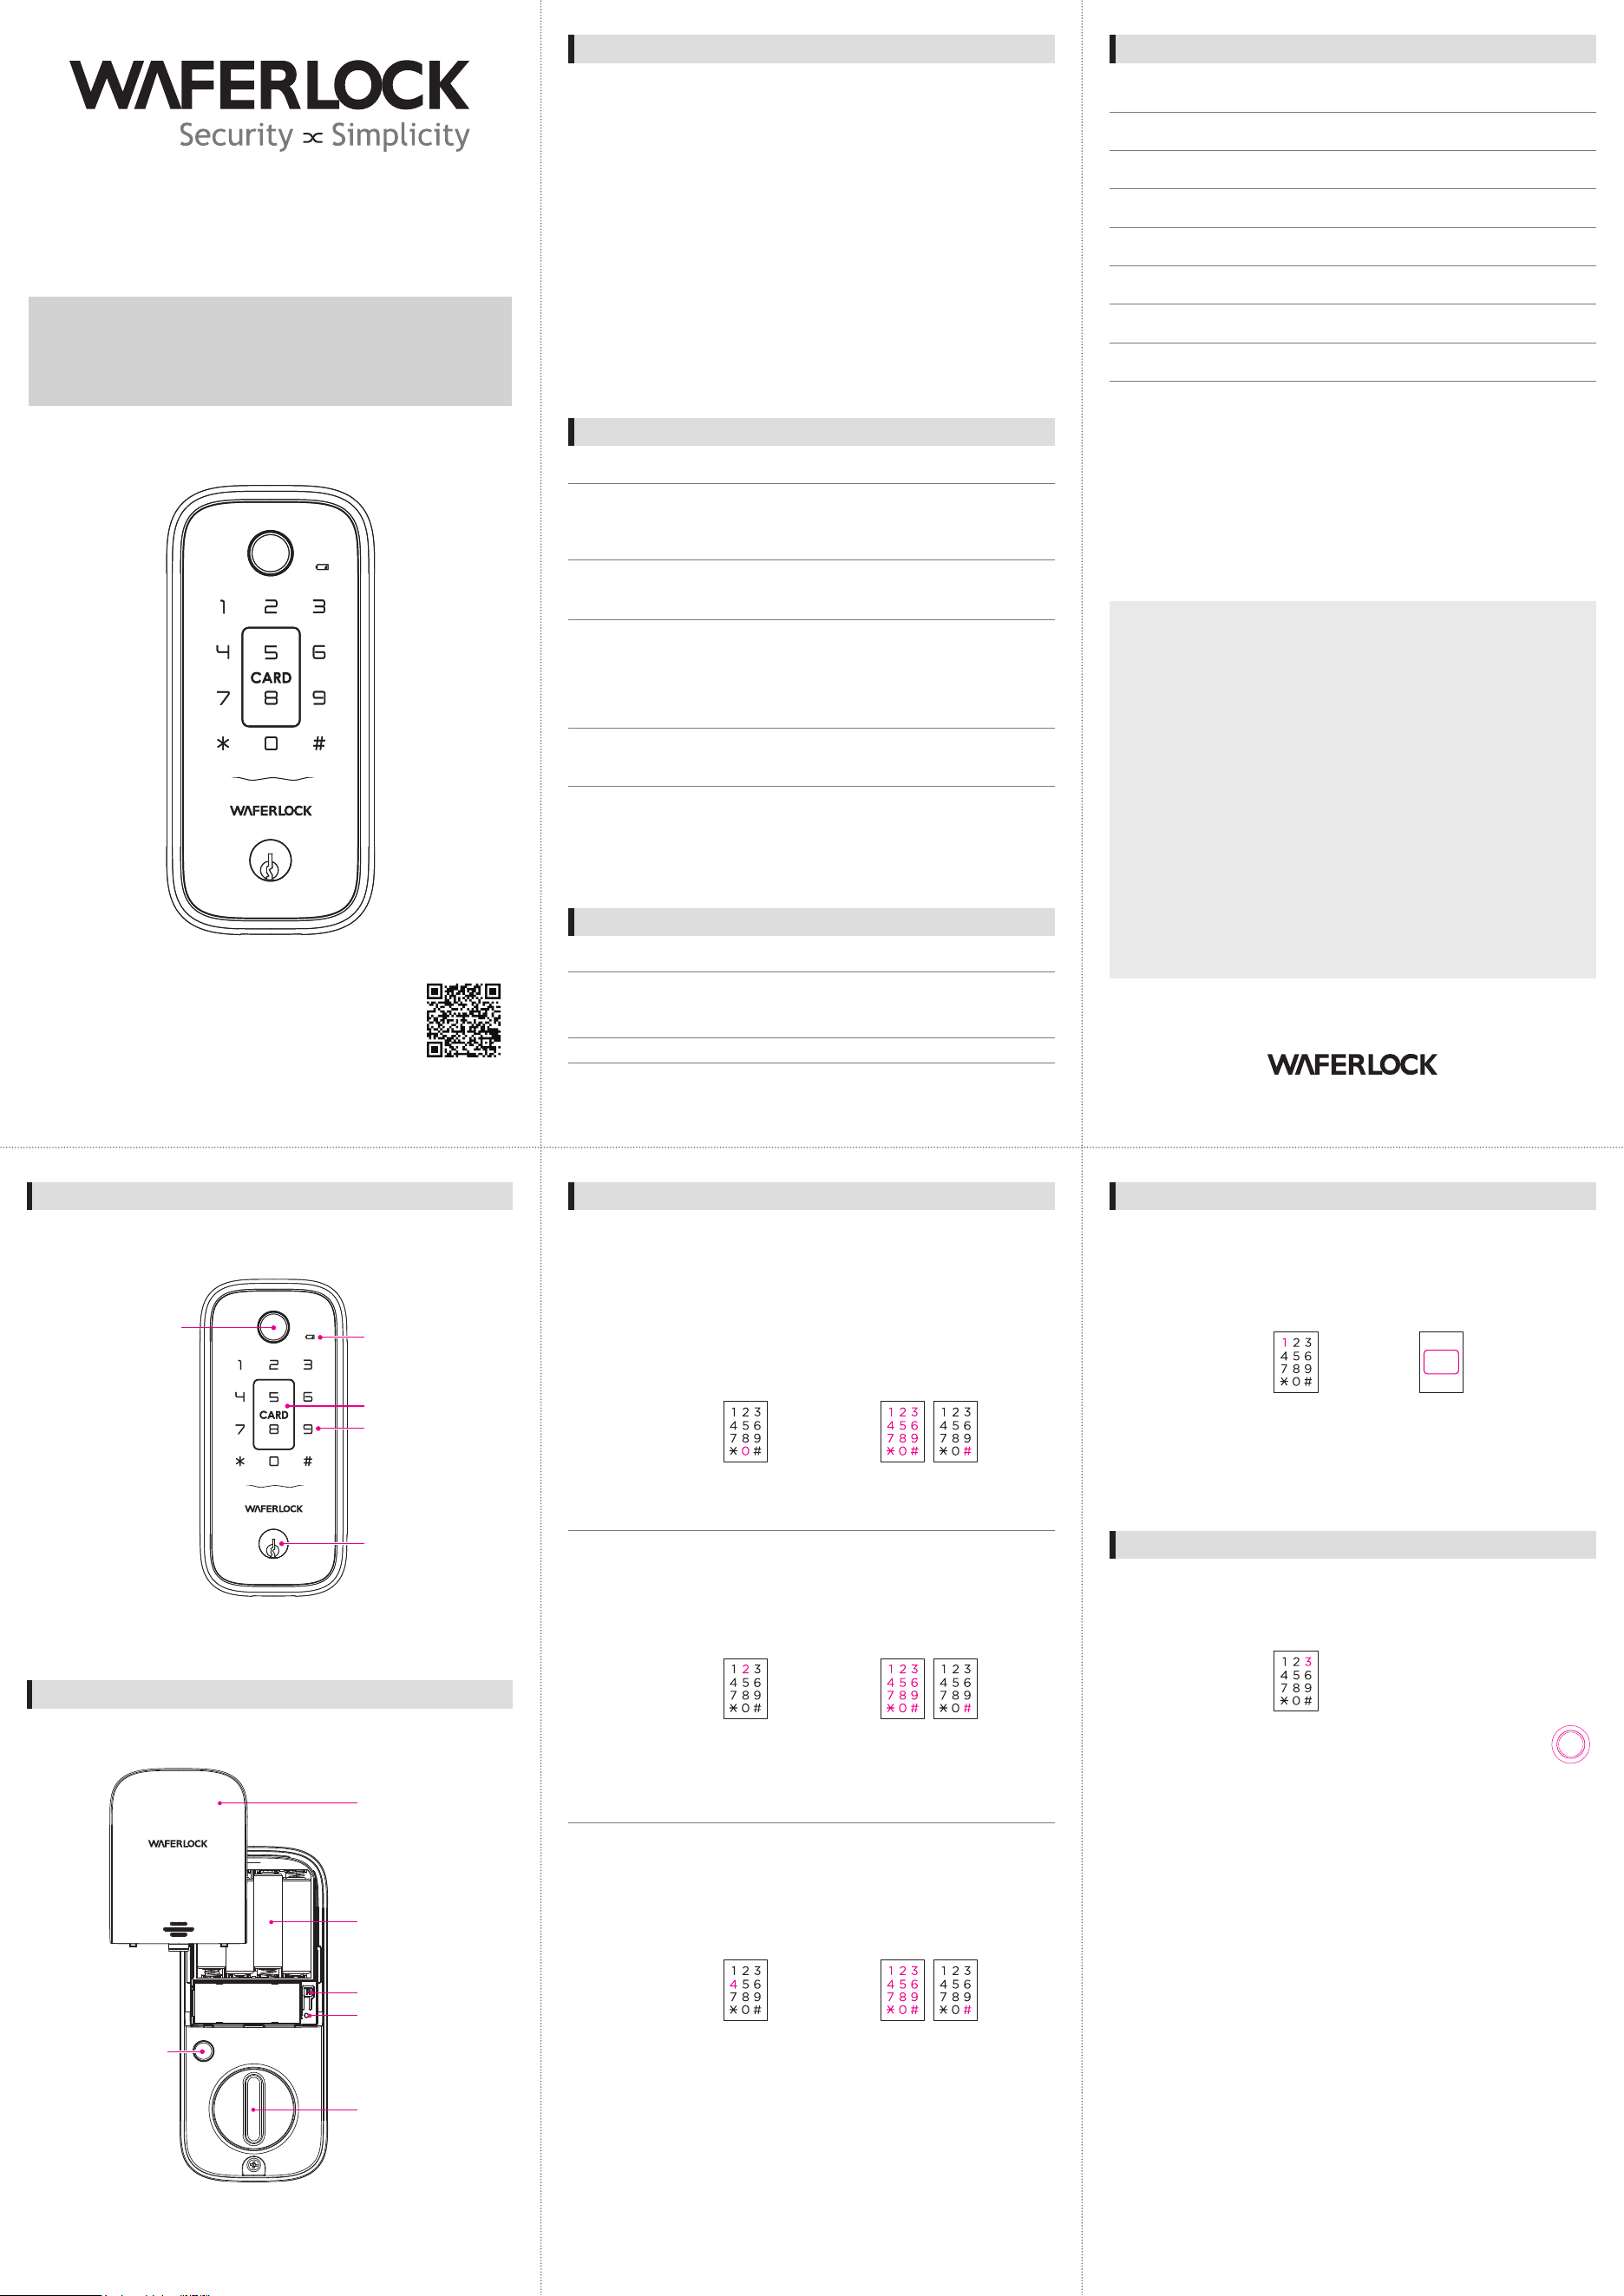
Parts List / Exterior Assembly Diagram
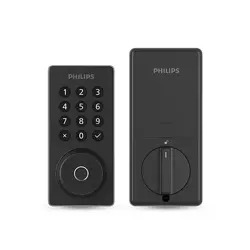
Parts List / Interior Assembly Diagram
Troubleshooting
Specication
• Please read this manual carefully before use
• Please change your PIN Code regularly to ensure security
• Incorrect battery installation (reversed polarity) may cause leakage or explosion
• Replace all batteries immediately when power is depleted
• Do not mix new and used batteries
• Alkaline batteries are recommended (marked “ALKALINE”)
• Do not use rechargeable batteries to avoid insufcient power
• Do not disassemble or repair the product yourself
• Clean with a dry or microber cloth only
• Do not press buttons with sharp objects or insert objects into the device
• This product is designed for door installation only
• Avoid water ingress
• Do not apply excessive force to the product
• Keep the warranty card for after-sales service
• Non-original RFID cards/tags may require waking up the keypad before use
2.
Press [0]
3.
Enter NEW Master PIN Code
(4~6 digits), then press #.
Re-enter the new 4~6 digits
again, then press #
Program New PIN Code
1.
Press [R]
Enter Default
Master PIN Code
123456+#
The Master PIN Code in factory mode is 123456. It is recommended
to change the Master PIN Code to a new one for security
Change Master PIN Code
Keypad
Low Battery Alert
Fingerprint Sensor
Battery Cover
D315 Smart Deadbolt
Professional installation is strongly recommended
Damage caused by improper installation, unauthorized disassembly,
or repair will void the warranty
SolutionProblem
No Response
After Power-On
Fingerprint / Card / PIN Code / App
Please ensure the batteries are properly installed
and in good working condition. Check that the
battery polarity (+ / –) is correctly aligned
Replace all batteries with new ones
Unable to Set PIN Code Open the battery cover and press the [R] button
Refer to the “Program PIN Code” section
in this manual and try again
Unable to Unlock After
Entering PIN Code
Ensure the entered PIN Code matches the one
previously set. If the keypad light turns off during
input, the entry will not be registered
Touch the keypad with your palm to wake it up,
then re-enter the PIN Code while the keypad
is illuminated
Door Thickness
Unlock Methods
Normal
Fingerprint
Card
PIN Code
35-50mm
Battery Spec DC 6V LR6 1.5V AA
Material
Zn, PC ABS
100
Master Card 10;Users 100
Master PIN Code 1;Users 4
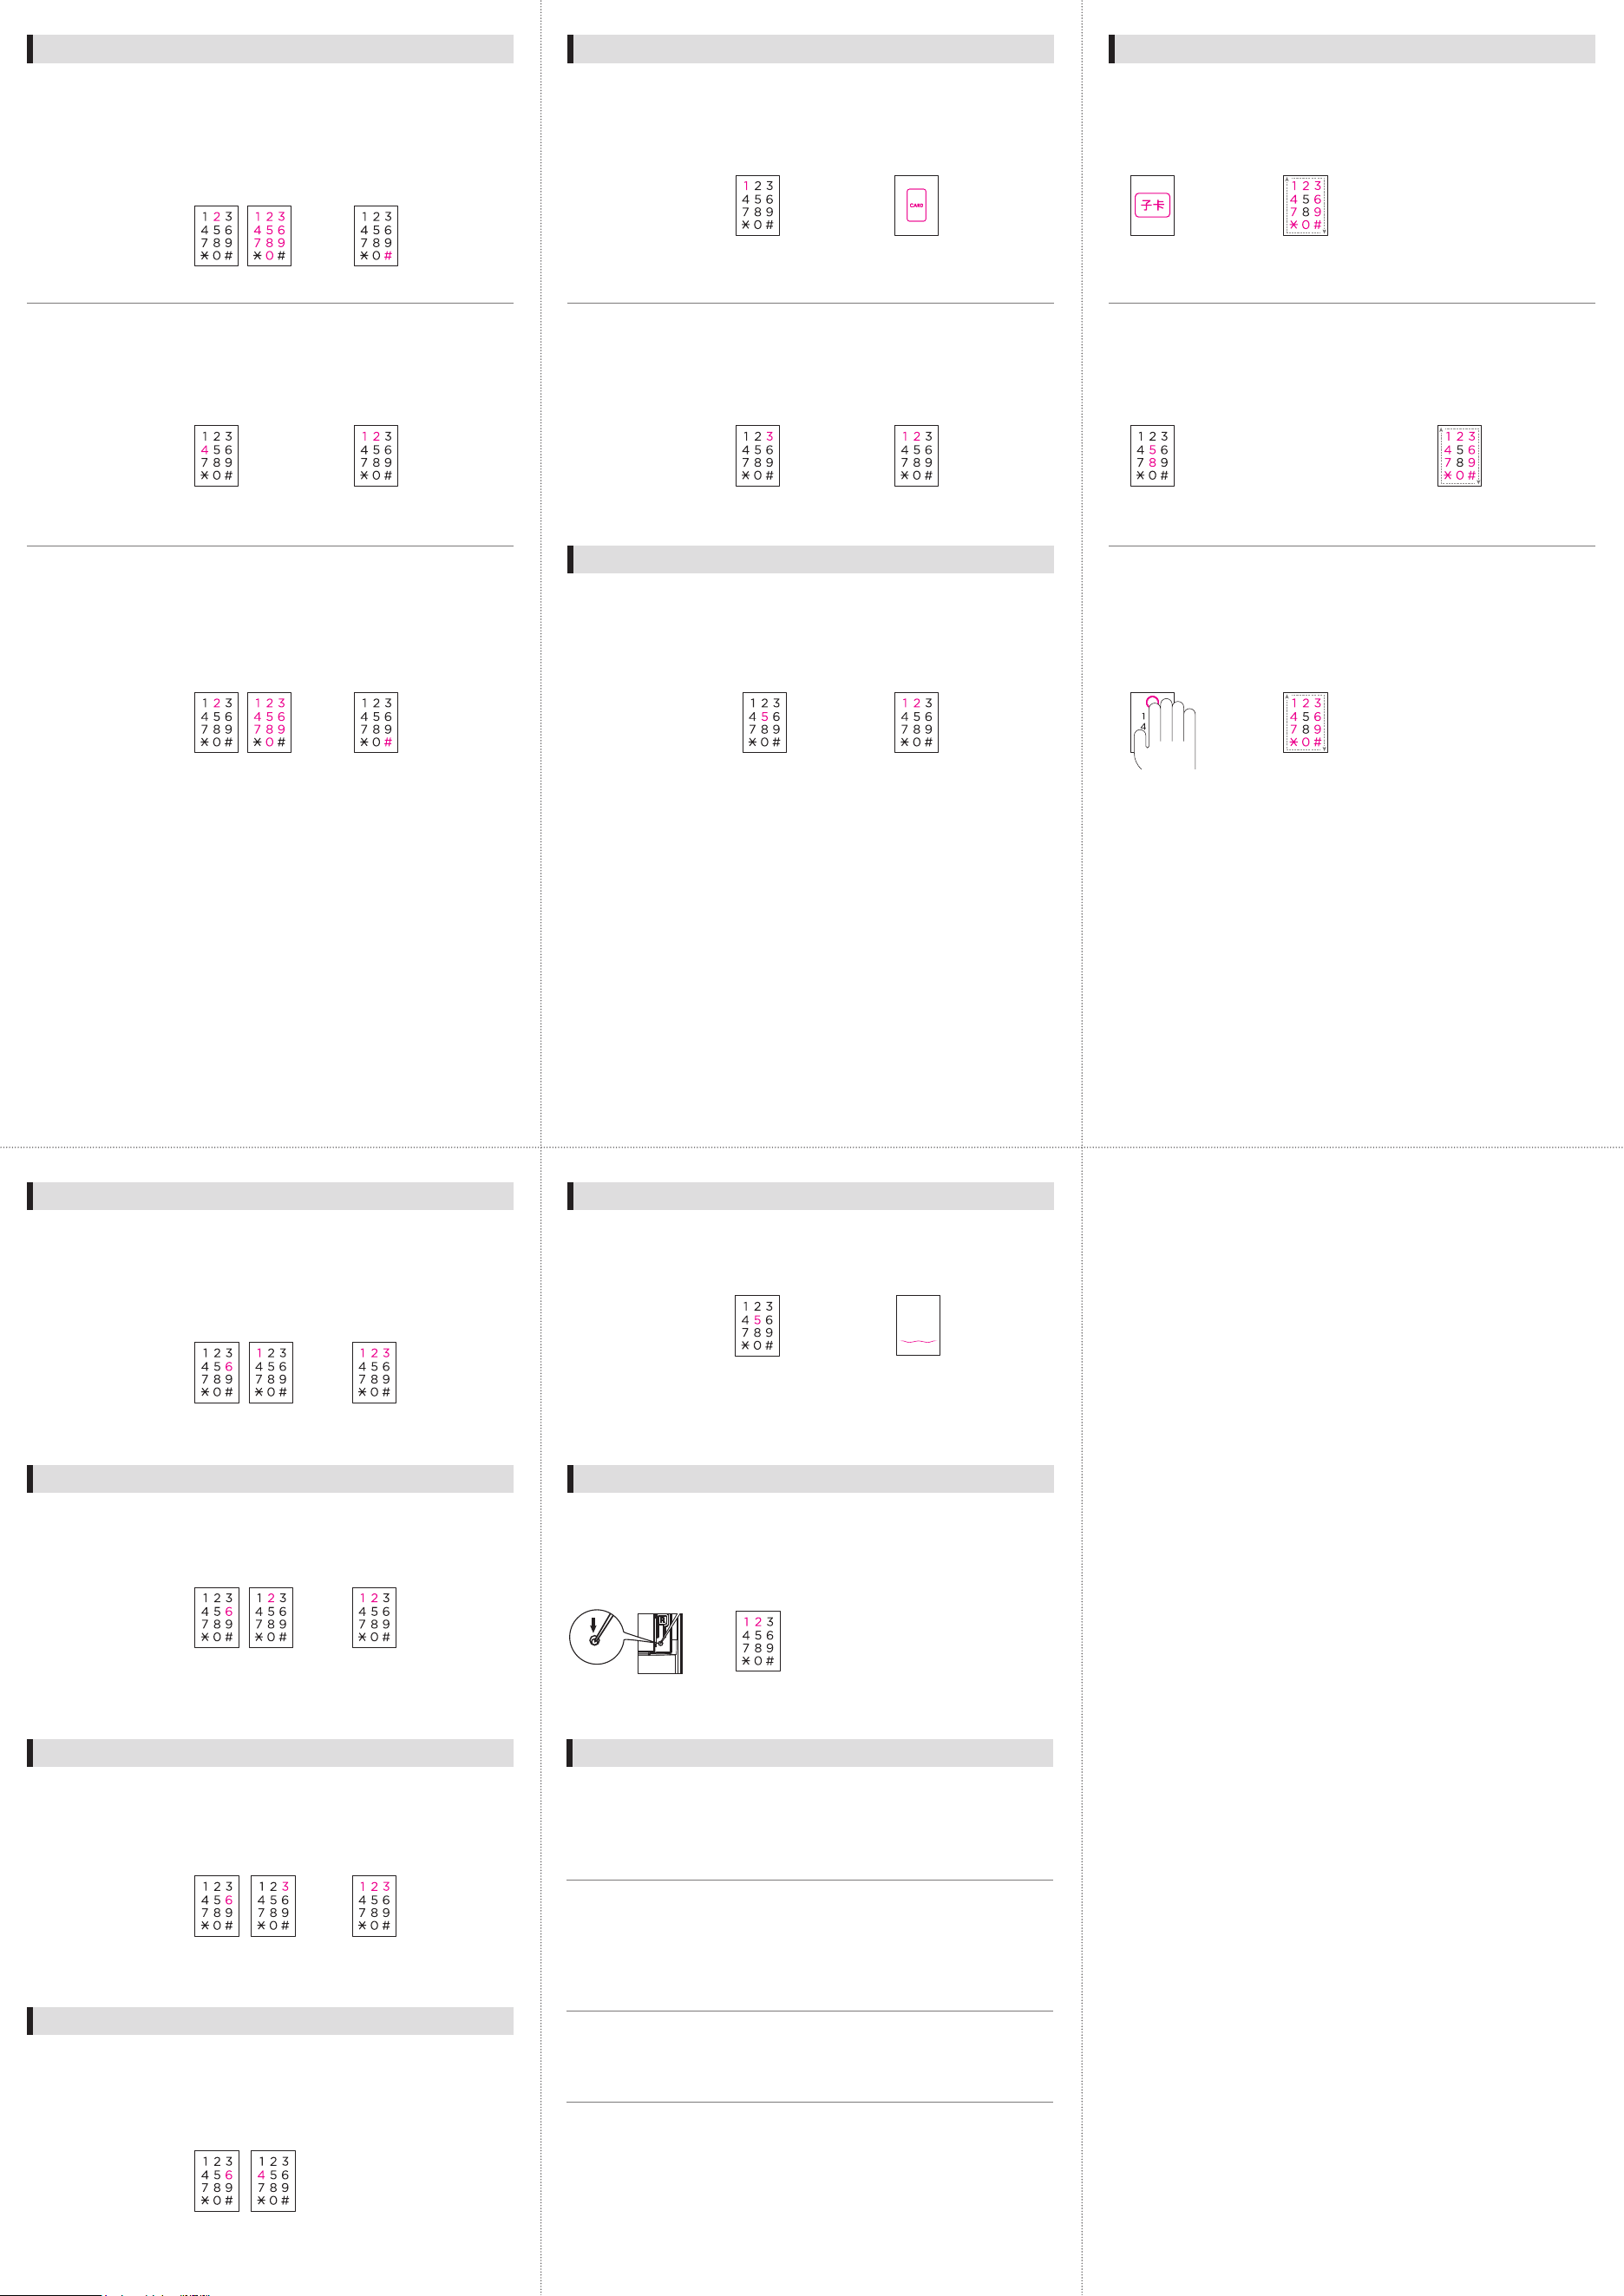
Program PIN Code (Change Master PIN Code/Add User PIN Code)
Program New Users Card
Beeping Sound During
Operation
If the device emits repeated “beep” sounds
during operation, it indicates low battery
Please replace all batteries immediately
Auto Lock
Not Functioning
Please recongure the auto-lock settings
If the device emits sound but does not operate
properly even when the batteries appear to be
functioning normally, please replace all batteries
with new ones
Warranty Card
Model:
Serial No.:
Installation Date (YYYY/MM/DD):
Installer / Company:
Technician:
Customer Name:
Customer Phone:
Customer Address:
•This warranty card must be presented when requesting warranty service
Proof of purchase date is required for warranty validation
•Warranty service for this product is provided in accordance with the terms stated
in this user manual. During the warranty period, repair charges will apply
if damage is caused by natural disasters or improper use
•The warranty period is two (2) years from the installation date recorded on this card
This warranty card must be registered by returning it to the manufacturer via:
LINE ID: @waferlock
Email: [email protected]
•The company reserves the right to modify the contents of this document
The actual product shall prevail
LINE ID: @waferlock Customer Service: 0800-002-345
Notes
• The Master PIN Code cannot be the same as any user or guest
1.
Press [R]
Enter Master
PIN Code + #
2.
Press [2]
3.
Enter 4~6 digits,
then press #
1.
Press [R]
Enter Master
PIN Code + #
• The one-time PIN Code will expire automatically after it is used to
unlock the door
• Verication will be canceled if input is not completed within 10 seconds
Add One-Time Guest PIN Code
2.
Press [4]
3.
Enter 4~6 digits,
then press #
ISO 9001 International
Quality Certification
www.waferlock.com
Program New Fingerprint
Fingerprint Sensor x3
•Enter additional ngerprints before the keypad light turns off
(up to 100)
3.
Place nger on the ngerprint
sensor 3 times (keypad will
ash1, 2, and 3 respectively)
Lift nger between each
ash until successful
Program New Fingerprint
1.
Press [R]
Enter Master
PIN Code + #
2.
Press [3]
Thumbturn
1.5V 'AA' Battery (LR6)
Registration Button
Reset Button
Open/Closed Button
Program New Users Card
3.
Approach the card, you
would like to program
as user card
•You could program user cards continuously when blue light ashes
(up to 100)
1.
Press [R]
Enter Master
PIN Code + #
2.
Press [1]
CARD
Card Reading Area
Key Cylinder
User Manual
Delete User PIN Code
3.
Press [#]
Delete Individual PIN Code
1.
Hold [R] for 5 seconds
Enter Master
PIN Code + #
2.
Press [2] Key in the
4~6 digits PIN Code
you would like to
delete
3.
Press [1] to conrm
Press [2] to cancel
Delete All PIN Code
1.
Hold [R] for 5 seconds
Enter Master
PIN Code + #
2.
Press [4]
3.
Press [#]
Delete One-Time Guest PIN Code
1.
Hold [R] for 5 seconds
Enter Master
PIN Code + #
2.
Press [2] Key in the
4~6 digits PIN Code
you would like to
delete
Set Opening Mode
1.
Press [R]
Enter Master
PIN Code + #
2 .
Press [6],
then press [1].
3.
Press [1] for toggle mode
Press [2] for auto-lock
with door sensor
Press [3] for auto-lock
in 5 sec
Set Locking Direction
1.
Press [R]
Enter Master
PIN Code + #
2 .
Press [6],
then press [2].
3.
Press [1] for right
Press [2] for left
V00
Set Voice Volume
3.
Press [1] for high volume
Press [2] for low volume
Press [3] for mute mode
1.
Press [R]
Enter Master
PIN Code + #
2.
Press [6],
then press [3]
3.
Press [1] Disable Anti-Peep
Press [2] Enable Anti-Peep
2.
Press [6],
then press [4]
Set PIN Code Anti-Snifng
1.
Press [R]
Enter Master
PIN Code + #
Set Waferkey
3.
blue light ashes
1.
Press [R]
Enter Master
PIN Code + #
2.
Press [5]
Factory Reset
2.
Press [1] to conrm and execute reset
Press [2] to cancel
1.
Press and hold the
reset button for 5
seconds along with
one long beep
Open Door
1.
Approach reading area
with user cards
2 .
The keypad lights will rotate,
indicating the door is unlocked
Open door with User Card
Open door with PIN Code
Touch keypad
[5] & [8]
Enter PIN Code,
then press #
1. 2 . 3.
The keypad lights will
rotate, indicating
the door is unlocked
Open door with Fingerprint
1.
Attach the ngerprint
on the sensor
2 .
The keypad lights will rotate,
indicating the door is unlocked
Delete User Cards
3.
Approach the card,
you would like to delete
Delete Individual User Card
1.
Hold [R] for 5 seconds
Enter Master
PIN Code + #
2.
Press [1]
Delete Fingerprint
Delete All Fingerprint
1.
Hold [R] for 5 seconds
Enter Master
PIN Code + #
3.
Press [1] to conrm
Press [2] to cancel
2.
Press [5]
Delete All User Cards
3.
Press [1] to conrm
Press [2] to cancel
1.
Hold [R] for 5 seconds
Enter Master
PIN Code + #
2.
Press [3]
Alarm function
Deadbolt Jam Alarm
When locking or unlocking the door, if the Deadbolt malfunctions or becomes jammed:
The device will emit continuous short beeps for 5 seconds Red and blue
indicator lights will ash alternately
• If the alarm continues and the product does not operate properly, the lock
position may need adjustment. Please contact a professional installer
• If the alarm sounds during operation, continued use may cause malfunction.
Please replace all batteries immediately.
• Do not mix new and used batteries.
• Do not mix batteries from different manufacturers.
Incorrect PIN Code Lockout
If an incorrect PIN Code is entered ve consecutive times:
The lock will be automatically disabled
PIN Code unlocking will be unavailable during the lockout period
The door can still be unlocked using other authorized methods
(card, ngerprint, or app) The keypad will be locked for 3 minutes
After 3 minutes, normal operation will resume
Low Battery Alarm
When the device is operating normally but the battery level is low:
The device will emit repeated “beep” sounds
Please replace all four batteries with new ones within one week after the warning
Federal Communication Commission Interference Statement
This equipment has been tested and found to comply with the limits for a Class B
digital device, pursuant to Part 15 of the FCC Rules. These limits are designed to
provide reasonable protection against harmful interference in a residential
installation.
This equipment generates, uses and can radiate radio frequency energy and,
if not installed and used in accordance with the instructions, may cause harmful
interference to radio communications. However, there is no guarantee that
interference will not occur in a particular installation. If this equipment does cause
harmful interference to radio or television reception, which can be determined by
turning the equipment off and on, the user is encouraged to try to correct the
interference by one of the following measures:
• Reorient or relocate the receiving antenna
• Increase the separation between the equipment and receiver
• Connect the equipment into an outlet on a circuit different from
that to which the receiver is connected
• Consult the dealer or an experienced radio / TV technician for help
FCC Caution: To assure continued compliance, any changes or modications not
expressly approved by the party responsible for compliance could void the user's
authority to operate this equipment. (Example - use only shielded interface cables
when connecting to computer or peripheral devices).
FCC Radiation Exposure Statement
This equipment complies with FCC RF radiation exposure limits set forth for an
uncontrolled environment. This equipment should be installed and operated
with a minimum distance of 20 centimeters between the radiator and your body.
This transmitter must not be co-located or operating in conjunction
with any other antenna or transmitter.
The antennas used for this transmitter must be installed to provide a separation
distance of at least 20 cm from all persons and must not be co-located
or operating in conjunction with any other antenna or transmitter.
This device complies with Part 15 of the FCC Rules. Operation is subject
to the following two conditions:
(1) This device may not cause harmful interference, and (2) This device must
accept any interference received, including interference that may cause
undesired operation.