
1. Cables Connection....................................................................... 3
1.1 Product List........................................................................... 3
1.2 Guidance Video...................................................................... 3
1.3 Ports Introduction................................................................... 4
1.4 Cables Connection Chart........................................................ 5
2. Installation Steps - Disassembly Steps........................................... 6
3. Installation Steps - Wiring Connection............................................. 9
4. Functional Testing........................................................................ 12
4.1 Wireless CarPlay / Android Auto / Hicar..................................... 12
4.2 Wired CarPlay / Android Auto / Hicar......................................... 13
4.3 Air-play.................................................................................. 13
4.4 Android Mirror-link.................................................................. 13
4.5 OEM Car................................................................................ 13
4.6 Sound Setup.......................................................................... 14
4.7 Camera and DVR.................................................................... 16
4.8 USB Player............................................................................ 18
5. Installation Steps - Assembly Steps................................................ 19
5.1 Screen Pinning....................................................................... 19
5.2 CD Host Fixed........................................................................ 19
5.3 Panel Reinstall....................................................................... 19
6. FAQ............................................................................................ 20
6.1 Screen Display....................................................................... 20
6.2 Audio..................................................................................... 21
7. Contact Us................................................................................... 21
CONTENTS
Linux Screen User Manual
03/21
1. Cables Connection
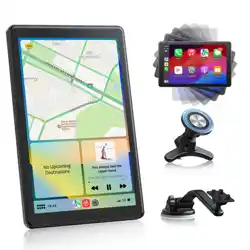
1.1 Product List
Reminder: If your car doesn’t have external Aux port, you might not need Aux cable.
1.2 Guidance Video
Reminder: It is recommended to use this user manual together with the video so
that you can complete the installation smoothly.
Main Screen Bracket (Varies depending on the model)
USB Cable Power Cable
Aux Cable Pry Bar Set
Linux Screen User Manual
05/21
Linux Screen User Manual
04/21
LVDS cable
Power cable
USB cable
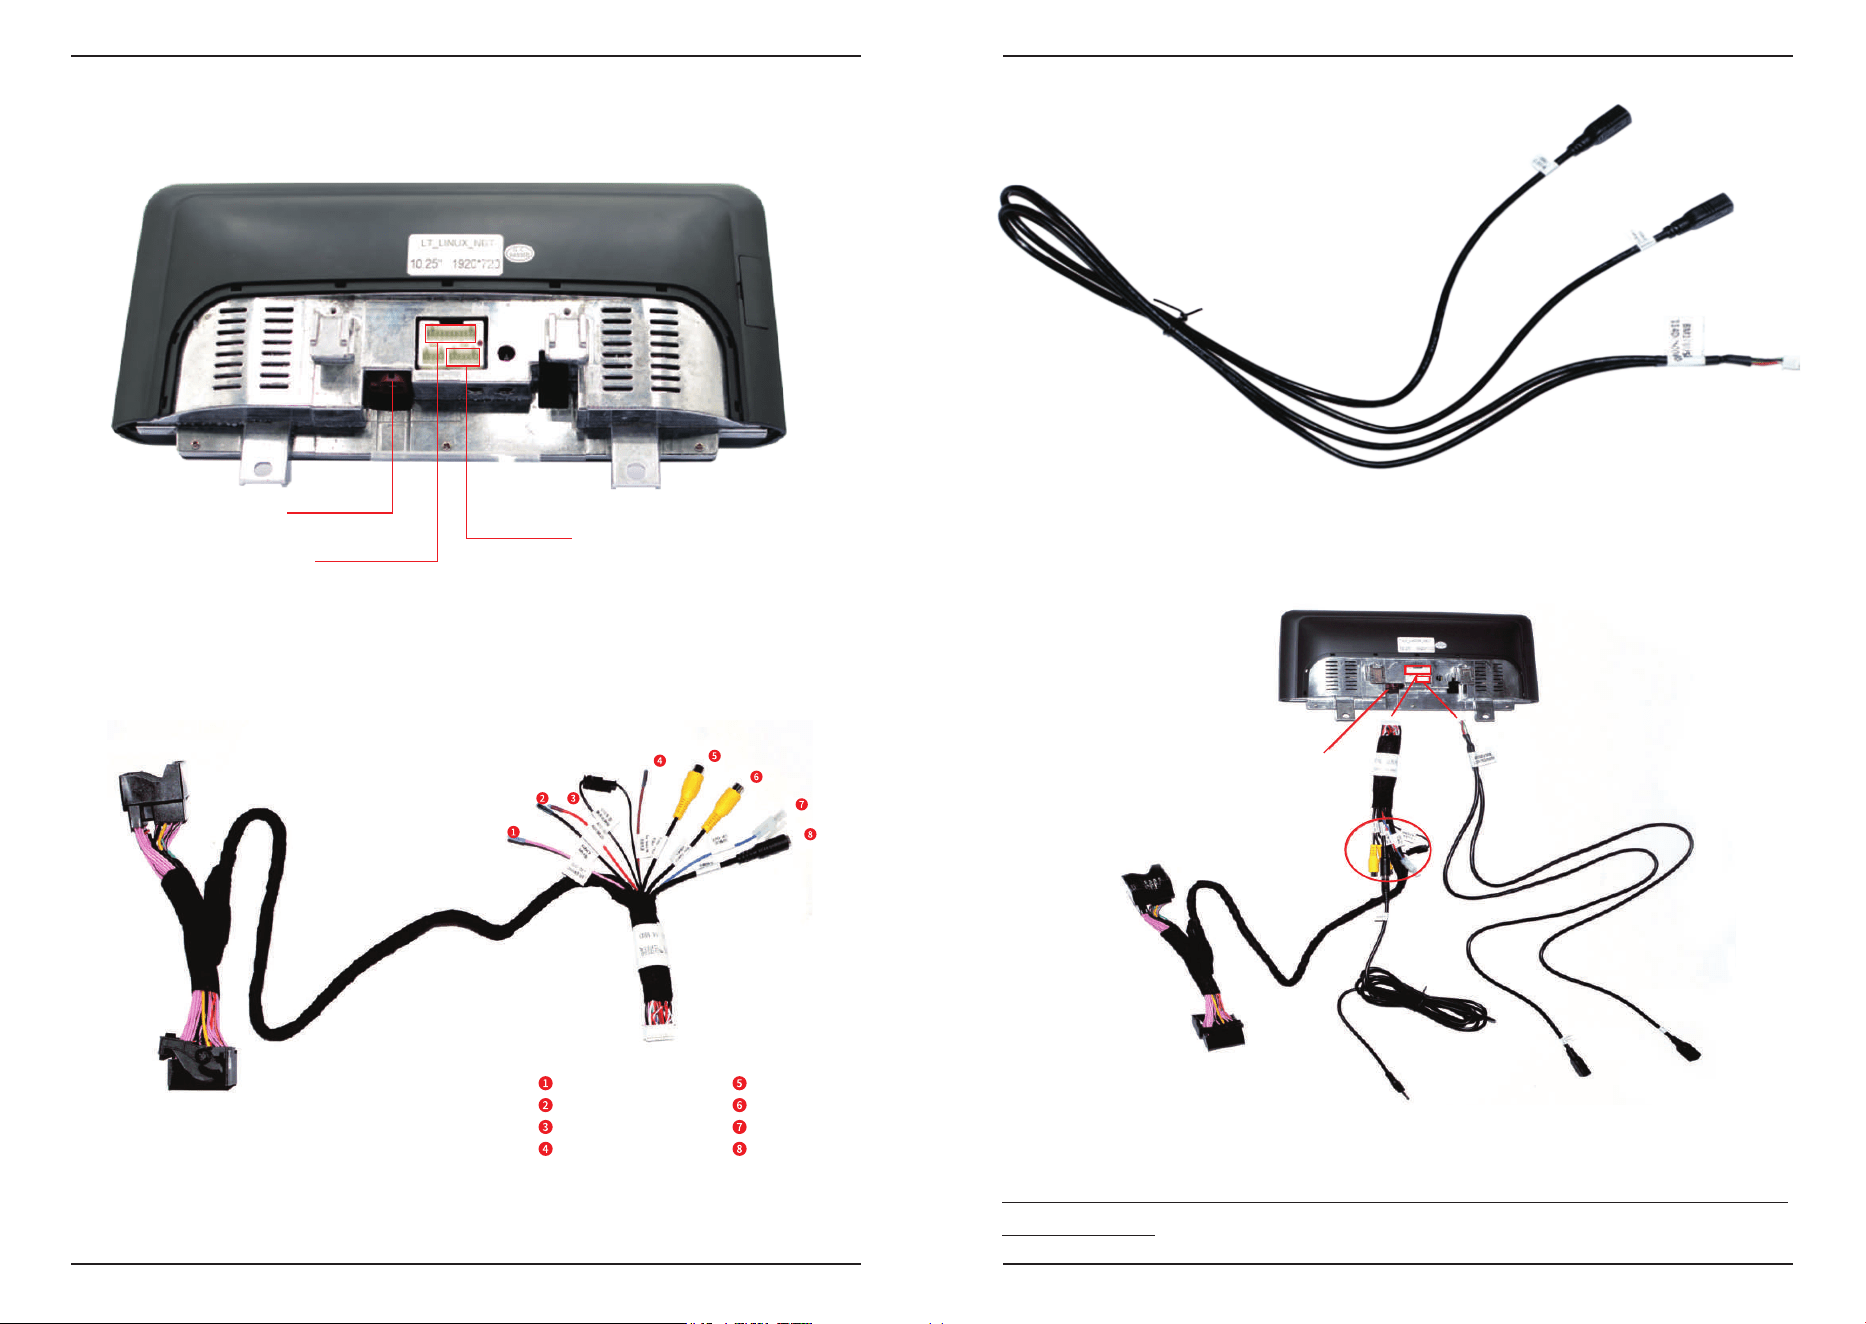
1) Main Screen
2) Power Cable
Connect with the CD host
Connect with the original
power cable
Connect with the screen
360 DET
Rear camera
GND
ACC out
Rear camera PWR
Video in
5V-out
Audio out
1.3 Ports Introduction
US
B2
(
f
or US
B di
sp
l
a
y
)
U
SB
1
(for U
S
B dis
p
lay
)
Bm168 (connect with the screen)
1.4 Cables Connection Chart
Connect with the original
power cable
Connect with the LVDS cable
Camera&video
Connect with the CD host
Connect with the Car AUX port
USB 2 for
normally use
USB 1 for
normally use
Reminder: If your car doesn’t have an original i-drive, you might need to install an
external i-drive.
3) USB Cable
Linux Screen User Manual
06/21
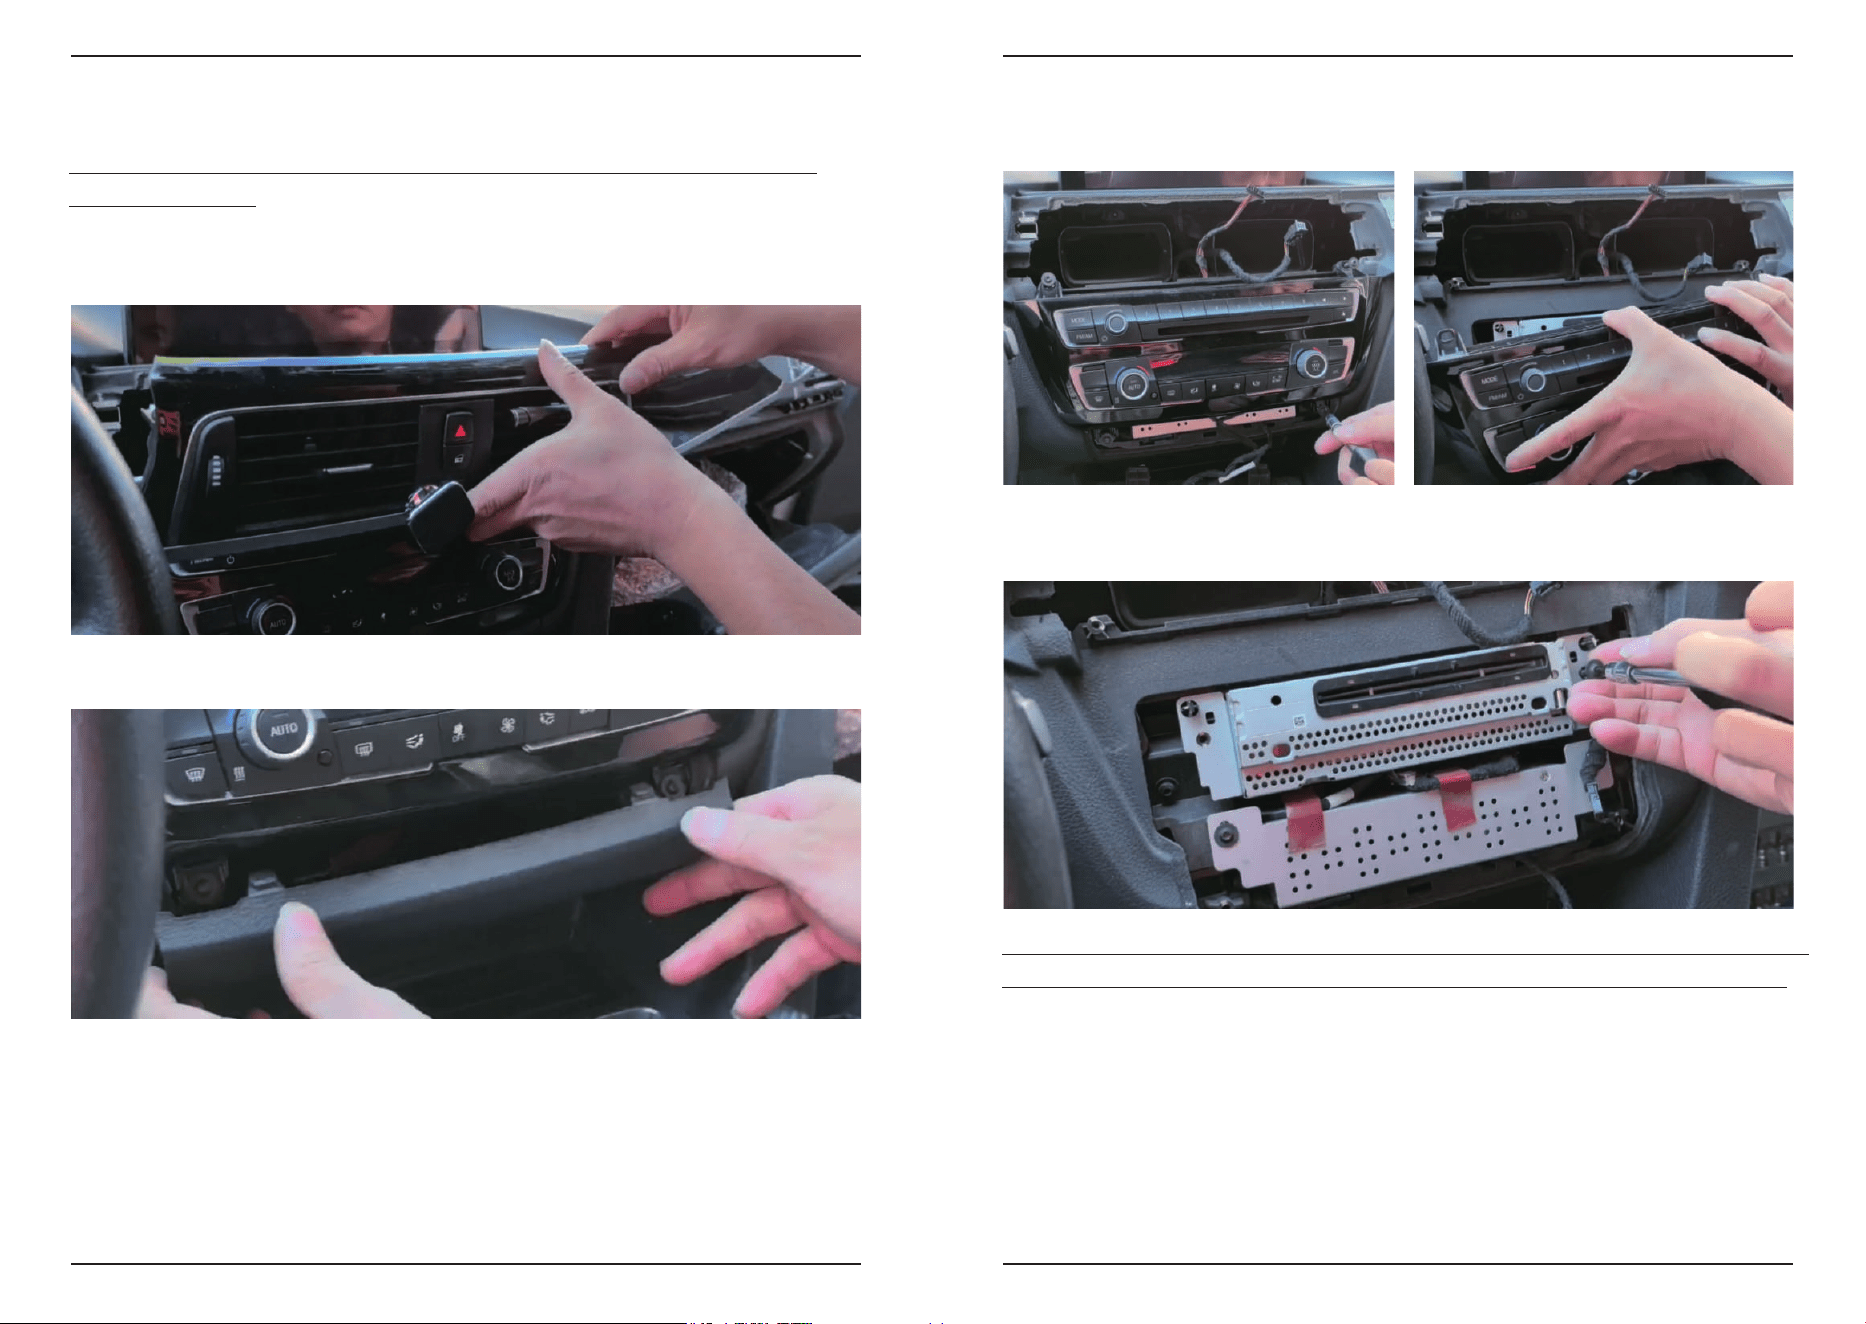
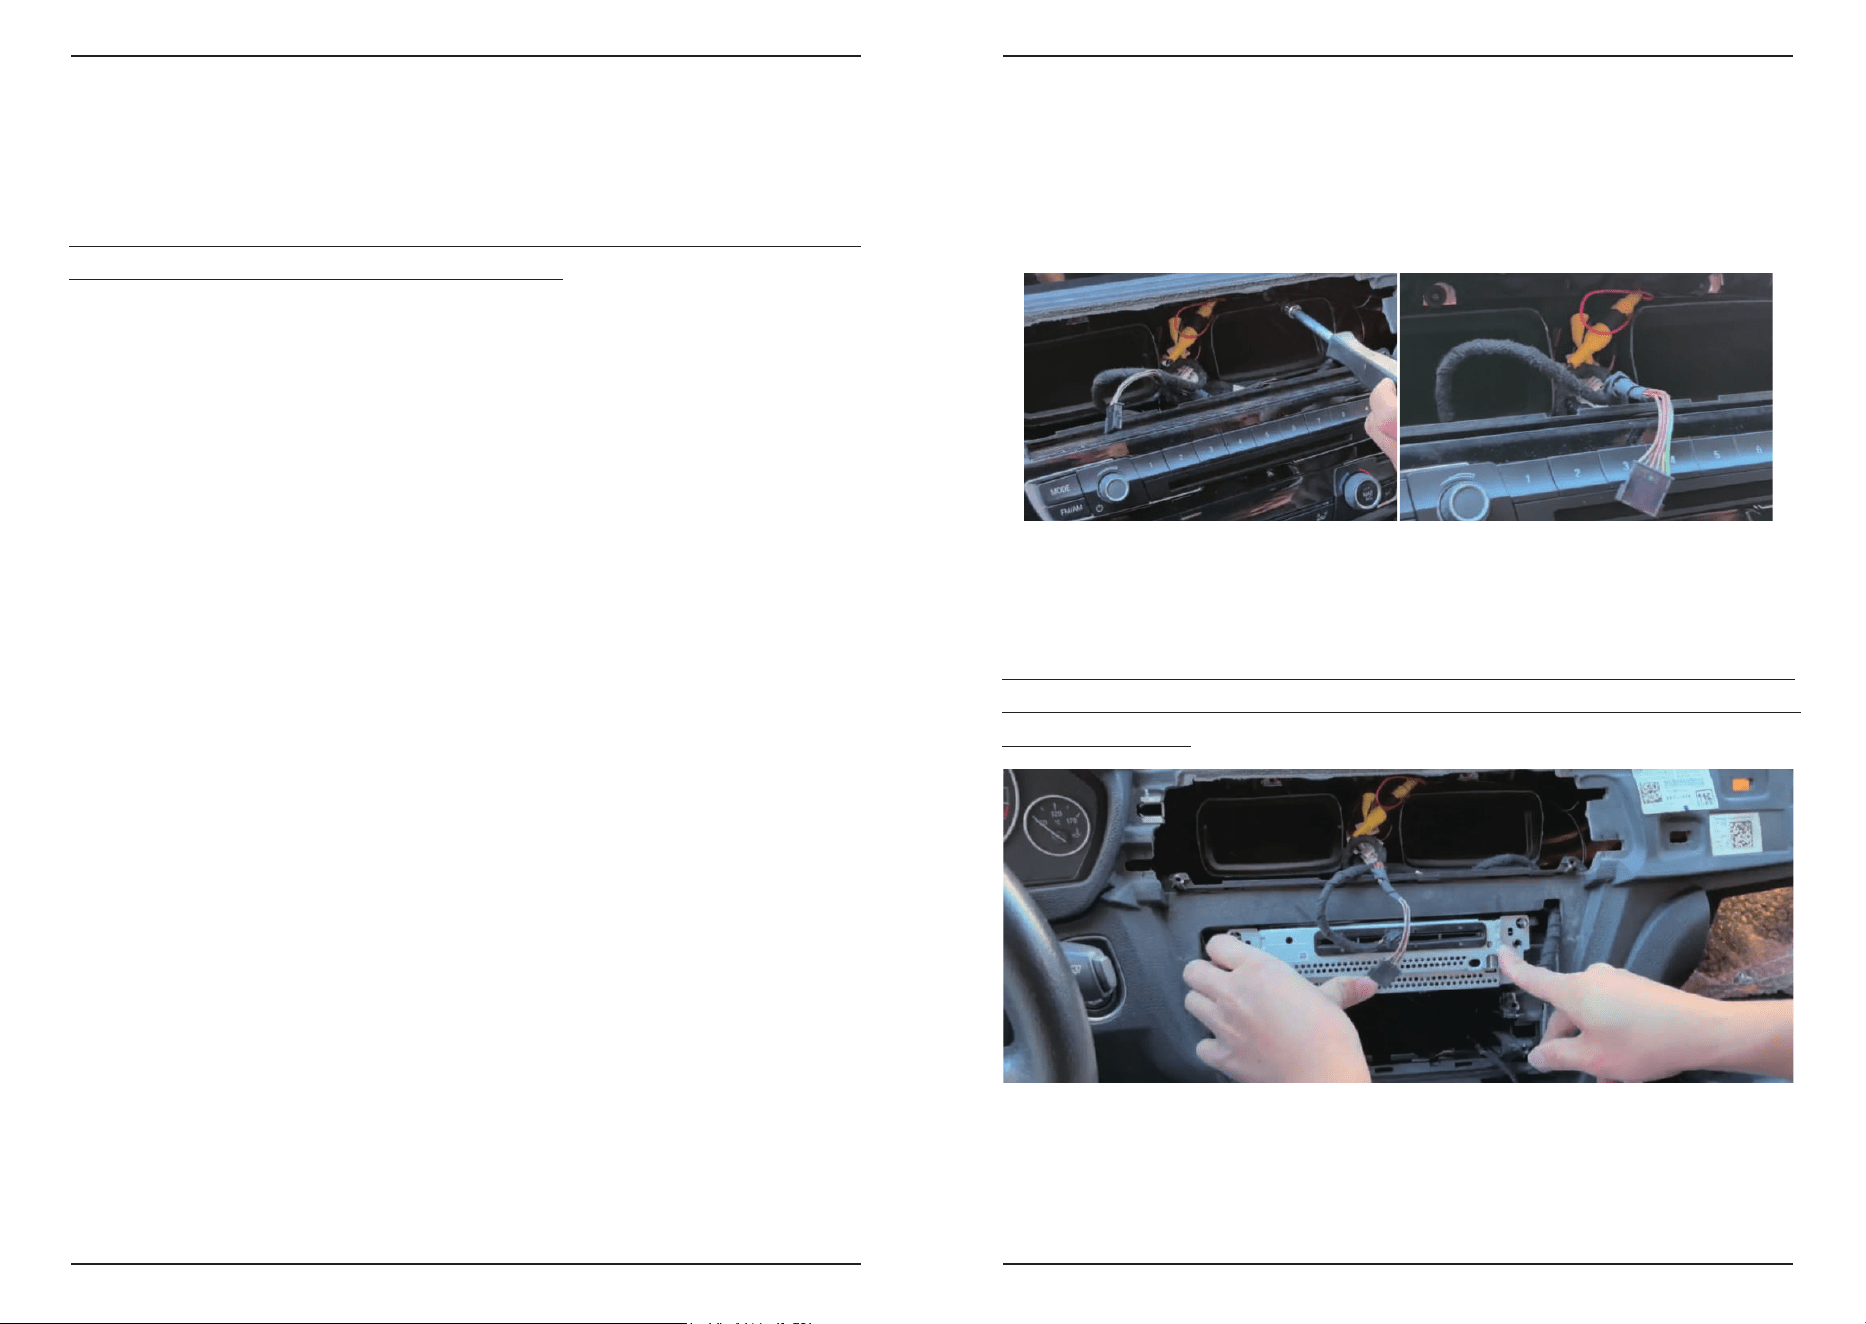
2. Installation Steps - Disassembly Steps
Linux Screen User Manual
07/21
Reminder: Please make sure you have already switched off the engine before
installing the cable.
Remove the upper shell and air conditioning vents, and disconnect the wires
connected to the panel.
Remove the lower shell and disconnect the wires connected to the panel.
Remove the screws, disassemble the button panel, and disconnect the wires
connected to the panel.
Remove the screws and take out the CD host, then unplug the original power cable
from the head unit.
Reminder: There is no need to disconnect the other cables, you can decide whether
to disconnect and reconnect based on the difficulty of installing the vehicle model.
Linux Screen User Manual
08/21
Linux Screen User Manual
09/21
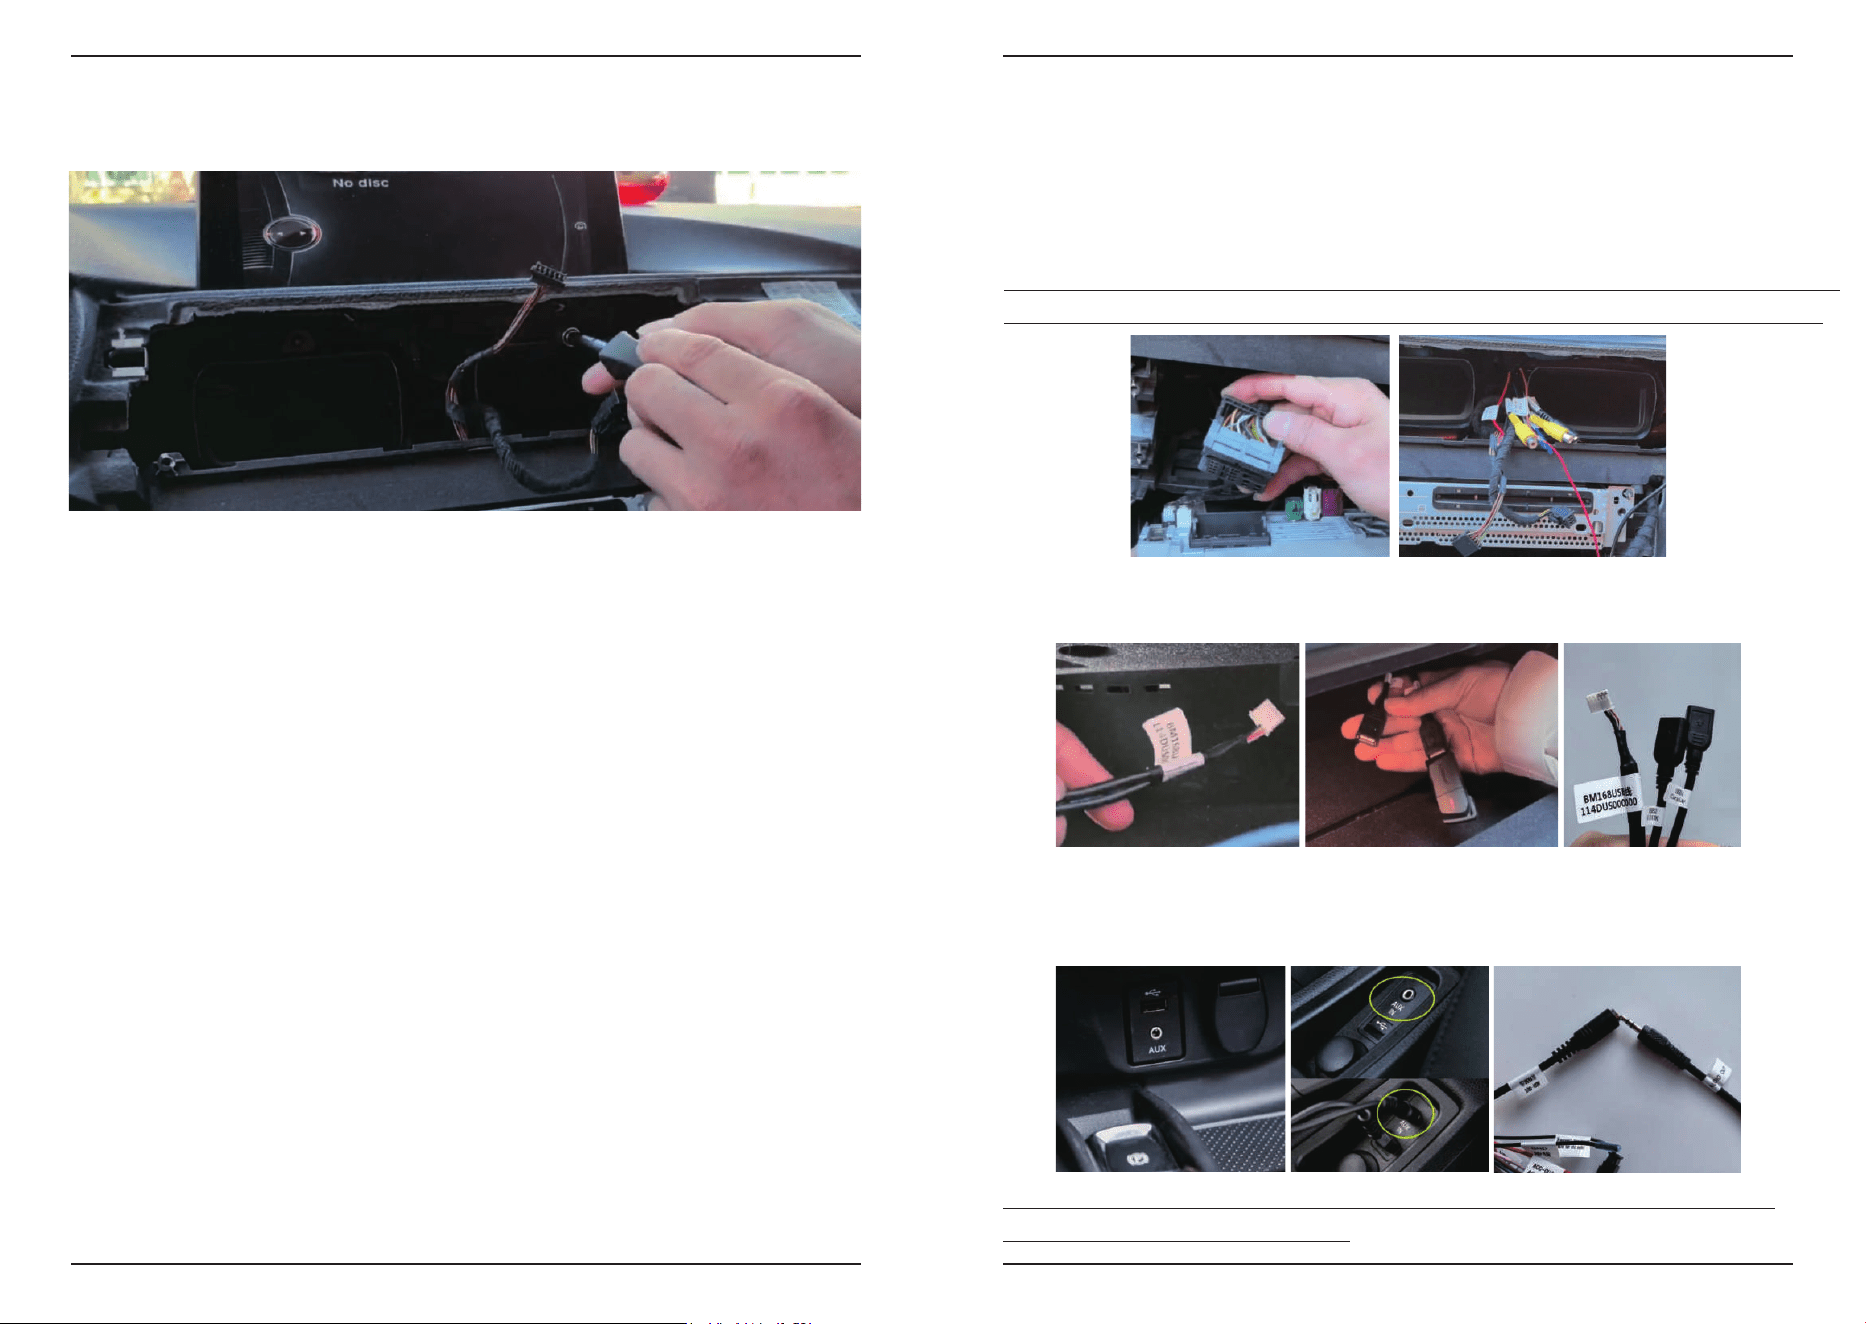
3. Installation Steps - Wiring Connection
Take the power cable from our product and route it inside the vehicle structure shown
in the image below.
1) Wiring Arrangement
Reminder: If your car has an optical fiber cable, you have to plug it to the host and pass
through the new power cable. (Detailed images and explanations: 4.6 sound setup. )
Take the USB cable and connect the bm168 port to the screen, and the USB port will
extend from the storage drawer through the internal vehicle structure.
Check whether your car has an external Aux port. Usually, you may find it next to the
cigarette lighter or below the central control screen. If available, connect the Aux cable
and with the car Aux port and the new power cable.
Reminder: Aux cable can only pass from the outside of the vehicle structure and
cannot be hidden inside in any form.
Remove the screws of the OEM screen and disconnect the wires connected to the
screen.

Linux Screen User Manual
10/21
Linux Screen User Manual
11/21
For the CD hosts, connect the new power cable with the CD host and the original
power cable, as well as the fiber cable.
But for the CIC system, the GND cable should be disconnected to avoid sound
distortion.
So please double-check your car system.
2) Connections
For the screen, you have to assemble the bracket and screen first and then connect
the cables shown in the image below.
Reminder: For CCC and NBT systems, the GND cable should be connected shown
as in the image below.
Linux Screen User Manual
12/21
Linux Screen User Manual
13/21
4. Functional Testing
Due to the particularity of the system, it is recommended to only open one function
at a time, otherwise it may cause the system to run slower or other problems.
Reminder: Before all the functions of the equipment have been tested successfully,
please don’t reinstall the shell and panel of the car. So that you can find the questions
of the equipment faster and more convenient. As well as minimize possible damage
and accidents during disassembly and assembly.
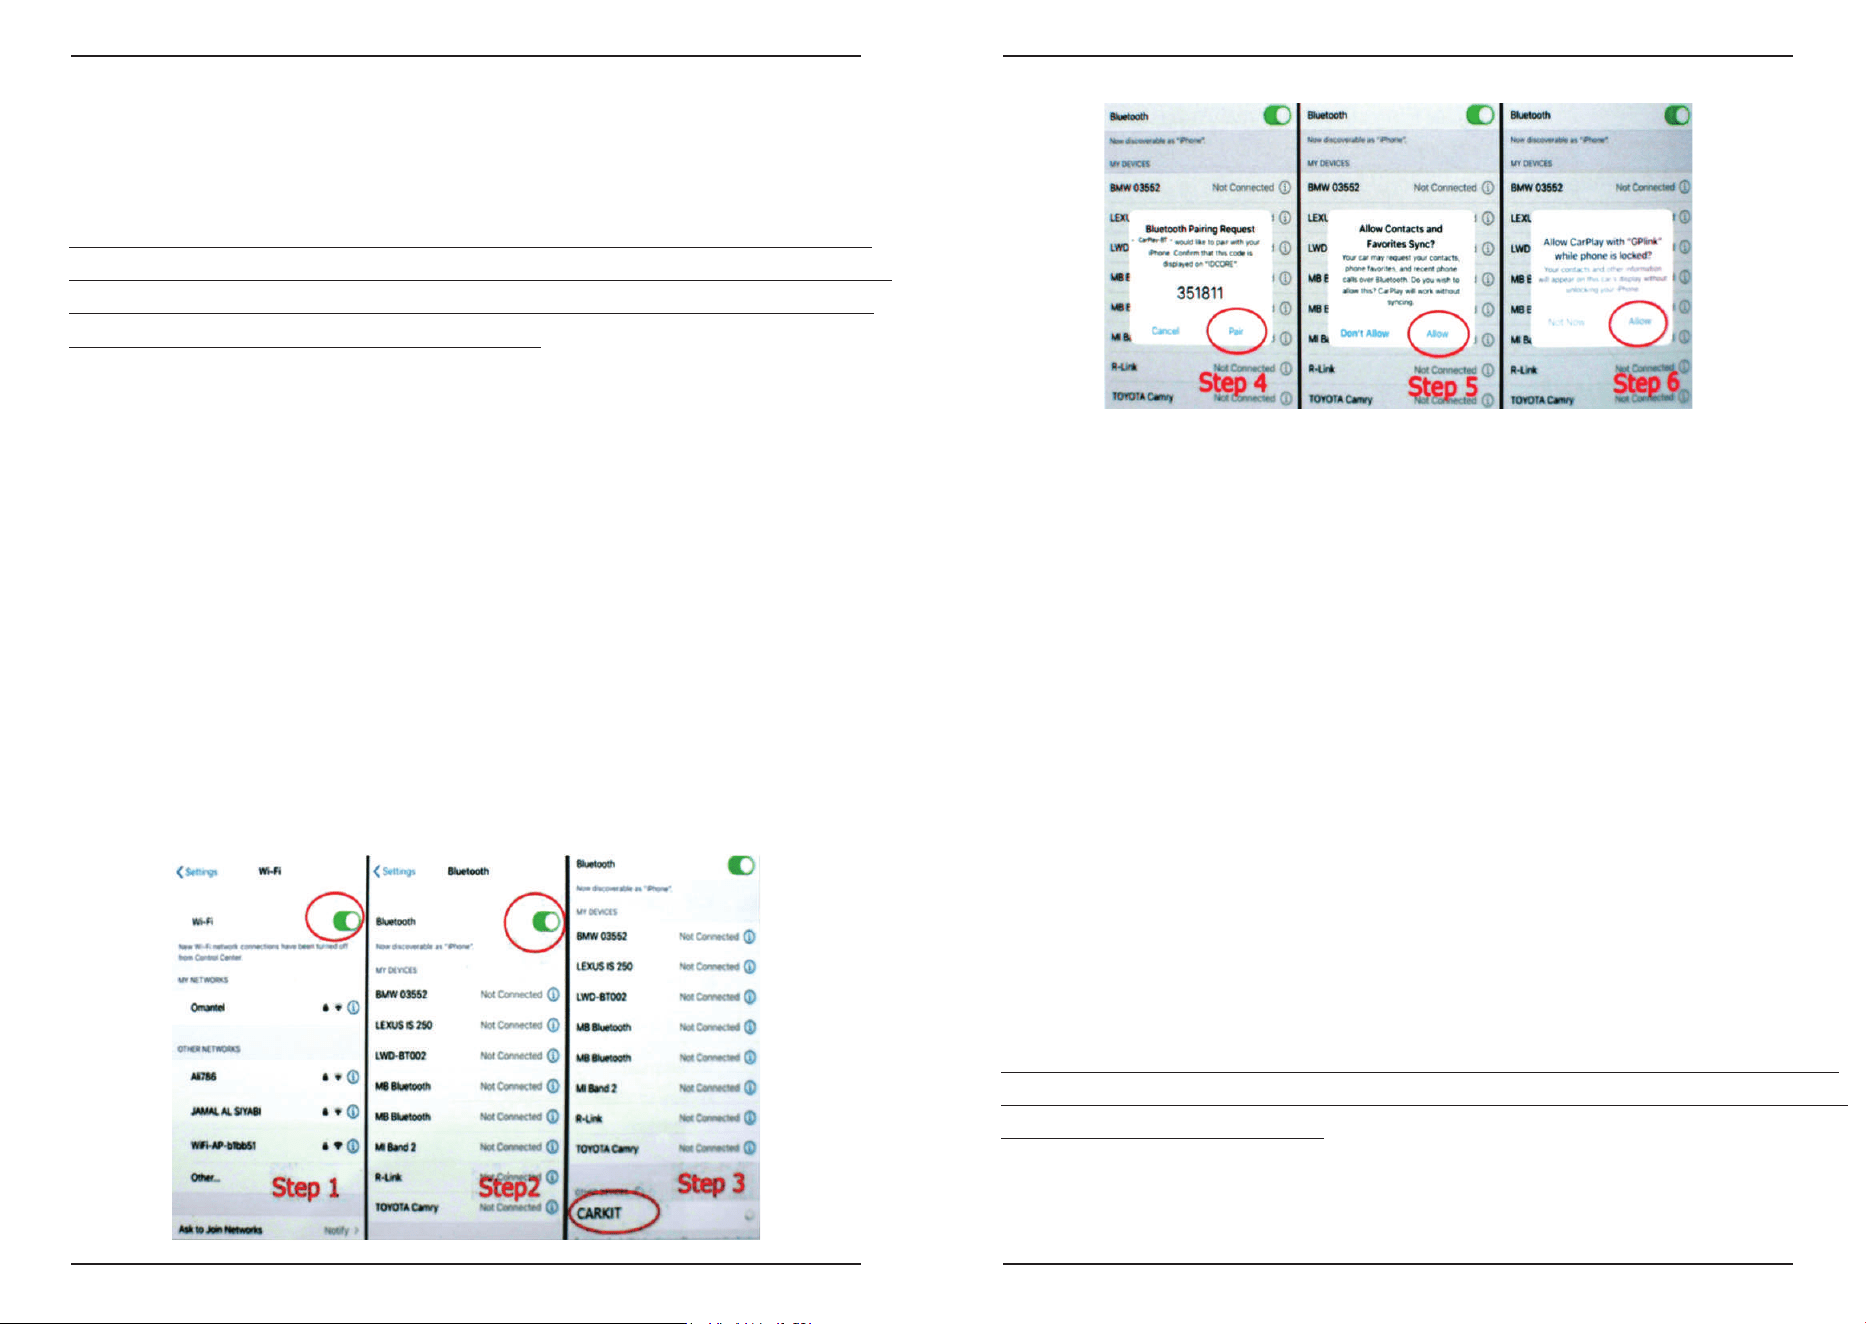
4.1 Wireless CarPlay / Android Auto / Hicar
1) Set up > Smart Phone, Turn on “CarPlay / Android Auto / Hicar”, and turn off the
others.
2) Before setting the CarPlay function, please disconnect the Bluetooth connection
between your phone and car first.
Step 1: Turn on your mobile Phone "Wi-Fi" switch.
Step 2: Turn on "Bluetooth" as well.
Step 3: Search for the Bluetooth of the product, the name of the Bluetooth is
"CARKIT".
Step 4: Pair the Bluetooth.
Step 5: Allow the sync.
Step 6: Click “Allow” to use the CarPlay function.
The connection solutions of wireless Android Auto are the same as CarPlay, so if
you want to use Android Auto, follow the connection method and steps of CarPlay.
4.2 Wired CarPlay / Android Auto / Hicar
1) Connect the product to your phone by USB cable.
2) Use wired CarPlay / Android Auto / Hicar.
4.3 Air-play
1) Set up > Smart Phone, Turn on “Air-play”, and turn off the others.
2) Turn on the WiFi switch of the screen and connect to your iPhone personal hotspot.
Open the shortcut menu bar of your iPhone, select “screen mirroring” and turn it on,
and then you can use the Airplay function.
4.4 Android Mirror-link
1) Download and install the “Auto-link Pro” App on your Android phone.
2) Set up-Smart Phone, Turn on “Autolink”, and turn off the others.
3) Open the “Auto-link Pro” App on your phone.
4) Connect “CAR-XXXXX”. Allow “Auto-link Pro” to use the mirror link function.
4.5 OEM Car
1) Home > OEM Car
2) Now you can use i-drive to use your OEM car system.
Reminder: The OEM screen doesn’t have a touch screen function, so after entering the
OEM car system, clicking anywhere on the screen will exit OEM mode. You can only use
i-drive to control the OEM screen.
Linux Screen User Manual
14/21
Linux Screen User Manual
15/21
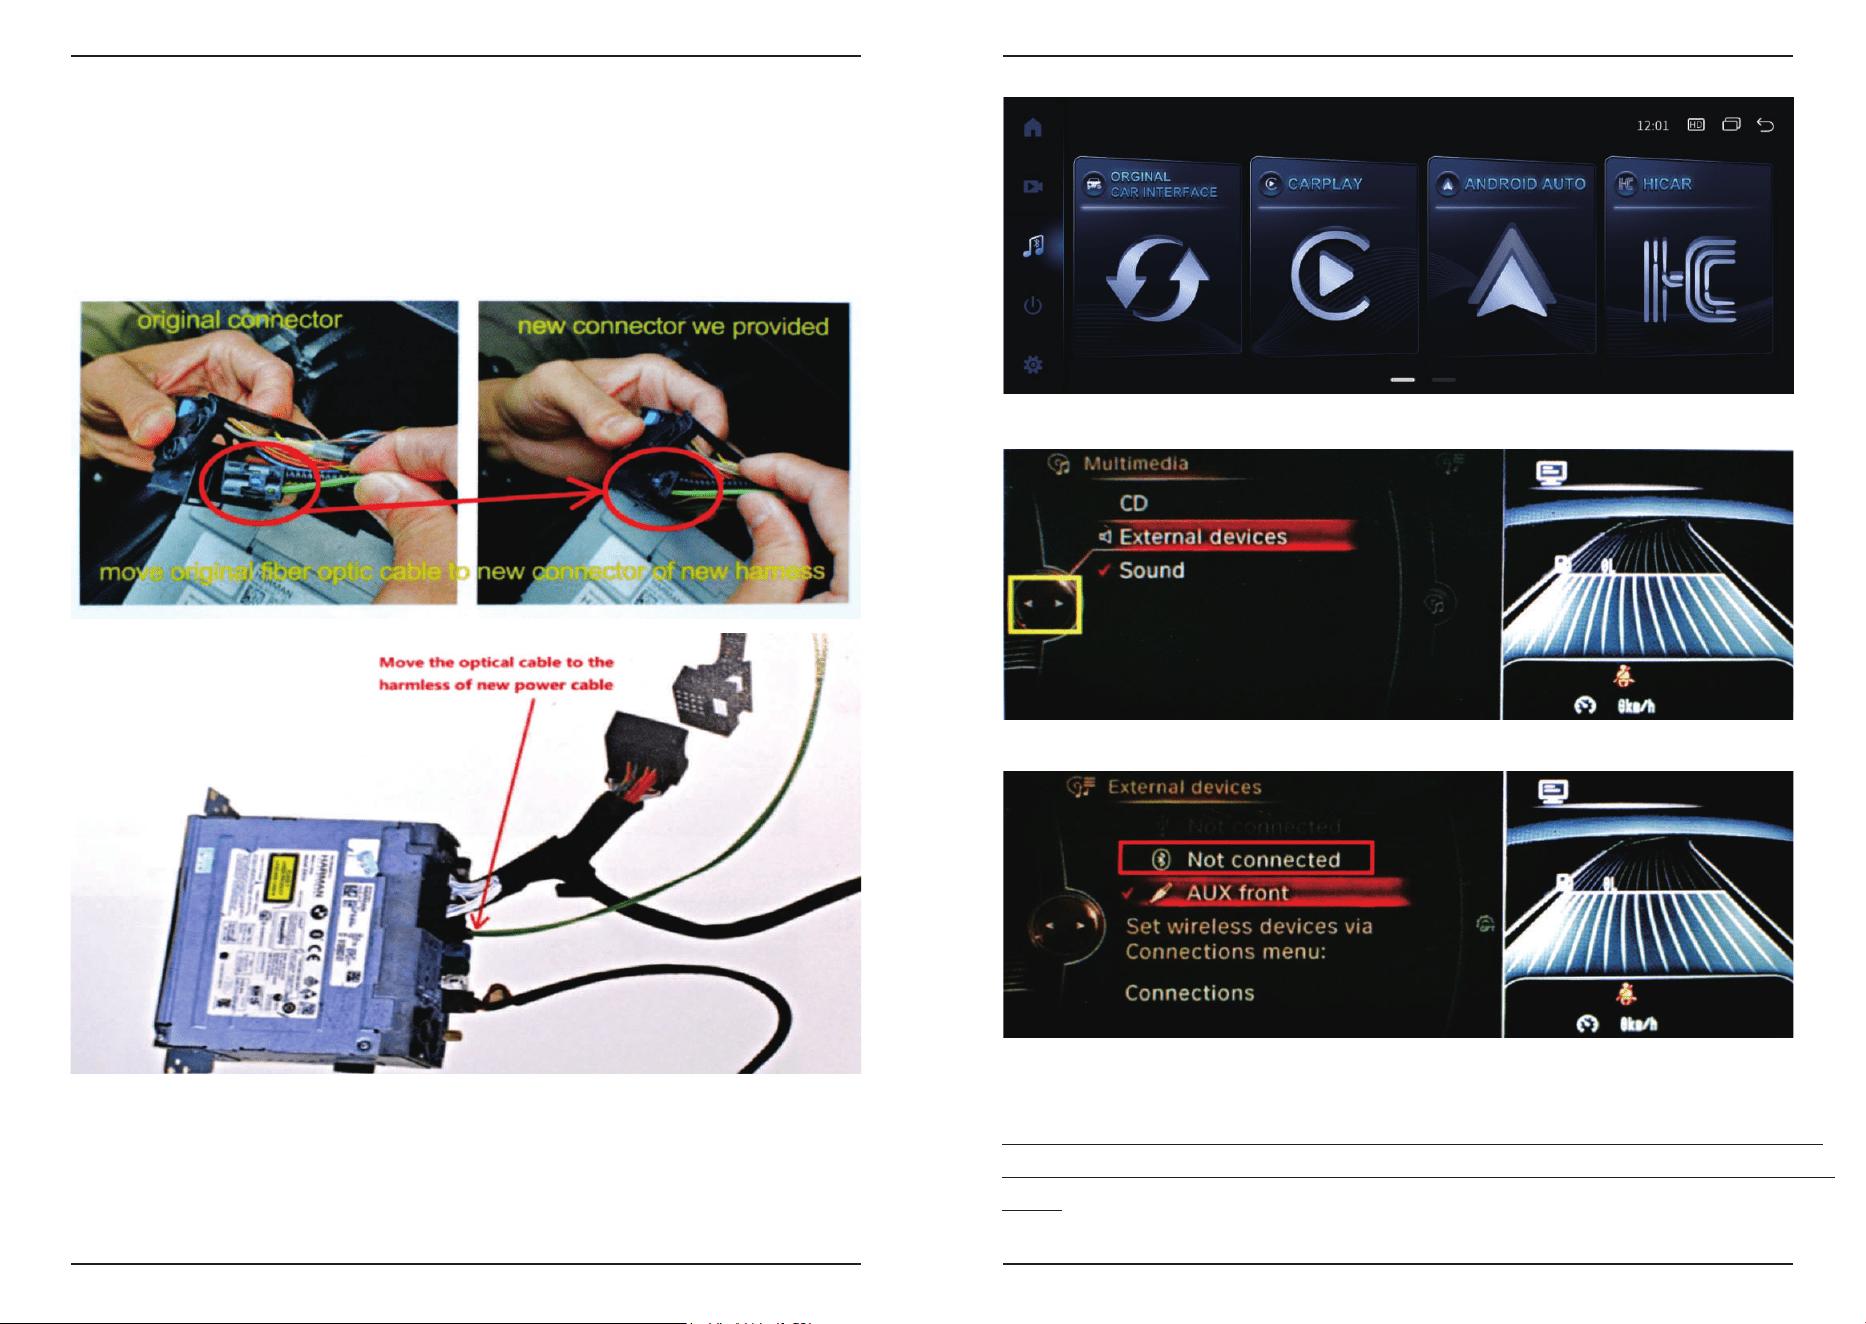
4.6 Sound Setup
1) Optical Fiber Cable Installation
2) Sound Transmission Methods
AUX setup steps
Enter into the “CD/Multimedia” or “Multimedia”, and click “External devices”.
Select the “AUX front” as the sound transmission method.
Keep the original system in “AUX front” status, touch the screen back to the Linux
interface, and the AUX setting is done.
Reminder: If "AUX Front" is not set, this may result in only FM and USB from the OEM
screen being able to play, CarPlay/Android Auto and Bluetooth may not be able to play
audio.
Click the “Original Car” logo in the main menu to enter the original system.
When you connect the new power cable to the head unit, you have to take the optical
fiber cable from the original power cable and plug it into the host pass through the new
power cable.
Linux Screen User Manual
16/21
Linux Screen User Manual
17/21
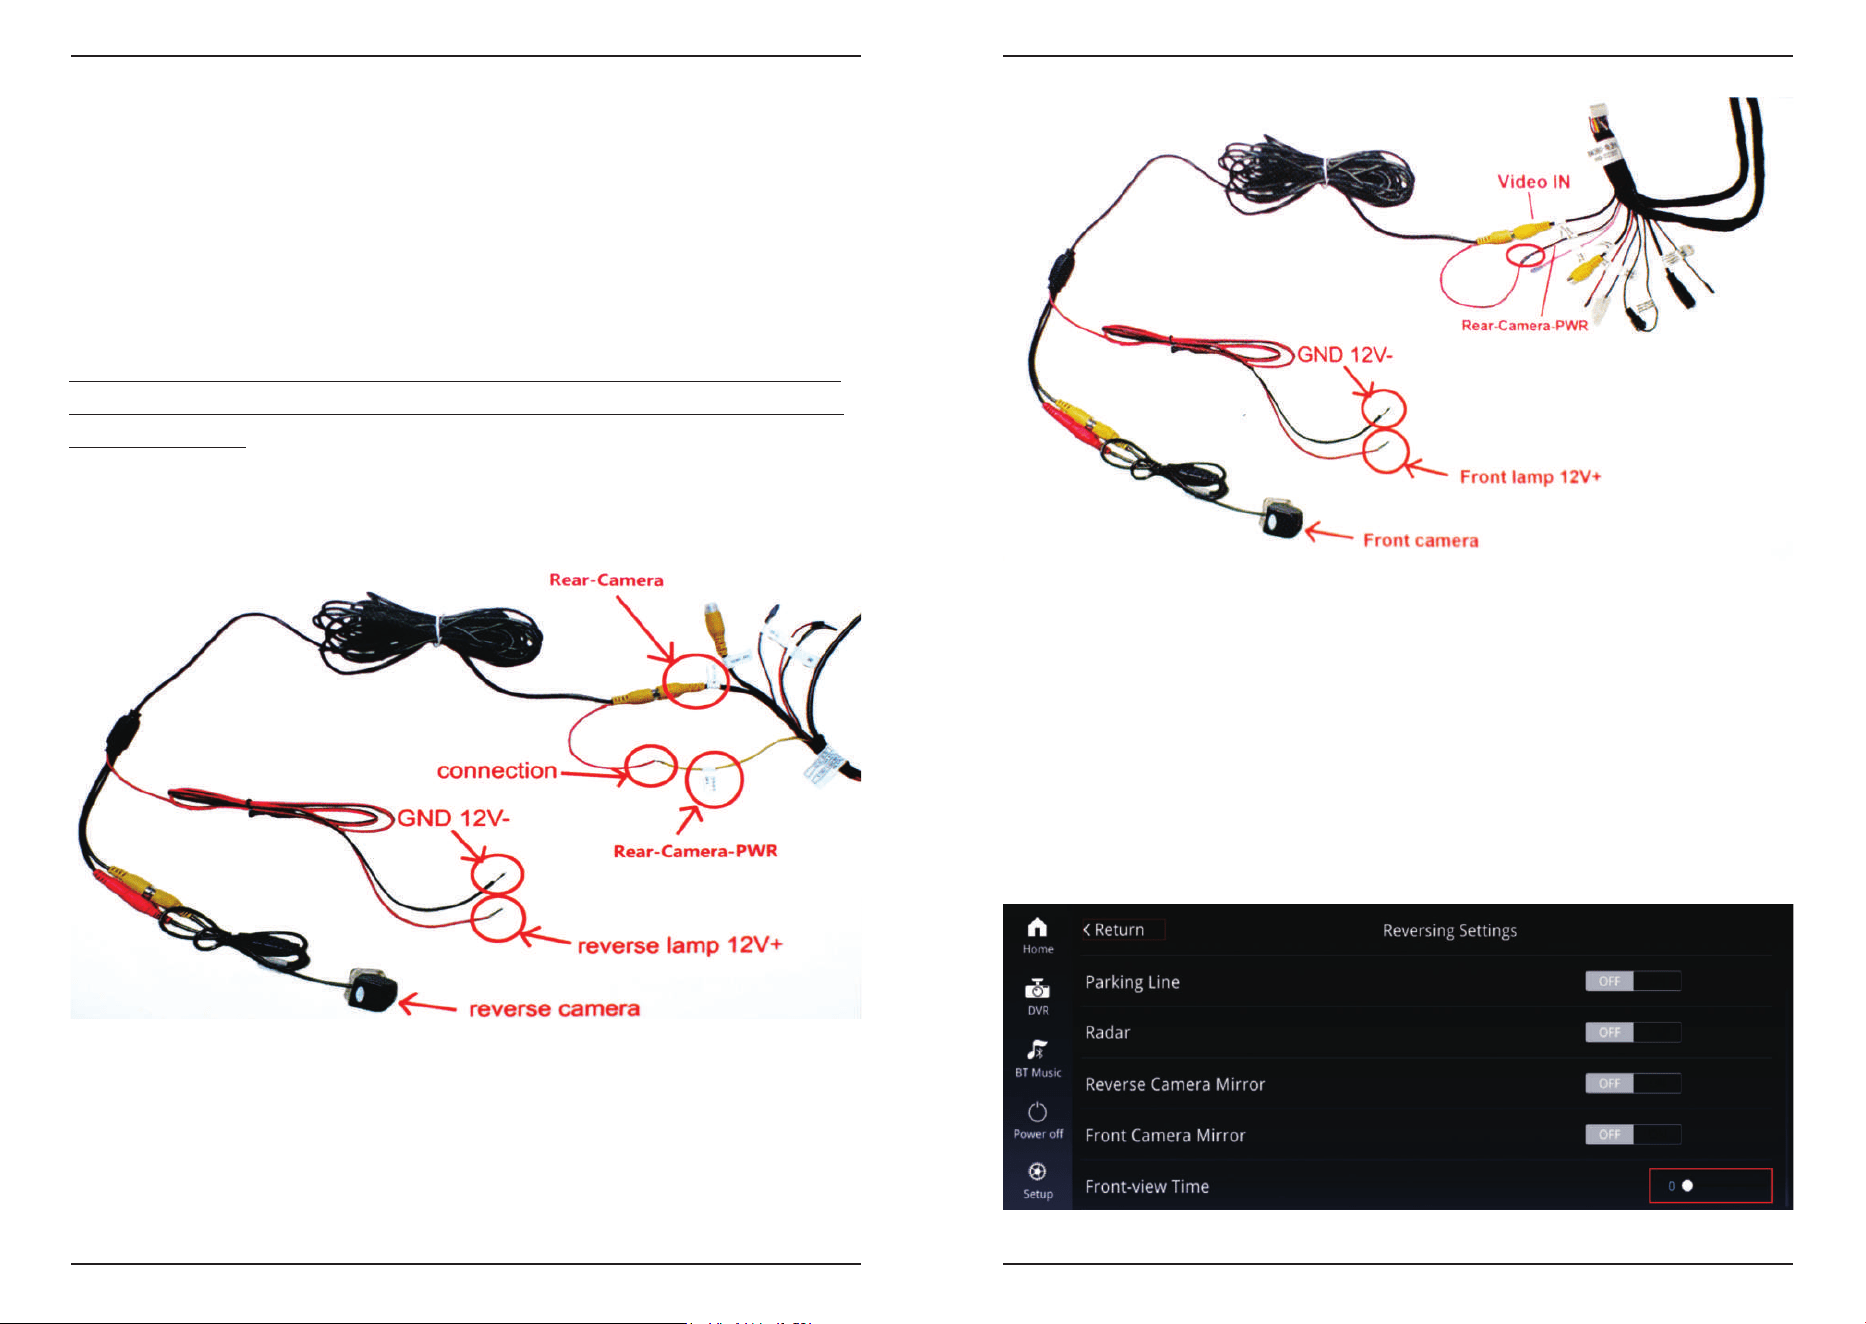
4.7 Camera and DVR
1) Camera Setup
Aftermarket Camera: Setup > Car Settings > Reversing Settings > Camera Type >
Aftermarket camera
2) Camera Cables Connection
Reminder: For the original camera, there is no need to connect any cable for the
camera, but for the aftermarket camera, you have to follow the below samples to
connect the cable.
Rear camera cables connection
Rear-Camera Cable connection for AT: “Rear - Camera” + “Rear - Camera - PWR”
Front Camera/DVR Cables Connection
The cable connection method for both the front camera and DVR are the same,
and now the product only supports the DVR of the RCA port.Cable connection
ports: “Video - input” + “Rear - Camera - PWR”
360 Camera Cables Connection
The power cable doesn’t have enough video in the port for the 360 cameras, so you
have to add one more decoder to integrate all the cameras’ video first, and then
connect the decoder with the video in the port of the power cable.
3) Front-view Time Setup
To activate the front camera, you have to set the “Front-view Time” first. First shift to
the reverse gear, then change to the driving gear. And the screen will enter the
“Reversing Setting” interface, so you can set the “Front-view Time” here. Normally
you shall set the “Front-view Time” as “0-20” seconds.
Rear-Camera Cable connection for MT: “Rear - Camera” + “Back DEL”
OEM camera: Setup > Car Settings > Reversing Settings > Camera Type > Original
camera
Linux Screen User Manual
18/21
Linux Screen User Manual
19/21
4.8 USB Player
Download videos and music to USB and connect to the screen via USB cable.
You can play music and videos in the car through the screen.
Reminder: It is recommended to unplug the USB when not using it to play music or
video, as this may cause audio playback confusion.
5. Installation Steps - Assembly Steps
5.1 Screen Pinning
Insert the screws through the fixing holes at the bottom of the screen tightly to ensure
that the screen is firmly fixed.
5.2 CD Host Fixed
You can place the wiring harness anywhere in the hollow space inside the car, and
using tape/zip ties may make it easier to store the wires.
Reminder: Please ensure that no wires will be stuck/crushed when reinstalling the
housing, which may significantly shorten the product life or cause certain functions
to be disconnected.
5.3 Panel Reinstall
Connect the wires of the key panel and reinstall, then fix four screws at the corners.
Connect the wires of the lower shell and reinstall.
Connect the wires of the upper shell and the air-conditioning outlet and reinstall.

Linux Screen User Manual
21/21
6.2 Audio
Linux Screen User Manual
20/21
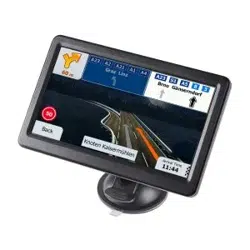
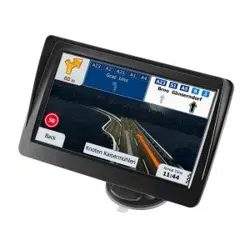
When your OEM screen shows like the image above, it may be because the screen
resolution is too large.
In the above two cases, you need to change the original car resolution to the correct
resolution and then restart the car.
Setup > Car settings > Original Car's Screen Resolution
Select the correct resolution as per your original car screen resolution.
Common audio problems that may occur include the following:
• Wiring error
• AUX front is not set
• AUX wiring is not plugged in all the way
• External AUX interface of some models is oxidized or aged
If you have any further questions or need more help, please:
When your OEM screen shows like the image above, it may be because the screen
resolution is too large.
6. FAQ
6.1 Screen Display
Reminder: Please make sure to restart the car after changing the resolution.
7. Contact Us
When you contact us, please send us the following information:
1. Order number
2. Car model and year
3. Tell us the detailed problem you encountered. Video or pictures of the problem
will be greatly appreciated. This will go a long way in helping us find a solution.

FCC Warning Statement: Changes or modifications to this unit not expressly
approved by the party responsible for compliance could void the user’s
authority to operate the equipment. This equipment has been tested and found
to comply with the limits for a Class B digital device, pursuant to Part 15 of the
FCC Rules. These limits are designed to provide reasonable protection against
harmful interference in a residential installation. This equipment generates,
uses and can radiate radio frequency energy and, if not installed and used in
accordance with the instructions, may cause harmful interference to radio
communications. However, there is no guarantee that interference will not
occur in a particular installation. If this equipment does cause harmful
interference to radio or television reception, which can be determined by
turning the equipment off and on, the user is encouraged to try to correct the
interference by one or more of the following measures:
- Reorient or relocate the receiving antenna.
- Increase the separation between the equipment and receiver.
-
Connect the equipment into an outlet on a circuit different from that to
which the receiver is connected.
- Consult the dealer or an experienced radio/TV technician for help.
This device complies with Part 15 of the FCC Rules. Operation is subject to the
following two conditions: (1) this device may not cause harmful interference,
and (2) this device must accept any interference received, including
interference that may cause undesired operation.
FCC Radiation Exposure Statement
The antennas used for this transmitter must be installed to provide a separation
distance of at least 20 cm from all persons and must not be co
‐
located for
operating in conjunction with any other antenna or transmitter.