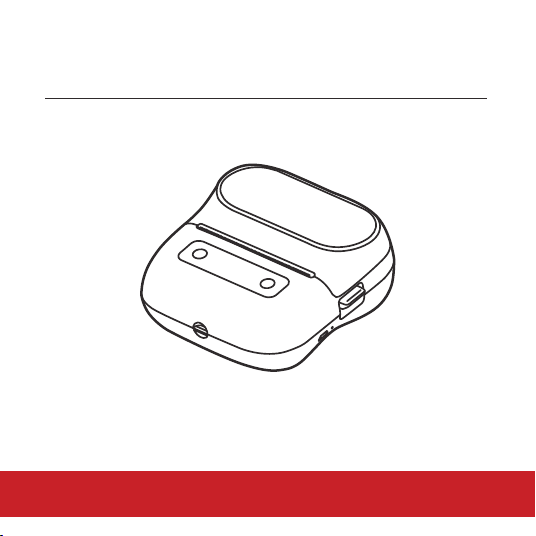
Instruction Manual
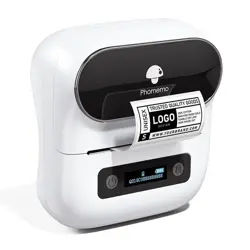
M220
Please read this instruction carefully before using this product and keep it properly.
English
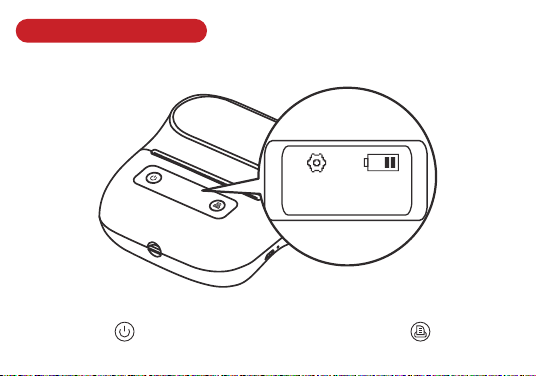
Language switching
Click the " "button to select the language and click the" " button
to switch the language.
Language
English
Click the " "button to select the language and click the" " button
to switch the language.
01. Item Checklist
NOTE
· The number of label rolls on the checklist is determined by the contents
of the shipped package.
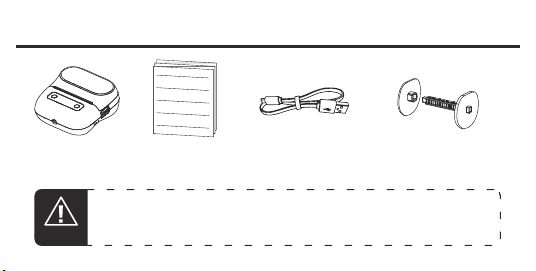
① Printer x1
② Instruction
Manual x1
③ USB Cable x1
④ Paper Width Guide
Disk (In the printer) x1
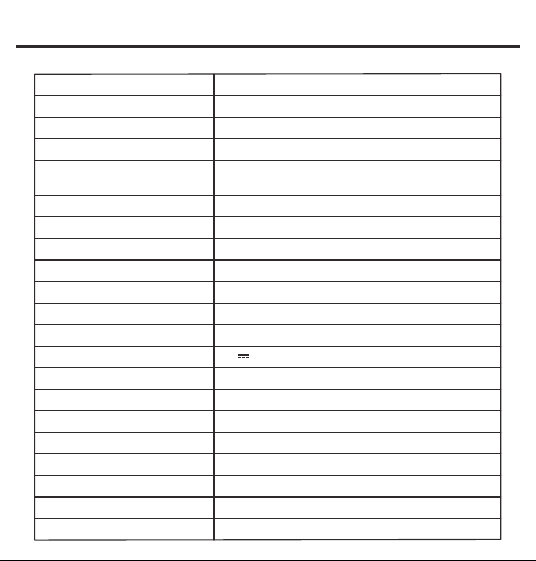
02. Specifications
Name
Model
Technology
Width of label
Supported Consumables
Consumable specifications
Printing speed
Darkness
Resolution
Printhead Lifespan
Communication Port
Product Dimensions
Power Input
Power Supply
OS Supported
Command set
Barcode
Working environment
Storage environment
Working humidity
Storage humidity
Multi-functional portable label printer
M220
Thermal Printing
20-75mm
Black mark thermal Label, Pre-cut Label, Continuous
Label
30-50mm/s (1-5 levels)
1-15 levels
203dpi
50KM
Bluetooth / Data wire
125*119*63.5mm(4.92*4.68*2.5in)
Data wire / Lithium battery
5V 2A
80mm x φ50mm (Max width + Max diameter)
Android / iOS
ESC/POS
1D barcode and QR code are supported
5℃~50℃
-20℃~60℃
20%~85%
2%~95% (Not frozen)
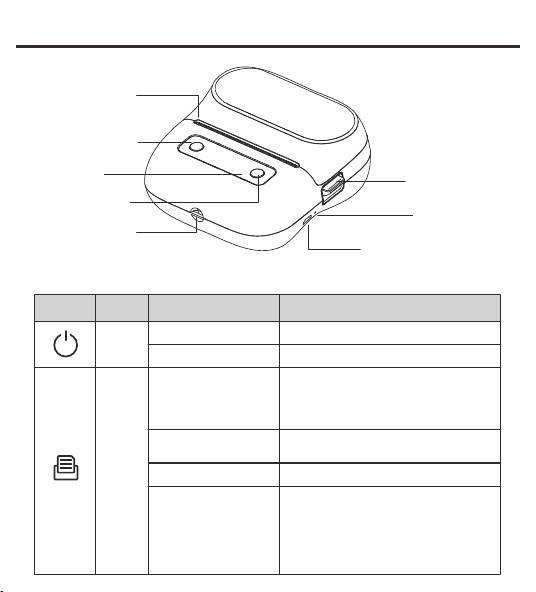
03. Product Introduction ‒ Parts and Features
① Paper Output
② Power Button
③ Display
⑦ Reset Hole
⑧ Open-Cover
Button
⑥ Data line interface
④ Eject Button
⑤ Lanyard Hole
Button functions
Diagram
Hold for 3 seconds
Press once
Instruction
Switch on/off.
Switch between the main menu pages.
FunctionButton
Power
Button
Eject
Button
Press once
(For non-continuous
paper and black mark
paper)
Long press
(For continuous paper)
Eject one label and reposition the label
paper to the head of the next label.
Hold to eject paper. Release to stop.
Hold for 3 seconds Return to the main menu.
Press once
1. After switching to the desired main
menu page using the Power Button,
press Eject Button to go through the
sub-menu.
2. Press once to eject one sheet of paper
when the printer is in standby mode.
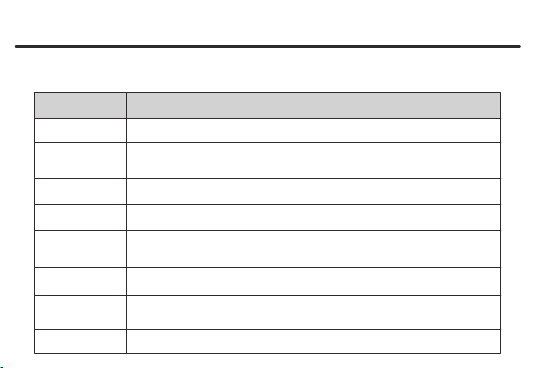
04. Parts Description
Selection
Language
Ink Intensity
Printing Speed
Paper Type
Automatic
Shutdown
Factory Reset
Chinese, English
1 (Lightest), 2, 3, 4 (Light), 5, 6 (Normal), 7, 8, 9, 10 (Dark), 11, 12, 13,
14, 15 (Darkest)
1 (Slowest), 2 (Slow), 3 (Normal), 4 (Fast), 5 (Fastest)
Non-continuous paper, Continuous paper, Black mark thermal paper
5 minutes, 15 minutes, 30 minutes, 1 hour, 2 hours, 4 hours, 8 hours,
24 hours, Stay on (Default)
Restore to default factory configuration
Firmware
Version
Device Address
Show firmware version
Show device address
Parameters (Contents)
Main Menu - Settings
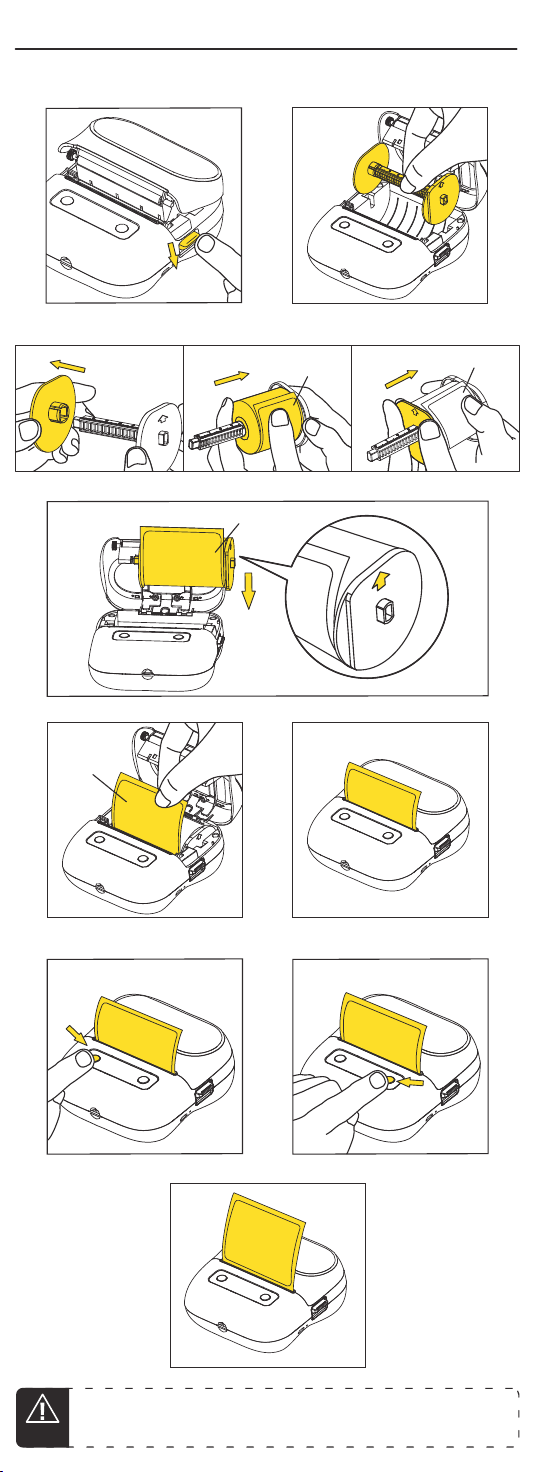
05. Paper Roll Installation
② Take out the paper holder inside the
compartment.
③ Remove the left disk and insert the label roll (with the printing side facing down). Insert
the left disk and push it to the right.
④ After the label holder is complete, insert the holder into the paper compartment.
Print side
Print side
Print side
Pull out
15 mm
⑤ Pull out around 15 mm of paper and close the paper compartment cover.
① Slide down the Open-Cover Button to
open the paper compartment cover.
⑦ Press the Eject Button once to detect
and reposition the label paper.
⑧ The label paper is repositioned once it comes out.
⑥ Hold the Power Button for 3 seconds.
NOTE
· On your first use or after you have replaced the label paper, the printer
automatically ejects paper to reposition the label paper. This helps avoid printing
errors (incomplete print, non-centered content, etc.).
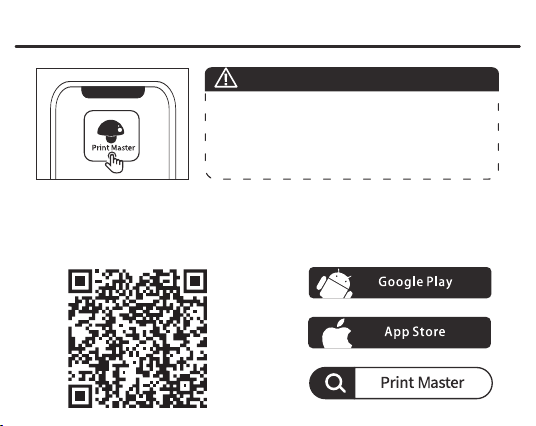
06. Downloading the App
Method 1:
Use your phone to scan the QR code to
install the App.
Method 2:
Search for "Print Master" in the app
store on your phone to download the
App.
· You need to connect the printer through the Print
Master app.
· In compliance with Google’s requirement, Android
phones must enable GPS (Location Services) before
using Bluetooth.
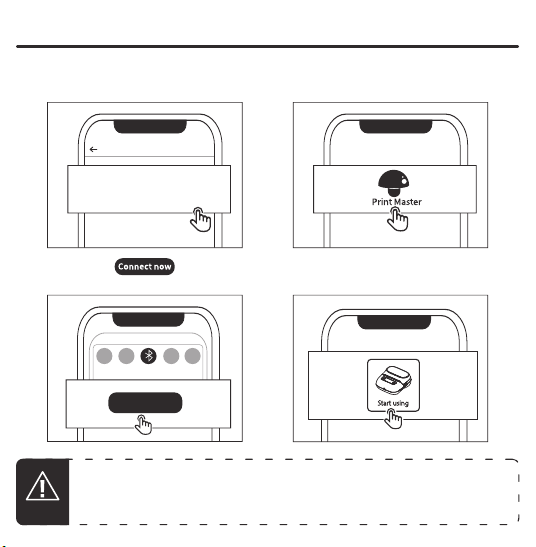
07. Connecting the Printer
② Open Print Master
③ Tap the " " button to
search for your device.
Connect now
④ Press "Start using"
① Turn on GPS (Location Services)
(Android phones only)
Location Services
Privacy
On >
NOTE
· In compliance with Google’s requirement, Android phones must enable GPS
(Location Services) before using Bluetooth.
· Before connecting to your device in Print Master, please make sure your printer
is turned on and your phone’s Bluetooth is on.
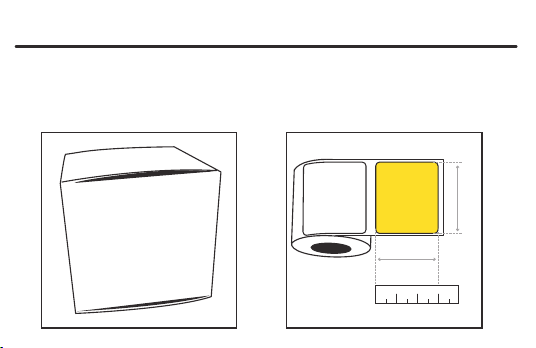
08. Identifying the Label Size
The App is required to set the label size or template before printing. Please follow the
instructions to download it.
Method 1:
Check your label package.
Method 2:
Measure with a ruler.
30mm
40mm
0
1 2 3
(cm)
Product:Square label
Model:XP4030-230
Detail:White
Spec:40*30mm/230pcs

09. FCC Caution
This device complies with part 15 of the FCC Rules. Operation is subject to the following two
conditions:
(1)This device may not cause harmful interference, and (2) this device must accept any interference
received, including interference that may cause undesired operation.
Any Changes or modifications not expressly approved by the party responsible for compliance
could void the user's authority to operate the equipment.
Note: This equipment has been tested and found to comply with the limits for a Class B digital
device, pursuant to part 15 of the FCC Rules. These limits are designed to provide reasonable
protection against harmful interference in a residential installation. This equipment generates uses
and can radiate radio frequency energy and, if not installed andused in accordance with the
instructions, may cause harmful interference to radio communications. However, there is no
guarantee that interference will not occur in a particular installation. If this equipment does cause
harmful interference to radio or television reception, which can be determined by turning the
equipment off and on, the user isencouraged to try to correct the interference by one or more of
the following measures:
-Reorient or relocate the receiving antenna.
-Increase the separation between the equipment and receiver.
-Connect the equipment into an outlet on a circuit different from that to which the receiver is
connected.
-Consult the dealer or an experienced radio/TV technician for help.
*RF warning for Portable device:
The device has been evaluated to meet general RF exposure requirement.
The device can be used in portable exposure condition without restriction.

This device complies with part 15 of the FCC Rules. Operation is subject to the following two
conditions:
(1)This device may not cause harmful interference, and (2) this device must accept any interference
received, including interference that may cause undesired operation.
Any Changes or modifications not expressly approved by the party responsible for compliance
could void the user's authority to operate the equipment.
Note: This equipment has been tested and found to comply with the limits for a Class B digital
device, pursuant to part 15 of the FCC Rules. These limits are designed to provide reasonable
protection against harmful interference in a residential installation. This equipment generates uses
and can radiate radio frequency energy and, if not installed andused in accordance with the
instructions, may cause harmful interference to radio communications. However, there is no
guarantee that interference will not occur in a particular installation. If this equipment does cause
harmful interference to radio or television reception, which can be determined by turning the
equipment off and on, the user isencouraged to try to correct the interference by one or more of
the following measures:
-Reorient or relocate the receiving antenna.
-Increase the separation between the equipment and receiver.
-Connect the equipment into an outlet on a circuit different from that to which the receiver is
connected.
-Consult the dealer or an experienced radio/TV technician for help.
*RF warning for Portable device:
The device has been evaluated to meet general RF exposure requirement.
The device can be used in portable exposure condition without restriction.
10. IC Caution
Radio Standards Specification RSS-Gen, issue 5- English:
This device contains licence-exempt transmitter(s)/receiver(s) that comply with Innovation,
Science and Economic Development Canada’s licence-exempt RSS(s). Operation is subject to the
following two conditions:
This device may not cause interference.
This device must accept any interference, including interference that may cause undesired
operation of the device.
RF exposure statement:
The device has been evaluated to meet general RF exposure requirement. The device can be used
in portable exposure condition without restriction.
- French:
Cet appareil contient des émetteurs / récepteurs exemptés de licence conformes aux RSS (RSS)
d'Innovation, Sciences et Développement économique Canada. Le fonctionnement est soumis aux
deux conditions suivantes:
Cet appareil ne doit pas causer d'interférences.
Cet appareil doit accepter toutes les interférences, y compris celles susceptibles de provoquer un
fonctionnement indésirable de l'appareil.
Déclaration d'exposition RF:
L'appareil a été évalué pour répondre aux exigences générales d'exposition aux RF. L'appareil peut
être utilisé dans des conditions d'exposition portable sans restriction.