
Car & Motorcycle
SMART BATTERY
CHARGER
6V/12V
Read and understand these instructions
before attempting any operation of
this battery charger and retain
for future reference!

1. IMPORTANT SAFETY INSTRUCTIONS
2. PERSONAL SAFETY PRECAUTIONS
3. PRODUCT OVERVIEW & SPECIFICATIONS
3-1 Product Overview (Mode Selection, LCD Display)
3-2 Specifications
4. OPERATING INSTRUCTIONS
4-1 INTENDED USE
4-2 PREPARING TO CHARGE
4-3 CONNECTION
4-4 CHARGING
4-5 SAFETY FEATURES
4-6 CHARGING TIME
4-7 ADAPTER FOR SUPPLY FUNCTION USE
5. TROUBLESHOOTING
6. MAINTENANCE INSTRUCTIONS.
7. DISPOSAL AND RECYCLING
1
2
3
6
7
8
8
CONTENT

Please save these instructions. This
manual contains important safety and
operating instructions. Read all
instructions and follow them with each
use of this product.
This manual contains important safety
and operating instructions.You may
need to refer to these instructions at a
later date.
To reduce risk of injury, charge lead-acid
wet cell, gel or AGM automotive type
rechargeable batteries. Other types of
batteries may burst causing personal injury
and property damage.
Do not expose charger to rain or snow.
Use of an attachment not recommended or
sold by the battery charger manufacturer
may result in a risk of fire, electric shock,or
injury to persons.
To reduce risk of damage to electric plug
and cord, pull by plug rather than cord
when disconnecting charger.
Make sure cord is located so that it will not
be stepped on, tripped over, or otherwise
subjected to damage or stress.
An extension cord should not be used
unless absolutely necessary. Use of improp-
er extension cord could result in a risk of
fire and electric shock. If an extension cord
must be used, make sure:
a. The pins on the plug of the extension
cord are the same number, size and shape
as those of the plug on the charger;
b. That extension cord is properly wired and
in good electrical condition;
Do not operate charger with damaged cord
or plug, replace the cord or plug immedi-
ately.
Do not operate charger if it has received a
sharp blow, been dropped, or otherwise
damaged in any way; take it to a qualified
serviceman.
1.IMPORTANT SAFETY INSTRUCTIONS
CAUTION.
SAVE THESE INSTRUCTIONS.
1.
2.
3.
4.
5.
6.
7.
8.
9.
10.
11.
12.
13.
14.
Do not disassemble charger; take it to a
qualified serviceman when service or repair
is required. Incorrect reassembly may result
in a risk of electric shock or fire.
To reduce risk of electric shock, unplug
charger form outlet before attempting any
maintenance or cleaning. Turning off con-
trols will not reduce this risk.
WARNING - RISK OF EXPLOSIVE GASES
a. WORKING IN VICINITY OF A LEAD-ACID
BATTERY IS DANGEROUS. BATTERIES
GENERATE EXPLOSIVE GASES DURING
NORMAL BATTERY OPERATION. FOR THIS
REASON IT IS OF UTMOST IMPORTANCE
TO READ THIS MANUAL AND FOLLOW
THE INSTRUCTIONS EXACTLY EACH TIME
BEFORE USING CHARGER.
b. To reduce risk of battery explosion, follow
these instructions and those published by
battery manufacturer and manufacturer of
any equipment you intend to use in vicinity
of battery. Review cautionary marking on
these products and on engine.
Prohibit 12V STD, 12V AGM/C, 12V M , 12V
LFP, RECOND, SUPPLY and other charging
modes to charge 6V lead-acid batteries or
any lithium batteries;
12V LFP mode is only suitable for 12V lithi-
um iron phosphate battery, not for other
lithium batteries, it is forbidden to charge
other lithium batteries;
For lead-acid batteries with a battery volt-
age of less than 3V for a long time, it is
recommended to replace the battery if the
voltage cannot be increased using this
charger;
1

Someone should be within range of your
voice or close enough to come to your aid
when you work near a lead-acid battery.
Have plenty of fresh water and soap nearby
in case battery acid contacts skin, clothing,
or eyes.
Wear complete eye protection, and clothing
protection. Avoid touching eyes while work-
ing near battery.
If battery acid contacts skin or clothing,
wash immediately with soap and water. If
acid enter eye, immediately flood eye with
running cold water for at least 10 minutes
and get medical attention immediately.
NEVER smoke or allow a spark or flame in
vicinity of battery or engine.
Be extra cautious to reduce risk of dropping
a metal tool onto battery. It might spark or
short circuit battery or other electrical part
that may cause explosion.
2.PERSONAL SAFETY PRECAUTIONS
1.
7.
8.
9.
2.
3.
4.
5.
6.
Changes or modifications not expressly approved by the party responsible for compli-
ance could void the user’s authority to operate the product.
WARNING
For the battery that displays BAD on the
screen, it is recommended to replace the
battery;
This device complies with Part 15 of the
FCC Rules. Operation is subject to the
following two conditions:
15.
16.
(1) this device may not cause harmful interfer-
ence.
(2) this device must accept any interference
received, including interference that may cause
undesired operation.
Remove personal metal items such as rings,
bracelets, necklaces, and watches when
working with a lead-acid battery. A lead-acid
battery can produce a short circuit current
high enough to weld a ring or the like to
metal, causing a severe burn.
Use the charger for charging Lead acid, Gel,
Calcium, AGM and EFB batteries. It is not
intended to supply power to a low voltage
electrical system other than in a starter
motor application. Do not use battery char-
ger for charging dry-cell batteries that are
commonly used with home appliances.
These batteries may burst and cause injury
to persons and damage to property.
NEVER charge a frozen battery.
2
3.PRODUCT OVERVIEW& SPECIFICATIONS
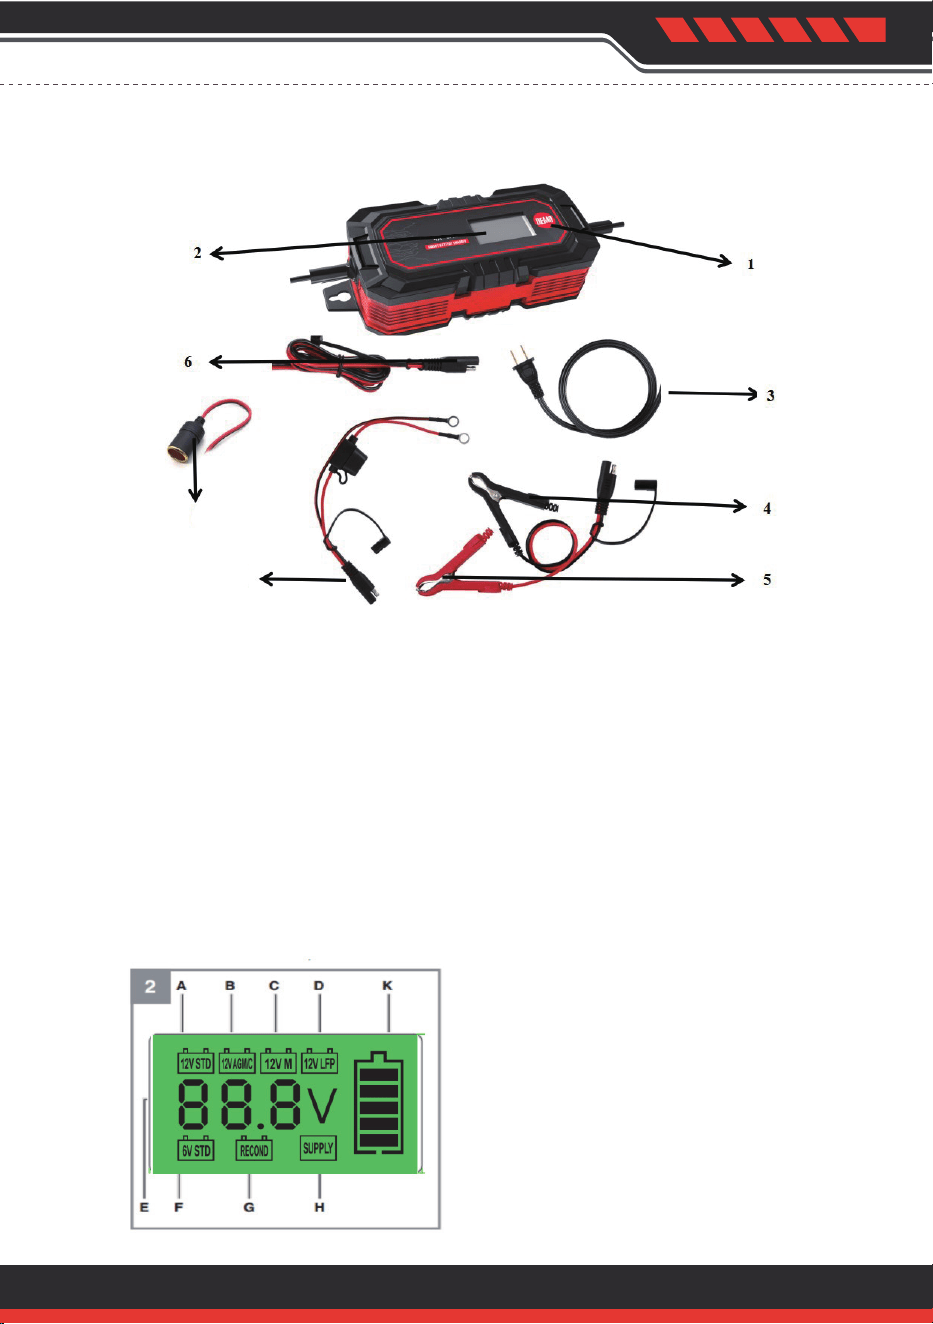
①-Mode Selection Button
Press" Mode" Button to select among the 4 Normal charging modes (12V STD, 12V AGM/C, 12V M, 12V
LFP )
Press and hold for about 3-5S to enter these three Additional Modes :
6VSTD,RECOND ,SUPPLY
Two ways to exit: To Press and hold again for about 3-5S to enter a certain 12V memory mode;
Or Power off and enter 12VSTD or a certain 12V memory mode.
Normal: 12V STD, 12V AGM/C, 12V M, 12V LFP
Additional functions: 6V STD, RECOND, SUPPLY
②-LCD Display
3-1 PRODUCT OVERVIEW
Inlet power cable with plug
Battery Terminal
Negative(black) Clamp
Battery Terminal
Positive(red) Clamp
Outlet power cable
O-ring with fuse
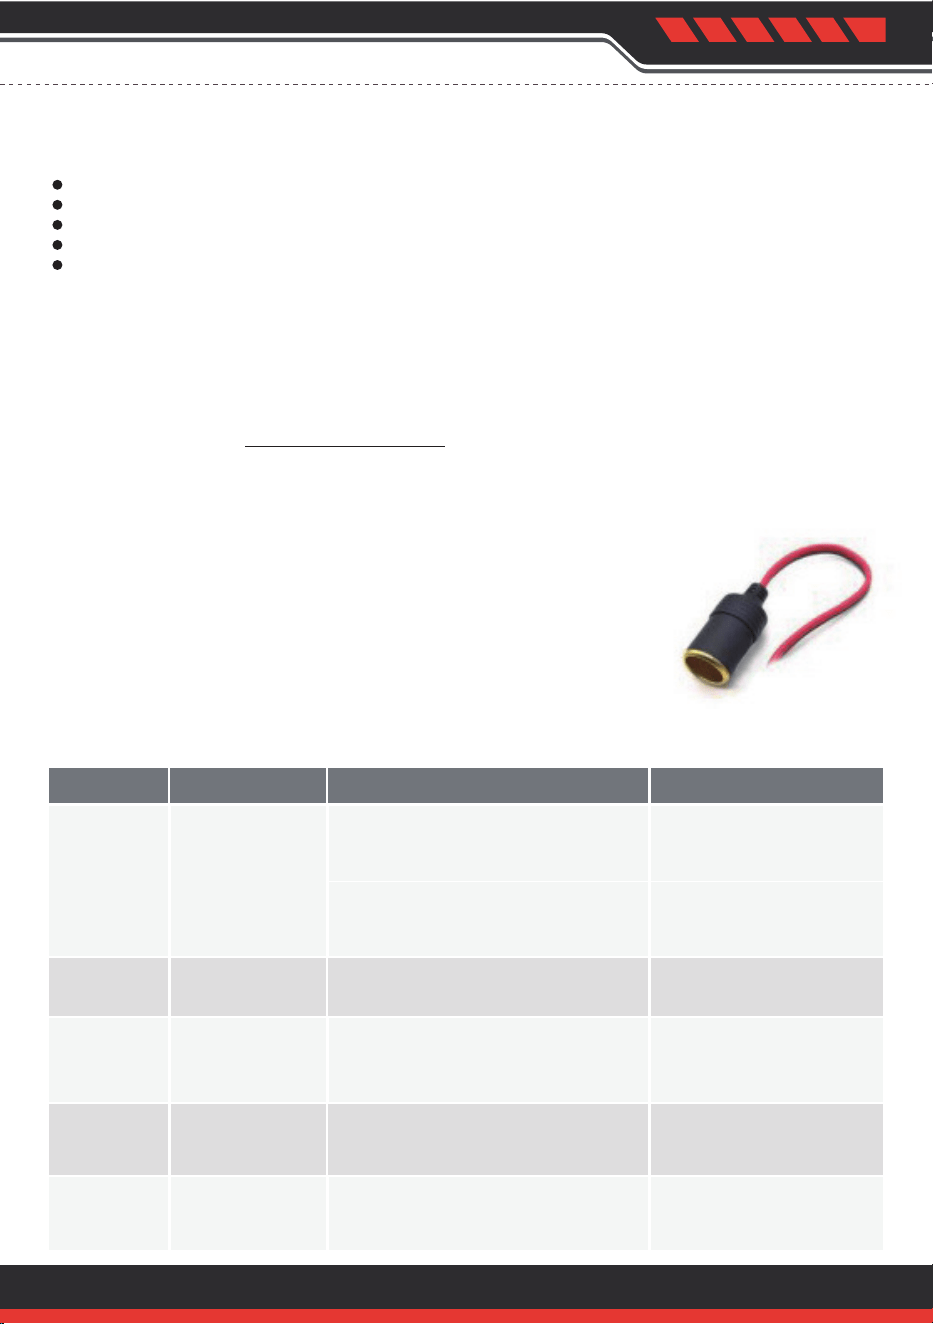
Adapter for Supply
Function Use(Only 10A)
3
③
④
⑤
⑥
⑦
⑧
Only 10A
7
8
1.
2.
3.
4.
5.
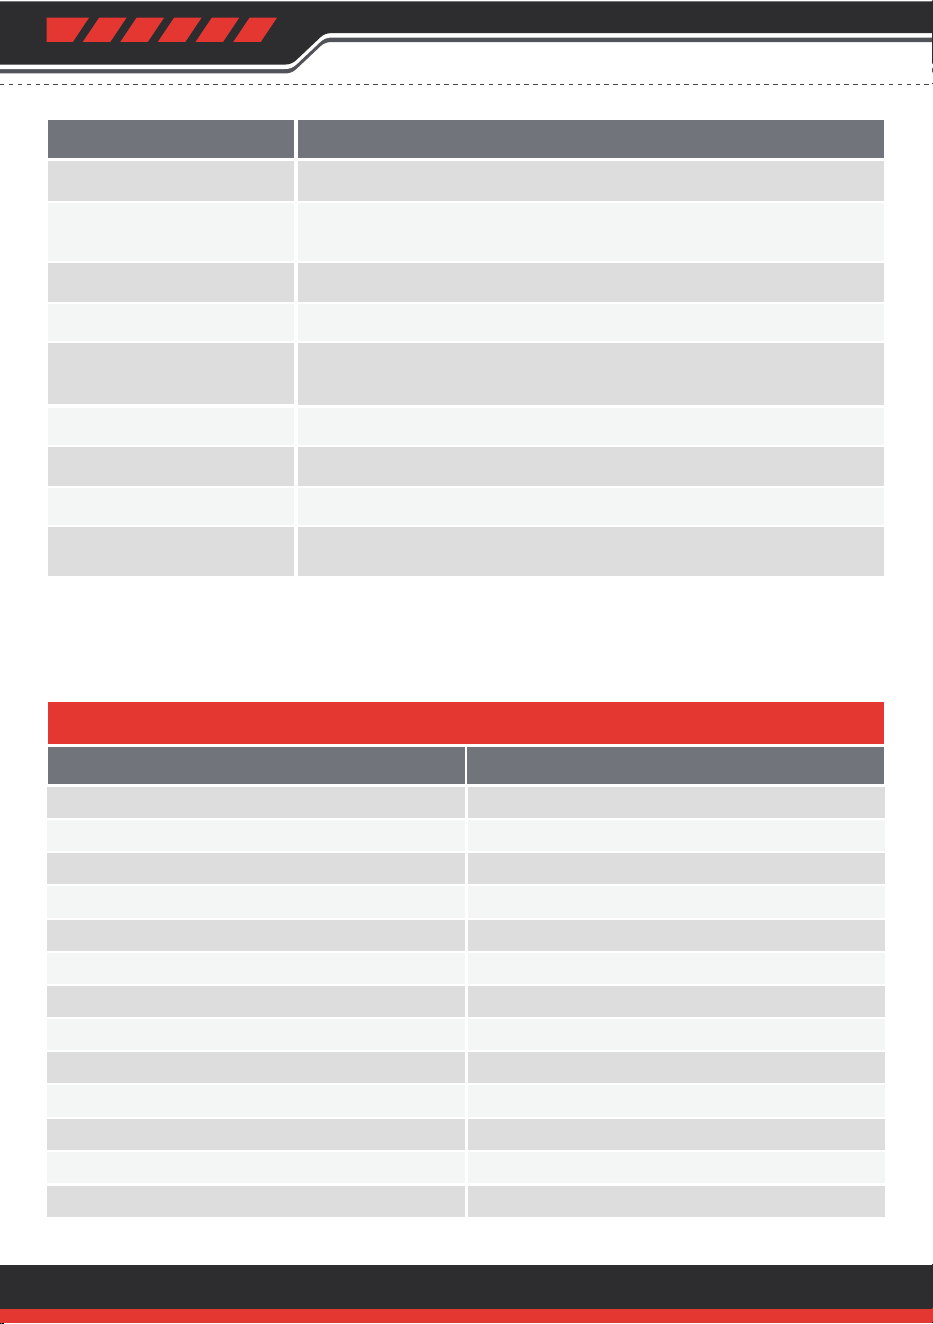
3-2 SPECIFICATIONS
Operating voltage
Max Input Power
Charge end voltage
Charging Current 12VSTD/AGM/GEL
12V LFP charging program
12V M charging program
12V RECOND charging program
6V STD charging program
Battery charge capacity
SUPPLY function output max.
Protection class
Protection class
Ambient temperature
120V, 60Hz
70 W
7.5V or 14.4 V or 14.6 or 16.5V (+/- 0.3V)
Max. 4A
14.6 V DC / 4A
14.4V DC/ 1A
16.5V DC/1.5A
7.5 V DC / 2A
4-120Ah
3A
II
IP65
-20°C/-4°F~ 40°C/104°F
4
Up to 14.5V, charging a 12V standard lead-acid batteryA- 12V STD
Explanation
LCD Display
Standard
Parameter
B- 12V AGM/C
C- 12VM
D- 12V LFP
E- Battery voltage
indicator
F-6VSTD
G- RECOND
H- SUPPLY Mode
K- Charging Indicator
Up to 14.8V,charging a 12V AGM battery or charging in winter mode
with an ambient temperature of -4°F/ -20°C to 41°F/+5°C
Up to 14.4V, charging a 12V battery for maintenance purpose
Up to 14.6 V, charging a 12V LiFePO4 battery
Accurate to 0.1V [faulty battery (BAD) / fully charged (FUL)/ con-
nected with reverse polarity or short-circuit at the clamps (Err)]
Up to 7.5V, suitable for charging 6Vsmall batteries
Up to 16.5V ,charging a 12V deeply discharged battery
Work as a 12V Power supply
Indicate the charging process, each bar represents approximately
20%.
4A
5
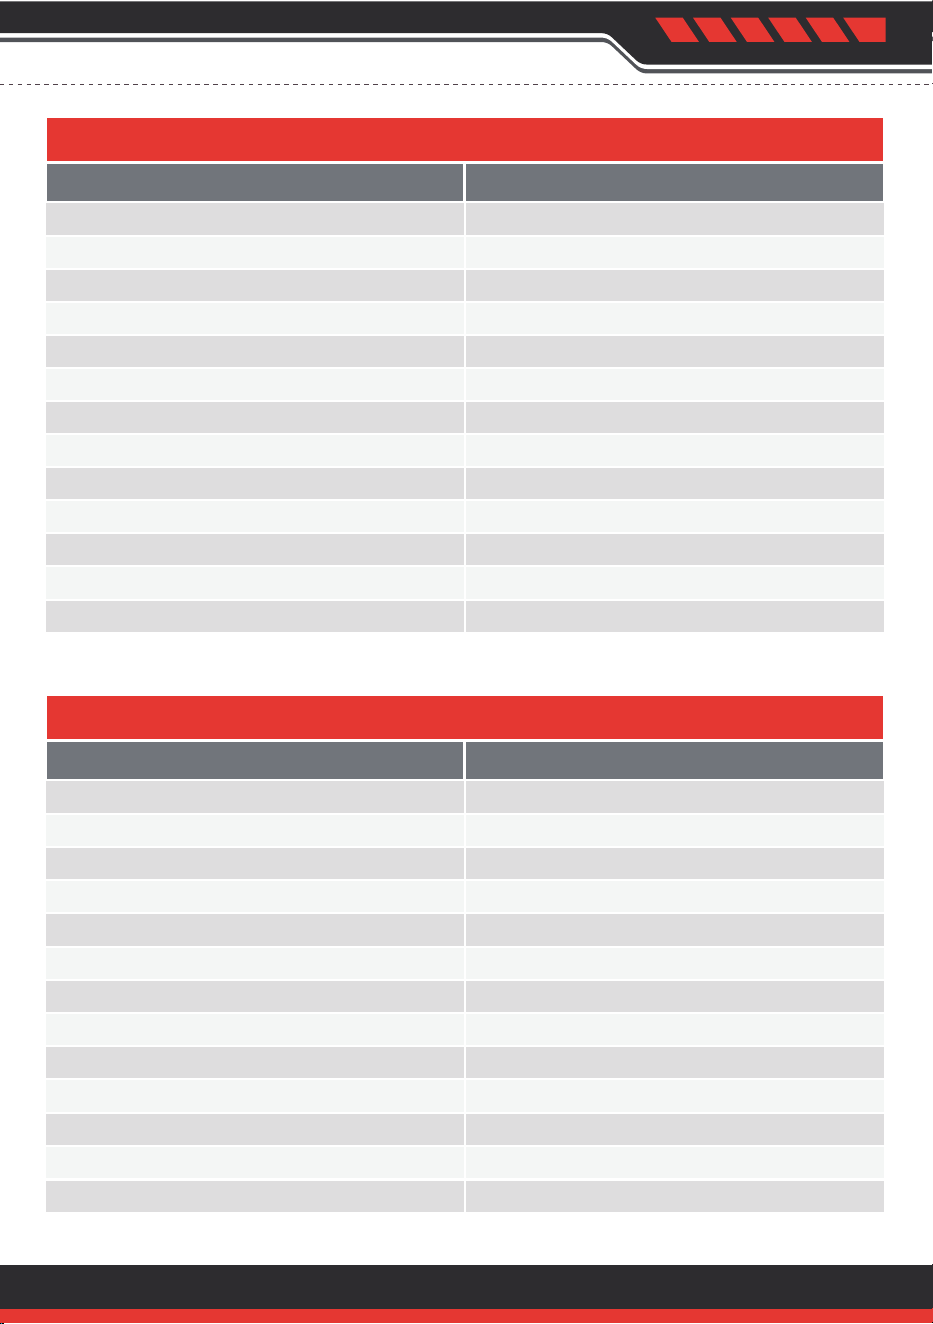
Operating voltage
Max Input Power
Charge end voltage
Charging Current 12VSTD/AGM/GEL
12V LFP charging program
12V M charging program
12V RECOND charging program
6V STD charging program
Battery charge capacity
SUPPLY function output max.
Protection class
Protection class
Ambient temperature
Parameter
6A
Operating voltage
Max Input Power
Charge end voltage
Charging Current 12VSTD/AGM/GEL
12V LFP charging program
12V M charging program
12V RECOND charging program
6V STD charging program
Battery charge capacity
SUPPLY function output max.
Protection class
Protection class
Ambient temperature
120V, 60Hz
160 W
7.5V or 14.4 V or 14.6 or 16.5V (+/- 0.3V)
Max. 10A
14.6 V DC / 10 A
14.4V DC/ 2A
16.5V DC/2.5A
7.5 V DC / 2A
4-200Ah
10A
II
IP65
-20°C/-4°F~ 40°C/104°F
Parameter
10A
120V, 60Hz
100 W
7.5V or 14.4 V or 14.6 or 16.5V (+/- 0.3V)
Max. 6A
14.6 V DC / 6 A
14.4V DC/ 1A
16.5V DC/1.5A
7.5 V DC / 2 A
4-150Ah
5 A
II
IP65
-20°C/-4°F~ 40°C/104°F
Standard
Standard

4.OPERATING INSTRUCTIONS
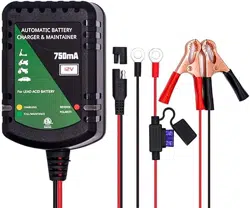
The product is designed to charge and maintain 6V/12V lead-acid batteries with a capacity of 4 - 200
Ah. (4A:4-120Ah; 6A:4-150A; 10A:4-200Ah) The charger has been optimised to maintain the battery of
your motorcycle or car when it is not being used over longer periods of time, for example over the
winter. The charger is designed to charge Lithium, Gel, AGM and standard lead-acid batteries.
Any use other than that described above will damage this product and involves the risk of short
circuits, fire, electric shock, etc.
If necessary to remove battery from vehicle to charge,always remove grounded terminal from bat-
tery first.Make sure all accessories in the vehicle are off,so as not to cause an arc.
Be sure area around battery is well ventilated while battery is being charged.
Clean battery terminals. Be careful to keep corrosion from coming in contact with eyes.
Add distilled water in each cell until battery acid reaches level specified by battery manufacturer.-
Do not overfill.For a battery without removable cell caps,such as valve regulated lead acid batter-
ies, carefully follow manufacturer’s recharging instruction.
Study all battery manufacturer’ s specific precautions while charging and recommended rates of
charge.
Determine voltage of battery by referring to the vehicle’ s manual and make sure the output volt-
age mode is correct.
To avoid sparks which could cause an explosion, the mains supply should always be disconnected
before making or breaking battery connections. Connect the battery clips or ring terminals to the bat-
tery in the following order:
1. Connect the positive charging lead (RED) to the positive post of the battery (marked + / +ve or P).
2. For vehicles with the battery still installed: Connect the negative charging lead (BLACK) to the vehi-
cle chassis (marked - / -ve or N), well away from the battery, fuel line, and hot or moving parts.
For batteries removed from the vehicle: Connect the negative charging lead (BLACK) to the negative
post of the battery (marked - / -ve or N).
After connecting the clips, rotate them slightly so as to remove any dirt or oxidization, thus ensuring a
good contact.
4-1 INTENDED USE
4-2 PREPARING TO CHARGE
4-3 CONNECTION
First make sure your battery is a 6V or 12V battery. Do not charge batteries with different operating
voltages!
Connect the battery charger to the power supply .
Select the appropriate charging mode for your batteries with the "Mode" button. Refer to 2-1 Prod-
uct Overview for a description of the individual operating modes.
Then connect the battery charger to the battery with the correct polarity. If connected with
reverse polarity or short-circuit at the clamps "Err" will be lit.
This battery charger is equipped with an automatic memory function, i.e. whenever AC supply is
connected, it starts in last selected mode.
After the charging process, disconnect the battery charger from the mains supply. First remove the
clamp from the negative terminal and then from the positive terminal.
4-4 CHARGING
6
1.
2.
3.
4.
5.
6.
1.
2.
3.
4.
5.
6.
5.TROUBLE SHOOTING
This battery charger is fitted with the following safety features:
Short circuit Protection
Overload Protection
Reverse Polarity Protection
Overcharging Protection
Over-temperature Protection
There is no reverse polarity protection in the supply mode
4-5 SAFETY FEATURES
1.Long press the Key for about 3-5S to Select the charger into “Supply” MODE.
2.Use below adapter to connect the charger and the appliances which need to
power up.
3.Then the Appliance can be opened for use.
4-7 ADAPTER FOR SUPPLY FUNCTION USE (ONLY 10A)
A partially charged battery will take less time to charge than a fully discharged battery.The approxi-
mate charging time for a battery can be calculated using the following equation:
Charging time/h = Battery capacity in Ah
Amp. (charging current)
4-6 CHARGING TIME
7
Err
The charge does
not begin.
Sdisconnect&
reconnect
The battery clamps are connected
with reverse polarity.The battery
correctly clamps are connected.
Bad
The charge does
not begin.
The battery is defective. Replace the battery.
Bad
The charge
voltage is too
low
The battery is deep-discharged
or defective.
Charge over 12-hour
first,if the battery back
to a normal voltage,it's
regenerate.
Battery is not full
charged after
24-hour charge
The charge current is too low.
Select a higher charge
rate.
The battery
voltage rising
fast
The charge current is too high.
Select a lower charge
rate.
Confirm that battery
voltage is matched
with the mode.
The battery voltage is not matched
with the selected mode.
Error code Condition Possible Cause Solution

7.DISPOSAL AND RECYCLING
6.MAINTENANCE INSTRUCTIONS
The equipment is supplied in packaging to prevent it from being damaged in transit. The raw materi-
als in this packaging can be reused or recycled. The equipment and its accessories are made of vari-
ous types of material, such as metal and plastic. Never place defective equipment in your household
refuse. The equipment should be taken to a suitable collection center for proper disposal. If you do
not know the whereabouts of such a collection point, you should ask in your local council offices.
This charger requires minimal maintenance. As with any appliance or tool, a few common sense rules
will prolong the life of the battery charger.
ALWAYS BE SURE THE CHARGER IS UNPLUGGED BEFORE PERFORMING ANY MAINTENANCE
OR CLEANING.
1. Store in a clean, dry place
2. Coil up the cords when not in use.
3. Clean the case and cords with a slightly damp cloth.
4. Clean any corrosion from the clamps with a solution of water and baking soda.
5. Examine the cords periodically for cracking or other damage and have them replaced if necessary.
6. WARNING: All other service should be done by qualified personnel only
MADE IN CHINA
8