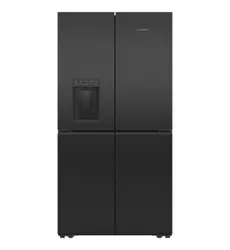


QUAD DOOR REFRIGERATOR FREEZER
RF620QNTVX1, RF620QNTVD1, RF620QNPVX1, RF620QNPVB1,
RF620QZPVG1
10
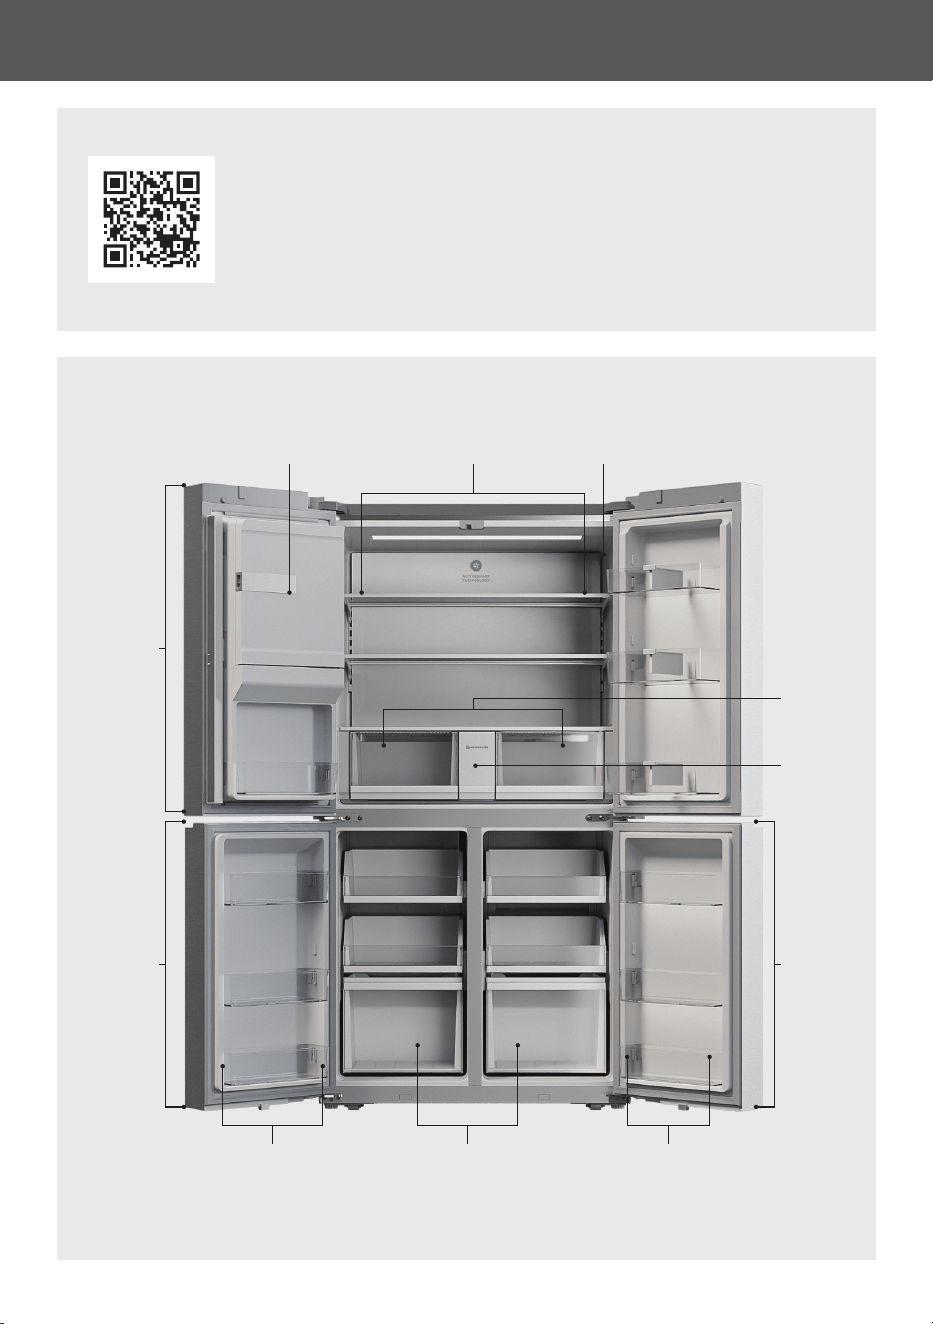
GET TO KNOW YOUR APPLIANCE
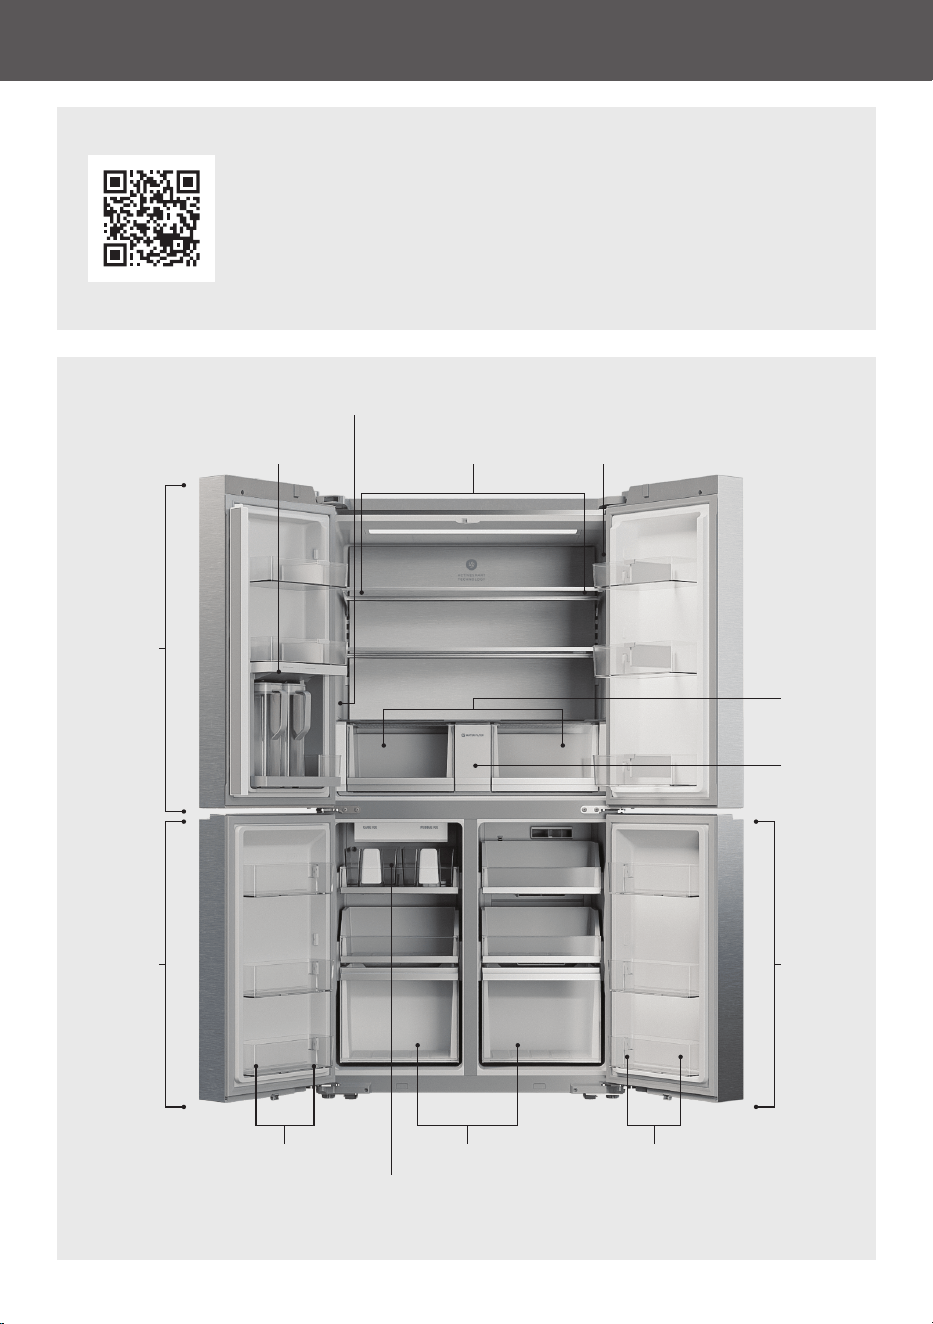
EXTERNAL DISPENSER MODELS
Fridge
compartment
Ice and water
dispenser*
Adjustable
glass shelves
Control panel
Freezer
compartment
Variable
temperature
zone
Humidity
control bins
Door shelves Door shelvesLower bins
*Located on front of door
Water filter
How to get the best results from your refrigerator:
z
Adjust the temperatures for each compartment as required.
z
Select a food mode for the variable temperature zone to suit the
items you are storing.
z
Register your product to get streamlined service support
z
Connect to Wi-Fi to access your appliance via the app.
11
GET TO KNOW YOUR APPLIANCE
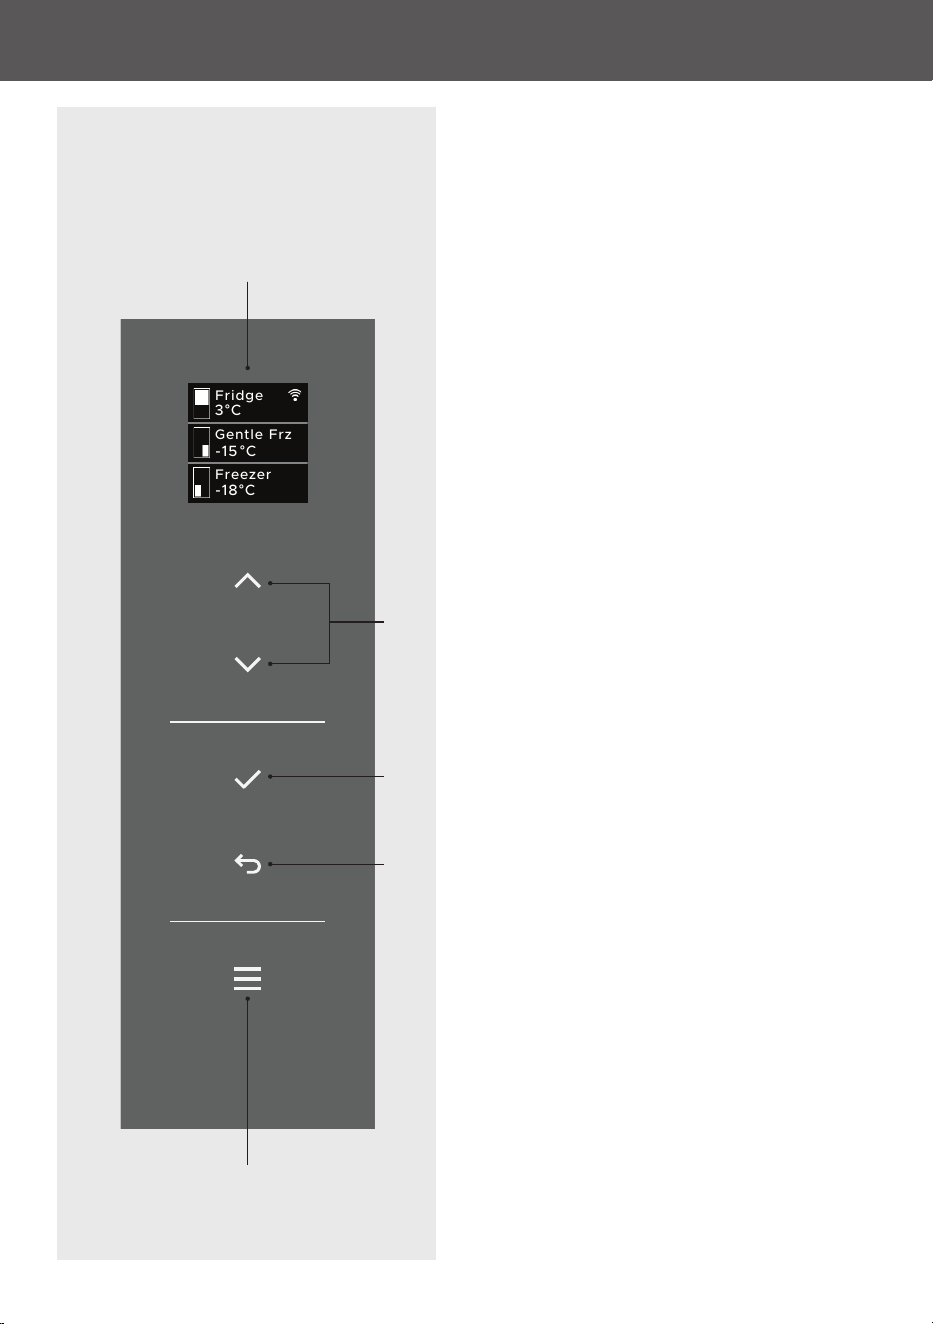
INTERNAL DISPENSER MODELS
Fridge
compartment
Autofill water
pitchers
Adjustable
glass shelves
Control panel
Freezer
compartment
Variable
temperature
zone
Humidity
control bins
Door shelves Door shelvesLower bins
Water filter
How to get the best results from your refrigerator:
z
Adjust the temperatures for each compartment as required.
z
Select a food mode for the variable temperature zone to suit the
items you are storing.
z
Register your product to get streamlined service support
z
Connect to Wi-Fi to access your appliance via the app.
Internal water
dispenser
Automatic ice
maker
12
GET TO KNOW YOUR APPLIANCE
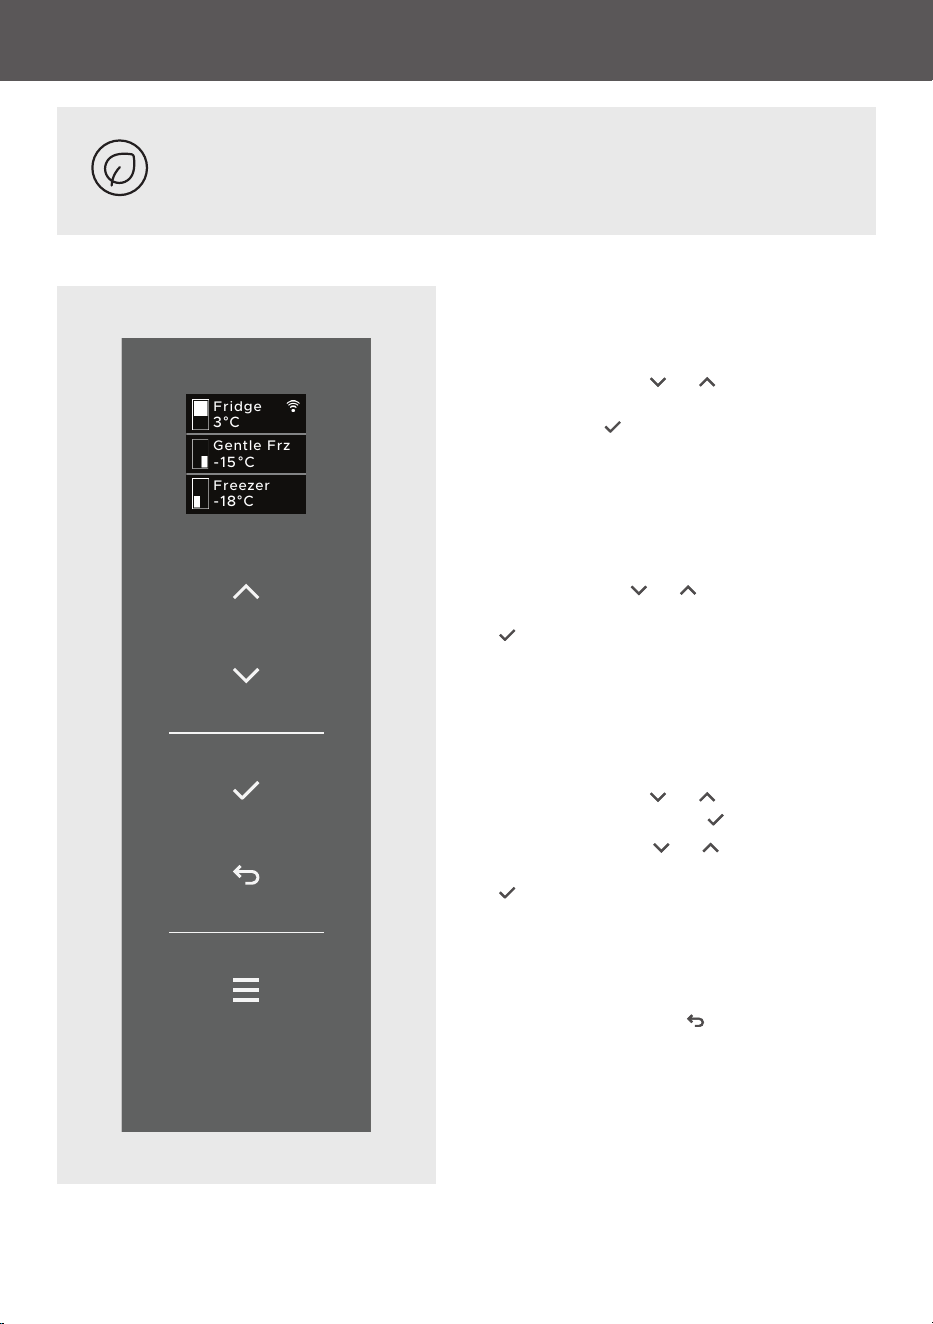
CONTROL PANEL & MENU
3
°
C
Fridge
Freezer
-18
°
C
Gentle Frz
-15
°
C
Display screen
Menu
Scroll
Select
Back
Use the menu to access product features and
settings, or to return to standby. If the display
has been locked, hold for two seconds to
unlock.
Temperature
Select a mode or adjust the temperature.
Ice
Turn the ice maker on or off.
Ice Boost*
Boost ice production for the next 24 hours.
Max Cold
Quickly cool down items that have just been
added to the product.
Bottle Chill
Set a 15-minute timer when chilling wine or
other beverages in the freezer.
Water Dispenser
Lock the water dispenser to prevent accidental
use.
Autofill Pitchers*
Turn autofill on or off.
Door Alarm
Mute the door alarm for 20 minutes or until
the door is closed again.
Display Lock
Lock the controls to prevent accidental use.
Sabbath Mode
For the Sabbath observant. In Sabbath
Mode alarms, lights and the display will be
deactivated for 80 hours.
The lights will not turn on when you open the
door.
z
The door alarm will not operate.
z
The display will not illuminate.
z
The display will be unresponsive.
Settings
Adjust the appliance settings to suit your
preferences or set up a Wi-Fi connection.
Refer to ‘Wi-Fi connection’.
*Internal dispenser models only
CONTROL PANEL
13
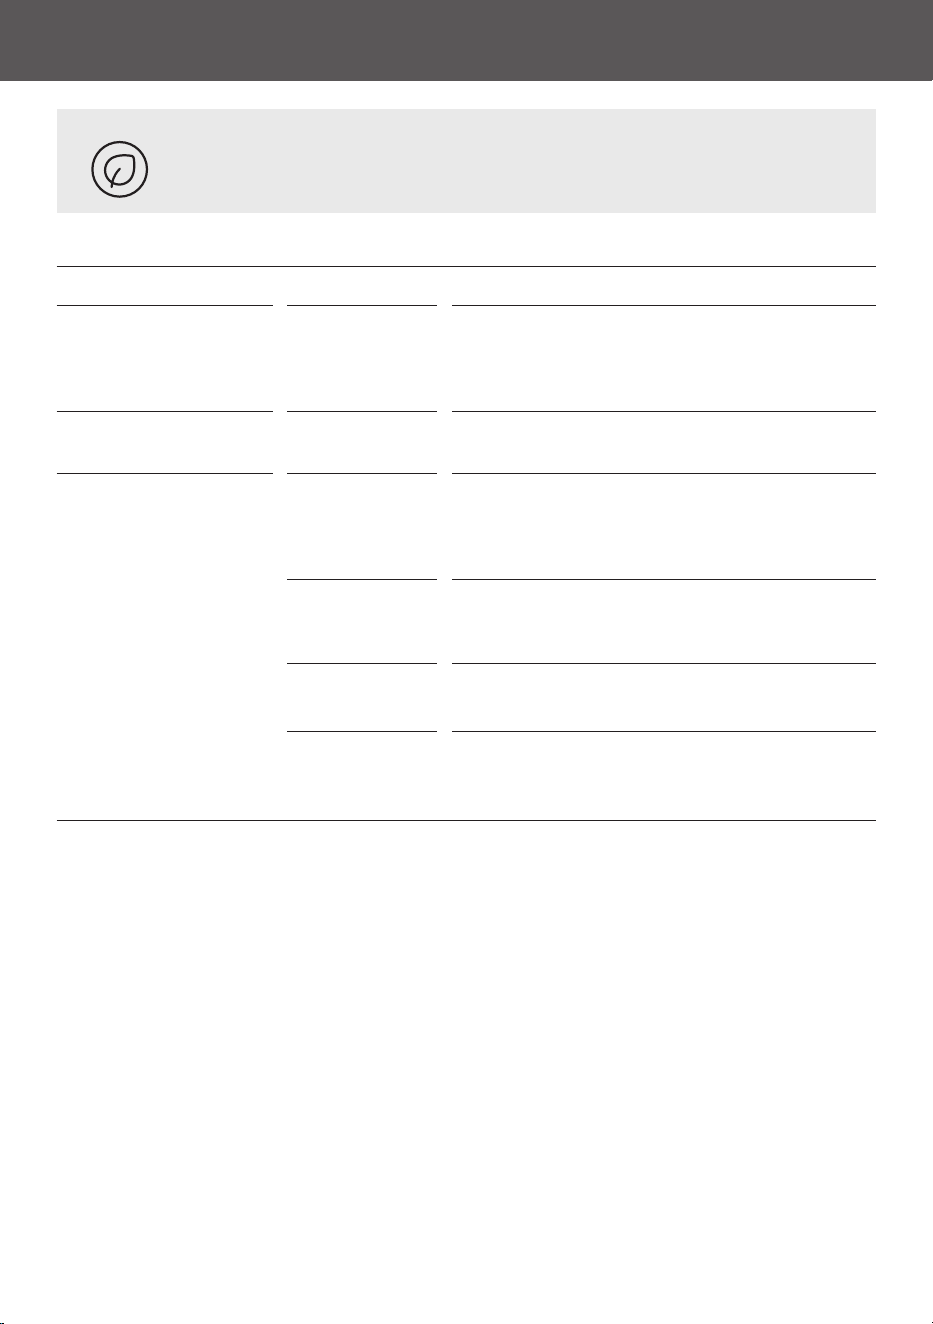
SET A TEMPERATURE & FOOD MODE
Select a food mode for the variable temperature zone as needed and adjust
the temperatures for each compartment to suit the items you are storing
Variable temperature zone:
1. Use the arrows
or to select a food
mode, then press select to confirm.
2. Use the arrows
or to adjust the
temperature as needed, then press select
to confirm.
Select a compartment:
1. Use the arrows
or to
select a compartment, then
press select to confirm.
Fridge and Freezer compartments:
Use the arrows
or to adjust the
temperature as needed, then press select
to confirm.
3
°
C
Fridge
Freezer
-18
°
C
Gentle Frz
-15
°
C
Press the back button at any point to exit
the menu.
14
COMPARTMENT MODE
Fridge compartment
FRIDGE
(1 to 8°C)
For fresh, everyday foods such as fruit and
vegetables, dairy products, meats, seafood,
ready-to-eat foods, leftovers, sauces, preserves
and drinks.
Freezer compartment
FREEZER
(-22 to -14°C)
For general frozen items that require storage
between 1 – 12 months.
Variable temperature zone
FRIDGE
(1 to 5°C)
For fresh, everyday foods such as fruit and
vegetables, dairy products, meats, seafood,
ready-to-eat foods, leftovers, sauces, preserves
and drinks.
CHILL
(-2 to 1°C)
Store highly perishable meats and seafood for
longer. Also for chilling alcoholic beverages
such as beer, champagne and wine.
SOFT FREEZE
(-9 to -5°C)
An extension of your refrigerator. Extends shelf
life of fresh items for weeks.
GENTLE FREEZE
(-18 to -13°C)
A gentle freezer setting for shorter term
frozen storage of perishable foods and faster
defrosting.
SET A TEMPERATURE & FOOD MODE
The following food modes and temperatures are available for each
compartment.
15
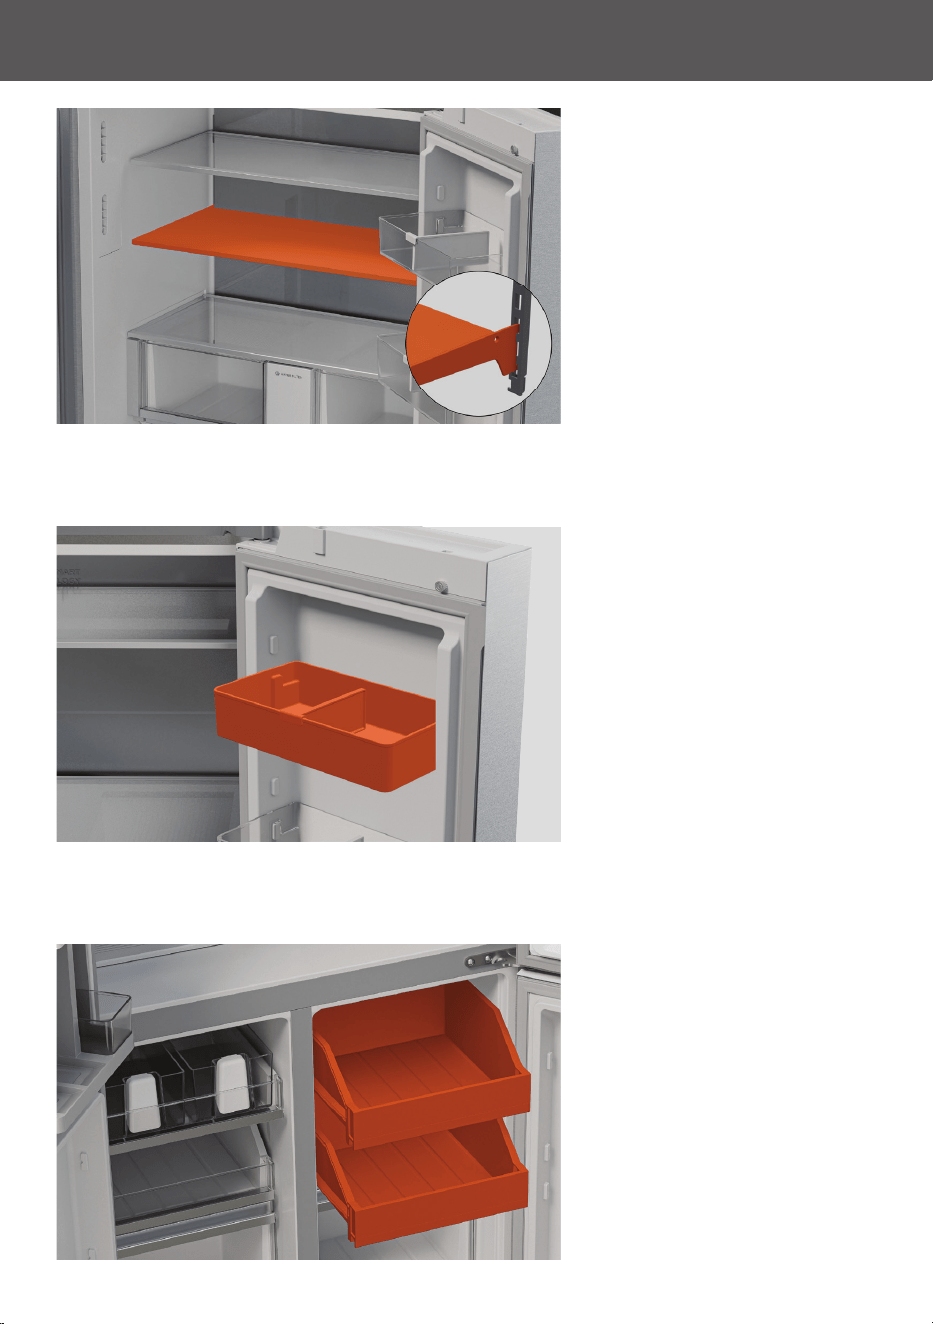
ADJUST THE SHELVES
Glass shelves
Adjust height or remove as
needed. The shelves hook onto
supports at the rear.
To remove, tilt shelf up to
dislodge it from support, then
pull it out.
To refit, hook the shelf back onto
supports at desired height.
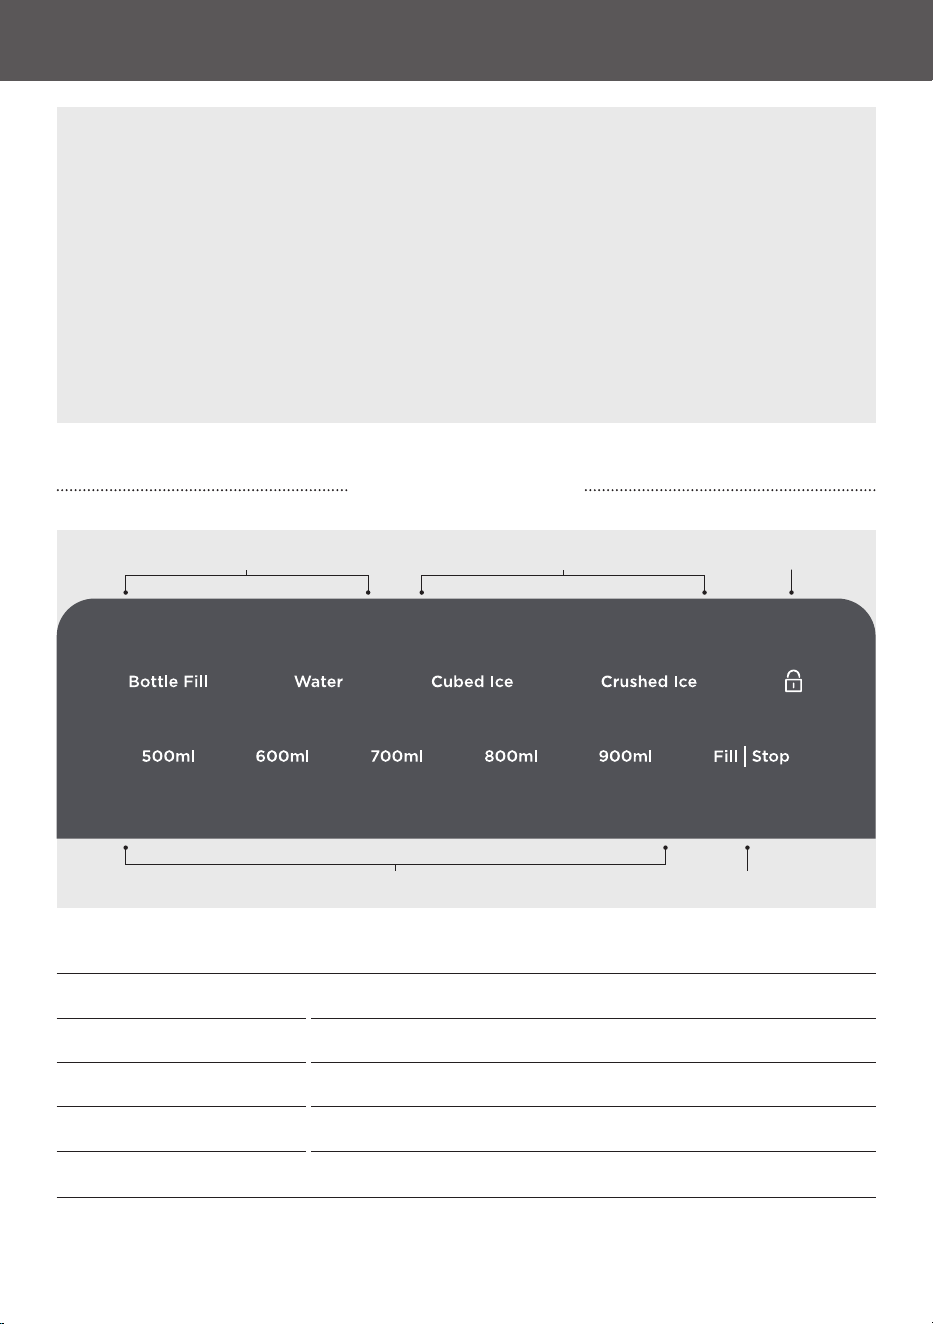
Door shelves
Adjust height or remove. Shelves
slot onto the hooks on the sides
of the door.
Adjust or remove the shelf
dividers as needed.
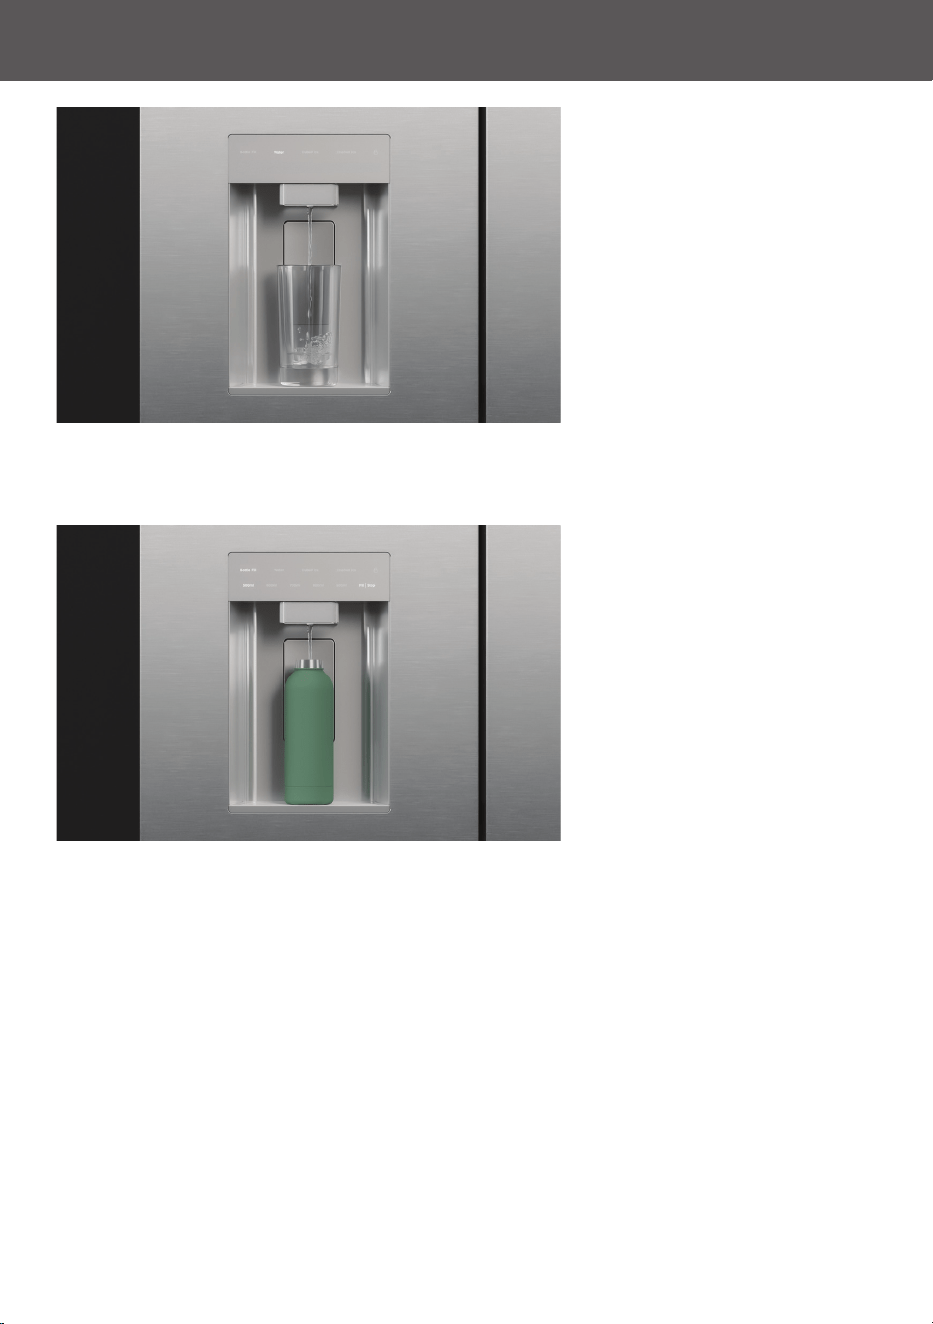
Bins
The bins in each compartment
can be removed as needed for
cleaning or making extra space.
To remove, slide the bin out
then tilt up to lift free of the side
runners.
To refit, place back on the side
runners and push back into
place.
16
USE THE ICE & WATER DISPENSERS
EXTERNAL DISPENSER MODELS
Your refrigerator comes with a dual ice and water dispenser located on the front of the
left hand door.
For best results:
z
Flush the water filter before using the dispenser for the first time. To do this, run 8
litres of water through the dispenser using the Water option (not Bottle Fill).
z
Turn the ice maker on to start making ice.
z
Replace your water filter as soon as possible after you get a reminder.
z
When using the dispenser for the first time it may take a few minutes for water to
begin flowing.
z
When dispensing a lot of water a time-out period may occur. Wait a few minutes
before using the dispenser again.
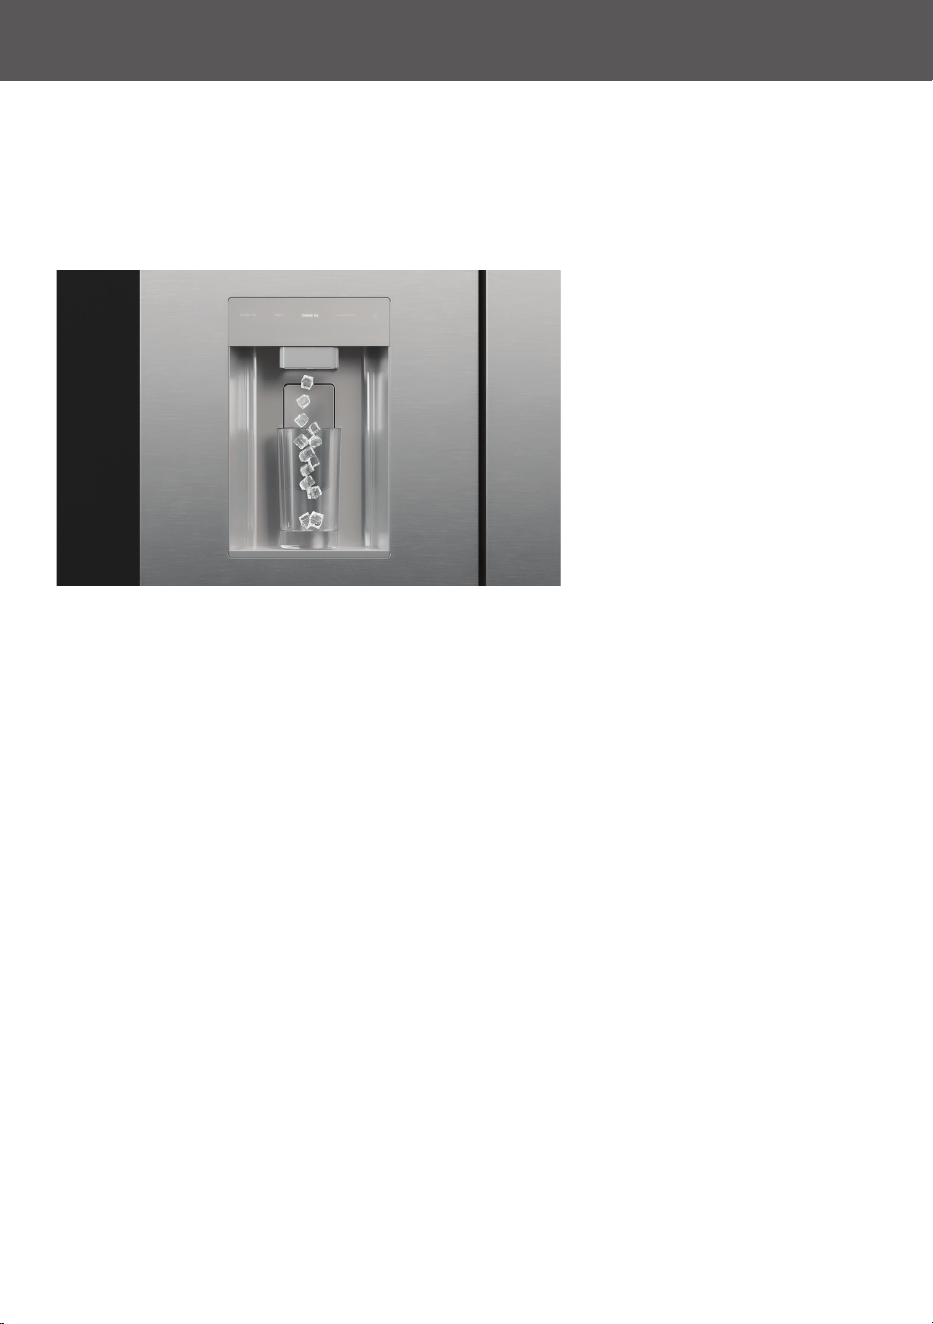
Water dispensing options
DISPENSER CONTROLS
Ice dispensing options
Bottle fill options
Water dispensing options Press to select a water dispensing option.
Bottle fill options Press to select the water volume needed.
Bottle fill start/stop Press to start bottle fill, and to manually stop bottle fill if needed.
Ice dispensing options Press to select a type of ice.
Dispenser lock Press and hold to lock or unlock the dispenser.
Dispenser lock
Bottle fill start/stop
17
Dispensing water
Select Water, then gently press
the dispensing pad with a glass
or container.
Pressing harder will not increase
the flow of water.
To stop, simply pull your glass
or container away from the
dispensing pad.
Using Bottle Fill
Select Bottle Fill and the
required volume. Ensure the
selected volume is less than the
bottle size.
Place the bottle on the shelf and
press Fill | Stop.
The bottle will automatically fill to
the set volume.
To stop dispensing early, press
Fill | Stop again.
USE THE ICE & WATER DISPENSERS
EXTERNAL DISPENSER MODELS
Sensor light
The dispenser has a sensor light that will automatically turn on when you are near the appliance.
This can be turned on or off by going to the menu on the main control panel inside the fridge
and selecting
SETTINGS, then SENSOR LIGHT.
When the sensor light is turned off, the dispenser controls will remain unlit until you touch the
controls or press the dispensing pad. The main dispenser light will remain off completely.
18
Dispensing ice
Select an ice type, then gently
press the dispensing pad with a
glass or container.
Pressing harder will not increase
the flow of ice.
To stop, simply pull your glass
or container away from the
dispensing pad.
USE THE ICE & WATER DISPENSERS
EXTERNAL DISPENSER MODELS
Turning the ice maker on
Before using the ice dispenser for the first time, you'll need to turn the ice maker on. The ice
maker can be turned on by going to the menu on the main control panel inside the fridge and
selecting
ICE.
When first turned on it may take several hours to begin producing ice.
Turn your ice maker off if:
z
There is no water supply for several hours.
z
You are going on holiday.
The ice maker can be turned on or off by going to the menu on the main control panel inside
the fridge
19
USE THE ICE & WATER DISPENSERS
INTERNAL DISPENSER MODELS
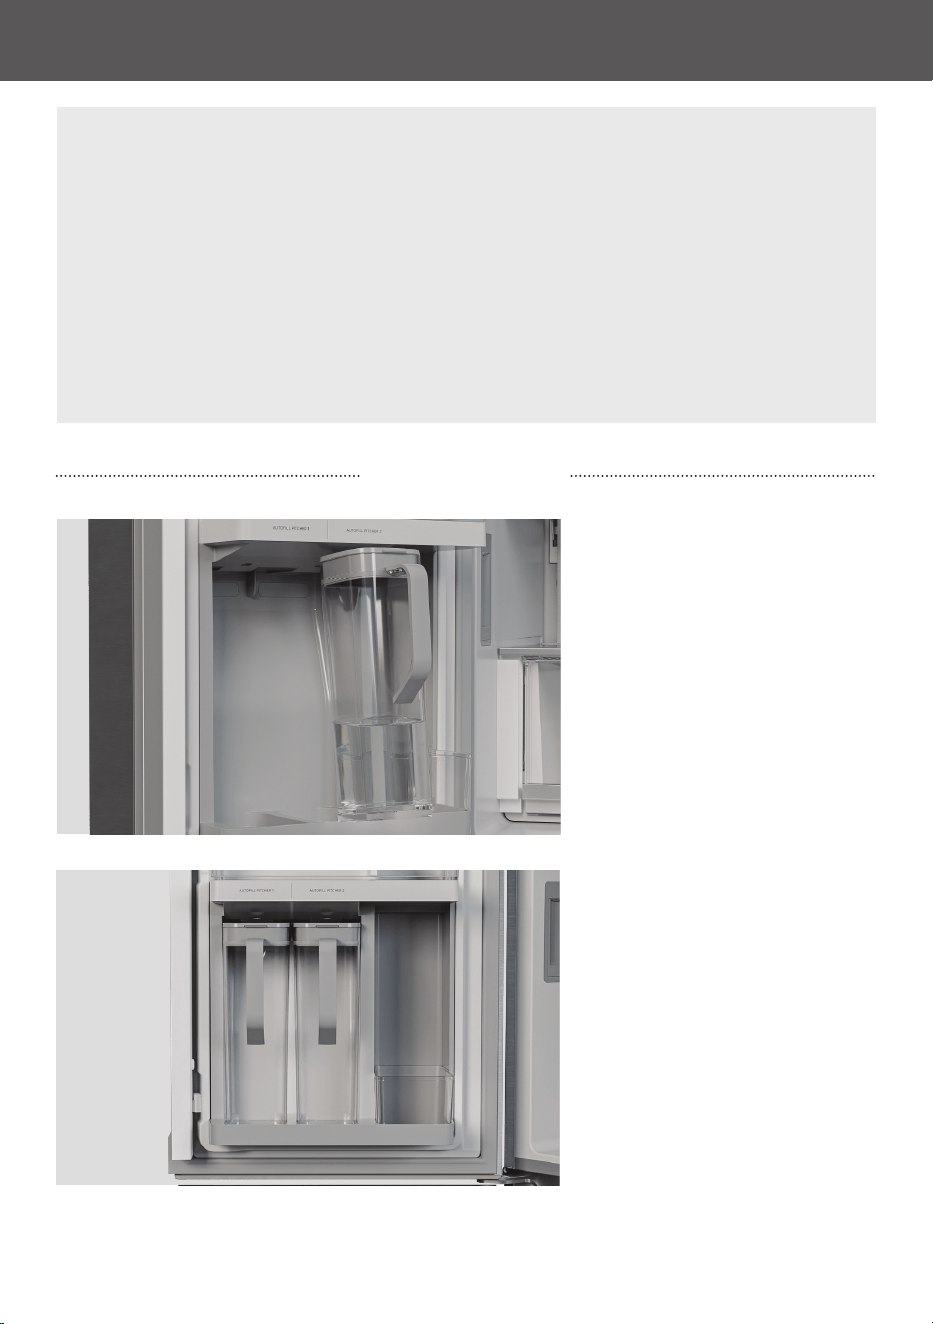
Your refrigerator comes with two autofill pitchers, a water dispenser and a dual
automatic ice maker.
For best results:
z
Flush the water filter before using the dispenser for the first time. To do this, run 8
litres of water through the water dispenser.
z
Discard the first full bins of ice as they may be discoloured.
z
When using the dispenser for the first time it may take a few minutes for water to
begin flowing.
z
When dispensing a lot of water a time-out period may occur. Wait a few minutes
before using the dispenser again.
z
Replace your water filter as soon as possible after you get a reminder.
Position the pitchers on the
dispenser shelf to activate the
dispenser.
Tilt the pitchers forward slightly
to insert, ensuring they are
correctly positioned in the slots.
AUTOFILL PITCHERS
The dispenser light will be
illuminated when the pitchers
are correctly positioned and the
dispenser is turned on.
The autofill pitchers can be
turned on or off by going to the
menu.
When the doors are closed the
pitchers will fill automatically and
stop when they are full.
Take care when closing the door and do not over fill the bottom refrigerator shelf. Any bulky or
overhanging items on the shelf may dislodge the pitchers when the door is closed.
20
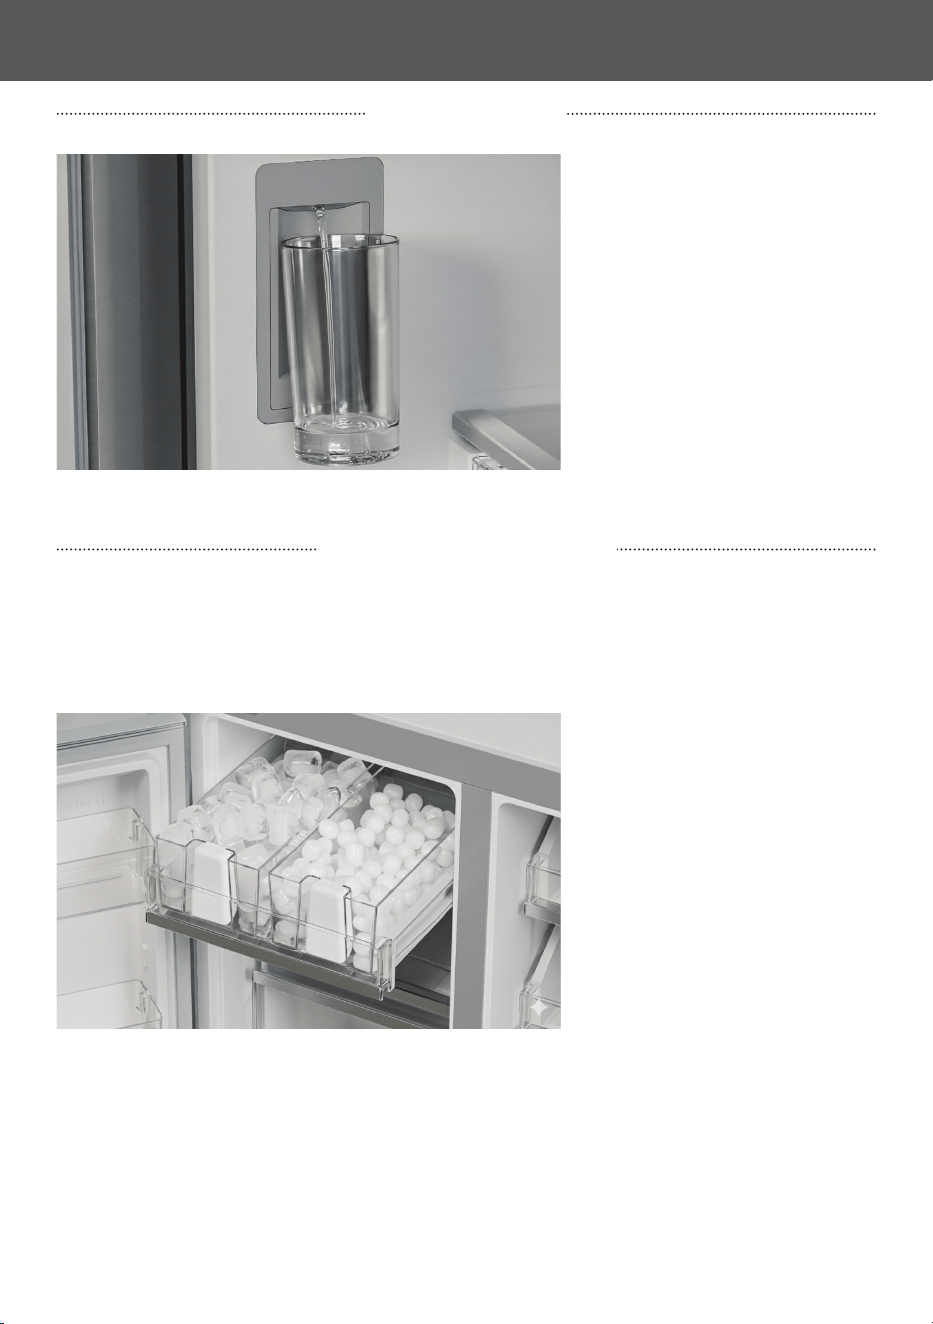
The left hand ice maker produces
cube ice and the right hand ice
maker produces pebble ice.
There are removable scoops on
the front of each bin.
The ice maker can be turned on
or off by going to the menu.
The dual automatic ice maker is located at the top of the freezer compartment and automatically
produces two different types of ice into the bins below. Keep the ice cubes level in the bin to
maximise storage space.
When first turned on it may take several hours to begin producing ice.
DUAL AUTOMATIC ICE MAKER
Turn your ice maker off if:
z
There is no water supply for several hours.
z
You are removing the ice storage bin for a long period of time.
z
You are going on holiday.
Making extra ice
You can turn on
ICE BOOST to make extra ice for up to 24 hours. Turn ICE BOOST on or off via
the menu.
USE THE ICE & WATER DISPENSERS
INTERNAL DISPENSER MODELS
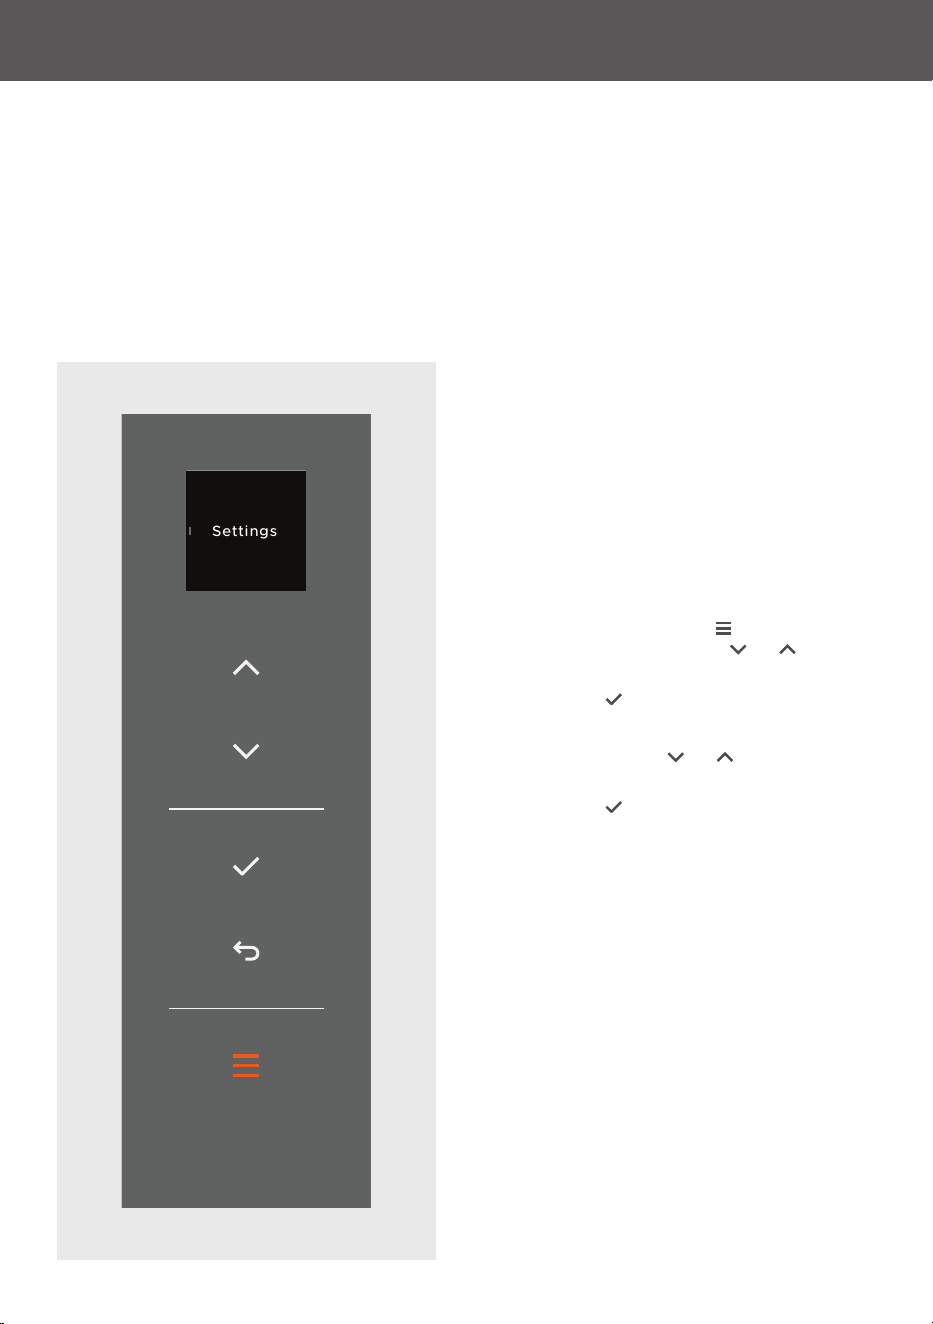
Gently press the dispensing pad
with a glass or container.
Pressing harder will not increase
the flow of water.
To stop, simply pull your glass
or container away from the
dispensing pad.
The water dispenser can be
locked for cleaning or to prevent
accidental use by going to the
menu.
WATER DISPENSER
21
SET UP WI-FI
Your appliance may be connected to your home wireless network and operated remotely using
the app.
Getting started
z
Ensure your home Wi-Fi network and Bluetooth on your mobile device are turned on.
z
You will be given step-by-step guidance on mobile device.
z
It may take up to 10 minutes to connect your appliance.
Connecting to Wi-Fi
On your mobile device:
1 Download the app from
www.fisherpaykel.com/connect
2 Register and create an account.
3 Add your appliance and set up the Wi-Fi
connection.
On your appliance
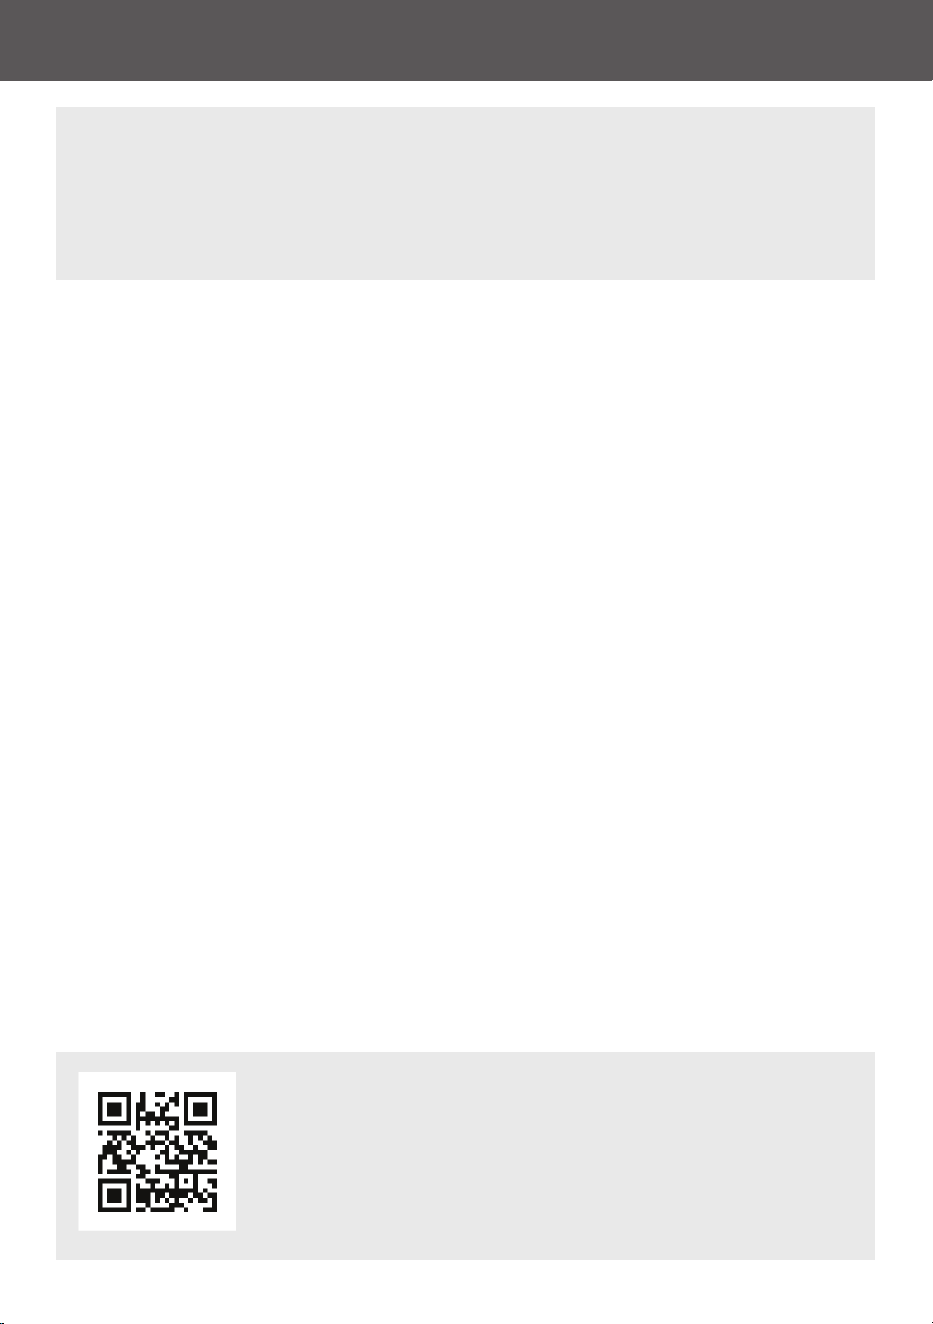
1. Press the menu button
to access the
menu, then use the arrows or to scroll
to SETTINGS.
Press select
to enter settings.
2. Press the arrows
or to scroll to
WI-FI SETUP.
Press select to enter Wi-Fi setup.
3. Follow the prompts on the display and in
the app to complete setup.
Settings
22
CLEAN & MAINTAIN YOUR APPLIANCE
Make these steps a regular part of your cleaning routine to get the best results from your
appliance.
z
Remove shelves and bins to make cleaning easier.
z
Do not use harsh or abrasive cleaners.
z
Replace your water filter regularly.
Internal surfaces, shelves and bins
Remove shelves and bins as needed. Clean with a damp cloth and mild detergent. Dry with a
clean, lint-free cloth. Use a small brush to clean difficult to reach spots if needed.
Exterior surfaces and door
Clean with warm water and mild detergent. Rinse with clean water and dry with a clean, lint-free
cloth. Do not use any abrasive stainless steel cleaners, glass cleaners, solvents or scourer pads
as these will damage the door surface. Use a small brush with warm water and mild detergent
to clean around the door seal as needed.
Cabinet surround
We recommend regularly vacuuming the floor around your appliance and cleaning behind it
once or twice a year to maintain optimum performance.
Water filter
You will get a reminder when it's time to replace your water filter. We recommend replacing
the filter as soon as possible after getting the alert. To fit the replacement filter, follow the
instructions supplied with new filter.
Water dispenser
Lock the dispenser before cleaning to prevent water spilling. Clean with a damp cloth.
External dispenser models only: Remove the drip tray and clean with water and mild detergent.
Ensure the drip tray is back in place before using the dispenser again.
Autofill water pitchers (internal dispenser models only)
The water pitchers can be taken apart and cleaned using hot water and mild detergent. We
recommend washing the pitchers before using them for the first time.
Care, maintenance and troubleshooting information
Scan the QR code or visit fisherpaykel.com and search for your
model code.
RF620QNTVX1, RF620QNTVD1, RF620QNPVX1,
RF620QNPVB1, RF620QZPVG1

433784A 04.26
© Fisher & Paykel Appliances 2026. All rights reserved.
The models shown in this guide may not be available in all markets
and are subject to change at any time.
The product specifications in this guide apply to the specific products and models
described at the date of issue. Under our policy of continuous product improvement, these
specifications may change at any time.
For current details about model and specification availability in your country,
please go to our website or contact your local Fisher & Paykel dealer.
FISHERPAYKEL.COM