Eagle Foodservice Equipment, Eagle MHC, and SpecFAB
®
are divisions of Eagle Group. ©2022 by the Eagle Group
• 100 Industrial Boulevard, Clayton, Delaware 19938-8903 U.S.A.
• Phone: 302/653-3000 • 800/441-8440 • Fax: 302/653-2065
• www.eaglegrp.com • www.eaglegrpnews.com • www.eaglemhc.com
EG9842 Revised 10/22
(continued on next page)
ASSEMBLY INSTRUCTIONS
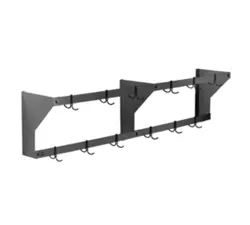
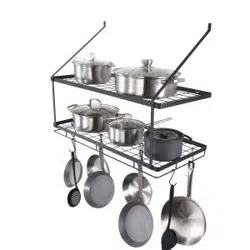
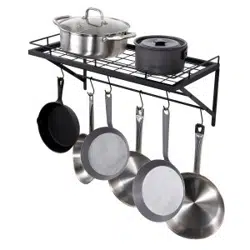
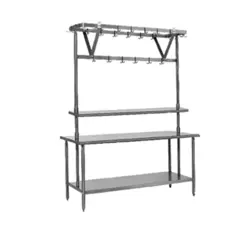
Table-Mounted Pot Rack
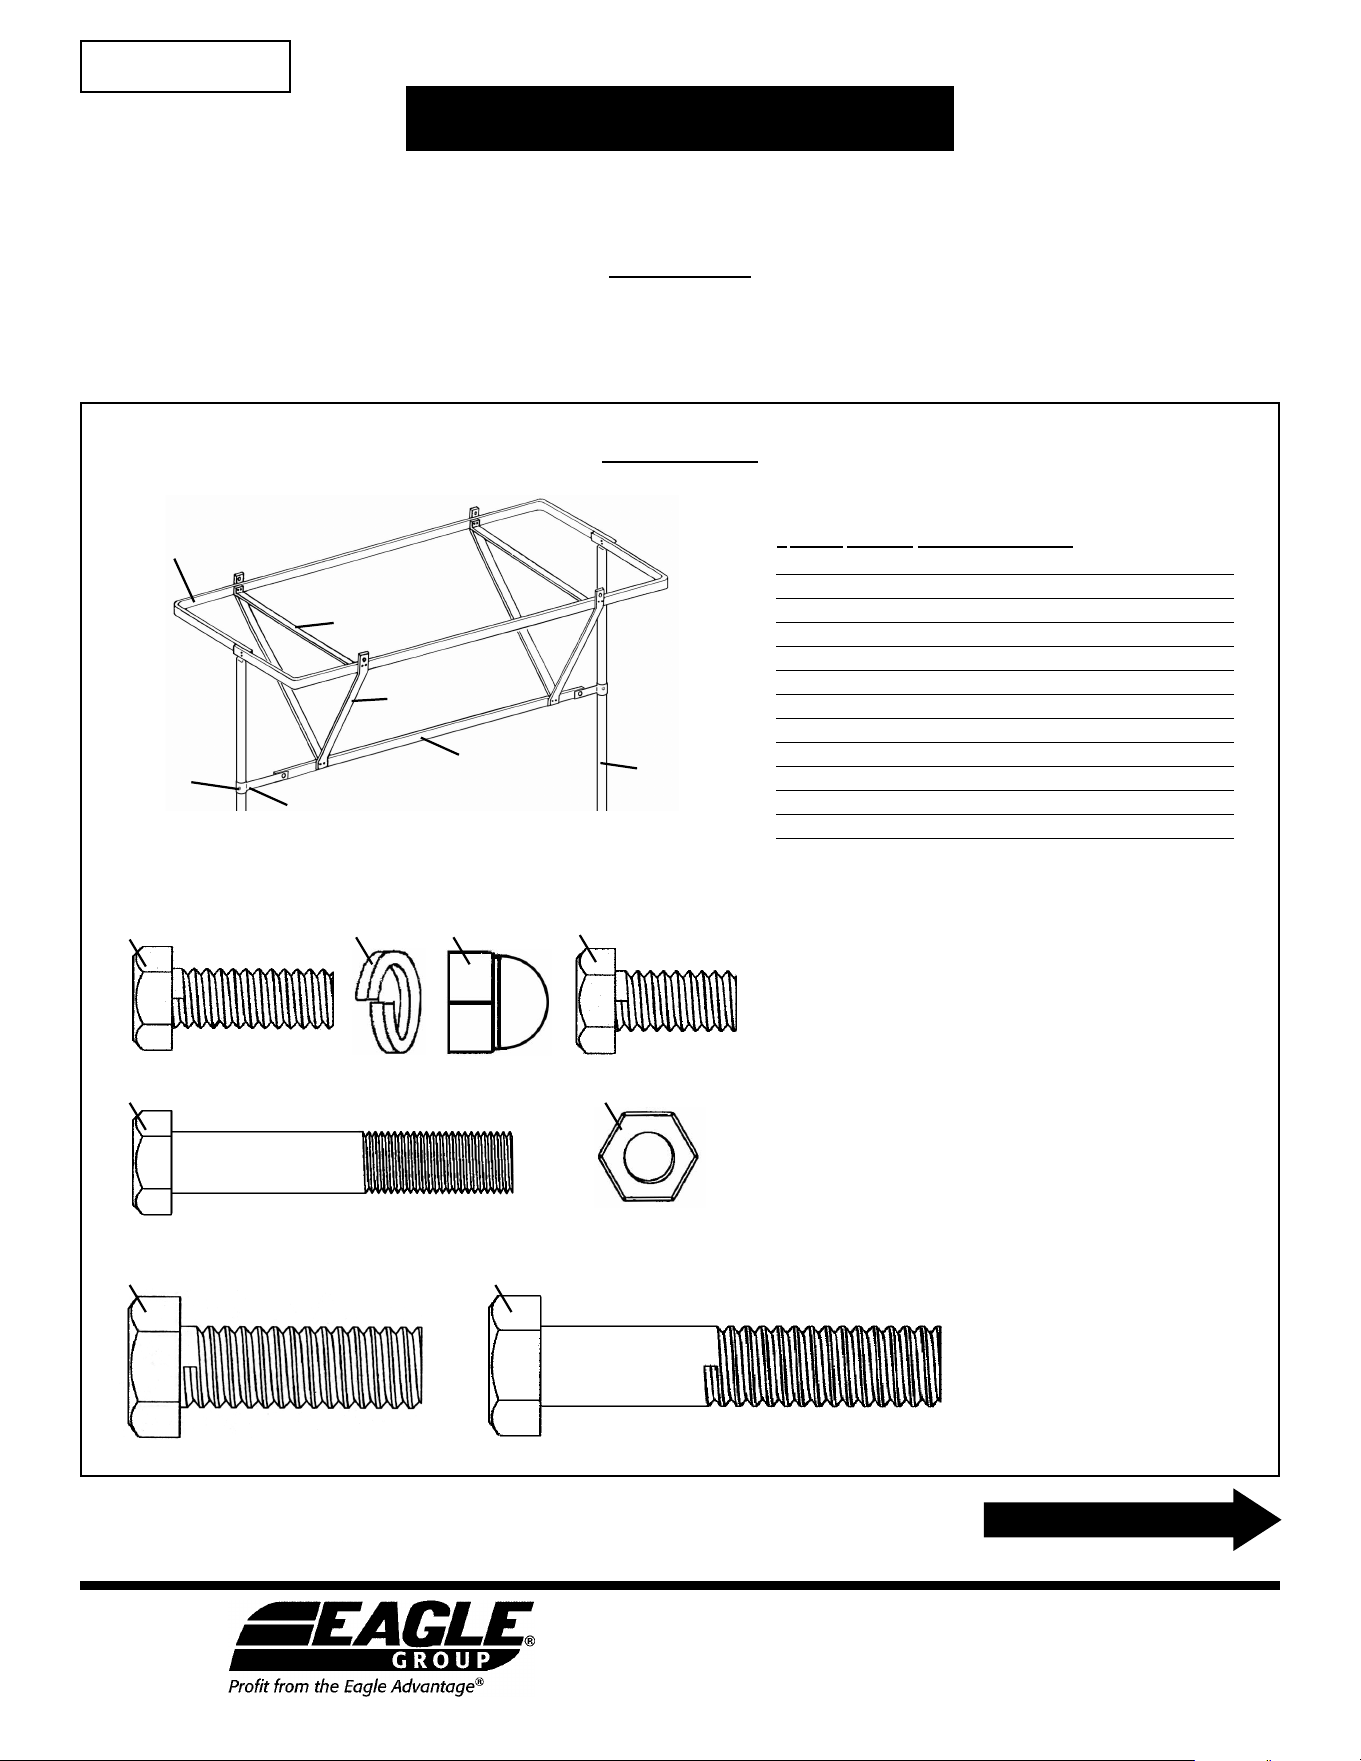
Parts List
CAUTION
INSPECT CONTENTS IMMEDIATELY AND FILE CLAIM WITH DELIVERING CARRIER FOR ANY DAMAGE.
SAVE YOUR BOX AND ALL PACKING MATERIALS.
YOU ARE RESPONSIBLE FOR DAMAGE TO YOUR UNIT IF RETURNED IMPROPERLY PACKED.
# qty part # description
#1 2 * bar - top piece
#2 * 305669 cross top support
#3 * 305668 support
#4 1 * bottom rack bar
#5 * 306136 hex head bolt
3
⁄8˝-1˝
#6 * 306122 lock washer,
3
⁄8˝
#7 * 306137 cap nut,
3
⁄8˝
#8 4 306138 hex cap bolt,
3
⁄8˝-
3
⁄4˝
#9 2 305663 84˝ leg
#10 2 306569 leg clip
#11 * 326785 bolt gusset,
3
⁄8˝–16 x 2
1
⁄4˝
#12 * 310176 nut,
3
⁄8˝-16
#13 2 300962** bolt,
1
⁄2˝–13 x 1
1
⁄2˝
or
#14 2 304143*** bolt,
1
⁄2˝–13 x 2
1
⁄2˝
#1
#11
#5
actual size of hardware:
#11 #12
#13 (#300962) #14 (#304143)
#2
#9
#3
#4
#10
#7
#6 #8
* Quantities and/or part numbers vary, depending on size.
** Used with tables that do not have center channels on undershelf.
*** Used with tables that have center channels on undershelf.
INSTRUCTION SHEET
#306844
MODELS UP TO 96˝ LONG
(FOR MODELS 108˝ AND LONGER, GO TO PAGE 3)

ASSEMBLY INSTRUCTIONS
Table-Mounted Pot Rack
#12
nut
#9 leg
#10
leg clip
#11
bolt
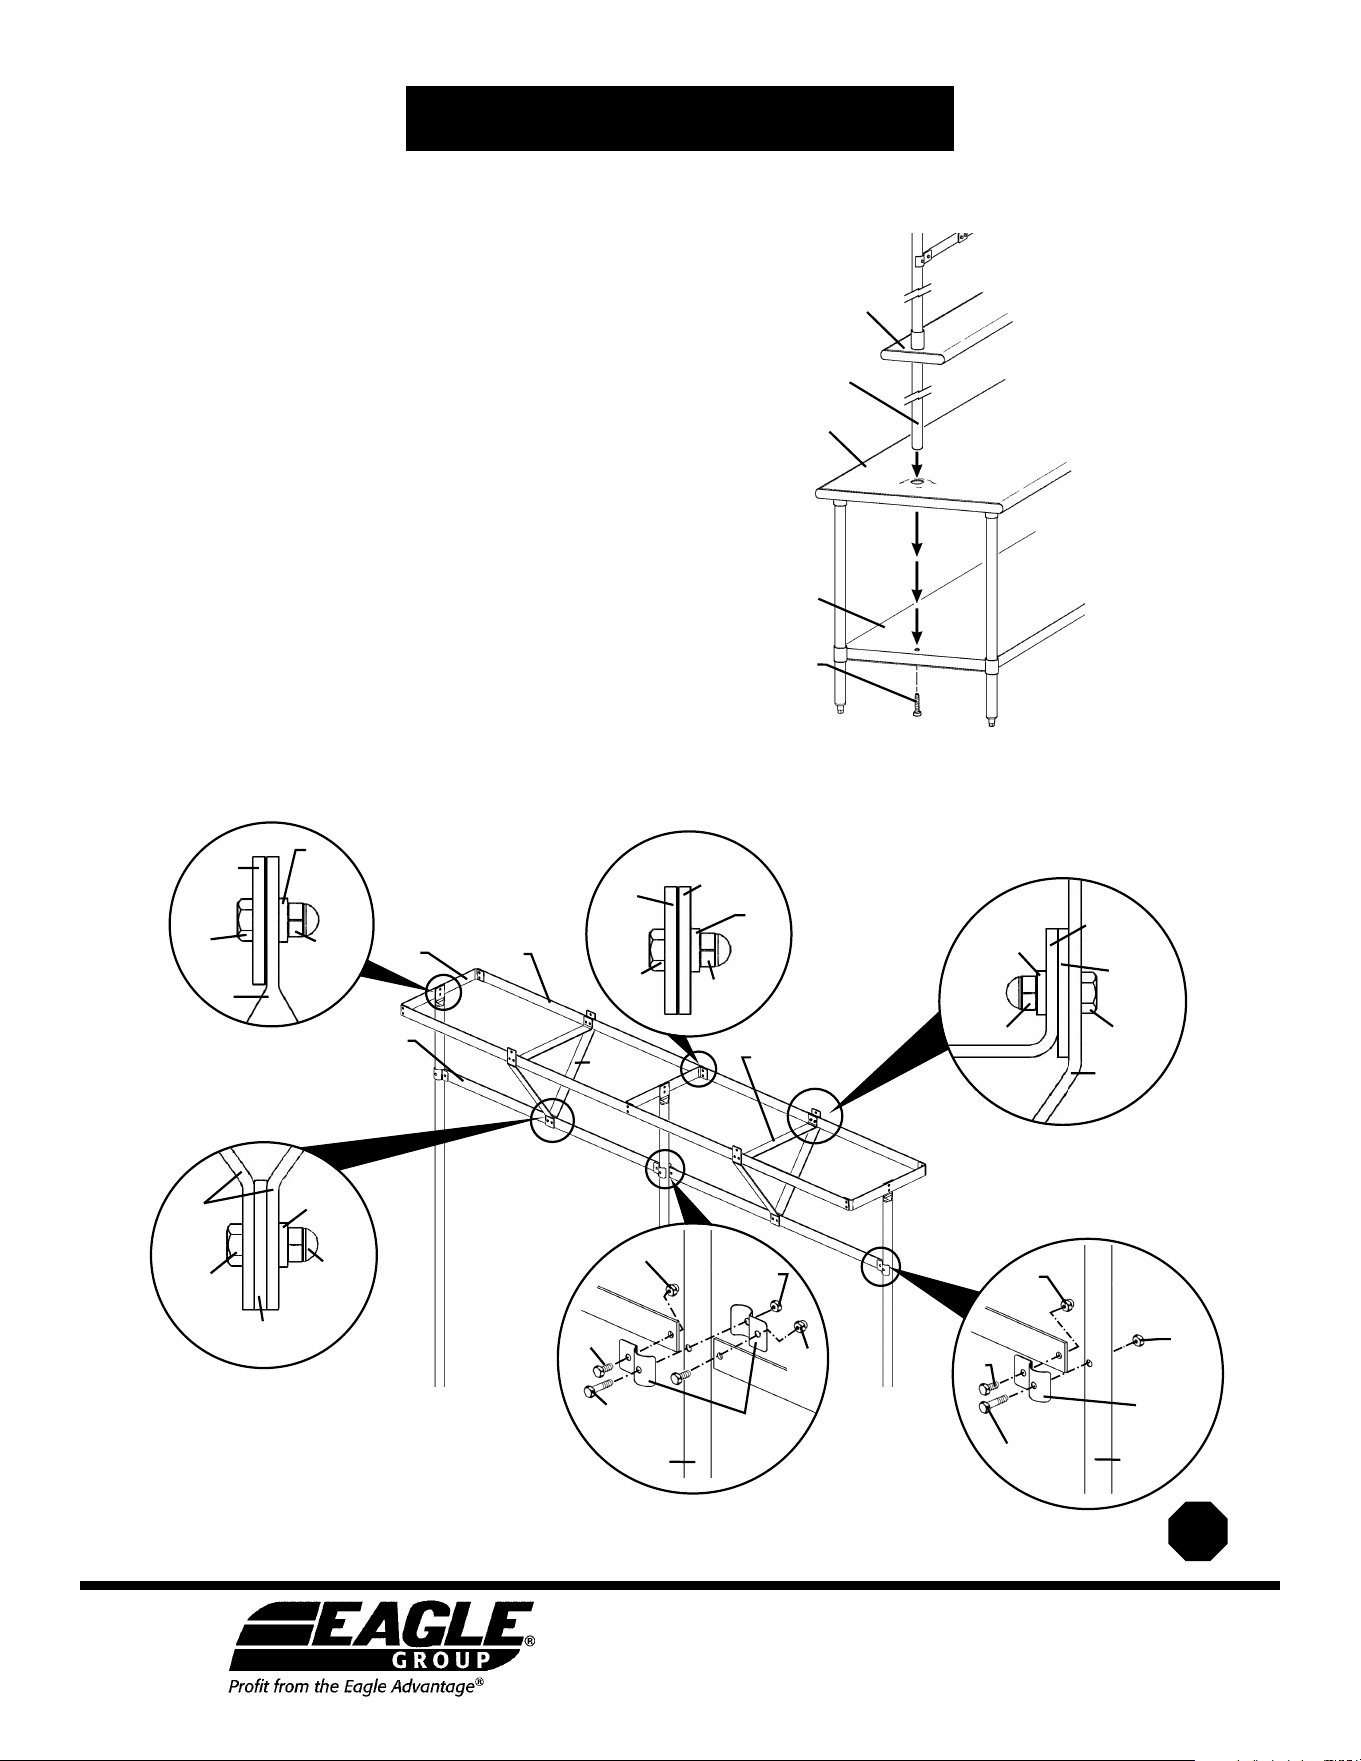
Step 6 - Attach leg clips
to legs.
Tighten all hardware.
Step 2 - Assemble top bar.
#7
cap nut
#6
lock
washer
#1
top bar
pieces
#1
top bar
piece
#5
bolt
#9
leg
#7
cap nut
#6
lock
washer
#1 top bar
piece
#2
cross top
support
#2
cross top
support
#5 bolt
Step 3 - Attach cross top supports and
bottom supports to top bar assembly.
#3
support
#3
bottom
support
#7 cap
nut
#6 lock
washer
#5 bolt
#3
supports
#4 bottom
rack bar
#4 bottom
rack bar
Step 4 - Attach
bottom rack bar.
#7
cap nut
#6 lock
washer
#10
leg clip
#8
bolt
#4 bottom
rack bar
Step 5 - Attach leg clips
to bottom rack bar.
tabletop
#9 leg
optional
adjustable
shelf
table’s
undershelf
Step 1 - Bolt leg to each end of table.
Please note:
• If you are assembling table-mounted pot rack to a
pre-existing table, you are required to drill
appropriate holes. Tabletop hole is 1-5/8˝
diameter. Undershelf hole is 1/2˝ diameter.
• If you ordered an optional adjustable shelf for
table-mounted pot rack, attach to tubular supports
now at desired height.
MODELS UP TO 96˝ LONG
Please note before continuing:
For easier assembly, turn table onto its side.
2
(End)
#13 or #14 bolt
(see Parts Lists on front page)

MODELS 108˝ AND LONGER
(FOR MODELS UP TO 96˝ LONG, GO TO FRONT PAGE)
ASSEMBLY INSTRUCTIONS
Table-Mounted Pot Rack
(continued on back page)
Parts List
# qty part # description
#1 3 317135 leg support bar
#2 2 * bar - top piece
#3 2 305669 cross top support
#4 4 305668 support
#5 2 * bar - bottom piece
#6 30 306136 hex head bolt
3
⁄8˝-1˝
#7 34 306122 lock washer,
3
⁄8˝
#8 34 306137 cap nut,
3
⁄8˝
#9 4 306138 hex cap bolt,
3
⁄8˝-
3
⁄4˝
#10 3 305663 84˝ leg
#11 4 306569 leg clip
#12 3 326785 bolt gusset,
3
⁄8˝–16 x 2
1
⁄4˝
#13 3 310176 nut,
3
⁄8˝-16
#14 3 300962** bolt,
1
⁄2˝–13 x 1
1
⁄2˝
or
#15 3 304143*** bolt,
1
⁄2˝–13 x 2
1
⁄2˝
#2
#1
actual size of hardware:
#3
#4
#5
#11
* Part numbers vary, depending on size.
** Used with tables that do not have center channels on undershelf.
*** Used with tables that have center channels on undershelf.
#10
3
#6
#12 #13
#14 (#300962) #15 (#304143)
#8#7
#9
#8
cap nut
#7
lock
washer
#1 leg
support
bar
#2
top bar
#9
bolt
ASSEMBLY INSTRUCTIONS
Table-Mounted Pot Rack
#8
cap nut
#7
lock
washer
#2 top
bar piece
#3
cross top
support
#3 cross top
support
#2 top
bar piece
#6 bolt
Step 4 - Attach cross top
supports and bottom supports
to top bar assembly.
#4
support
Tighten all hardware.
#8
cap nut
#7 lock
washer
#6 bolt
#4
supports
#5 bottom
rack bar
#5 bottom rack
bar piece
#4 bottom
support
Step 5 - Attach
bottom rack bar.
(End)
#8
cap nut
#7
lock
washer
#1 leg
support
bar
#1 leg
support
bar
#9
bolt
#10
leg
#8
nut
#8
nut
#10
leg
#11
leg clip
#12
bolt
#13
nut
Step 6 - Attach leg
clips to bottom rack
bar pieces and
center leg.
MODELS 108˝ AND LONGER
(FOR MODELS UP TO 96˝ LONG, GO TO FRONT PAGE)
• If you are assembling table-mounted pot rack to a
pre-existing table, you are required to drill
appropriate holes. Tabletop hole is 1-5/8˝
diameter. Undershelf hole is 1/2˝ diameter.
• Racks 108˝ and longer have three legs. You will
need to drill a hole for each end leg, plus one for
the center leg.
• If you ordered an optional adjustable shelf for
table-mounted pot rack, attach to tubular supports
now at desired height.
Please note before continuing:
For easier assembly, turn table onto its side.
Step 1 - Bolt legs to table’s undershelf.
Step 2 - Affix leg support
bars to legs.
Step 3 - Attach top bar
pieces to leg support bars.
#9
bolt
#8
nut
#10
leg
#11
leg clip
#12
bolt
#13
nut
#9
bolt
Step 7 - Attach leg clips
to bottom rack bar pieces
and end legs.
tabletop
#10 leg
optional
adjustable
shelf
table’s
undershelf
#14 or #15 bolt
(see Parts Lists
on page 3)
Eagle Foodservice Equipment, Eagle MHC, and SpecFAB
®
are divisions of Eagle Group. ©2022 by the Eagle Group
• 100 Industrial Boulevard, Clayton, Delaware 19938-8903 U.S.A.
• Phone: 302/653-3000 • 800/441-8440 • Fax: 302/653-2065
• www.eaglegrp.com • www.eaglegrpnews.com • www.eaglemhc.com