User Guide
v
1.0

2
Table of Contents
Introduction .................................................... 3
Box Contents ..................................................... 3
Support ............................................................... 3
About This User Guide ..................................... 3
Setup ............................................................... 4
Firmware Updates............................................. 4
Connection Diagram ........................................ 5
Tutorial ............................................................ 6
Features ........................................................ 15
Operation ..................................................... 24
Sample Mode .................................................. 24
Pad Play ................................................................ 31
Loading and Saving Samples ............................ 36
Sample Record Mode ..................................... 37
Sequence Mode .............................................. 39
Recording Sequences ........................................ 41
Editing Sequences .............................................. 42
Step Edit ............................................................... 43
Song Mode ........................................................... 44
Effects ............................................................... 46
Pad FX ................................................................... 47
Flex Beat ................................................................ 50
Knob FX ................................................................. 51
Compressor .......................................................... 56
Menus ............................................................... 57
Input Configuration ............................................. 57
Fader ...................................................................... 58
Time Correct ......................................................... 59
MIDI Configuration .............................................. 60
Project ................................................................... 62
Appendix ...................................................... 64
Technical Specifications ................................. 64
Trademarks & Licenses .................................. 66

3
Introduction
Box Contents
MPC Sample
USB-C® Cable
Quickstart Guide
Safety & Warranty Manual
Support
To learn more about MPC Sample, visit akaipro.com.
To register your product, visit profile.inmusicbrands.com. Log in or register for an account if you do not already
have one, and then select Register New Product to register MPC Sample. You can also download the inMusic
Software Center from your Account to register your product, as well as access updates and support links.
For additional product support, visit support.akaipro.com.
About This User Guide
This manual should help you get familiar with using your MPC Sample. We use specific formatting to indicate
particular topics of significance:
Important/Note/Tip: Important or helpful information on a given topic.
Names of buttons, controls, parameters, settings, and other options are written in bold characters throughout
the manual.
Examples:
To open the Flex Beat page, press and hold SHIFT and press the PAD FX / FLEX BEAT button.
Press the B3 Function Button to Bypass Knob FX on all affected pads.
Some parts of this manual refer to other relevant chapters or sections, which are cited in bold, italic blue
characters. Click the text to skip immediately to that section.
Examples:
See the Pad Play section for more information on Chop Mode controls.
While in Step Edit mode, you can also use the fader to adjust event timing.
You can also click on certain images to jump to specific sections of the manual.

4
Setup
This chapter describes how to initially set up your MPC Sample and connect it with other equipment. We
recommend reviewing this chapter before continuing to the Tutorial chapter to get started making beats with
MPC Sample.
For a more detailed overview of MPC Sample’s controls and connections, proceed to the following Features
chapter.
For additional information on MPC Sample’s functions, proceed to the Operation chapter.
Firmware Updates
Before you use MPC Sample for the first time, we recommend checking for available firmware updates. These
updates add exciting new features and improvements, so staying up-to-date ensures the best experience with
MPC Sample.
To check for available firmware updates and apply them to your MPC Sample:
1. Connect MPC Sample to an available USB port on a computer using the included USB-C cable.
2. Power on MPC Sample.
3. Open a web browser, and navigate to mpc-sample.local.
Tip: If you are having trouble connecting, try restarting MPC Sample while connected via USB. If this still does
not work, try entering 192.168.155.1 into your web browser instead.
For Windows 10 users, make sure you have installed the Windows 10 driver prior to connecting.
4. Once the web page is loaded and a connection is established, your current firmware version is automatically
scanned. If there is a firmware update available, follow the instructions on screen to apply it to your device.
5. You can also click Manual Firmware Upload if you have a firmware update file that you would like to load to
your device.
If you have downloaded the inMusic Software Center, you can also use this to check for updates and apply them
to your MPC Sample.
In addition to checking before you use MPC Sample the first time, we recommend periodically checking for
firmware updates. You can also visit akaipro.com for the latest product news.
5
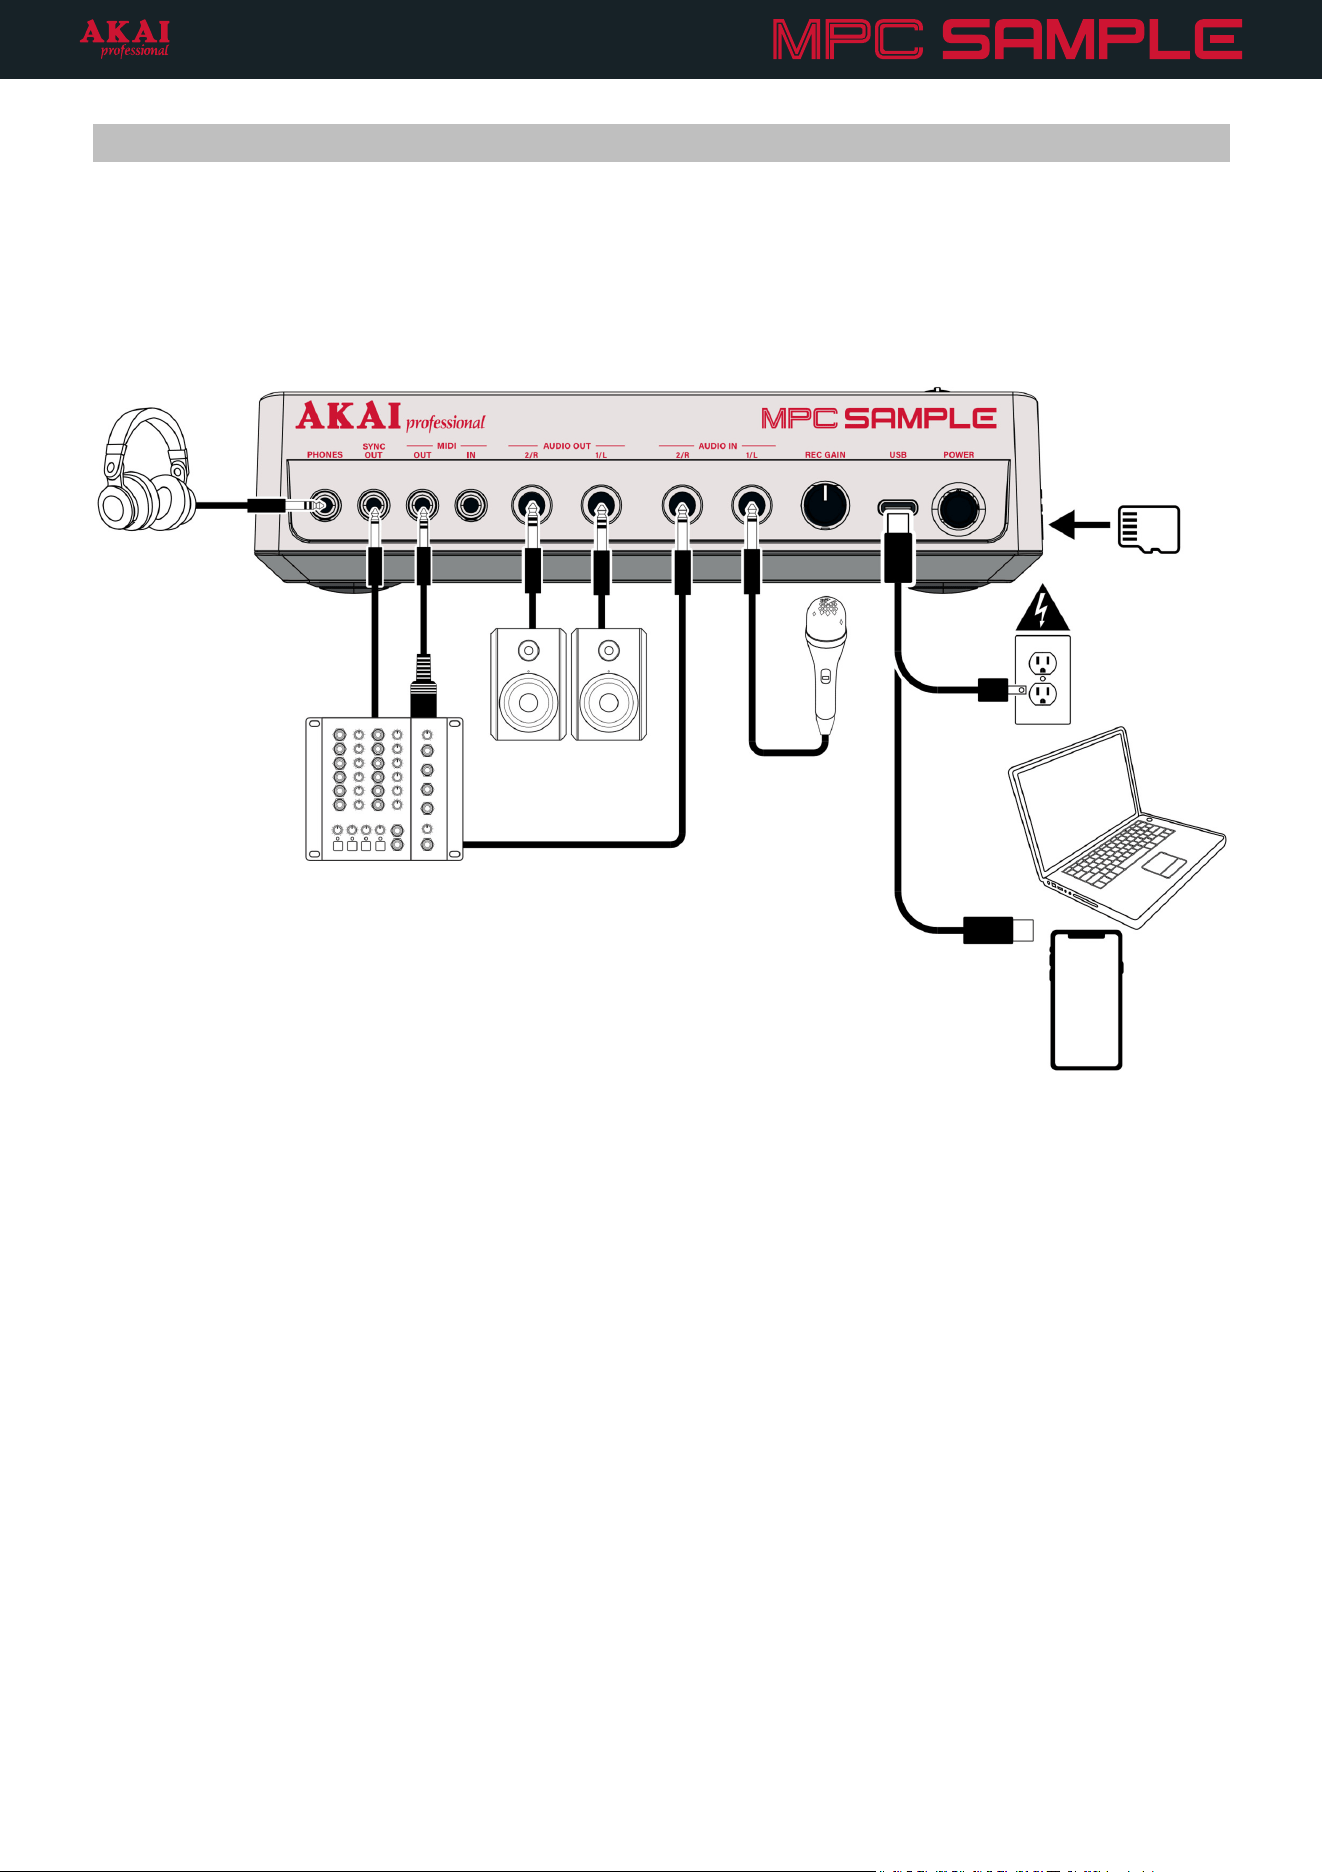
Connection Diagram
Pictured below is an example of how to set up MPC Sample with other equipment. Note that items not listed
under the Box Contents are sold separately.
Proceed to the Features chapter for more information on these connections.
Microphone
External Sound
Module
Headphones
Power
(Adapter not
included)
Speakers
microSD
Card
Computer or
Smartphone
6
Tutorial
This tutorial walks you through the basics of making beats with MPC Sample. We recommend following the steps
in this chapter in order.
There are links throughout this section to later chapters of the manual if you would like to learn more about
specific functions.
You can also watch tutorials by visiting the Akai Professional YouTube channel at youtube.com/AkaiProVideo.
Playing Sounds
As soon as you turn on MPC Sample, a sample demo project loads automatically so you can get started
immediately.
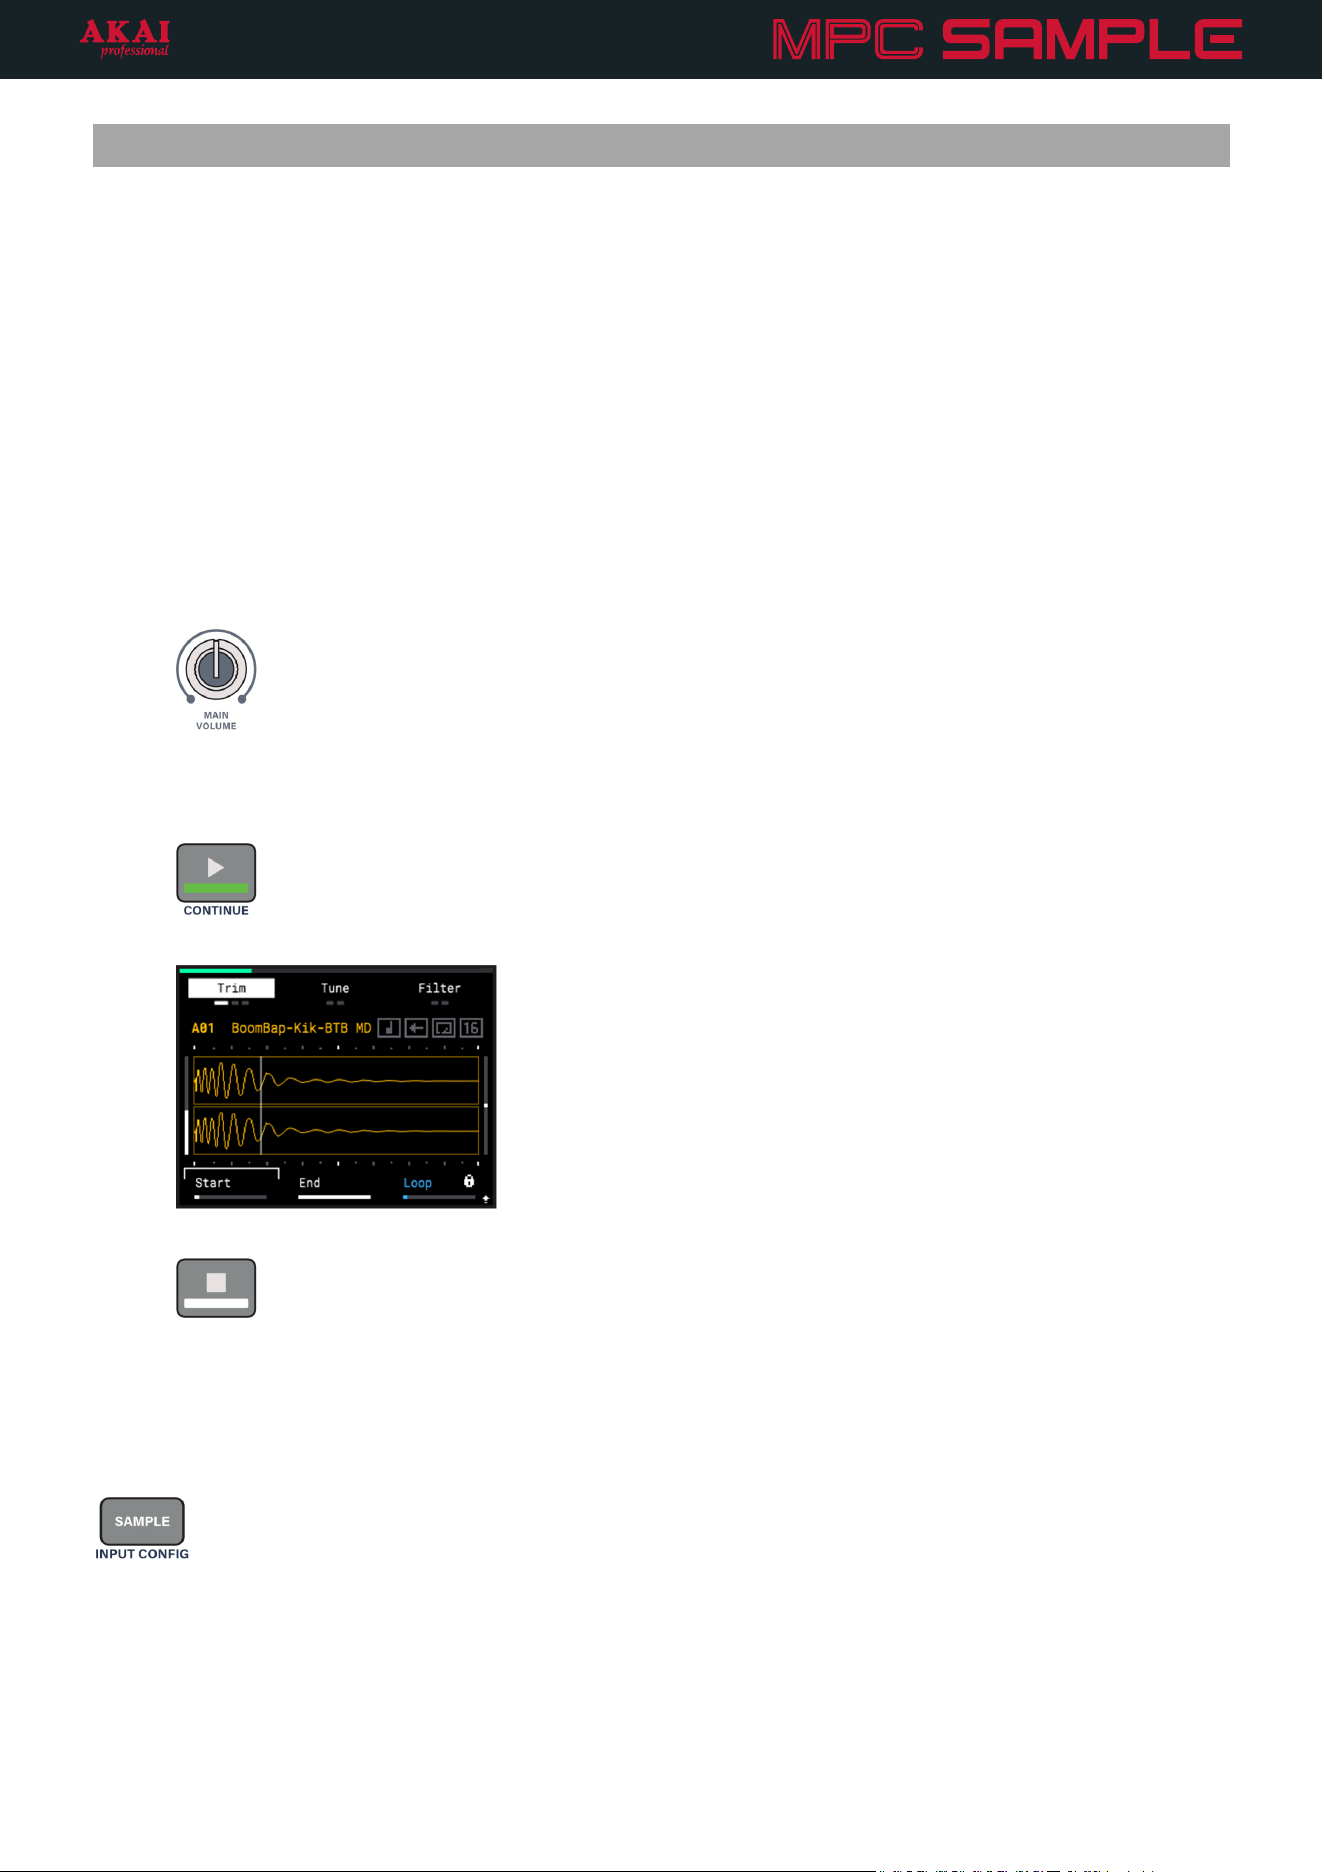
1. Press the POWER button to turn MPC Sample on.
2. Turn up the MAIN VOLUME knob.
This will adjust the audio level coming from the built-in speaker, or from the PHONES or AUDIO OUT if
you have audio output devices connected to them.
3. Press the PLAY button to hear a sequence using the startup project.
As the sequence plays, the pads light up as each sound is triggered.
4. Press the STOP button to stop playback.
If you want to stop all sounds at once, quickly double-press the STOP button.
After you stop the sequence, try tapping on the pads. Each time you hit a pad, the sample triggers, and the sample
waveform is shown on the MPC Sample display. This is known as Sample Mode, which can be accessed any time
by pressing the SAMPLE button.
7
Exploring Samples
MPC Sample includes hundreds of different samples, from individual drum and instrument hits to full drum breaks
and melodic phrases.
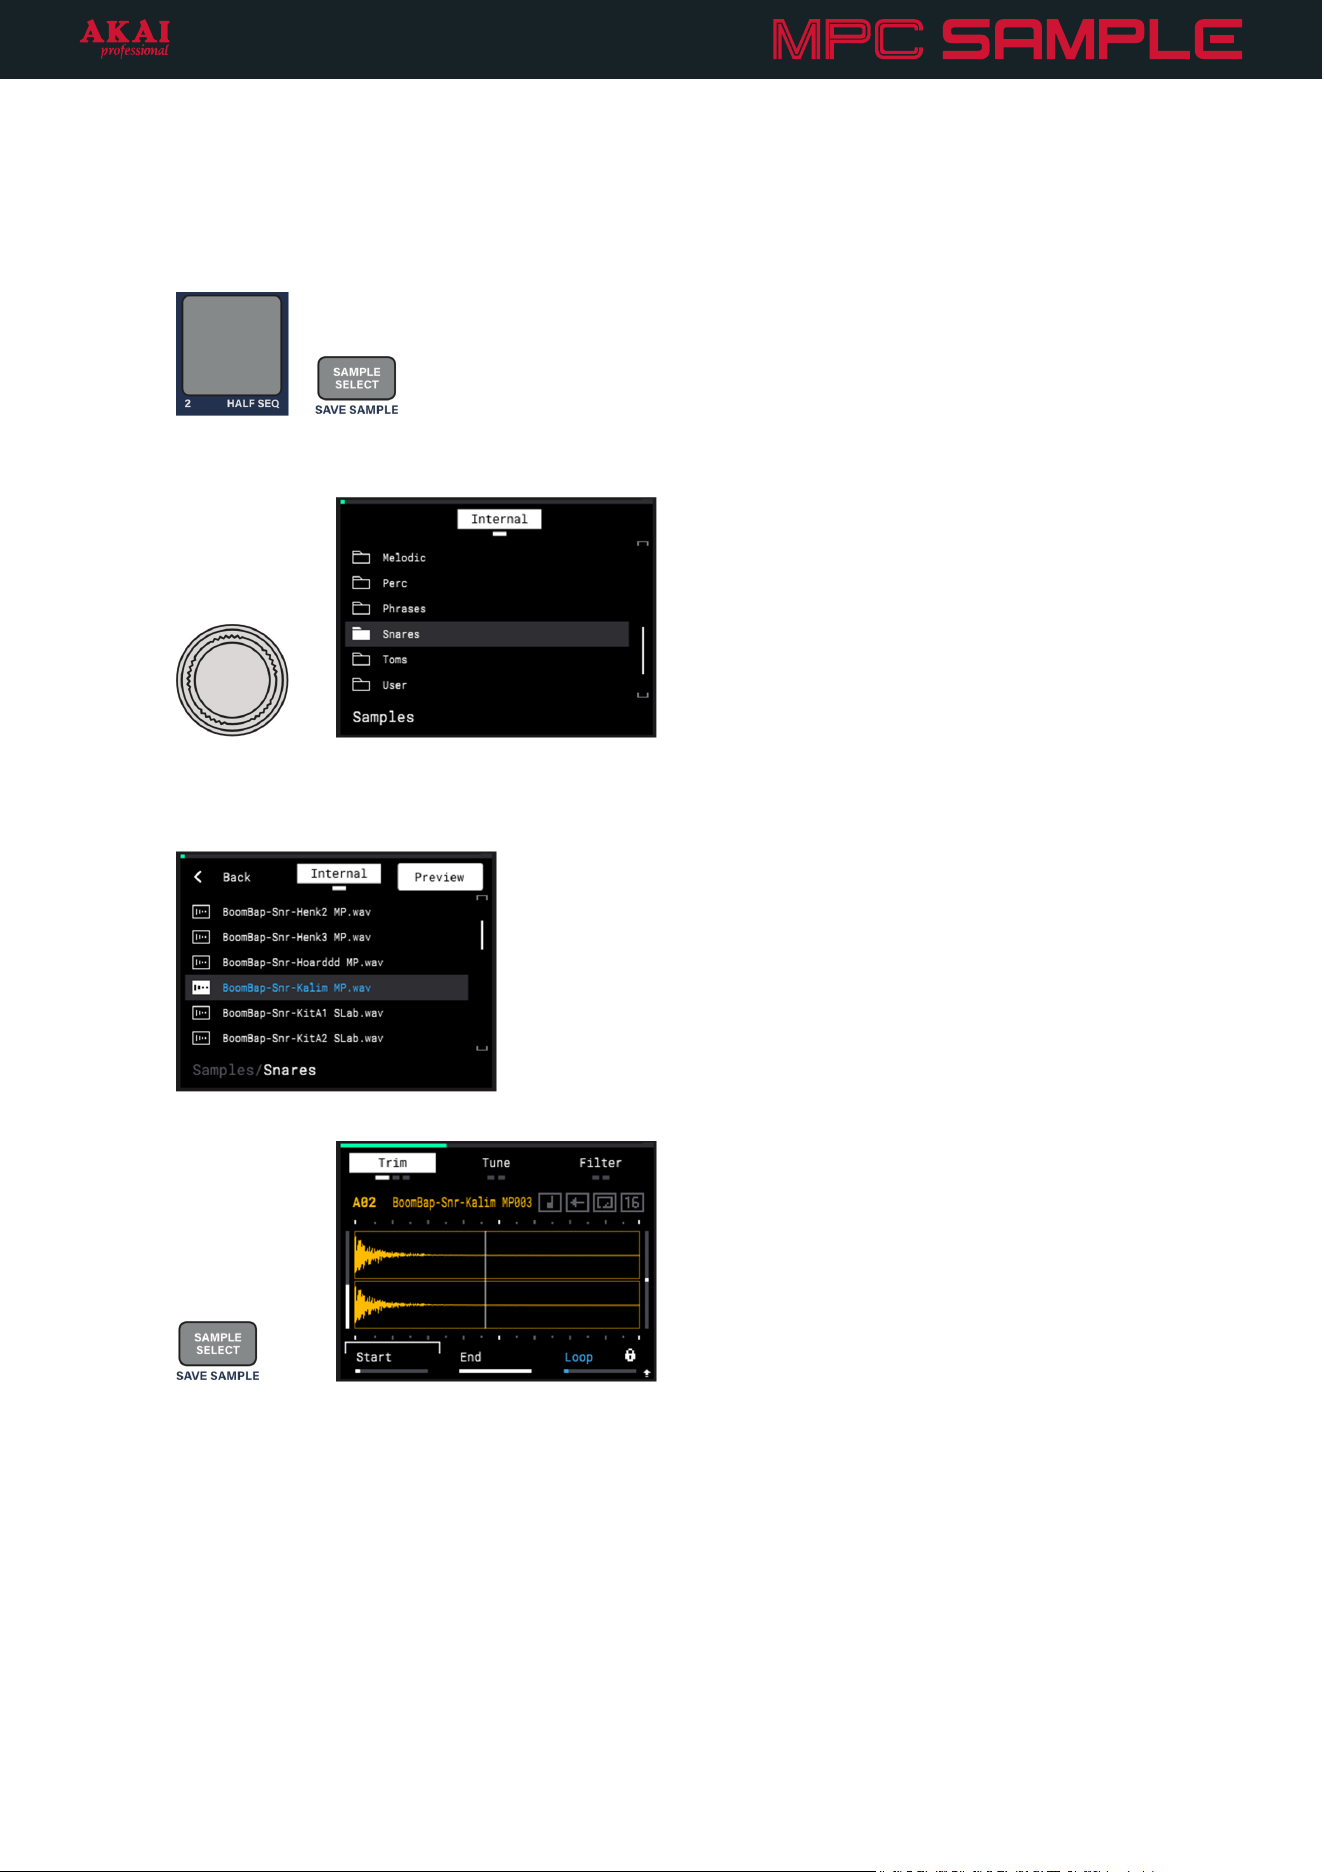
1. Tap a pad, and then press the SAMPLE SELECT button. For example, try tapping PAD 2 and then press
SAMPLE SELECT.
+
2. Turn the ENCODER to browse the list of sample content folders. Try turning the ENCODER so that the
Snares folder is highlighted.
3. Press the ENCODER to open the folder, and then turn it to browse the list of samples. As each sample is
highlighted, the sample is previewed from the built-in speaker or a connected audio output.
4. Select a new sample, and then press the ENCODER to load the highlighted sample to the pad.
5. Press the SAMPLE SELECT button again to return to Sample Mode.
6. Try playing the sequence back again to hear the difference in sound with the new sample.
8
Playing Sequences
Now that you’ve heard one sequence, you can explore how to use MPC Sample to play multiple sequences
together.
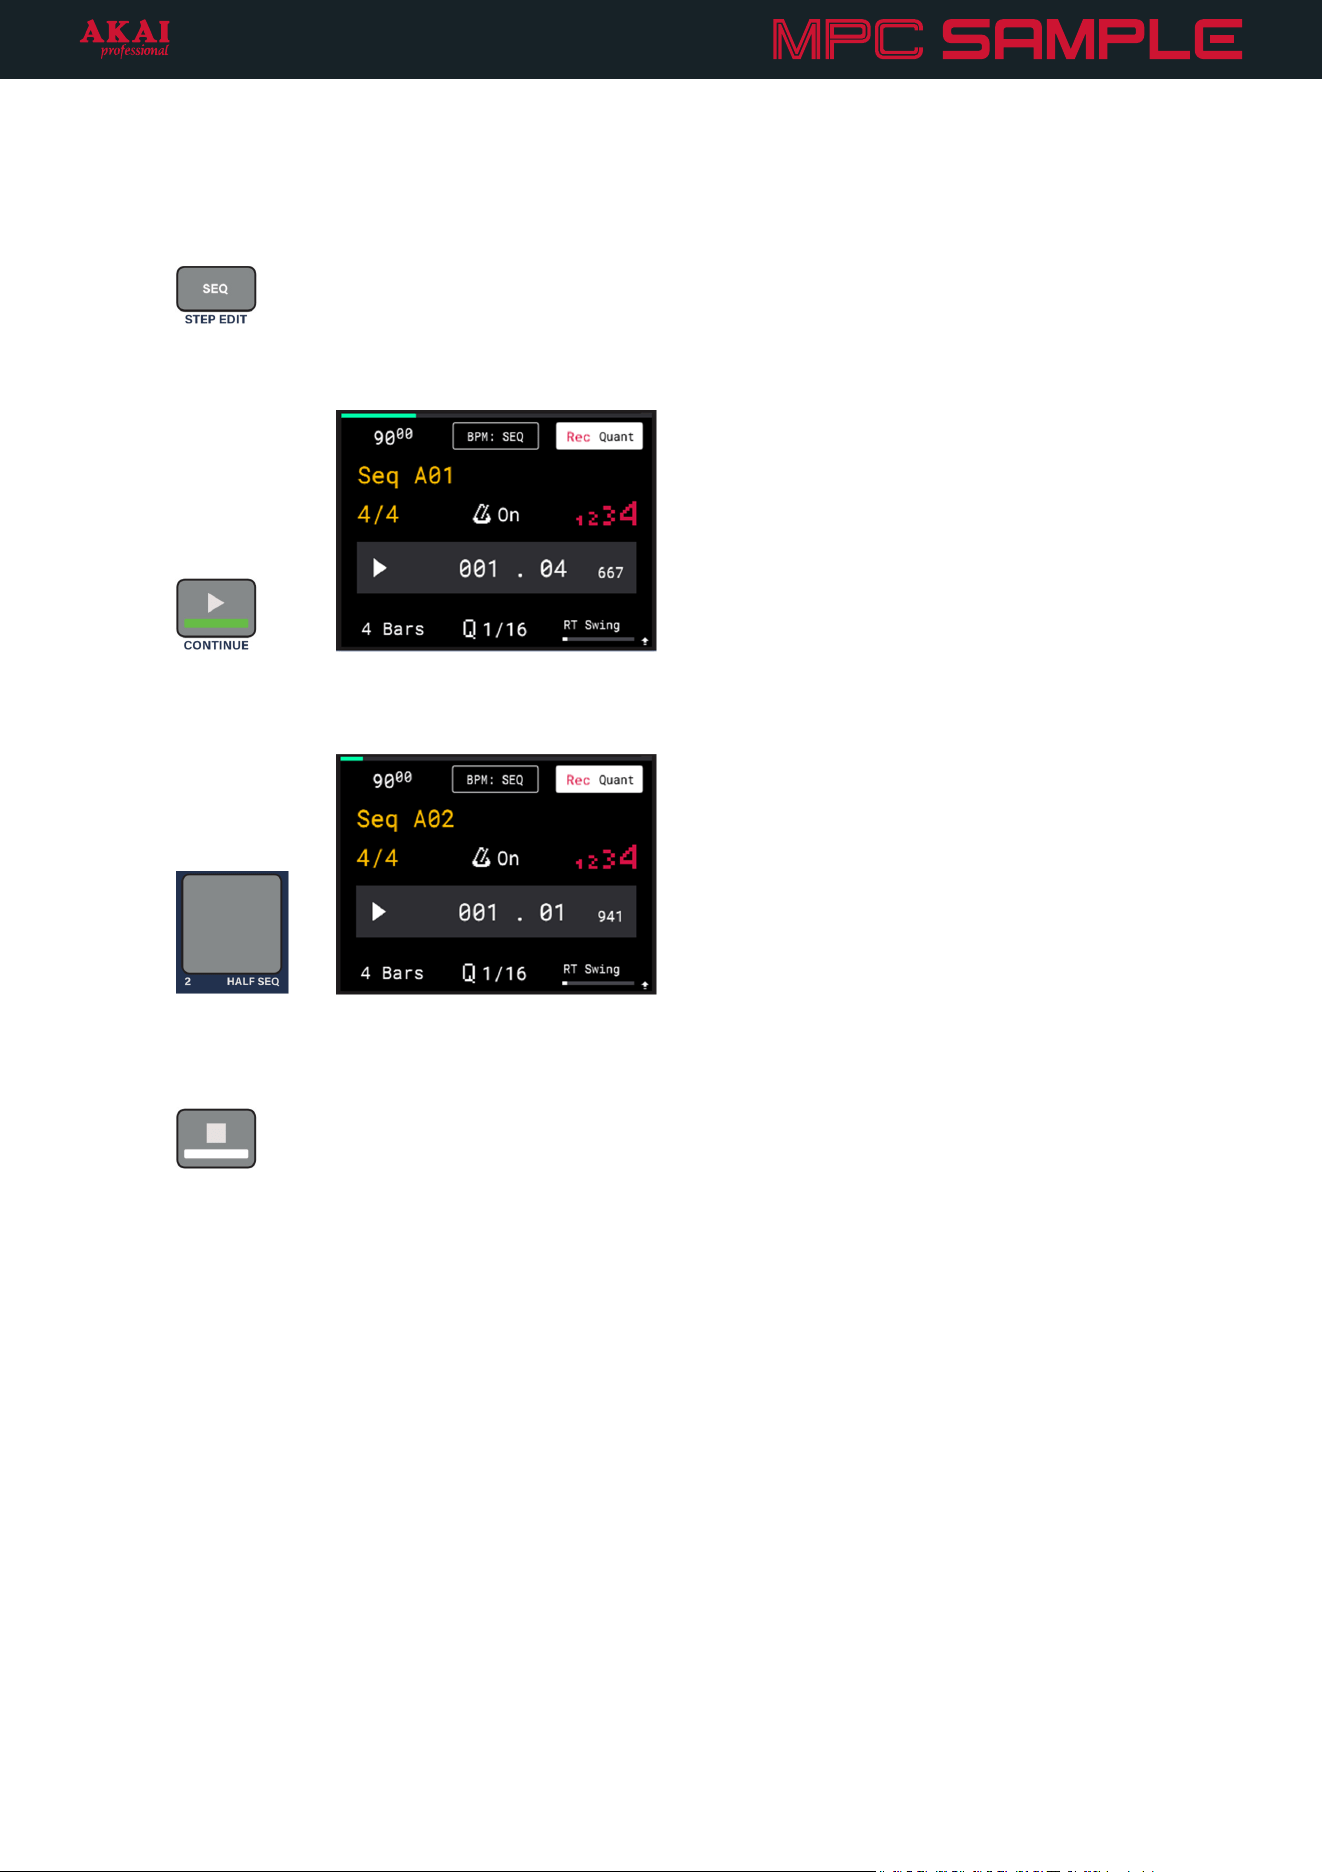
1. Press the SEQ button to open Sequence Mode.
In this mode, the pads are used to select and trigger different sequences.
2. With PAD 1 still selected, press the PLAY button again to begin sequence playback.
3. While Sequence 1 is still playing, tap PAD 2. This queues Sequence 2 to start playing as soon as Sequence
1 ends, and PAD 2 will start blinking. Continue listening until you hear the sequence change. PAD 2 also
lights up once that sequence begins playing.
4. Try triggering other sequences in different orders as MPC Sample continues playing to hear how you can
create longer songs with different parts.
5. When you are finished, press the STOP button to stop playback.
9
Recording a Sequence
While in Sequence Mode, you can also try recording your own new sequence using the current sounds.
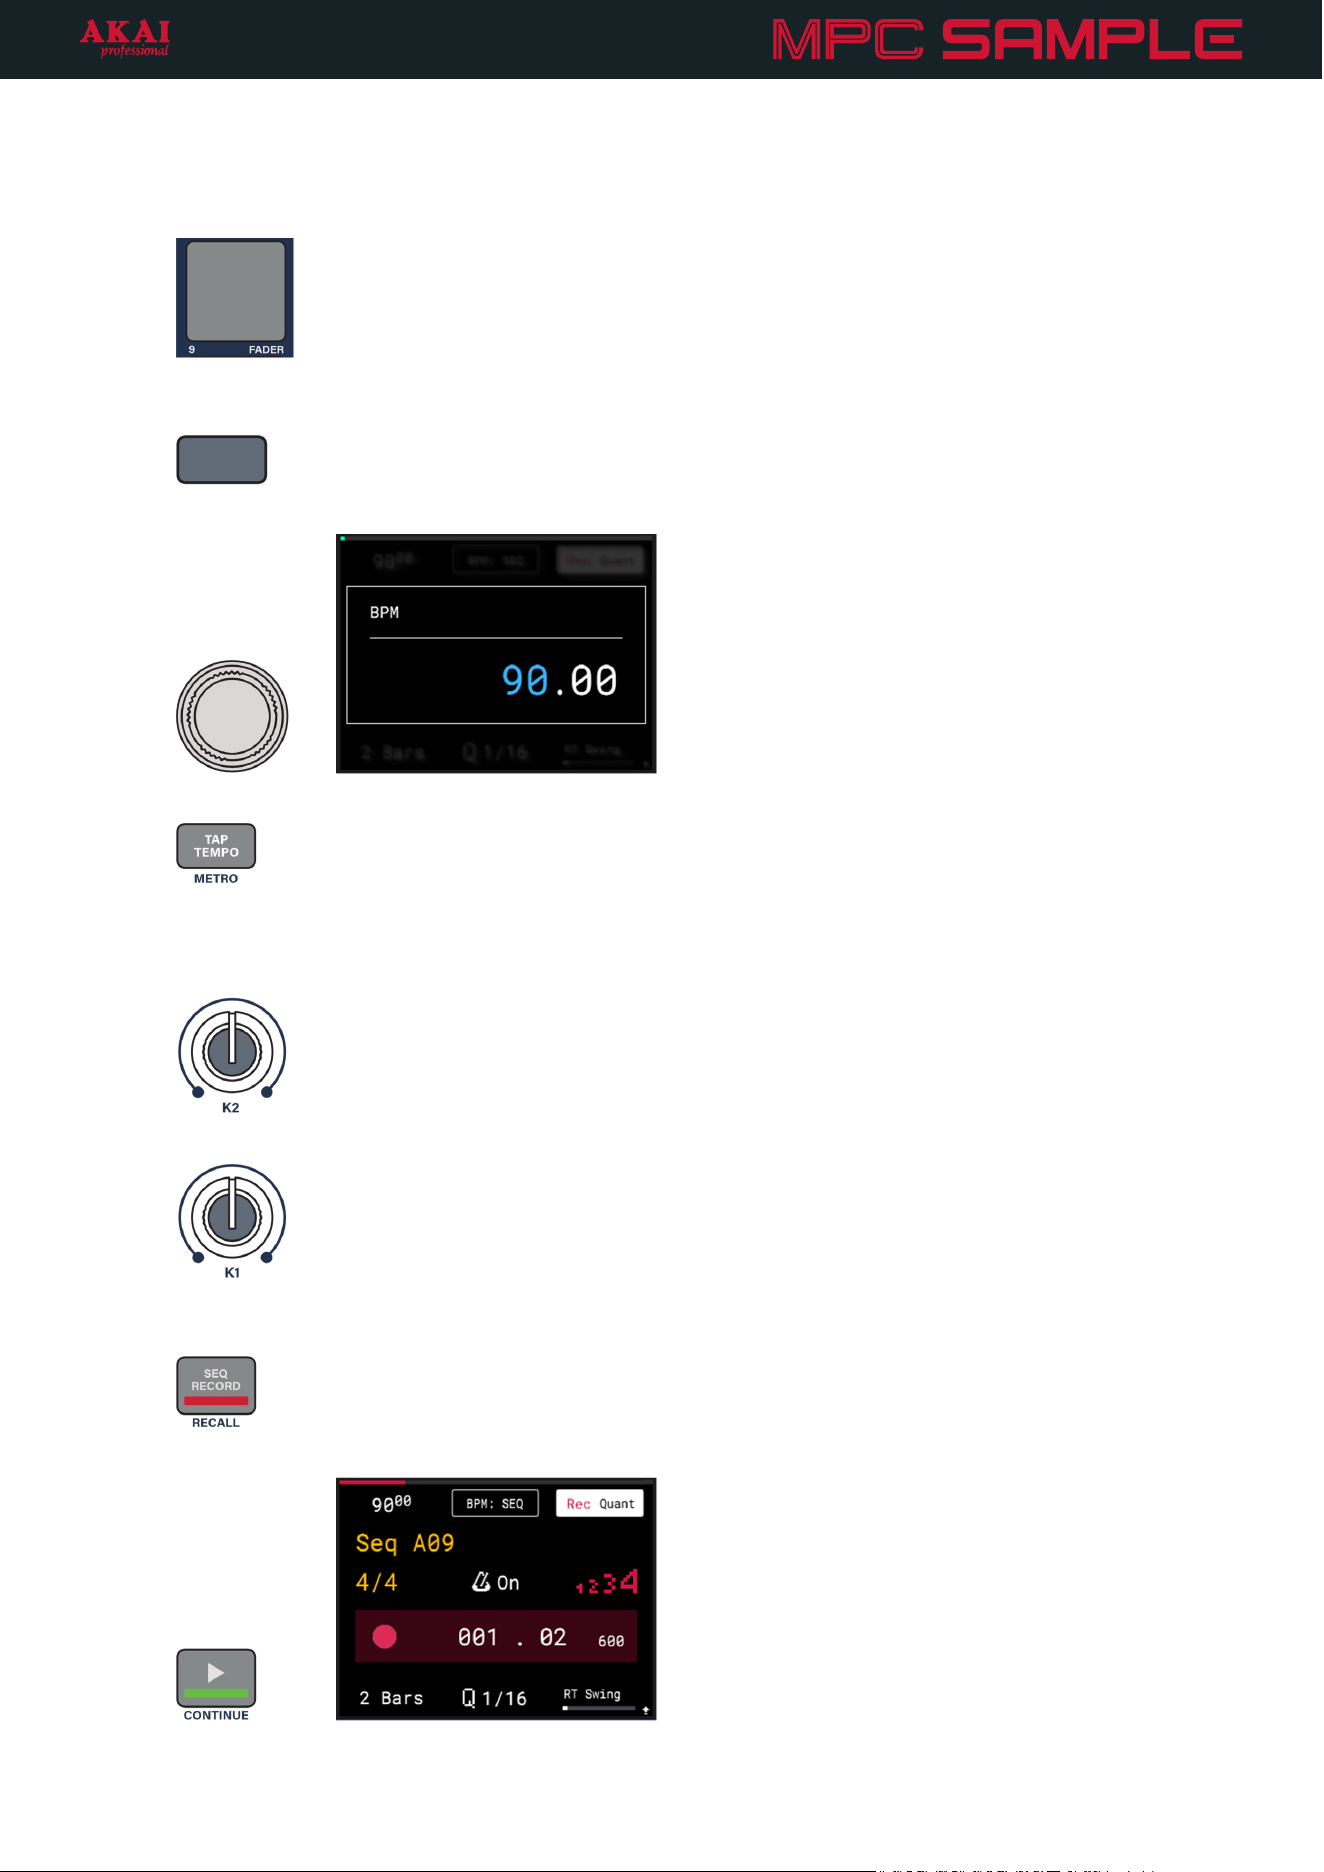
1. Tap a dimly lit pad to select an empty sequence. For example, tap PAD 9 in the demo startup project.
2. Press and hold the B1 Function Button (the left-most button above the display) to open the Sequence
BPM window.
Turn the ENCODER to adjust the tempo to the desired BPM.
You can also press the TAP TEMPO button at a regular interval to set a new tempo.
3. Press the B3 Function Button (the right-most button above the display) to turn Record Quantization on or
off. When on, the notes you play while recording are snapped to the grid at the current Q value.
You can adjust the Q value by turning the K2 Knob.
4. Turn the K1 Knob to adjust the sequence length, in bars.
5. When you are ready to record, press the SEQ RECORD button, and the pads will return to sample
triggering mode.
6. Press the PLAY button to begin recording, and tap the pads to add recorded events.
10
7. When the end of the Sequence is reached, MPC Sample continues overdub recording and any samples
triggered will play back at their recorded locations.
8. When you are finished, press the SEQ RECORD button again to stop recording but continue playback.
You can also press the STOP button to stop recording and playback at the same time. The pads will return
to sequence triggering mode.
/
9. Try launching your new sequence, and then try launching other sequences in the project.
Starting a New Project
When you’re ready to move on from the included startup project, you can start a new project.
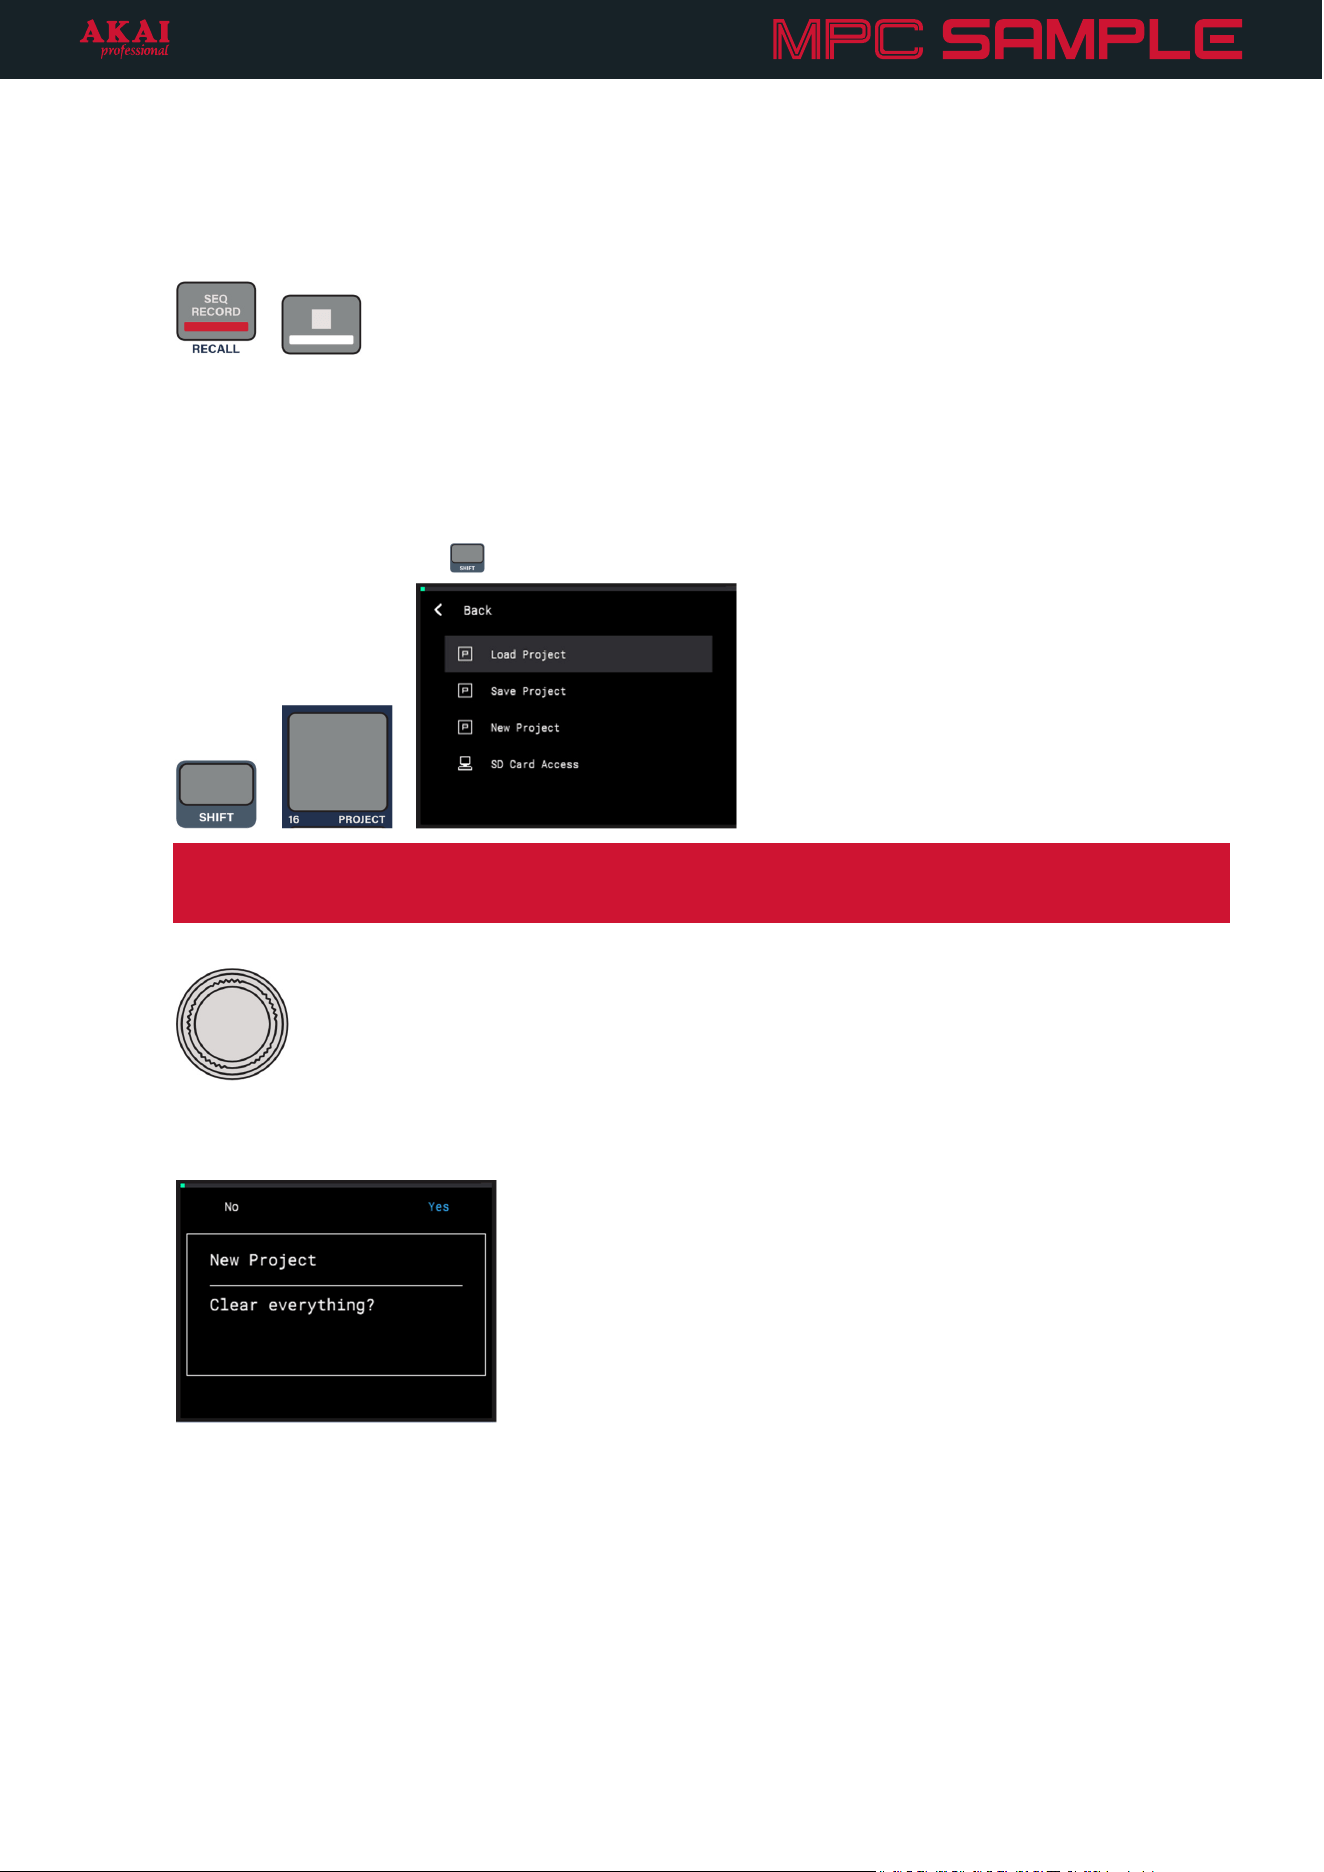
1. Press and hold the SHIFT (
) button and press PAD 16 – PROJECT. This will open the Project menu.
+
Tip: If you’d like to save your work so far, turn the ENCODER so that Save Project is highlighted, and
then press it to select. You can use the ENCODER and -/+ buttons to enter a name for your project and
save it.
2. Turn the ENCODER so that New Project is highlighted, and then press it to select.
3. If you have unsaved changes in the current project, you can press the B3 Function Button to confirm you
want to clear everything. If you need to save your project, press the B1 Function Button to return to the
Project menu, and follow the instructions in the Tip above to save your project.
11
Recording a Sample
In addition to the hundreds of included samples, you can sample any kind of audio with MPC Sample to create your
own samples. Let’s try using the built-in microphone to capture sound from around you to create a new sample.
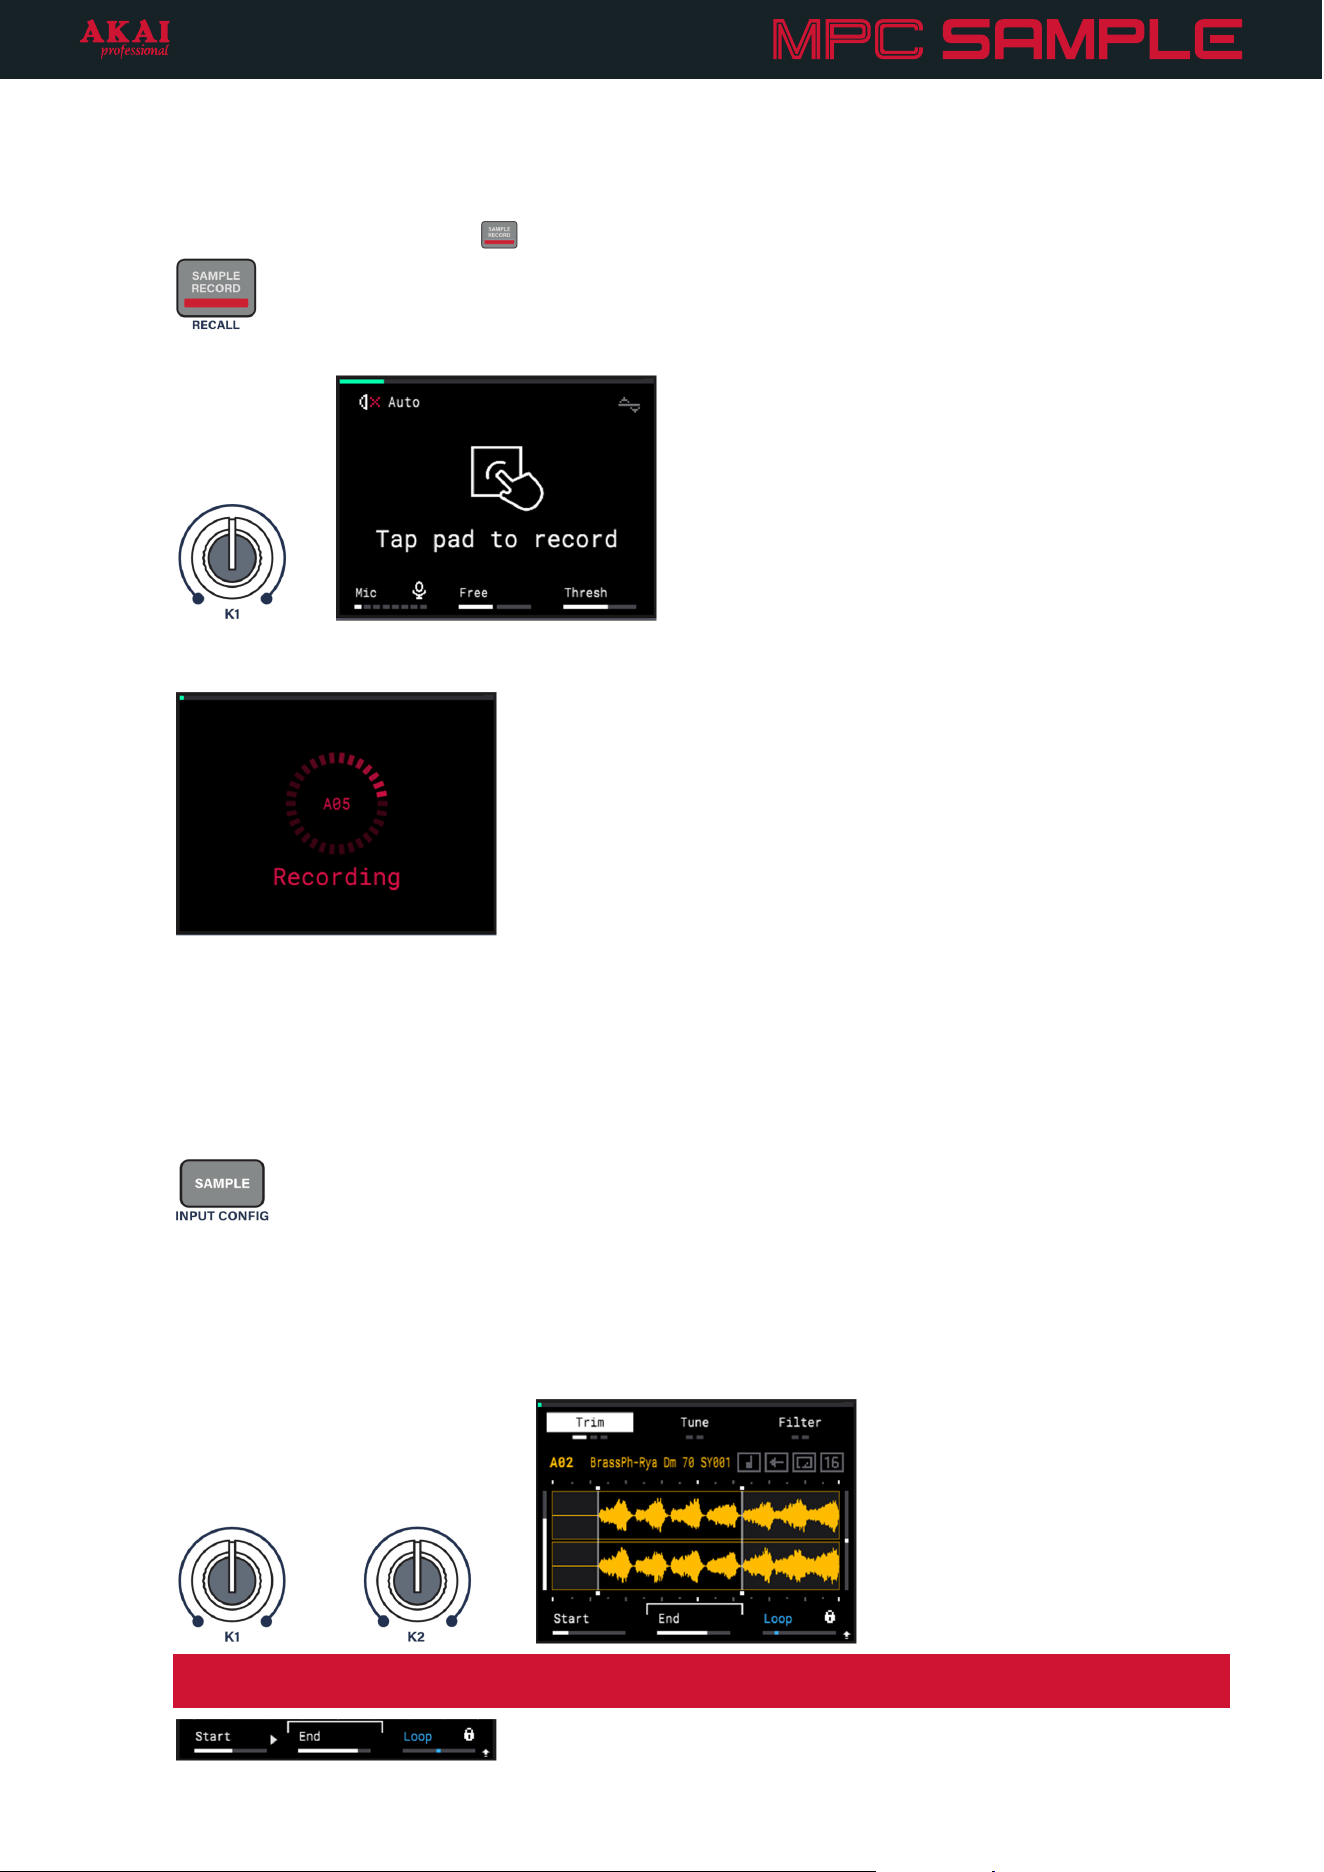
1. Press the SAMPLE RECORD (
) button to enter Sample Record Mode.
2. Turn the K1 Knob to adjust the current input Source. Select Mic for the built-in microphone.
3. Tap a pad to begin recording. Try humming, singing, or even tapping on your surroundings to make
some noise!
4. When you are finished recording, tap the PAD again to return to the Sample Record page.
Editing a Sample
After recording your own sample, or if you want to change one of the included samples, you can use MPC
Sample’s editing features.
1. Make sure you are in Sample Mode by pressing the SAMPLE button.
2. Tap a pad to select the sample you want to edit. If you recorded a sample above, tap that pad to select it.
3. Your recorded sample might have extra audio around the start and end of your recording that you don’t
need.
Turn the K1 Knob to adjust the sample Start point. Turn the K2 Knob to adjust the sample End point. Try
isolating the best part of your recorded sample.
Note: If you move the knob but the parameter doesn’t change, look for the arrows (/) next to the
parameter name. Move the knob in this direction until you regain control of the parameter.
12
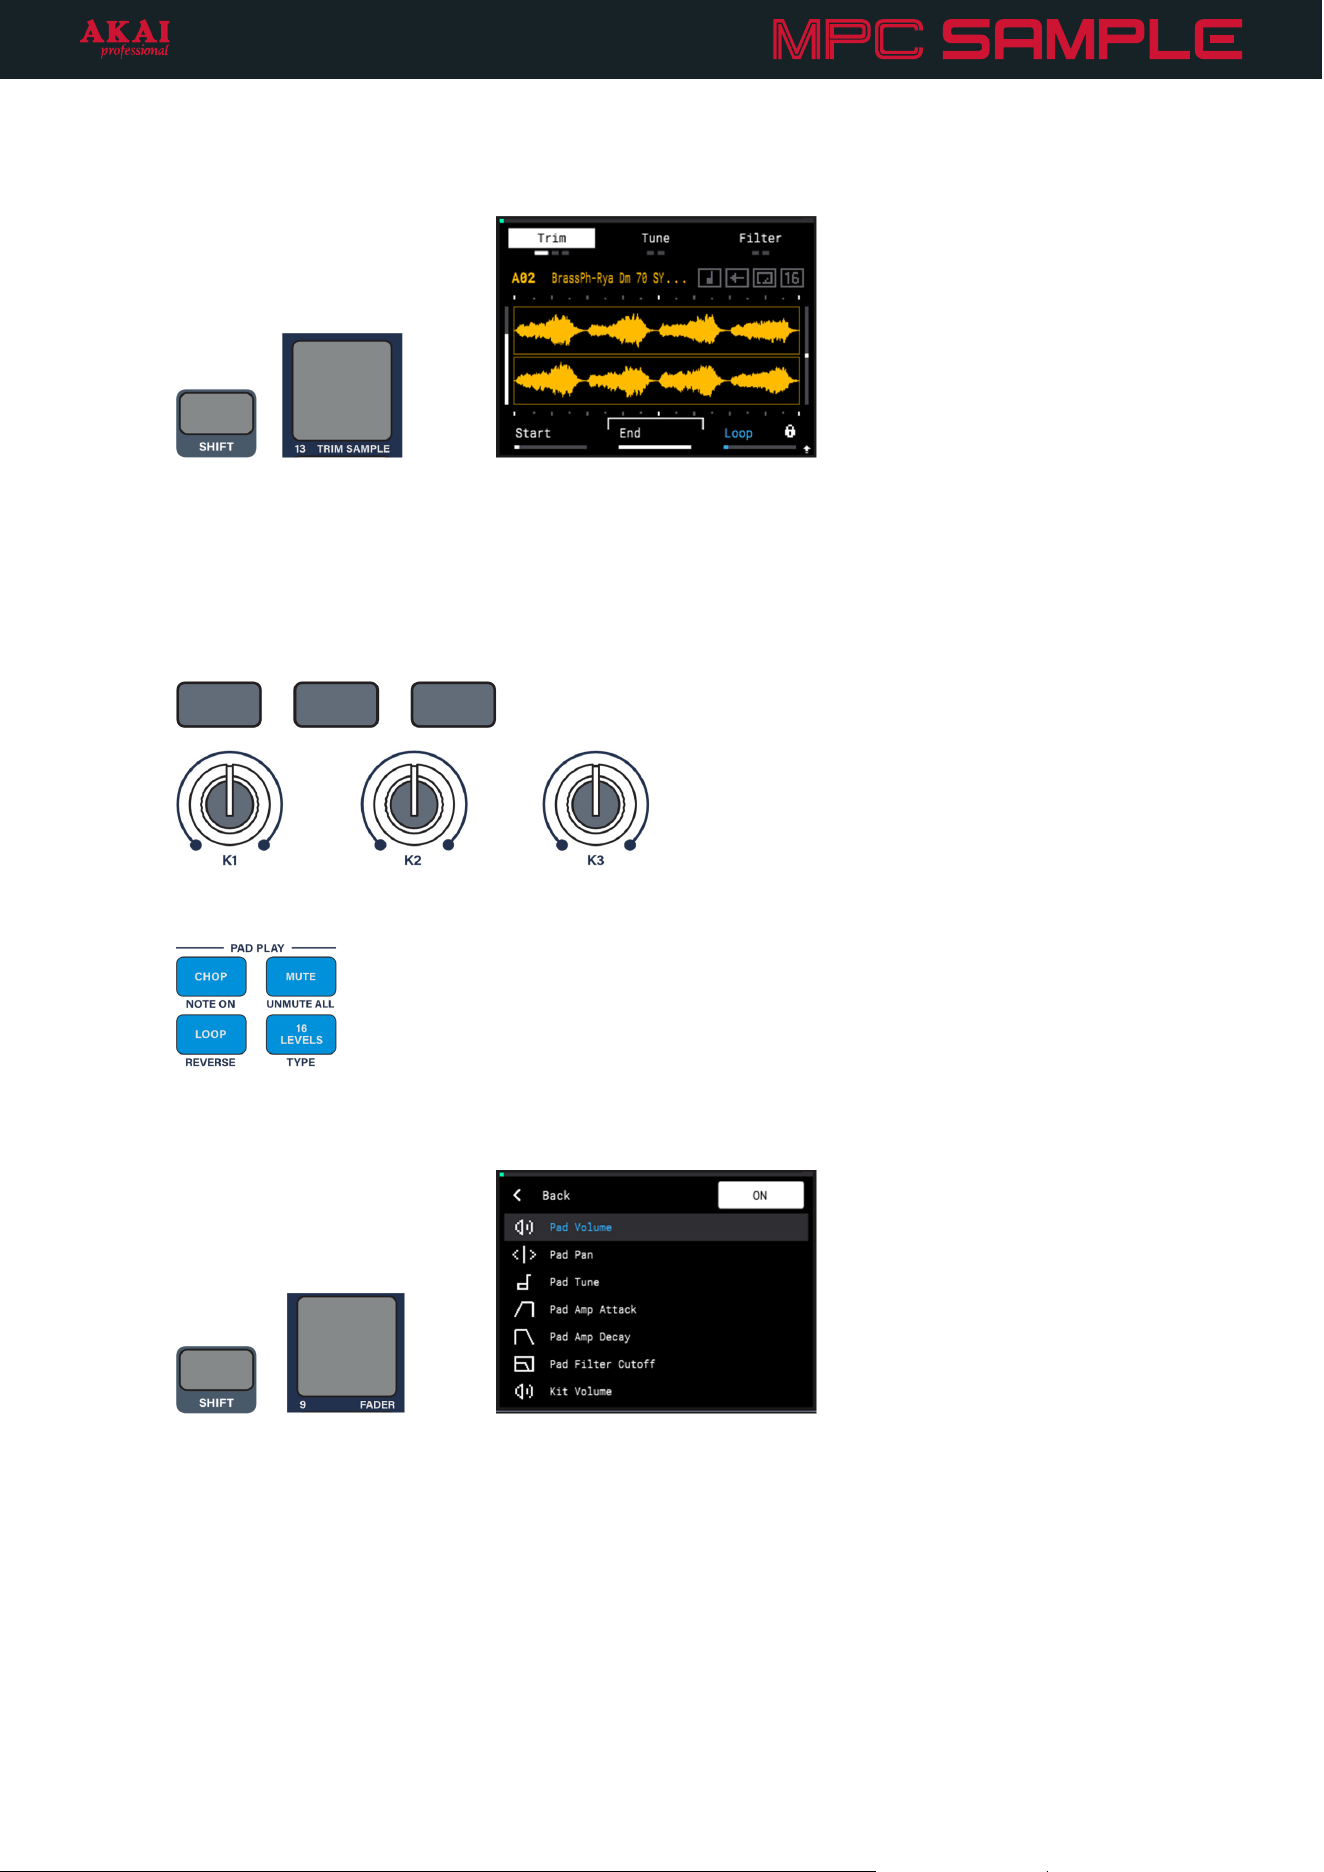
4. When you tap the pad again, the sample now plays between the sample Start and End points. You can
permanently alter the sample to be this length by pressing and holding SHIFT and pressing PAD 13 –
TRIM SAMPLE. This will discard any audio before the Start point and after the End point.
+
There are many other ways to edit your sample.
• Try pressing the B1, B2, and B3 Function Buttons to cycle between different options in Sample Mode.
Use the K1, K2, and K3 Knobs to adjust the various parameters, from pad volume and tuning to filter and
amplitude envelopes.
• Try using the buttons in the PAD PLAY section to adjust sample playback. For example, press the LOOP
button to make the sample loop continuously when triggered.
• Press and hold SHIFT and press PAD 9 – FADER to open the Fader control menu. You can select from
different parameters that can be adjusted using the Fader. Try selecting Pad Tune. Move the fader as you
trigger a pad to hear the pitch of the sample change.
+
13
Using FX
As your projects grow, you can take your beats to the next level with MPC Sample’s powerful effects. First, try
using the Pad FX mode. In this mode, each pad triggers a different effect, and the level of the effect is determined
by how hard you press the pad.
1. Press the PAD FX button to open Pad FX mode.
2. Press the PLAY button to play the current sequence, and then tap and hold on the pads to trigger the
respective effects.
3. Use the K1–K3 Knobs to adjust different parameters for each effect.
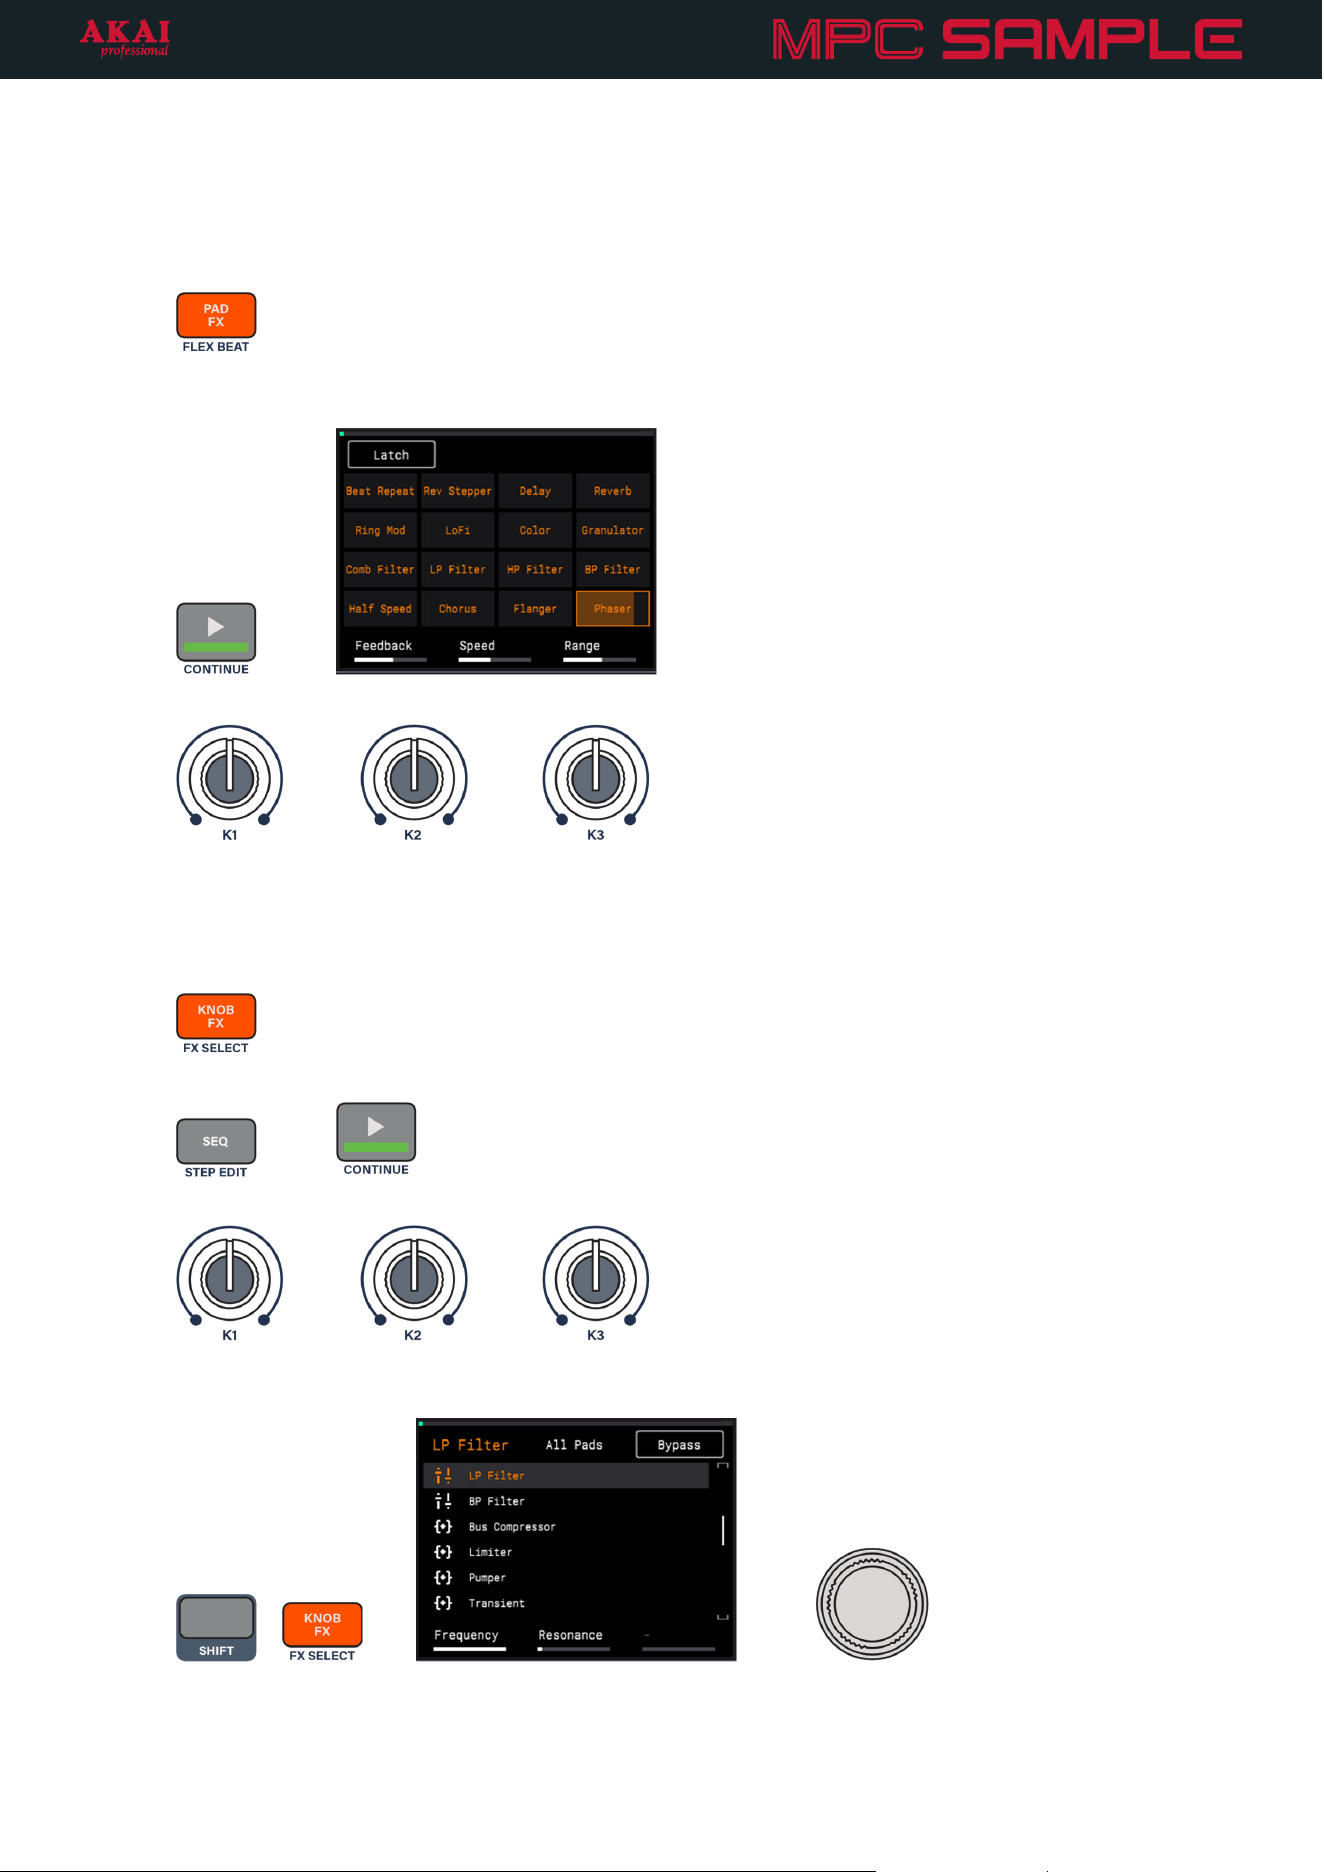
Next, try using Knob FX mode. In this mode, a single effect is controlled using the K1–K3 Knobs, freeing the MPC
Sample pads for other uses. For example, this is perfect for applying effects as transitions between sequences.
1. Press the KNOB FX button to open Knob FX mode.
2. Press SEQ to open Sequence mode, and press PLAY to play a sequence.
3. Use the K1–K3 Knobs to adjust the effect while you launch different sequences.
4. To change the current Knob FX, press and hold SHIFT and press the KNOB FX / FX SELECT button. Use
the ENCODER to select a different effect.
+
While in this menu, you can also press the PADS to determine which samples are affected by the Knob
FX. Knob FX affects lit pads, while dim pads are not affected. Press the B2 Function Button to apply Knob
FX to All Pads at once.
14
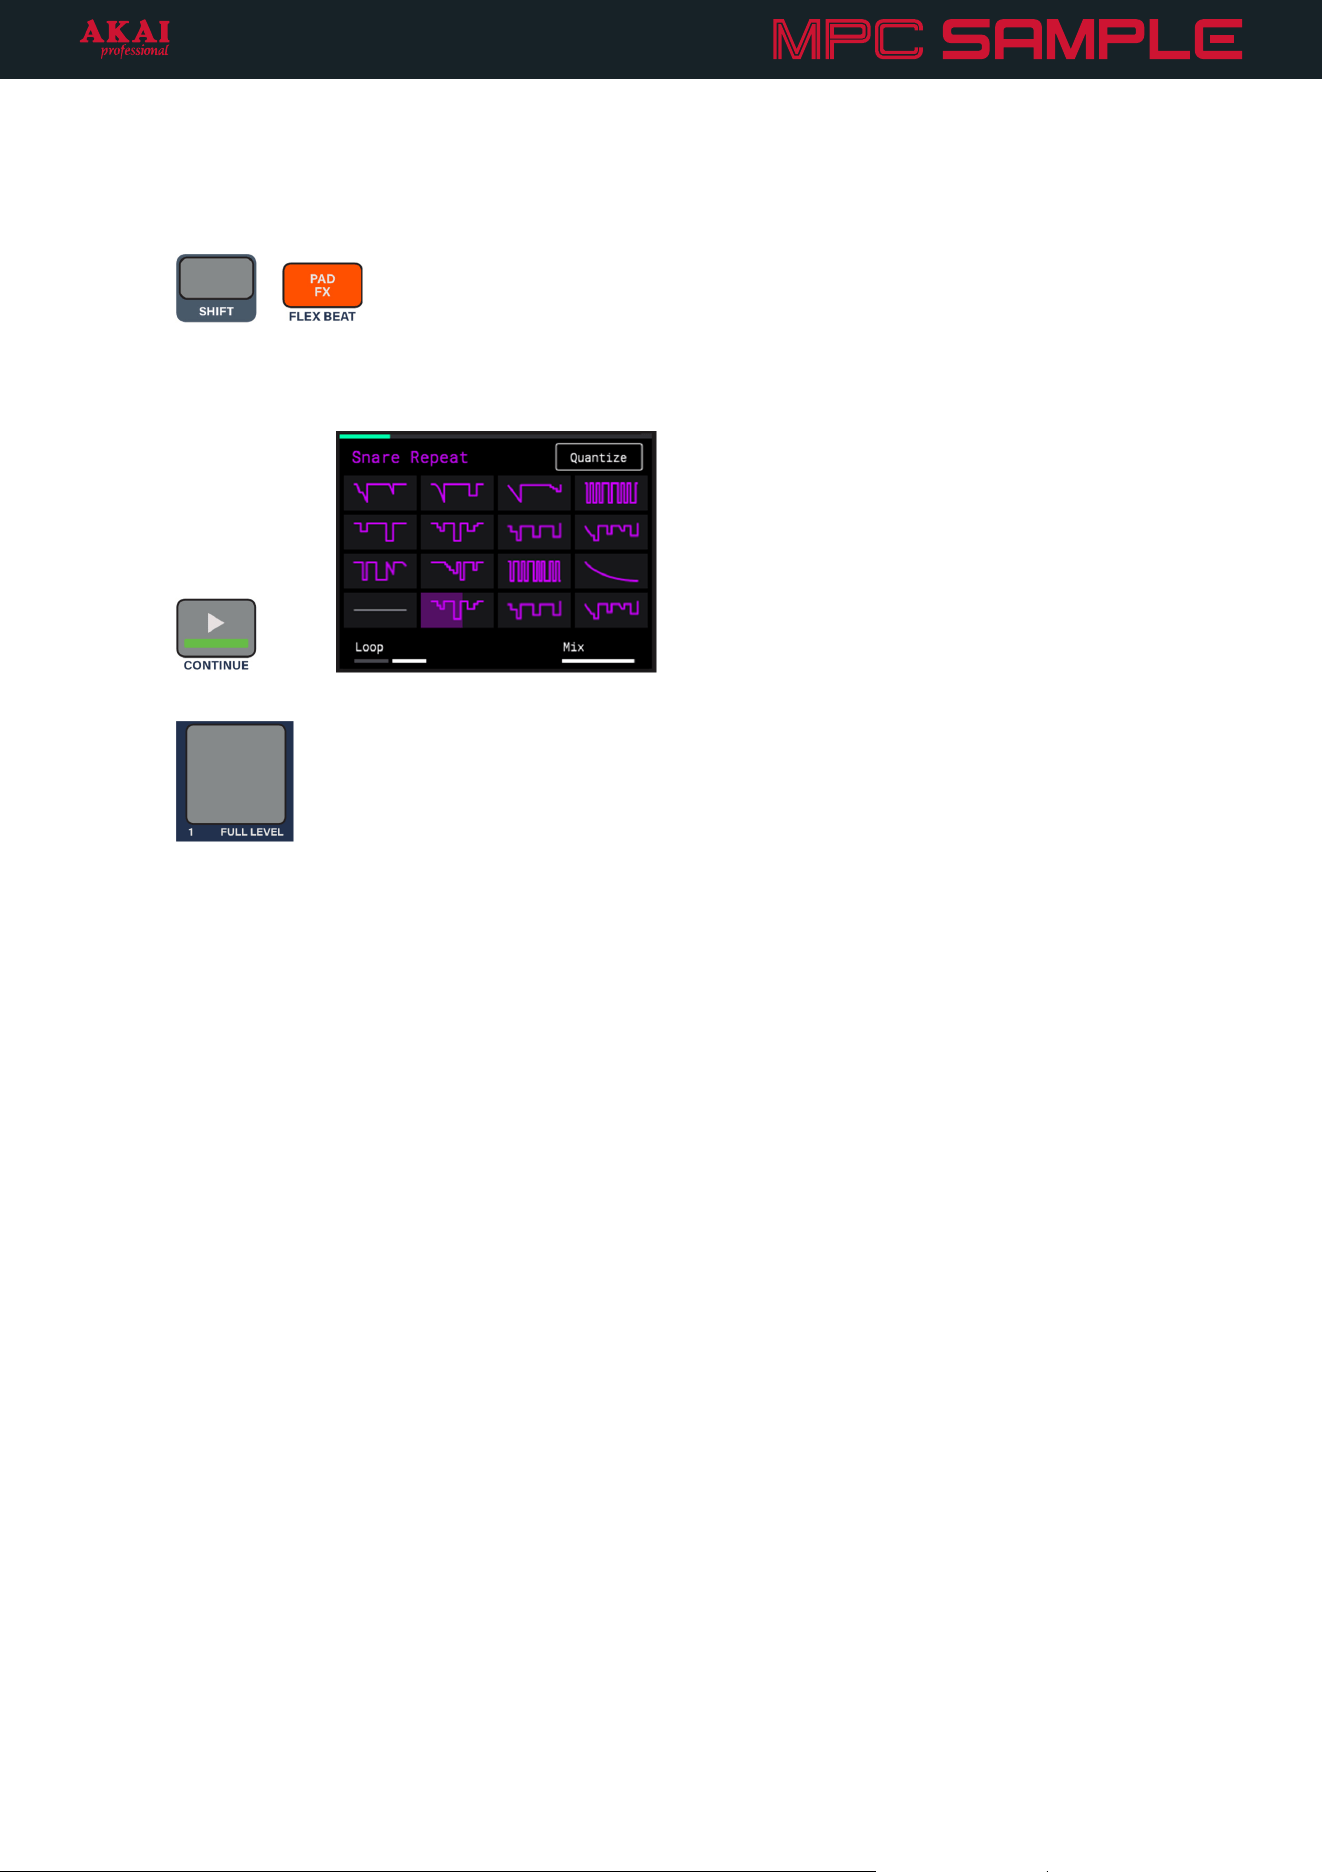
Finally, let’s explore Flex Beat mode. Similar to Pad FX, the pads trigger different effects in this mode, but the
effects are time-based effects that warp the pitch, time, and volume of your sequence for beat chops, DJ-style
scratches, and trance gate effects.
1. Press and hold SHIFT and press the PAD FX / FLEX BEAT button to open Flex Beat mode.
+
2. Press the PLAY button to play the current sequence, and then tap the pads to trigger the respective
effects. Each Flex Beat effect begins looping once you press the pad, and you will hear your sequence’s
audio change.
3. Press PAD 1 to return to the “Empty” effect.
In addition to the many features and functions covered in this Tutorial, there’s so much more you can do to make
beats with MPC Sample.
The following Features chapter gives you a breakdown of every connection and control on MPC Sample and its
function.
The Operation chapter provides greater detail on the different modes and functions of MPC Sample.
15
Features
This chapter describes the functions of MPC Sample’s connections and controls. Click on the picture to jump
directly to the selected control.
For more information on using some of the features described below, proceed to the following Operation
chapter.
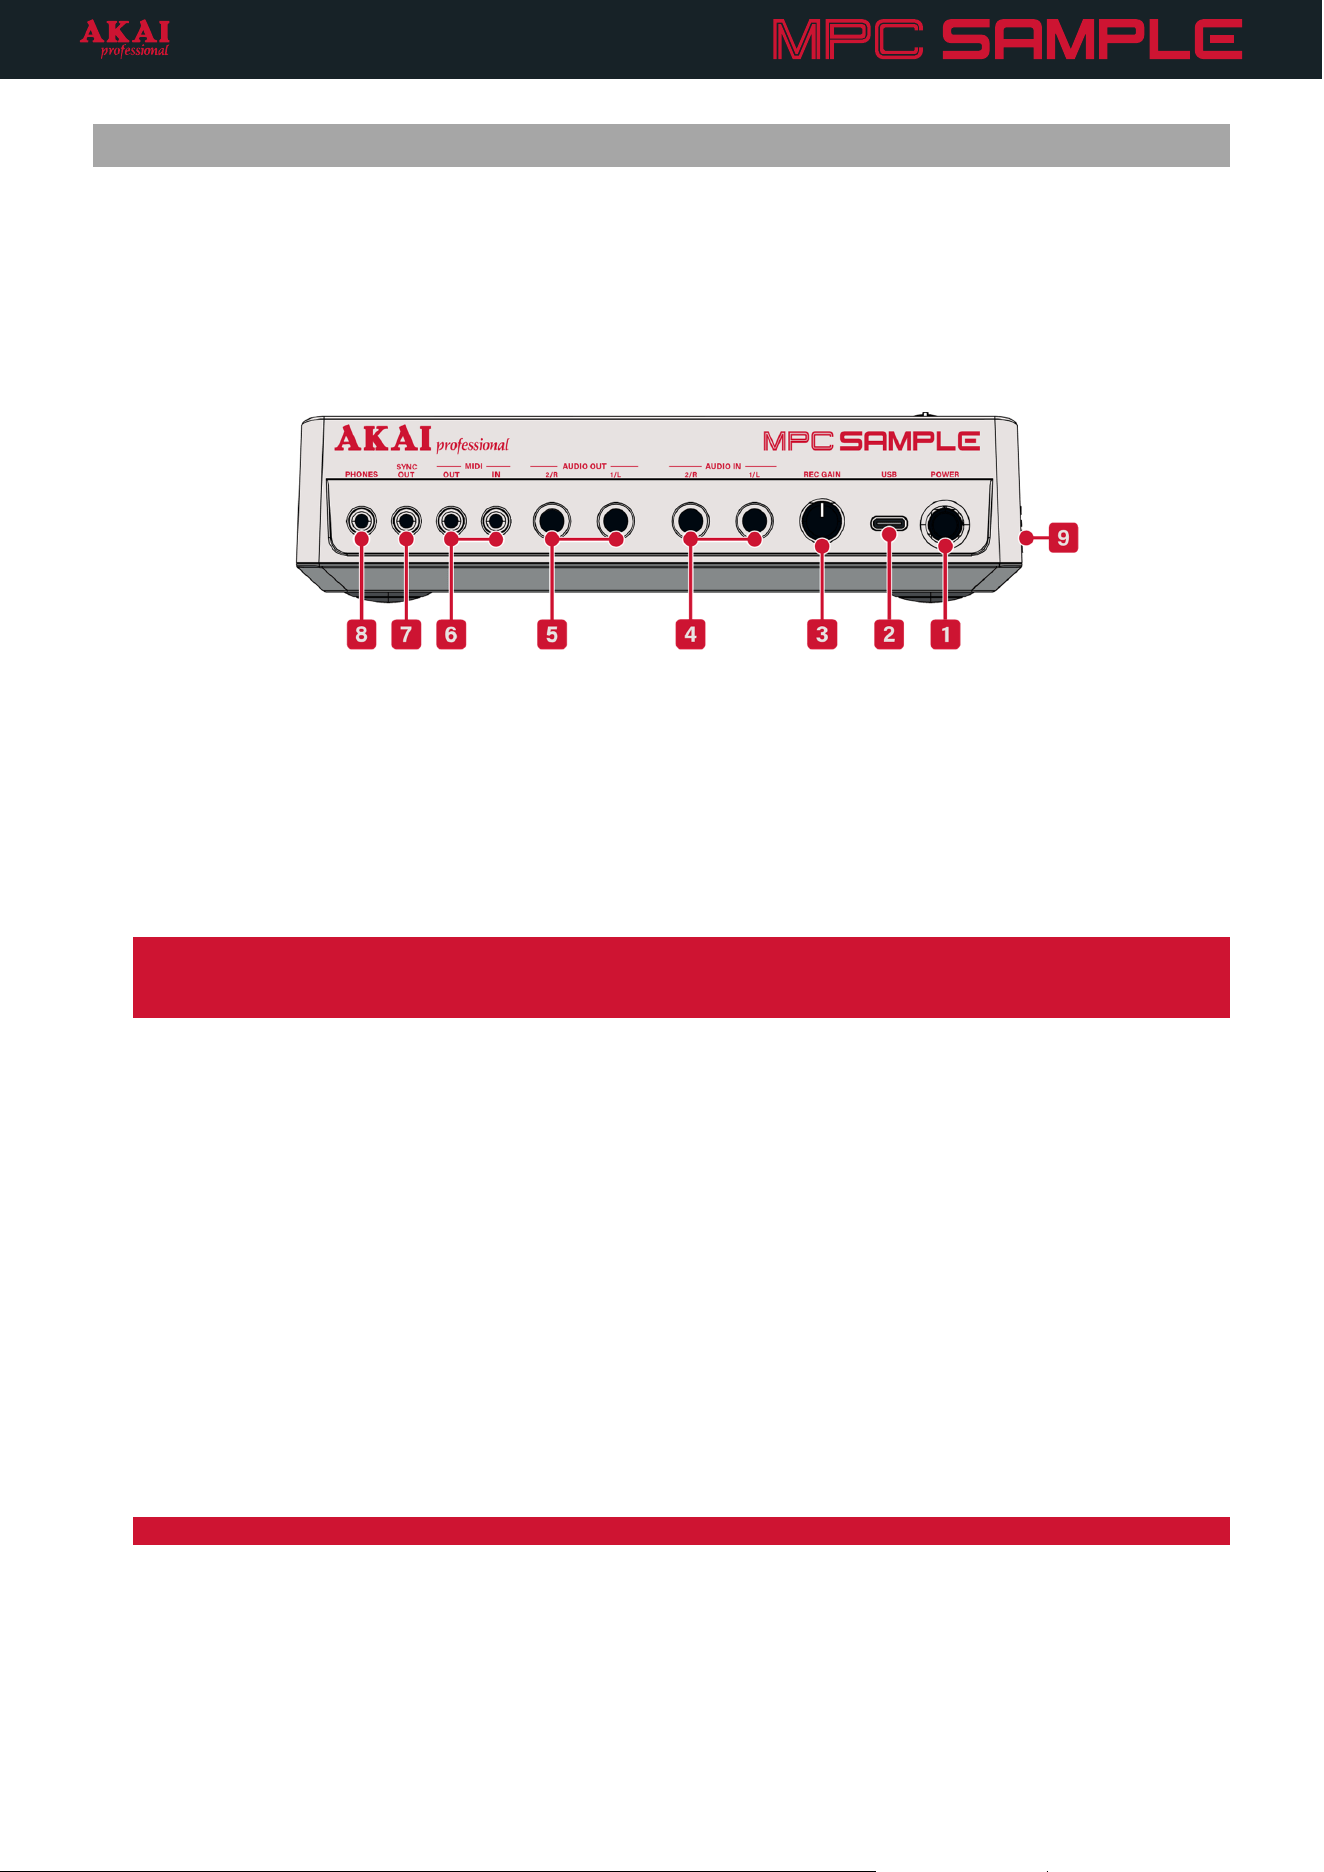
1. POWER: Press this button to turn MPC Sample’s power on and off.
2. USB-C® Port: To power MPC Sample and charge the internal battery, use the included USB-C cable to
connect this port to a USB-C power adapter or USB-C power bank (not included). When charging, the
Charging Icon on the top panel lights up.
You can also connect this to a USB-C host port on your computer (or mobile device) to send and receive
audio and MIDI, and transfer files to and from a microSD card inserted into the microSD Card Slot.
Important: Depending on the type of USB cable and power source used, charging of MPC Sample may be
limited to when it is powered off only. For best results, use the included USB-C cable with a minimum 5V, 2A
power source.
3. REC GAIN: Turn this knob to adjust the recording level of the line-level AUDIO IN connections.
4. AUDIO IN (1/4” [6.35 mm], TRS): Use these inputs to connect a microphone, instrument, or other line-level
audio source (mixer, synthesizer, drum machine, etc.).
5. AUDIO OUT (1/4” [6.35 mm], TRS): Use these outputs to connect to your speakers, a mixer, or other audio
output destination. Use the MAIN VOLUME control to adjust the level of the audio output.
6. MIDI IN / OUT (1/8” [3.5 mm], TRS): Connect external MIDI devices such as drum machines or synthesizers
to the MIDI Input and Output using 1/8” TRS to 5-Pin MIDI DIN connectors (not included).
7. SYNC OUT (1/8” [3.5 mm], TS): Use this 5V control voltage (CV) output to send clock pulse for syncing
external modular gear.
Note: You can adjust MIDI and Sync settings in the MIDI Configuration menu.
8. PHONES (1/8” [3.5 mm], TRS): Connect standard headphones here to monitor MPC Sample’s audio. Use
the MAIN VOLUME control to adjust the level of the headphones output. When headphones are connected,
the built-in Speaker will be deactivated.
9. microSD Card Slot (Left side, not pictured): Insert a microSD card here for external file storage. You can
access this storage using SD Card Access Mode in the Project menu.
16
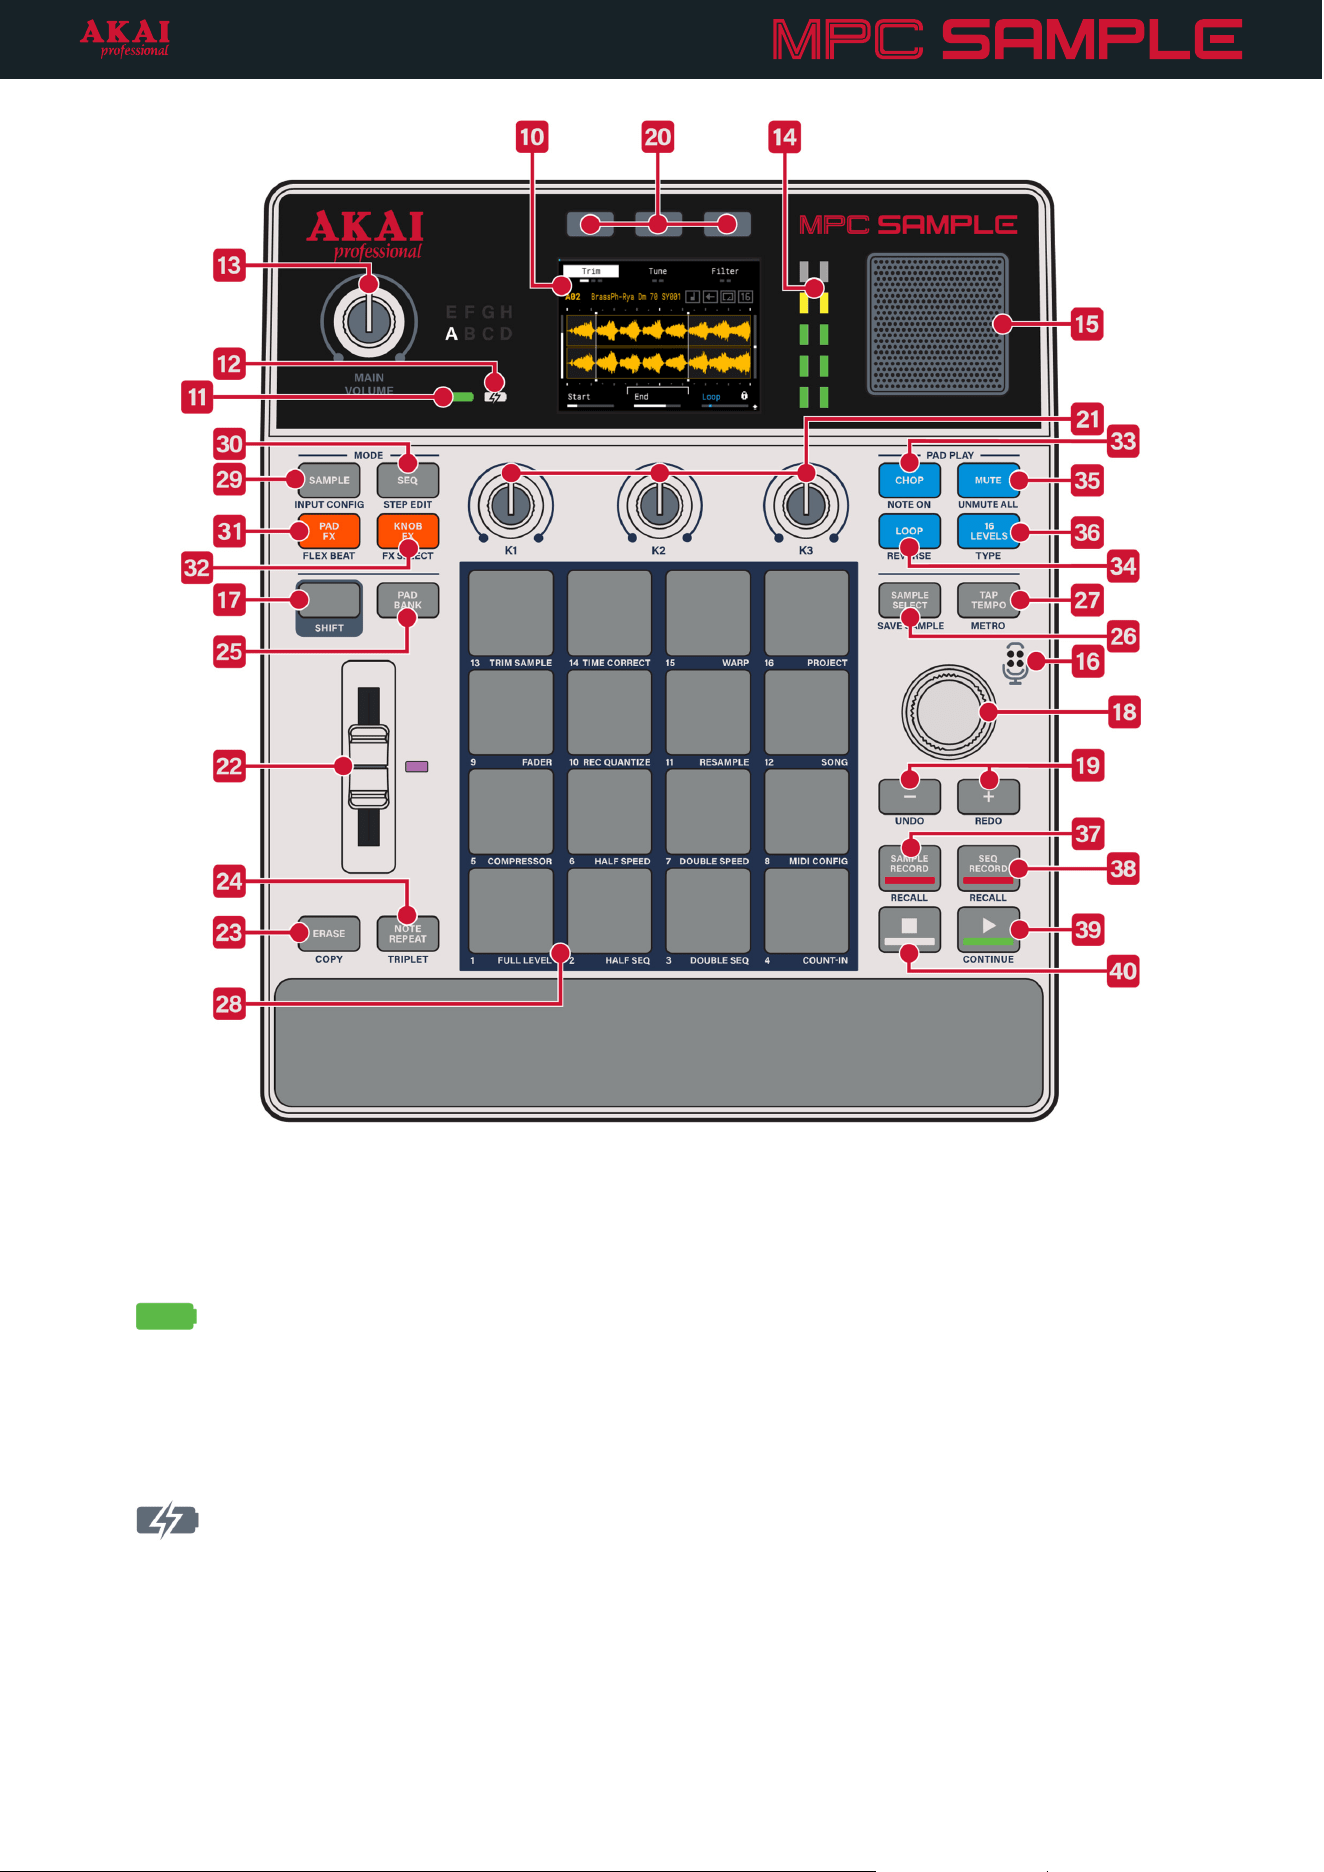
10. Display: The display on MPC Sample shows the various menus and parameters available. To learn more
about all of MPC Sample’s features and functions, continue reading below and proceed to the Operation
chapter for more details.
11. Battery Icon: This icon shows the current battery life of MPC Sample. If this icon is green, the battery has
between 100% and 30% charge. If the icon is amber, the battery has between 29% and 15% charge. If the
icon is red, the battery has between 14% and 5% charge. If the battery is blinking red, the battery has less
than 5% charge and needs to be connected to power immediately.
12. Charging Icon: This icon lights up when MPC Sample is connected to power and charging. If MPC Sample is
not connected to power, or if the battery is fully charged, the icon does not light up.
17
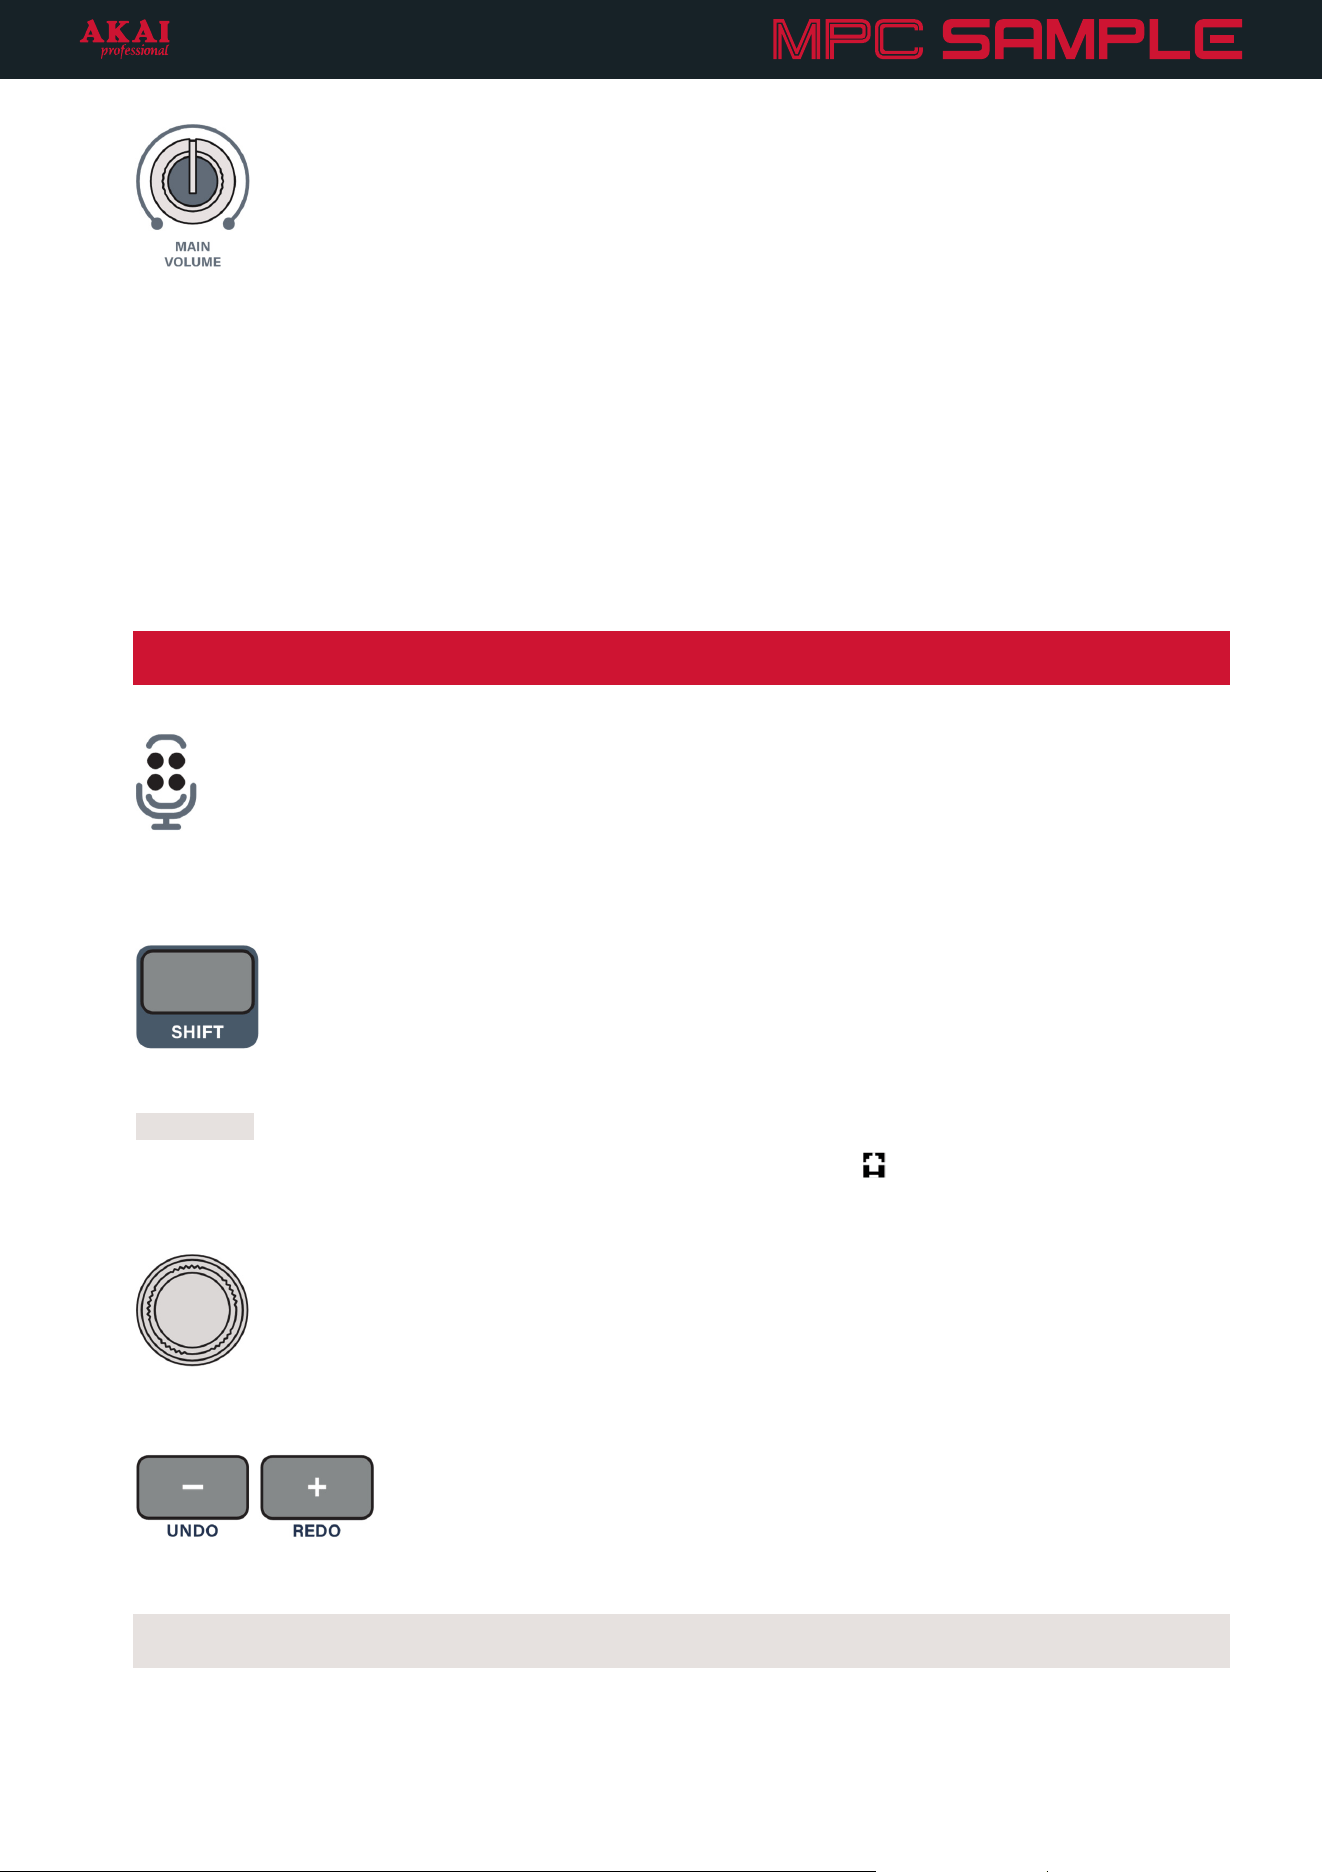
13. MAIN VOLUME: Turn this knob to adjust the audio output level. This applies to the built-in SPEAKER as well
as audio to the PHONES and AUDIO OUT connections on the rear panel.
14. Meters: These meters display the main output volume level, or the input source level when recording a
sample. If the meter consistently lights up in the red during playback, adjust the volume of your samples. If
the meter consistently light up in the red while recording, reduce the volume of your audio input source
directly, or by turning down the REC GAIN knob for audio connected to the AUDIO IN connection on the
rear panel.
15. Speaker: This built-in speaker plays audio when nothing is connected to the PHONES or AUDIO OUT
connections on the rear panel. Adjust the volume of the speaker by turning the MAIN VOLUME knob.
Important: When recording using the built-in Microphone, the speaker is automatically deactivated to
prevent feedback.
16. Microphone: This built-in condenser microphone allows you to easily sample anything. For more information
on recording samples and adjusting the microphone settings, see the Sample Record Mode chapter.
17. SHIFT: This button provides access to secondary functions on MPC Sample. Press and hold it and then press
another button or pad to access its secondary function. These are printed below the selected control, and are
highlighted
in the descriptions below.
When viewing parameters and menus on the Display, if the Shift icon ( ) is visible you can press and hold
this button to access additional parameters for control using the K1–K3 Knobs or B1–B3 Function Buttons.
18. Encoder: Turn this knob to navigate menus, adjust settings, and more, depending on the current mode.
19. -/+: Press these buttons to decrease (-) or increase (+) the selected parameter, or move down (-) or up (+) in
the current list.
Undo/Redo: Press and hold SHIFT and press these buttons to undo the last action (-) or redo the last action
you undid (+).
18
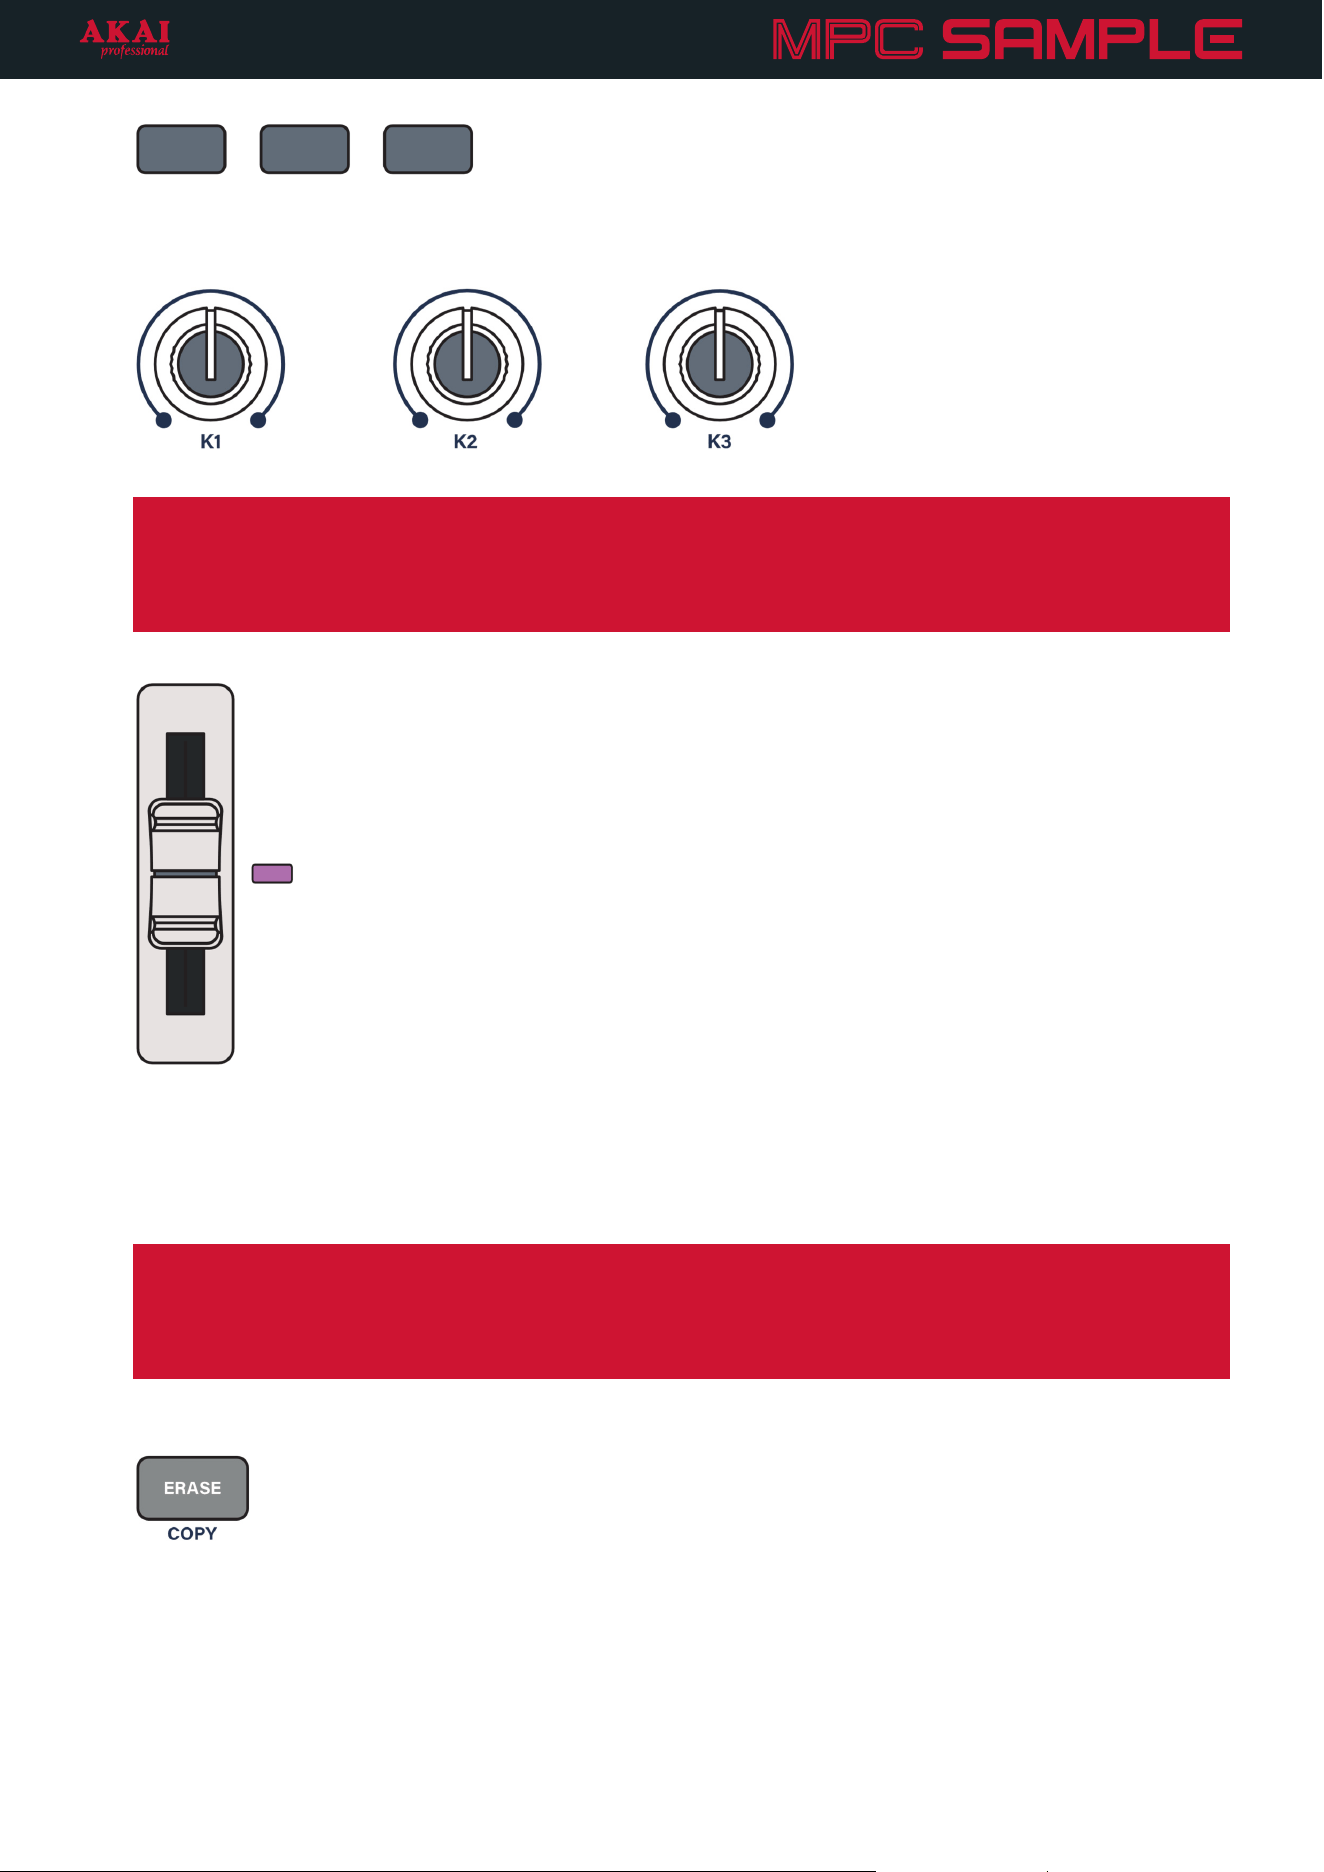
20. B1, B2, B3 Function Buttons: Press these buttons above the display to cycle between pages on the display
or enable certain functions.
21. K1, K2, K3 Knobs: Turn these knobs to adjust various settings and parameters as shown on the display.
Important: These knobs have absolute position only. This means that as you are moving between banks of
controls, the knob’s position may not align with the current setting of the parameter in that bank. When this
happens, an arrow will appear to the left or right of the parameter name, pointing in that direction. Turn the
knob in the direction shown until the parameter becomes selected and the arrow disappears. You will now
be able to regain control of the selected parameter using the knob.
22. Fader: The fader can be used to adjust various pad and kit parameters. By default, the fader adjusts pad
volume.
Press and hold SHIFT and press PAD 9 – FADER to select a different parameter to control. See Menus >
Fader for more information.
While in Step Edit mode, you can also use the fader to adjust event timing.
Important: Like the knobs, the fader has absolute position only. This means that as you are moving between
different controls, the fader’s position may not align with the current setting of the new parameter. The
brightness of the Fader LED indicates the relative position of the current parameter value. The brighter the
LED, the higher the value. Move the fader until the LED begins changing brightness again, indicating the
fader has regained control of the current parameter value.
23. ERASE: This button is used to erase samples, sequences, events, and automation.
To erase a sample from a pad, stop playback in Sample Mode, then press and hold this button and press a
pad. If playback is active, press and hold this button and then press and hold a pad to erase note events from
that pad on the current sequence. While in Step Edit Mode, you can also press and hold this button and then
press a pad to erase all events from that pad.
To erase a sequence, press and hold this button and then press a pad in Sequence Mode.
19
To erase automation, select the pad that contains the automation you want to erase. Then, press and hold
this button and move the K1–K3 Knob for the parameter with recorded automation. If the FADER is set to
control a parameter with automation, you can also move the FADER while holding ERASE. A menu will
appear on the display for confirmation. Press the B3 Function Button to continue, or press the B1 Function
button to cancel.
COPY: Press and hold SHIFT and press this button to initiate the copy process for samples and sequences.
The currently selected pad determines the sample or sequence that is being copied. While still holding SHIFT
and COPY, press a pad or pads to select the destination(s) for the copied sample or sequence. Selected pads
turn red, and can be pressed again to deselect. Finally, release SHIFT and COPY to complete the copy
process for the sample or sequence.
24. NOTE REPEAT: Press this button to engage Note Repeat mode. When enabled, pressing a pad will cause it
to sound repeatedly at the set time division. Use the B1–B3 Function Buttons to set the current division.
You can also press and hold this button to temporarily engage Note Repeat. Release the button to disengage
Note Repeat.
TRIPLET: While Note Repeat is engaged, press and hold SHIFT to display triplet time divisions for selection
using the B1–B3 Function Buttons.
25. PAD BANK: Press this button to cycle between pad banks A–H. You can also press and hold this button and
press PADS 1–8 to jump directly to a bank. The current bank is shown on the top panel next to the MAIN
VOLUME control.
Press and hold SHIFT and press this button to move to the previous pad bank.
26. SAMPLE SELECT: Press this button to open the sample browser, where you can browse and select a sample
to add to the current pad from the internal drive or a connected microSD card (not included).
SAVE SAMPLE: Press and hold SHIFT and press this button to save the currently selected sample. See
Loading and Saving Samples for more information.
27. TAP TEMPO: Press this button at a regular interval to set a new project tempo. You can also press and hold
this button in any mode and use the ENCODER to adjust the project tempo from the BPM pop-up.
METRO: Press and hold SHIFT and press this button to cycle the metronome (or “click”) between its three
states: Off (the metronome does not play), On (the metronome always plays during playback and recording),
or Record (the metronome only plays during recording).
20
28. PADS: These 16 velocity-sensitive pads with poly-aftertouch are used to trigger samples and sequences, and
perform other functions. See the Operation chapter to learn more about using the pads in each mode.
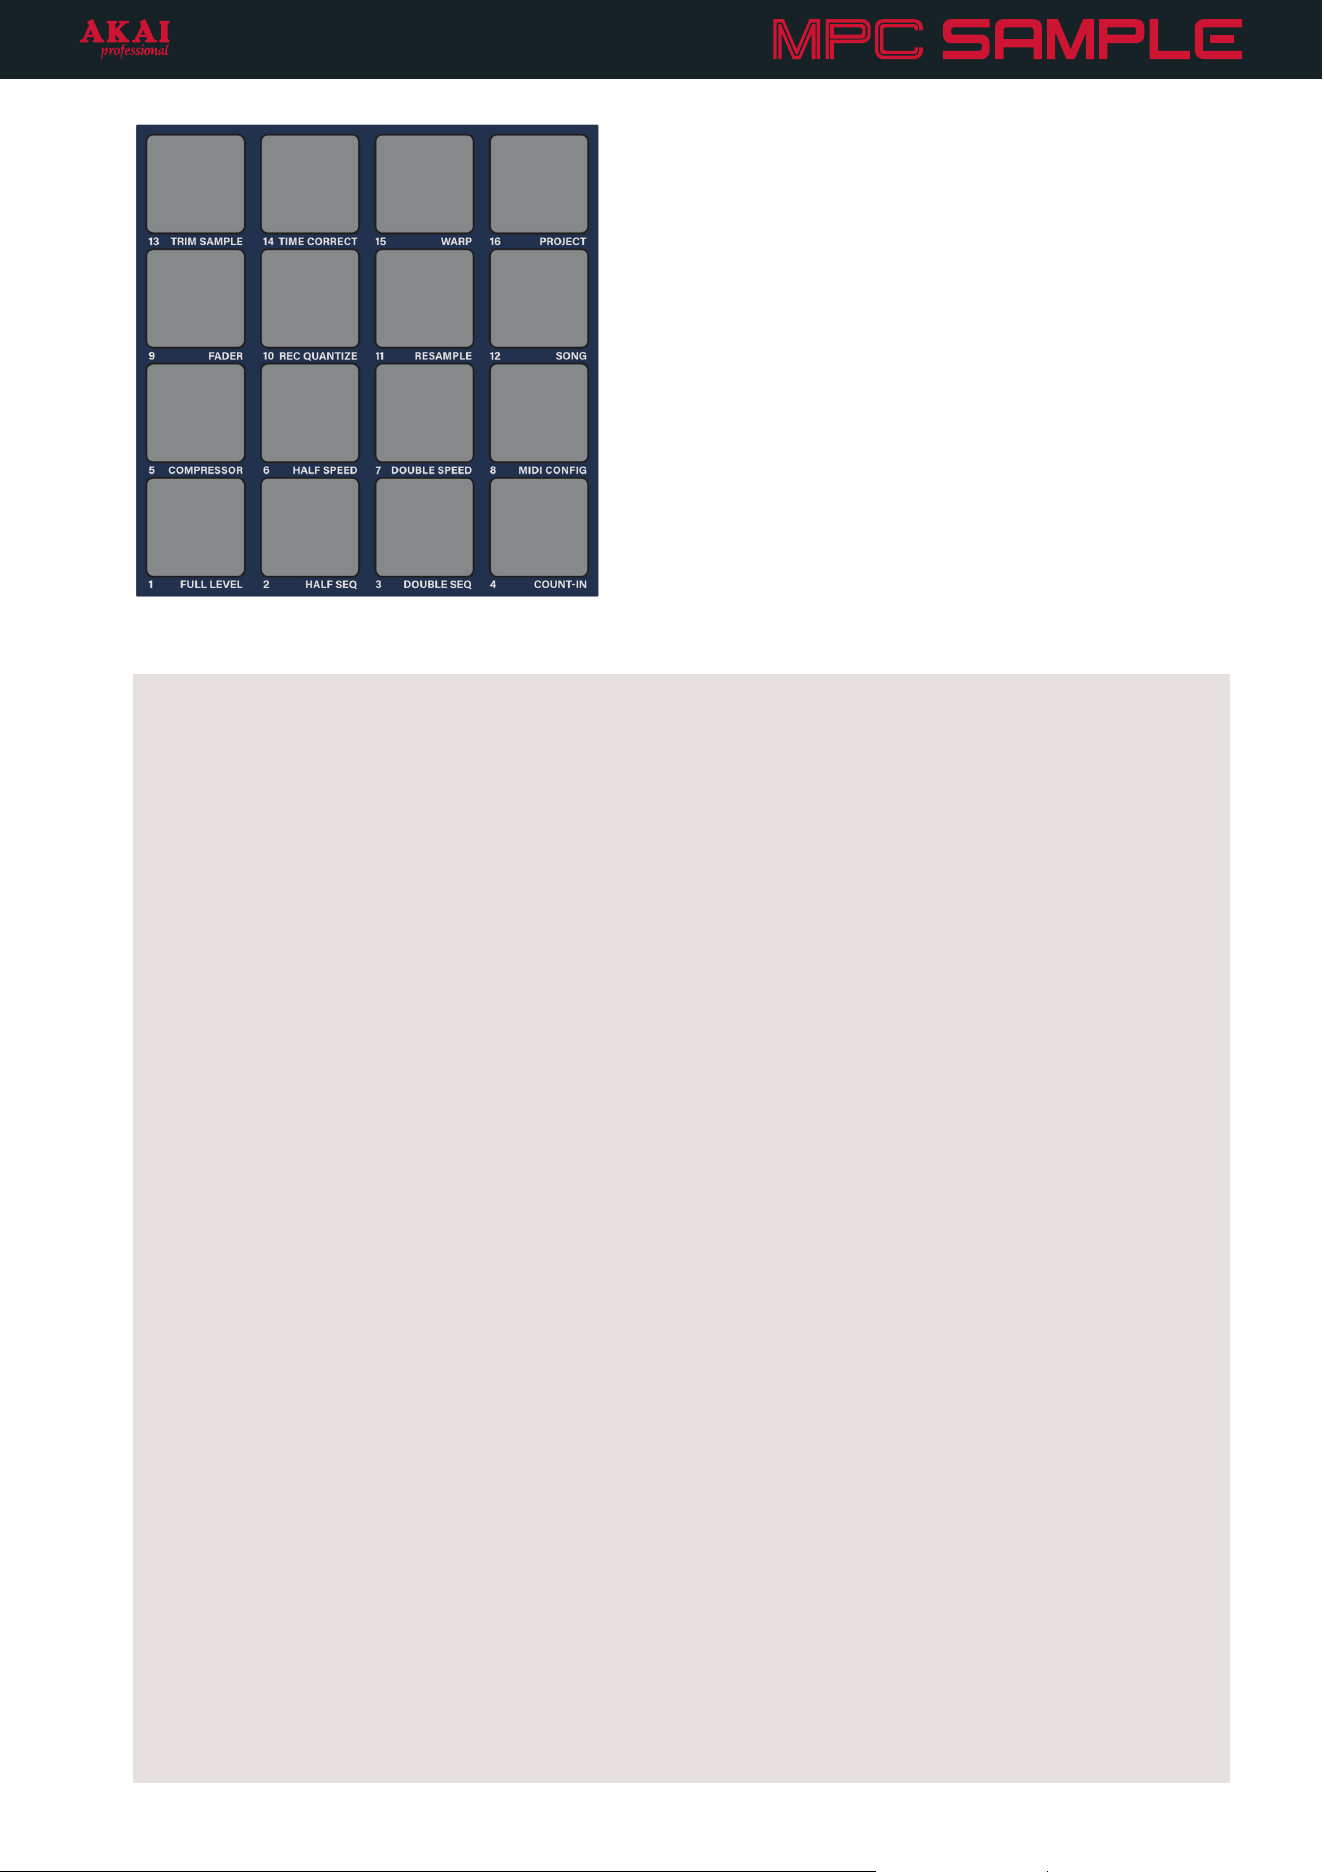
SHIFT FUNCTIONS: Press and hold SHIFT and press each pad to perform the additional function printed
below the pad.
• PAD 1 – FULL LEVEL: Sets all pads to play at full velocity, no matter how soft or hard they are struck.
• PAD 2 – HALF SEQ: Cuts the current sequence length in half.
• PAD 3 – DOUBLE SEQ: Doubles the length of the current sequence, duplicating all recorded events.
• PAD 4 – COUNT-IN: Activates or deactivates the count-in, which gives you a one-bar introduction prior
to recording a sequence.
• PAD 5 – COMPRESSOR: Opens the Compressor menu, where you can apply the compressor effect and
adjust its parameters.
• PAD 6 – HALF SPEED: Makes the events of the current sequence play back at half the speed, taking twice
as much space in the sequence.
• PAD 7 – DOUBLE SPEED: Makes the events of the current sequence play back at twice the speed, taking
half as much space in the sequence.
• PAD 8 – MIDI CONFIG: Opens the MIDI Configuration menu, where you can adjust device settings for
MIDI and CV, as well as reset MPC Sample.
• PAD 9 – FADER: Opens the Fader menu, where you can select the active fader parameter, or deactivate
it entirely.
• PAD 10 – REC QUANTIZE: Activates or deactivates record quantization, causing all events you record to
snap to the grid based on the current quantization setting. You can adjust the quantize value in the Time
Correct or Sequence Mode pages.
• PAD 11 – RESAMPLE: Automatically resamples all audio from the current sequence and adds it as a new
sample to the chosen pad.
• PAD 12 – SONG: Opens the Song Mode page, where you can combine your sequences into a song and
export it to a new audio file or a new sequence.
• PAD 13 – TRIM SAMPLE: Trims the sample on the selected pad, removing any content before the Start
point and after the End point.
• PAD 14 – TIME CORRECT: Opens the Time Correct menu, where you can adjust the timing and
quantization settings for pads in your project.
• PAD 15 – WARP: Toggles the current Warp mode between Time Stretch and Pitch. When set to Time
Stretch, adjusting the Warp value changes the length (and tempo) of the sample, but keeps the pitch the
same. When set to Pitch, adjusting the Warp values changes the length (and tempo) of the sample as well
as adjusting the pitch.
• PAD 16 – PROJECT: Opens the Project page, where you can load, save, or start a new project. You can
also access the internal microSD Card Storage from this menu when connected to a computer.
21
Mode: The buttons in this section determine the current function mode of MPC Sample. You can learn more
about these pages and functions in the Operation chapter.
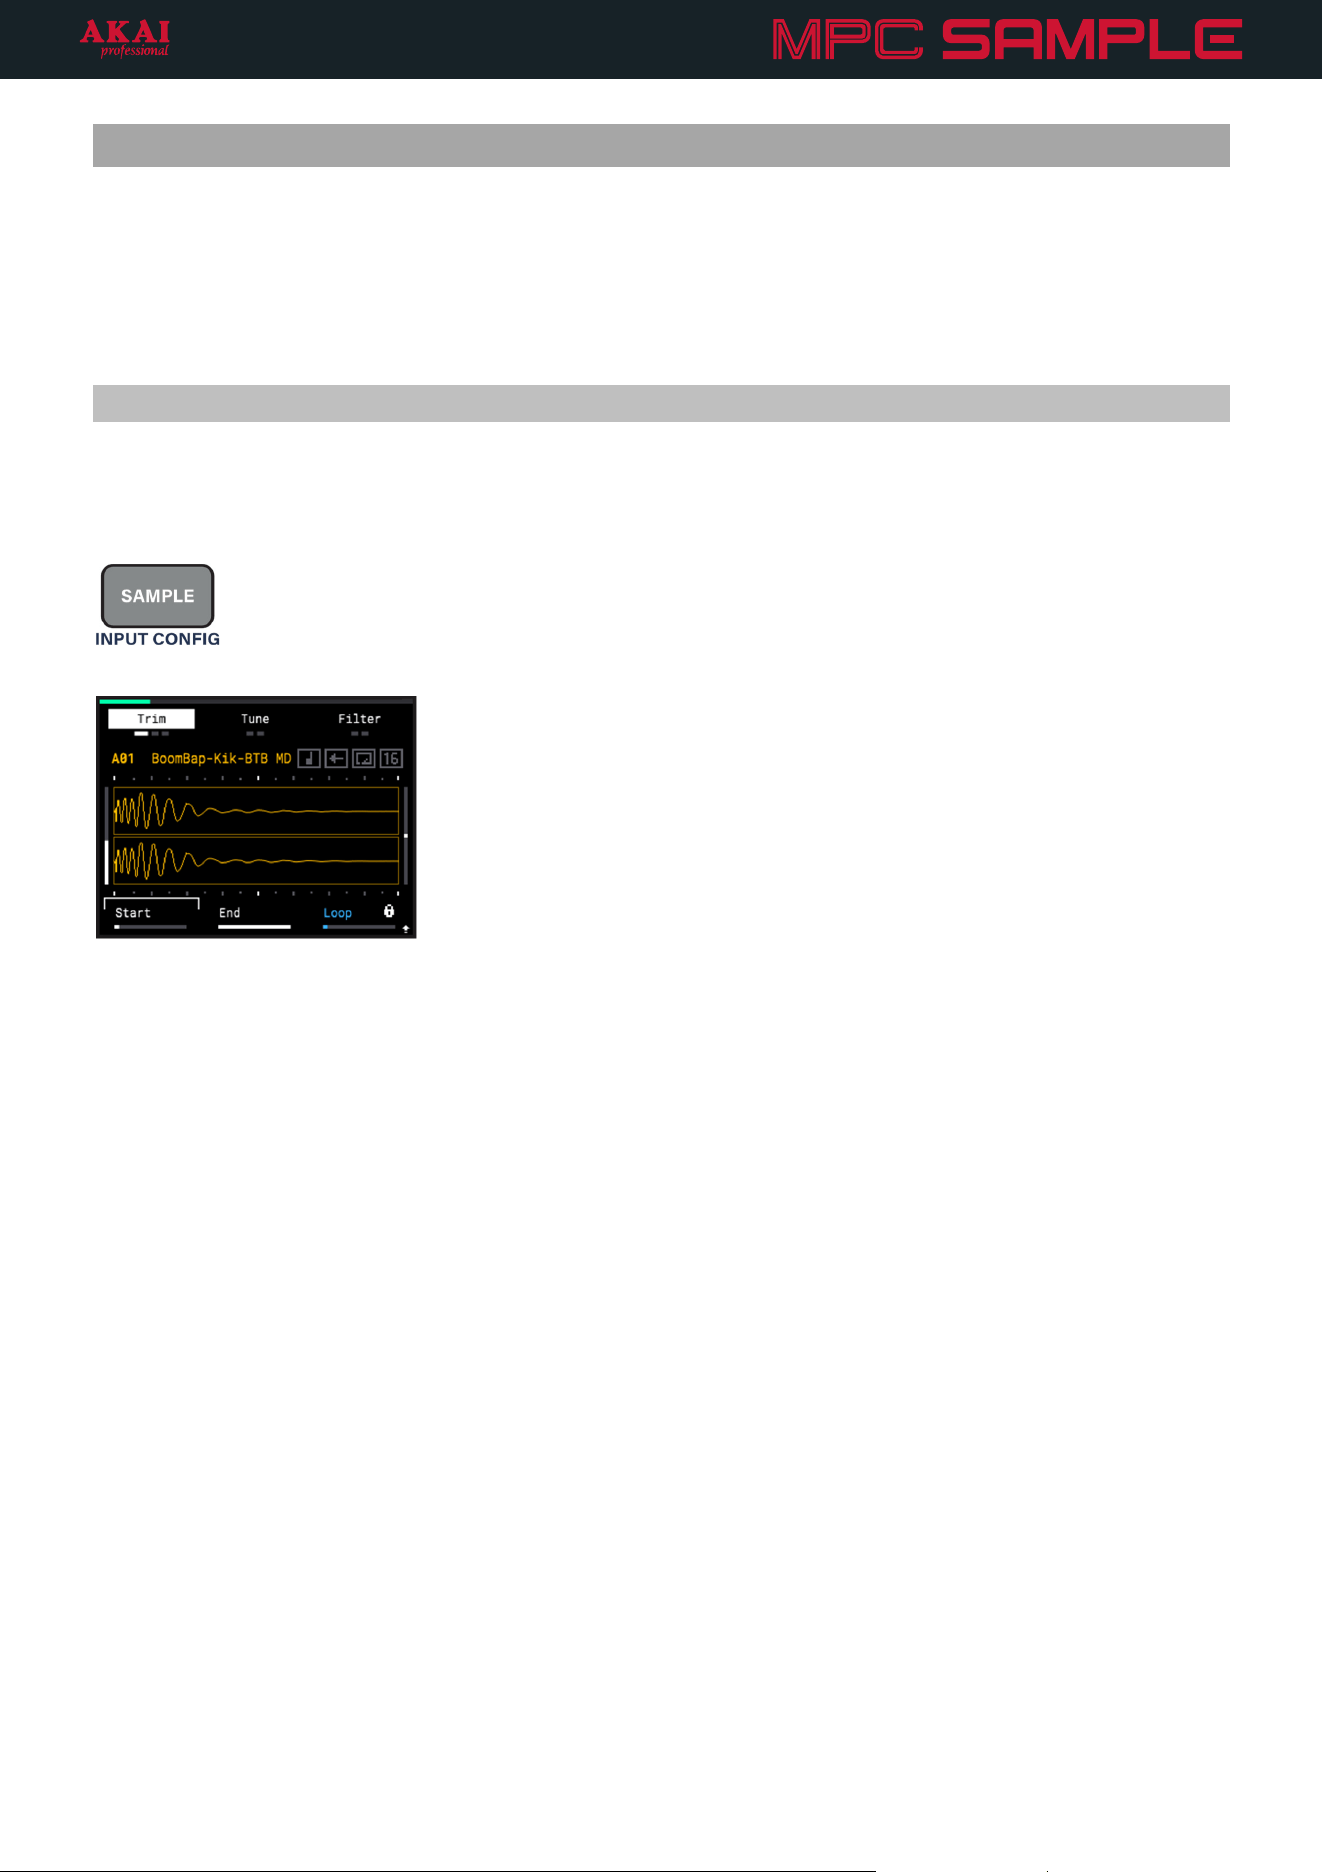
29. SAMPLE: Press this button to open Sample Mode. Here, you can trigger your samples, view and edit their
parameters, and more.
INPUT CONFIG: Press and hold SHIFT and press this button to enter the Input Configuration menu, where
you can select and adjust audio input sources.
30. SEQ: Press this button to enter Sequence Mode, where you can record and edit sequences of note events.
STEP EDIT: Press and hold SHIFT and press this button to enter the Step Edit menu, where you can view and
adjust individual events in your sequence per step.
31. PAD FX: Press this button to activate Pad FX mode, where you can use the pads to trigger effects that are
applied to your entire sequence.
FLEX BEAT: Press and hold SHIFT and press this button to enter Flex Beat FX mode. In this mode, the pads
trigger time-based effects that warp the pitch, time, and volume of your sequence for beat chops, DJ-style
scratches, and trance gate effects.
32. KNOB FX: Press this button to activate Knob FX mode, where you can use the K1–K3 KNOBS to adjust
effects applied to specific pads, freeing your pads for other uses.
FX SELECT: Press and hold SHIFT and press this button to open the Knob FX selection menu, where you can
select the active Knob FX and select the pads to which Knob FX is applied.
22
Pad Play: The buttons in this section determine the functionality of the pads while in Sample Mode. You can
learn more about these functions in the Pad Play chapter.
33. CHOP: Press this button to activate Chop Mode. When activated, the sample on the selected pad is
automatically chopped by the selected chop type (Threshold by default), and the pads are assigned to trigger
each available slice.
To return to Trim Mode, press the CHOP button again.
NOTE ON: Press and hold SHIFT and press this button to set the current pad to NOTE ON mode. In this
mode, pad playback occurs only while the pad is held down. NOTE ON mode is indicated on the Sample
page by the note icon (
).
34. LOOP: Press this button to activate loop playback for the current pad. While activated, triggering the pad
initiates the loop, which plays between the Loop Start Point (set using the K3 Knob while Loop Mode is active)
and the Sample End Point. Loop mode is indicated on the Sample page by the loop icon (
).
REVERSE: Press and hold SHIFT and press this button to activate reverse playback for the current pad. While
activated, triggering the pad starts sample playback from the Sample End Point and moves backwards to the
Sample Start Point (or Loop Start Point, if Loop playback is active). Reverse mode is indicated on the Sample
page by the arrow icon (
).
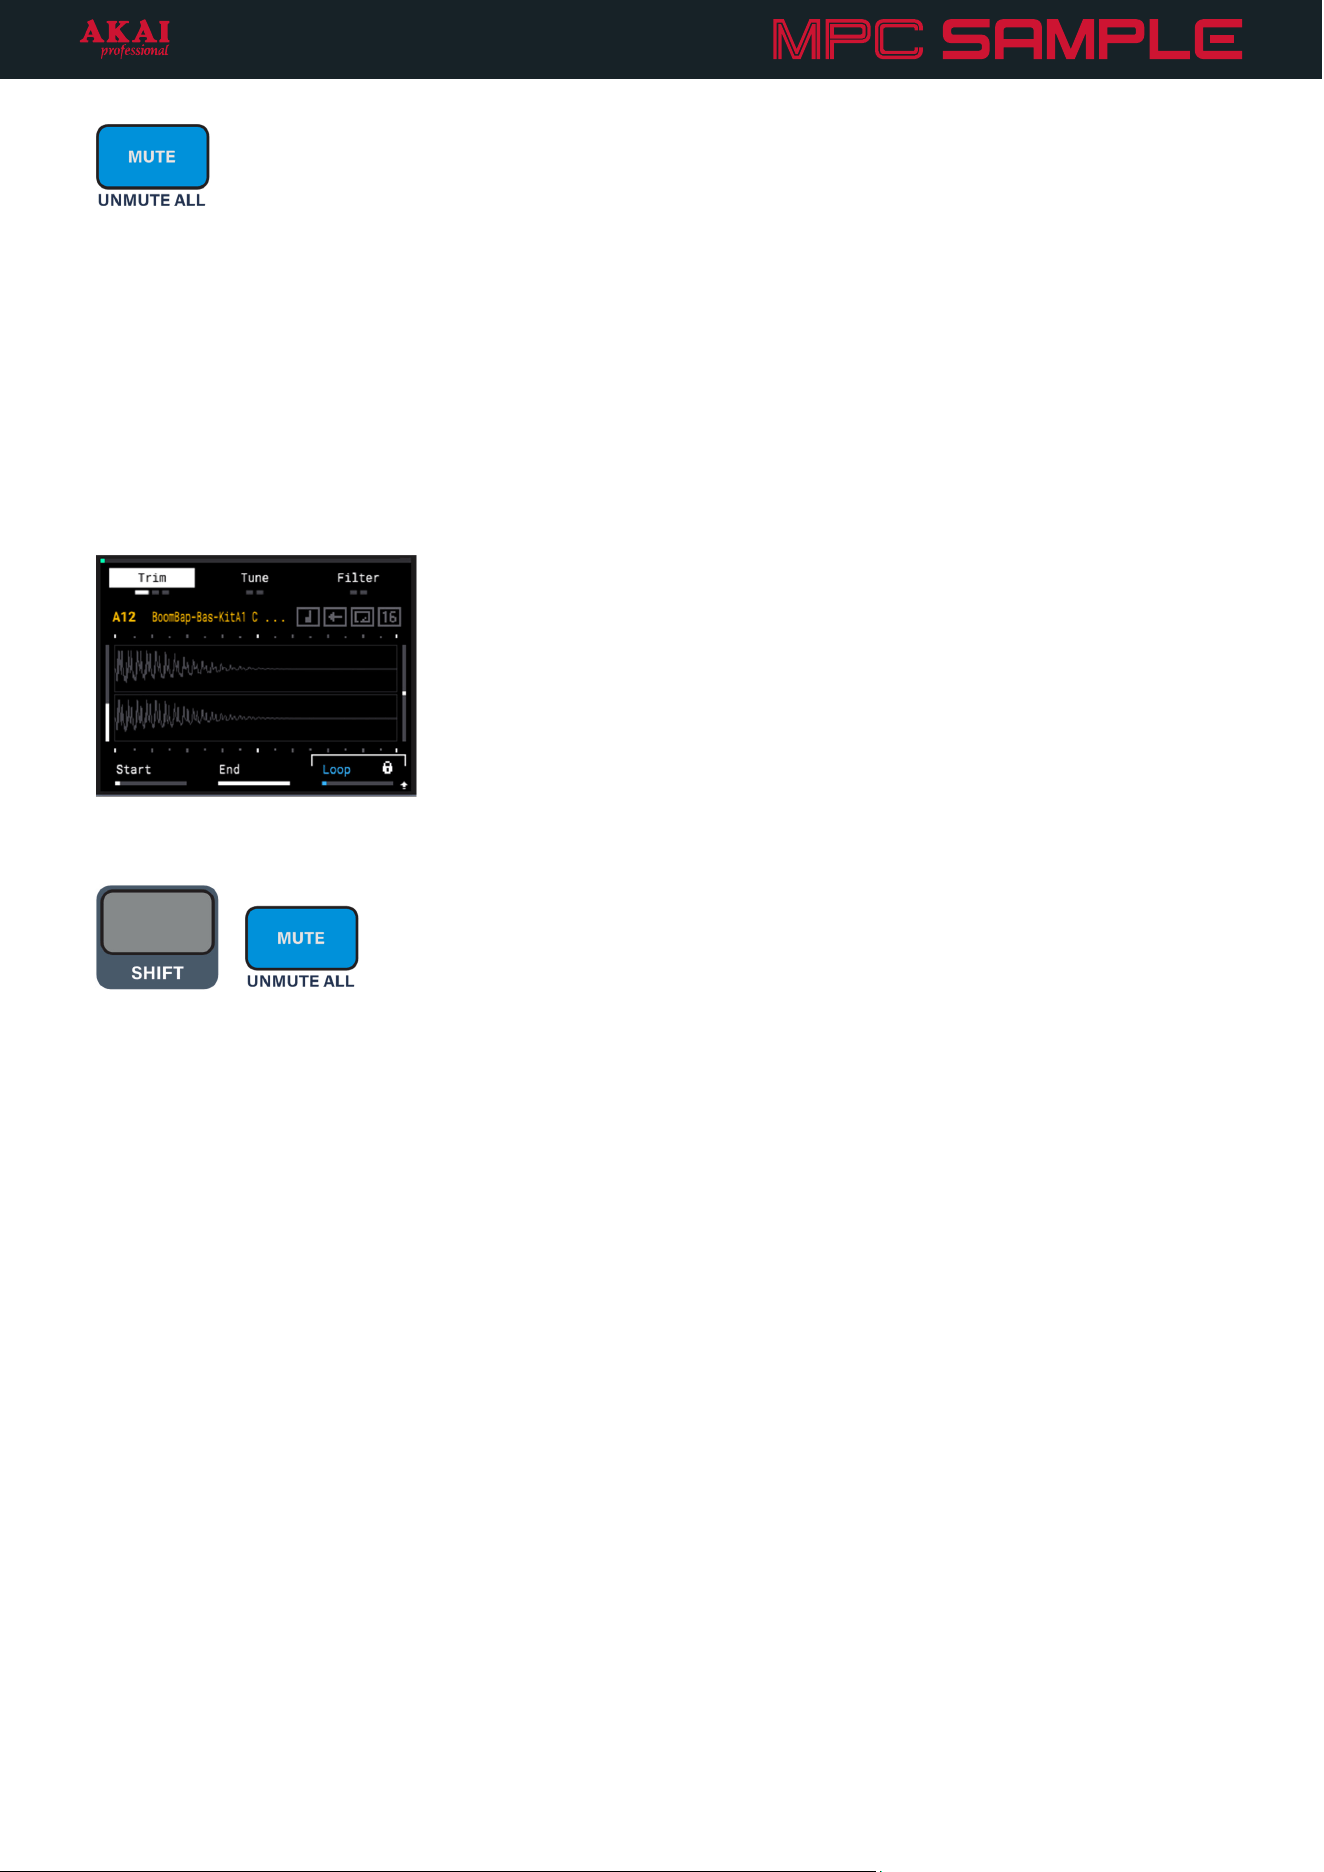
35. MUTE: Press this button to activate Mute mode for the pads in Sample Mode. While activated, press a pad to
mute it, which prevents its sound from being heard during playback, but does not remove any recorded
events from the sequence. Muted pads are lit red, while unmuted pads are lit yellow.
You can also press and hold this button to temporarily engage Mute mode. Release the button to disengage.
UNMUTE ALL: Press and hold SHIFT and press this button to unmute all muted pads.
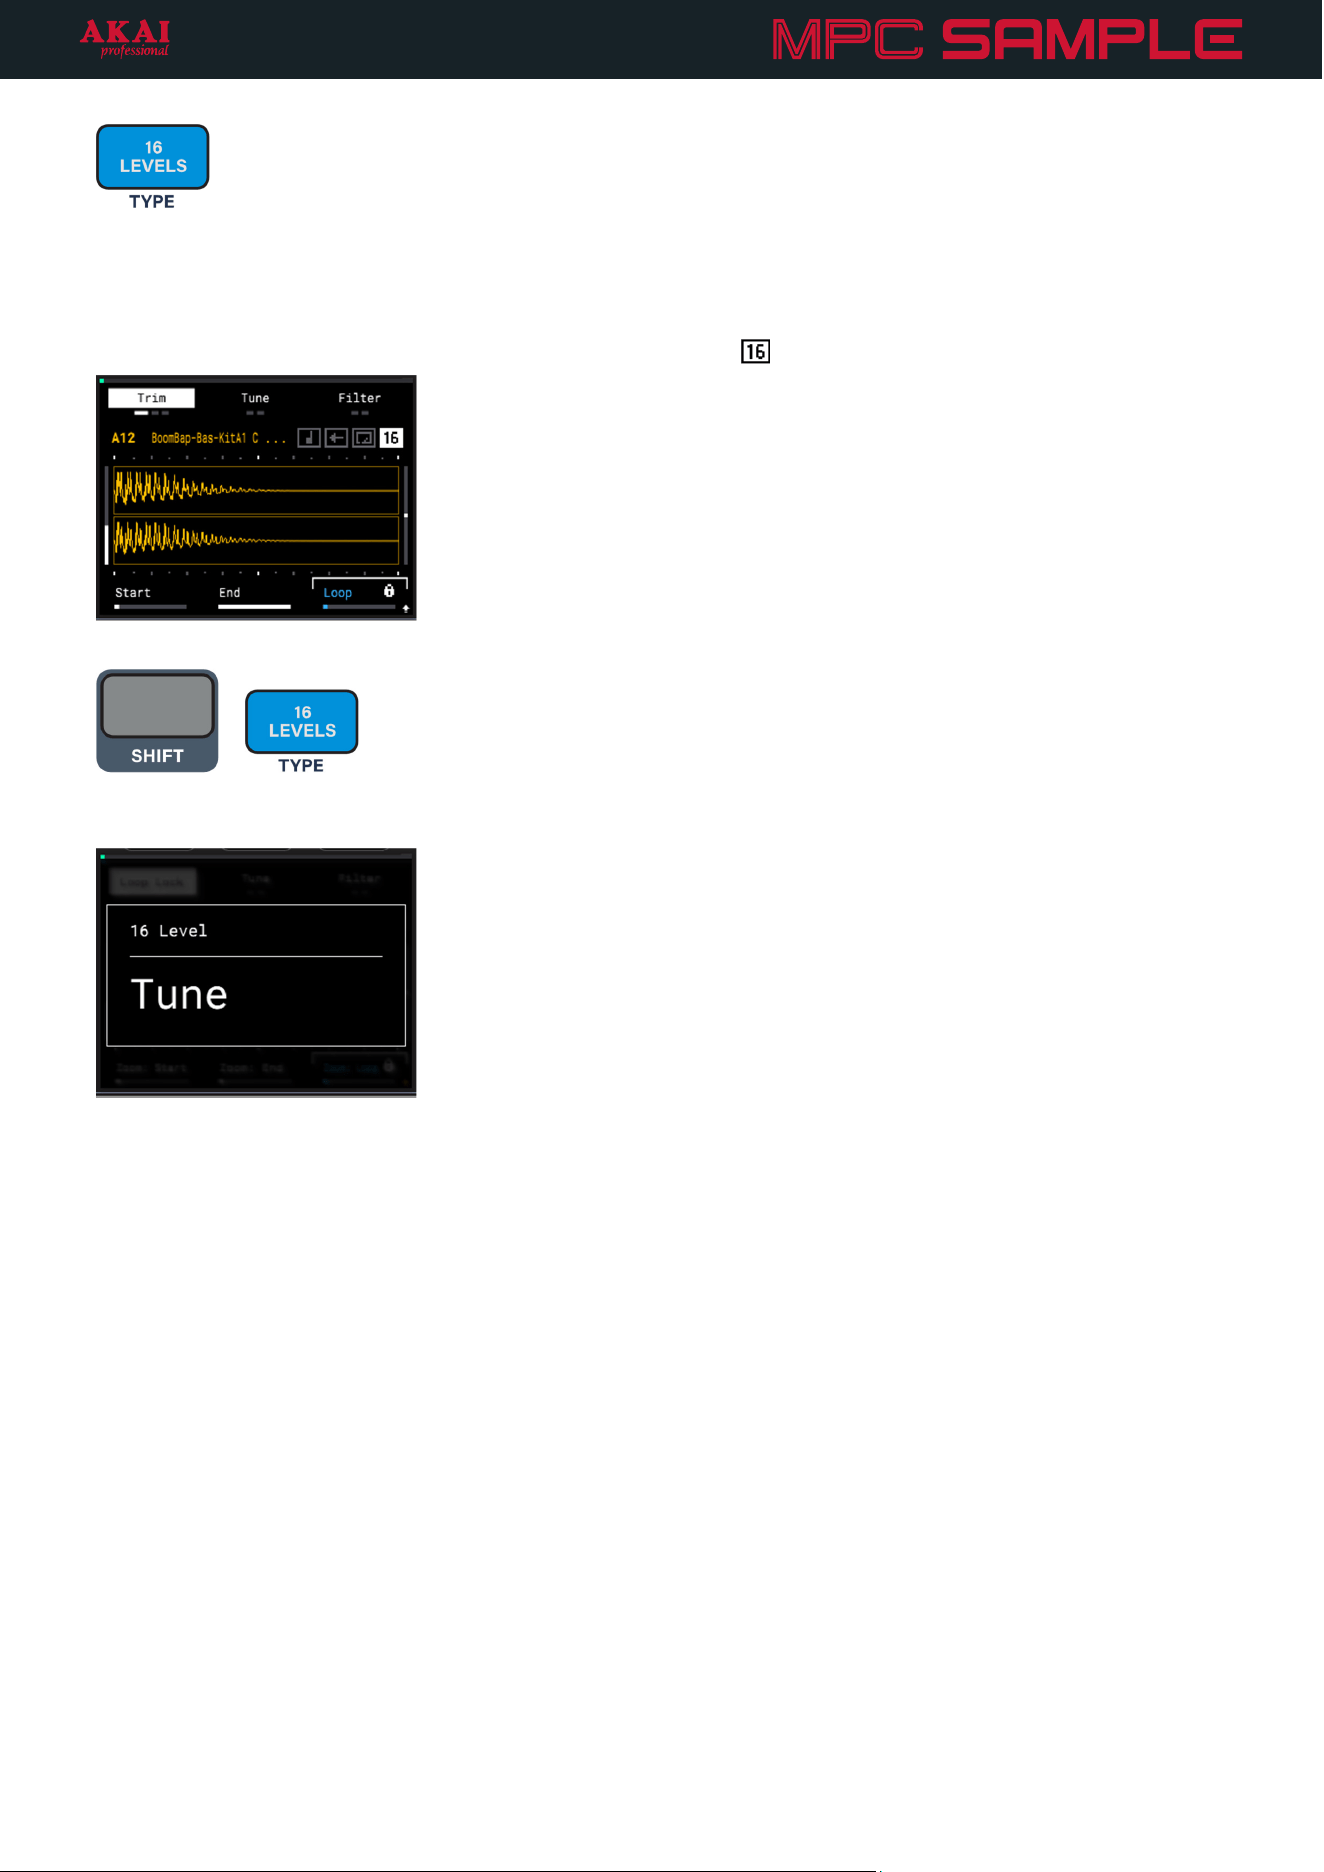
36. 16 LEVELS: Press this button to activate 16 Levels mode for the pads. While activated, the currently selected
sample is copied across all 16 pads, with the selected 16 Levels TYPE determining how the sample changes
across the 16 pads. 16 Levels mode is indicated on the Sample page by the 16 icon (
).
TYPE: Press and hold SHIFT and press this button to select the 16 Levels type:
• Velocity: The sample increases in velocity across the 16 pads.
• Filter: The filter cutoff point of the currently selected filter type is adjusted across the 16 pads. Pads 1–8
increase the cutoff from the minimum point to the current Cutoff value. Pads 9–16 increase the cutoff
from the current value to the maximum point. Depending on the current Cutoff value, the range of
available value adjustment may be limited. The Cutoff value can be adjusted using the Filter functions in
Sample Mode.
• Tune: The pitch of the sample is adjusted across the 16 pads. The sample at its original pitch is placed
on PAD 4, with pads below this lowering in pitch and pads above this increasing in pitch.
23
37. SAMPLE RECORD: Press this button to enter Sample Record mode. In this mode, you can record audio from
connected sources to create your own samples. See the Sample Record Mode chapter for more information.
RECALL: Press and hold SHIFT and press this button to retrieve the last 25 seconds of audio input from the
currently selected input source into the next available pad.
38. SEQ RECORD: Press this button to enter Sequence Record mode. See the Sequence Mode chapter for more
information.
RECALL: Press and hold SHIFT and press this button to retrieve events played during the last loop of
sequence playback into the sequence.
39. PLAY: Press this button to start playback or recording from the beginning of the sequence.
CONTINUE: Press and hold SHIFT and press this button to start playback from the current playhead position.
40. STOP: Press this button to stop playback or recording.
Quickly double-press this button to stop all audio.
Tip: The buttons’ LED states provide additional information on what functions are active, available, or unavailable.
If a function is currently active, the associated button is brightly lit. For example, when you are in Sample Mode,
the SAMPLE button is brightly lit.
If a button is available to be used but not active, it is dimly lit. If a button is not available to be used, the LED is
completely off. For example, if you are in Sequence Mode, you cannot access the Chop or 16 Levels functions, so
those buttons’ LEDs are off.
When you press and hold SHIFT, buttons that have available secondary functions are dimly lit in red if they are
inactive, or brightly lit in red if they are active. For example, if you are in Knob FX Select Mode, the button is
brightly lit in red. This will remain brightly lit in red as long as you are in this mode, whether or not you are holding
SHIFT.
24
Operation
This chapter describes MPC Sample’s different modes, functions, and menus.
For more information on specific controls or connections, refer to the previous Features chapter.
Sample Mode
Sample Mode is the “main” mode of MPC Sample, where you can trigger your samples, view and edit their
parameters, and more.
To open Sample Mode, press the SAMPLE button.
Press a PAD to trigger it and view its sample on the display.
To select and view a sample without triggering it, press and hold the SAMPLE button and press a PAD.
Turn the K1-K3 Knobs to select and adjust parameters as described below.
Alternatively, press the ENCODER to cycle between the K1–K3 parameters at the bottom of the screen, and then
turn the ENCODER or press the -/+ buttons to adjust the selected parameter. You can also press and hold SHIFT
and press the ENCODER to cycle backwards between the parameters.
25
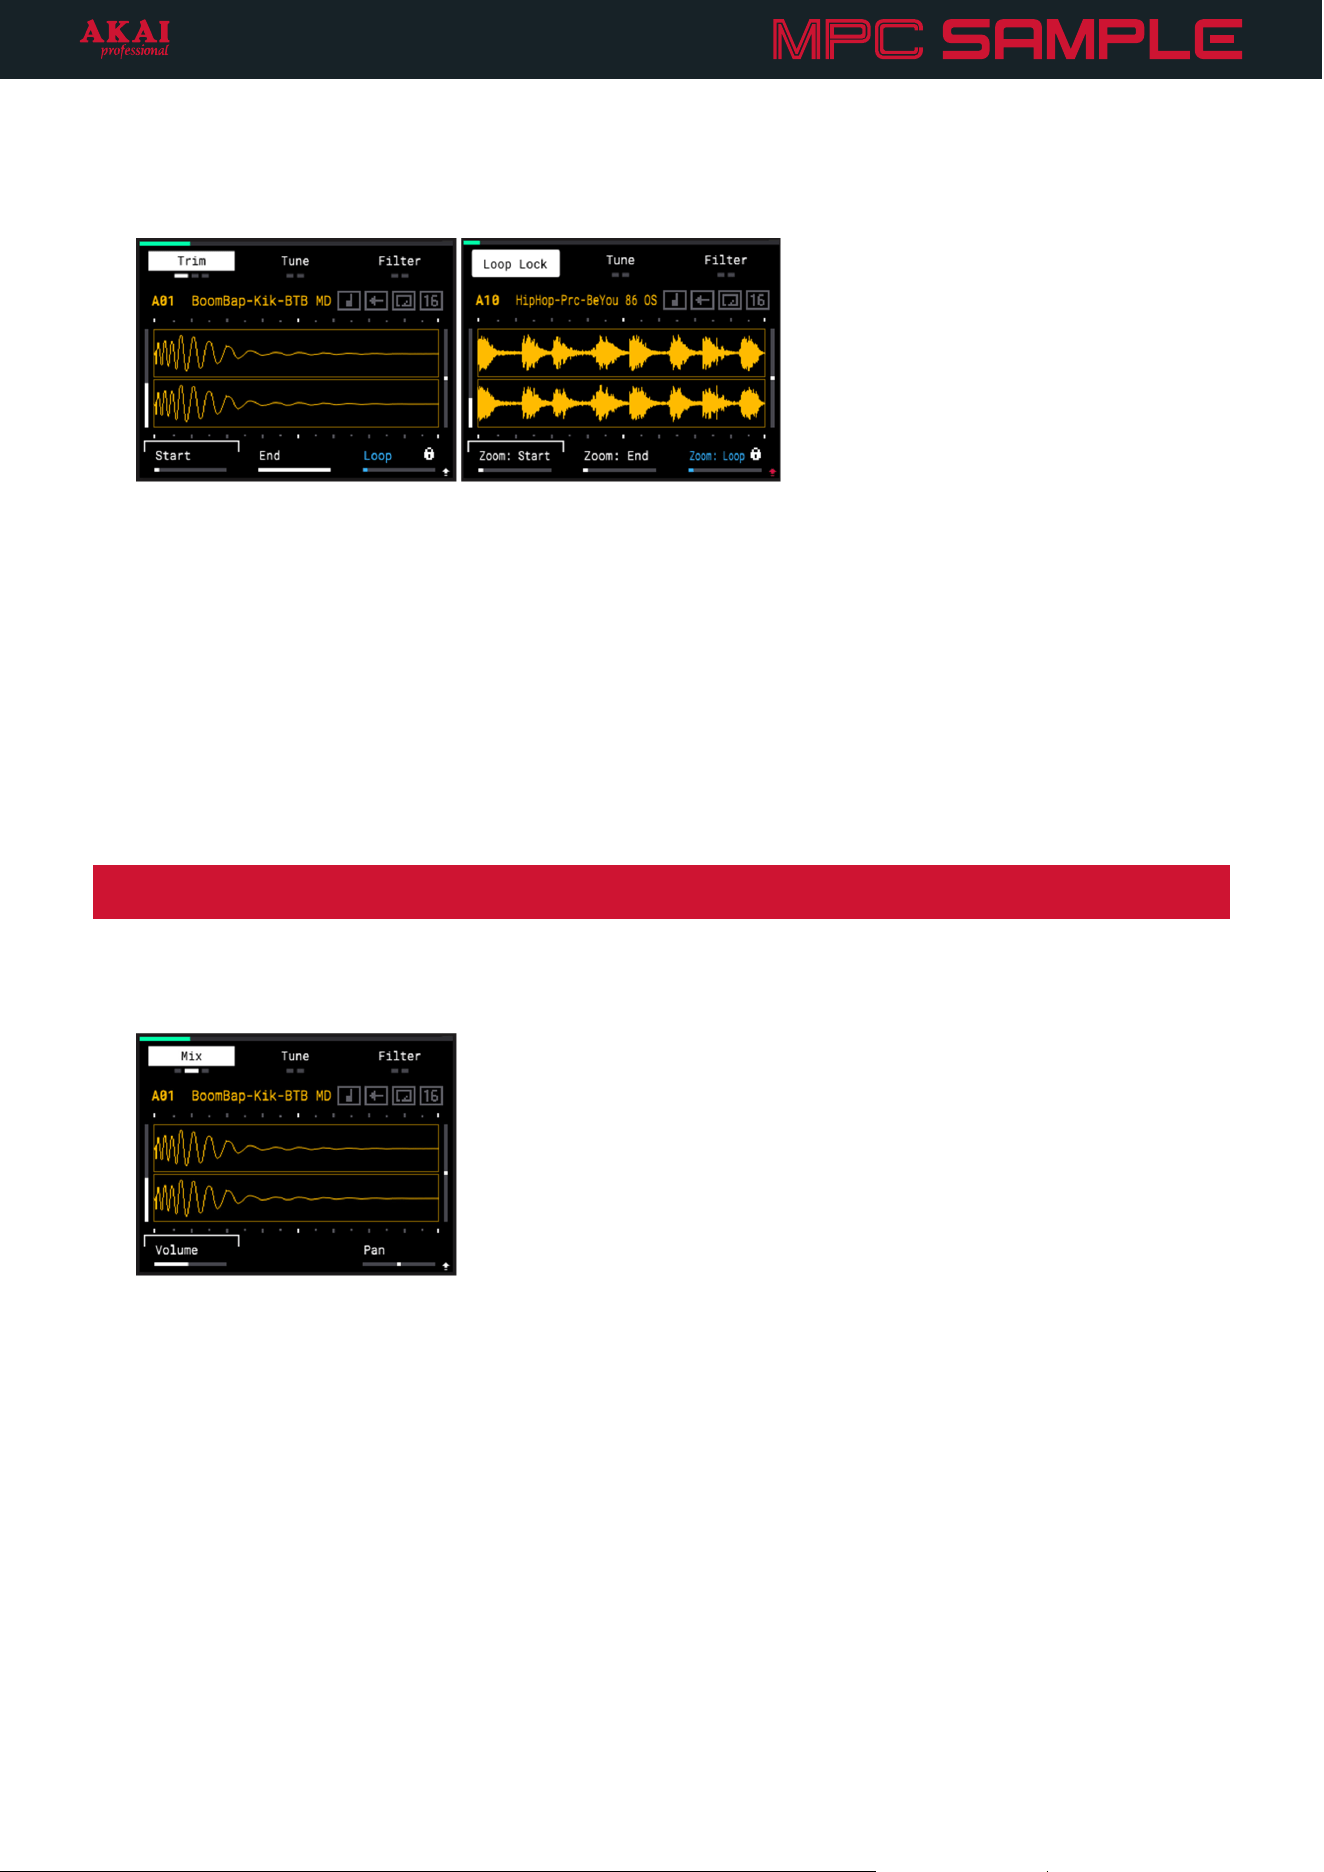
Press the B1 Function Button to cycle between the following options:
Trim: Use these functions to edit the length of the selected sample.
• K1 – Start: Adjust the sample start point (0 – 100%).
SHIFT+K1 – Zoom: Start: Zoom in or out of the sample waveform at the sample start point (0 – 100%).
• K2 – End: Adjust the sample end point (0 – 100%).
SHIFT+K2 – Zoom: End: Zoom in or out of the sample waveform at the sample end point (0 – 100%).
• K3 – Loop: Adjust the loop point (0 – 100%).
SHIFT+K3 – Zoom: Loop: Zoom in or out of the sample waveform at the loop point (0 – 100%).
SHIFT+B1 – Loop Lock: Activate or deactivate loop lock. When activated, loop start is locked to the sample
start.
Note: When Chop Mode is enabled, the Trim controls are replaced by Chop controls. See the Pad Play section
for more information on Chop Mode controls.
Mix: Use these functions to adjust mix settings for the sample.
• K1 – Volume: Adjust the sample volume (-INF, -74.00 – +6.00 dB). The vertical meter to the left of the sample
waveform displays the current volume setting.
• SHIFT+K2 – Kit Volume: Adjust the kit volume, or the overall volume of all samples (-INF, -74.00 – +6.00 dB).
• K3 – Pan: Adjust the left/right stereo panning of the sample (50L – C – 50R). The vertical meter to the right of
the sample waveform displays the current pan setting.
26
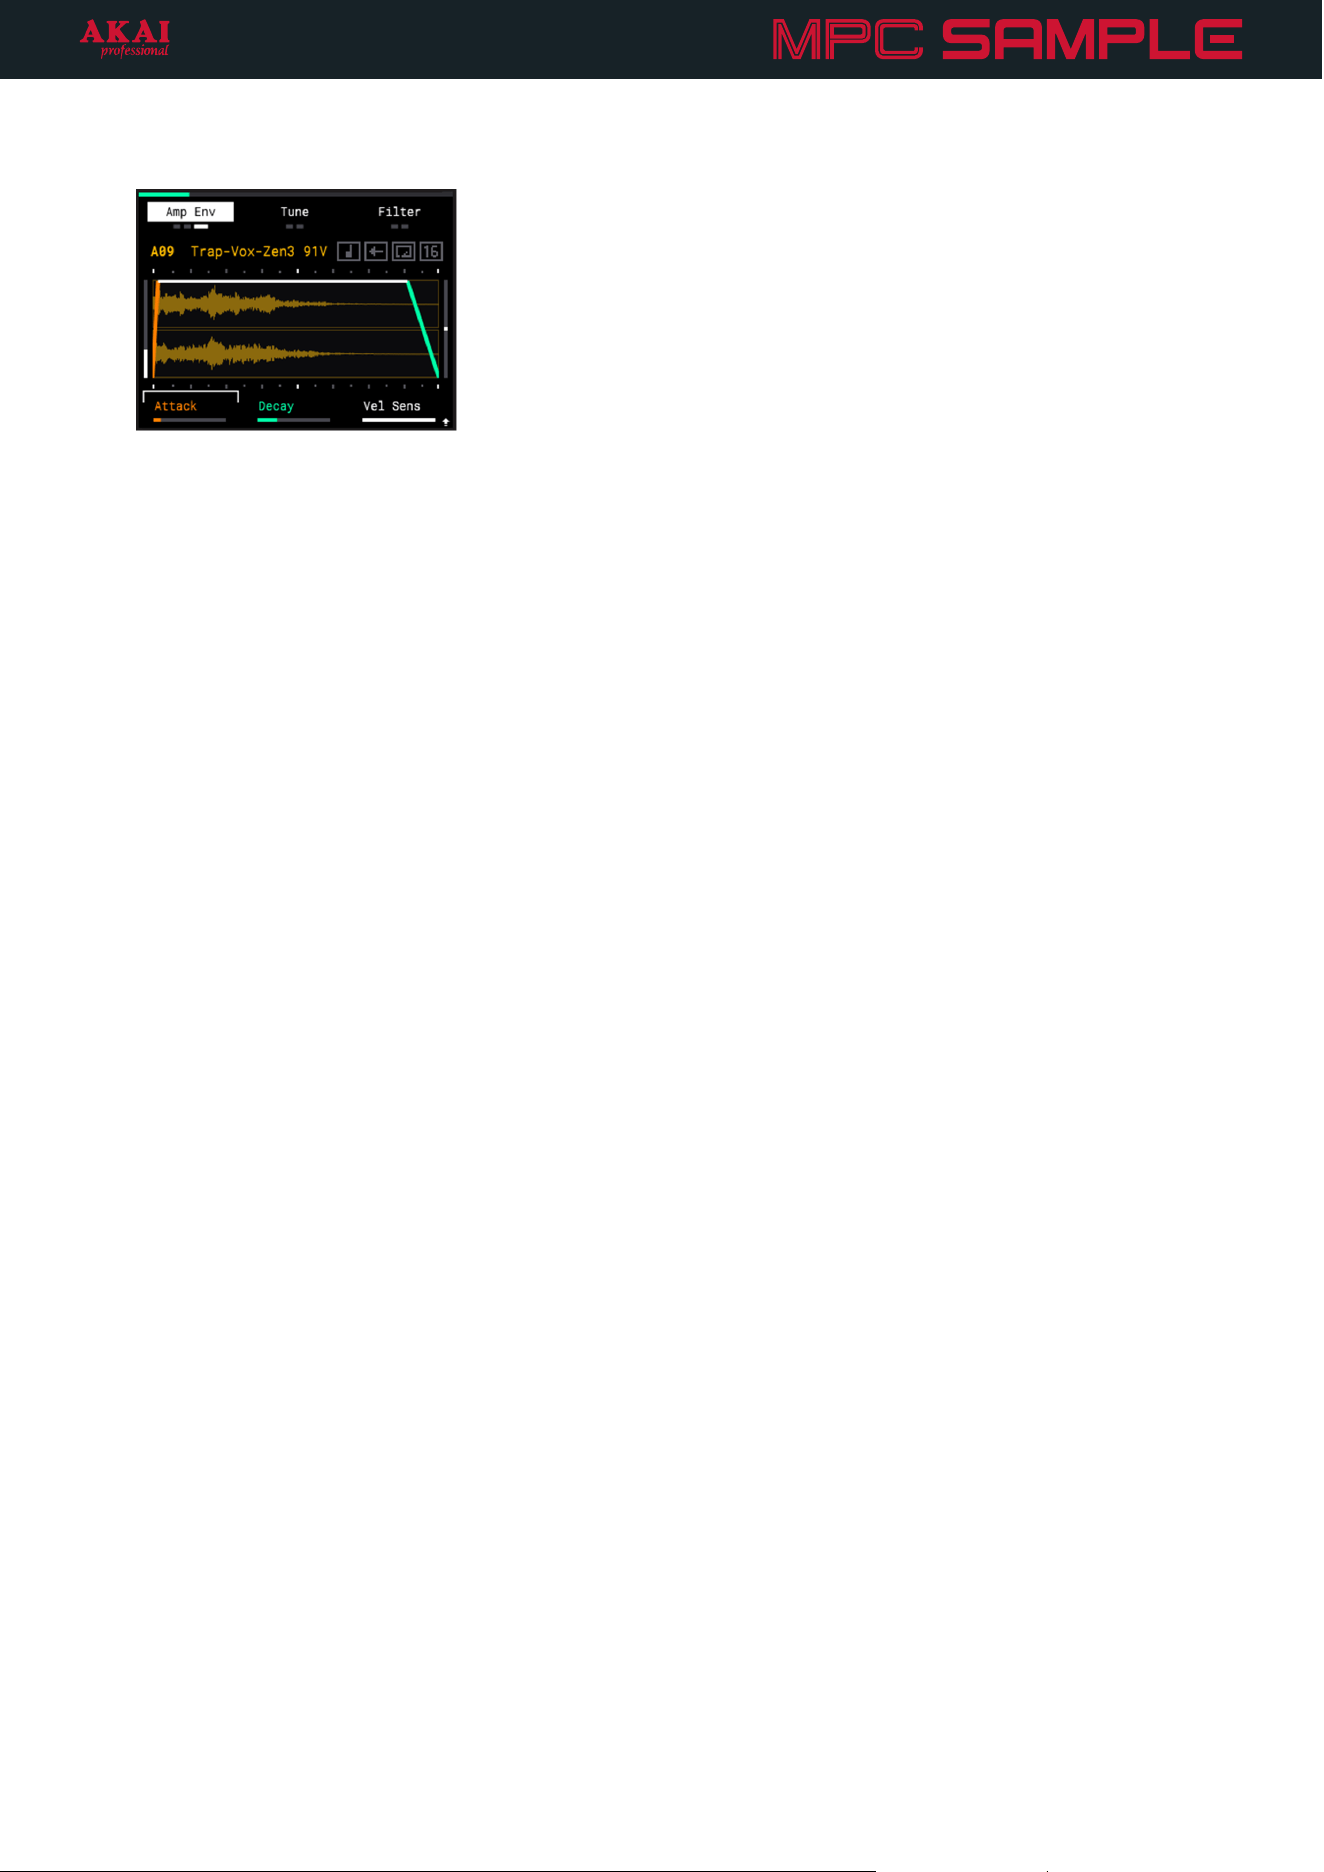
Amp Env: Use these functions to adjust the amplitude envelope of the sample, which allow you to change the
sample dynamics.
• K1 – Attack: Adjust the attack phase of the amplitude envelope (0 – 127). This determines how quickly the
sound fades in from the sample start point.
• K2 – Decay: When the sample is set to One Shot playback, use this knob to adjust the decay phase of the
amplitude envelope (0 – 127). This determines how quickly the sound fades out, either from the sample start
point or end point.
SHIFT+K2 – Decay From: This setting determines whether the decay phase of the amplitude envelope is
applied to the sample Start or End when the sample is set to One Shot playback.
K2 – Release: When the sample is set to Note On playback, use this knob to adjust the release phase of the
amplitude envelope (0 – 127). This determines how quickly the sound fades out when the pad is released.
See the Pad Play section to learn more about Note On playback.
• K3 – Vel Sens: This setting determines how responsive the sample level is to your playing (0 – 127). When
set to 127, the pads are the most responsive to your playing dynamics as they can be, so that soft hits trigger
low velocity events. When set to 0, the sample plays at full velocity no matter how soft or hard you hit the pad.
27
Press the B2 Function Button to cycle between the following options:
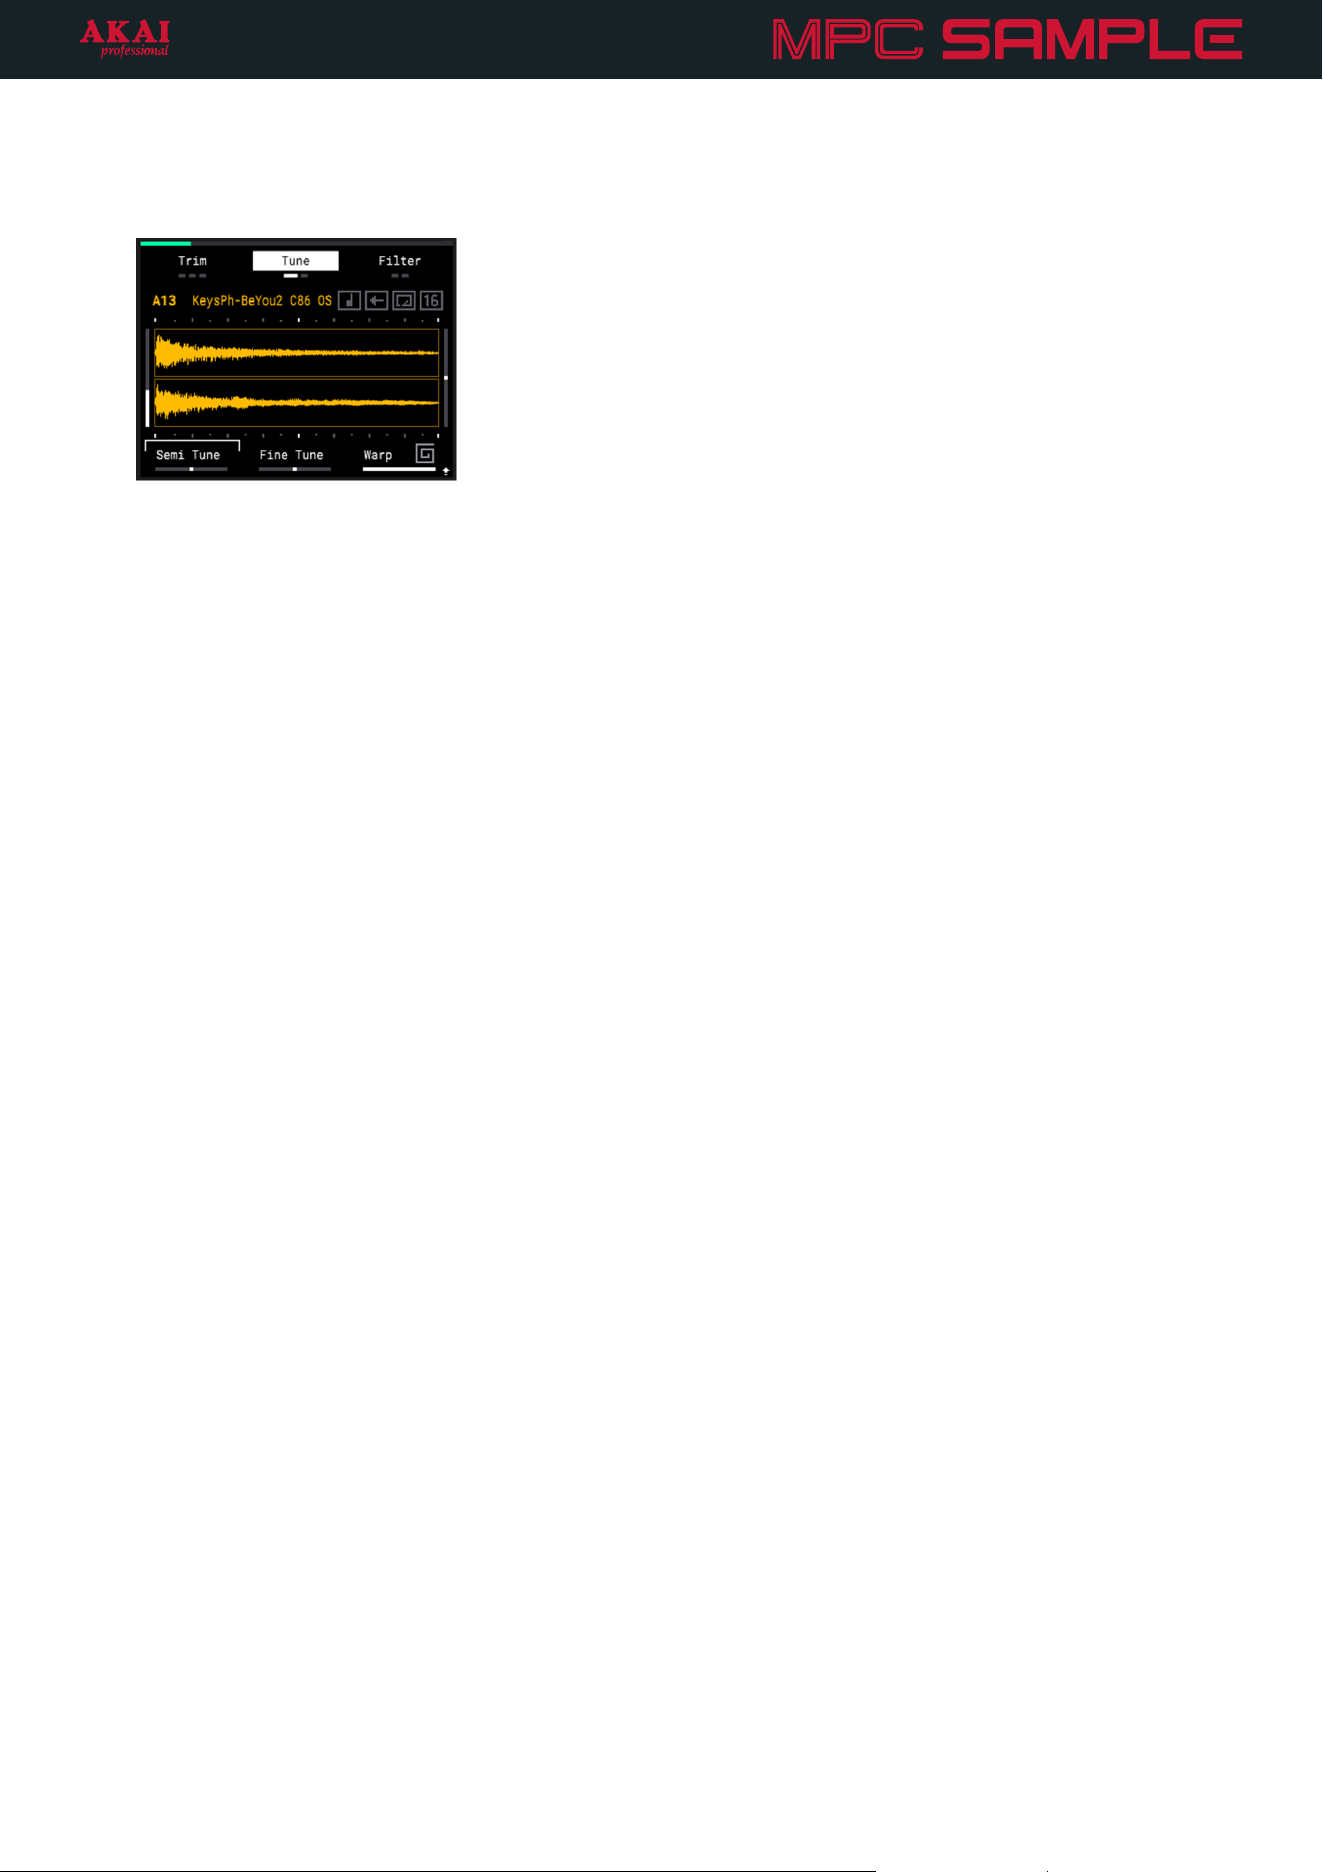
Tune: Use these functions to adjust sample tuning.
• K1 – Semi Tune: Adjust the coarse tuning of the sample pitch in semitones (-24 – 0 – 24).
• K2 – Fine Tune: Adjust the fine tuning of the sample pitch in cents (-90 – 0 – 90).
• K3 – Warp: This setting adjusts the Warp value (Off, 50 – 200%, Seq). Press and hold SHIFT and press PAD
15 – WARP to adjust the Warp mode.
When Warp is set to Time Stretch, adjusting this value changes the length (and tempo) of the sample, but
keeps the pitch the same. If set to Off, there is no change to the length of the sample. At 50%, the sample is
half as long, or twice as fast. At 200%, the sample is twice as long, or twice as slow. If set to Seq, the sample’s
tempo remains locked to the Sequence tempo.
When Warp is set to Pitch, adjusting this value changes the length (and tempo) of the sample in the same
way, but also adjusts the pitch of the sample accordingly. When this Warp mode is selected, the Semi Tune
and Fine Tune parameters are unavailable.
• SHIFT+K3 – # Beats: This setting determines the length of the sample in beats. This is used in conjunction
with the Warp setting to determine how the sample changes in tempo.

28
Play: Use these settings to adjust sample playback functionality.
• K1 – Polyphony: This setting determines whether the polyphony of the sample is Mono or Poly. When set
to Mono, each time the pad is struck, the current sample playback will stop, and the sample will restart from
the sample start point. When set to Poly, each time the pad is struck, the sample will play in its entirety. Striking
the pad again will replay the sample from the sample start point while the previous trigger continues.
• K2 – Mute Group: This setting allows you to assign pads to mute groups (Off, 1 – 16). When pads are
assigned to the same mute group, the last pad played silences any other playing samples in the same group.
For example, you can assign a closed hi-hat sample and open hi-hat sample to the same mute group.
Triggering the closed hi-hat after the open hi-hat stops the sound of the open hi-hat, mimicking the natural
playing dynamic of a hi-hat.
SHIFT+ K2 – Pad Link: This setting allows you to set two samples in the same Pad Bank to trigger at the same
time (Off, 1 – 16). For example, if you have a melodic sample on PAD 6 in Bank A that you want to trigger at
the same time as a drum break on PAD 7 in Bank A, set the Pad Link value on PAD 7 to 6. Now, each time
PAD 7 is triggered to launch the drum break, the melodic sample on PAD 6 is triggered at the same time.
Note, however, this will not affect PAD 7 in any other Pad bank.
• K3 – Offset: This setting allows you to apply a trigger offset to the sample (0 – 100%). This delays the start of
the sample audio after you hit the pad.
29
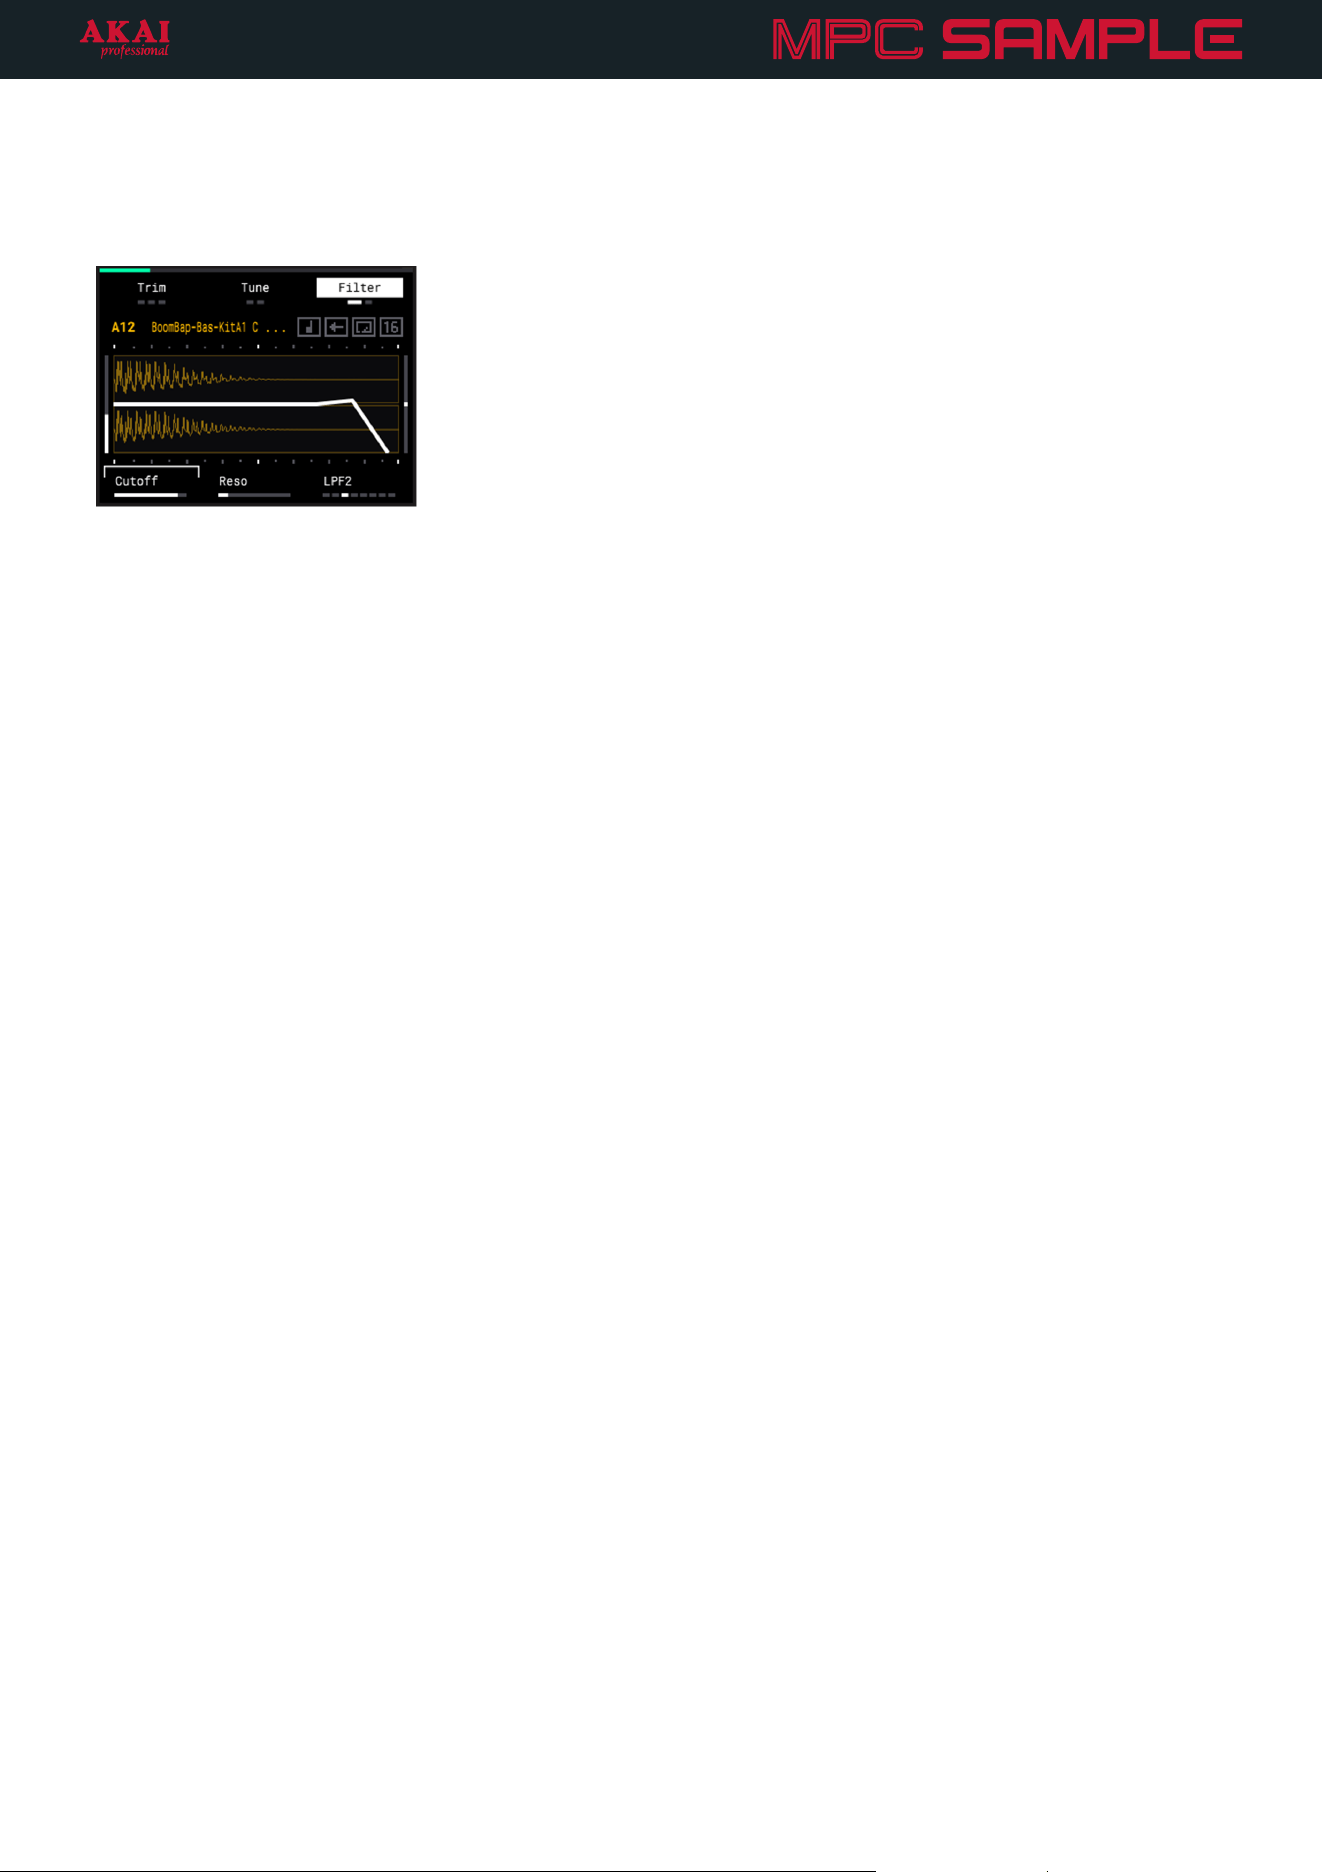
Press the B3 Function Button to cycle between the following options:
Filter: Use these functions to adjust the sample filter, which allows some of a sample’s audio frequencies to pass
through it and dampens other frequencies.
• K1 – Cutoff: Adjust the center frequency of the selected filter type (0 – 127). Frequencies below, above, or
around this frequency will be dampened, depending on the selected filter type.
• K2 – Reso: Adjust the resonance of the filter around the center frequency (0 – 127). This gives a boost around
the center frequency.
• K3 – Type: This setting determines the type of filter applied: Off (no filter), Classic, LPF2, LPF4, HPF2, HPF4,
BPF2, BPF4.
Classic – Similar to the low-pass filter with a slightly different character, particularly when the resonance is
increased. This is modeled after the filter on the classic MPC3000 drum machine.
LPF – Low-pass filter. Audio frequencies below the cutoff are unaffected, and audio frequencies above
the cutoff are dampened.
HPF – High-pass filter. Audio frequencies below the cutoff are dampened, and audio frequencies above
the cutoff are unaffected.
BPF –Band-pass filter. Audio frequencies above and below the cutoff are dampened.
2 and 4 refer to the rate of damping.

30
Filt Env: Use these functions to adjust the filter envelope settings. The filter envelope affects the filter Cutoff
frequency.
• K1 – Attack: Adjust the attack phase of the filter envelope (0 – 127). This determines how quickly the filter
opens up, increasing the filter cutoff frequency.
• K2 – Decay: When the sample is set to One Shot playback, use this knob to adjust the decay phase of the
filter envelope (0 – 127). This determines how quickly the filter closes, or returns to the filter cutoff frequency.
SHIFT+K2 – Decay From: This setting determines whether the decay phase of the filter envelope is applied
to the sample Start or End.
K2 – Release: When the sample is set to Note On playback, use this knob to adjust the release phase of the
filter envelope (0 – 127). This determines how quickly the filter closes, or returns to the filter cutoff frequency.
See the following Pad Play section to learn more about Note On playback.
• K3 – Depth: This setting determines the amount of influence the filter envelope has on the filter Cutoff
frequency (0 – 127). The higher the Depth, the greater the range of filter frequency adjustment.
31
Pad Play
While in Sample Mode, use the PAD PLAY buttons to activate additional playback functions for the samples,
described below.
Note: The MUTE function can be accessed in any mode at any time for fast performance.
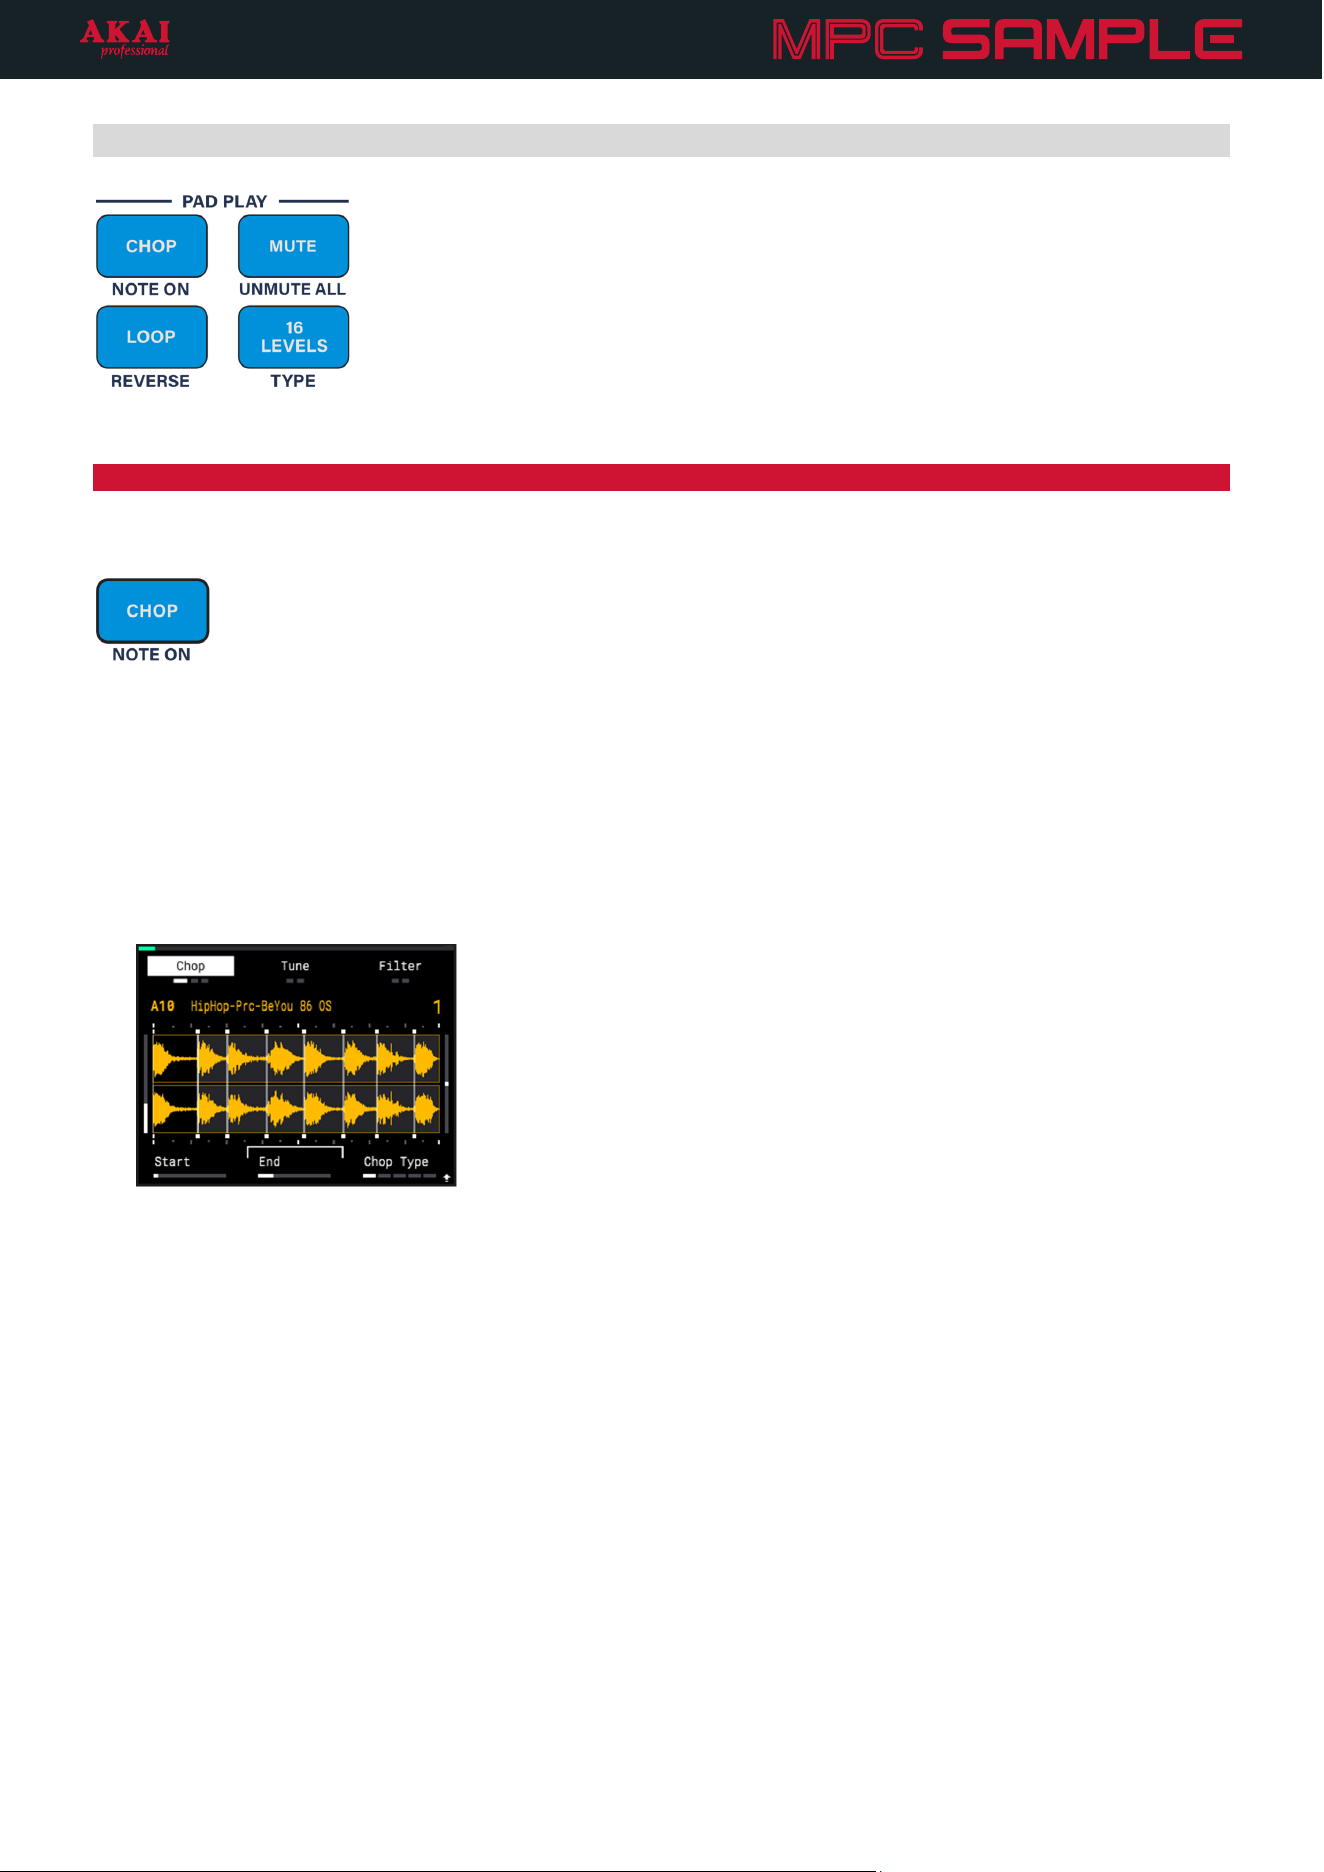
Chop
Press the CHOP button to activate Chop Mode for the sample on the selected pad.
In Chop Mode, the sample is automatically chopped by the current chop type between the sample Start Point
and End Point. You can then use the PADS to trigger each slice or select it for editing. For example, if your sample
is chopped into eight slices, press PAD 5 to select Slice 5.
When Chop Mode is activated, the Trim controls on the Sample Page are replaced by the following Chop
controls:
• K1 – Start: Adjust the slice start point (0 – 100%, depending on the length of the slice).
SHIFT+K1 – Zoom: Start: Zoom in or out of the sample waveform at the slice start point (0 – 100%).
• K2 – End: Adjust the slice end point (0 – 100%, depending on the length of the slice).
SHIFT+K2 – Zoom: End: Zoom in or out of the sample waveform at the slice end point (0 – 100%).
• K3 – Chop Type: Adjust the chop type. This determines how a sample is chopped when in Chop Mode.
Threshold: In this mode, slices are placed automatically according to the Threshold setting.
Regions 4/8/16: In these modes, slices are divided evenly across the length of the sample to create the
selected number of slices (4, 8, or 16).
Manual: In this mode, you can manually create slices. Tap PAD 1 to begin playing the sample and add
the initial slice start point. As the sample plays, tap pads to add additional slices. You can add up to 16
slices per sample.
SHIFT+K3 – Threshold: When Chop Mode is set to Threshold, press and hold SHIFT and turn this knob to
adjust the Threshold value (0 – 100%). Generally, the higher the threshold, the fewer the resulting slices.
32
Press and hold SHIFT and press the B1 Function Button to Extract the currently selected slice. The selected area
is exported as a new sample and automatically added to the next available pad. This is a non-destructive edit, so
the original sample remains fully intact.
Press and hold SHIFT and press the B2 Function Button to Split the currently selected slice. This automatically cuts
the selected area in half, creating two slices in place of one. The subsequent slice numbers also increase by one.
Press and hold SHIFT and press the B3 Function Button to Merge the currently selected slice with the previous
slice. All subsequent slice numbers will decrease by one.
For example, if you have a sample with eight slices and Merge Slice 2, Slice 2 is added to Slice 1, leaving seven
slices in total. The previous Slice 3 becomes Slice 2, and so on.
Press and hold the ERASE button and tap a PAD to remove a slice. This will also merge the removed slice with
the previous slice and decrease all subsequent slice numbers by one.
Note: Editing slices automatically sets the Chop Type to Manual.
Editing slices also cannot be undone or redone using the UNDO/REDO functions.
To exit Chop Mode, press the CHOP button again.
+
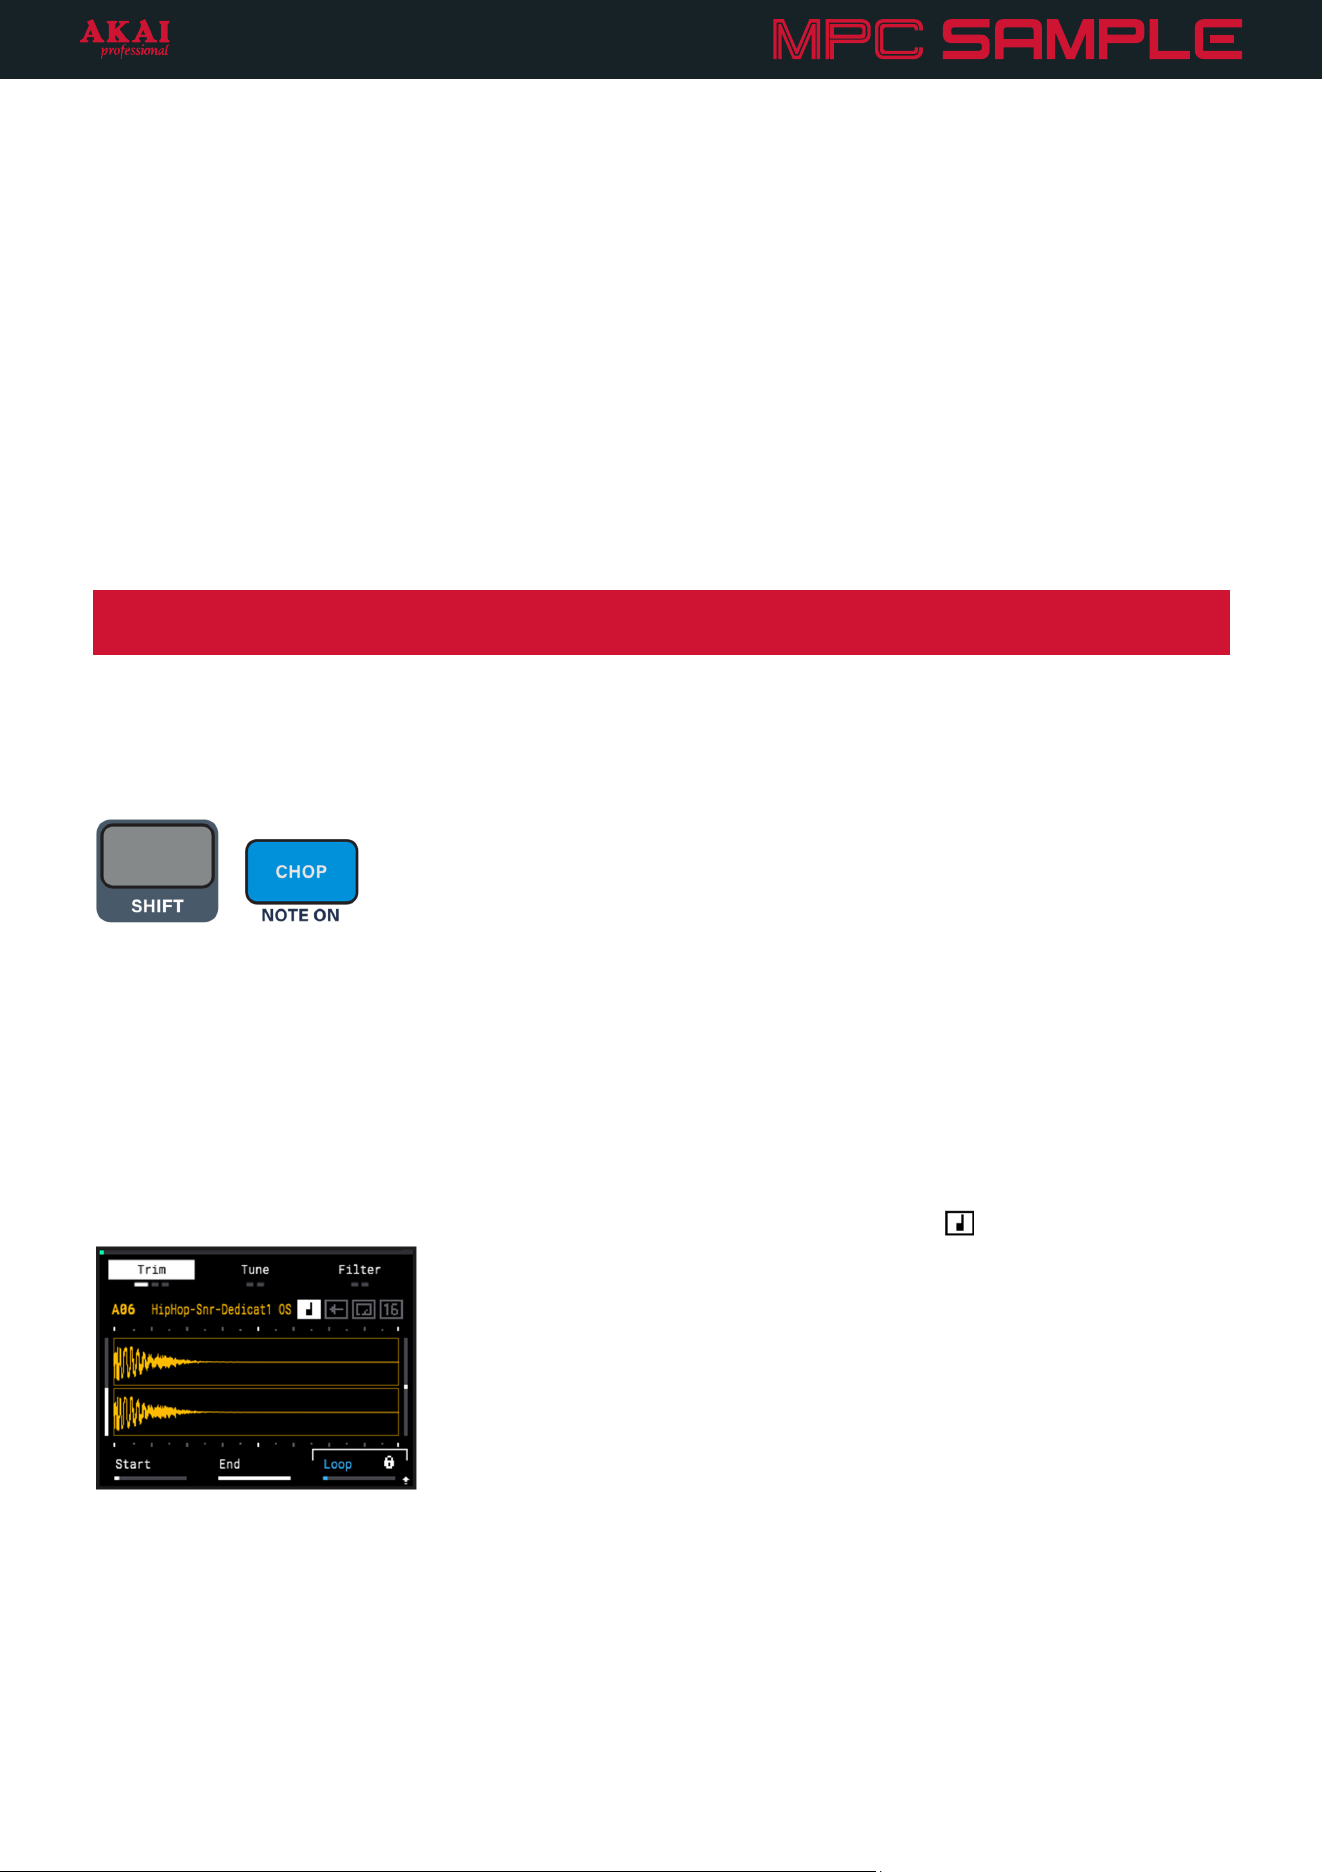
Note On
Press and hold SHIFT and press the CHOP button to enable Note On playback for the sample on the selected
pad. When set to Note On, the sample will play only as long as the pad is held down. Once the pad is released,
sample playback will stop. When Note On is off, the sample plays as a “One Shot” instead, playing in its entirety
each time the pad is triggered (except when the LOOP function is engaged, in which case triggering the PAD
starts and stops the loop).
Enabling Note On mode for a sample also affects the Amplitude Envelope and Filter Envelope controls for the
selected pad. Instead of Decay parameters, these Envelopes will have Release parameters. See the previous
Sample Mode section for more information on the Envelope parameters.
Note On playback is indicated for each sample in Sample Mode with the note icon (
).

33
Loop
Press the LOOP button to activate looping playback for the sample.
To start loop playback, tap a PAD while Loop is activated to begin playing the sample from the Sample Start
point. When the sample reaches the Sample End point, it returns to the Loop Start point and keeps playing.
By default, the LOOP LOCK function is engaged when looping playback is activated. This locks the Sample
Start point to the Loop Start point. While in Sample Mode, press and hold SHIFT and press the B1 Function
Button to disengage Loop Lock. When disengaged, the Sample Start point and Loop Start point can be set
independently.
If the sample is also in Reverse playback, it begins at the Sample End point and plays backwards until reaching
the Sample Start point, then returns to the Sample End point and keeps playing.
Loop playback also affects how the Amp Env is applied. If the sample is set to One Shot playback and the
envelope is set to Decay From End (default), the loop plays indefinitely until the pad is toggled off. If the
sample is set to One Shot playback and the envelope is set to Decay From Start, the loop plays until it is
manually toggled off, or until the Decay stage of the envelope is completed and mutes the sample.
To stop loop playback, tap the pad again. If the sample is also in Note On playback, it keeps looping as long
as the pad is being held, and stops once the pad is released.
Loop playback is indicated in Sample Mode by the loop icon (
).
+
Reverse
Press and hold SHIFT and press the LOOP button to activate reverse playback for the sample. When activated,
the sample plays in reverse, starting from the Sample End Point and moving backwards to the Sample Start Point
(or Loop Start Point, if Loop playback is active).
Reverse playback is indicated in Sample Mode by the arrow icon (
).
34
Mute
Press the MUTE button to activate the mute function of the pads. You can also press and hold this button to
temporarily engage the mute function. Release the button to disengage.
When mute is activated, the pads no longer trigger samples, and can instead be used to mute and unmute
individual samples. This can be useful when playing sequences to create dynamic arrangements by bringing
elements in and out of the sequence.
To mute a sample, press the respective pad so that it is lit red. Unmuted samples are lit yellow.
To unmute a sample, press a pad that is lit red so that it returns to yellow. You can also use the UNMUTE ALL
function, described below, to unmute all samples at the same time.
If a muted sample is selected in Sample Mode, the waveform will appear greyed out, and the sample will not trigger.
This function can be accessed from any mode at any time for fast performance.
+
Unmute All: Press and hold SHIFT and press the MUTE button to unmute all muted samples at the same time.
35
16 Levels: Press the 16 LEVELS button to activate 16 Levels mode for the sample on the currently selected pad.
When activated, the current sample is copied across all 16 pads, with a selected parameter increasing in value across
the pads. This allows you to create more dynamic arrangements by adding variations of the sample without having
to load multiple versions of the same sound.
16 Levels mode is indicated on the Sample page by the 16 icon (
).
+
TYPE: Press and hold SHIFT and press the 16 LEVELS button to cycle between the available 16 Levels types. This
determines how the sample changes across the 16 pads.
• Velocity: The sample increases in velocity across the 16 pads.
• Filter: The filter cutoff point of the currently selected filter type is adjusted across the 16 pads. Pads 1–8
increase the cutoff from the minimum point to the current Cutoff value. Pads 9–16 increase the cutoff from
the current value to the maximum point. Depending on the current Cutoff value, the range of available value
adjustment may be limited. The Cutoff value can be adjusted using the Filter functions in Sample Mode.
• Tune: The pitch of the sample is adjusted across the 16 pads. The sample at its original pitch is placed on
PAD 4, with pads below this lowering in pitch and pads above this increasing in pitch.
36
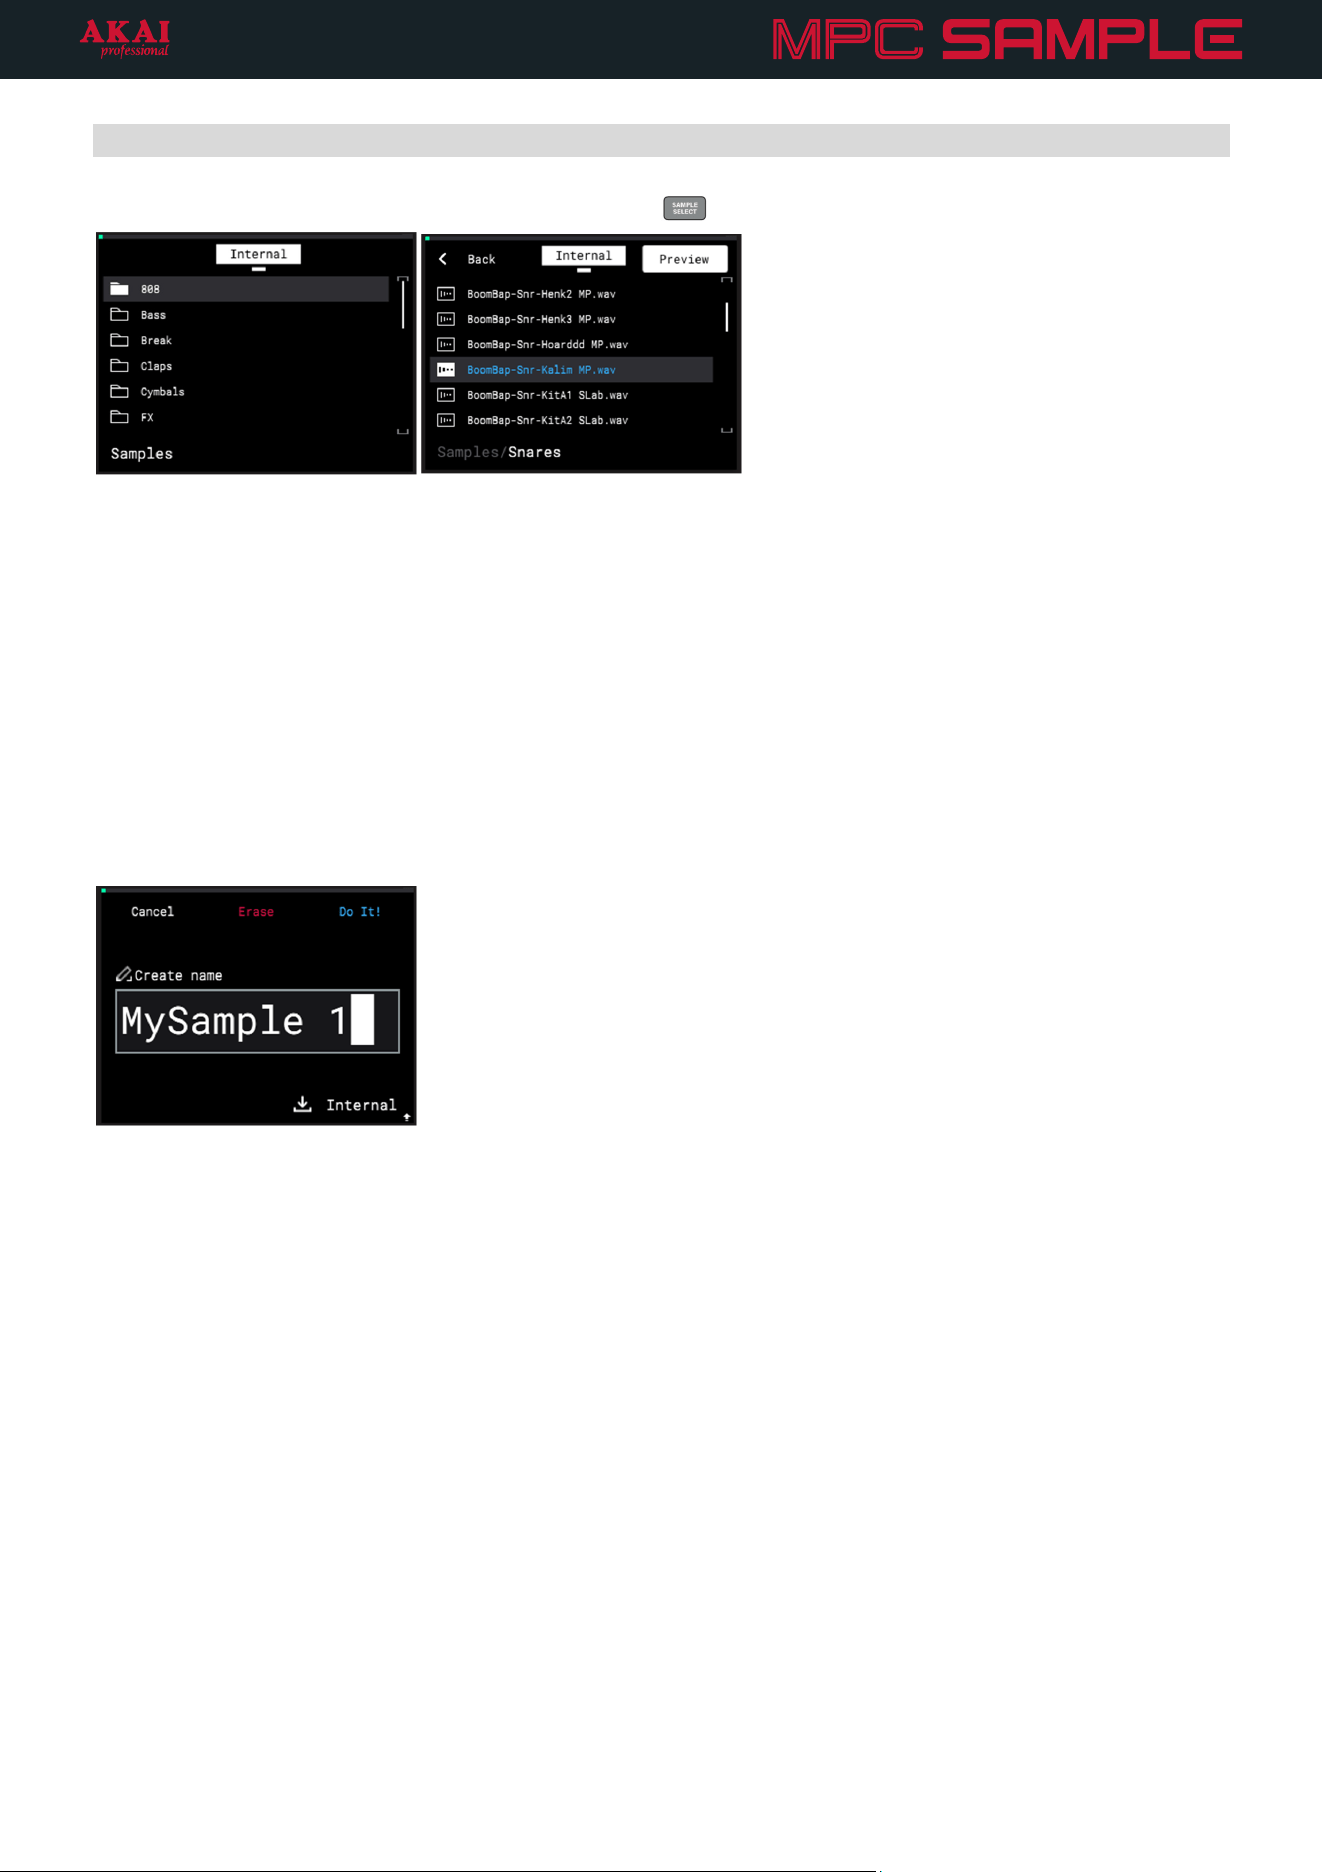
Loading and Saving Samples
To load a sample to a pad, press the SAMPLE SELECT (
) button to open the Sample Browser.
Turn the ENCODER, or press the -/+ buttons, to browse the list of sample categories.
Press the ENCODER to open a folder, and then turn the ENCODER or press the -/+ buttons to browse the
list of samples.
Use the B3 Function Button to turn automatic Preview on or off. When on, each sample will play as it is
highlighted.
Press the B1 Function Button to move Back.
Press the B2 Function Button to switch between the Internal drive and an External drive if you have a microSD
card inserted into the microSD Card Slot. This defaults to an automatically-created MPC-Sample/Samples
directory where user samples are stored, but you can freely navigate to other directories on your microSD
card as needed.
To save a sample, press and hold SHIFT and press the SAMPLE SELECT / SAVE SAMPLE button.
Turn the ENCODER to scroll through letters and numbers. Press the ENCODER to select the desired
character and move to the next character.
Press and hold SHIFT to access capital letters.
Press the -/+ buttons to move between characters.
Press the B2 Function Button to erase the current character.
Press and hold SHIFT and press the B2 Function Button to erase all characters at the same time.
When you have finished editing the sample name, press the B3 Function Button (Do It!) to save the sample.
To exit the Save Sample page without saving, press the B1 Function Button (Cancel).
37
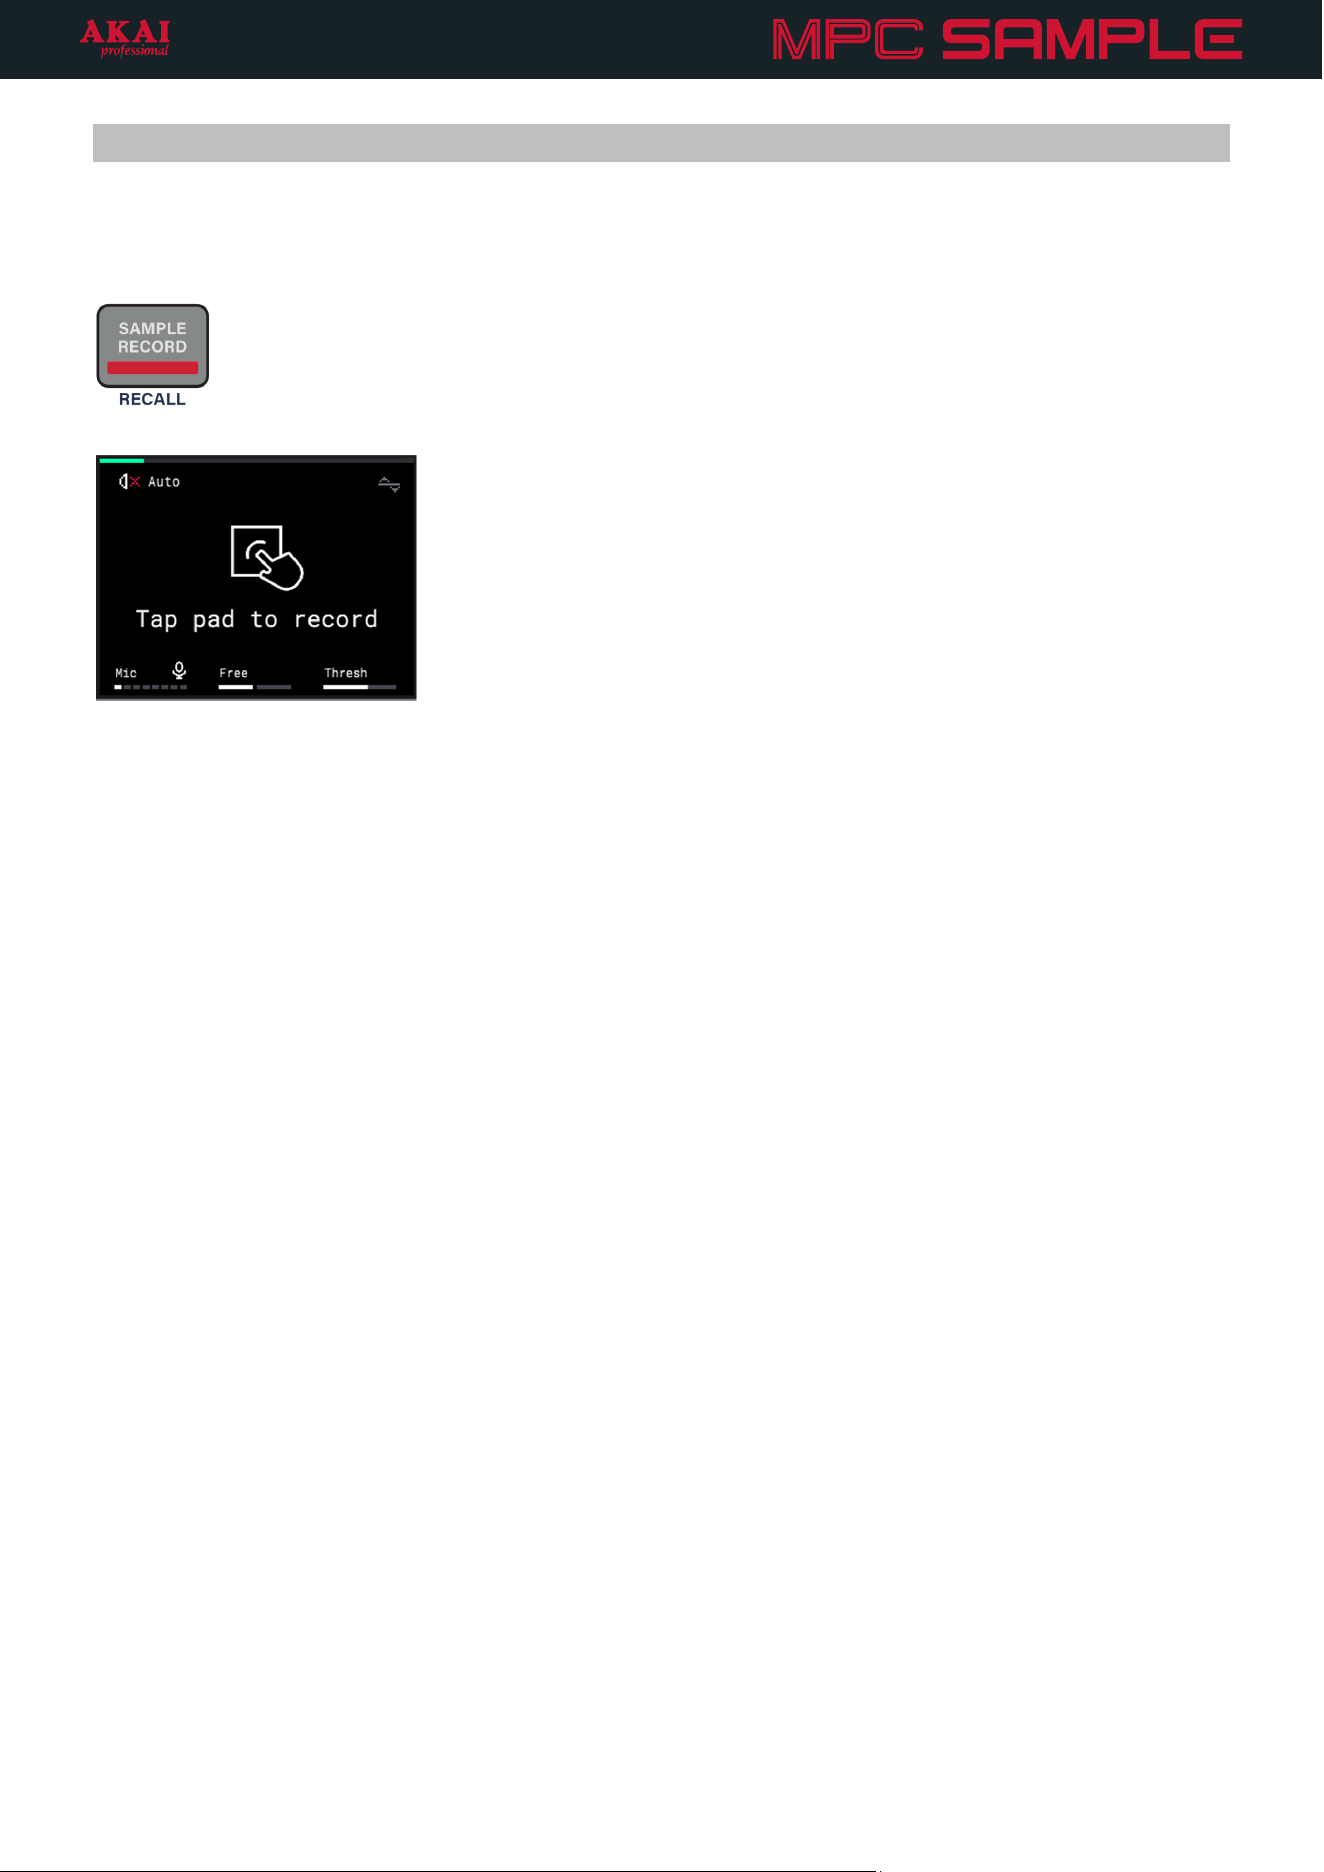
Sample Record Mode
In addition to the built-in sounds of MPC Sample, you can use its sampling capabilities to record your own sounds
using Sample Record mode.
To open Sample Record Mode, press the SAMPLE RECORD button.
Press the B1 Function Button to cycle between the audio monitoring settings.
• Off: Audio from the selected Source is never monitored.
• Auto: Audio from the selected Source is monitored only while Sample Record Mode is in focus.
• On: Audio from the selected Source is always monitored.
This is automatically set to the current MONITOR setting in the Input Configuration menu.
The Speaker icon below to this setting indicates the current state of the built-in speaker. If the speaker is
deactivated, the icon appears crossed out. For example, this occurs when the built-in Microphone is selected as
the active Source and Monitor is set to On or Auto (while Sample Record Mode is in focus), or when an audio
output device is connected to the PHONES or AUDIO OUT connections on the rear panel while any input is
selected as the active Source.
Turn the K1 Knob to select the active input source.
• Mic: The built-in microphone, located next to the ENCODER.
• Rear: The rear panel AUDIO IN connections. Selecting this option enables both the 1/L and 2/R inputs to
record in stereo.
• Rear L: The 1/L AUDIO IN on the rear panel.
• Rear R: The 2/R AUDIO IN on the rear panel.
• Resample: Re-recorded audio from MPC Sample. You can use this to record a sequence onto a single pad,
freeing up other pads for additional sounds.
• USB: Audio from a device connected to MPC Sample’s rear panel USB port. Selecting this option records
stereo audio from the USB device.
• USB L: Left-channel audio from a device connected to the USB port.
• USB R:
Right-channel audio from a device connected to the USB port.
This is automatically set to the current SOURCE setting in the Input Configuration menu.
Turn the K2 Knob to set the recording length for the sample. Set this to Free to record with no set length, or set
to Seq to record for the length of the current sequence. If Seq is selected and playback is active, recording begins
at the end of the current loop.
This is automatically set to the REC LENGTH setting in the Input Configuration menu.

38
Turn the K3 Knob to adjust the recording Threshold.
When incoming audio rises above the Threshold setting, the waveform icon in the top-right corner of the screen
lights up.
This is automatically set to the THRESHOLD setting in the Input Configuration menu.
Once you have confirmed these settings, you can begin recording.
1. Tap the pad where you would like to add your sample to begin recording.
2. Record audio from your selected source.
As you record, you can also tap additional PADS to chop your sample.
3. Once you are finished recording, stop recording by pressing the pad again, pressing the STOP button, or
pressing the SAMPLE RECORD button.
If you stop recording by pressing the PAD or STOP button, you will remain in Sample Record mode, and can
continue recording samples. To return to Sample Mode and view your recorded sample, press the SAMPLE
button.
If you stop recording by pressing the SAMPLE RECORD button, you will automatically return to Sample Mode
with your newly recorded sample selected.
Tip: If you miss capturing a great moment, you can press and hold SHIFT and press the SAMPLE RECORD/
RECALL button to retrieve the last 25 seconds of audio from your selected source and automatically place it on
the next available pad.
You can now edit your sample and add it to sequences. See the Sample Mode chapter for more information on
editing samples, as well as Loading and Saving Samples, or the Sequence Mode chapter for more information
on recording and editing sequences.
39
Sequence Mode
Sequences are the building blocks of songs when making music with MPC Sample. A sequence contains a pattern
of notes over a set length of time. You can use sequences to create entire song sections, like having one sequence
for a verse and one sequence for a chorus, or create many variations using sequences, like having four similar
sequences for a verse that you can use interchangeably or together. As you build your sequences, you can also
edit them and export them as an entire song for sharing.
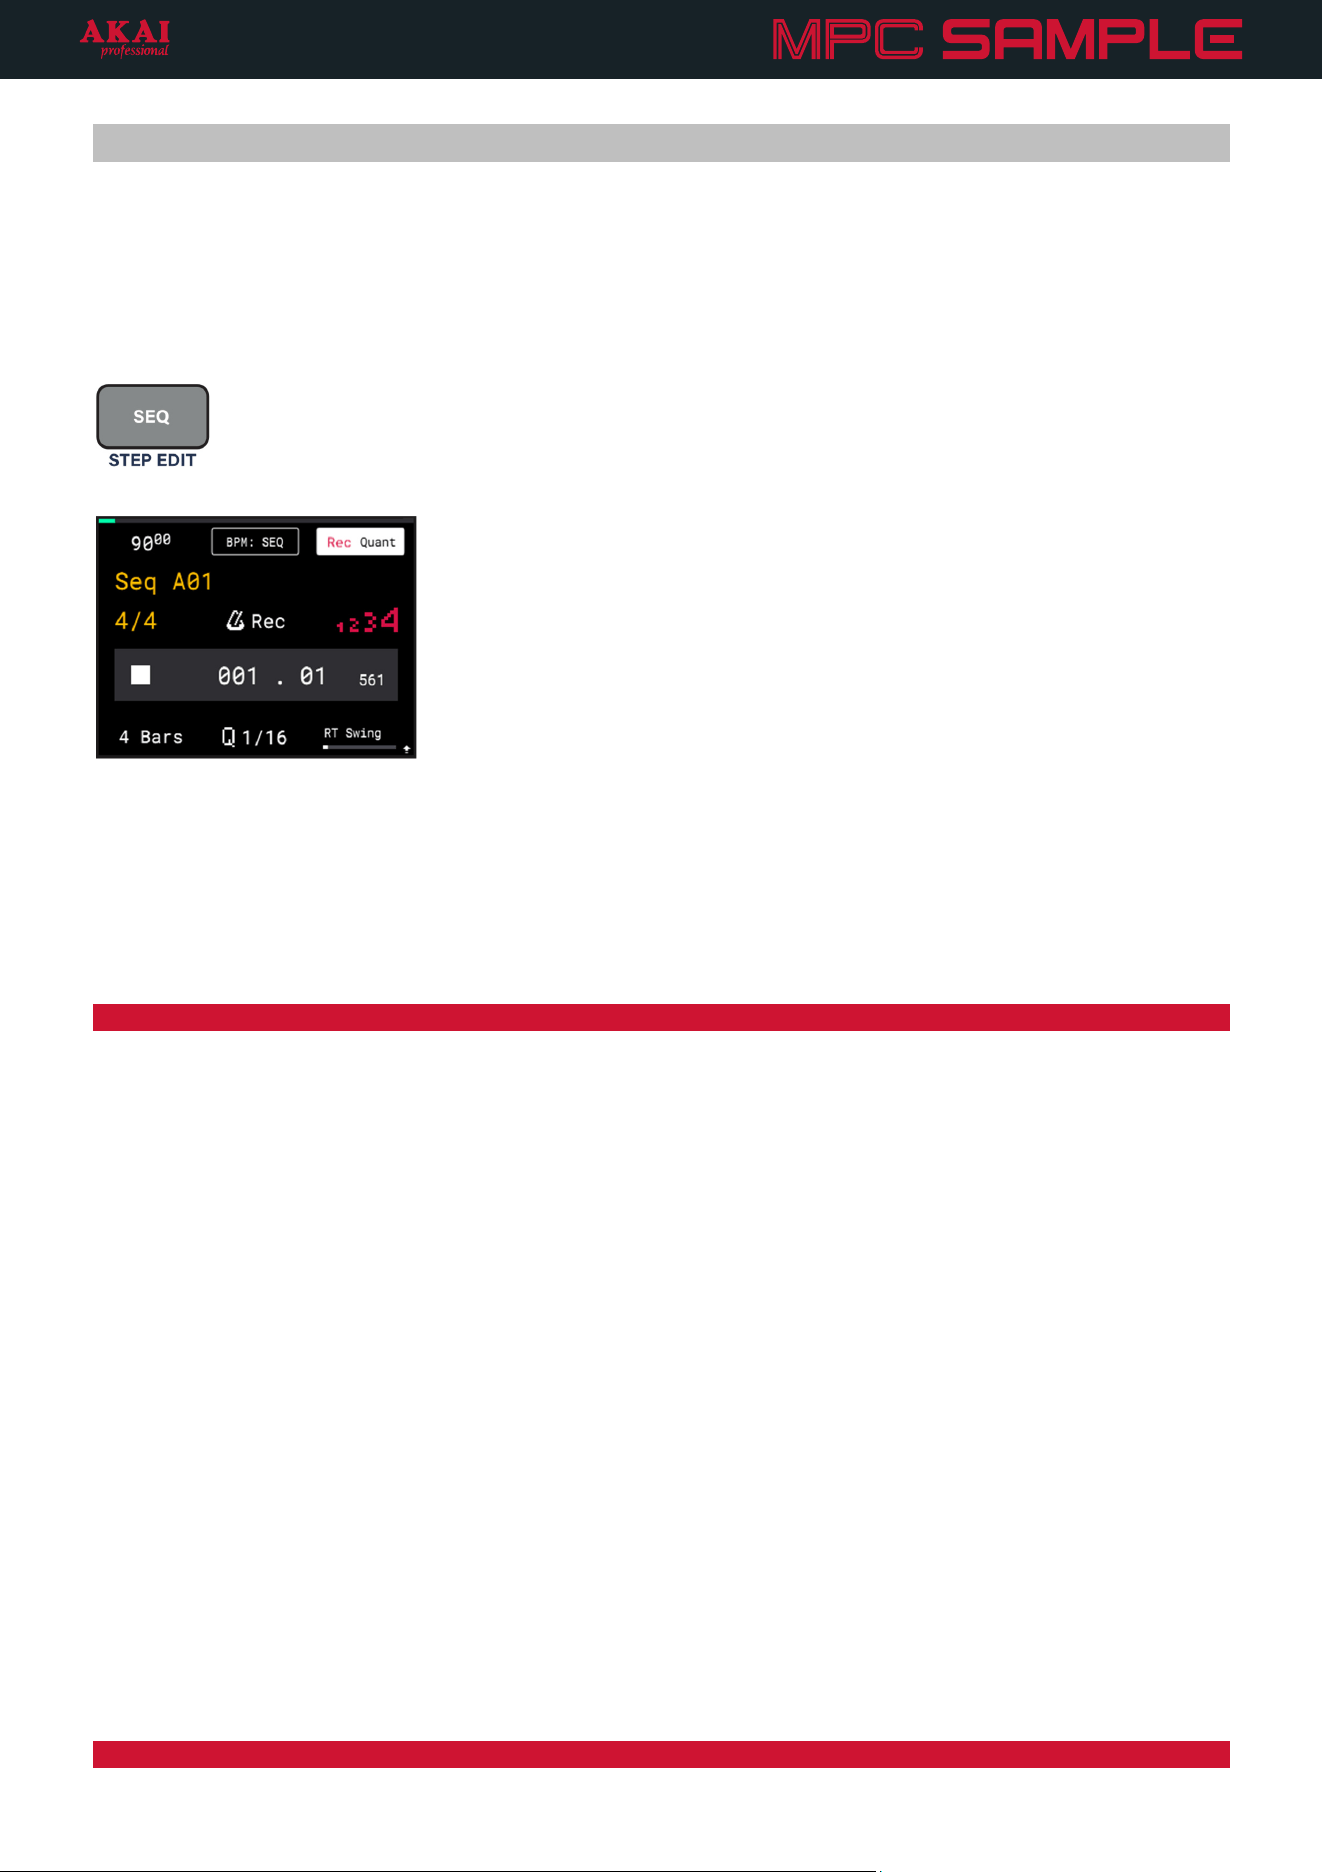
To open Sequence Mode, press the SEQ button.
Turn the ENCODER to adjust the current playhead position by beats. Press and hold SHIFT and turn the
ENCODER to adjust the current playhead position by the current Q value (described below).
Press and hold the B1 Function Button to open the Sequence BPM window. Turn the ENCODER to adjust the
tempo to the desired BPM. Press the ENCODER to cycle between whole numbers and decimals. When you have
finished editing the Sequence BPM, release the B1 Function Button.
Tip: You can also press the TAP TEMPO button at a regular interval to set a new tempo for the sequence.
Press the B2 Function Button to toggle between Sequence (SEQ) BPM control and Global (GBL) BPM control. When
set to SEQ, each sequence has an independent BPM. When set to GBL, all sequences are tied to the same BPM.
Press the B3 Function Button to turn Record Quantization on or off. When on, the notes you play while recording
are snapped to the grid at the current Q value (described below).
Turn the K1 Knob to adjust the length of the sequence to 1, 2, 4, 8, 16, 32, 64, or 128 Bars. Press and hold SHIFT
and turn the K1 Knob to adjust the length of the sequence to any value between 1–128 Bars.
Turn the K2 Knob to adjust the Quantization (Q) value. This determines the time division that each bar of the
sequence is divided into, and how note events snap to those divisions. For example, if the Q is set to 1/16, all
events will snap to the nearest 1/16
th
note on the grid.
Turn the K3 knob to adjust the RT Swing value. This is a “live” parameter that does not affect the actual placement
of note events in the sequence, but instead applies a percentage shift based on the current note event position
and relative to the nearest time division as set by the Q value. You can use this as a performative tool to adjust
your beat’s rhythms on the fly.
Press and hold SHIFT and turn the K2 Knob to adjust the time signature of the Project. The current time signature
is also shown on the display in Sequence Mode below the current sequence name.
Note: All sequences are tied to the same time signature.

40
Press and hold SHIFT and turn the K3 Knob to adjust the Metronome (or “click”) volume.
Press and hold SHIFT and press the TAP TEMPO / METRONOME button to cycle the metronome between its
three states: Off (the metronome does not play), On (the metronome always plays during playback and
recording), or Record (the metronome only plays during recording). The current metronome setting is also shown
on the display in Sequence Mode above the current sequence time.
Press and hold SHIFT and press PAD 4 – COUNT-IN to activate or deactivate the recording count-in. When
activated, MPC Sample will count off one bar at the current tempo and time signature prior to recording a
sequence. This count appears on the display, and if the Metronome is set to On or Record, it can also be heard.
The count-in status is also shown on the display in Sequence Mode. The 1234 icon is red when the count-in is
activated, and grey when it is deactivated.
Tip: You can access the Sequence Mode display functions while keeping the pads in Sample Mode for triggering
samples by pressing and holding the SEQ button and then pressing the SAMPLE button (or vice versa). Both
buttons will flash while Sample/Seq Mode is engaged. To exit, press either the SEQ or SAMPLE button to return
to that mode’s display and pad functions.
Selecting and Triggering Sequences
Press a PAD to select a sequence. Sequences with note events are lit light green, while empty sequences are
dimly lit.
If playback is stopped, the current sequence will flash bright green, indicating it is queued for playback. The name
of the current sequence is also shown on the display below the sequence tempo.
Press the PLAY button to launch a sequence. The pad for the current sequence will stop flashing and remain
solidly lit bright green.
During playback, press another PAD to queue a different sequence. The pad for the queued sequence flashes
bright green until the end of the current sequence. Once the current sequence ends, the new sequence
immediately begins playing, and the pad for the new sequence is now solidly lit bright green.

41
Recording Sequences
To record a new sequence with MPC Sample:
1. In Sequence Mode, tap a dimly lit pad to select an empty sequence.
2. Prior to recording, you can adjust the Sequence data like BPM, Length, and Record Quantization as
needed using the methods described above.
3. When you are ready to record, press the SEQ RECORD (
) button. The button will begin flashing to
indicate it is armed for recording.
The pads will also enter Sample/Seq Mode, where the Sequence Mode display remains while the pads
return to sample triggering mode, as described above. Both the SAMPLE and SEQ buttons flash to
indicate they are in Sample/Seq Mode. You can also press the SAMPLE button to return to Sample Mode
while keeping sequence recording armed.
4. Press the PLAY button to begin recording. The sequence begins playing, and you can tap the pads to
add recorded events.
5. When the end of the Sequence is reached, MPC Sample automatically switches to overdub recording,
and any samples triggered will play back at their recorded locations. You can continue recording as
needed.
6. When you are finished, press the SEQ RECORD button again to stop recording but continue playback.
You can also press the STOP button to stop recording and playback at the same time. The pads will return
to sequence triggering mode if you were previously in Sequence Mode.
Press and hold SHIFT and press -/UNDO to undo all recorded events since the last time recording began.
While sequence recording is armed, you can also press and hold the ERASE button and press a PAD to erase all
recorded events for that pad.
Press and hold SHIFT and press the SEQ RECORD/RECALL button to retrieve any events played during the last
loop of the sequence. These events are automatically added to your sequence on the respective pads.
In addition to recording events, you can also record parameter automation on your sequence.
1. Select the pad on which you want to record automation.
2. Press the SEQ RECORD button to arm sequence recording, and then press the PLAY button to begin
recording.
3. Turn the K1–K3 Knobs or move the FADER to adjust the desired parameter. You can automate
parameters including Volume, Tuning, Pan, Amp and Filter Envelope parameters (except Decay From),
Velocity Sensitivity, and Offset.
4. When you are finished, press the SEQ RECORD button again to stop recording but continue playback.
You can also press the
STOP button to stop recording and playback at the same time.
Press and hold SHIFT and press -/UNDO to undo all recorded automation events since the last time recording
began.
To erase automation, select the pad that contains the automation you want to erase. Then, press and hold this
button and move the K1–K3 Knob for the parameter with recorded automation. If the FADER is set to control a
parameter with automation, you can also move the FADER while holding ERASE. A menu will appear on the
display for confirmation. Press the B3 Function Button to continue, or press the B1 Function button to cancel.

42
Editing Sequences
Press and hold SHIFT and press the following PADS to perform the following actions for your sequence:
• PAD 2 – Half Seq: Cuts the length of the current sequence in half. For example, a 4-bar sequence becomes
a 2-bar sequence.
• PAD 3 – Double Seq: Doubles the length of the current sequence, duplicating all recorded events. For
example, a 4-bar sequence becomes an 8-bar sequence.
• PAD 6 – Half Speed: Makes all events in the current sequence play at half speed, so they take twice as much
space in the sequence. For example, hi-hats playing at 1/8 notes now play at 1/4 notes.
• PAD 7 – Double Speed: Makes all events in the current sequence play at double speed, so they take half as
much space in the sequence. For example, hi-hats playing at 1/8 notes now play at 1/16 notes.
• PAD 10 – Rec Quantize: Activates or deactivate record quantization. This makes all recorded events snap to
the grid based on the current time division. This can also be adjusted in Sequence Mode.
• PAD 11 – Resample: Press this to capture the current sequence a new sample. After selecting this action,
press the pad where you want to add the new sample, and the sequence is rendered as a new sample to that
pad.
• PAD 12 – Song: Enter Song Mode, where you can string together sequences to create a song, and then
export it as an audio file or new sequence added to your project. See the following Song Mode chapter to
learn more.
• Pad 14 – Time Correct: Enter the Time Correct menu, where you can adjust and apply quantization to events
in your sequence. See the Time Correct chapter to learn more.
43
Step Edit
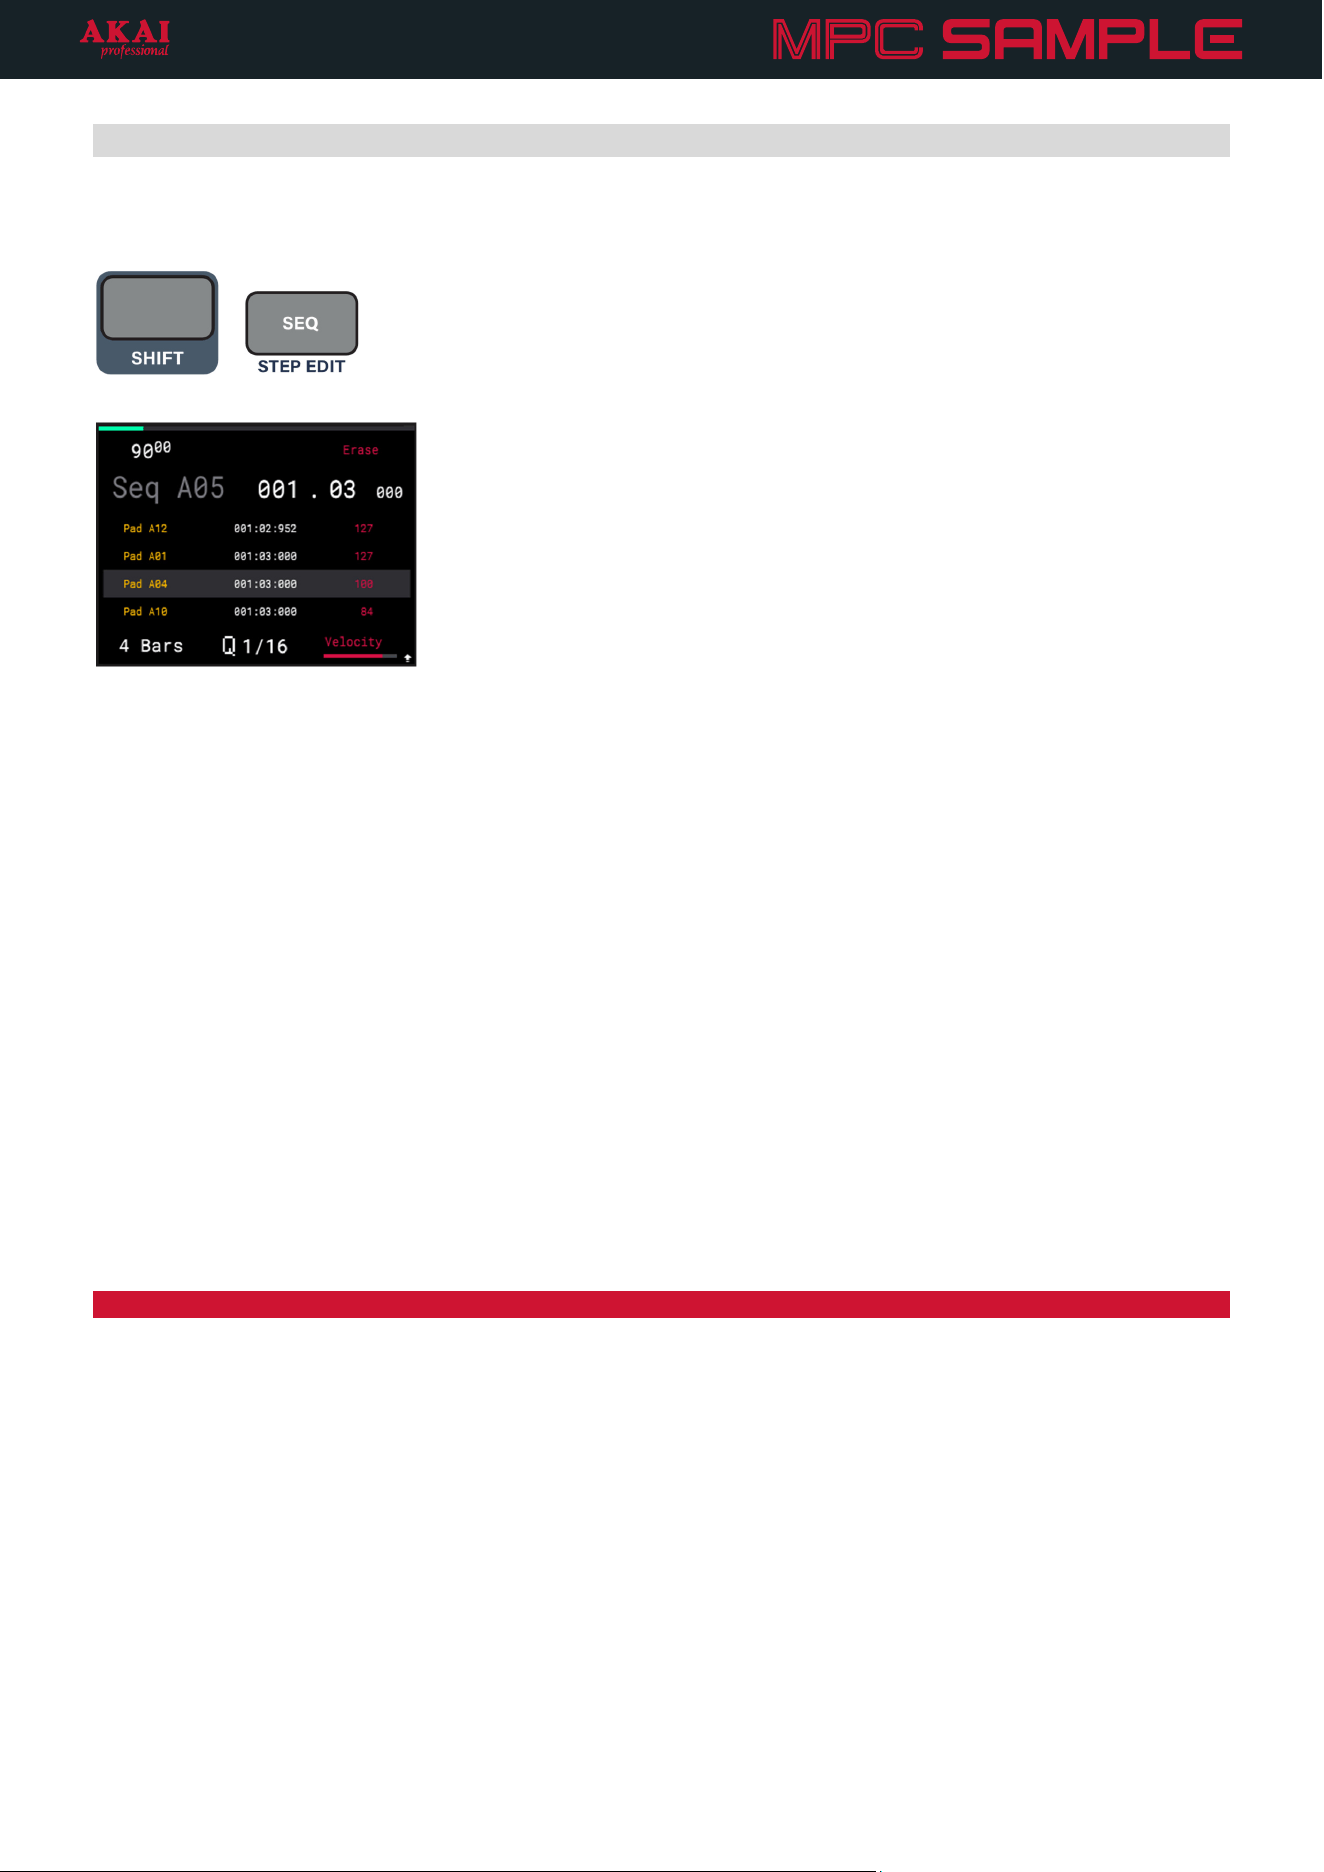
The Step Edit page allows you to edit individual events in your sequence by step.
+
To open the Step Edit page, press and hold SHIFT and press the SEQ / STEP EDIT button.
Turn the ENCODER to move between each step of the sequence at the current quantization (Q) value.
Press the -/+ buttons to move between events on the current step. You can also tap the respective pad to select
its event.
Move the FADER up or down to adjust the timing of the selected event, nudging it forward or backward,
respectively, from the current position.
Turn the K1 Knob to adjust the sequence length.
Turn the K2 Knob to adjust the current quantization (Q) value. This also determines the value of each step that
you can scroll through using the ENCODER.
Turn the K3 Knob to adjust the velocity of the selected event.
Press and hold SHIFT and turn the K2 Knob to adjust the time signature of the Project.
Note: All sequences are tied to the same time signature.
Press and hold the B1 Function Button to adjust the sequence tempo using the ENCODER. Press the ENCODER
to move between whole numbers and decimals.
Press the B3 Function Button to erase the selected event.
While viewing the Step Edit page, you can also press and hold the ERASE button and press a PAD to erase all
events from that pad. Press the B1 Function Button to Cancel and return to the Step Edit page, or press the B3
Function Button (Do It!) to proceed with erasing the events.
44
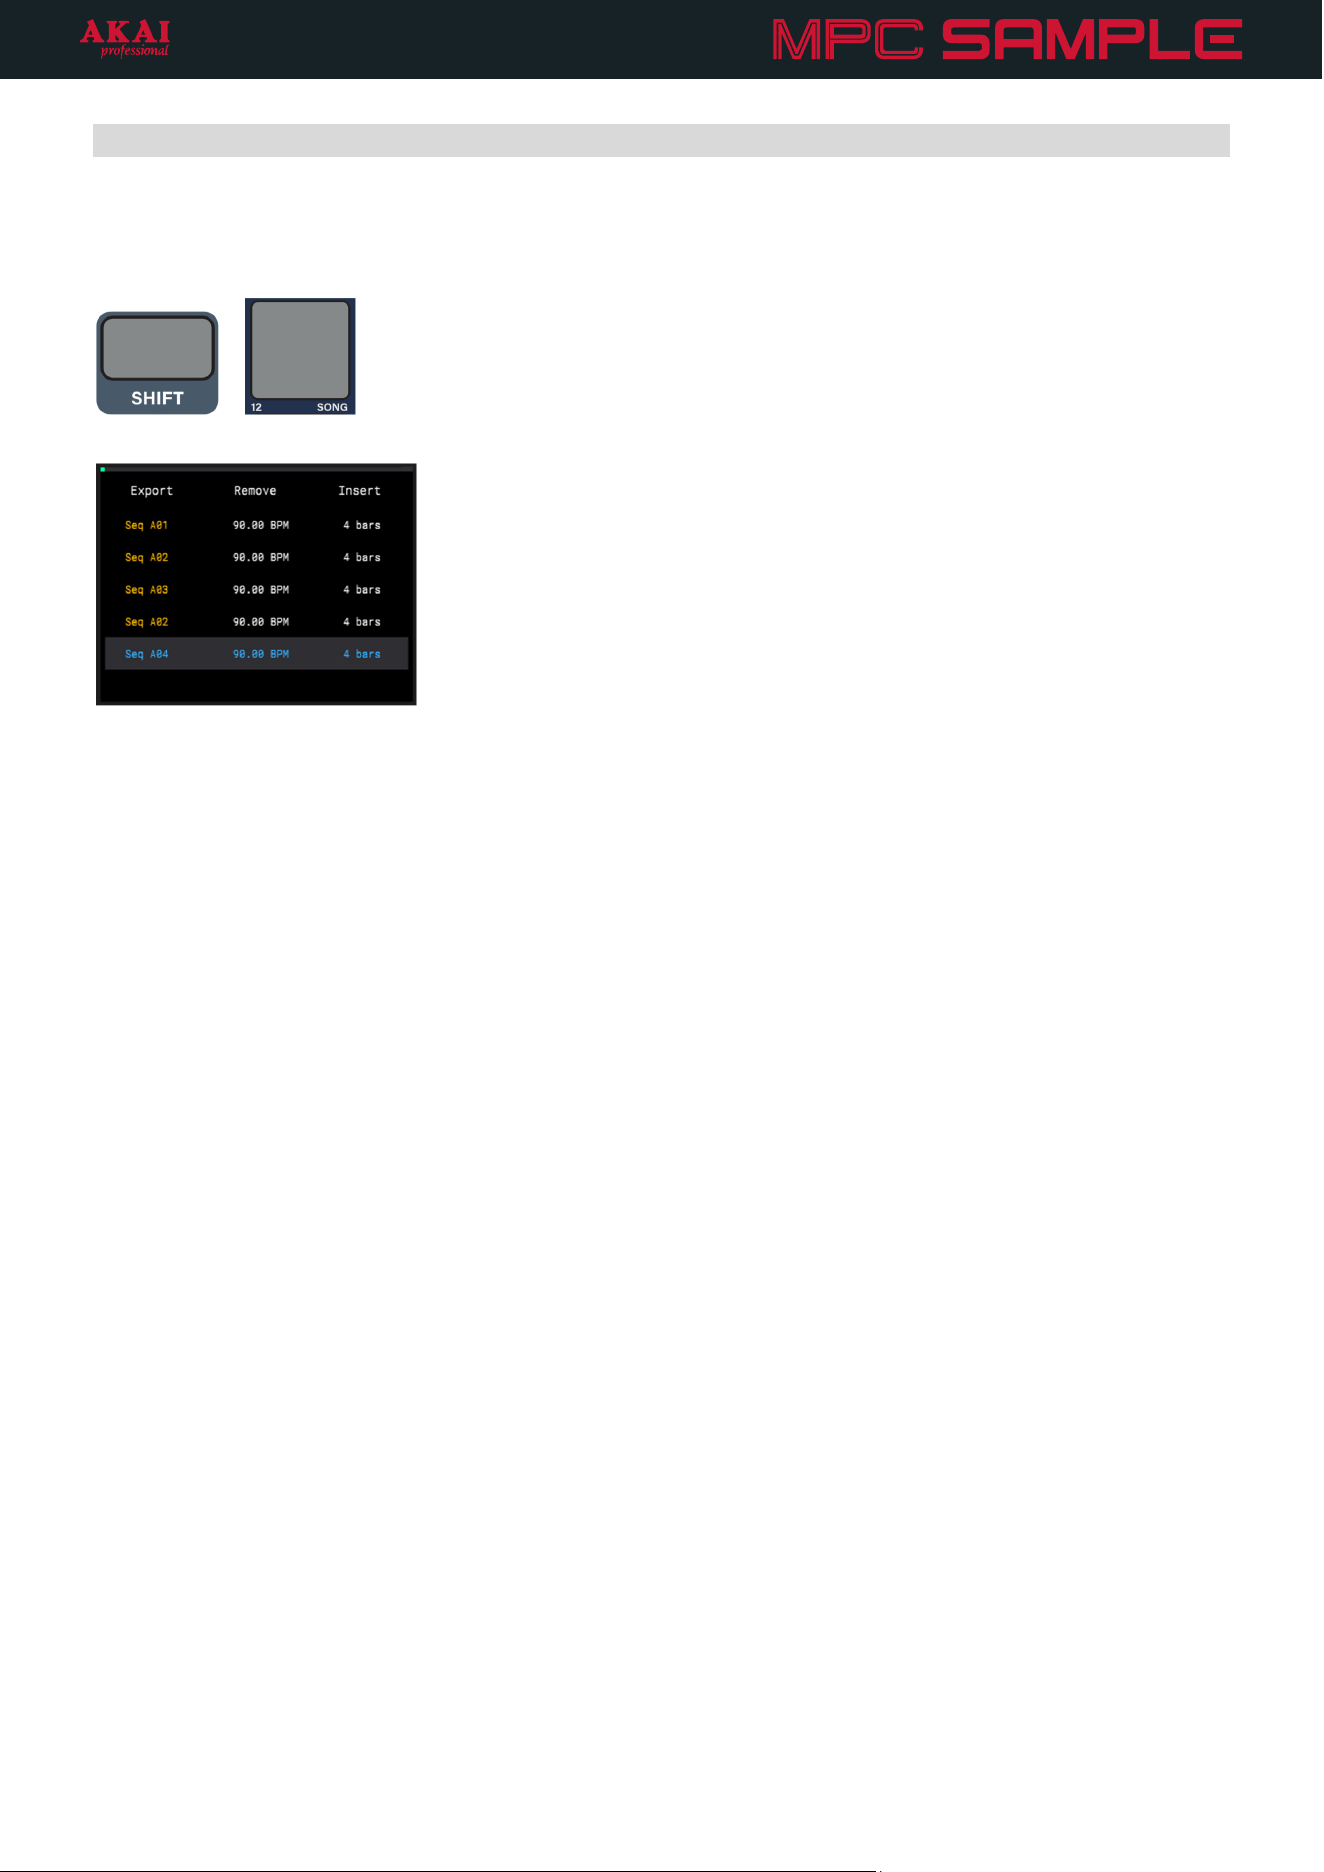
Song Mode
Song Mode allows you to create a list of sequences, which you can then export as an audio file or as a new
sequence in your project.
+
To enter song mode, press and hold SHIFT and press PAD 12 – SONG.
Use the PADS to select a sequence. Filled sequences are brightly lit, while empty sequences are dim.
Press the B3 Function Button to insert the sequence into the song at the current location. Sequences will be
placed after the highlighted sequence if there are already sequences in place.
Turn the ENCODER or press the -/+ buttons to browse the list of sequences inserted into the song.
To remove a sequence, highlight it and then press the B2 Function Button.
To hear your song from the beginning, press the PLAY button. Sequences will play back automatically in the
order the appear on the Song page.
To hear your song starting from another point, highlight the sequence you want to start from and then press and
hold SHIFT and press PLAY/CONTINUE. Playback will begin from the selected sequences and progress through
the following sequences.
45
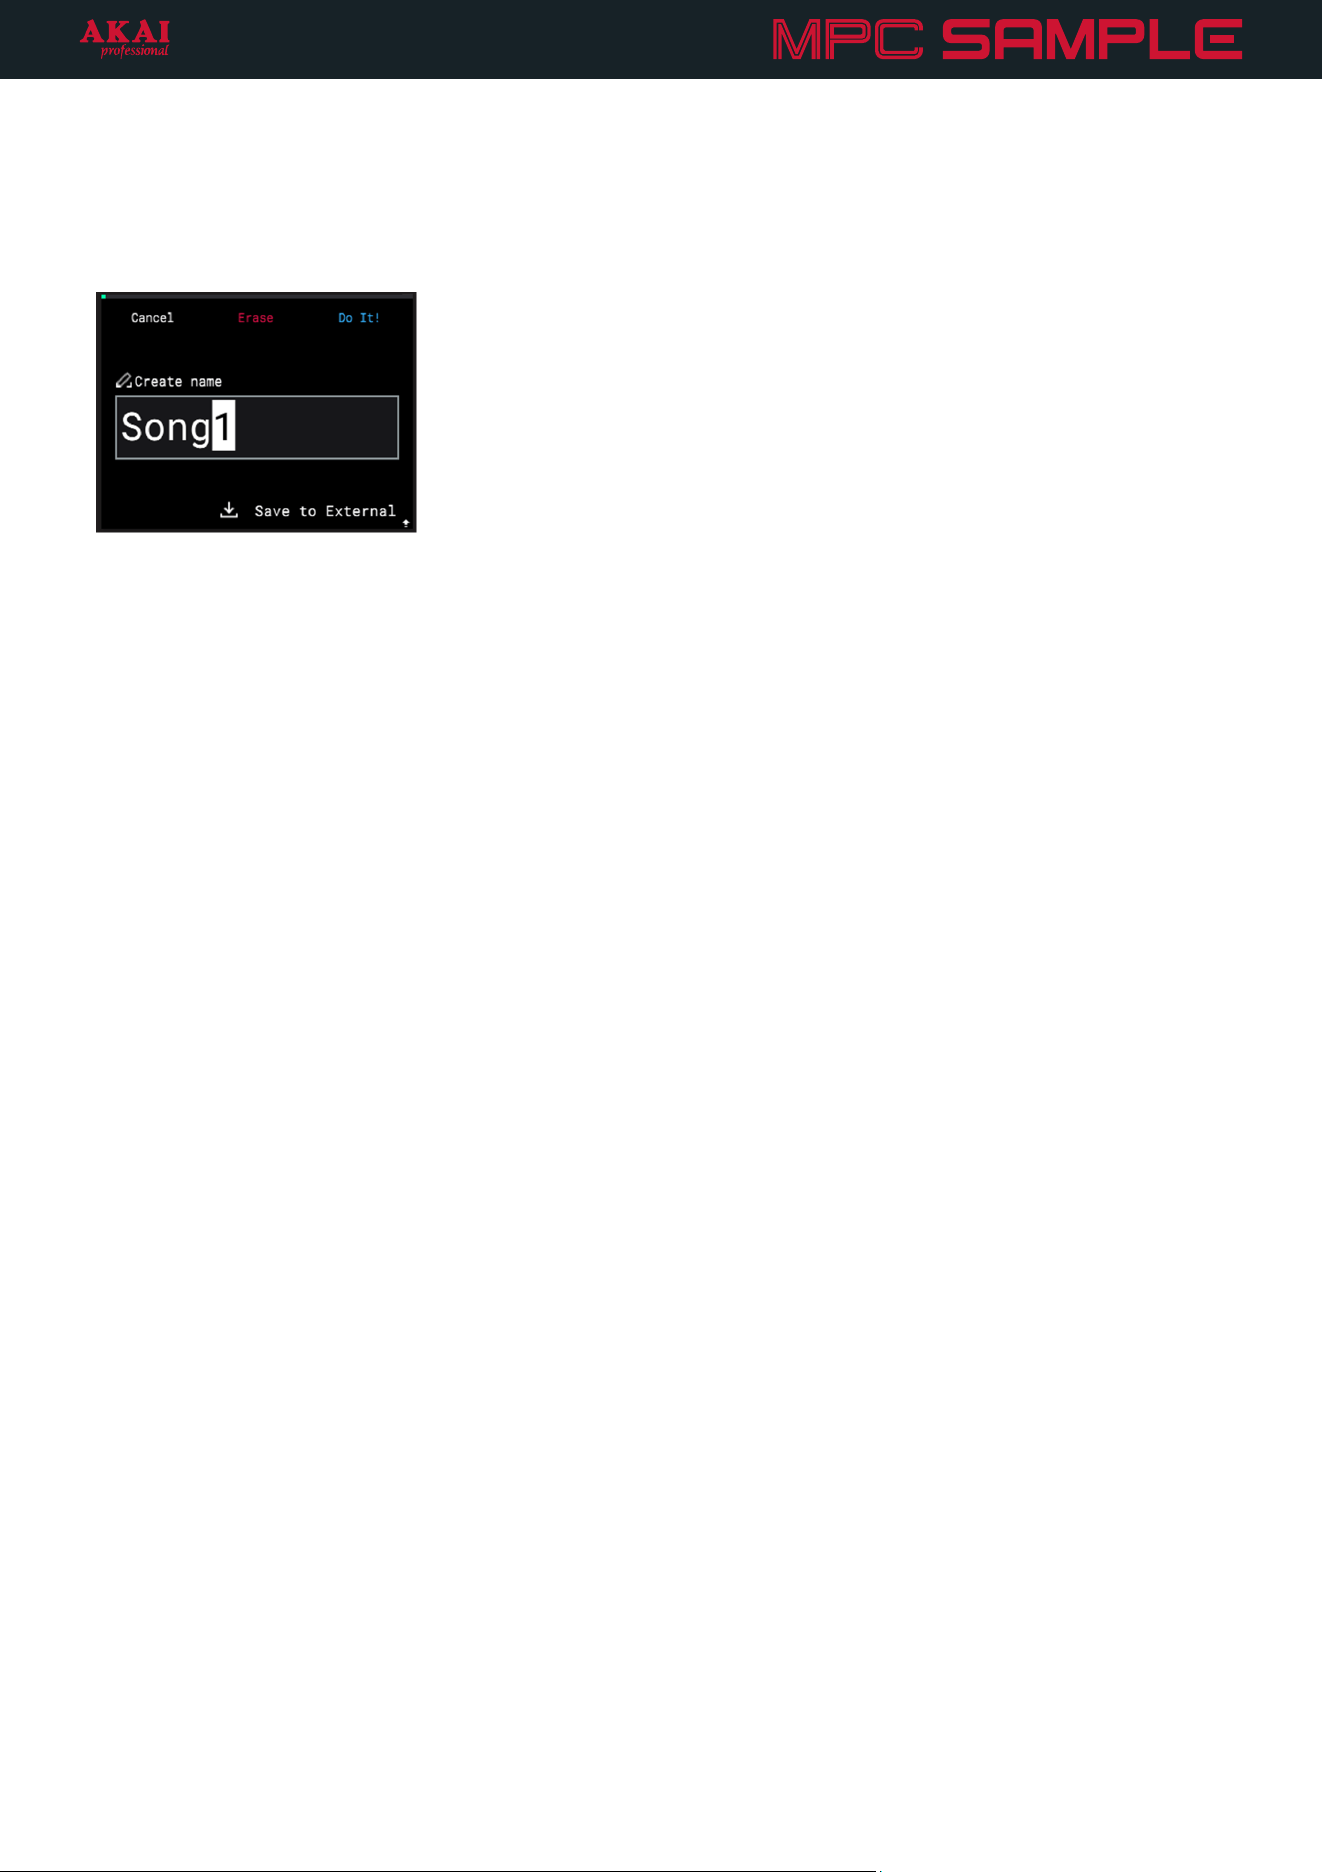
To export your song, press the B1 Function Button. You can export your song as an audio mixdown or as a new
sequence in your project.
Press the B2 Function Button to export your song as an audio mixdown. This allows you to save your song as an
audio file which you can then transfer to a computer for sharing.
Turn the ENCODER to scroll through letters and numbers. Press the ENCODER to select the desired
character and move to the next character.
Press and hold SHIFT to access capital letters.
Press the -/+ buttons to move between characters.
Press the B2 Function Button to erase the current character.
Press and hold SHIFT and press the B2 Function Button to erase all characters at the same time.
When you have finished editing the song name, press the B3 Function Button (Do It!) to start the export.
To exit the audio export page, press the B1 Function Button (Cancel).
Press the B3 Function Button to export your song as a new sequence. The resulting sequence is automatically
added to the next available sequence slot. If the new sequence length is over 128 bars, you will not be able to
edit the length of the created sequence.
Press the B1 Function Button to cancel exporting and return to the Song page.

46
Effects
MPC Sample includes four different effect engines, all of which can be used to take your beats to the next level.
Pad FX: In this mode, effects are triggered using the pads during playback of your sequence. There are 16
available effects which can be dynamically triggered according to how hard you press the pad. The harder you
press, the more the effect is applied.
Flex Beat: In this mode, the pads trigger 16 different effects that warp pitch, time, and volume of your audio for
beat chops, DJ-style scratches, and trance gate effects.
Knob FX: In this mode, the K1–K3 knobs are used to control a specific effect that can be applied to any number
of pads. This mode is great for when you want to continue to use the pads for triggering samples or sequences,
but also want to incorporate effects during your performance.
Compressor: This page allows you to apply and adjust the built-in compressor for adding extra punch to your
sound.

47
Pad FX
MPC Sample’s Pad FX allow you to trigger effects using the pads as your sequence plays.
To open the Pad FX page, press the PAD FX mode button.
To trigger Pad FX, press PADS 1–16, corresponding to the effect you would like to trigger. The more pressure
you apply to the pad, the more the effect is applied to the audio signal.
You can use up to four effects at the same time. If additional effects are triggered, previously engaged effects are
bypassed, starting with the first effect engaged. When the additional effects after the fourth are turned off, the
bypassed effects will re-engage.
To adjust Pad FX parameters, turn the K1–3 Knobs. See the list below for the available parameters for all effects.
Press the B1 Function Button to Latch an effect at the current amount. Select the pad and press this button again
to disable Latch.
Pad Effect Description Parameters Values
1 Half Speed This effect processes your audio and
plays it back at a reduced speed.
K1 – Speed x1.5, x2, x4
K2 – Mix 0–100%
2 Chorus This effect uses a low-frequency
oscillator to modulate the pitch and a
delay of the input signal for a
shimmering, “watery” sound.
K1 – Rate 0.40 – 3.20 Hz
K2 – Depth 0–100%
K3 – Feedback 0–100%
3 Flanger This effect applies a short, modulating
delay to the audio signal, resulting in a
signature “whooshing” sound.
K1 – Rate 0.02 – 10.00 Hz
K2 – Depth 0–100%
K3 – Feedback 0–100%
4 Phaser This effect applies modulated filters to
the audio signal, resulting in a sharp,
“sweeping” sound.
K1 – Feedback 0–100%
K2 – Speed 2 bars, 1 bar, 1/2, 1/4, 1/4t,
1/8, 1/8t, 1/16, 1/16t, 1/32,
1/64
K3 – Range 0–100%
5 Comb Filter This effect creates “notches” in the
frequency spectrum by delaying the
audio signal and adding it back to itself.
K1 – Speed 2 bars, 1 bar, 1/2, 1/4, 1/4t,
1/8, 1/8t, 1/16, 1/16t, 1/32,
1/64

48
Pad Effect Description Parameters Values
6 LP Filter This effect applies a low-pass filter,
suppressing frequencies above the
cutoff point.
K1 – Resonance 0–100%
K2 – Speed 2 bars, 1 bar, 1/2, 1/4, 1/4t,
1/8, 1/8t, 1/16, 1/16t, 1/32,
1/64
K3 – Range 0–100%
7 HP Filter This effect applies a high-pass filter,
suppressing frequencies below the
cutoff point.
K1 – Resonance 0–100%
K2 – Speed 2 bars, 1 bar, 1/2, 1/4, 1/4t,
1/8, 1/8t, 1/16, 1/16t, 1/32,
1/64
K3 – Range 0–100%
8 BP Filter This effect applies a band-pass filter,
suppressing frequencies above and
below the cutoff point.
K1 – Resonance 0–100%
K2 – Speed 2 bars, 1 bar, 1/2, 1/4, 1/4t,
1/8, 1/8t, 1/16, 1/16t, 1/32,
1/64
K3 – Range 0–100%
Note: Each filter has an LFO that is controlled by the set Speed and Range.
9 Ring Mod This modulation effect creates metallic
pulsing or ringing sounds by
combining audio signals, and at slow
speeds creates a “ducking” sound.
K1 – Max Freq 40.00 – 400.00 Hz
10 LoFi This effect reduces the audio quality of
the signal for a lo-fi sound that ranges
from subtle to mangled distortion.
K1 – Bitcrush 24.00 – 2.00
K2 – Decimator 0–100%
11 Color This effect applies EQ, noise, and
modulation to emulate the sounds of
vintage sound equipment.
K1 – Mode
Cassette, Flutter, Tube
Amp, Vinyl, Saturation,
Radio
12 Granulator This effect turns your audio into small
grains of sound that can be
manipulated for sonic
experimentation.
K1 – Density 1.0/s – 300.0/s
K2 – Feedback 0–100%
K3 – Grain Len 10.0 – 200.0 ms
13 Beat Repeat This stuttering effect loops and
repeats your source audio.
K1 – Division 1/4, 1/4t, 1/8, 1/8t, 1/16,
1/16t, 1/32, 1/64
K2 – Reverse Off, On
K3 – Resonance 0–100%
14 Rev Stepper This effect continually slices the
incoming audio by the length of the
Delay Time parameter. It then plays
the slices forwards and reverse as
many times as the Repeat parameter
dictates.
K1 – Delay Time 1/4, 1/4t, 1/8, 1/8t, 1/16,
1/16t, 1/32, 1/64
K2 – Repeats 2–8

49
Pad Effect Description Parameters Values
15 Delay This effect adds echo repeats to your
source audio.
K1 – Time 1/1, 1/2, 1/4d, 1/4, 1/4t,
1/8d, 1/8, 1/8t, 1/16d, 1/16,
1/16t, 1/32d, 1/32, 1/32t,
1/64d, 1/64, 1/64t
K2 – Feedback 0–100%
K3 – Range Normal, X-Feedback, Ping-
Pong
16 Reverb This is a spatial effect, designed to
emulate playing audio in an empty
space.
K1 – Pre-Delay 0–250 ms
K2 – Decay 0–100%
K3 – Diffusion 0–100%
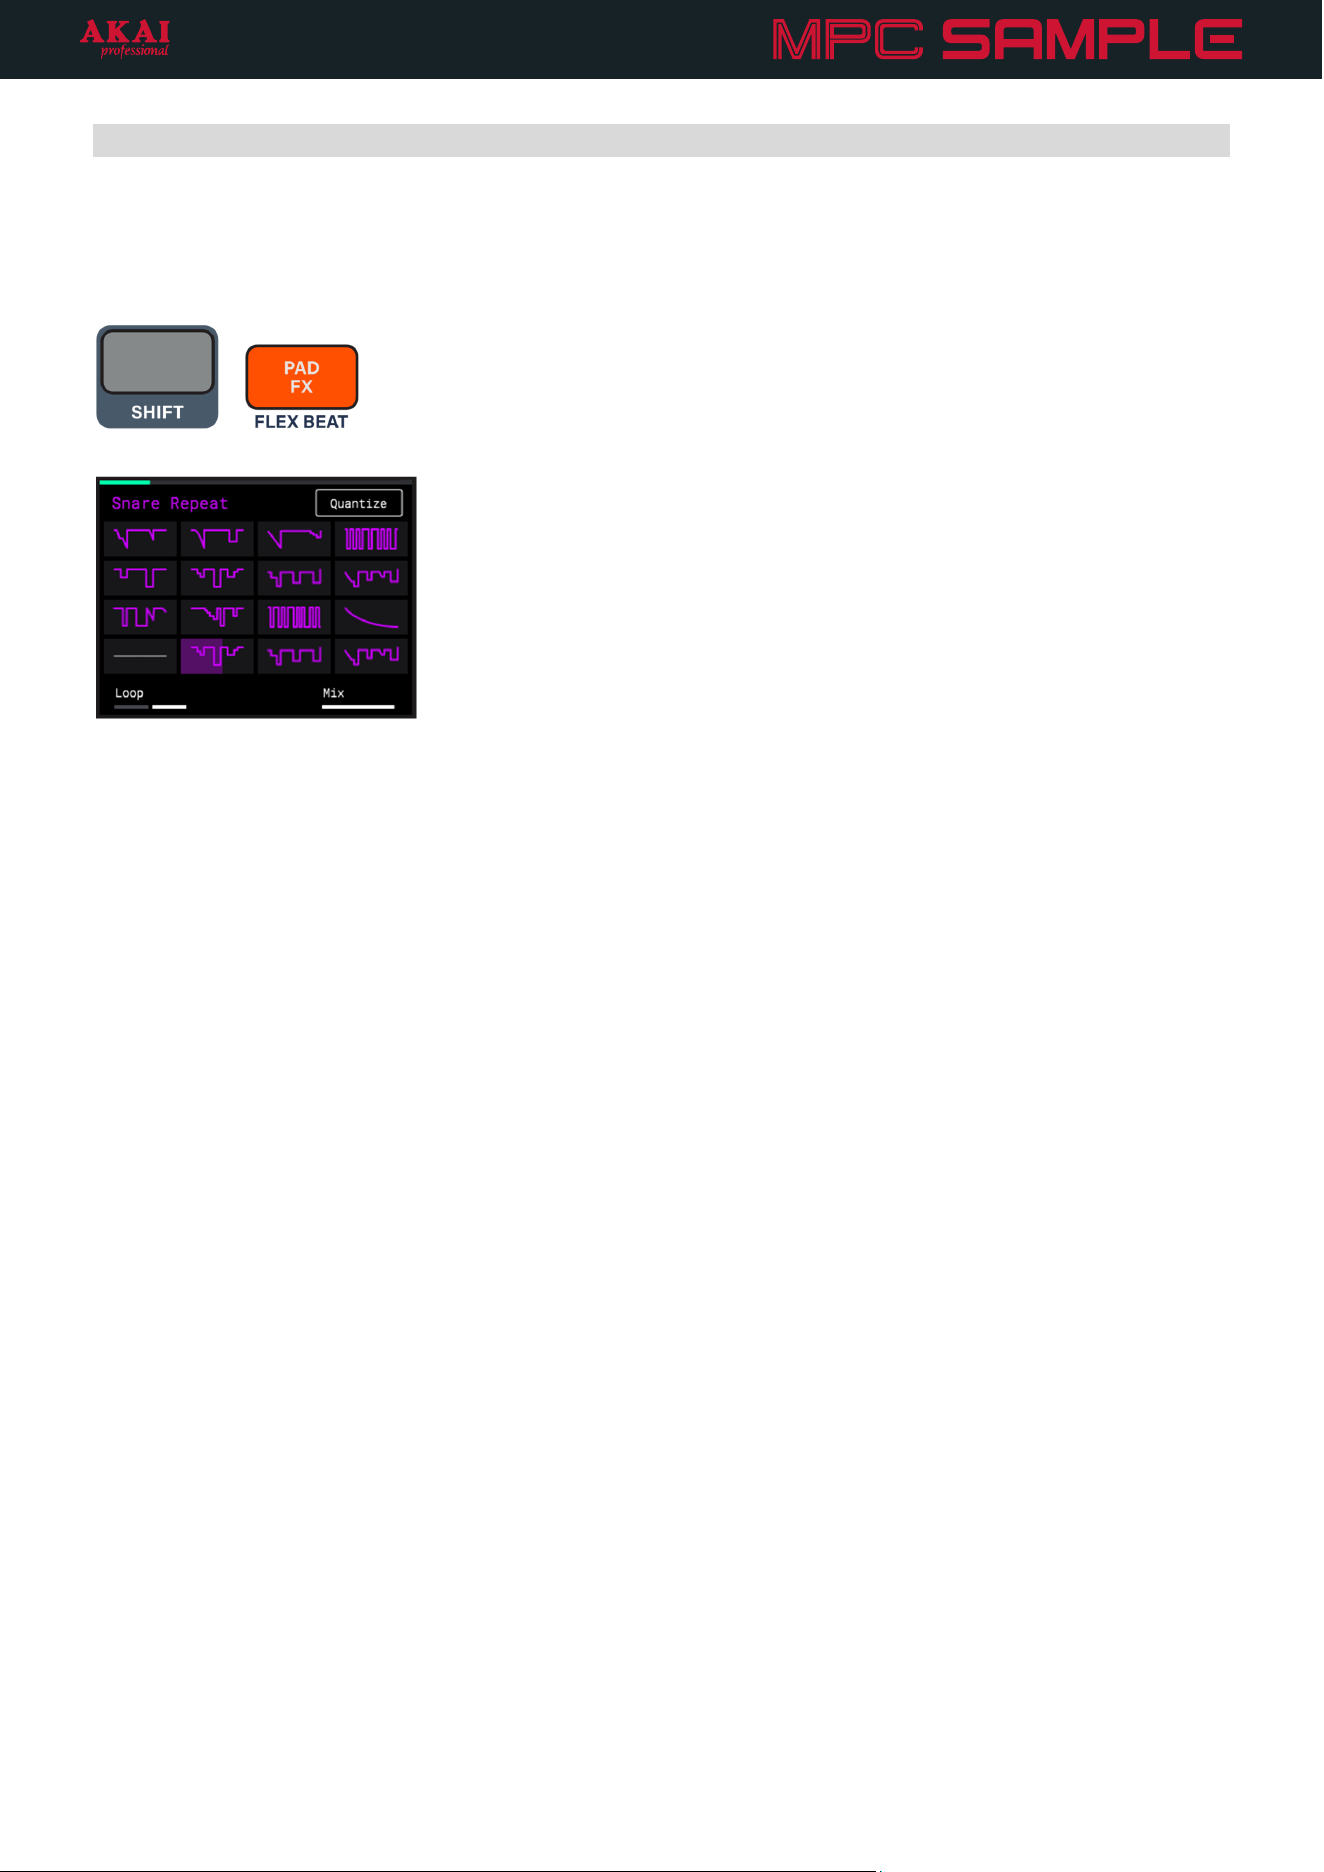
50
Flex Beat
Similar to Pad FX, the pads are used to trigger effects in MPC Sample’s Flex Beat mode, but these are time-based
effects that warp the pitch, time, and volume of your sequence for beat chops, DJ-style scratches, and trance gate
effects.
+
To open the Flex Beat page, press and hold SHIFT and press the PAD FX / FLEX BEAT button.
Flex Beat effects are applied to your entire sequence during playback. Press the PLAY button to play your
sequence before using Flex Beat.
By default, PAD 1 is active when Flex Beat is entered. This is an EMPTY effect and is the baseline of no change to
your audio.
To apply a Flex Beat effect, press PADS 2–16.
Press the B3 Function Button to activate or deactivate Quantize for Flex Beat. When activated, Flex Beat effects
are applied starting at the nearest time division.
Turn the K1 Knob to change the Flex Beat mode from One Shot to Loop. In One Shot mode, when a Flex Beat
effect is triggered, it automatically returns to the Empty effect (PAD 1) after completion. In Loop mode, each Flex
Beat effect will continue to repeat until another effect is selected or the Empty slot is selected.
Turn the K3 Knob to adjust the dry/wet Mix of the Flex Beat effect (0 – 100%). When set to 0%, only the original
audio is heard. When set to 100%, the original audio is not heard, and only the Flex Beat affected audio is heard.
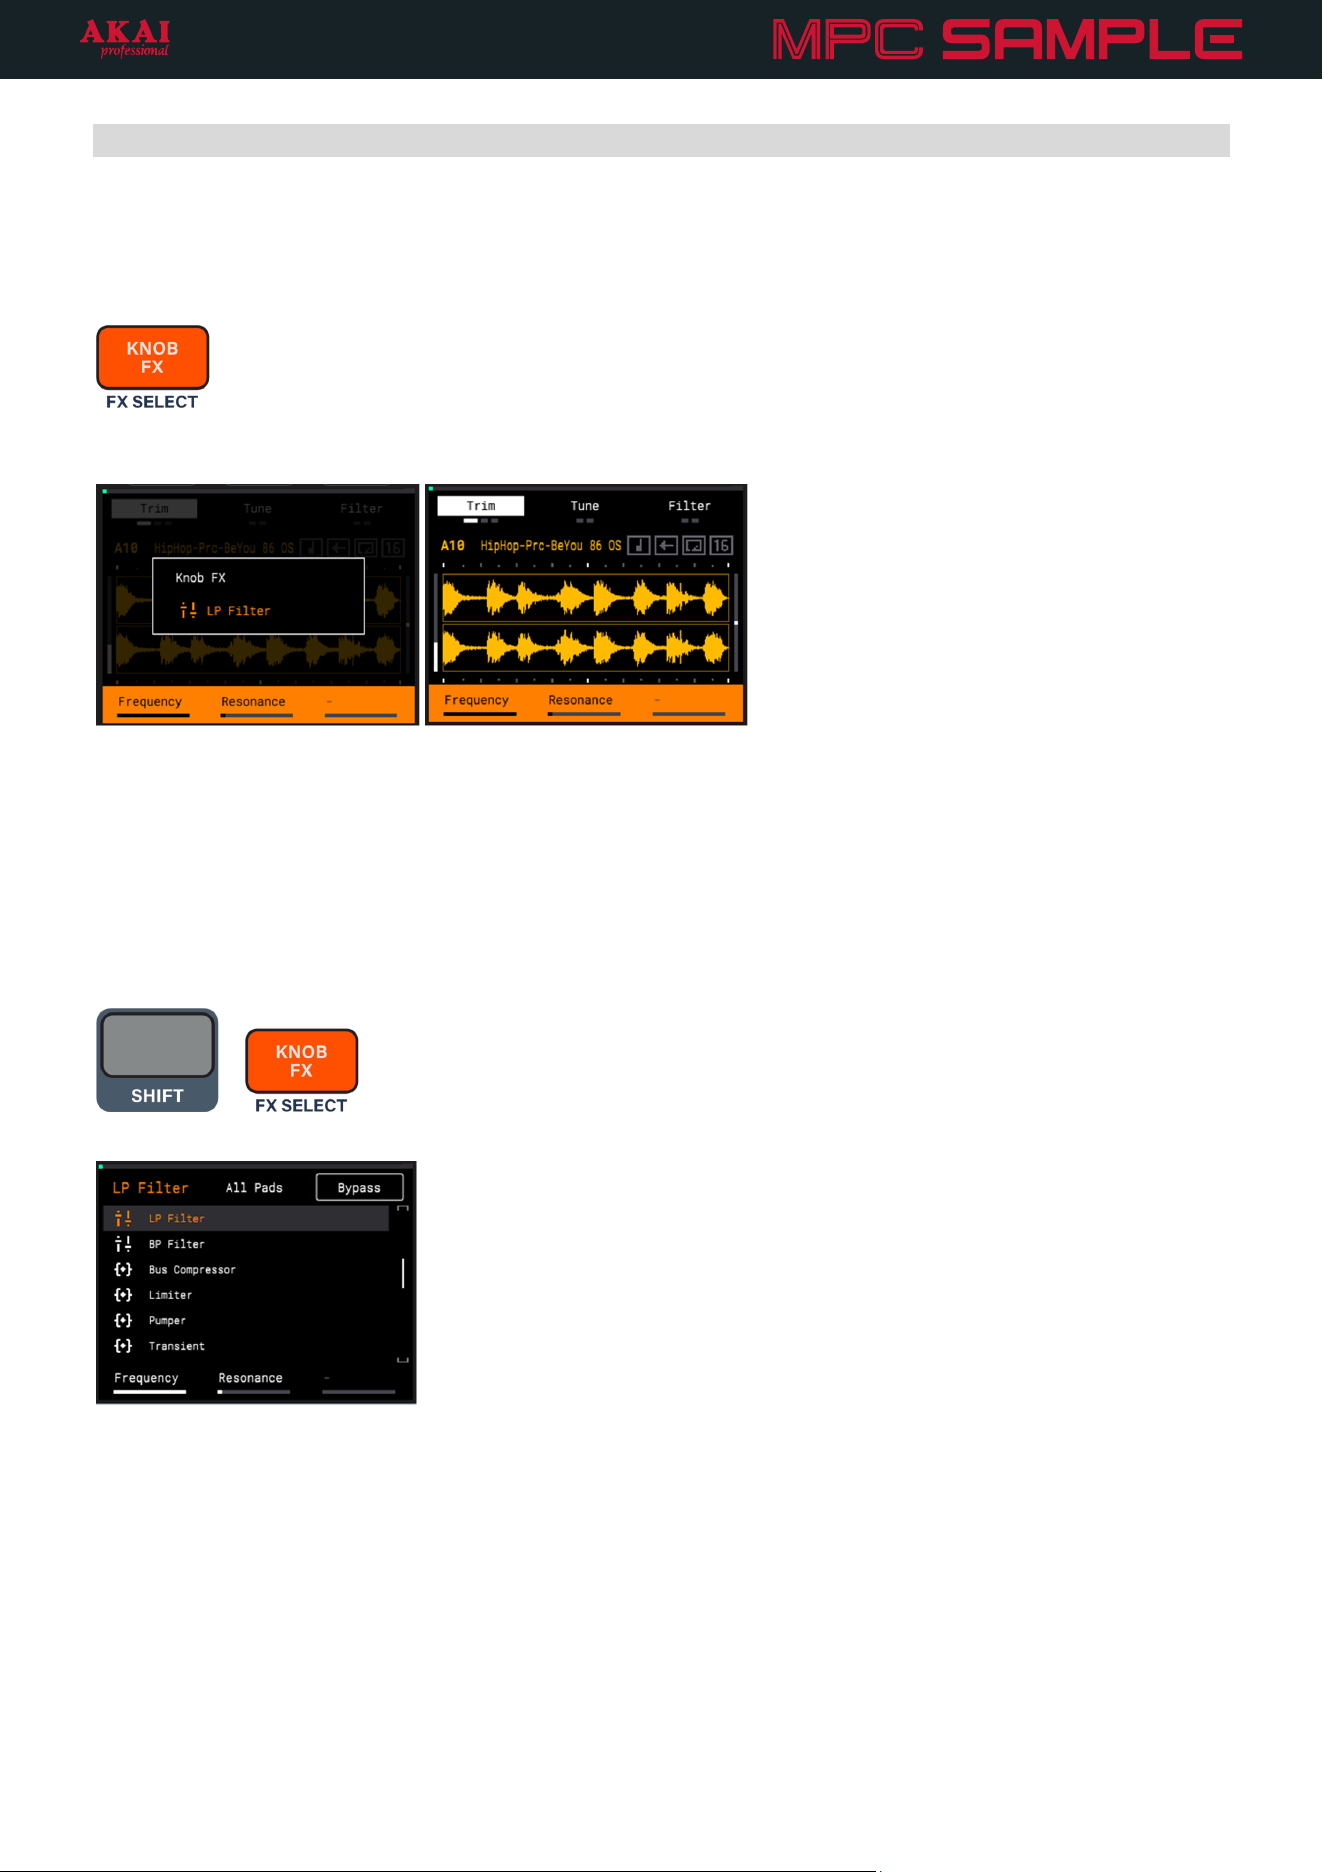
51
Knob FX
MPC Sample’s Knob FX allows you to use the K1–3 KNOBS to control a single effect parameter, freeing your
pads for other uses, such as triggering samples or sequences, or even in conjunction with the pads in Pad FX or
Flex Beat modes.
To engage the Knob FX controls, press the KNOB FX button. Once enabled, the KNOB FX button lights up, and
the current effect is briefly shown on the display.
The bottom of the display will show the parameters available for control using the K1–K3 Knobs. If the Shift
indicator is shown, you can press and hold SHIFT to access additional parameters for control using the K1–K3
Knobs.
While Knob FX is engaged, you are unable to use the K1–3 KNOBS for other functions, such as adjusting the
Start/End points in Sample Mode or adjusting Pad FX parameters.
To disengage Knob FX mode, press the KNOB FX button again.
+
To adjust the Knob FX settings, press and hold SHIFT and press the KNOB FX button.
Knob FX can be applied to specific pads, or to all pads. Press a pad to enable Knob FX for that pad. Enabled pads
are brightly lit, while pads unaffected by Knob FX are dimly lit.
Press the B2 Function Button to enable Knob FX on All Pads at the same time.
Press the B3 Function Button to Bypass Knob FX on all affected pads.
To select an effect for Knob FX, turn the ENCODER or press the -/+ buttons to browse the list of effects, and then
press the ENCODER to load the highlighted effect.
52
The table below provides a list of the available Knob FX, along with their descriptions and available parameters
for control.
Effect Description Parameters Values
Delay This effect adds echo repeats
to your source audio.
K1 – Time
When SYNC is ON: 1/32, 1/16T,1/32D, 1/16, 1/8T,
1/16D, 1/8, 1/4T, 1/8D, 1/4,
2/4T, 1/4D, 2/4, 5/8, 3/4, 7/8,
4/4, 5/4, 6/4, 8/4
When SYNC is OFF: 1 ms – 2.00 s
K2 – Feedback 0 – 100%
K3 – Mix 0 – 100%
SHIFT+K1 – Sync Off, On
SHIFT+K2 – Damping 1.00 – 20.0 kHz
SHIFT+K3 – Width 0 – 100%
Diff Delay This effect applies a delay with
an adjustable amount of
diffusion, emulating the
dissipation of echoes in a
reverberant space.
K1 – Time
When SYNC is ON: 1/64, 1/32, 1/16T,1/32D, 1/16,
1/8T, 1/16D, 1/8, 1/4T, 1/8D,
1/4, 1/2T, 1/4D, 2/4, 4/4T, 3/4,
4/4
When SYNC is OFF: 1 – 1000 ms
K2 – Feedback 0 – 100%
K3 – Mix 0 – 100%
SHIFT+K1 – Sync Off, On
SHIFT+K2 – Diffusion 0 – 100%
SHIFT+K3 – High Damp 0 – 100%
Tape Delay This effect emulates a delay
system using an analog tape
loop and a series of tape
heads to produce an echo
effect.
K1 – Time 1, 1/2, 1/2., 1/4, 1/4., 1/8, 1/8.,
1/16, 1/16.
K2 – Feedback 0 – 100
K3 – Mix 0 – 100
SHIFT+K1 – Wow/Flut 0 – 100
SHIFT+K2 – Ramp 0 – 100
SHIFT+K3 – Spread 0 – 100
Sample Delay This effect is a utility delay
plugin that can delay the left
and right channels by
different, small amounts to
loosen percussion elements or
add stereo width.
K1 – Left 0.0 – 250.0 ms
K2 – Right 0.0 – 250.0 ms
53
Effect Description Parameters Values
Reverb Small,
Reverb Medium,
Reverb Large
These are spatial effects,
designed to emulate playing
audio in an empty space,
ranging from a small room to a
large hall.
The settings for the three
effects are identical.
K1 – Pre-Delay 0 – 250 ms
K2 – Time 0.4 – 71.5 s, +inf s
K3 – Mix 0 – 100%
SHIFT+K1 – ER/Tail Mix 0 – 100%
SHIFT+K2 – Density 0 – 100%
SHIFT+K3 – Low Cut 1 – 1000 Hz
Spring Reverb
This is a spatial effect, designed
to emulate the sound of a
spring reverb tank.
K1 – Pre-Delay 0 – 250 ms
K2 – Time 1.0 – 10.0 s
K3 – Mix 0 – 100%
SHIFT+K1 – Width 0 – 100%
SHIFT+K2 – Diffusion 0 – 100%
SHIFT+K3 – Low Cut 20.0 Hz – 1.00 kHz
HP Filter This effect applies a high-pass
filter, suppressing frequencies
below the cutoff point.
K1 – Frequency 10 – 19999 (Hz)
K2 – Resonance 0 – 100
LP Filter This effect applies a low-pass
filter, suppressing frequencies
above the cutoff point.
K1 – Frequency 22 – 19999 (Hz)
K2 – Resonance 0 – 100
BP Filter This effect applies a band-pass
filter, suppressing frequencies
above and below the cutoff
point.
K1 – Frequency 55.0 Hz – 20.0 kHz
K2 – Resonance 0.7 – 20.0
Bus Compressor
This is a transparent
compressor, able to perform
substantial volume adjustments
without artifacts.
K1 – Attack 0 – 100
K2 – Release 0 – 100
K3 – Threshold -50 – 0
SHIFT+K1 – Ratio 1 – 20
SHIFT+K2 – Output -6 – 24
SHIFT+K3 – Mix 0 – 100
Limiter This effect changes the
dynamics of a signal by
boosting the entire signal so
that the quietest parts are
louder but peaks above a set
level are limited.
K1 – Gain -12.0 – 36.0 dB
K2 – Ceiling -24.0 – 0.0 dB
K3 – Release 10.0 ms – 10.0 s
Pumper
This effect creates a rhythmic
pumping effect, similar to that
of sidechain compression.
K1 – Speed Bar, 1/2, 1/2T, 1/4, 1/4T, 1/8,
1/8T, 1/16, 1/16T, 1/32, 1/32T
K2 – Shape 0 – 100%
K3 – Depth 0 – 100%
SHIFT+K1 – Attack 0 – 100%
SHIFT+K2 – Hold 0 – 100%
SHIFT+K3 – Release 0 – 100%
54
Effect Description Parameters Values
Transient This effect can be used to
shape and accentuate the
impact of percussive tracks and
more.
K1 – Attack -100 – +100%
K2 – Shape 0 – 100%
K3 – Sustain -100 – +100%
Noise Gate
This effect is similar to a
compressor, but instead of
attenuating audio signal that
rises above a threshold, a noise
gate attenuates audio signal
that falls below a threshold by a
set amount. This can help
reduce background noise in
your audio signal.
K1 – Threshold -120.0 – 0.0 dB
K2 – Depth 0 – -120 dB
SHIFT+K1 – Attack 0.01 – 1000.00 ms
SHIFT+K2 – Hold 0 – 1000 ms
SHIFT+K3 – Release 1.00 – 3000.00 ms
Amp Sim
This effect simulates guitar and
bass amplifiers with a wide
range of available cabinet
models and tone shaping
options.
K1 – Cab Model D.I., Brit, 1x8”, 1x12”, 2x10”,
2x12, 4x10“, 4x12“, 1x15“
Bass, 4x10” Bass, Radio
K2 – Drive 0.0 – 11.0
K3 – Soft Clip 0 – 100%
SHIFT+K1 – Bass -12.0 – 12.0 dB
SHIFT+K2 – Mid -12.0 – 12.0 dB
SHIFT+K3 – Treble -12.0 – 12.0 dB
Tube Drive This effect is designed to
reproduce the sound of an
overdriven tube amplifier.
K1 – Drive 0 – 100%
K2 – Headroom -30.0 – 0.0 dB
K3 – Saturation 0 – 100%
Soft Clipper
This effect produces a range of
saturation effects, from subtle
warmth to harsh distortion.
K1 – Drive 1.0 – 10000.0%
K2 – Shape Tanh, Sine, Parabolic
K3 – Mix 0 – 100%
SHIFT+K1 – True Peak Off, On
SHIFT+K2 – Rel Time 0.1 – 100.0 ms
SHIFT+K3 – Post Lvl -Inf, -80.0 – 0.0 dB
Ensemble
This effect applies fluid,
shimmering modulation effects
to the audio signal.
K1 – Rate 0.1 – 10.0 Hz
K2 – Depth 0.00 – 24.00 ms
K3 – Mix 0 – 100%
SHIFT+K1 – Delay 0.00 – 24.00 ms
SHIFT+K2 – Shimmer 0 – 100%
SHIFT+K3 – Width 0 – 100%
Multi-Chorus
This effect applies a thick,
complex chorus effect to your
audio signal.
K1 – Rate 0.1 – 10.0 Hz
K2 – Depth 0.00 – 24.00 ms
K3 – Mix 0 – 100%
SHIFT+K1 – Voices 3, 4, 6
SHIFT+K2 – Delay 0.00 – 24.00 ms
55
Effect Description Parameters Values
Phaser
This effect applies modulated
filters to the audio signal,
resulting in a sharp, “sweeping”
sound.
K1 – Rate 0.10 – 10.00 Hz
K2 – Depth 0 – 100%
K3 – Mix 0 – 100%
SHIFT+K1 – Model Vibe, Stone, Ninety, Tron
SHIFT+K2 – Feedback 0 – 100%
Flanger
This effect applies a short,
modulating delay to the audio
signal, resulting in a signature
“whooshing” sound.
K1 – Rate 0.02 – 10.00 Hz
K2 – Depth 0 – 100%
K3 – Mix 0 – 100%
SHIFT+K1 – Feedback 0 – 100%
Auto-Wah This effect is a low-pass filter
modulated by an envelope that
yields a classic funky “wah-
wah”- like sound. The envelope
is triggered by the incoming
signal’s amplitude.
K1 – Sens 0 – 100
K2 – Resonance 0 – 100
K3 – Mix 0 – 100%
SHIFT+K1 – Center 0 – 100
SHIFT+K2 – Attack 0 – 100
SHIFT+K3 – Release 0 – 100
Auto-Pan This effect uses an LFO to move
the incoming signal back and
forth across the stereo field,
creating a rotary effect.
K1 – Rate 0 – 100
K3 – Mix 0 – 100%
Vintage
Emulator
This effect emulates the sonic
qualities of different vintage
hardware.
K1 – Type MPC3000, MPC60, SP1200,
SP1200Ring
Vinyl Emulator This effect emulates the sonic
qualities of a vinyl record.
K1 – Tone 0 – 100
K2 – Crackle 0 – 100%
K3 – Pitch 10 – 100%
Tape Emulator This effect emulates the sonic
qualities of a cassette tape.
K1 – Wow 10 – 100%
K2 – Noise 10 – 100%
K3 – Pitch 20 – 100%
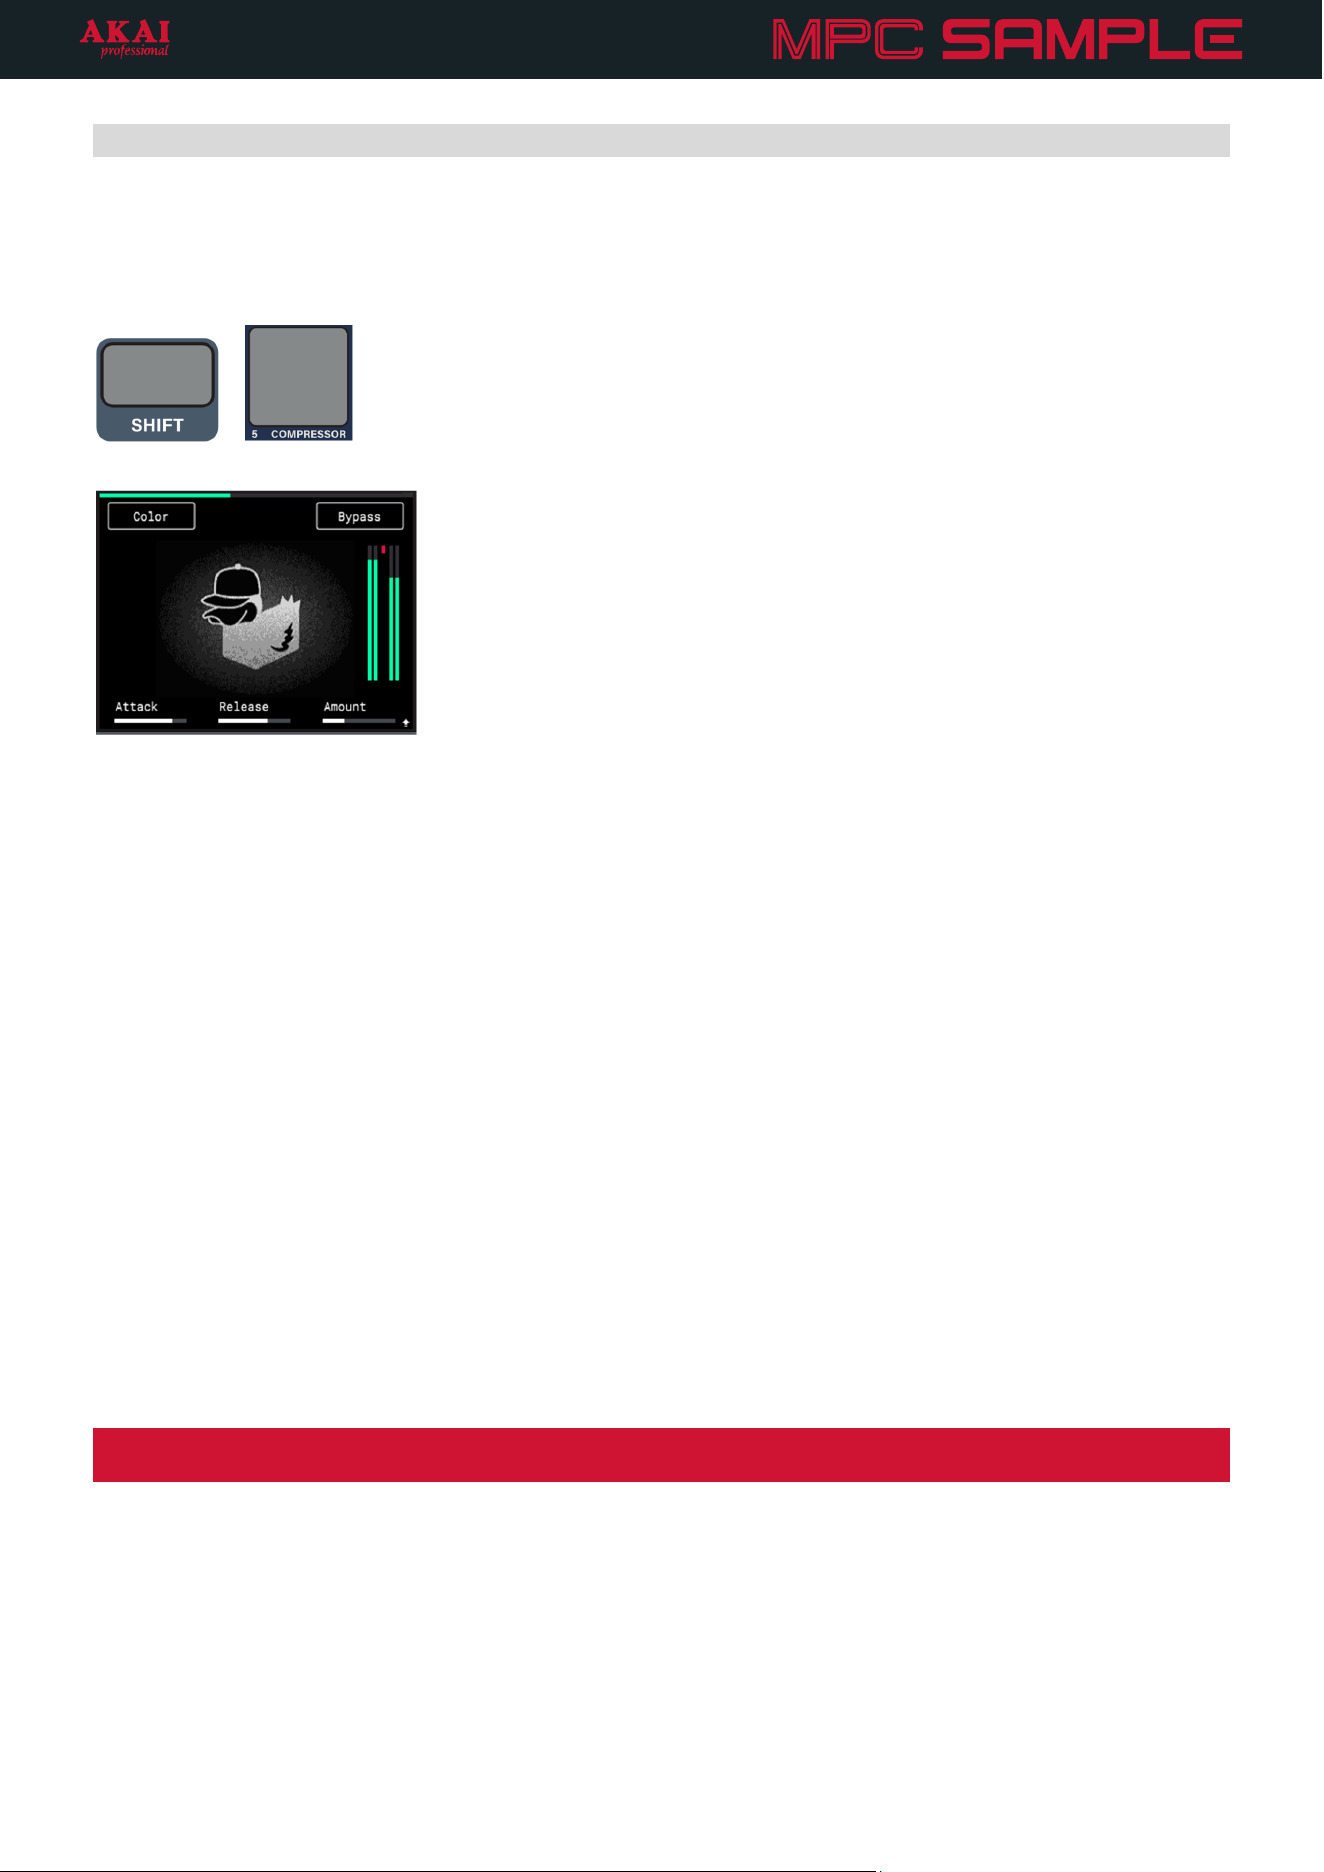
56
Compressor
The dedicated Compressor effect can be used to change the dynamic range of your signal by automatically
reducing its gain if it exceeds a certain level. This is primarily a “pumping” compressor, designed to apply sharp
ducking, but can also be used for more subtle peak-limiting.
+
To open the Compressor page, press and hold SHIFT and press PAD 5 – COMPRESSOR.
Press the B1 Function Button to activate or deactivate the Color effect for the compressor. This applies a slight
parallel bass boost when activated, as well as minor pitch instability and harmonic saturation for a classic “tape
warmth” effect.
Press the B3 Function Button to Bypass or engage the compressor effect.
Turn the K1 Knob to adjust the Attack phase of the compressor (0.100 – 150 ms). This determines how much
time it takes to start applying compression and reducing the incoming signal gain after the audio signal passes
above the threshold. High settings may allow some signal peaks to bypass the compressor.
Turn the K2 Knob to adjust the Release phase of the compressor (3.0 – 300 ms). This determines how much time
it takes for the compressor to stop applying compression after the audio signal passes below the threshold.
Turn the K3 Knob to adjust the compressor Amount (0.00 – 100.00%). This determines how much compression
is applied, and combines the threshold and ratio parameters of traditional compressor effects.
Press and hold SHIFT and turn the K3 Knob to adjust the amount of In Boost applied. This increase the incoming
volume to the compressor, allowing it to work more aggressively.
Note: The traditional makeup gain compressor parameter is automatically calculated based on input level and
overall parameter settings.
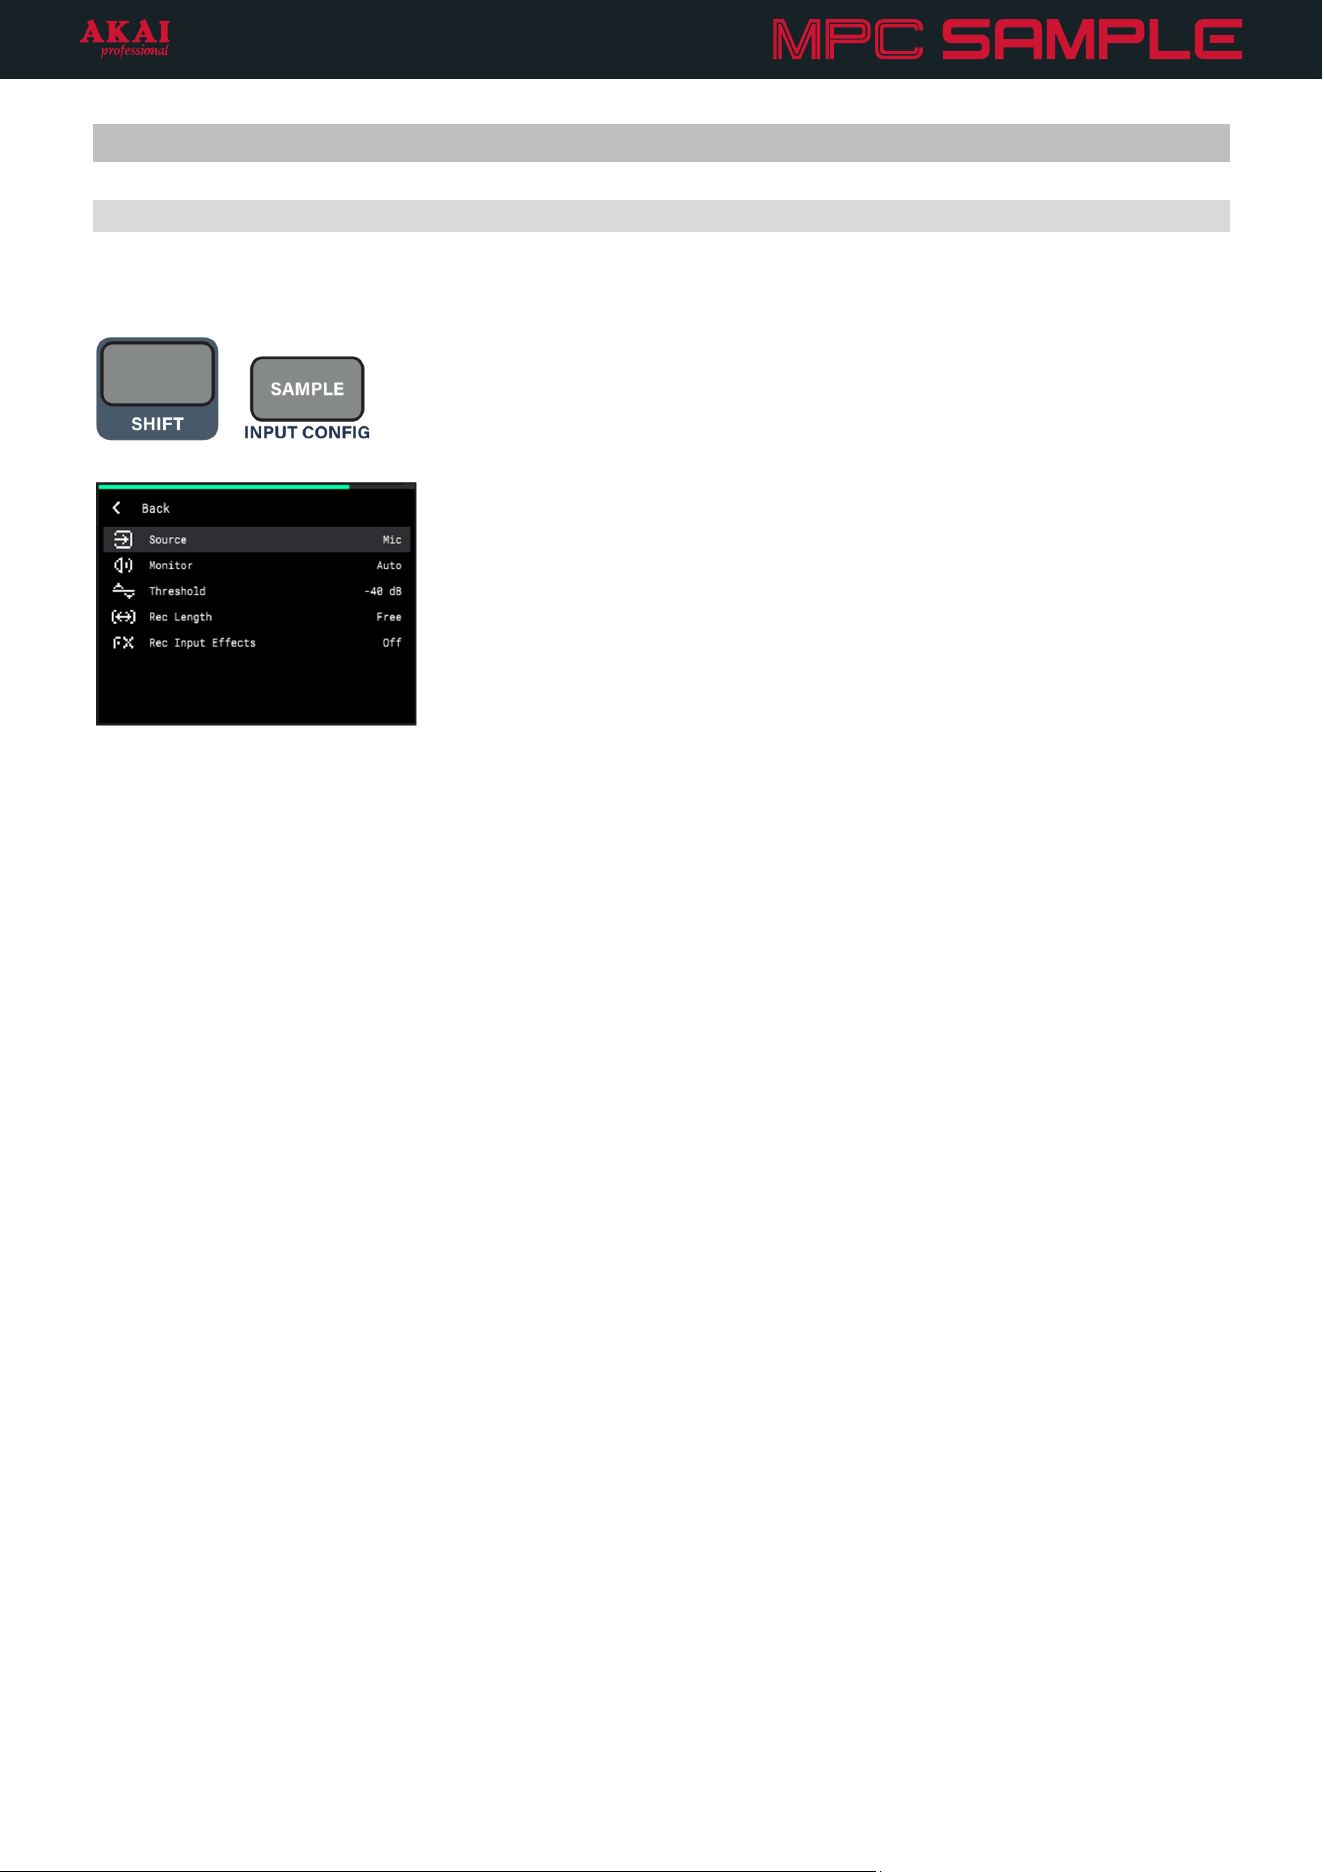
57
Menus
Input Configuration
The Input Configuration menu allows you to select and adjust your audio input sources for sampling.
+
To enter the Input Configuration menu, press and hold SHIFT and press the SAMPLE button.
Source:
• Mic: The built-in microphone, located next to the ENCODER.
• Rear: The rear panel Audio Inputs. Selecting this option enables both the 1/L and 2/R inputs to record in stereo.
• Rear L: The 1/L Audio Input on the rear panel.
• Rear R: The 2/R Audio Input on the rear panel.
• Resample: Re-recorded audio from MPC Sample. You can use this to record a sequence onto a single pad,
freeing up other pads for additional sounds.
• USB: Audio from a device connected to MPC Sample’s rear panel USB-C PORT. Selecting this option records
stereo audio from the USB device.
• USB L: Left-channel audio from a device connected to the USB-C PORT.
• USB R: Right-channel audio from a device connected to the USB-C PORT.
Monitor:
• Off: Audio from the selected Source is never monitored.
• Auto: Audio from the selected Source is monitored only while Sample Record Mode is in focus.
• On: Audio from the selected Source is always monitored.
Threshold: This setting determines the minimum audio level (-96 – 0 dB) from the selected audio input Source
that must be reached to automatically trigger recording.
Rec Length: This setting determines the length of your recording. When set to FREE, you can record with no set
length. When set to SEQ, the recording length is locked to the Sequence length. If SEQ is selected and playback
is active, recording begins at the end of the current loop.
Rec Input Effects:
This setting determines whether Knob FX triggered during recording are recorded as part of
the audio sample (ON) or are excluded from the recording (Off).
All these settings (except Rec Input Effects) can also be adjusted in the Sample Record menu.
To close the Input Configuration menu, press the B3 Function Button to move back to the previous page.
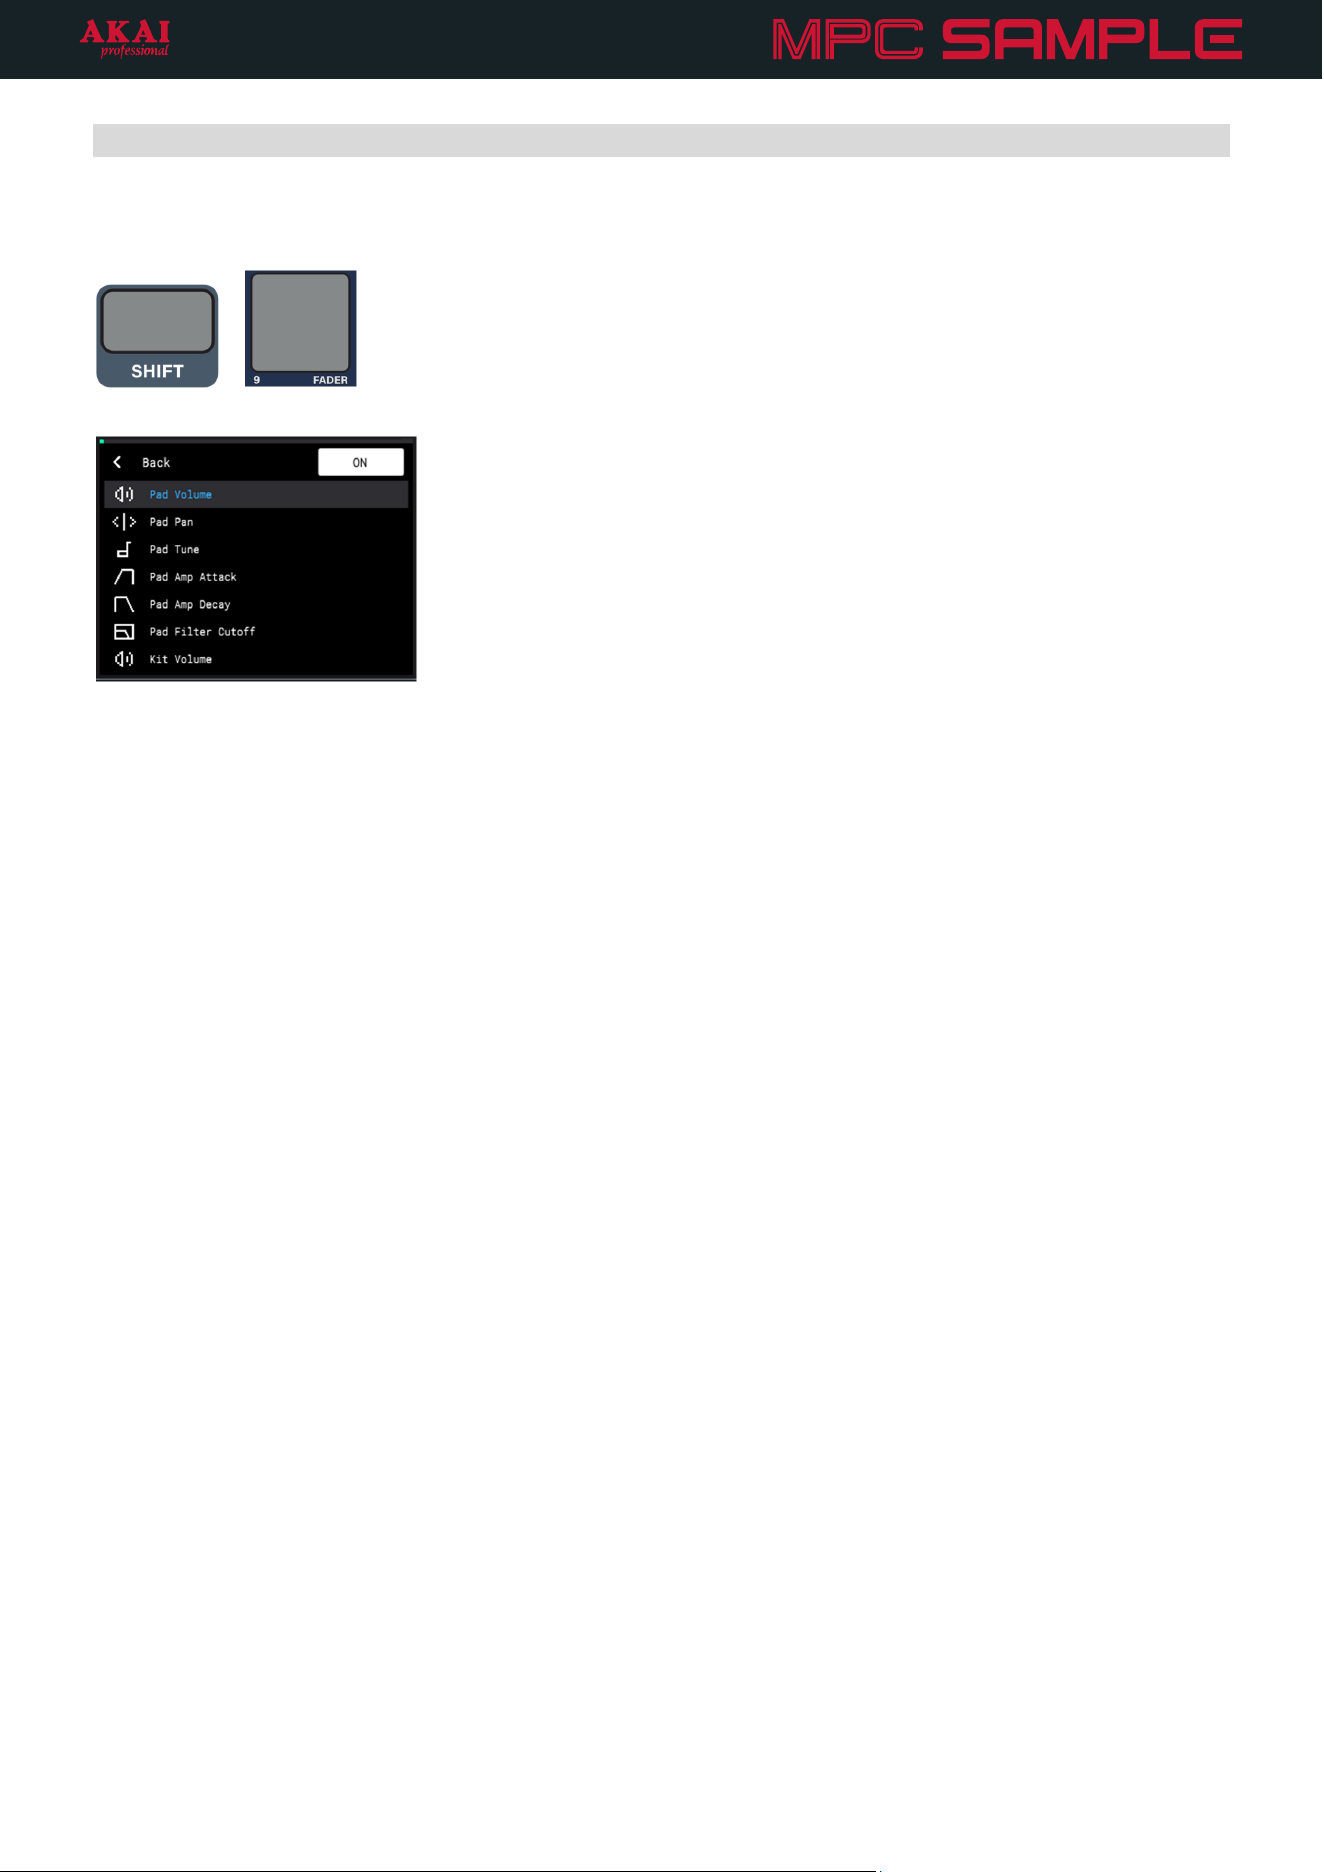
58
Fader
The Fader menu allows you to select the current parameter controlled by the Fader.
+
To open the FADER menu, press and hold SHIFT and press PAD 9 – FADER.
Press the B3 Function Button to turn the Fader control on or off.
Turn the ENCODER to browse the following Fader functions, and then press it to select.
• Pad Volume: Adjust the volume level of the selected pad.
• Pad Pan: Adjust the stereo panning of the selected pad.
• Pad Tune: Adjust the Semi Tune value of the selected pad.
• Pad Amp Attack: Adjust the Attack value of the Amplitude Envelope for the selected pad.
• Pad Amp Decay/Release: Adjust the Decay or Release value of the Amplitude Envelope for the selected
pad. This controls Decay if the pad is set to One Shot playback, and controls Release if the pad is set to Note
On playback.
• Pad Filter Cutoff: Adjust the Cutoff value of the Filter for the selected pad.
• Kit Volume: Adjust the volume of the entire kit.
Similar to the K1–K3 Knobs, the FADER has absolute position only and uses soft takeover when switching
between controls. This means that as you are moving between different controls, the fader’s position may not
align with the current setting of the new parameter.
The brightness of the Fader LED indicates the relative position of the current parameter value. The brighter the
LED, the higher the value (when Pad Pan or Pad Tune are selected, the Fader LED is brightest at the center, and
dims at both the top and bottom). Move the fader until the LED begins changing brightness again, indicating the
fader has regained control of the current parameter value.
Press the B1 Function Button to move back to the previous page.
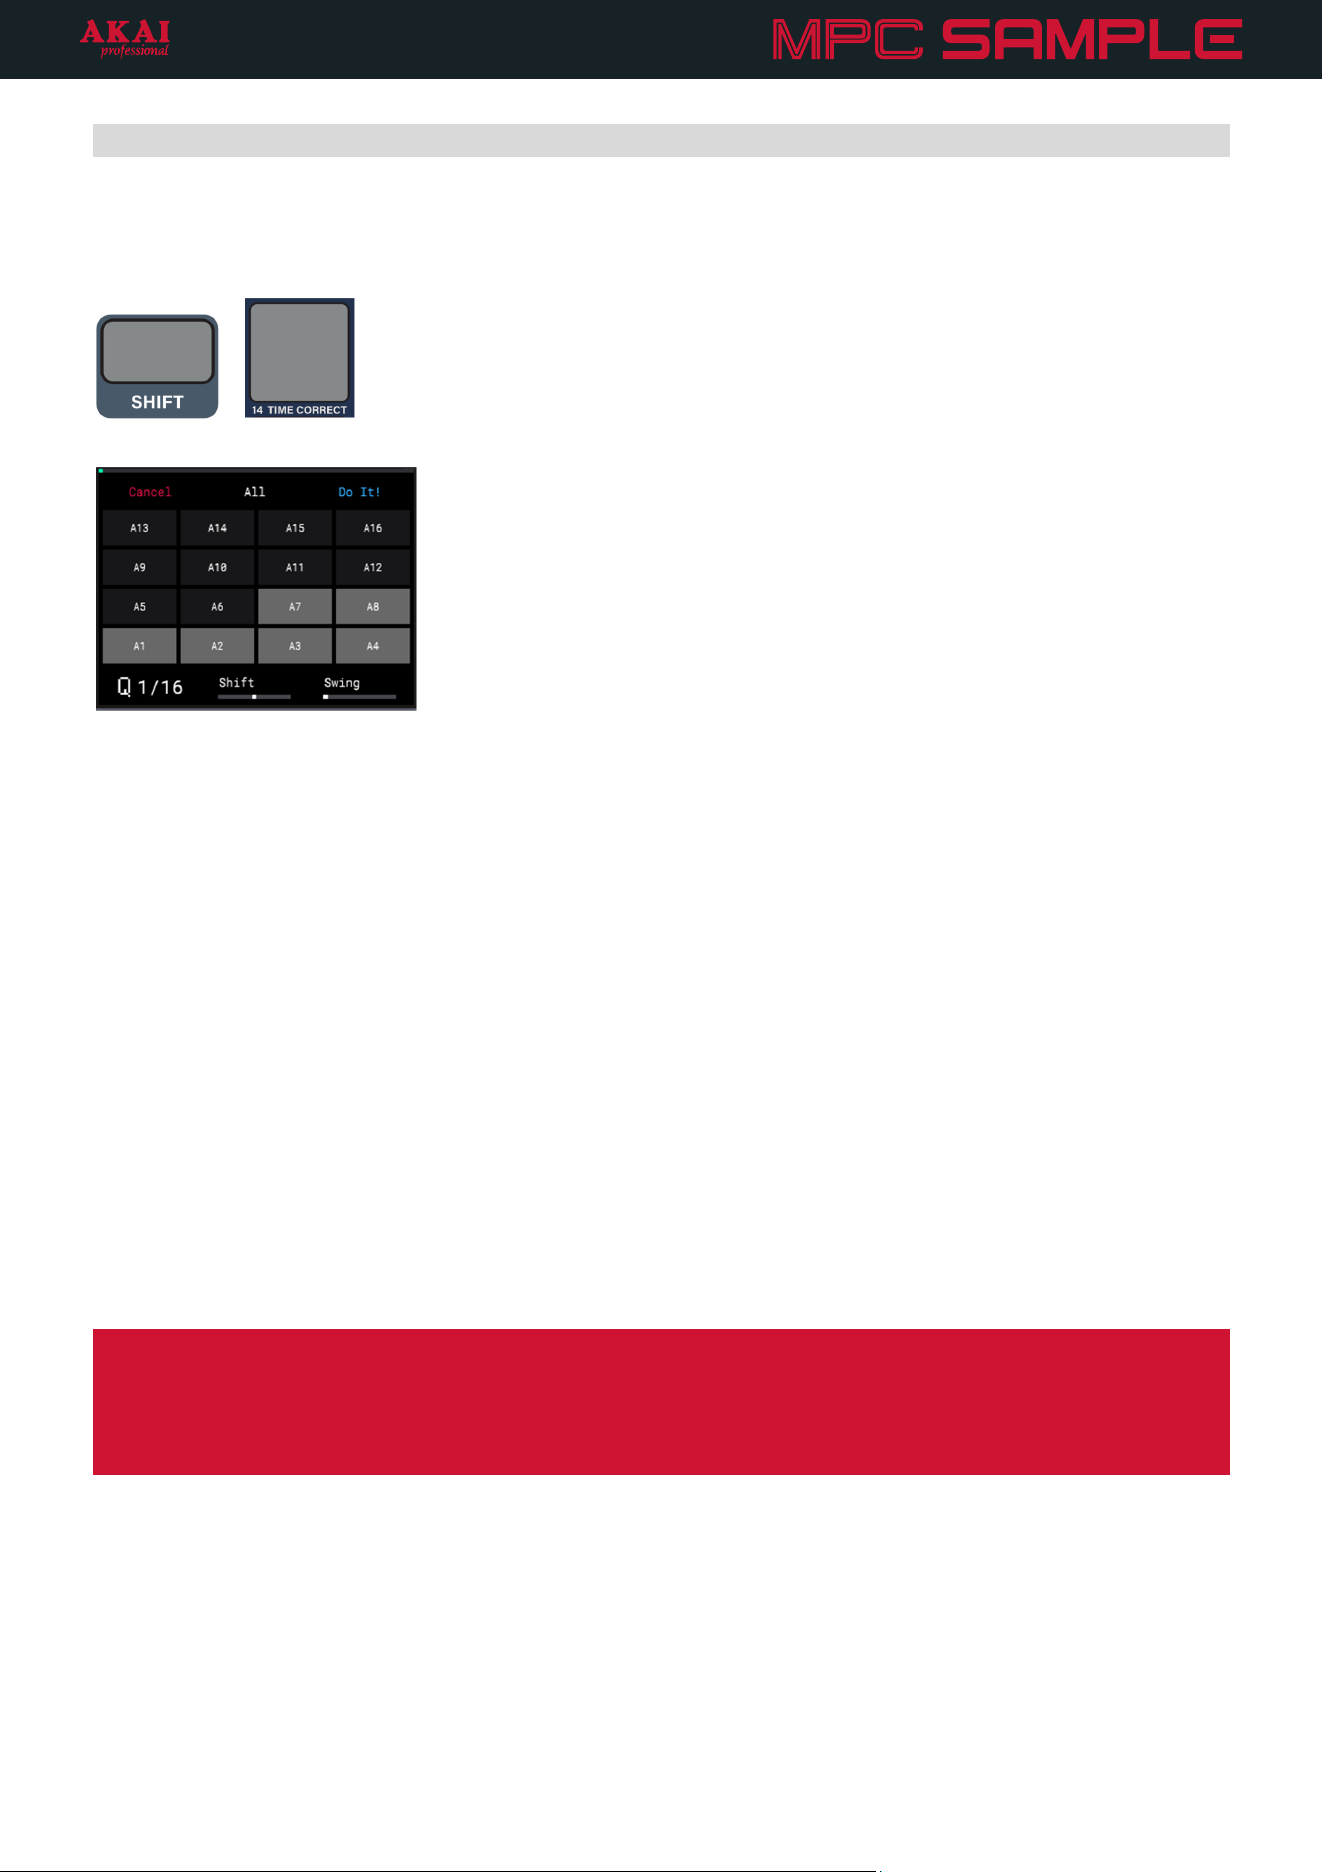
59
Time Correct
The Time Correct menu contains settings that help quantize the events in your project. This makes your notes
snap to a grid at a defined value.
+
To open the Time Correct menu, press and hold SHIFT and press PAD 14 – TIME CORRECT.
Press a PAD to select it for timing correction. Selected pads are highlighted on the display, and the pad lights up
while viewing the Time Correct menu.
You can also press the B2 Function Button to select all pads at the same time.
Turn the K1 Knob to adjust the quantization (Q) value. This determines the time division that each bar of the
sequence is divided into, and how note events snap to those divisions. For example, if the Q is set to 1/16, all
events will snap to the nearest 1/16 note on the grid.
Turn the K2 Knob to adjust the Shift value. This setting adjusts all selected events forward or backward in the
sequence by a small amount. This can allow you to create subtle timing variations that give your events a more
“humanized” feel.
Turn the K3 Knob to adjust the Swing value. This setting lets you “shuffle” your beats by shifting the timing of
notes, so they have a triplet-like feel instead of falling on the downbeat.
To apply the Time Correct settings, press the B3 Function Button (Do It!). All recorded events for the selected
pads are adjusted according to the settings.
Tips: Play your sequence before and after applying Time Correct settings to hear the difference. If you aren’t
happy with the results, you can undo the settings by holding SHIFT and pressing -/UNDO.
The Q and Swing values are global and will remain at the settings shown here whether they are applied to
recorded events or not. For example, changing the Q value in this menu also changes it in Sequence Mode. For
the Swing value, the current setting will also affect how Note Repeat functions.
To exit the Time Correct menu without applying the settings, press the B1 Function Button (Cancel).
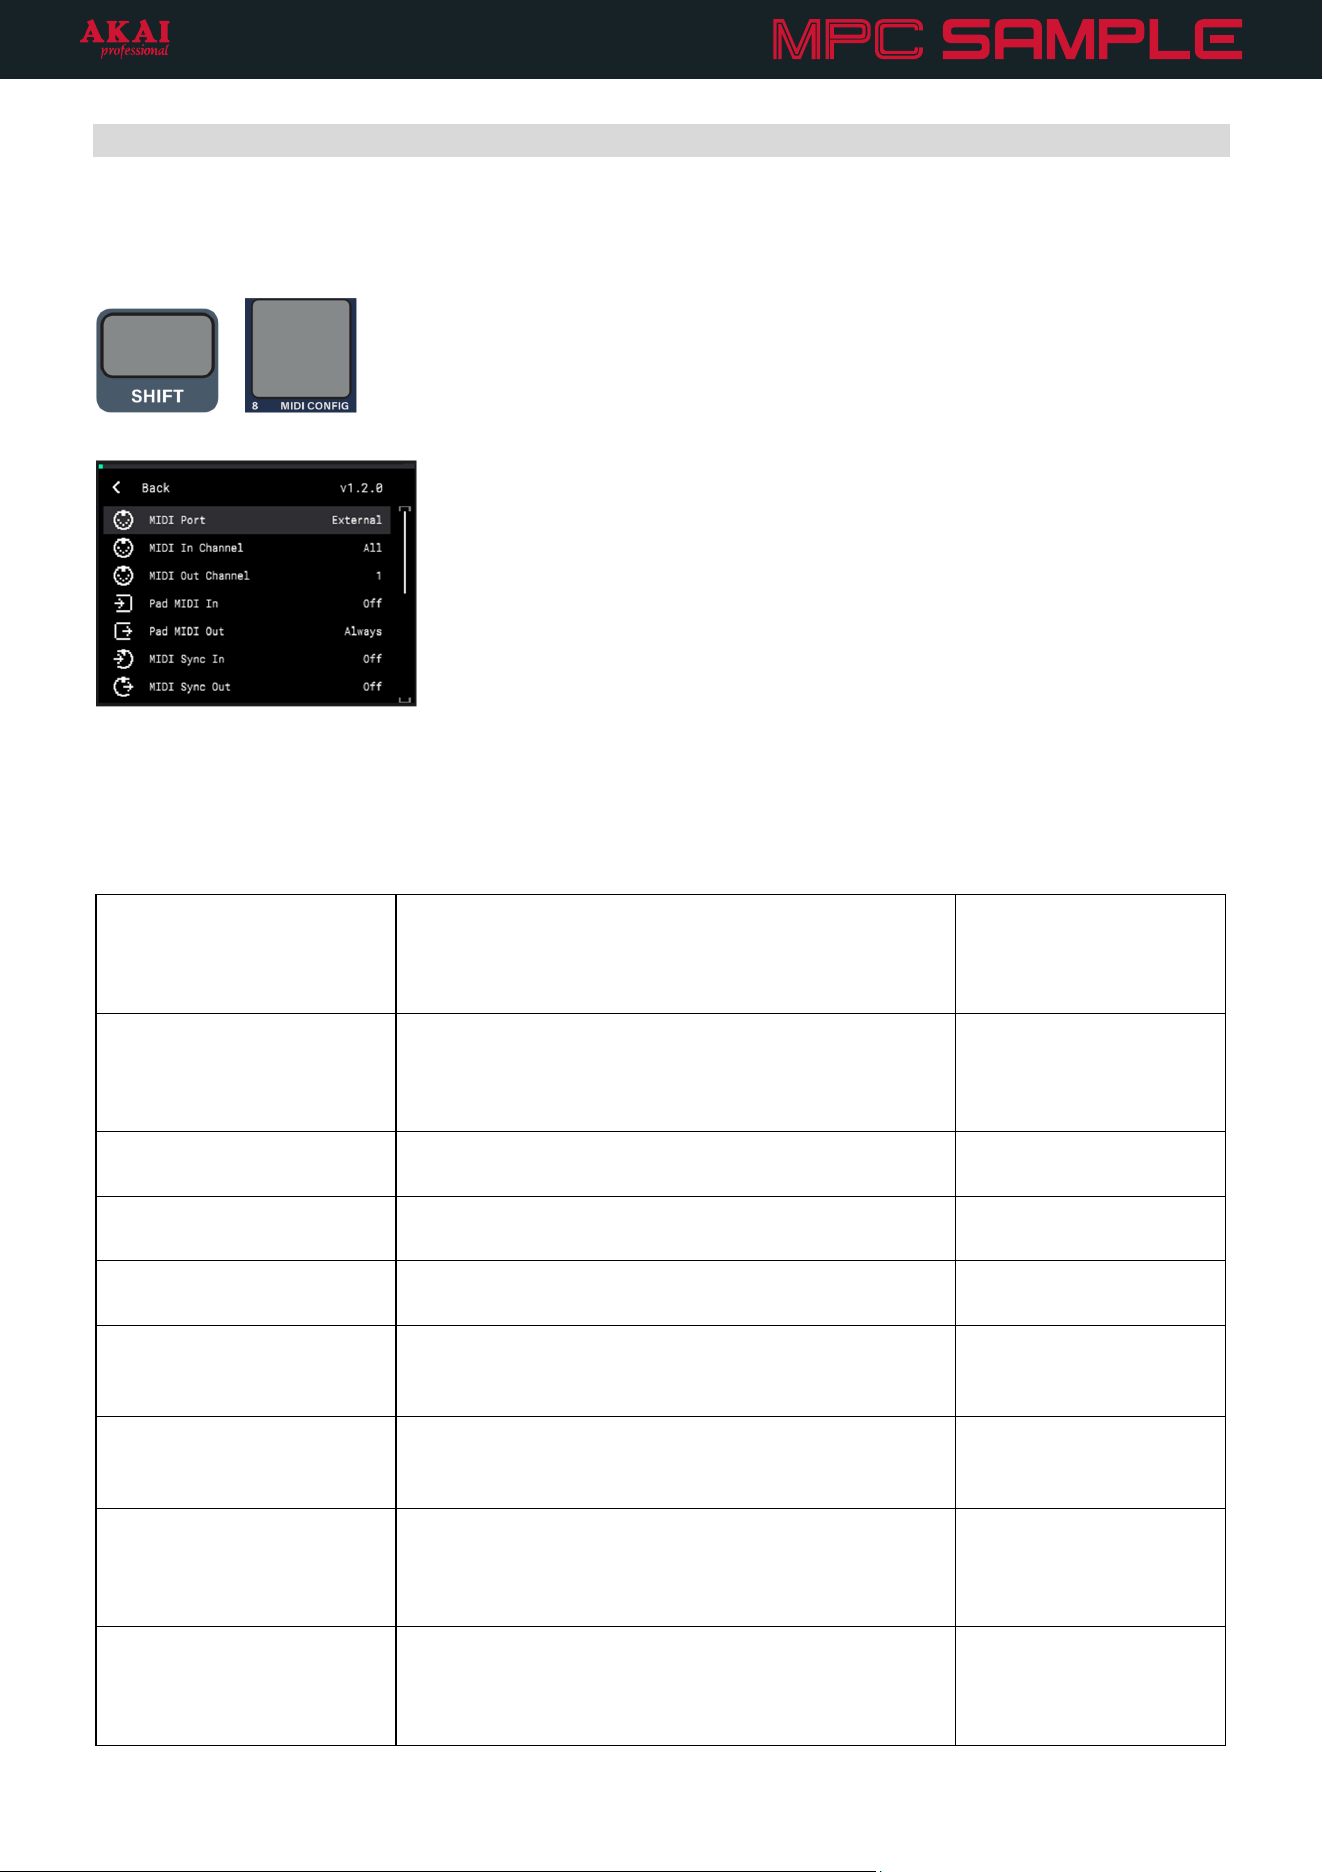
60
MIDI Configuration
The MIDI Configuration menu allows you to adjust how MPC Sample sends and receives MIDI and CV data. You
can also use this menu to reset MPC Sample’s settings and data.
+
Press and hold SHIFT and press PAD 8 – MIDI CONFIG to open the MIDI Configuration menu.
Use the ENCODER to scroll through the following options. Press the ENCODER to select a setting, and then turn
it to adjust the value. Press the ENCODER again to confirm.
Setting Description Values
MIDI Port This setting determines the active MIDI port for
sending and receiving MIDI data. External refers to
the 1/8” MIDI IN and MIDI OUT ports on the rear
panel.
External, USB
MIDI In Channel This setting determines the MIDI Channel on which
MIDI input data is received. Select All to receive MIDI
input data from all channels, or select a specific
channel.
All, 1–16
MIDI Out Channel This setting determines the MIDI Channel on which
MIDI output data is sent.
1–16
Pad MIDI In This setting determines whether MIDI Input can be
used to trigger the pads.
Off, On
Pad MIDI Out This setting determines whether MIDI Output is sent
from the pads.
Never, Always, Empty
MIDI Sync In This setting determines whether MPC Sample
receives MIDI Sync information, and what type of
information if enabled.
Off, Midi Clock, MTC
MIDI Sync Out This setting determines whether MPC Sample sends
MIDI Sync information, and what type of information
if enabled.
Off, Midi Clock, MTC
MIDI Thru This setting determines whether the MIDI OUT port
also functions as a Thru port. When set to ON, MIDI
data received by the MIDI IN port is also forwarded
through the MIDI OUT port.
Off, On
Receive Program Change This setting determines whether MPC Sample
receives MIDI Program Change messages. When
enabled, these messages can be used to trigger
sequences.
Off, Sequence
61
Setting Description Values
CV/Sync Out This setting determines whether MPC Sample send
CV/Sync output data via the SYNC OUT port.
Off, On
CV/Sync Base This setting determines the base CV clock resolution.
A value of 1 is equal to 1 pulse per quarter note.
1–8
CV/Sync Division This setting multiplies the CV/Sync Base setting by
the given value.
1–24
Select RESET FACTORY SETTINGS to reset all settings on MPC Sample to their factory defaults and restart the
device. Press the B3 Function Button to select YES to continue with the reset, or press the B1 Function Button to
select NO to return to the MIDI Config menu.
Select RESET FACTORY DATA to delete all internal user content and restart MPC Sample. Press the B3 Function
Button to select YES to continue with the reset, or press the B1 Function Button to select NO to return to the
MIDI Config menu.
IMPORTANT: Doing so will remove all user content saved to the internal drive and restore MPC Sample to the
factory default content. This includes any content in an unsaved user project, including the current project, and
this action cannot be undone.
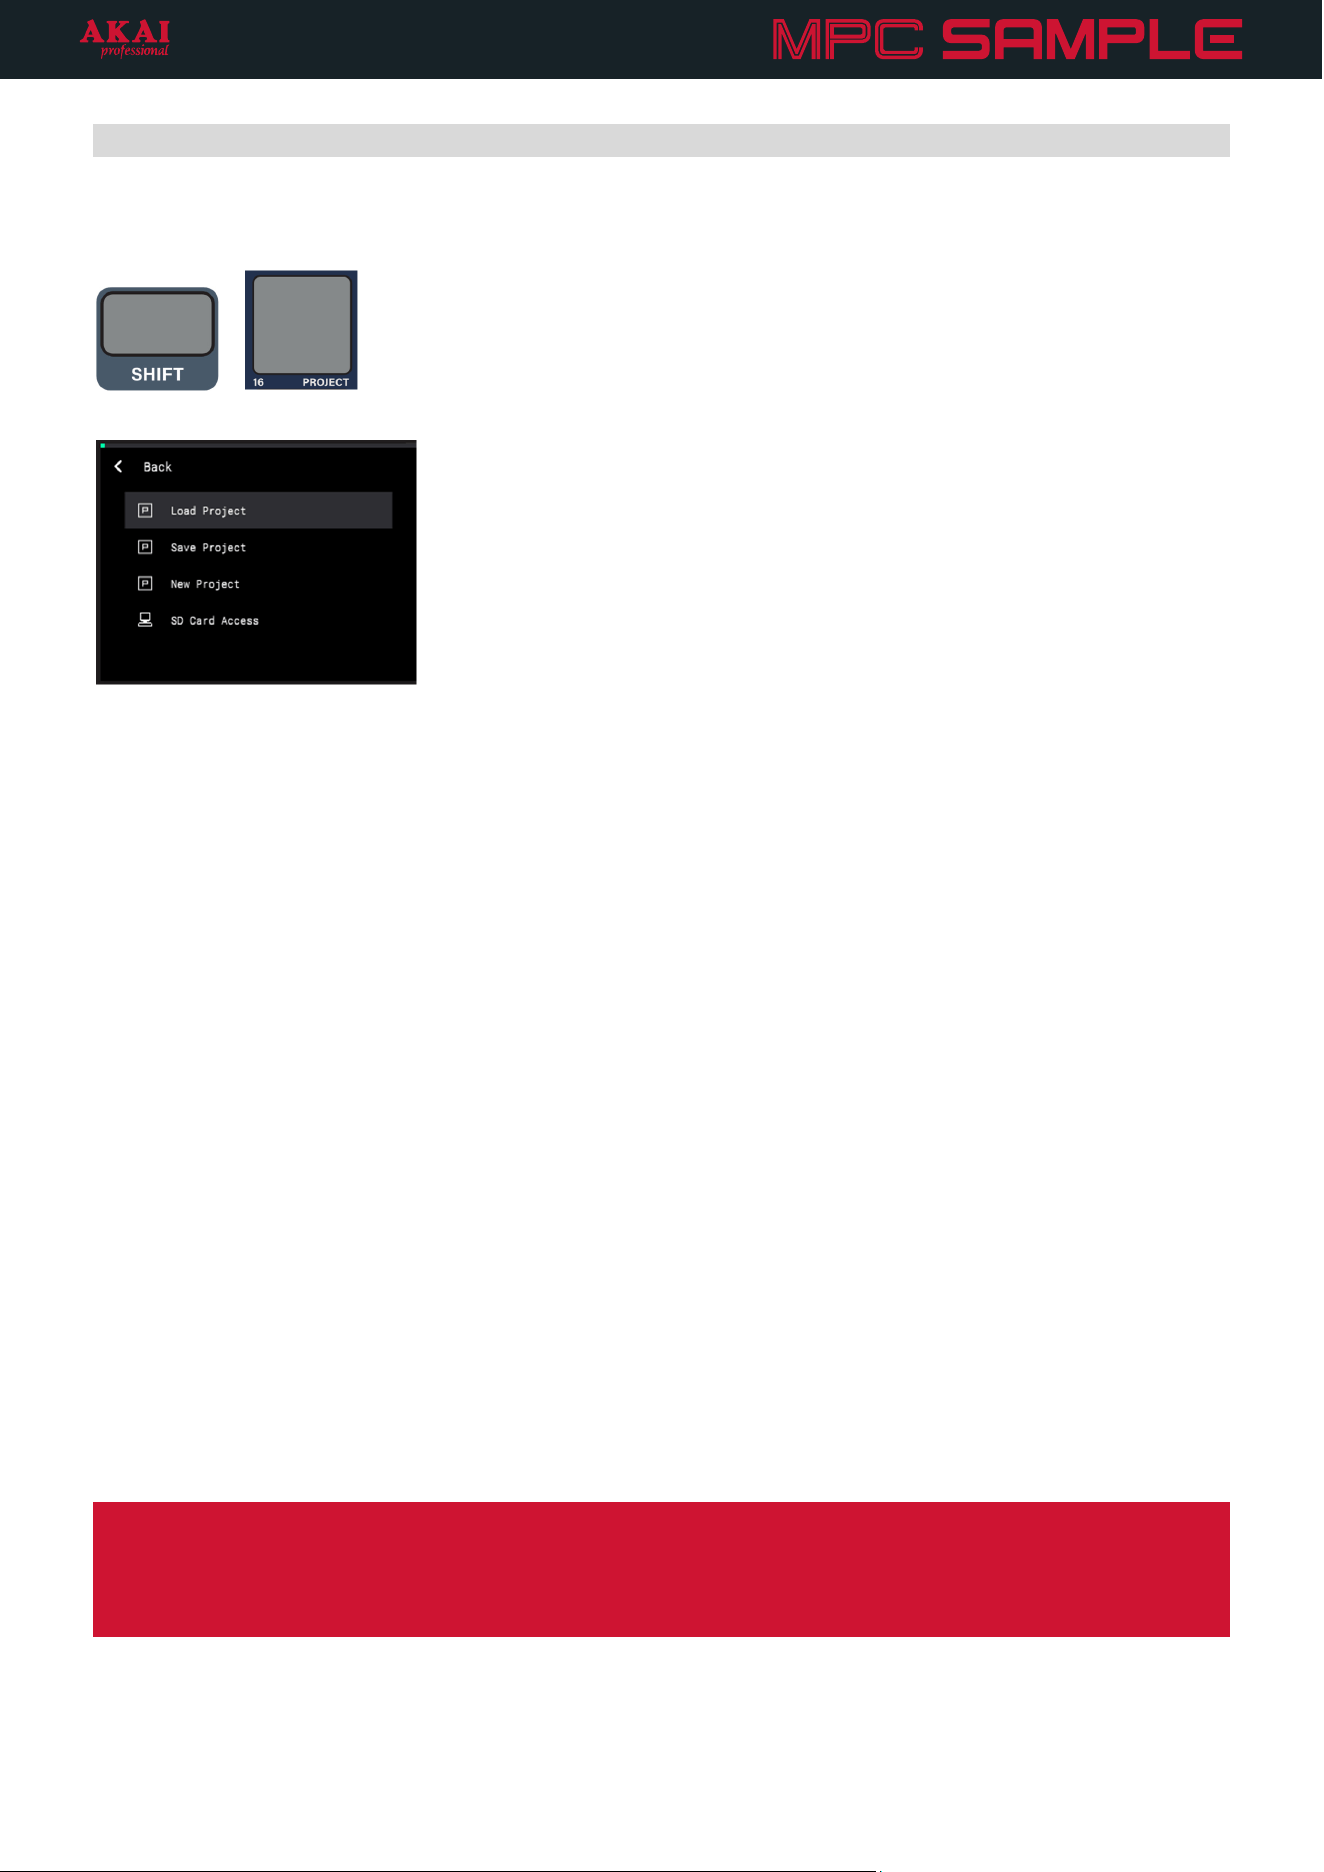
62
Project
The Project menu lets you save and load your projects, as well as manage external microSD card storage.
+
Press and hold SHIFT and press PAD 16 – PROJECT to open the Project menu.
Use the ENCODER to browse the available options, and then press it to select.
Load Project
Select this option to load projects and kits.
• Demos: This category includes demo projects, including the default startup project. These projects are great
for exploring the range of sounds and styles that you can create with MPC Sample.
• Kits: This category includes entire kits. Press the ENCODER to load the kit along with four default sequences,
or press the B3 Function Button (Load Kit) to only load the kit samples with no sequence data.
• User: This category includes user-saved projects on the internal drive.
Save Project
Select this option to save the current project.
Turn the ENCODER to scroll through letters and numbers. Press the ENCODER to select the desired character
and move to the next character.
Press and hold SHIFT to access capital letters.
Press the -/+ buttons to move between characters.
Press the B2 Function Button to erase the current character.
Press and hold SHIFT and press the B2 Function Button to erase all characters at the same time.
When you have finished editing the project title, press the B3 Function Button (Do It!) to start the export.
To exit the project save page, press the B1 Function Button (Cancel).
Note: MPC Sample contains an automatic saving system. As you work on your project, your progress is saved in
the background, so if you turn MPC Sample off and on, your project reloads at the last saved state. Saving your
project in the Project menu copies the locally stored files to a new location, either internal or external. Because of
this system, performing certain actions such as chopping, extracting, or copying on long samples may take a short
time.

63
New Project
Select this option to start a new project. On the page that appears, press the B3 Function Button to confirm that
you want to clear the current project and start a new project. Press the B1 Function Button to cancel and return
to the Project menu.
SD Card Access
Select this option to access a microSD card (not included) inserted into the microSD Card Slot on MPC Sample
from a computer connected via USB. This allows you to easily transfer samples, songs, and project files between
MPC Sample and your computer.
The microSD card will mount as an external drive on your computer. You are unable to use other modes while in
SD Card Access mode.
When you have finished transferring files, make sure you safely eject the microSD card drive from your computer
before exiting SD Card Access mode.
Once the drive is ejected, press the B1 Function Button to exit SD Card Access mode.
64
Appendix
Technical Specifications
Hardware and I/O
Storage Capacity 8 GB Internal Drive, including ~2 GB Factory Data
Expandable via microSD Card Slot
Memory 2 GB
Pads 16 RGB-lit velocity-sensitive MPC Pads with aftertouch
Display 2.4” (6.1 cm) Full-color LCD with high-resolution waveform editing
I/O Input:
• 2 1/4” [6.35 mm] TRS Audio Inputs (Mic/Line-Level)
Output:
• 2 1/4” [6.35 mm] TRS Audio Outputs (Line-Level)
• 1 1/8” [3.5 mm] TRS Headphones Output
MIDI:
• 1 1/8” [3.5 mm] TRS MIDI DIN Input Port
• 1 1/8” [3.5 mm] TRS MIDI DIN Output Port
Sync Out :
• 1 1/8” [3.5 mm] TRS CV/Gate (with configurable sync rates)
1 USB Type-C® Port
• Power
• Audio In/Out
• MIDI In/Out
• SD Card Access
Mic/Speaker Built-in microphone and 3-watt speaker for portable standalone recording and
monitoring
Buttons 11 bi-color LED buttons
8 single-color LED buttons
4 unlit buttons
Knobs 3 270° knobs
1 360° encoder with push
Fader 1 30 mm fader
Power via USB type-C
(bus powered, or connected to wall adapter or power bank [5V, 2A; sold separately])
Battery Type: Lithium-Ion
Life: Approximately 5 hours of continuous playback. Battery life may vary depending
on the features used.
Dimensions
(width x length x height)
7.6” x 9.3” x 2.0”
19.4 x 23.6 x 5.0 cm
Weight 2.03 lbs.
0.92 kg
65
Format and Support
Polyphony 32 stereo voices
Disk Streaming Fast onboard disk streaming (up to 32 voices)
Recordable Data 16 samples x 8 banks, per project
16 sequences x 8 banks, per project
No project limit
Maximum Sampling Time 20 minutes, per sample
Recall Recording 30 seconds of audio or pad performance to sequence
Import Format .wav, .mp3, .aif/.aiff, .snd, .s1s, .s3s, .flac, .ogg
Processing Sampling Frequency 44.1 kHz, 32-bit float
Supporting Sampling Frequencies File Import: 24 or 16-bit; 44.1, 48, or 96 kHz
Recording: 24-bit, 44.1 kHz
Key Software Features
Sequencer MPC Sequencer with Real-Time Swing
960 pulses per quarter note
Sampling Fast sample-to-pad workflow from a wide range of sources (Mic, Audio
In, USB [Mac/Win/iOS/Android], Resample).
Threshold-controlled sampling
Fixed-length sampling to ensure accurate loops
Record With classic MPC Note Repeat, Sequence Recall (MIDI Retrospective
Record), and Sample Recall
Effects 60+ different FX spread across four effect engines:
• Pad FX
• Knob FX
• Flex Beat
• Color-Compressor
Effects Routes Main Output, Input, and Per-Pad
• Internal (Main Out, Knob FX per-pad)
• Real-time processing of External Inputs
• Input record Knob FX
Advanced Sample Editing With Chop Mode, lazy-chopping, auto-snapping, real-time looping, and
warping.
Fast Workflow Fast one-touch functionality, for intuitive sampling, recording, and
performance.
Fader Control Assignable fader for customizable controls over pad parameters.
Song Mode For easy arrangement of songs and export.
MPC3 Support MPC Sample projects can be loaded in MPC3 to continue production in-
the-box.
Specifications are subject to change without notice.
Model: AC50

66
Trademarks & Licenses
Akai Professional and MPC are trademarks of inMusic Brands, Inc., registered in the U.S. and other countries.
macOS is a trademark of Apple Inc., registered in the U.S. and other countries.
microSD is a registered trademark of SD-3C, LLC.
Windows is a registered trademark of Microsoft Corporation in the U.S. and other countries.
All other product names, company names, trademarks, or trade names are those of their respective owners.