
1
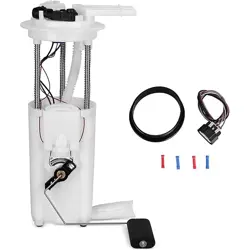
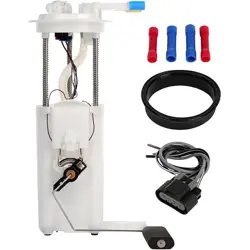
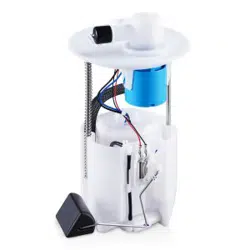
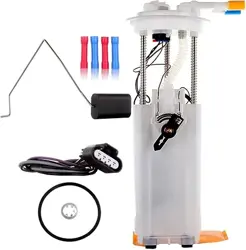
FUEL INJECTIONS FUEL PUMP TANK
UNIT REPLACEMENT INSTRUCTIONS
Precautions For Fuel System Service
TO REDUCE THE RISK OF FIRE AND
PERSONAL INJURY IT IS NECESSARY
TO OBSERVE THE FOLLOWING
PRECAUTIONS:
■Ensure that you are in a well ventilated
and level work area.
■Be certain that you are near any source of
spark or combustion in the area of your work.
■Work area should be clear of persons
smoking or be done in a non-smoking area.
■This type of repair should be done in a
properly equipped service facility.
■Always have a functional Class B fire
extinguisher available and local fire,
emergency and paramedic phone numbers
readily at hand.
■The use of bare light bulb and/or extension
cords that may break or cause sparks is not
recommended.
■Always use approved safety glasses or
goggles when working on any motor vehicle.
■Before beginning work on any part of a
vehicles fuel system, disconnect the ground
(negative) cable of the battery and ensure
that it does not accidentally spark while
working.
■Gasoline that comes in contact with skin
for prolonged periods should be washed
promptly after work is completed.
■Vapors should not be inhaled and should
be avoided. Should you feel light headed or
faint, stop working and proceed to a fresh air
source.
■Always follow proper lift or hoist
procedures when working underneath a
vehicle. If jacking equipment is used to lift
the vehicle, always use approved supports to
maintain stability while working underneath
the vehicle.
■Removing gasoline from a fuel tank must
be done with an OSHA approved pump. It is
strongly recommended that no other type of
pump is used because of the possibility of
explosion and/or fire.
■Gasoline that has been removed from a
vehicle fuel tank must be stored in
containers specific to gasoline only. Do not
store gasoline in containers that have had
any other type of liquid or combustible
product.
■Contaminated gasoline should be
disposed of properly. Follow your state and
local ordinances for proper disposal of
contaminated gasoline and/or other liquids.
It is impossible to anticipate all possible risks
and conditions under which repairs may be
made to a fuel system. Therefore, in addition
to the safety concerns listed, you are urged
to carefully evaluate the hazards involved in
such a service procedure and take whatever
further precautions that may be necessary.

2
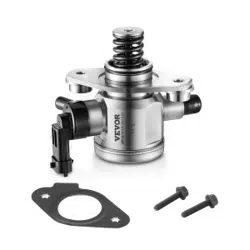
FUEL PUMP REPLACEMENT INSTRUCITONS
I. Preparations
A. Fuel systems are under pressure. It is necessary to relieve the fuel system pressure before
beginning work on the fuel system. Relieving the pressure can be done by removing the fuel cap.
1. Locate and remove the fuel pump fuse from the fuse block.
2. After the fuse is removed, start the engine and let the engine consume the remaining
gasoline in the fuel lines. The engine will stop when remaining fuel is consumed.
3. Once the engine has stopped, crank the engine for three seconds to relieve any possible
remaining fuel pressure.
B. Disconnect the vehicles negative/ground cable at the battery and secure it so that it will not
accidentally make a connection while replacing the fuel pump.
C. Drain the gasoline from the vehicle’s fuel tank.
1. Using only an OSHA approved gasoline transfer pump and approved fuel storage
containers, remove as much gasoline as from the fuel tank through the filler neck.
2. Raise the vehicle with an automotive hoist or jack up the vehicle and support it with OSHA
approved jack stands, which allow unobstructed clearance for the removal of the fuel tank.
3. Fuel tank gasoline levels will vary depending on the amount of gasoline removed through
the filler neck. Once the vehicle is raised, additional gasoline can be removed through
bracket connections.
II. Fuel Tank Removal
Fuel tanks vary from vehicle to vehicle; the following fuel tank removal instructions are for a typical
fuel tank removal. For more specific instructions on fuel tank removal for your specific vehicle it
may be necessary to obtain an approved Service Manual for the vehicle that you are replacing the
fuel pump on.
1. Visually inspect the scope of work involved before beginning the fuel tank removal
step. Be sure to have help readily available.
2. Disconnect all visible fuel hoses that connect to the fuel tank from the rest of the
vehicle (be sure to mark or label all connections for reassembly).
3. Disconnect electrical connections at the fuel tank taking extra care not to damage pins
or connectors.
4. If necessary, disconnect and remove the fuel filler neck from the vehicle.
5. Loosen the retaining straps of the fuel tank and support the fuel tank prior to removing
the straps entirely. Take extra precautions to avoid a fuel spill.
6. Take note of the condition and location of any insulating pads. Worn or misaligned,
wrongly installed pads should be replaced as they may affect the performance of the
new fuel pump.
III. Bracket Removal
1. Before removing the bracket from the fuel tank, be sure to thoroughly clean any dirt or
debris that may have accumulated at the top of the fuel tank or at the opening of the

3
locking ring area. This step must be done to prevent debris or foreign matter from
entering the fuel tank which can cause problems later on.
2. Using the correct tools, remove the locking ring or retainer using care not to damage
it.
3. Carefully lift out the bracket from the fuel tank. The old o-ring seal must be removed
from using extra care not to let pieces fall into the tank as it may be brittle. Discard the
old o-ring seal, it will be replaced with a new o-ring seal which is included in the kit.
IV. Replacement of the Pump
1. Replace the pump and filter as directed in the instructions that accompany the kit.
2. Ensure that all connections are secure before installation into the fuel tank.
V. Bracket Reinstallation
1. Before bracket reinstallation, carefully inspect the inside of the fuel tank for
contamination, dirt or foreign matter. Clean out the fuel tank if necessary prior to
bracket reinstallation.
2. Ensure the bracket is fully assembled and ready for installation.
3. Install the new o-ring in the groove at the bracket opening. Carefully lower the bracket
assembly into the fuel tank taking extra care not to bend or damage the float or the
float arm. Be sure not to disturb the o-ring when seating the bracket while keeping the
filter free of kinks and fold as this may restrict fuel flow.
4. Reinstall the locking ring or retainer using the correct tools.
VI. Reinstalling the fuel tank
1. As mentioned in section II, worn insulation and mounting pads must be replaced. It is
imperative that pads are installed in the same manor that they were removed as
missing or wrongly installed pads will cause noise or vibration to the vehicle.
2. Prior to lifting the fuel tank into place, ensure that all fuel lines and hoses sound.
Replace any inferior or defective fuel lines or hoses.
.
3. Support the fuel tank in the correct installation position. Once the fuel tank is in the
correct position install the support straps and bolt in the same manner that they were
removed.
4. Reconnect all fuel lines and electrical connections securely ensuring the there are no
kinks or perforations. Routing of fuel lines is especially important, be sure to route fuel
lines in the same manner as before using all clips and securing devices provided by
the manufacturer.
VII. Finishing the Process
1. Gasoline should only be reinstalled back into the vehicles fuel tank with an OSHA
approved gasoline-dispensing device. Before moving to the next step, be sure to
clean up any fuel that may have spilled during pump replacement or during the
gasoline refilling process.
2. At this time a visual inspection for leaks is necessary. Correct any leaks at this time
prior to proceeding to the next step.
4
3. Following the reverse order of the removal, reinstall the fuel pump fuse back into the
fuse block and reconnect the negative/ground battery cable to the battery.
4. Start the vehicle’s engine and inspect for any leaks. If leaks exist correct them
immediately.
5. Some vehicles are equipped with OBD (On board diagnostic) systems which may
have illuminated a light indicating a trouble code of malfunction. Clear trouble codes
using a service manual specific to the vehicle.
.
TROUBLE SHOOTING
Should the pump fail to operate:
Check the fuel pump fuse and fuel pump relay as outlined in the car service manual.
If the pump has power and proper polarity, check the remainder of the fuel system as outlined in
the car service manual.
NOTE: This pump will not remedy malfunctions of the regulator, injectors or other fuel
system components.
THE JUDGEMENT OF COMMON FAULTS
1).Not Pumping
Failure Judgement
Reason analysis
Repair methods
Engine Stalling
Fuel is not sufficient
Fill up the tank
Wire is not well connected
Use the multimeter to check
whether the wire circuit
The positive and negative poles are
connected mistakenly
Exchange the positive and
negative poles connections.
The carbon brush and commutator worn
out, or pump are jammed.
Replace the fuel pump, clean
the tank completely and use
standard fuel.
The relay of the pump failed
Replace the relay.
2) Fuel pump with low pressure
Failure Judgement
Reason analysis
Repair methods

5
Engine hard to coldstart
The clamps of junction on pumps’
pipeline are loosen or gapped, which
cause the fuel leaked into the tank
and decrease of the pressure of the
fuel system.
Check junctions of all the
pipelines and fasten the
clamp.
The module connecting pipeline
broke and causes fuel leakage.
Replace rubber pipes or
corrugated pipes.
The failure of safe valve cause the
fuel system pressure decreased.
Replace the fuel pump
The one-way valve failed and cause
the fuel system pressure decreased.
Replace the fuel pump
3) Fuel pump pressure and flow decrease
Failure Judgement
Reason analysis
Repair methods
Acceleration and power
are both getting down
The filter is jammed with foreign
matters, which cause big resistance
Replace the gas filter.
The strainer is jammed with foreign
matters, which cause big resistance
Change the strainer.
The pressure regulator of the pump
failed.
Replace the pressure
regulator.
The entry of filth into the pump leads to
the over-worn of the pump body and the
impeller, causing the decrease of the
pump’s pumping function.
Change the pump or the
module, clean the tank
completely, and use
standard fuel.
Used incorrect fuel pump.
Use the multimeter to
measure the pressure of
the fuel system, and
replace it with correct fuel
pump.
Fuel pump expired.
Change the fuel pump
4) Noise
Failure Judgement
Reason analysis
Repair methods
Fuel pump noisy
The strainer or filter is jammed
Change the strainer or filter
Pump was not installed in a standard
manner and have resonance
vibration during pump working.
Recheck the installation
position of the pump.
The wrong type of pump is used, and
pumps with much higher flow, which
will cause noise easily.
Replace with the proper
pump.
The pump is worn out and its life
comes to an end.
Replace with a new pump
High temperature cause gas
Restart vehicles after a
6
resistance, which make noise
period of time cooling down
can solve trouble.
5) Oil level sensor failure
Failure Judgement
Reason analysis
Repair methods
Oil level display
incorrect
Float and other parts of the fuel tank
were stuck when installing, caused
floating arm can not be moved up and
down
Adjust and reinstall
Different Circuit
Check with the multimeter
Floating arm was distorted, failed or
damaged during transportation or
installing.
Replace of the oil level
sensor
Resistor or silver touch spot was
vulcanized and corroded and cause
poor connetion
Slide come-and-go 20 times
before installing, it will clean
up the corrosion point
6) System pipeline gas blocked
Failure Judgement
Reason analysis
Repair methods
Vehicles shaked during
driving
Fuel tank inhaled air at low fuel
level.
Fill up oil or inspect on flat
road.
High temperature in summer
caused the oil vapor inside the
tubes and form gas block.
Restart vehicles after a period
of time cooling down can solve
trouble.
CAUTION:
(1)Prohibit fuel pump free working in non-oil situation.
(2)Fuel pump in line should use standard fuel: alcohol pump can use alcohol
fuel, diesel fuel pump use diesel fuel, methanol fuel pump use methanol
(
3
)
You need replace the fuel pump and strainer/ filter at the same time
(
4
)
It is not allowed to use falled off products;
(5)Replace fuel filter according to the stipulated time or mileage;
(
6
)
Replacement pump should be kept in clean work environment

7
(7)Oil should be added timely if it is too low, it is recommended to add oil when
the tank only have 1 / 3 of fuel
(8)Fuel pump should match with vehicles models.