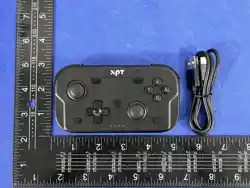
.
.....................................
R
+
.
.....................................
R
Turbo
A/B X/Y key value interchange
Six-axis gyro calibration
HOME button operation
In X-input mode, press and hold Turbo+Shotshot key for 3 seconds, controller
vibration prompt for 1 second, it will swap controller A/B X/Y key value.
After swapping A/B X/Y key values, shutdown and reboot without saving the
settings, the controller defaults to N-S layout key values.
In the controller off state, long press B + [-] + HOME key for 2 seconds to enter
the calibration, the channel light is on and change from running light (1HZ) to left
and right swing flashing (1HZ), flat the controller and then press the [+] key to
start the calibration, after 1 second the calibration is successful, the LED1-4 are
all lit up for 1 second to exit the calibration mode the controller is off to hibernate.
①
In the controller hibernation state, short press the “HOME ” key, the controller
power on LED1-4 running lights flash back and forth slowly (1HZ), back to
connect the last Bluetooth device.
②
In the controller hibernation state, long press the “HOME ” key for about 3
seconds, the controller power on to LED1-4 Happy Train light blinking back
and forth quickly (2HZ), the controller for Bluetooth pairing.
③
Under the power on state of the controller, press and hold the “HOME ” button
for about 5 seconds, the controller will shut down and enter into hibernation.
④
When the controller is in N-S mode, after connecting to the N-S host, when the
console goes into hibernation, press the “HOME ” button of the controller to
wake up the console.
⑤
When the controller is abnormal, it can be reset by long pressing the “HOME ”
button for 10 seconds.
Rocker lift operation
Lower the joystick by flicking the rocker lift switch on the back of the controller in
the direction of the triangular arrow and pressing the corresponding position of
the joystick at the same time;
To raise the joystick, operate the rocker lift switch again.
+
LED1-
4
Turbo
.
................................................................................
Right Rocker
Press down for R3
连发功能
L
..........................
-
HOME
+
本 产品 是 一 款 无 线 游 戏 手 柄 ,
N-S
按 键布 局 , 适 配
N-S /N -S Ole d / N- S Lite
主机和
PC
的
X- in p u t
模式,手柄 带
N- S
和
X- IN P U T
模式切换开关 , 通 过 开关
切换模式。内置六轴陀螺仪,快速准确锁定目标;配置高精度摇杆和双纽扣
振动 马达;有唤醒 主机、连发和连发速度调节功能。
Rocker Lift Switch
.............................................................
.
.....................................
ZL
ZR
..........................
-
HOME
+
.
....................................
ABXY
.
................................................................................
右摇杆
下压为
R3
*蓝牙连接
手柄初次使用,需对手柄充电确保电量满足正常使用。长按手柄
HO ME
键约
3
秒,
手柄开机,
LE D 1 -4
跑马灯来 快闪(
2H Z
),松开
HO ME
键,打开
PC
蓝牙配对界
面,进行蓝牙配对,配对成功后手柄
LE D 1 -2
长亮;若未配对成功,
60
秒后手柄会
自动休眠。
注:
PC
平台 时
N-S
模式 设备名:
Pro Controller
,
X-input
模式 设备名:
Xbox 360
Controller
,
VID PID
均按 原装手柄。
注:
①在有线连接中拔动开关切换模式,手柄切换模式连接现有设备。
②在蓝牙连接中 拔动开关 切换模式,手柄切换模式并以该模 式 连设 备,跑
马灯 来 慢 闪 (
1HZ
)。
按住
“TURBO”
键时 按一下某个功能键,松开后再按该功能键,将会连发功能
;
第二 次按住
“TURBO”
键及按一下该功能键,该键将自动连发功能。取消该键
连发 功能需再一次 按上述步骤操作一遍。手柄关机重启不保存上述
Tu r b o
设置 ,
手柄 默认按键无
Tu r b o
功能 。
可设 置连发功能的按键包括:
A
、
B
、
X
、
Y
、
L
、
R
、
ZL
、
ZR
。
按住
Tu r b o +
右摇 杆上下推可以 调节
Tu rb o
速度 ,
5H z -- > 1 2 H z - - > 2 0 H z
可调 ,
开机 默认
12 H z
。
在手 柄
X- in p u t
模式 下,按住
Tu r b o +
截屏 键
3
秒, 手 柄震动提示
1
秒, 将 互换
手柄
A/ B X/ Y
键值 。
A/B X/Y
键值 互换后,关机重启不保存设置,手 柄默认为
N-S
布局键值。
在手 柄关机状态下,长按
B+
【
-
】
+HOM E
键
2
秒进入校准,通道灯亮起并由
跑马灯(
1HZ
)变为左右摆动闪烁(
1HZ
),平放手柄后按【
+
】键开始校准,
1
秒后校正成功,
LED1-4
全亮
1
秒退出校准模式手柄关机休眠。
六轴陀螺仪校准
A/B X/Y
键值互换
左摇杆
.................................
下压为
L3
HOME
键操作
LED1-
4
截屏键
模式切换开关
ZR
..........................
.
.....................................
ZL
摇 杆 升 降 开 关
.............................................................
.
.....................................................
摇杆升降开关
.
......................................................
Rocker Lift Switch
摇杆升降操作
关机/充电/低电量报警
L
..........................
Left Rocker
.................................
Press down for L3
Screenshot
key
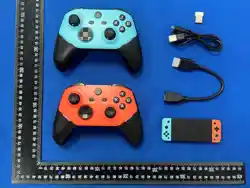
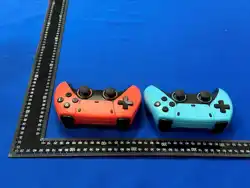
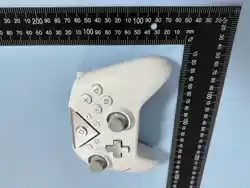
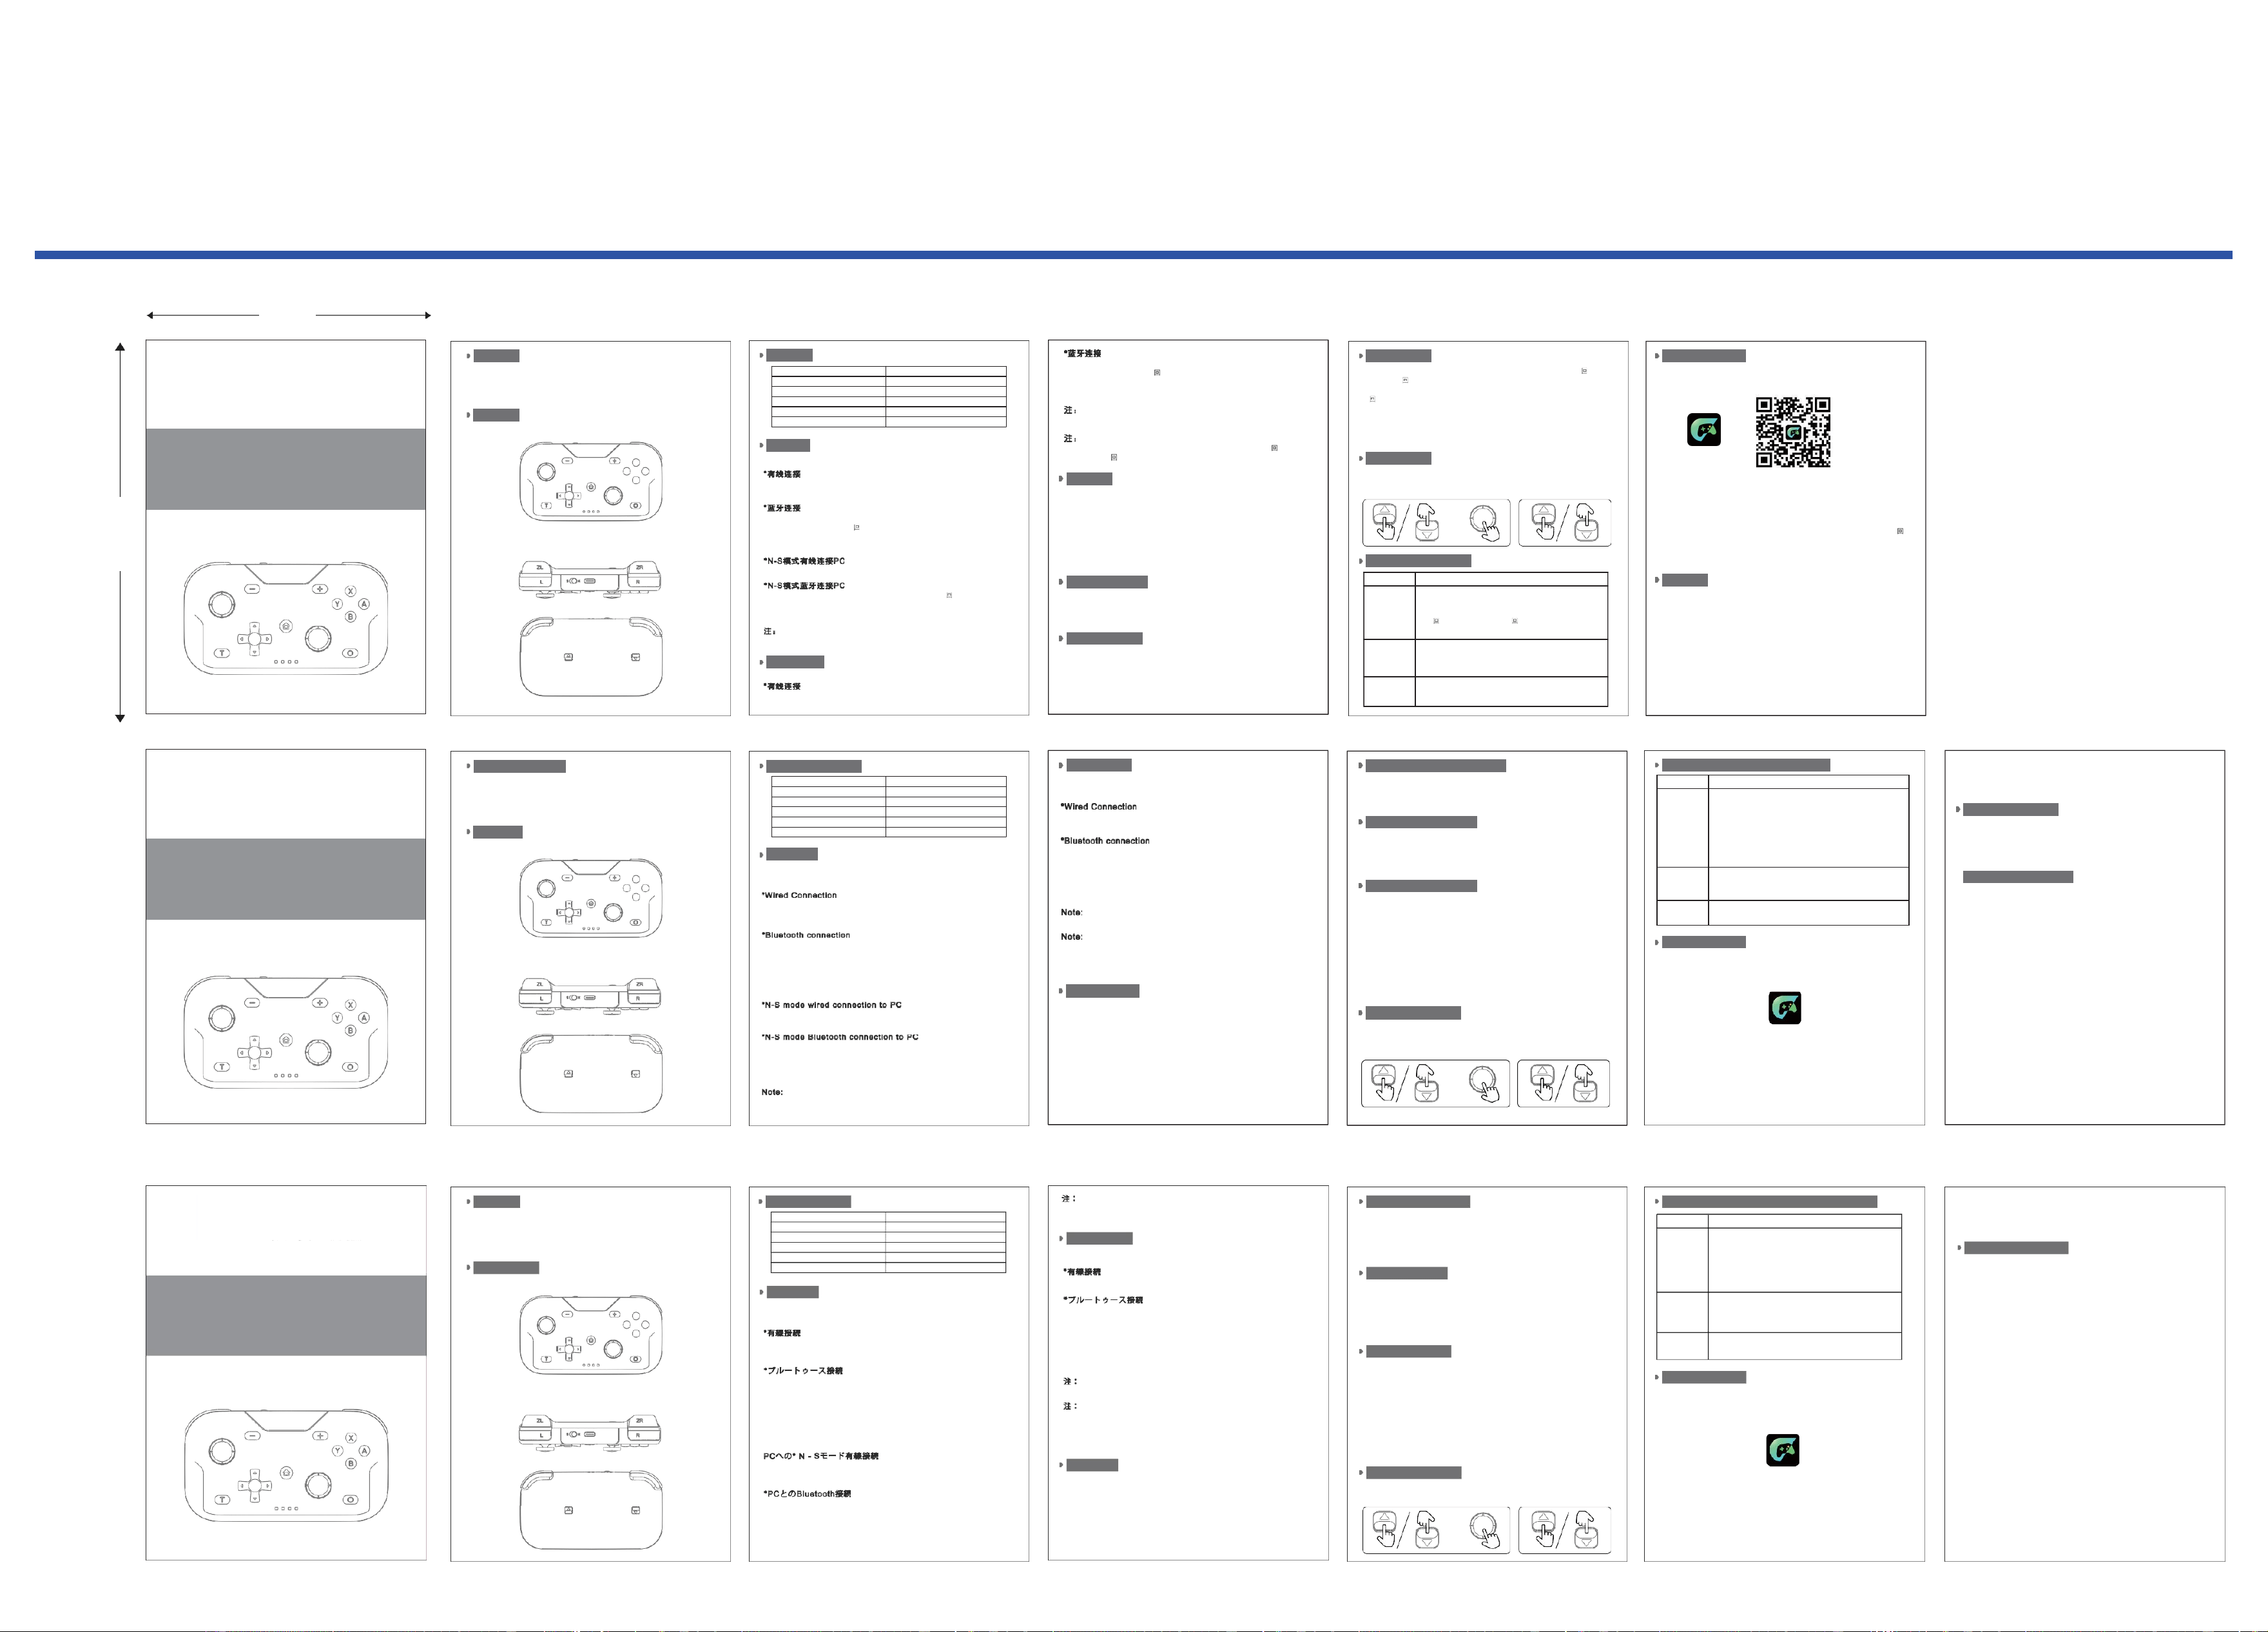
This product is a wireless game controller, N-S button layout, adapted to N-S/
N-S Oled/N-S Lite console and PC's X-input mode, the controller with N-S
and X-INPUT mode switch switch, through the switch to switch modes. Built-in
six-axis gyroscope, fast and accurate target locking; equipped with high-
precision joystick and dual button vibration motors; with wake-up console,
continuous firing and continuous firing speed adjustment.
1.
Ga m e M a c ro
安装 : 国内安卓用 户需扫描二维码下载,国外用户可在谷歌商
店直 接搜索下载安 装,苹果系统可在苹果商店搜索下载安装。将
Ga m e M a c ro
安装到手机后,开启手柄,并让手柄进入蓝牙配对状态,打开手机的蓝牙开关。
2.
在手机蓝牙列表找到手柄蓝牙设备,将手柄与手机蓝牙配对连接,连接成功
后, 再 次查看手机 蓝牙列表,列表中会出现
“G a m e M a c r o ”
的
AP P
蓝牙 名,选
择
“G a m e M a c r o ”
进行 连接配对。
3.
进入
ap p
后, 点 击左上角
“
加号 图标
”
选择 刚刚在系统蓝 牙连接的手柄,连接
成功 。
4.
GameM acro
的各 项功能应用,按
APP
界面内容指引进行操作设置。
5.
可通 过
Ga m e M a c r ap p
更新手柄的固件, 手柄下载新固件版本后,还可 退
到旧 版本使用。
注意 : 手机需连接 上手柄蓝牙设备后,才可以检索到
AP P
的
“ Ga m e M a c r o ”
蓝
牙名 。
1.
使用前请仔细阅读本手册,熟悉操作和调整。
2.
产品不得私自拆卸。
3.
严禁将产品置于火中、水中,以免发生爆炸。
4.
充电 源为
5V/2A
充电线,非标充电设备不适用于本产品。
安全说明
GameMacro APP
①在手柄休眠状 态下,短 按
“HOME ”
键, 手柄开机
LED1-4
跑马 灯来 慢 闪
(
1HZ
), 连 上次 蓝 牙 设 备 。
②在手柄休眠状 态下,长按
“H O M E ”
键约
3
秒, 手 柄开机至
LE D 1 - 4
跑马 灯来
快闪 (
2H Z
),手 柄进行蓝牙配 对。
③在手柄开机状 态下,长 按
“HOME ”
键约
5
秒,手柄关机进入休眠。
④手柄在
N-S
模式时,连接
N-S
主机后,当主机进入休眠状态,按下手柄的
“HOME”
键可以唤醒主机。
⑤当手柄出现异 常时,可 通过长按
“HOME ”
键
10
秒进行复位。
将游戏手柄背部的摇杆升降开关向三角箭头所指方向拨动,同时按下相应位置
的摇杆,即可降下摇杆;
若需升起摇杆,再次操作摇杆升降开关即可。
.
....................................
ABXY
按键图示
产品简介
Mode switching switches
将手 柄顶部的模式切换开关推至“
S
”位置进入
N-S
模式。
*有线连接
将手柄通过
US B
数据线连接到
N-S
主机底座,按任意键有线连接到
N-S
主机,主机
分配手柄通道灯,灯光保持长亮。
*蓝牙连接
手柄初次使用,需对手柄充电确保电量满足正常使用。长按手柄
HO ME
键约
3
秒,
手柄开机,
LE D 1 -4
跑马灯来 快闪(
2H Z
),松开
HO ME
键,打开
N-S
主机至配对
界面,进行蓝牙配对,配对成功后,主机分配手柄通道灯亮起;若未配对成功,
60
秒后手柄会自动休眠。
*N-S模式有线连接PC
将手 柄通过
USB
数据 线连接到
PC
,连 接成功后
LED1
亮起。
*N-S模式蓝牙连接PC
长按游戏手柄
HO ME
键约
3
秒,手柄开机,
LE D 1 -4
跑马灯来 快闪(
2H Z
),松开
HO ME
键,打开
PC
蓝牙配对界面,进行蓝牙配对,配对成功后手柄
LE D 1
长亮;若
未配对成功,
60
秒后手柄会自动休眠。
注 :
支持有线引导蓝牙对接功能,手柄通过
US B
数据线连接
N-S
主机后,拔去数
据线,手柄自动蓝牙连接
N-S
主机。
将手 柄顶部的模式切换开关推至“
X
”位置进入
X-input
模式。
*有线连接
将手 柄通过
USB
线连 接到
PC
设备
USB
端 口 , 连 接 后 手 柄
LED1-2
亮起。
X-input
模式
N-S
模式
产品参数
输入 电压:
DC 5.0V
充电 时间:约
2
小时
工作 电流:
≤ 25 mA
振动 电流:
≤ 100 mA
休眠 电流:
< 20 uA
充电 电流:约
230 mA
电池 容量:
400 mAh
数据 线:
Type-C
使用时间:约
8
小时 无线 连接距离:
< 10
米
重量 :
96 ± 2 g
尺寸 :
121 x 67 x 32
毫米
状态 说明
关机
手柄连机状态下,
5
分钟内不使用将会进入休眠状态。(手柄
全自动
TU R BO
动作时不休眠)当主机屏幕关闭时
,
手柄即自动
关机休眠;
手柄 连 状 态 时 , 若
20
秒未 能 连成功 ,将自动 关机休眠 ;手
柄开机状态时,长按
HOME
键约
5
秒,手柄关机进入休眠。
充电
手柄在休眠状态下插入电源适配器充电,通道灯闪烁,充满
电后通道灯熄灭。
手柄在连机状态时充电,相应通道灯慢闪,充满后长亮。
低电量报警
手柄电池电压低于
3.3 V
时,相应通道的灯闪烁提示,表示手
柄电池低电,需要进行充电。
Product Description
Product Parameters
N-S mode
1.
文件名: T50 说明书
2.
材质: 普通印刷纸
3.
工艺: 双面印刷;风琴折;单色印刷。
4.
成品尺寸: 110 x 75 mm
5.
备注说明:做大货对齐边条;留出血值;按要求尺寸。
75mm
正面
Key Icons
Input voltage: DC 5.0V Charging time: About 2 hours
Operating current: ≤ 25 mA Vibration current: ≤ 100 mA
Sleep current: < 20 uA Charging current: About 230 mA
Battery capacity: 400 mAh Data cable: Type-C
Operating time: About 8 hours Wireless connection distance: < 10 m
Weight: 96 ± 2 g Dimensions: 121 x 67 x 32 mm
Push the mode switch on the top of the controller to the “S” position to enter the
N-S mode.
*Wired Connection
Connect the controller to the base of N-S console via USB cable, press any key
to connect to N-S console by wired connection, the console will assign the
channel light to the controller, and the light will remain on for a long time.
*Bluetooth connection
When using the controller for the first time, you need to charge the controller to
ensure that the power meets the normal use. Long press the controller's HOME
button for about 3 seconds, the controller will turn on, the LED1-4 runner light will
flash back and forth (2HZ), release the HOME button, turn on the N-S console to
the pairing interface, carry out Bluetooth pairing, after pairing successfully, the
host will assign the controller's channel light to light up; if the pairing is not
successfully completed, the controller will automatically hibernate after 60 econds.
*N-S mode wired connection to PC
Connect the controller to PC via USB cable, LED1 will light up after successful
connection.
*N-S mode Bluetooth connection to PC
Long press the controller's HOME button for about 3 seconds, the controller will
power on, LED1-4 runner light will flash back and forth (2HZ), release the HOME
button, open the PC Bluetooth pairing interface, Bluetooth pairing, after successful
pairing, the controller LED1 will light up; if it is not paired successfully, the
controller will automatically hibernate after 60 seconds.
Note:
Support wired guide bluetooth docking function, after the controller is
connected to the N-S console via USB cable, unplug the cable, the controller will
automatically connect to the N-S console via bluetooth.
製品概要
本製 品はワイヤレスゲームパッドで、 N-Sボタン配置、N-S/N-S Oled/N-S
製品パラメーター
入力電圧
DC 5.0V
充電 時間:約
2
時間
注:
サポート有線ガイドブルートゥースドッキング機能、ハンドルが
US B
ケー
ブルを介して
N-S
ホストに接続した後、ケーブルを抜いて、ハンドルは自動的に
ブル ートゥースが
N-S
ホストに接続します。
A/B X/Y
キー値の交換
ジョ イスティック
X
入力 モードで、
Turbo+
スク リーンショットボタンを
3
秒
電源オフ/充電中/バッテリー残量低下アラーム
5.GameM acr
アプリからジョイスティックのファームウェアをアップデートす
ることができ、ジョイスティックの新しいファームウェアバージョンをダウン
ロードした後、古いバージョンに戻って使用することもできます。
LiteホストとPCのX-INPUTモードに適応し、N-SとX-INPUTモード切替スイ
游戏控制器
ッ
チ付きハンドル、切替スイッチモードを通じて。 6軸ジャイロスコープ内蔵、
高速で正確なターゲットロック、高精度ジョイスティックとデュアルボタン振
動モーター搭載、ウェイクアップホスト、バースト、バーストスピード調整機
能付き。
キーアイコン
動作 電流:
≤ 25 mA
スリープ電流
< 20 uA
バッテリー容量:
400 mAh
動作時間: 約
8
時間
重量:
96 ± 2 g
振動 電流
: ≤ 100 mA
充電電流:約
230
ミリアンペア
データケーブル タイプ
C
ワイヤレス接続距離
< 10 m
外形寸法
121 x 67 x 32 mm
X-input
モード
ジョイスティック上部のモードスイッチを 「
X
」の位置に押すと、
X
入力モー
ドになります。
*有線接続
間長押しすると、ジョイスティックが
1
秒間振動し、ジョイスティックの
A/B
X/Y
キー値が入れ替わります。
A/ B
の
X/ Y
キー 値を入れ替え た後、設定を保存せずに電源を切って再起動す
ると 、 ジョイステ ィックは
N- S
レイ アウトのキー 値に初期設定される。
6
軸ジャイロ校正
状況
電源OFF
インストラクション
ハンドルがコンピュータに接続されている場合、5分以内に使用されな
いと休止状態に入ります。 (全自動TURBO動作中はスリープしません)
ホスト画面を閉じると、ハンドルは自動的にシャットダウンしてスリ
ープします;
ハンドルが状態に接続されるとき、もし
20
秒以内に状態に接続されな
い場合、ハンドルは自動的にシャットダウンし、スリープします;
GameMacro "
の
Bluetooth
名をアプリで取得するには、携帯電話がジョイステ
ィックの
Bluetooth
デバイスに接続されている必要があります。
セキュリティ·ノート
1.
ご使用の前にこの取扱説明書をよくお読みになり、操作や調整に慣れてくだ
さい。
商品番号 T50
反面
L
..........................
L3
.................................
-
HOME
+
.
.....................................
R
.
....................................
ABXY
.
................................................................................
右スティック
R3を押し下げる
N-S
モード
ジョイスティック上部のモードスイッチを 「
S
」の位置に押すと、
N-S
モード
になります。
*有線接続
ジョ イスティックを
USB
ケー ブルで
N-S
ホストと接続し、任意のキーを押して
N-S
ホストと有線接続します。
ジョイスティックを
US B
ケーブルで
PC
の
US B
ポートに接続すると、ジョイステ
ィックの
LE D 1 -2
が点灯します。
*ブルートゥース接続
初めてハンドルを使用する場合は、電源が通常の使用を満たすようにハンドル
を充電する必要があります。 ハンドルのHOMEボタンを約3秒間長押しすると、ハ
ンドルがオンになり、LED1-4ランニングライトが前後に点滅し(2HZ)、HOMEボ
タンを離し、PCのブルートゥースペアリングインターフェースを開き、ブルート
ゥースペアリング、ペアリング成功後、ハンドルのLED1-2が長時間点灯し、
それが正常にペアリングされていない場合、ハンドルは60秒後に自動的に休止
状態になります。
ハン ドルオフの状 態で、キャリブレーションに入るために2秒間長押しB +
[-] + HOME キー、チャンネルランプが点灯し、ランニングライト(1HZ )か
ら左 右スイング点 滅(1H Z )、フ ラットハンドルに変更し、[+]キーを押し
てキ ャリブレーシ ョンを開始するには、キャリブレーションが成功した1秒
後、 LED1-4 は、すべて のキャリブ レーションモードを終了する1秒間点灯ハ
ンド ルシャットダ ウン休止状態。
HOME
ボタン操作
①ハンドルのスリープ状態で、 「
HOME
」キーを短く押すと、ハンドルの電源オ
充電
ローバッテリー
警報
ハンドルがオンになった時、
HOME
ボタンを約
5
秒間長押しすると、ハ
ンドルはオフになり、休止状態に入ります。
ハンドルがスリープ中に電源アダプターを接続して充電している場合、
チャンネルライトは点滅し、満充電になると消灯します。
ハンドルが接続された状態で充電されている場合、対応するチャンネ
ル
・
ライトはゆっくりと点滅し、満充電になってから長時間経過する
と点灯します。
ハンドルバッテリーの電圧が3.3Vより低くなると、対応するチャンネ
ルライトが点滅し、ハンドルバッテリーの残量が少なく充電が必要で
あることを示します。
2.
本製品は個人で分解しないでください。
3.
爆発を避けるため、製品を火中や水中に入れることは厳禁です。
4.
充電源は
5V/2A
の充電ケーブルで、非標準の充電設備は本製品に適用できませ
ん。
取扱説明書
ZR
..........................
Turbo
LED1-
4
モードスイッチ
スクリーンキャプチャボタン
.
......................................
ZL
*ブルートゥース接続
ハンドルが最初に使用されるときは、電源が通常の使用を満たすようにハンド
ルを充電する必要があります。 ハンドルの
HO ME
ボタンを長押し約
3
秒、ハン
ドルの電源オン、
LE D 1 -4
ランニングライトが前後に点滅(
2H Z
)、
HO ME
ボ
タンを離し、ペアリングインターフェイスに
N-S
ホストを開き、
Bluetooth
のペ
アリング、ペアリング成功、ハンドルのチャンネルライトに割り当てられてい
るホスト、正常にペアリングされていない場合は、ハンドルが自動的にスリー
プ状態になります
60
秒後。
PC
への
* N - S
モード有線接続
US B
ケーブルでジョイスティックを
PC
に接続し、接続が成功すると
LED 1
が点
灯します。
*PCとのBluetooth接続
ゲー ムパッドの
HOME
ボタ ンを約
3
秒間長押しすると、ゲームパッドの電源がオ
注:
N-S
モードデバイス名:
Pro
コントローラ、
X-
入力モードデバイス名:
Xbox
360 Controller
、
VID PID
は元 のハンドルによると、
PC
プラットフォーム。
注:①有線接続の場合、スイッチを引っ張ってモードを切り替え、ハンドルスイ
ッチモードは既存のデバイスに接続する。
Bluetooth
接続では、スイッチを引
っ張ってモードを切り替えるには、ジョイスティックのスイッチモードとそのモ
ードでデバイスに接続し直すと、ランニングランプが前後にゆっくりと点滅しま
す(
1H Z
)。
Turbo
機能
TU R B O "
キーを押しながらファンクションキーを押し、離した後、再度ファン
クションキーを押すと、ファンクションが送信されます。 このキーの機能をキ
ャンセルするには、もう一度上記の手順を踏む必要があります。 また、ジョイ
スティックのデフォルトボタンにはターボ機能はありません。
ン
LED1 -4
ランニングライトが前後にゆっくりと点滅し(
1HZ
)、最後の
Bluetooth
デバイスを接続するために戻る。
②ハンドルのスリープ状態で、「
HOME
」キーを長押し約
3
秒、ハンドルの電源オ
ン
LED1 -4
ハッピートレインライトが前後に点滅(
2HZ
)、
Bluetooth
ペアリング
のためのハンドル。
③ハンドルの電源オン状態で、「
HOME
」ボタンを約
5
秒間長押しすると、ハン
ドルがシャットダウンし、休止状態に入ります。
④ジョイスティックが
N-S
モードの場合、
N-S
ホストと接続後、ホストがハイバネ
ーションになったら、ジョイスティックの
HOME
キーを押してホストを起動してく
ださい。
⑤ジョイスティックに異常が発生した場合、「
HOME
」キーを
10
秒間長押しする
とリセットされます。
ロッカーリフト操作
ジョイスティックを下げるには、ゲームパッド背面のロッカーリフトスイッチを
三角矢印の方向にフリックし、同時にジョイスティックの対応する位置を押します;
ジョイスティックを上げるには、もう一度ロッカーリフトスイッチを操作します。
GameMacro APP
1.
GameMacro
インストール: ユーザーは
Google Play Store
で直接検索し、ダウ
ンロードしてインストールすることができ、
Apple
システムは
Apple Store
で検索し、
ダウンロードしてインストールすることができます。携帯電話に
GameM acro
をイ
ンストールした後、ジョイスティックの電源を入れ、ジョイスティックが
Bluetooth
のペアリング状態に入るようにし、携帯電話の
Bluetooth
スイッチをオン
にします。
2.
携帯電話のブルートゥースリストでゲームパッドのブルートゥースデバイスを
探し、ゲームパッドと携帯電話のブルートゥースをペアリングし、接続に成功し
たら、もう一度携帯電話のブルートゥースリストを確認し、
"Gam eMacro "
のブ
ルートゥース名がリストに表示されるので、
"Gam eMacro "
を選択してゲームパッ
ドを接続し、ペアリングする。
GameMacro
」を選択し、接続とペアリングを
ロッカー・リ フ
.............................................................
ト・スイッチ
.
.....................................................
ロッカー
・
リフ
ト・スイッチ
ンに なり、
LED1-4
ラン ナーライトが前後に点滅します(
2HZ
)、
HOME
ボタン
を離し、
PC
の
Bluetooth
ペアリングインターフェイスを開き、
Bluetooth
のペア
リングを行い、
LE D 1
がペアリング成功後に点灯します
;
正常にペアリングされて
いない場合、ゲームパッドは
60
秒後に自動的に休止状態になります
.
ター ボ機能を設定できるボタンは、
A
、
B
、
X
、
Y
、
L
、
R
、
ZL
、
ZR
です。
ターボを押しながら右スティックを上下に押すと、ターボスピードを調整でき
る。
行う。
3. アプリに入った後、左上の「プラスアイコン」をクリックして、今システム
Bluetooth
に接続したハンドルを選択し、接続が成功します。
4.
GameMacro
の様々な機能とアプリケーションは、
APP
のインターフェイスの
内容のガイドラインに従って、操作と設定を行います。
5.You can update the firmware of the joystick through the Gam eMacr app, and
after downloading the new firm w are version of the joystick, you can also go back
to the old version to use it.
Note: Your cell phone must be connected to the Bluetooth device of the joystick
to retrieve the Bluetooth nam e of "GameMacro" in the app.
1. Please read this manual carefully before use to familiarize yourself with
operation and adjustment.
2. The product must not be disassembled privately.
3. It is strictly prohibited to put the product in fire or water to avoid explosion.
4. The charging source is 5V/2A charging cable, non-standard charging
equipment is not applicable to this product.
This device complies with part 15 of the FCC Rules. Operation is subject to the following two conditions: (1)
this device may not cause harmful interference, and
(2) This device must accept any interference received, including interference that may cause undesired
operation.
Changes or modifications not expressly approved by the party responsible for compliance could void the
user’s authority to operate the equipment. This equipment has been tested and found to comply with the limits
f
or a Class B digital device, pursuant to Part 15 of the FCC Rules. These limits are designed to provide
reasonable protection against harmful interference in a residential installation. This equipment generates uses
and can radiate radio frequency energy and, if not installed and used in accordance with the instructions, may
cause harmful interference to radio communications. However, there is no guarantee that interference will not
occur in a particular installation. If this equipment does cause harmful interference to radio or television
reception, which can be determined by turning the equipment off and on, the user is encouraged to try to
correct the interference by one or more of the following measures:
‐‐
Reorient or relocate the receiving antenna.
‐‐ Increase the separation between the equipment and receiver.
‐‐
Connect the equipment into an outlet on a circuit different from that to which the receiver is
connected.
‐‐ Consult the dealer or an experienced radio/TV technician for help.ct.
*RF warning for Portable device:
The device has been evaluated to meet general RF exposure requirement.
The device can be used in portable exposure condition without restriction.
Security instructions
1.GameMacro Installation: Users can search and download and install directly in
Google Play Store, and Apple system can search and download and install in
Apple Store. After installing GameMacro to your cell phone, turn on the joystick
and let the joystick enter the Bluetooth pairing state, turn on the Bluetooth switch
of your cell phone.
2.
Find the bluetooth device of the gam epad in the bluetooth list of your cell phone,
pair the gamepad with the bluetooth of your cell phone and connect it successfully,
check the bluetooth list of your cell phone again, and the bluetooth name of
"GameMacro" will appear in the list, select "GameMacro" to connect and pair the
gam epad. Select "GameMacro" to connect and pair.
3.
After entering the app, click on the "plus icon" in the upper left corner to select
the handle that has just been connected to the system Bluetooth, and the
connection is successful.
4.
GameM acro's various functions and applications, according to the APP interface
content guidelines for operation and setup.
GameMacro APP
Power off/charging/low battery alarm
Push the mode switch on the top of the controller to the “X” position to enter
X-input mode.
*Wired Connection
Connect the controller to the USB port of the PC device via USB cable, the
controller LED1-2 will light up after connection.
*Bluetooth connection
When using the controller for the first tim e, you need to charge the controller to
ensure that the power meets the normal use. Long press the controller's HOME
button for about 3 seconds, the controller will turn on, and the LED1-4 will flash
back and forth (2Hz), release the HOME button, open the PC Bluetooth pairing
interface, and then perform Bluetooth pairing, and the controller's LED1-2 will
light up long time after the pairing is successful; if the pairing is unsuccessful, the
controller will be automatically hibernated after 60 seconds.
Note:
PC platform N-S mode device name: Pro Controller, X-input mode device
nam e: Xbox 360 Controller, VID PID are according to the original controller.
Note: ①
In the wired connection pull the switch to switch mode, the controller
switch mode to connect to the existing device.
②
In Bluetooth connection pull the switch to switch mode, the controller
switches mode and connects back to the device in that mode, the running
light flashes back and forth slowly (1HZ).
Turbo Function
Press a function key while holding down the “TURBO ” key, release it and then
press it again, it will send out the function; hold down the “TURBO ” key for the
second time and press the function key, the key will automatically send out the
function. To cancel the function of this key, you need to follow the above steps
once again. The above Turbo settings will not be saved when the controller is shut
down and restarted, and the default buttons of the controller do not have Turbo
function.
The buttons that can be set for Turbo function include: A, B, X, Y, L, R, ZL, ZR.
Hold down Turbo + push right stick up and down to adjust Turbo speed, 5Hz-12Hz
-20Hz adjustable, power on default 12Hz.
X-input mode
...........................
...........................
...........................
...........................
...........................
...........................
......................................................
......................
......................................................
......................
......................................................
......................
................
................
................
...........................
...........................
...........................
...........................
...........................
...........................
110mm
+
游戏控制器
型号:T50
产品说明书
Game Controller
Model No. T50
Product Manuals
Statuses Instruction
Power off
The controller will be put to sleep if it is not used within 5 minutes
when it is connected to the computer. (The controller will not sleep
when it is in full auto-turbo mode.) When the screen of the console is
turned off, the controller will automatically turn off the computer and
sleep. The controller will automatically shut down and hibernate when
the console screen is turned off;
When the controller is reconnected, if it fails to reconnect successfully
in 20 seconds, it will automatically shut down and sleep;
When the controller is turned on, press and hold the HOME button for
about 5 seconds, the controller will turn off and enter into hibernation.
Recharge
When the controller is charging with the power adapter plugged in, the
channel light blinks and turns off when fully charged.
When the controller is charging in the connected state, the corresponding
channel light blinks slowly and lights up when fully charged.
Low Battery Alarm
When the controller battery voltage is lower than 3.3V, the corresponding
channel light flashes to indicate that the controller battery is low and
needs to be recharged.
FCC Warning Statement