
33
1
RB48 radio setup and troubleshooting procedures
Setup and troubleshooting procedure for
Retekess T130S Tour Guide System

33
2
目录
1. Unboxing and Initial Setup................................................................................3
1.1. Check ............................................................................................................. 3
1.2. Turn on/off.....................................................................................................3
1.3. Daily Use ....................................................................................................... 3
Transmitter Functions Introduction ......................................................................3
1.3.1Mute function ............................................................................................... 3
1.3.2 One key shutdown function........................................................................ 3
1.3.3 Interface description ....................................................................................4
1.3.4 Channel Setting ........................................................................................... 4
Receiver Functions Introduction .......................................................................... 4
1.3.5 Volume Setting ............................................................................................ 4
1.4 If you use T130s transmitter with the old version T131 receivers, you need
to use the following method to set the channel ID. ............................................. 5
1.4.1Wireless Channel Synchronization Setting Transmitter Setting ..................5
1.4.2Then Set the Receiver .................................................................................. 5
1.4.3 Manual Set Receiver Channel ID................................................................5
1.4.4 Precautions .................................................................................................. 6
1.4.5 Precautions for using the charging box.......................................................6
2. Troubleshooting...................................................................................................... 6
3. Contact Manufacturer .............................................................................................8

33
3
1.Unboxing and Initial Setup
1.1. Check
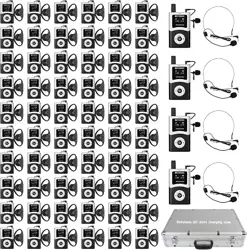
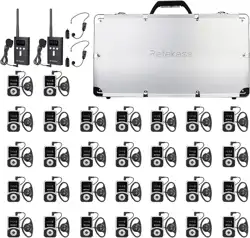
Please check if your package contains all parts listed in the package detail list.
1.2. Turn on/off
1.2.1 Transmitter:
Press and hold the【 】button for 1 second to power on or off.
1.2.2 Receiver
Press and hold the【▶|| 】button for 1 second to power on or off.
1.3. Daily Use
Transmitter Functions Introduction
1.3.1Mute function
In working mode, press (>) or (+) button, the
transmitter enters mute mode icon appears on
the transmitter screen and icon disappears. At the same time, icon appears
on the receiver screen. Press (>) or (+) button again, the transmitter will
return to normal working mode, icon appears on the transmitter screen and
icon disappears
from receiver screen at the same time.
1.3.2 One key shutdown function
In working mode, press and hold (>) or (-) button for about 5 seconds until the
OFF icon flashes on the transmitter screen and icon disappears, all
receivers paired with this transmitter that are within the range will be powered
off. Then you can short press any key of the transmitter to exit the one key

33
4
shutdown mode or long press and hold the ( ) key to power off.
1.3.3 Interface description
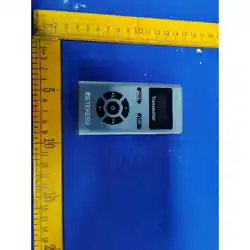
There are two jacks at the bottom of the transmitter, the MIC microphone jack
on the left and the AUX audio input jack on the right.
Note: Don't insert them into the wrong interface, if you plug the mic into the
AUX jack, there will be no sound.
1.3.4 Channel Setting
When encountering the following situations, you will need to set the channel
A.If there are two or more transmitters in use, select different channel for each
to avoid interference.
B.When you need to add receivers for a group (transmitter and receivers
channels must be the same in each group).
Channel Setting Operations
A.In working mode, press and hold (>) and (<) buttons at the same time until
the icon disappears on the transmitter screen, t.
B.Release the (>) and (<) buttons, the transmitter will enter channel setting
mode
C.Press (>), (<), (+) or (-) buttons to select the desired channel ( the value
could be set from 01 to 49).
D.Press and hold ( ) button for 3 second until the channel ID flashes on the
transmitter screen and icon disappears.
E.Release the ( ) button, the transmitter enters the wireless channel
synchronization mode.
F.Put the receivers in the power-on state close to the transmitter (within about
2 meters), the receivers will receive sync signal. Once sync successfully, the
receivers channel will be changed to the same channel as the transmitter
G.Press the ( ) button on the transmitter to exit channel synchronization
mode.
Receiver Functions Introduction
1.3.5 Volume Setting

33
5
In working mode, press ( ) or ( ) button to adjust the volume (the value
could be set from 0 to 9 level).
Note: Volume cannot be adjusted while the receiver is in signal seek mode (
icon shows on the receiver screen.
1.4 If you use T130s transmitter with the old version T131
receivers, you need to use the following method to set the
channel ID.
1.4.1Wireless Channel Synchronization Setting Transmitter
Setting
A.In the power off mode, press and hold (>) button
by your left hand, then press ( ) button for about 2s to turn on the transmitter
by your right hand
B.Release the ( ) button when the transmitter is powered on
C.Release the (>) button when the channel ID flashed on the screen, the
transmitter enters channel setting mode
D.Press (>) or (<) button to select the desired channel
E.Press ( ) button to confirm, the transmitter enters the wireless channel
synchronization mode
1.4.2Then Set the Receiver
F.In power off mode, insert the earphone, press and hold the ( ) button with
your left hand, then press the ( ll ) button with your right hand to turn on the
receiver.
G.Release the ( ) button when the receiver is powered on
H.Release the ( ) button when the channel ID shows 00 in the receiver
screen, the receiver will receive sync signal. Once sync successfully, the
receivers channel will be changed to the same channel as the transmitter ( Note:
this step must be done under the condition that the transmitter is at the wireless
channel synchronization mode)
I.Turn off the transmitter, then turn on it, the transmitter will work with the
paired receivers.
1.4.3 Manual Set Receiver Channel ID
A.In power off mode, press and hold ( ) button with your right hand, then

33
6
press the ( ) button with your left hand to turn on the receiver .
B.Release the ( ) button when the receiver is powered on.
C.Release the ( ) button when the channel ID changes on the screen.
D.Press ( ) or ( ) button to select the desire channel ID.
E.Press ( ) button to confirm.
1.4.4 Precautions
When the device is not used for a long time, please charge the device every 3
months to prevent the battery from being damaged. (The built-in lithium battery
will be damaged due to over-discharge)
1.4.5 Precautions for using the charging box
1.Working Voltage: AC90V-250V.
2.Please take out the foam from the charging box before charging, and keep
the cover of the charging box open when charging.
3.It takes about 4 hours to fully charge.
2.Troubleshooting
2.1 The microphone of the purchased T130S transmitter does not work.
----------------
For this, the T130S transmitter's microphone can only be used with the original
microphone.If you purchase a non-original microphone, incompatibility issues may
occur.Our T130S transmitter headset also functions as the product's antenna for
receiving signals.We hope this information is helpful.
2.2 My transmitter stopped sending voice to both of my T131S receivers.
-------------
Could you please check if the microphone is plugged in securely?

33
7
Could you please try a different microphone? It might be faulty.
Here is a video about product pairing, which we hope will be helpful:
Tinyurl-dot-com/krcsr6ad
You can change “-dot-” to“.” the link and copy it to download it.
2.3 Do these operate in 2.4ghz, 5.8ghz, or UHF frequencies?
------------------
The frequency of this product is 195MHz-216MHz.
By the way, products can only be used together if the frequencies of each channel
are the same.
I hope this information is helpful.
2.4 How to automatically pair the transmitter and receiver of the T130S?
-----------
A.In working mode, press and hold (>) and (<) buttons at the same time until
the icon disappears on the transmitter screen, t.
B.Release the (>) and (<) buttons, the transmitter will enter channel setting
mode
C.Press (>), (<), (+) or (-) buttons to select the desired channel ( the value
could be set from 01 to 49).
D.Press and hold ( ) button for 3 second until the channel ID flashes on the
transmitter screen and icon disappears.
E.Release the ( ) button, the transmitter enters the wireless channel
synchronization mode.
F.Put the receivers in the power-on state close to the transmitter (within about
2 meters), the receivers will receive sync signal. Once sync successfully, the
receivers channel will be changed to the same channel as the transmitter
G. Press the ( ) button on the transmitter to exit channel synchronization
mode.
Here is a video about product pairing, which we hope will be helpful:
Tinyurl-dot-com/krcsr6ad

33
8
2.5 How do I set the receiver channel?
A.In power off mode, press and hold ( ) button with your right hand, then
press the ( ) button with your left hand to turn on the receiver .
B.Release the ( ) button when the receiver is powered on.
C.Release the ( ) button when the channel ID changes on the screen.
D.Press ( ) or ( ) button to select the desire channel ID.
E.Press ( ) button to confirm.
2.6 How can I use the product's one-click shutdown function?
In working mode, press and hold (>) or (-) button for about 5 seconds until the
OFF icon flashes on the transmitter screen and icon disappears, all
receivers paired with this transmitter that are within the range will be powered
off. Then you can short press any key of the transmitter to exit the one key
shutdown mode or long press and hold the ( ) key to power off.
3.
Contact Manufacturer
If none of the above steps resolve the issue, contact the manufacturer for repair or
replacement.
We provides a warranty period of up to 3 years for the Wireless Tour Guide System,
even if the product is out of warranty, we will provide appropriate support.