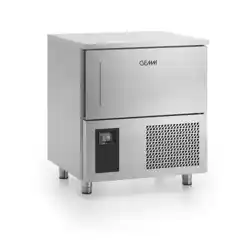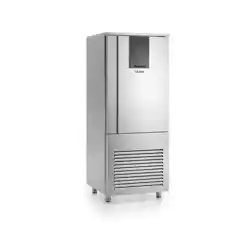

INSTRUCTIONS FOR USE
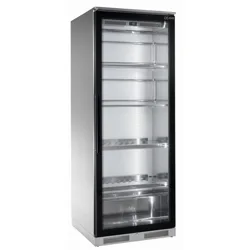
WINE DISPLAY
Serie “BRERA”
WD5121
WD7121
www.gemm-srl.com
www.eurodib.com
WD Rev.00 01-2016 pag. 33
1 – GENERAL INFORMATION
Thank you for choosing a wine display of our production.
Read this manual very carefully and make sure it is available to those who will install, use and maintain the equipment.
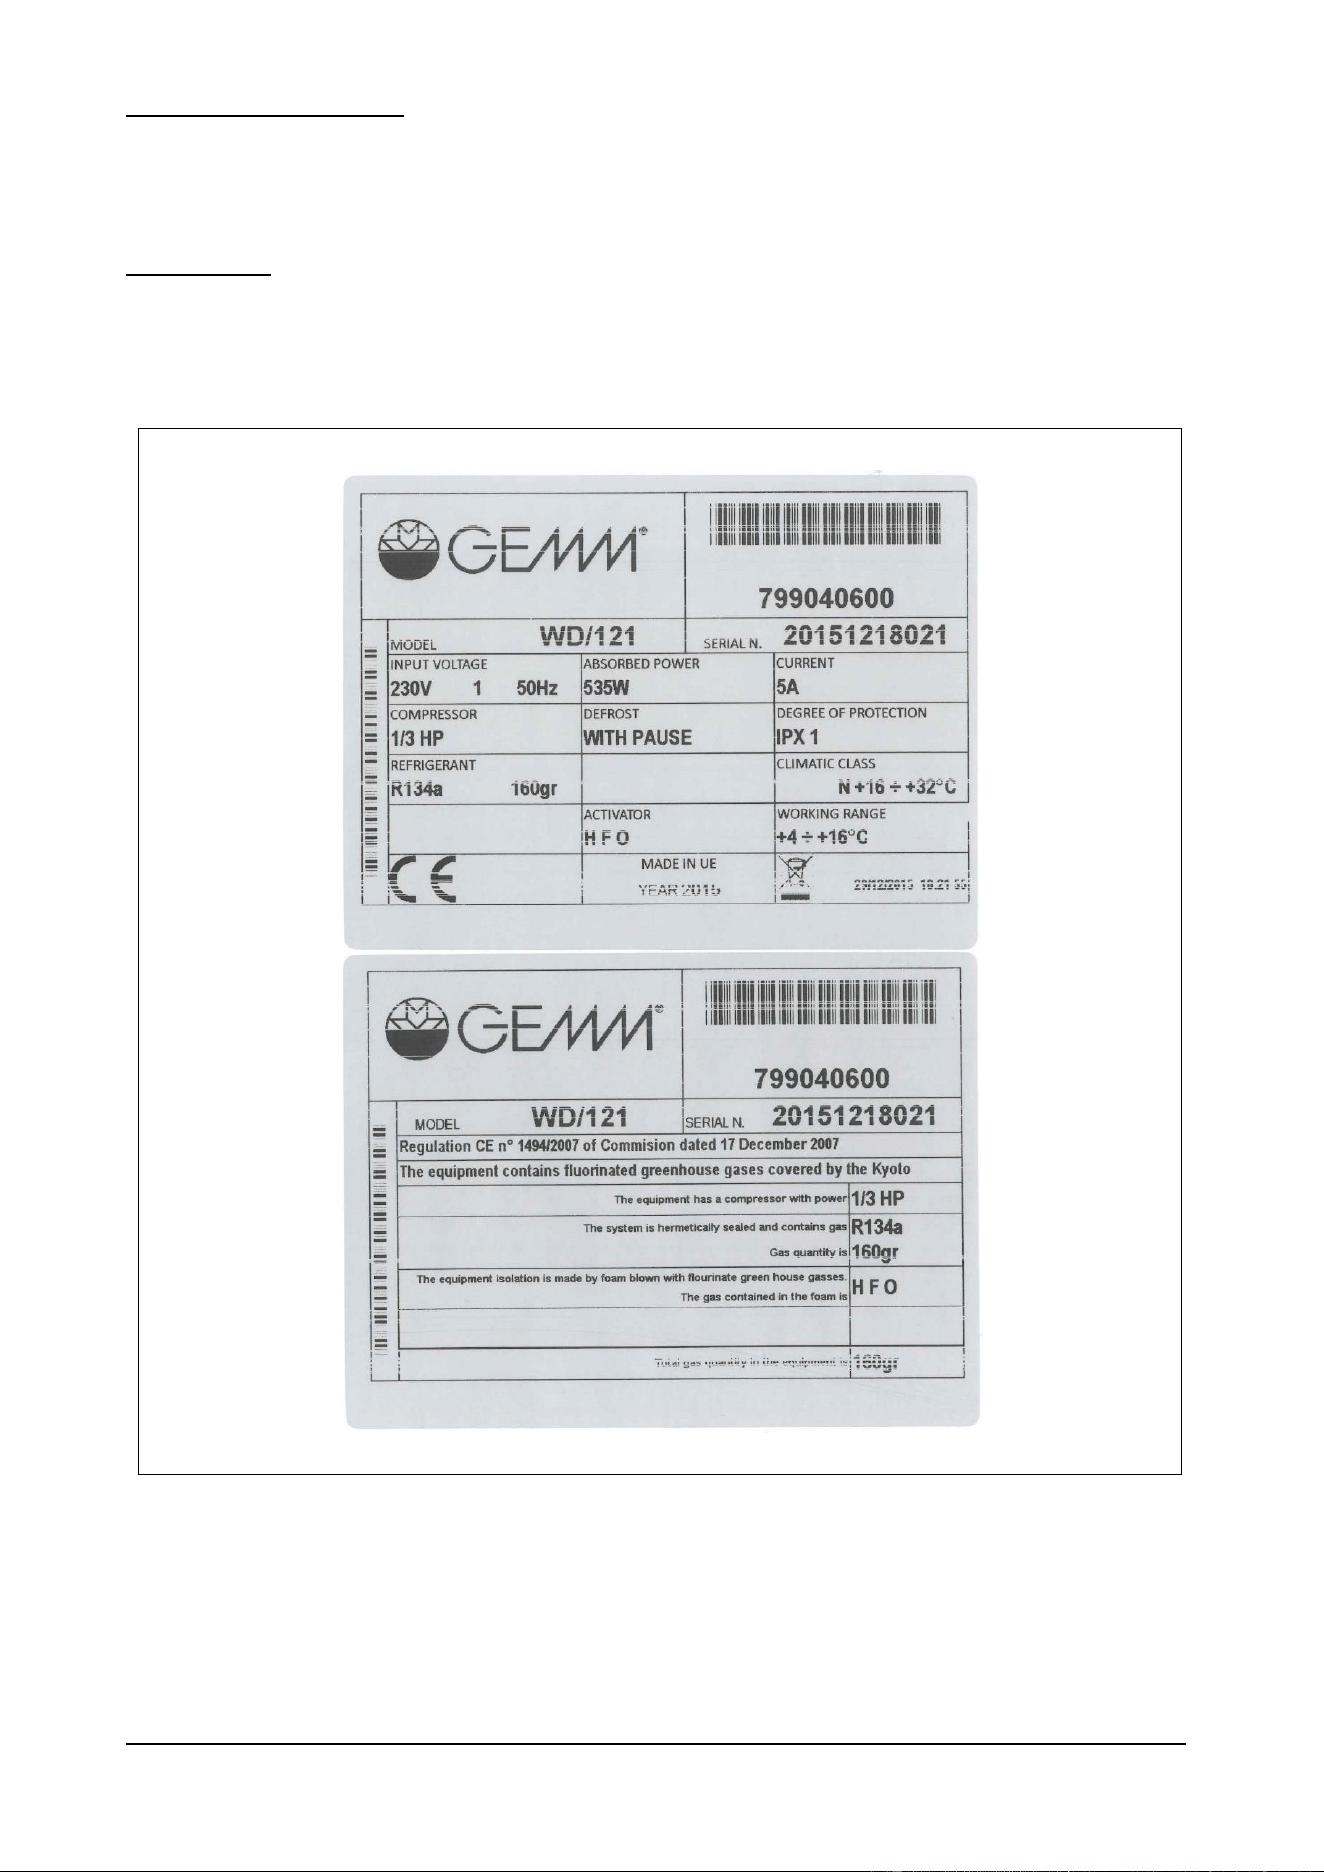
1.1 – MARKING
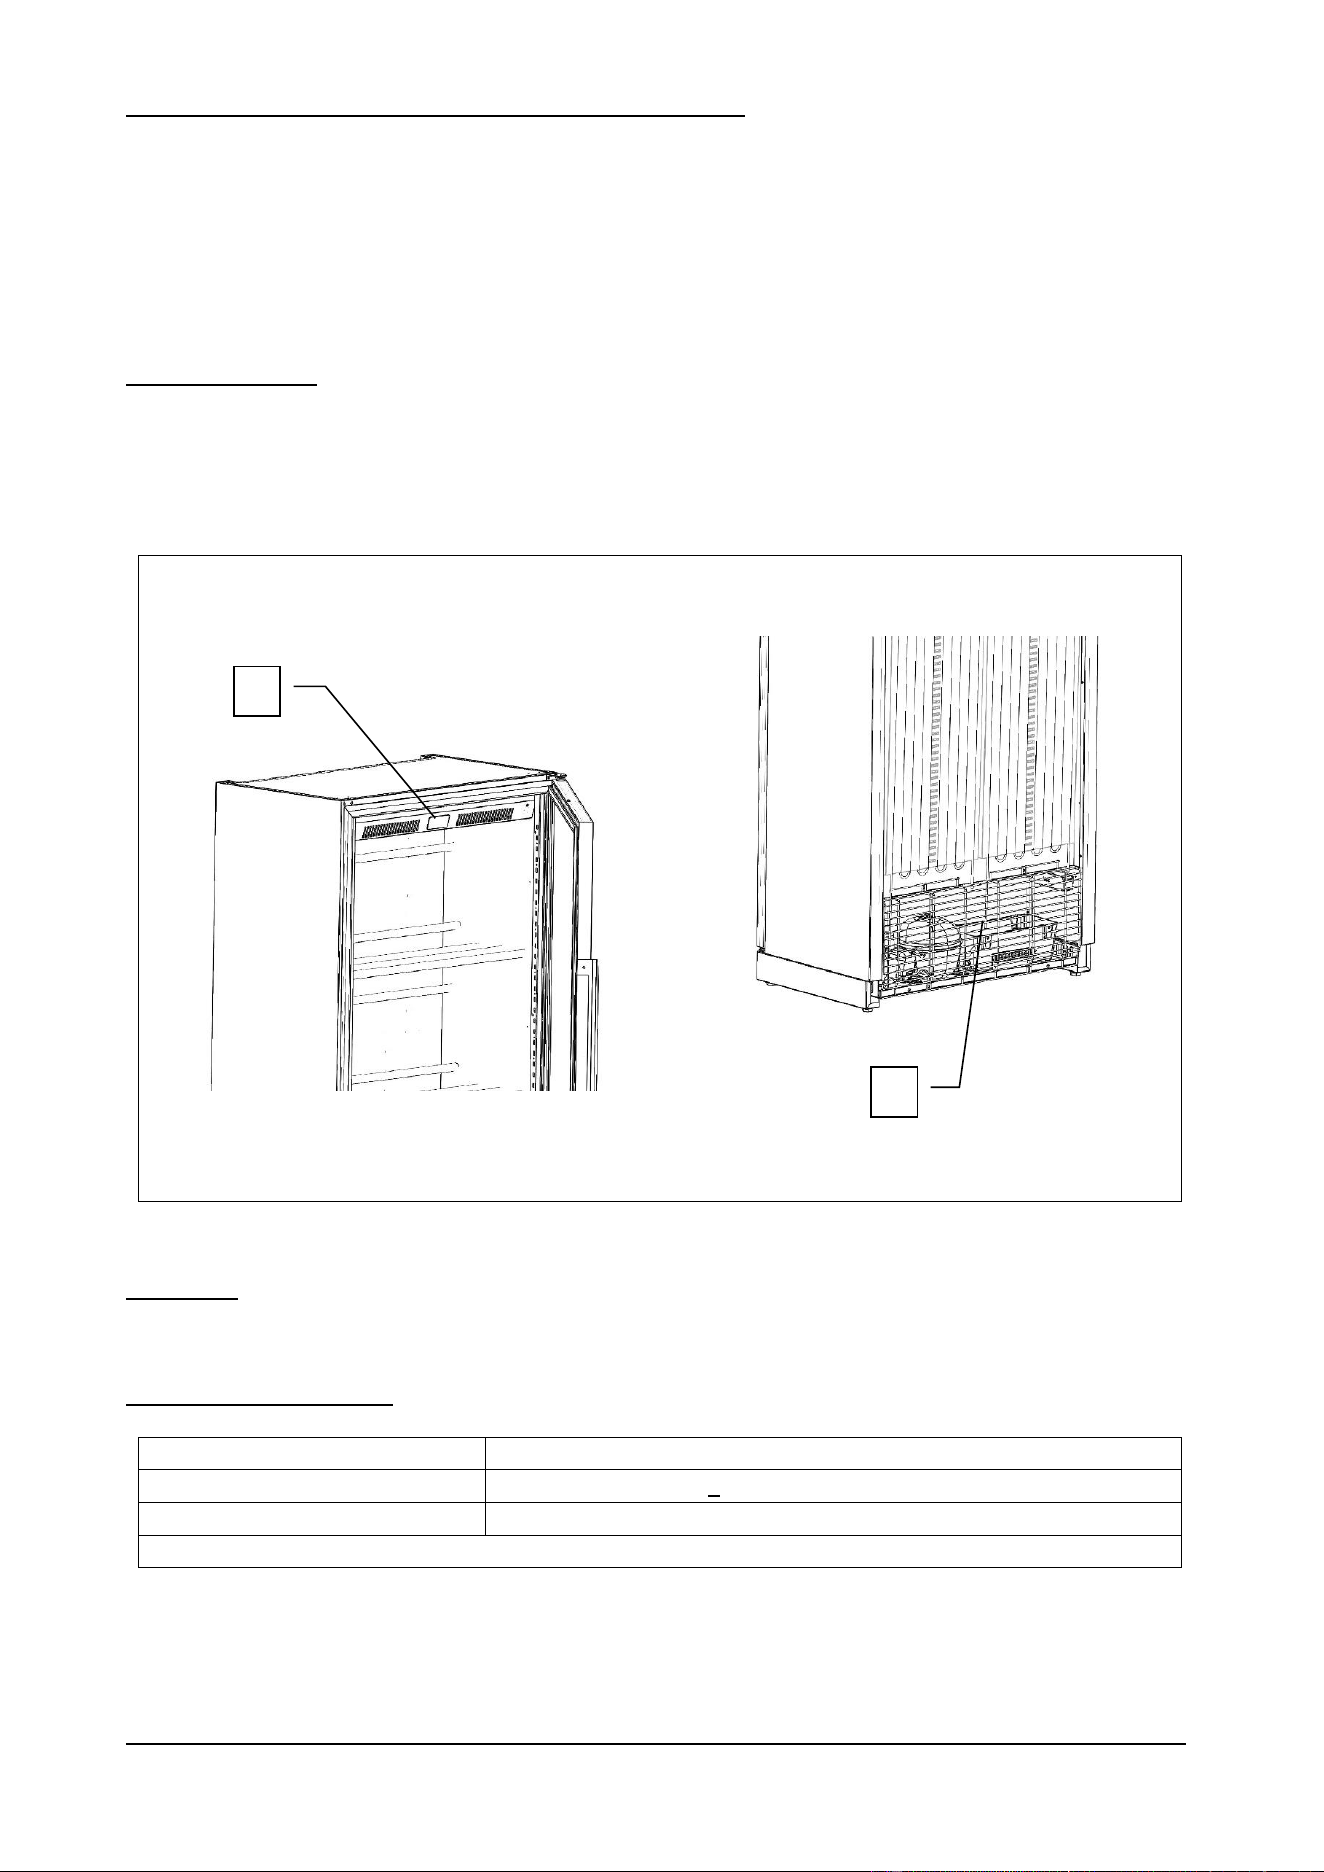
The appliance identification plates (as shown in fig. 1 below) of all Wine Display, are applied at the top on the back
outside of the device and the same also at the top on the inside right.
Fig. 1
WD Rev.00 01-2016 pag. 34
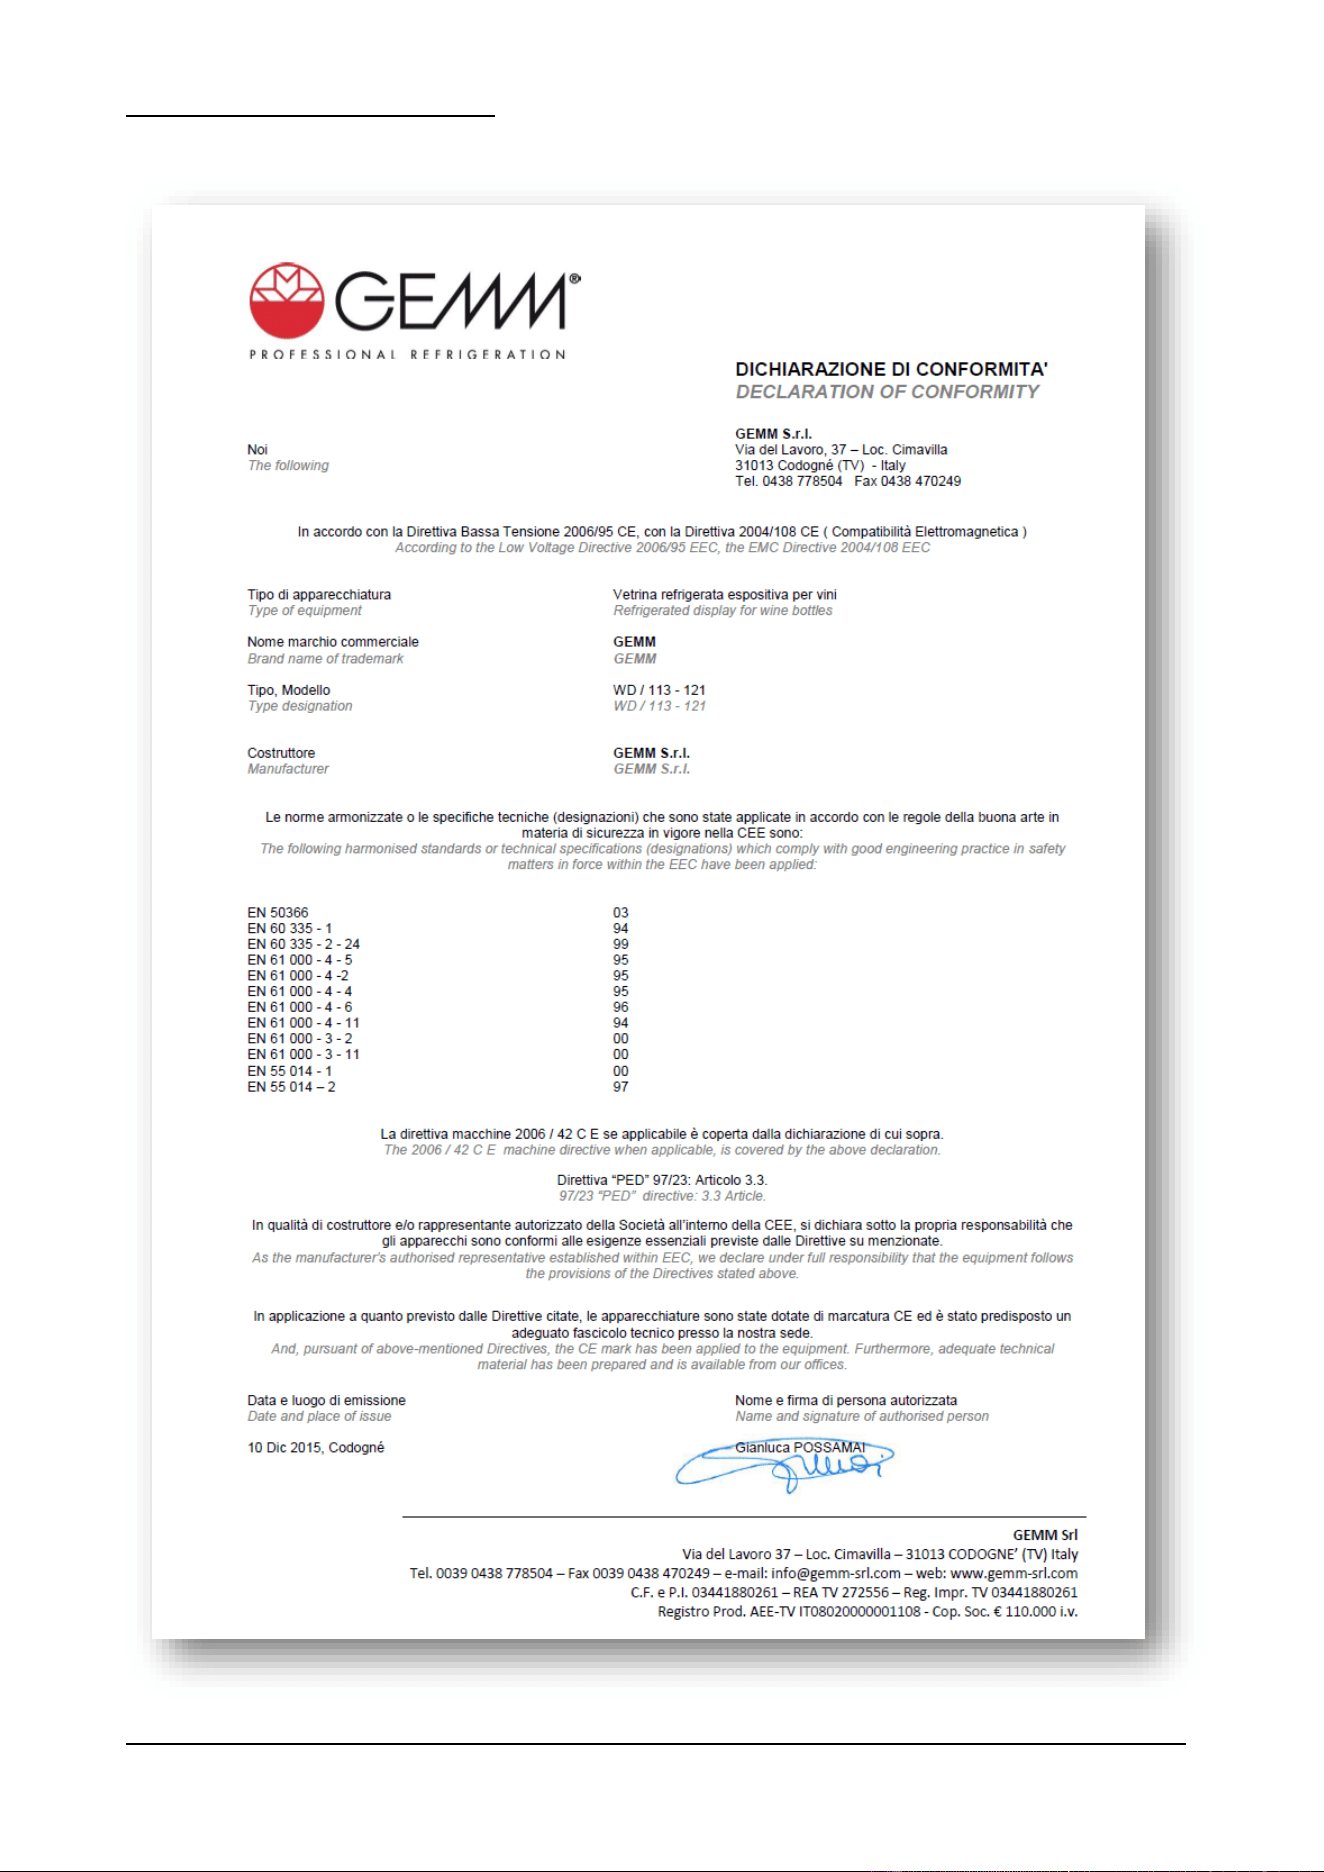
1.2 – DECLARATION OF CONFORMITY
WD Rev.00 01-2016 pag. 35
1.3 – WARRANTY
The warranty covering the various parts of the appliance is valid from the date on the relative delivery note and is as
described in the sales agreement.
The warranty does not cover damage to the appliance caused by:
- transport and/or handling;
- operator errors;
- lack of the maintenance described in this manual;
- faults and/or breakages that cannot be traced to faulty operation of the appliance;
- maintenance operations carried out by unqualified personnel;
- improper use.
1.4 – AFTER-SALES SERVICE
Please contact the manufacturer directly for any needs regarding use, maintenance or ordering of spare parts, and specify
the identification of the appliance given on the ID plate.
1.5 – HOW TO USE AND KEEP THE MANUAL
The purpose of this manual is to provide all the information necessary to ensure proper use of the appliance in complete
safety and independence.
The manual is sub-divided into chapters with paragraphs and sub-paragraphs: the contents page is easily consulted to find
any aspect of interest.
The material in this document is provided exclusively for the purpose of information and may be altered without notice.
Although great attention is paid to drawing up the manual, the manufacturer is not responsible for damage deriving
from errors, omissions or the use made of the information herein.
Keep this manual and all the documentation in the appendices in good condition, legible and complete in all its parts; keep
it close to the equipment in an accessible place known to all operators.
1.5.1 – SYMBOLS USED IN THIS MANUAL
This symbol indicates information and warnings which if not observed could damage the appliance or
compromise the safety of personnel.
This symbol indicates information and warnings regarding electrical devices which if not observed could
damage the appliance or compromise the safety of personnel.

WD Rev.00 01-2016 pag. 36
1.6 – PERSONNEL
This manual is for the use of operators, authorized fitters and maintenance engineers.
Operators must not carry out operations reserved for maintenance engineers or specialised
technicians.
The manufacturer accepts no responsibility for damage deriving from failure to observe this
rule.
- Appliance operator: specialised person who can operate the appliance in normal working conditions by using
the relevant controls. The operator must also be capable of carrying out simple routine maintenance (cleaning,
loading) and starting or resetting the appliance after a power failure.
- Specialised electrician: specialised electrician who has been trained by the manufacturer to work on the
appliance. The specialised electrician must be capable of installing the appliance and operating it in normal
conditions; s/he is qualified to carry out all electrical and mechanical adjustments, maintenance and repairs. S/he
is able to operate with live electrical control boxes and connector blocks.
- Qualified fork-lift operator: person qualified in handling materials on the company’s premises, holder of a licence
for the use of fork-lift trucks.
WD Rev.00 01-2016 pag. 37
2 – MACHINE DESCRIPTION
2.1 – TECHNICAL DATA
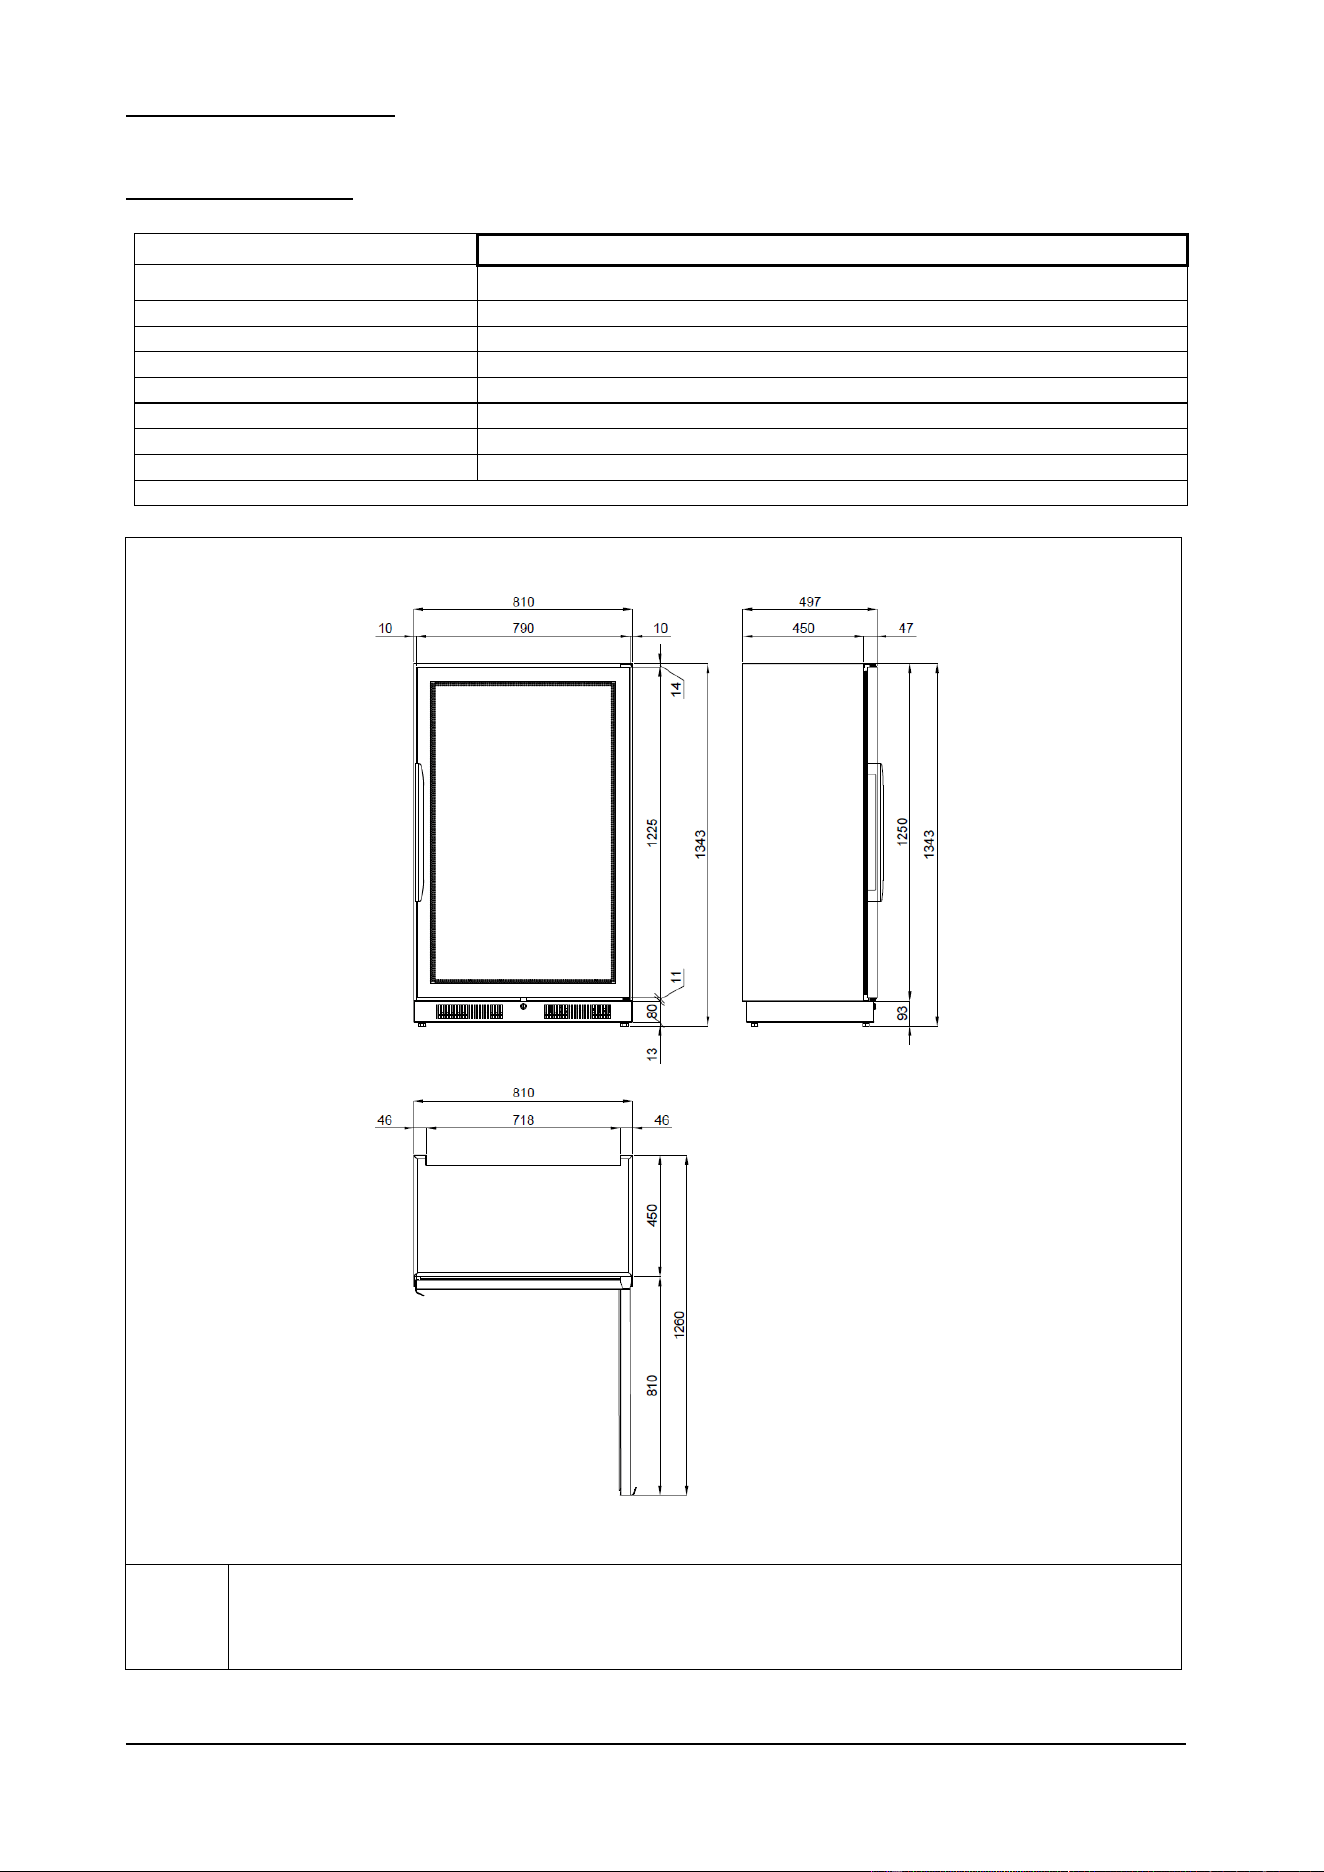
Model
WD5121
External dimensions
cm
81 x 50 x 135h
Weight
kg
158
Max bottles capacity
nr
128
Chamber temperature
°C
+ 4 / + 16
Gas
R 134 a - 140gr
Compressor power
Hp
1/5 (LBP)
Max. absorbed power
W
XXX
Input Voltage
Volt 1x230 ~ 50 Hz
Tab. 1/a
R
Alimentazione elettrica: cavo 3x1.5 mm
2
completo di spina Schuko; L=4000 mm
Electricity supply: 3x1.5 mm
2
wire complete with Schuko plug; L=4000 mm
Elektrischer Stromanschluss: Kabel 3x1,5 mm
2
komplett mit Schukostecker; L=4000 mm
Alimentation électrique: câble 3x1.5 mm
2
avec fiche Schuko; L=4000 mm
Fig. 2/a
WD Rev.00 01-2016 pag. 38
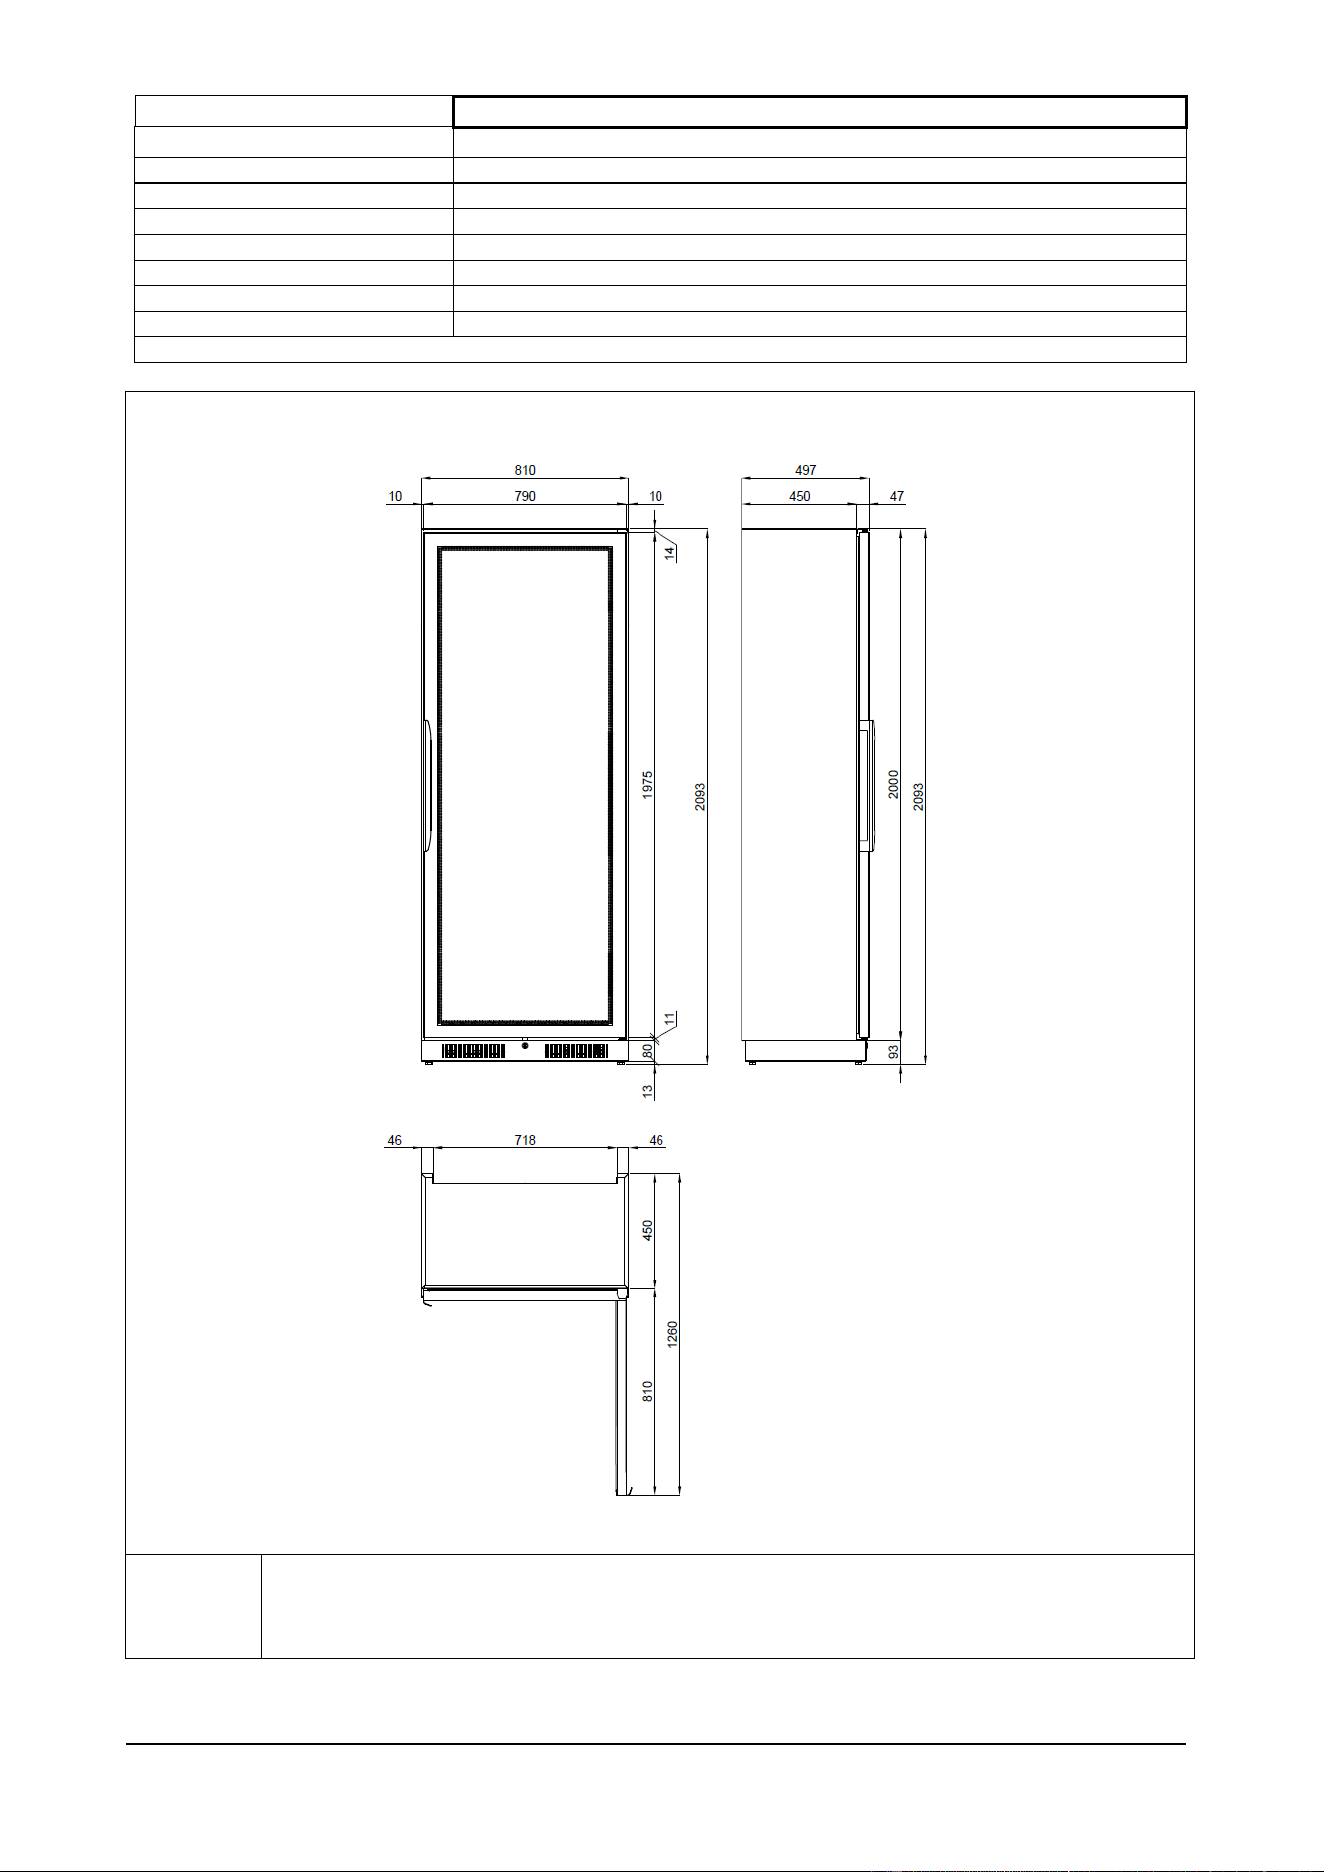
Model
WD7121
External dimensions
cm
81 x 50 x 210h
Weight
kg
309
Max bottles capacity
nr
256
Chamber temperature
°C
+ 4 / + 16
Gas
R 134 a - 160gr
Compressor power
Hp
1/3 (LBP)
Max. absorbed power
W
535
Input Voltage
Volt 1x230 ~ 50 Hz
Tab. 1/b
R
Alimentazione elettrica: cavo 3x1.5 mm
2
completo di spina Schuko; L=4000 mm
Electricity supply: 3x1.5 mm
2
wire complete with Schuko plug; L=4000 mm
Elektrischer Stromanschluss: Kabel 3x1,5 mm
2
komplett mit Schukostecker; L=4000 mm
Alimentation électrique: câble 3x1.5 mm
2
avec fiche Schuko; L=4000 mm
Fig. 2/b
WD Rev.00 01-2016 pag. 39
2.2 – DESCRIPTION OF THE WINE DISPLAY AND INTENDED USE
The Wine Display has been conceived for displaying wine bottles to best advantage directly in restaurants, drinking rooms,
exhibitions/shows, showrooms and bars/pubs, ensuring perfect storage conditions while drawing attention to the product.
The one-piece steel cabinet, the fully glazed door and the interior LED lighting make the Wine Display a truly elegant
furnishing accessory that will complement any type of surroundings. The internal bottle rack is modular with different
versions in steel and Plexiglas to be arranged as desired. The Wine Display is available in high and low, made of glass
and refrigeration system brings all type of home.
2.2.1 – MAIN PARTS
The appliance comprises the following parts:
body;
refrigerating unit (ref. 1, fig. 3);
digital controller (ref. 2, fig. 3)
Fig. 3
2.3 – NOISE
The equipment has been designed and built so as to reduce the acoustic pressure to a minimum level, below 60dB.
2.4 –AMBIENT CONDITIONS
Installation site
Restaurants, drinking rooms, exhibitions/shows, showrooms, bars/pubs.
Relative humidity
< 80% without condensation
Climatic class
“N” + 16 °C ÷ + 32 °C
Tab. 2
1
2
WD Rev.00 01-2016 pag. 40
3. – SAFETY
3.1 – GENERAL WARNINGS
IMPORTANT: before using the appliance read this manual carefully and follow the technical operating
instructions and indications to the letter. The operator must know the position and function of all the
control devices and the characteristics of the wine display.
The wine display complies with current safety regulations, but improper use may cause damage to
persons and things.
At the time of installation all operatives must be suitably trained in accident hazards, operator safety
devices, general accident prevention regulations described in international directives and the current law
in the countries where the appliance is used. Start-up and use of the appliance must be exclusively in
the hands of trained personnel. The behaviour of operators must in any case scrupulously observe
accident prevention regulations in the country where the appliance is used.
Do not remove or deface the plates fitted to the appliance by the manufacturer.
The wine display must not be used if the control panel or any other part is damaged.
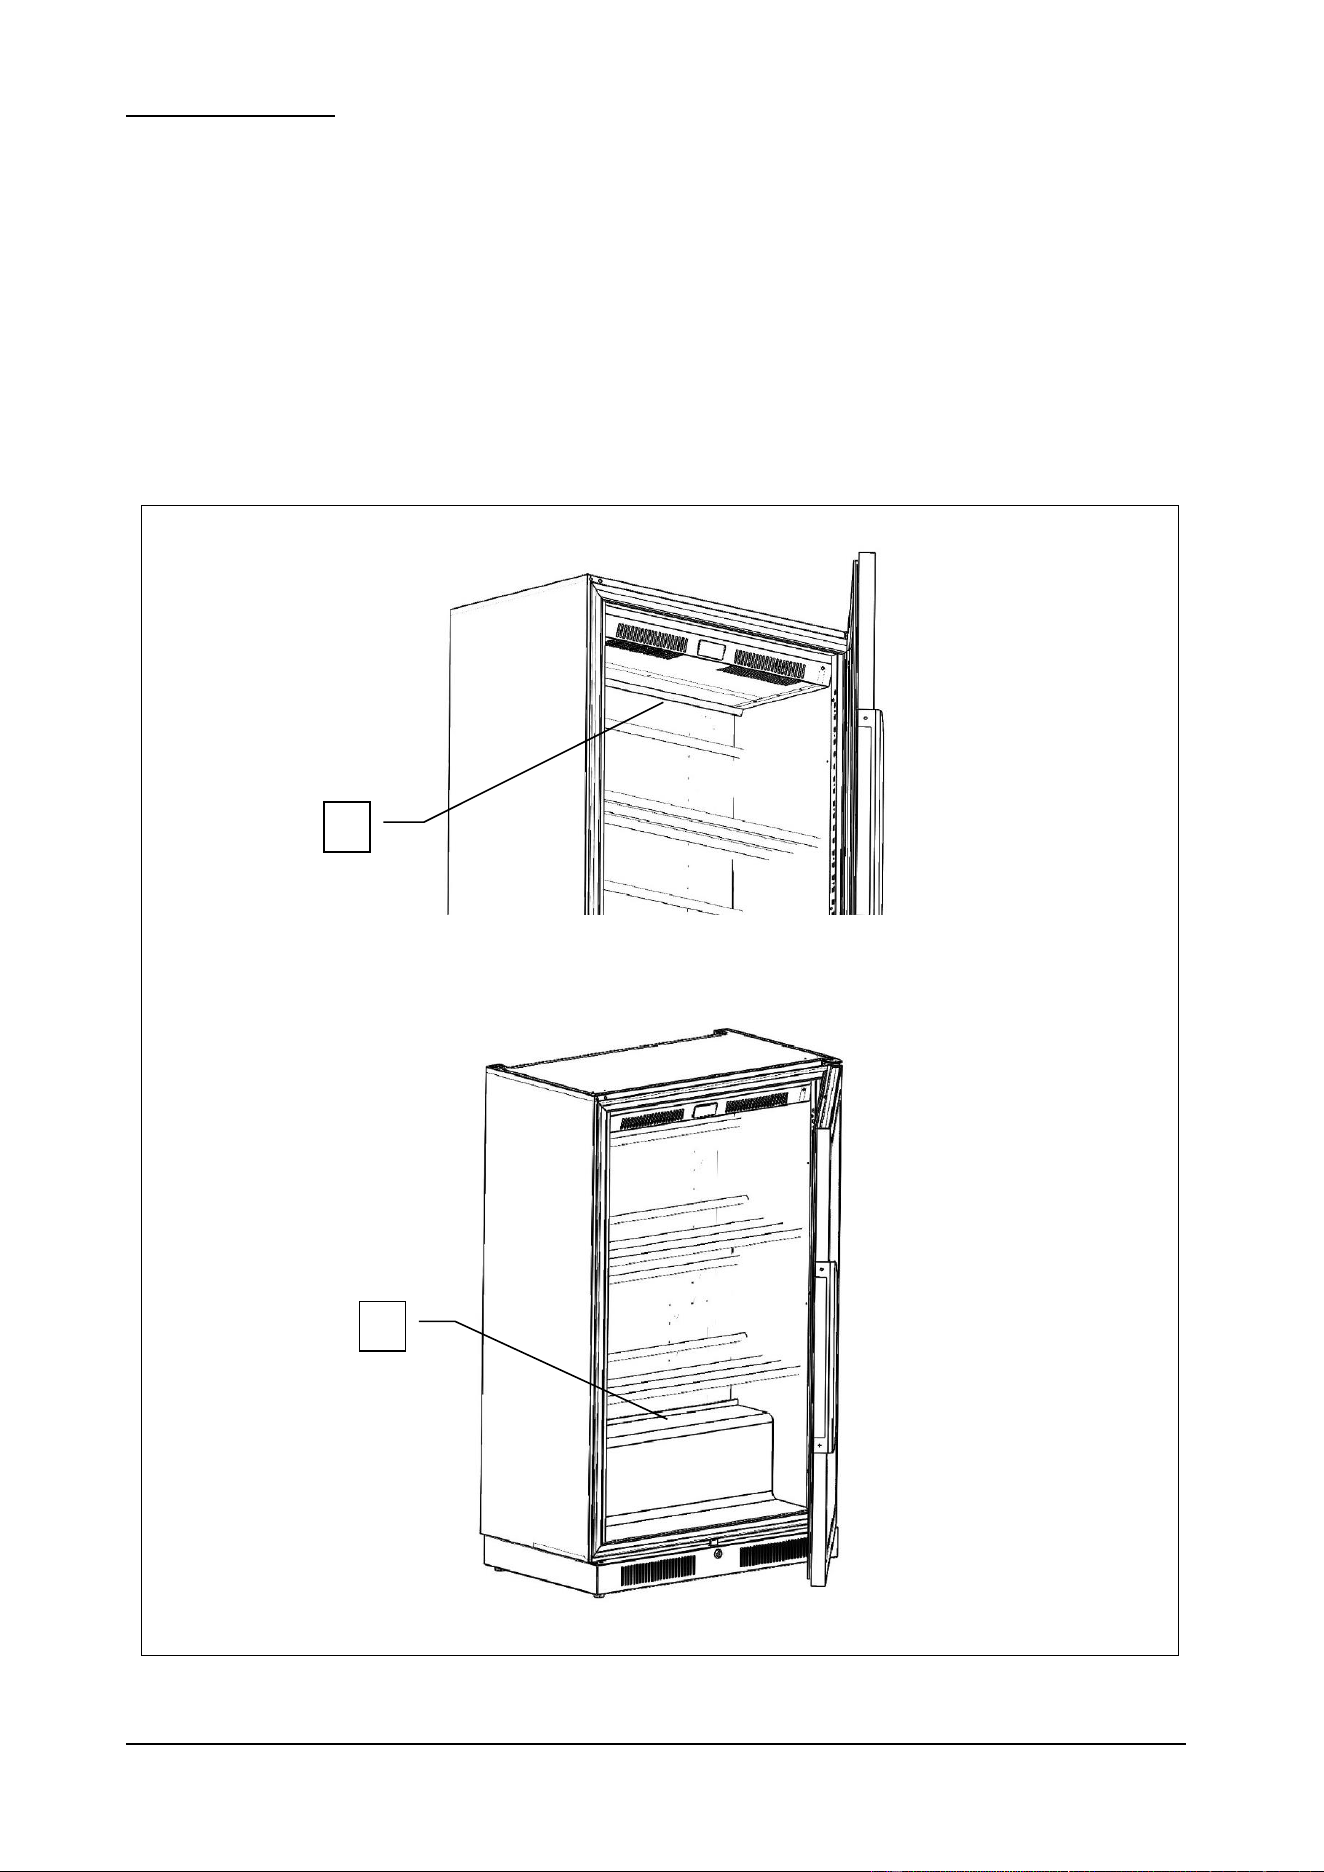
Do not obstruct the front and/or rear air vents on the appliance; do not place food to be processed up
against the ventilation grilles or air ducts, or directly on the bottom of the chamber.
Promptly report any anomalies in operation.
Use only accessories recommended by the manufacturer.
Do not expose the appliance to rain or sprays of water.
Routine and extraordinary maintenance that require the electrical box to be opened or even partial
dismantling of the wine library must be carried out only after the appliance has been disconnected.
The manufacturer has no responsibility in the following cases:
the maintenance plan is not carried out;
unauthorized alterations and/or operations:
spare parts used are not original;
failure to observe even part of the contents of this manual;
improper use of the appliance.
Any tampering with or unauthorized replacement of one or more appliance parts or components and use of
accessories and consumables different from the original ones can constitute a hazard and relieve the
manufacturer of any civil or penal responsibility.
If in doubt about operation of the appliance, refrain from using it and contact the manufacturer.
WD Rev.00 01-2016 pag. 41
3.2 – SPECIFIC WARNINGS
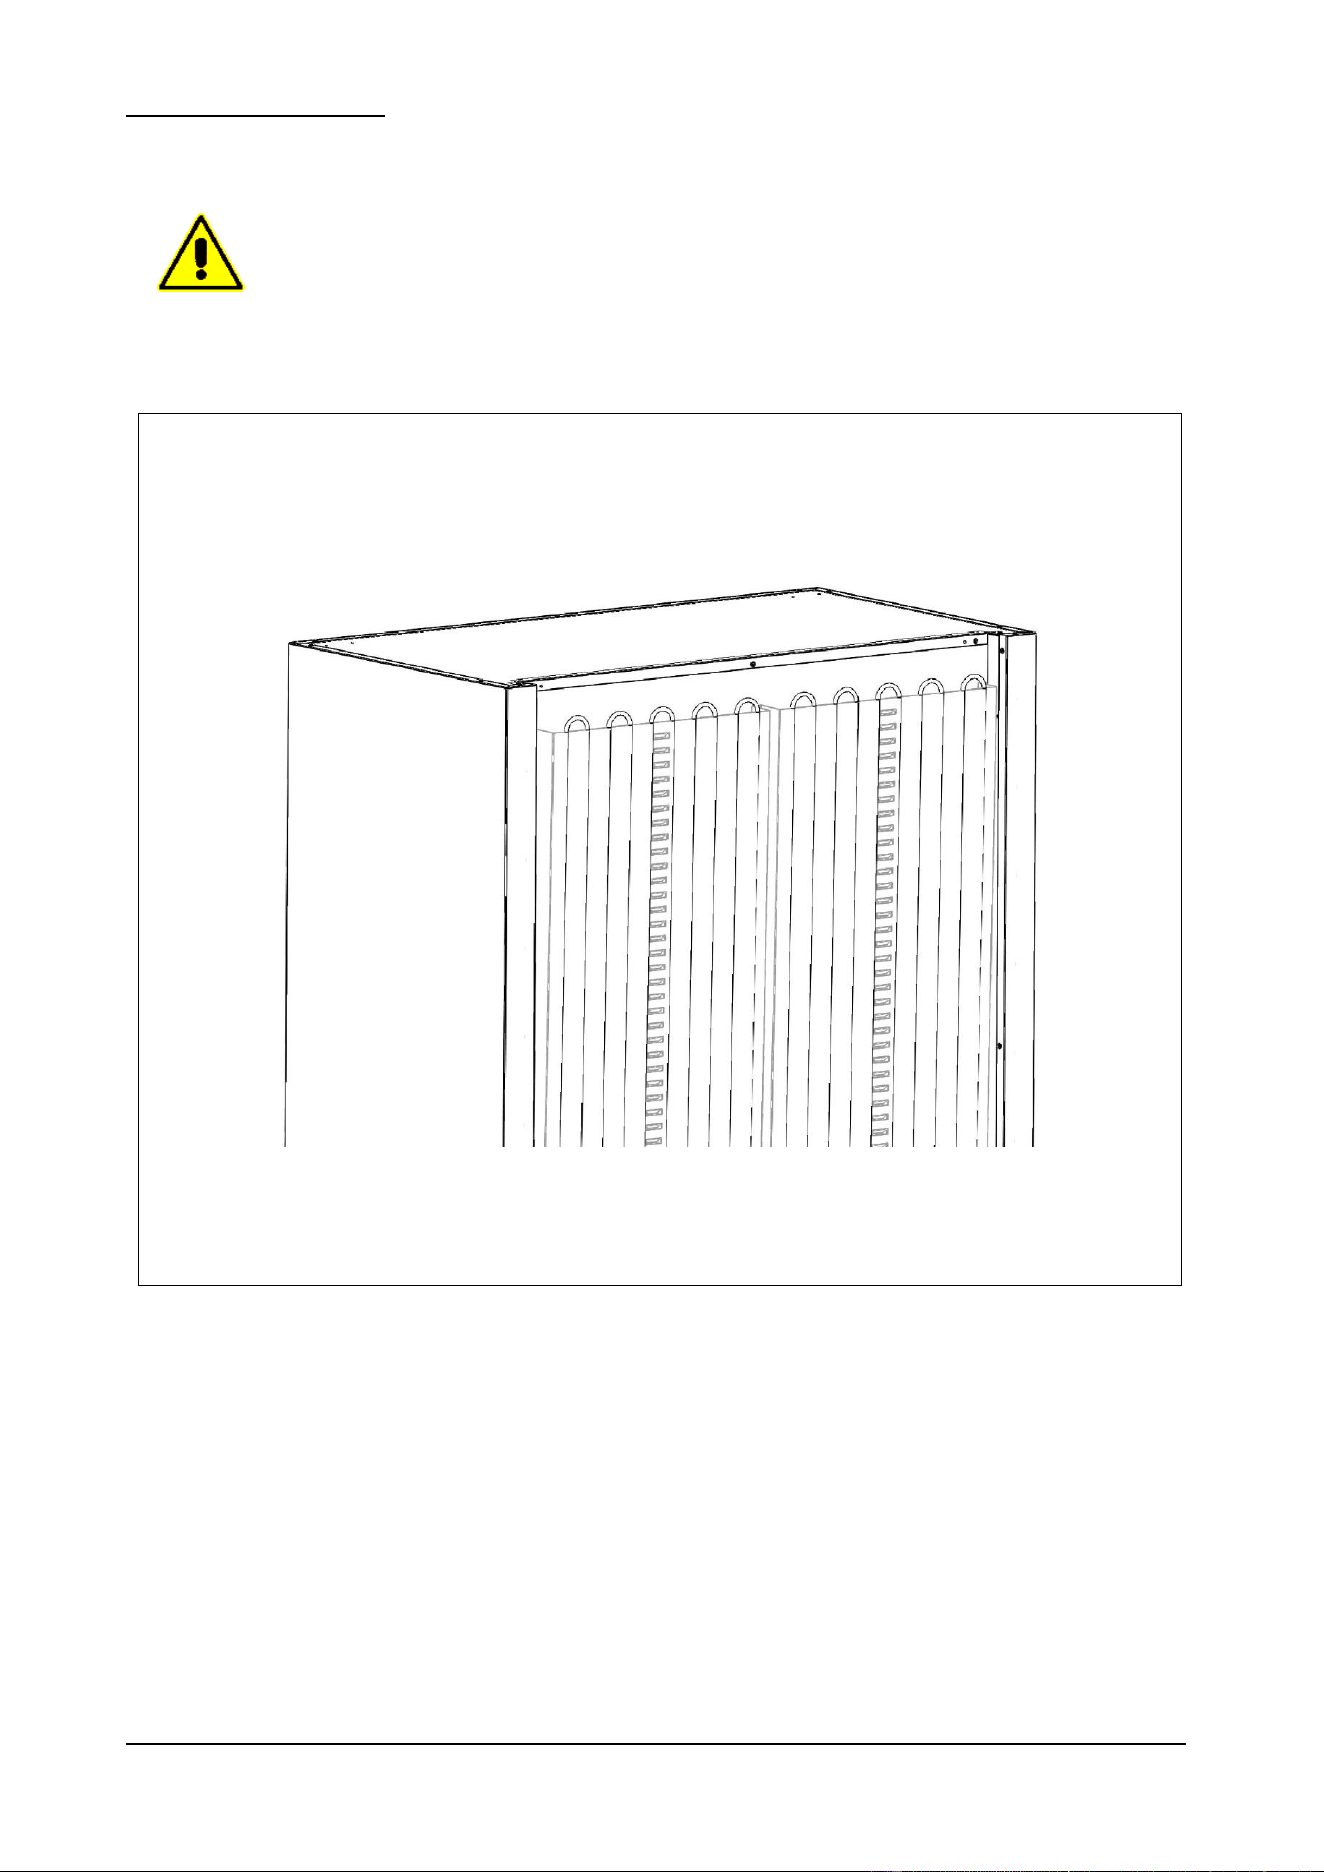
Fig. 4
AFTER HAVING PLACED THE WINE LIBRARY IN ITS FINAL LOCATION, FOR SAFETY REASONS
IT MUST BE FASTENED AS THE SET BACK TO THE WALL ON WHICH BACKS. THE
MANUFACTURER CANNOT BE HELD LIABLE FOR ANY DAMAGE CAUSED TO PROPERTY OR
INJURY TO PERSONS DUE TO FAILURE TO COMPLY WITH THE RECOMMENDATIONS GIVEN
BELOW.
WD Rev.00 01-2016 pag. 42
3.2. – IMPROPER USE
The wine display must not be used:
for purposes different from those given in paragraph 2.2 “Description of wine display and its use”;
with safety systems not working;
after badly done installation;
by untrained personnel;
when maintenance has not been carried out, or has been carried out badly;
when non-original spare parts are used;
with damaged power lead and/or electrical socket;
with obstructed air ducts (ref. 1 fig. 5);
with the food to be processed placed against the ventilation grilles (ref. 1 fig. 5), air ducts, or on the bottom of the
chamber (ref. 2 fig. 5).
Fig. 5
1
2
WD Rev.00 01-2016 pag. 43
3.4 – SAFETY DEVICES
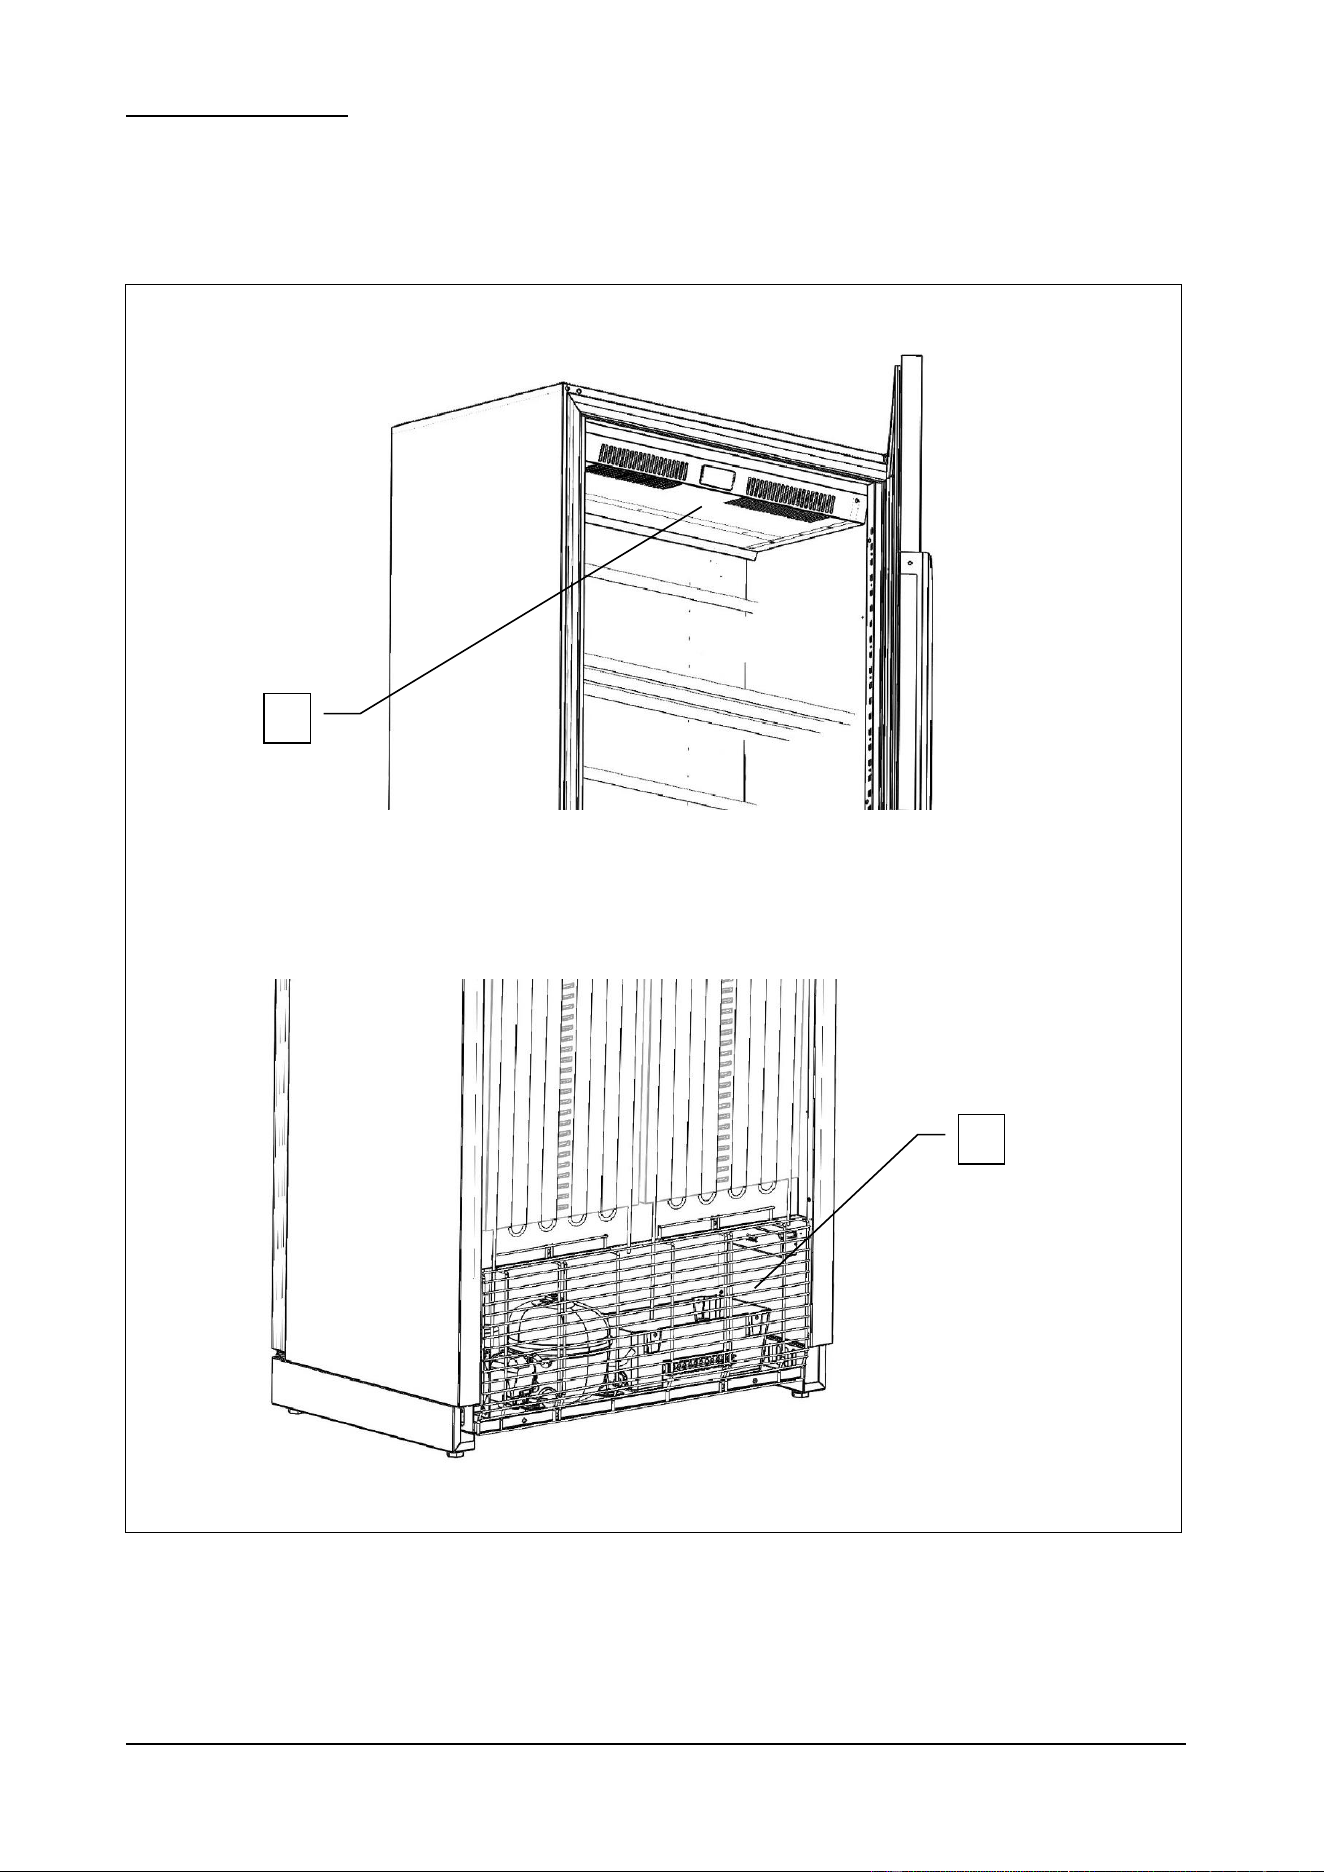
Personnel exposed to the hazards inherent in moving parts are protected by special safety devices on the appliance.
grilles covering the cooling fans (ref. 1 fig. 6);
grilles covering the condenser unit (ref. 2 fig. 6).
Fig. 6
1
2
WD Rev.00 01-2016 pag. 44
3.5 – STOP FUNCTIONS
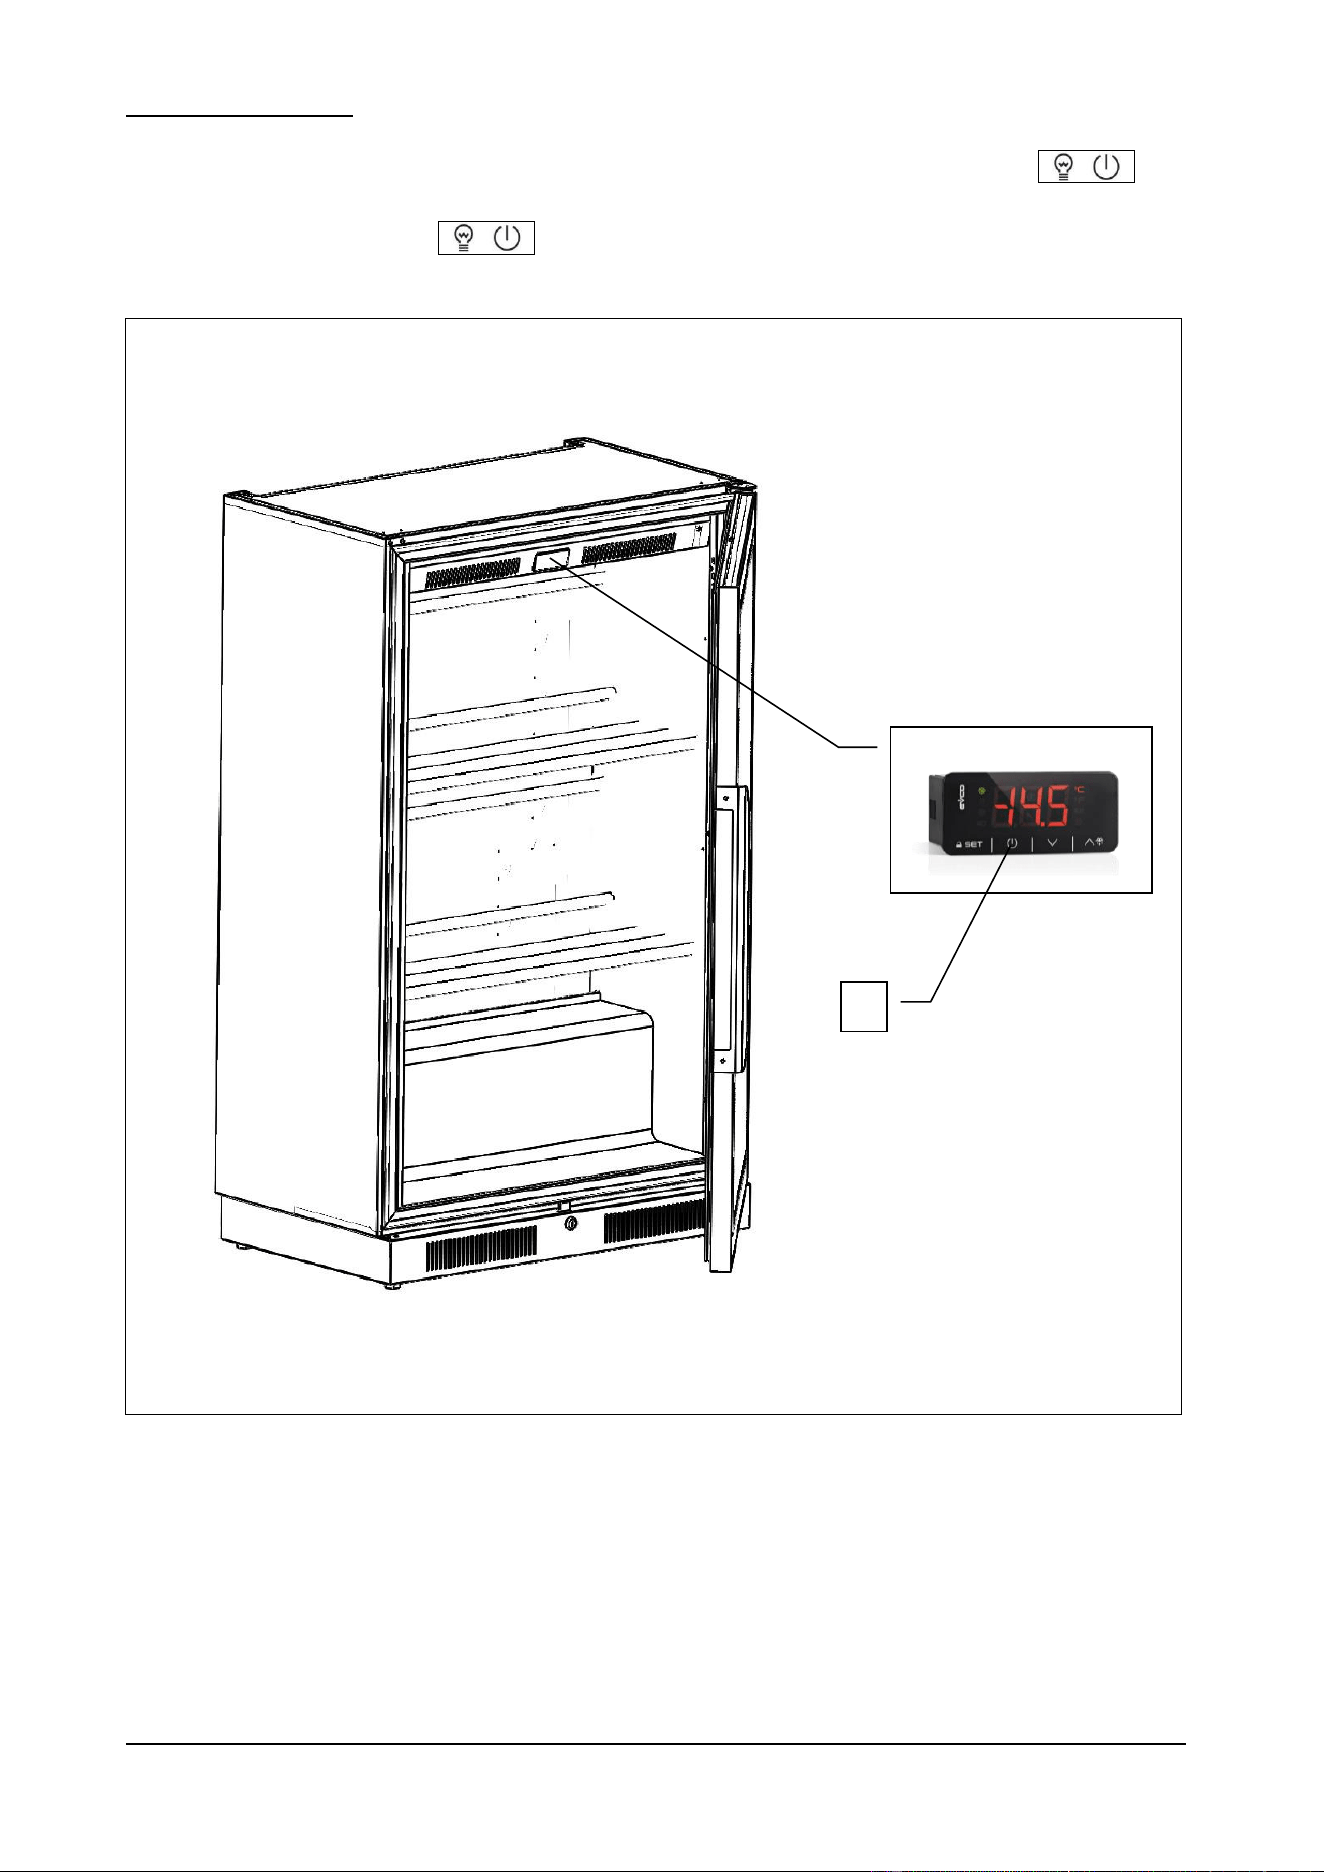
The entire appliance is controlled by an electronic circuit board. The stop function is represented by the button
(ref. 1 fig. 7). In any state you can find the machine, after activating the keyboard by pressing and holding the set button
for 3sec / lock, pressing the button puts the card in OFF.
Fig. 7
1
WD Rev.00 01-2016 pag. 45
4 – TRANSPORT AND HANDLING
4.1 – TRANSPORT
The packing used is suitable for the type, dimensions and weight of the appliance and ensures that it is protected and
remains undamaged during transport and delivery to the purchaser.
The wine display must be placed in position and kept upright on a pallet and surrounded by its packing box throughout its
journey.
The wine display is handed over to the carrier ready to be handled.
The appliance must never be overturned.
The packing must be well placed on the platform of the means of transport and secured by
appropriate ropes.
Take the utmost care when lifting and positioning the wine display, so as to avoid serious
damage to persons or things. The manufacturer declines all responsibility if the indications for
lifting and transport the wine library are not observed.
Ambient temperature must never drop below 4°C during transport.
Once the wine display has been unpacked, the packing material must be eliminated and/or re-used in compliance with
current waste disposal regulations in the countries where the appliance will be used.
4.2. – HANDLING THE PACKED WINE DISPLAY
Take great care when lifting and handling the wine display; there is an injury hazard in handling
loads, which may also be fatal.
All handling and lifting operations must be carried out with great caution, making sure that all
personnel is strictly at a safety distance and that no-one stands under suspended loads, be they
still or in motion.
Before starting the operation, check the whole appliance handling area to identify any
dangerous points.
Ambient temperature must never drop below 4°C during transport.
WD Rev.00 01-2016 pag. 46
AUTHORIZED PERSONNEL
Specialised fork-lift truck operator.
Individual safety devices:
- safety shoes;
- safety gloves.
Personnel carrying out such operations must not wear rings, wrist watches, jewellery, loose or unfastened garments, such
as, for example, ties, torn garments, scarves, unbuttoned jackets or blouses with open zips, etc. In general, personnel
must wear safety apparel.
4.2.1 – WEIGHT AND DIMENSIONS
Model
WD5121 WD7121
Dimensions
cm
81 x 50 x 135h
81 x 50 x 210h
Weight
Kg
/
/
Tab.3
4.2.2 – MEANS REQUIRED
- To lift the appliance use a fork-lift truck of suitable minimum capacity.
The use of unsuitable equipment can cause accidents to those involved in the operation and/or
damage to the appliance.
The manufacturer declines all responsibility for improper non-compliant use of equipment for
lifting, transport and handling.
WD Rev.00 01-2016 pag. 47
5 – INSTALLATION
Use the utmost care in handling the appliance, so as to avoid damage to persons or things.
Do not start the appliance if there are faults on the control panel or parts are damaged.
AUTHORIZED PERSONNEL
Specialised electrician.
Individual safety devices:
safety shoes;
safety gloves.
Personnel carrying out such operations must not wear rings, wrist watches, jewellery, loose or unfastened garments, such
as, for example, ties, torn garments, scarves, unbuttoned jackets or blouses with open zips, etc. In general, personnel
must wear safety apparel.
5.1 – PREPARATION FOR INSTALLATION
For installation prepare an area of manoeuvre suitable for the dimensions of the appliance (see fig. 2) and the chosen
lifting equipment.
The installation site must be prepared with all the connecting systems required for the appliance to work.
Choose an installation site with requisites that will allow the appliance to be used safely. The area must provide good
support, with a solid flat floor whose finish will ensure a suitable and safe working place for personnel.
Install the appliance in a place with natural and/or artificial light suitable for the operations to be carried out (in compliance
with specific regulations).
5.2 – UNPACKING
Check that the packing has not been damaged during transport.
5.2.1 – MEANS REQUIRED
Use a fork-lift truck or equivalent equipment to lift the appliance.
The use of unsuitable equipment can cause accidents to those involved in the operation and/or
damage to the appliance.
The manufacturer declines all responsibility for improper non-compliant use of equipment for
lifting, transport and handling.
WD Rev.00 01-2016 pag. 48
5.2.2 – UNPACKING PROCEDURE
All the handling and unpacking operations must be carried out with extreme care, making sure
that all personnel is strictly at a safety distance and that no-one stands under suspended loads,
be they still or in motion.
To unpack the appliance just remove its cardboard wrapping. Take the appliance off the pallet, lifting it by means of a
suitable fork-lift truck; the forks should be placed under the appliance taking care not to damage the two water tray
runners.
AFTER INSTALLING THE APPLIANCE, WAIT AT LEAST TWO HOURS BEFORE TURNING IT ON.
5.3 – HANDLING THE WINE DISPLAY
5.3.1 – MEANS REQUIRED
See paragraph 5.2.1.
The use of unsuitable equipment can cause accidents to those involved in the operation and/or
damage to the appliance.
The manufacturer declines all responsibility for improper non-compliant use of equipment for
lifting, transport and handling.
5.3.2 – HANDLING THE UNPACKED WINE DISPLAY
All the handling and unpacking operations must be carried out with extreme care, making sure
that all personnel is strictly at a safety distance and that no-one stands under suspended loads,
be they still or in motion.
Use a fork-lift truck to lift and move the Wine Display; the forks must go underneath the appliance, taking care not to
damage the brackets securing the bottom plinth.
5.4 – ASSEMBLING THE WINE DISPLAY
BEFORE ASSEMBLING THE WINE DISPLAY, MAKE SURE THAT IT HAS BEEN FASTENED IN THE
WAYS SHOWN AND DESCRIBED IN SECTION 3.1 .
Secure the door with screws, handle supplied separately.
Carefully remove the protective film from the steel both inside and outside the Wine Display.
Using the screws provided, secure all the bottle display kits as needed or desired.
Connect the appliance directly to the electricity supply without using any multiple adapters, converters or
extension cords.
Switch on the Wine Display setting the temperature as required.
WD Rev.00 01-2016 pag. 49
6 – SETTING UP
AFTER INSTALLING THE APPLIANCE, WAIT AT LEAST TWO HOURS BEFORE TURNING IT ON.
6.1 – CONNECTIONS
6.1.1 – ELECTRICAL CONNECTION
Electrical connection must be made by a specialised electrician.
Check that the power supply voltage given on the ID plate corresponds to that available at the
installation site.
Connections must be made to current regulations; the supply mains must have an efficient
earthing system compliant with electricity regulations in the country; this is a responsibility of
the customer.
Do not make tight bends on the power lead and do not place any object whatsoever on top of
it.
If it is necessary to unplug the mains supply, first make sure the circuit board is on OFF on
the display.
The manufacture declines all responsibility for damage or accidents caused by failure to observe
such regulations.
ELECTRICAL CONNECTION PROCEDURE
The appliance is supplied by the manufacturer complete with power plug. Just connect the power plug to a socket at the
installation site; the system must be carried out to current regulations.
The electricity supply at the installation site must have the following requisites:
Voltage: 230 Vac
Frequency: 50 Hz
6.2 – PRELIMINARY CHECKS
The electrician fitter shall train the operator in the correct use of the wine Display and give the basic notions of maintenance.
METHOD
The operations to prepare the wine display for initial start-up must be carried out by a specialised engineer, in the presence
of the operator, who can acquire information to carry out certain routine maintenance and cleaning.
Before starting up the appliance, a series of checks and inspections must be carried out for the purpose of preventing
errors or accidents during start-up.
Check that the appliance has not been damaged during transport.
Check with special care for any damage to the electrical box, push button control panel, wiring and pipes.
Check that all external power sources have been connected properly.
Check that the machine is perfectly level.
6.2.1 – REGULATION
Regulation carried out by unauthorized personnel may damage the appliance and expose the
operator to serious hazards. Regulation carried out by unauthorized personnel is considered
tampering with the appliance and as such null the warranty and relieve the manufacturer of any
responsibility.
WD Rev.00 01-2016 pag. 50
7 – USE
AFTER INSTALLING THE APPLIANCE, WAIT AT LEAST TWO HOURS BEFORE TURNING IT ON.
7.1 – INTENDED USE
The Wine Dsiplay has been conceived for displaying wine bottles to best advantage directly in restaurants, drinking rooms,
exhibitions/shows, showrooms and bars/pubs, ensuring perfect storage conditions while drawing attention to the product.
The one-piece steel cabinet, the fully glazed door and the interior LED lighting make the Wine Display a truly elegant
furnishing accessory that will complement any type of surroundings. The internal bottle rack is modular with different
versions in steel and Plexiglas to be arranged as desired. The wine display is available in high and low, both made with
refrigeration unit type of home.
7.2 – INAPPROPRIATE USE
Any use of the Wine Library other than those described in 7.1 is not recommended. In particular, the Wine Display is not
an appliance designed for the rapid cooling of bottles or for storing food.
7.3 –RESIDUAL RISKS
DANGER OF FALLING OBJECTS
Use a support or stepladder when taking bottles from the highest part of the appliance in order
to avoid the bottles tipping over and possible injuring people below.
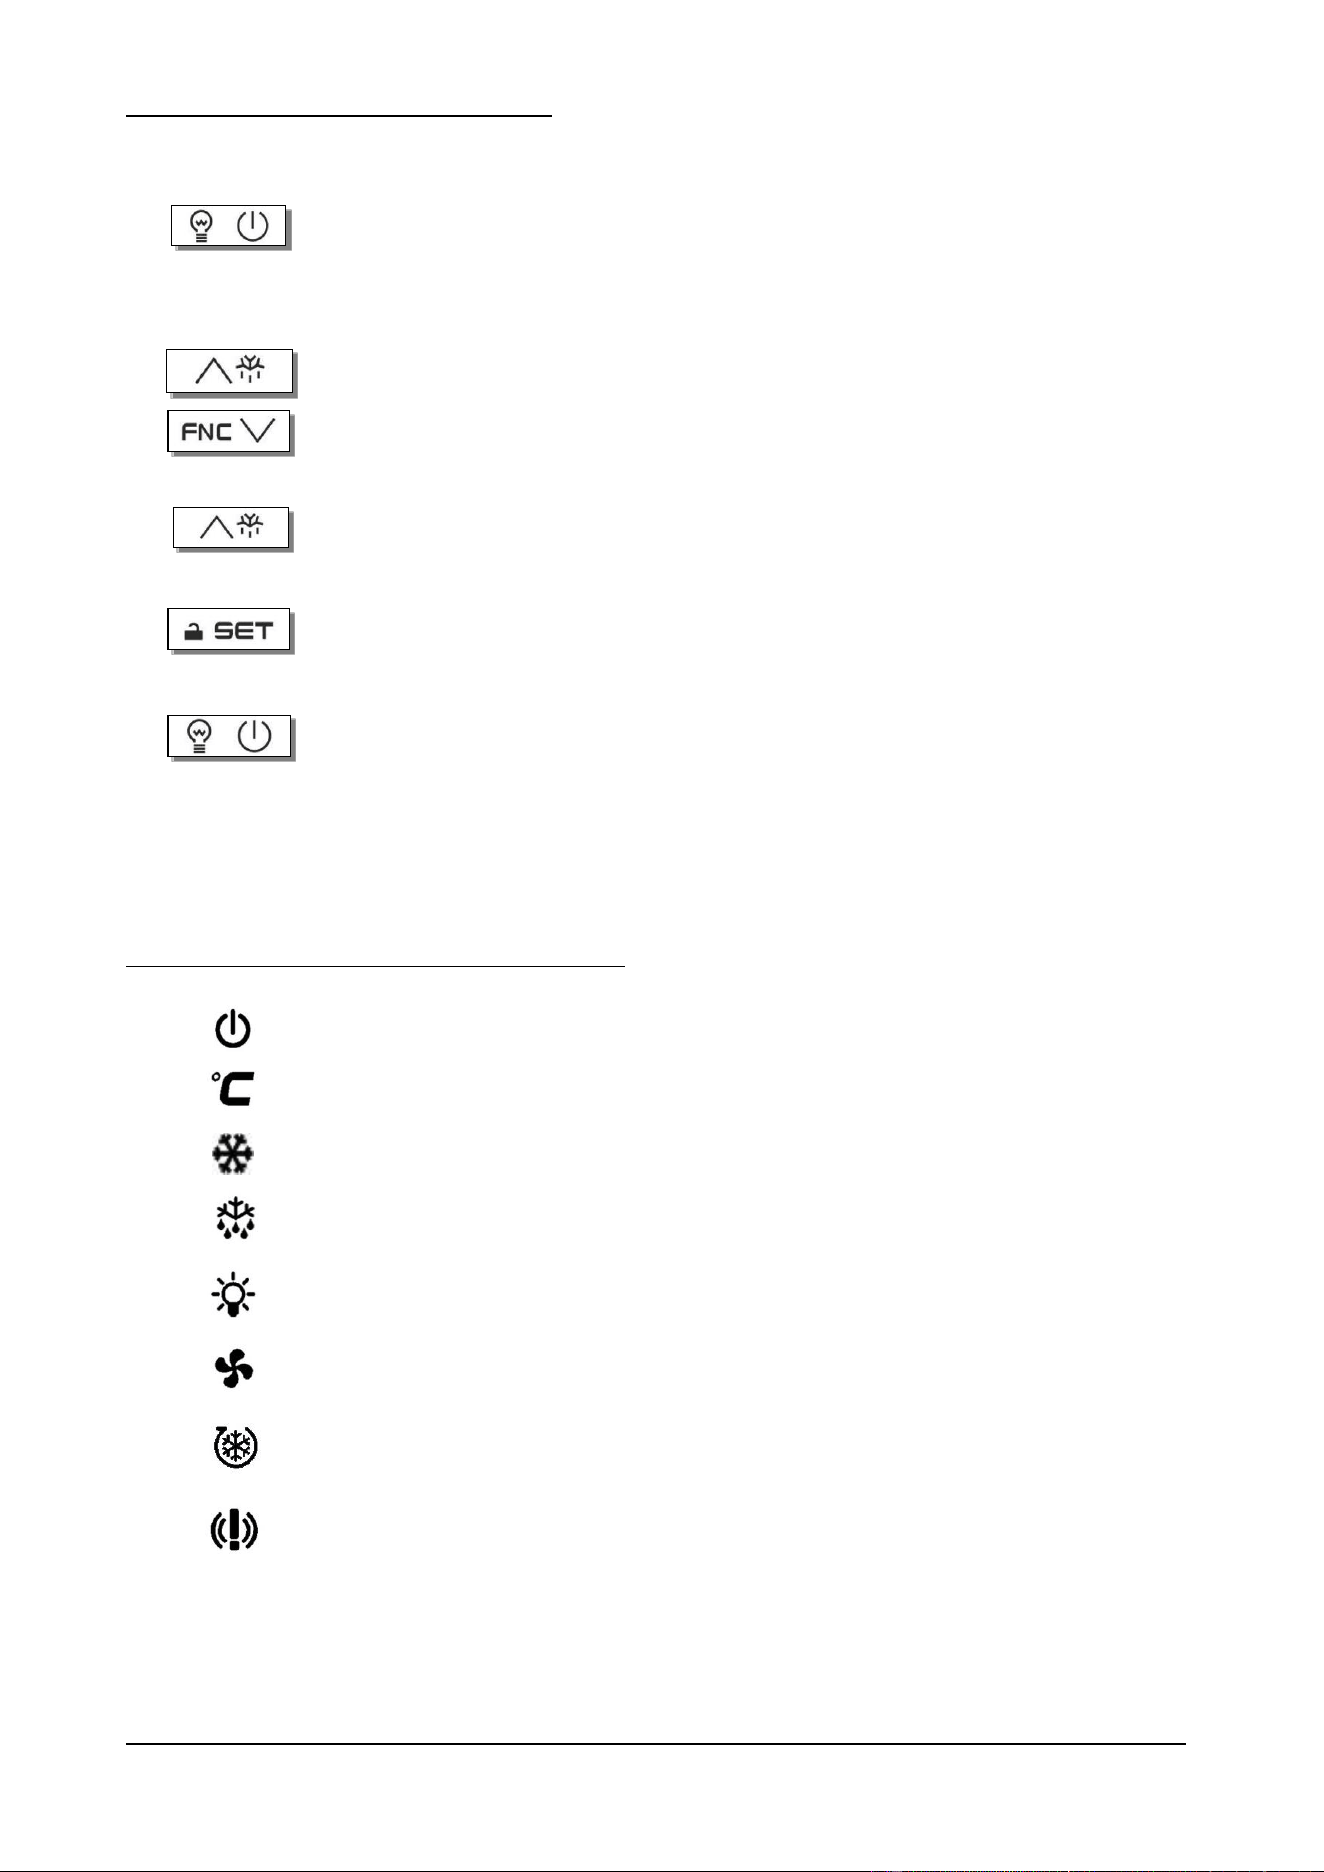
7.4 – CONTROL PANEL
Fig. 8
WD Rev.00 01-2016 pag. 51
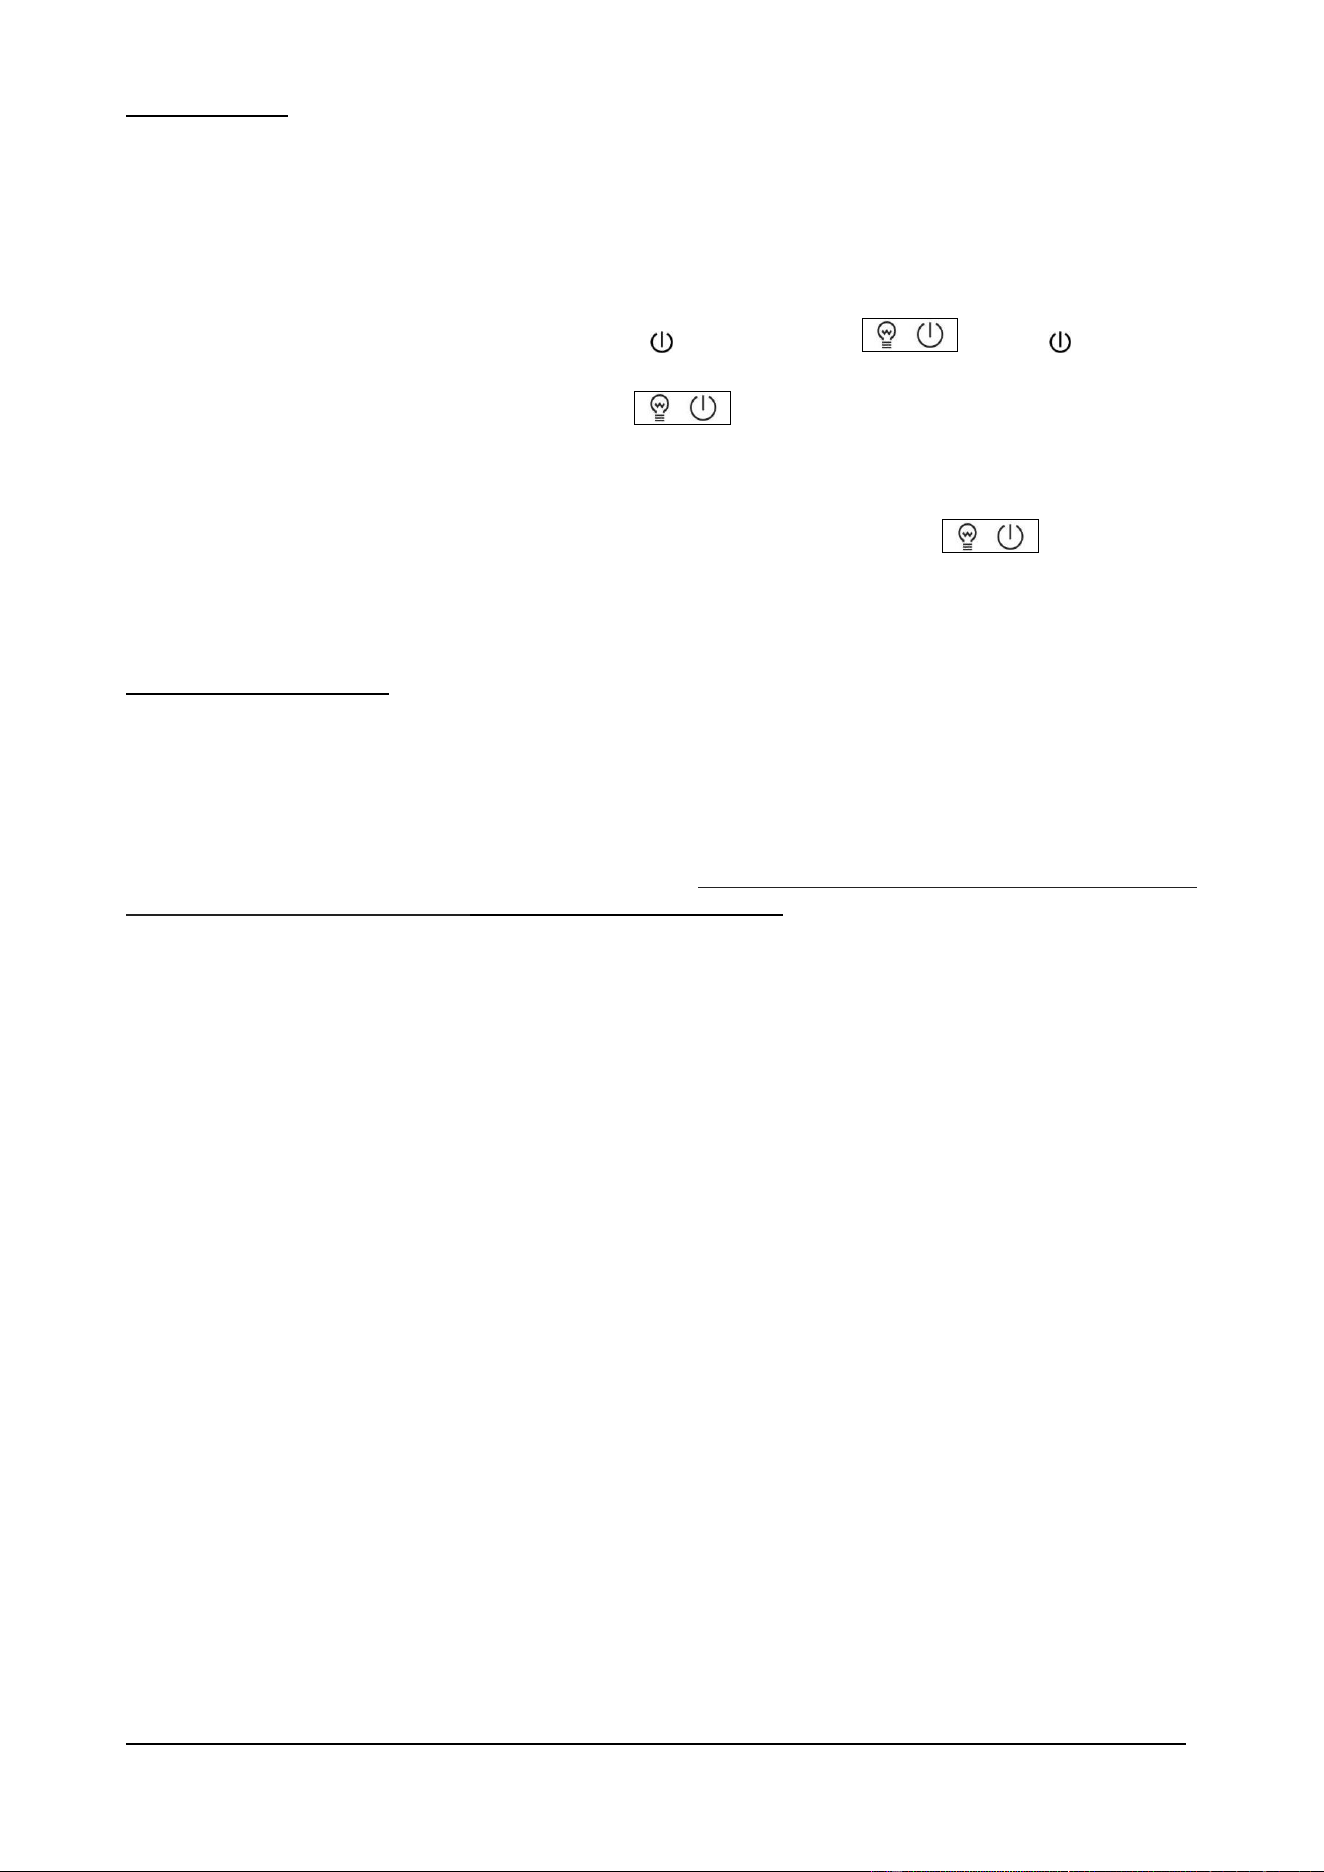
The following keys are present on the controller:
0/1, ON-OFF KEY
When the appliance is OFF (0), press just once to pass to ON (1).
While the display is turned on, after activating the keyboard by
pressing for 3s the SET / LOCK, a single press puts the card to
OFF.
UP AND DOWN KEYS
Used to increase or decrease the value that appears on the
display. With the keypad active, press and hold the UP arrow key
for 3 sec to activate the defrost cycle.
With the keypad active, press and hold the DOWN arrow key for
3 sec to activate the continuous timed cycle.
DEFROST KEY
With the appliance ON, press and hold for 3 sec to activate
defrost.
SET KEY
With the appliance ON and keypad active, press just once to
display the set point; press and hold for 3 sec to change the set
point.
LIGHT KEY
With the appliance ON and keypad active, press just once to
switch the interior light on or off.
The following icons are present on the controller display:
OFF
Only lit when the appliance is OFF, otherwise always off.
CELSIUS
May be lit to show the temperature unit of measurement.
COMPRESSOR
Lit during normal refrigerating stages with compressor ON; off with
compressor OFF. Blinking during defrosting (temperature drop).
DEFROST
Lit during DEFROST.
LIGHT
Only lit when the cabinet interior lights are on.
FAN
Only lit when the cabinet internal fans are operating (evaporator).
CONTINUOUS CYCLE
Only lit when the continuous cycle is activated (timed cycle).
ALARMS
Only lit when an appliance malfunction or alarm is recorded by the
controller.
WD Rev.00 01-2016 pag. 52
7.5 – CONTROLS
As a whole the appliance is controlled by an digital controller touch.
As soon as the appliance is connected to the electricity supply, the display lights up completely for a lamp test lasting a
few seconds. At the end of the lamp test, the display goes automatically to how it was before the appliance was switched
off, for example if a cycle was in progress at that time, the cycle will restart from the point it was interrupted.
With the PCB OFF, the display is not lit except for the icon . Upon pressing key the icon goes out and
the display comes ON showing the temperature in the cabinet.
With the PCB OFF and the keypad active, press the key to switch the LED lights inside the appliance on and
off.
Use the commands on the touch panel, helped by the indications on the display, to activate the various appliance functions.
If the buzzer sounds for any reason whatsoever, it may be muted by simply pressing any key.
Whatever the status of the appliance, after having activated the keypad, pressing the key puts the PCB to
OFF.
7.6 – PREPARING FOR USE
Before using the appliance, the inside of the cabinet should be thoroughly cleaned.
When switching on after installation or if the appliance has not been used for a long time, it is a good rule to let it operate
empty until the set temperature has been reached.
To get the best performance from the Wine Display, arrange the bottles so that air can circulate properly: do not lay the
bottles on each other and distribute the load evenly.
Do not load the appliance with more than the allowed quantities, not to introduce bottles with a temperature equal to and /
or greater than that of the environment indicated design room temperature (+25°C) and avoid pointlessly opening the door
otherwise the efficiency of the refrigerating unit will be reduced.
WD Rev.00 01-2016 pag. 53
7.7 – USE
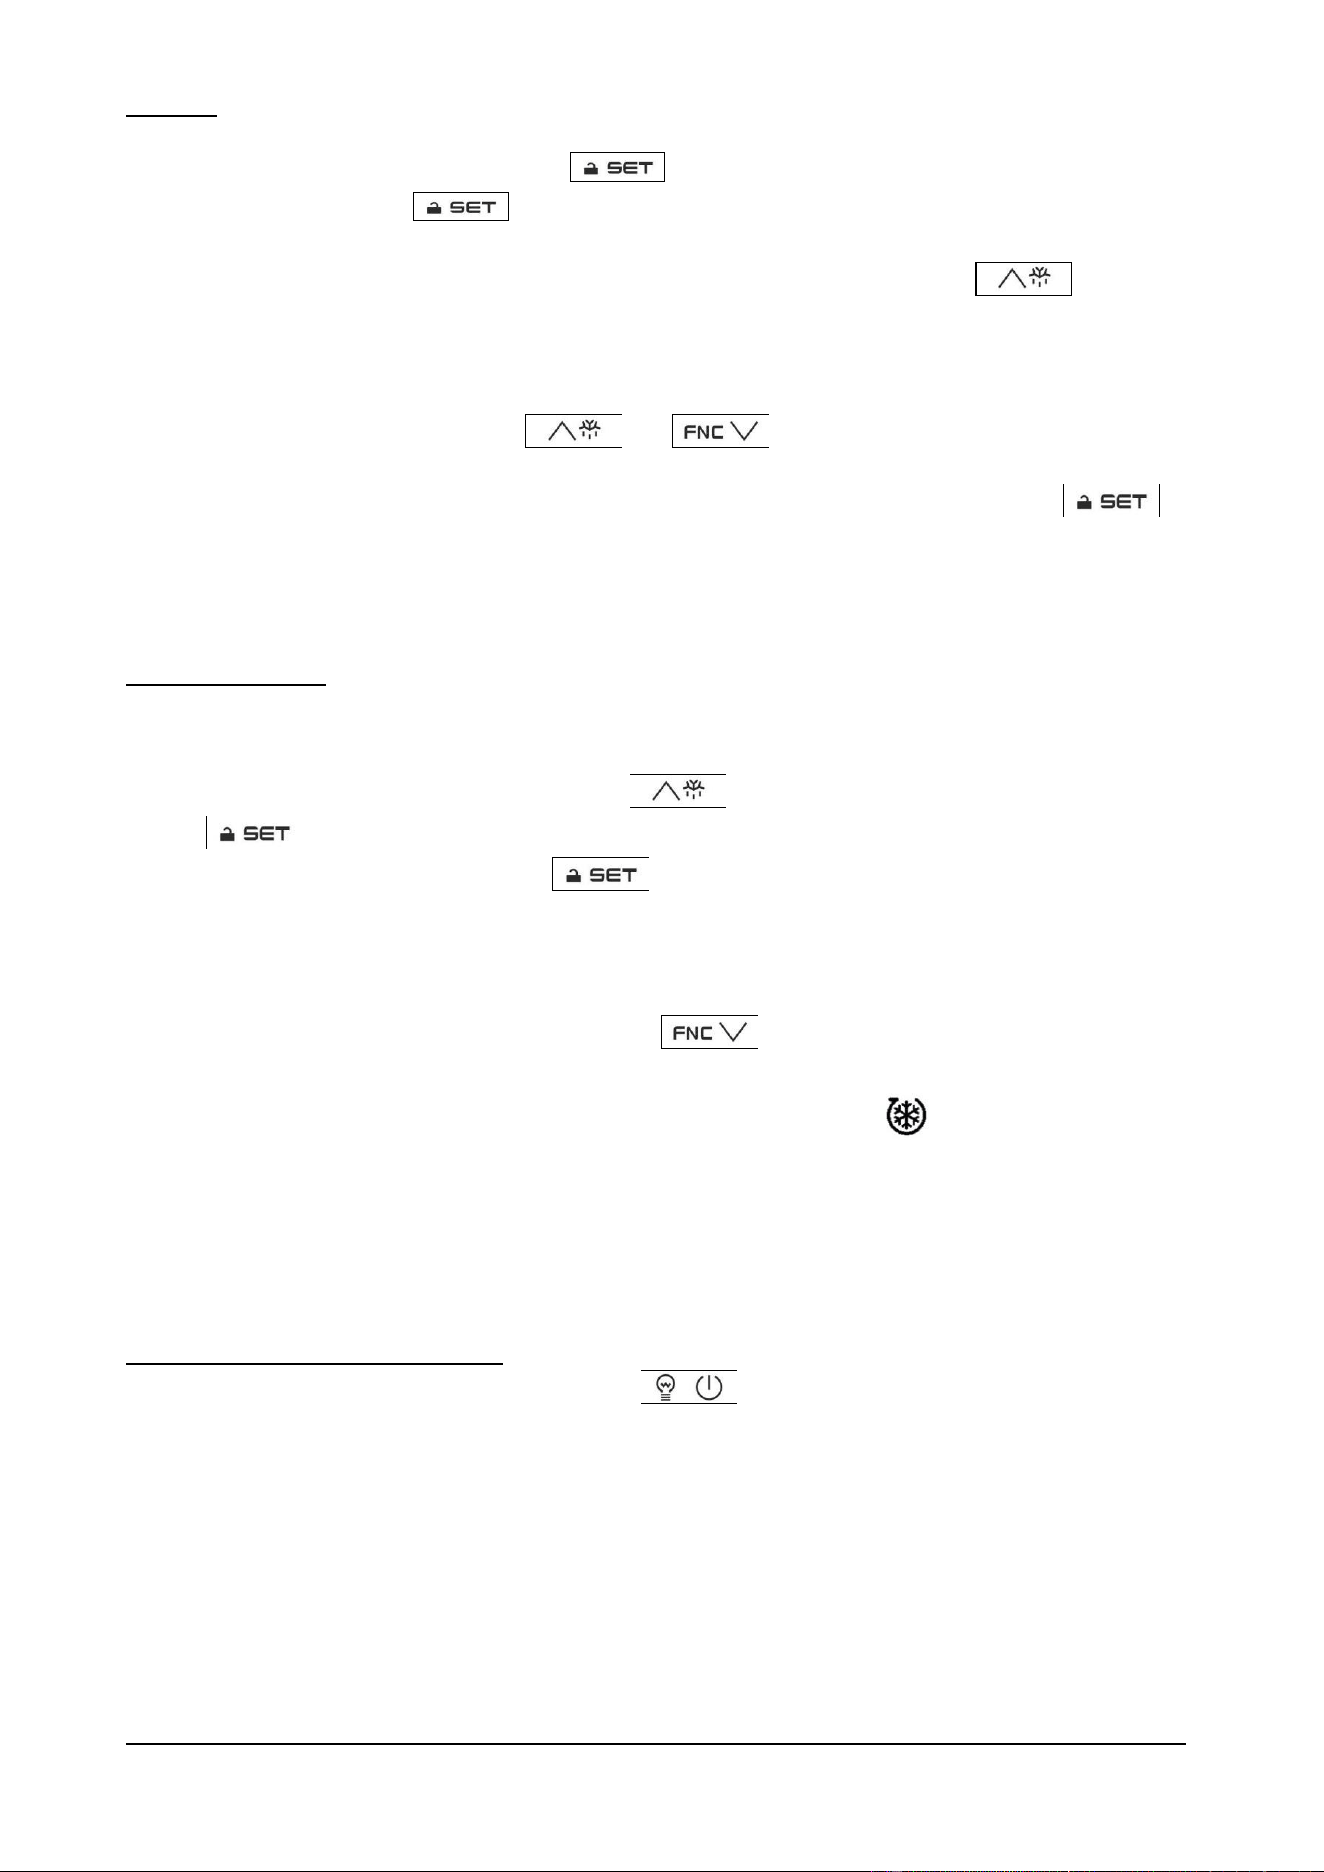
- In active keyboard (hold down the button for 3 seconds), then you can view and change the set point,
if necessary; press the key just once to display the set temperature, which can be changed using the
up and down arrow keys by pressing and holding for 3 sec the same key.
- With the keypad active, a manual defrost can be selected; press and hold for 3 sec the key and if the
room temperature is no higher than +10°C, a manual defrost phase is activated. This phase ends either when the
time of 20’ has elapsed. The automatic defrost, managed by the controller, takes place once every 6H for a max.
of 20’ during which time the readout dEF is shown on the display.
- With the keypad active, press keys and just once to display the maximum and minimum
temperature respectively, which are recorded by the sensor inside the cabinet. The displayed values are preceded
by the readouts LO and HY respectively. To reset this stored value, press and hold for 3sec the key
at the time it is displayed. On the display this reset is preceded by the readout RST (reset).
7.7.1 – SPECIAL USE
- You can set, in a simple, two modes of use of the showcase wines: VENTILATED or STATIC.
With the appliance in STAND-BY hold 4 sec key : then show the message DEF. By pressing the button
you can set the values 1 or 2 or the configuration parameters 1 "FAN" or configuration parameters 2
"STATIC". The next press of the button will load the selected mode , the display will flash for 3 seconds
- - - , then the equipment will be positioned to ON.
At each change of parameter map, wait the technical time of 30 seconds required to make the same actual
parameters.
- With the keypad active, press and hold for 3 sec the key to activate the CONTINUOUS CYCLE phase.
This phase lasts (1H) at a temperature, a decrease of 3 ° C above the set point . These values are factory set in
the controller. Unlike the normal refrigerating phase, in this case the symbol on the display is lit. When the
set time (1H) has elapsed, the symbol will go out and the appliance will start once again to operate with the
previous set point.
7.7.2 – STOPPING FOR LONG PERIODS
With the appliance OFF and the keypad active, press the key and pull the plug out of the socket.
Thoroughly clean the appliance (as described under 8.2) and make sure the door is left ajar at the end of cleaning and
remains ajar for the entire period that the appliance is not used.
WD Rev.00 01-2016 pag. 54
8 – MAINTENANCE
8.1 – SPECIAL PRECAUTIONS
Contact the manufacturer for any anomalies not described in this manual; contact the manufacturer
also for any doubts during the maintenance operations described herein. Maintenance carried out
by unauthorized personnel may damage the appliance and expose the operator to serious hazards.
Maintenance carried out by unauthorized personnel is considered tampering with the appliance and
therefore nulls the warranty and relieves the manufacturer of any responsibility.
Any routine or extraordinary maintenance operation that requires the electric box to be
opened or the machine to be dismantled, even partially, must be carried out only after the
appliance has been switched off, on the display, and unplugged.
Any maintenance operations carried out on a live machine may cause people serious
accidents which may also be fatal.
The safety devices must be deactivated only by authorized personnel, who will guarantee safety for
people and avoid damage to the machine. The safety devices must be carefully activated again after
carrying out maintenance.
During maintenance or repairs unauthorized persons must keep a safe distance from the appliance.
Observe the intervals prescribed or indicated in this manual for making inspections.
At the end of maintenance or repairs the appliance can be started only after the specialist engineer
has made sure that:
- all the work has been fully carried out;
- the safety systems are active;
- the appliance is working perfectly;
- no-one is working on the appliance.
8.2 – ROUTINE MAINTENANCE
8.2.1 – ROUTINE MAINTENANCE TABLE (TAB. 5)
Component
Type of operation
Timing
Responsibility
Method
Chamber
Cleaning
When needed
Appliance operator
See para. 8.2.2
External part
Cleaning
When needed
Appliance operator
See para. 8.2.3
Condenser
Cleaning
Every 60 days
Appliance operator
See para. 8.2.4
Tab. 4
8.2.2 – CLEANING THE CHAMBER
Carry out this operation whenever necessary.
APPLIANCE STATUS:
- ON/OFF button on OFF ( on the display);
- power supply plug disconnected from the mains.
AUTHORIZED PERSONNEL
Appliance operator.
WD Rev.00 01-2016 pag. 55
METHOD
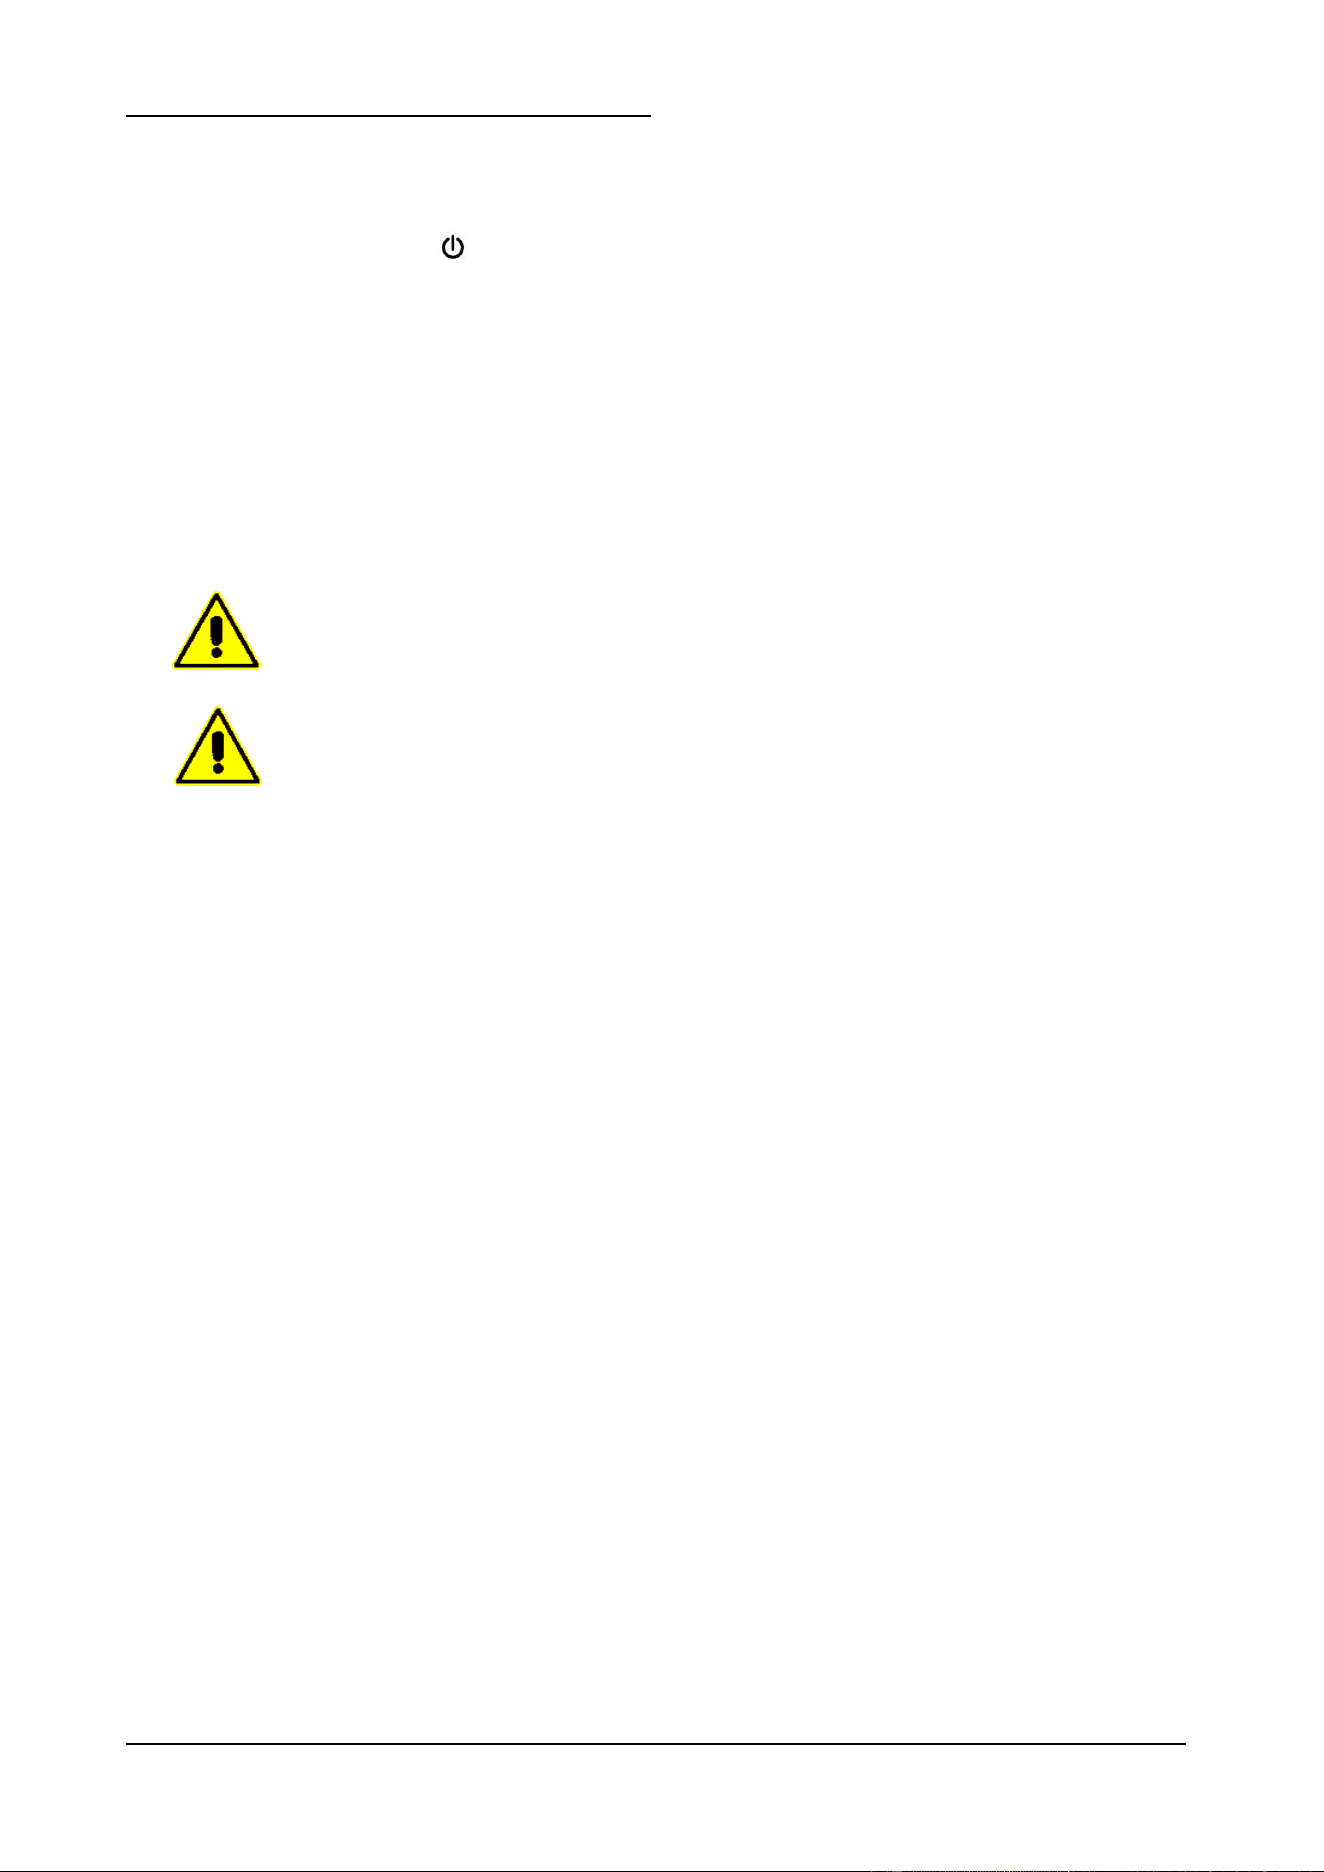
Carefully clean the cabinet interior, the contact surfaces of where the door closes (ref. 1 fig. 9) and the gasket (rif. 2 fig. 9),
using a sponge soaked with neutral detergent, neither of which must be abrasive. Rinse thoroughly using a clean sponge
soaked with water and then wipe dry using a clean cloth.
Proper cleaning of the appliance interior prevents the formation of unpleasant odours, which could impair the product to
be stored there. Do not use alcohol or alcohol-based products for the internal parts.
Use exclusively water and non-abrasive neutral detergent for cleaning. The use of different products
could damage the surface of the appliance and compromise the quality and healthiness of the
product being processed.
Do not use abrasive sponges.
Do not use cleaning cloths which could leave behind fibres and do not use water jets in the appliance.
Using alcohol or alcohol-based products for cleaning the Plexiglas bottle racks could damage
the transparent, glossy surface finish.
Fig. 9
1
2
WD Rev.00 01-2016 pag. 56
8.2.3 – CLEANING THE EXTERIOR OF THE APPLIANCE
Carry out this operation whenever necessary.
APPLIANCE STATUS:
- ON/OFF button on OFF ( on the display);
- power supply plug disconnected from the mains.
AUTHORIZED PERSONNEL
Appliance operator.
METHOD
Clean the external surfaces of the appliance (door, side strips and steel panels), using a sponge soaked with neutral
detergent, neither of which must be abrasive. Rinse thoroughly using a clean sponge soaked with water and then wipe dry
using a clean cloth.
Only use water and non-abrasive neutral detergent to clean the appliance. The use of other products
could damage the appliance surfaces and affect overall quality and hygiene.
Do not use abrasive sponges.
When cleaning do not use cloths that leave lint.
WD Rev.00 01-2016 pag. 57
8.3 – EXTRAORDINARY MAINTENANCE
If the appliance needs extraordinary maintenance, or if operating anomalies occur that are not described in this manual,
contact the manufacturer.
8.4 – OPERATING ANOMALIES AND FAULTS
It is important to remember that whatever machine status is, pressing the button for 3 seconds turns it OFF.
When any operating anomaly occurs the buzzer sounds intermittently and abbreviation appears on the display. Whatever
the reason for the buzzer, it can be silenced by pressing any button.
8.4.1– ALARMS
The following alarms could appear on the display:
- “ AH ” HIGH cabinet internal temperature alarm. This alarm is triggered during the normal refrigerating cycle,
after the delay time, but has no direct effect. The alarm message disappears as soon as the cabinet internal
temperature falls to within the set point. If, however, the alarm persists, have the appliance checked by a
specialised technician.
- “ AL ” LOW cabinet internal temperature alarm. This alarm is triggered during the normal refrigerating cycle, after
the delay time, but has no direct effect. The alarm message disappears as soon as the cabinet internal
temperature falls to within the set point. If, however, the alarm persists, have the appliance checked by a
specialised technician.
8.4.2– TROUBLESHOOTING
The following malfunctions are acknowledged by the electronic controller:
- “Pr1” CABINET or probe INLET AIR sensor error. The error is triggered during the normal refrigerating cycle just
a few seconds after the sensor starts to malfunction. The cycle is not stopped, but the compressor operates on
an alternating basis (ON/OFF) to ensure that cabinet temperature is maintained. The error message disappears
just a few seconds after the sensor starts operating regularly again. If the error persists, before replacing the
sensor, first check the connections.
- “Pr3” Probe AIR OUTPUT sensor error. The error is triggered during the normal refrigerating cycle just a few
seconds after the sensor starts to malfunction. The refrigerating cycle is not stopped by the error and the
compressor operates regularly, but the subsequent defrost cycles will be carried out on a time basis rather than
according to the temperature given by the actual sensor. The error message disappears just a few seconds after
the sensor starts operating regularly again. If the error persists, before replacing the sensor, first check the
connections.
WD Rev.00 01-2016 pag. 58
9 – DISMANTLING
Contact the manufacturer to dismantle the appliance in any way.
10 – DISPOSAL
10.1 – DISPOSAL METHOD
APPLIANCE STATUS
- electronic circuit board in position “O” (OFF);
- power supply plug disconnected from the mains.
METHOD
The appliance is made of ferrous materials, electronic components and plastics. If it needs to be disposed of, separate
the various components according to the material of which they are made, to simplify separate waste collection or re-use
of the parts. The appliance must be disposed of separately from urban waste.
No special instructions apply to the dismantled appliance. Dispose of it through the special operators or return to the
dealer, if the law provides for this (also see “Information to users regarding waste disposal in the European Union” below).
For disposal consult the laws applicable in the country where the appliance is used (also see “Information to users regarding
waste disposal in the European Union” below).
TAKE CARE: THE APPLIANCE CONTAINS REFRIGERANT GAS THAT MUST BE
CONTROLLED AND RECOVERED ACCORDING TO THE REGULATIONS OF THE COUNTRY
IN WHICH DISPOSAL WILL TAKE PLACE.
Consult the fitter for any dismantling requirements.
INFORMATION TO USERS REGARDING WASTE DISPOSAL IN THE EUROPEAN UNION
The symbol of a crossed waste bin on the appliance indicates that at the end of its working life the product must be collected
separately from other waste.
Therefore, at the end of the product’s working life the user must take it to a suitable centre for the collection of electronic
and electrical waste, or return it to a dealer when purchasing a new appliance of the same type.
Suitable separate waste collection of unwanted appliances and their forwarding to treatment, recovery and
environmentally friendly disposal makes it possible to avoid potential negative effects on the environment and human
health, and assists recycling and recovery of materials.
Unauthorized disposal of the product by the user is punished by the application of fines established by the countries in
which the appliance is disposed of.

WD Rev.00 01-2016 pag. 59
11 – SPARE PARTS
11.1 – ORDERING SPARE PARTS
Contact authorized dealer or the manufacturer to order spare parts.
12 – APPENDICES
The appliance comes with the following appendices:
- Declaration of conformity
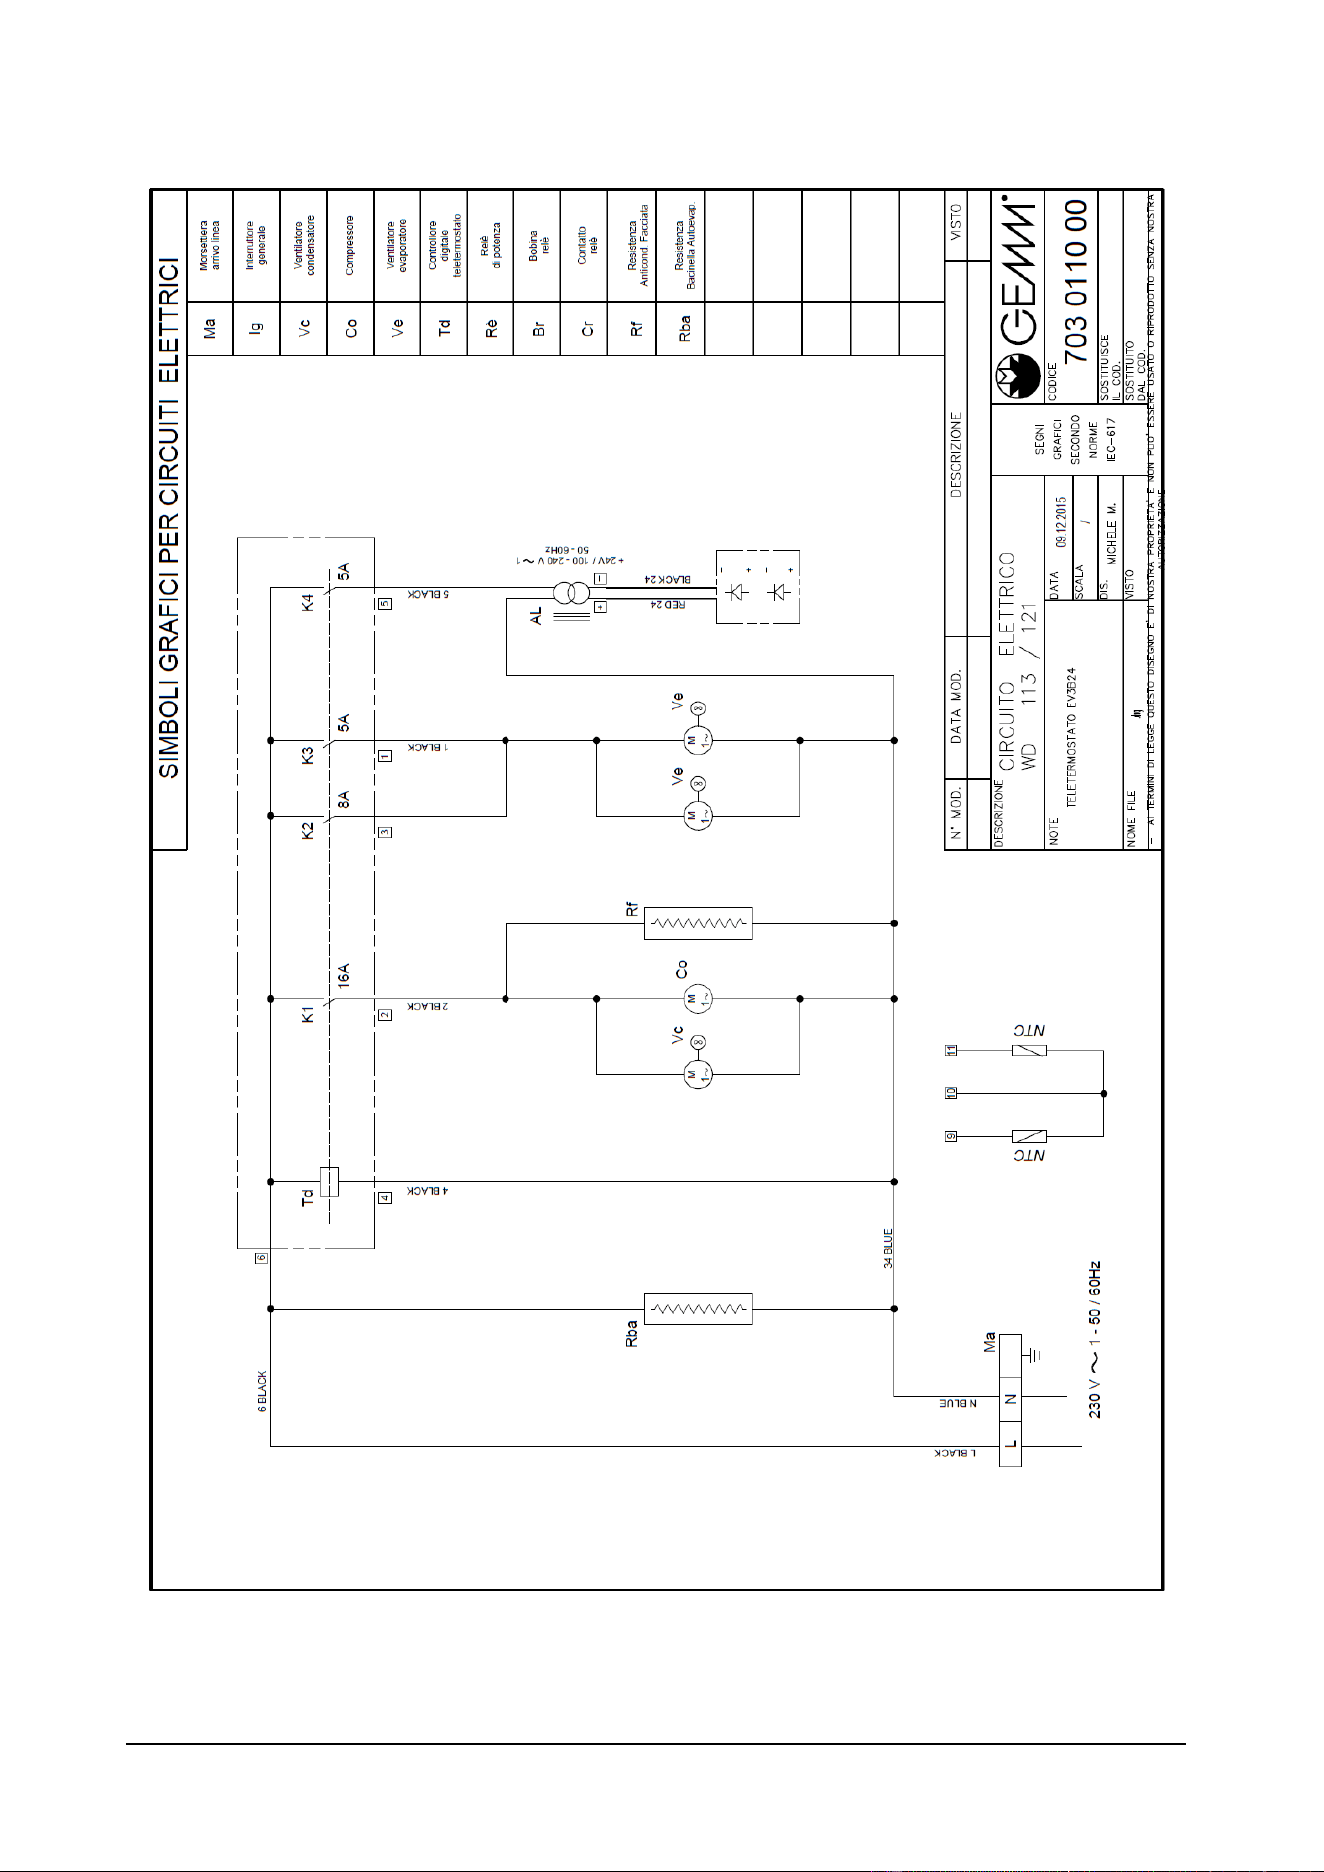
- Electrical diagram
- Electrical approval report
- Assessment of vacuum, leakage and gas loading for cooling unit.
WD Rev.00 01-2016 pag. 60
WD Rev.00 01-2016 pag. 61
NOTE

WD Rev.00 01-2016 pag. 62
NOTE