1-⅜″–3-½″ Turbo Pressure
Leakage Testers
User Manual
Read Carefully Before Use
Keep for Future Reference
V20231030

1
Safety Information
• Read these instructions carefully before use and only use this toolkit for its intended use,
testing turbo pressure. Do not allow children or people unfamiliar with this product or these
instructions to operate it. Keep children and bystanders away while using this product.
•
DO NOT
use this product while you are tired or under the influence of drugs, alcohol, or
medication.
DO NOT
allow persons with impaired mental sobriety and physical capability to
use this toolkit.
•
ALWAYS
ensure that the person using this tool is adequately trained and qualied for the
task.
• Ensure all health and safety, local authority and general workshop practice regulations are
adhered to when using these tools.
•
AWLAYS
wear safety equipment appropriate for your work.
ALWAYS
wear eye protection
and heavy-duty work gloves. Other safety equipment may be necessary for your project.
• Dress properly.
DO NOT
wear loose clothing or jewelry while using this product. Keep your
hair, clothing, and gloves away from any moving parts.
• Keep your work area clean and well lit. Cluttered or dark areas invite accidents.
•
DO NOT
use tools if seals or threads are damaged. This may incur false readings and
personal injury.
• Maintain the tools in good, clean condition for optimum performance. Any defective seals
MUST
be replaced before use to avoid incorrect readings.
•
ALWAYS
park your vehicle on rm and level ground and turn o its engine before beginning
work.
•
ALWAYS
ensure that your vehicle has been jacked up and is adequately supported with axle
stands.
• Ensure fuel supply is isolated to prevent re whilst engine is being tested.
• Ensure that the correct adapter is used for the engine/vehicle being tested.
• Always release the pressure from the gauge before disconnecting the quick release coupling.
• Account for all tools and parts being used and
DO NOT
leave them in or near the engine.
• Always refer to your vehicle’s workshop manual, or a proprietary manual, to establish the
correct procedure and data.
•
DO NOT
overreach. Keep proper footing and balance at all times.
• Maintain this product. Check for misalignment or binding of parts, breakage of parts, and
any other condition that may aect this product's operation. If damage is detected, have this
product repaired before further use.
• In case of an accident or injury, have a first aid kit and a communication device (e.g., a
phone) readily available. Know the location of emergency medical facilities.
•
ALWAYS
wait till the engine and turbo have cooled to ambient temperature
BOFORE
tting
the adapters, which are plastic and may melt and get warped from engine and turbo heat.
•
ALWAYS
follow the protocols for using a workshop airline or other sources of compressed
air.
• Automotive repair is an inherently dangerous activity. This manual and the separate vehicle
service manual cannot cover all possible situations that may arise, and training, common
sense, and care must be supplied by the operator.
DANGER!

2
Specications
Pressure Gauge
Assembly
Max. Pressure 86 psi 6 Bar
Adapter SAE
Test Adapter OD
90, 85, & 80 mm
3-½, 3-⅜, & 3-⅛″
75, 70, & 65 mm 3, 2-¾, & 2-½″
50, 55, & 60 mm 2-⅜, 2-⅛, & 1-³¹/₃₂″
35, 40, & 45 mm 1-⅜, 1-⁹/₁₆, & 1-¾″
Blanking Adapter OD
35, 40, & 45 mm
1-⅜, 1-⁹/₁₆, & 1-¾″
50, 55, & 60 mm 2-⅜, 2-⅛, & 1-³¹/₃₂″
75, 70, & 65 mm 3, 2-¾, & 2-½″
90, 85, & 80 mm 3-½, 3-⅜, & 3-⅛″
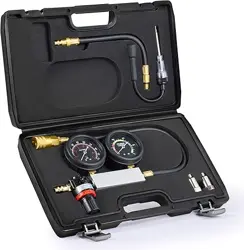
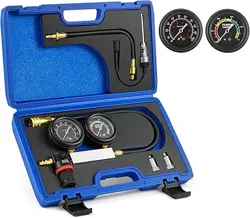
Parts List
No.
Item
Qty.
A
Test Adapters
4
B Blanking Adapters 4
C Pressure Gauge Assembly 1
D DIN Adapter 1
E
Protective Gloves
(not shown)
1 Pair

3
Operation
1. Turn the engine o and wait till it has cooled to room temperature.
2. Locate a test point where it is easily accessible to attach the test adapter and the blanking
adapter.
It is recommended to pressurize the system to the ow of the charged air
.
3. Measure the hose diameter to select the correct adapter. Fit the adapters onto the hoses to
be checked. Reuse or apply new hose clamps and ensure the hose clamps are secure or
torqued to your vehicle’s specications.
Before connecting the gauge, ensure the regulator knob is fully closed to zero and the
lever on the gauge is turned to its o position.
4. Connect the pressure gauge to the test adapter by holding back and releasing the sleeve on
the gauge’s quick coupler.
5. Connect the pressure gauge to your workshop airline or other compressed air outlet. Use the
provided DIN adapter and another quick coupler as needed.
6. Slowly turn open the lever and turn the knob to set the desired pressure as stated in your
vehicle’s specications. Press lock the knob when the desired pressure has been reached.
7. Carefully listen to air escaping throughout the turbo charging system. If no audible leaks are
detected, apply soapy water to joints or connections. A leak will cause the soapy water to
bubble.
8. If no bubble has been formed and the reading of the gauge remains stable for one minute, it
indicates that the system is functioning properly. Pull unlock and turn the knob to its closed
position. Remove the workshop air line from the gauge and disconnect the gauge from
the test adapter. Remove test adapter and blanking adapter from your vehicle and stow
everything away.
Maintenance
• Check for smooth movement and secure connections before each use. Never use this tool if
any part is found to be loose, bound, worn, or damaged. Tighten, lubricate, repair, or replace
all such components before further use. Only use identical parts for replacement.
• Clean the components of this toolkit after each use. Do not use caustic chemicals or harsh
abrasives.
• If this kit will ever be unused for an extended period, clean all components, place them in
their storage case, and store in a cool dry location inaccessible to children and away from
direct sunlight.

4
Contact Us
Thank you for choosing our products! If you have any questions or
comments, contact us at
and we'll resolve
your issue ASAP!
For a .pdf copy of the latest version of these instructions, use the
appropriate app on your smartphone to scan the QR code to the right.

CLT-B001-00
Rev. 30 Oct. 2023