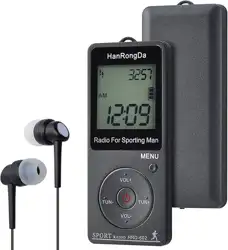

OPERATION INSTRUCTION FOR
MINI FM/AM PORTABLE RADIO WITH BUILT-IN LITHIUM BATTERY
DESIGNED FOR WALK & JOGGING
(model: HRD-602)
Thank you for purchasing Mini FM/AM potable radio with built-in lithium battery. Please read this
manual before use and keep it properly for future reference.
A healthy body is what everyone pursues, and moderate exercise is good for health. Thus, it’s important
for us to persevere in carrying out moderate physical activity.
Relevant reports recommend that adults should walk about 6000-10,000 steps per day.
How many steps have you taken today?
Now I’d like to introduce this sport-themed radio characterized by portability, green backlight display
screen and easy operation (as long as individual’s stride lengthen and weight are inputted into the radio,
the radio will enter step-counting mode). This is a radio that can accompany you when you exercise and
relieve you of boredom.
The radio has the following features:
& Built-in battery: 500 MAH battery with long battery life.
& High Sensitivity Receiving: being able to receive FM/AM signal stably.
& Big LCD digital screen (dimension: 28.5×28.5mm): showing information including frequency,
volume, FM band, time, battery, charge, calories, kilometers, strides, kilograms/pounds, inches/miles,
centimeters/inches
& Green Backlight LCD display: convenient for nighttime operation.
& Large chip capacity: could save 70 radio station (50 in FM, and 20 in medium-frequency wave) , and
can run the last set automatically after it is turned on.
& Radio can automatically scan and save radio station.
& Could set to allow the radio to automatically shutdown in 90-80-70-60-50-40-30-20-10 minutes.
& Lock button: help you to avoid misoperation.
& Medium wave step value (9KHZ/10KHZ) can be adjusted by users basing on personal preference.
This pocket radio has great use and we hope it will bring you enjoyment.
Standard Accessories: 1× Stereo Earphone; 1×USB Charging Cable, 1×Lanyard, 1×Operation Instruction,1×Bag
BRIEF INTRODUCTION
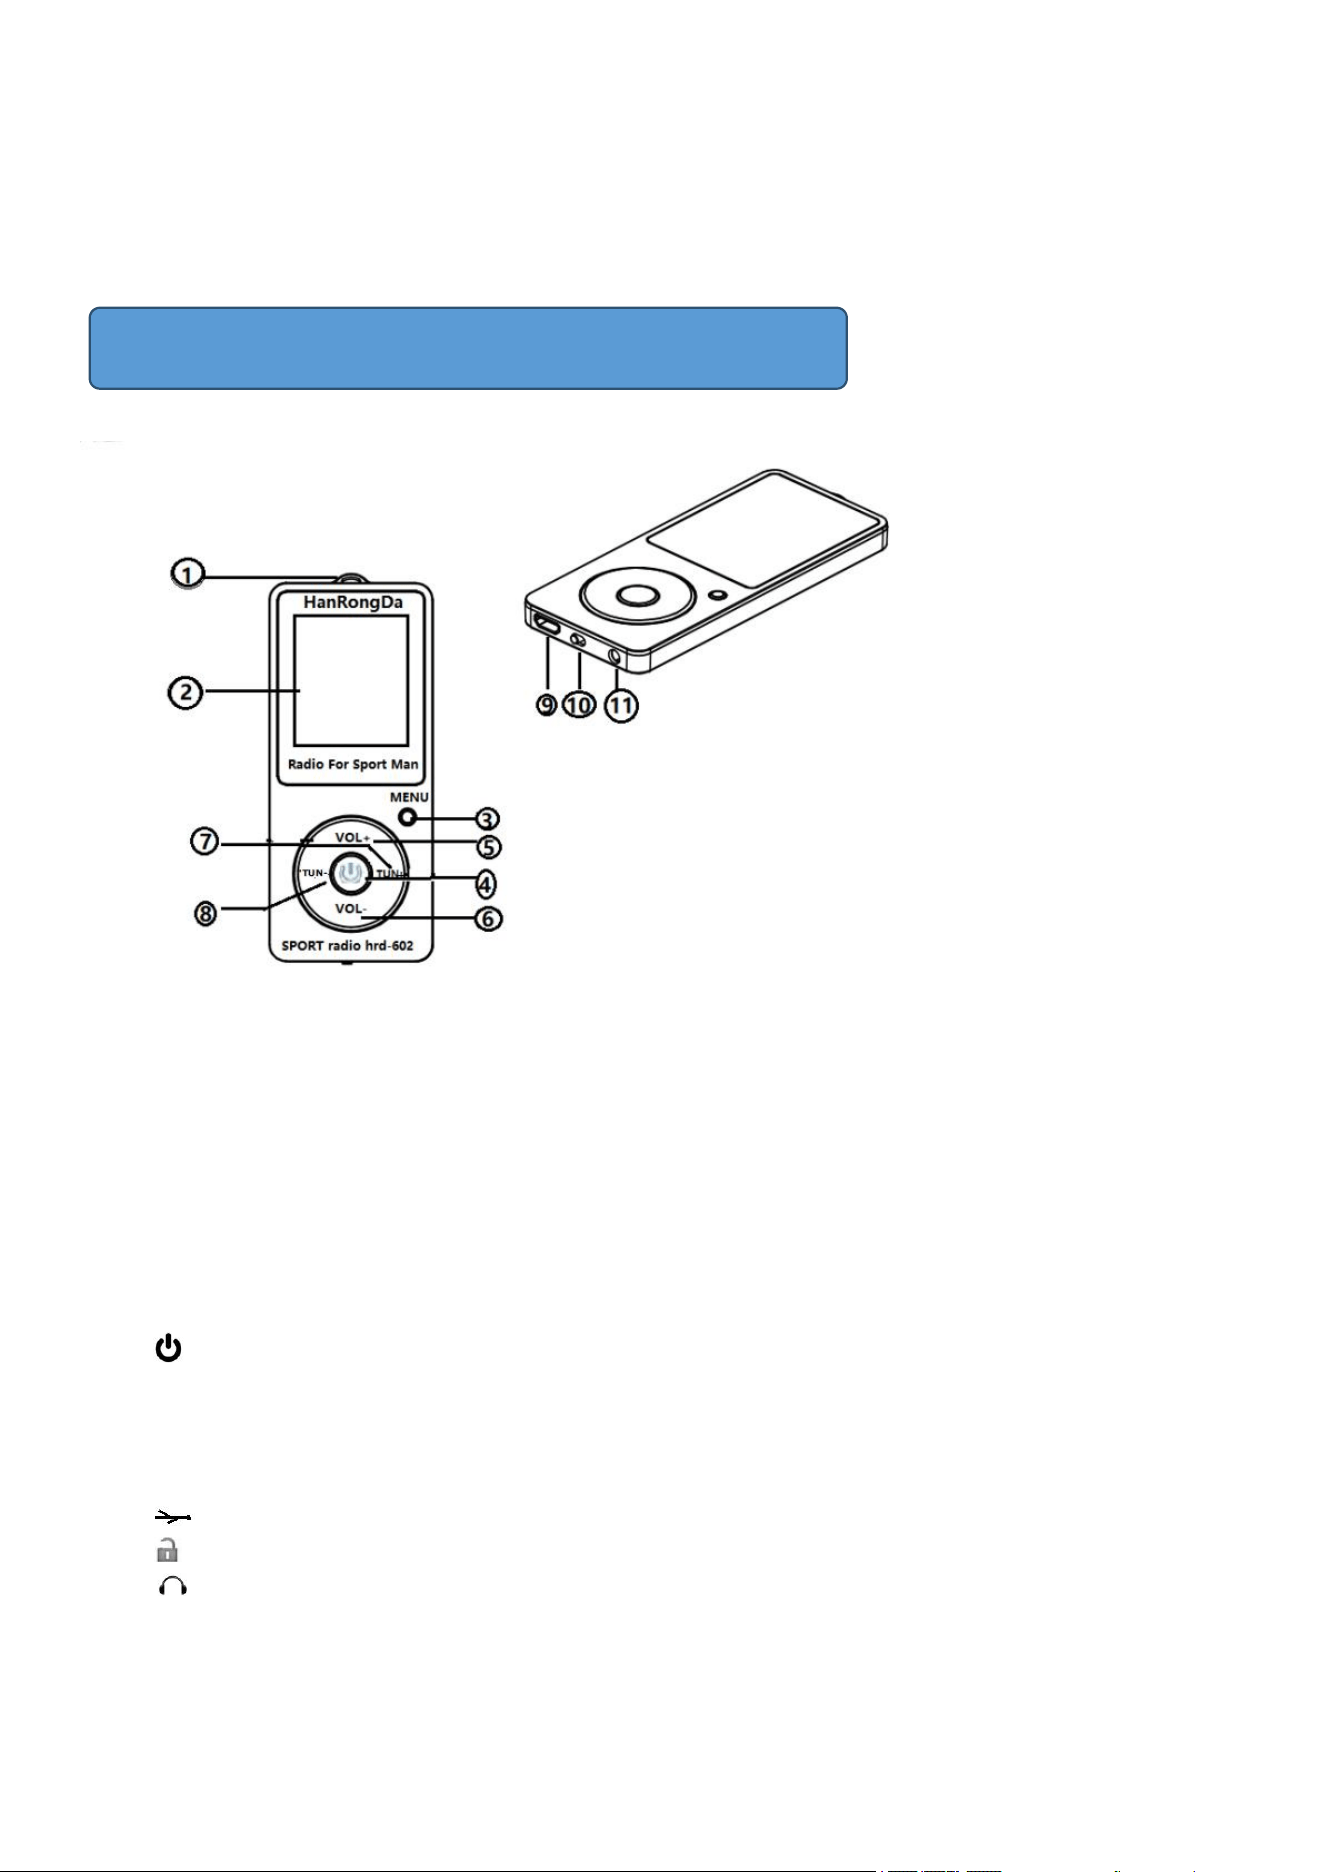
①Lanyard hole
②LCD display
③MENU: Band switching/Automatically scan ratio station/Setting time
④ : Switch button /Set 90-80-70-60-50-40-30-20-10 minutes auto shutdown
⑤VOL+ : volume+/change radio station+/input step counting information (stride, weight)
⑥VOL- : volume-/change radio station-/look up steps information/calories/kilometre
⑦TUN+: tuning+
⑧TUN-: tuning-
⑨ : MICRO USB charging port
⑩ : LOCK
⑪ : 3.5mm earphone port
External View And Function Indicators
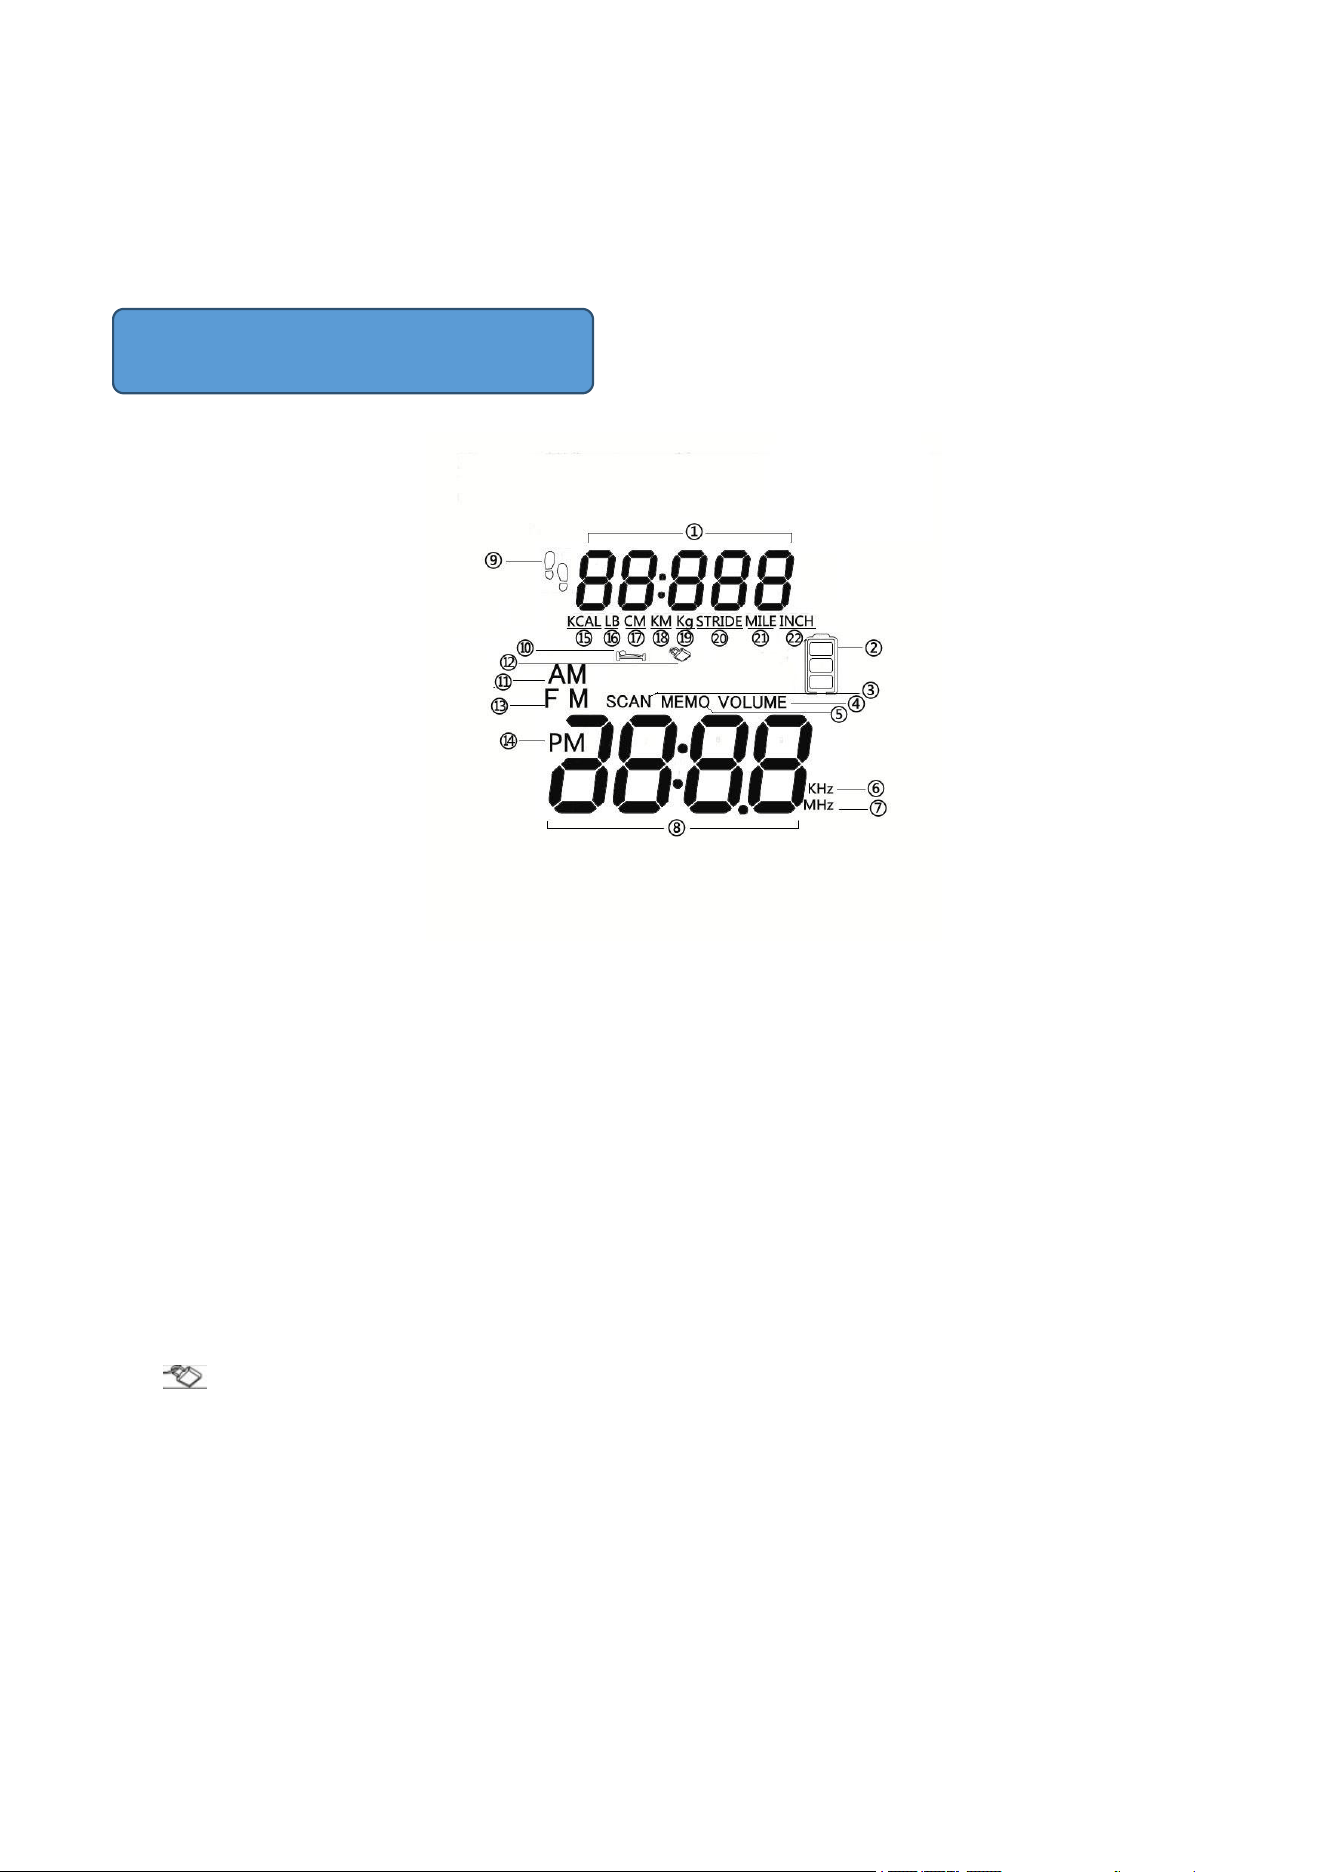
①. Steps/weight/average stride/distance
②. Battery symbol
③. SCAN: Automatically scan and save ratio station
④. VOLUME: volume information
⑤. MEMO: memorize radio station
⑥. KHZ: kilohertz
⑦. MHZ: megahertz
⑧. frequency/memorized radio station no./volume
⑨. step-counting sign
⑩. sleep symbol
⑪. AM: medium wave mode/ante meridiem
⑫.
: Lock Sign
⑬.FM:frequency modulation
⑭.PM:post meridiem
⑮. KCAL : Kilocalorie information
⑯.LB pound
⑰. CM centimetre
⑱. KM kilometre
⑲. Kg kilogram
⑳. STRIDE stride
㉑
.
MILE mile
㉒
.
INCH inch
LCD Display Sign Introduction

① Lanyard Hole
Lanyard is a standard accessory to allow you to carry the radio more conveniently. And you can attach it to
the radio and wear it around your neck when you need.
②LCD Display
The dimension of the LCD display is 29x28mm(1.57 inches). The green backlight will light up for ten
seconds every time a bottom is pressed, showing contents introduced in “LCD Display Sign Introduction”.
③MENU: Band switching/Automatic scan ratio station/Setting time
Band switching:
When the radio is on, every time you press ③MENU button, the radio will stitch between FM and AM, and
LCD display screen will show FM or AM.
Automatically scan ratio station:
When the radio is on, long press ③MENU button, the radio will automatically scan for radio station in current
wave band from the minimum to the maximum frequency, and save all the signaled radio. During the process,
the LCD display will show “SCAN” and frequency point will change rapidly. When saving signaled radio, LCD
display “P01, P02.....” (50 radio station can be saved in FM, and 20 in medium-frequency wave).
FM frequency range: 87.5-108MHZ
AM frequency range: step value: 530-1700KHz
Once finishing a round of scan, P01 will be played.
*Note: In FM mode, earphone is the antenna, so earphone should be inserted into earphone port before
scanning.
Setting the clock:
When the radio is off, long press ③MENU button to enter clock-setting interface. Set hour format (12-hour
format or 24-hour format) first and then set current time.
Set hour format: long press LCD show “12Hr” or ”24Hr”, press ⑦TUN+⑧TUN- to choose the format you
like.
Set current time: after finishing choosing hour format, press ③MENU button, and the number represents hour
will flash, then press ⑦TUN+⑧TUN- to set it; press ③MENU button again, and the number represents
minute will flash this time, then press ⑦TUN+⑧TUN- to set minute. (In 12-hour format, LCD display
show AM in the morning, and show PM in the afternoon.)
④ switch button /Set 90-80-70-60-50-40-30-20-10 minutes auto shutdown
Switch button
Press ④ button, LCD display “on”, showing the radio is on. After that, radio will enter time
mode if no operation is made. If a button is pressed, LCD display frequency. Long press
④ button when the radio is on, the LCD will display “OFF”, and the radio will be turned
off.
Set 90-80-70-60-50-40-30-20-10 minutes auto shutdown
Radio Parts and Button Function Introduction

Long press ④ button to set auto shutdown, and “ ” will appear on the screen. Options
include auto shutdown in 90-80-70-60-50-40-30-20-10 minutes. Every time
④
button is
pressed, the 9 options will switch (from long to short). After a decision is made, the radio will
start, with screen showing “on”, in about one second, and the sign “ ” will appear on the
screen. Later, the radio will shutdown at the set time.
Note: If you turn off and turn on the radio, “ ” sign will disappear, because what is set is
effective for once only.
⑤VOL+⑥VOL- volume up, down/change radio station+,-
volume up, down
When the radio is on, long press ⑤VOL+⑥VOL- button to choose radio volume, LCD
display will show VOLUME. This radio provide 33 volume options in total (00-32).
switch radio station
When the radio is on, in current wave band, long press ③MENU button will initiate auto scan,
and singled station will be saved (50 radio station be saved in FM, and 20 in
medium-frequency wave).
Once there are saved radio stations, every time you press ⑤VOL+⑥VOL- button, you can
change among the saved station, with LCD showing MEMO P01, MEMO P02......
⑦TUN+/⑧TUN-: tuning+, tuning-
Tuning:
This radio, except has the auto scan function introduced above, supports manually and automatic searching:
Manually search: when pressing ⑦TUN+/⑧TUN- button, the radio will increase or decrease step value by
default value.
In FM, default value of step value is 0.1 MHZ.
In AM, default value of step value is 9KHZ/10KHZ. Users can choose between these two step value basing on
national difference.
Automatic scan: long press ⑦TUN+/⑧TUN- button, the radio will search signaled station and once one
station is obtained, the radio will stop scan to play the station
⑨ MICRO USB CHARGING PORT
This radio uses micro USB charging port that most smart phones apply.
If the battery sign flashes, please connect to power (DC 5V) to charge the radio.
(the radio can be charged in either shutdown or boot-up states).
When charging, a battery
sign will appear on the screen, and the sign will flash until the radio is
fully charged.
Please disconnect power once the radio is fully charged.
Note: output voltage of adapter is DC 5V, and the recommended output current is1A-3A.
⑩ lock button

This is a push button. It’s “lock” to the left and “unlock” to the right.
If the radio is locked when it is off, press button will produce no effect, and the radio won’t be able to be
turned on.
If the radio is locked when it is on, LCD display will show the flashing symbol . By locking the radio,
users will be able to avoid station change caused by misoperation.
⑪ :3.5mm earphone port
When insert earphone, please adjust the volume to a moderate level.
The headphone cord functions as the FM antenna.
If there is no special instruction, the step value of AM in factory of this radio is setted as 9KHZ
Note:In the United States, Canada, Mexico and other north and South American countries, AM step value must be
adjusted
to 10KHZ, other countries must be adjusted to 9KHZ
Adjusting AM step value operation:
On the time state and the radio is not Lock.Long press TUN+ and TUN- keys simultaneously for about three seco
nds, and the LCD displays the current AM step value.
Frequency range: 530-1700KHZ
If the current step value is not what you need, release the hand, the radio restore time state, and press TUN+ and T
UN- keys together again.Such an approach can yield to value rotation.
Before counting steps with the radio, please measure user’s average stride and weight first. The specific operation
is as follows:
When the radio is off, long press VOL- button until LCD shows step-counting symbol , and then long press
VOL+, LCD display will show “CM KM KG” or ”LB MILE INCH ”. Long press the button again and you can
switch between “CM KM KG” and “LB MILE INCH” according to your habit.
Press VOL+ button, LCD display shows 0.
Press VOL+ button again, what appear on the screen will be distance units of stride (CM STRIDE or INCH
STRIDE). Press TUN+/- button to input the user’s average stride.
Press VOL+ button, LCD display shows weight units (KG or LB). By pressing TUN+/- button, user can enter
his/her weight.
After all the data is inputted, press VOL- button to initiate the step counting function.
When user starts to walk, the radio will begin its counting.
After walk is done, the radio will calculate KCAL consumed and walk distance (KM or MILE).
Note: To exit step-counting mode, press VOL- button, and the sign on LCD display will disappear.
SET STEP COUNTINGFUNCTION
MATTERS NEED ATTENTION
Adjusting AM step value operation
1) DO NOT STEP ON! NO COLLISION!
2) Put away from direct sunlight, heat sources and moisture. Do not use where temperatures below -5℃ or above
+50℃.
3) Do not use chemical reagents to clean the shell to prevent corrosion.
4) Do not disassemble or adjust internal component parameters by yourself.
FCC Statement:
This device complies with part 15 of the FCC Rules. Operation is subject to the following two conditions:
(1) This device may not cause harmful interference, and
(2) this device must accept any interference received, including interference that may cause undesired operation.
This equipment has been tested and found to comply with the limits for a Class B digital device, pursuant to
part 15 of the FCC Rules. These limits are designed to provide reasonable protection against harmful
interference in a residential installation. This equipment generates, uses and can radiate radio frequency energy
and, if not installed and used in accordance with the instructions, may cause harmful interference to radio
communications. However, there is no guarant ee that interference will not occur in a particular installation.
If this equipment does cause harmful interference to radio or television reception, which can be determined
by turning the equipment off and on, the user is encouraged to try to correct the interference by one or more
of the following measures:
—Reorient or relocate the receiving antenna.
—Increase the separation between the equipment and receiver.
—Connect the equipment into an outlet on a circuit different from that to which the receiver is connected.
—Consult the dealer or an experienced radio/TV technician for help.
Caution: Any changes or modifications not expressly approved by the party responsible for compliance
could void the user's authority to operate the equipment.
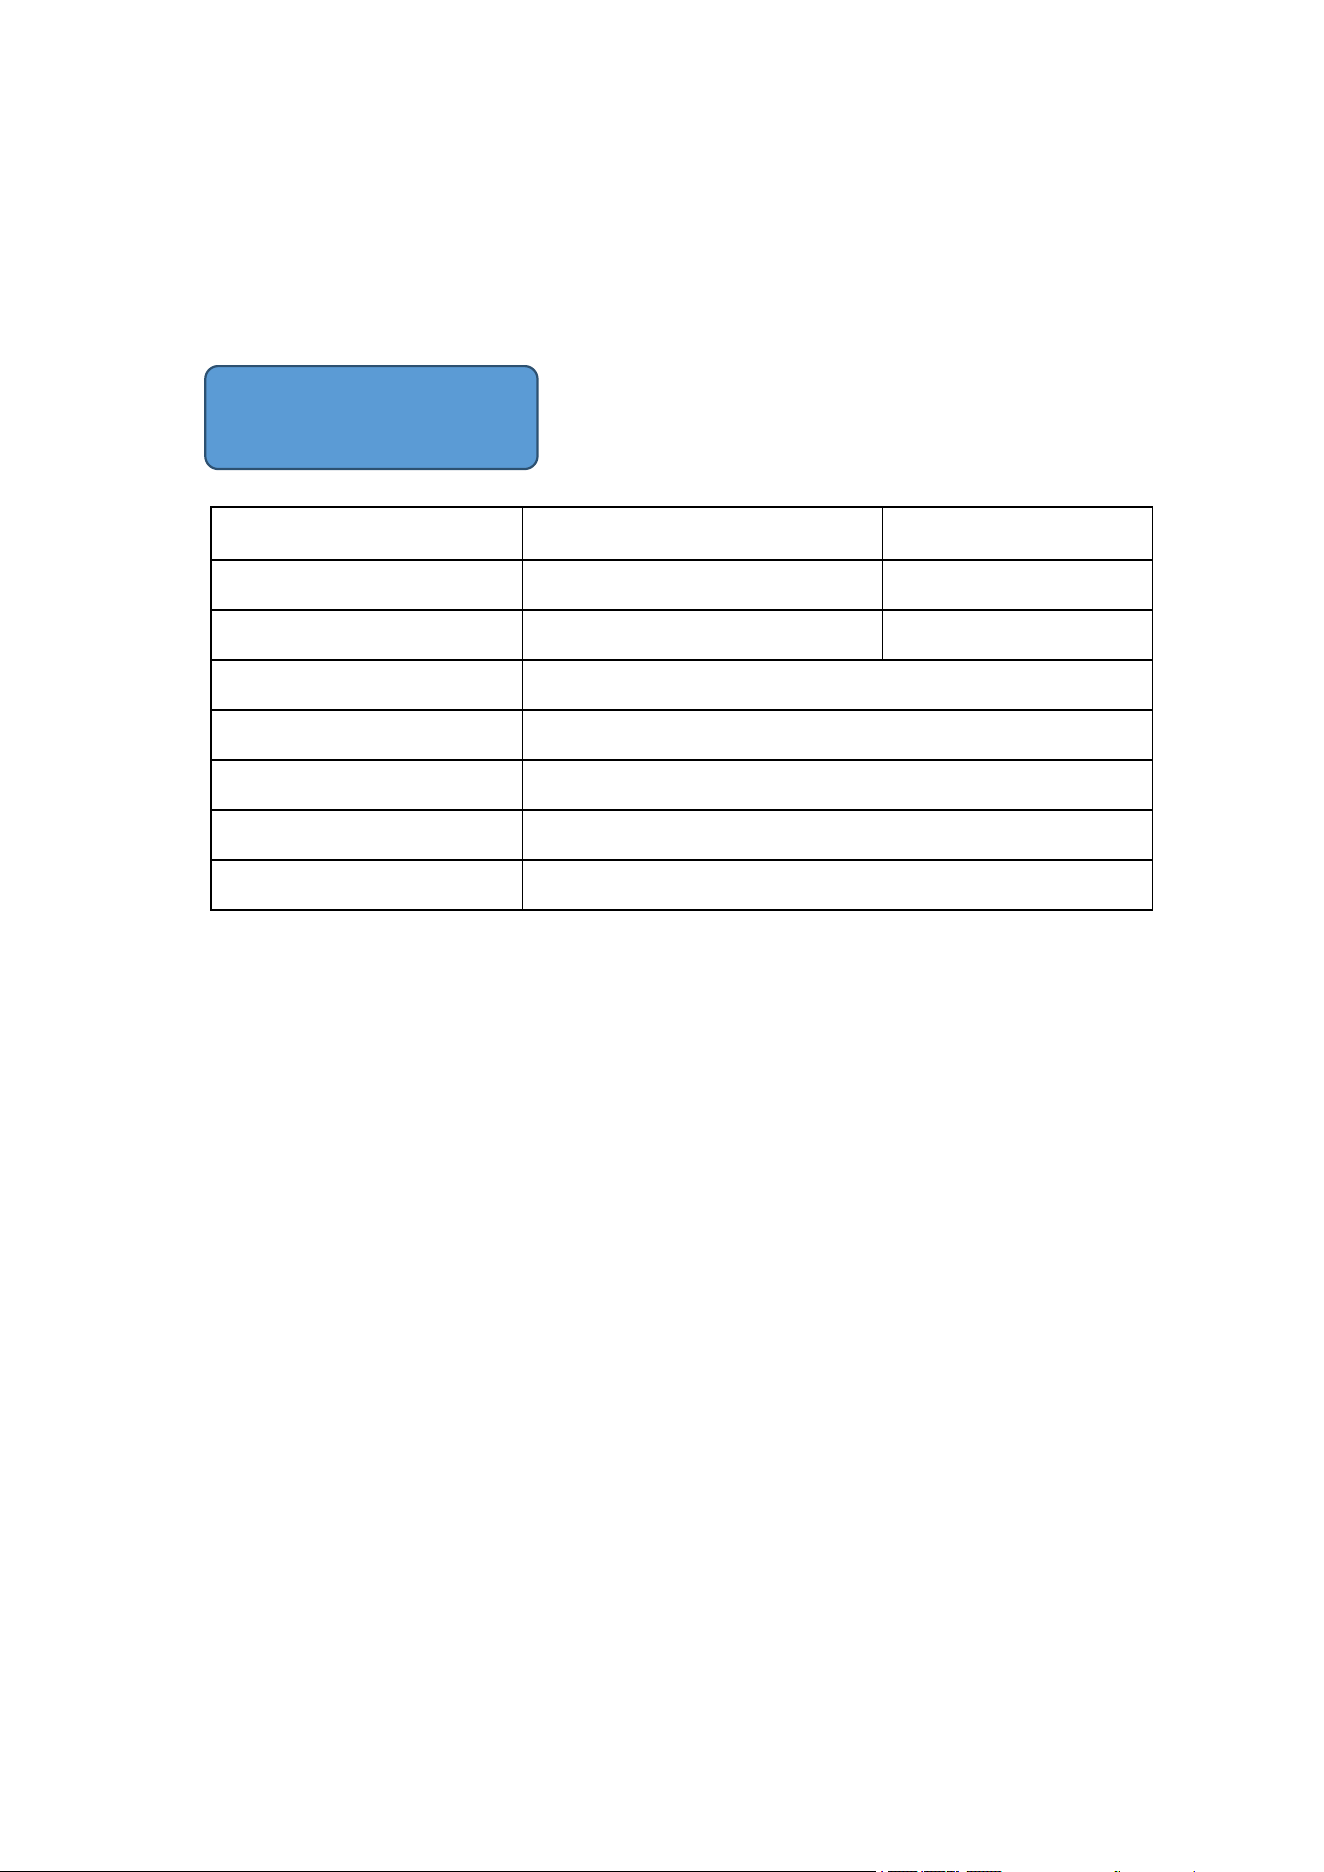
Frequency Range
AM: 530-1700 KHZ
FM: 87.5-108MHZ
Sensitivity
AM: ≤20mV/m
FM: 8Uv
SNR
AM≥30dB
FM: ≥40DB
Size
90x39x7mm
Lithium Battery
400Mah 3.7v
External Power Supply
DC 5V
Minimum Working Voltage
3.3V
External Earplug
Φ3.5MM/32ΩX2
PARAMETERS

