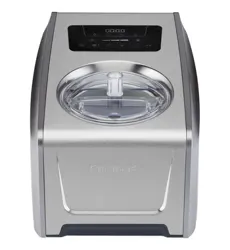
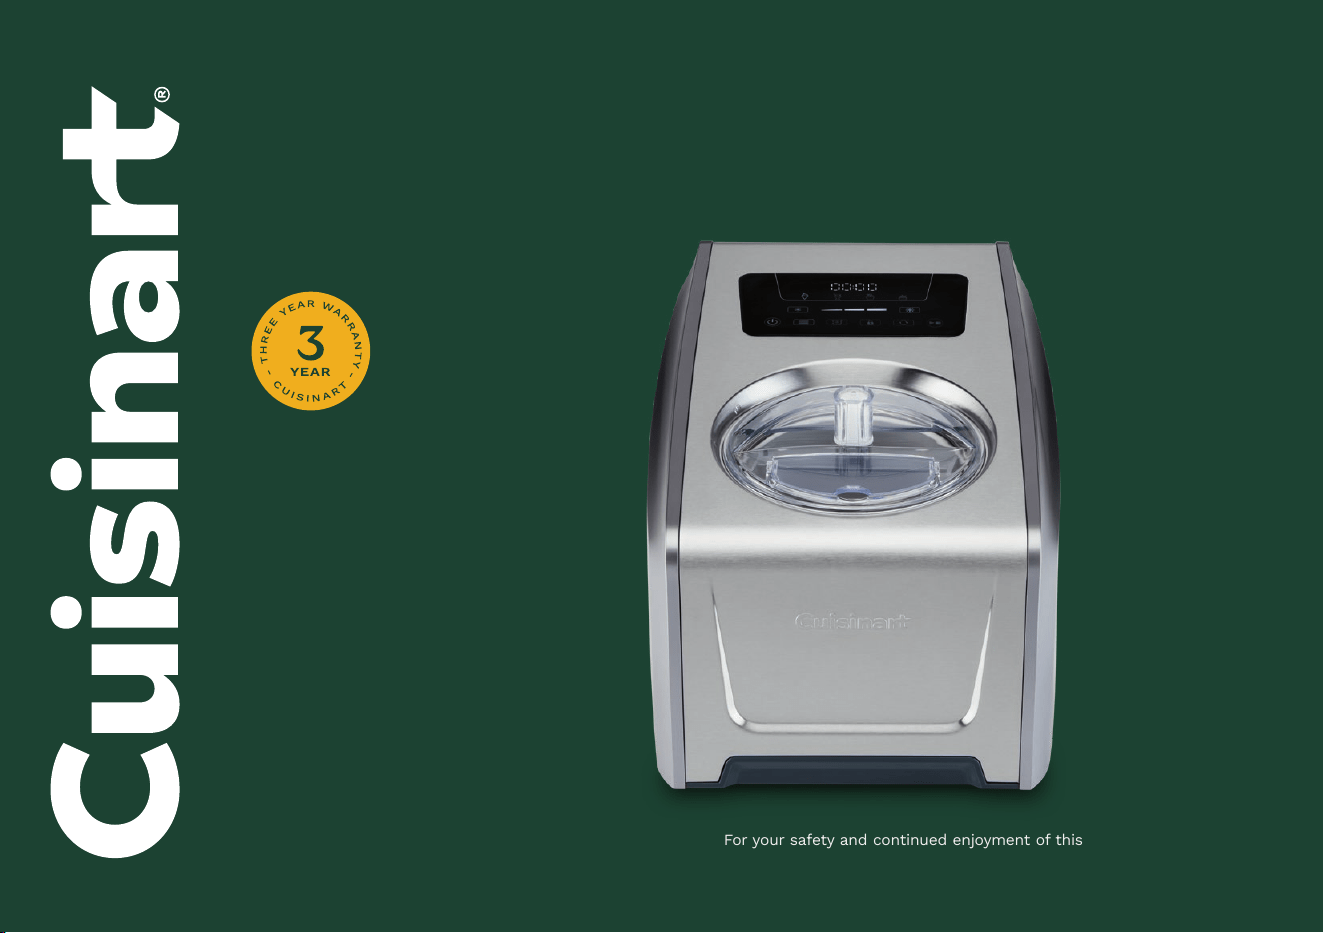
ICE-150 SERIES
Instruction
Booklet
For your safety and continued enjoyment of this product, always read the
instruction book carefully before using.
Freeze Ease
™
1.5-Quart
Pro Ice Cream Maker

2
IMPORTANT SAFEGUARDS
When using an electrical appliance, basic safety precautions should always be
followed to reduce the risk of fire, electric shock, and/or injury, including the
following:
1. READ ALL INSTRUCTIONS BEFORE USING.
2. Always unplug from outlet when not in use, before putting on or taking
off parts, and before cleaning.
3. To protect against risk of electric shock, do not place cord, plug, or base of
appliance in water or any other liquid.
4. Close supervision is necessary when any appliance is used by or near
children.
5. Avoid contact with moving parts. Keep hands, hair, and clothing as well as
spatulas and other utensils away from unit during operation to reduce the
risk of injury and/or damage to the appliance.
6. Do not operate any appliance with a damaged cord or plug, or after the
appliance malfunctions or is dropped or damaged in any manner. Return the
appliance to the nearest Cuisinart Repair Center for examination, repair,
electrical, or mechanical adjustment.
7. The use of attachments not recommended by Cuisinart may cause fire, electric
shock, or risk of injuries.
8. Do not use outdoors.
9. Do not let cord hang over edge of table or counter, or touch hot surfaces.
10. Keep hands and utensils out of mixing bowl while in use to reduce the risk of
injury to persons or to the appliance itself. DO NOT USE SHARP OBJECTS
OR UTENSILS INSIDE THE MIXING BOWL! Sharp objects will scratch and
damage the inside of the bowl. A rubber spatula or wooden spoon may be
used when the appliance is in the off position.
11. This appliance is for household use. Any servicing other than cleaning and
user maintenance should be done only by authorized Cuisinart
®
repair
personnel.
12. Do not use appliance for other than intended use.
13. Do not operate your appliance in an appliance garage or under a wall cabinet.
When storing in an appliance garage, always unplug the unit from the
electrical outlet. Not doing so could create a risk of fire, especially if the
appliance touches the walls of the garage or the door touches the unit as it
closes.
14. Keep the appliance 4 inches from other objects to ensure motor ventilation.
15. Do not upend this product or incline it over a 45˚ angle.
16. Do not use the appliance near an open flame, hot plate, or stove.
17. Do not remove the paddle when the appliance is mixing.
SAVE THESE INSTRUCTIONS
FOR HOUSEHOLD USE ONLY
SPECIAL CORD SET INSTRUCTIONS
A short power-supply cord is provided to reduce the risks resulting from becoming
entangled in or tripping over a longer cord. Longer extension cords may be used if
care is exercised in their use.
If a long, grounded 3-prong extension cord is used, the marked electrical rating
of the extension cord should be at least as great as the electrical rating of the
appliance, and the longer cord should be arranged so that it will not drape over
the countertop or tabletop, where it can be pulled on by children or animals, or
tripped over.
CAUTION
This appliance is for household use. Any servicing other than cleaning and user
maintenance should be performed by an authorized service representative.
• Do not immerse base in water or other liquids.
• To reduce the risk of fire or electric shock, do not disassemble the base.
Note: The base does not contain any user-serviceable parts.
• Repairs should be made only by authorized personnel.
• Check voltage to be sure that the voltage indicated on the nameplate agrees
with your voltage.
• Never clean with scouring powders or hard implements.
• Unit should remain upright at all times. If unit is turned on its side or upside
down, you will need to put it in upright position and wait 24 hours before using.
3
CONTENTS
Important Safeguards.................................2
Parts and Features................................... 3
Before First Use ..................................... 3
Operating Instructions ................................ 4
Safety Feature ...................................... 5
Cleaning, Storage, and Maintenance..................... 5
Troubleshooting ..................................... 5
Recipe Tips ........................................ 6
Warranty ........................................... 7
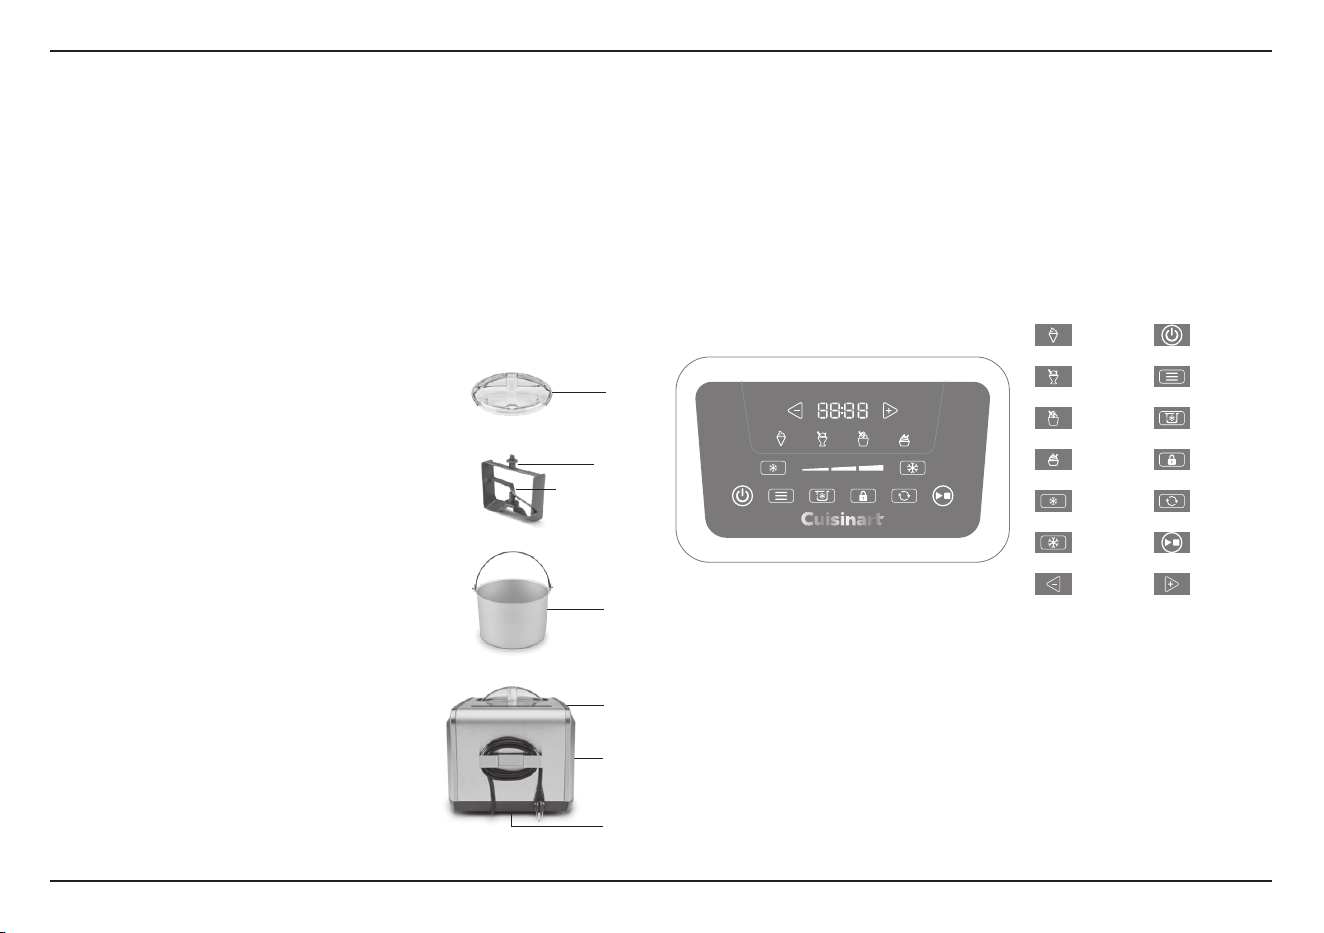
PARTS AND FEATURES
1. Transparent lid with ingredient funnel Effortlessly add
mix-ins to the bowl and check the progress of your
frozen treats.
2. Mixing paddle Mix and aerate ingredients in mixing
bowl to create frozen treats.
3. Mixing bowl with lift-out handle. Anodized aluminum
mixing bowl. No need to pre-chill or freeze bowl
4. Touchpad control panel with LCD readout
5. Compressor base
6. Cord storage
BEFORE FIRST USE
DO NOT immerse the compressor base in water. Wipe it with a moist cloth. Wash the
lid, mixing bowl, and mixing paddle in warm, soapy water to remove any dust or
residue from the manufacturing and shipping process. Only the mixing paddle and lid
are top-shelf dishwasher safe. DO NOT place mixing bowl in dishwasher. DO NOT
clean any of the parts with abrasive cleaners or hard implements. Place the base in
location to be used in upright position and let it rest for 24 hours before use.
CONTROL PANEL
Ice Cream
Sorbet
Gelato
Frozen Yogurt
Softer
Firmer
Timer Decrease Timer Increase
ON/ OFF
Program Selection
Pre-Cool
Screen Lock
Mixing
Start / Stop
1.
2.
4.
5.
6.
3.
Horizontal rib
4
OPERATING INSTRUCTIONS
IMPORTANT: Prior to initial use, let the unit rest upright for 24 hours before plugging
it in.
1. After 24-hour rest period, plug the unit into the power outlet. The power button will
illuminate, and the unit beeps to indicate it is ready to use.
2. Prepare ingredients (see page 6 for recipe tips)
3. Place mixing bowl into the base. Be sure the mixing bowl is properly aligned in
base. Mixing bowl handle should line up with gaps in rim of compressor base.
4. Place the mixing paddle onto stainless steel shaft in the center of the mixing bowl.
5. Pour frozen treat base into the mixing bowl.
Note: If using your own recipe, be sure bases do not go over horizontal rib of
the mixing paddle (See part #2 on page 3).
6. Position mixing bowl lid by lining up arrow on lid with the unlock icon on base.
Turn counterclockwise to lock the lid. The mix-in ingredient funnel should be
centered in the front.
7. Press the Power button
to turn the unit on. The LCD display will illuminate.
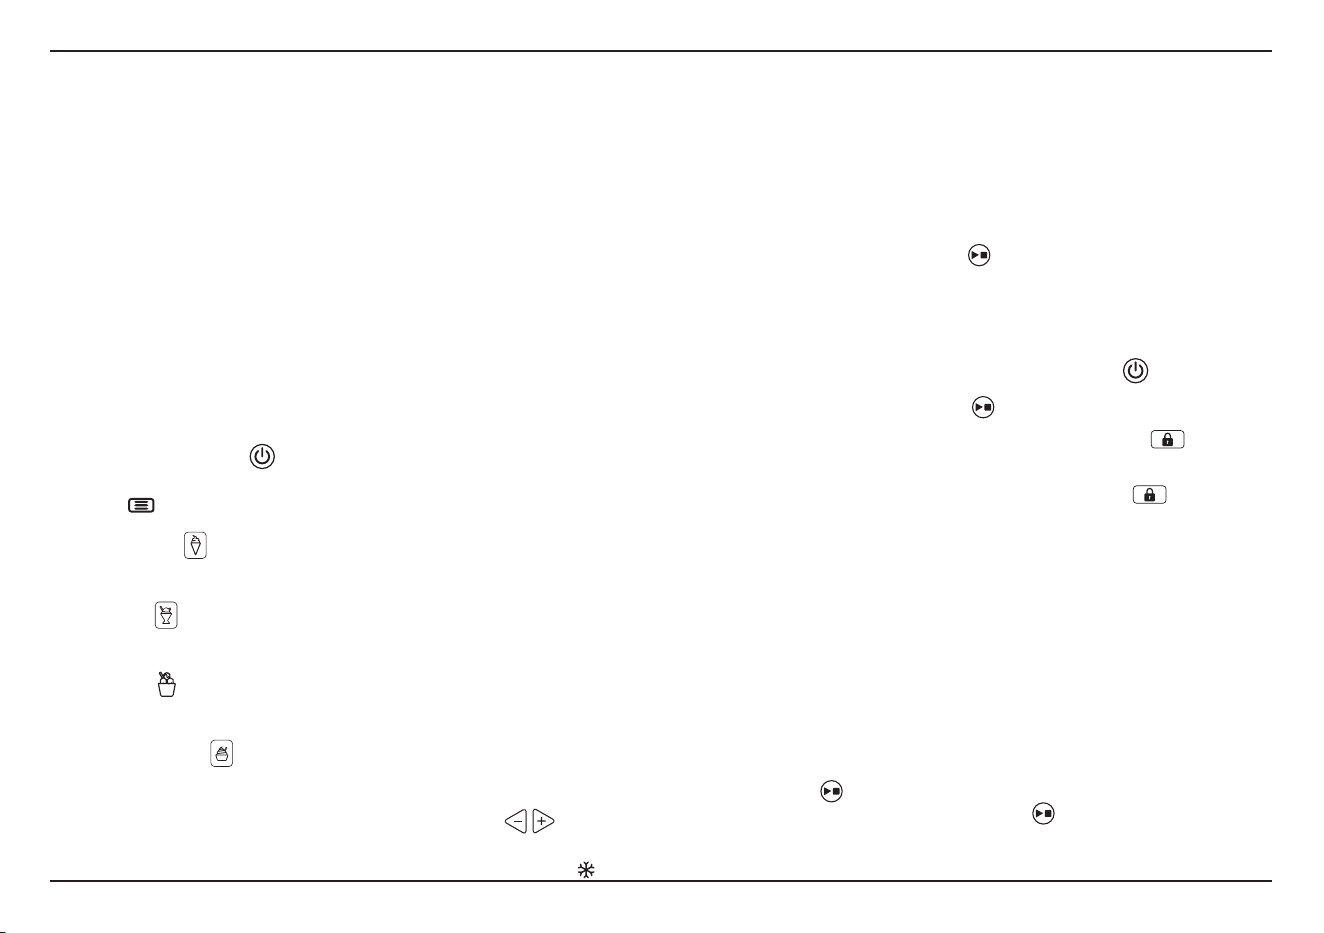
8. Select the desired preset from the screen by using the program selection
button
.
a. Ice Cream
When Ice Cream is selected, the display will show “35:00” (35 minutes).
b.Sorbet
When Sorbet is selected, the display will show “40:00” (40 minutes).
c. Gelato
When Gelato is selected, the display will show “40:00” (40 minutes).
d. Frozen Yogurt
When Frozen Yogurt is selected, the display will show “30:00” (30 minutes).
9. If you want to adjust the preset time, press up/down arrows
. Press and
hold to scroll through quickly.
10. If you want to adjust the firmess of frozen treats, press snow buttons
.
Note: First, select the desired preset. Then, choose the firmness level. When
you press the firmness button, the display will show ‘Auto.’ Choose the
firmness level you prefer from 1 bar being the softest to 3 bars being the
firmest. Time adjustment is not necessary. With Smart Firmness Sensing
technology, the ice cream machine will automatically detect the required run
time and stop once the frozen treats reach the desired firmness.
Tip: For personalized recipes, start with the suggested options in the instruction
book and experiment with different settings until you achieve the perfect result.
11. Once ready, press Start/Stop button
to begin the cooling/mixing cycle.
a. Mix-in ingredients such as chips and nuts can be added towards the end of
mixing time. Once the frozen treats have begun to thicken (usually 5 minutes
from end time), add the ingredients through the mix-in ingredient funnel. Mix-ins
should be no larger than chocolate chips. Do not add more than ¼ cup.
b. Note: To turn the unit off at any time, press the Power
button.
c. 5 minutes after Start/Stop button
is pressed, the screen will be locked.
12. To turn on the screen lock feature, press and hold screen lock
for 3
seconds and the screen lock button will illuminate.
13. To turn off the screen lock feature, press and hold screen lock
for 3 seconds.
14. When one of presets is selected, the timer will count down to “00:00”. When
firmness is selected, the display will show ‘Auto,’ and the firmness bar will
indicate progress. Once the selected cycle is over, the unit will beep to indicate
the frozen treat is ready.
15. When the selected cycle is over, the unit will go to automatic Keep Cool feature
for 10 minutes.
16. Turn the unit off by pressing the Power button and unplug. Remove the lid by turning it
clockwise to unlock. Lift the lid from mixing bowl. Remove the compressor base from
the base by lifting it with the handle. Remove mixing paddle from mixing bowl.
17. When finished, turn the unit off by pressing the Power button.
To pause time and mixing:
Press the Start/Stop
button at any point in the cooling/mixing cycle to pause the
time and mixing. To continue, press the Start/Stop
button again.
To add time:

5
If frozen treat is not done or you would like to add time at any point during the
selected program, press the -/+ arrow repeatedly to increase or decrease time in
5-minute increments. .
Note: when making consecutive batches of frozen treats, be sure to allow extra
time for the compressor to adjust to cooling.
Tip: Unplug unit and let it rest for 10 minutes to allow the motor to cool before
making a second batch.
Keep Cool
At the end of the cooling/mixing cycle, “COOL/count-up timer” will be displayed will
blink and the unit will automatically enter the Keep Cool cycle, where it will remain
for 10 minutes.
Note: The compressor will be on, but the paddle will not rotate during the Keep Cool
cycle. The display will indicate the unit is in Keep Cool mode by showing a count-up
timer and COOL. At the end of Keep Cool cycle, the unit will beep and return to
standby mode and the compressor will be off.
Note: You can turn the unit off at any time during the Keep Cool cycle.
If the frozen treat is not as firm as you desire, press + arrow to add 5 minute
increments of further processing time. The unit will automatically begin a 5-minute
processing cycle with the compressor and motor running. After 5 minutes, it will
transition into a Keep Cool cycle for an additional 10 minutes.
Pre-cool:
This cycle cools the mixing bowl to the optimal temperature for creating frozen treats. Do
not place the mixing paddle or frozen treat base inside the mixing bowl during the
Precool cycle. The default Pre-cool time is 10 minutes, and it can be adjusted by
pressing -/+ buttons. Once the Pre-cool cycle is complete, insert the mixing paddle, add
the frozen treat base to the mixing bowl, put the lid, and press Start to begin.
Mixing:
This feature allows users to blend mix-ins into the base before starting the process of
making frozen treats. It ensures a better mixture. The default time for Mixing is 30
minutes, but time can be adjusted by pressing -/+ arrow.
Firmness selection:
This unit offers a frozen treat firmness selection feature, allowing you to adjust the texture
of frozen treats. Simply press the snow buttons to make them softer or firmer, depending
on your preference.
SAFETY FEATURE
The Cuisinart
®
ICE-150 Freeze Ease
™
1.5-Quart Pro Ice Cream Maker is equipped
with a safety feature that automatically stops the unit if the motor overheats. This
safety system may activate under heavy loads, if the unit has been running for an
excessively long period of time, or if mix-ins (nuts, etc.) are in extremely large pieces.
To reset the unit, press the Power button and unplug the unit. Let the unit rest. After
10 minutes, you may turn the unit on again and continue making the frozen treat.
CLEANING, STORAGE, AND MAINTENANCE
Cleaning
Clean the mixing bowl, mixing paddle, and lid in warm soapy water. Mixing paddle
and lid are top-shelf dishwasher safe. DO NOT PUT MIXING BOWL IN THE
DISHWASHER. DO NOT CLEAN WITH ABRASIVE CLEANSERS OR IMPLEMENTS.
Wipe the unit base clean with damp cloth. Dry all parts thoroughly.
Storage
Be sure to store your unit in an upright position. Do not store frozen desserts in the
mixing bowl in the freezer for more than 30 minutes at a time. Transfer frozen treats
to a freezer-safe, airtight container for longer storage in the freezer.
Maintenance
Any other servicing should be performed by an authorized service representative.
6
TROUBLESHOOTING
RECIPE TIPS
The recipes that follow offer you a variety of options for delicious frozen desserts.
You may create or use recipes of your own, as long as bases do not go over the top
dasher on mixing paddle.
Recipe Tips
• Gelato and sorbet bases should be no more than 1 quart (should not go above the
highest dasher on the paddle).
• Ice cream bases should be no more than 5 cups (should not go above the highest
dasher on the paddle).
• For optimum consistency, chill all mixtures for a minimum of 2 hours, or up to 3 days.
Always rewhisk the mixture after chilling to be sure all ingredients are well combined.
While chilling the mixture is not required, this step will prevent any large “ice” or “fat”
crystals from forming during the freezing process as resting it in a chilled environment
helps bind the ingredients together.
• Frozen desserts from the Cuisinart
®
Freeze Ease
™
1.5-Quart Pro Ice Cream Maker use
pure, fresh ingredients. Because of this, the desserts do not have the same charac-
teristics as commercially prepared frozen desserts. If you desire a rmer consistency,
transfer the dessert to an airtight container and store in the freezer until desired
consistency is reached, usually two or more hours. Remove from freezer about 15
minutes before serving.
• Some recipes use cooked ingredients. For best results, the mixture should be chilled
overnight before using. Or chill the recipe over an ice bath, until it is completely cooled,
before using. To make an ice bath, ll a large container with ice and water. Place sauce-
pan or other container into the ice bath. Cool the cooked ingredients completely.
• You may substitute lower-fat creams (e.g., half-and-half) and/or milk (reduced fat or low
fat) for heavy cream and whole milk used in many recipes. However, keep in mind that
the higher the fat content, the richer and creamier the result. Using lower-fat substitutes
may change the taste, consistency, and texture of the dessert. When substituting, be sure
to use the same volume of the substitute as you would have used of the original item. For
example, if the recipe calls for 2 cups of cream, use a total of 2 cups of the substitute (such
as 1 cup cream, 1 cup whole milk). See our recipes starting on page 8 for more tips.
• You may substitute other sweeteners for sugar. Stir the mixture thoroughly to dissolve
the sweetener. See our Sugar-Free Vanilla Ice Cream recipe on page 14
as a guide.
• When making sorbet, be sure to test the ripeness and sweetness of the fruit before you
use it. The freezing process reduces the sweetness of the fruit so that it will taste less
sweet than the recipe mixture. If the fruit tastes tart, add additional sugar to the recipe.
If the fruit is very ripe or sweet, reduce the amount of sugar in the recipe. Use our sorbet
recipes on page 22 as a guide.
• Make sure the mixing paddle and lid are in place before turning on machine.
ADDING INGREDIENTS
• Ingredients such as chips and nuts should be added about 5 minutes before the freezing
process is complete. You want it to still be soft enough to be able to fully incorporate
into the frozen mixture.
• To add a chocolate swirl to ice cream, gelato, or frozen yogurt, drizzle in hot fudge or
melted chocolate. The melted chocolate will harden once it makes contact with the
freezing base so add it in a slow drizzle to ensure that it does not clump.
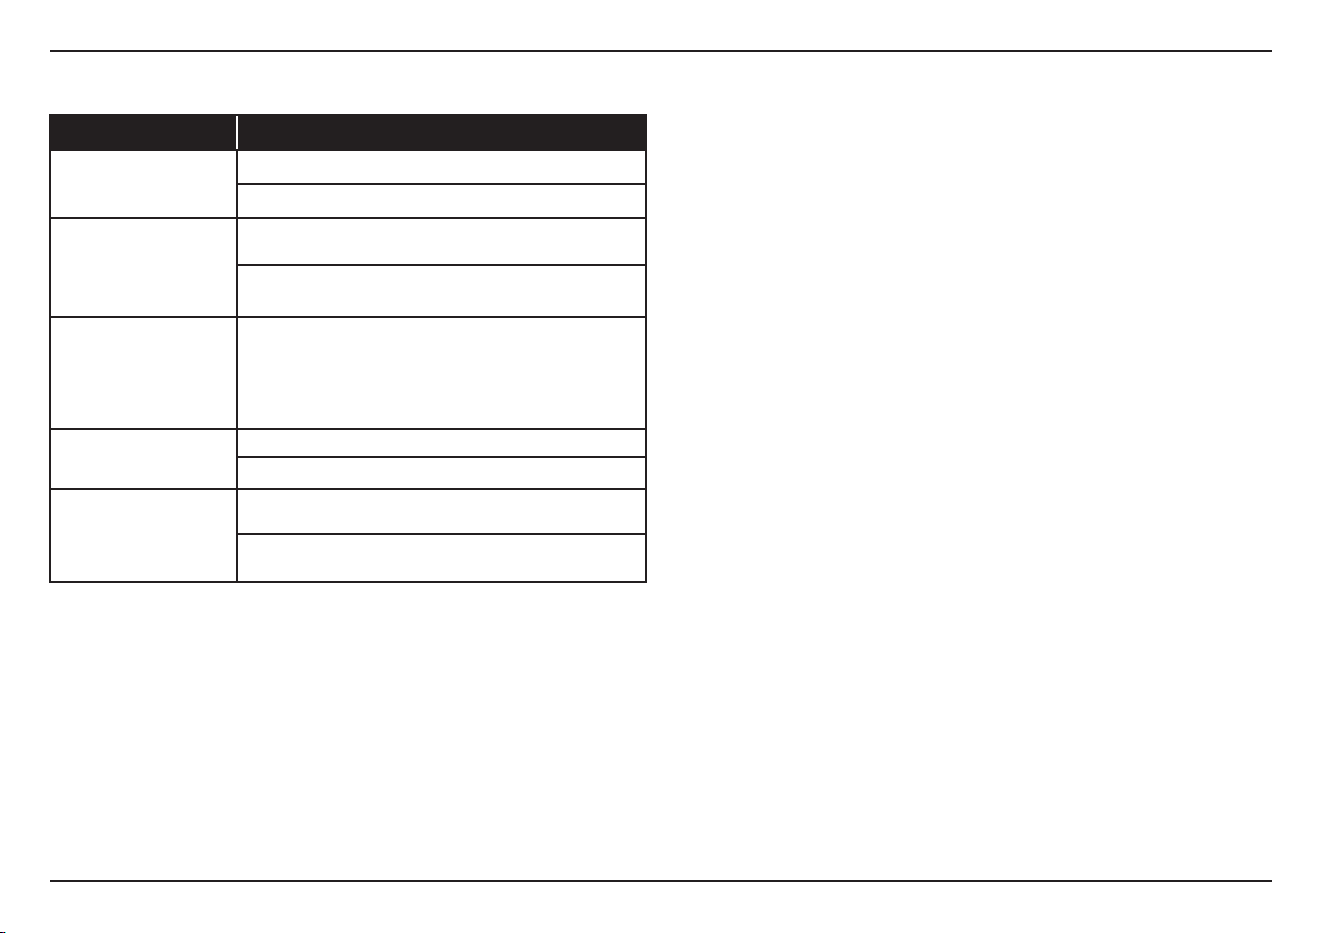
PROBLEM SOLUTION
Screen displays “EEEE,”
continuous beeping, and the
unit is stopped.
Power off and unplug the unit.
Contact Consumer Service.
Unit turns off sooner than
the time set
The overload safety feature has been activated. Let unit rest for a
few minutes before continuing making the frozen dessert.
If not the reason above, unplug the unit and let it rest for 2 hours.
Power unit on and begin making your frozen dessert.
At any time during the
cooling/mixing cycle, the
unit beeps continuously for
30 seconds.
Power off and unplug the unit. Let it rest for 2 hours. Power unit
on and being making your frozen dessert.
If this happens again, let the unit rest for 24 hours. If unit
continues to beep after you have tried
the above procedure, contact Consumer Service.
Mixing bowl is difficult to lift.
Wait 2 minutes and lift the mixing bowl.
Make sure mixing bowl and base are dry before making frozen dessert.
Paddle slippage after several
batches of ice cream.
Watch for condensation on the outside of mixing bowl. Clear off
water or ice from mixing bowl and base.
Make sure mixing bowl and base are dry and clean before making
next batch.

7
Limited Warranty
Subject to the exclusions and limitations contained herein, Conair LLC dba
Cuisinart (“Cuisinart”) warrants that the Cuisinart
®
Freeze Ease™ 1.5-Quart Pro
Ice Cream Maker ("Product") will be free from material defects in materials and
workmanship under normal home use conditions for a period of three (3) years
beginning on the date the Product was purchased in its original, sealed
packaging, unless otherwise specied in this Limited Warranty. This Limited
Warranty is only for U.S. consumers (dened herein as purchasers at retail for
personal, family, or household use) who originally purchase the Product from
Cuisinart or an authorized Cuisinart
®
reseller (if you are unsure whether a
retailer or other point of sale is an authorized or unauthorized Cuisinart reseller,
contact Cuisinart).
This Limited Warranty does NOT cover:
• Normal wear and tear;
• Any Product purchased by commercial purchasers or for commercial or
nonhousehold uses;
• Accessories, parts, or software added to the Product after the system is
shipped from Cuisinart;
• Any costs associated with the replacement or repair of the Product,
including labor, installation, or other costs incurred by you without prior
Cuisinart approval;
• Damage to the Product, defective conditions, or nonconformities due to: (1)
external causes, including shipping, accidents, problems with electrical
power (Product designed only for use with 120-volt outlets), abnormal
conditions (such as mechanical or environmental); (2) usage not in
accordance with Product instructions; (3) misuse, neglect, unauthorized
alteration, unauthorized repair; and (4) acts of god or other events beyond
Cuisinart’s control;
• Though necessary repairs and maintenance might be performed by any
company, damage caused by you or any nonauthorized third party, may void,
this Limited Warranty;
• Damage caused by accessories or replacement parts not specically
authorized by Cuisinart, may void, this Limited Warranty; and
• Any Product where the original Product identication markings
(trademark or serial number) have been removed, altered, or obliterated
from the Product.
It is recommended that you visit the website, https://www.cuisinart.com/
register-your-product.html, for a fast, ecient way to complete your product
registration. However, product registration does not eliminate the need for the
consumer to maintain the original proof of purchase in order to obtain the
warranty benets. In the event that you do not have proof of purchase date, the
purchase date for purposes of this Limited Warranty will be the date of
manufacture.
Hassle-free warranty
If the Product that is the subject of this Limited Warranty fails during the
warranty period for reasons covered by this Limited Warranty, Cuisinart will, at
its option, repair the Product, replace the Product with another identical or
reasonably equivalent product, or if Cuisinart is unable to repair or replace the
Product, refund the purchase price, less the amount directly attributable to the
consumer’s prior usage of the Product. To obtain a return shipping label, email
us at https://www.cuisinart.com/customer-care/product-assistance/product-
inquiry/, or call our Consumer Service Center toll-free at 1-800-726-0190 to
speak with a representative.
Upon receipt of the Product, Cuisinart will inspect the Product and, if required
under this Limited Warranty, attempt to repair, replace, or refund the Product
within thirty (30) days. However, there may be delays beyond Cuisinart’s control,
in which case that time period may be extended as reasonably necessary.
IMPORTANT: If the nonconforming Product is to be serviced by someone other
than Cuisinart’s Authorized Service Center, please remind the servicer to call
our Consumer Service Center at 1-800-726-0190 to ensure that the problem is
properly diagnosed, the Product is serviced with the correct parts, and the
product is still under warranty.
California Residents Only
The three (3) year Limited Warranty period begins on the date the Product was
delivered, which may be dierent than the date the Product was purchased.
California residents also have the option of obtaining the benets of this
Limited Warranty by bringing the Product to (A) the store where it was
purchased or (B) another retail store that sells Cuisinart products of the same
type. The retail store shall then, according to its preference, either repair the

8
Product, refer the consumer to an independent repair facility, replace the
Product with another identical or reasonably equivalent product, or refund the
purchase price less the amount directly attributable to the consumer’s prior
usage of the Product. California residents may also, according to their
preference, return nonconforming products directly to Cuisinart for repair or, if
necessary, replacement with another identical or reasonably equivalent product
by calling our Consumer Service Center toll-free at 1-800-726-0190. Cuisinart
will be responsible for the cost of such repair, replacement, and/or shipping and
handling for such nonconforming products under warranty.
THIS LIMITED WARRANTY GIVES YOU SPECIFIC LEGAL RIGHTS, AND YOU MAY
ALSO HAVE OTHER RIGHTS THAT VARY FROM STATE TO STATE OR BY
JURISDICTION. IN THE EVENT THIS LIMITED WARRANTY IS BREACHED, YOU MAY
HAVE CLAIMS FOR REPLACEMENT, DAMAGES, OR OTHER PENALTIES
LIMITATIONS OF LIABILITY/ADDITIONAL LIMITATIONS AND EXCLUSIONS
ALL EXPRESS AND IMPLIED WARRANTIES ARE LIMITED IN DURATION TO THE
LIMITED WARRANTY PERIOD. NO WARRANTIES APPLY AFTER THAT PERIOD.
SOME STATES DO NOT ALLOW LIMITATIONS ON HOW LONG AN IMPLIED
WARRANTY LASTS, SO THIS LIMITATION MAY NOT APPLY TO YOU. CUISINART’S
RESPONSIBILITY UNDER THIS OR ANY OTHER WARRANTY, IMPLIED OR
EXPRESS, IS LIMITED TO REPAIR, REPLACEMENT, OR REFUND, AS SET FORTH
ABOVE. THESE REMEDIES ARE THE SOLE AND EXCLUSIVE REMEDIES FOR ANY
BREACH OF WARRANTY. TO THE MAXIMUM EXTENT PERMITTED BY LAW,
CUISINART IS NOT RESPONSIBLE FOR ANY DIRECT, INDIRECT, SPECIAL,
INCIDENTAL, OR CONSEQUENTIAL DAMAGES RESULTING FROM ANY BREACH OF
WARRANTY OR UNDER ANY OTHER LEGAL THEORY (INCLUDING, BUT NOT
LIMITED TO, LOST PROFITS, DOWNTIME, GOODWILL, DAMAGE TO OR
REPLACEMENT OF EQUIPMENT AND PROPERTY, AND ANY COSTS OF
RECOVERING, REPROGRAMMING, OR REPRODUCING ANY PROGRAM OR DATA
STORED IN OR USED WITH A SYSTEM CONTAINING THE PRODUCT), EVEN IF
CUISINART HAS BEEN ADVISED OF THE POSSIBILITY OF SUCH DAMAGES. SOME
STATES DO NOT ALLOW THE EXCLUSION OR LIMITATION OF INCIDENTAL OR
CONSEQUENTIAL DAMAGES, SO THE ABOVE LIMITATIONS OR EXCLUSIONS MAY
NOT APPLY TO YOU. ALL EXPRESS AND IMPLIED WARRANTIES ARE LIMITED IN
DURATION TO THE LIMITED WARRANTY PERIOD. NO WARRANTIES APPLY AFTER
THAT PERIOD. SOME STATES (OR JURISDICTIONS) DO NOT ALLOW LIMITATIONS
ON HOW LONG AN IMPLIED WARRANTY LASTS, SO THIS LIMITATION MAY NOT
APPLY TO YOU.
This Limited Warranty is issued by:
Conair LLC
1 Cummings Point Road
Stamford, CT 06902
1-800-726-0190
©2025 Cuisinart
Glendale, AZ 85307
Printed in China
25CE200417
18816