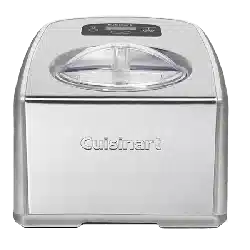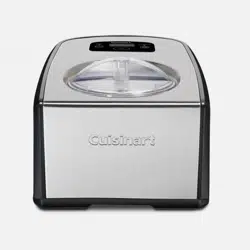
ICE-150XA
For your safety and continued enjoyment of this product, always read the
instruction book carefully before using.
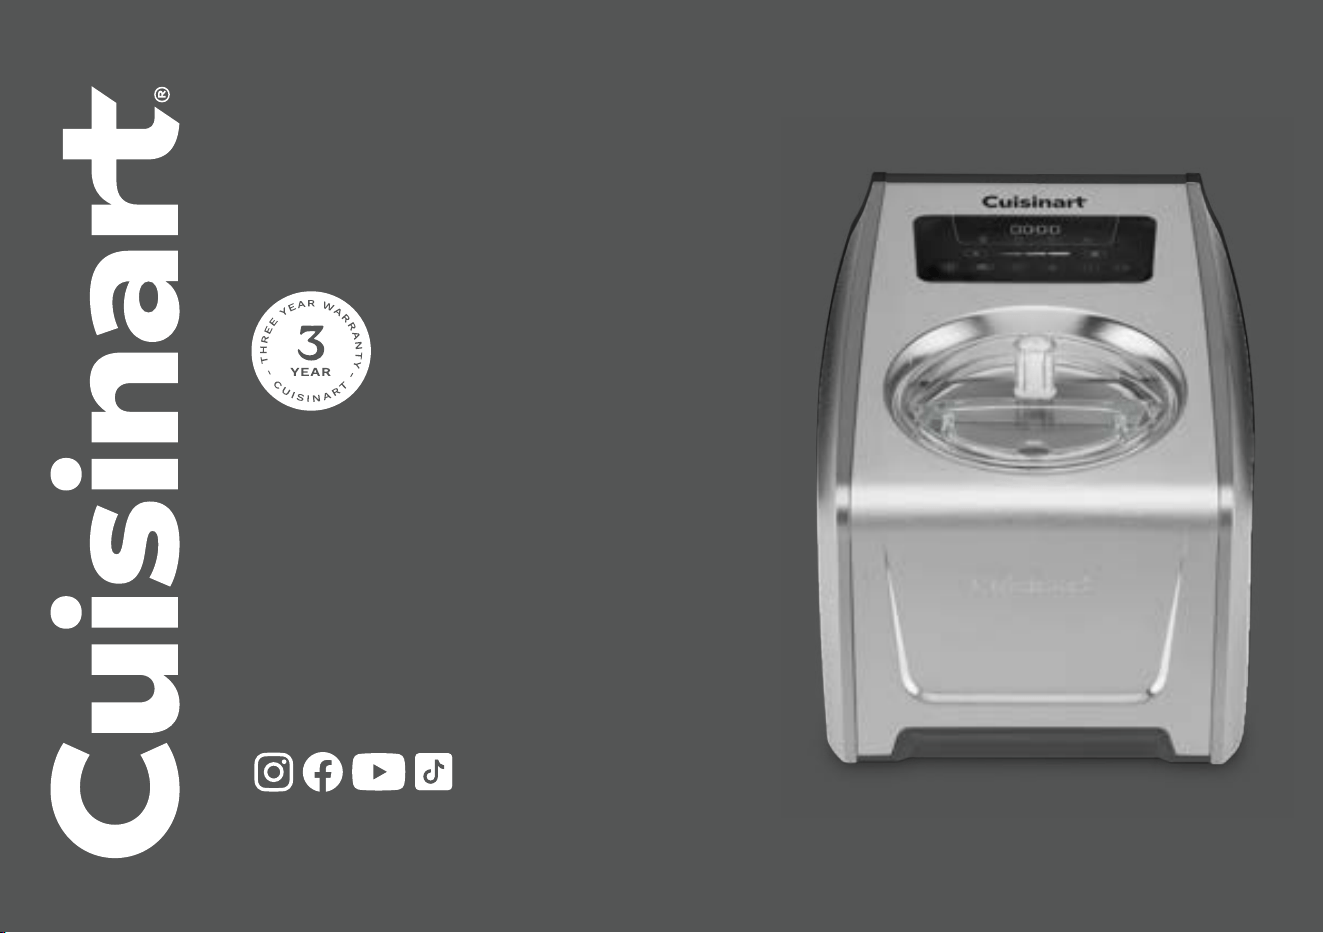
Freeze Ease Pro
Ice Cream Maker
Instruction
& Recipe
Booklet
Follow us @cuisinart_au
www.cuisinart.com.au

2
Contents
Important Safeguards.................................2
Safety During Use................................... 3
Before First Use .....................................4
Parts And Features ...................................4
Operating Instructions ................................5
Cleaning, Storage, And Maintenance .....................7
Troubleshooting .....................................7
Recipe Tips .........................................8
Warranty ...........................................8
Recipes ........................................... 10
IMPORTANT SAFEGUARDS
Carefully read all the instructions before using the
appliance and keep in a safe place for future reference.
Always follow these safety cautions when using this
appliance to avoid personal injury or damage to the
appliance. This appliance should be used only as described
within this instruction book.
When using any electrical appliance, especially when
children are present, basic safety precautions should always
be taken to reduce the risk of re, electric shock and/or
injury, including the following:
This appliance is intended for HOUSEHOLD USE ONLY and
similar applications such as:
- Staff kitchen areas in shops, offices and other working
environments;
- farmhouses;
- Clients in hotels, motels and other residential type
environments;
- bed and breakfast settings
This appliance is not intended for use by persons
(including children) with reduced physical, sensory or
mental capabilities, or lack of experience and knowledge,
unless they have been given supervision or instruction
concerning use of the appliance by a person responsible
for their safety.
1. WARNING: Keep ventilation openings, in the appliance
enclosure or in the built-in structure, clear of
obstruction.
2. WARNING: Do not use mechanical devices or other
means to accelerate the defrosting process, other than
those recommended by the manufacturer.
3. WARNING: Do not damage the refrigerant circuit.
4. Do not store explosive substances such as aerosol cans
with a flammable propellant in this appliance.
5. The appliance is not intended to be operated by means
of external timer or separate remote control system.
6. Children should always be supervised to ensure that
they do not play with this product.
7. This appliance shall not be used by children. Keep out
of reach of children during and after use.
8. Always inspect the appliance before use for noticeable
signs of damage. Do not use if damaged, or if the
appliance has been dropped. In the event of damage,
or if the appliance develops a fault, contact the
Cuisinart Customer Care.
9. Do not operate any appliance with a damaged cord or
plug, or after the appliance malfunctions, or is dropped
or damaged in any manner. No repair must be
attempted by the consumer.
10. Never pull the plug out of the mains socket by the
cord.
11. Do not wrap the cord around the main body of the
appliance during or after use.

3
12. Always ensure the voltage to be used corresponds with
the voltage on the appliance; this is indicated on the
bottom of the housing.
13. Always disconnect the appliance from the electrical
supply if it is left unattended and before assembling,
disassembling or cleaning.
14. If the supply cord is damaged, it must be replaced by
the manufacturer, its service agent or similarly
qualified persons in order to avoid a hazard.
WARNING: Polythene bags over the product or
packaging may be dangerous. To avoid danger of
suocation, keep away from babies and children.
These bags are not toys.
Warning
Danger
Extremely
Flammable Gas
This product uses R600a as a
refrigerant gas.
R600a has higher eciency and lower
environmental impacts, compared to
Fluorinated gases.
The gas is ammable, but under
normal operating conditions this
poses no risk to the user as it is safely
contained in a sealed system within
the product. If the product is dropped or damaged it is
possible for the gas to escape. In such circumstances the
gas could ignite if exposed to sources of ignition such as
naked ames.
When transporting this product take care to ensure that the
product is not dropped or damaged.
If the refrigerant gas escapes or leaks are suspected:
Immediately ventilate the room by opening doors and
windows for several minutes.
Avoid naked ames and other potential ignition sources.
Do NOT use the product if you suspect a leak of the
refrigerant gas.
Do Not dispose of this product in household waste.
Instead it should be handed over to an appropriate
collection point for the recycling of electrical and electronic
equipment.
Safety Feature
The Cuisinart
®
Freeze Ease Pro Ice Cream maker is equipped
with a safety feature that automatically stops the unit if
the motor overheats. This safety system may activate under
heavy loads, if the unit has been running for an excessively
long period of time, or if added ingredients (nuts, etc.)
are in extremely large pieces. To reset the unit, press the
Power button and unplug the unit. Let the unit rest. After a
few minutes, you may turn the unit on again and continue
making the dessert.
Safety During Use
• The appliance should remain upright at all times. If the
appliance is turned on its side or upside down, you will
need to put it in an upright position and wait 24 hours
before using.
• Before rst use, remove all packaging materials and any
promotional labels and stickers.
• Do not use the appliance for anything other than its
intended use.
• Position the unit on a stable, level surface, near a power
socket.
• Do not place on or near hot gas or electric burners or in a
heated oven.
• Do not leave the cord hanging over the edge of a kitchen
table or worktop. Avoid contact between the cord and hot
surfaces.
4
• Do not use accessories or attachments with this
appliance other than those recommended by Cuisinart.
• Avoid contact with moving parts. Keep hands, hair,
clothing and spatulas and other utensils away during
operation to reduce the risk of injury and/or damage to
the appliance.
• DO NOT USE SHARP OBJECTS OR UTENSILS INSIDE THE
MIXING BOWL! Sharp objects will scratch and damage the
inside of the bowl. A rubber spatula or wooden spoon may
be used when the appliance is in the o position.
• Always ensure that your hands are dry before removing
the plug from the mains outlet.
• Always unplug from the mains outlet when not in use,
before putting on or taking o parts and before cleaning.
• Do not immerse the housing or motor base in water or
any other liquid or put it in a dishwasher.
SAVE THESE
INSTRUCTIONS
FOR HOUSEHOLD USE
ONLY
Before First Use
DO NOT immerse the compressor base in water. Wipe it with
a moist cloth. Wash the lid, mixing bowl, and mixing paddle
in warm, soapy water to remove any dust or residue from the
manufacturing and shipping process. Only the mixing paddle is
top-shelf dishwasher safe. DO NOT place lid and mixing bowl in
dishwasher. DO NOT clean any of the parts with abrasive cleaners
or hard implements. Place the base in location to be used in upright
position and let it rest for 24 hours before use.
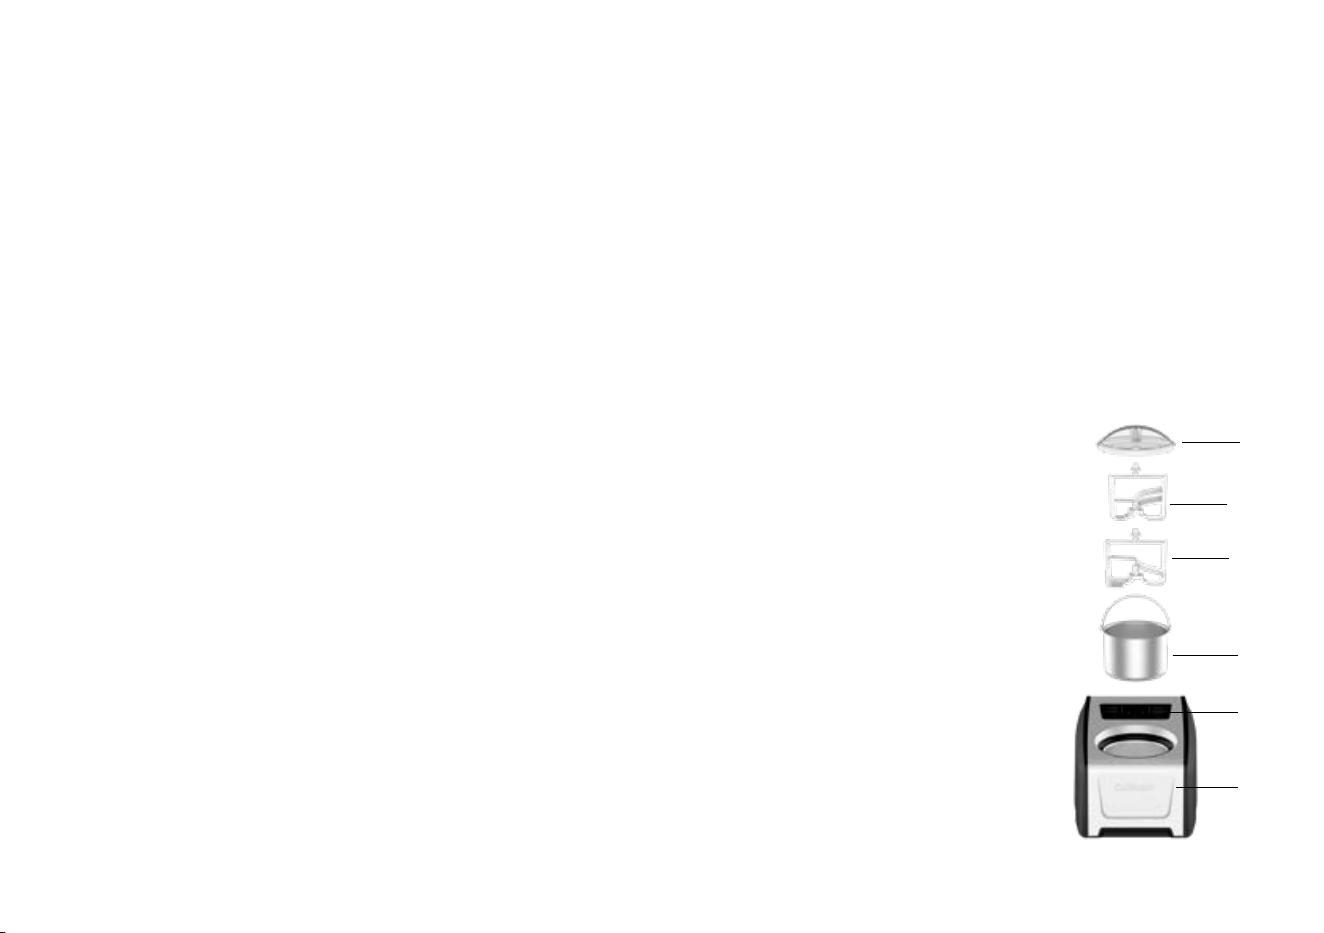
Parts And Features
1. Transparent lid with ingredient funnel
Eortlessly add mix-ins to the bowl and check the progress of
your ice cream creation.
2. Mixing Paddles
Mix and aerate ingredients in mixing bowl to create frozen
dessert.
a. Gelato Paddle
Perfectly incorporates less air into the ingredients and creates
richly textured results with intense avour.
b. Ice Cream Paddle
Churns ingredients perfectly and creates smooth and creamy
results.
3. Mixing bowl with lift-out handle. No
need to pre-chill or freeze bowl.
4. Touchpad Control panel with LED
5. Base Contains heavy-duty compressor
motor and mixing motor.
1.
2a.
2b.
4.
3.
5.
5
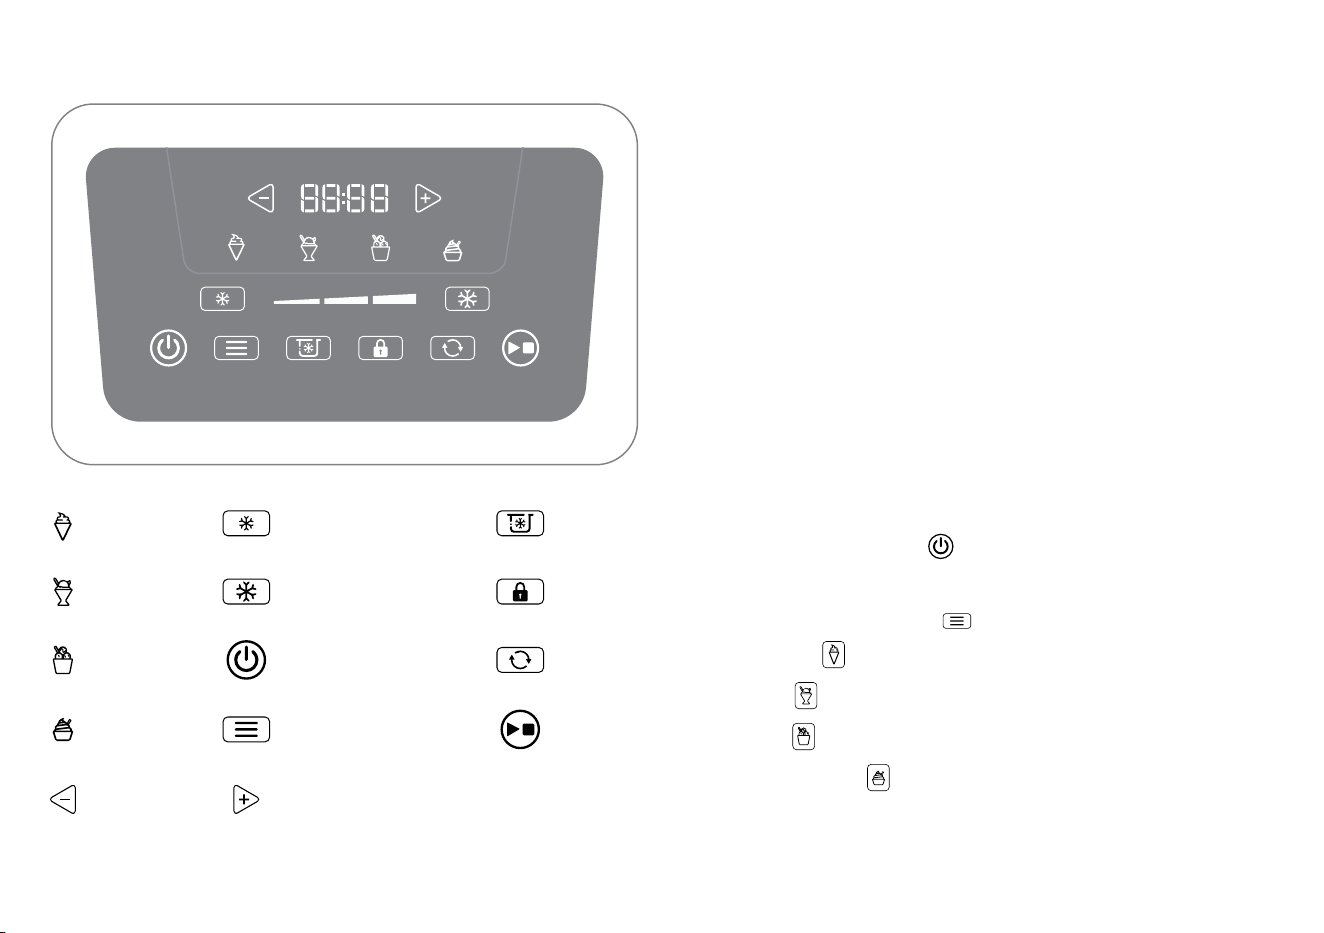
Control Panel Operating Instructions
IMPORTANT: Prior to first use, let the unit rest upright for 24 hours
before plugging it in.
1. After 24-hour rest period, plug the unit into the power outlet.
The light above the power button will illuminate, and the unit
will beep to indicate it is ready for use.
2. Prepare ingredients.
NOTE: IF USING YOUR OWN RECIPE, BE SURE BASES
DO NOT GO OVER 4 CUPS OR OVER THE HORIZONTAL
RIB OF THE MIXING PADDLE WHEN ADDED TO THE
MIXING BOWL.
3. Place mixing bowl into the base. Be sure the mixing bowl is
properly aligned in base. Mixing bowl handle should line up
with gaps in rim of compressor base.
4. Place the mixing paddle onto stainless steel shaft in the
centre of the mixing bowl.
5. Pour ingredients into the mixing bowl.
6. Position mixing bowl lid by lining up arrow on lid with the
unlock icon on base. Turn counterclockwise to lock the lid.
The mix-in ingredient funnel should be centered at the front.
7. Press the Power button
to turn the unit on. The LED
display will illuminate.
8. Select the desired preset from the screen by using the
program selection button
.
a. Ice cream
b. Sorbet
c. Gelato
d. Frozen yoghurt
9. To adjust the preset time, press the + and - buttons. Press and
release timer buttons to decrease or increase time in 1-minute
increments. Press and hold to scroll up or down more quickly.
Ice Cream
Sorbet
Gelato
Frozen yoghurt
Firmness selector - Softer
Firmness selector - Firmer
Timer decrease Timer increase
Power ON / OFF
Program Selection
Pre-Cool
Screen Lock
Mixing
Start / Stop

6
10. To adjust the firmness of frozen treats, press the button with
the snowflake icon . The large snowflake indicates a firmer
consistency.
NOTE: When firmness setting is selected this will over-ride the
timer which will default to 0:00. The timer will count up during
the churning process and the unit will detect when the desired
consistency has been reached.
NOTE: Firmness cannot be adjusted once the program begins.
NOTE: Time can be set up to 60 minutes or as low as 5
minutes.
11. Once ready, press Start/Stop button
to begin the cooling/
mixing cycle.
a. Mix-in Ingredients such as chips and nuts can be added
towards the end of mixing time. Once the frozen treats have
begun to thicken (usually 5 minutes from end time), add the
ingredients through the mix-in ingredient funnel. Mix-ins
should be no larger than chocolate chips.
b. NOTE: To turn the unit off at any time, press the Power
button.
12. If the firmness setting has not been selected, the timer will
count down to “00:00” and the unit will beep to indicate the
frozen treat is ready.
13. When the cycle is over, the unit will go to automatic keep cool
for 90 minutes.
14. Turn the appliance off by pressing the power ON / OFF button
and unplug. Remove the lid by turning it clockwise to unlock.
Lift the lid from mixing bowl. Remove mixing bowl from the
base by lifting it with the handle. Remove mixing paddle from
mixing bowl.
NOTE: To use the screen lock feature during operation, press
and hold screen lock
for 3 seconds. The screen lock button
will illuminate to show that it is ON. To cancel the screen lock
feature, press and hold the screen lock button for 3
seconds.
When turned ON the screen lock feature will stop any program
alterations during the churning process.
NOTE: The screen lock will automatically activate after 3 minutes.
To pause churning, or change processing time the screen lock will
need to be turned OFF by pressing the screen lock button for 3
seconds first.
15. When finished, turn the unit off by pressing the Power button.
To Pause time and mixing:
After turning screen lock
OFF (if processing has already
commenced for greater than 3 minutes), press the START / STOP
button to pause churning. To continue again, press the
START / STOP button again.
To add or reduce time:
If you would like to add or reduce churning time at any point
during the selected program, ensure the screen is unlocked and
press the arrow keys up or down repeatedly to increase or
decrease in 1 minute increments. To scroll through quickly, press
the arrow key and hold down.
NOTE: when making consecutive batches of frozen treats, be sure
to allow extra time for the compressor to adjust to cooling.
TIP: Unplug unit and let it rest for 10 minutes to allow the motor to
cool before making a second batch.
Keep Cool
At the end of the cooling/mixing cycle, the unit will beep and the
unit will automatically enter the Keep Cool cycle.
NOTE: The compressor will be on during the Keep Cool cycle. At
the end of keep cool cycle, the unit will beep and return to
standby.
NOTE: The mixing function is not activated during the Keep Cool
cycle. You can turn the unit off at any time during the Keep Cool
cycle.
If the frozen treat is not as firm as you desire, press + arrow to
add further processing time.
During Keep Cool, the compressor runs without mixing, so texture
may firm at the edges over time; if you plan to serve later, remove
7
the mixing bowl and transfer to a freezer-safe, airtight container, or
briefly re-churn by selecting Mixing before serving to restore an
even texture.
Activating the pre-cool feature: Make sure the paddle is inside the
mixing bowl. This feature ensures that both the mixing bowl and
the frozen treat mix are kept cool before starting the process of
making frozen treats. It helps maintain the right temperature and
can also save time, making the frozen treat creation process more
efficient. Use only room temperature frozen treat mix.
Activating the mixing feature: This feature allows users to blend
mix-ins into the base before starting the process of making frozen
treats. It ensures a better mixture.
Cleaning, Storage, And Maintenance
Cleaning
Clean the mixing bowl, mixing paddle and lid in warm soapy water.
Only the mixing paddle is top-shelf dishwasher safe. DO NOT PUT
LID AND MIXING BOWL IN THE DISHWASHER. DO NOT CLEAN WITH
ABRASIVE CLEANSERS OR IMPLEMENTS. Wipe the unit base clean
with damp cloth. Dry all parts thoroughly.
Storage
Be sure to store your unit in an upright position. Do not store
frozen desserts in the mixing bowl in the freezer for more than 30
minutes at a time. Transfer frozen treats to a freezer-safe, airtight
container for longer storage in the freezer.
Maintenance
Any other servicing should be performed by an authorised service
representative.
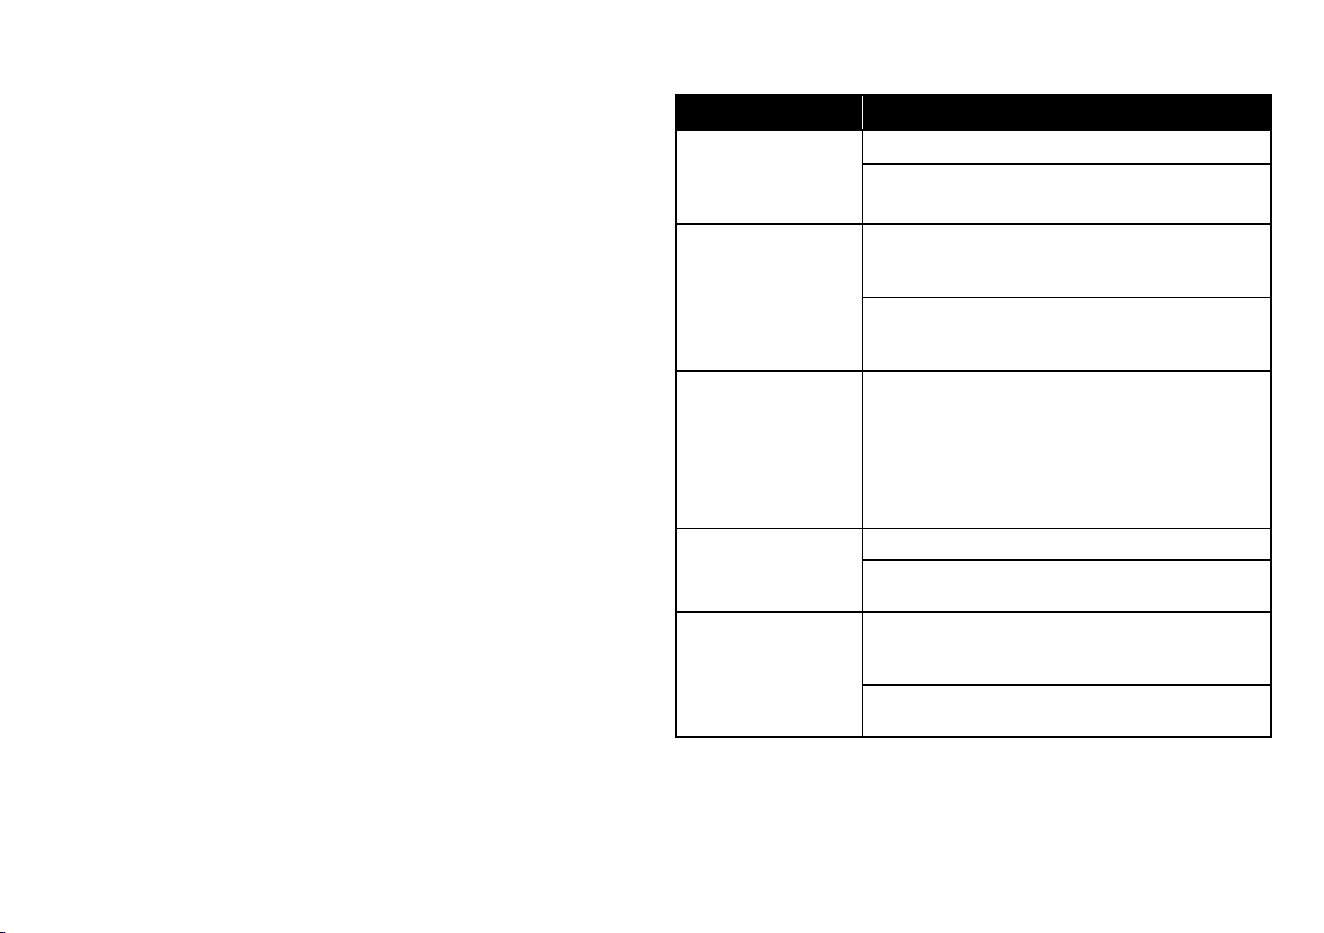
Troubleshooting
PROBLEM SOLUTION
Screen displays
“EEEE”, continuous
beeping and the
unit is stopped.
Power off and unplug the unit.
Contact Consumer Service
Unit turns off
sooner than the
time set
The overload safety feature has been
activated. Let unit rest for a few minutes
before continuing making the frozen dessert.
If not the reason above, unplug the unit and
let it rest for 2 hours. Power unit on and
begin making your frozen dessert.
At any time during
the cooling/mixing
cycle, the unit
beeps continuously
for 30 seconds.
Power off and unplug the unit. Let it rest for
2 hours. Power unit on and being making
your frozen dessert.
If this happens again, let the unit rest for 24
hours. If unit continues to beep after you
have tried the above procedure, contact
Consumer Service.
Mixing bowl is
difficult to lift.
Wait 2 minutes and lift the mixing bowl.
Make sure mixing bowl and the base are dry
before making frozen dessert.
Paddle slippage
after several
batches of ice
cream.
Watch for condensation on the outside of
mixing bowl. Clear off water or ice from
mixing bowl and base.
Make sure mixing bowl and base are dry and
clean before making next batch.

8
Recipe Tips
The recipes that follow offer you a variety of options for delicious
frozen desserts. You may create or use recipes of your own, as
long as bases do not go over the top dasher on mixing paddle.
Recipe Tips
•
Always re-whisk the mixture after chilling to be sure all
ingredients are well combined. While chilling the mixture is not
required, this step will prevent any “ice” or “fat” crystals from
forming during the freezing process as resting it in a chilled
environment helps bind the ingredients together.
• Some recipes use cooked ingredients. For best results, the
mixture should be chilled overnight before using.
• You can replace thickened cream and full-cream milk with
lighter options, such as reduced-fat cream or light milk, used in
many recipes. However, keep in mind that the higher the fat
content, the richer and creamier the result. Using lower-fat
substitutes may change the taste, consistency, and texture of
the dessert. When substituting, be sure to use the same volume
of the substitute as you would have used of the original item.
• You may substitute other sweeteners for sugar. Stir the mixture
thoroughly to dissolve the sweetener.
NOTE: Frozen desserts from the Cuisinart Freeze Ease Pro Ice
Cream & Gelato Maker use fresh ingredients, because of this,
the desserts do not have the same characteristics as store
bought desserts. Most store bought ice creams use gums and
preservatives to make them firmer. If you desire a firmer
consistency, transfer the dessert to an air tight container and
store in the freezer until the desired consistency is reached.
• If a firmer consistency is desired, transfer to an airtight
container and place in freezer for about 2 hours. Remove from
freezer about 15 minutes before serving.
• When making sorbet, be sure to test the ripeness and
sweetness of the fruit before you use it. The freezing process
reduces the sweetness of the fruit so that it will taste less
sweet than the recipe mixture. If the fruit tastes tart, add
additional sugar to the recipe. If the fruit is very ripe or sweet,
reduce the amount of sugar in the recipe.
• Make sure the mixing paddle and lid are in place before turning
on machine.
Adding Mix-Ins
• Ingredients such as chocolate chips and nuts should be added
about 5 minutes before the freezing process is complete. You
want it to still be soft enough to be able to fully incorporate
into the frozen mixture.
• To add a chocolate swirl to ice cream, gelato, or frozen yoghurt,
drizzle in hot fudge or melted chocolate. The melted chocolate
will harden once it makes contact with the freezing ingredients
so add it in a slow drizzle to ensure that it does not clump.
Warranty
Cuisinart warrants that, in the unlikely event that this product
develops any malfunction within 36 months of purchase of the
product used for household or domestic use (or within 3 months
of purchase of the product used for commercial use) due to
faulty workmanship, materials or manufacture, we will either (at
our discretion) repair or replace it for you.
This warranty applies for a period of 36 months for products
purchased for household or domestic use (and 3 months for
products purchased for commercial use) from the date of
purchase of the product after which time the warranty expires
and has no further force of effect.
Should you experience any operating difficulties refer to the FAQ
in this booklet or contact Customer Service for advice on 1800
566 567 in Australia or 0800 456 546 in New Zealand.
Please retain your Purchase Receipt as proof of purchase in
order for your warranty entitlement to be valid.This document
must be presented in the event of making a claim under the
terms of the Cuisinart Warranty Policy.

9
During the warranty period Cuisinart will repair or replace (at our
discretion) any defective product. However, if the product
includes a number of accessories, only the defective part or
relevant accessory will be replaced. Cuisinart reserves the right
to make minor adjustments to fix any defect instead of replacing
the entire product or accessory. Packaging, instructions, recipe
books etc. will not be replaced unless faulty. A product
presented for repair may be replaced by a refurbished product of
the same type rather than being repaired. Refurbished parts may
be used to repair the product.
If a spare part is required under warranty it will be shipped to
the customer or retailer at No Charge.
In the event of a product or accessory being replaced during the
warranty period, the guarantee on the replacement product or
accessory will expire 36 months for household or domestic use
(or 3 months for commercial use) from the original purchase
date.
This warranty does not include or cover the following:
• Defects caused by the product not being used in accordance
with instructions;
• Defects caused by accidental damage;
• Defects caused by misuse or negligent handling of the product;
• Defects caused by the product not being maintained or cleaned
according to instructions;
• Defects caused by being tampered with by unauthorised
persons;
• Defects which are normal or fair wear and tear;
• Freight or any other costs incurred in making a claim;
• Consumable items or accessories that by their nature and
limited lifespan require periodic renewal (such as filters, seals,
blades or related accessories, such as trays, racks or utensils);
• Products serviced or modified other than by Cuisinart or an
authorised Cuisinart representative;
• To any claims made beyond 12 months if the filament of the
light bulb breaks i.e. the light bulb has burned out;
• Exposure of the product to abnormally corrosive conditions;
• Any product which has its serial number or appliance plate
removed or defaced;
• To any claims made beyond 3 months from the date of
purchase if the product is used in commercial, industrial,
educational or rental applications; or
• To any claims made beyond 36 months from the date of
purchase if the product is used in household or domestic
applications.
• Products purchased from any person who is not a retailer
serviced by Conair’s authorised distributors, overseas retailers,
parallel importers or purchased second hand.
The benefits given to you by our warranty are in addition to other
rights and remedies under the Australian Consumer Law.
In Australia our goods come with guarantees that cannot be
excluded under the Australian Consumer Law. You are entitled to
a replacement or refund for a major failure and for compensation
for any other reasonably foreseeable loss or damage. You are
also entitled to have the goods repaired or replaced if the goods
fail to be of acceptable quality and the failure does not amount
to a major failure.
Our goods also come with guarantees that cannot be excluded
under the New Zealand Guarantees Act.

10
To make a warranty claim or spare part, contact our customer
service agents:
Cuisinart Australia
Ph: 1800 566 567
PO Box 146, Terrey Hills
NSW 2084 AUSTRALIA
Cuisinart New Zealand
Ph: 0800 456 546
YOU MUST provide your full name, address, email and phone
details. A copy of your proof of purchase must be supplied.
You can contact Cuisinart Australia/New Zealand via email at
aus_cuisinart@conair.com or through the “Contact Us” option on
the Cuisinart website www.cuisinart.com.au
The warranty contained in this document is provided by:
Conair Australia Pty Ltd (ACN 068 492 044) (Cuisinart)
18 Rodborough Rd,
Frenchs Forest, NSW 2086
Australia
Recipes
To help you get started with your new Ice Cream & Gelato
Professional, we have included a few recipe ideas in this instruction
manual. For further recipe ideas and inspiration please visit our
website www.cuisinart.com.au.
Ice Cream
Simple Vanilla Ice Cream ..............................11
Simple Chocolate Ice Cream ...........................11
Fresh Mint with Chocolate Cookies ..................... 12
Dairy-Free Vanilla Ice Cream . . . . . . . . . . . . . . . . . . . . . . . . . . 13
Gelato
Lemon Gelato ...................................... 13
Frozen Yoghurt
Honey-Almond Frozen Yoghurt......................... 14
Sorbet
Coconut Sorbet .................................... 14

11
Simple Vanilla Ice Cream
This ice cream can easily be dressed up by adding your favourite
chopped lollies, chopped chocolate or berries at the end of
churning.
MAKES ABOUT 5 CUPS (TEN ½-CUP SERVINGS)
1½ cups full cream milk
1 cup caster sugar
pinch salt
2½ cups thickened cream
1 tablespoon pure vanilla extract
1. In a medium bowl, use a hand mixer on low speed or whisk to
combine the milk, sugar and salt until the sugar is dissolved.
Stir in the thickened cream and vanilla. Cover and refrigerate
a minimum of 2 hours, or overnight. Whisk mixture together
again before pouring into the ice cream maker.
2. Pour the mixture into the mixing bowl of the Cuisinart
®
Freeze
Ease Pro fitted with the ice cream paddle. Turn unit on, set
Timer and press Start. Let mix until thickened, about 50-60
minutes. The ice cream will have a soft, creamy texture. If a
firmer consistency is desired, transfer to an airtight container
and place in freezer for about 2 hours. If frozen for longer
remove from freezer about 10 minutes before serving
Simple Chocolate Ice Cream
MAKES ABOUT 5 CUPS (TEN ½-CUP SERVINGS)
¾ cup cocoa powder, sifted
½ cup caster sugar
¹∕
³
cup packed brown sugar
pinch salt
1 cup full cream milk
2 cups thickened cream
2 teaspoons pure vanilla extract
1. In a medium bowl, whisk together the cocoa, sugars and salt.
Add the milk and, using a hand mixer on low speed or a whisk,
beat to combine until the cocoa, sugars and salt are dissolved.
Stir in the thickened cream and vanilla. Cover and refrigerate
for a minimum of 2 hours, or overnight. Whisk mixture
together again before pouring into the ice cream maker.
2. Pour the mixture into the mixing bowl of the Cuisinart
®
Freeze
Ease Pro fitted with the ice cream paddle. Turn unit on, set
Timer and press Start. Let mix until thickened, about 50-60
minutes. The ice cream will have a soft, creamy texture. If a
firmer consistency is desired, transfer to an airtight container
and place in freezer for about 2 hours. If frozen for longer
remove from freezer about 10 minutes before serving.

12
Fresh Mint with Chocolate Cookies
Always a winning combination, fresh mint and chocolate take the
forefront in this rich and creamy ice cream.
MAKES ABOUT 6 CUPS (TWELVE ½-CUP SERVINGS)
2 cups full cream milk
2 cups thickened cream
1 cup caster sugar, divided
pinch salt
2 teaspoons pure vanilla extract
2 cups packed fresh mint leaves
5 large egg yolks
1 cup crushed chocolate sandwich cookies, e.g., Oreo
(about 8 cookies)
1. In a medium saucepan, whisk together the milk, cream, half of
the white sugar, salt and vanilla. Place over medium heat and
bring to a gentle simmer. Remove from heat and add the mint
leaves; let steep for 20 to 30 minutes. If you desire a milder
mint flavour, remove and discard the mint leaves after
steeping, but for a more intense ice cream we recommend
blending the milk/mint mixture using an immersion blender.
After steeping, reheat the mixture to a gentle simmer over low
heat.
2. While the milk/cream mixture is reheating, combine the yolks
and remaining sugar in a medium bowl. Using a hand mixer on
low speed or a whisk, beat until mixture is pale and thick.
3. Once the milk/cream mixture has come to a gentle boil, whisk
about ¹∕ ³ of the hot mixture into the yolk/sugar mixture. Add
another ⅓ of the mixture, then return the combined mixture
to the saucepan. Using a wooden spoon, stir the mixture
constantly over low heat until it thickens slightly and coats
the back of the spoon. This mixture must NOT boil or the
yolks will overcook – the process should only take a few
minutes.
4. Pour the mixture through a fine mesh strainer into a jug or
bowl. Cover the mixture with a layer of plastic wrap directly
onto the surface to prevent a ‘skin’ forming as the mixture
cools and stand at room temperature for 1 hour. Refrigerate
for a minimum of 2 hours or overnight. Whisk mixture together
again before pouring into the ice cream maker.
5. Pour the mixture into the mixing bowl of the Cuisinart
®
Freeze
Ease Pro fitted with the ice cream paddle. Turn unit on, set
Timer and press Start. Let mix until thickened, about 50-60
minutes. When the ice cream is almost fully churned,
gradually add the crushed cookies through the mix-in opening;
let mix until fully combined.
6. The ice cream will have a soft, creamy texture. If a firmer
consistency is desired, transfer to an airtight container and
place in freezer for about 2 hours. If frozen for longer remove
from freezer about 10 minutes before serving.

13
Dairy-Free Vanilla Ice Cream
The soy milk powder helps the texture of the ice cream. If you are
intolerant to soy then try an alternative listed below.
MAKES ABOUT 5 CUPS (TEN ½-CUP SERVINGS)
3 cups dairy-free milk (soy, almond, rice)
2 tablespoons soy milk powder
¾ cup caster sugar
pinch salt
2 teaspoons pure vanilla extract
1. In a medium bowl, use a hand mixer on low speed or whisk to
combine the milk, sugar and salt until the sugar is dissolved.
Cover, and refrigerate for a minimum of 2 hours or overnight.
Whisk mixture again before pouring into the ice cream maker.
2. Pour the mixture into the mixing bowl of the Cuisinart
®
Freeze
Ease Pro fitted with the ice cream paddle. Turn unit on, set
Timer and press Start. Let mix until thickened, about 50-60
minutes. The ice cream will have a soft texture. If a firmer
consistency is desired, transfer to an airtight container and
place in freezer for about 2 hours.
If frozen for longer remove from freezer about 10 minutes
before serving.
Lemon Gelato
The perfect amount of sweet and tart for this classic gelato flavour.
MAKES ABOUT 4 CUPS (EIGHT ½-CUP SERVINGS)
1 cup thickened cream
2 cups full cream milk, divided
4 lemons, rind removed (reserve 2 tablespoons of finely
grated lemon rind), juiced with juice reserved
1¼ cup caster sugar
1 teaspoon pure vanilla extract
2 tablespoons cornflour
1. In a medium saucepan, combine cream and 1 cup of the milk.
Place over medium heat and bring to a gentle simmer.
2. While cream/milk mixture is heating, put the remaining milk,
lemon rind, sugar, cornflour, salt and vanilla into a medium
sized mixing bowl. Whisk to combine.
3. Once milk/cream mixture comes to a simmer, add the milk/
sugar mixture and stir until fully combined. With the saucepan
still over medium heat, continuously stir mixture until it gently
boils and thickens to where it can coat the back of a spoon
(this will take about 15 minutes, depending on the stove being
used).
4. Remove pan from heat, and transfer mixture to a jug or bowl
and stir in the lemon juice. Cover and refrigerate for a
minimum of 2 hours, or overnight. Whisk mixture together
again before pouring into the ice cream maker.
5. Pour the mixture into the mixing bowl, fitted with the gelato
paddle, of the Cuisinart
®
Freeze Ease Pro. Turn unit on, set
Timer and press Start. Let mix until thickened, about 50-60
minutes. The gelato will have a soft,creamy texture. If a firmer
consistency is desired, transfer to an airtight container and
place in freezer for about 2 hours. If frozen for longer remove
from freezer about 10 minutes before serving.

14
Honey-Almond Frozen Yoghurt
MAKES ABOUT 5 CUPS (TEN ½-CUP SERVINGS)
2 cups thickened cream
¼ cup honey
¼ cup caster sugar
pinch salt
2 cups full cream milk vanilla yoghurt
1½ teaspoons pure almond extract
½ cup toasted sliced almonds
1. In a medium saucepan, combine the cream,honey, sugar and
salt. Place over medium heat and bring to a gentle simmer.
Cover and stand at room temperature for 1 hour.
2. In a medium mixing bowl, whisk the yoghurt and almond
extract together until combined. Re-cover and refrigerate a
minimum of 2 hours, or overnight. Whisk mixture again before
pouring into the ice cream maker.
3. Pour the mixture into the mixing bowl of the Cuisinart
®
Freeze
Ease Pro fitted with the ice cream paddle. Turn unit on, set
Timer and press Start. Let mix until thickened, about 50-60
minutes. About 5 minutes before the mixture is done
churning, add the sliced almonds through the mix-in opening.
Allow to mix thoroughly. The frozen yoghurt will have a soft,
creamy texture. If a firmer consistency is desired, transfer to
an airtight container and place in freezer for about 2 hours. If
frozen for longer remove from freezer about 10 minutes before
serving.
Coconut Sorbet
MAKES ABOUT 5 CUPS (TEN ½-CUP SERVINGS)
1¼ cups water
1¼ cups caster sugar
1 whole vanilla bean, halved and seeds scraped
pinch flaked salt
2 cans (400ml each) unsweetened coconut milk
1. Combine the water, sugar, vanilla bean (including the pod) and
salt. Place over medium heat and bring to a gentle simmer.
Remove saucepan from heat and allow the mixture to stand/
steep for 1 hour; using a fine wire meshed strainer, strain the
mixture (discarding pod) into a jug or bowl.
2. Add the coconut milk to the strained mixture. Cover and
refrigerate for a minimum of 2 hours, or overnight. Whisk
mixture again before pouring into the ice cream maker.
3. Pour the mixture into the mixing bowl of the Cuisinart
®
Freeze
Ease Pro fitted with the ice cream paddle. Turn unit on, set
Timer and press Start. Let mix until thickened, about 50-60
minutes. The sorbet will have a soft, creamy texture. If a
firmer consistency is desired, transfer to an airtight container
and place in freezer for about 2 hours. If frozen for longer
remove from freezer about 10 minutes before serving.

15

Scan to get started with
your new ice cream & gelato maker.
www.cuisinart.com.au
IB-25/514