Instruction
& Recipe
Booklet
For your safety and continued enjoyment of this product,
always read the instruction book carefully before using.
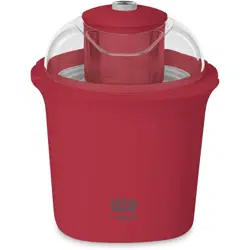
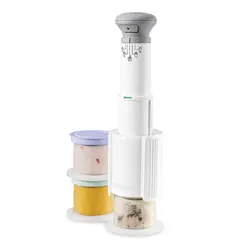
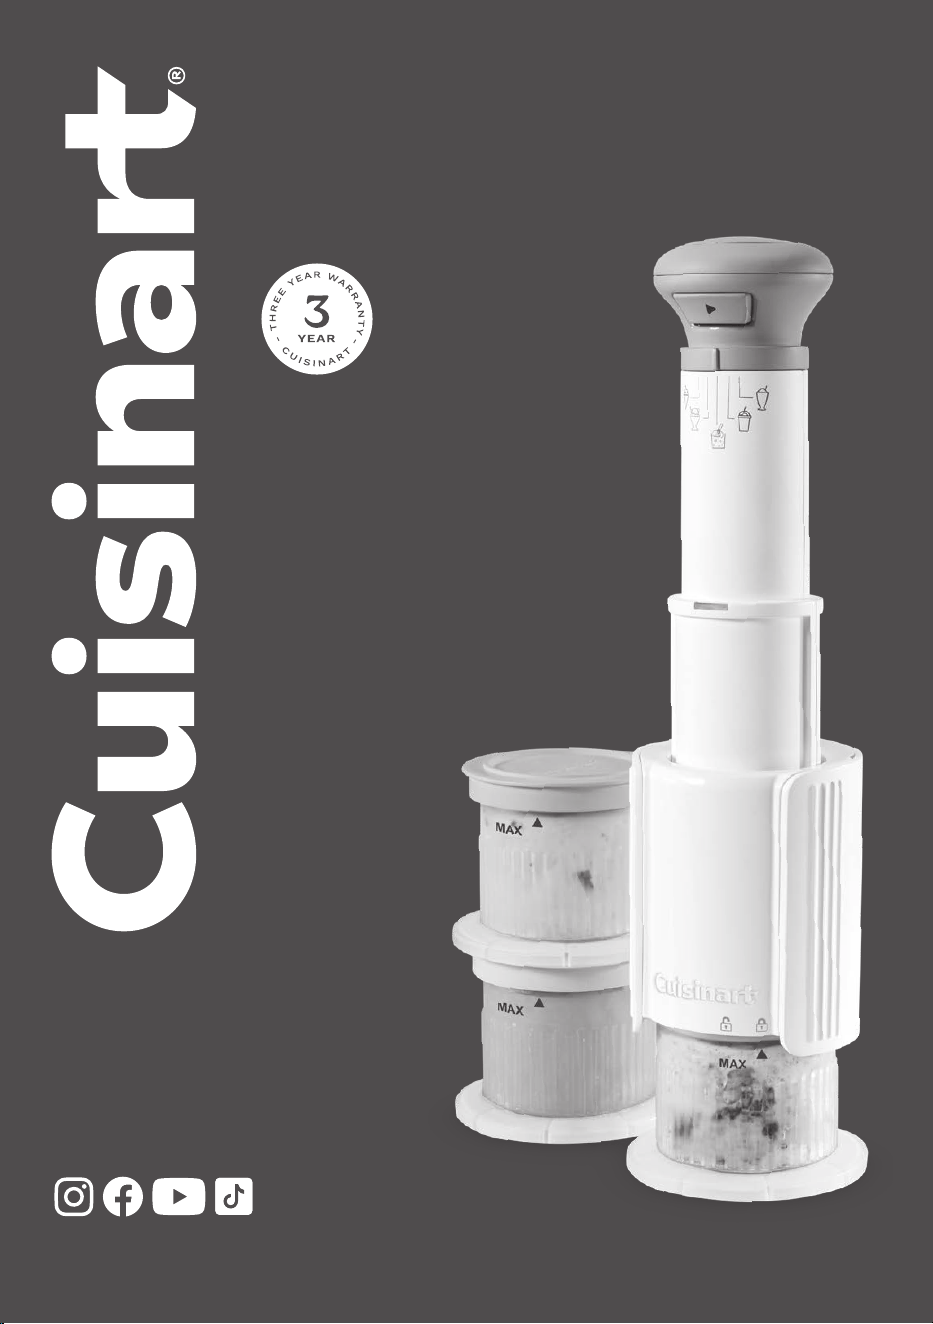
Freeze Wand
Ice Cream Maker
ICE-FD10XA
Follow us @cuisinart_au
www.cuisinart.com.au

2
CONTENTS
Important Safety Cautions..............2
Parts and Features ....................4
Understanding Presets .................4
Operating Instructions .................5
Cleaning, Storage And Maintenance ......6
Warranty ............................6
Recipes .............................8
IMPORTANT
SAFEGUARDS
When using an electrical appliance, basic
safety precautions should always be
followed to reduce the risk of re, electric
shock, and/or injury, including the following:
READ ALL INSTRUCTIONS BEFORE USING.
1. To protect against risk of electric shock,
do not place cord, plug, or motor drive
assembly of appliance in water or any
other liquid.
2. This appliance is not intended for use
by persons (including children) with
reduced physical, sensory, or mental
capabilities, or lack of experience and
knowledge, unless they are closely
supervised and instructed concerning
use of the appliance by a person
responsible for their safety. Close
supervision is necessary when any
appliance is used by or near children.
Children should be supervised to ensure
that they do not play with the appliance.
3 Turn the appliance OFF, then unplug
from the outlet when not in use, before
assembling or disassembling parts, and
before cleaning. To unplug, grasp the
plug and pull from the outlet. Never pull
from the power cord.
4. Avoid contact with moving parts. Keep
hands, hair, and clothing, as well as
spatulas and other utensils, away during
operation to reduce the risk of injury
and/or damage to the appliance.
5. Always inspect the appliance before use
for noticeable signs of damage. Do not
use if damaged, or if the appliance has
been dropped. In the event of damage,
or if the appliance develops a fault,
contact Cuisinart Customer Service on
1800 566 567 in Australia or 0800 456
546 in New Zealand.
6. The use of attachments not
recommended by Cuisinart may cause
re, electric shock, or risk of injury.
7. Do not use outdoors.
8. Do not let cord hang over edge of table
or counter, or touch hot surfaces.
9. DO NOT USE SHARP OBJECTS INSIDE
THE DESSERT BOWL.
10. Any servicing other than cleaning and
user maintenance should be done only
by authorized Cuisinart repair personnel.
11. This appliance is for indoor, domestic
use only and is not intended to be used
in applications such as: sta kitchen
areas in shops, oces and other
working environments; farm houses; by
customers in hotels, motels and other
residential type environments; bed and
breakfast type establishments.
12. Do not operate your appliance in an
appliance cupboard. When storing,
always unplug the unit from the
electrical outlet. Not doing so could
create a risk of re, especially if the
appliance touches the walls of the
cabinet or the door touches the unit as
it closes.
13. Do not use appliance for other than its
intended use.
14. THIS IS AN ATTENDED APPLIANCE.
Do not leave unattended during use,
unplug after each use. Never leave the
appliance unattended when switched on
or plugged in.
15. Always disconnect the appliance
from the electric supply, if it is left
unattended and before assembling,
disassembling or cleaning.
16. Always ensure that your hands are
dry before touching the supply cord
or removing the plug from the mains
socket.
17. Ensure all packaging materials and
any promotional labels or stickers are
removed from the appliance before rst
use.
18. Position on a stable, level surface, near
a power socket.
19. Do not place the appliance on or near a
hot gas or electric burner.
20. Do not use accessories or attachments
with this appliance, other than those
recommended by Cuisinart.
21. Periodically check all parts before use. If
any part is damaged DO NOT USE.
22. To avoid injury or possible re, do not
cover the appliance when in use.

3
23. The appliance is not intended to be
operated by means of an external timer
or separate remove control system.
24. NOTE: This unit comes with a re-
settable fuse feature. If the appliance
is overloaded or put under extreme
push force the motor will stop running.
Release the power button and pull the
power handle to its original position
if possible; then wait for 10 seconds
to allow the appliance to recover. Try
again, if the appliance still does not
run, unplug and allow the appliance cool
down for 15 minutes, then resume use.
25. Do not use the appliance if the lead
is damaged. In the event of damage,
discontinue use immediately. If the lead
is damaged it must be replaced by the
manufacturer. Return the appliance to
the Customer Care Centre. No repair
must be attempted by the consumer.
26. Be careful when handing the sharp
cutting blades, detaching the bowl and
during cleaning.
SAVE THESE
INSTRUCTIONS
FOR HOUSEHOLD
USE ONLY
SPECIAL CORD SET
INSTRUCTIONS
A short power-supply cord is provided to
reduce the risks resulting from becoming
entangled in or tripping over a longer cord.
Longer extension cords may be used if care
is exercised in their use. If a long, extension
cord is used, the marked electrical rating of
the extension cord should be at least as
great as the electrical rating of the
appliance, and the longer cord should be
arranged so that it will not drape over the
countertop or tabletop, where it can be
pulled on by children or animals, or tripped
over.
CAUTION
• Do not immerse Power Handle or Blade
Assembly in water.
• To reduce the risk of fire or electric
shock, do not disassemble the Power
Handle or Mixing Assembly.
• Check voltage to be sure that the voltage
indicated on the name plate agrees with
your voltage.
• Never clean with scouring powders or
hard implements.
• Product is only used with ice-cream,
sorbet & slushy. Do not process sugar free
ingredients.
4
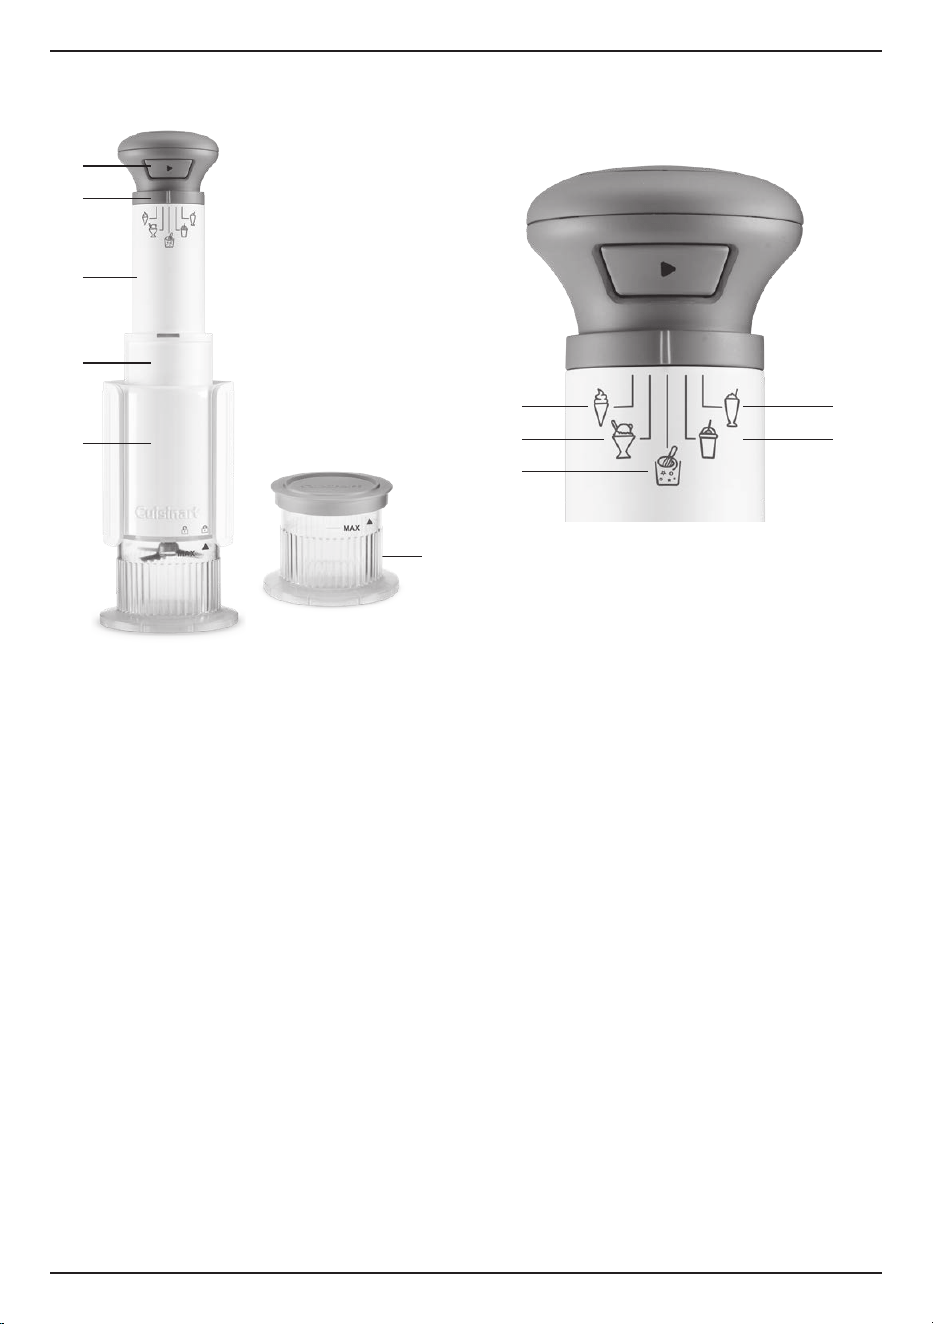
PARTS & FEATURES
1. Power button
2. Cord wraps safely around the Power
Handle when Freeze Wand is not in use
3. Preset options
(See next: Understanding Presets)
4. Power Handle
5. Mixing Assembly
6. Dessert Cups with lids; Three 240ml
cups can be stacked in freezer
UNDERSTANDING
PRESETS
1. ICE CREAM
Use this pre-set to make scoopable
dairy and non-dairy ice cream
2. SORBET
This pre-set is for frozen fruit-based
treats
3. MIX INS
Once your treat has been churned, use
the Mix-in setting to add chocolate
chips, nuts, biscuits and more
4 MILKSHAKE
Use this setting to mix homemade or
shop-bought ice cream with milk
5. SLUSHIE
Turn your favourite drinks into slushies
BEFORE FIRST USE
Remove all packaging materials from the
Freeze Wand. Wash the dessert cups in
warm, soapy water to remove any dust or
residue from the manufacturing and
shipping process. DO NOT immerse the
Power Handle or Blade Assembly in water.
Wipe them with a moist cloth. DO NOT
clean any of the parts with abrasive
cleaners or hard implements.
1
2
3
4
5
6
1
2
4
5
3
5
OPERATING
INSTRUCTIONS
Scan for video instructions
1. Prepare the recipes of your choice and
add to the individual dessert cups.
NOTE: Do not fill past the MAX fill line on
the dessert cup.
NOTE: For carbonated recipes, use one
quarter less liquid than standard ice
cream recipes.
2.
If the recipe requires to be frozen (ice cream,
slushie and sorbet), ensure the mixture is
level and place the lid on the dessert cup.
Freeze for at least 24 hours; the cup should
sit flat and upright in the freezer. For best
results, your freezer temperature should be
set to -18°C or below.
NOTE: Do not process recipes that have
been frozen on an angle or unevenly.
3. Once the mixture has been prepared (and
frozen for 24-hours for ice cream, slushie
& sorbet), remove the lid from the dessert
cup and attach to the mixing assembly by
twisting and locking the dessert cup on.
NOTE: Leave frozen desserts at room
temperature for 5-10 minutes prior to
processing.
NOTE: Do not microwave dessert containers.
4.
Once the dessert cup is locked into place,
attach the Power Handle to the top of the
Mixing Assembly by lining up the grooves;
the release button should be facing away
from you. Then press the release button in
and push downwards into place. The Power
Handle will engage to the Mixing Assembly.
NOTE:
Dessert cup must be locked into the
Mixing Assembly correctly for the power
handle to engage to the Mixing Assembly.
5. Place the assembled Freeze Wand on a
flat surface in the upright position.
6. Choose your preset by rotating the dial on
the Power Handle.
7. Plug the Freeze Wand into a power outlet.
8. With one hand, hold the Mixing
Asssembly. Use the other hand to firmly
grasp the top of the power handle.
9. When ready to operate the Freeze Wand,
press and hold the power button .
10. Whilst holding in the button, apply
minimal downward force to guide the
power handle through the mixture. Do not
use excessive force as the blade will do
the hard work.
NOTE: The power button must be on with
the motor running before applying any
downward force to avoid jamming.
11. The blade will churn your ingredients as
you guide the handle down. A green light
will indicate to keep guiding downward.
12. A red light will signal you have processed
to the bottom of the dessert cup.
13. Continue to churn by holding in the
button and guiding the handle upward to
its original position.
NOTE: The churning process will only be
completed when the power handle is
back to its original position. If you stop
churning in any other position, the
dessert cup will be difficult to remove.
NOTE:
Processing time will vary depending
on your recipe, most recipes should take
approximately 2-3 minutes. Do not operate
for more than 30 seconds at a time.
14. Unplug the Freeze Wand.
15.
Press and hold the Release Button located
the back of the Power Handle to lift the
Power Handle off the Mixing Assembly.
16. Twist and unlock the dessert cup to
remove from Mixing Assembly.
NOTE: Do not touch mixing blade.
NOTE: If you would like the dessert
further churned to achieve your desired
consistency, you can repeat this process
again.
NOTE: If your dessert turns out icy or
powdery after the first churning, add 1 to
2 tablespoons of cream or milk (or fruit
juice or plant-based cream for sorbet and
dairy-free options) and repeat the
churning process. This helps achieve a
smoother, creamier texture. You can
repeat the process again if a softer
consistency is desired.

6
ADDING MIX-INS TO ICE
CREAM OR SORBET
Once your frozen treat has finished
churning, you can add mix-ins, such as
chocolate chips, nuts or biscuits.
1. Whist the mixture is still in the dessert
cup, create a 1-2cm well in the centre and
pour in your mix-ins, being careful not to
over-fill.
NOTE: Mix-ins should be no bigger than
0.5cm in size.
2. Re-attach the dessert cup to the Mixing
Assembly and insert the Power Handle.
3. Select the Mix-Ins function and complete
the steps above to churn.
CLEANING, STORAGE
AND MAINTENANCE
Cleaning
Clean the dessert cups in warm soapy
water or on the top shelf of your
dishwasher. DO NOT CLEAN WITH ABRASIVE
CLEANSERS OR IMPLEMENTS.
NOTE: the Mixing Assembly should NOT be
placed in the dishwasher. Wipe the Power
Handle and Mixing Assembly clean with
damp cloth. DO NOT immerse the Power
Handle in water. Dry all parts thoroughly.
Storage
DO NOT store Power Handle or Mixing
Assembly in freezer. You may store the dry
dessert cups in the freezer. The power cord
can be wrapped around the Power Handle
for easy storage in a cupboard or drawer.
Maintenance
Any other servicing should be performed by
an authorised service representative.
WARRANTY
Cuisinart warrants that, in the unlikely
event that this product develops any
malfunction within 36 months of purchase
of the product used for household or
domestic use (or within 3 months of
purchase of the product used for
commercial use) due to faulty workmanship,
materials or manufacture, we will either (at
our discretion) repair or replace it for you.
This warranty applies for a period of 36
months for products purchased for
household or domestic use (and 3 months
for products purchased for commercial use)
from the date of purchase of the product
after which time the warranty expires and
has no further force of effect.
Should you experience any operating
difficulties refer to the FAQ in this booklet
or contact Customer Service for advice on
1800 566 567 in Australia or 0800 456 546
in New Zealand.
Please retain the Purchase Receipt as proof
of purchase in order for your warranty
entitlement to be valid.This document
must be presented in the event of making a
claim under the terms of the Cuisinart
Warranty Policy.
During the warranty period Cuisinart will
repair or replace (at our discretion) any
defective product. However, if the product
includes a number of accessories, only the
defective part or relevant accessory will be
replaced. Cuisinart reserves the right to make
minor adjustments to fix any defect instead
of replacing the entire product or accessory.
Packaging, instructions, recipe books etc. will
not be replaced unless faulty. A product
presented for repair may be replaced by a
refurbished product of the same type rather
than being repaired. Refurbished parts may
be used to repair the product.
If a spare part is required under warranty it
will be shipped to the customer or retailer
at no charge.
In the event of a product or accessory being
replaced during the warranty period, the
guarantee on the replacement product or
accessory will expire 36 months for
household or domestic use (or 3 months for
commercial use) from the original purchase
date.

7
This warranty does not include or cover the
following:
• Defects caused by the product not being
used in accordance with instructions;
• Defects caused by accidental damage;
• Defects caused by misuse or negligent
handling of the product;
• Defects caused by the product not being
maintained or cleaned according to
instructions;
• Defects caused by being tampered with by
unauthorised persons;
• Defects which are normal or fair wear and
tear;
• Freight or any other costs incurred in
making a claim;
• Consumable items or accessories that by
their nature and limited lifespan require
periodic renewal (such as filters, seals,
blades or related accessories, such as
trays, racks or utensils);
• Products serviced or modified other than
by Cuisinart or an authorised Cuisinart
representative;
• To any claims made beyond 12 months if
the filament of the light bulb breaks i.e.
the light bulb has burned out;
• Exposure of the product to abnormally
corrosive conditions;
• Any product which has its serial number
or appliance plate removed or defaced;
• To any claims made beyond 3 months
from the date of purchase if the product
is used in commercial, industrial,
educational or rental applications; or
• To any claims made beyond 36 months
from the date of purchase if the product
is used in household or domestic
applications.
• Products purchased from any person who
is not a retailer serviced by Conair’s
authorised distributors, overseas retailers,
parallel importers or purchased second
hand.
The benefits given to you by our warranty
are in addition to other rights and remedies
under the Australian Consumer Law.
In Australia our goods come with
guarantees that cannot be excluded under
the Australian Consumer Law. You are
entitled to a replacement or refund for a
major failure and for compensation for any
other reasonably foreseeable loss or
damage. You are also entitled to have the
goods repaired or replaced if the goods fail
to be of acceptable quality and the failure
does not amount to a major failure.
Our goods also come with guarantees that
cannot be excluded under the New Zealand
Guarantees Act.
To make a warranty claim or spare part,
contact our customer service agents:
Cuisinart Australia
Ph: 1800 566 567
PO Box 146, Terrey Hills
NSW 2084 AUSTRALIA
Cuisinart New Zealand
Ph: 0800 456 546
YOU MUST provide your full name, address,
email and phone details. A copy of your
proof of purchase must be supplied.
You can contact Cuisinart Australia/New
Zealand via email at aus_cuisinart@conair.
com or through the “Contact Us” option on
the Cuisinart website www.cuisinart.com.au
The warranty contained in this document is
provided by:
Conair Australia Pty Ltd (ACN 068 492 044)
(Cuisinart)
18 Rodborough Rd,
Frenchs Forest, NSW 2086
Australia

8
Recipes
To help you get started with your new Freeze
Wand Ice Cream Maker, we have included a
few recipe ideas in this instruction manual.
For further recipe ideas and inspiration please
visit our website www.cuisinart.com.au.
Simple Vanilla Ice Cream ..................................8
Simple Chocolate Ice Cream ...........................8
Fresh Lemon Sorbet .......................................... 9
Flavoured Milkshake .......................................... 9
Slushie ...................................................................9
Simple Vanilla Ice Cream
70ml full cream milk
140ml thickened cream
50g caster sugar
1 tsp vanilla extract
1. Combine milk and sugar in a medium bowl.
Use a hand mixer (about 1 to 2 minutes on
a low speed) or whisk by hand until the
sugar is dissolved.
2. Stir in the thickened cream & vanilla
extract.
3. Pour the mixture into dessert cup. Ensure
the mixture is at, level and not over-
lled.
4. Cover and chill in the freezer for at least
24 hours. Make sure the temperature of
your freezer is set below -18 °C.
NOTE: Take the ice cream mixture out the
freezer 5-10 minutes before churning.
Simple Chocolate Ice Cream
70ml full cream milk
140ml thickened cream
2.5 tsp caster sugar
2 tsp brown sugar
20g cocoa powder
1 tsp vanilla extract
1. Combine the cocoa powder and sugars in a
medium bowl; stir with a whisk to remove
any lumps.
2. Add the milk and combine using a hand
mixer (about 1 to 2 minutes on a low
speed) or whisk by hand until the sugar is
dissolved.
3. Stir in the thickened cream & vanilla
extract.
4. Pour the mixture into dessert cup. Ensure
the mixture is at, level and not over-
lled.
5. Cover and chill in the freezer for at least
24 hours. Make sure the temperature of
your freezer is set below -18 °C.
NOTE: Take the ice cream mixture out the
freezer 5-10 minutes before churning.

9
Fresh Lemon Sorbet
60g sugar
120ml water
100ml freshly squeezed lemon juice
1 tsp nely chopped lemon zest
1. Combine the sugar and water in a medium
saucepan and bring to a boil over medium-
high heat.
2. Reduce heat to low and simmer without
stirring until the sugar dissolves, about 3
to 5 minutes. Allow to cool completely.
3. When cool, add the lemon juice and zest;
stir to combine.
4. Pour the mixture into dessert cup. Ensure
the mixture is at, level and not over-
lled.
5. Cover and chill in the freezer for at least
24 hours. Make sure the temperature of
your freezer is set below -18 °C.
NOTE: Take the sorbet mixture out the
freezer 5-10 minutes before churning.
Flavoured Milkshake
1 scoop your favourite ice cream
200ml full cream milk
1. Place your ice cream and milk into an
empty dessert container, ice cream rst.
2. Follow operating instructions using the
Milkshake setting.
NOTE: this recipe does not require pre-
freezing.
Slushie
330ml your favourite drink
1. Fill the dessert cup ¾ full with your
chosen drink (saving the remaining drink
for later)
2. Cover and chill in the freezer for at least
24 hours. Make sure the temperature of
your freezer is set below -18 °C.
NOTE: take the slushie mixture out the
freezer 10 minutes before churning.
3. Follow operating instructions using the
Slushie setting, processing once.
4. After the rst process, add the remaining
liquid to the MAX ll line and process
again. You can repeat the process until
your desired consistency is reached.
NOTE: you can also add more liquid to
the mixture after you have completed
processing for a less icy, longer slushie.
10
Notes:
11
Notes:

Scan to get started with
your new ice cream maker.
www.cuisinart.com.au
G IB-25/352
Version No: ICEFD10XA IB-25-352
Open Size: 210x296MM Fold Size:210x148MM
Number of Page: 12PP Saddle Stitiched
Materal: 105gsm Both side artpaper for whole book
Coating: Gloss varnishing in cover
Front Cover: 1C(BK)+1C(BK)
PDF version: ICEFD10XA IB-25-352(0.0)
Hugo Code: CEM 0834 IB-1-1 Operator:Lin
:PRI :tuceiD oguH
Hot Stamping:
Remark:
Spot UV: Embossing:
Front Inside: 1C(BK)+1C(BK)
Date: 08-Aug-2025
Co-ordlinator:
Scarlett
Hugo Description
Model No: ICEFD10XA Item:ICEFD10XA Manual