Bluetooth remote pairing (default pre-paired by factory):
Press the left and right buttons at the same time, let go when the indicator light ashes. Hold the
remote close to the turned on Projector. The indicator light ashes several times rapidly when
pairing is succesful.
Druk tegelijkertijd op de linker- en rechterknop, laat los wanneer het indicatielampje knippert. Houd
de afstandsbediening dicht bij de ingeschakelde projector. Het indicatielampje knippert meerdere
keren snel wanneer het koppelen is gelukt.
Appuyez simultanément sur les boutons gauche et droit, relâchez lorsque le voyant clignote. Tenez
la télécommande près du projecteur allumé. Le voyant clignote plusieurs fois rapidement lorsque
l’appairage est réussi.
Drücken Sie gleichzeitig die linke und rechte Taste und lassen Sie sie los, wenn die Kontrollleuchte
blinkt. Halten Sie die Fernbedienung nahe an den eingeschalteten Projektor. Die Kontrollleuchte blinkt
mehrmals schnell, wenn die Kopplung erfolgreich war.
Premere contemporaneamente i pulsanti sinistro e destro, rilasciare quando la spia lampeggia.
Tenere il telecomando vicino al proiettore acceso. L’indicatore luminoso lampeggia più volte rapida-
mente quando l’associazione ha esito positivo.
Presione los botones izquierdo y derecho al mismo tiempo, suéltelos cuando la luz indicadora
parpadee. Sostenga el control remoto cerca del proyector encendido. La luz indicadora parpadea
varias veces rápidamente cuando el emparejamiento es exitoso.
Tryck på vänster och höger knapp samtidigt, släpp när indikatorlampan blinkar. Håll fjärrkontrollen
nära den påslagna projektorn. Indikatorlampan blinkar era gånger snabbt när parningen är
framgångsrik.
Paina vasenta ja oikeaa painiketta samanaikaisesti, päästä irti, kun merkkivalo vilkkuu. Pidä
kaukosäädintä lähellä päälle kytkettyä projektoria. Merkkivalo vilkkuu useita kertoja nopeasti, kun
pariliitos on onnistunut.
Πατήστε το αριστερό και το δεξί κουμπί ταυτόχρονα, αφήστε το όταν αναβοσβήσει η ενδεικτική
λυχνία. Κρατήστε το τηλεχειριστήριο κοντά στον ενεργοποιημένο προβολέα. Η ενδεικτική λυχνία
αναβοσβήνει πολλές φορές γρήγορα όταν η σύζευξη είναι επιτυχής.
How to surf the internet:
Go to ‘setting’ > ‘network’ and select ‘WLAN’. Select a suitable Wi-Fi network and enter the password (refresh the page if your Wi-Fi network is
not listed).
Ga naar ‘instellingen’ > ‘netwerk ’ en selecteer ‘WLAN’. Selecteer een geschikt Wi-Fi-netwerk en voer het wachtwoord in (vernieuw de pagina
als uw Wi-Fi-netwerk niet wordt vermeld).
Allez dans « Paramètres » > « Paramètres sans l et réseau » et sélectionnez « WLAN ». Sélectionnez un réseau Wi-Fi approprié et entrez le mot de
passe (actualisez la page si votre réseau Wi-Fi n’est pas répertorié).
Gehen Sie zu „Einstellungen“ > „WLAN- und Netzwerkeinstellungen“ und wählen Sie „WLAN“. Wählen Sie ein geeignetes WLAN-Netzwerk aus und
geben Sie das Passwort ein (aktualisieren Sie die Seite, wenn Ihr WLAN-Netzwerk nicht aufgeführt ist).
Vai su “impostazioni” > “impostazioni wireless e di rete” e seleziona “WLAN”. Seleziona una rete Wi-Fi adatta e inserisci la password (aggiorna la
pagina se la tua rete Wi-Fi non è elencata).
Vaya a ‘conguración’ > ‘conguración inalámbrica y de red’ y seleccione ‘WLAN’. Seleccione una red Wi-Fi adecuada e ingrese la con-
traseña (actualice la página si su red Wi-Fi no está en la lista).
Gå till “inställningar” > “trådlösa och nätverksinställningar” och välj “WLAN”. Välj ett lämpligt Wi-Fi-nätverk och ange lösenordet (uppdatera sidan
EN:
NL:
FR:
DE:
IT:
ES:
SV:
FL:
EL:
EN:
NL:
FR:
DE:
IT:
ES:
SV:
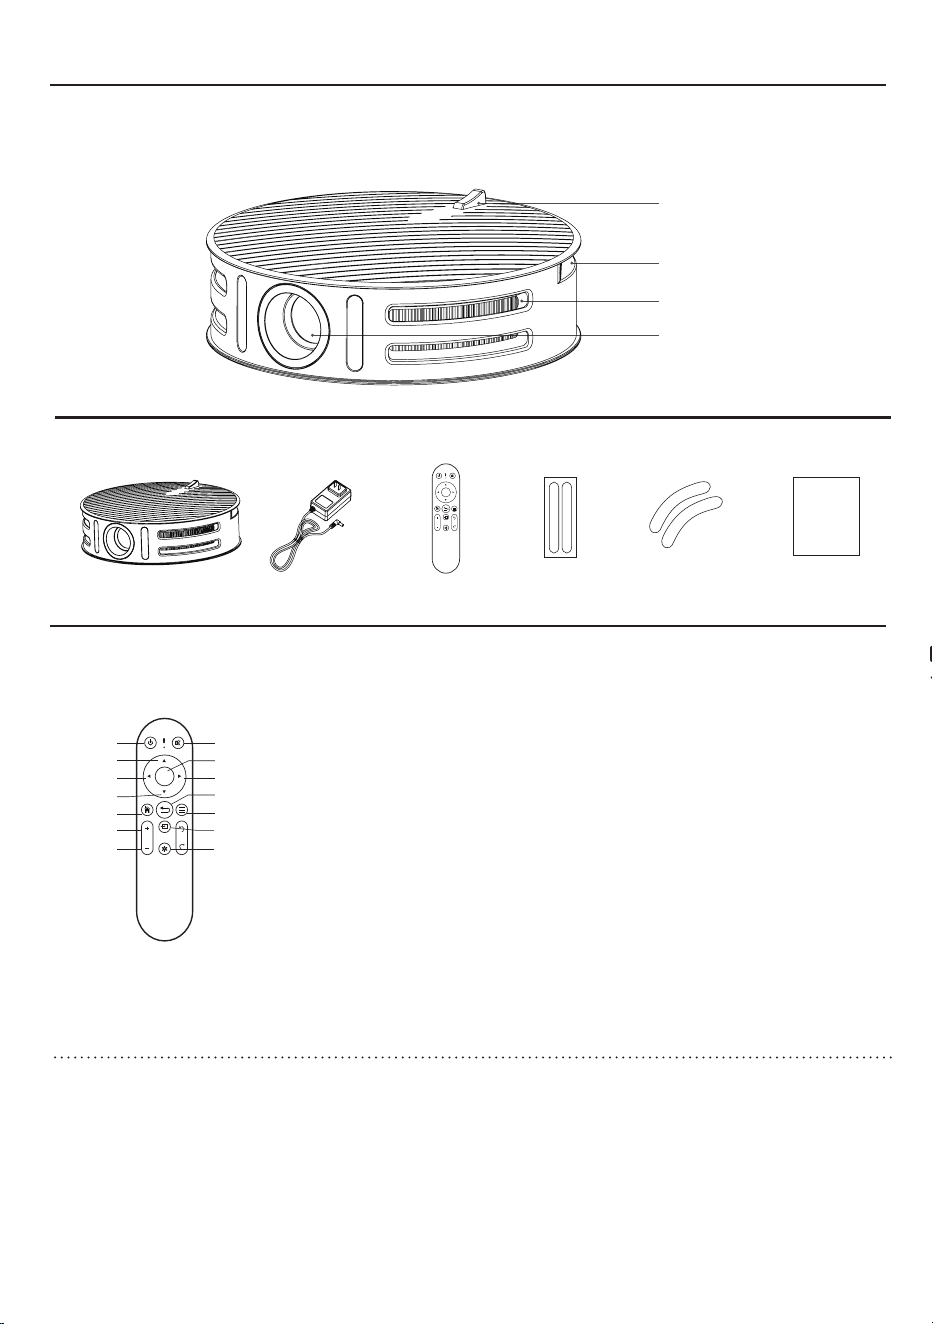
Mute
Enter
Right
Return
Menu
Input
Settings
Power
Up
Left
Down
Home
Volume +
Volume -
OK
VOL
F
F
OK
VOL
F
F
Connectivity ports
Fan in- and outlet
Lens
On/Off Switch
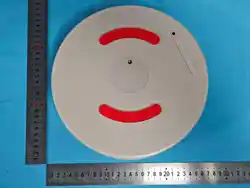
Projector Circle
Please read the instructions carefully before using this product.
Please keep this owner's manual for future reference, as it contains important information.
Manual
Product Overview
Package content
Usage
Manua
Projector Power adapter Remote control User manualStand Protective stickers

How to connect a Bluetooth accessory/speaker:
Go to ‘setting’ > ‘Bluetooth’ > ‘add accessory’ and select the bluetooth device that is already in pairing mode.
Ga naar ‘instellingen’ > ‘Bluetooth’ > ‘accessoire toevoegen’ en selecteer het bluetooth-apparaat dat al in de pairing modus staat.
Allez dans « Paramètres » > « Bluetooth » > « Ajouter un accessoire » et sélectionnez le périphérique Bluetooth qui est déjà en mode de couplage.
Gehen Sie zu „Einstellungen“ > „Bluetooth“ > „Zubehör hinzufügen“ und wählen Sie das Bluetooth-Gerät aus, das sich bereits im Kopplungsmodus
om ditt Wi-Fi-nätverk inte nns med i listan).
Siirry kohtaan “asetukset” > “langattomat ja verkkoasetukset” ja valitse “WLAN”. Valitse sopiva Wi-Fi-verkko ja anna salasana (päivitä sivu, jos
Wi-Fi-verkkosi ei ole luettelossa).
Μεταβείτε στις «Ρυθμίσεις» > «Ρυθμίσεις ασύρματου και δικτύου» και επιλέξτε «WLAN». Επιλέξτε ένα κατάλληλο δίκτυο Wi-Fi και εισαγάγετε τον
κωδικό πρόσβασης (ανανεώστε τη σελίδα εάν το δίκτυό σας Wi-Fi δεν εμφανίζεται στη λίστα).
How to use the projector as a Bluetooth speaker:
Go to ‘APPS’ > ‘My apps’ and select ‘BT Speaker’. On you (source/mobile) device, search and add a bluetooth device called Bluetooth speaker
EN:
NL:
FR:
bluetooth που ονομάζεται ηχείο Bluetooth (Q5_XXXX).
DE:
bendet.
IT:
Vai su “impostazioni” > “Bluetooth” > “aggiungi accessorio” e seleziona il dispositivo Bluetooth che è già in modalità di accoppiamento.
ES:
Vaya a ‘conguración’ > ‘Bluetooth’ > ‘agregar accesorio’ y seleccione el dispositivo bluetooth que ya está en modo de emparejamiento.
SV:
Gå till “inställning” > “Bluetooth” > “lägg till tillbehör” och välj den Bluetooth-enhet som redan är i parningsläge.
FL:
Siirry kohtaan “asetukset” > “Bluetooth” > “lisää lisälaite” ja valitse Bluetooth-laite, joka on jo pariliitostilassa.
EL:
Μεταβείτε στη «ρύθμιση» > «Bluetooth» > «προσθήκη αξεσουάρ» και επιλέξτε τη συσκευή bluetooth που βρίσκεται ήδη σε λειτουργία σύζευξης.
FL:
EL:
How to mirror/sync your Android/Apple phone screen:
note:
Υπάρχουν πολλοί τρόποι για να αντικατοπτρίσετε την οθόνη του τηλεφώνου σας, ανάλογα με την εφαρμογή που είναι εγκατεστημένη στον
προβολέα και τον τύπο του λειτουργικού συστήματος του τηλεφώνου. Στην ακόλουθη εξήγηση, υποθέτουμε ότι οι εφαρμογές «mircast» και «
airscreen» είναι προεγκατεστημένες στον προβολέα και ότι το τηλέφωνο και ο προβολέας είναι συνδεδεμένα στο ίδιο δίκτυο Wi-Fi.
EN:
There are numerous ways to mirror your phone screen, depending on the application installed on the projector and the type of phone operating
system. In the following explanation, we assume that the “mircast” and “airscreen” applications are pre-installed on the projector and that the
phone and the projector is connected to the same Wi-Fi network.
NL:
opmerking:
Er zijn talloze manieren om uw telefoonscherm te spiegelen, afhankelijk van de applicatie die op de projector is geïnstalleerd en het type
telefoonbesturingssysteem. In de volgende uitleg gaan we ervan uit dat de applicaties “mircast” en “airscreen” vooraf zijn geïnstalleerd op de
projector en dat de telefoon en de projector zijn verbonden met hetzelfde Wi-Fi-netwerk.
FR:
note:
Il existe de nombreuses façons de reéter l’écran de votre téléphone, en fonction de l’application installée sur le projecteur et du type de
système d’exploitation du téléphone. Dans l’explication suivante, nous supposons que les applications « mircast » et « airscreen » sont
préinstallées sur le projecteur et que le téléphone et le projecteur sont connectés au même réseau Wi-Fi.
DE:
Notiz:
Esistono numerosi modi per eseguire il mirroring dello schermo del telefono, a seconda dell’applicazione installata sul proiettore e del tipo di
sistema operativo del telefono. Nella seguente spiegazione, presupponiamo che le applicazioni “mircast” e “airscreen” siano preinstallate sul
proiettore e che il telefono e il proiettore siano collegati alla stessa rete Wi-Fi.
ES:
Abhängig von der auf dem Projektor installierten Anwendung und der Art des Telefonbetriebssystems gibt es zahlreiche Möglichkeiten, den
Bildschirm Ihres Telefons zu spiegeln. In der folgenden Erklärung gehen wir davon aus, dass die Anwendungen “mircast” und “airscreen” auf
dem Projektor vorinstalliert sind und dass das Telefon und der Projektor mit demselben Wi-Fi-Netzwerk verbunden sind.
IT:
Nota:
nota:
Existen numerosas formas de reejar la pantalla de su teléfono, según la aplicación instalada en el proyector y el tipo de sistema operativo
del teléfono. En la siguiente explicación, asumimos que las aplicaciones “mircast” y “airscreen” están preinstaladas en el proyector y que el
teléfono y el proyector están conectados a la misma red Wi-Fi.
SV:
notera:
Det nns många sätt att spegla din telefonskärm, beroende på vilket program som är installerat på projektorn och vilken typ av
telefonoperativsystem. I följande förklaring antar vi att applikationerna “mircast” och “airscreen” är förinstallerade på projektorn och att
telefonen och projektorn är anslutna till samma Wi-Fi-nätverk.
FL:
Huomautus:
On olemassa lukuisia tapoja peilata puhelimen näyttöä projektoriin asennetun sovelluksen ja puhelimen käyttöjärjestelmän tyypin mukaan.
Seuraavassa selityksessä oletamme, että “mircast”- ja “airscreen”-sovellukset on esiasennettu projektoriin ja että puhelin ja projektori on
yhdistetty samaan Wi-Fi-verkkoon.
EL:
Σημείωση:
- Mirror/sync with Android:
EN:
On the projector go to “APPS: and select “mircast”. On your mobile device scan the EShareServer QR code, you might need to install the
software when using it for the rst time, and select the mircast ID number to start mirroring.
NL:
Ga op de projector naar ‘APPS’ en selecteer “mircast”. Scan op uw mobiele apparaat de EShareServer QR-code. Mogelijk moet u de software
installeren wanneer u deze voor de eerste keer gebruikt, en selecteert u het mircast-ID-nummer om te beginnen met spiegelen.
FR:
Sur le projecteur, allez dans « APPS » et sélectionnez « mircast ». Sur votre appareil mobile, scannez le code QR mircast, vous devrez peut-
être installer le logiciel lors de sa première utilisation et sélectionnez le numéro d’identication de l’appareil mircast démarrer la mise en miroir.
DE: Gehen Sie auf dem Projektor zu „APPS“ und wählen Sie “mircast”. Scannen Sie auf Ihrem Mobilgerät den mircast-QR-Code.
EN:
(Q5_XXXX).
NL:
Ga naar ‘APPS’ > ‘Mijn apps’ en selecteer ‘BT Speaker’. Zoek op uw (bron/mobiele) apparaat een Bluetooth-apparaat met de naam Bluetooth-
luidspreker (Q5_XXXX) en voeg het toe.
FR:
Allez dans « APPLICATIONS » > « Mes applications » et sélectionnez « BT Speaker ». Sur votre appareil (source/mobile), recherchez et ajoutez un
appareil Bluetooth appelé haut-parleur Bluetooth (Q5_XXXX).
DE:
Gehen Sie zu „APPS“ > „Meine Apps“ und wählen Sie „BT Speaker“. Suchen Sie auf Ihrem (Quell-/Mobilgerät) Gerät ein Bluetooth-Gerät namens
Bluetooth-Lautsprecher (Q5_XXXX) und fügen Sie es hinzu.
IT:
Vai su “APP” > “Le mie app” e seleziona “Altoparlante BT”. Sul tuo dispositivo (sorgente/mobile), cerca e aggiungi un dispositivo Bluetooth
llamado altavoz Bluetooth (Q5_XXXX).
SV:
chiamato altoparlante Bluetooth (Q5_XXXX).
ES:
Vaya a ‘APLICACIONES’ > ‘Mis aplicaciones’ y seleccione ‘Altavoz BT’. En su dispositivo (fuente/móvil), busque y agregue un dispositivo bluetooth
Gå till “APPS” > “Mina appar” och välj “BT Speaker”. På din (källa/mobil) enhet, sök och lägg till en bluetooth-enhet som heter Bluetooth-
kaiutin (Q5_XXXX).
EL:
högtalare (Q5_XXXX).
FL:
Siirry kohtaan SOVELLUKSET > Omat sovellukset ja valitse BT Speaker. Hae ja lisää omalla (lähde-/mobiili)laitteella Bluetooth-laite nimeltä Bluetooth-
Μεταβείτε στις «APPS» > «Οι εφαρμογές μου» και επιλέξτε «BT Speaker». Στη συσκευή σας (πηγή/κινητό), αναζητήστε και προσθέστε μια συσκευή
EN: Correct disposal of the products. Within the European Union, this symbol indicates that the products must not be disposed in the household waste.
Devices contain valuable recyclable materials that should be recycled for reuse and uncontrolled waste disposal may cause harm to the environment
and human health. Please dispose the old products via suitable collection systems or send the unit to the ofce where you bought it. This will make the
product recycling.
DE: Korrekte Entsorgung dieses Produkts Innerhalb der EU weist dieses Symbol darauf hin, dass dieses Produkt nicht über den Hausmüll entsorgt werden darf.
Altgeräte enthalten wertvolle recyclingfähige Materialien, die einer Wiederverwertung zugeführt werden sollten und um der Umwelt bzw. der menschlichen
Gesundheit nicht durch unkontrollierte Müllbeseitigung zu schaden. Bitte entsorgen Sie Altgeräte deshalb über geeignete Sammelsysteme oder senden Sie
das Gerät zur Entsorgung an die Stelle, bei der Sie es gekauft haben. Diese wird dann das Gerät der stofichen Verwertung zuführen.
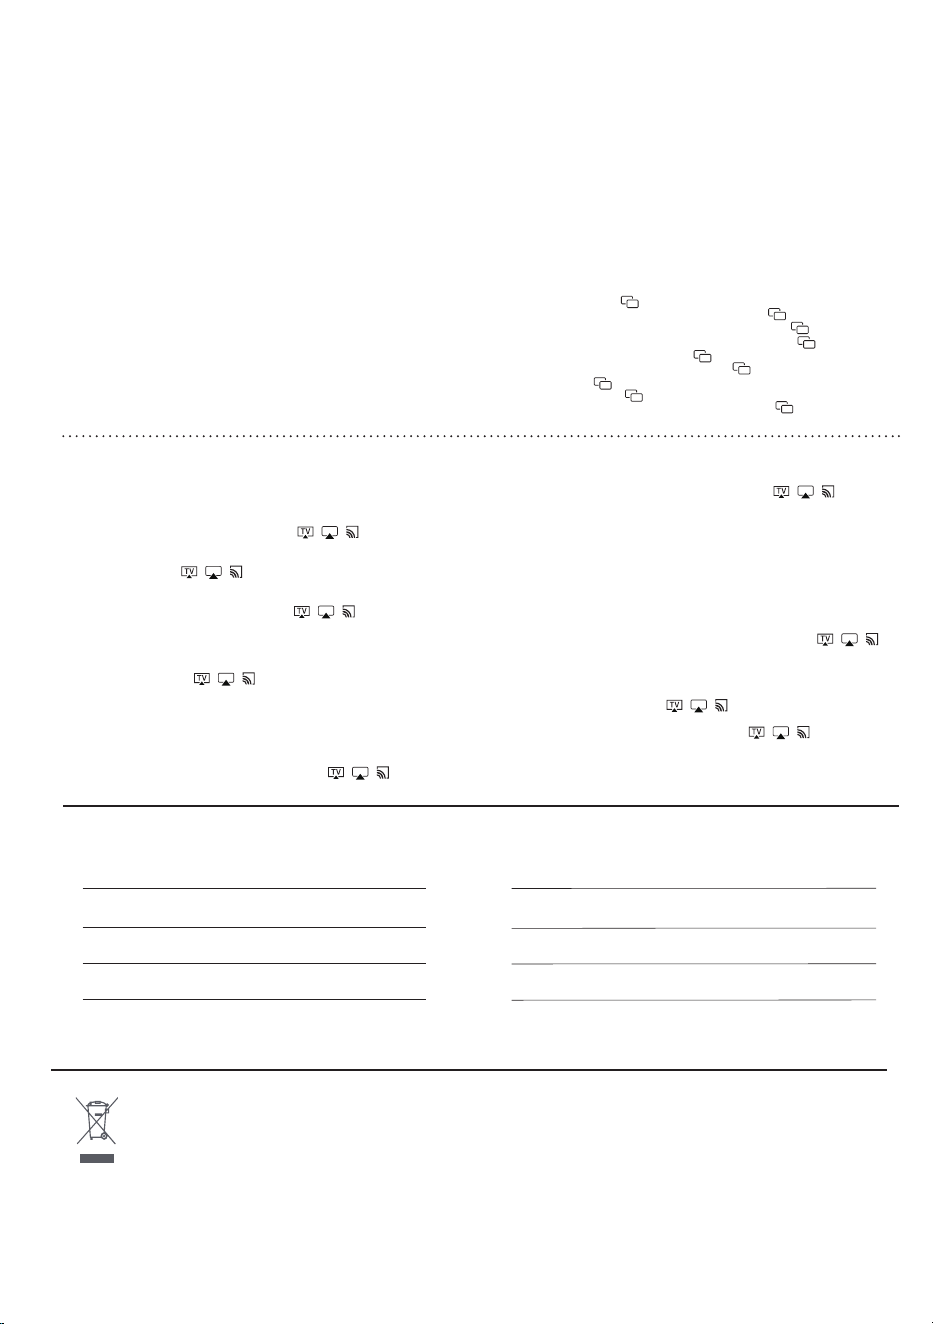
How to Screen cast with Android/iPhone (Miracast):
Make sure the phone and the projector is connected to the same Wi-Fi network. On the projector go to ‘APPS’ and select ‘Miracast’. On your
mobile device, select the screencast icon to nd your projector name. The icon can look as follows depening on the software:
Zorg ervoor dat de telefoon en de projector met hetzelfde Wi-Fi-netwerk zijn verbonden. Ga op de projector naar ‘APPS’ en selecteer
‘Miracast’. Selecteer op uw mobiele apparaat het screencast-pictogram om de naam van uw projector te vinden. Afhankelijk van de software
kan het pictogram er als volgt uitzien:
Assurez-vous que le téléphone et le projecteur sont connectés au même réseau Wi-Fi. Sur le projecteur, allez dans « APPS » et sélectionnez «
Miracast ». Sur votre appareil mobile, sélectionnez l’icône screencast pour trouver le nom de votre projecteur. L’icône peut ressembler à ceci
selon le logiciel:
Stellen Sie sicher, dass das Telefon und der Projektor mit demselben Wi-Fi-Netzwerk verbunden sind. Gehen Sie auf dem Projektor zu „APPS“ und
wählen Sie „Miracast“. Wählen Sie auf Ihrem Mobilgerät das Screencast-Symbol aus, um den Namen Ihres Projektors zu nden. Das Symbol kann
je nach Software wie folgt aussehen:
Assicurati che il telefono e il proiettore siano connessi alla stessa rete Wi-Fi. Sul proiettore vai su “APPS” e seleziona “Miracast”. Sul tuo dispositivo
mobile, seleziona l’icona screencast per trovare il nome del tuo proiettore. L’icona può apparire come segue a seconda del software:
Asegúrese de que el teléfono y el proyector estén conectados a la misma red Wi-Fi. En el proyector, vaya a “APPS” y seleccione “Miracast”.
En su dispositivo móvil, seleccione el ícono de screencast para encontrar el nombre de su proyector. El icono puede tener el siguiente aspecto
según el software:
Se till att telefonen och projektorn är anslutna till samma Wi-Fi-nätverk. Gå till ‘APPS’ på projektorn och välj ‘Miracast’. På din mobila enhet väljer
du screencast-ikonen för att hitta ditt projektornamn. Ikonen kan se ut så här beroende på programvaran:
Varmista, että puhelin ja projektori on yhdistetty samaan Wi-Fi-verkkoon. Siirry projektorissa kohtaan “APPS” ja valitse “Miracast”. Valitse
mobiililaitteessasi screencast-kuvake löytääksesi projektorin nimen. Kuvake voi näyttää seuraavalta ohjelmistosta riippuen:
Βεβαιωθείτε ότι το τηλέφωνο και ο προβολέας είναι συνδεδεμένα στο ίδιο δίκτυο Wi-Fi. Στον προβολέα μεταβείτε στο «APPS» και επιλέξτε
«Miracast». Στην κινητή συσκευή σας, επιλέξτε το εικονίδιο προβολής οθόνης για να βρείτε το όνομα του προβολέα σας. Το εικονίδιο μπορεί να
φαίνεται ως εξής, ανάλογα με το λογισμικό:
EN:
NL:
FR:
DE:
IT:
ES:
SV:
FL:
EL:
Möglicherweise müssen Sie die Software installieren, wenn Sie sie zum ersten Mal verwenden, und die mircast-ID-Nummer auswählen, um
mit der Spiegelung zu beginnen.
- Mirror/sync with iPhone:
EN:
On the projector go to ‘APPS’ and select ‘airscreen’. On your iPhone select the screen mirroring
IT:
DE:
NL:
Ga op de projector naar ‘APPS’ en selecteer ‘airscreen’. Selecteer op uw iPhone het pictogram voor schermspiegeling:
FR:
Sur le projecteur, allez dans « APPS » et sélectionnez « airscreen ». Sur votre iPhone, sélectionnez l’icône de mise en miroir d’écran:
Gehen Sie auf dem Projektor zu „APPS“ und wählen Sie „airscreen“. Wählen Sie auf Ihrem iPhone das Bildschirmspiegelungssymbol:
Sul proiettore vai su “APPS” e seleziona “airscreen”. Sul tuo iPhone seleziona l’icona del mirroring dello schermo:
SV:
ES:
En el proyector, vaya a “APPS” y seleccione “airscreen”. En tu iPhone selecciona el ícono de duplicación de pantalla:
Gå till ‘APPS’ på projektorn och välj ‘airscreen’. Välj ikonen för skärmspegling på din iPhone:
FL:
Mene projektorissa kohtaan “APPS” ja valitse “airscreen”. Valitse iPhonessasi näytön peilauskuvake:
EL:
Στον προβολέα μεταβείτε στο «APPS» και επιλέξτε «airscreen». Στο iPhone σας επιλέξτε το εικονίδιο αντικατοπτρισμού οθόνης:
IT: Sul proiettore andare su “APPS” e selezionare “mircast”. Sul tuo dispositivo mobile scansiona il codice QR di mircast, potrebbe essere
necessario installare il software quando lo usi per la prima volta e seleziona il numero ID del dispositivo mircast avviare il mirroring.
ES: En el proyector, vaya a “APPS” y seleccione “mircast”. En su dispositivo móvil, escanee el código QR de mircast; es posible que
Στον προβολέα πηγαίνετε στο “APPS” και επιλέξτε “mircast”. Στην κινητή συσκευή σας σαρώστε τον κωδικό QR του mircast
necesite instalar el software cuando lo use por primera vez y seleccionar el número de identicación del dispositivo mircast comenzar a
SV: duplicar.Gå till “APPS” på projektorn och välj “mircast”. Skanna mircast QR-kod på din mobila enhet, du kan behöva installera
programvaran
FL: när du använder den för första gången och välj EShare-enhetens ID-nummer för att börja spegla.
Mene projektorissa kohtaan “APPS” ja valitse “mircast”. Skannaa mobiililaitteellasi mircast QR-koodi, saatat joutua asentamaan
EL: ohjelmiston, kun käytät sitä ensimmäistä kertaa, ja valitsemalla Eshare-laitteen tunnusnumero aloittaaksesi peilaus.
, ίσως
χρειαστεί να εγκαταστήσετε το λογισμικό όταν το χρησιμοποιείτε για πρώτη φορά και να επιλέξετε τον αριθμό αναγνωριστικού συσκευής mircast
για να ξεκινήσει ο κατοπτρισμός.
Product Specications
Brightness 150 ANSI Lumens Inputs 1x USB, HDMI, AV
Resolution 1280x720dpi Outputs Aux 3.5mm
Contrast 1300:1 Speaker output 4Ω,5W
Projection Ratio 1.4:1 Dimensions Ø242*85(H)mm
Aspect Ratio 16:9 - 4:3 Power consumption 63W
Warnings and Safety precautions
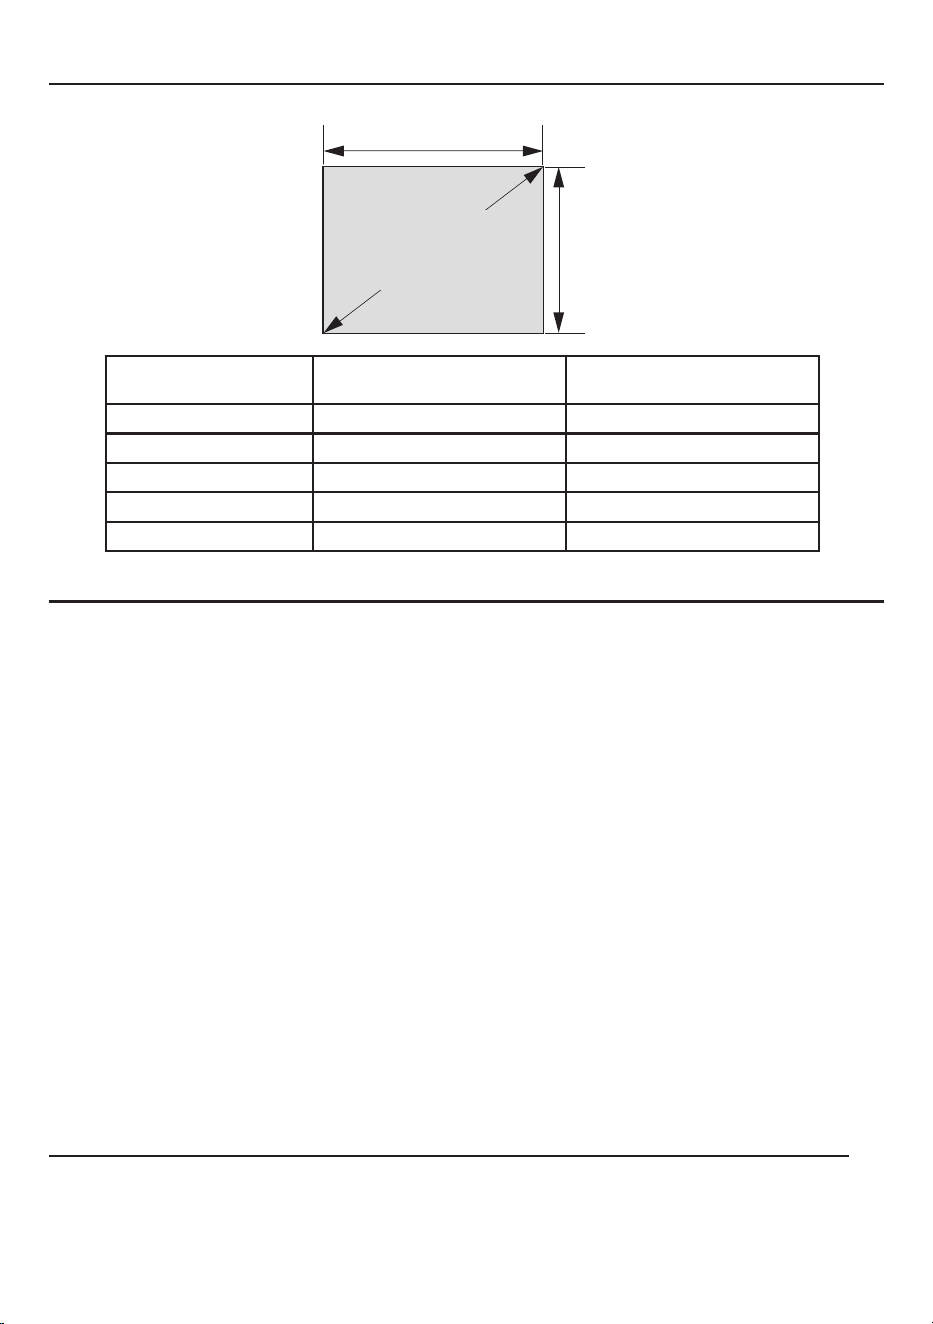
Distance and screen size
•Be sure to use the supplied poweradapter of the device. Improper use of different power adapters will cause
serious damage to the device;
•If you do not use the device for a long time, please make sure to turn off the power switch;
•Please avoid particles entering or blocking the air outlet at the fan outlet;
•When the device is operating, please do not turn off the power directly;
•When connecting an external device with a large power consumption, please conrm whether the power
consumption can support it;
•Do not open the device;
•Do not look directly into the lens;
•Do not expose this unit to water or moisture;
•Do not install in hot and humid places;
•Do not install in poorly ventilated places;
•Do not install in dusty and smoky places;
• Do not block ventilation holes (inlet or outlet);
•Position the device at least 30cm away from any obstacle, ceiling and wall;
•After this product is scrapped, it should be treated as waste electrical and electronic products, and the
corresponding
waste electronic products should be recycled.
This product is not suitable for the disposal of ordinary garbage.
Screen size (diagonal)
Width
Height
Projection distance
(m)
Screen size Widht x Height
(cm)
Screen size Diagonal
(inch)
1.0 76.5 x 43.5 35
1.5 116 x 65 52
2.0 157 x 88 69
2.5 198 x 113 90
3.0 236 x 133 106

FCC STATEMENT
1. This device complies with Part 15 of the FCC Rules. Operation is subject to the following two conditions:
(1) This device may not cause harmful interference, and
(2) This device must accept any interference received, including interference that may cause undesired
operation.
2. Changes or modifications not expressly approved by the party responsible for compliance could void the user's
authority to operate the equipment.
NOTE: This equipment has been
tested and found to comply with the limits for a Class B digital device, pursuant to
Part 15 of the FCC Rules. These limits are designed to provide reasonable protection against harmful interference in
a residential installation.
This equipment generates uses and can radiate radio frequency energy and, if not installed and used in
accordance with the instructions, may cause harmful interference to radio communications. However, there is no
guarantee that interference
will not occur in a particular installation. If this equipment does cause harmful
interference to radio or television reception, which can be determined by turning the equipment off and on, the
user is encouraged to try to correct the interference by one or more of the following measures:
Reorient or relocate the receiving antenna.
Increase the separation between the equipment and receiver.
Connect the equipment into an outlet on a circuit different from that to which the receiver is connected.
Consult the dealer or an experienced radio/TV technician for help.
FCC Radiation Exposure Statement
This equipment complies with FCC radiation exposure limits set forth for an uncontrolled environment. This
equipment should be installed and operated with minimum distance 20cm between the radiator & your body