THANK YOU
We appreciate the trust and confidence you have placed in Home Decorators Collection through the purchase of this ceiling fan.
We strive to continually create quality products designed to enhance your home. Visit us online to see our full line of products available for your
home improvement needs. Thank you for choosing Home Decorators Collection!
Item #1001992100
Model #MX999709-1A-B
USE AND CARE GUIDE
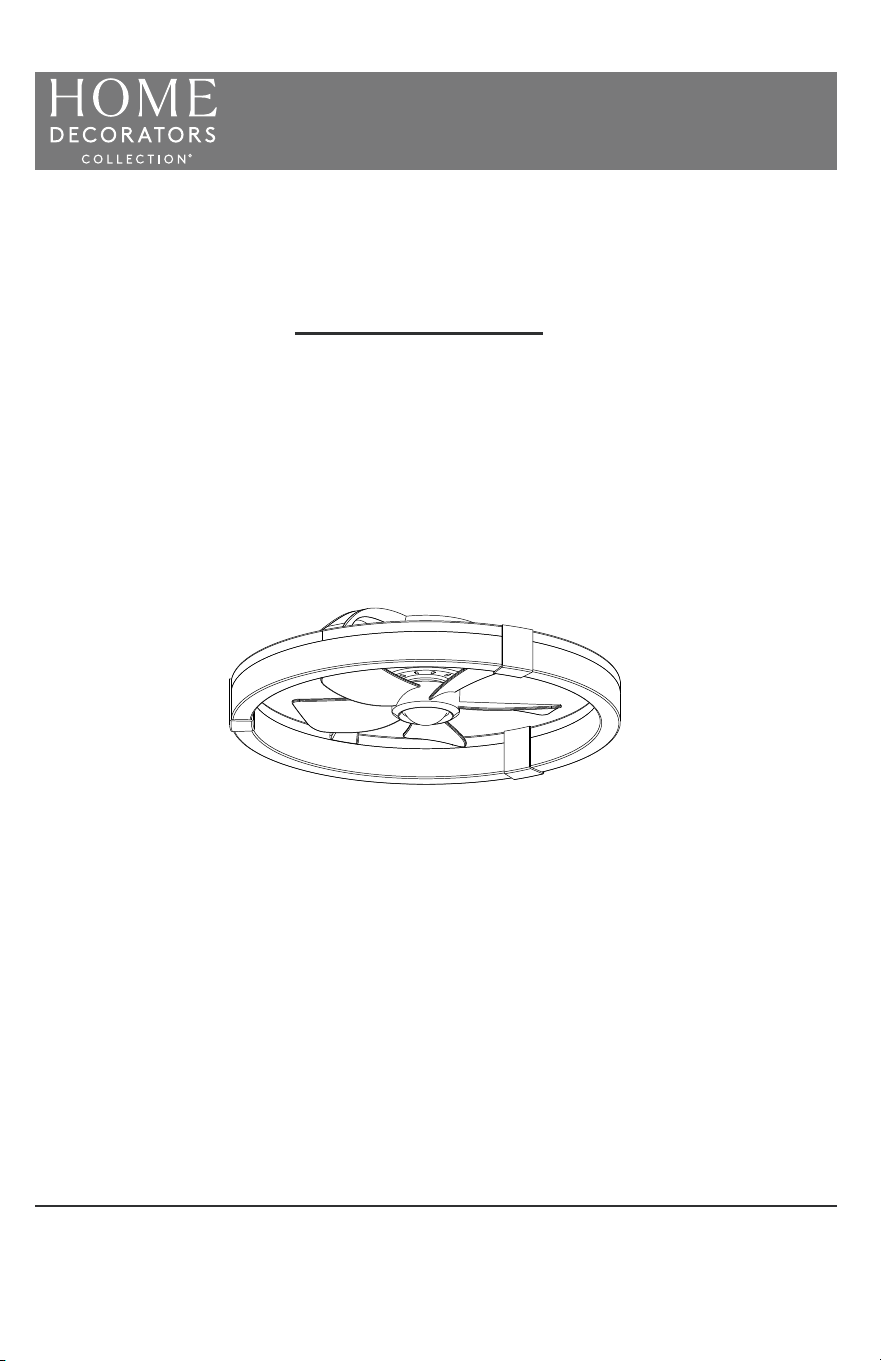
20 IN LED INDOOR CEILING FAN
M
Questions, problems, missing parts? Before returning to the store,
call Home Decorators Collection Customer Service
a.m. - 7 p.m., EST, Monday - Friday, 9 a.m. - 6 p.m., EST, Saturday
1-800-986-3460
WWW.HOMEDEPOT.CA
Fan
LOW
MED
HIGH
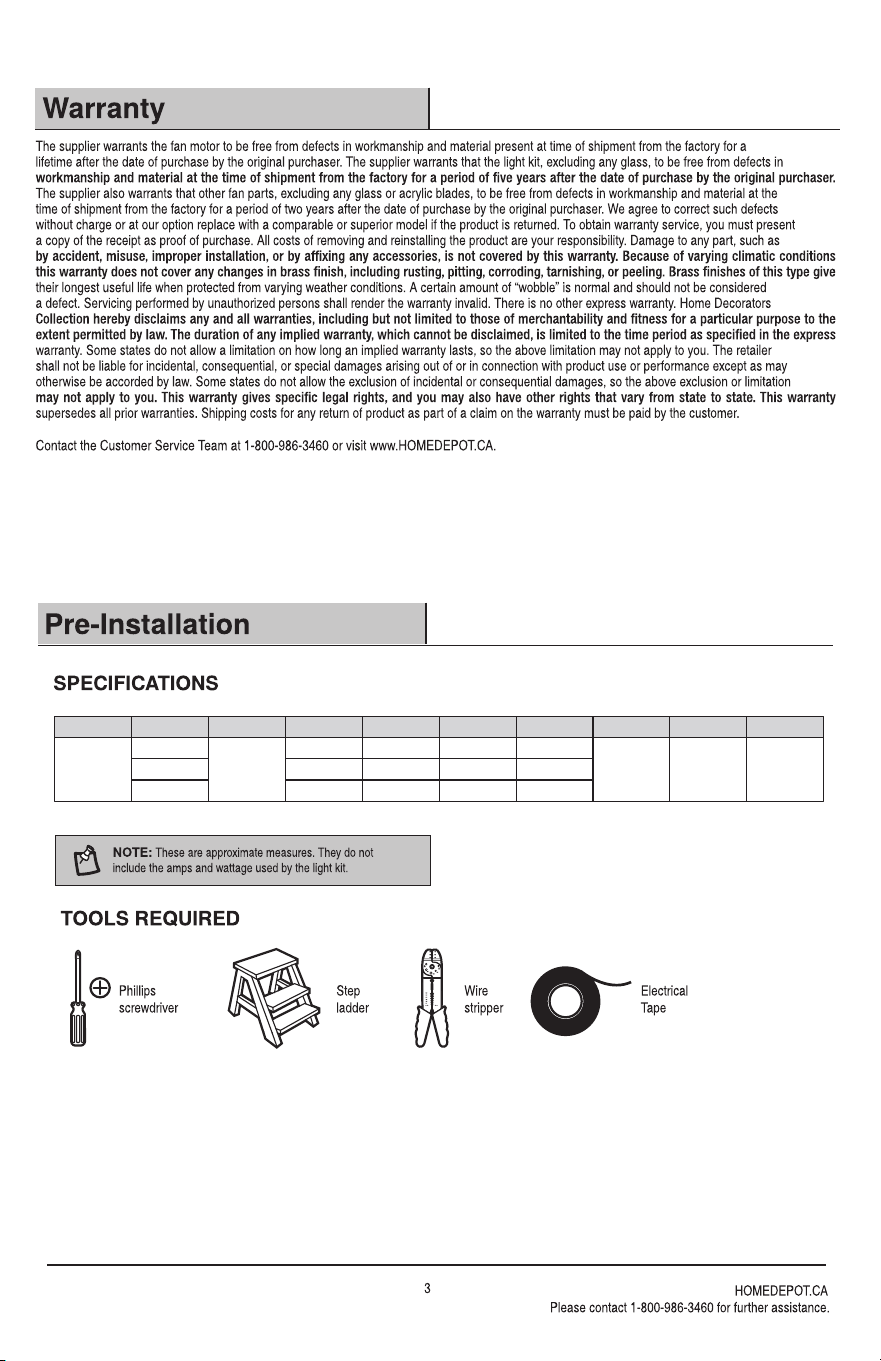
size Watt s RPM CFMSpeed Volt s Amp s
Net Wt
Gross Wt
Cubic Ft
20in. 120
0.053
0.071
0.088
2.1
3.3
4.4
524
657
756
345
420
510
4.4lbs
(2kgs)
8.2lbs
(3.72kgs)
1.79 ’
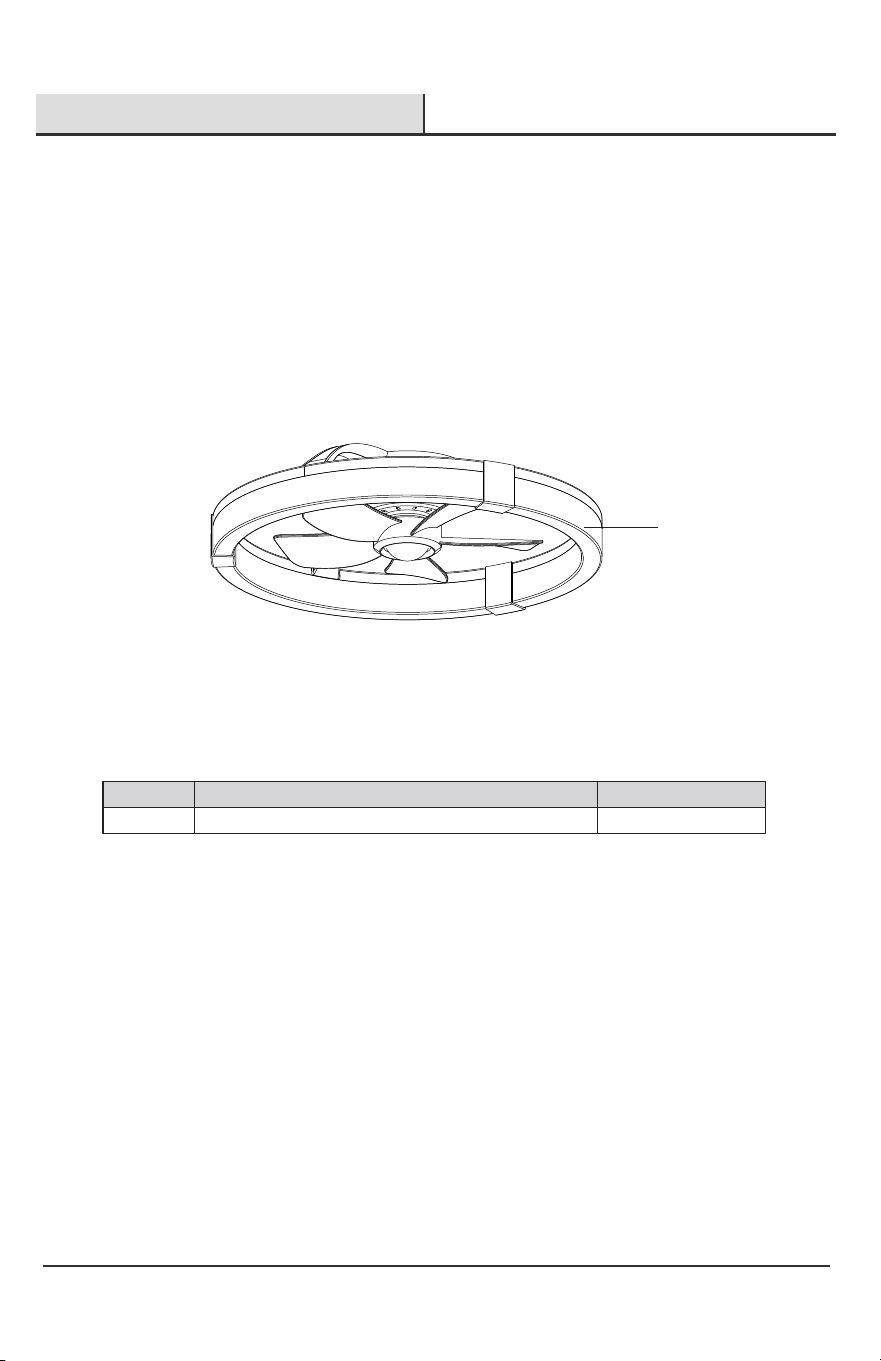
PACKAGE CONTENTS
5
Pre-Installation (continued)
A
HOMEDEPOT.CA
Please contact 1-800-986-3460 for further assistance.
A Fixture body
1
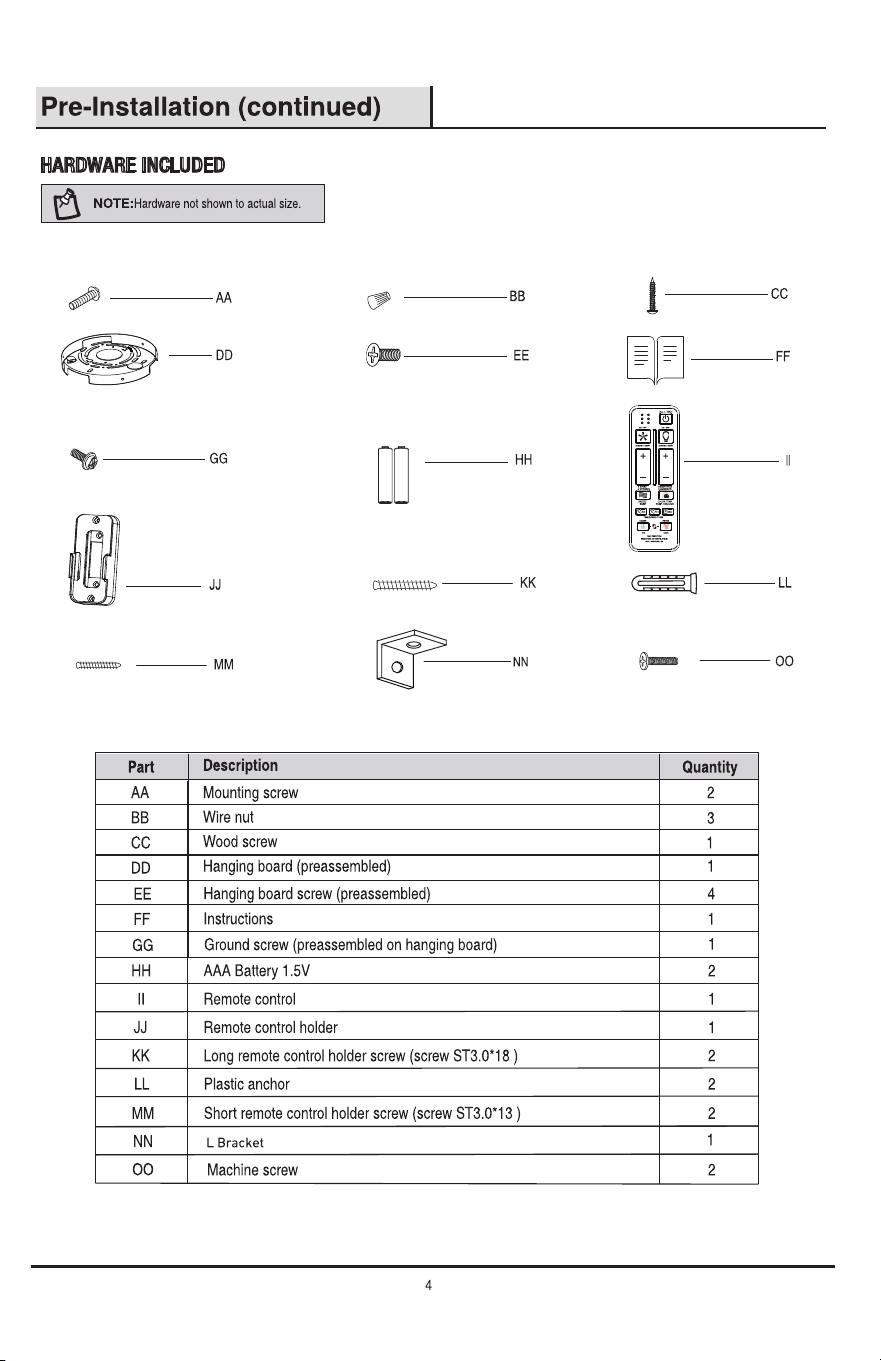
Part
Description
Quantity
Installation - Standard Ceiling Mount
NOTE
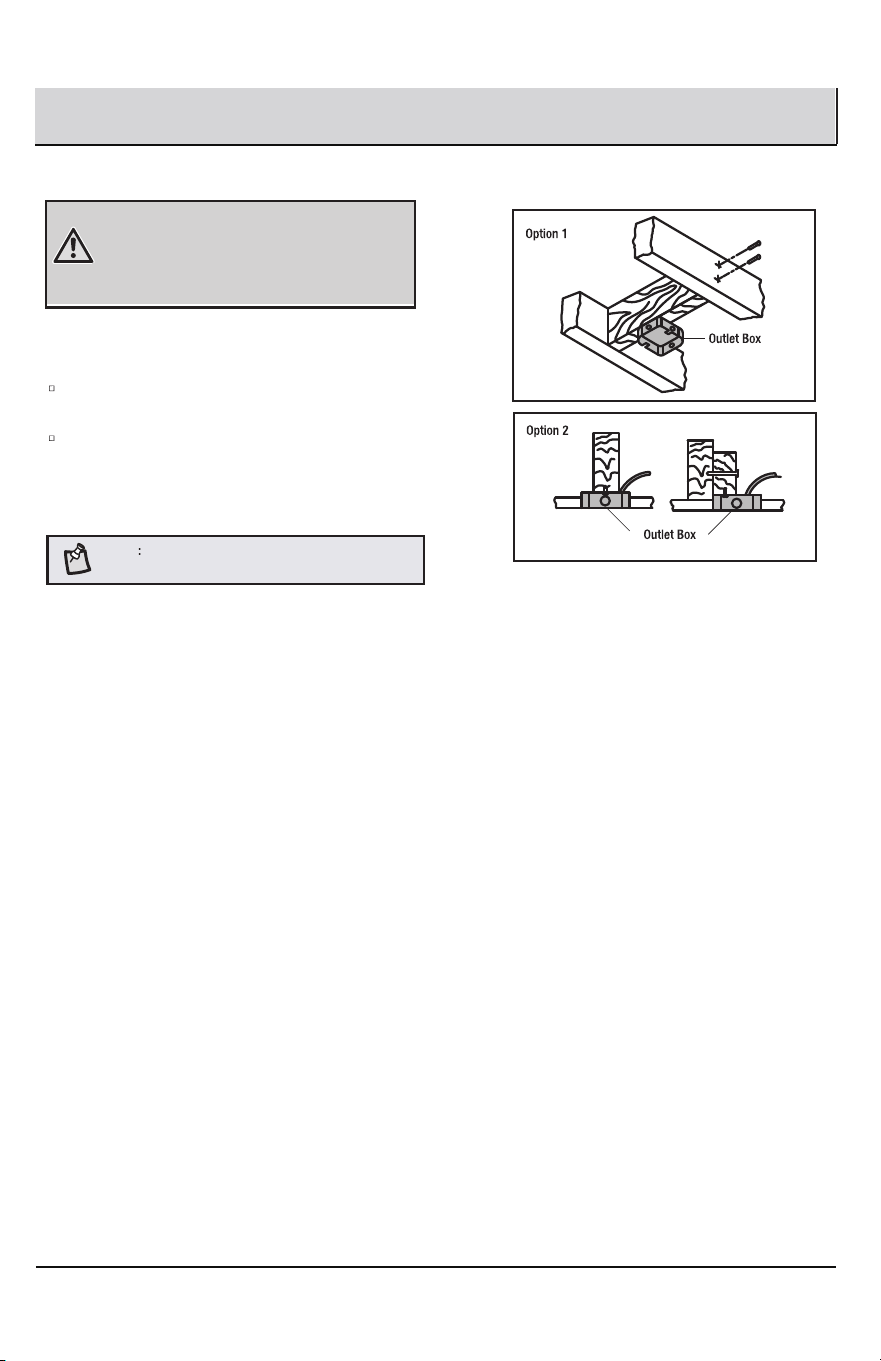
MOUNTING OPTIONS
WARNING:To reduce the risk of fire, electric shock, or
personal injury, mount to an outlet box marked “acceptable
for fan support of 15.9 kg (35lbs) or less”. An outlet box
commonly used for the support of lighting fixtures may not
be acceptable for fan support and may need to be
replaced. If in doubt, consult a qualified electrician.
If your ceiling fan does not have an existing UL-listed
mounting box, then install one using the following instructions:
Disconnect the power by removing the fuses or turning
off the circuit breakers.
Secure the outlet box (not included) directly to the
building structure. Use appropriate fasteners and
materials (not included). The outlet box and its bracing
must be able to fully support the weight of the moving
fan at least 15.9 kgs (35 lbs). Do not use a plastic outlet box.
The illustrations on the right show two different
ways to mount the outlet box (not included).
6
7
HOMEDEPOT.CA
Please contact 1-800-986-3460 for further assistance.
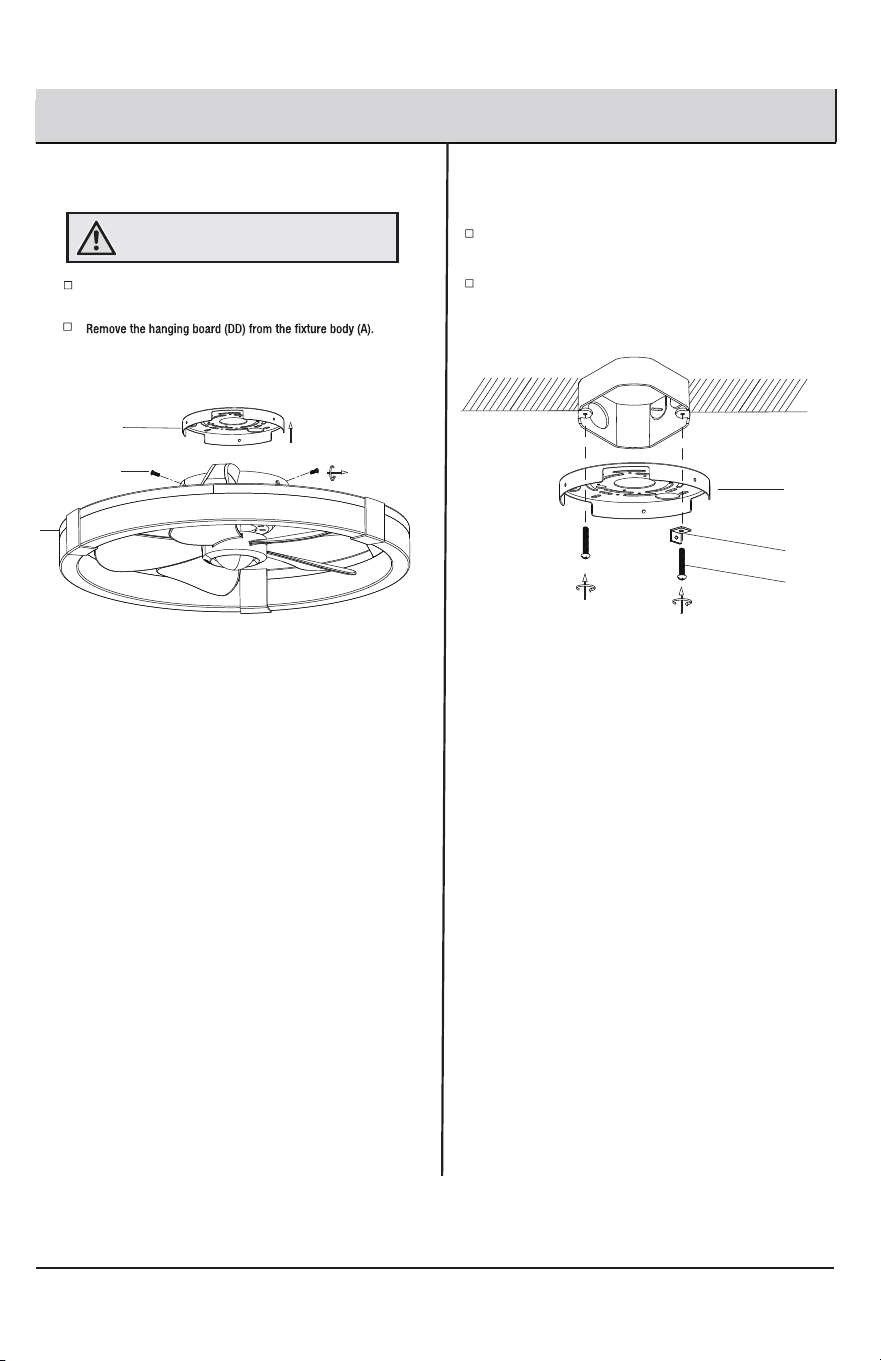
Unlock the hanging board screws (EE) from the hanging
board (DD).
1 2
Routing the wires Installing the hanging board
WARNING: Make sure power is off before attempting
installation.
Place the L bracket (NN) onto the mounting screws (AA) supplied
with your current output box.
Secure the hanging board (DD) to the outlet box (not included) with
the two mounting screws (AA) provided with your outlet box.
Installation - Standard Ceiling Mount (continued)
7
HOMEDEPOT.CA
Please contact 1-800-986-3460 for further assistance.
Unlock the hanging board screws (EE) from the hanging
board (DD).
1 2
DD
AA
NN
OO
Routing the wires Installing the hanging board
WARNING: Make sure power is off before attempting
installation.
DD
EE
A
Place the spring washers (OO) and the metal
washers (NN) onto the mounting screws (AA)
provided with your outlet box.
Installation - Standard Ceiling Mount (continued)
DD
AA
DD
EE
A
NN
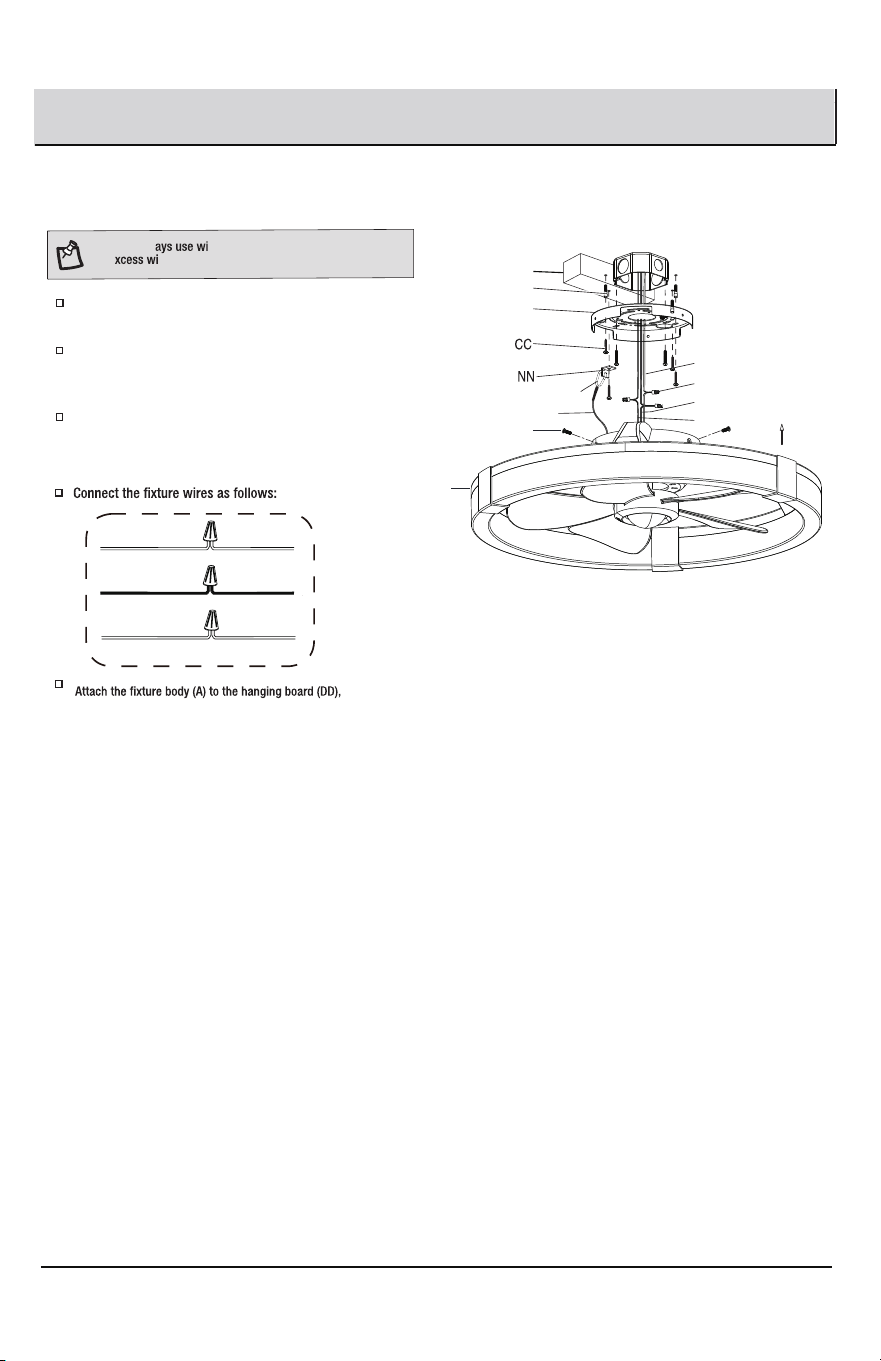
Making the electrical connections and installing the ceiling fan assembly
8
NOTE: Alw
all e
re nuts (BB) to connect wires and push
res and connections back into the outlet box.
and secure it with the hanging board screws (EE).
WHITE WIRE
FROM FIXTURE
WHITE WIRE
FROM HOUSE
BLACK WIRE
FROM FIXTURE
BLACK WIRE
FROM HOUSE
GROUND WIRE
FROM FIXTURE
GROUND WIRE
FROM HOUSE
Hanging buckle
Wood ceiling
Safety wire
Installation - Standard Ceiling Mount (continued)
Making the electrical connections and installing the ceiling fan assembly
8
NOTE: Alw
all e
re nuts (BB) to connect wires and push
res and connections back into the outlet box.
and secure it with the hanging board screws (EE).
WHITE WIRE
FROM FIXTURE
WHITE WIRE
FROM HOUSE
BLACK WIRE
FROM FIXTURE
BLACK WIRE
FROM HOUSE
GROUND WIRE
FROM FIXTURE
GROUND WIRE
FROM HOUSE
hanging board (DD).
Pass the safety wire through the hanging board (DD),
Connect the receiver green wire, the hanging board
(DD) green wire, and the motor green wire to the
GND
EE
Hanging buckle
BB
DD
Wood ceiling
Safety wire
NN
CC
White
Green
Black
A
Installation - Standard Ceiling Mount (continued)
BB
DD
EE
A
Green
Black
Attach the suspension loop of the luminaire body (A) to the
suspension panel (DD).
Route the safety wire through the suspension panel (DD),
then securely fasten the safety wire to the ceiling using the
wood screw (CC).
Connect the green wire of the receiver, the green wire of the
suspension panel (DD) and the green wire of the motor to the
house grounding wires using a wire nut (BB). Secure the wire
nuts with UL/CSA listed insulating tape.
OO
OO
OO
OO