THE INSTALLATION GUIDE IS FOR REFERENCE ONLY. PLEASE REFER T0
THE VEHICLE’S SERVICE MANUAL OR A PROFESSIONAL INSTALLER FOR
COMPLETE INSTRUCTIONS AND GUIDANCE.
Brakes are one of the most critical
components of your vehicle. Ensuring your
brake pads and rotors are in good condition,
and replacing them when necessary, can
significantly improve stopping power, safety,
and overall vehicle performance. It’s essential
to check for uneven wear and corrosion on the
brake rotor to maintain optimal brake
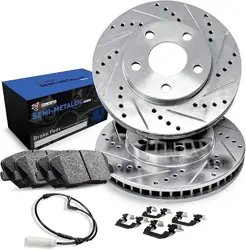
performance. R1 Concepts offers high-quality
brake pads and rotors designed for everything
from daily driving to high-performance
applications. In this comprehensive guide, we’ll
walk you through how to install new R1
Concepts brake pads and rotors on your
vehicle, providing all the necessary steps, tips,
and safety precautions.
Why Choose R1 Concepts Brake Pads
and Rotors?
R1 Concepts is renowned for producing high-quality
brake pads and rotors designed to enhance braking
performance across various driving styles, including
daily commuting, towing, off-roading, and racing.
Here’s why R1 Concepts is a top choice
Superior Stopping Power: R1 Concepts’ drilled and
slotted rotors improve brake cooling and deliver
consistent stopping power by dissipating heat and
gases more efficiently.
Durability and Longevity: The GEO-Carbon and eLINE
Series rotors are coated for corrosion protection,
extending their life, even in harsh conditions. Regular
vehicle upkeep, including replacing brake rotors when
signs of wear appear, is crucial for maintaining optimal
braking performance.
Quiet and Smooth Operation: R1 Concepts brake pads,
particularly the ceramic series, are engineered for
quiet, low-dust performance, keeping your wheels
cleaner and providing a smooth braking experience.
Easy Installation: R1 Concepts brake products are
designed for plug-and-play installation, meaning no
major modifications are necessary.
Why Worry About Replacing Your
Brakes?
STEP 1
HAVE THE FOLLOWING PARTS AVAILABLE BEFORE YOU BEGIN:
R1 Concepts Brake Pads R1 Concepts Brake Rotors DOT 3 or 4 Brake Fluid
(as recommended by your owner’s manual)
C-Clamp, Car Jack
& Jack Stands
STEP 2
Block the rear wheels so the car won't roll once you jack it up. Put the set the
parking brake firmly.
STEP 3
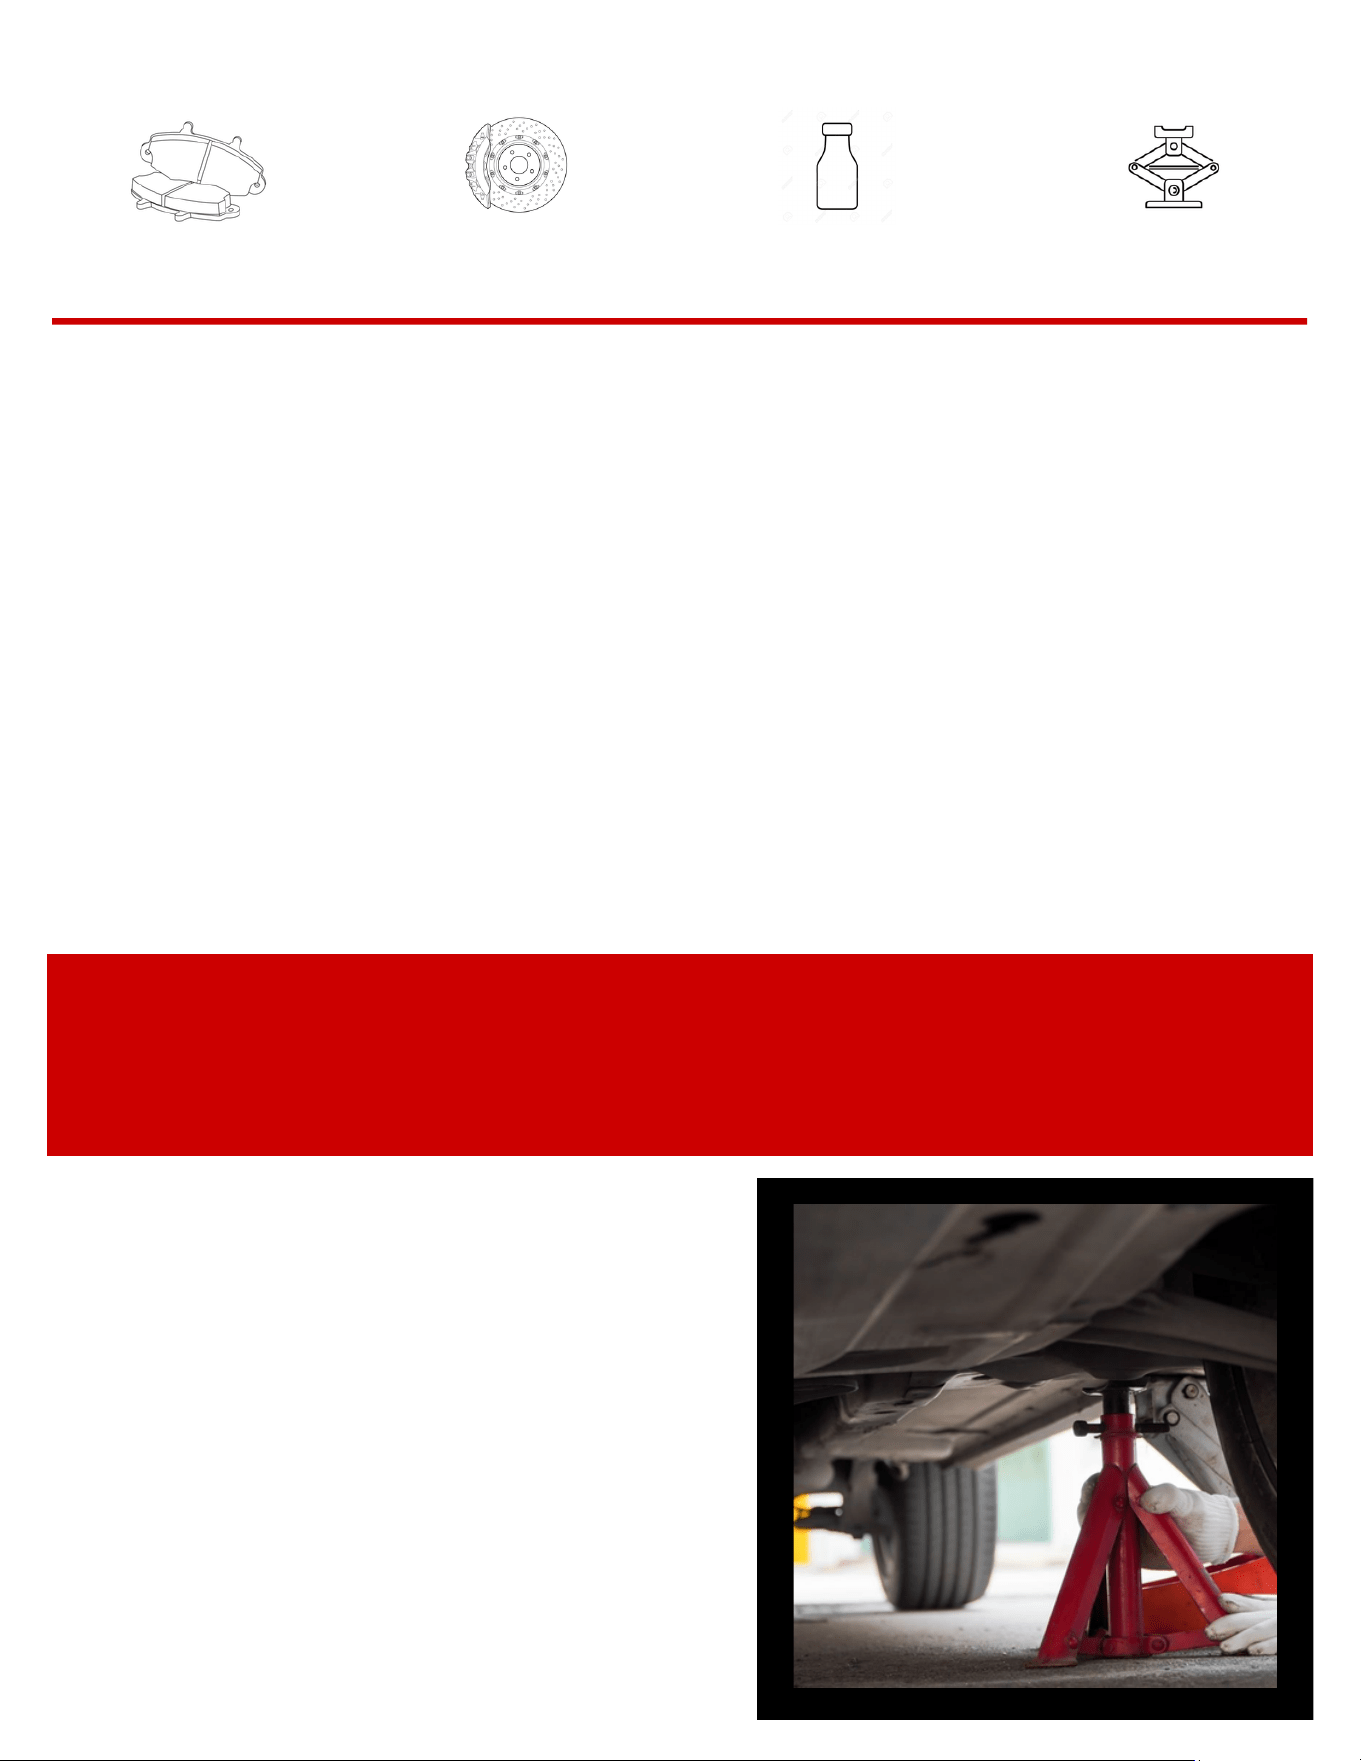
Before jacking the car up off the ground, set the parking brake and loosen the lug
nuts on the wheels just enough to break them free. Work them off just enough
until loosen their resistance and become to turn with the tire iron. Be sure to jack
the vehicle on level ground, and use jack stands designed to support the weight
of the vehicle. Raise the car and support with jack stands placed at the
manufacturers recommended lift points. Usually the frame support area is
immediately to the rear of the front wheels.
ALWAYS USE JACK STANDS. NEVER ATTEMPT TO WORK ON A
VEHICLE SUPPORTED ONLY BY A HYDRAULIC JACK.
STEP 4
Remove the lug nuts and the wheel.
It is best to work on one wheel at a
time, leaving the other side intact
as a point of reference. As a safety
precaution, roll the wheel/tire
assembly under the front-center of
the car, between the stands, and
set it down beneath the engine's K-
member, in the event of a faulty
jack stand.
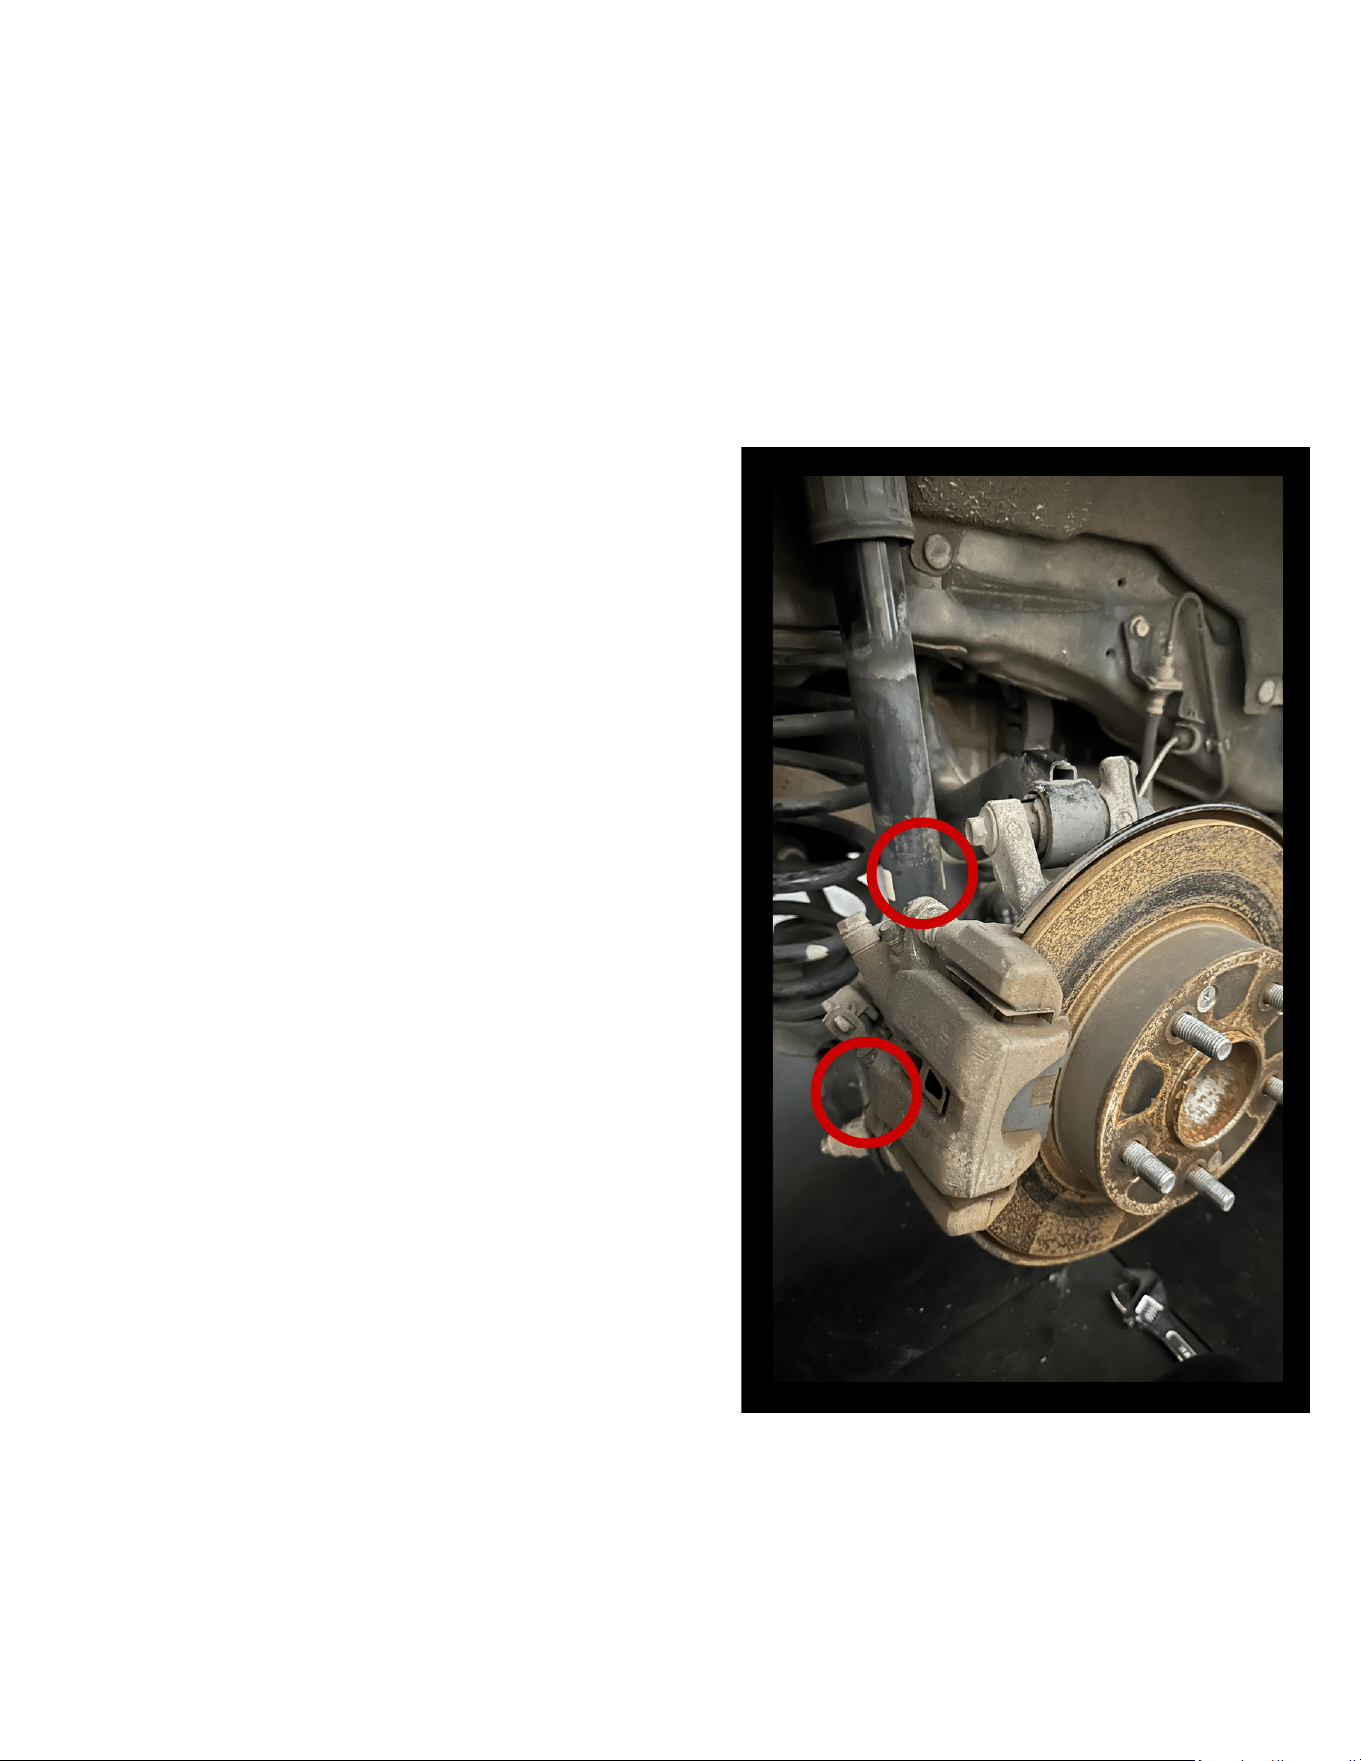
STEP 5
Review the brake components. A disc brake assembly is composed of a caliper,
two brake pads, and a rotor. The caliper works on pressurized brake fluid
through a piston in the caliper. The caliper mounting bracket is bolted to the
spindle, and holds the brake pads in position relative to the brake rotor. The
caliper fits over the pads and is fastened to the brackets with special sliding
bolts. These bolts usually have dust boots. When the brakes are applied, the
caliper piston squeezes the pads against the rotor creating friction.
STEP 6
Remove the bolts fastening the
caliper to the caliper mounting
bracket. Gently slide it out and away
from the rotor. Hang the caliper
inside the wheel well using a bungee
cord, so that the hose is not stressed.
Do not let the caliper dangle from the
brake hose line. Inspect the inside of
the caliper and remove the brake
pads. Remove the two remaining
bolts that hold the caliper bracket to
the knuckle. Use a wire brush to
clean rust from the rails where the
pads contact the caliper.
STEP 7
With the caliper out of the way,
remove the rotor. Sometimes the
rotor rust will make it bind and you
will need to use a mallet to loosen it.
Tap both the front and backside alternating left and right, top and bottom of the
rotor. The rotor thickness should be measured and compared to the minimum
discard thickness that is etched on the rotor. If the thickness is less than this
minimum, then the rotor should be replaced.
STEP 8
The next step is to move the piston
back inside the caliper. The piston
has extended as the pad material
wears. With new thicker pads, you
must return the piston back inside
the caliper body to give the thicker
pads room for installation.
First crack open the bleeder screw on the caliper to allow brake fluid to be relieved.
Place a container under the caliper to collect the fluid. Use a large C-clamp, place
the used brake pad over the face of the piston to protect the surface from marring,
and work it back that way. As you turn the handle on the clamp, it will increase
pressure on the piston, until it becomes flush with the surrounding metal. Brake
fluid will be released through the bleeder. Then loosen and remove the C-clamp.
Close the bleeder screw for now. If you cannot open the bleeder screw, then push
the C-clamp in slowly to prevent unsafe back pressure and damage to the ABS
modulator, brake valving or master cylinder. It may be necessary to drain some
fluid from the master cylinder reservoir.
STEP 9
Check and replace all hardware as needed. Improper hardware can lead to noise
or poor brake pad performance. Clean the caliper rails or hardware slides where
the pads make contact. Clean the hub-mating surface with a wire brush. Rust or
debris on the hub can cause rotor run out and lead to wheel vibration
STEP 10
Install the new rotor and remount the caliper bracket (not the piston part) to the
spindle knuckle arm.
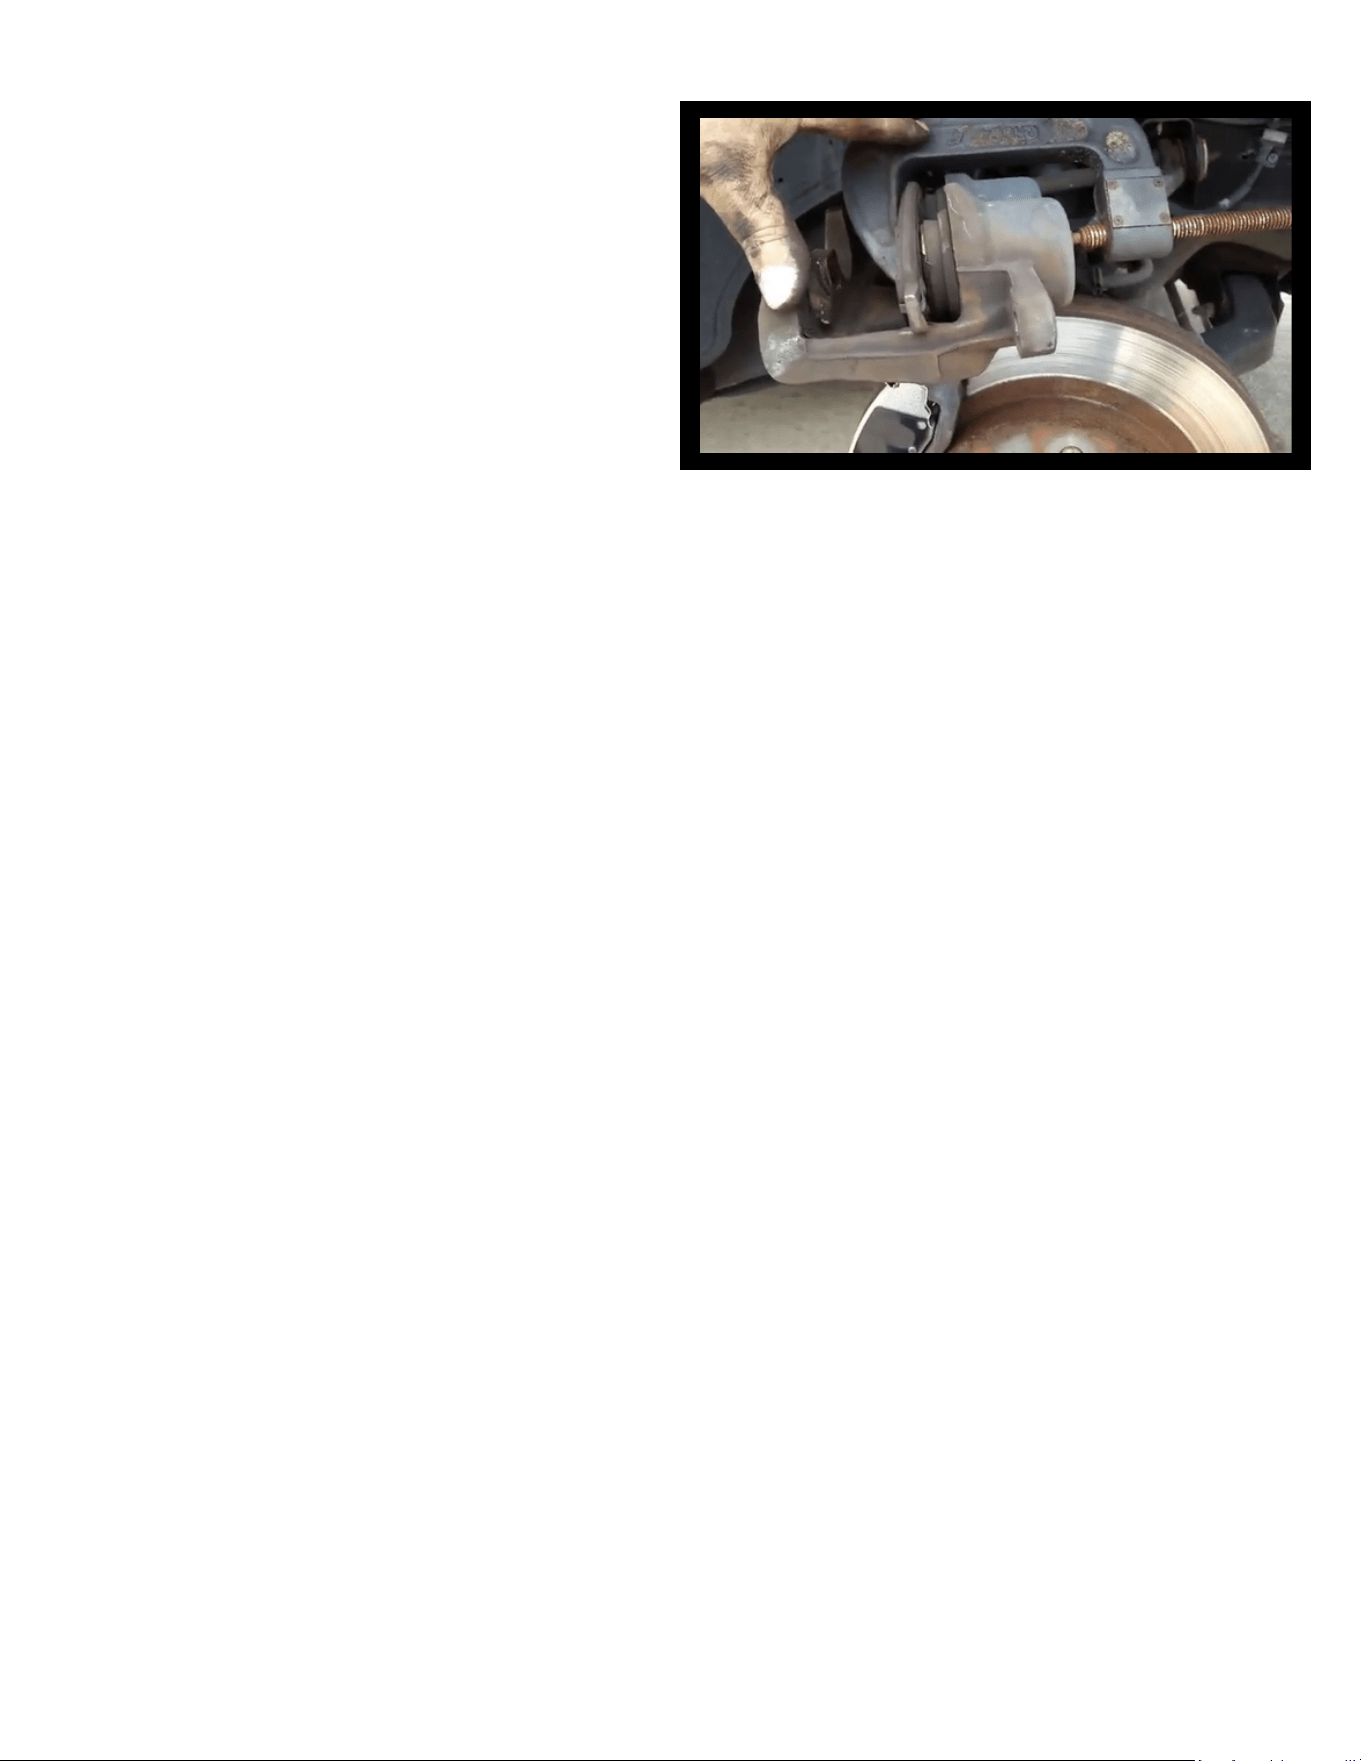
STEP 11
With the caliper bracket bolted to the spindle, reinstall the brake pads. Slide the
caliper over the pads and rotor and line up the bolt holes. Bolt the caliper to the
caliper bracket. Torque caliper and caliper bracket bolts to manufacturer
specifications.
STEP 14
STEP 12
STEP 13
Bleed the brakes to remove air from the brake line. First make sure the brake fluid
is full to the top. When you open the bleeder screw, have someone press down
slowly on the pedal as you monitor the bleeder screw. Before he releases the
pedal, close the bleeder screw. This prevents sucking air back into the brake
caliper. Repeat this process until you see a constant stream of fluid with no
bubbles, then close the bleeder screw. It usually takes 5 or 6 pumps of the pedal to
clear the air and old brake fluid out of the line. You may need to pump quite a few
times more if you haven't changed your brake fluid in a long time. Check the
master cylinder reservoir and replace brake fluid to the MAX line. Do not overfill
the reservoir. Pump the brakes several times to seat the brake pads to the rotor
and check the reservoir one more time. Top off as necessary.
Replace the wheel and lugs. Drop the car to the ground to finish tightening the
bolts to the manufacturer's specified bolt torque. Alternate tightening sequence by
going to the opposite side of the hub. A torque gun is not recommended.
BREAK-IN NEW BRAKE PADS AND ROTORS AS SHOWN BELOW
IMPORTANT | TO BREAK-IN NEW BRAKE PADS & ROTORS USE THE FOLLOWING BREAK-IN PROCEDURE.
PROPER PAD BEDDING CAN PREVENT ROTOR WARPING.
WARM-UP BRAKES
Find a safe, open road or empty parking lot to perform
the break-in. Drive at 30–35 mph and apply the brakes
gently to a stop 3–4 times. The goal is to get the pads and
rotors up to temperature gradually.
Moderate Stops (Initial Bedding)
Perform 4–6 stops from 40–45 mph to about 10 mph. Use
medium brake pressure and do not come to a complete
stop. Do not allow the brakes to cool completely between
these stops. You may smell the brakes heating up which
is normal.
Aggressive Stops (Final Bedding)
Perform 4–6 harder stops from 50–60 mph to 10 mph.
Brake firmly, but not hard enough to lock up the wheels
or trigger ABS. Again, do not come to a full stop, and do
not rest your foot on the brake pedal when stopped, it
can cause pad imprinting.
COOL DOWN
Drive at 40–60 mph for 5–10 minutes without using the
brakes. This allows the system to cool evenly and avoids
“warping”. Try to avoid coming to a complete stop with
hot brakes.
AFTER PROCESS
Your brakes may feel slightly different for the first 100–200 miles. Avoid hard braking during this break-in
period unless necessary. Once fully bedded, you’ll notice smoother, stronger braking performance.