Oxbot R1
Quick Start Guide
Built for high-performance control, with precision in every move.
Before use, please read the [Safety Instructions] and important precautions inside.
Quick Bind
Wireless Tuning
Smart Connectivity
Customizable Settings

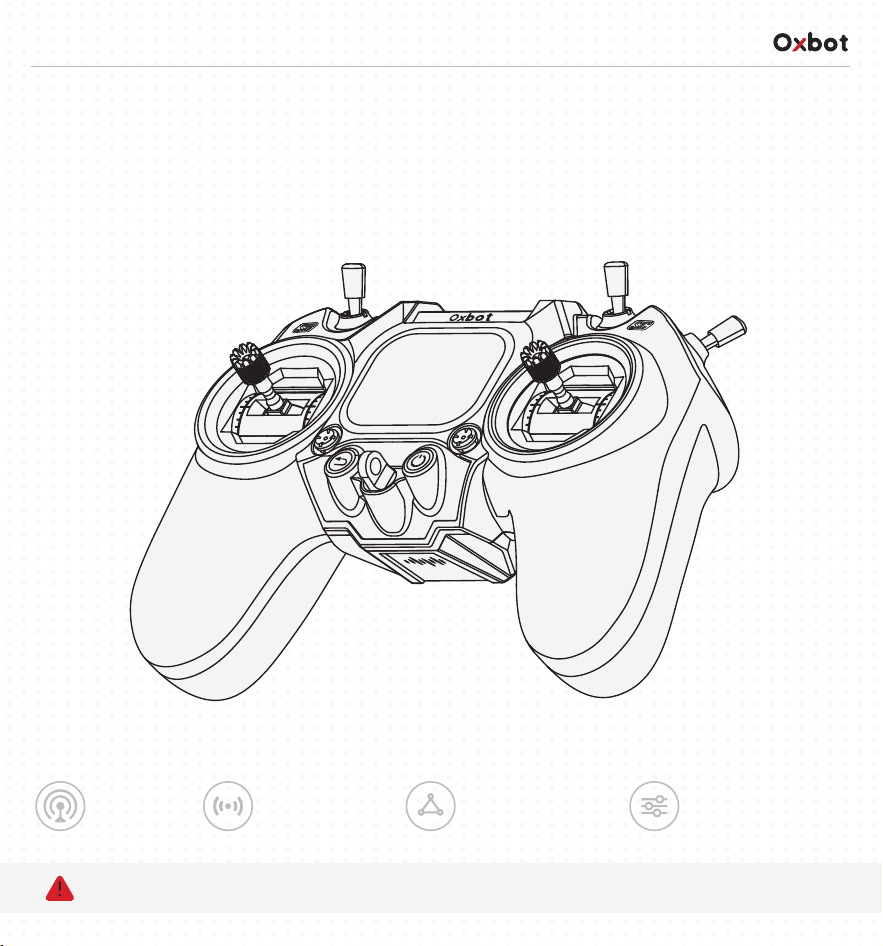
Know Your Device
Left Stick
(Throttle / Yaw)
Throttle / Yaw TRIM
(4-Way Buttons)
Back Button
Switch A (SA)
Switch B (SB)
AMOLED HD Display
Switch D (SD)
Switch C (SC)
Switch F (SF)
Stick
Holder Slot
Stick Holder Slot
Switch E (SE)
Nano RF Module Bay
(Supports ELRS 2.4GHz
Modules Only)
LED Status Indicator
Heat Sink
USB-C Port
(For Charging / Tuning)
Speaker
Lanyard Hole
Roll / Pitch TRIM
(4-Way Buttons)
Power Button
Right Stick
(Roll / Pitch)
Power Button: Press and hold for 3 seconds to power on/off.
Touch Screen: Swipe up, down, left, or right on the home screen to quickly switch between function panels.
Back Button: Short press: Go back to the previous menu. Long press (about 1 second): Quickly return to the home screen.
1
Buttons & Controls Overview
Main Interface Overview
2
1 2 3 4 5
8
7
10
9
6
2/5
1
Device Name
2
Remote Controller Bluetooth
Indicator
3
RF Output Power
4
RF Signal Strength
5
Remote Controller
Battery Level
6
Find Drone Button
7
Operating Time
9
Trim Status Bar
10
Widgets
8
Bind Button
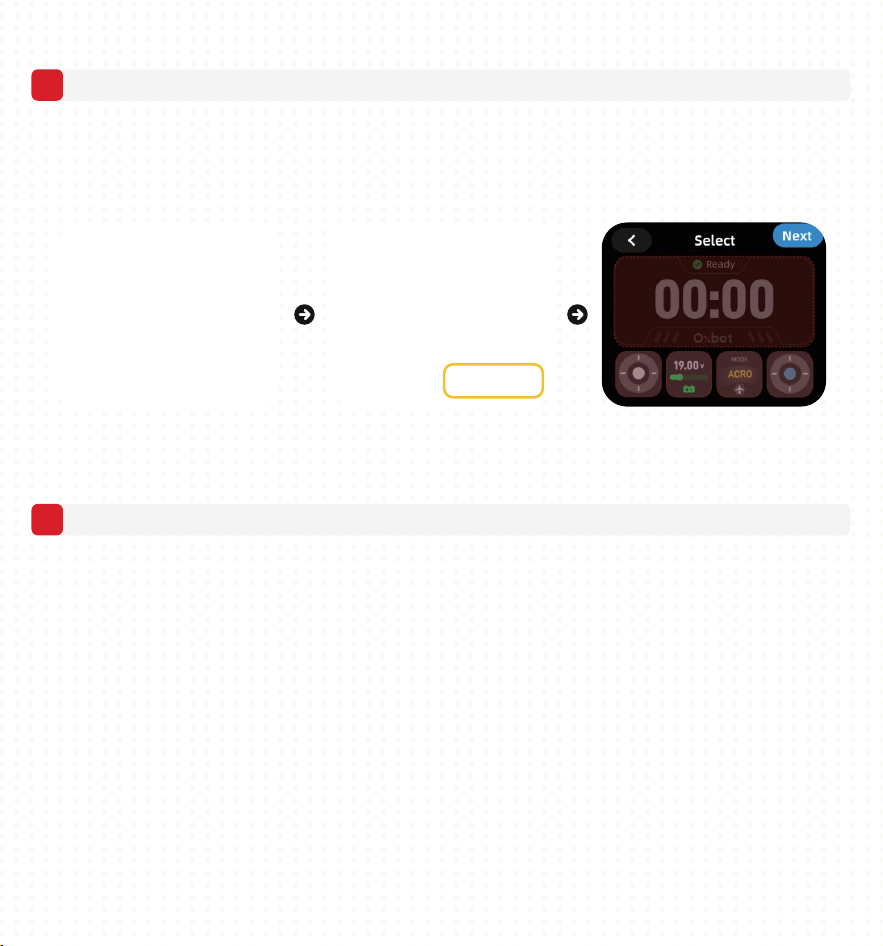
On the remote controller, tap “Find Drone”
A location QR code will appear on the screen
Scan it with your phone to see the device's last known location
Use map navigation to reach the drop location.
● Binding Function: Binding is required when using the receiver for the first time or after replacing it. This device only supports the
ELRS 2.4GHz (ExpressLRS) protocol.
Nano RF Module Bay
(Supports ELRS 2.4GHz
Modules Only)
Basic Functions & App Operation
1
Basic Functions
● Model Switching: The remote controller can store multiple model profiles (including channel mapping, switch settings, etc.),
allowing you to quickly switch between devices.
1. Power cycle the device receiver twice (power on then off counts as one cycle).
Keep it powered on during the third power-up.
2. Observe the receiver LED. A rapid double flash indicates Bind mode.
3. On the remote controller home screen, tap “Bind” to complete the binding process.
Steps:
On the home screen, swipe left to enter
the “Model Selection” menu
Browse and select the desired model
Tap “Switch”.
Steps:
Steps:
● Smart Locate (Find Drone): Smart Locate (Find Drone): Locate your device quickly if it crashes or lands unexpectedly.
(Note: The device must be equipped with a GPS module, and at least 6 satellites must be locked. Accuracy depends on the number
of satellites. The displayed location is the coordinate information last returned by the device's positioning module and is for reference only.)
3/5

2
App Connectivity & Control System Tuning
● Oxbot App Operation (Remote Controller Configuration)
Used for remote controller settings, Bluetooth firmware updates,
and viewing the digital user manual.
Steps:
1. Swipe down on the home
screen to open the menu and
turn on Bluetooth.
2. Open the Oxbot App on your
phone, tap “Add New Device”,
then search for and connect to
this remote controller.
3. Once connected, you can
configure settings and perform
firmware updates on your phone.
● SpeedyBee App Operation
(Wireless Parameter Configuration)
Support wireless connection for adjusting and maintaining
device control system parameters.
Steps:
1. Swipe down on the home
screen to open the menu and
turn on Bluetooth.
Steps:
2. Use the included USB-C
cable to connect the remote
controller to the device
control module.
3. Open the SpeedyBee App and tap “+”
to search for the remote controller.
4. Tap “Connect”.
Found Oxbot R1
Identifiable devices Connect
4/5
5. Once connected, you can adjust device control parameters
or update firmware directly from your phone.
● USB Mode
When connected to a computer via USB-C cable,
two modes are supported:
○ Gamepad Mode: Functions as a professional simulator
controller for mainstream simulators.
○ Charging Mode: Charges the remote controller.
Customization & Safety Information
1
Customization
2
Safety Instructions
● Custom Control Panel: Swipe left on the home screen to enter “Model Selection”,
then tap “Layout” to enter edit mode.
You can freely add or replace widgets (such as attitude indicator, channel output monitor, etc.)
to create your personalized control interface.
● (Note: Additional OTA upgrade features, such as theme colors and background customization,
are currently under development. Stay tuned.)
● Safety First: Always remove all external rotating parts before indoor binding, tuning, or power testing.
● Pre-Flight Check: Before powering on, ensure all switches are in their default (safe) positions and
the throttle stick is at its lowest position.
● Antenna Warning: Do not power on or transmit high-power signals without an antenna installed,
as this may damage the internal RF module.
● Regulatory Compliance: Before use, ensure you understand and strictly comply with local radio
and electronic device regulations.
5/5
FCC Statement
This device complies with part 15 of the FCC rules. Operation is subject to
the following two conditions: (1) this device may not cause harmful
interference, and (2) this device must accept any interference received,
including interference that may cause undesired operation.
Changes or modifications not expressly approved by the party responsible
for compliance could void the user's authority to operate the equipment.
NOTE: This equipment has been tested and found to comply with the limits
for a Class B digital device, pursuant to part 15 of the FCC Rules. These
limits are designed to provide reasonable protection against harmful
interference in a residential installation. This equipment generates uses and
can radiate radio frequency energy and, if not installed and used in
accordance with the instructions, may cause harmful interference to radio
communications. However, there is no guarantee that interference will not
occur in a particular installation. If this equipment does cause harmful
interference to radio or television reception, which can be determined by
turning the equipment off and on, the user is encouraged to try to correct the
interference by one or more of the following measures:
-Reorient or relocate the receiving antenna.
-Increase the separation between the equipment and receiver.
-Connect the equipment into an outlet on a circuit different from that to
which the receiver is connected.
-Consult the dealer or an experienced radio/TV technician for help.
The device has been evaluated to meet general RF exposure requirement.
The device can be used in portable exposure condition without restriction.
The device has been evaluated to meet general RF exposure requirement.
The device can be used in an uncontrolled environment without restriction.