
1
Contents
Important Safety Instructions…………………………………………………………………………….…..2
Before Using the Hood………………………………………………………...........…………….…………2
Environmental Protection ..……………………………………..…………………………………...........4
Declaration of Content of Restricted Substances……………………...................…………….5
Packing List………………….………………………………………………………………………………….……..5
Installation………………………………………………………………………………………………….….…....6
Hood Operation…………………………………........………………………………………….………….…..11
Maintenance & Cleaning………………………………………………………………………….........…..13
Replacing Lamps ………………………………………………………………………….……………….….....14
Troubleshooting………………………………..………………………………………………………..….....…14
Hood Measurement…………………………………………………………………………….…….…………..15
Explode Diagram ……………………………………………………..……………………………….…………..17
Wiring Diagram ……………………………………………………………………………………….…..………..18
Specifications…………………………………………………………………..…………………………………….18
2
Important Safety Instruction
IMPORTANT TO BE READ AND OBSERVED
1. This manual explains how to properly install and use your range hood. Please read this manual in
detail before installation and use, and follow these safety information.
2. Keep this user manual well for future reference.
3. Do not use plug and extension cord other than the one provided.
4. Ground electrode of the hood is compulsory. Do not remove the ground prong of the plug.
5. Before installing the product, it is necessary to confirm whether the connection environment is safe
and whether the circuit wires are intact. If there are hidden dangers or defects, please do not install
them to avoid injury
Before Using The Hood
After unpacking the appliance, check for any transport damage. Do not install the appliance if it has been
damaged. In the event of problems, contact Whirlpool Customer Service. To prevent any damage, only
remove the appliance from its polystyrene foam packaging at the time of installation.
1. Packing materials (plastic bags, polystyrene, foam, etc.) must be kept out of children’s reach. These
are potentially dangerous to children.
2. Installation must be carried out by a qualified technician.
3. Make sure the power voltage specified on the appliance’s rating plate is the same as the main
voltage of your home.
4. After connecting the power supply, check the lamp, motor and switch are in normal operation.
5. The power supply cable must be long enough to connect the appliance to the mains socket outlet.
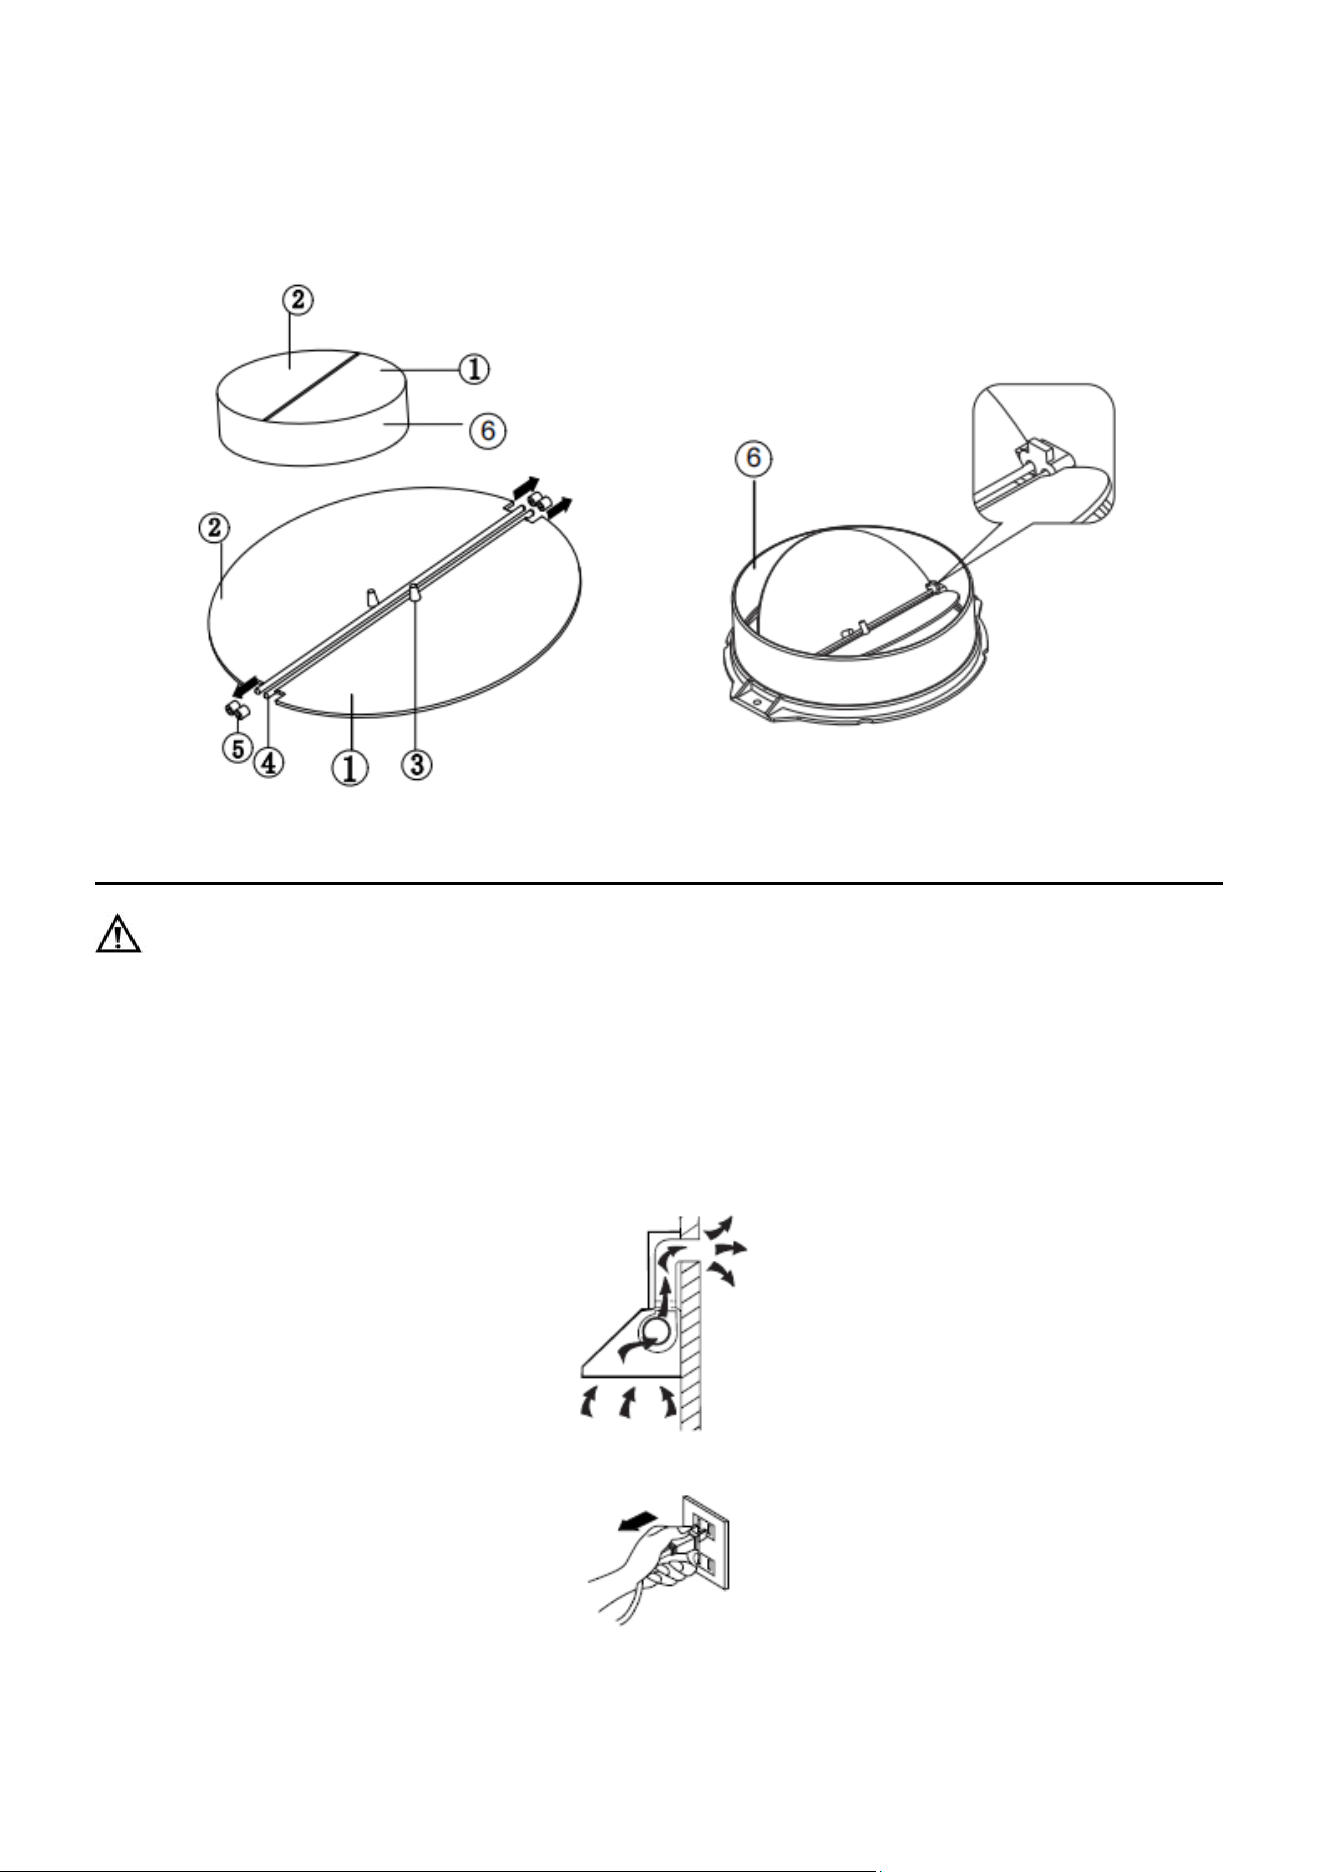
6. Unplug the appliance with hands. Do not pull the power supply cable to unplug the appliance.
7. When drilling holes in walls or ceilings, be careful not to damage the power connection box or pipes.
Never do:
The electrical components must no longer be accessible to the user after installation.
Do not touch the appliance with any wet part of the body and do not operate it when barefoot.
Do not try to use the cooker hood without baffle filters or with excessive grease on the filters.
Do not install above a cooker with a high level grill.
Do not leave frying pans unattended during use because overheated fats or oils may catch fire.
Never leave naked flames under the cooker hood. Flame cooking may cause a fire.
Do not flame under the range hood.
If the cooker hood is damaged, stop using it immediately.
CAUTION: Cooker hood and accessible parts may become hot during using or cooking. Please be
careful not to touch high-temperature parts.
Exhaust air must not be vented through a flue used for removal of fumes produced by appliances burning gas

3
or other fuels, but must have a separate outlet. All national regulations governing extraction of fumes must
be observed. Range hoods and other cooking fume extractors may adversely affect the safe operation
of appliances burning gas or other fuels (including those in other rooms) due to back flow of
combustion gases. These gases can potentially result in carbon monoxide poisoning. After
installation of a range hood or other cooking fume extractor, the operation of open flue gas
appliances should be tested by a competent person to ensure that back flow of combustion gases
does not occur.
Do not remove filters during cooking.
Do not use or leave the hood without its lamps correctly installed which has risk of electric shock
Always do:
The Manufacturer will not be liable for any improper use or incorrect operation.
Important! Always switch off the electricity supply at the mains during installation and maintenance,
such as light bulb replacement.
Before touching the bulbs, ensure they are cool.
Before scrapping the appliances, cut the power supply lead and make it unusable.
Wear work gloves for all installation and maintenance operations.
Installation or maintenance must be carried out by a specialized technician, in compliance with the
manufacturer’s instructions and local safety regulations
Please dispose packing material carefully. Children are vulnerable to it.
Pay attention to the sharp edges inside the cooker hood especially during installation and cleaning.
Warning: Failure to install the screws or fixing device in accordance with these instructions may
result in electrical hazards.
Warning: Before obtaining access to terminals, all supply circuits must be disconnected.
Always put lids on pots and pans when cooking on a gas cooker.
When in extraction mode, air in the room is being removed by the cooker hood. Please make sure
that proper ventilation measures are being observed. The cooker hood removes odours from room
but not steam.
There shall be adequate ventilation of the room when the cooker hood is used at the same time as
appliances burning gas or other fuels.
Cooker hood is for home or indoor use only. Do not use it outside.
Gas appliances must be used under the extractor hood only with pans resting.
When using more than three gas burners, the hood should be operate at power level 2 or greater.
This will eliminate heat congestion in the appliance.
If the power cord is damaged, it must be replaced by the manufacturer, its service agent or similarly
qualified persons in order to avoid a hazard.
This appliance is not intended for use by persons (including children) with reduced physical, sensory
or mental capabilities, or lack of experience and knowledge, unless they have been given
supervision or instruction concerning use of the appliance by a person responsible for their safety
Children must be supervised to ensure they do not play with the appliance.
Please follow the instructions in the manual to clean the cooker hood, clean and replace filter to
avoid the risk of fire and electric shock.
Regular cleaning and maintenance is essential to ensure good performance and hood can be
functioned normally. Frequently clean all encrustations from dirty surfaces to prevent the
accumulation of grease. Regularly clean oil cup and filters, and replace filters when necessary.
4
For safety reason, please use only the same size of fixing or mounting screw recommended in this
instruction manual.
Regarding details about cleaning method and frequency, please refer to maintenance and cleaning
section in this instruction manual.
Regarding hood installation and operation details, please refer to operation and Installation sections
in this manual.
When the cooker hood and other appliances are working simultaneously, the negative pressure in
the room must not exceed 4 Pa(4 x 10⁻⁵ bar).
WARNING: Danger of fire: do not store items on the cooking surfaces.
Do not use steam cleaner, to prevent steam cause damage on the product.
NEVER try to extinguish a fire with water, when there is a fire, always switch off the appliance and
use a fire blanket or a lid to cover the flame.
Environmental Protection
All the materials used are environmentally compatible and recyclable. Please make your
contribution to conserve the environment by using waste collection channels.
Do not use this appliance in environment with highly corrosive or explosive gases
Recycle appliance which are no longer in use or dispose unused hood through recycle channels that
reusable part can be collected. Through environment-friendly disposal, a number of materials used
in the production of your appliance can be recovered.
Find out disposal options from your dealer, or local authority.
This product is marked with the symbol on the selective sorting of waste electronic
equipment. This means that this product must not be disposed of with household
waste but must be supported by a system of selective collection in accordance with
Directive 2012/19/EU. It will then be recycled or dismantled to minimize impacts on
the environment, electrical and electronic products are potentially dangerous for the
environment and human health due to the presence of hazardous substances. For
more information, please contact your local or regional authorities.
Note: The following steps will help to reduce the total environmental impact in the cooking process
(e.g. energy use).
(1) Install the cooker hood in a proper place where there is sufficient ventilation.
(2) Clean the cooker hood regularly to avoid airway being blocked.
(3) Remember to switch off cooker hood light after cooking.
(4) Remember to switch off cooker hood after cooking.
5
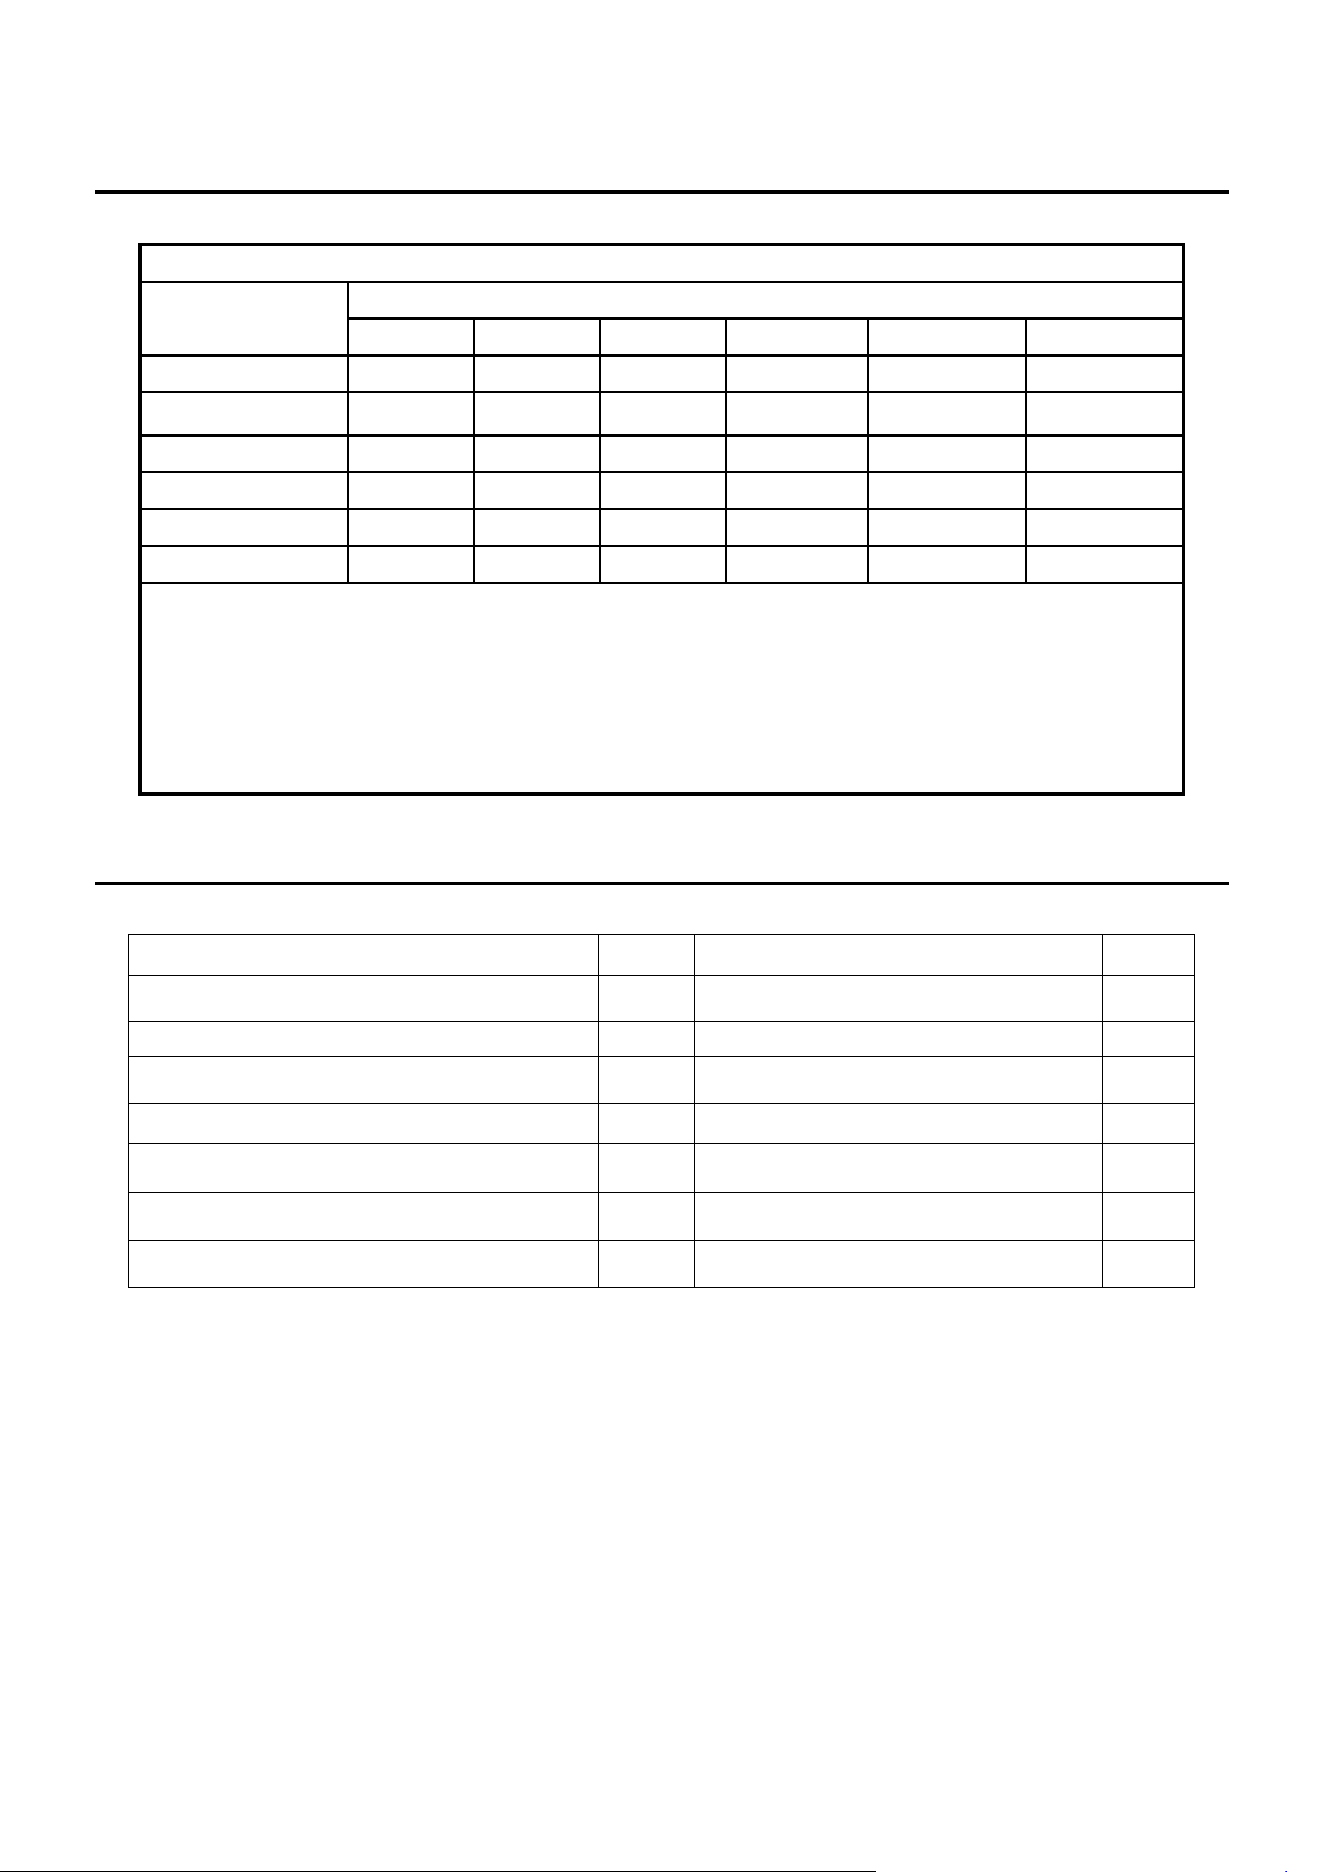
Declaration of Content of Restricted Substances
Model No.:WT9BTABC
Restricted substances and chemical symbols
(Pb)
(Hg)
(Cd)
(Cr+6)
(PBB)
(PBDE)
Power cord
○
○
○
○
○
○
PCB Board
○
○
○
○
○
○
Heat Element
○
○
○
○
○
○
Motor
○
○
○
○
○
○
LED Lamp
○
○
○
○
○
○
Plastic
○
○
○
○
○
○
Remark:
1. "Exceed 0.1 wt %" and "Exceed 0.01 wt %" Refers to the percentage content of the restricted
substance exceeding the percentage content reference value.
2. "○ " Means the percentage content of the restricted substance does not exceed the
percentage content reference value.
3. "-" Means the restricted substance is an excluded item.
Packing List
Material
QTY
Material
QTY
Instruction manual
1 pc
Baffle Filter
3 pcs
Cooker hood body
1 set
Outlet (with v-flaps) φ150
1 pc
Outside duct cover
1 pc
Wall plug
9 pcs
Outside duct cover bracket
1 pc
ST4 x 8 screw
8 pcs
Inside duct cover
1 pc
ST4 x 30 screw
2 pcs
Inside duct cover bracket
1 pc
ST4 x 40 screw
7 pcs
Plastic oil cup
1 pc
Hanging hook
1 pc
6
Installation
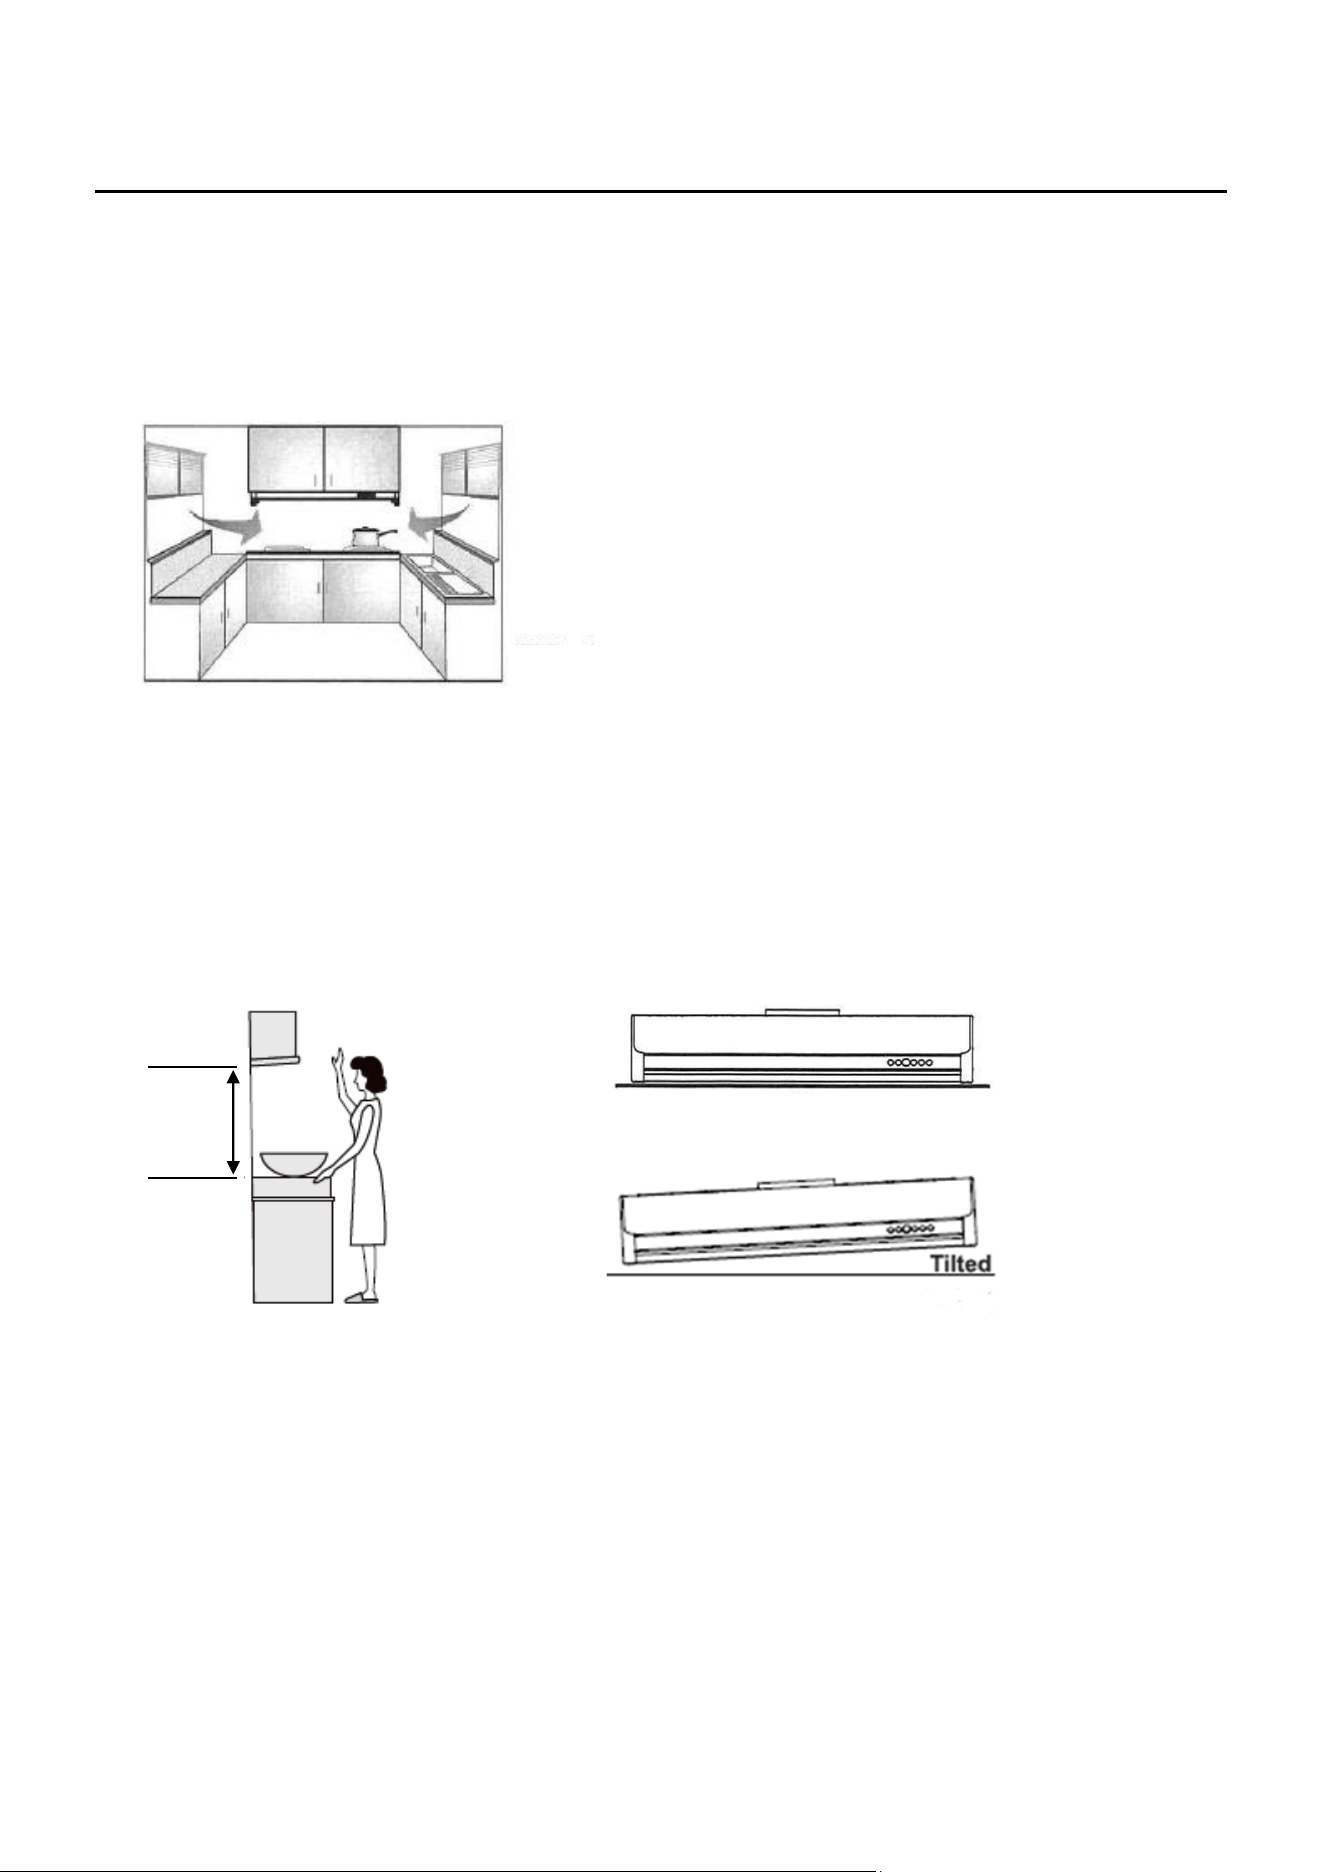
1. Location
Air turbulence from window/door may reduce the effectiveness of hood. Suggest to close
window or door before using the hood. (FIG. 1)
The hood has to rise up to 250 mm from cooktop in order to bring up the efficiency and deliver
the best performance.
2. Position
The installation height is measured vertically from center of aluminum filter of hood to the
cooktop .
The min height is 650mm and the max installation height is 750mm from gas hob.(FIG. 2)
Ensure your cooker hood is installed horizontally and balance, avoid left-right or front-dropped
inclination.(FIG. 3)
3. Exhaust duct
6"diameter exhaust duct is recommended to use in order to maximize suction efficiency.
Before installing the hood, please apply fast drying glue to the collar then insert exhaust duct
into the collar; use fast drying glue to seal the connected part of the collar and the exhaust
duct.
4. Mounting of the V-flap
Install V-Flap to the cooker hood, procedures as follow:
Mount a half-part of V-Flap ① into the body ⑥
(FIG.1)
(FIG.2)
(FIG.3)
√
65cm
~
75cm
×
7
Pin ③ should face up
Axis ④ should be inserted in holes ⑤ on the hood body
Repeat above steps to install the other half v-flap ②
Mounting Method
Warning: Electrical connections must be carried out by a specialized technician, this appliance
must be connected with earth wire. Supply cord must be disconnected from power
source before connection (to the appliance).
If you have an air outlet connect to the outside of your home, your cooker hood can be connected with
an extraction duct (enamel, aluminum, flexible pipe or non-flammable material with an interior diameter
of 150mm), as shown in below picture.
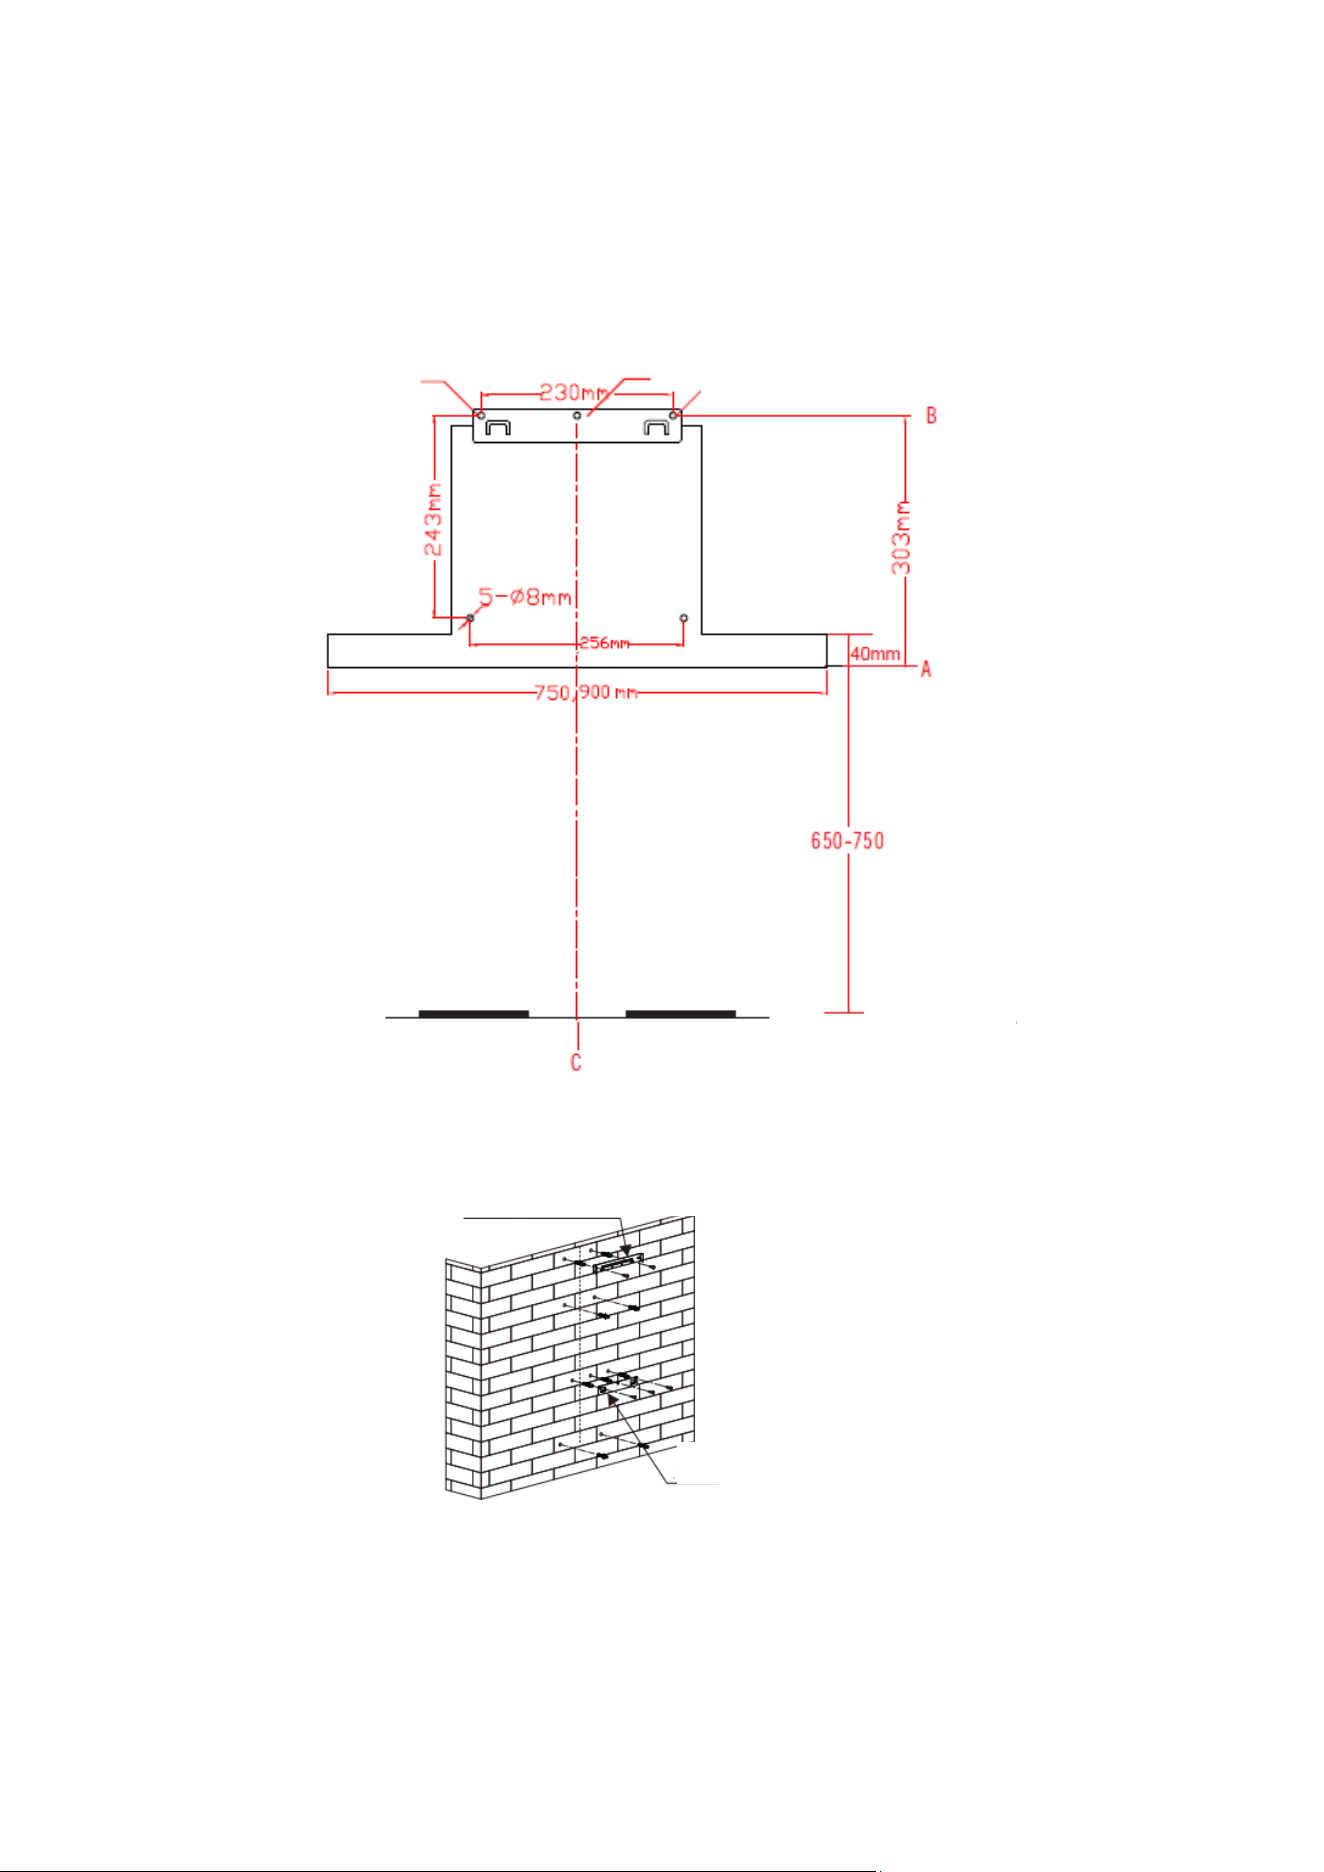
1. Before installation, turn off the unit and unplug it from the outlet.
2. Mark a line “A” as shown in FIG 4, the distance between the bottom of the hood to the top of
cooktop is 650-750mm.
8
3. Draw and mark a center vertical line C on the wall (See FIG 4).
4. Mark hood height line B. (303 mm from line A)
5. Mark screw holes for hooking the hood on line B, total length is 230mm (from left to right).
6. Fix the hook with 3pcs ST4*40mm screws into studs on line B. (For hang the hood)
7. Install the hook on a suitable place once the installation height is fixed, and keep it in line. The
fixed position of inside chimney bracket is the highest place of chimney. See FIG 5.
(FIG 5)
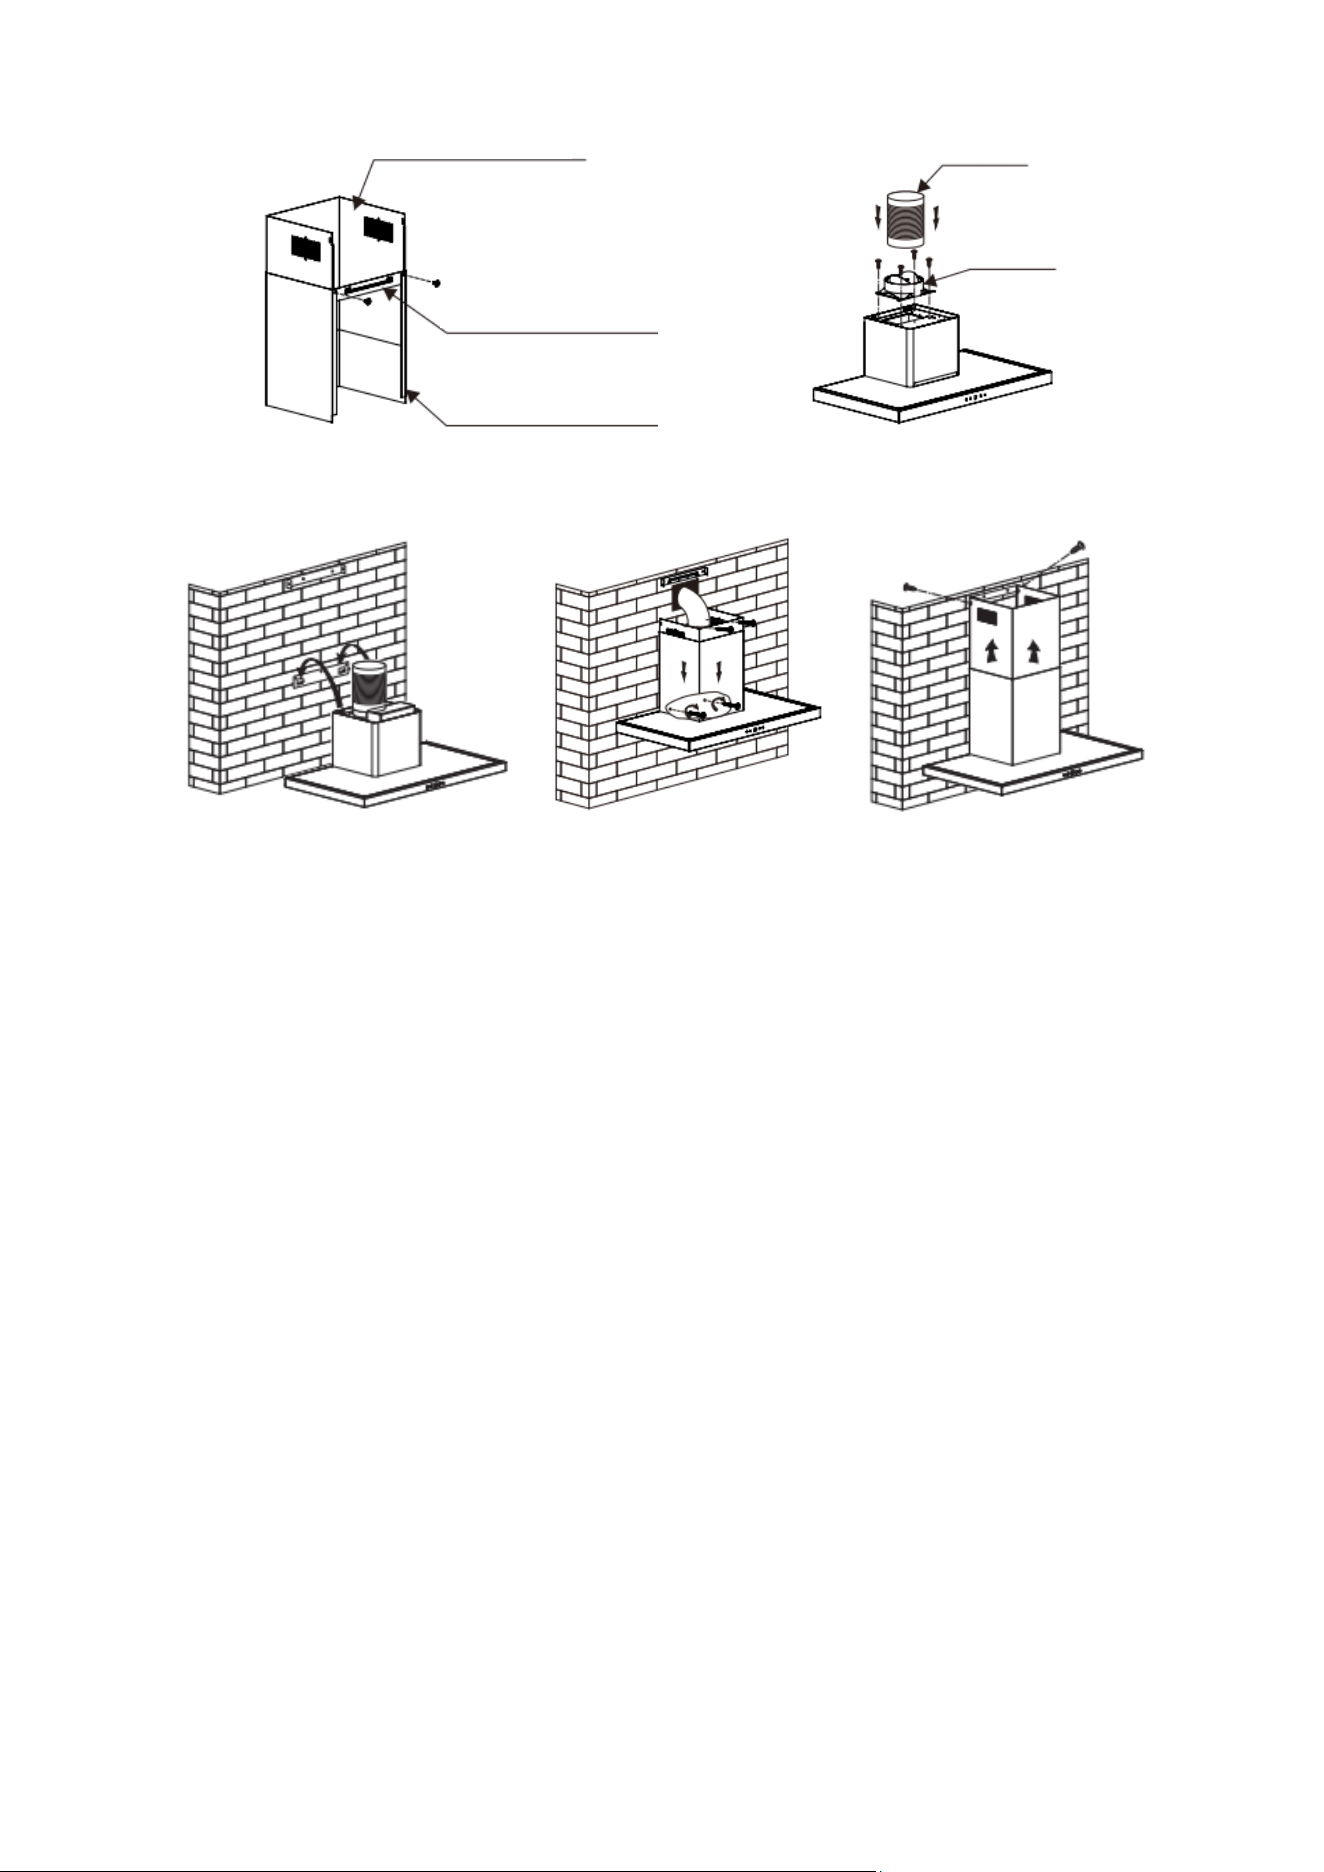
8. Fix outside chimney bracket on the outside chimney, and ensure that the inside chimney height
can be adjusted freely. Afterwards, install the expansion pipe (not included) and chimney on the
cooker hood.
Fix the expansion pipe with the cable tie on the outlet. See FIG 6 & FIG
Screw of hook
Screw of hook
Screw of hook
Unit: mm
(FIG.4)
inside chimney bracket
hook
9
(FIG 6) (FIG 7)
9. Put the cooker hood on the hook. See FIG 8.
(FIG 8) (FIG 9) (FIG 10)
10. Fix the body with 2pcs ST4*30mm safety screw. Note: The two safety vents are positioned on the
back housing, with diameter of 6mm. And then adjust the height of the inside chimney to the
position of inside chimney bracket and fix on it by screw(ST4*8mm). See FIG 9 & FIG 10.
Hints for Exhaust Duct Installation
The following rules must be strictly followed to obtain optimal air extraction result:
Keep expansion pipe short and straight.
Suggest to use φ 150*2m expansion pipe for the best performance.
When installing expansion pipe, always pull it tight to minimize loss on hood efficiency caused by
pressure.
Failure to observe and follow these instructions, cooker hood performance will be reduced and
noise level will be increased.
Installation work must be carried out by a qualified electrician or competent person.
Do not connect the ducting system of the hood to any existing ventilation system which is being
used by any other appliances, such as warmer tube, gas tube, hot wind tube.
The angle of the bend of the expansion pipe should not less than 120°; you must direct the pipe
horizontally, or, alternatively, the pipe should go up from the initial point and led to an outer wall.
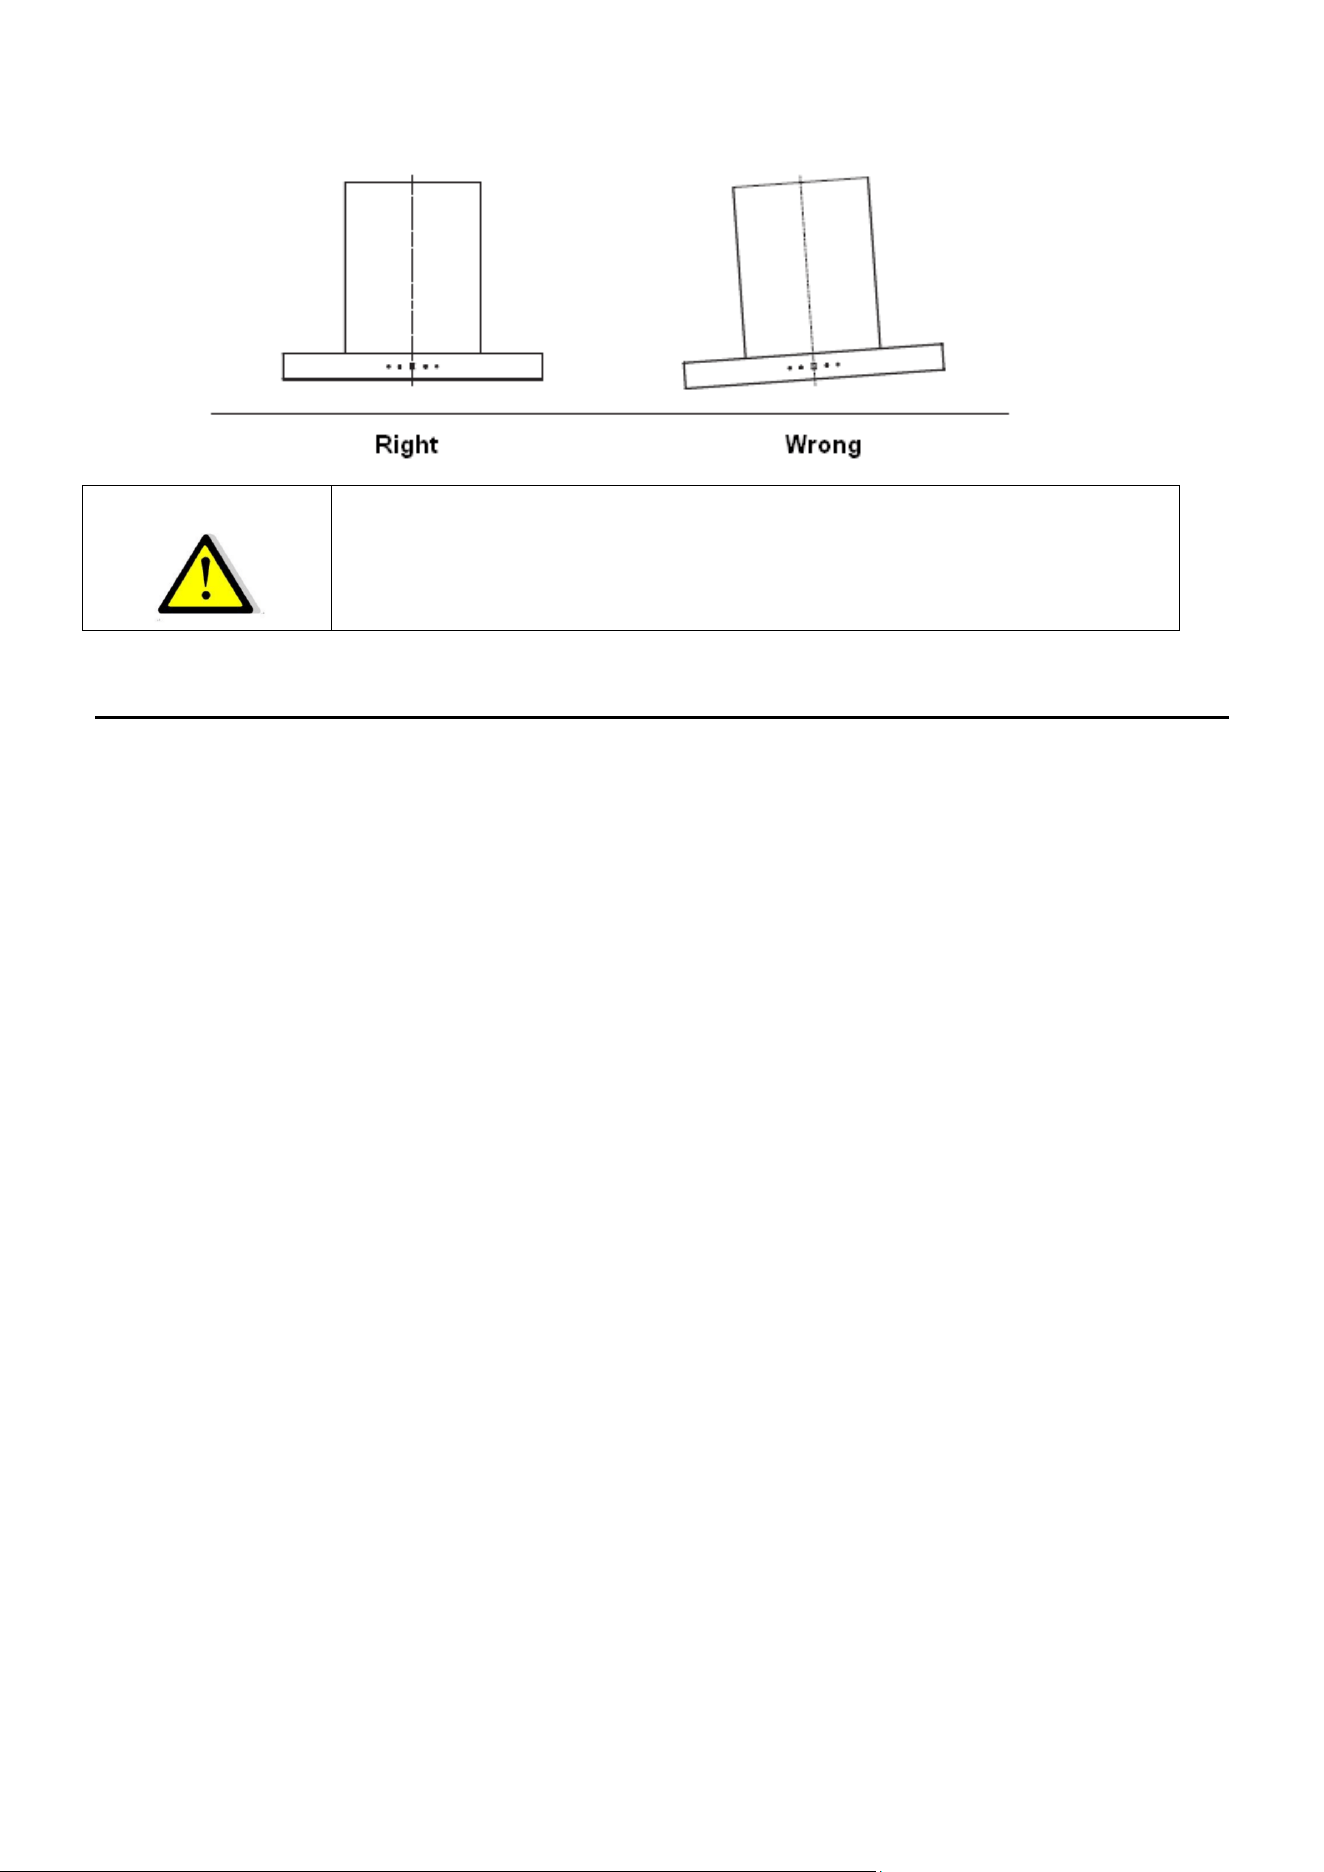
After the installation, make sure that the cooker hood is level to avoid grease collection leak out
from one end. See FIG 11.
Ensure the expansion pipe selected for installation complies with relevant standards and is fire
retardant.
inside chimney
outside chimney bracket
outside chimney
expansion pipe
V-flap
10
(FIG 11)
WARNING:
For safety reason, please use only the same size of fixing or mounting
screw which are recommended in this instruction manual.
Failure to install the screws or fixing device in accordance with these
instructions may result in electrical hazards.
Mounting Method (Re-circulation)
Ductless re-circulation is intended for applications where an exhaust duct work is not possible to be
installed. When converted, the hood function as a recirculating hood rather than an exhaust hood.
Fumes and exhaust from cooking are drawn and filtered by a set of optional carbon filter. The air is then
purified and recirculated back within the home.
We recommend to ALWAYS exhaust air outside of the home by employing existing or installing new duct
work, if possible. The hood is most effective and efficient as an exhaust hood. You should convert the
hood into a re-circulation hood only when the exhaust option is not possible or not allowed by local
regulations.
When converted to be a recirculating hood, a set of carbon filter is required on top of the hood.
(Order according to its model number below). The baffle filter are intended to capture residue from
cooking and the optional carbon filter help to purify fumes exhausted from cooking for re-circulation.
Model of carbon filter : CAB04
Install the carbon filter:
Note: For Singapore market, carbon filter is included in the carton box with hood;
For other countries, please contact Whirlpool to purchase the carbon filter if need.
1. Purchase carbon filter according to the model stated above.
2. Normally the carbon filter should be changed from three or six months time (according to your
cooking habit).
3. Before installing or replacing the carbon filters, disconnect the mains power to the unit.
4. Press the filter lock and remove the baffle filter.
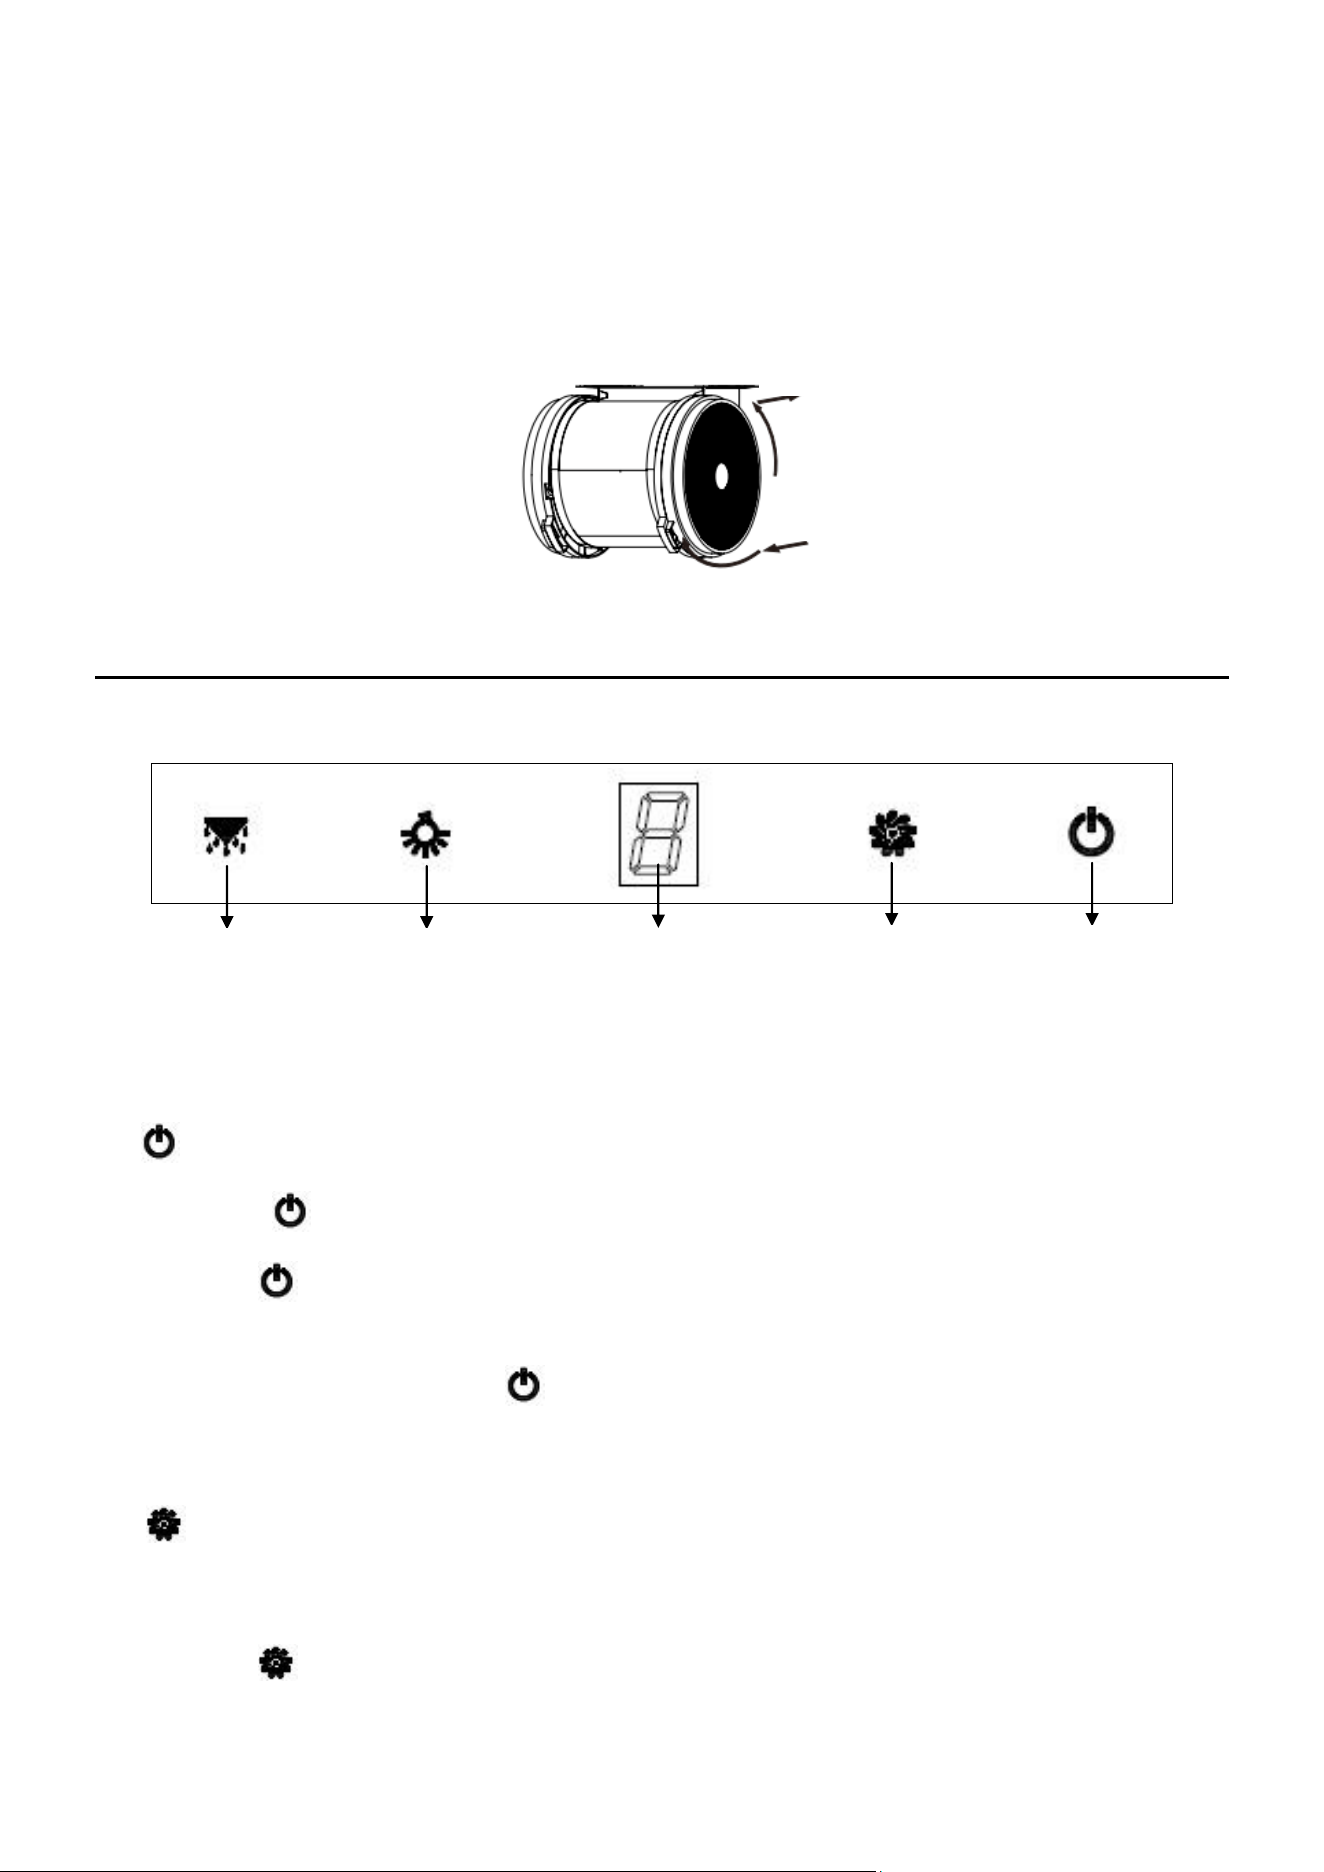
5. Place carbon filters on the both sides of the motor, turn carbon filter in clockwise direction until
properly affixed on it, (anti-clockwise to uninstall the carbon filters)
6. Place the baffle filters back.
7. Connect the power supply to the wall socket.
11
NOTE:
Make sure the filter is affixed properly. Otherwise, it will be loosen and cause dangerous.
When carbon filter attached, the suction power will be lowered.
Do not clean or wash the carbon filter; carbon filter replacement frequency should be determined
based on cooking habits.
It is recommend to use induction hob when the hood is converted to recirculating hood.
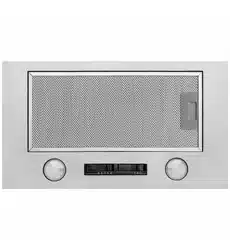
Hood Operation
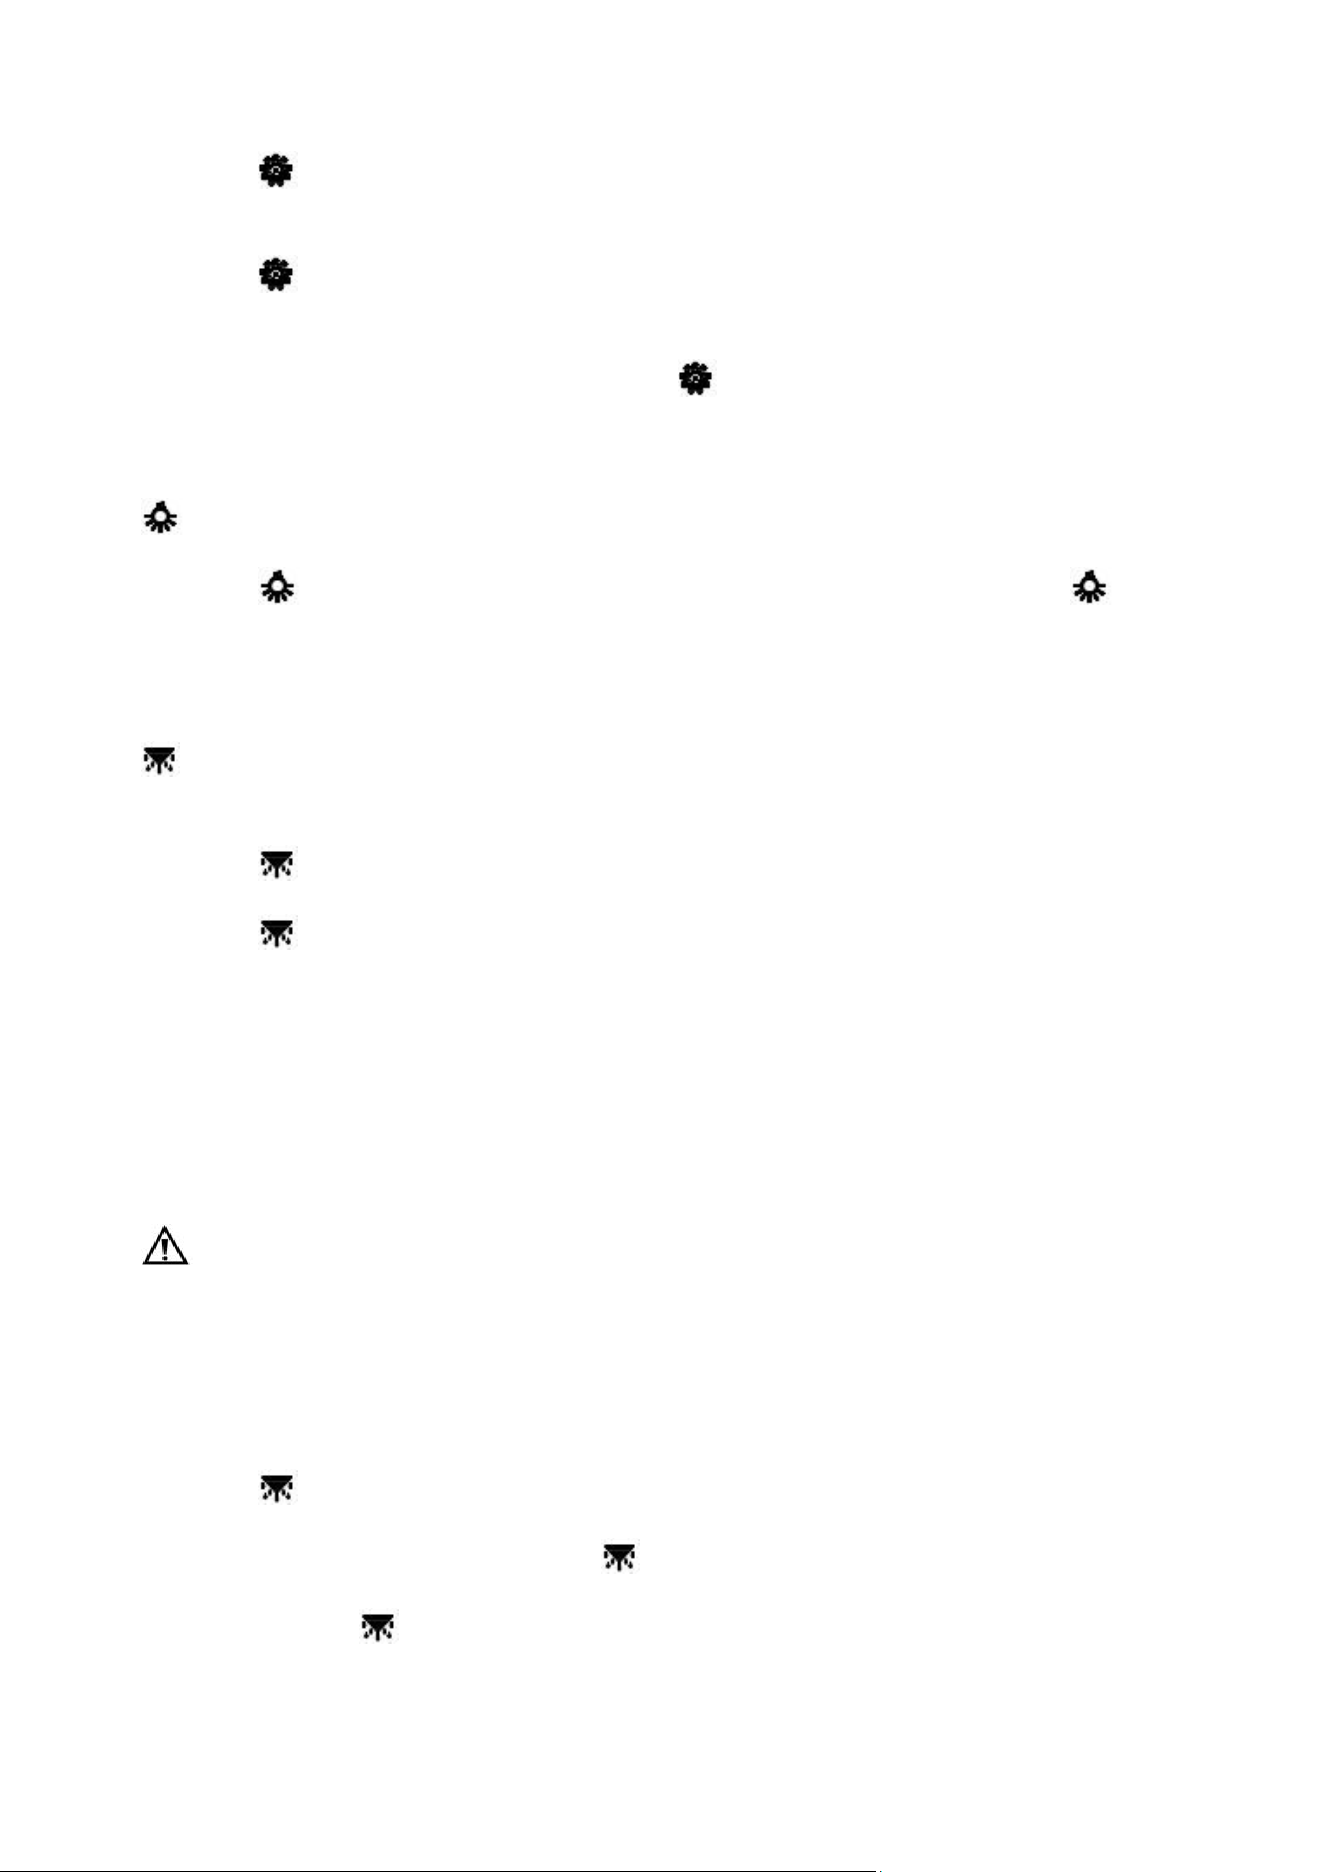
LED Touch Panel
After connecting the cooker hood to main supply, the backlight of all buttons will turn on and will buzz
once. Then cooker hood will stay at stand-by mode.
1. Power:
Press button, cooker hood starts to operate at low speed and LED display will show “1”.
Press again, cooker hood will stop operate.
Cooker hood speed can only be adjusted when power is on.
Switch off cooker hood with button, when you switch on the hood again, it will operate at
the speed per last operation.
2. Fan Speed:
The cooker hood has three speed levels, they are low, mid and high, the corresponding LED display
will be “1”, “2”, “3”.
Press button, cooker hood starts to work at low speed and the LED display will show “1”.
uninstall
install
Heat auto clean/
Delay off
Lamp
LED Display
Speed
Power
12
Press button again when it is working at low speed, cooker hood will switch to operate at
mid speed and the LED display will show “2”.
Press button again when it is working at mid speed, cooker hood will switch to operate at
high speed and the LED display will show “3”.
When the hood is operating, you can press button to change the speed circularly: “low
→mid → high → low → mid……”
3. Lights On / Off:
Press button, to turn on the lamp, backlight of this button will be on. Press button
again to turn the lights off.
The lamp function can be operated individually without switching on the power.
4. Auto Clean / Delay Off:
Auto Clean:
Press button once, icon indicator will light up, heat auto clean function is activated.
Press button again will exit the function, indicator light will turn off.
If auto clean function is being turned on when the hood is operating, hood will stop the current
operation and start auto clean function.
When the hood is performing auto clean function, turning on or adjusting fan speed will stop
the auto clean job.
Every time when auto clean function is activated: hood will heat up for 9 mins, and the motor
will work at high speed for 1 min before switching off. Meanwhile, the hood will exit heat auto
clean function and indicator light will be off.
Warning: When the cooker hood is operating the heat auto clean function, do not touch the
fan drum or the heating parts to avoid burns.
Delay Off:
Delay function can only be used when the cooker hood is operating. (Cannot be used at standby
mode or only with the light on).
Press button and hold for 5 second to start the delay function. Hood will keep operate for
9 mins then switch off automatically, button will flash during delay function is on.
Press and hold button again, to turn off delay function, indicator light will be off. The
above steps can be repeated. When delay function end, speed and light will be turned off.
13
If speed is being adjusted during delay function is in operation, the hood will automatically turn
off the delay function.
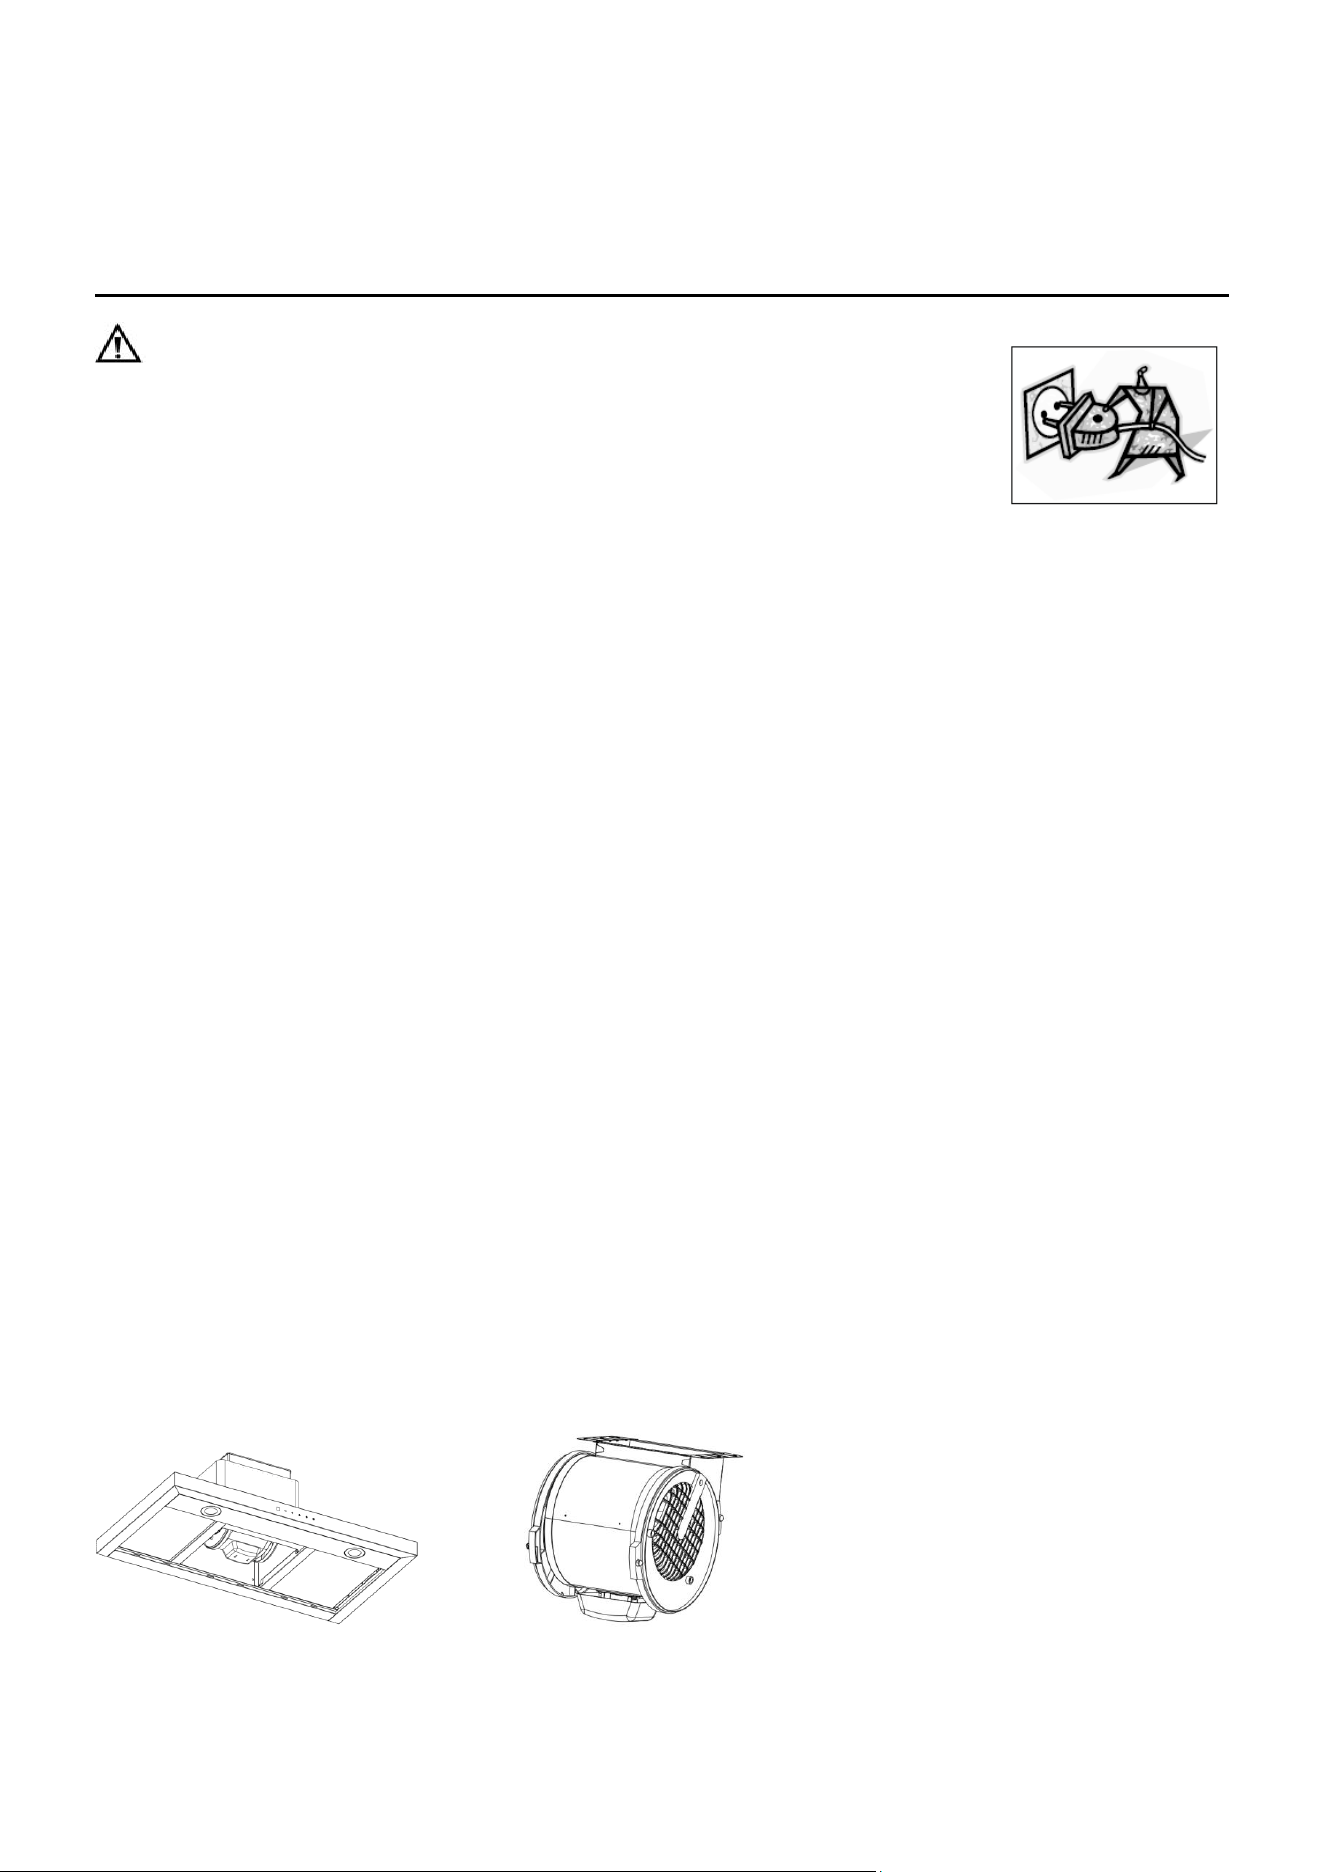
Maintenance & Cleaning
Caution
Before maintenance or cleaning is carried out, the cooker hood should be
disconnected from the main power supply. Ensure the cooker hood is
switched off at the wall socket and the plug is removed from the socket.
External surfaces are susceptible to scratches and abrasions, please follow
the cleaning instructions to ensure the best possible result is achieved without damage.
Cleaning and maintenance must be carried out when the appliance has been cooled down. Avoid
leaving alkaline or acid substances (lemon juice, vinegar etc.) on the hood surfaces.
Metal - Black painted cold plate
Use neutral detergent to clean the cooker hood, gently wipe the black surface with a clean soft cloth. If
the stains are difficult to clean, use warm water and slightly increase the concentration of detergent to
wipe.
Note: Ensure wiping gently to prevent crisscross scratches.
Control Panel Surface
The inlay control panel can be cleaned using warm soapy water. Ensure the cloth is clean and well wrung
before cleaning. Use a dry soft cloth to remove any excess moisture left after cleaning.
Important
Using neutral detergents and avoid using harsh cleaning chemicals, strong household detergents or
products containing abrasives, as this will affect the appliance appearance and potentially remove the
printing on control panel and manufacture warrantee will also become invalid.
Clean the Oil Cup
Take off the baffle filters. Place oil cup handle (two sides) to the rail under the blower and push the oil
cup in gently.
Note: The oil cup is detachable and should be cleaned regularly with detergent. Install the oil cup
when it is dry after cleaning.
14
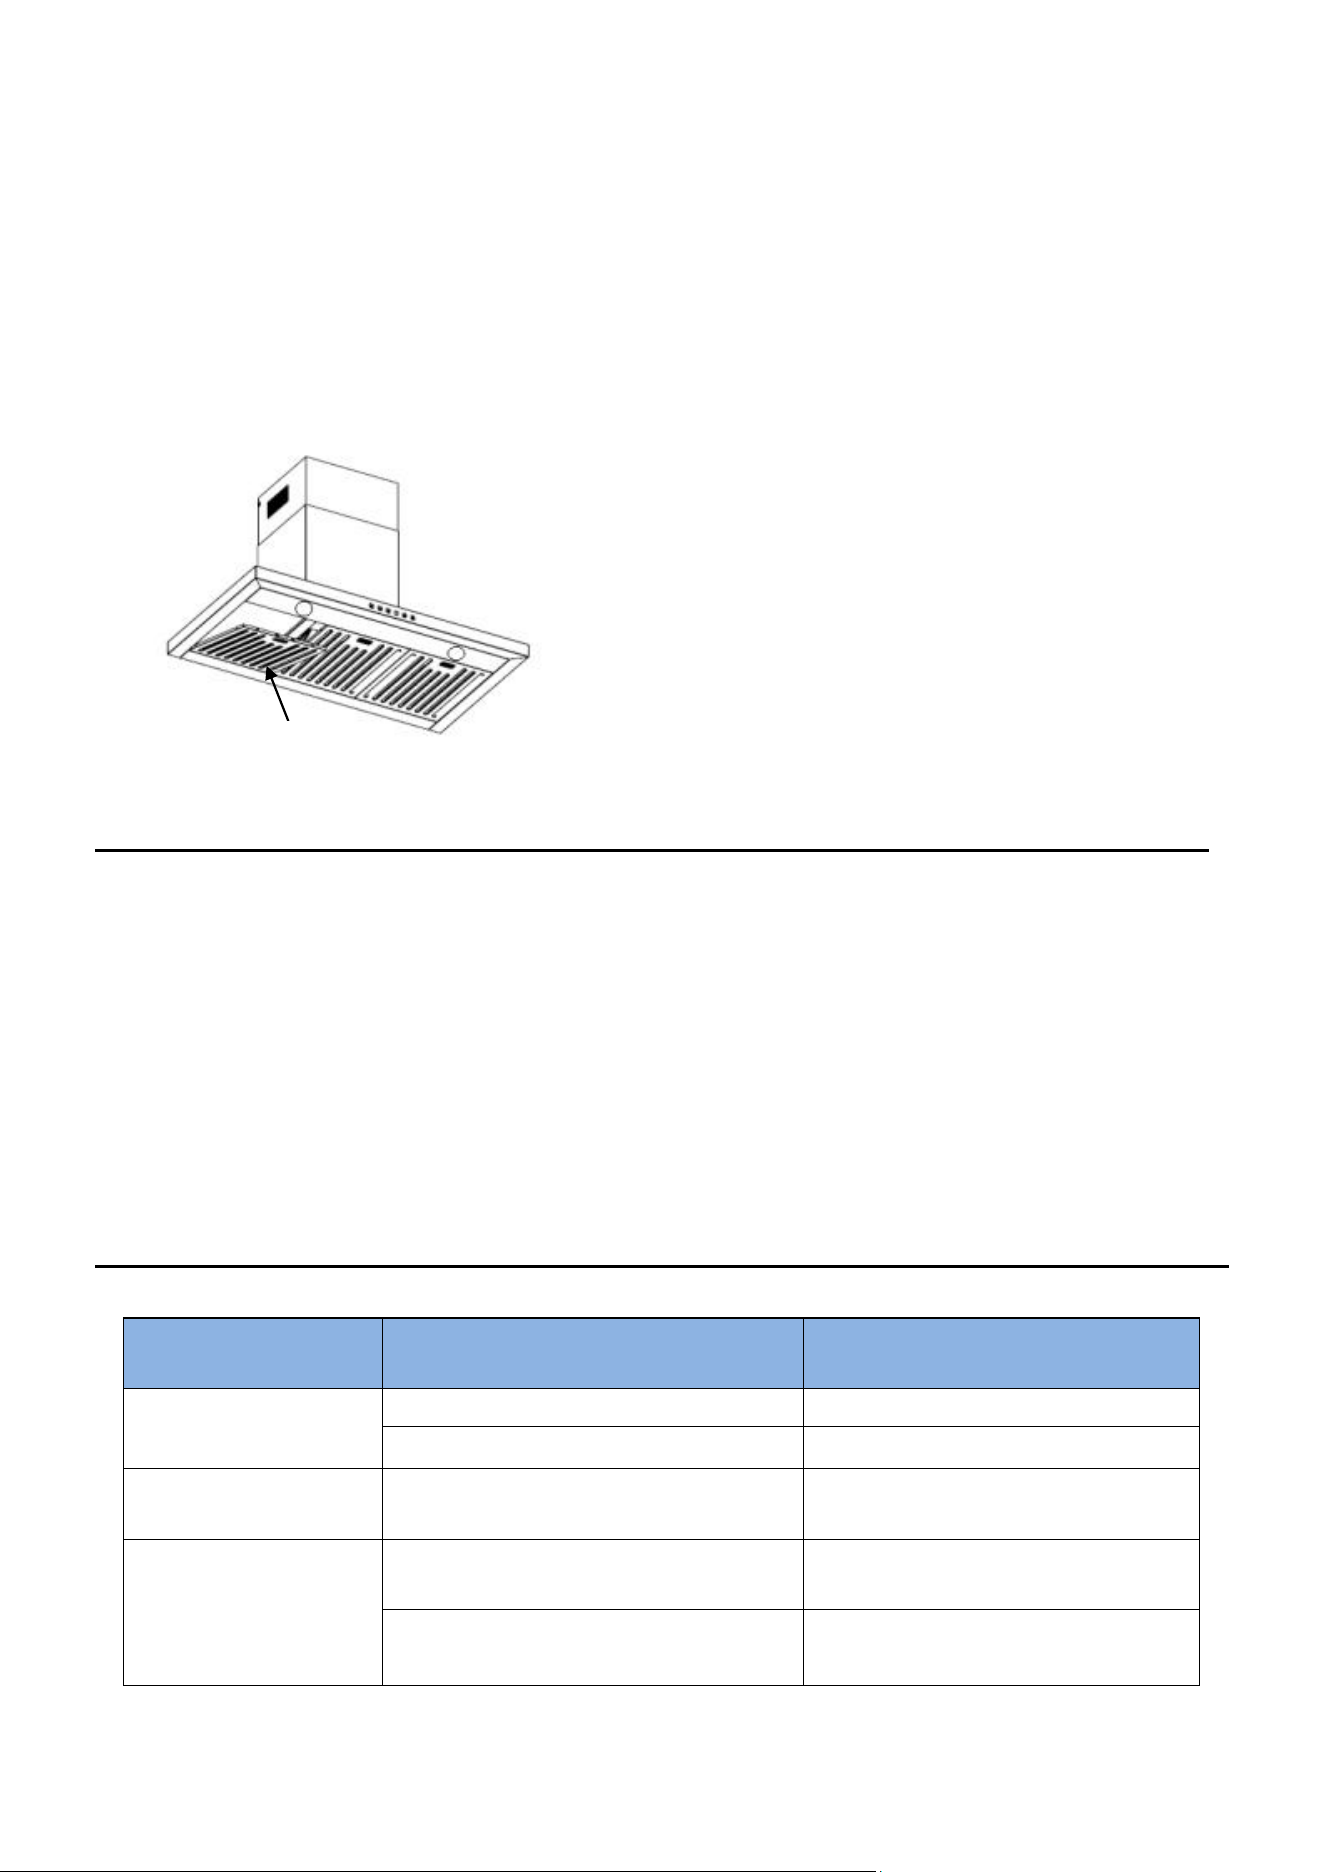
Baffle Filter
Baffle filters can be cleaned by hand. Soak them for about 5-10 minute in water(40-50℃) with a
neutral detergent, then use the soft cloth or soft brush to gently clean it. Please do not apply too
much force when cleaning, to avoid damage. (Baffle filter can be dried naturally under the sunlight).
Filters should be washed separately from crockery and kitchen utensils. Do not use rinse aid.
All cooker hood filters are made of metal products. Do not use cleaning agents that have corrosive
effects on metal products during cleaning.
Replacing Lamps
The bulb must be replaced by the manufacturer, its service agent or similarly qualified persons.
Always switch off the electricity supply before carrying out any operations on the appliance. When
handling the bulb, make sure it is completely cooled down before any direct contact to hands.
When handling bulbs hold with a cloth or gloves to ensure perspiration does not come in contact
with the globe as this can reduce the life of the bulb.
Note:
Before changing the lights, make sure that the appliance is turned off and unplugged.
Protect against danger when changing lights, such as wearing gloves.
Troubleshooting
Fault
Possible Cause
Solution
Light on, but motor
does not work
Fan speed is off
Select a fan speed.
Fan switch or motor failed
Contact service center.
Light does not work,
motor does not work
Mains power cable is loose or
disconnected
Check and make sure power cord
is properly connected.
Oil leakage
Excessive grease accumulated on
filters or oil cup
Clean baffle filters and oil cup.
Leakage from the connection of
duct cover
Contact service center.
Baffle filter
15
Fault
Possible Cause
Solution
Lights not working
Broken or faulty bulbs
Contact service center.
Low suction
The distance between the cooker
hood and the gas top is too far
Contact service center.
The Cooker hood
inclines
The fixing screw is not tight enough
Contact service center.
Note: Any electrical repairment must conform to your local, state and federal laws. Please
contact the Whirpool if in any doubt before undertaking any of the above. Always
disconnect the unit from the power source when uninstalling the unit.
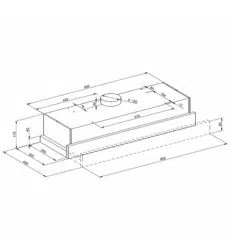
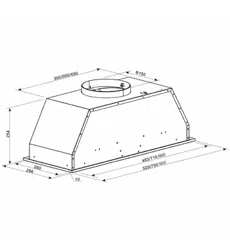
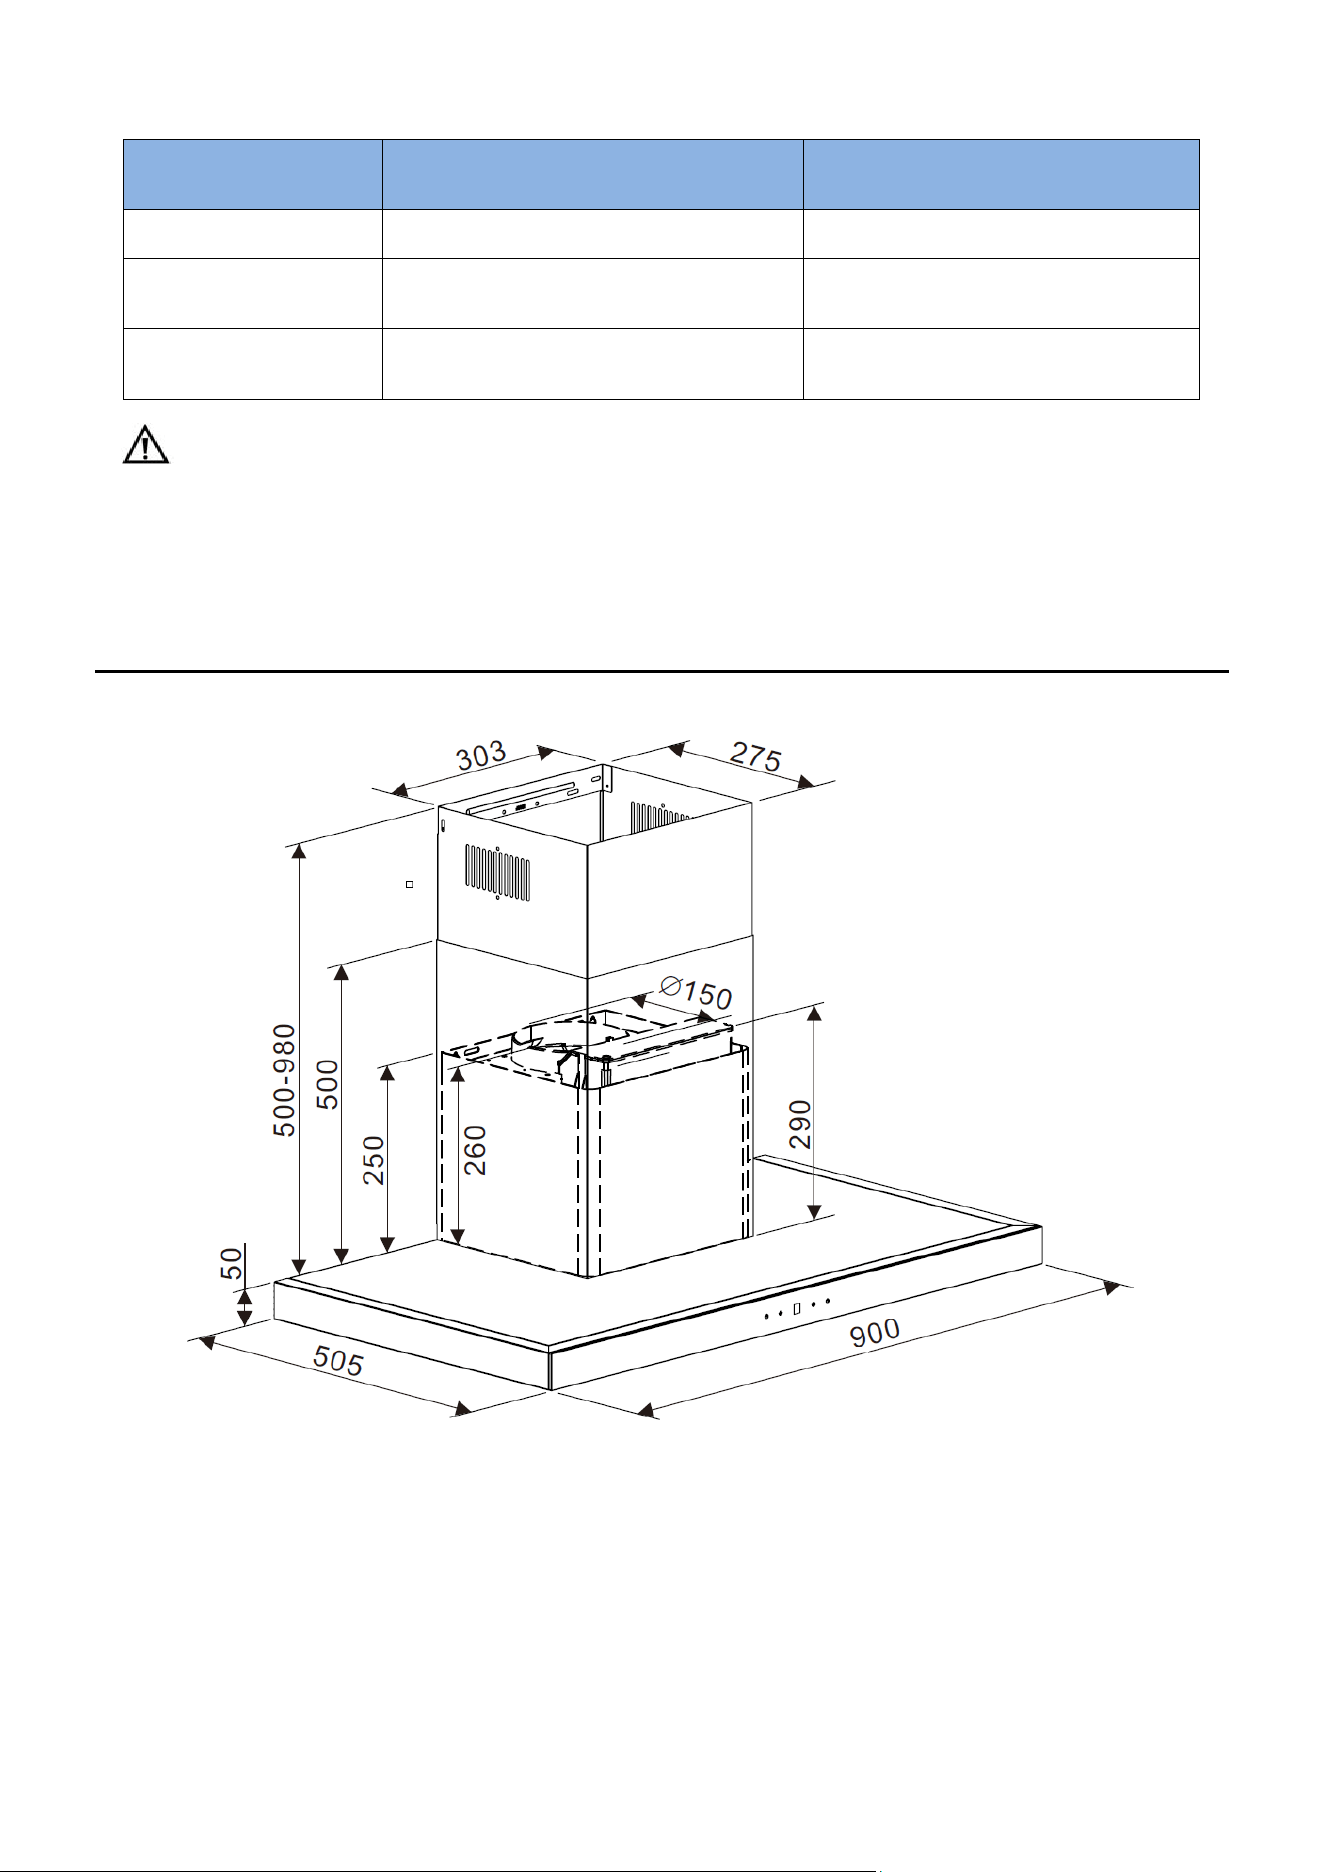
Hood Measurement
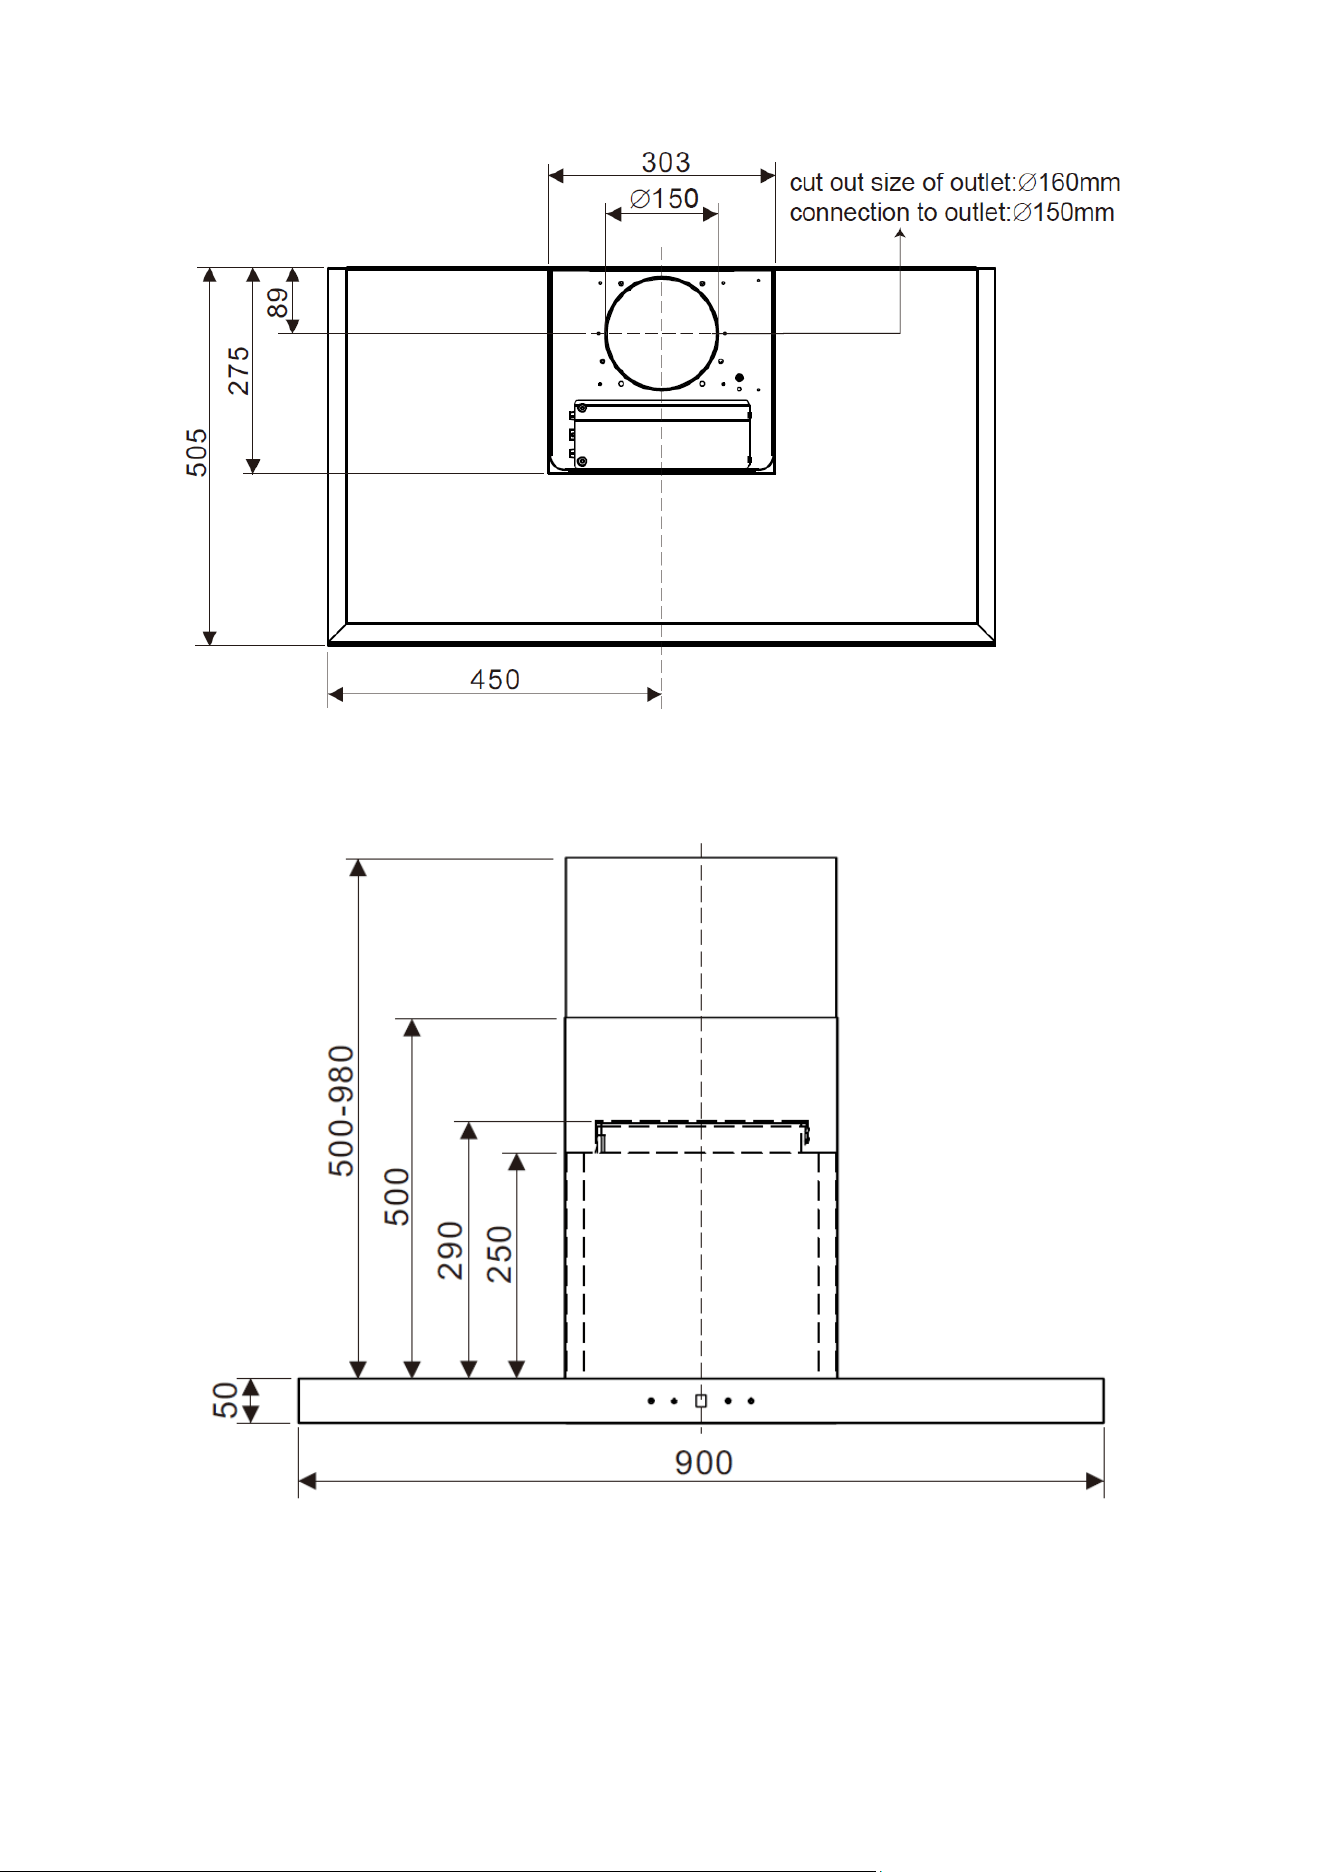
16
Unit:mm
17
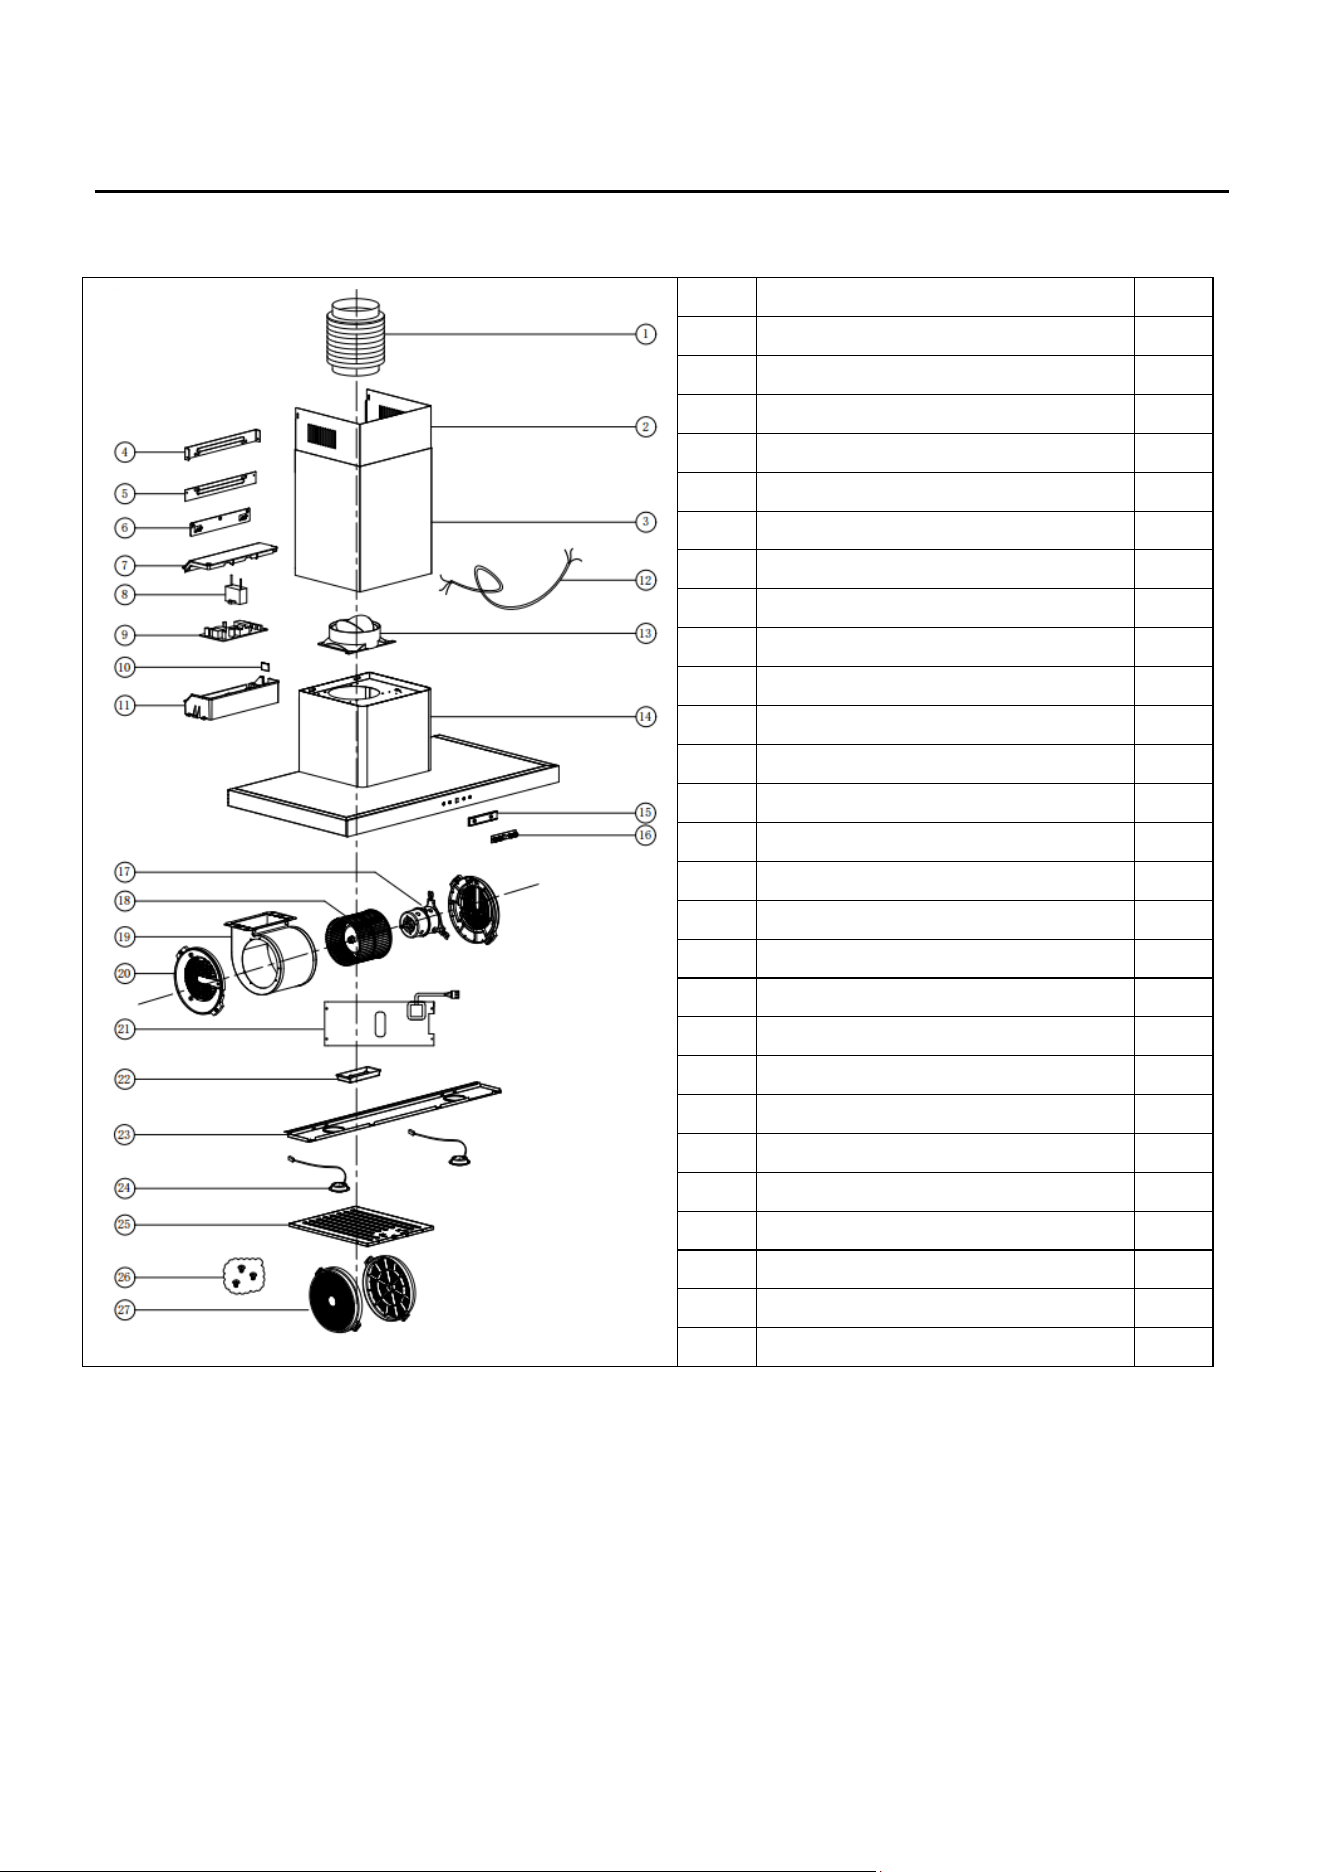
Explode Diagram
Ref.
Part name
QTY
1
Plastic extension pipe (not included)
1
2
Inside chimney
1
3
Outside chimney
1
4
Bracket for inside chimney
1
5
Bracket for outside chimney
1
6
Mounted bracket
1
7
Junction box cover
1
8
Capacitor
1
9
PCB board
1
10
Junction box seal cover
1
11
Junction box
1
12
Plug and cord
1
13
V-flap
1
14
Motor casing
1
15
Touch control board Box
1
16
Touch control board
1
17
Motor
1
18
Impeller
1
19
Blower
1
20
Plastic mesh
2
21
Heat element
1
22
Plastic oil cup
1
23
Light panel
2
24
LED light
2
25
Baffle filter
3
26
Screw kit
1
27
Carbon filter (if applicable)
2

18
Wiring Diagram
Specifications
Model
WT9BTABC
Rated voltage & Frequency
220-240V / 50Hz
Motor power
320W
Light power
LED 1W*2
Total power
322W
Product Size
896x505x830mm
Packing size
995x465x600mm
Product Net weight
17.0 KG
Product Gross weight
24.1 KG
Information for dismantling
Do not dismantle the appliance in a way which is not shown in the user manual. The appliance should
not be dismantled by the user. At the end of life, the appliance should not be disposed of with
household waste. Check with your Local Authority or retainer for recycling advice.