en Table of contents
Table of contentsTable of contents
INFORMATION FOR USE
1 Safety ........................................................................ 2
2 Preventing material damage .................................. 5
3 Environmental protection and saving energy ...... 6
4 Familiarising yourself with your appliance .......... 7
5 Accessories ............................................................. 9
6 Before using for the first time .............................. 10
7 Basic operation ..................................................... 11
8 Microwave .............................................................. 12
9 Automatic programmes ........................................ 14
10 Time-setting options .......................................... 16
11 Basic settings ..................................................... 17
12 Cleaning and servicing ...................................... 17
13 Troubleshooting ................................................. 19
14 Disposal ............................................................... 21
15 Customer Service ............................................... 21
16 How it works ........................................................ 21
17 INSTALLATION INSTRUCTIONS ....................... 34
17.2 Safe installation ............................................... 34
Safety 1 Safety
Observe the following safety instructions.
1.1 General information
¡ Read this instruction manual carefully.
¡ Keep the instruction manual and the product
information safe for future reference or for
the next owner.
¡ Do not connect the appliance if it has been
damaged in transit.
1.2 Intended use
This appliance is designed only to be built into
kitchen units. Read the special installation in-
structions.
Only a licensed professional may connect ap-
pliances without plugs. Damage caused by in-
correct connection is not covered under the
warranty.
The appliance can only be used safely if it is
correctly installed according to the safety in-
structions. The installer is responsible for en-
suring that the appliance works perfectly at its
installation location.
Only use this appliance:
¡ To prepare meals and drinks.
¡ For household use and similar applications,
such as: In kitchens for employees in shops,
offices and other commercial sectors; in ag-
riculture; by customers in hotels and other
residential facilities; in bed and breakfasts.
¡ Up to an altitude of 4000m above sea level.
This appliance complies with the standards EN
55011 and CISPR 11. It is a group 2, class B
product. Group 2 means that microwaves are
produced for the purpose of heating food.
Class B means that the appliance is suitable
for private households.
1.3 Restriction on user group
This appliance may be used by children aged
8 or over and by people who have reduced
physical, sensory or mental abilities or inad-
equate experience and/or knowledge,
provided that they are supervised or have
been instructed on how to use the appliance
safely and have understood the resulting
dangers.
Do not let children play with the appliance.
Children must not perform cleaning or user
maintenance unless they are at least 15 years
old and are being supervised.
Keep children under the age of 8 years away
from the appliance and power cable.
1.4 Safe use
Always place accessories in the cooking com-
partment the right way round.
"Accessories", Page9
WARNING‒Risk of fire!
Combustible objects that are left in the cook-
ing compartment may catch fire.
Never store combustible objects in the cook-
ing compartment.
If smoke is emitted, the appliance must be
switched off or the plug must be pulled out
2

Safety en
and the door must be held closed in order to
stifle any flames.
Loose food remnants, fat and meat juices may
catch fire.
Before using the appliance, remove the
worst of the food residues and remnants
from the cooking compartment, heating ele-
ments and accessories.
Opening the appliance door creates a draught.
Greaseproof paper may come into contact with
the heating element and catch fire.
Never place greaseproof paper loosely over
accessories when preheating the appliance
and while cooking.
Always cut greaseproof paper to size and
use a plate or baking tin to hold it down.
Overheating of the appliance may cause a fire.
If the appliance is installed behind a decorative
door or unit door, this will result in a build-up
of heat during operation with the decorative
door or unit door closed.
Only operate the appliance when the decor-
ative door or unit door is open.
WARNING‒Risk of burns!
The appliance and its parts that can be
touched become hot during use.
Caution should be exercised here in order to
avoid touching heating elements.
Young children under 8 years of age must
be kept away from the appliance.
Accessories and cookware get very hot.
Always use oven gloves to remove ac-
cessories or cookware from the cooking
compartment.
When the cooking compartment is hot, any al-
coholic vapours inside may catch fire. The ap-
pliance door may spring open. Hot steam and
jets of flame may escape.
Only use small quantities of drinks with a
high alcohol content in food.
Do not heat spirits (≥ 15% vol.) when undi-
luted (e.g. for marinating or pouring over
food).
Open the appliance door carefully.
WARNING‒Risk ofscalding!
The accessible parts of the appliance become
hot during operation.
Never touch these hot parts.
Keep children at a safe distance.
Hot steam may escape when you open the ap-
pliance door. Steam may not be visible, de-
pending on the temperature.
Open the appliance door carefully.
Keep children at a safe distance.
If there is water in the cooking compartment
when it is hot, this may create hot steam.
Never pour water into the cooking compart-
ment when the cooking compartment is hot.
WARNING‒Risk of injury!
Scratched glass in the appliance door may de-
velop into a crack.
Do not use any harsh or abrasive cleaners
or sharp metal scrapers to clean the glass
on the appliance door, as they may scratch
the surface.
The hinges on the appliance door move when
the door is opened and closed, which could
trap your fingers.
Keep your hands away from the hinges.
Components inside the appliance door may
have sharp edges.
Wear protective gloves.
Alcoholic vapours may catch fire in the hot
cooking compartment, and the appliance door
may spring open and may fall off. The door
panels may shatter and fragment.
"Preventing material damage", Page5
Only use small quantities of drinks with a
high alcohol content in food.
Do not heat spirits (≥ 15% vol.) when undi-
luted (e.g. for marinating or pouring over
food).
Open the appliance door carefully.
WARNING‒Risk of electric shock!
Improper repairs are dangerous.
Repairs to the appliance should only be car-
ried out by trained specialist staff.
Only use genuine spare parts when repairing
the appliance.
If the power cord of this appliance is dam-
aged, it must be replaced by the manufac-
turer, the manufacturer's Customer Service
or a similarly qualified person in order to pre-
vent any risk.
If the insulation of the power cord is damaged,
this is dangerous.
Never let the power cord come into contact
with hot appliance parts or heat sources.
Never let the power cord come into contact
with sharp points or edges.
Never kink, crush or modify the power cord.
An ingress of moisture can cause an electric
shock.
Do not use steam- or high-pressure cleaners
to clean the appliance.
3

en Safety
If the appliance or the power cord is damaged,
this is dangerous.
Never operate a damaged appliance.
Never operate an appliance with a cracked
or fractured surface.
Never pull on the power cord to unplug the
appliance. Always unplug the appliance at
the mains.
If the appliance or the power cord is dam-
aged, immediately unplug the power cord or
switch off the fuse in the fuse box.
Call customer service.
Page21
WARNING‒Risk of suffocation!
Children may put packaging material over their
heads or wrap themselves up in it and suffoc-
ate.
Keep packaging material away from chil-
dren.
Do not let children play with packaging ma-
terial.
Children may breathe in or swallow small
parts, causing them to suffocate.
Keep small parts away from children.
Do not let children play with small parts.
1.5 Microwave
CAREFULLY READ THE IMPORTANT SAFETY
INSTRUCTIONS AND KEEP THEM SAFE FOR
FUTURE USE
WARNING‒Risk of fire!
Using the appliance for anything other than its
intended purpose is dangerous and may
cause damage. For example, heated slippers
and pillows filled with grain or cereal may
catch fire, even several hours later.
Never dry food or clothing with the appli-
ance.
Never heat up slippers, pillows filled with
grain or cereal, sponges, damp cleaning
cloths or similar with the appliance.
The appliance must only be used to prepare
food and drink.
Food and its packaging and containers may
catch fire.
Never heat food in heat-retaining packaging.
Do not leave food unattended while it is
heating in containers made of plastic, paper
or other combustible materials.
Never set the microwave power too high or
the cooking time too long. Follow the instruc-
tions provided in this user manual.
Never use the microwave to dry food.
Never defrost or heat food with a low water
content, such as bread, at too high a mi-
crowave power or for too long.
Cooking oil may catch fire.
Never use the microwave to heat cooking oil
on its own.
Objects and utensils that are left in the mi-
crowave oven may catch fire.
Before using the appliance, make sure that
there are no objects or utensils in the cook-
ing compartment that are not suitable for
use in a microwave oven.
Do not use the cooking compartment to
store combustible objects, cooking utensils,
food or similar when the microwave oven is
not in use.
WARNING‒Risk of explosion!
Liquids and other food may easily explode
when in containers that have been tightly
sealed.
Never heat liquids or other food in contain-
ers that have been tightly sealed.
WARNING‒Risk of burns!
Foods with peel or skin may burst or explode
during heating, or even afterwards.
Never cook eggs in their shell or heat hard-
boiled eggs in their shell.
Never cook shellfish or crustaceans.
Always prick the yolk of eggs before mi-
crowaving.
The skin of foods that have a peel or skin,
such as apples, tomatoes, potatoes and
sausages, may burst. Before heating, prick
the peel or skin.
Heat is not distributed evenly through baby
food.
Never heat baby food in closed containers.
Always remove the lid or teat.
Stir or shake well after heating.
Check the temperature before giving the
food or drink to a child.
Heated food gives off heat. The cookware may
become hot.
Always use oven gloves to remove cook-
ware or accessories from the cooking com-
partment.
Airtight packaging may burst when food is
heated.
Always follow the instructions on the pack-
aging.
Always use oven gloves to remove the
dishes from the cooking compartment.
4
Preventing material damage en
The accessible parts of the appliance become
hot during operation.
Never touch these hot parts.
Keep children at a safe distance.
Using the appliance for anything other than its
intended purpose is dangerous. This is be-
cause, for instance, overheated slippers, pil-
lows filled with grain or cereal, sponges and
damp cleaning cloths, etc., may cause burns
to the skin.
Never dry food or clothing with the appli-
ance.
Never heat up slippers, pillows filled with
grain or cereal, sponges, damp cleaning
cloths or similar with the appliance.
The appliance must only be used to prepare
food and drink.
WARNING‒Risk ofscalding!
There is a possibility of delayed boiling when a
liquid is heated. This means that the liquid
reaches the boiling temperature without the
usual steam bubbles rising to the surface. Ex-
ercise caution even when only gently shaking
the container. The hot liquid may suddenly boil
over and splatter.
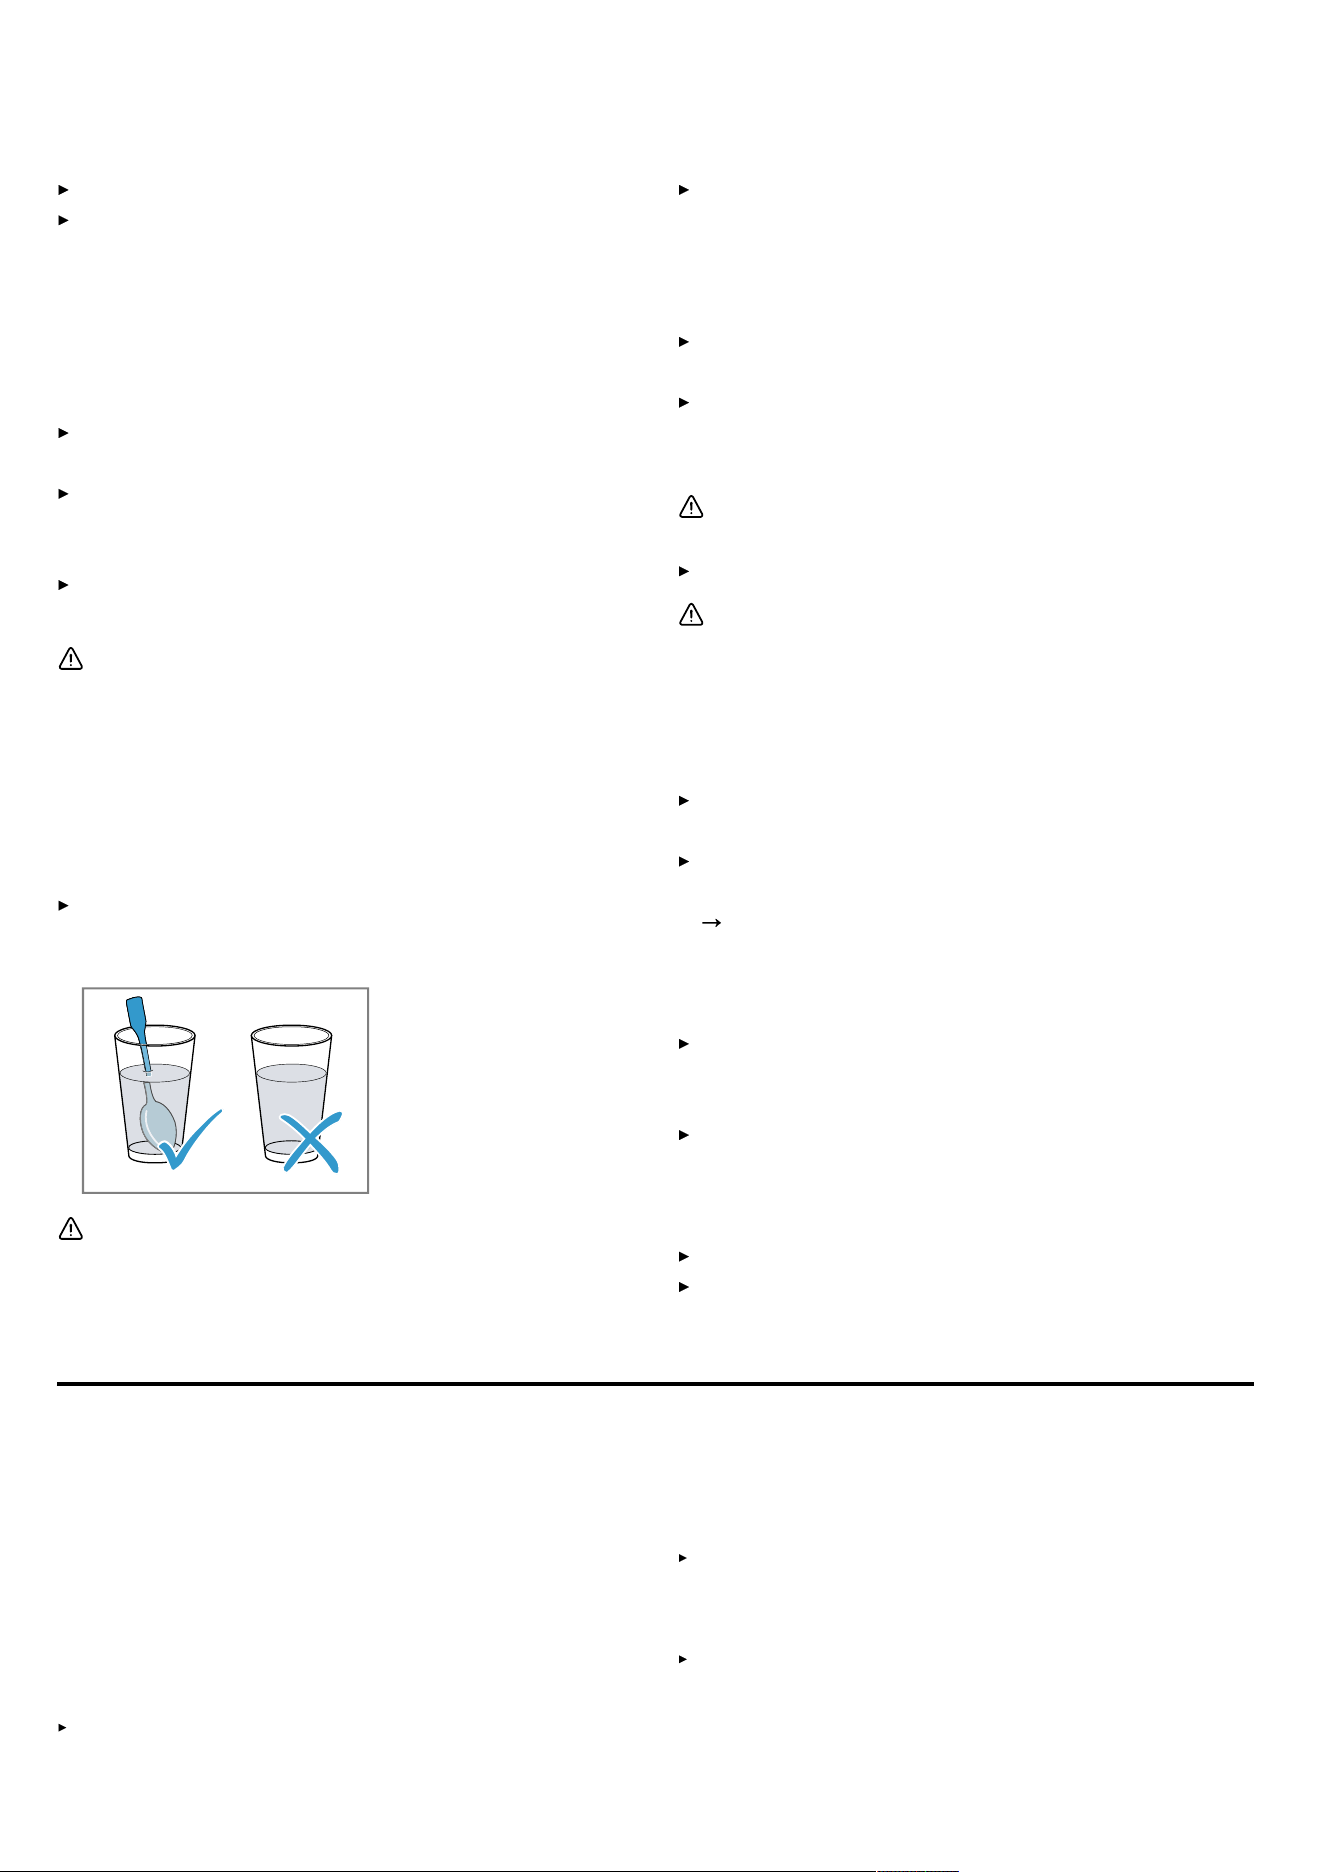
Always place a spoon in the container when
heating liquids. This prevents delayed boil-
ing.
WARNING‒Risk of injury!
Unsuitable cookware may crack. Porcelain or
ceramic cookware can have small perforations
in the handles and lid. These perforations con-
ceal a cavity below. If moisture penetrates this
cavity, it could cause the cookware to crack.
Only use microwave-safe cookware.
Cookware and containers made from metal or
cookware with metal edging may lead to
sparks being formed during simple microwave
operation. The appliance is damaged.
Never use metal containers during mi-
crowave-only operation.
Only use microwave-safe cookware or use
the microwave in combination with a type of
heating.
WARNING‒Risk of electric shock!
The appliance uses a high voltage.
Never remove the casing.
WARNING‒Risk of serious harm to
health!
Inadequate cleaning may destroy the surface
of the appliance, reduce its service life, and
lead to dangerous situations, such as escap-
ing microwave energy.
Clean the appliance on a regular basis, and
remove any food residue immediately.
Always keep the cooking compartment, door
seal, door and hinge clean.
"Cleaning and servicing", Page17
Never operate the appliance if the cooking
compartment door or the door seal is dam-
aged. Microwave energy may escape.
Never use the appliance if the cooking com-
partment door, the door seal or the plastic
door frame is damaged.
Any repair work must only be carried out by
customer service.
Microwave energy will escape from appliances
that do not have any casing.
Never remove the casing.
For any maintenance or repair work, contact
the customer service.
Preventing material damage2 Preventing material damage
2.1 General
ATTENTION
Alcoholic vapours may catch fire in the hot cooking
compartment and cause permanent damage to the ap-
pliance. The appliance door may spring open due to an
explosion and it may fall off. The door panels may shat-
ter and fragment. Due to the resulting negative pres-
sure, the cooking compartment may become consider-
ably deformed inwards.
Do not heat spirits (≥ 15% vol.) when undiluted (e.g.
for marinating or pouring over food).
When the cooking compartment is hot, any water inside
it will create steam. The change in temperature may
cause damage.
Never pour water into the cooking compartment when
it is still hot.
The prolonged presence of moisture in the cooking
compartment leads to corrosion.
Always wipe away the condensation after cooking. Al-
ways allow the cooking compartment to cool down
with the door closed after cooking at high temperat-
ures.
5
en Environmental protection and saving energy
Do not keep moist food in the cooking compartment
for a long time with the door closed.
Do not store food in the cooking compartment.
Take care not to trap anything in the appliance door.
If the seal is very dirty, the appliance door will no longer
close properly during operation. This may damage the
front of adjacent kitchen units.
Keep the seal clean at all times.
Never operate the appliance if the seal is damaged or
missing.
Sitting or placing objects on the appliance door may
damage it.
Do not place, hang or support objects on the appli-
ance door.
With certain models, accessories may scratch the door
pane when closing the appliance door.
Always push accessories fully into the cooking com-
partment.
2.2 Microwave
Follow these instructions when using the microwave.
ATTENTION
Metal touching the wall of the cooking compartment will
cause sparks, which may damage the appliance or the
inner door pane.
Metal (e.g. a spoon in a glass) must be kept at least
2cm from the cooking compartment walls and the in-
side of the door.
Placing aluminium containers in the appliance may
cause sparks, which will damage the appliance.
Do not use aluminium containers in the appliance.
Operating the appliance without food in the cooking
compartment may lead to overloading.
Do not switch on the microwave unless there is food
inside. The only exception to this rule is when per-
forming a short cookware test.
If you prepare several bags of microwave popcorn in
immediate succession at a microwave power level that
is too high, the cooking compartment may be damaged.
Leave the appliance to cool down for several minutes
between each use.
Never set a microwave power level that is too high.
Use a maximum microwave output of 600 watts.
Always place the popcorn bag on a glass plate.
The microwave feed is damaged by the removal of the
cover.
Never remove the cover of the microwave feed in the
cooking compartment.
Using unsuitable cookware may result in damage.
When using the grill, the microwave combi mode or
the hot air, only use tableware that can withstand the
high temperatures.
Environmental protection and saving energy3 Environmental protection and saving energy
3.1 Disposing of packaging
The packaging materials are environmentally compatible
and can be recycled.
Sort the individual components by type and dispose
of them separately.
3.2 Saving energy
If you follow these instructions, your appliance will use
less power.
Note: To save energy, the display is dimmed after 1
minute in low power mode.
Only preheat the appliance if the recipe or the recom-
mended settings tell you to do so.
Not preheating the appliance can reduce the energy
used.
Use dark-coloured, black-coated or enamelled baking
tins.
These types of baking tin absorb the heat particularly
well.
When cooking multiple dishes, do so in succession or in
parallel.
The cooking compartment is heated after cooking the
first dish. This reduces the cooking time for the follow-
ing dishes.
If the cooking time is relatively long, you can switch the
appliance off 10minutes before the cooking time ends.
There will be enough residual heat to finish cooking
the dish.
Allow frozen food to defrost before cooking.
This saves the energy that would otherwise be re-
quired to defrost it.
Open the appliance door as little as possible during op-
eration.
This will maintain the temperature in the cooking com-
partment and eliminate the need for the appliance to
reheat.
Heat two cups of liquid at the same time.
Heating several dishes at the same time requires less
energy than heating dishes one after the other.
Hide the clock in low power mode.
The appliance saves energy in low power mode.
Note: In accordance with the EU Ecodesign Directive
2023/826, this appliance is in a different state when
switched off. This is referred to below as low power
mode.
Even when the main function is not active, the appliance
needs energy for:
Detecting operation of the touch keys
Monitoring door opening
6
Familiarising yourself with your appliance en
Editing the time (without display)
By definition, therefore, there is neither an “off” nor a
“standby” mode, which is why the term low power mode
is used. EN IEC 60350-1:2023 must be used to meas-
ure low power mode.
Familiarising yourself with your appliance4 Familiarising yourself with your appliance
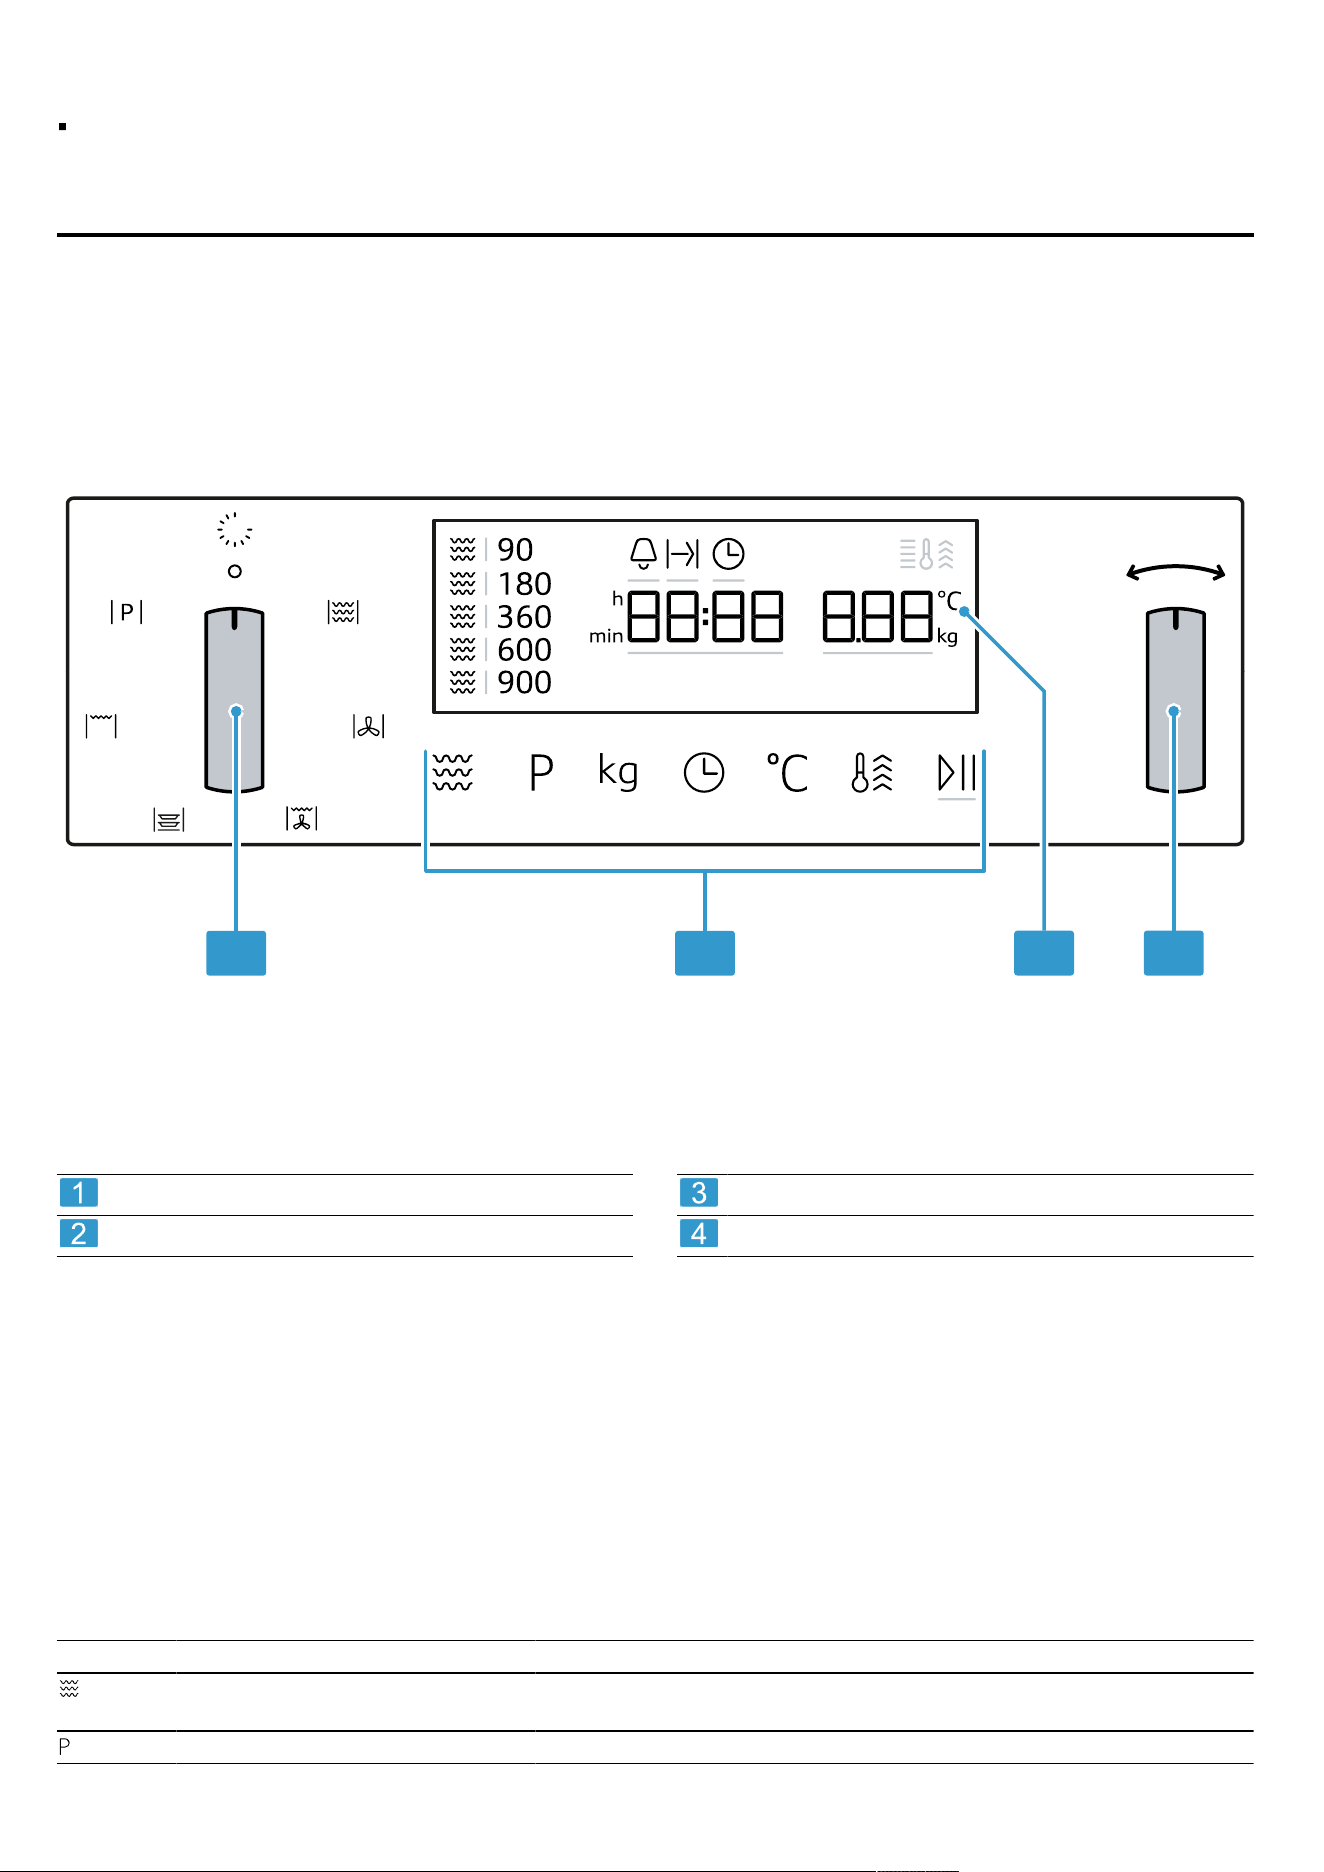
4.1 Controls
You can use the control panel to configure all functions of your appliance and to obtain information about the operat-
ing status.
1 2
3 4
On certain models, specific details such as the colour and shape may differ from those pictured.
Function selector
Touch fields
Display
Rotary selector
Function selector
Use the function selector to set the types of heating and
other functions.
On some product variants, the function selector can be
pushed in.
If you turn the function selector from the off position to a
function, it takes a few seconds for the relevant function
to be available.
Rotary selector
Use the rotary selector to change the settings values
shown in the display.
On some product variants, the rotary selector can be
pushed in.
In selection lists, e.g. programmes, the first selection fol-
lows the last.
For values, e.g. weight, turn the rotary selector back the
other way when you reach the minimum or maximum
value.
Touch fields
Touch fields are touch-sensitive surfaces. To select a function, touch the relevant field.
Symbol Name Use
Microwave Select the microwave power levels or switch on the microwave func-
tion for a type of heating.
Automatic programmes Call up the selection of automatic programmes.
7
en Familiarising yourself with your appliance
Symbol Name Use
Time-setting options Timer, cooking time or set the time.
Temperature Select set the temperature.
Weight Select set the weight.
Start/stop Press briefly: Start or stop operation.
Press and hold: End operation. The settings are reset.
Display
You can see the current setting values or options in the
display.
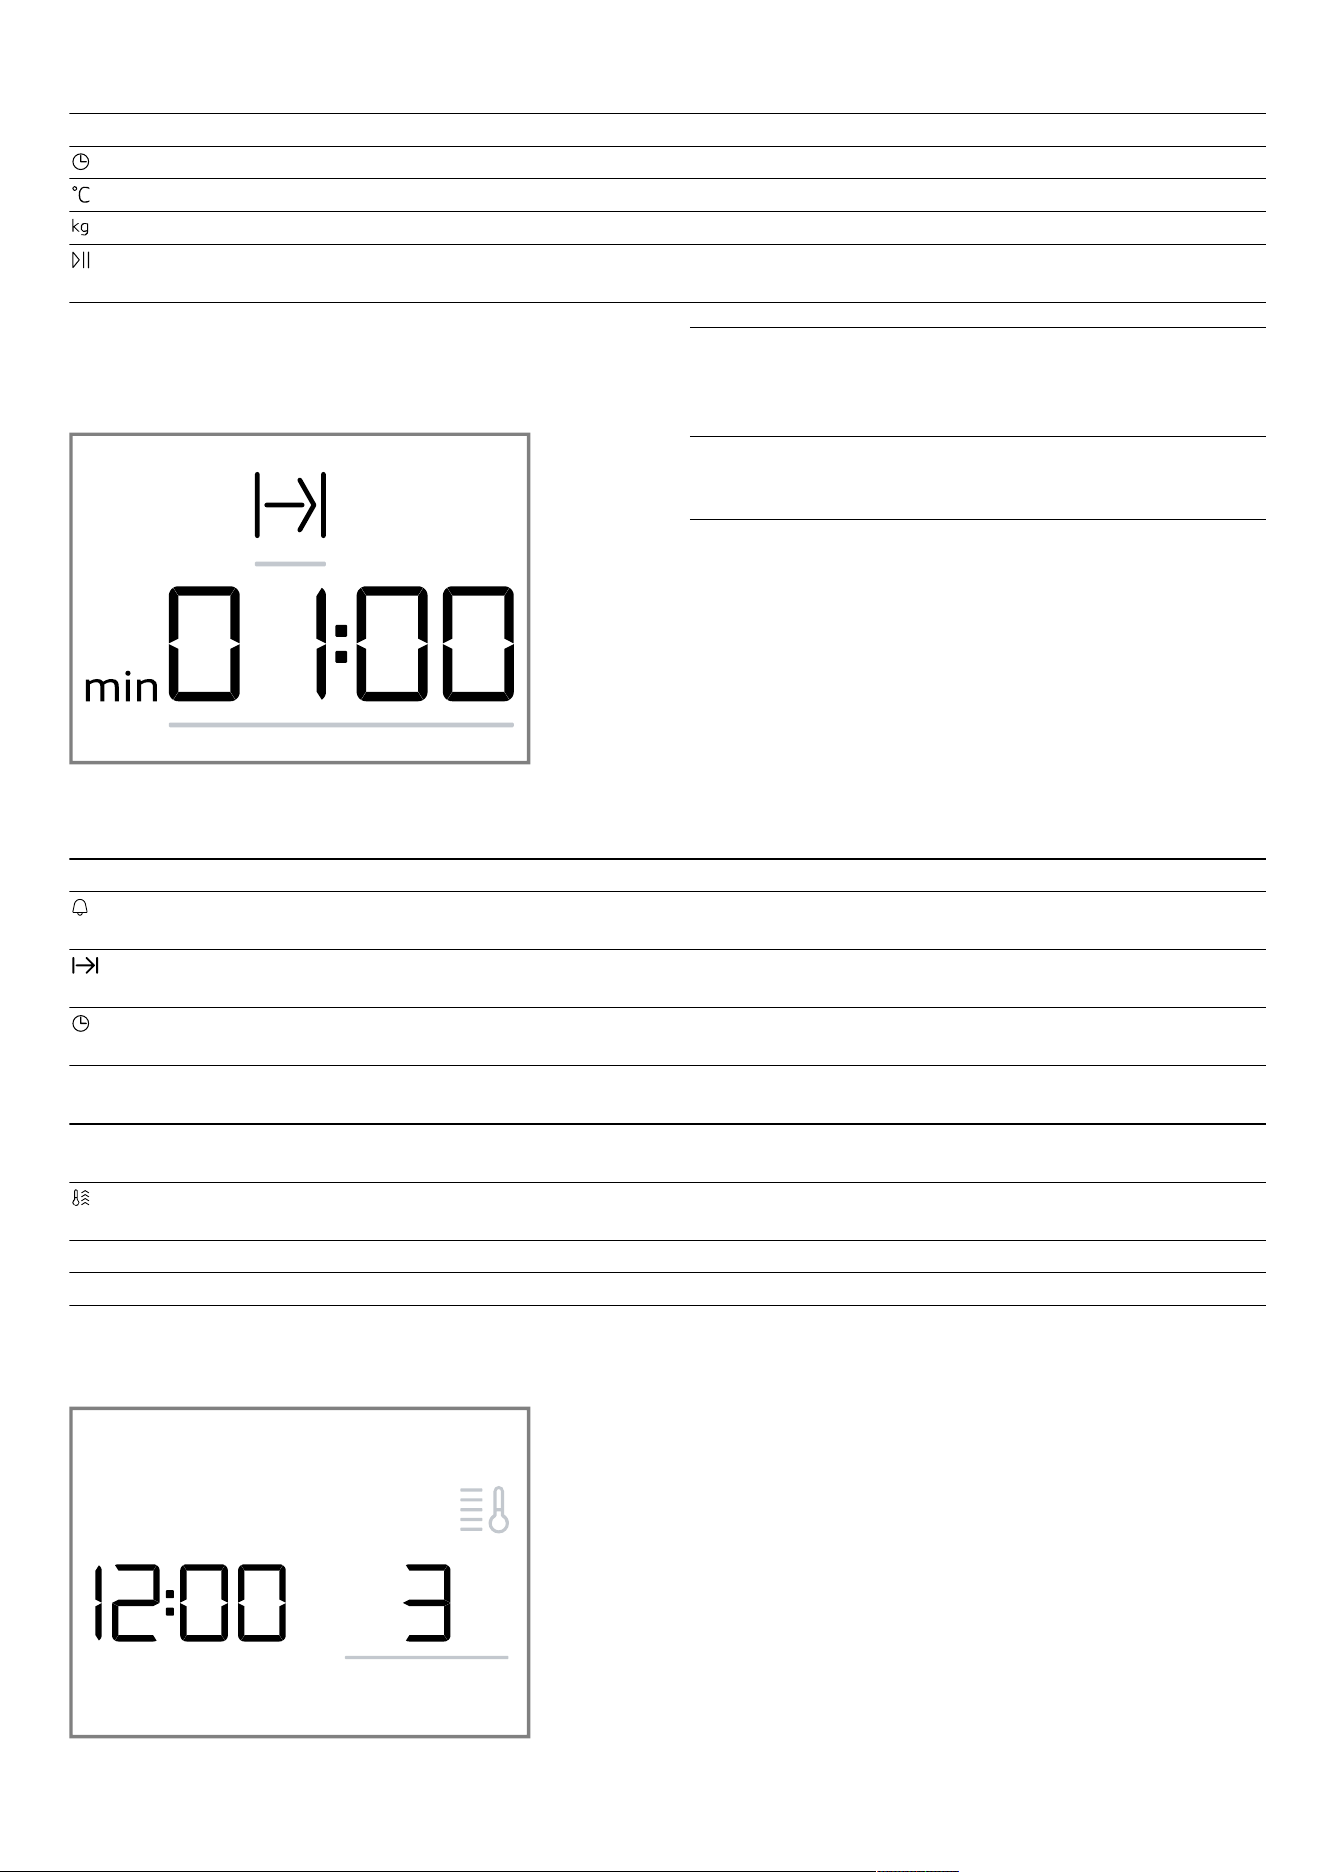
Active value The directly adjustable value is high-
lighted white with a red bar underlined.
You can use the rotary selector to change
the active value.
Passive
value
You cannot directly adjust values outside
of the brackets. If you want to change a
value, you must first activate the value.
Display elements
Here you can find a short explanation of the various display elements.
Symbol Name Meaning
Timer If the symbol is highlighted, the timer
appears in the display.
Cooking time If the symbol is highlighted, the cook-
ing time appears in the display.
Clock If the symbol is highlighted, the clock
appears in the display.
h:min Hours/minutes The time is displayed in hours and
minutes.
min:sec Minutes/seconds The time is displayed in minutes and
seconds.
Rapid heating If the symbol is highlighted, rapid heat-
ing is activated.
°C Temperature The temperature is displayed in °C.
kg Weight The weight is displayed in kg.
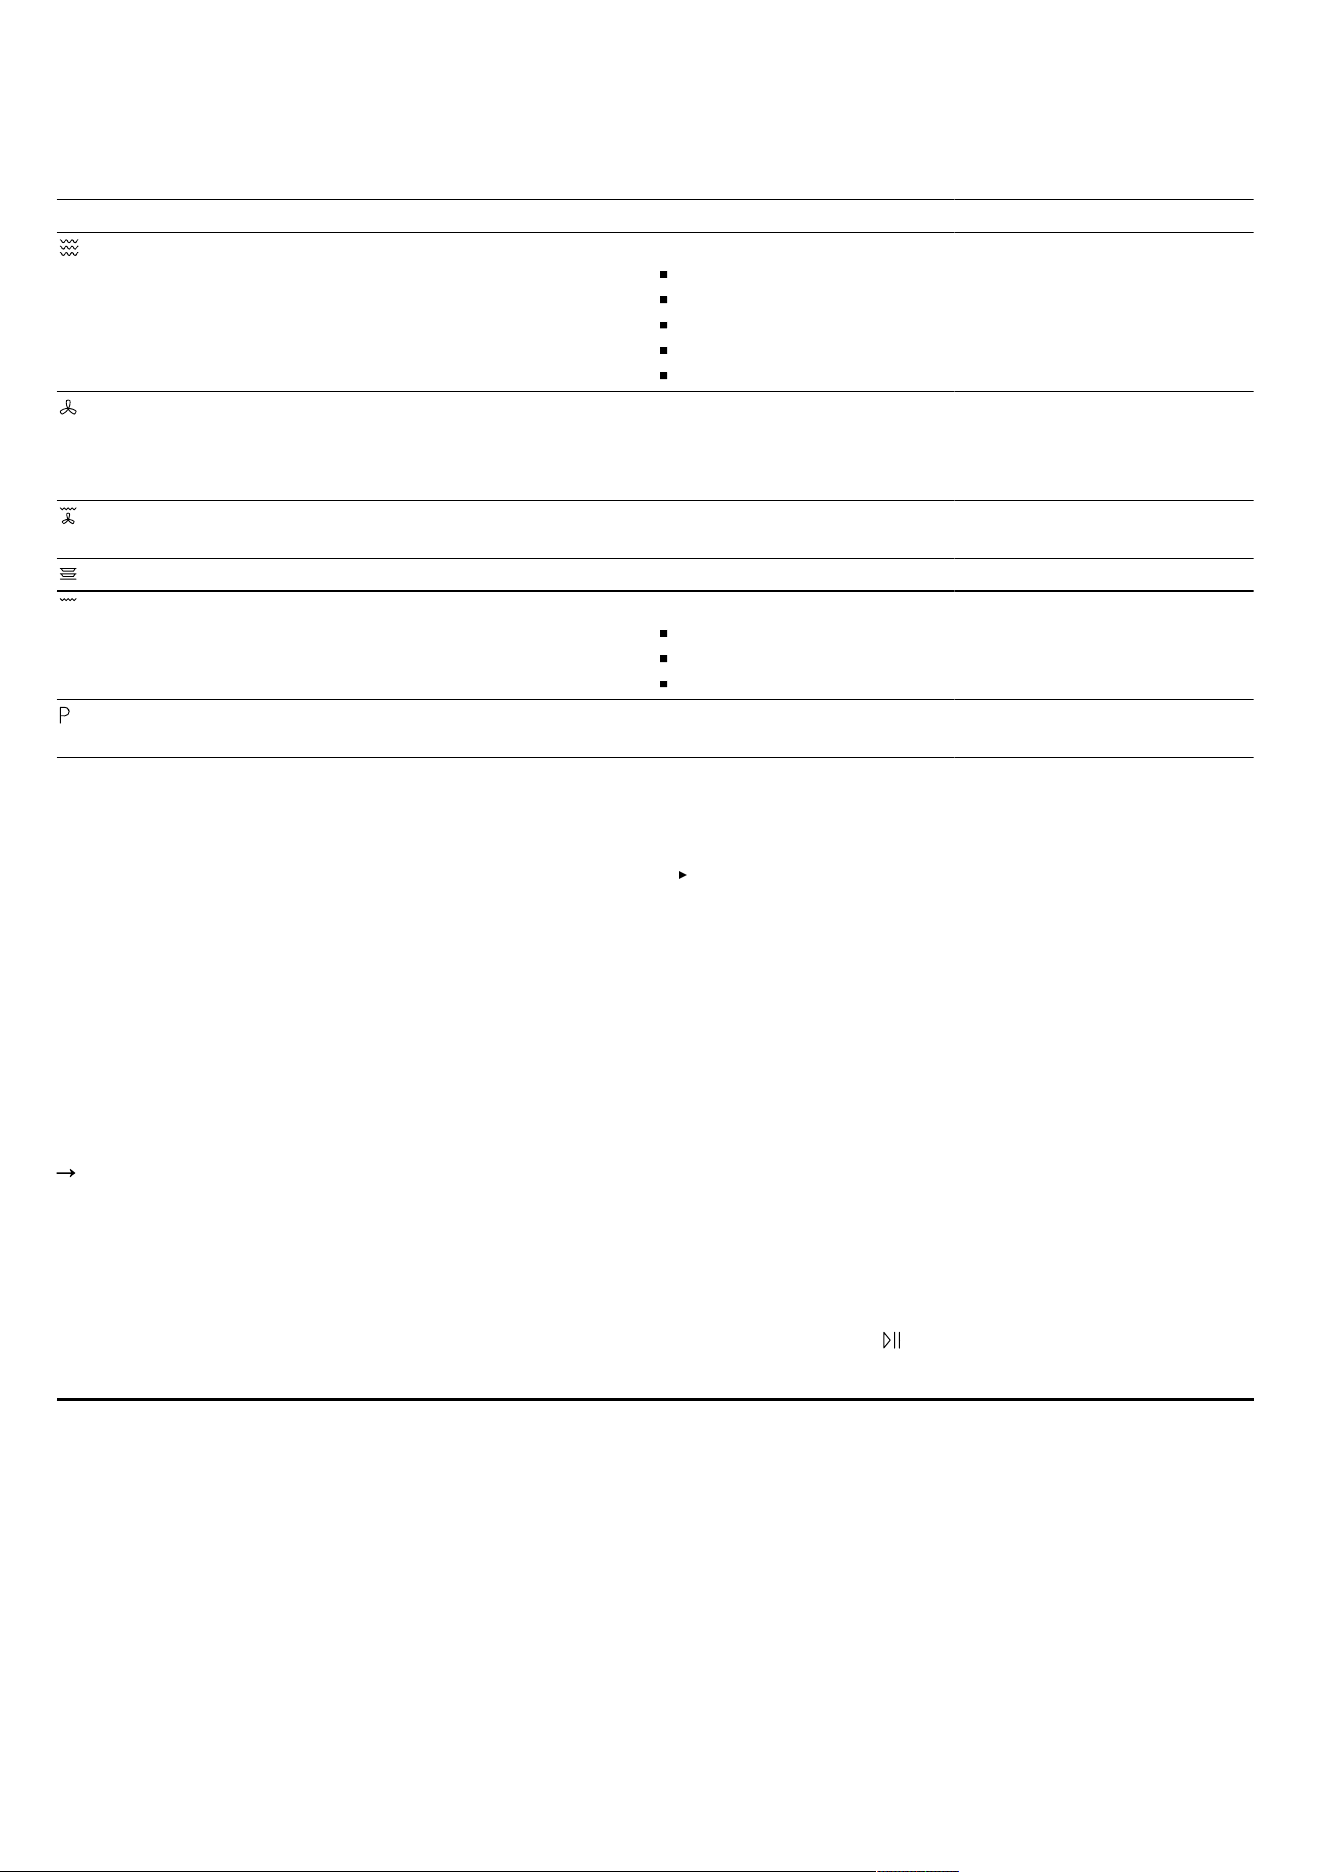
Temperature display
The temperature display shows the heating progress.
After operation starts, the thermometer lights up and the
bars next to it light up one after another to display the
heating up progress of the interior temperature. When
all the bars are lit, the appliance has reached the set
temperature. When using the grill, all the bars are lit
from the start.
When using the microwave, there is no temperature dis-
play.
Due to thermal inertia, the temperature displayed may
differ slightly from the actual temperature inside the
cooking compartment.
Night mode
To save energy, the control panel brightness is automat-
ically reduced to a lower level between 10 p.m. and
5.59 a.m.
8
Accessories en
4.2 Types of heating
Here you can find an overview of the types of heating. You can find recommendations on using the types of heating.
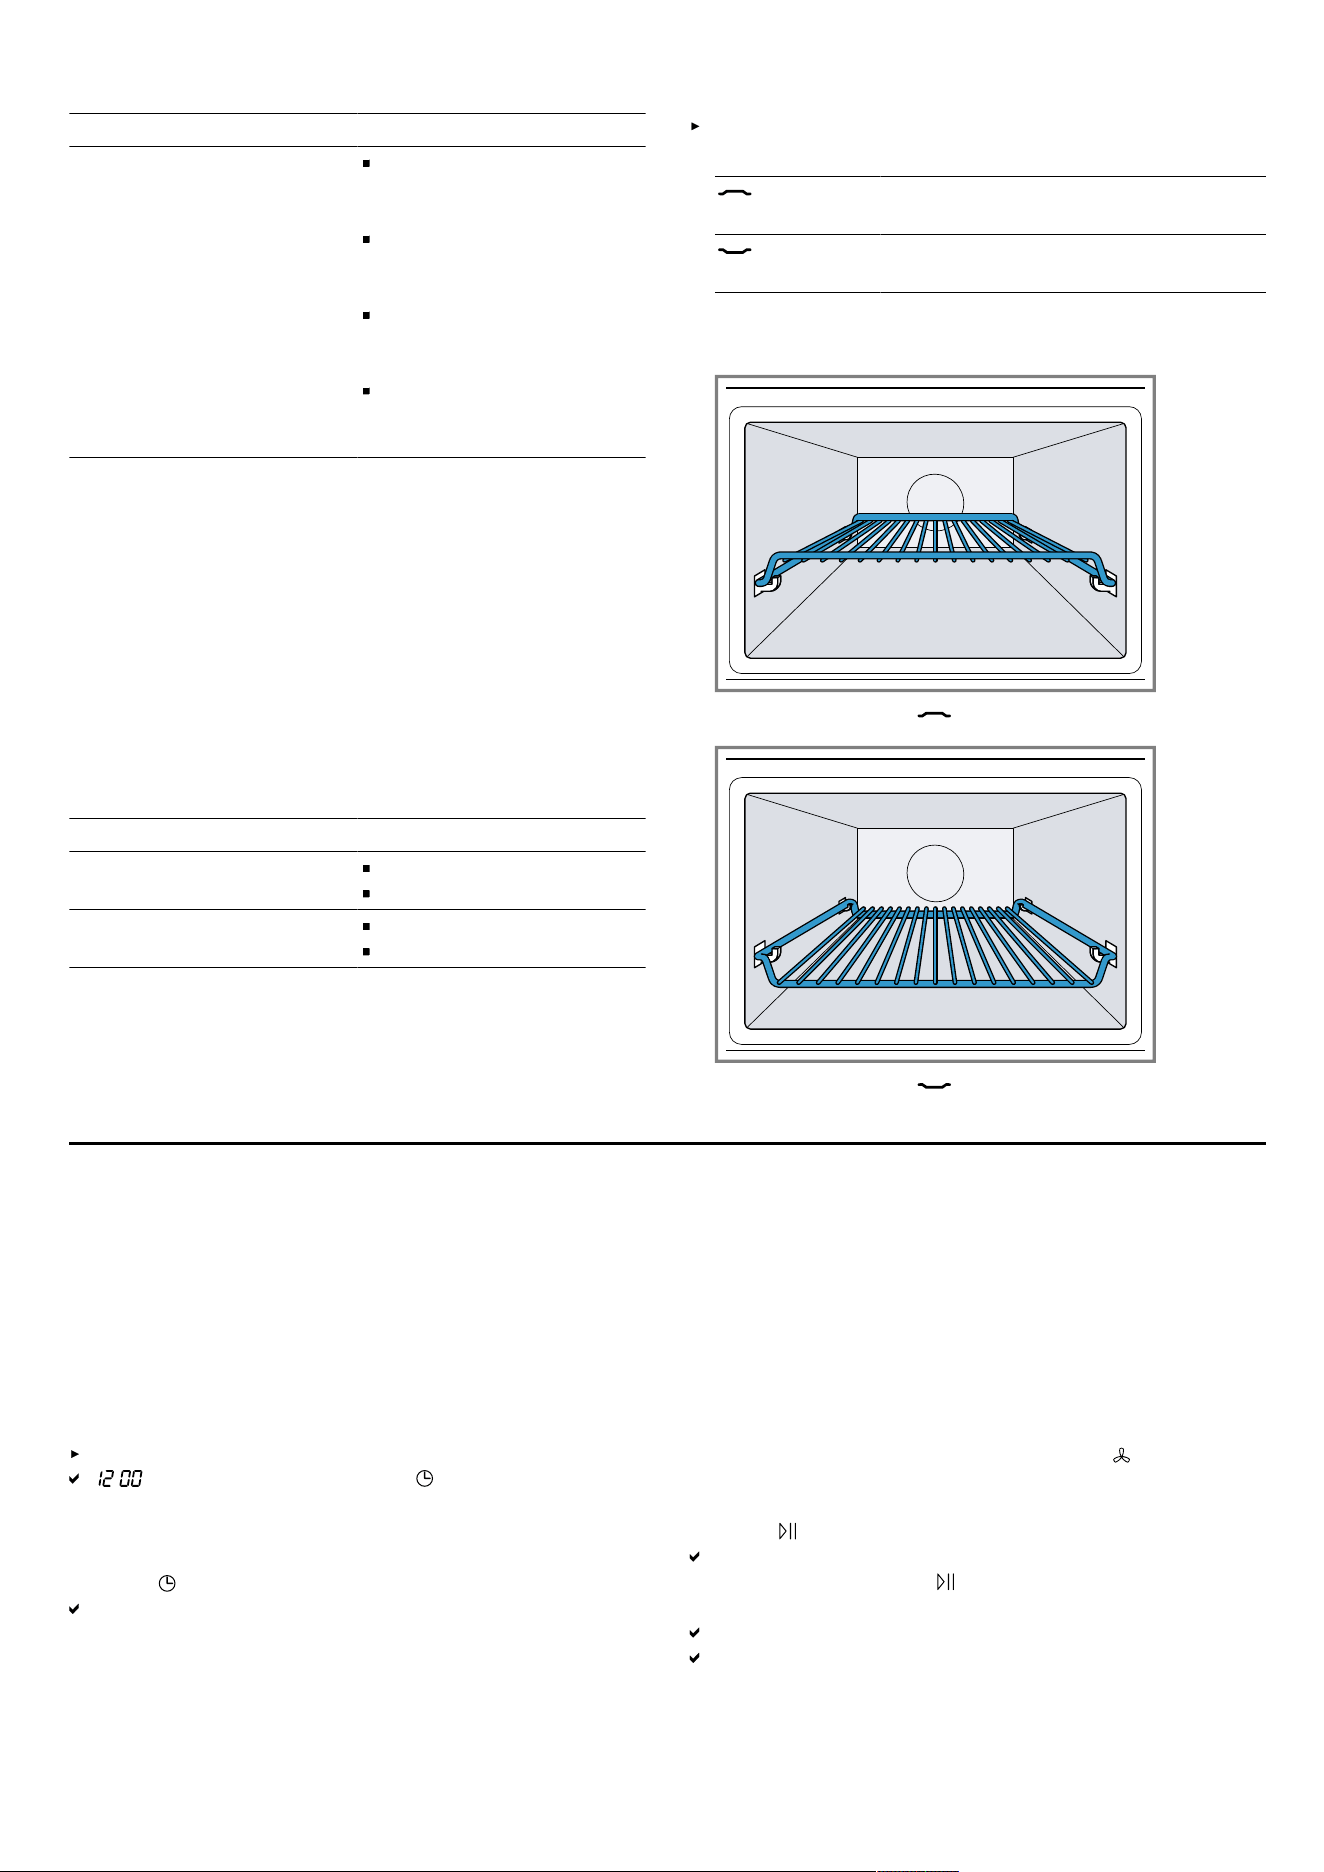
Symbol Name Temperature/levels Use
Microwave Microwave power settings:
90 W
180 W
360 W
600 W
900 W
For defrosting, cooking and
heating foods and liquids.
Hot air 40°C
100-230°C
Let yeast dough rise, defrost
cream cakes.
For baking and roasting on
one level.
Hot air grilling 100-230°C Roasting poultry, whole fish
and large pieces of meat.
Plate warming 30-70°C Warming plates.
Grill Grill settings:
1 = low
2 = medium
3 = high
Grilling flat items such as
steak and sausages, or mak-
ing toast. Browning food.
Programmes - There are preprogrammed
settings for many dishes.
4.3 Cooking compartment
The functions in the cooking compartment make your
appliance easier to use.
Interior lighting
When you open the appliance door, the light in the
cooking compartment switches on. If the appliance door
remains open for longer than 15minutes, the light
switches off again.
In most operating modes, the interior lighting switches
on as soon as operation starts. The interior lighting
switches off again when operation stops.
You can specify whether you want the interior lighting to
switch on during operation in the basic settings.
Page17
Cooling fan
The cooling fan switches on and off as required. The hot
air escapes through the ventilation slots above the appli-
ance door.
ATTENTION
Covering the ventilation slots will cause the appliance to
overheat.
Do not cover the ventilation slots.
To cool the cooking compartment more quickly after op-
eration, the cooling fan continues to run for a certain
period afterwards. If the appliance is running in mi-
crowave operation, the appliance remains cool, but the
cooling fan still switches on. The cooling fan may con-
tinue to run even when microwave operation has ended.
Condensation
Condensation can occur in the cooking compartment
and on the appliance door when cooking. Condensation
is normal and does not adversely affect appliance oper-
ation. Wipe away the condensation after cooking.
4.4 Appliance door
If you open the appliance door during operation, opera-
tion stops. If the appliance door is closed, you can con-
tinue operation with .
Accessories5 Accessories
Use original accessories. These have been made espe-
cially for your appliance.
The accessories supplied may differ depending on the
appliance model.
9
en Before using for the first time
Accessories Use
Wire rack Wire rack for baking and
roasting in oven opera-
tion.
Wire rack for grilling, e.g.
steaks, sausages and
bread
Wire rack as a storage
space, e.g. for flat oven-
proof dishes
Wire rack not suitable for
maximum microwave
output
5.1 Other accessories
You can purchase other accessories from our customer
service, specialist retailers or online.
You will find a comprehensive range of products for
your appliance in our brochures and online:
www.neff-home.com
Accessories are appliance-specific. When purchasing
accessories, always quote the exact product number (E
no.) of your appliance.
You can find out which accessories are available for
your appliance in our online shop or from our customer
service.
Other accessories Use
Glass roasting dish Stews
Bakes
Pizza tray Tray bakes
Biscuits
5.2 Inserting the accessory
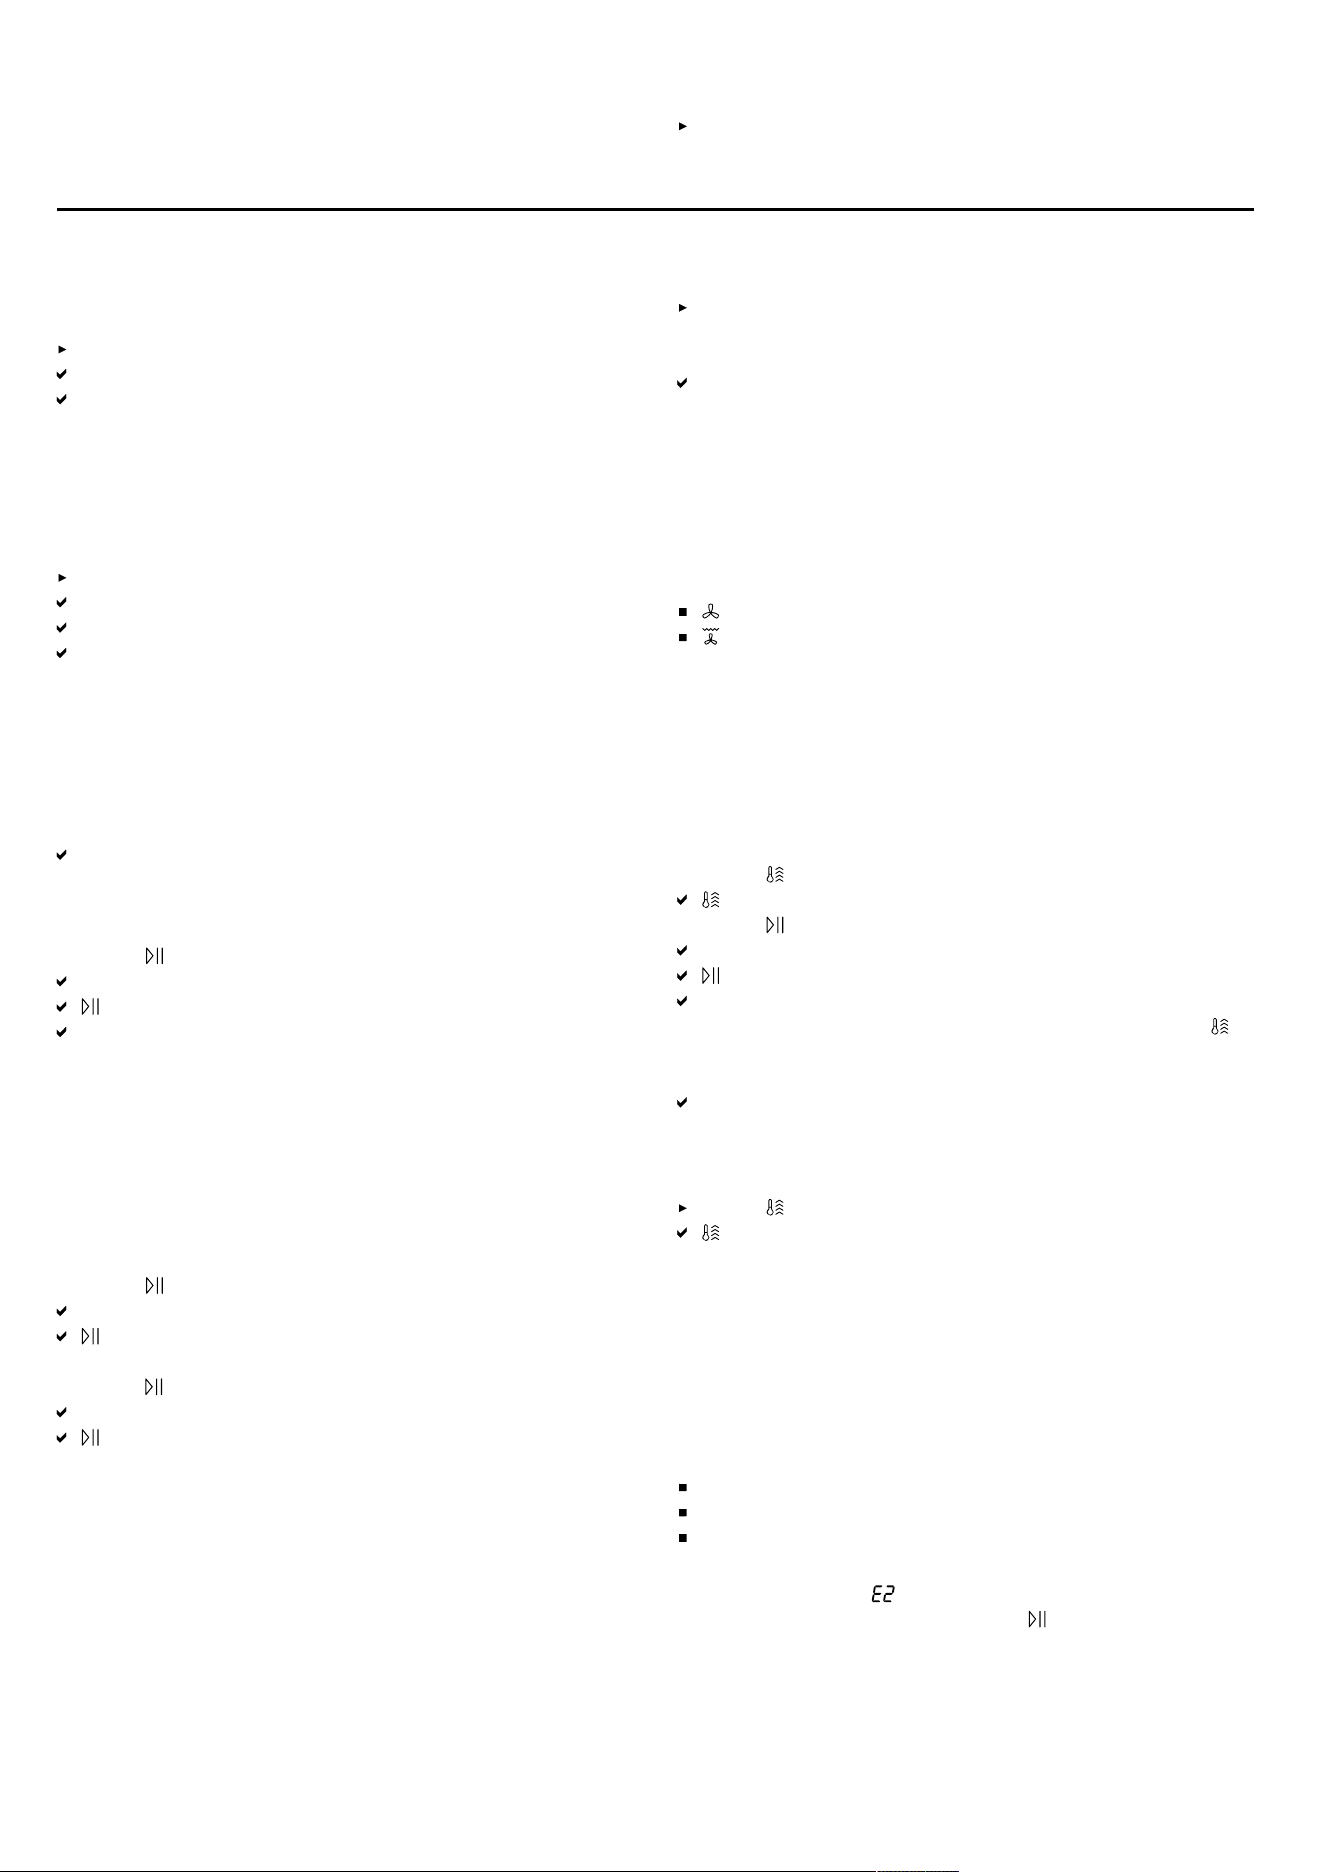
The accessory can be inserted in two positions.
Insert the accessory so that it does not touch the ap-
pliance door.
Insert the accessory in the high posi-
tion.
Insert the accessory in the low posi-
tion.
The accessories supplied may differ depending on
the appliance model.
The image shows the engagement position.
The image shows the engagement position.
Before using for the first time6 Before using for the first time
Configure the settings for initial start-up. Clean the appli-
ance and accessories.
6.1 Performing the initial configuration
After connecting the appliance to the power supply or
following a power cut, the following prompt appears in
the display for the setting the time. It may take a few
seconds for the prompt to appear.
Connect the appliance to the power supply.
: flashes in the display and lights up.
Setting the time
1.
Set the time using the rotary selector.
2.
Press .
The time is set.
Note: To reduce the consumption of your appliance in
low power mode, you can hide the clock.
6.2 Cleaning the appliance before using it
for the first time
Clean the cooking compartment and accessories before
using the appliance to prepare food for the first time.
1.
Make sure that there is no leftover packaging, ac-
cessories or other objects in the cooking compart-
ment.
2.
Close the appliance door.
3.
Use the function selector to set Hot air .
4.
Use the rotary selector to set the temperature to
180°C.
5.
Press .
The appliance starts.
6.
After one hour, press .
7.
Turn the function selector to the off position.
The appliance is cleaned.
The appliance is switched off.
10
Basic operation en
6.3 Cleaning the accessories
Clean the accessory thoroughly with soapy water and
a soft dish cloth.
Basic operation7 Basic operation
7.1 Switching on the appliance
Turn the function selector to switch on the appliance.
The appliance is ready to use.
A default value appears in the display.
7.2 Switching off the appliance
Switch your appliance off when you are not using it. If
no settings are applied for an extended period, the ap-
pliance switches itself off automatically.
Turn the function selector to the off position.
The appliance stops any ongoing functions.
The display shows the time.
Some displays also remain visible in the display when
the appliance has been switched off.
7.3 Setting the type of heating and
temperature
1.
Use the function selector to set the required type of
heating.
A default value appears in the display.
2.
If necessary, change the settings. To do this, touch
the appropriate field and use the rotary selector to
change the value.
3.
Press .
The appliance starts.
lights up.
With a type of heating with temperature, the temperat-
ure display lights up gradually.
4.
If necessary, use the rotary selector to change the
temperature while the oven is in operation.
When the appliance is in operation, you cannot set
the temperature to 40 °C.
7.4 Pausing operation
You can pause operation at any time.
1.
Press or open the appliance door.
Operation is paused.
flashes.
2.
To continue operation, close the appliance door and
press .
Operation continues.
lights up.
7.5 Stopping operation
You can stop operation at any time.
Turn the function selector to the off position.
The fan may continue to run after operation has been
paused or stopped.
The appliance stops any ongoing functions.
7.6 Rapid heating
To save time, you can shorten the preheat time for cer-
tain types of heating from a minimum temperature of
100°C.
You can use rapid heating for the following types of
heating:
Hot air, exception: Hot air 40°C
Hot air grilling
Configuring rapid heating
To ensure an even cooking result, do not place the ac-
cessory with the food in the cooking compartment until
rapid heating has finished. Do not set a cooking time
until rapid heating has finished.
1.
Set a suitable type of heating and a temperature of at
least 100 °C.
2.
Press .
lights up in the display.
3.
Press .
Rapid heating starts.
lights up.
Once the set temperature has been reached, the
rapid heating process ends. A signal sounds and
goes out in the display. Your appliance continues to
run with the set type of heating and temperature.
Rapid heating is automatically deactivated within no
more than 15 minutes.
Cancelling rapid heating
Press .
goes out in the display. Your appliance continues
to run with the set type of heating and temperature.
7.7 Safety switch-off function
For your safety, the appliance has a safety switch-off
function. The appliance is automatically switched off if it
has been in operation for an extended period.
How long the appliance waits before switching itself off
depends on the setting:
Hot air 40°C and preheating: 24 hours
Hot air 100-230°C and hot air grilling: 5 hours
Grill: 90minutes
If the appliance has been switched off by the safety
switch-off function, is shown in the display. You can
confirm this message by pressing .
11
en Microwave
Microwave8 Microwave
You can use the microwave to cook, heat up, bake or
defrost food very quickly. The microwave can be used
on its own or in combination with a type of heating.
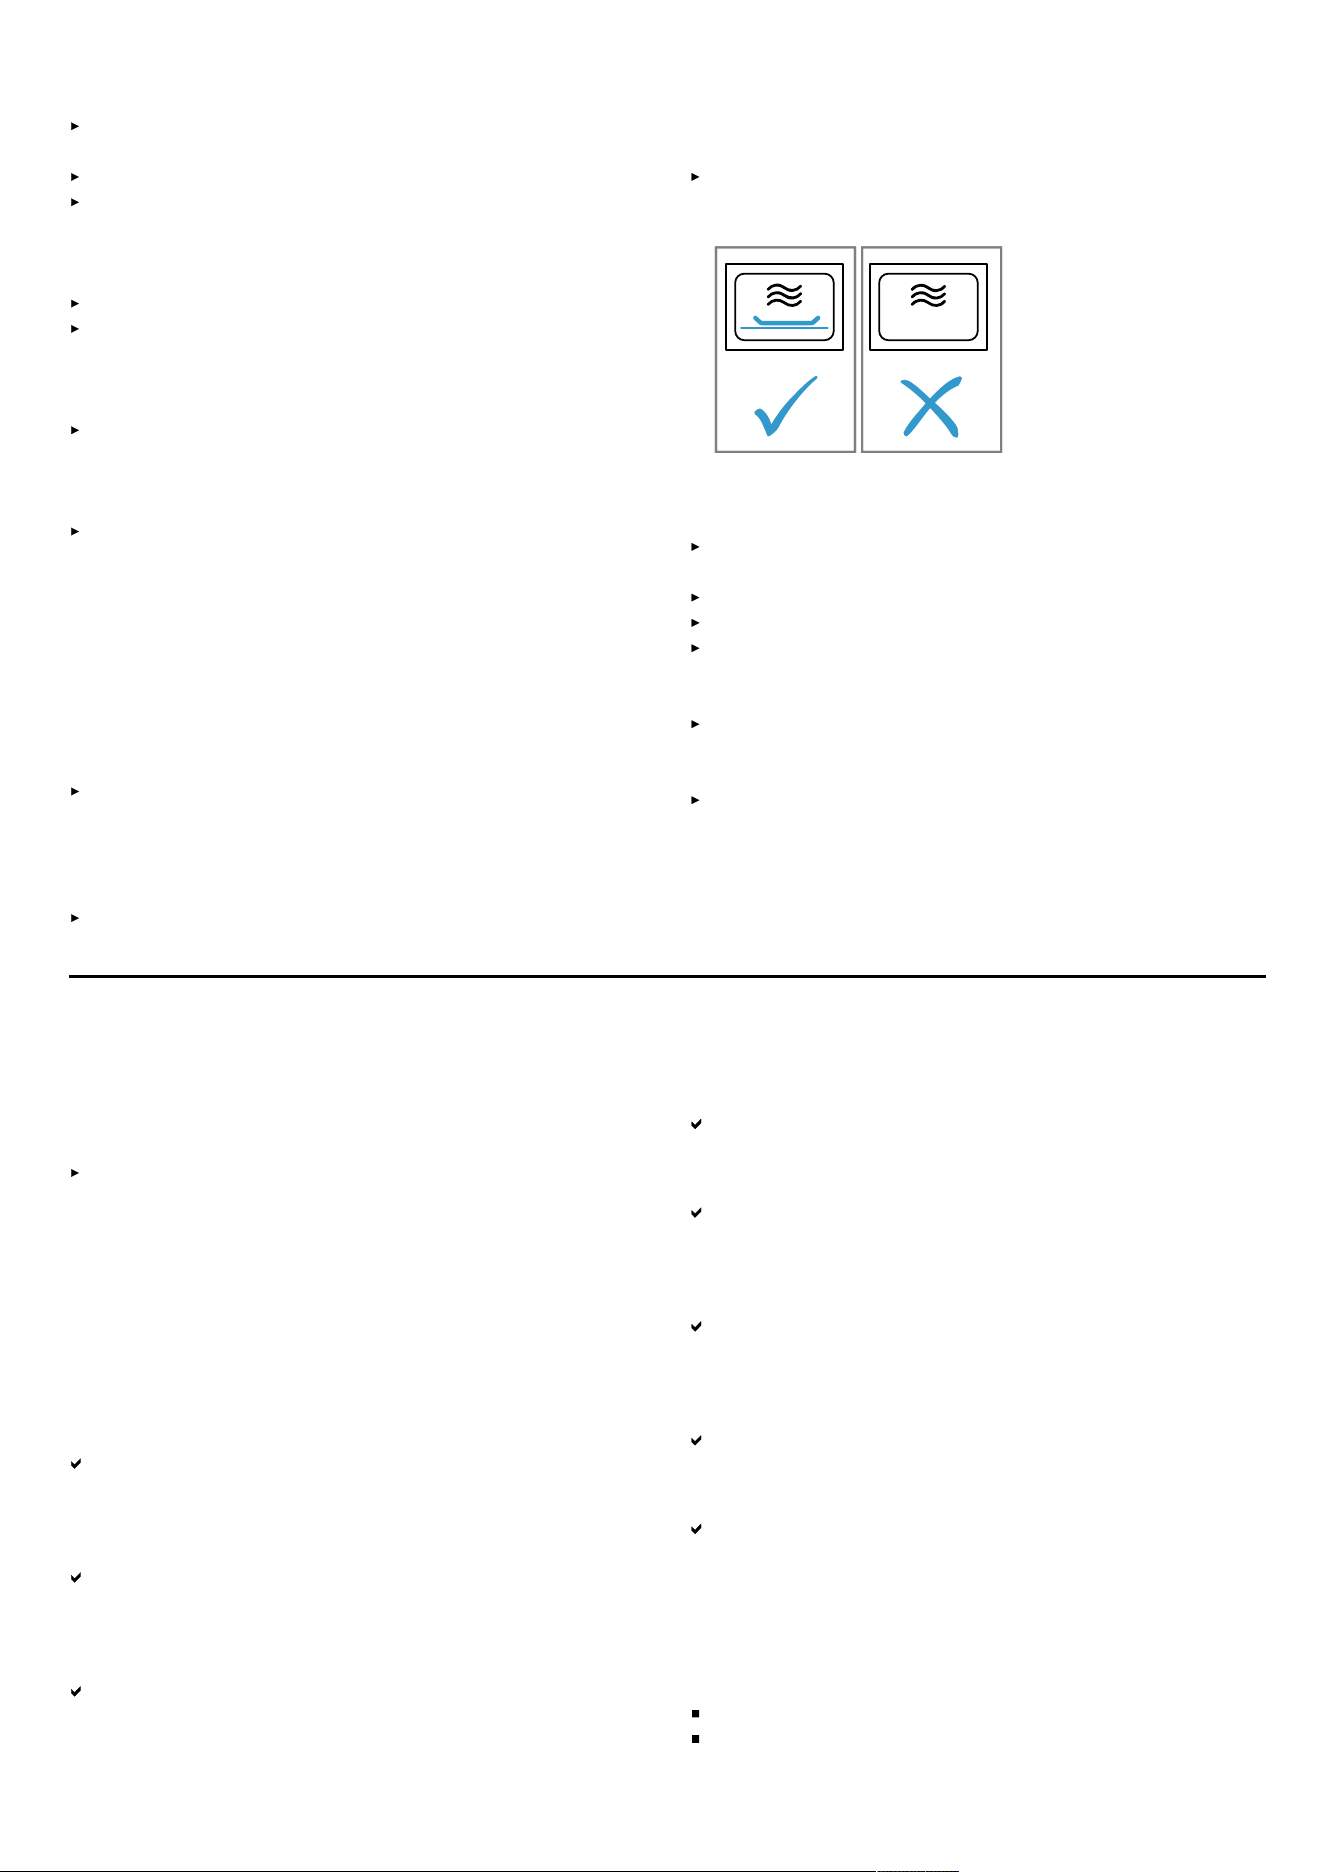
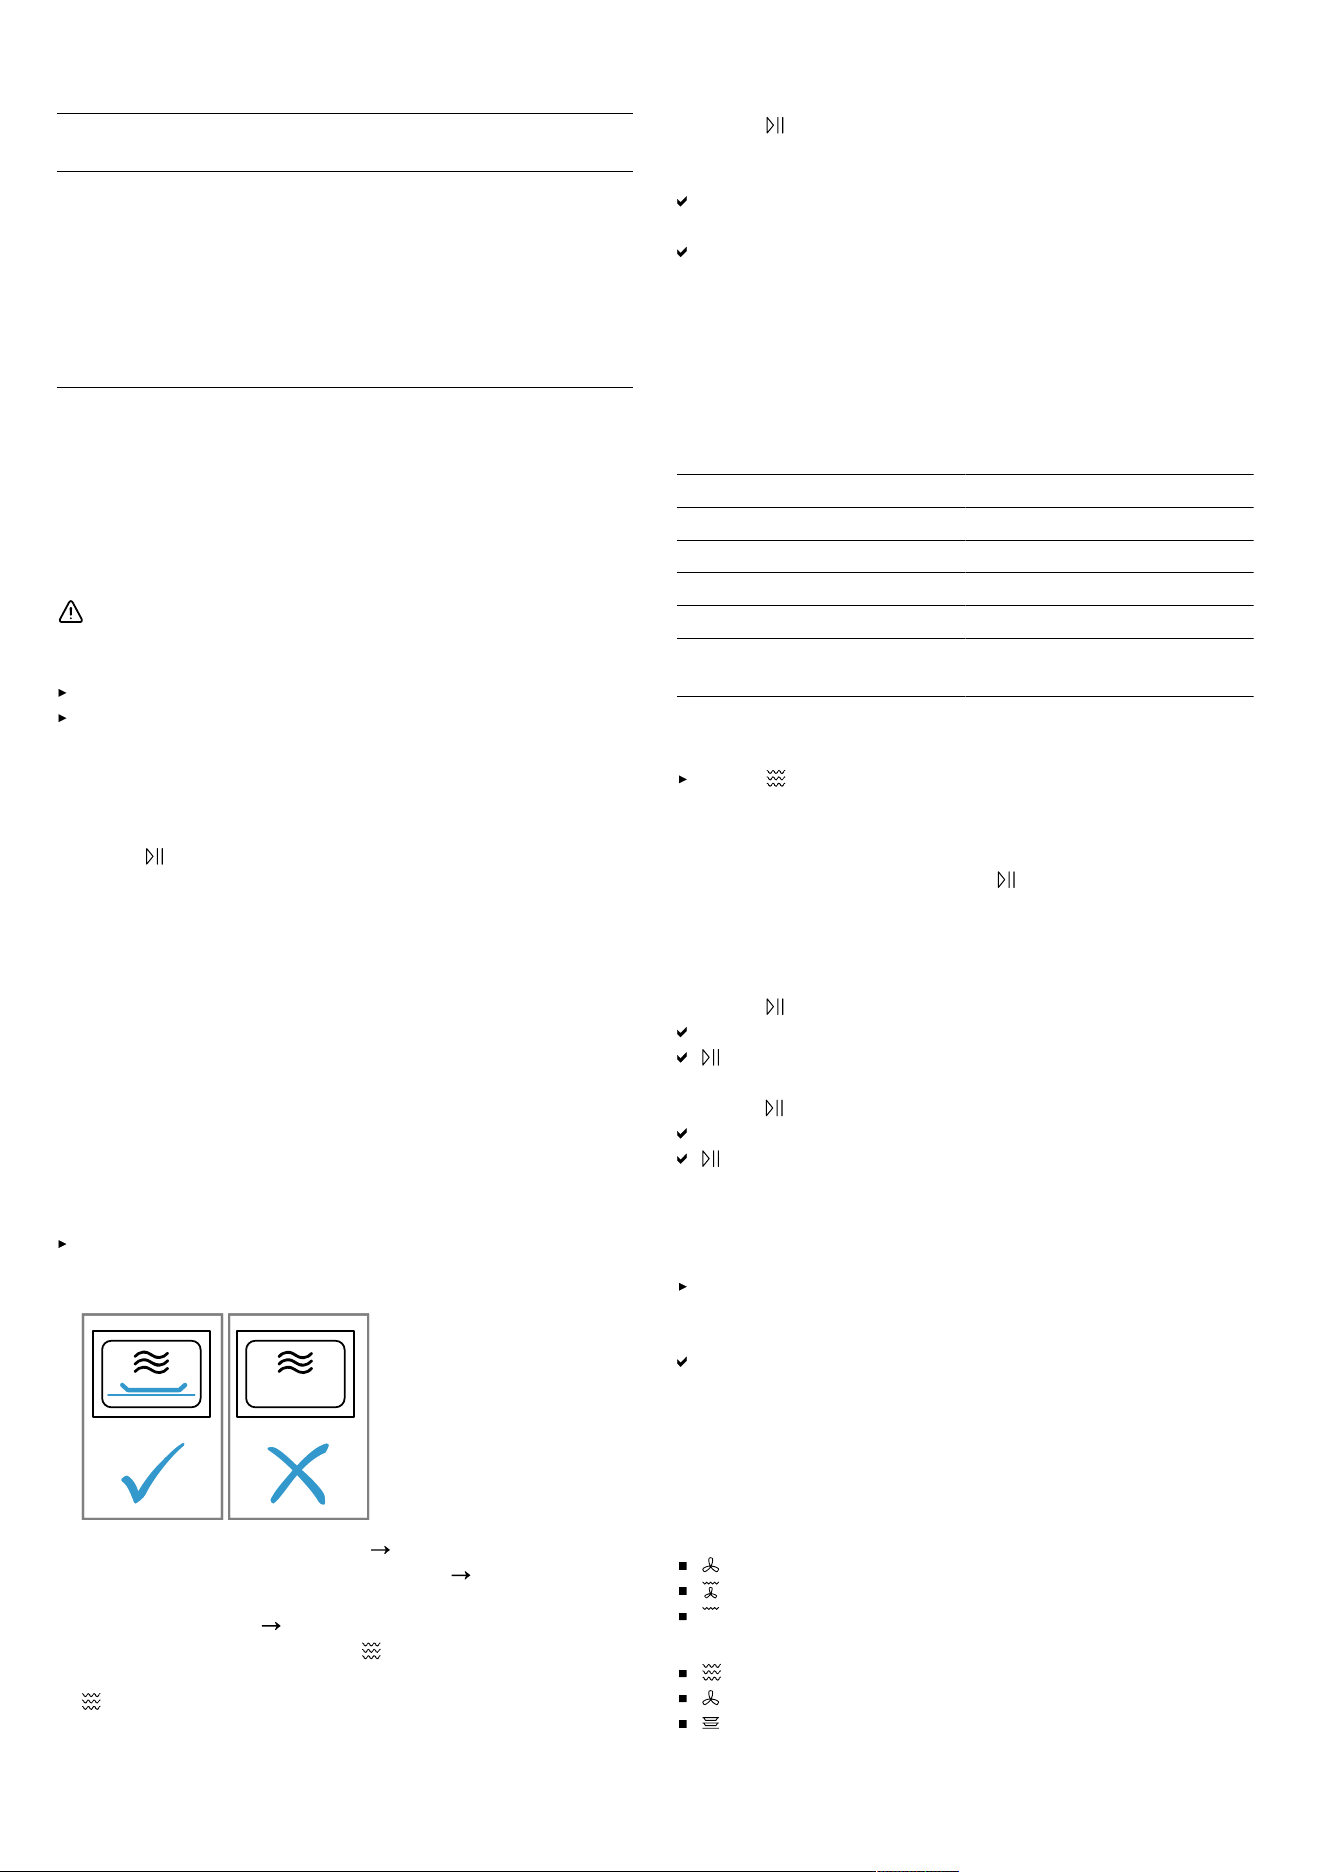
When the appliance is in microwave-only mode, place
the cookware on the cooking compartment floor.
8.1 Microwave power settings
Here you can find an overview of the different microwave power settings and when to use them.
Microwave output
in watts
Maximum cooking time Use
90 W 1:30 hours Defrosting delicate foods.
180 W 1:30 hours Defrosting food and continued cooking.
360 W 1:30 hours Cooking meat and fish or heating delicate foods.
600 W 1:30 hours Heating and cooking food.
900 W 30minutes Heating liquids.
The maximum power setting is not designed for heating food.
Default settings
The appliance suggests a cooking time for each mi-
crowave power setting. You can accept this value or
change it in the relevant area.
8.2 Microwave-safe cookware and
accessories
To heat food evenly and avoid damaging your appli-
ance, it is important to use the right cookware and ac-
cessories.
Read the manufacturer's instructions before using any
cookware in the microwave. If in doubt, carry out a
cookware test. Testing cookware for microwave suitabil-
ity
Page13
Microwave-safe
Cookware and accessor-
ies
Reason
Cookware made from
heat-resistant, microwave-
safe material:
Glass
Glass ceramic
Porcelain
Temperature-resistant
plastic
Fully glazed ceramic
without cracks
Microwaves do not damage
heat-resistant material.
Accessories supplied:
Wire rack
The wire rack supplied has
been designed specifically
for the appliance and is
therefore suitable for mi-
crowave use.
Metal cutlery You can use metal cutlery,
e.g. place a spoon in a
glass, to prevent delayed
boiling.
Cookware and accessor-
ies
Reason
Note: Metal may create
sparks, which could dam-
age the cooking compart-
ment and the inner door
pane. Metal must be kept
at least 2cm from the
cooking compartment walls
and the inside of the door.
Not microwave-safe
Cookware and accessor-
ies
Reason
Metal cookware Microwaves cannot pass
through metal. The food is
barely heated or not heated
at all.
Cookware with gold or sil-
ver decoration
Microwaves can damage
gold and silver decoration.
Only use this kind of cook-
ware if the manufacturer
guarantees that it is mi-
crowave-safe.
Microwave-safe in MicroCombi mode
In MicroCombi mode, a microwave output of up to 600
W watts can be added to a type of heating. This means
that metal dishes can be used in MicroCombi mode.
Cookware and accessor-
ies
Reason
Accessories supplied The accessories supplied,
e.g. the wire rack, do not
create sparks in Micro-
Combi mode.
Metal baking tins Cakes will brown both on
top and on the bottom, as
baking tins made of metal
conduct heat more effi-
ciently.
12
Microwave en
Cookware and accessor-
ies
Reason
Note: Metal may create
sparks, which could dam-
age the cooking compart-
ment and the inner door
pane. Metal must be kept
at least 2cm from the
cooking compartment walls
and the inside of the door.
8.3 Testing cookware for microwave
suitability
Test cookware to see whether it is suitable for mi-
crowave use. Testing cookware is the only time the ap-
pliance should be operated in microwave mode without
any food inside.
WARNING‒Risk ofscalding!
The accessible parts of the appliance become hot dur-
ing operation.
Never touch these hot parts.
Keep children at a safe distance.
1.
Place the empty cookware in the cooking compart-
ment.
2.
Set the appliance to run for 30 seconds to 1 minute
at maximum power.
3.
Press to start.
4.
Check the cookware several times:
– If the cookware is cold or warm to the touch, it is
suitable for microwave use.
– If the cookware becomes hot or sparks are cre-
ated, the stop the cookware test. The cookware is
not microwave-safe.
8.4 Configuring the microwave settings
Different power levels and settings are available for dif-
ferent types of food and recipes.
ATTENTION
Operating the appliance without food in the cooking
compartment may lead to overloading.
Do not switch on the microwave unless there is food
inside. The only exception to this rule is when per-
forming a short cookware test.
1.
Read the safety instructions
Page4
and the section
on how to prevent material damage
Page6
.
2.
Read the information on microwave-safe cookware
and accessories.
Page12
3.
Set the function selector to .
4.
To set the required microwave power setting, press
.
5.
Use the rotary selector to set the required cooking
time.
6.
Press to start.
You can change the cooking time at any time during
operation using the rotary selector.
The cooking time starts to count down and the mi-
crowave starts.
Once the cooking time has elapsed, the microwave
stops and a signal sounds.
7.
When the dish is cooked, turn the function selector to
the off position.
8.5 Intervals for the time settings
The interval for setting a cooking time in microwave op-
eration changes with the length of the cooking time.
Cooking time Interval
0–1minutes 5seconds
1-3minutes 10seconds
3–15minutes 30seconds
15minutes – 1hour 1minute
1hour–
1hour30minutes
5minutes
8.6 Changing the microwave power
Press .
Repeatedly pressing switches from the highest to the
lowest microwave power setting.
If the microwave function is only added after starting,
the appliance pauses. Press to start.
8.7 Pausing operation
You can pause operation at any time.
1.
Press or open the appliance door.
Operation is paused.
flashes.
2.
To continue operation, close the appliance door and
press .
Operation continues.
lights up.
8.8 Stopping operation
You can stop operation at any time.
Turn the function selector to the off position.
The fan may continue to run after operation has been
paused or stopped.
The appliance stops any ongoing functions.
8.9 MicroCombi
To reduce the cooking time, you can use certain of the
types of heating in combination with microwave mode.
MicroCombi mode can be used with the following types
of heating:
Hot air
Hot air grilling
Grill
Exceptions:
Microwave power setting 900 W
Hot air 40°C
Warming plates
13
en Automatic programmes
Configuring MicroCombi mode
Switch on microwave mode in addition to a type of heat-
ing.
1.
Set the function selector to a combinable type of
heating.
A default value for the temperature is displayed.
2.
Set the temperature using the rotary selector.
3.
To set the required microwave power setting, press
.
A default value for the cooking time is displayed.
4.
Use the rotary selector to set the cooking time.
5.
Press to start.
The cooking time counts down and MicroCombi
mode starts.
Once the cooking time has elapsed, MicroCombi
mode ends automatically and a signal sounds.
Changing the microwave power
Press .
Repeatedly pressing switches from the highest to the
lowest microwave power setting.
If the microwave function is only added after starting,
the appliance pauses. Press to start.
Pausing operation
You can pause operation at any time.
1.
Press or open the appliance door.
Operation is paused.
flashes.
2.
To continue operation, close the appliance door and
press .
Operation continues.
lights up.
Stopping operation
You can stop operation at any time.
Turn the function selector to the off position.
The fan may continue to run after operation has been
paused or stopped.
The appliance stops any ongoing functions.
8.10 Heating and drying the cooking
compartment
Always dry the cooking compartment after operation to
ensure that no moisture remains.
1.
Allow the appliance to cool down.
2.
Remove the worst of the food residues from the cook-
ing compartment immediately.
3.
Wipe any humidity from the cooking compartment
floor.
4.
Use the function selector to set the type of heating.
5.
Press .
6.
Use the rotary selector to set the temperature to
150°C.
7.
Press twice.
is highlighted in the display.
8.
Use the rotary selector to set a cooking time of
15minutes.
9.
Press to start.
The drying process starts and ends after 15minutes.
10.
Open the appliance door to allow the steam to es-
cape.
8.11 Drying the cooking compartment by
hand
Always dry the cooking compartment after operation to
ensure that no moisture remains.
1.
Allow the appliance to cool down.
2.
Remove the worst of the food residues from the cook-
ing compartment.
3.
Dry the cooking compartment with a sponge.
4.
Leave the appliance door open for 1 hour so that the
cooking compartment dries completely.
Automatic programmes9 Automatic programmes
Automatic programmes can help you prepare different
dishes by selecting the optimal settings automatically.
9.1 Tips on configuring the settings for
dishes
Follow these tips to achieve optimal cooking results.
Only use food that is in perfect condition.
Only use meat at refrigerator temperature.
Only use frozen food straight from the freezer.
Take the food out of its packaging and weigh it. If you
cannot set the exact weight on the appliance, round
the weight up or down.
Place the food in the cold cooking compartment.
Always use microwave-safe, heat-resistant cookware,
for example made of glass or ceramic.
9.2 Overview of dishes
The appliance prompts you to enter the weight. You can only enter weights within the intended weight range.
Defrost
When the appliance is in microwave-only mode, you can place the cookware on the cooking compartment floor or on
the wire rack.
No. Food Accessories Weight range in kg Information
Minced meat Shallow cook-
ware without lid
0,2-1,0 After turning, remove any minced meat
that has already defrosted.
14
Automatic programmes en
No. Food Accessories Weight range in kg Information
Pieces of meat Shallow cook-
ware without lid
0,2-1,0 Drain off any liquid when turning and un-
der no circumstances use it for other
purposes or allow it to come into con-
tact with other foods.
Chicken,
chicken pieces
Shallow cook-
ware without lid
0,4-1,8 Drain off any liquid when turning and un-
der no circumstances use it for other
purposes or allow it to come into con-
tact with other foods.
Bread Shallow cook-
ware without lid
0,2-1,0 Bread should only be defrosted in the
required amounts, as it quickly becomes
stale. If possible, separate the slices.
Cooking programmes
When the appliance is in microwave-only mode, you can place the cookware on the cooking compartment floor or on
the wire rack.
No. Food Accessories Weight range in kg Information
Rice Cookware with
lid
0,05-0,2 Do not use boil-in-the-bag rice. Rice
foams a lot during cooking. Enter the
uncooked weight (without liquid). Add
two to two and a half times the amount
of liquid to the rice.
Potatoes Cookware with
lid
0,15-1,0 Cut into pieces of equal size. Add 1
tbsp water per 100 g.
Vegetables Cookware with
lid
0,15-1,0 Cut into pieces of equal size. Add 1
tbsp water per 100 g.
Combi cooking programmes
No. Food Accessories Rack pos-
ition
Weight range
in kg
Information
Bake, frozen Cookware
without lid
0,4-1,2 The bake should not be more than 3cm
deep.
Chicken, whole Cookware
without lid
0,5-2,0 Breast side down.
Sirloin, medium Cookware
without lid
0,5-1,5
Pork neck joint Cookware with
lid
0,5-2,0
Lamb, medium Cookware with
lid
0,8-2,0 Shoulder joint or boned leg of lamb
Meatloaf Cookware
without lid
0,5-1,5 The meat loaf should not be more than
7cm deep.
Fish, whole Cookware
without lid
0,3-1,0 Scale the fish beforehand. Place the fish
in the cookware in its "swimming posi-
tion".
Rice stew with
fresh ingredi-
ents
Deep cookware
with lid
0,05-0,2 Add one part rice, three parts water, four
parts vegetables. Only use fresh ingredi-
ents. Only enter the weight of the rice.
9.3 Applying settings for dishes
1.
Set the function selector to .
The display shows the first dish number and a default
value for the weight.
2.
Use the rotary selector to set the required weight.
3.
Press .
4.
Turn the rotary selector to set the weight.
Before starting, you can use and to switch
between the dish and the weight.
The appliance automatically sets the right cooking
time.
15
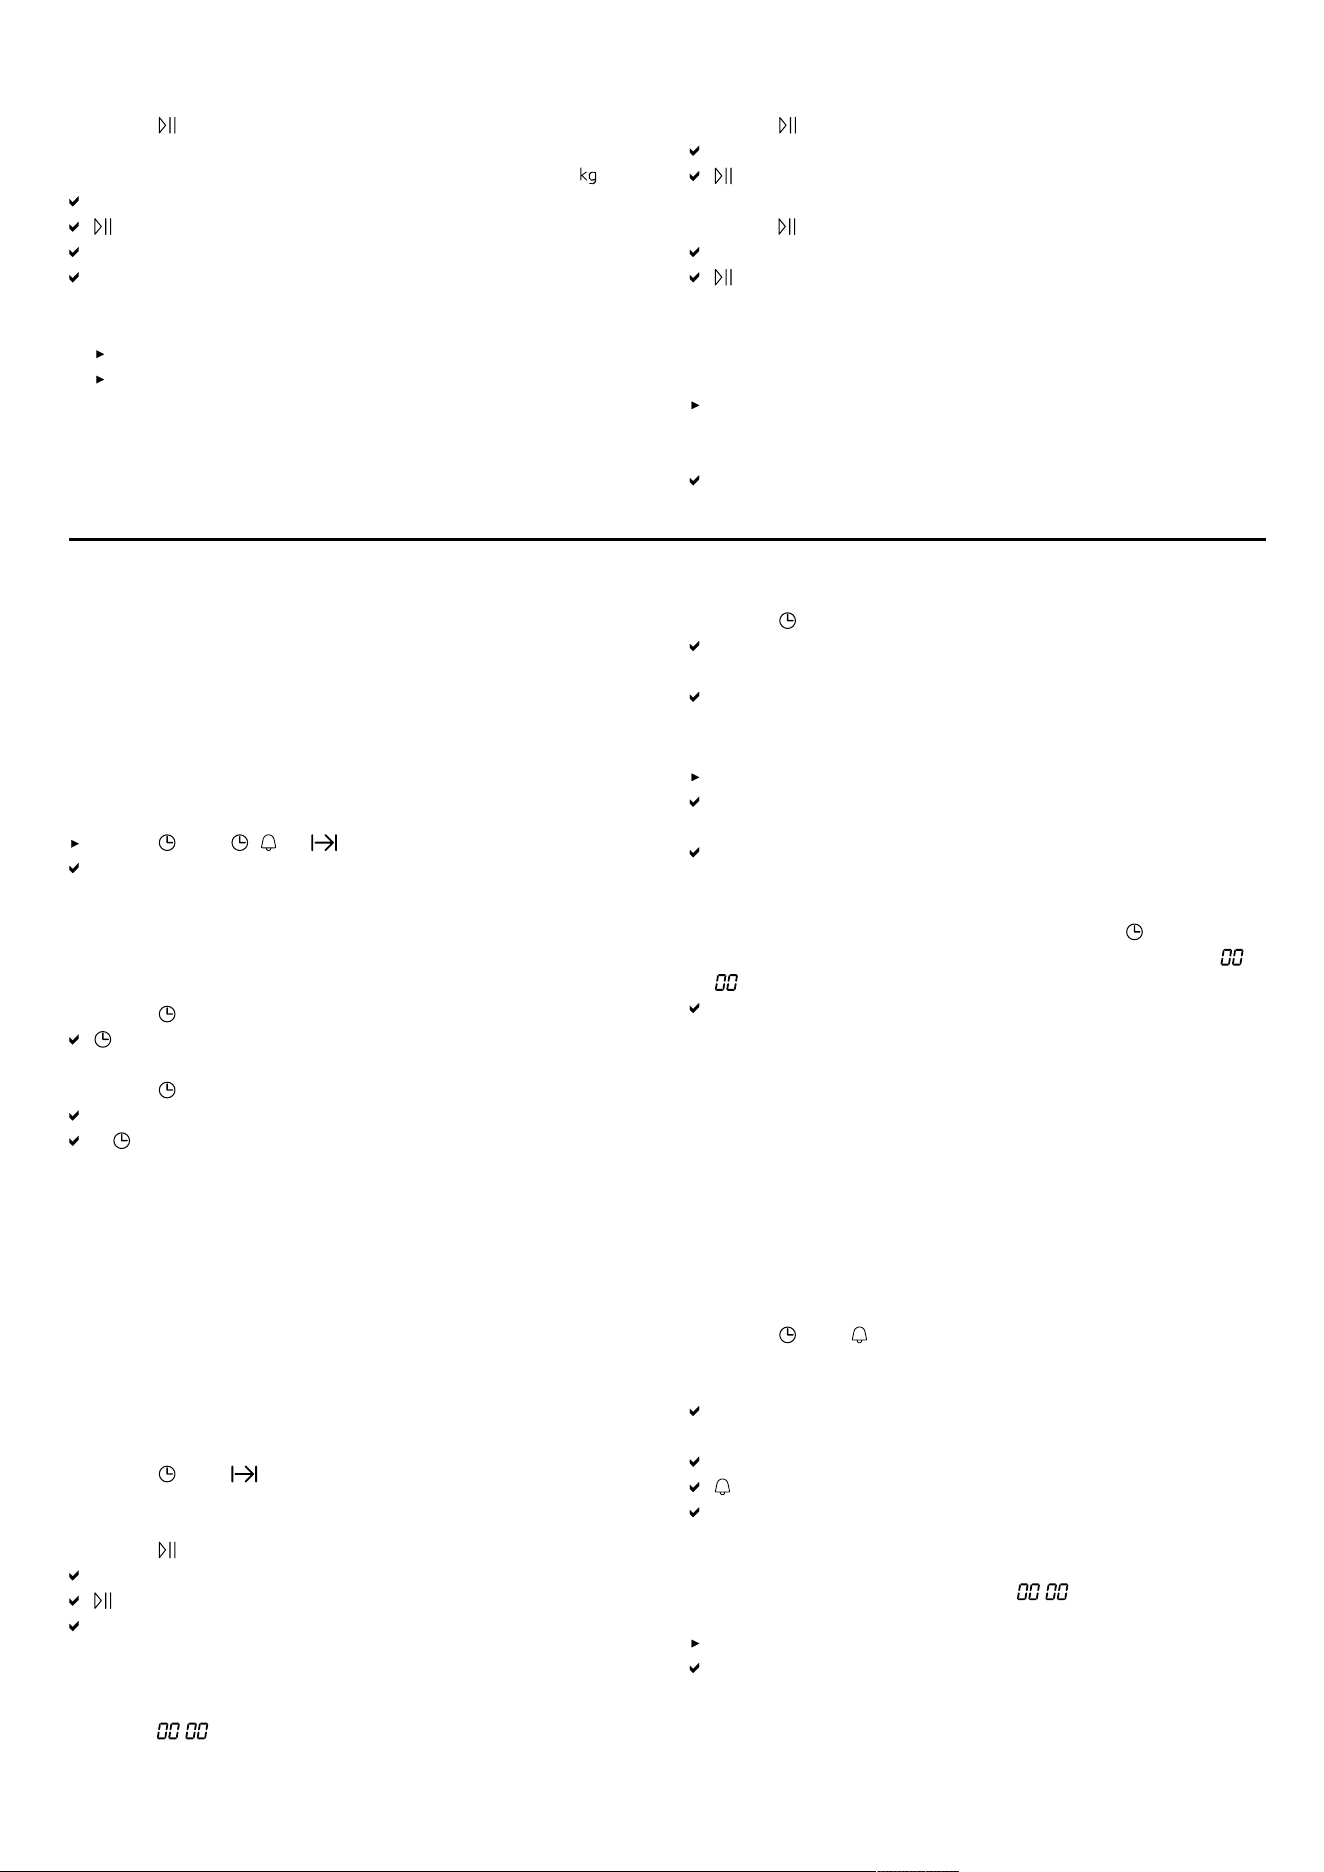
en Time-setting options
5.
Press .
After starting, the dish and weight cannot be
changed. The set weight can be displayed with .
The appliance starts.
lights up.
You will see the cooking time counting down.
For some programmes, a short audible signal sounds
when you have to stir or turn the dish.
6.
When the cooking time has elapsed:
A signal sounds. The appliance stops heating.
Turn the function selector to the off position.
9.4 Pausing operation
You can pause operation at any time.
1.
Press or open the appliance door.
Operation is paused.
flashes.
2.
To continue operation, close the appliance door and
press .
Operation continues.
lights up.
9.5 Stopping operation
You can stop operation at any time.
Turn the function selector to the off position.
The fan may continue to run after operation has been
paused or stopped.
The appliance stops any ongoing functions.
Time-setting options10 Time-setting options
Your appliance features time-setting options that you
can use to set the cooking time and the timer.
10.1 Checking the time-setting options
Requirement: If multiple time-setting options are set, the
corresponding symbols light up. During operation, the
timer and cooking time are available. In low power
mode, the timer and the time are available.
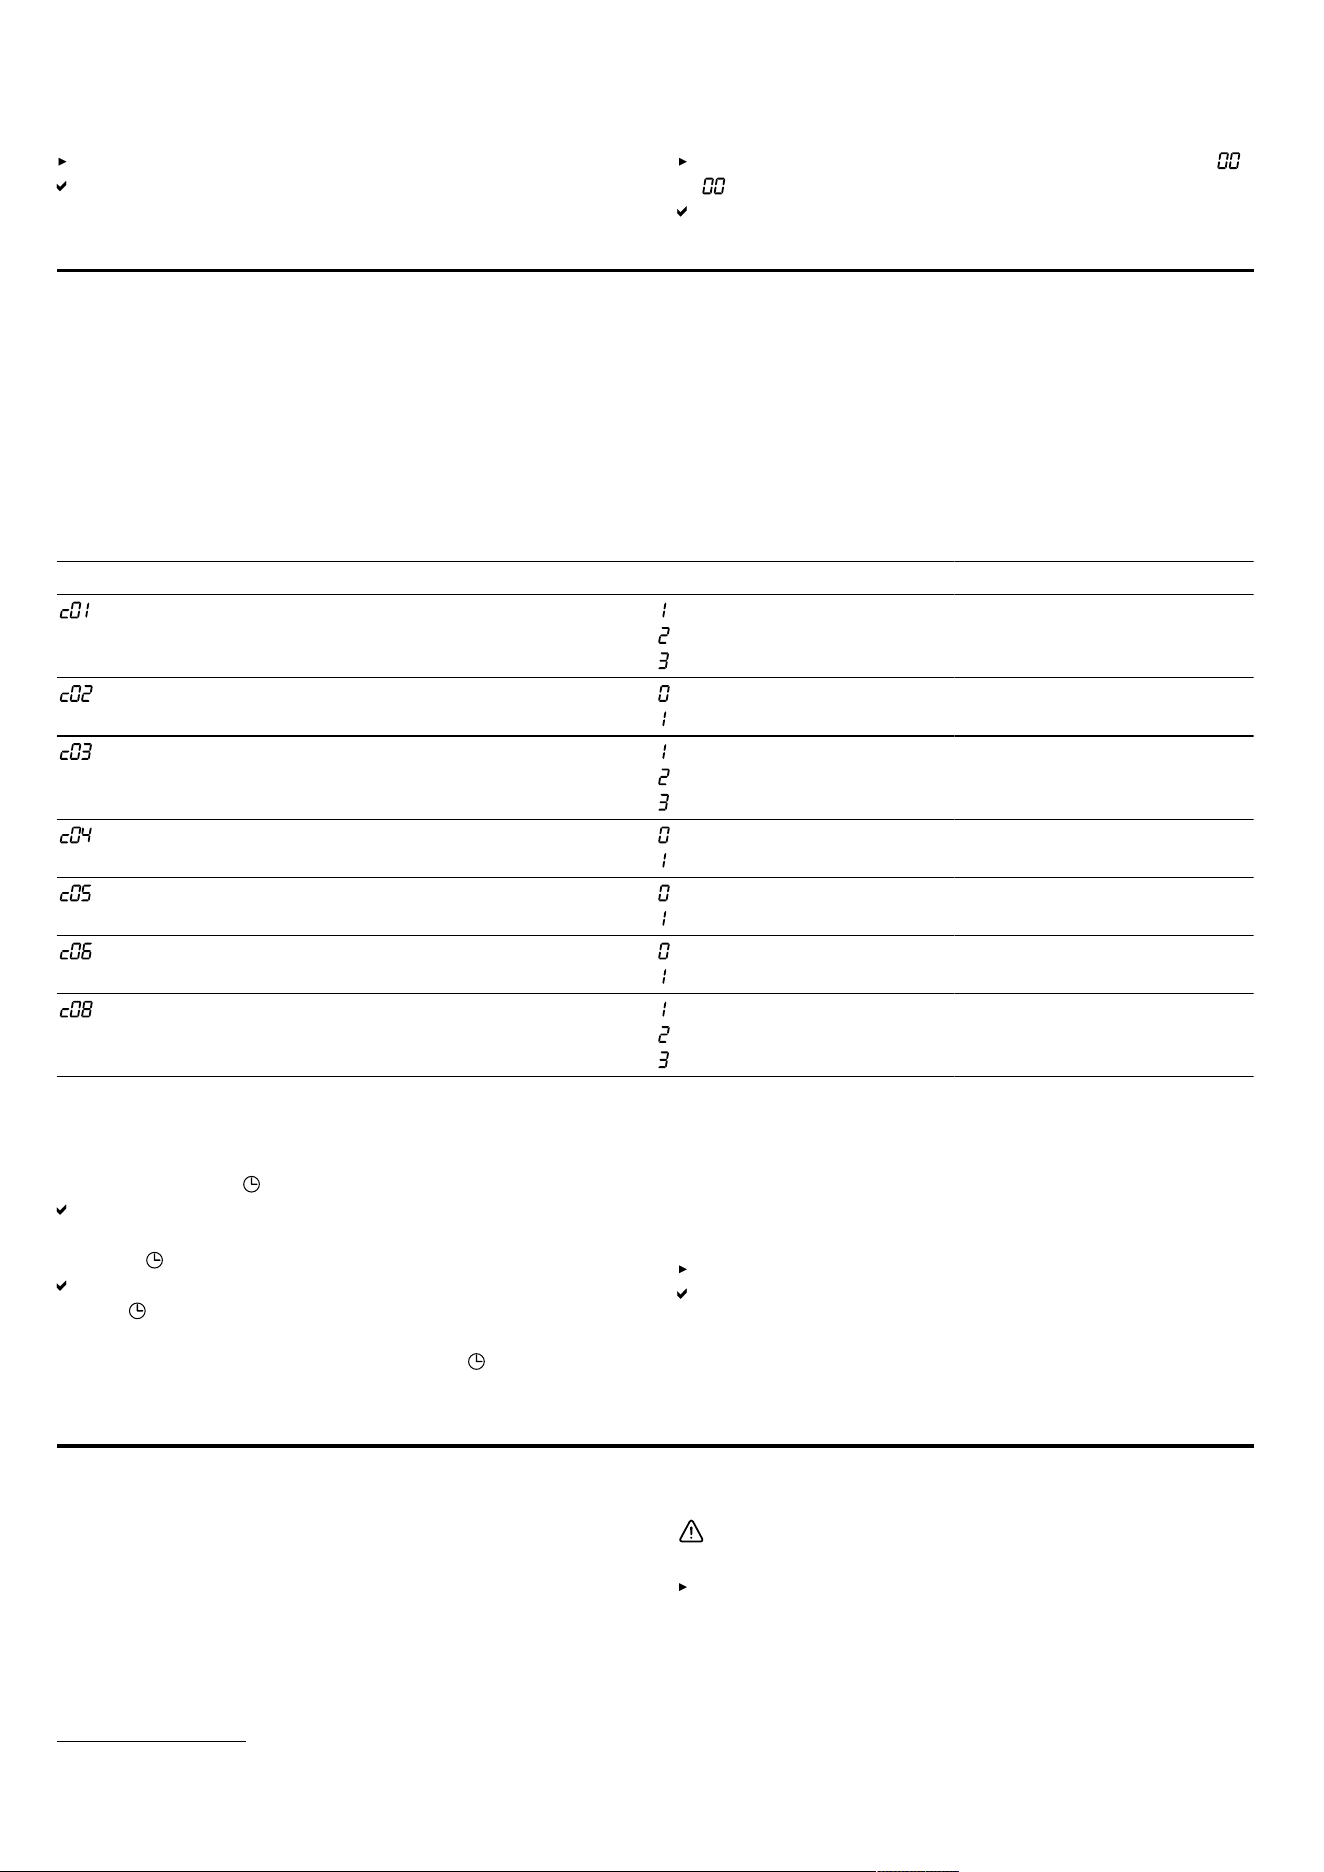
Press until , or is highlighted.
The respective value is shown on the display.
10.2 Changing the time
Requirement: To change the time on the clock, the ap-
pliance must be switched off.
1.
Press twice.
and the time appear on the display.
2.
Set the time using the rotary selector.
3.
Press .
The time is set.
If is not pressed, the set value is applied after a few
seconds.
Note: To reduce the consumption of your appliance in
low power mode, you can hide the clock.
10.3 Cooking time
You can set a time after which operation ends automat-
ically. The maximum cooking time is 23 hours and 59
minutes.
Setting the cooking time
1.
Set the type of heating and temperature.
2.
Press until is in focus.
3.
Use the rotary selector to set the required cooking
time.
4.
Press .
The appliance starts.
lights up.
You will see the cooking time counting down.
Ending the cooking time
Requirement: A signal sounds. The appliance stops
heating. : is shown in the display.
1.
Press .
The signal is switched off.
2.
Turn the function selector to the off position.
The appliance is switched off.
Changing the cooking time
Change the cooking time using the rotary selector.
After a few seconds, the display shows the changed
cooking time.
You will see the cooking time counting down.
Clearing the cooking time
1.
If the timer function has been set, press .
2.
Use the rotary selector to set the cooking time to :
.
After a few seconds, the cooking time is cleared. The
appliance does not interrupt operation.
10.4 Timer
You can set the time on the timer. Once this time has
elapsed, a signal tone sounds. You can set a maximum
time on the timer of 24hours.
The function works independently of the operation and
other time-setting options. The timer signal is different
from other signals.
Setting the timer
1.
Press until is in focus.
2.
Use the rotary selector to set the required timer dura-
tion.
After a few seconds, the appliance displays the set
timer duration.
The timer starts.
lights up in the display.
You will see the timer duration counting down.
Ending the timer
Requirement: A signal sounds. : is shown in the
display.
Press any symbol.
The timer is switched off.
16
Basic settings en
Changing the timer
Use the rotary selector to change the timer duration.
After a few seconds, the appliance displays the set
timer duration.
Cancelling the timer
Use the rotary selector to set the timer duration to :
.
The timer is switched off.
Basic settings11 Basic settings
You can configure the basic settings for your appliance
to meet your needs.
11.1 Overview of the basic settings
Here you can find an overview of the basic settings and factory settings. The basic settings depend on the features
of your appliance.
Note: If the childproof lock is activated, the time is automatically displayed.
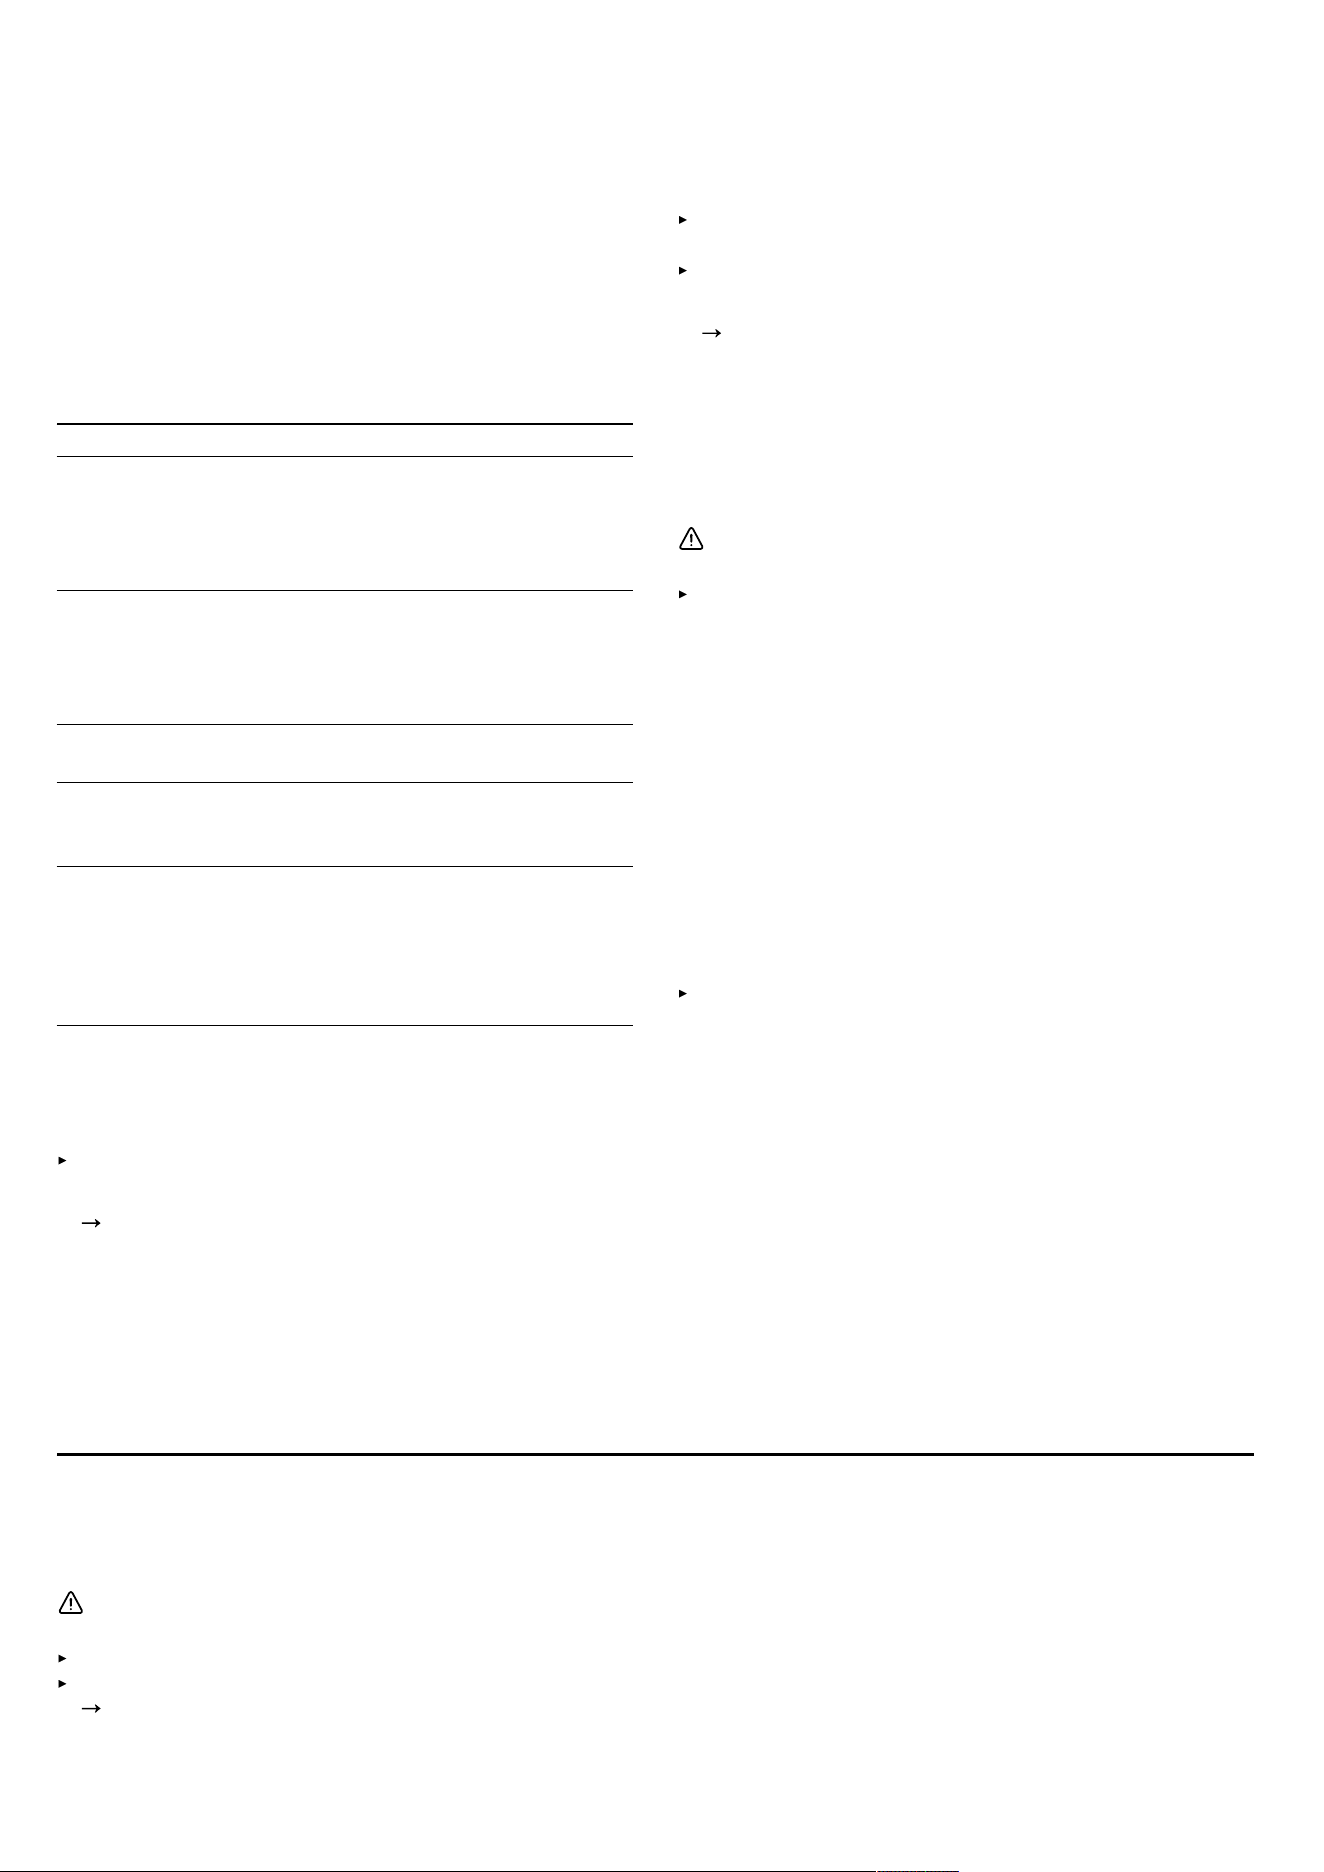
Display Basic setting Selection Description
Signal duration = short = 10seconds
= medium = 30seconds
1
= long = 2minutes
Set the signal duration for
after a cooking time elapses
or the timer reaches zero.
Button tone = off
= on
1
Switch the button tones on
or off.
Display brightness = low
= medium
1
= high
Set the brightness of the dis-
play.
Time indicator = off
= on
1
Show the clock time in the
display.
Interior lighting = off
= on
1
Switch the interior lighting on
or off.
Factory setting = off
1
= on
Reset the changed settings
to the factory settings.
Signal volume = low
= medium
1
= high
Setting the signal volume.
11.2 Changing the basic settings
Requirement: The appliance must be switched off.
1.
Press and hold for a few seconds.
The first basic setting is shown on the display.
2.
Use the rotary selector to change the basic setting.
3.
Press .
The next basic setting is shown on the display.
4.
Use to select all of the required basic settings and
change the values.
5.
To save the changes, press and hold for a few
seconds.
Note: The changes to the basic settings will be retained
even after a power cut.
11.3 Discarding changes to the basic
settings
Turn the function selector.
All changes are discarded and not saved.
Cleaning and servicing12 Cleaning and servicing
To keep your appliance working efficiently for a long
time, it is important to clean and maintain it carefully.
12.1 Cleaning products
Only use suitable cleaning agents.
WARNING‒Risk of electric shock!
An ingress of moisture can cause an electric shock.
Do not use steam- or high-pressure cleaners to clean
the appliance.
1
Factory setting (may vary according to model)
17

en Cleaning and servicing
ATTENTION
Unsuitable cleaning agents damage the surfaces of the
appliance.
Do not use harsh or abrasive cleaning products.
Do not use cleaning products with a high alcohol con-
tent.
Do not use hard scouring pads or cleaning sponges.
Do not use any special cleaners for cleaning the ap-
pliance while it is hot.
Only use glass cleaners, glass scrapers or stainless
steel care products if recommended in the cleaning
instructions for the relevant part.
Salt contained in new sponge cloths may damage sur-
faces.
Wash new sponge cloths thoroughly before use.
You can find out which cleaning products are suitable
for each surface or part of the appliance in the indi-
vidual cleaning instructions.
12.2 Cleaning the appliance
Clean the appliance as specified. This will ensure that
the different parts and surfaces of the appliance are not
damaged by incorrect cleaning or unsuitable cleaning
products.
WARNING‒Risk of burns!
The appliance and its parts that can be touched be-
come hot during use.
Caution should be exercised here in order to avoid
touching heating elements.
Young children under 8 years of age must be kept
away from the appliance.
WARNING‒Risk of fire!
Loose food remnants, fat and meat juices may catch
fire.
Before using the appliance, remove the worst of the
food residues and remnants from the cooking com-
partment, heating elements and accessories.
WARNING‒Risk of injury!
Scratched glass in the appliance door may develop into
a crack.
Do not use any harsh or abrasive cleaners or sharp
metal scrapers to clean the glass on the appliance
door, as they may scratch the surface.
1.
Read the information on cleaning products.
Page17
2.
Observe the information on cleaning the appliance
components or surfaces.
3.
Unless otherwise specified:
Clean the components of the appliance with hot
soapy water and a dish cloth.
Dry with a soft cloth.
12.3 Cleaning the cooking compartment
1.
Follow the instructions for .
"Cleaning products", Page17
2.
Use hot soapy water or a vinegar solution for clean-
ing.
3.
Use oven cleaner to remove very heavy soiling. Only
use oven cleaner when the cooking compartment is
cold.
Do not use oven spray, other aggressive oven clean-
ers or abrasive materials.
To avoid scratching the surface, do not use scouring
pads, rough sponges or pan cleaners.
Tip: To eliminate unpleasant odours, heat up a cup of
water with a few drops of lemon juice for 1 to 2
minutes at maximum microwave power. Always place
a spoon in the container to prevent delayed boiling.
4.
Dry with a soft cloth.
Cleaning the glass floor
1.
Follow the instructions for .
"Cleaning products", Page17
2.
Clean the glass floor with hot soapy water and a soft
dish cloth.
Do not use metal or glass scrapers for cleaning. Do
not scour.
3.
Dry with a soft cloth.
12.4 Cleaning the front of the appliance
ATTENTION
Incorrect cleaning may damage the front of the appli-
ance.
Do not use glass cleaner, metal scrapers or glass
scrapers for cleaning.
To prevent corrosion on stainless steel fronts, remove
any limescale, grease, starch and albumin (e.g. egg
white) stains immediately.
On stainless steel surfaces, use special stainless
steel cleaning products suitable for hot surfaces.
1.
Read the information on cleaning products.
Page17
2.
Clean the front of the appliance using hot soapy wa-
ter and a dish cloth.
Note: Slight differences in colour on the front of the
appliance are caused by the use of different materi-
als, such as glass, plastic and metal.
3.
For stainless steel appliance fronts, apply a thin layer
of the stainless steel cleaning product with a soft
cloth.
You can obtain the stainless steel cleaning products
from the after-sales service or the online shop.
4.
Dry with a soft cloth.
12.5 Cleaning the control panel
ATTENTION
Incorrect cleaning may damage the control panel.
Never wipe the control panel with a wet cloth.
1.
Read the information on cleaning products.
Page17
2.
Clean the control panel using a microfibre cloth or a
soft, damp cloth.
3.
Dry with a soft cloth.
12.6 Cleaning the accessories
1.
Read the information on cleaning products.
Page17
2.
Soften baked-on food remnants with a damp dish
cloth and hot soapy water.
18
Troubleshooting en
3.
Clean the accessory with hot soapy water and a soft
dish cloth or a scrubbing brush.
4.
Clean the wire rack with stainless steel cleaner or in
the dishwasher.
Use steel wool or oven cleaner to remove very heavy
soiling.
5.
Dry with a soft cloth.
12.7 Tips on caring for your appliance
Follow the tips on appliance care to make sure your ap-
pliance functions properly at all times.
Measure Advantage
Always keep the appliance
clean and remove dirt im-
mediately. Always clean
the cooking compartment
after use.
Prevents dirt from accumu-
lating and burning on.
Remove splashes and
patches of limescale,
grease, starch and albu-
min (e.g. egg white) imme-
diately.
Prevents corrosion.
Use the pizza tray for very
moist cakes.
Keeps the cooking com-
partment cleaner.
Use suitable cookware for
roasting, e.g. a roasting
dish.
Keeps the cooking com-
partment cleaner.
You can purchase suitable
cleaning and care
products from our after-
sales service. Always fol-
low the manufacturer's in-
structions.
12.8 Cleaning the door panels
ATTENTION
Incorrect cleaning may damage the door panes.
Do not use a glass scraper.
1.
Read the information on cleaning products.
Page17
2.
Clean the door panels with a soft dish cloth and glass
cleaner.
Note: Shadows on the door panels, which look like
streaks, are caused by reflections made by the in-
terior lighting.
3.
Dry with a soft cloth.
12.9 Cleaning the door seal
ATTENTION
Incorrect cleaning may damage the door seal.
Do not use metal scrapers or glass scrapers for
cleaning.
Do not use abrasive cleaning agents.
1.
Read the information on cleaning products.
Page17
2.
Clean the door seal with hot soapy water and a soft
dish cloth.
3.
Dry with a soft cloth.
12.10 Drying the cooking compartment by
hand
WARNING‒Risk of burns!
The appliance will become hot during operation.
Allow the appliance to cool down before cleaning it.
1.
Remove any food remnants from the cooking com-
partment.
2.
Dry the cooking compartment with a soft cloth.
3.
Leave the appliance door open until the cooking com-
partment has dried completely.
12.11 EasyClean
The cleaning aid is a quick alternative for occasionally
cleaning the cooking compartment. The cleaning aid
softens dirt by evaporating the soapy water. It is then
easier to remove the dirt.
ATTENTION
Incorrect cleaning may damage the appliance.
Never pour liquid into the cooking compartment.
Setting the cleaning aid
1.
Add a few drops of washing-up liquid to a cup of wa-
ter.
2.
Place a spoon in the cup to prevent delayed boiling.
3.
Place the cup in the centre of the cooking compart-
ment.
4.
Set the microwave output to 600W.
5.
Set the cooking time to 5minutes.
6.
Start the microwave.
7.
Once the cooking time has elapsed, leave the doors
closed for an additional threeminutes.
8.
Wipe out the cooking compartment with a soft cloth.
9.
Leave the cooking compartment to dry with the door
open.
Troubleshooting13 Troubleshooting
You can rectify minor faults on your appliance yourself. Read the troubleshooting information before contacting after-
sales service. This will avoid unnecessary costs.
WARNING‒Risk of injury!
Improper repairs are dangerous.
Repairs to the appliance should only be carried out by trained specialist staff.
If the appliance is defective, call Customer Service.
"Customer Service", Page21
19
en Troubleshooting
WARNING‒Risk of electric shock!
Improper repairs are dangerous.
Repairs to the appliance should only be carried out by trained specialist staff.
Only use genuine spare parts when repairing the appliance.
If the power cord of this appliance is damaged, it must be replaced by the manufacturer, the manufacturer's Cus-
tomer Service or a similarly qualified person in order to prevent any risk.
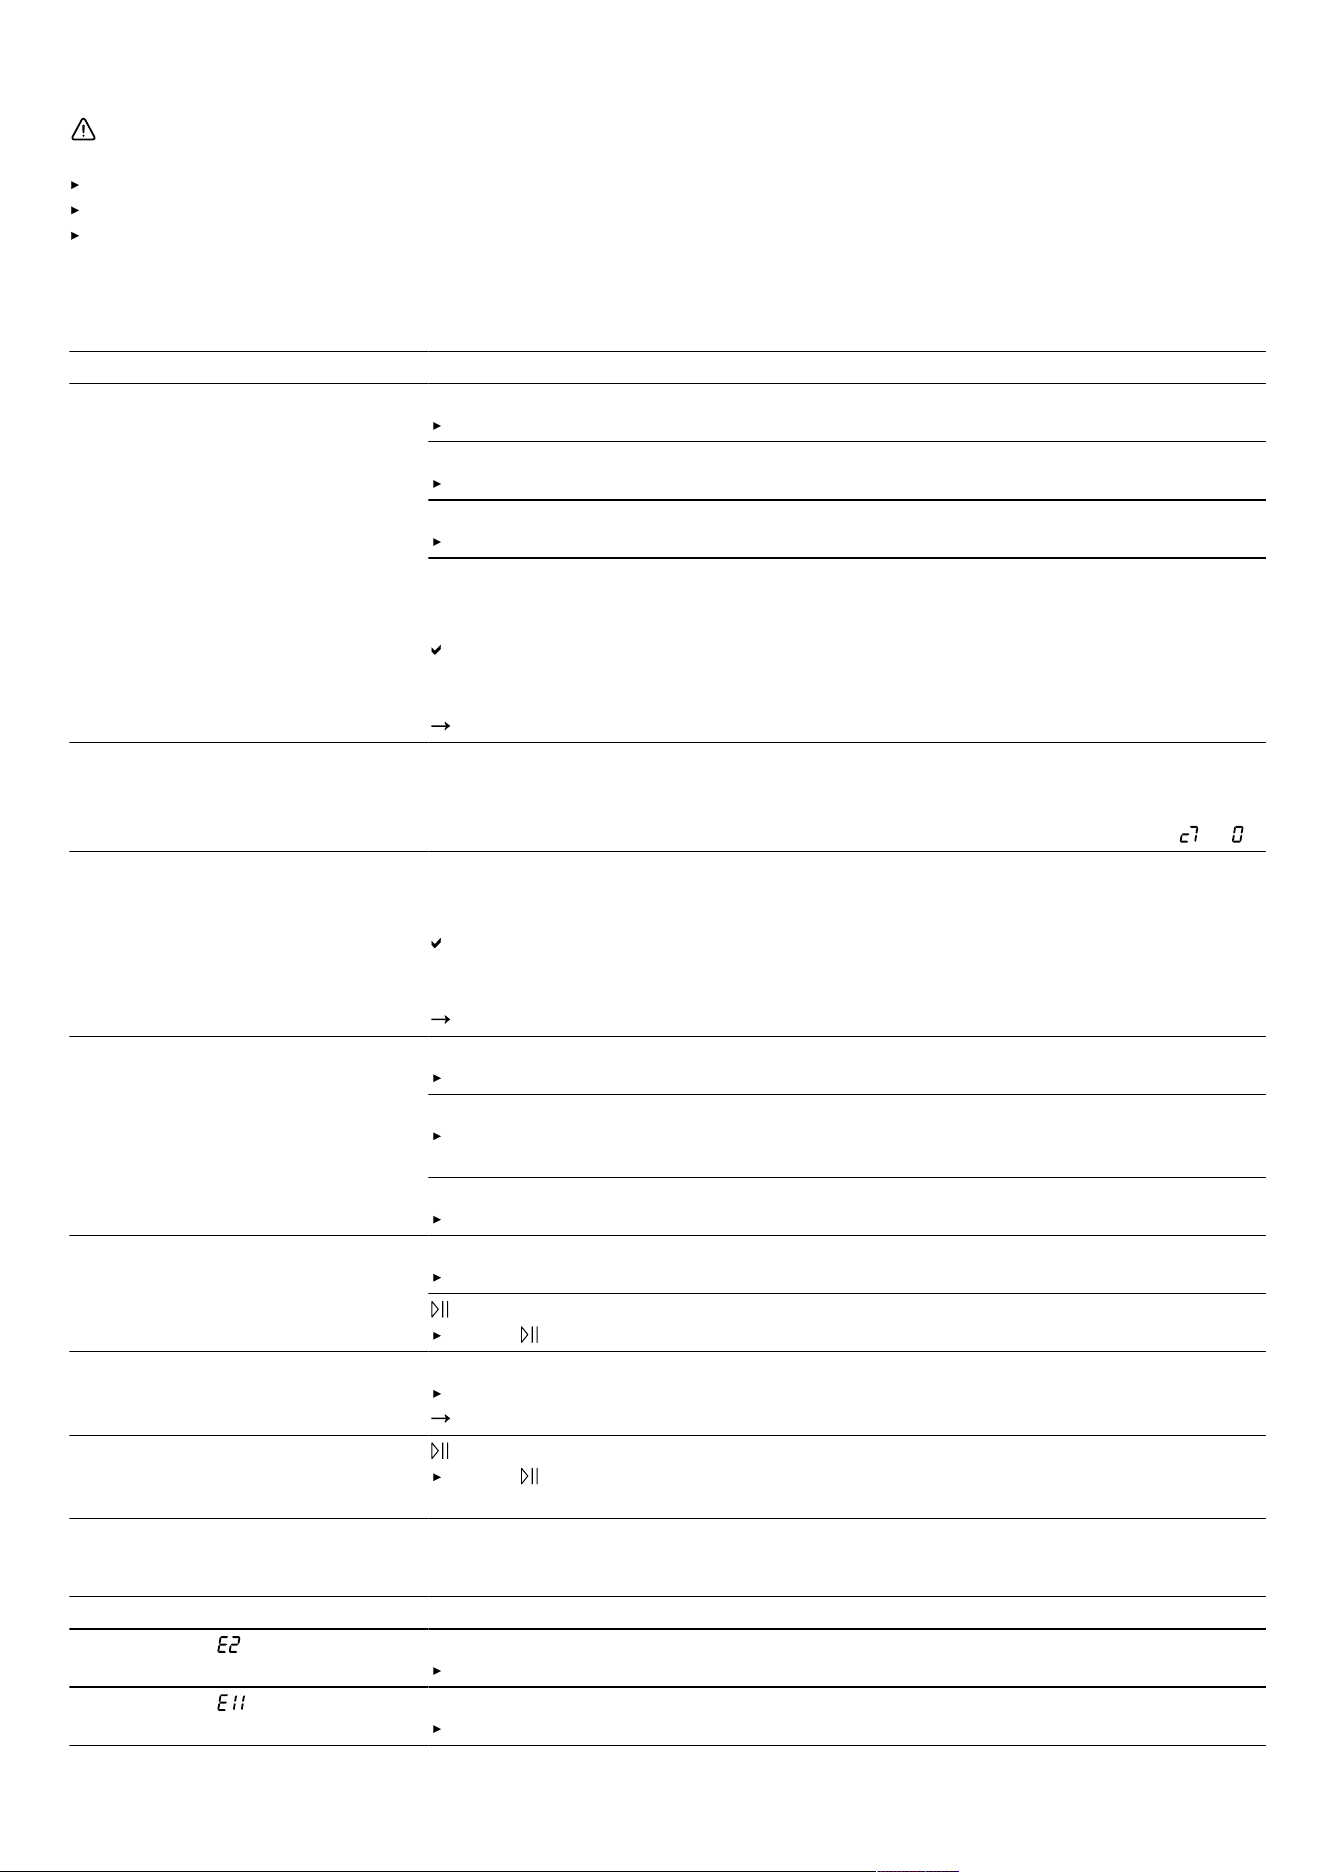
13.1 Malfunctions
Fault Cause and troubleshooting
The appliance is not working. The mains plug of the power cord is not plugged in.
Connect the appliance to the power supply.
The circuit breaker in the fuse box has tripped.
Check the circuit breaker in the fuse box.
There has been a power cut.
Check whether the lighting in your room or other appliances are working.
Malfunction
1.
Switch off the fuse in the fuse box.
2.
Switch the fuse back on after approx. 10seconds.
If the fault was a one-off, the message disappears.
3.
If the message appears again, call the after-sales service. Please specify the
exact error message when calling.
"Customer Service", Page21
Appliance is not heating, colon is
flashing in the display.
Demo mode is activated.
1.
Briefly disconnect the appliance from the power supply by switching the circuit
breaker in the fuse box off and then on again.
2.
Deactivate demo mode within 5minutes by changing the basic setting to .
Microwave operation is stopped. Malfunction
1.
Switch off the fuse in the fuse box.
2.
Switch the fuse back on after approx. 10seconds.
If the fault was a one-off, the message disappears.
3.
If the message appears again, call the after-sales service. Please specify the
exact error message when calling.
"Customer Service", Page21
Food takes longer than usual to
heat up.
The microwave power setting was too low.
Select a higher microwave power setting.
You have placed a larger amount of food than normal in the appliance.
Set a longer cooking time.
Double the amount needs double the cooking time.
The food was colder than usual.
Stir or turn the food during cooking.
Microwave not working. The door was not fully closed.
Check whether food residue or debris is trapped in the door.
has not been pressed.
Press .
12:00 flashes in the display and
the symbol lights up.
There has been a power cut.
Reset the time.
"Setting the time", Page10
The appliance is not in operation.
A cooking time is shown in the
display.
has not been pressed.
Press .
13.2 Information on display panel
Fault Cause and troubleshooting
The message appears in the
display.
The automatic safety cut-out function has been activated.
Press any button.
The message appears in the
display.
Moisture in the control panel.
Allow the control panel to dry.
20
Disposal en
Disposal14 Disposal
14.1 Disposing of old appliance
Valuable raw materials can be reused by recycling.
1.
Unplug the appliance from the mains.
2.
Cut through the power cord.
3.
Dispose of the appliance in an environmentally
friendly manner.
Information about current disposal methods are avail-
able from your specialist dealer or local authority.
This appliance is labelled in accordance
with European Directive 2012/19/EU
concerning used electrical and elec-
tronic appliances (waste electrical and
electronic equipment - WEEE).
The guideline determines the framework
for the return and recycling of used ap-
pliances as applicable throughout the
EU.
Customer Service15 Customer Service
Function-relevant genuine spare parts according to the
corresponding Ecodesign Directive can be obtained
from Customer Service for a period of at least 10years
from the date on which your appliance was placed on
the market within the European Economic Area.
Furthermore, our Customer Service will continue to
provide you with other function-relevant and storable
genuine spare parts for up to 15years from the date on
which your appliance was placed on the market.
For more information, please contact our Customer Ser-
vice team.
Detailed information about the warranty period and the
warranty conditions in your country is available via the
QR code on the enclosed document on service con-
tacts and warranty conditions, from our customer ser-
vice or on our website.
You can find the contact details for our customer ser-
vice via the QR code on the enclosed document on ser-
vice contacts and warranty conditions or on our website.
This product contains light sources from energy effi-
ciency class G. These light sources are available as a
spare part and should only be replaced by trained spe-
cialist staff.
You can find the information required as per Regulation
(EU) 2023/826 online at
www.neff-home.com
on the
product and service pages for your appliance, in the
area of user manuals and additional documents.
15.1 Product number (E-Nr.) and production
number (FD)
If you contact Customer Service, you will require the
product number (E-Nr.) and the production number
(FD), which you can find on the appliance's rating plate.
You will see the rating plate with these numbers if you
open the appliance door.
Make a note of your appliance's details and the Cus-
tomer Service telephone number to find them again
quickly.
How it works16 How it works
Here, you can find the ideal settings for various dishes
as well as the best accessories and cookware. We have
tailored these recommendations to your appliance.
16.1 What is the best way to proceed?
Tip: Your appliance has programmed settings for a se-
lection of dishes. If you want to be guided by the appli-
ance, use the automatic programmes.
WARNING‒Risk of burns!
Foods with peel or skin may burst or explode during
heating, or even afterwards.
Never cook eggs in their shell or heat hard-boiled
eggs in their shell.
Never cook shellfish or crustaceans.
Always prick the yolk of eggs before microwaving.
The skin of foods that have a peel or skin, such as
apples, tomatoes, potatoes and sausages, may burst.
Before heating, prick the peel or skin.
ATTENTION
Acidic food may damage the wire rack
Do not place acidic food, such as fruit or food with an
acidic marinade directly on the wire rack.
Note: Information for those allergic to nickel
In rare cases, small amounts of nickel may pass into the
food.
1.
Select a suitable dish from the overviews.
Tips
– If you are using the appliance for the first time, pro-
ceed in accordance with the following basic inform-
ation:
–
"Safety", Page2
–
"Condensation", Page9
If you do not find the exact dish or application that
you want to prepare or implement, look for a sim-
ilar dish and take the general information into con-
sideration.
2.
Remove any accessories from the cooking compart-
ment.
21
en How it works
3.
Select suitable cookware and accessories.
Use the cookware and accessories listed in the re-
commended settings.
4.
Only preheat the appliance if the recipe or the recom-
mended settings tell you to do so.
5.
Use the recommended settings when configuring the
appliance settings.
6.
WARNING‒Risk ofscalding!
Hot steam may escape when you open the appliance
door. Steam may not be visible, depending on the
temperature.
Open the appliance door carefully.
Keep children at a safe distance.
When the dish is ready, switch off the appliance.
16.2 Defrosting, heating and cooking with
the microwave
Recommended settings for defrosting, heating and
cooking with the microwave.
The cooking time depends on the cookware, as well as
on the temperature, composition and quantity of the
food. This is why temperature ranges are given in the
tables. Begin with the lower temperature and, if neces-
sary, use a higher setting the next time. If you use differ-
ent quantities than those specified in the table, adhere
to the rule of thumb: Double the amount = almost
double the time, half the amount = half the time.
Tips on defrosting, heating and cooking with
the microwave
Follow these tips for good results when defrosting, heat-
ing and cooking with the microwave.
Issue Tip
You want to prepare a dif-
ferent amount than that in-
dicated in the table.
Increase or reduce the
cooking times using the fol-
lowing rule of thumb:
Double the amount = al-
most double the cooking
time
Half the amount = half
the cooking time
Defrosting with the microwave
Note
Cooking tips
Use microwave-safe cookware without a lid.
Turn or stir the food 2 to 3times during this time. When turning, remove any liquid that escapes during defrosting.
Delicate parts such as the legs and wings of chicken or fatty outer layers of roasts can be covered with small
pieces of aluminium foil. The foil must not touch the cooking compartment walls. You can remove the foil halfway
through the defrosting time.
Recipe Accessory/cookware Microwave output in
watts
Cooking time in mins
Whole pieces of beef, veal or
pork (on the bone or boned),
800g
Cookware without lid 1. 180
2. 90
1. 15
2. 10-20
Whole pieces of beef, veal or
pork (on the bone or boned),
1.0kg
Cookware without lid 1. 180
2. 90
1. 20
2. 15-25
Whole pieces of beef, veal or
pork (on the bone or boned),
1.5kg
Cookware without lid 1. 180
2. 90
1. 30
2. 20-30
Pieces or slices of beef, veal or
pork, 200g
1
Cookware without lid 1. 180
2. 90
1. 3
2. 10-15
Pieces or slices of beef, veal or
pork, 500g
1
Cookware without lid 1. 180
2. 90
1. 5
2. 15-20
Pieces or slices of beef, veal or
pork, 800g
1
Cookware without lid 1. 180
2. 90
1. 8
2. 15-20
Minced meat, mixed, 200g
2
Cookware without lid 90 10-15
Minced meat, mixed, 500g
2
Cookware without lid 1. 180
2. 90
1. 5
2. 10-15
Minced meat, mixed, 800g Cookware without lid 1. 180
2. 90
1. 10
2. 5-10
Poultry or poultry portions, 600g Cookware without lid 1. 180
2. 90
1. 8
2. 10-15
Poultry or poultry portions, 1.2kg Cookware without lid 1. 180 1. 15
1
Separate any defrosted parts.
2
Remove any meat that has already defrosted.
22
How it works en
Recipe Accessory/cookware Microwave output in
watts
Cooking time in mins
2. 90 2. 25-35
Duck, 2.0kg Cookware without lid 1. 180
2. 90
1. 20
2. 30-40
Fish fillet, fish steak or slices,
400g
1
Cookware without lid 1. 180
2. 90
1. 5
2. 10-15
Whole fish, 300g Cookware without lid 1. 180
2. 90
1. 3
2. 10-15
Whole fish, 600g Cookware without lid 1. 180
2. 90
1. 8
2. 10-15
Vegetables, e.g. peas, 300g Cookware without lid 180 10-15
Vegetables, e.g. peas, 600g Cookware without lid 1. 180
2. 90
1. 8
2. 5-10
Fruit, e.g. raspberries, 300g
1
Cookware without lid 180 7-10
Fruit, e.g. raspberries, 500g
1
Cookware without lid 1. 180
2. 90
1. 8
2. 5-10
Defrosting butter, 125g Cookware without lid 1. 180
2. 90
1. 1
2. 2-4
Defrosting butter, 250g Cookware without lid 1. 360
2. 90
1. 1
2. 2-4
Loaf of bread, 500g Cookware without lid 1. 180
2. 90
1. 6
2. 5-10
Loaf of bread, 1.0kg Cookware without lid 1. 180
2. 90
1. 12
2. 15-25
Cakes, plain, e.g. sponge cake,
500g
2
Cookware without lid 90 15-25
Cakes, plain, e.g. sponge cake,
750g
2
Cookware without lid 1. 180
2. 90
1. 5
2. 10-15
Cakes, moist, e.g. fruit flan,
cheesecake, 500g
2
Cookware without lid 1. 180
2. 90
1. 5
2. 10-15
Cakes, moist, e.g. fruit flan,
cheesecake, 750g
2
Cookware without lid 1. 180
2. 90
1. 7
2. 10-15
Defrosting and heating frozen food
Note
Cooking tips
Use microwave-safe cookware with a lid. You can also use a plate or a microwave cover to cover the dish. Take
ready meals out of the packaging.
Distribute the food flat in the cookware. Food which lies flat cooks more quickly than food which is piled high.
Turn or stir the food 2 to 3times during this time.
After heating, leave the food to rest for 1–2ºminutes.
The food transfers heat to the cookware. The cookware can become very hot. Use oven gloves.
Dish Accessory/cookware Microwave output in
watts
Cooking time in mins
Menu, plated meal, ready meal,
300–400g
Cookware with lid 600 10-15
Soup, 400g Cookware with lid 600 8-15
Stew, 500g Cookware with lid 600 10-15
Stew, 1kg Cookware with lid 600 20-25
Slices or pieces of meat in sauce,
e.g. goulash, 500g
Cookware with lid 600 25-30
1
Separate any defrosted parts.
2
Only defrost cakes without icing, whipped cream, gelatine or custard.
23
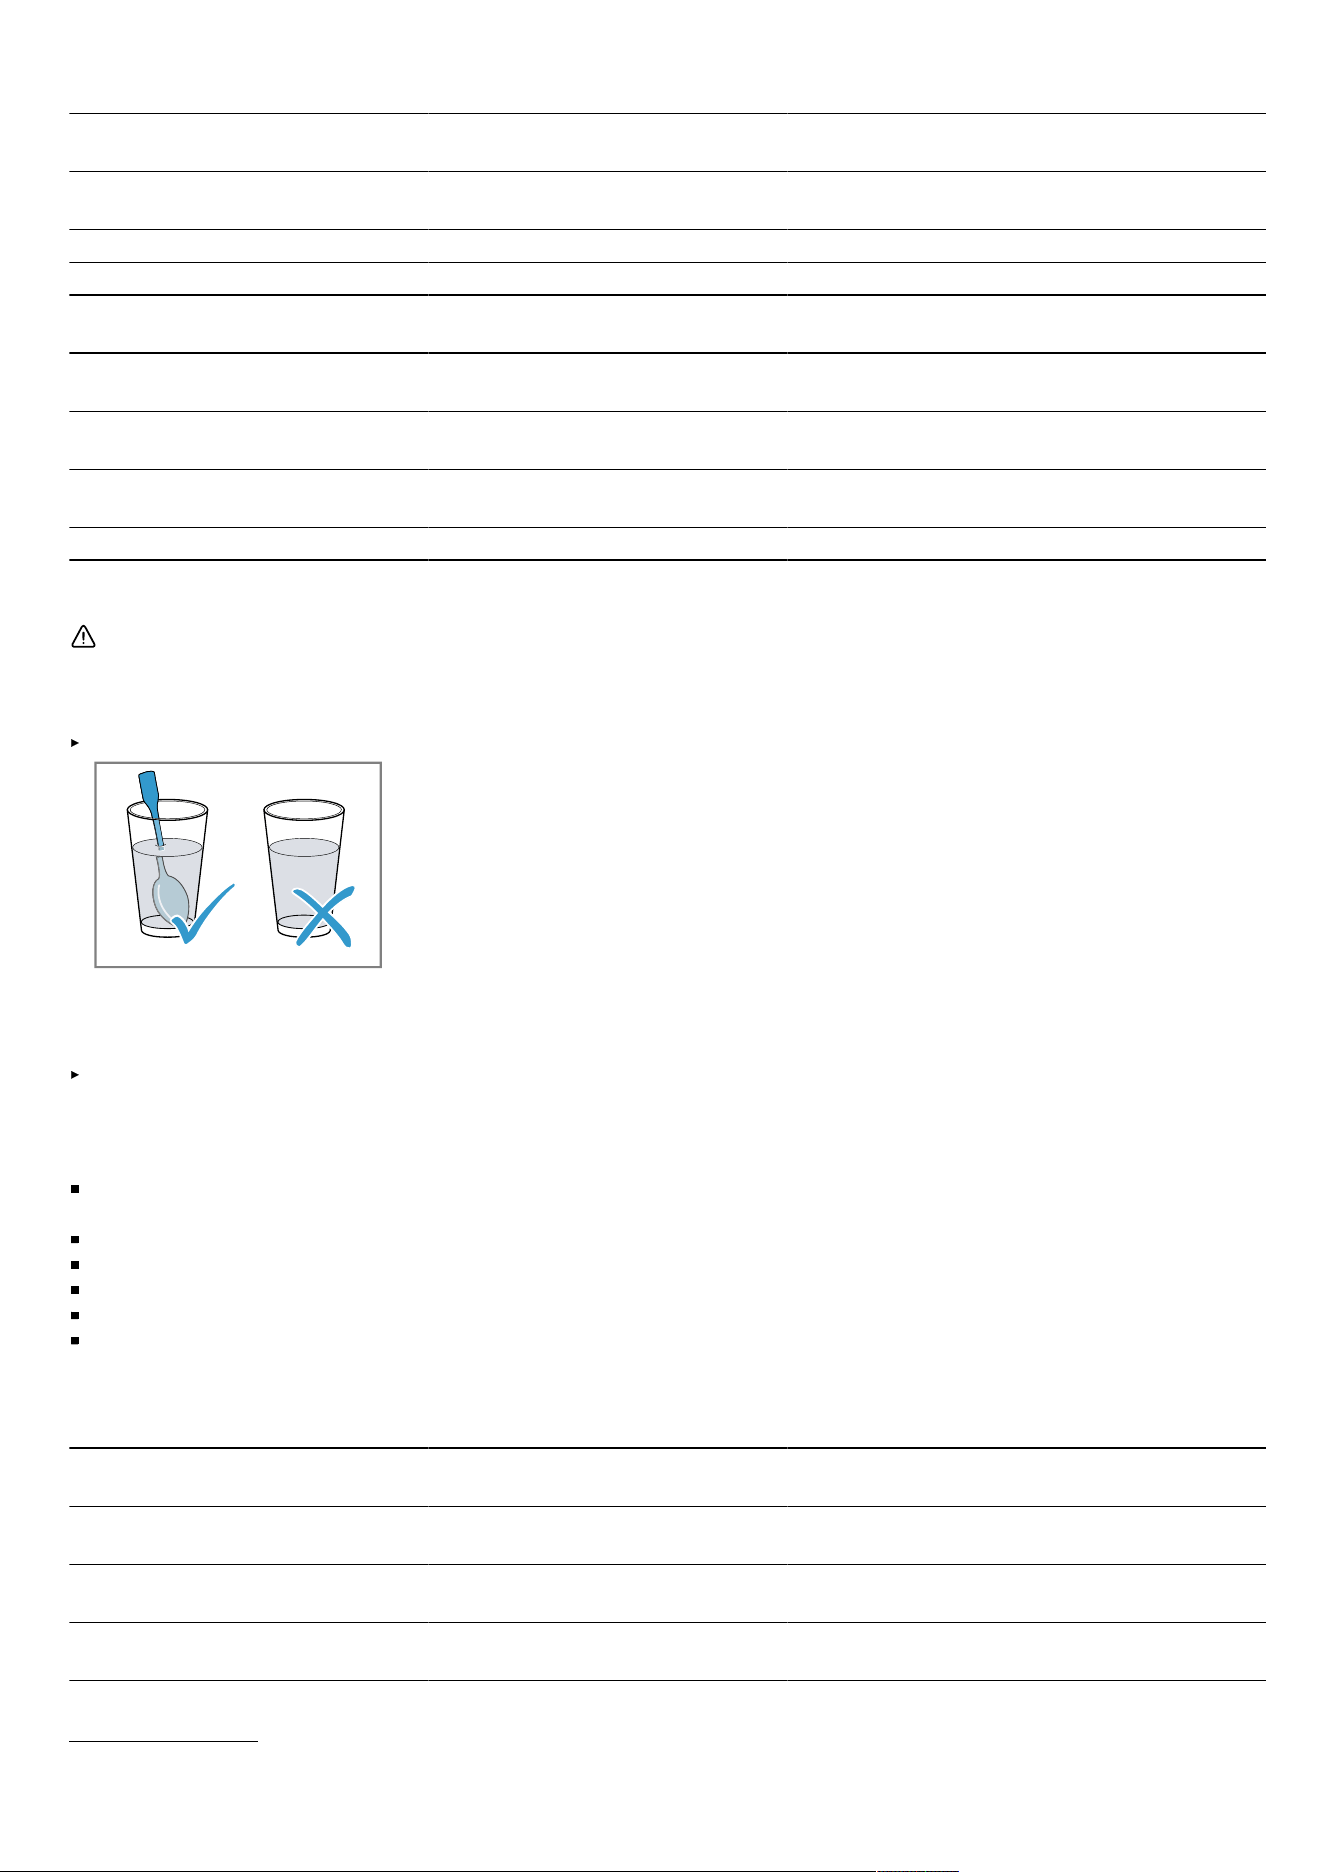
en How it works
Dish Accessory/cookware Microwave output in
watts
Cooking time in mins
Slices or pieces of meat in sauce,
e.g. goulash, 1kg
Cookware with lid 600 25-30
Fish, e.g. fillet steaks, 400g Cookware with lid 600 10-15
Fish, e.g. fillet steaks, 800g Cookware with lid 600 18-20
Side dishes, e.g. rice, pasta,
cooked, 250g
1
Cookware with lid 600 2-5
Side dishes, e.g. rice, pasta,
cooked, 500g
1
Cookware with lid 600 8-10
Vegetables, e.g. peas, broccoli,
carrots, precooked, 300g
1
Cookware with lid 600 5-8
Vegetables, e.g. peas, broccoli,
carrots, precooked, 600g
1
Cookware with lid 600 14-17
Creamed spinach, 500g Cookware with lid 600 11-16
Heating in the microwave
WARNING‒Risk ofscalding!
There is a possibility of delayed boiling when a liquid is heated. This means that the liquid reaches the boiling tem-
perature without the usual steam bubbles rising to the surface. Exercise caution even when only gently shaking the
container. The hot liquid may suddenly boil over and splatter.
Always place a spoon in the container when heating liquids. This prevents delayed boiling.
ATTENTION
Metal touching the wall of the cooking compartment will cause sparks, which may damage the appliance or the inner
door pane.
Metal (e.g. a spoon in a glass) must be kept at least 2cm from the cooking compartment walls and the inside of
the door.
Note
Cooking tips
Use microwave-safe cookware with a lid. You can also use a plate or a microwave cover to cover the dish. Take
ready meals out of the packaging.
Distribute the food flat in the cookware. Food which lies flat cooks more quickly than food which is piled high.
Turn or stir the food 2 to 3times during this time.
After heating, leave the food to rest for 1–2ºminutes.
The food transfers heat to the cookware. The cookware can become very hot. Use oven gloves.
Baby food:
– Place bottles without a teat or lid on the wire rack.
– Stir or shake well after heating.
– Always check the temperature of the baby food.
Dish Accessory/cookware Microwave output in
watts
Cooking time in mins
Menu, plated meal, ready meal,
approx.400g
Cookware without lid 600 5-10
Drinks, 200ml Glass
Place a spoon in the glass
900 1-2
Drinks, 500ml Glass
Place a spoon in the glass
900 2-4
1
Add a little water to the food.
24
How it works en
Dish Accessory/cookware Microwave output in
watts
Cooking time in mins
Baby food, e.g. baby bottles,
150ml
1
Place bottles without a teat or lid
on the cooking compartment floor
360 1-2
Soup, 2 cups, 175g each Cookware without lid 900 4-5
Soup, 4 cups, 175g each Cookware without lid 900 5-6
Slices or pieces of meat in sauce,
e.g. goulash, 500g
Cookware with lid 600 10-15
Stew, 400g Cookware with lid 600 5-10
Stew, 800g Cookware with lid 600 10-15
Vegetables, 150g
2
Cookware without lid 600 2-3
Vegetables, 300g
2
Cookware without lid 600 3-5
Cooking with the microwave
Note
Cooking tips
Use microwave-safe cookware with a lid. You can also use a plate or a microwave cover to cover the dish. Take
ready meals out of the packaging.
Distribute the food flat in the cookware. Food which lies flat cooks more quickly than food which is piled high.
After heating, leave the food to rest for 1–2ºminutes.
The food transfers heat to the cookware. The cookware can become very hot. Use oven gloves.
The food will retain most of its natural flavor. Use salt and seasonings sparingly.
Cut vegetables and potatoes into equal-sized pieces. Add 1–2 tbsp water for every 100g. Stir while cooking.
Add double the amount of liquid to the rice.
Recipe Accessory/cookware Microwave output in
watts
Cooking time in mins
Whole chicken, fresh, no giblets,
1.3kg
Cookware with lid 600 30-35
Fish fillet, fresh, 400g Cookware with lid 600 10-15
Vegetables, fresh, 250g Cookware with lid 600 5-10
Vegetables, fresh, 500g Cookware with lid 600 10-15
Potatoes, 250g Cookware with lid 600 8-10
Potatoes, 500g Cookware with lid 600 10-15
Rice, 125g + 250ml water Cookware with lid 1. 600
2. 180
1. 7-9
2. 15-20
Rice, 250g + 500ml water Cookware with lid 1. 600
2. 180
1. 8-10
2. 20-25
Desserts, e.g. blancmange (in-
stant), 500ml
3
Cookware with lid 600 5-8
Blancmange made from blancmange powder
WARNING‒Risk of burns!
Heated food gives off heat. The cookware may become
hot.
Always use oven gloves to remove cookware or ac-
cessories from the cooking compartment.
1.
Mix together one packet of blancmange powder with
sugar and a little milk in a tall microwave-suitable
bowl in accordance with the package instructions so
that there are no lumps.
2.
Add the rest of the milk and stir again.
3.
Place the bowl into the cooking compartment and
close the appliance door.
4.
Set the appliance according to the recommended set-
tings.
5.
Only stir for the first time after 3minutes. Then stir
again every minute until it reaches the required con-
sistency.
The cooking time depends on the temperature of the
milk and the container that is used.
1
Stir or shake well after heating. Check the temperature.
2
Add a little water to the food.
3
Stir 2 to 3 times with a whisk while heating.
25
en How it works
Microwave popcorn
Note
Cooking tips
Use shallow, heat-resistant glass ovenware. Do not use porcelain or deep plates.
Adjust the cooking time to the quantity.
To prevent the popcorn from burning, after 1minute 30seconds, briefly take the popcorn bag out of the oven and
shake it. Take care as it will be hot!
Meal Accessory/cookware Microwave output in
watts
Cooking time in mins
Microwave popcorn, 100g Glass tray 600 3-5
Tips on defrosting, heating and cooking with
the microwave next time
Follow these tips for good results when defrosting, heat-
ing and cooking with the microwave.
Issue Tip
Your food is too dry. Reduce the cooking time
or select a lower mi-
crowave power setting.
Cover the food and add
more liquid.
The time has elapsed but
the food is not defrosted,
hot or cooked.
Increase the cooking time.
Large quantities and food
which is piled high require
longer times.
The time has elapsed but
your food is not yet done
on the inside, but is
already overdone on the
outside.
Stir while cooking.
Reduce the microwave
power setting and in-
crease the cooking time.
After defrosting, the
poultry or meat is defros-
ted on the outside but not
defrosted in the middle.
Reduce the microwave
power setting.
Turn large pieces of
frozen food several
times.
16.3 Cakes and baked items
Recommended settings for cakes and baked items.
The temperature and baking time depend on the con-
sistency and quantity of the dough. This is why temper-
ature ranges are given in the tables. Begin with the
lower temperature and, if necessary, use a higher set-
ting the next time. A lower temperature results in more
even browning.
Baking tips
We have compiled a few tips to help you achieve a
good baking result.
Issue Tip
You want your cake to rise
evenly.
Only grease the base of
the springform cake tin.
After baking, use a knife
to carefully loosen the
cake from the baking tin.
You do not want small
baked items to stick to
each other when baking.
Leave a minimum clear-
ance of 2cm around each
item to be baked. This al-
lows enough space for the
baked items to expand and
brown on all sides.
Determine whether the
cake is ready.
Push a cocktail stick into
the highest point on the
cake. If no dough sticks to
the wood, the cake is
ready.
You want to bake using
your own recipe.
Use similar items in the
baking tables as a guide.
Use bakeware made of sil-
icone, glass, plastic or
ceramic.
The bakeware must be
heat-resistant up to 250
°C.
Cakes in this bakeware
brown less.
When using the mi-
crowave, the cooking
time is shorter than the
time shown in the table.
Cakes in tins
Note
Preparation tips
The recommended settings apply to dishes placed into the non-preheated appliance.
Always place the cake tin in the centre of the wire rack.
Use heat-resistant, microwave-safe bakeware.
Metal baking tins are not suitable for baking with microwaves.
Dark-coloured metal baking tins are most suitable.
26
How it works en
Dish Accessories/
cookware
Rack posi-
tion
Type of
heating
Temperature
in °C
Microwave
output in
watts
Cooking time
in mins
Sponge cake, basic
1
Vienna ring tin/
loaf tin
170-180 90 40-50
Sponge cake, delicate (e.g.
sand cake)
1
Vienna ring tin/
loaf tin
150-170 - 70-90
Sponge flan base Flan base tin 160-180 - 30-40
Fruit cake, delicate, made
of sponge
Springform/
ring tin
170-190 90 30-45
3-egg fatless sponge cake Springform
cake tin, dia-
meter 26 cm
170-180 - 30-40
Fruit tart or cheesecake
with shortcrust pastry base
1
Springform
cake tin, dia-
meter 26 cm
170-180 180 35-45
Pizza Round pizza
tray
220-230 - 15-25
Savoury cakes, (e.g.
quiche)
Springform
cake tin, dia-
meter 26 cm
200-220 - 50-70
Nut cake Springform
cake tin, dia-
meter 26 cm
170-180 90 30-35
Yeast dough with moist top-
ping
Round pizza
tray
170-190 - 55-65
Plaited loaf with 500g flour Round pizza
tray
170-190 - 35-45
Small baked items
Note
Preparation tips
The recommended settings apply to dishes placed into the non-preheated appliance.
Always place the cake tin in the centre of the wire rack.
Dark-coloured metal baking tins are most suitable.
Dish Accessories/
cookware
Rack position Type of
heating
Temperature in
°C
Cooking time
in mins
Biscuits Round pizza tray 150-170 20-35
Macaroons Round pizza tray 110-130 35-45
Meringues Round pizza tray 100 80-100
Muffins Muffin tray on
wire rack
160-180 35-40
Puff pastry Round pizza tray 190-200 35-45
Bread and bread rolls
Note
Preparation tips
The recommended settings apply to dishes placed into the non-preheated appliance.
Always place the cake tin in the centre of the wire rack.
Dark-coloured metal baking tins are most suitable.
Dish Accessories/
cookware
Rack position Type of
heating
Temperature in
°C
Cooking time
in mins
Bread, 1.5kg Loaf tin 1. 230
2. 200-210
1. 10-15
2. 40-50
1
Allow cakes to cool in the oven for approx. 20 minutes.
27
en How it works
Dish Accessories/
cookware
Rack position Type of
heating
Temperature in
°C
Cooking time
in mins
Bread rolls, e.g. wheat rolls Round pizza tray 210-230 25-35
Tips for next time you bake
If something goes wrong when baking, you can find
some tips here.
Issue Tip
Your cake collapses. Note the ingredients and
preparation instructions
that are given in the re-
cipe.
Use less liquid.
Or:
Reduce the baking tem-
perature by 10°C and
increase the baking time.
Your cake is too dry. Increase the baking tem-
perature by 10°C and
shorten the baking time.
Your cake is generally too
light in colour.
Check the shelf position
and accessory.
Increase the baking tem-
perature by 10°C.
Or:
Increase the baking time.
Your whole cake is too
dark.
Reduce the baking temper-
ature and increase the bak-
ing time.
Your cake is too light on
top and too dark under-
neath.
Place the cake one level
higher in the cooking com-
partment.
Your cake is too dark on
top and too light under-
neath.
Place the cake one level
lower in the cooking
compartment.
Reduce the baking tem-
perature and increase
the baking time
Your cake is unevenly
browned.
Reduce the baking tem-
perature.
Cut the greaseproof pa-
per to a suitable size.
Position the baking tin in
the centre.
Shape small baked
goods to be the same
size and thickness.
Your cake is cooked on
the outside but is not fully
baked through on the in-
side.
Reduce the baking tem-
perature and increase
the baking time.
Add less liquid.
For cakes with a moist top-
ping:
Pre-bake the base.
Sprinkle the baked base
with almonds or bread-
crumbs.
Place the topping on the
base.
Issue Tip
The cake will not come out
of the tin when turned up-
side down.
Allow the cake to cool
for 5-10minutes after
baking.
Use a knife to carefully
loosen the edge of the
cake.
Turn the cake tin upside
down again and cover it
several times with a cold,
wet cloth.
Next time you bake,
grease the baking tin/
dish and sprinkle it with
breadcrumbs.
Sparks are generated
between the tin and the
wire rack.
Check that the tin is
clean on the outside.
Change the position of
the tin in the cooking
compartment.
Continue baking without
the microwave and in-
crease the baking time.
16.4 Roasting and grilling
The temperature and roasting time depend on the con-
sistency and amount of food being cooked. This is why
temperature ranges are given in the tables.
Begin with the lower temperature and, if necessary, use
a higher setting the next time.
Roasting in cookware
If you prepare dishes in cookware, you can remove
them from the cooking compartment more easily and
serve them directly in the cookware. When preparing
food in cookware with a lid, the cooking compartment
remains cleaner.
General information about roasting in cookware
Use heat-resistant, microwave-safe cookware.
Metal roasting dishes are not suitable for roasting
with microwaves.
Place the cookware onto the wire rack.
Check in advance whether the cookware fits in the
cooking compartment.
Glass cookware is best.
Place hot glass ovenware on a dry mat after cooking.
The glass may crack if placed on a cold or wet sur-
face.
The cookware can become very hot. Use oven gloves
to take the cookware out of the oven.
Follow the manufacturer's instructions for your roast-
ing dishes.
Cookware without lid
Use a deep roasting dish.
Cookware with lid
Use a suitable lid that seals well.
28
How it works en
When roasting meat, there should be at least 3 cm
between the food and the lid as the meat may ex-
pand.
Meat, poultry and fish can also become crispy in a
covered roasting dish. Use a roasting dish with a
glass lid. If necessary, set a higher temperature.
WARNING‒Risk ofscalding!
Very hot steam may escape when the lid is opened after
cooking. Steam may not be visible, depending on the
temperature.
Lift the lid in such a way that the hot steam can es-
cape away from you.
Keep children away from the appliance.
Notes
Lean meat or pot roast
– Add liquid to the cookware so that it is approx. 1/2
cm deep, e.g. water, wine, vinegar or similar liquid.
The amount of liquid depends on the type of
meat, what the cookware is made of and on
whether or not a lid is used.
More liquid needs to be added to enamelled or
dark metal roasting pan than for glass cookware.
Add slightly more liquid for pot roasts.
– During roasting, the liquid in the roasting dish will
evaporate. Carefully add liquid as necessary.
– Turn pieces of meat halfway through the cooking
time.
Fish
– When steaming fish, add one to three tablespoons
of liquid to the cookware, e.g. lemon juice or vin-
egar.
Grilling
Grill food if you want it to be crispy.
ATTENTION
Acidic food may damage the wire rack
Do not place acidic food, such as fruit or food with an
acidic marinade directly on the wire rack.
Information for those allergic to nickel
In rare cases, small amounts of nickel may pass into the
food.
Do not grill food with the appliance door open.
Do not preheat.
Use food to be grilled that is of a similar weight and
thickness.
This allows the food to be grilled to brown evenly and
remain succulent and juicy.
Place the food to be grilled directly on the wire rack.
Use grill tongs to turn the grilled items.
If you pierce the meat with a fork, the juices will run
out and it will become dry.
Do not add salt until after the food has been grilled.
Salt draws water from the meat.
Note: Dark meat, such as beef, browns more quickly
than lighter-coloured meat, such as veal or pork. When
grilling light-coloured meat or fish, these often only
brown slightly on the surface, although they are cooked
and juicy on the inside.
The grill element switches on and off continuously. This
is normal. The grill setting that you use determines how
frequently this occurs.
Smoke may be produced when grilling.
Tips for roasting and braising
Use these tips for good results when roasting and brais-
ing.
Issue Tip
Lean meat should not dry
out.
Coat lean meat with fat
or oil as required or
cover it with strips of ba-
con.
You want to prepare joints
with the rind on.
Score the rind in a cross-
wise pattern.
Roast the joint with the
rind facing down first.
Keep the cooking com-
partment as clean as pos-
sible.
Cook the food in a
covered roasting dish at
a higher temperature.
You want the meat (e.g.
roast beef) to remain hot
and succulent.
When the roast is ready,
switch off the oven and
leave the meat to rest for
10minutes in the cook-
ing compartment with the
door closed. This helps
distribute the meat juices
more evenly. The resting
time is not included in
the specified cooking
time.
After preparing it, wrap
the food in aluminium
foil.
Beef
Note
Preparation tips
The recommended settings apply to dishes placed into the non-preheated appliance.
Turn sirloin and steaks halfway through the cooking time. Allow the dish to stand for around a further 10minutes
at the end.
Dish Accessories/
cookware
Rack posi-
tion
Type of
heating
Temperature
in °C/grill set-
ting
Microwave
output in
watts
Cooking time
in mins
Pot-roasted beef, ap-
prox.1kg
Wire rack
Cookware with
lid
180-200 180 120-145
29
en How it works
Dish Accessories/
cookware
Rack posi-
tion
Type of
heating
Temperature
in °C/grill set-
ting
Microwave
output in
watts
Cooking time
in mins
Sirloin, medium, ap-
prox.1kg
Wire rack
Cookware
without lid
210-230 180 30-40
Beef steak, medium, 2–
3pieces, 2–3cm thick,
200g each
Wire rack
Glass tray
3 - 20-30
Pork
Note
Preparation tips
The recommended settings apply to dishes placed into the non-preheated appliance.
Turn rindless joints halfway through the cooking time. Allow the joint to stand for around a further 10minutes at the
end.
Place the joint in the cookware rind-side up. Score the rind. Do not turn the joint. Allow the joint to stand for around
a further 10minutes at the end.
Turn neck steaks after 2/3 of the cooking time.
Dish Accessories/
cookware
Rack posi-
tion
Type of
heating
Temperature
in °C/grill set-
ting
Microwave
output in
watts
Cooking time
in mins
Rindless joint, e.g. pork
neck, approx.750g
Wire rack
Cookware with
lid
220-230 180 40-50
Joint with rind, e.g.
shoulder, approx. 1kg
Wire rack
Cookware
without lid
190-210 - 130-150
Pork neck, 2–3 pieces, 2–
3cm thick
Wire rack
Glass tray
3 - 25-35
Other meat dishes
Note
Preparation tips
The recommended settings apply to dishes placed into the non-preheated appliance.
Allow the meat loaf to stand for around a further 10 minutes at the end.
Turn the sausages after 2/3 of the cooking time.
Dish Accessories/
cookware
Rack posi-
tion
Type of
heating
Temperature
in °C/grill set-
ting
Microwave
output in
watts
Cooking time
in mins
Meat loaf, approx.750g Wire rack
Cookware
without lid
180-200 600 15-20
Sausages for grilling, 4 to
6, approx.150g each
Wire rack
Glass tray
3 - 25-35
Poultry
Note
Preparation tips
The recommended settings apply to dishes placed into the non-preheated appliance.
Arrange whole chickens breast-side down. Turn halfway through the cooking time.
Arrange chicken portions and duck breast skin side up. Do not turn the dishes.
Turn goose legs halfway through the cooking time. Pierce the skin.
Dish Accessories/
cookware
Rack posi-
tion
Type of
heating
Temperature
in °C/grill set-
ting
Microwave
output in
watts
Cooking time
in mins
Chicken, whole, ap-
prox.1.2kg
Wire rack 220-230 360 35-45
30
How it works en
Dish Accessories/
cookware
Rack posi-
tion
Type of
heating
Temperature
in °C/grill set-
ting
Microwave
output in
watts
Cooking time
in mins
Cookware with
lid
Chicken portions, ap-
prox.800g
Wire rack
Cookware
without lid
210-230 360 20-30
Duck breast, approx.500g Wire rack
Glass tray
3 90 20-30
Goose breast, goose legs,
700–900g
Wire rack
Cookware
without lid
210-230 90 30-40
Fish
Note
Preparation tips
The recommended settings apply to dishes placed into the non-preheated appliance.
For grilling, place the whole fish, e.g. salmon or trout, onto the middle of the wire rack.
Grease the wire rack with oil beforehand.
Dish Accessories/
cookware
Rack position Type of
heating
Grill setting Cooking time
in mins
Fish steaks, 2–3, 150g each Wire rack
Glass tray
3 20-25
Fish, whole, 2-3, 300 g each Wire rack
Glass tray
3 20-30
Tips for next time you roast
If roasting is not successful the first time, you can find
some tips here.
Issue Tip
Your roast is too dark and
the crackling is partly
burnt.
Select a lower temperat-
ure.
Reduce the roasting
time.
Your roast is too dry. Select a lower temperat-
ure.
Reduce the roasting
time.
The crackling on your
roast is too thin.
Increase the temperat-
ure.
Or:
Switch on the grill briefly
at the end of the roasting
time.
Your roasting juices are
burnt.
Select a smaller item of
cookware.
When roasting, add more
liquid.
Issue Tip
Your roasting juices are
too clear and watery.
Use a larger item of
cookware so that more li-
quid evaporates.
When roasting, add less
liquid.
The meat catches during
braising.
Check whether the roast-
ing dish and lid fit to-
gether and close prop-
erly.
Reduce the temperature.
Add liquid when braising.
Your roast is not well-done
enough.
Carve the meat into por-
tions.
Prepare the juices in the
roasting dish.
Place the sliced meat in
the juices.
Place the slices of meat
in the microwave to finish
cooking.
16.5 Bakes, gratins and toast
Note
Preparation tips
The recommended settings apply to dishes placed into the non-preheated appliance.
Use a 4 to 5cm deep microwave-safe, heat-resistant dish for bakes and potato gratins.
Leave bakes and gratins to cook in the oven for a further 5minutes after the oven has been switched off.
Toast the slices of bread first.
31
en How it works
Dish Accessories/
cookware
Rack posi-
tion
Type of
heating
Temperature
in °C/grill set-
ting
Microwave
output in
watts
Cooking time
in mins
Sweet bake, approx.1.5kg Cookware
without lid
140-160 360 25-30
Savoury bake, made with
cooked ingredients, ap-
prox.1kg
Cookware
without lid
150-170 600 20-25
Potato gratin made from
raw ingredients, ap-
prox.1.1kg
Cookware
without lid
210-220 600 20-25
Toast with topping, 4 slices Wire rack 3 - 8-10
16.6 Frozen convenience products
Note
Preparation tips
Observe the manufacturer's instructions on the packaging.
The recommended settings apply to dishes placed into the non-preheated appliance.
Do not arrange chips, croquettes or potato röstis on top of each other.
Dish Accessories/
cookware
Rack posi-
tion
Type of
heating
Temperature
in °C
Microwave
output in
watts
Cooking time
in mins
Thin-crust pizza Wire rack 220-230 - 10-15
Pizza baguette Wire rack 1. -
2. 220-230
1. 600
2. -
1. 2
2. 13-18
Chips Round pizza
tray
220-230 90 10-15
Croquettes Round pizza
tray
210-220 - 10-15
Rösti, stuffed potato pock-
ets
Round pizza
tray
200-220 90 15-20
Strudel Round pizza
tray
220-230 - 20-30
Bakes, e.g. lasagne, ap-
prox.450g
Cookware with
lid
220-230 600 10-15
16.7 Test dishes
These overviews have been produced for test institutes
to facilitate appliance testing in accordance with EN
60350-1:2013 or IEC 60350-1:2011 and EN
60705:2012, IEC 60705:2010.
Defrosting with the microwave
Dish Accessories/cook-
ware
Rack position Microwave
output in
watts
Cooking time in
mins
Meat, 500g Cookware without lid Cooking com-
partment floor
1. 180
2. 90
1. 5
2. 10-15
Cooking with the microwave
Recommended settings for cooking test dishes in the microwave.
Dish Accessories/cook-
ware
Rack position Microwave
output in
watts
Cooking time in
mins
Custard, 1kg Cookware without lid Cooking com-
partment floor
1. 600
2. 180
1. 10-13
2. 20-30
Sponge flan, 475g Cookware without lid Cooking com-
partment floor
600 8-10
32
How it works en
Dish Accessories/cook-
ware
Rack position Microwave
output in
watts
Cooking time in
mins
Meat loaf, 900g Cookware without lid Cooking com-
partment floor
18-23 18-23
Cooking in combination with a microwave
Note
Preparation tips
Use a deep dish for chicken.
Arrange the chicken breast-side down. Turn halfway through the cooking time.
Dish Accessories/
cookware
Rack posi-
tion
Type of
heating
Temperature
in °C
Microwave
output in
watts
Cooking time
in mins
Potato gratin Wire rack
Cookware
without lid
210-220 600 25-30
Cakes Wire rack
Cookware
without lid
190-200 180 20-27
Chicken Wire rack
Cookware
without lid
190 360 30-45
Baking
Note: The recommended settings apply to dishes placed into the non-preheated appliance.
Dish Accessories/
cookware
Rack position Type of
heating
Temperature in
°C
Cooking time
in mins
Hot water sponge cake Wire rack
Springform cake
tin, diameter 26
cm
170-180 30-40
Double-crusted apple pie Wire rack
Springform cake
tin, diameter 20
cm
170-190 80-100
Viennese whirls Glass tray 160-170 30-35
Small cakes Glass tray 160-170 25-30
Grilling
Note: Turn beef burgers halfway through the cooking time.
Dish Accessories/
cookware
Rack position Type of
heating
Grill setting Cooking time
in mins
Toasting bread Wire rack 3 4-5
Beef burgers, x9 Wire rack
Glass tray
3 35-45
33
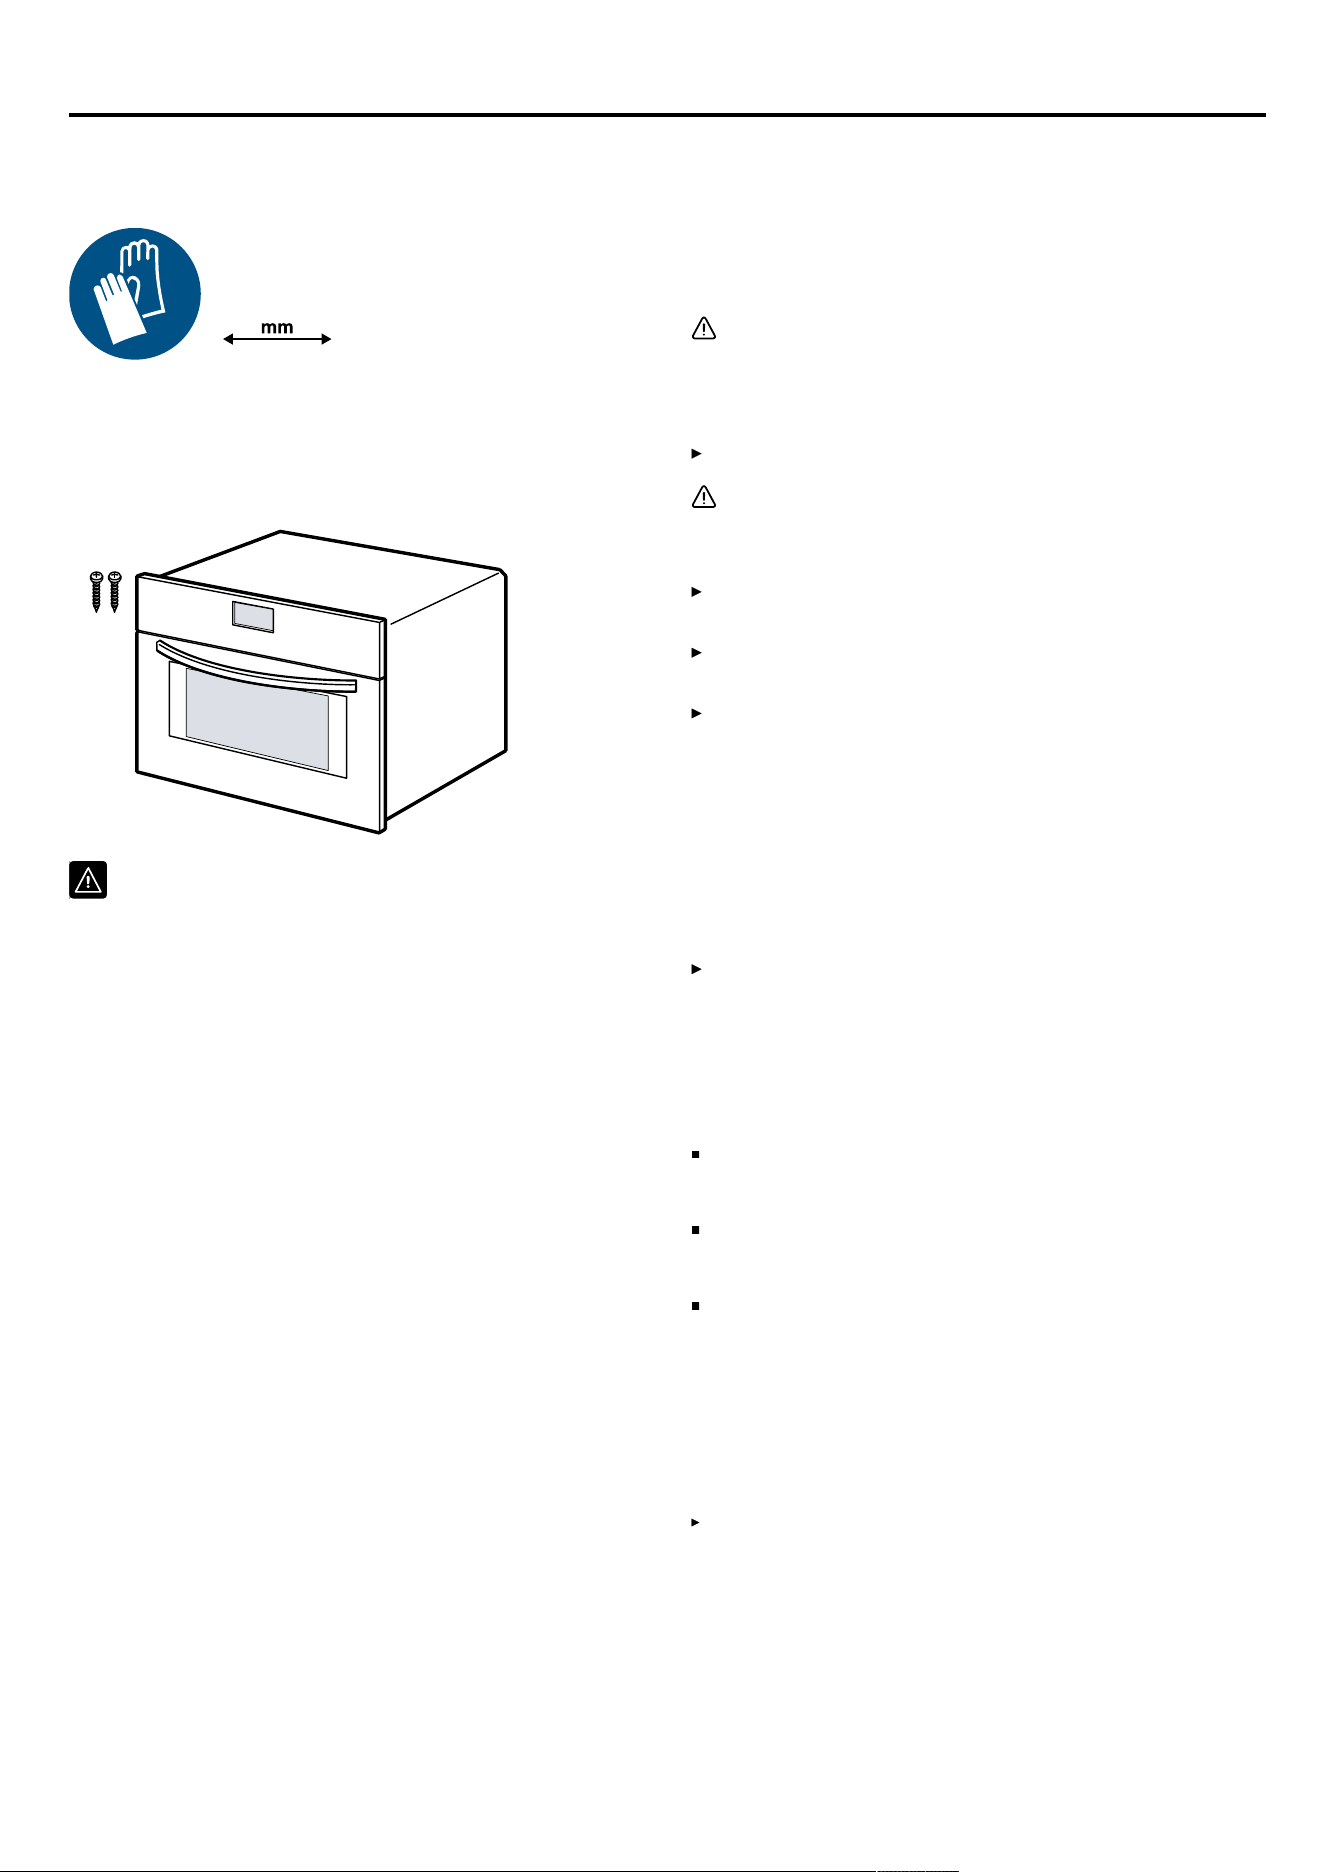
en Installation instructions
Installation instructions17 Installation instructions
Observe this information when installing the appliance.
17.1 Scope of delivery
After unpacking all parts, check for any damage in
transit and completeness of the delivery.
17.2 Safe installation
Follow these safety instructions when installing
the appliance.
¡ The appliance can only be used safely if it is
correctly installed according to the safety in-
structions. The installer is responsible for en-
suring that the appliance works perfectly at
its installation location.
¡ Do not use the door handle for the transport
or installation.
¡ Check the appliance for damage after un-
packing it. Do not connect the appliance if it
has been damaged in transit.
¡ Before starting up the appliance, remove any
packaging material and adhesive film from
the cooking compartment and the door.
¡ Proceed in accordance with the installation
sheets for installing accessories.
¡ Fitted units must be heat-resistant up to
95°C, and adjacent unit fronts up to 70°C.
¡ Do not install the appliance behind a decor-
ative door or the door of a kitchen unit.
There is a risk of overheating.
¡ Cut-out work on the units should be carried
out before installing the appliance. Remove
any shavings. Otherwise, the correct opera-
tion of electrical components may be ad-
versely affected.
¡ Only a licensed professional may connect
appliances without plugs. Damage caused
by incorrect connection is not covered under
the warranty.
WARNING‒Risk of injury!
Parts that are accessible during installation
may have sharp edges and may lead to cut-
ting injuries.
Wear protective gloves.
WARNING‒Risk of fire!
It is dangerous to use an extended power cord
and non-approved adapters.
Do not use extension cables or multiple
socket strips.
Only use adapters and power cords ap-
proved by the manufacturer.
If the power cord is too short and a longer
one is not available, please contact an elec-
trician to have the domestic installation ad-
apted.
ATTENTION
Carrying the appliance by the door handle
could break it. The door handle cannot sup-
port the weight of the appliance.
Do not carry or hold the appliance by the
door handle.
17.3 Electrical connection
In order to safely connect the appliance to the electrical
system, follow these instructions.
The appliance corresponds to protection class I and
must only be operated with a protective earth connec-
tion.
The fuse protection must correspond to the power rat-
ing specified on the appliance's rating plate and to
the local regulations.
The appliance must be disconnected from the power
supply whenever installation work is being carried
out.
Electrically connecting the appliance with the
protective contact plug
Note: The appliance must only be connected to a pro-
tective contact socket that has been correctly installed.
Insert the mains plug of the appliance into a nearby
socket.
When the appliance is installed, the mains plug of the
power cable must be freely accessible. If free access
to the mains plug is impossible, an isolating switch
must be integrated into the permanent electrical in-
stallation in accordance with the installation regula-
tions.
34
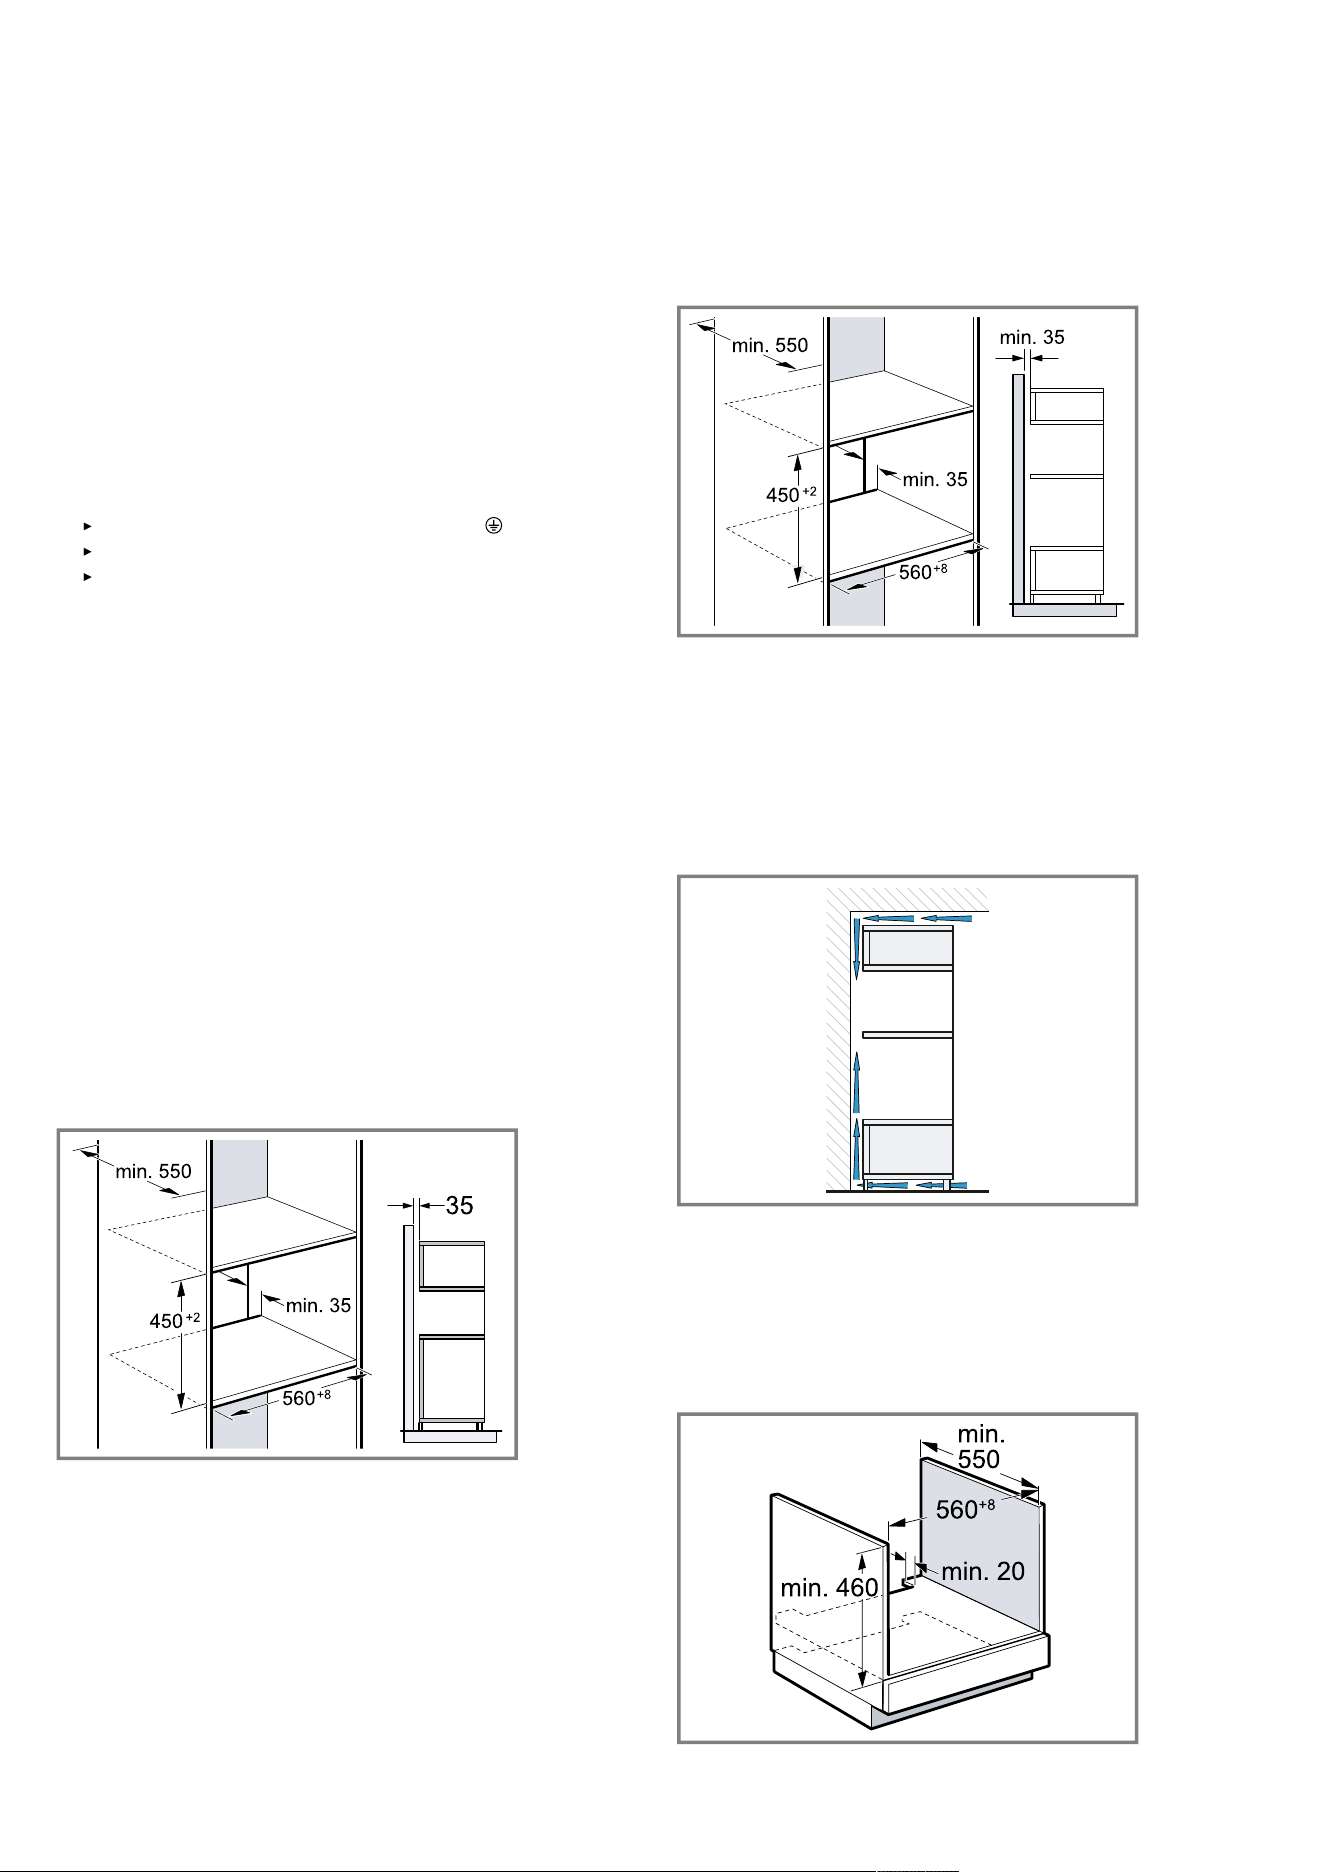
Installation instructions en
Electrically connecting an appliance without a
protective contact plug
Note: Only licensed specialists may connect the appli-
ance. Damage caused by incorrect connection is not
covered under the warranty.
An isolating switch must be integrated into the perman-
ent electrical installation according to the installation
regulations.
1.
Identify the phase and neutral conductors in the
socket.
The appliance may be damaged if it is not connected
correctly.
2.
See the rating plate for the voltage.
3.
Connect the wires of the mains power cable accord-
ing to the colour coding:
Green/yellow = Protective conductor
Blue = Neutral conductor
Brown = Phase (external conductor)
17.4 Fitted units
This appliance is only intended to be fully fitted in a kit-
chen. This appliance is not intended to be used as a
tabletop appliance or within a cupboard.
The installation cabinet must not have a back panel be-
hind the appliance. Maintain a clearance of at least
35mm between the wall and the cabinet base or the
rear panel of the cabinet situated above.
The fitted cabinet must have a ventilation opening of
50cm² on the front. To do this, trim the base panel or fit
a ventilation grille. Do not cover ventilation slots and air
intake openings.
The appliance may be installed at a height of less than
850mm above the floor.
17.5 Installation in a tall unit
Observe the installation dimensions and the safety clear-
ances in a tall unit.
To ventilate the appliance, the intermediate floor must
have a ventilation cut-out.
If the tall unit has another back panel in addition to the
element back panels, this must be removed.
Only install the appliance up to a height which allows
the accessory to be easily removed.
17.6 Installing two appliances on top of each
other
Your appliance can also be installed above or below an-
other appliance. Observe the installation dimensions
and the installation instructions when installing appli-
ances on top of each other.
To ventilate the appliances, the intermediate floor must
have a ventilation cut-out.
To ensure sufficient ventilation of the two appliances,
there must be a ventilation opening of at least 200cm²
in the plinth area. To do this, trim the base panel or fit a
ventilation grille.
Ensure that air exchange is guaranteed in accordance
with the diagram.
Only install appliances up to a height that allows the ac-
cessory to be easily removed.
17.7 Installation below a worktop
Observe the installation dimensions and the safety clear-
ances when installing below a worktop.
35
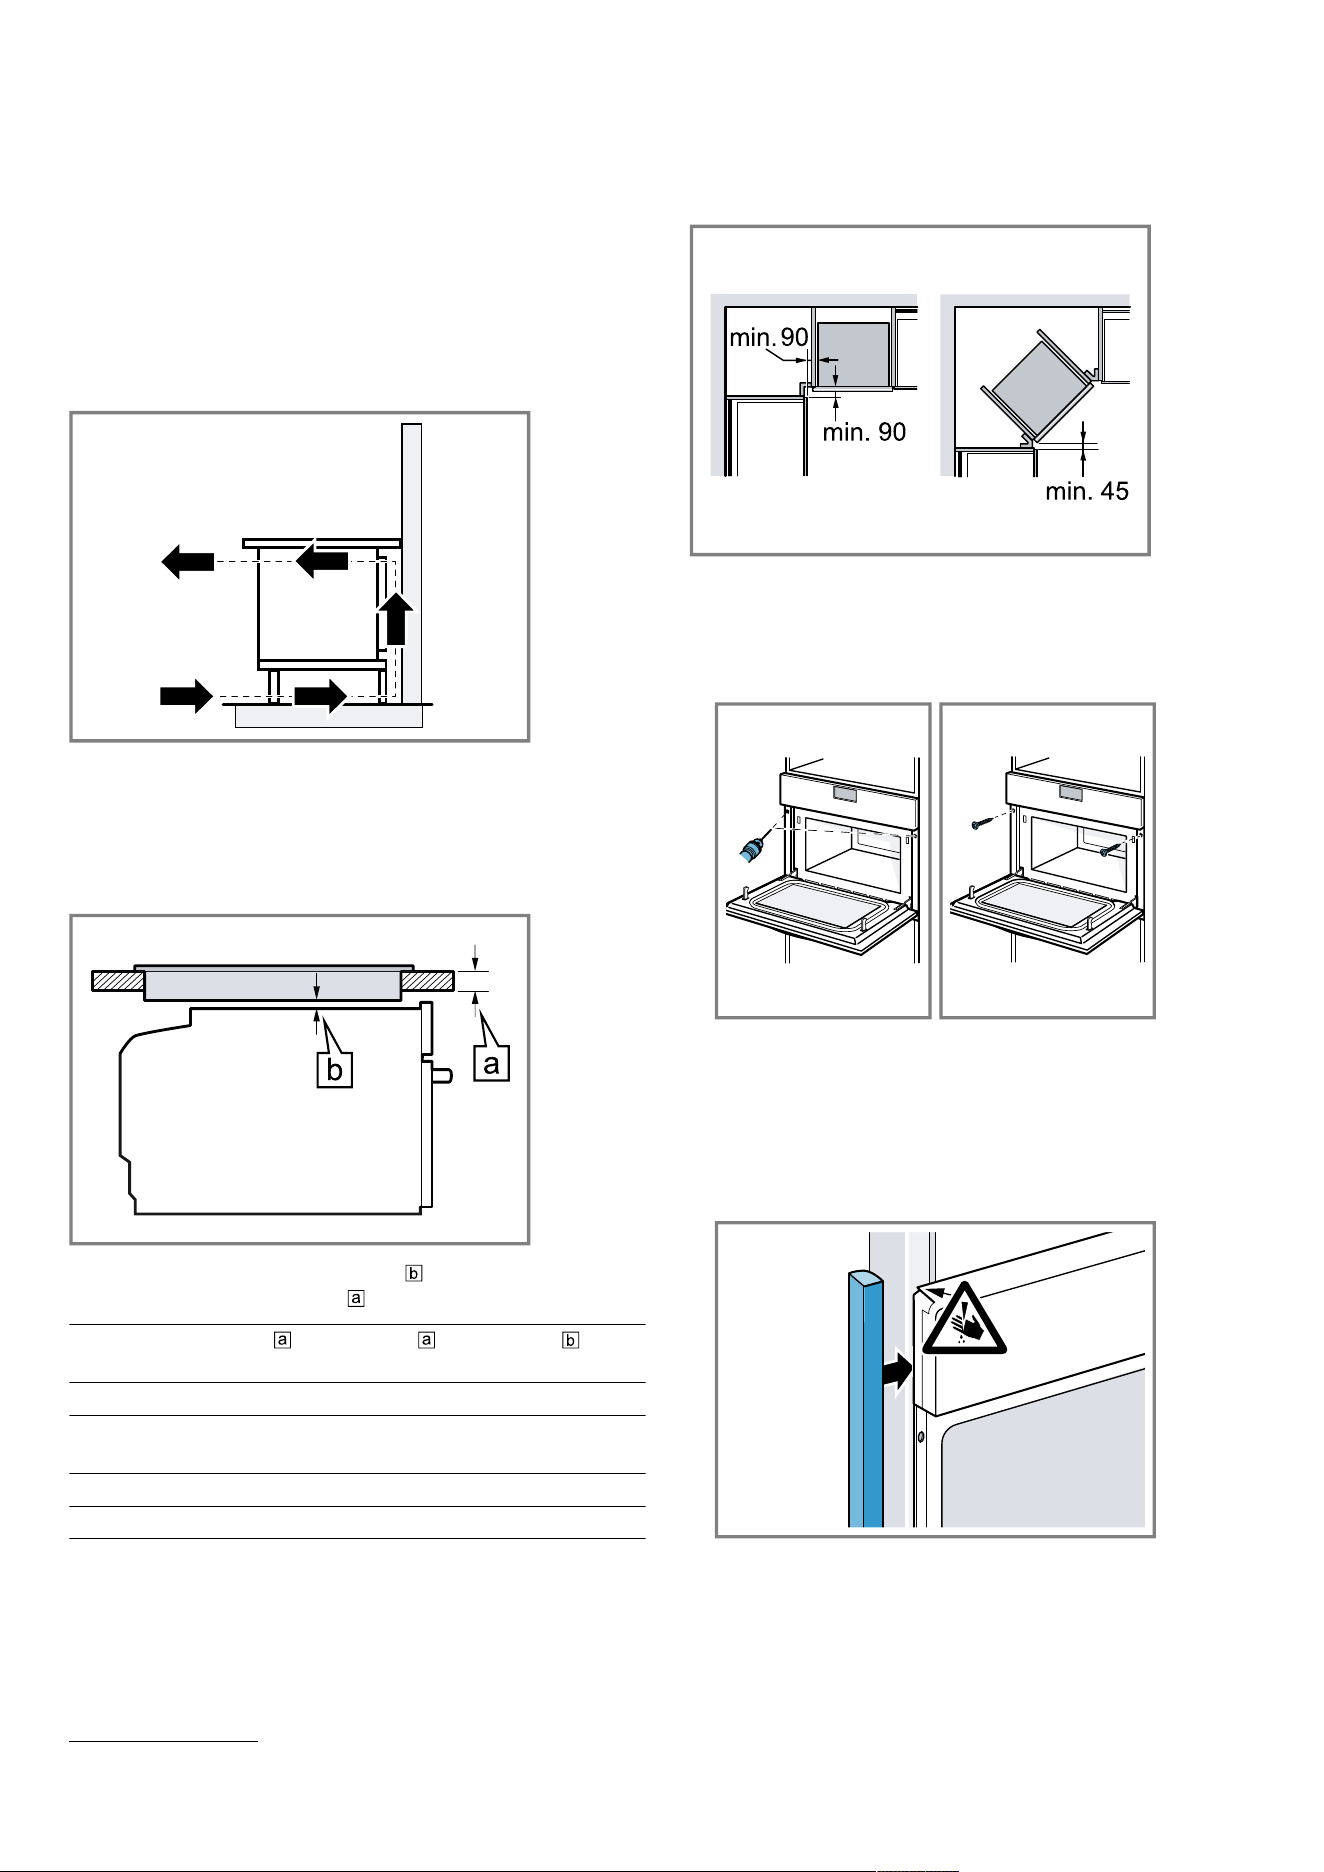
en Installation instructions
To ventilate the appliance, the intermediate floor must
have a ventilation cut-out.
The worktop must be secured to the fitted unit.
Observe any available installation instructions for the
hob.
Observe different national installation instructions for the
hob.
In order to ensure sufficient ventilation of the appliance,
there must be a ventilation opening of at least 100cm².
For example, trim the base panel or fit a ventilation
grille.
17.8 Installing below a hob
If the appliance is installed below a hob, the following
minimum dimensions must be adhered to (including
substructure, if applicable).
The minimum worktop thickness is based on the re-
quired minimum clearance .
Hob type raised in
mm
flush in
mm
in
mm
Induction hob 45 46 5
Full-surface induc-
tion hob
55 56 5
Gas hob 35 46 5
1
Electric hob 35 38 2
Observe the installation instructions for the hob.
17.9 Corner installation
Observe the installation dimensions and the safety clear-
ances when installing in a corner.
17.10 Installing the appliance
1.
Centre the appliance.
2.
Screw the appliance onto the unit.
17.11 For handleless kitchens with vertical
bar handle strips:
1.
Attach a suitable filling piece on both sides in order
to cover any sharp edges and to guarantee safe in-
stallation.
2.
Secure the filling piece to the unit.
1
Observe different national installation instructions for the hob.
36
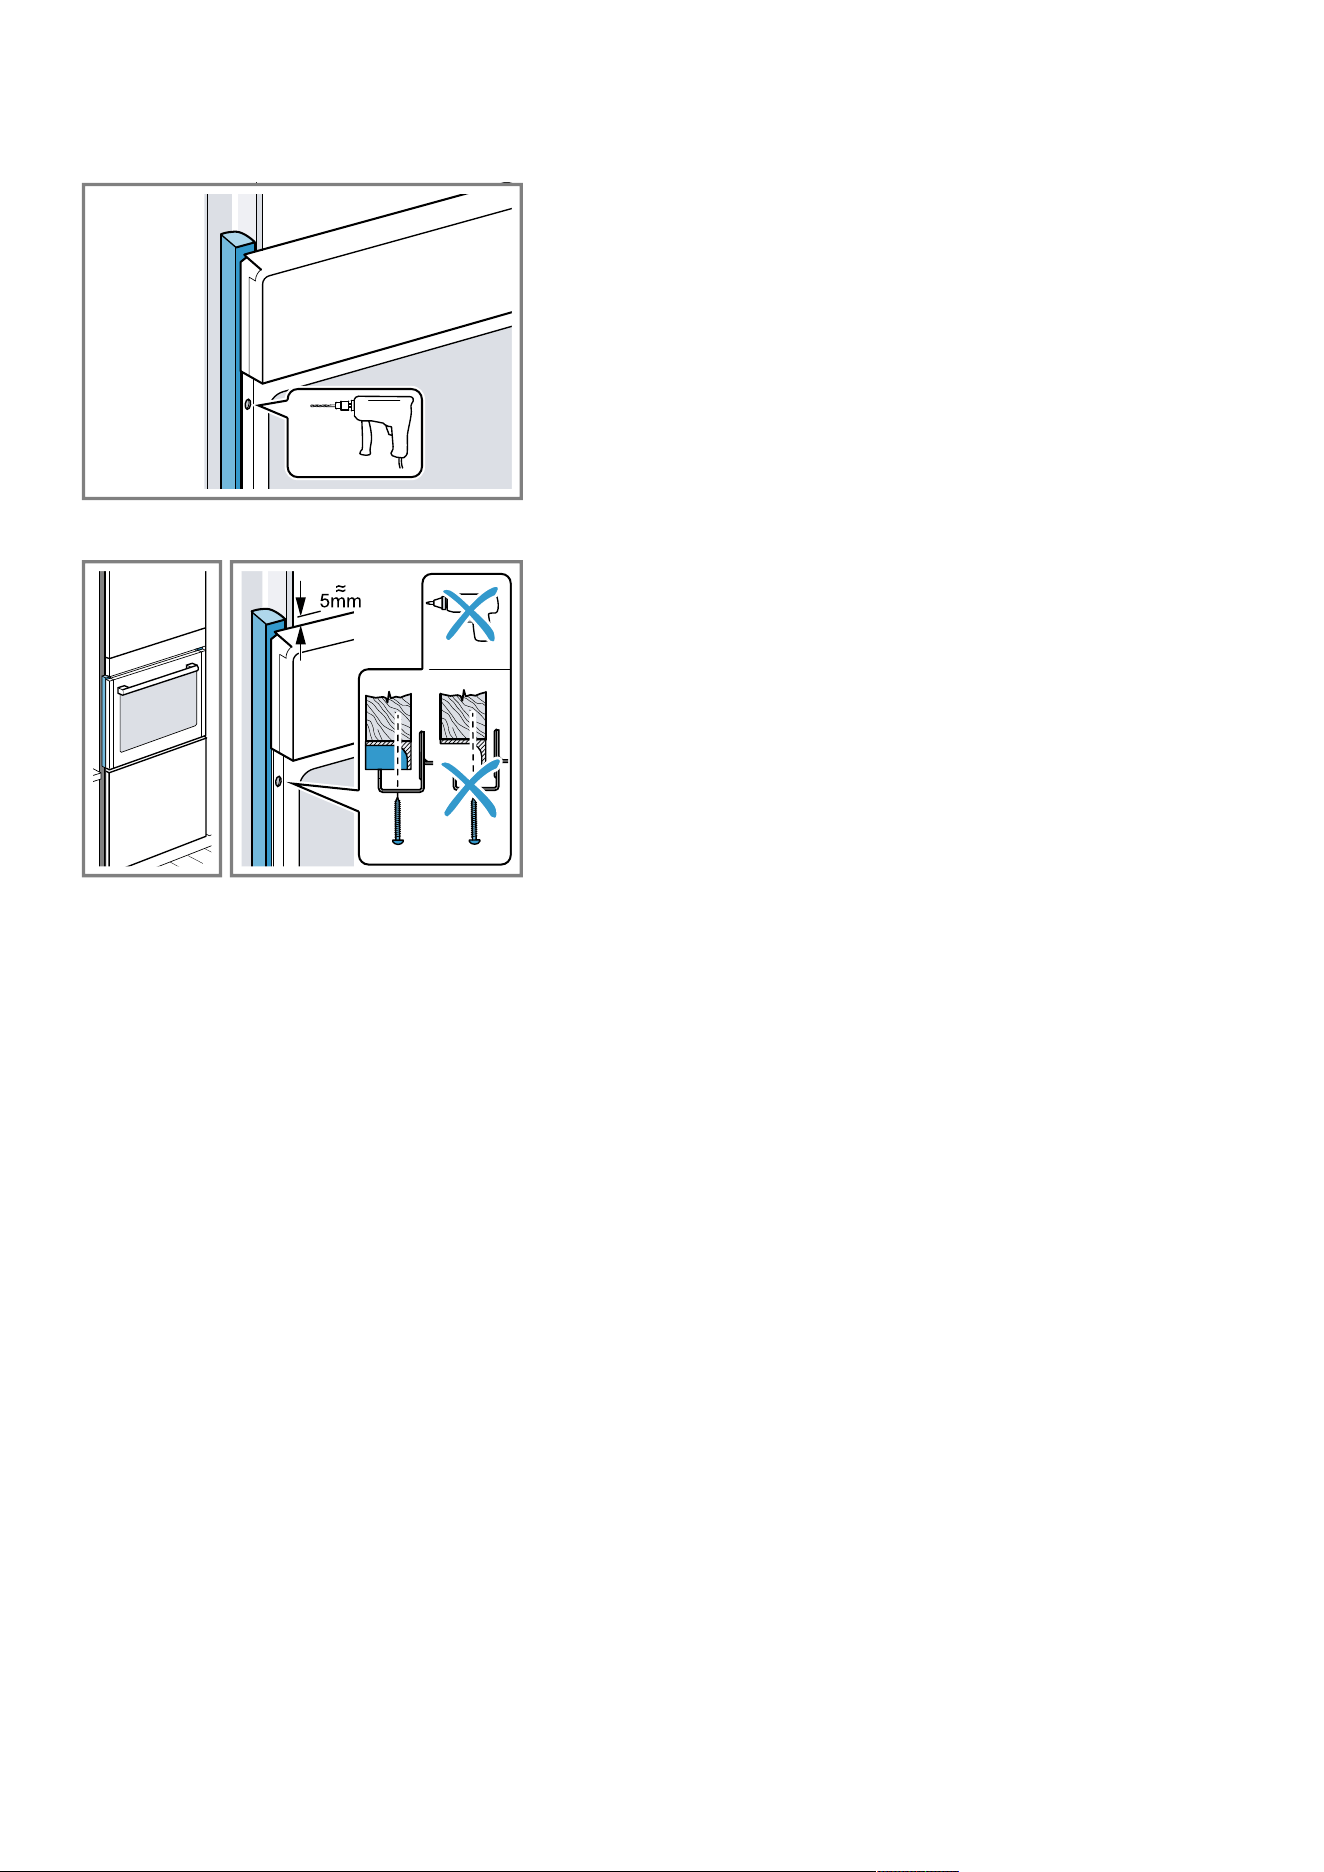
Installation instructions en
3.
Pre-drill the filling piece and the unit to establish a
screw connection.
4.
Secure the appliance using a suitable screw.
17.12 Removing the appliance
1.
Disconnect the appliance from the power supply.
2.
Undo the fastening screws.
3.
Lift the appliance slightly and pull it out completely.
37
Register your product online
neff-home.com
BSH Hausgeräte GmbH
Carl-Wery-Straße 34
81739 München, GERMANY
Valid within Great Britain:
Imported to Great Britain by
BSH Home Appliances Ltd.
Grand Union House
Old Wolverton Road
Wolverton, Milton Keynes
MK12 5PT
United Kingdom
*9001972902*
9001972902 (051202) REG25
en