
www.auna-multimedia.com
Belle Epoque 1912
Retro-Plattenspieler
Retro Record Player
Platine vinyle rétro
Tocadisco retro
Giradischi rétro
10034402


3
DE
INHALTSVERZEICHNIS
Sicherheitshinweise 5
Geräteübersicht 7
Fernbedienung 10
Inbetriebnahme 12
DAB-Radio 13
FM-Radio 14
CD-Betrieb 14
Schallplatten wiedergeben 15
Aux-in-Bedienung 16
USB-Betrieb 16
USB-Aufnahme 17
BT-Betrieb 17
Spezielle Entsorgungshinweise für Verbraucher in Deutschland 18
Hinweise zur Entsorgung 20
Konformitätserklärung 20
TECHNISCHE DATEN
Artikelnummer
10034402
Stromversorgung 230 V~ 50/60 Hz
RMS-Leistung 2x,.5W
Abspielgeschwindigkeiten 33/45/78 RPM
(Plattengröße 17.5/25/30 cm)
Abspielbare CD-Formate CD/CD-R/CD-RW/MP3
Abspielbare Dateiformate von USB MP3
Sehr geehrter Kunde,
wir gratulieren Ihnen zum Erwerb Ihres Gerä-
tes. Lesen Sie die folgenden Hinweise sorgfäl-
tig durch und befolgen Sie diese, um möglichen
Schäden vorzubeugen. Für Schäden, die durch
Missachtung der Hinweise und unsachgemäßen
Gebrauch entstehen, übernehmen wir keine Haf-
tung. Scannen Sie den folgenden QR-Code, um
Zugri auf die aktuellste Bedienungsanleitung
und weitere Informationen rund um das Produkt
zu erhalten.
4
DE
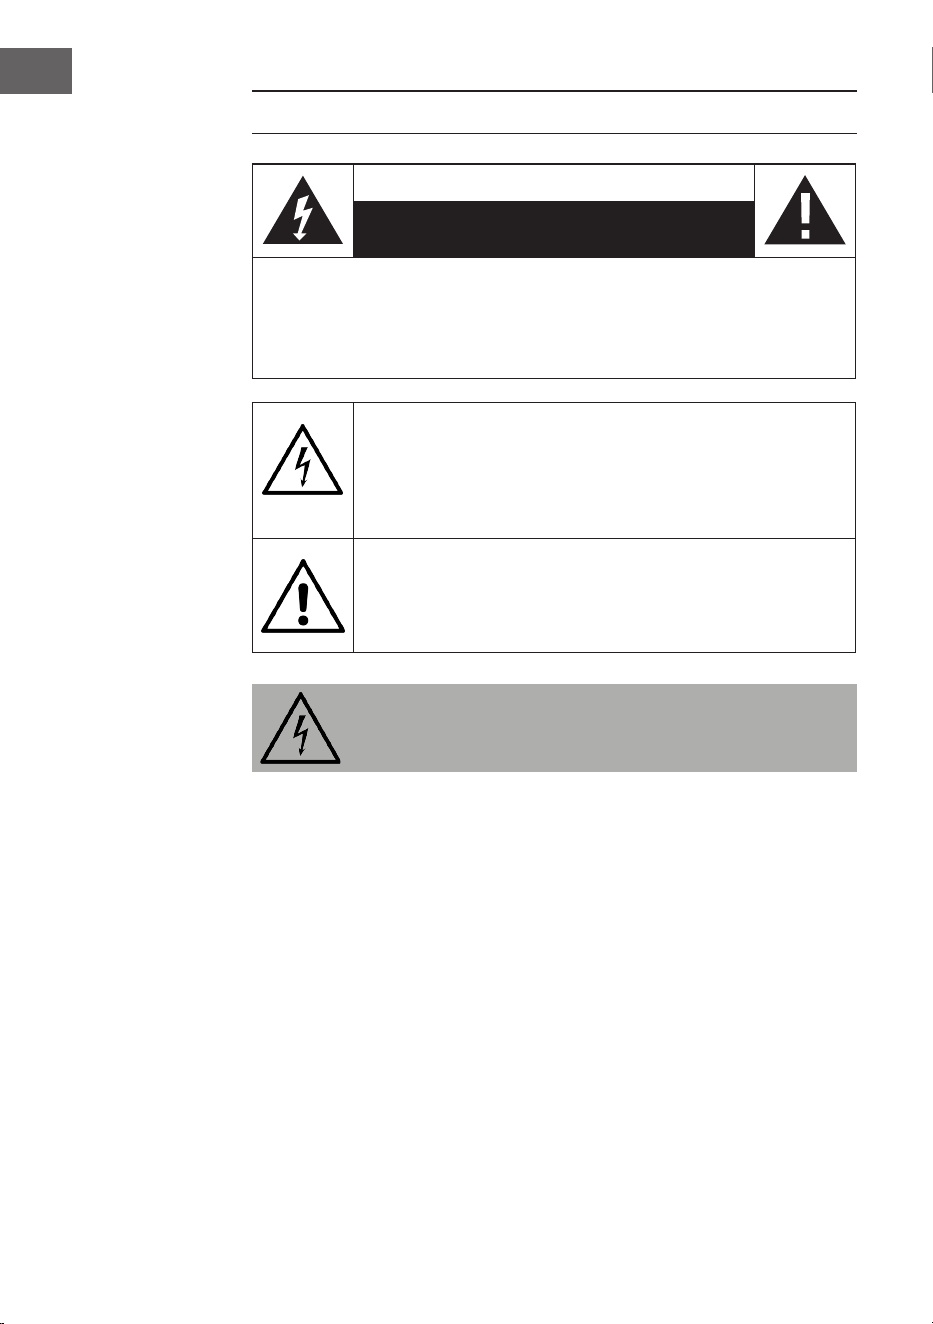
WARNUNG
VORSICHT: DAS GEHÄUSE NICHT ÖFFNEN, UM EINEN STROMSCHLAG UND ERNSTE
PERSONENVERLETZUNGEN ZU VERMEIDEN. IM INNEREN KEINE VOM KUNDEN
ZU WARTENDEN KOMPONENTEN. WENDEN SIE SICH AUSSCHLIESSLICH AN
QUALIFIZIERTE FACHLEUTE.
WARNUNG. UM DIE GEFAHR EINES BRANDS ODER EINES STROMSCHLAGS
ZU VERRINGERN, DAS GERÄT NICHT IN WASSER, REGEN ODER FEUCHTIGKEIT
AUSZUSETZEN.
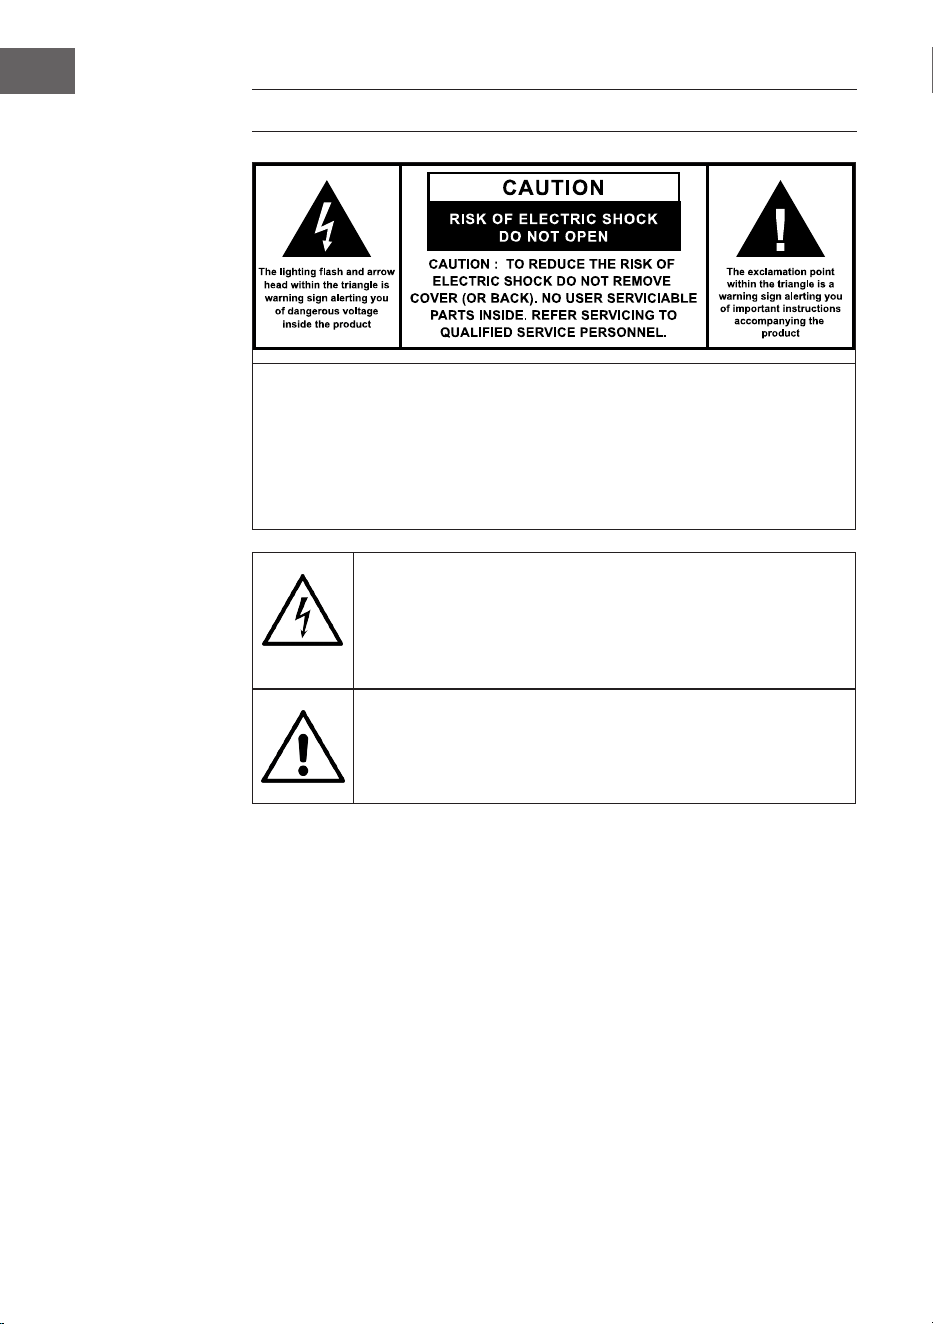
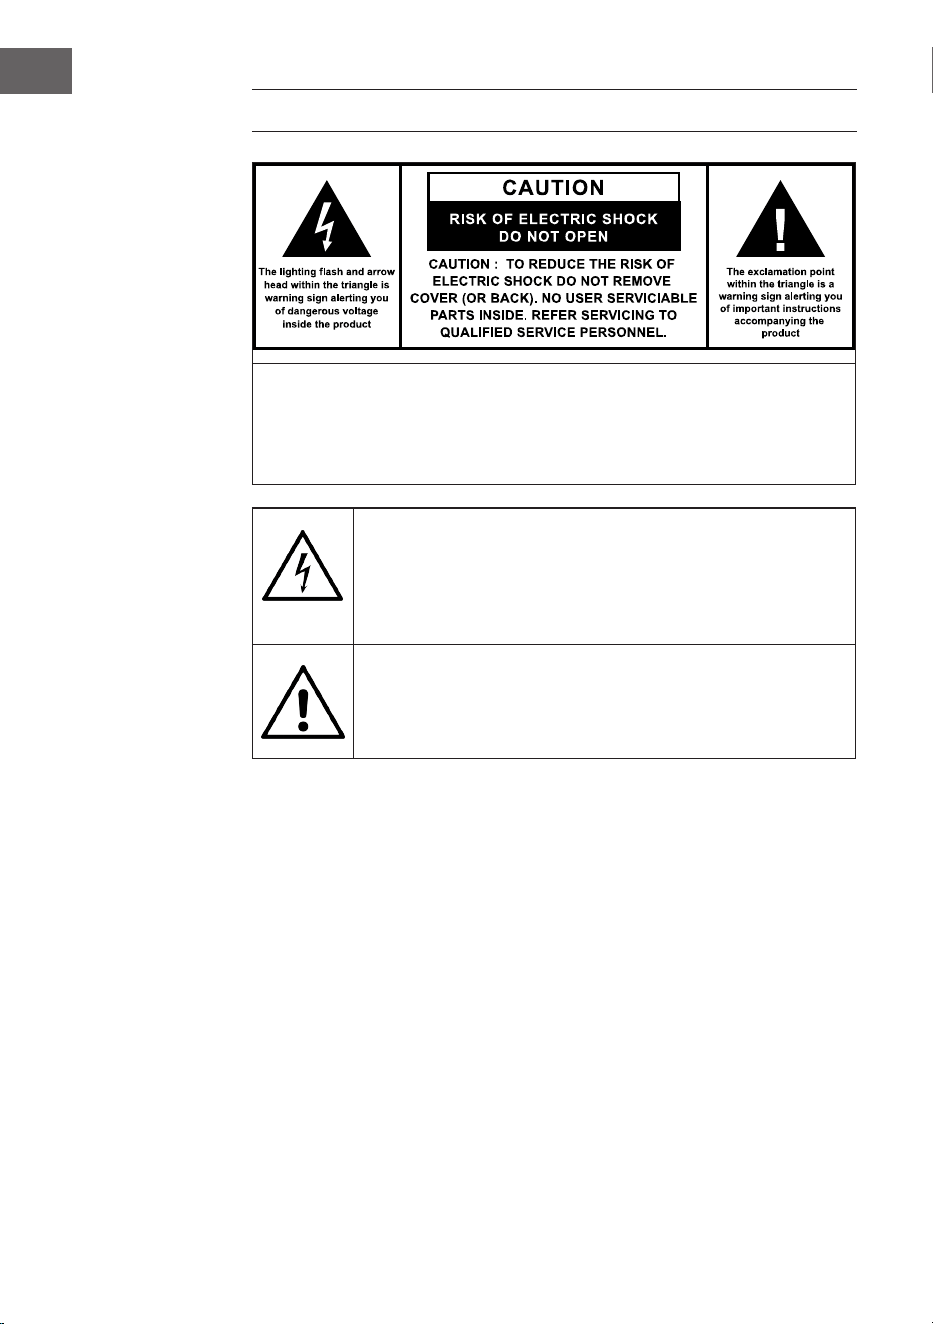
Das Dreick mit den Blitz mit folgendem Hinweis:
GEFÄHRLICHE SPANNUNG: Das Blitzsymbol mit Pfeilspitze im
gleichseitigen Dreieck soll den Benutzer auf das Vorhandensein einer
nicht isolierten gefährlichen Spannung im Gehäuse des Produkts
aufmerksam machen, die von ausreichender Größe sein kann, um
eine Gefahr eines Stromschlags für Personen darzustellen.
Das Dreieck mit dem Ausrufezeichen und folgendem Hinweis:
ACHTUNG: Das Ausrufezeichen innerhalb des gleichseitigen Dreiecks
soll den Benutzer auf das Vorhandensein wichtiger Betriebs- und
Wartungsanweisungen in der diesem Produkt beiliegenden Literatur
hinweisen.

5
DE
SICHERHEITSHINWEISE
• Lesen Sie die Anleitung. Alle Anwendungshinweise müssen vor der
Verwendung des Geräts gelesen werden.
• Bewahren Sie die Bedienungsanleitung für den späteren Gebrauch auf.
• Die Richtlinien für Aufmerksamkeit, Verwendung und Sicherheit müssen
eingehalten werden.
• Das Gerät darf nicht in der Nähe von Wasser verwendet oder mit
Feuchtigkeit in Berührung gebracht werden.
• Stellen Sie sicher, dass keine Flüssigkeit über die Geräte- und
Geräteönungen gelangt.
• Bewegen Sie das Gerät vorsichtig, vermeiden Sie Stöße.
• Blockieren Sie nicht den Ausfall der Geräteausgänge.
• Stellen Sie das Gerät nicht in der Nähe einer Wärmequelle (z. B.
Heizkörper) auf. Setzen Sie es nicht der Sonne aus.
• Schließen Sie das Gerät wie in dieser Bedienungsanleitung angegeben
an.
• Dieses Gerät hat eine Verbindung mit einem Überlastschutz. Der
Austausch sollte nur von einem erfahrenen Techniker oder dem
Gerätehersteller durchgeführt werden.
• Zur Reinigung des Gerätes beachten Sie bitte die Empfehlungen des
Hinweises.
• Das Netzkabel sollte abgezogen werden, wenn Sie es über einen
längeren Zeitraum nicht benutzen.
• Das Gerät ist von einer qualizierten Person zu reparieren, wenn:
a. das Netzkabel beschädigt ist.
b. Gegenstände in das Gerät gefallen sind oder eine Flüssigkeit in das
Gerät eingedrungen ist,.
c. Das Gerät war dem Regen ausgesetzt.
d. Das Gerät funktioniert nicht korrekt ohne nennenswerte äußere
Veränderungen
e. Das Gerät ist defekt.
• Der Benutzer darf nicht versuchen, das Gerät über das hinaus zu warten,
was in dieser Informationsform beschrieben ist.
• Das Gerät darf keinen Tropfen oder Spritzern ausgesetzt sein und es
dürfen keine mit Flüssigkeiten gefüllten Gegenstände, wie z. B. Vasen,
auf das Gerät gestellt werden.
• Um die Stromzufuhr vollständig zu trennen, muss der Netzstecker des
Gerätes vom Netz getrennt werden, da die Trennvorrichtungen der
Netzstecker des Gerätes sind.
• Der Netzstecker des Geräts darf nicht verstopft sein ODER sollte bei

6
DE
bestimmungsgemäßer Verwendung leicht zugänglich sein.
• Die Batterie darf keiner übermäßigen Hitze wie Sonne, Feuer oder
dergleichen ausgesetzt werden.
• Übermäßiger Schalldruck von Ohrhörern und Kopfhörern kann zu
Hörverlust führen.
• Halten Sie Mindestabstand (8 cm) um das Gerät herum für ausreichende
Belüftung ein.
• Die Belüftung darf nicht dadurch behindert werden, dass die
Belüftungsönung mit Gegenständen wie Zeitungen, Tischdecken,
Vorhängen usw. abgedeckt wird.
• Es dürfen keine oenen Flammen wie z. B. brennende Kerzen auf das
Gerät gestellt werden;
• Auf die Umweltaspekte der Batterieentsorgung ist zu achten.
• Das Gerät muss in in gemäßigten Klimazonen eingesetzt werden.
• Explosionsgefahr durch unsachgemäßen Batteriewechsel.
• Batterien nur durch den gleichen oder gleichwertigen Typ ersetzen.
• Der Hauptstecker muss leicht zugänglich bleiben.
• Die Belüftung darf nicht dadurch behindert werden, dass die
Belüftungsönung mit Gegenständen wie Zeitungen, Tischdecken,
Vorhängen usw. abgedeckt wird.
• Es dürfen keine oenen Flammen wie z. B. brennende Kerzen auf das
Gerät gestellt werden.
• Auf die Umweltaspekte der Batterieentsorgung ist zu achten.
• Das Gerät eignet sich für den Einsatz in gemäßigten Klimazonen.
• Explosionsgefahr durch unsachgemäßen Batteriewechsel. Nur durch
den gleichen oder gleichwertigen Typ ersetzen.
• Der Netzstecker muss leicht zugänglich bleiben.

7
DE
GERÄTEÜBERSICHT
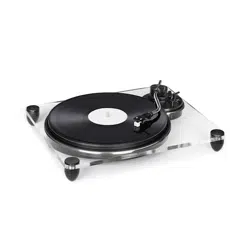
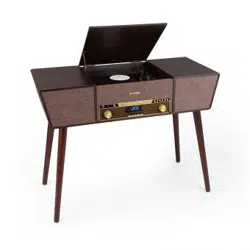
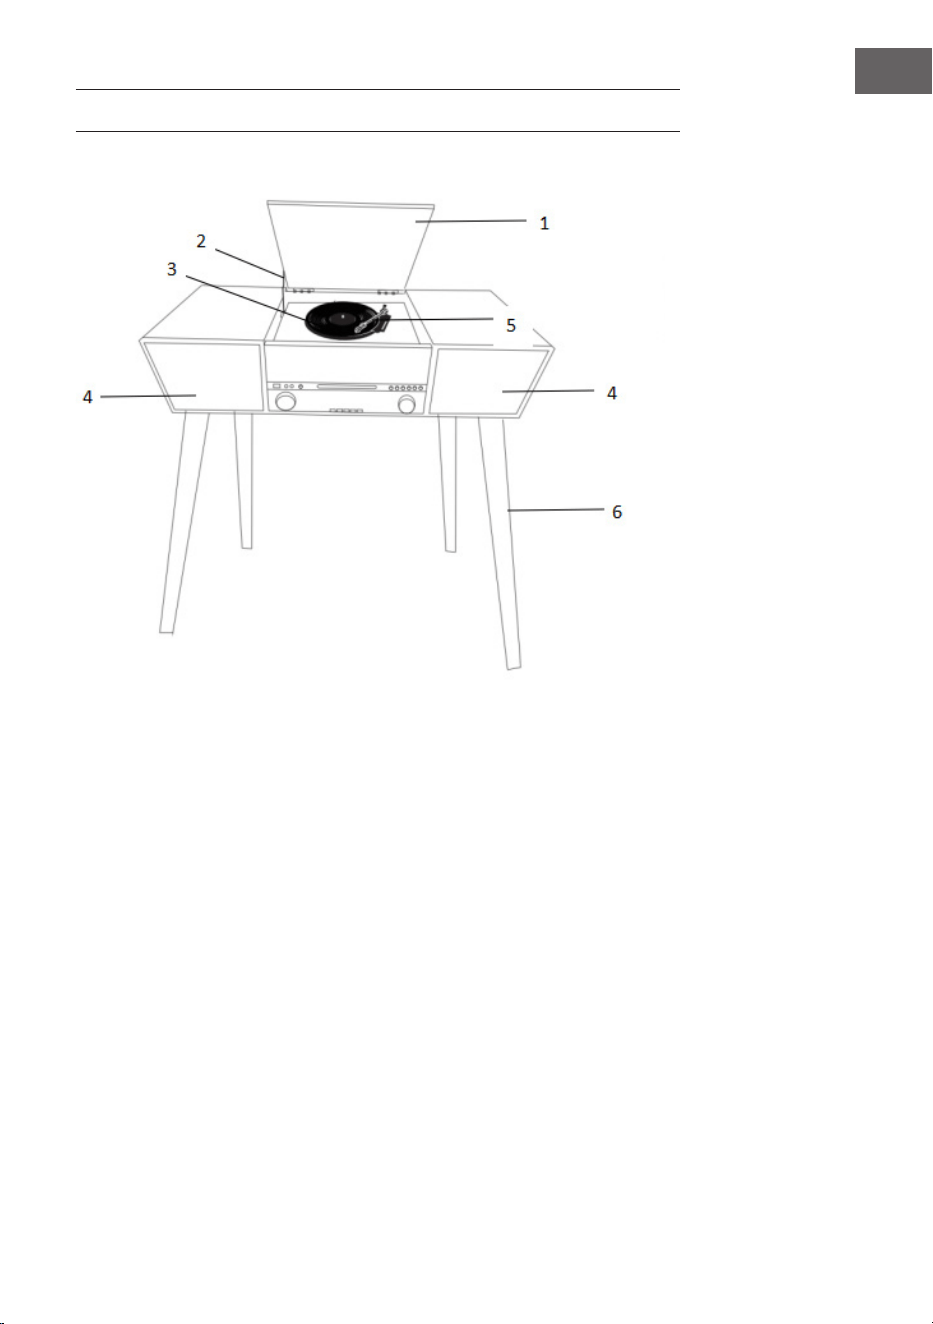
1 Staubschutzhülle
2 Abdeckmechanismus
3 Drehtisch
4 Lautsprecher
5 Tonarm
6 Holzbein

8
DE
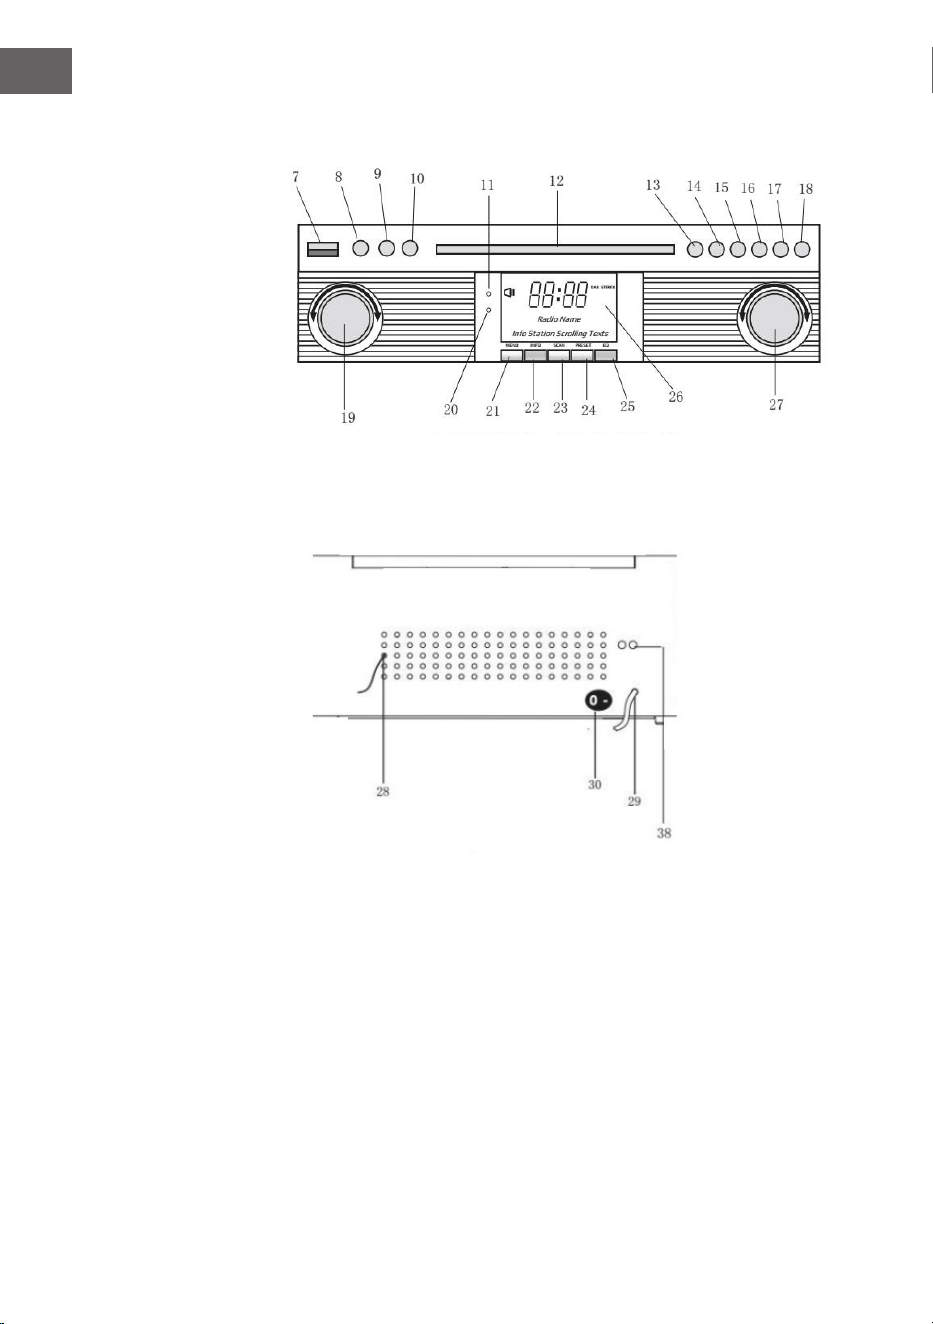
Front
Rückseite
7 USB-STECKDOSE
8 AUX-IN
9 3.5mm KOPFHÖRER-BUCHSE
10 FUNKTIONSTASTE (DAB/FM/
CD/USB/PHONO/AUX)
11 FERNBEDIENUNGSSENSOR
12 CD-FACH
13 PLAYE/PAUSE
14 STOPP-TASTE
15 DN/F-R
16 UP/F-F-F
17 REC/DEL (AUFNAHME-TASTE/
LÖSCHEN-TASTE)
18 CD-FACH ÖFFNEN/SCHLIEßEN
TASTE
19 LAUTSTÄRKEREGLER/
STANDBY
20 POWER-LED
21 DAB-MENÜ-TASTE
22 DAB-INFO-TASTE
23 DAB-SCAN-TASTE
24 DAB-VOREINSTELLUNGSTASTE
25 DAB-EINGABE
26 LCD-ANZEIGE
27 TUNING TASTE/PLAY.MODUS
28 FM/DAB-ANTENNENANLAGE
29 AC-KABEL
30 EIN/AUS-SCHALTER

9
DE
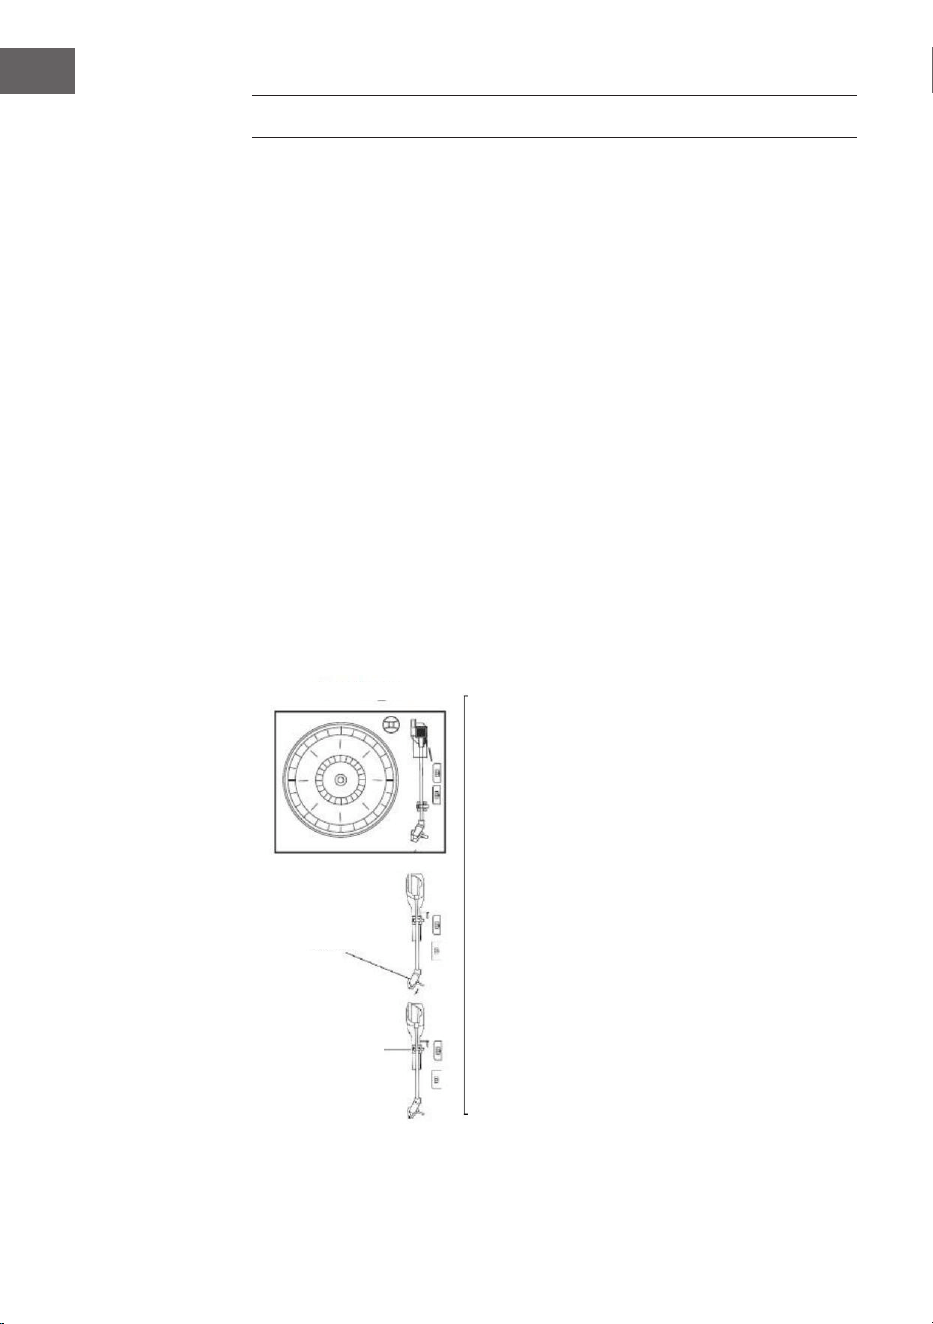
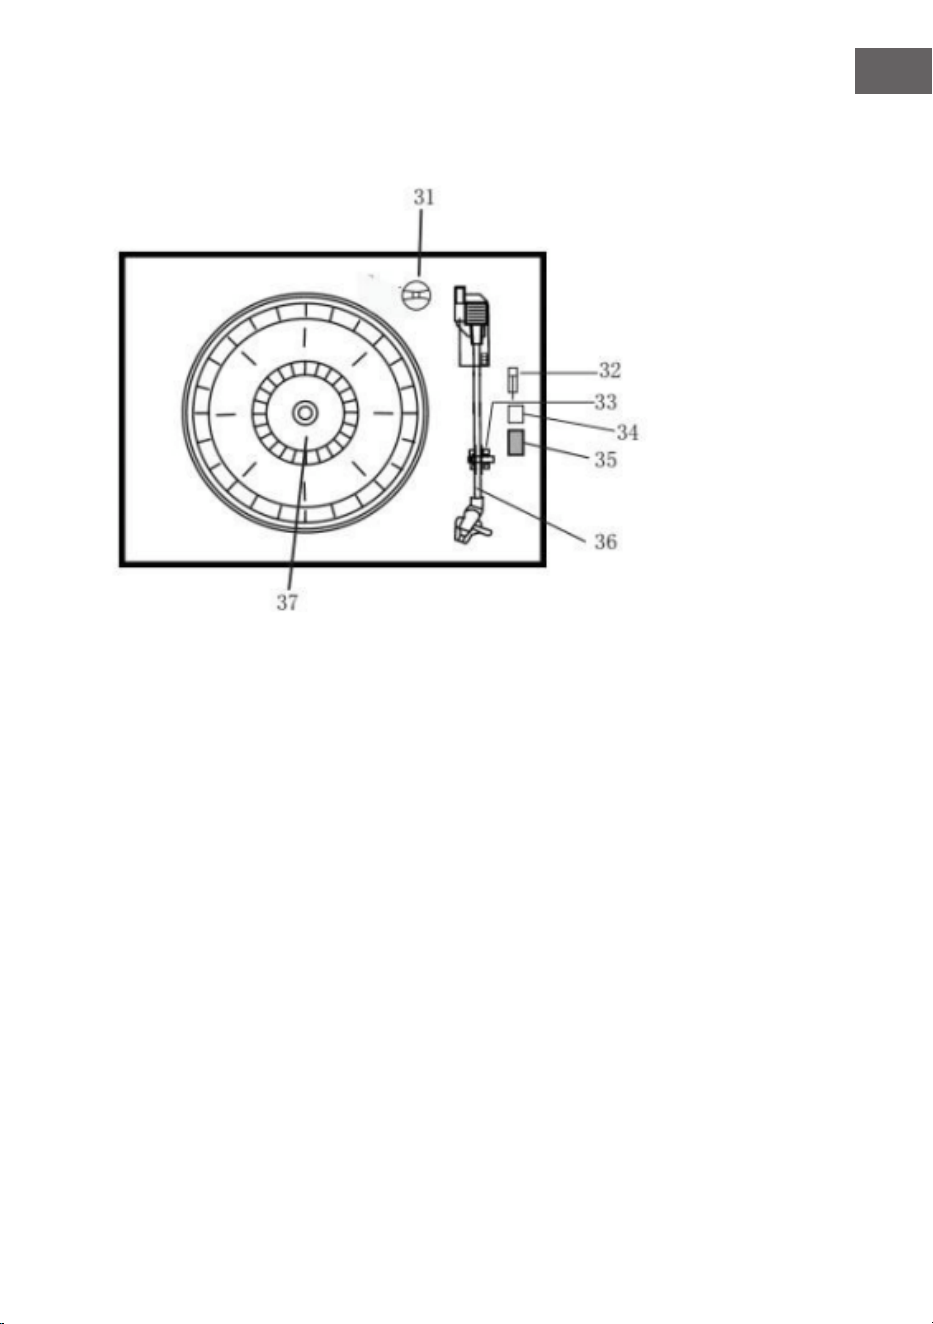
Plattenspieler
31 Adapter
32 Plattenteller-Pausenschalter
33 Tonarmhalterung
34 Autostopp ein/aus
35 33/45/78 U/min Drehzahlwahlschalter
36 Tonarm
37 Plattenteller
38 Line out
10
DE
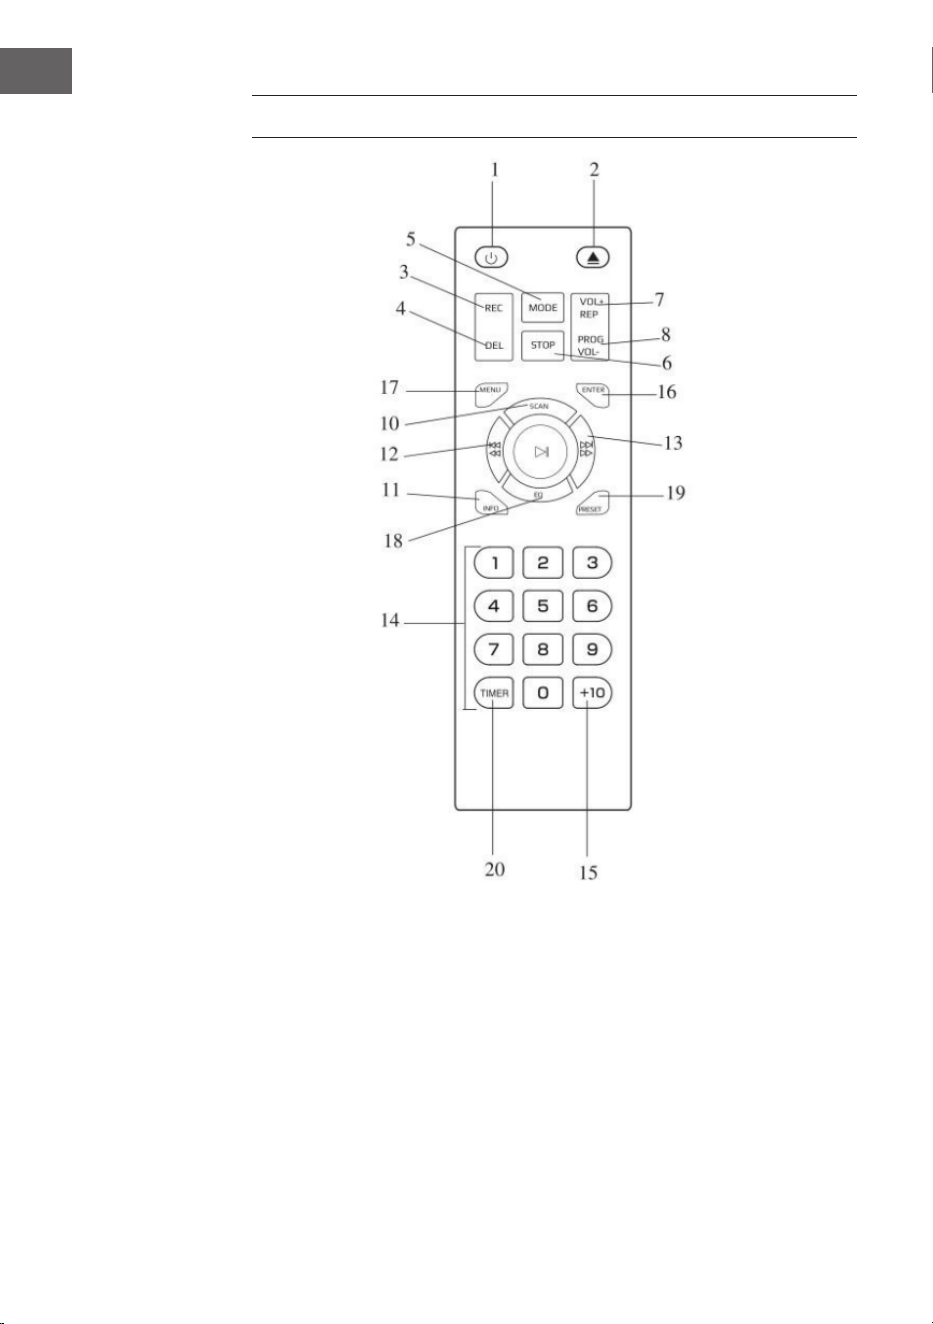
FERNBEDIENUNG
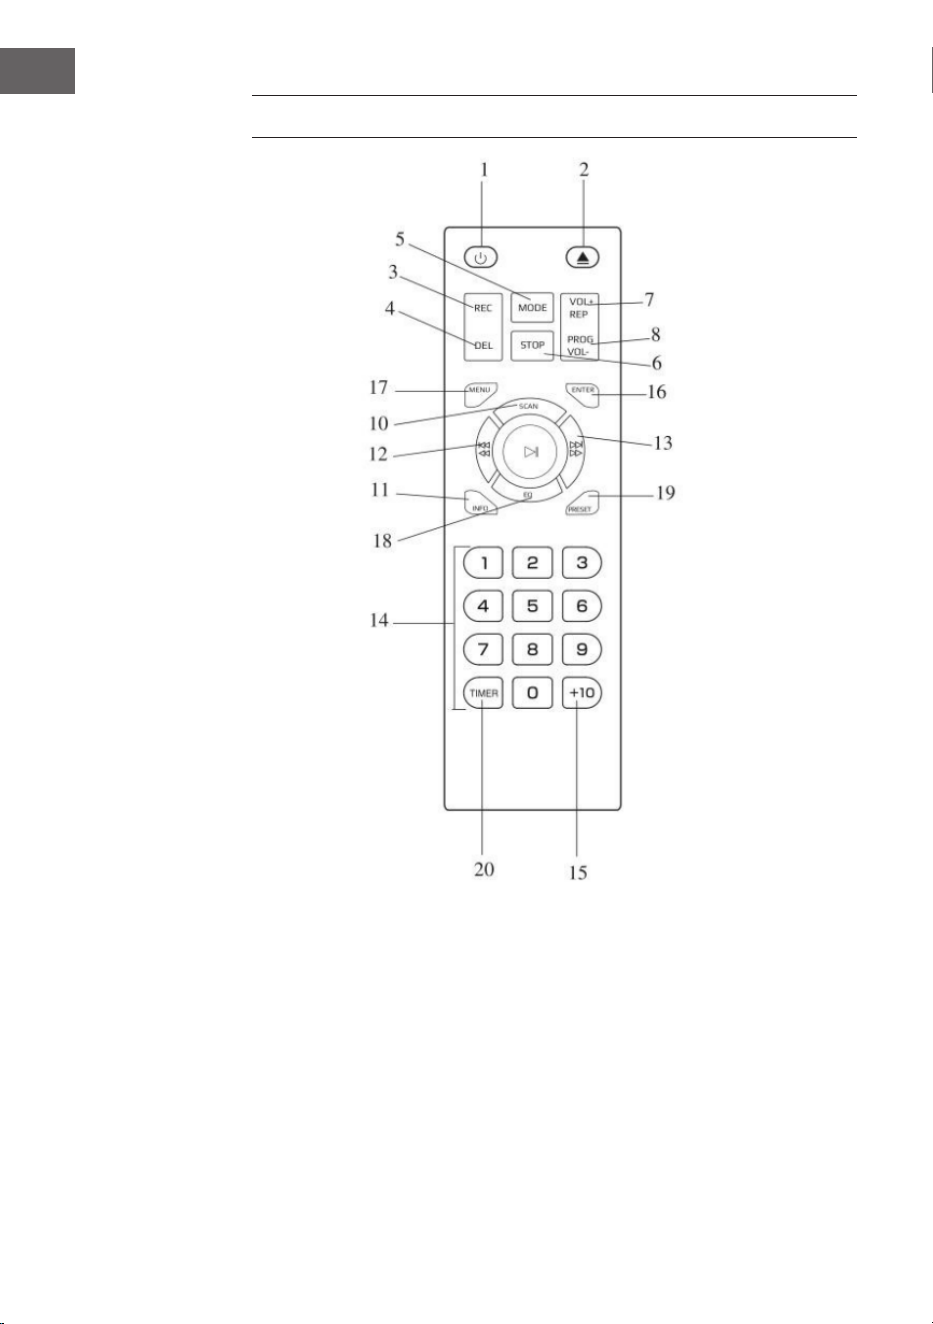
1 Ein-/Ausschalten
2 CD-Fach önen/schließen
3 Aufnahme
4 Löschen
5 Modus
6 Stopp
7 Wiederholen/Lautstärke+
8 Programm/Lautstärke-
9 Wiedergabe/Pause
10 DAB-Scan
11 Info
12 Titel zurück/schneller Rücklauf
13 Titel vor/schneller Vorlauf
14 Tastenfeld
15 +10
16 Eingabe
17 Menü
18 EQ
19 Einstellungen
20 Timer

11
DE
Batterien in die Fernbedienung einlegen
Die Infrarot-Fernbedienung benötigt 2 Stück UM-4 R03, AAA (3V) Batterie.
Batterien sind nicht enthalten.
Ein-/Auschalten
1. Drücken Sie POWER, um das System einzuschalten. Die Betriebsanzeige
leuchtet auf.
2. Drücken Sie die Funktionswahltasten (DAB/FM/CD/USB/PHONO/AUX
IN), um die gewünschte Funktion auszuwählen.
3. Beginnen Sie mit der Einstellung der Lautstärke, indem Sie den
Lautstärkeregler verwenden.
4. Wenn Sie fertig sind, drücken Sie erneut die Taste POWER, um das
System auszuschalten. Die Stromanzeige erlischt.
Anmerkung: Das Gerät entspricht dem ERP2-Standard, das Gerät wechselt
in den Standby-Modus, wenn das Gerät innerhalb von 15 Minuten nicht
mehr betrieben wird. Bitte drücken Sie die POWER-Taste zweimal, wenn
Sie das Gerät neu starten möchten.
12
DE
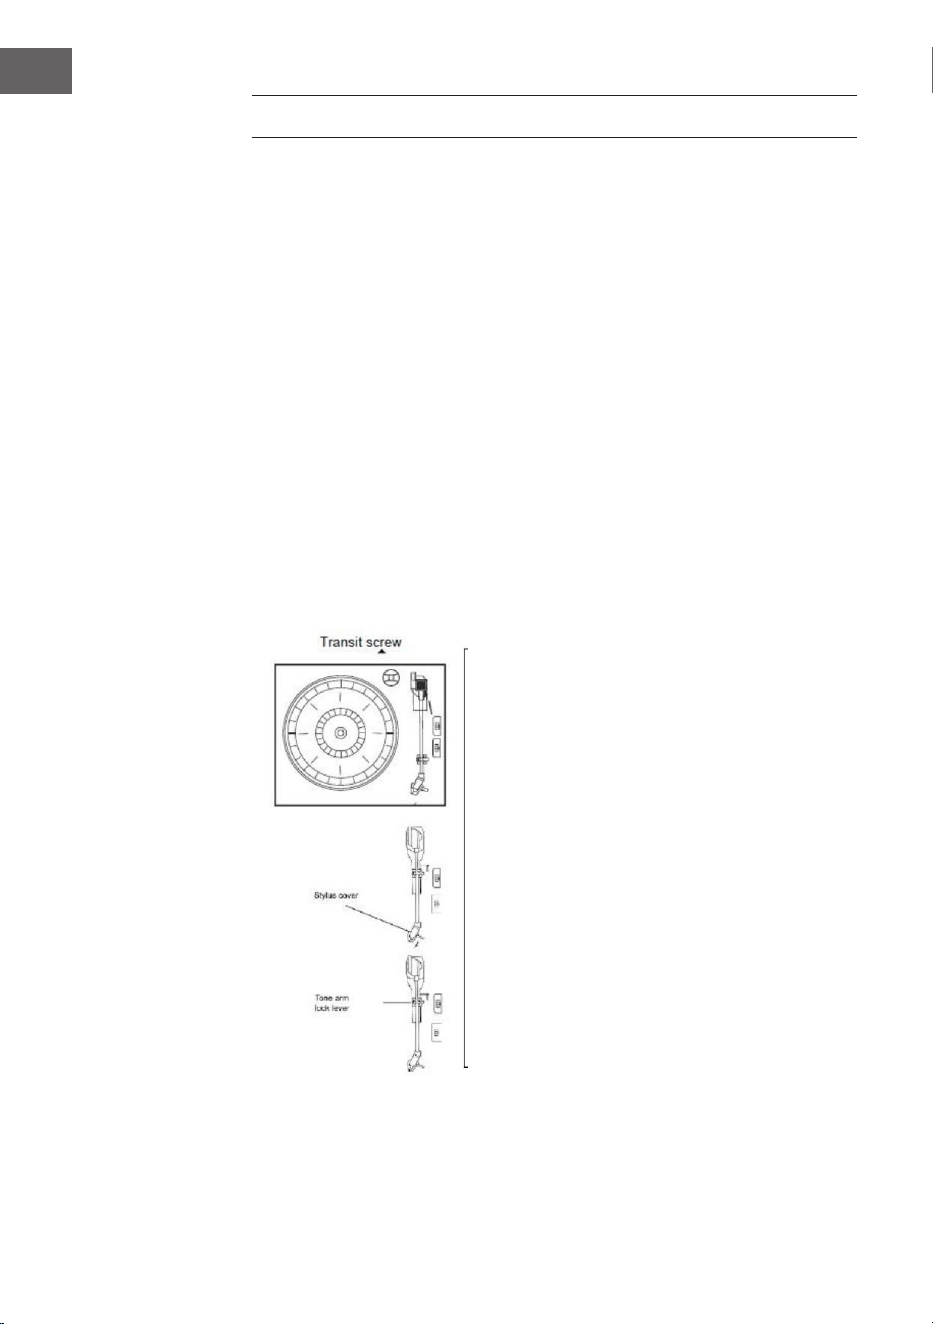
INBETRIEBNAHME
• Entnehmen Sie das Gerät vorsichtig aus dem Karton und entfernen Sie
das gesamte Verpackungsmaterial.
• Wickeln Sie das Netzkabel aus und ziehen Sie es auf die volle Länge
aus.
• Wickeln Sie den FM-Antennendraht aus und ziehen Sie ihn auf die
gesamte Länge aus.
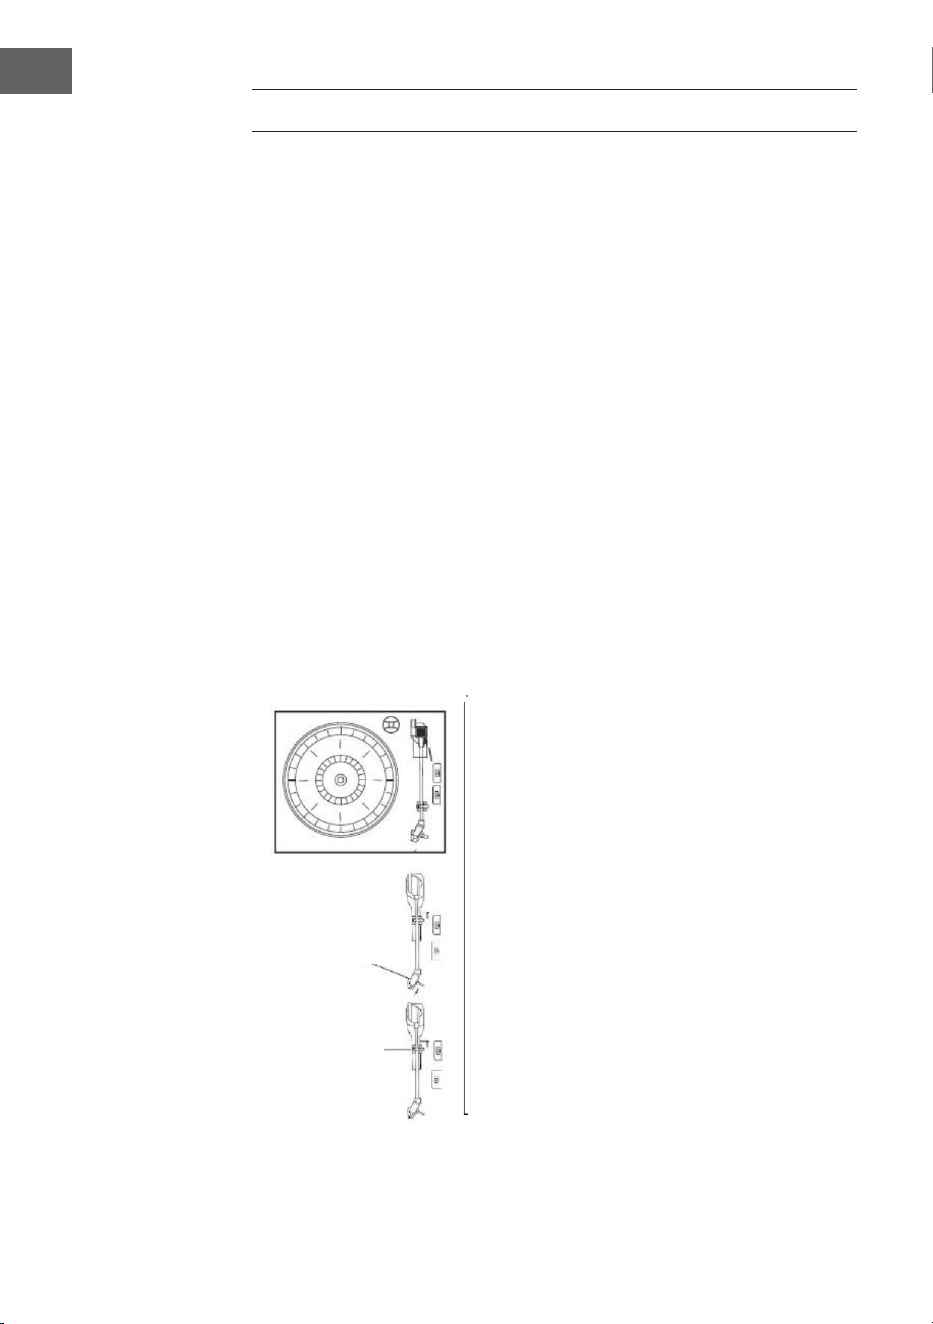
• Entfernen Sie den gedrehten Draht, der für den Transport am Tonarm
angebracht wurde.
• Entfernen Sie die durchsichtige Nadelbdeckung vom Tonkopf, indem
Sie sie in Pfeilrichtung verschieben.
• Bitte achten Sie während des Betriebs auf die Nadel, da eine
Beschädigung der Nadel nicht von der Garantie abgedeckt ist.
• Entfernen Sie das Transportband, mit dem der Tonarm für den Versand
gesichert wurde.
• Lassen Sie den Verriegelungshebel des Tonarms los.
Tranportschraube
Nadelschutz
Tonarmhebel

13
DE
DAB-RADIO
Drücken Sie die Funktionstaste (10) (5 auf der Fernbedienung) wiederholt,
um den DAB-Modus auszuwählen. Drücken Sie SKIP+/- (16/15) (12/13 auf der
Fernbedienung), um das Programm zu suchen.
DAB-Menü
Drücken Sie MENÜ (21) (17 auf der Fernbedienung), um auf die Optionen
zuzugreifen.
1. Vollständiger Scan: Wählen Sie diese Option, um einen vollständigen
Scan der verfügbaren DAB-Programme durchzuführen. Sie können SCAN
(23) drücken, um die gleiche Aktion auszuführen.
2. Manuelles Tuning: Wählen Sie diese Option, um die DAB-Frequenz
manuell auszuwählen.
3. DRC: Wählen Sie diese Option, um zwischen DRC niedrig, DRC hoch und
DRC Aus zu wählen.
4. Prune: Wählen Sie diese Option, um das Bereinigen von Stationen ein-
oder auszuschalten.
DAB-Sender speichern
Sie können maximal 20 voreingestellte Radiosender speichern.
1. Drücken und halten Sie PRESET (24) (19 auf der Fernbedienung). PRESET
STORE wird auf dem Display angezeigt. Drücken Sie SKIP+/- (16/15)
(12/13 auf der Fernbedienung), um die Speichernummer auszuwählen.
Drücken Sie zur Bestätigung ENTER (9) (16 auf der Fernbedienung).
2. Drücken Sie PRESET (24) (19 auf der Fernbedienung), um durch die
Voreinstellungen zu navigieren.
DAB-Info
Drücken Sie wiederholt INFO (22) (18 auf der Fernbedienung), um die
folgenden Informationen anzuzeigen: NAME / KBPS / DATUM / UHRZEIT.

14
DE
FM-RADIO
Drücken Sie die Funktionstaste (10) (5 auf der Fernbedienung) wiederholt,
um den FM-Modus auszuwählen. Drehen Sie den Einstellknopf (27), um die
Frequenz manuell auszuwählen.
FM-Menü
Drücken Sie MENÜ (21) (Taste 17 auf der Fernbedienung), um auf die
Optionen zuzugreifen.
1. Scan Einstellung: Wählen Sie diese Option, um zwischen dem Scannen
aller Sender oder nur der starken Sender zu wählen.
2. Audio Einstellung: Wählen Sie diese Option, um zwischen dem
Erzwingen von Mono-Audio oder dem Aktivieren von Stereo-Sound zu
wählen.
FM-Sender speichern
Siehe DAB PRESET Anleitungen.
FM-Info
Drücken Sie wiederholt INFO (22) (18 auf der Fernbedienung), um
die folgenden Informationen anzuzeigen: ART DES PROGRAMMS /
FREQUENZ/ AUDIO / DATUM / UHRZEIT.
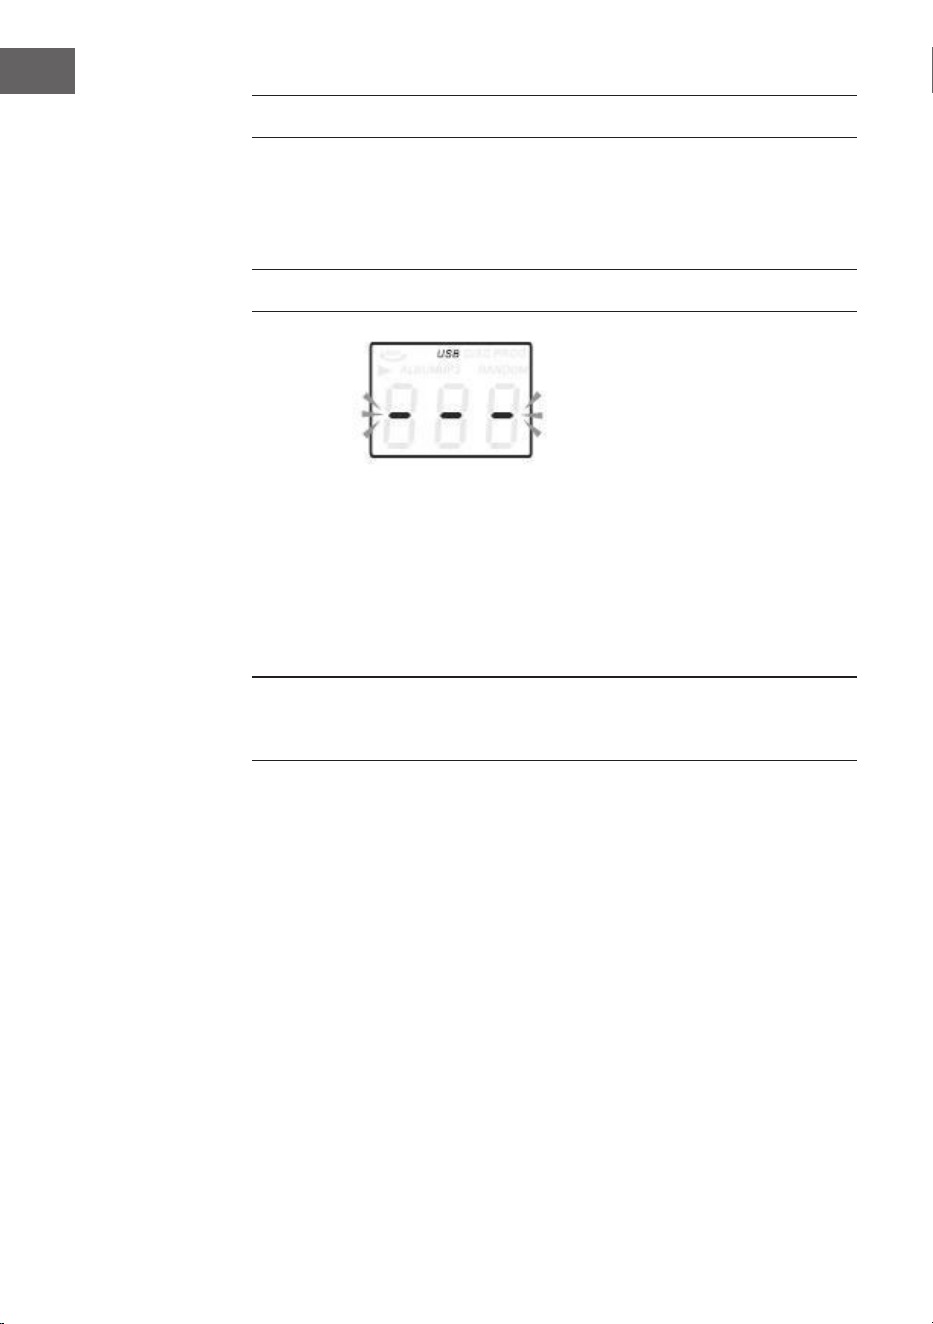
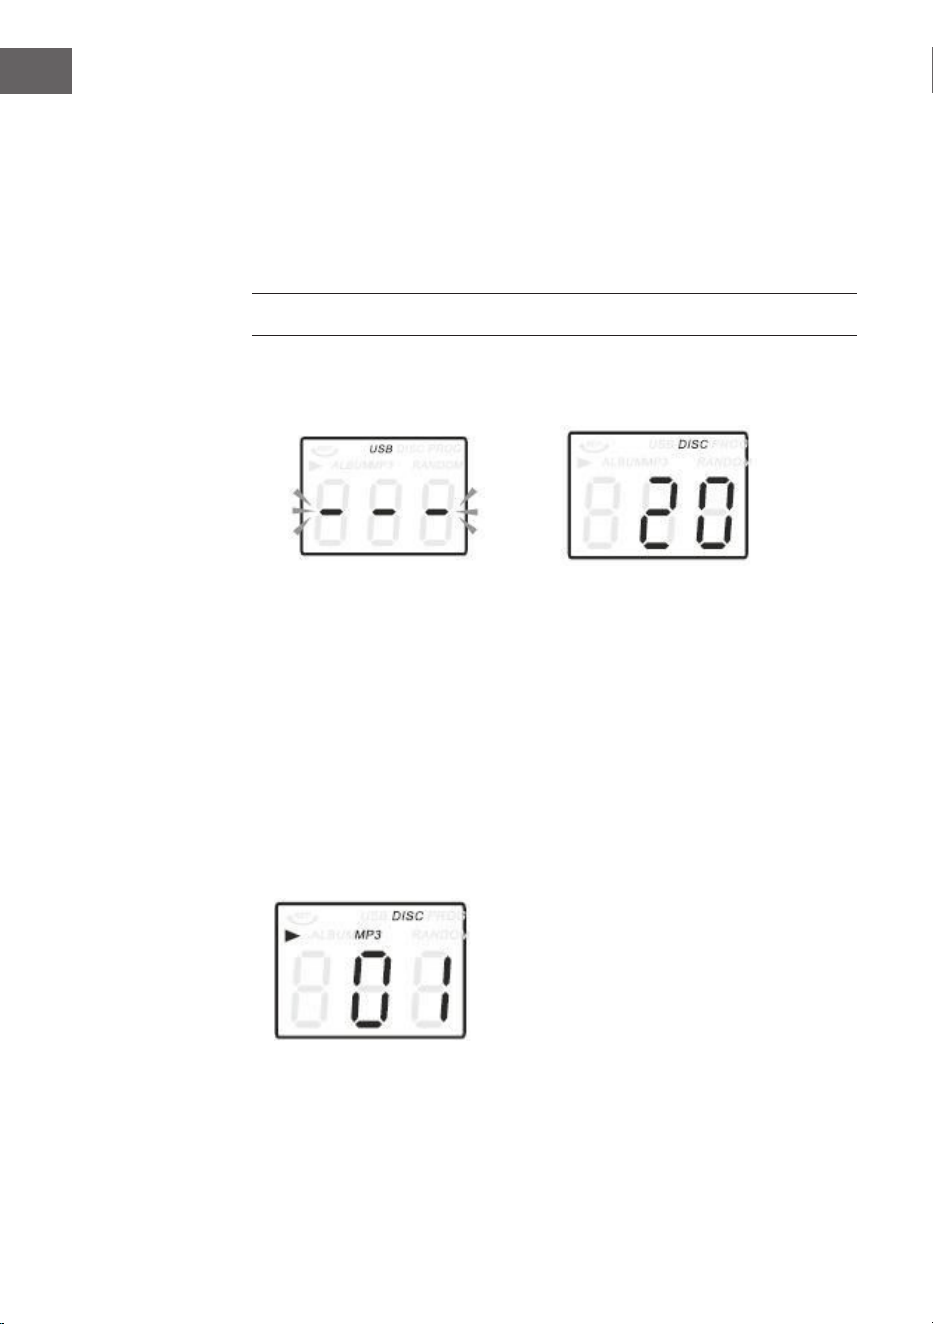
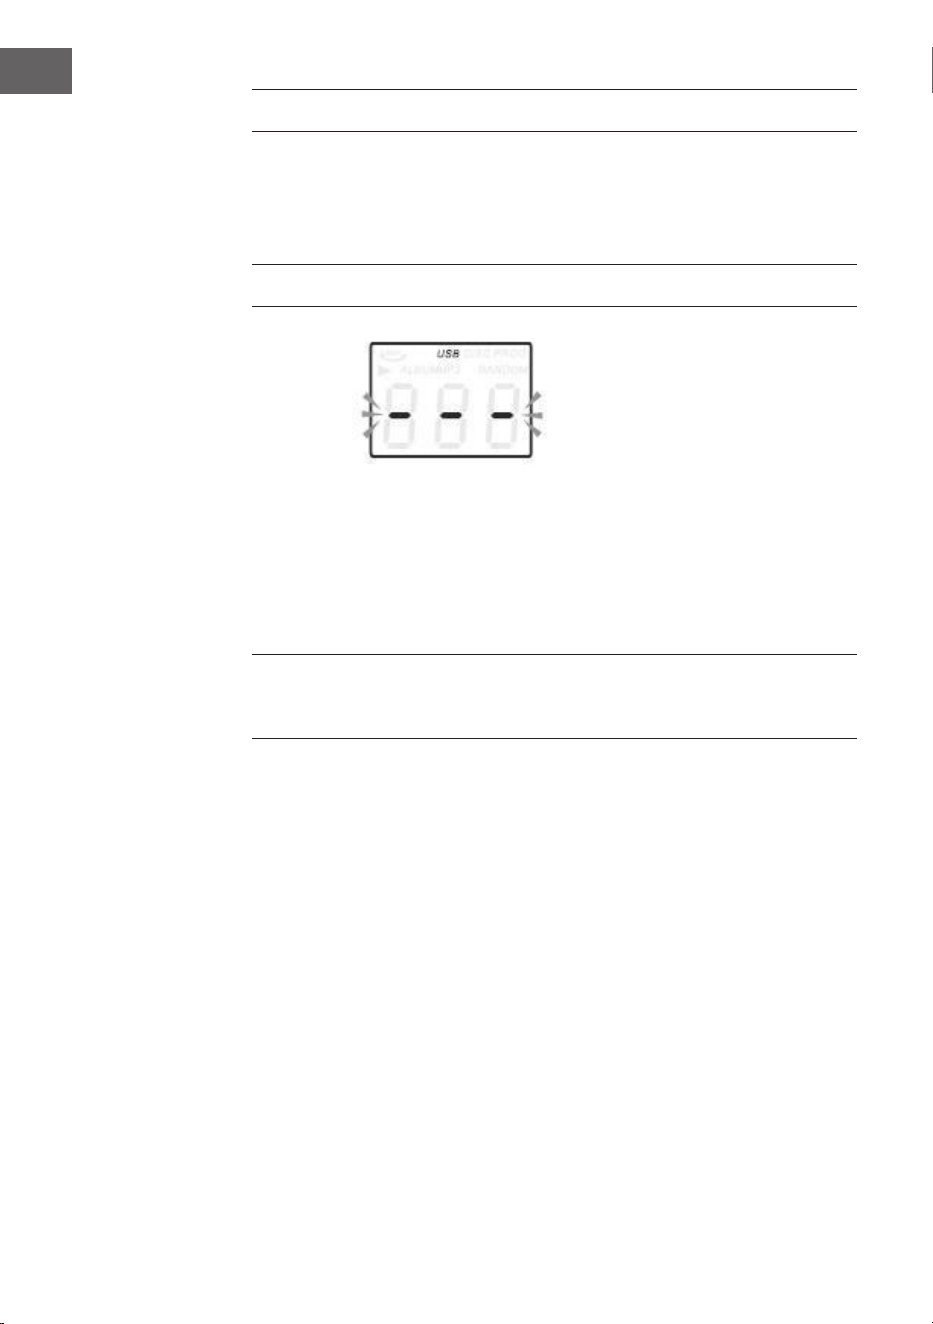
CD-BETRIEB
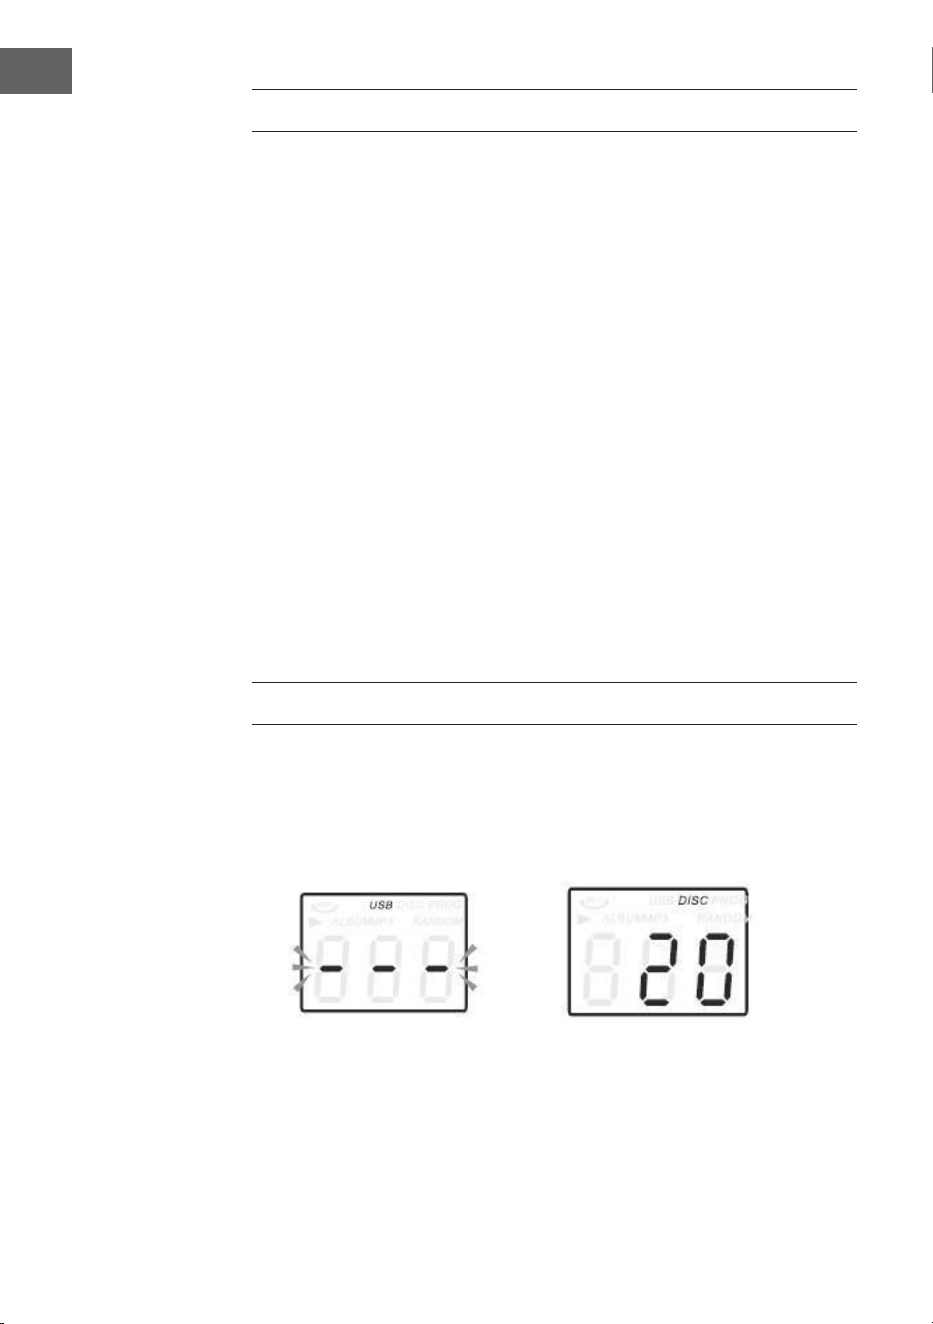
1. Drücken Sie die CD/USB-Taste, um in den CD-Modus zu gelangen, das
Symbol "---" und "DISC" werden auf dem Bildschirm angezeigt. Das Gerät
kann CD, CD-R und CD-RW abspielen.

15
DE
SCHALLPLATTEN WIEDERGEBEN
Das System beinhaltet einen vollwertigen, dreistugen Plattenspieler mit
Riemenantrieb. Sie können 33, 45 und 78 U/min Schallplatten abspielen.
1. Drücken Sie POWER, um das Gerät einzuschalten.
2. Drücken Sie die PHONO-Taste, um in den PHONO-Modus zu gelangen.
3. Vergewissern Sie sich, dass Sie die Nadelabdeckung von der Nadel
entfernt und die Tonarmverriegelung, die den Tonarm an der
Tonarmlehne befestigt, gelöst haben.
4. Stellen Sie den Drehzahlwahlschalter des Plattenspielers auf die
entsprechende Drehzahl 33, 45 oder 78 U/min. ein. Wenn Sie 45 U/min
Platten abspielen, legen Sie den 45 U/min Adapter auf die Mittelspindel.
5. Legen Sie Ihre Schallplatte auf die Mittelspindel.
6. Heben Sie den Queuehebel an, um den Tonarm von seiner Halterung
anzuheben. Bewegen Sie den Tonarm auf die Kante der Schallplatte. Der
Plattenspieler startet automatisch. Verwenden Sie den Queuehebel, um
den Tonarm sanft auf die Schallplatte abzusenken.
7. Stellen Sie den Lautstärkeregler auf den gewünschten Pegel ein.
8. Wenn der Tonarm das Ende der Aufnahme erreicht, kehrt er automatisch
zur Tonarmlehne zurück und der Plattenspieler stoppt.
9. Drücken Sie erneut auf POWER, um das System auszuschalten. Die
POWER-Anzeige erlischt.
Hinweis: Drehen oder stoppen Sie den Plattenspieler nicht manuell. Ein
Verschieben oder Erschüttern des Plattenspielers ohne Sicherung der
Tonarmklammer kann zu einer Beschädigung des Tonarms führen.
2. Drücken Sie die OP/CL-Taste oben, um das CD-Fach zu önen.
3. Legen Sie die CD mit der Beschriftungsseite nach oben in die CD-ade.
4. Drücken Sie die OP/CL-Taste erneut, um die CD-Schublade zu schließen.
Die Wiedergabe beginnt automatisch ab dem ersten Titel
5. Das MP3-Symbol wird angezeigt, wenn eine MP3-Datei auf der Disc
erkannt wird.
16
DE
AUX-IN-BEDIENUNG
Schließen Sie das Audiosystem an die AUX IN-Buchse auf der Rückseite an
und drücken Sie die PHONO/AUX IN-Taste. Starten Sie die Wiedergabe
vom angeschlossenen Gerät aus
USB-BETRIEB
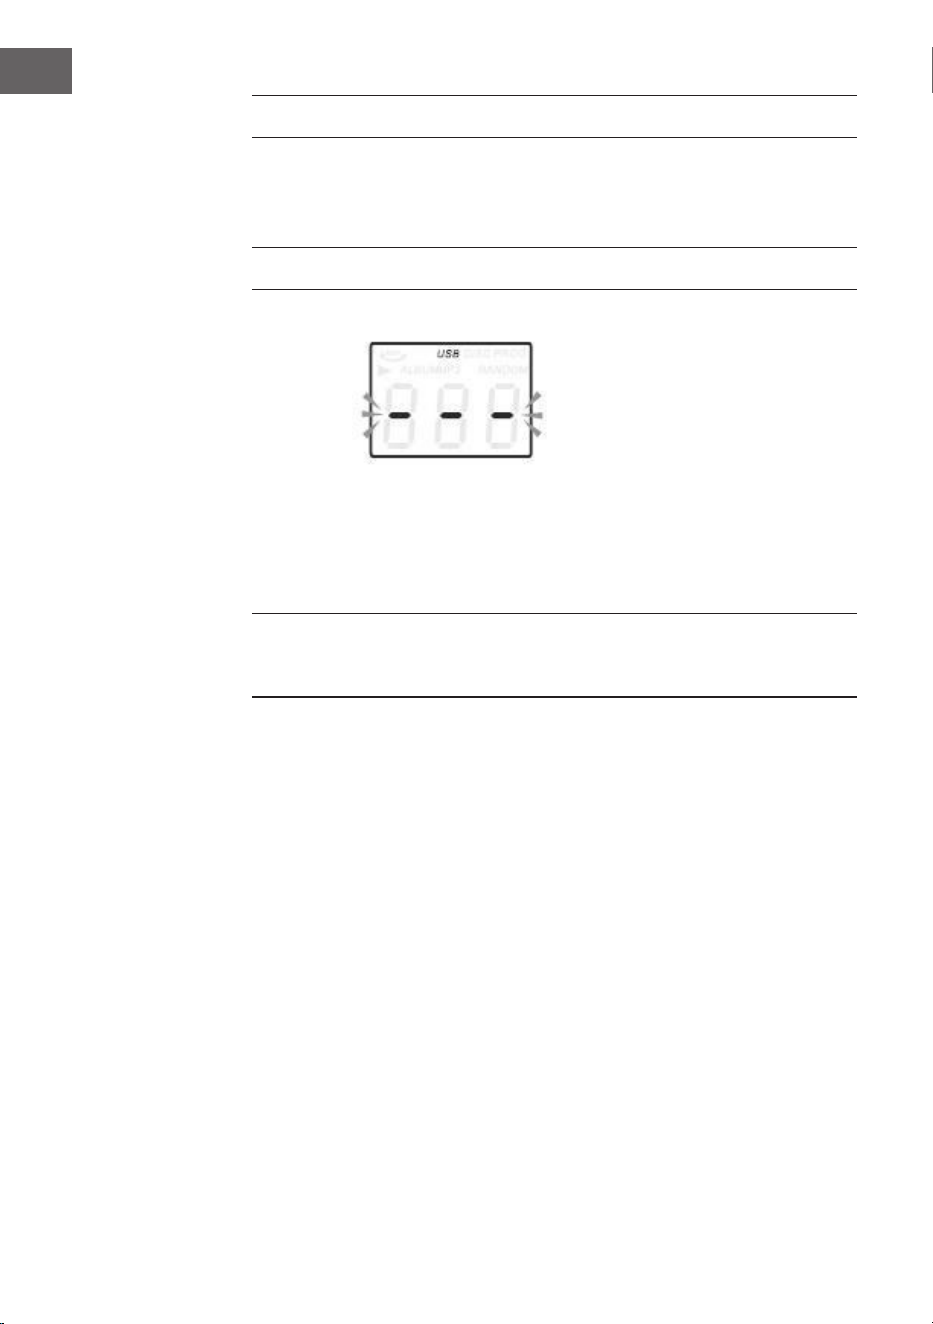
1. Drücken Sie zuerst die CD/USB-Taste und die FUNKTIONS-Taste, um
in den USB-Modus zu gelangen. Das Symbol "---" und das USB-Symbol
werden angezeigt.
2. Stecken Sie ein USB-Flash-Gerät in den USB-Anschluss.
3. Die Funktionen PLAY/PAUSE, DN/UP und Stop sind identisch mit den
CD-Funktionen.
Hinweis: Sie können die FUNKTION auf dem Bedienfeld drücken oder die
Taste PLAY/PAUSE auf der Fernbedienung für 2 Sekunden lang drücken, um
den Wiedergabemodus zwischen CD und USB zu wechseln.
Wiedergabe im MP3-Modus
1. Drücken Sie die Taste PLAY/PAUSE, um die Wiedergabe des
ausgewählten Titels zu starten oder zu unterbrechen.
2. Während der Wiedergabe des Songs werden die Song- und
Ordnernummer des ausgewählten Tracks im Display angezeigt.
3. Sie können die Wiedergabe jederzeit durch Drücken der STOP-Taste
stoppen.
Drücken Sie während der CD/USB-Wiedergabe die Taste / auf der
Gerätevorderseite oder auf der Fernbedienung wiederholt, um den Titel
zu wechseln. Um innerhalb eines Titels schnell vorwärts oder rückwärts zu
suchen, halten Sie UP/F.F. gedrückt (drücken Sie die Taste / Um 10 Titel
vorwärts oder rückwärts zu überspringen, drücken Sie dann TRACK-10 oder
TRACK+10 auf der Fernbedienung.

17
DE
USB-AUFNAHME
1. CD Aufnahme
IStecken Sie den USB-Stick in die USB-Buchse. Drücken Sie dann die CD/
USB-Taste. Legen Sie die CD in das CD-Fach und spielen Sie den Titel ab,
der aufgenommen werden soll. Drücken Sie die RECORD-Taste zweimal,
um die Aufnahme zu starten. Wenn die gesamte CD abgespielt wird,
werden alle Titel aufgenommen. HINWEIS: Die Aufnahme schlägt fehl,
wenn Sie während der Aufnahme die STOP-Taste drücken.
2. MP3-Disc Aufnahme
Stecken Sie den USB-Stick in die USB-Buchse. Drücken Sie dann die CD/
USB-Taste. Legen Sie eine CD mit MP3-Dateien in das CD-Fach und spielen
Sie den MP3-Track ab, der aufgenommen werden soll. Drücken Sie die
RECORD-Taste zweimal, um die Aufnahme zu starten. Wenn alle MP3-
Dateien wiedergegeben werden, werden alle Titel aufgenommen. HINWEIS:
Die Aufnahme schlägt fehl, wenn Sie während der Aufnahme die STOP-
Taste drücken.
3. Aufnahme von Schallplatte
Stecken Sie den USB-Stick in die USB-Buchse. Drücken Sie dann die
Taste PHONO/AUX IN. Spielen Sie die Schallplatte ab und drücken Sie
die RECORD-Taste zweimal, um die Aufnahme zu starten. Drücken Sie die
STOP-Taste, um die Aufnahme zu stoppen.
4. AUX IN recording
Stecken Sie den USB-Stick in die USB-Buchse. Schließen Sie das externe
Audiogerät an die AUX-Buchse auf der Rückseite an. Drücken Sie dann
die PHONO/AUX IN-Taste und spielen Sie Audio ab und drücken Sie die
RECORD-Taste zweimal, um die Aufnahme zu starten.
Musiktitel von USB-Speicher löschen
Drücken Sie die CD/USB-Taste auf der Vorderseite oder lange die Taste
PLAY/PAUSE auf der Fernbedienung, um den USB-Modus auszuwählen.
Wählen Sie den Titel aus und drücken Sie 2 Sekunden lang auf Löschen, und
der Titel wird gelöscht.
BT-BETRIEB
Schalten Sie das Gerät ein und drücken Sie FUNCTION, um die BT-Funktion
auszuwählen. Suchen Sie nach dem BT-Gerät mit der ID „Auna Belle" und
stellen Sie damit eine Verbindung her.

18
DE
SPEZIELLE ENTSORGUNGSHINWEISE FÜR
VERBRAUCHER IN DEUTSCHLAND
Entsorgen Sie Ihre Altgeräte fachgerecht. Dadurch wird gewährleistet,
dass die Altgeräte umweltgerecht verwertet und negative Auswirkungen
auf die Umwelt und menschliche Gesundheit vermieden werden. Bei der
Entsorgung sind folgende Regeln zu beachten:
• Jeder Verbraucher ist gesetzlich verpichtet, Elektro- und
Elektronikaltgeräte (Altgeräte) sowie Batterien und Akkus
getrennt vom Hausmüll zu entsorgen. Sie erkennen die
entsprechenden Altgeräte durch folgendes Symbol der
durchgestrichene Mülltonne (WEEE Symbol).
• Sie haben Altbatterien und Altakkumulatoren, die nicht vom Altgerät
umschlossen sind, sowie Lampen, die zerstörungsfrei aus dem
Altgerät entnommen werden können, vor der Abgabe an einer
Entsorgungsstelle vom Altgerät zerstörungsfrei zu trennen.
• Bestimmte Lampen und Leuchtmittel fallen ebenso unter das Elektro-
und Elektronikgesetz und sind dementsprechend wie Altgeräte zu
behandeln. Ausgenommen sind Glühbirnen und Halogenlampen.
Entsorgen Sie Glühbirnen und Halogenlampen bitte über den Hausmüll,
sofern Sie nicht das WEEE Symbol tragen.
• Jeder Verbraucher ist für das Löschen von personenbezogenen Daten
auf dem Elektro- bzw. Elektronikgerät selbst verantwortlich.
Rücknahmepicht der Vertreiber
Vertreiber mit einer Verkaufsäche für Elektro- und Elektronikgeräte von
mindestens 400 Quadratmetern sowie Vertreiber von Lebensmitteln
mit einer Gesamtverkauläche von mindestens 800 Quadratmetern, die
mehrmals im Kalenderjahr oder dauerhaft Elektro- und Elektronikgeräte
anbieten und auf dem Markt bereitstellen, sind verpichtet,
1. bei der Abgabe eines neuen Elektro- oder Elektronikgerätes an einen
Endnutzer ein Altgerät des Endnutzers der gleichen Geräteart, das
im Wesentlichen die gleichen Funktionen wie das neue Gerät erfüllt,
am Ort der Abgabe oder in unmittelbarer Nähe hierzu unentgeltlich
zurückzunehmen und
2. auf Verlangen des Endnutzers Altgeräte, die in keiner äußeren
Abmessung größer als 25 Zentimeter sind, im Einzelhandelsgeschäft
oder in unmittelbarer Nähe hierzu unentgeltlich zurückzunehmen; die
Rücknahme darf nicht an den Kauf eines Elektro- oder Elektronikgerätes
geknüpft werden und ist auf drei Altgeräte pro Geräteart beschränkt.

19
DE
• Bei einem Vertrieb unter Verwendung von Fernkommunikationsmitteln
ist die unentgeltliche Abholung am Ort der Abgabe auf Elektro- und
Elektronikgeräte der Kategorien 1, 2 und 4 gemäß § 2 Abs. 1 ElektroG,
nämlich „Wärmeüberträger“, „Bildschirmgeräte“ (Oberäche von mehr
als 100 cm²) oder „Großgeräte“ (letztere mit mindestens einer äußeren
Abmessung über 50Zentimeter) beschränkt. Für andere Elektro- und
Elektronikgeräte (Kategorien 3, 5, 6) ist eine Rückgabemöglichkeit in
zumutbarer Entfernung zum jeweiligen Endnutzer zu gewährleisten.
• Altgeräte dürfen kostenlos auf dem lokalen Wertstohof oder in
folgenden Sammelstellen in Ihrer Nähe abgegeben werden:
www.take-e-back.de
• Für Elektro- und Elektronikgeräte der Kategorien 1, 2 und 4 an bieten
wir auch die Möglichkeit einer unentgeltlichen Abholung am Ort der
Abgabe. Beim Kauf eines Neugeräts haben sie die Möglichkeit eine
Altgerätabholung über die Webseite auszuwählen.
• Batterien können überall dort kostenfrei zurückgegeben werden, wo sie
verkauft werden (z. B. Super-, Bau-, Drogeriemarkt). Auch Wertsto- und
Recyclinghöfe nehmen Batterien zurück. Sie können Batterien auch per
Post an uns zurücksenden. Altbatterien in haushaltsüblichen Mengen
können Sie direkt bei uns von Montag bis Freitag zwischen 08:00 und
16:00 Uhr unter der folgenden Adresse unentgeltlich zurückgeben:
Chal-Tec Fulllment GmbH
Norddeutschlandstr. 3
47475 Kamp-Lintfort
• Wichtig zu beachten ist, dass Lithiumbatterien aus Sicherheitsgründen
vor der Rückgabe gegen Kurzschluss gesichert werden müssen (z. B.
durch Abkleben der Pole).
• Finden sich unter der durchgestrichenen Mülltonne auf der Batterie
zusätzlich die Zeichen Cd, Hg oder Pb ist das ein Hinweis darauf, dass
die Batterie gefährliche Schadstoe enthält. (»Cd« steht für Cadmium,
»Pb« für Blei und »Hg« für Quecksilber).
Hinweis zur Abfallvermeidung
Indem Sie die Lebensdauer Ihrer Altgeräte verlängern, tragen Sie dazu
bei, Ressourcen eizient zu nutzen und zusätzlichen Müll zu vermeiden.
Die Lebensdauer Ihrer Altgeräte können Sie verlängern indem Sie defekte
Altgeräte reparieren lassen. Wenn sich Ihr Altgerät in gutem Zustand
bendet, könnten Sie es spenden, verschenken oder verkaufen.

20
DE
HINWEISE ZUR ENTSORGUNG
Wenn es in Ihrem Land eine gesetzliche Regelung
zur Entsorgung von elektrischen und elektronischen
Geräten gibt, weist dieses Symbol auf dem Produkt
oder auf der Verpackung darauf hin, dass dieses
Produkt nicht im Hausmüll entsorgt werden darf.
Stattdessen muss es zu einer Sammelstelle für
das Recycling von elektrischen und elektronischen
Geräten gebracht werden. Durch regelkonforme
Entsorgung schützen Sie die Umwelt und die
Gesundheit Ihrer Mitmenschen vor negativen
Konsequenzen. Informationen zum Recycling
und zur Entsorgung dieses Produkts, erhalten
Sie von Ihrer örtlichen Verwaltung oder Ihrem
Hausmüllentsorgungsdienst.
Dieses Produkt enthält Batterien. Wenn es in Ihrem
Land eine gesetzliche Regelung zur Entsorgung
von Batterien gibt, dürfen die Batterien nicht im
Hausmüll entsorgt werden. Informieren Sie sich
über die örtlichen Bestimmungen zur Entsorgung
von Batterien. Durch regelkonforme Entsorgung
schützen Sie die Umwelt und die Gesundheit Ihrer
Mitmenschen vor negativen Konsequenzen.
KONFORMITÄTSERKLÄRUNG
Hersteller:
Chal-Tec GmbH, Wallstraße 16, 10179 Berlin,
Deutschland.
Importeur für Großbritannien:
Berlin Brands Group UK Limited
PO Box 42
272 Kensington High Street
London, W8 6ND
United Kingdom
Hiermit erklärt Chal-Tec GmbH, dass der
Funkanlagentyp Belle Epoque 1912 der Richtlinie
2014/53/EU entspricht. Der vollständige Text der
EU-Konformitätserklärung ist unter der folgenden
Internetadresse verfügbar: use.berlin/10034402
21
EN
CONTENTS
Technical Data 21
Safety Instructions 23
Overview 25
Remote Control 28
Prepare for Use 30
DAB Mode 31
FM Mode 31
CD Operation 32
Playing Vinyls Records 33
Aux in Operation 34
USB Operation 34
BT Operation 35
Disposal Considerations 36
Declaration of Conformity 36
Dear Customer,
Congratulations on purchasing this equipment.
Please read this manual carefully and take care of
the following hints to avoid damages. Any failure
caused by ignoring the items and cautions men-
tioned in the instruction manual are not covered
by our warranty and any liability. Scan the QR
code to get access to the latest user manual and
other information about the product.
TECHNICAL DATA
Item number 10034402
Power input 230 V~ 50/60 Hz
RMS power 2x2.5W
Turntable speed 33/45/78 RPM
(Record size 17.5/25/30 cm)
Playable CD formats CD/CD-R/CD-RW/MP3
Playable les from USB MP3
22
EN
WARNING
CAUTION
RISK OF ELECTRIC SHOCK
DO NOT OPEN
CAUTION: TO REDUCE THE RISK OF ELECTRIC SHOCK AND SERIOUS PERSONAL
INJURY, DO NOT REMOVE ANY COVER. NO USER-SERVICABLE
PARTS INSIDE. REFER SERVICING TO QUALIFIED SERVICE PERSONNEL ONLY.
WARNING. TO REDUCE THE RISK OF FIRE OR ELECTRICAL SHOCK, DO NOT EXPOSE
THIS PRODUCT TO WATER, RAIN OR MOISTURE.
Triangle with lightning plus explanation as follows:
DANGEROUS VOLTAGE: The lightning ash with arrowhead symbol
within the equilateral triangle is intended to alert the user to the
presence of uninsulated dangerous voltage within the product‘s
enclosure that may be of suicient magnitude to constitute a risk of
electric shock to persons.
Triangle with exclamation point plus explanation as follows:
ATTENTION: The exclamation point within the equilateral triangle is
intended to alert the user to the presence of important operating and
maintenance (servicing) instructions in the literature accompanying
this product.
CAUTION
To reduce the risk of electric shock do not use this plug with
an extension cord or receptacle.

23
EN
SAFETY INSTRUCTIONS
Read these instructions. All uses guidelines must be read before using the
device. Keep the instructions for future use.
• Attention, use and security guidelines must be respected.
• The device must not be used near water or be put in contact with
moisture.
• Make sure has no liquid is spilled on device and device openings.
• Move device carefully, avoid shocks.
• Do not block the breakdown of the device outputs.
• Do not place the device near from a heat source (e.g. radiator). Do not
expose it to the Sun.
• Plug the device as indicate on this information form.
• This device has a connection with overload protection. Replacement
should only be done bt an experienced technician or the device
manufacturer.
• For cleaning the device, please follow the recommendations of the
notice.
• The power cord should be unplugged when not using for a long period
of time.
• Device shall be repaired by a qualied person when:
a. the power cord is damaged,
b. objects have fallen into the apparatus or a liquid has been spilled
into device,
c. device was exposes to the rain,
d. device does not work correctly without notable exterior change,
e. device is broken.
• The user shall not try to maintain device beyond that which is described
in this information form.
• The apparatus shall not be exposed to dripping or splashing and that no
objects lled with liquids, such as vases, shall be placed on apparatus.
• To be completely disconnect the power input, the mains plug of
apparatus shall be disconnected from the mains.” as the disconnect
devices is the mains plug of apparatus.
• The mains plug of apparatus should not be obstructed OR should be
easily accessed during intended use.
• Battery shall not be exposed to excessive heat such as sunshine, re or
the like.
• Excessive sound pressure form earphones and headphones can cause
hearing loss.

24
EN
• Minimum distance (8 cm) around the apparatus for suicient
ventilations;
• The ventilation should not be impeded by covering the ventilation
opening with items such as newspaper, table-cloths, curtain etc;
• No naked ame sources such as lighted candles should be placed on
the apparatus;
• Attention should be drawn to the environmental aspects of battery
disposal;
• The use of apparatus in moderate climates.
• Danger of explosion if battery is incorrectly replaced.
• Replace only with the same or equivalent type.
The main plug shall remain readily operable.

25
EN
OVERVIEW
1. Dust cover
2. Cover mechanism
3. Turntable
4. Speakers
5. Tone arm
6. Wood leg
26
EN
Front panel
Rear view
7 USB socket
8 Aux-in
9 3.5Mm headphone jack
10 Function button (DAB/FM/CD/
USB/Phono/AUX)
11 Remote sensor
12 CD door
13 Play/pause
14 Stop button
15 Dn/f-r
16 Up/f-f
17 Rec/del (record button/delete
button)
18 CD door open/close button
19 Volume knob/ power stanby
20 Power led
21 DAB menu button
22 DAB info button
23 DAB scan button
24 DAB preset button
25 DAB enter
26 LCD display
27 Tuning botton/play.Mode
28 FM/DAB antenna
29 AC cord
30 On/o switch

27
EN
Turntable
31 Adaptor
32 Turntable pause switch
33 PICK-UP HOLDER
34 AUTO STOP ON/OFF
35 33/45/78 RPM speed selector
36 Tone arm
37 Turntable
38 LINE OUT
28
EN
REMOTE CONTROL
1 Power on/o
2 CD door open/close button
3 Record button
4 Delete button5. Mode button
5 Stop button
6 Mode button
7 Repeat button/vol+
8 Program button/vol-
9 Play/pause button
10 DAB scan button
11 Info
12 Skip-button/fast forward button
13 Skip+ button/rewind button
14 Numeric keyboard
15 +10
16 Enter
17 Menu
18 EQ
19 Preset
20 Timer

29
EN
Remote battery installation
The infrared remote control requires 2 PCS UM-4 R03, AAA (3V) Battery.
Battery excluded.
Power on/o
1. Press POWER to turn the system on. The power indicator lights up.
2. Press the function selector buttons (DAB/FM/CD/USB/PHONO/AUX IN)
to select the desired function.
3. Start to adjust the volume by using the volume control button.
4. When nished listening press POWER again to turn o the system. The
power indicator goes o.
Remark: The unit is comply with ERP2, the unit will turn to Standby mode if
there is no operation on the unit after 15 mins, please press POWER button
2 times if you want to re-start the unit.
30
EN
PREPARE FOR USE
• Carefully remove the unit from the carton and remove all packing
material from the unit.
• Unwind the AC power cord and extend it to its full length.
• Unwind the FM Antenna wire and extend to it to its full length.
• Remove the twisted wire that was attached to the tone arm for
transport.
• Remove the opaque white plastic stylus cover from the phonograph
stylus by sliding it in the direction of the arrow.
• Please pay attention to the stylus during operation because stylus
damage is not covered by the warranty.
• Remove the the twist-tie that was used to secure the tone arm during
shipment.
• Release the tone arm lock lever.

31
EN
DAB MODE
Press function button (10) (5 on remote) repeatedly to select DAB mode.
Press SKIP+/- (16/15) (12/13 on remote) to search the program
DAB menu
Press MENU (21) (17 on remote) to access to the options.
1. Full Scan: select this option to perform a full scan of the available DAB
programs. You can press SCAN (23) to perform the same action.
2. Manual Tune: select this option to select manually the DAB frequency.
3. DRC: select this option to choose between DRC low, DRC high and DRC
o.
4. Prune: select this option to choose between PRUNE stations on or o.
DAB preset
You can program a maximum of 20 preset radio stations.
1. Press and hold PRESET (24) (19 on remote). PRESET STORE will appear
on display. Press SKIP+/- (16/15) (12/13 on remote) to select the preset
number. Press ENTER (9) (16 on remote) to conrm.
2. Press PRESET (24) (19 on remote) to navigate through the presets.
DAB INFO
1. Repeatedly press INFO (22) (18 on remote) to see the following
information: NAME/KBPS/DATE /TIME.
FM MODE
Press function button (10) (5 on remote) repeatedly to select FM mode. Turn
the TUNING KNOB (27) to manually select the frequency
FM menu
Press MENU (21) (17 on remote) to access to the options.
1. Scan Setting: select this option to choose between scanning all stations
or only the strong stations.
2. Audio Setting: select this option to choose between forcing mono audio
or allowing stereo sound.
32
EN
FM preset
See DAB PRESET instructions.
FM info
Repeatedly press INFO (22) (18 on remote) to see the following
informations: KIND OF PRO-GRAM/FREQUENCE/AUDIO/DATE/TIME.
CD OPERATION
1. Press the CD/USB button to enter CD mode, the “---“ and ‘DISC’ icon will
be shown on the screen. The unit can play CD, CD-R and CD-RW.Press
the OP/CL button top open the CD drawer.
2. Place your disc in the CD drawer with the label side facing up.
3. Press the OP/CL button again to close the CD drawer. Playback will
automatically start from the rst track.
4. MP3 icon will be shown if MP3 le is detected in the disc.

33
EN
PLAYING VINYLS RECORDS
The system includes a full-size, 3 speed, belt-drive turntable. You can play
33, 45 and 78rpm records.
1. Press POWER to turn the system on.
2. Press the PHONO button to enter the PHONO mode.
3. Make sure you have removed the stylus cover from the stylus and have
released the tone arm lock that secured the tone arm to the tone arm
rest. 5. Set the turntable speed selector to appropriate speed 33, 45 or
78rpm. If you are playing 45 rpm singles, place the 45rpm adapter on
the centre spindle.
4. Place your record on the the centre spindle.
5. Raise the cue lever to lift the tone arm of its rest. Move the tone arm to
the edge of the record. The turntable starts automatically. Use the cue
lever to gently lower the tone arm onto the record.
6. Adjust the volume control to the desired level.
7. When the tone arm reaches the end of the record it automatically returns
to the tone arm rest and the record player stops.
8. Press POWER again to turn the system o. The POWER indicator goes
OFF.
Note: Do not turn or stop the turntable manually. Moving or jarring the
turntable without securing the tone arm clamp could result in damage to
the tone arm.
34
EN
AUX IN OPERATION
Connect the audio system into the AUX IN jack on the rear panel, Press the
PHONO/AUX IN button. Start playing from the connected device.
USB OPERATION
1. Press the CD/USB button rst and the FUNCTION button to enter USB
mode. The ‘---‘ and USB icon will be shown.
2. Insert a USB ash device into the USB socket.
3. PLAY/PAUSE, DN/UP and stop functions are the same as CD functions.
Note: You may press the FUNCTION on the panel or long press PLAY/PAUSE
button on the remote control for 2 seconds to change the playing mode
between CD and USB.
Playing in MP3 Mode (CD/USB)
1. Press PLAY/PAUSE button to start or pause playback selected track.
2. While playing the song, the song number and folder number of the
selected track will be shown in the display.
3. You can stop the playback at any time by pressing the STOP button.
TRACK SKIP AND HIGH SPEED TRACK SEARCH IN CD/USB MODE
During CD/USB playback press UP/F.F ( ) or DN/F.R ( ) button on
the unit front panel or on the remote control repeatedly to change track. To
rapidly search forward or backwards within a track press and hold UP/F.F
(press UP/F.F ( ) or DN/F.R ( ) button. To skip 10 tracks back or
forth then press TRACK-10 or TRACK+10 on the remote control.

35
EN
USB Recording
1. CD recording
Insert USB ash drive into the USB socket. Then press CD/USB button.
Place CD into tthe CD drawer and play the track which will be recorded.
Press RECORD button twice to start recording. If all CD is played, Then all
tracks will be recorded. NOTE: Recording will fail if pressing STOP button
during recording
2. MP3 DISC recording
Insert USB ash drive into the USB socket. Then press CD/USB button.
Place CD with MP3 les into the CD drawer and play the MP3 track which
will be recorded. Press RECORD button twice to start recording. If all MP3
les is played, Then all tracks will be recorded. NOTE: Recording will fail if
pressing STOP button during recording
3. Vinyl recording
Insert USB ash drive into the USB socket. Then press PHONO/AUX IN
button. Play the vinyl and press RECORD button twice to start recording.
Press STOP button to stop recording.
4. AUX IN recording
Insert USB ash drive into the USB socket. Connect the external audio
device into the AUX jack on the rear panel. Then press PHONO/AUX IN
button and play audio and press RECORD button twice to start recording.
Delete tracks from USB disc
Press CD/USB button on the front panel or long press PLAY/PAUSE on
remote control to select USB mode. Select the track and press delete for 2
seconds and the track is deleted.
BT OPERATION
Power on the unit and press the FUNCTION button to select the BT function.
Search for a BT device with the ID "Auna Belle" and connect to this device.

36
EN
DISPOSAL CONSIDERATIONS
If there is a legal regulation for the disposal of
electrical and electronic devices in your country,
this symbol on the product or on the packaging
indicates that this product must not be disposed of
with household waste. Instead, it must be taken to
a collection point for the recycling of electrical and
electronic equipment. By disposing of it in accordance
with the rules, you are protecting the environment and
the health of your fellow human beings from negative
consequences. For information about the recycling
and disposal of this product, please contact your local
authority or your household waste disposal service.
This product contains batteries. If there is a legal
regulation for the disposal of batteries in your country, the
batteries must not be disposed of with household waste.
Find out about local regulations for disposing of batteries.
By disposing of them in accordance with the rules, you are
protecting the environment and the health of your fellow
human beings from negative consequences.
DECLARATION OF CONFORMITY
Manufacturer:
Chal-Tec GmbH, Wallstrasse 16, 10179 Berlin,
Germany.
Importer for Great Britain:
Berlin Brands Group UK Limited
PO Box 42
272 Kensington High Street
London, W8 6ND
United Kingdom
Hereby, Chal-Tec GmbH declares that the radio
equipment type Belle Epoque 1912 is in compliance with
Directive 2014/53/EU. The full text of the EU declaration
of conformity is available at the following internet
address: use.berlin/10034402
For Great Britain: Hereby, Chal-Tec GmbH declares
that the radio equipment type Belle Epoque 1912 is in
compliance with the relevant statutory requirements. The
full text of the declaration of conformity is available at the
following internet address: use.berlin/10034402
37
FR
SOMMAIRE
Fiche technique 37
Consignes de sécurité 39
Aperçu de l'appareil 41
Télécommande 44
Mise en marche 46
Radio dab 47
Radio fm 48
Utilisation du cd 48
Lecture de disques vinyles 49
Utilisation de "aux-in" 50
Utilisation de l'usb 50
Enregistrement sur usb 51
Utilisation de bt 51
Informations sur le recyclage 52
Déclaration de conformité 52
FICHE TECHNIQUE
Numéro d'article 10034402
Alimentation 230 V~ 50/60 Hz
Puissance RMS 2x,.5W
Vitesses de lecture 33/45/78 RPM
(Dimensions des disques
17.5/25/30 cm)
Formats de CD compatibles CD/CD-R/CD-RW/MP3
Formats de chiers USB compatibles MP3
Chère cliente, cher client,
Toutes nos félicitations pour l’acquisition de ce
nouvel appareil. Veuillez lire attentivement et
respecter les instructions de ce mode d’emploi
an d’éviter d’éventuels dommages. Nous ne
saurions être tenus pour responsables des dom-
mages dus au non-respect des consignes et à la
mauvaise utilisation de l’appareil. Scannez le QR-
Code pour obtenir la dernière version du mode
d‘emploi et des informations supplémentaires
concernant le produit :

38
FR
MISE EN GARDE
ATTENTION : POUR RÉDUIRE LES RISQUES DE CHOCS ÉLECTRIQUES, NE DÉMIONTEZ
AUCUN CACHE. L‘APPAREIL NE CONTIEN AUCUNE PIÈCE À ENTRETENIR. ADRESSEZ-
VOUS UNIQUEMENT À DES PERSONNELS QUALIFIÉS POUR LA MAINTENANCE.
MISE EN GARDE / POUR RÉDUIRE LE RISQUE D‘INCENDIE ET DE CHOC ÉLECTRIQUE,
NE PLONGEZ PAS L‘APPAREIL DANS L‘EAU ET NE L‘EXPOSEZ PAS À LA PLUIE OU À
L‘HUMIDITÉ
Signication du triangle contenant un éclair :
TENSION DANGEREUSE L'éclair avec la èche à l'intérieur du
triangle équilatéral est destiné à alerter l'utilisateur de la présence
de tension dangereuse non isolée à l'intérieur du boîtier, d'une
magnitude suisante pour constituer un risque de choc électrique aux
personnes.
Signication du triangle avec un point d'exclamation :
ATTENTION : le point d'exclamation point dans le triangle équilatéral
est destiné à alerter l'utilisateur de la présence d'importantes
instructions d'utilisation et d'entretien (maintenance) dans les
documents qui accompagne ce produit.

39
FR
CONSIGNES DE SÉCURITÉ
• Lisez les indications. Vous devez lire toutes les consignes d'utilisation
avant d'utiliser l'appareil.
• Conservez ce mode d'emploi pour vous y référer ultérieurement.
• Les consignes de prudence, d’utilisation et de sécurité doivent être
respectées.
• L'appareil ne doit pas être utilisé près de l'eau ni exposé à l'humidité.
• Assurez-vous qu'aucun liquide ne pénètre par les ouvertures de
l'appareil.
• Déplacez l'appareil avec précaution, évitez les chocs.
• Ne bloquez pas les sorties de l'appareil.
• Ne placez pas l'appareil près d'une source de chaleur (par exemple, un
radiateur). Ne l'exposez pas au soleil.
• Branchez l'appareil comme indiqué dans ce mode d'emploi.
• Cet appareil dispose d'une connexion avec une protection contre
les surcharges. Son remplacement ne peut être eectué que par un
technicien expérimenté ou le fabricant de l'appareil.
• Pour nettoyer l'appareil, veuillez respecter les consignes.
• Le cordon d'alimentation doit être débranché si vous n'utilisez pas
l'appareil pendant une longue période.
• L’appareil doit être réparé par une personne qualiée si :
a. Le câble secteur est endommagé.
b. Des objets sont tombés dans l'appareil ou un liquide a pénétré
dans l'appareil.
c. L'appareil a été exposé à la pluie.
d. L’appareil ne fonctionne pas correctement sans impact externe
important.
e. L'appareil est défectueux.
• L'utilisateur ne doit pas essayer d'obtenir de l'appareil des
performances supérieures à ce qui est décrit dans ce formulaire
d'information.
• L'appareil ne doit pas être exposé à de l'eau qui s'égoutte ou aux
éclaboussures et ne doit porter aucun objet rempli de liquide tel que
des vases.
• Pour déconnecter complètement l'alimentation électrique, débranchez
la che secteur de l'appareil, car il s'agit du dispositif de déconnexion
du secteur.
• La che secteur de l'appareil ne doit pas être recouverte ET doit
être facilement accessible lorsqu'elle est utilisée conformément aux
instructions.

40
FR
• L'utilisateur ne doit pas essayer d'obtenir de l'appareil des
performances supérieures à ce qui est décrit dans ce formulaire
d'information.
• L'appareil ne doit pas être exposé à de l'eau qui s'égoutte ou aux
éclaboussures et ne doit porter aucun objet rempli de liquide tel que
des vases.
• Pour déconnecter complètement l'alimentation électrique, débranchez
la che secteur de l'appareil, car il s'agit du dispositif de déconnexion
du secteur.
• La che secteur de l'appareil ne doit pas être recouverte ET doit
être facilement accessible lorsqu'elle est utilisée conformément aux
instructions.
• La pile ne doit pas être exposée à une chaleur excessive telle que
l'ensoleillement, le feu ou similaires.
• Une pression sonore excessive des écouteurs ou du casque peut
entraîner une perte d'audition. Laissez une distance minimale (8 cm)
autour de l’appareil pour assurer une ventilation adéquate.
• La ventilation ne doit pas être obstruée en bloquant l’ouverture de
ventilation avec des objets tels que des journaux, des nappes, des
rideaux, etc.
• Il ne doit y avoir aucune amme nue telle qu'une bougie allumée sur
l'appareil.
• Les aspects environnementaux de la mise au rebut des piles doivent
être pris en compte.
• L'appareil doit être utilisé dans les climats tempérés.
• Risque d'explosion en cas de remplacement incorrect de la pile.
• Remplacez les piles avec un type identique ou équivalent uniquement.
• La che principale doit rester facilement accessible.
• La ventilation ne doit pas être obstruée en recouvrant l’ouverture de
ventilation avec des objets tels que des journaux, des nappes, des
rideaux, etc.
• Il ne doit y avoir aucune amme nue telle qu'une bougie allumée sur
l'appareil.
• Les aspects environnementaux de la mise au rebut des piles doivent
être pris en compte.
• L'appareil est adapté pour une utilisation dans les climats tempérés.
• Risque d'explosion en cas de remplacement incorrect de la pile.
Remplacez les piles par le même type ou un type équivalent
uniquement.
• La che d'alimentation doit rester facilement accessible.
41
FR
APERÇU DE L'APPAREIL
1 Couvercle de protection
2 Mécanisme du couvercle
3 Platine
4 Enceinte
5 Bras de lecture
6 Pied en bois

42
FR
Avant
Arrière
7 PORT USB
8 AUX-IN
9 PRISE CASQUE 3.5mm
10 TOUCHE DE FONCTION (DAB/
FM/CD/USB/PHONO/TAPE/
AUX)
11 CAPTEUR TÉLÉCOMMANDE
12 LECTEUR CD
13 PLAYE/PAUSE
14 TOUCHE STOP
15 DN/F-R
16 UP/F-F-F
17 REC/DEL (ENREGISTREMENT /
EFFACER)
18 OUVERTURE/FERMETURE DU
LECTEUR CD
19 VOLUME / VEILLE
20 VOYANT DE MARCHE LED
21 TOUCHE DE MENU DAB
22 TOUCHE INFO DAB
23 TOUCHE SCAN DAB
24 TOUCHE DE PRÉRÉGLAGE DAB
25 ENTRÉE DAB
26 ÉCRAN LCD
27 TOUCHE TUNING /MODE PLAY
28 ANTENNE FM/DAB
29 CÂBLE AC
30 BOUTON DE MARCHE/ARRÊT

43
FR
Platine
31 Adaptateur
32 Mise en pause de la platine
33 Support de bras de lecture
34 Autostop marche/arrêt
35 Sélecteur de vitesse de rotation 33/45/78 T/min
36 Bras de lecture
37 Platine
38 Line out

44
FR
TÉLÉCOMMANDE
1 Marche/arrêt
2 Ouverture/ fermeture du lecteur
CD
3 Enregistrement
4 Eacer
5 Mode
6 Stop
7 Répétition/Volume +
8 Programme/ Volume -
9 Lecture/Pause
10 Scan DAB
11 Info
12 Titre précédent /retour rapide
13 Titre suivant /avance rapide
14 Clavier
15 +10
16 Entrée
17 Menu
18 EQ
19 Paramètres
20 Minuterie

45
FR
Installation des piles dans la télécommande
La télécommande infrarouge nécessite 2 piles UM-4 R03, AAA (3V). Les
piles ne sont pas fournies.
Pour allumer/éteindre
1. Appuyez sur POWER pour allumer le système. Le voyant d'alimentation
s'allume.
2. Appuyez sur les touches de sélection de fonctions (DAB / FM / CD / USB
/ TAPE / PHONO / AUX IN) pour sélectionner la fonction souhaitée.
3. Réglez le volume en utilisant le bouton de volume.
4. Une fois terminé, appuyez à nouveau sur la touche POWER pour
éteindre le système. Le voyant d'alimentation s'éteint.
Remarque : L'appareil étant conforme à la norme ERP2, l'appareil passe en
mode veille s'il ne fonctionne plus dans les 15 minutes. Appuyez deux fois
sur la touche d'alimentation pour redémarrer l'appareil.

46
FR
MISE EN MARCHE
• Retirez délicatement l‘appareil de sa boîte et retirez tout le matériel
d‘emballage.
• Déroulez entièrement le cordon d‘alimentation.
• Déroulez le l de l‘antenne FM sur toute sa longueur.
• Soulevez le couvercle pour découvrir la platine. La platine est sécurisée
pour l‘expédition avec une vis de transport.
• Retirez le l torsadé qui a été xé au bras de lecture pour le transport.
• Retirez le capuchon transparent de l‘aiguille de la tête de lecture en le
déplaçant dans le sens de la èche.
• Faites attention pendant la manœuvre, car les dommages causés à
l‘aiguille ne sont pas couverts par la garantie.
• Retirez la bande utilisée pour xer le bras de lecture pendant le
transport.
• Relâchez le levier de verrouillage sur le bras de lecture.
Vis de transport
Protection de
l'aiguille
Levier du bras
de lecture

47
FR
RADIO DAB
Appuyez plusieurs fois sur la touche de fonction (10) (5 sur la
télécommande) pour sélectionner le mode DAB. Appuyez sur SKIP +/-
(16/15) (12/13 sur la télécommande) pour rechercher le programme.
Menu DAB
Appuyez sur MENU (21) (17 sur la télécommande) pour accéder aux options.
1. Scan complet : sélectionnez cette option pour eectuer un scan complet
des programmes DAB disponibles. Vous pouvez appuyer sur SCAN (23)
pour eectuer la même action.
2. Tuner manuel : sélectionnez cette option pour sélectionner
manuellement la fréquence DAB.
3. DRC : sélectionnez cette option pour basculer entre DRC bas, DRC haut
et DRC désactivé.
4. Suppression : sélectionnez cette option pour activer ou désactiver la
ltration des stations.
Mémorisation des stations DAB
Vous pouvez mettre en mémoire 20 stations favorites au maximum.
1. Appuyez sur PRESET (24) (19 sur la télécommande) et maintenez la
touche. PRESET STORE apparaît à l'écran. Appuyez sur SKIP +/- (16/15)
(12/13 sur la télécommande) pour sélectionner le numéro de préréglage.
Appuyez sur ENTER (9) (16 sur la télécommande) pour conrmer.
2. Appuyez sur PRESET (24) (19 sur la télécommande) pour parcourir les
préréglages.
Info DAB
Appuyez plusieurs fois sur INFO (22) (18 sur la télécommande) pour aicher
les informations suivantes : NOM / KBPS / DATE / HEURE.
48
FR
RADIO FM
Appuyez plusieurs fois sur la touche de fonction (10) (5 sur la
télécommande) pour sélectionner le mode FM. Tournez le bouton de
réglage (27) pour sélectionner manuellement la fréquence.
Menu FM
Appuyez sur MENU (21) (touche 17 de la télécommande) pour accéder aux
options.
1. Réglage du scan : Sélectionnez cette option pour choisir entre le scan de
toutes les stations ou seulement des stations puissantes.
2. Réglage audio : Sélectionnez cette option pour choisir entre forcer
l'audio mono ou activer le son stéréo.
Mémorisation des stations FM
Voir les indications pour les favoris DAB.
Info FM
Appuyez plusieurs fois sur INFO (22) (18 sur la télécommande) pour aicher
les informations suivantes : TYPE DE PROGRAMME / FRÉQUENCE / AUDIO
/ DATE / HEURE.
UTILISATION DU CD
1. Appuyez sur la touche CD / USB pour passer en mode CD. Les icônes
"---" et "DISC" apparaissent à l’écran. L'appareil peut lire les disques CD,
CD-R et CD-RW.
2. Appuyez sur la touche OP / CL en haut pour ouvrir le lecteur CD.
49
FR
LECTURE DE DISQUES VINYLES
Le système comprend une platine complète à trois vitesses à entraînement
par courroie. Vous pouvez lire les disques en 33, 45 et 78 tours.
1. Appuyez sur POWER pour allumer l'appareil.
2. Appuyez sur la touche PHONO pour entrer en mode PHONO.
3. Assurez-vous de retirer le capuchon de l'aiguille et libérez le verrou du
bras de lecture qui le retient au repose-bras.
4. Réglez le sélecteur de vitesse de la platine à la vitesse appropriée de 33,
45 ou 78 tr/min. Si vous lisez des disques 45 tours, placez l’adaptateur à
45 tours / minute sur l'axe central.
5. Placez votre disque sur l'axe central.
6. Soulevez le levier pour soulever le bras de lecture de son support.
Déplacez le bras de lecture jusqu'au bord du disque. La platine démarre
automatiquement. Utilisez le levier pour abaisser doucement le bras de
lecture sur le disque.
7. Ajustez le volume au niveau souhaité.
8. Lorsque le bras de lecture atteint la n de l’enregistrement, il revient
automatiquement sur son support et la platine s’arrête.
9. Appuyez de nouveau sur POWER pour éteindre le système. Le voyant
POWER s'éteint.
Remarque : Ne tournez pas et n'arrêtez pas le plateau tournant
manuellement. Déplacer la platine ou la secouer sans avoir bloqué le bras
de lecture peut endommager ce dernier.
3. Placez le CD avec l'étiquette vers le haut dans le lecteur CD.
4. Appuyez à nouveau sur la touche OP / CL pour fermer le lecteur CD. La
lecture commence automatiquement à partir du premier titre.
5. L'icône MP3 s'aiche lorsqu'un chier MP3 est détecté sur le CD.

50
FR
UTILISATION DE "AUX-IN"
Branchez le système audio à la prise AUX IN arrière et appuyez sur la touche
PHONO / AUX IN. Lancez la lecture à partir de l'appareil connecté.
UTILISATION DE L'USB
1. Tout d’abord, appuyez sur la touche CD / USB et sur la touche
FUNCTION pour passer en mode USB. Le symbole "---" et le symbole
USB s'aichent.
2. Branchez un périphérique ash USB sur le port USB.
3. Les fonctions PLAY / PAUSE, DN / UP et Stop sont identiques aux
fonctions CD.
Remarque : Vous pouvez appuyer sur la touche FUNCTION du panneau de
commande ou appuyer sur la touche PLAY / PAUSE de la télécommande
pendant 2 secondes pour basculer entre les modes de lecture CD et USB.
Lecture en mode MP3
1. Appuyez sur la touche PLAY / PAUSE pour démarrer ou arrêter la lecture
du titre sélectionné.
2. Pendant la lecture du titre, les numéros de titre et de dossier du titre
sélectionné sont aichés.
3. Vous pouvez arrêter la lecture à tout moment en appuyant sur la touche
STOP.
Pendant la lecture d'un CD/par USB, appuyez plusieurs fois sur les touches
/ à l'avant de l'appareil ou sur la télécommande pour changer de
titre. Pour avancer ou reculer rapidement à l'intérieur d'un titre, maintenez
UP/F.F. (appuyez sur la touche / pour avancer ou reculer de 10 titres, ou
appuyez sur TRACK-10 ou TRACK+10 sur la télécommande.

51
FR
ENREGISTREMENT SUR USB
1. Enregistrement de CD
Insérez la clé USB dans le port USB. Appuyez ensuite sur la touche CD /
USB. Insérez le CD dans le lecteur CD et lisez le titre que vous souhaitez
enregistrer. Appuyez deux fois sur la touche RECORD pour commencer
l’enregistrement. Lorsque tout le CD est lu, tous les titres sont enregistrés.
REMARQUE : l’enregistrement échouera si vous appuyez sur la touche STOP
pendant l’enregistrement.
2. Enregistrement d'un CD MP3
Insérez la clé USB dans la prise USB. Appuyez ensuite sur la touche CD /
USB. Insérez un CD contenant des chiers MP3 dans le lecteur CD et lisez
le titre MP3 à enregistrer. Appuyez deux fois sur la touche RECORD pour
commencer l’enregistrement. Lorsque tous les chiers MP3 sont lus, tous
les titres sont enregistrés. REMARQUE : l'enregistrement échouera si vous
appuyez sur la touche STOP pendant l'enregistrement.
3. Enregistrement d'un disque vinyle
Insérez la clé USB dans la prise USB. Appuyez ensuite sur la touche PHONO
/ AUX IN. Jouez l'enregistrement et appuyez deux fois sur la touche RECORD
pour commencer l'enregistrement. Appuyez sur la touche STOP pour arrêter
l'enregistrement.
4. Enregistrement par AUX IN
Insérez la clé USB dans la prise USB. Connectez le périphérique audio
externe à la prise AUX arrière. Appuyez ensuite sur la touche PHONO / AUX
IN pour lire le son et appuyez deux fois sur la touche RECORD pour lancer
l’enregistrement.
Pour eacer des titres sur un support USB
Appuyez sur la touche CD / USB du panneau avant ou appuyez longuement
sur la touche PLAY / PAUSE de la télécommande pour sélectionner le mode
USB. Sélectionnez le titre et appuyez sur Supprimer pendant 2 secondes
pour supprimer le titre.
UTILISATION DE BT
Allumez l’appareil et appuyez sur FUNCTION pour choisir la fonction BT.
Recherchez le périphérique BT portant l’ID "Auna Belle" et connectez-vous
à celui-ci.

52
FR
CONSEILS POUR LE RECYCLAGE
S‘il existe une réglementation pour l‘élimination ou le
recyclage des appareils électriques et électroniques
dans votre pays, ce symbole sur le produit ou sur
l‘emballage indique que cet appareil ne doit pas
être jeté avec les ordures ménagères. Vous devez le
déposer dans un point de collecte pour le recyclage
des équipements électriques et électroniques.
La mise au rebut conforme aux règles protège
l‘environnement et la santé de vos semblables des
conséquences négatives. Pour plus d‘informations
sur le recyclage et l‘élimination de ce produit, veuillez
contacter votre autorité locale ou votre service de
recyclage des déchets ménagers.
Ce produit contient des piles. S‘il existe une
réglementation pour l‘élimination ou le recyclage
des piles dans votre pays, vous ne devez pas les
jeter avec les ordures ménagères. Renseignez-vous
sur les dispositions locales relatives à la collecte
des piles usagées. La mise au rebut conforme aux
règles protège l‘environnement et la santé de vos
semblables des conséquences négatives.
DÉCLARATION DE CONFORMITÉ
Fabricant :
Chal-Tec GmbH, Wallstraße 16, 10179 Berlin,
Allemagne.
Importateur pour la Grande Bretagne :
Berlin Brands Group UK Limited
PO Box 42
272 Kensington High Street
London, W8 6ND
United Kingdom
Le soussigné, Chal-Tec GmbH, déclare que
l’équipement radioélectrique du type Belle Epoque
1912 est conforme à la directive 2014/53/UE. Le
texte complet de la déclaration UE de conformité
est disponible à l’adresse internet suivante : use.
berlin/10034402

53
ES
ÍNDICE
Datos técnicos 53
Instrucciones de seguridad 55
Vista general del aparato 57
Mando a distancia 60
Puesta en marcha 62
Radio dab 63
Radio fm 64
Modo cd 64
Reproducir discos 65
Modo aux-in 66
Funcionamiento usb 66
Grabación usb 67
Modo bt 67
Indicaciones sobre la retirada del aparato 68
Declaración de conformidad 68
DATOS TÉCNICOS
Número de artículo 10034402
Alimentación eléctrica 230 V~ 50/60 Hz
Potencia RMS 2x,.5W
Velocidad de reproducción 33/45/78 RPM (tamaño del
disco 17,5/25/30 cm)
Formatos de CD reproducibles CD/CD-R/CD-RW/MP3
Formatos de archivo reproducibles
desde USB
MP3
Estimado cliente,
Le felicitamos por la adquisición de este produc-
to. Lea atentamente el siguiente manual y siga
cuidadosamente las instrucciones de uso con el
n de evitar posibles daños. La empresa no se
responsabiliza de los daños ocasionados por un
uso indebido del producto o por haber desaten-
dido las indicaciones de seguridad. Escanee el
siguiente código QR para obtener acceso a la úl-
tima guía del usuario y más información sobre el
producto.
54
ES
ATENCIÓN
ATENCIÓN: NO ABRA LA CARCASA PARA EVITAR DESCARGAS ELÉCTRICAS Y LESIONES
GRAVES. EN EL INTERIOR NO HAY COMPONENTES A MANTENER POR EL CLIENTE.
PÓNGASE EN CONTACTO ÚNICAMENTE CON ESPECIALISTAS CUALIFICADOS.
ADVERTENCIA. PARA REDUCIR EL RIESGO DE INCENDIO O DESCARGA ELÉCTRICA, NO
EXPONGA EL APARATO AL AGUA, LA LLUVIA O LA HUMEDAD.
El triángulo con el rayo: Voltaje peligroso: El símbolo de relámpago
con punta de echa dentro de un triángulo equilátero tiene por
objeto alertar al usuario de la presencia de un voltaje peligroso no
aislado dentro de la carcasa del producto que puede ser de magnitud
suciente para constituir un riesgo de descarga eléctrica para las
personas.
El triángulo con el signo de exclamación: PRECAUCIÓN: El signo de
exclamación dentro del triángulo equilátero tiene por objeto alertar al
usuario de la presencia de instrucciones importantes de operación y
mantenimiento en la literatura que acompaña a este producto.

55
ES
INSTRUCCIONES DE SEGURIDAD
• Lea las instrucciones. Todas las instrucciones de uso deben ser leídas
antes de usar la unidad.
• Conserve el manual de instrucciones para futuras consultas.
• Deben observarse las directrices de atención, uso y seguridad.
• El dispositivo no debe ser utilizado cerca del agua o expuesto a la
humedad.
• Asegúrese de que no entre líquido por las aberturas del equipo.
• Mueva el dispositivo con cuidado y evite los golpes.
• No bloquee el fallo de las salidas del dispositivo.
• No coloque el aparato cerca de una fuente de calor (por ejemplo, un
radiador). No lo exponga al sol.
• Conecte la unidad como se describe en este manual.
• Este dispositivo está conectado a una protección contra sobrecarga. La
sustitución sólo debe ser llevada a cabo por un técnico experto o por el
fabricante del dispositivo.
• Para limpiar el dispositivo, siga las recomendaciones de la nota.
• El cable de alimentación debe desconectarse cuando no se utilice
durante un período de tiempo prolongado.
• El aparato debe ser reparado por una persona cualicada si:
a. el cable de alimentación está dañado.
b. han caído objetos en el aparato o ha penetrado líquido en el
aparato.
c. el producto ha estado expuesto a la lluvia.
d. la unidad no funciona correctamente sin cambios externos
apreciables.
e. el aparato está defectuoso.
• El usuario no debe intentar reparar el equipo más allá de lo que se
describe en este formulario de información.
• No exponga el aparato a goteos o salpicaduras y no coloque objetos
llenos de líquidos, como jarrones, sobre el aparato.
• Para desconectar completamente la fuente de alimentación,
desenchufe el equipo de la toma de corriente, ya que los dispositivos de
desconexión son los enchufes de alimentación del equipo.
• La clavija de alimentación del aparato no debe estar bloqueada O debe
ser fácilmente accesible cuando se utilice según lo previsto.

56
ES
• No exponga la batería a un calor excesivo como el sol, el fuego o
similares.
• La presión sonora excesiva de los auriculares y los audífonos puede
causar pérdida de audición.
• Mantenga una distancia mínima (8 cm) alrededor de la unidad para una
ventilación adecuada.
• No obstruya la ventilación cubriendo la abertura de ventilación con
objetos como periódicos, manteles, cortinas, etc.
• No coloque llamas abiertas, como velas encendidas, sobre el aparato;
• Preste atención a los aspectos medioambientales de la eliminación de
baterías.
• La unidad debe utilizarse en climas templados.
• Peligro de explosión debido a una sustitución incorrecta de la pila.
• Reemplace las pilas sólo con pilas del mismo tipo o de tipo equivalente.
• El enchufe principal debe permanecer fácilmente accesible.
• No obstruya la ventilación cubriendo la abertura de ventilación con
objetos como periódicos, manteles, cortinas, etc.
• No coloque llamas abiertas, como velas encendidas, sobre el aparato.
• Preste atención a los aspectos medioambientales de la eliminación de
baterías.
• El dispositivo es adecuado para su uso en climas templados.
• Peligro de explosión debido a una sustitución incorrecta de la pila.
Sustitúyalo sólo por uno del mismo tipo o equivalente.
• El enchufe de la red debe permanecer fácilmente accesible.

57
ES
VISTA GENERAL DEL APARATO
1 Tapa antipolvo
2 Mecanismo de cobertura
3 Tocadiscos
4 Altoparlantes
5 Brazo de tono
6 Pata de palo

58
ES
Parte delantera
Parte trasera
7 PUERTA USB
8 AUX-IN
9 Toma de auriculares de 3,5 mm
10 TECLA DE FUNCIÓN (DAB/FM/
CD/USB/PHONO/TAPE/AUX)
11 SENSOR REMOTO
12 BANDEJA PARA CD
13 REPRODUCIR / PAUSA
14 BOTÓN DE PARADA
15 DN/F-R
16 UP/F-F-F
17 REC/DEL (TECLA DE GRABAR/
ELIMINAR)
18 BOTÓN ABRIR/CERRAR
BANDEJA DE CD
19 CONTROL DE VOLUMEN/
20 LED DE ALIMENTACIÓN
21 BOTÓN DEL MENÚ DAB
22 BOTÓN DE INFORMACIÓN DAB
23 BOTÓN DE ESCANEO DAB
24 BOTÓN DE PREAJUSTE DE DAB
25 ENTRADA DAB
26 PANTALLA LCD
27 TECLA DE SINTONÍA/MODO DE
REPRODUCCIÓN
28 SISTEMA DE ANTENAS FM/DAB
29 CABLE DE CA
30 INTERRUPTOR DE
ENCENDIDO/APAGADO
59
ES
Tocadiscos
31 Adaptador
32 Interruptor de pausa del tocadiscos
33 Soporte del cartucho
34 Auto stop encendido/apagado
35 Interruptor de selector de velocidad 33/45/78 rpm
36 Brazo de tono
37 Giradiscos
38 Línea de salida

60
ES
MANDO A DISTANCIA
1 Encender/apagar
2 Abrir/cerrar la bandeja para CD
3 Grabar
4 Borrar
5 Modo
6 Parar
7 Repetir/ Volumen+
8 Programa / Volumen
9 Reproducir/Pausar
10 Escaneo DAB
11 Información
12 Vuelta atrás/rebobinar el título
13 Título adelante/avance rápido
14 Teclado
15 +10
16 Entrar
17 Menú
18 EQ
19 Ajustes
20 Cronómetro

61
ES
Insertar las pilas en el mando a distancia
El mando a distancia por infrarrojos requiere 2 pilas UM-4 R03, AAA (3V).
Las pilas no están incluidas.
Encendido/apagado
1. Pulse POWER para encender el sistema. Se enciende el indicador de
encendido.
2. Pulse los botones de función (DAB/FM/CD/USB/TAPE/PHONO/AUX IN)
para seleccionar la función deseada.
3. Comience a ajustar el volumen utilizando el control de volumen.
4. Cuando termine, pulse el botón POWER de nuevo para apagar el
sistema. El indicador de encendido se apaga.
Nota: El dispositivo cumple con el estándar ERP2, el dispositivo cambia al
modo de espera si el dispositivo no es operado en 15 minutos. Por favor,
pulse el botón POWER dos veces para reiniciar la unidad.
62
ES
PUESTA EN MARCHA
• Retire cuidadosamente la unidad de la caja y de todo el material de
embalaje.
• Desenrolle el cable de alimentación y desenchúfelo en toda su longitud.
• Desenrolle el cable de la antena de FM y tire de él en toda su longitud.
• Retire el cable trenzado que estaba unido al brazo de tono para el
transporte.
• Retire la cubierta transparente de la aguja de la cabeza del sonido
moviéndola en la dirección de la echa.
• Por favor, preste atención a la aguja durante la operación, ya que el
daño a la aguja no está cubierto por la garantía.
• Retire la cinta transportadora utilizada para asegurar la tóner para el
envío.
• Suelte la palanca de bloqueo del brazo de tono.
tornillo de
transporte
portaagujas
soporte del
brazo de tono

63
ES
RADIO DAB
Pulse repetidamente el botón de función (10) (5 en el mando a distancia)
para seleccionar el modo DAB. Pulse SKIP+/- (16/15) (12/13 en el mando a
distancia) para encontrar el programa.
Menú DAB
Pulse MENU (21) (17 en el mando a distancia) para acceder a las opciones.
1. Escaneo completo: Seleccione esta opción para realizar un escaneo
completo de los programas DAB disponibles. Puede pulsar SCAN (23)
para realizar la misma acción.
2. Sintonización manual: Seleccione esta opción para seleccionar
manualmente la frecuencia DAB.
3. DRC: Seleccione esta opción para seleccionar entre DRC Low, DRC High
y DRC O.
4. Prune: Seleccione esta opción para activar o desactivar la limpieza de la
estación.
Guardar el transmisor DAB
Puede almacenar hasta 20 emisoras de radio preestablecidas.
1. Pulse y mantenga pulsado PRESET (24) (19 en el mando a distancia).
En el display aparece PRESET STORE. Pulse SKIP+/- (16/15) (12/13 en
el mando a distancia) para seleccionar el número de preajuste. Pulse
ENTER (9) (16 en el mando a distancia) para conrmar.
2. Pulse PRESET (24) (19 en el mando a distancia) para navegar por los
presets.
Información DAB
Pulse INFO (22) (18 en el mando a distancia) repetidamente para visualizar
la siguiente información: NOMBRE / KBPS / FECHA / HORA.

64
ES
RADIO FM
Pulse repetidamente el botón de función (10) (5 en el mando a distancia)
para seleccionar el modo FM. Gire el botón de control (27) para seleccionar
la frecuencia manualmente.
Menú FM
Pulse MENU (21) (Botón 17 del mando a distancia) para acceder a las
opciones.
1. Conguración de escaneo: Seleccione esta opción para elegir entre
escanear todas las estaciones o sólo las estaciones fuertes.
2. Ajuste de audio: Seleccione esta opción para elegir entre forzar el audio
mono o activar el sonido estéreo.
Guardar emisoras FM
Consulte las instrucciones de PRESET DAB.
Información FM
Pulse INFO (22) (18 en el mando a distancia) repetidamente para visualizar
la siguiente información: TIPO DE PROGRAMA / FRECUENCIA / AUDIO /
FECHA / HORA.
MODO CD
1. Pulse el botón CD/USB para entrar en el modo CD, el icono "---" y el
icono "DISC" aparecerán en la pantalla. La unidad puede reproducir CD,
CD-R y CD-RW.
2. Pulse el botón OP/CL en la parte superior para abrir el compartimento

65
ES
REPRODUCIR DISCOS
El sistema incluye una plataforma giratoria de tres etapas con transmisión
por correa. Puede reproducir discos de 33, 45 y 78 rpm.
1. Pulse POWER para encender la unidad.
2. Pulse el botón PHONO para entrar en el modo PHONO.
3. Asegúrese de haber quitado la cubierta de la aguja de la aguja y aojado
el bloqueo del brazo de tono que une el brazo de tono al soporte del
brazo de tono.
4. Ajuste el selector de velocidad de la plataforma giratoria a la velocidad
adecuada de 33, 45 ó 78 rpm. Cuando reproduzca discos de 45 rpm,
coloque el adaptador de 45 rpm en el eje central.
5. Coloque su registro en el eje central.
6. Levante la palanca del taco para levantar el brazo tóner de su soporte.
Mueva el antebrazo al borde del registro. La plataforma giratoria
se iniciará automáticamente. Utilice la palanca de taco para bajar
suavemente el tono en el registro.
7. Ajuste el control de volumen al nivel deseado.
8. Cuando el tono llega al nal de la grabación, regresa automáticamente
al reposabrazos y la plataforma giratoria se detiene.
9. Pulse POWER de nuevo para apagar el sistema. El El indicador POWER
se apaga.
Nota: No gire ni detenga la plataforma giratoria manualmente. Mover o
sacudir el tocadiscos sin jar el soporte del brazo de tono puede dañar el
mismo.
para CD.
3. Coloque el CD en la bandeja de CD con la cara de la etiqueta hacia
arriba.
4. Pulse el botón OP/CL de nuevo para cerrar la bandeja de CD. La
reproducción se inicia automáticamente desde el primer tema.
5. El icono MP3 aparece cuando se detecta un archivo MP3 en el disco.
66
ES
MODO AUX-IN
Conecte el sistema de audio a la toma AUX IN del panel trasero y pulse
el botón PHONO/AUX IN. Inicie la reproducción desde el dispositivo
conectado.
FUNCIONAMIENTO USB
1. Primero pulse el botón CD/USB y el botón FUNCTIONS para entrar en el
modo USB. Aparecerán el icono "--" y el icono USB.
2. Inserte un dispositivo ash USB en el puerto USB.
3. Las funciones PLAY/PAUSE, DN/UP y Stop son idénticas a las funciones
del CD.
Nota: Puede pulsar el botón FUNCTION del panel de control o mantener
pulsado el botón PLAY/PAUSE del mando a distancia durante 2 segundos
para cambiar el modo de reproducción entre CD y USB.
Reproducción en el modo MP3
1. Pulse la tecla PLAY/PAUSE para iniciar o pausar la reproducción de la
pista seleccionada.
2. Durante la reproducción de la canción, se mostrará el número de
canción y carpeta de la pista seleccionada.
3. Puede detener la reproducción en cualquier momento pulsando el botón
STOP.
Durante la reproducción de CD/USB, pulse el botón / en el panel
frontal o en el mando a distancia repetidamente para cambiar de canción.
Para buscar rápidamente hacia adelante o hacia atrás en una pista,
mantenga pulsado el botón UP/F.F. (pulse el botón / para saltar 10
pistas hacia delante o hacia atrás y, a continuación, pulse TRACK 10 o
TRACK+10 en el mando a distancia).

67
ES
GRABACIÓN USB
1. Grabación CD
Inserte el lápiz USB en la toma USB. A continuación, pulse el botón CD/
USB. Inserte el CD en el compartimento para CD y reproduzca la canción
que desea grabar. Pulse el botón RECORD dos veces para iniciar la
grabación. Cuando se reproduce todo el CD, se graban todas las canciones.
NOTA: La grabación fallará si presiona el botón STOP durante la grabación
2. Grabación Disco-MP3
Inserte el lápiz USB en la toma USB. A continuación, pulse el botón
CD/USB. Inserte el CD con datos MP3 en el compartimento para CD y
reproduzca la canción que desea grabar. Pulse el botón RECORD dos veces
para iniciar la grabación. Cuando se reproducen todos los archivos MP3, se
graban todas las canciones. NOTA: La grabación fallará si presiona el botón
STOP durante la grabación.
3. Grabación de disco
Inserte el lápiz USB en la toma USB. A continuación, pulse el botón
PHONO/AUX IN. Reproduzca la grabación y pulse el botón RECORD
dos veces para iniciar la grabación. Pulse el botón STOP para detener la
grabación.
4. Grabación AUX IN
Inserte el lápiz USB en la toma USB. Conecte el dispositivo de audio
externo a la toma AUX del panel trasero. A continuación, pulse el botón
PHONO/AUX IN y reproduzca el audio y pulse dos veces el botón RECORD
para iniciar la grabación.
Para eliminar títulos de un medio USB
Pulse el botón CD / USB del panel frontal o mantenga pulsado el botón
PLAY / PAUSE del mando a distancia para seleccionar el modo USB.
Seleccione el título y mantenga presionada la tecla Suprimir durante 2
segundos para eliminar el título.
MODO BT
Encienda el equipo y pulse FUNCTION para seleccionar la función BT.
Busque el dispositivo BT con el ID "Auna Belle" y establezca una conexión.

68
ES
RETIRADA DEL APARATO
Si en su país existe una disposición legal relativa a
la eliminación de aparatos eléctricos y electrónicos,
este símbolo estampado en el producto o en
el embalaje advierte que no debe eliminarse
como residuo doméstico. En lugar de ello, debe
depositarse en un punto de recogida de reciclaje
de aparatos eléctricos y electrónicos. Una gestión
adecuada de estos residuos previene consecuencias
potencialmente negativas para el medio ambiente
y la salud de las personas. Puede consultar más
información sobre el reciclaje y la eliminación de este
producto contactando con su administración local o
con su servicio de recogida de residuos.
Este producto contiene baterías. Si en su país existe
una disposición legal relativa a la eliminación de
baterías, estas no deben eliminarse como residuo
doméstico. Infórmese sobre la normativa vigente
relacionada con la eliminación de baterías. Una
gestión adecuada de estos residuos previene
consecuencias potencialmente negativas para el
medio ambiente y la salud de las personas.
DECLARACIÓN DE CONFORMIDAD
Fabricante:
Chal-Tec GmbH, Wallstraße 16, 10179 Berlín, Alemania.
Importador para Gran Bretaña:
Berlin Brands Group UK Limited
PO Box 42
272 Kensington High Street
London, W8 6ND
United Kingdom
Por la presente, Chal-Tec GmbH declara que el tipo de
equipo radioeléctrico Belle Epoque 1912 es conforme
con la Directiva 2014/53/UE. El texto completo de la
declaración UE de conformidad está disponible en la
dirección Internet siguiente: use.berlin/10034402
69
IT
INDICE
Dati tecnici 69
Avvertenze di sicurezza 71
Descrizione del dispositivo 73
Telecomando 76
Messa in funzione 78
Radio dab 79
Radio fm 80
Cd 80
Riproduzione di vinili 81
Aux-in 82
Usb 82
Registrazione usb 83
Bt 83
Avviso di smaltimento 84
Dichiarazione di conformità 84
DATI TECNICI
Numero articolo 10034402
Alimentazione 230 V~ 50/60 Hz
Potenza RMS 2x,.5W
Velocità di riproduzione 33/45/78 RPN (dimensioni
dischi 17,5/25/30 cm)
Formati CD riproducibili CD/CD-R/CD-RW/MP3
Formati le riproducibili da USB MP3
Gentile Cliente,
La ringraziamo per aver acquistato il dispositivo.
La preghiamo di leggere attentamente le segu-
enti istruzioni per l’uso e di seguirle per evitare
possibili danni tecnici. Non ci assumiamo alcuna
responsabilità per danni scaturiti da una mancata
osservazione delle avvertenze di sicurezza e da
un uso improprio del dispositivo. Scansionare il
codice QR seguente, per accedere al manuale
d’uso più attuale e per ricevere informazioni sul
prodotto.

70
IT
AVVERTENZA
ATTENZIONE: NON APRIRE L’ALLOGGIAMENTO, IN MODO DA EVITARE
FOLGORAZIONI E SERIE LESIONI. ALL’INTERNO NON CI SONO COMPONENTI
CHE NECESSITANO DELLA MANUTENZIONE DA PARTE DELL’UTENTE. RIVOLGERSI
ESCLUSIVAMENTE A TECNICI QUALIFICATI. AVVERTENZA: PER RIDURRE IL RISCHIO DI
INCENDI E FOLGORAZIONI, NON ESPORRE IL DISPOSITIVO A PIOGGIA, ACQUA O
UMIDITÀ.
Il triangolo con il lampo con la seguente avvertenza: TENSIONE
PERICOLOSA: il simbolo del lampo con la punta a freccia all’interno
del triangolo serve a indicare all’utente la presenza di una tensione
pericolosa non isolata nell’alloggiamento del prodotto, che è di forza
suiciente a rappresentare un pericolo di folgorazione per persone.
Il triangolo con il punto esclamativo e la seguente avvertenza:
ATTENZIONE: il punto esclamativo all’interno del triangolo serve
a indicare all’utente la presenza di importanti indicazioni relative a
utilizzo e manutenzione del dispositivo contenute nel manuale accluso
al prodotto.

71
IT
AVVERTENZE DI SICUREZZA
• Leggere il manuale. Tutte le avvertenze di utilizzo devono essere lette
prima di procedere all’uso del dispositivo.
• Conservare il manuale per future consultazioni.
• Rispettare le direttive relative ad attenzione, utilizzo e sicurezza.
• Il dispositivo non deve essere utilizzato nelle vicinanze d’acqua o
entrare in contatto con umidità.
• Assicurarsi che non niscano liquidi sulle aperture del dispositivo.
• Muovere con cura il dispositivo ed evitare colpi.
• Non bloccare le uscite del dispositivo.
• Non posizionare il dispositivo vicino a fonti di calore (ad es. termosifoni)
o al sole.
• Collegare il dispositivo come descritto nel manuale.
• Questo dispositivo è collegato a una protezione da sovraccarico. La
sostituzione deve essere realizzata solo da un tecnico esperto o dal
produttore del dispositivo.
• Per pulire il dispositivo, rispettare le indicazioni fornite.
• Scollegare il cavo se il dispositivo non viene utilizzato per lunghi
periodi.
• Il dispositivo deve essere riparato da una persona qualicata se:
a. Il cavo di alimentazione è danneggiato.
b. Sono caduti oggetti nel dispositivo o è penetrata umidità al suo
interno.
c. Il dispositivo è stato esposto a pioggia.
d. Il dispositivo non funziona correttamente senza valori nominali di
modiche esterne.
e. Il dispositivo è guasto.
• L’utente non deve cercare di eettuare opere di manutenzione che
trascendono le informazioni fornite in questo manuale.
• Il dispositivo non deve essere esposto a gocce o spruzzi e non è
possibile posizionare sopra al dispositivo oggetti pieni di liquidi, come
ad es. vasi.
• Per scollegare completamente l’alusso di tensione, è necessario
staccare la spina dalla presa elettrica, dato che sono i separatori della
spina del dispositivo.
• La spina del dispositivo non deve essere ostacolata O deve essere

72
IT
facilmente accessibile secondo l’utilizzo corretto.
• La batteria non deve essere esposta a calore eccessivo come sole,
fuoco o simili.
• Una pressione sonora eccessiva di auricolari o cuie può causare la
perdita dell’udito.
• Tenere una distanza minima (8 cm) intorno al dispositivo per garantire
una ventilazione suiciente.
• Non ostacolare la ventilazione. Non coprire le aperture di ventilazione
con oggetti come giornali, tovaglie, tende, ecc.
• Non poggiare amme libere sul dispositivo, come ad es. candele
accese.
• Quando si procede allo smaltimento delle batterie, tenere in
considerazioni gli aspetti ecologici.
• Il dispositivo deve essere utilizzato in zone climatiche temperate.
• Pericolo di esplosione dovuto a un’errata sostituzione della batteria.
• Sostituire le batterie solo con altre della stessa tipologia o equivalenti.
• La spina deve essere facilmente accessibile.

73
IT
DESCRIZIONE DEL DISPOSITIVO
1 Copertura protezione polvere
2 Meccanismo copertura
3 Piatto rotante
4 Altoparlanti
5 Braccio del pickup
6 Gambe in legno
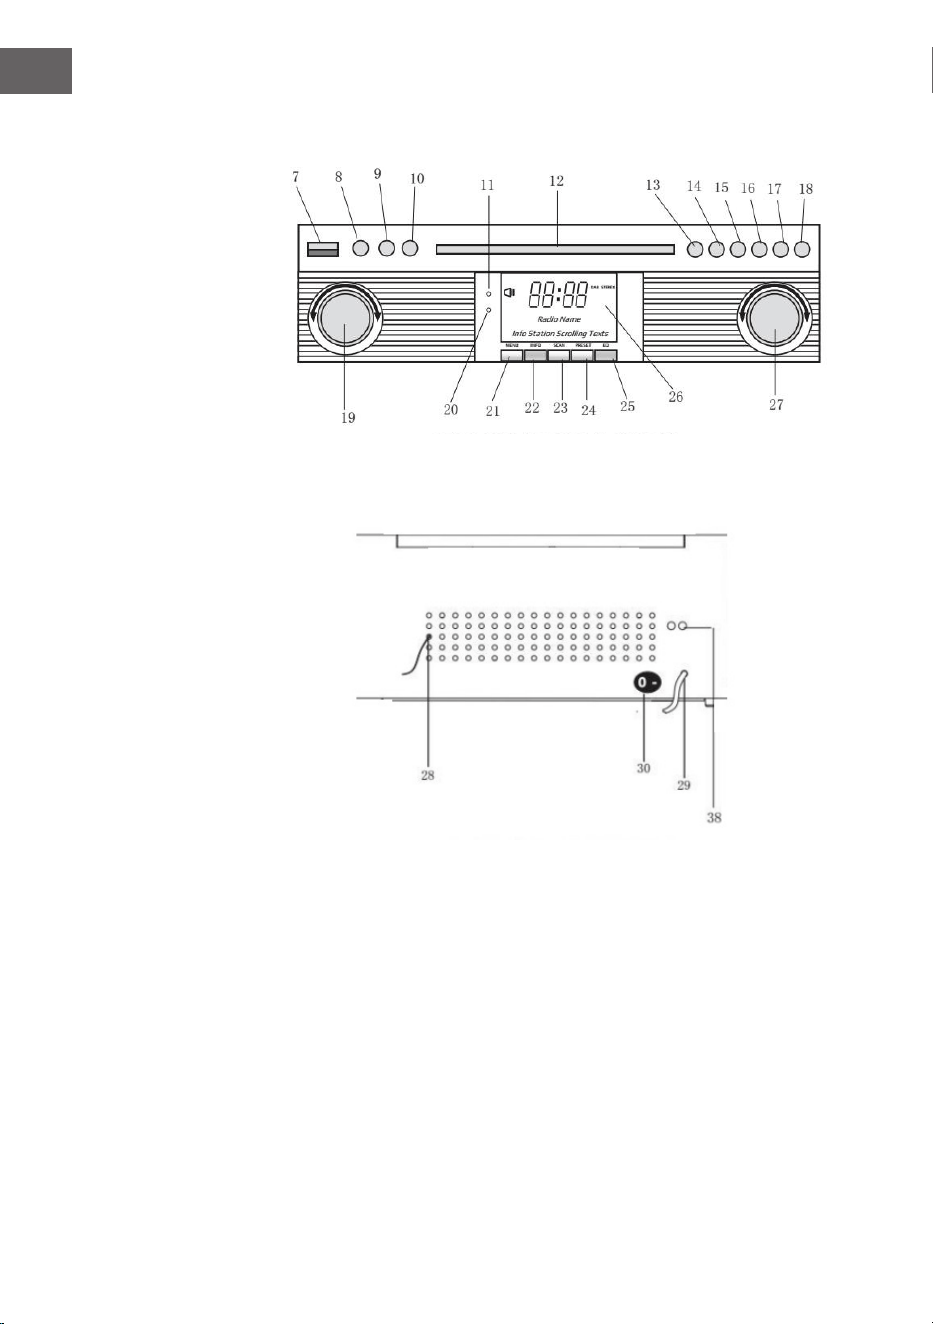
74
IT
Fronte
Retro
7 PRESA USB
8 AUX-IN
9 INGRESSO CUFFIE 3,5 mm
10 TASTO FUNZIONI (DAB/FM/
CD/USB/PHONO/TAPE/AUX)
11 SENSORE TELECOMANDO
12 VANO CD
13 PLAY/PAUSE
14 STOP
15 DN/F-R
16 UP/F-F-F
17 REC/DEL (registrare/cancellare)
18 APRIRE/CHIUDERE VANO CD
19 VOLUME/STANDBY
20 POWER-LED
21 MENU DAB
22 INFO DAB
23 SCAN DAB
24 IMPOSTAZIONI PREDEFINITE
DAB
25 IMMISSIONE DAB
26 SCHERMO LCD
27 TUNING/MODALITÀ PLY
28 ANTENNE FM/DAB
29 CAVO AC
30 ON/OFF

75
IT
Giradischi
31 Adattatore
32 Interruttore per mettere in pausa il piatto
33 Supporto del braccio del pickup
34 Stop automatico on/o
35 Selezione velocità 33/45/78 giri/minuto
36 Braccio del pickup
37 Piatto girevole
38 Line out

76
IT
TELECOMANDO
1 On/O
2 Aprire/Chiudere vano CD
3 Registrare
4 Cancellare
5 Modalità
6 Stop
7 Ripetere/Volume+
8 Programma/Volume-
9 Play/Pausa
10 Scan DAB
11 Info
12 Titolo precedente/Indietro
veloce
13 Titolo successivo/Avanti veloce
14 Pannello tasti
15 +10
16 Inserire
17 Menu
18 EQ
19 Impostazioni
20 Timer

77
IT
Inserire le batterie nel telecomando
Il telecomando a infrarossi funziona con 2 batterie UM-4 R03, AAA (3V). Le
batterie non sono incluse in consegna.
Accendere/Spegnere
1. Premere POWER per accendere il dispositivo. L’indicazione di
funzionamento si illumina.
2. Premere il tasto di selezione delle funzioni (DAB/FM/CD/USB/TAPE/
PHONO/ AUX IN) per scegliere la funzione desiderata.
3. Iniziare a regolare il volume con l’apposita manopola.
4. Finito l’utilizzo, premere di nuovo POWER per spegnere il dispositivo.
L’indicazione di alimentazione si spegne.
Nota: il dispositivo è conforme allo standard ERP2 e passa in standby se
non viene utilizzato entro 15 minuti. Premere due volte POWER per riavviare
il dispositivo.

78
IT
MESSA IN FUNZIONE
• Togliere il dispositivo dalla scatola facendo attenzione e rimuovere
tutto il materiale d’imballaggio.
• Srotolare completamente il cavo di alimentazione.
• Estrarre completamente l’antenna FM in tutta la sua lunghezza.
• Rimuovere il lo attorcigliato che era attaccato al braccio del tono per il
trasporto.
• Togliere la copertura trasparente della puntina, spostandola in
direzione della freccia.
• Durante l’utilizzo, fare attenzione alla puntina, dato che i danni alla
puntina non sono coperti dalla garanzia.
• Togliere il nastro di trasporto utilizzato per ssare il braccio del pickup
durante la spedizione.
• Lasciare andare la leva di ssaggio del braccio del pickup.
Vite di trasporto
Protezione
puntina
Leva del
braccio del
pickup

79
IT
RADIO DAB
Premere ripetutamente il tasto funzioni (10) (5 sul telecomando)
per selezionare la modalità DAB. Premere SKIP+/- (16/15) (12/13 sul
telecomando) per cercare il programma.
Menu DAB
Premere MENU (21) (17 sul telecomando) per accedere alle opzioni.
1. Scansione completa: selezionare questa opzione per realizzare la
scansione completa dei programmi DAB disponibili. Per realizzare la
stessa azione è possibile premere SCAN (23).
2. Sintonizzazione manuale: selezionare questa opzione per selezionare
manualmente la frequenza DAB.
3. DRC: selezionare questa opzione per scegliere tra DRC basso, DRC alto
e DRC o.
4. Prune: selezionare questa opzione per accendere o spegnere la
regolazione delle emittenti.
Salvare emittenti DAB
Possono essere salvate no a 20 emittenti predenite.
1. Tenere premuto PRESET (24) (19 sul telecomando). Sul display compare
PRESET STORE. Premere SKIP+/- (16/15) (12/13 sul telecomando) per
selezionare la posizione di salvataggio. Premere ENTER (9) (16 sul
telecomando) per confermare.
2. Premere PRESET (24) (19 sul telecomando) per navigare tra le
impostazioni predenite.
Info DAB
Premere ripetutamente INFO (22) (18 sul telecomando) per mostrare le
seguenti informazioni: NOME/KBPS/DATA/ORA.

80
IT
RADIO FM
Premere ripetutamente il tasto funzioni (10) (5 sul telecomando) per
selezionare la modalità FM. Ruotare la manopola di regolazione (27) per
selezionare manualmente la frequenza.
Menu FM
Premere MENU (21) (17 sul telecomando) per accedere alle opzioni.
1. Impostazione scansione: selezionare questa opzione per scegliere tra la
scansione di tutte le emittenti o la scansione delle emittenti con segnale
intenso.
2. Impostazione audio: selezionare questa opzione per forzare Mono Audio
o attivare Stereo Sound.
Salvare emittenti FM
V. le istruzioni DAB PRESET.
Info FM
Premere ripetutamente INFO (22) (18 sul telecomando) per mostrare le
seguenti informazioni: TIPO DI PROGRAMMA/FREQUENZA/AUDIO/DATA/
ORA.
CD
1. Premere CD/USB per passare in modalità CD e sullo schermo
compaiono il simbolo “---” e “DISC”. Il dispositivo può riprodurre CD,
CD-R, CD-RW.
2. Premere OP/CL in alto per aprire il vano CD.

81
IT
RIPRODUZIONE DI VINILI
Il dispositivo è dotato di un giradischi di alta qualità, con trazione a cinghia
e tre velocità. Possono essere riprodotti dischi in 33/45/78 giri.
1. Premere POWER per accendere il dispositivo.
2. Premere PHONO per attivare la modalità PHONO.
3. Assicurarsi che la copertura della puntina sia stata rimossa e che il
blocco del braccio del pickup, che ssa il braccio del pickup al supporto,
sia stato disattivato.
4. Selezionare la velocità corrispondente al disco che si desidera ascoltare
(33/45/78 giri). Se si desidera ascoltare un 45 giri, utilizzare l’apposito
adattatore.
5. Posizionare il disco sul piatto.
6. Sollevare la leva in modo che il braccio del pickup si muova dal suo
supporto. Muovere il braccio del pickup verso il bordo del disco e
utilizzare di nuovo la leva per abbassarlo delicatamente sul disco.
7. Impostare il volume.
8. Quando il braccio del pickup raggiunge la ne del disco, torna
automaticamente al supporto e il giradischi si ferma.
9. Premere POWER per spegnere il dispositivo. L’indicazione POWER si
spegne.
Nota: non girare o fermare manualmente il giradischi. Se si sposta o scuote
il giradischi senza aver ssato il braccio del pickup possono risultare
danneggiamenti.
3. Inserire il CD con il lato stampato verso l’alto.
4. Premere di nuovo OP/CL per chiudere il vano. La riproduzione inizia
automaticamente dal primo titolo.
5. Il simbolo MP3 viene mostrato quando vengono rilevati le MP3 sul
disco.
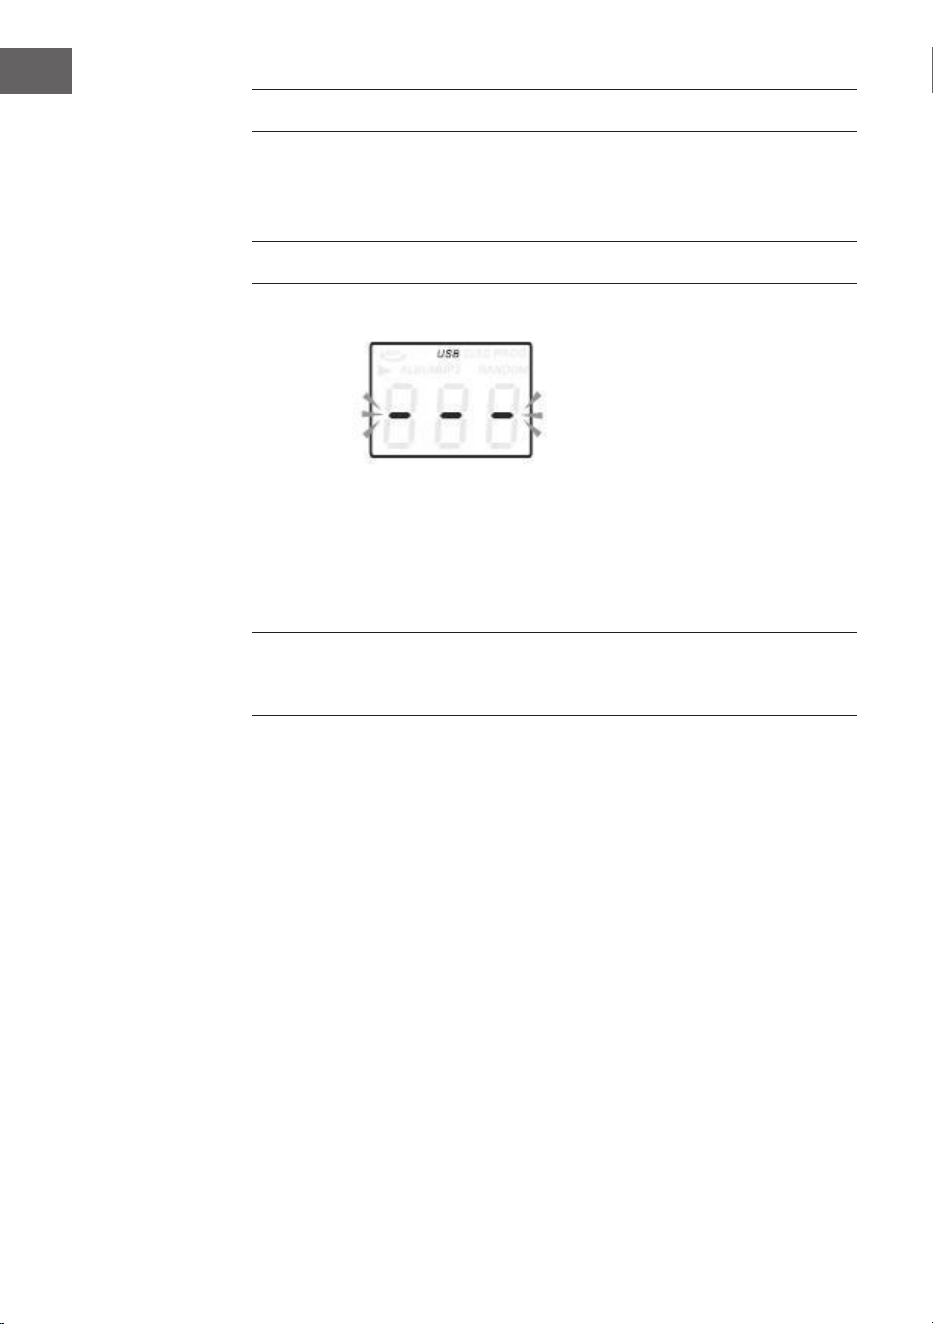
82
IT
AUX-IN
Collegare il dispositivo audio alla connessione AUX-IN sul retro e premere
PHONO/AUX IN. Iniziare la riproduzione dal dispositivo collegato.
USB
1. Premere CD/USB e il tasto funzioni per accedere alla modalità USB.
Compaiono i simboli “---” e USB.
2. Inserire il supporto USB nel relativo ingresso.
3. Le funzioni PLAY/PAUSA, DN/UP e STOP sono identiche alle funzioni CD.
Nota: per passare da modalità di riproduzione CD a USB e viceversa, è
possibile premere FUNZIONE sul pannello di controllo o PLAY/PAUSA sul
telecomando per 2 secondi.
Riproduzione in modalità MP3
1. Premere PLAY/PAUSA per avviare o interrompere la riproduzione del
titolo selezionato.
2. Durante la riproduzione del brano, i numeri di canzone e cartella
selezionate vengono mostrati sul display.
3. Premendo STOP è possibile arrestare la riproduzione in ogni momento.
Durante la riproduzione CD/USB, premere ripetutamente / sul lato
frontale del dispositivo o sul telecomando per cambiare canzone. Per
scorrere velocemente avanti o indietro all’interno di un titolo, tenere
premuto UP/F.F. (premere / per saltare 10 titoli in avanti o indietro e
premere poi TRACK-10 o TRACK+10 sul telecomando.

83
IT
REGISTRAZIONE USB
1. Registrazione CD
Inserire il supporto USB nell’apposito ingresso. Premere CD/USB. Inserire il
CD nel vano e riprodurre il titolo da registrare. Premere due volte RECORD
per avviare la registrazione. Se si riproduce l’intero CD, verranno registrati
tutti i titoli. AVVERTENZA: la registrazione fallisce se si preme STOP durante
la procedura.
2. Registrazione CD-MP3
Inserire il supporto USB nell’apposito ingresso. Premere CD/USB. Inserire
il CD con le MP3 nel vano e riprodurre il titolo MP3 da registrare. Premere
due volte RECORD per avviare la registrazione. Se si riproducono tutti i le
MP3, verranno registrati tutti i titoli. AVVERTENZA: la registrazione fallisce
se si preme STOP durante la procedura.
3. Registrazione di vinili
Inserire il supporto USB nell’apposito ingresso. Premere PHONO/
AUX IN. Riprodurre il vinile e premere due volte RECORD per avviare la
registrazione. Premere STOP per arrestare la registrazione.
4. Registrazione AUX IN
Inserire il supporto USB nell’apposito ingresso. Collegare il dispositivo
esterno alla connessione AUX sul retro. Premere PHONO/AUX IN,
riprodurre i le audio e premere due volte RECORD per avviare la
registrazione.
Cancellare titoli dal supporto USB
Premere CD/USB sul lato frontale o premere a lungo PLAY/PAUSA sul
telecomando per selezionare la modalità USB. Selezionare il titolo e tenere
premuto Cancellare per 2 secondi. Il titolo viene cancellato.
BT
Accendere il dispositivo e premere FUNZIONE per selezionare BT. Cercare il
dispositivo BT con ID “Auna Belle” e realizzare l’accoppiamento.

84
IT
SMALTIMENTO
Se nel proprio paese si applicano le
regolamentazioni inerenti lo smaltimento di
dispositivi elettrici ed elettronici, questo simbolo
sul prodotto o sulla confezione segnala che questi
prodotti non possono essere smaltiti con i riuti
normali e devono essere portati a un punto di
raccolta di dispositivi elettrici ed elettronici. Grazie
al corretto smaltimento dei vecchi dispositivi si
tutela il pianeta e la salute delle persone da possibili
conseguenze negative. Informazioni riguardanti
il riciclo e lo smaltimento di questi prodotti si
ottengono presso l’amministrazione locale oppure il
servizio di gestione dei riuti domestici.
Il prodotto contiene batterie. Se nel proprio
paese si applicano le regolamentazioni inerenti
lo smaltimento di batterie, non possono essere
smaltite con i normali riuti domestici. Preghiamo
di informarvi sulle regolamentazioni vigenti sullo
smaltimento delle batterie. Grazie al corretto
smaltimento dei vecchi dispositivi si tutela l’ambiente
e la salute delle persone da conseguenze negative.
DICHIARAZIONE DI CONFORMITÀ
Produttore:
Chal-Tec GmbH, Wallstraße 16, 10179 Berlino,
Germania.
Importatore per la Gran Bretagna:
Berlin Brands Group UK Limited
PO Box 42
272 Kensington High Street
London, W8 6ND
United Kingdom
Il fabbricante, Chal-Tec GmbH, dichiara che il tipo di
apparecchiatura radio Belle Epoque 1912 è conforme
alla direttiva 2014/53/UE. Il testo completo della
dichiarazione di conformità UE è disponibile al
seguente indirizzo Internet: use.berlin/10034402