
Portable Air Fryer
USER MANUAL
THANK YOU
for choosing our PORTABLE AIR FRYER as your life partner!
MODEL NO.: AF7026
ITEM NO.: K8126-GREY
MODEL NO.: K8126-GREY

IMPORTANT SAFETY INSTRUCTIONS ················ 1
················ 3
GETTING TO KNOW YOUR AIR FRYER
························· 5
BEFORE FIRST USE
······················· 5
USING YOUR AIR FRYER
····················· 7
HELPFUL TIPS OF COOKING
····················· 8CLEANING YOUR AIR FRYER
························· 9
LIMITED WARRANTY
························· 10TROUBLESHOOTING

1.
Keep the box and packing material for storage.
2.
Do not immerse the cord, plug, or any part of the appliance in water or any other
liquids to avoid electric shock or damage to the fryer.
3.
Keep all the food in the glass container and do not fill the food too full to prevent any
contact from heating elements, which may affect the safe use of the machine or cause
damage.
4.
To prevent food from coming into contact with the heating element and causing injury
or affecting the safe use of the equipment, do not hold food over the edge of the
glassware.
5.
There are some risks associated with cooking with glassware;
(1) Glassware may break due to sudden temperature changes. Make sure to let hot glassware cool
before washing, refrigerating, or freezing it.
(2) Glassware can be broken by falling or hitting hard objects.
(3) Place hot glassware on a rack, heat pad, or dry cloth to cool. Do not place glassware over or
under a flame or other direct heat source, including on the stove, under/on the grill, or in the oven.
(4) Grab the handle of the glassware. Avoid direct contact and handling of hot glassware
without protective heat pads or insulated gloves. Be careful when handling broken glass, as the
pieces can be very sharp and difficult to find. Do not use or repair any glassware that is chipped,
cracked, or badly scratched. Do not drop glassware or hit hard objects or anyone with the
glassware.
6.
Do not cover the air inlet and air outlet when the appliance is operating.
7.
Do not touch the inside of the appliance while it is operating.
8.
Do not use the appliance if there is any damage to the plug, power cord or other parts.
9.
Do not go to any unauthorized person to replace or fix the appliance.
10.
Keep the power cord away from hot surfaces.
11.
Do not use electrical appliance with wet hands and make sure that the appliance is
plugged into the wall socket properly.
12.
Keep the cord and the appliance out of the reach of children.
13.
Do not connect the appliance to an external timer switch.
14.
Do not place the appliance on or near combustible materials, such as tablecloth or
curtain.
1
15.
Do not place the appliance against a wall or any other appliances while in operation.
Leave at least 5 inches of free space on the back, sides, and above the appliance to
keep air inlet/outlet clear.
16.
Do not place anything on top of the appliance during operation.
17.
Do not use the appliance for any other purposes than described in this manual.
18.
Do not leave the appliance unattended while it is operating.
19.
During hot air frying, hot steam is released through the air outlet openings. Keep your
hand and face at a safe distance from the steam and from the air outlet opening. Be
careful of hot steam and air when you remove the glass container from the appliance.
Any accessible surfaces may become hot during use.
20.
When you see black smoke coming out of the appliance, unplug the appliance
immediately and wait for the smoke to stop before removing the glass from the
appliance.
21.
Ensure that the appliance is placed on a horizontal, flat, and stable surface.
22.
This appliance is designed for household use only. It is not safe to use in environ-
ments, such as staff kitchens, farms, motels, and other non-residential environments.
23.
The warranty is void if the appliance is used for professional or semi-professional
purposes, or it is not used according to instructions.
24.
Always wait 30 minutes for the appliance to cool down before handling or cleaning it.
25.
If the power cord is damaged, it must be replaced by the manufacturer or its service
agent or a similarly qualified person in order to avoid danger.
26.
This appliance can be used by children aged from 8 years and above and persons
with reduced physical, sensory or mental capabilities or lack of experience and
knowledge if they have been given supervision or instruction concerning use of the
appliance in a safe way and understand the hazards involved. Children shall not play
with the appliance. Cleaning and user maintenance shall not be made by children
unless they are old than 8 and supervised.
27.
Keep the appliance and its cord out of reach of children less than 8 years old.
2
3
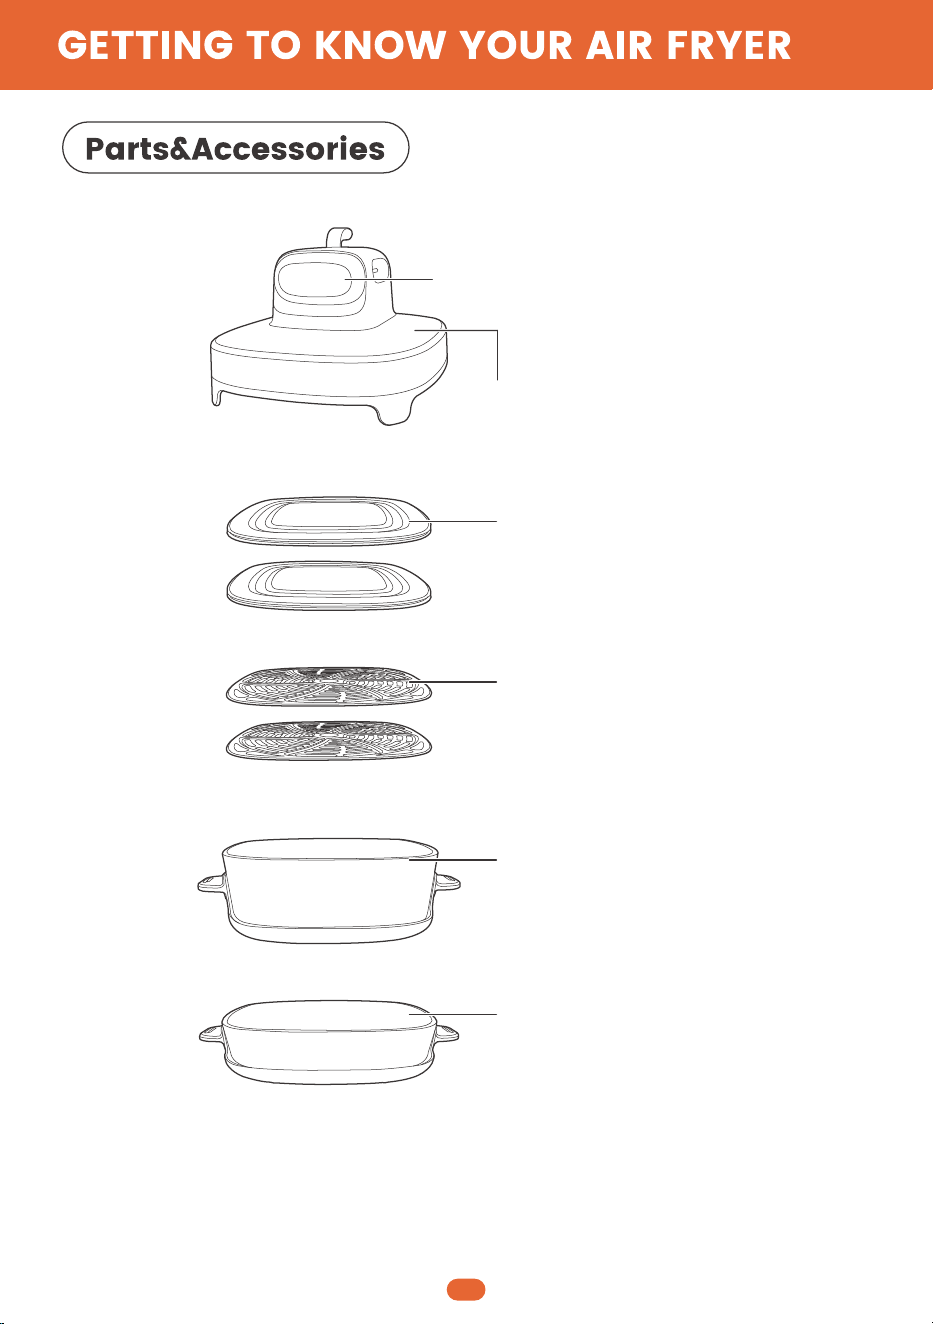
NOTE: The illustration may differ from the actual product. We continuously strive to
improve our products, and therefore, the specifications included here are subject to
change without notice.
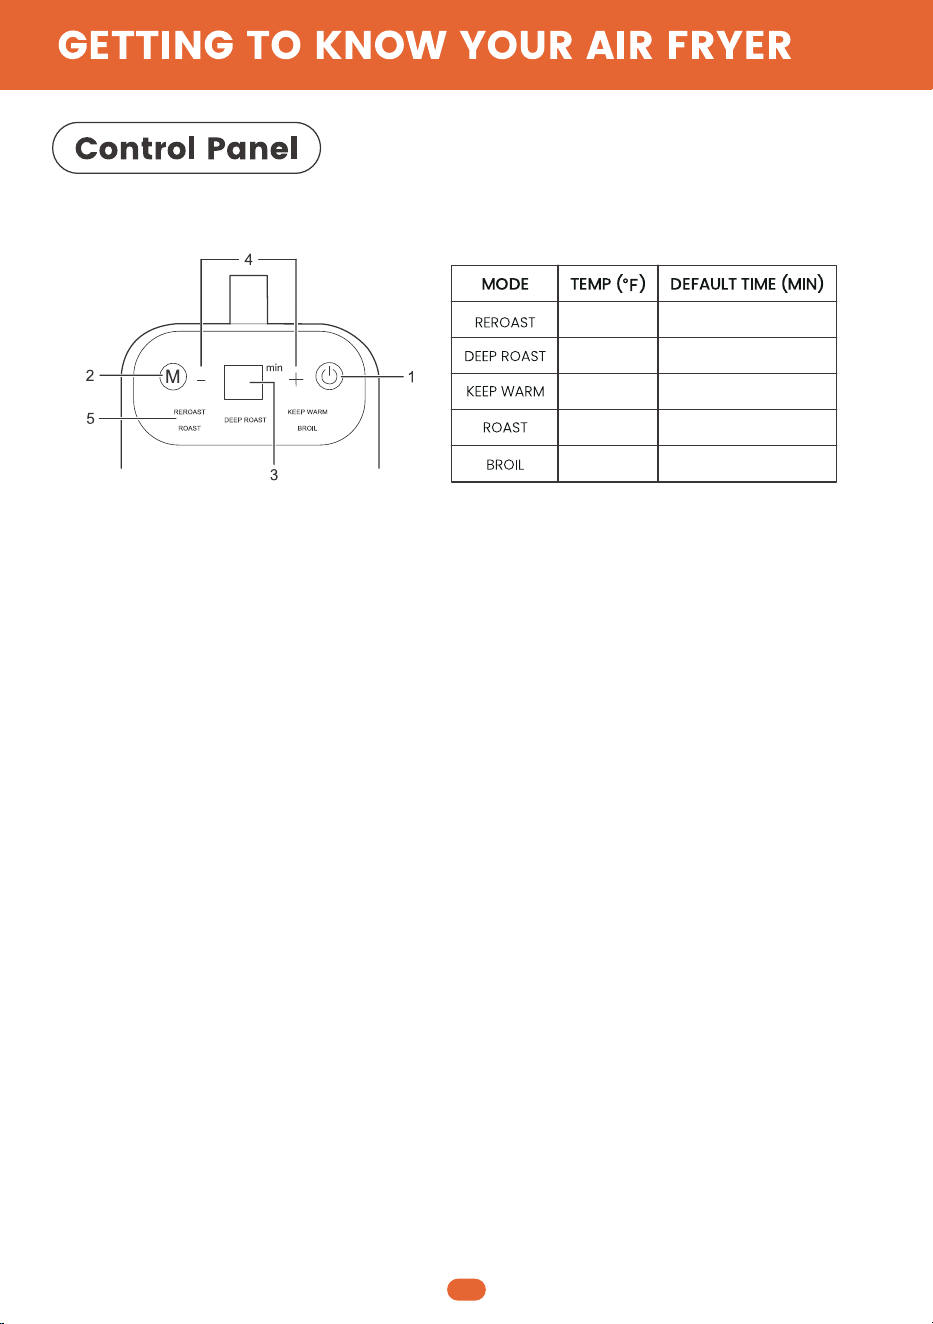
Control Panel
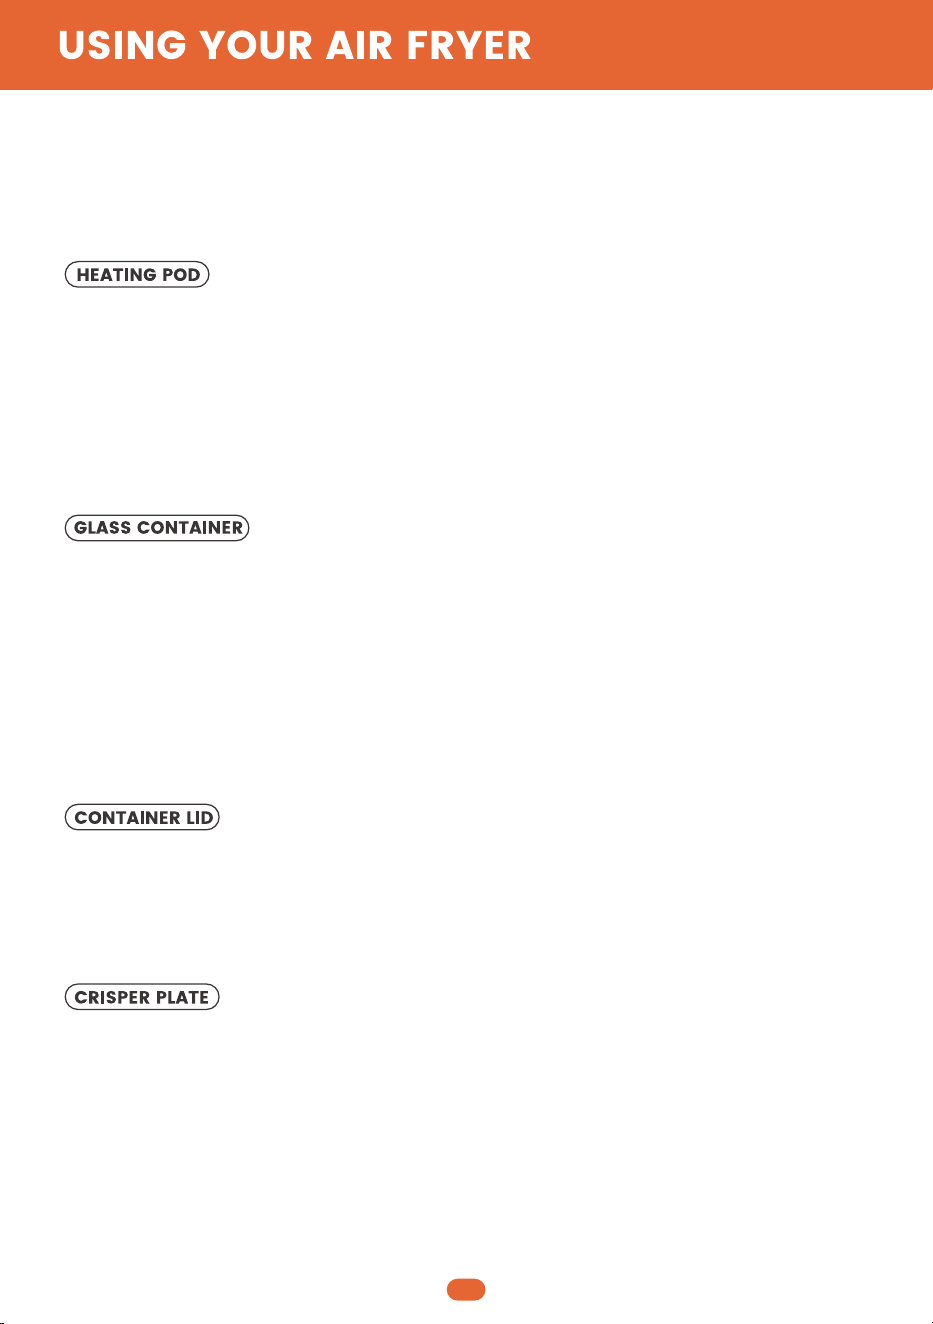
Heating Pod
Container Lid
Crisper Plate
The size is about 7.68*7.68 inch
You canroast without the plate, but it is
not recommended because the plate
can make the roast effect better.
Large Glass Container
4.7qt of capacity
(without crisper plate installed)
Small Glass Container
2.6qt of capacity
(without crisper plate installed)
4
NOTE: The table shows the default time for different modes, which could be adjusted
according to your preference and the container volume.
1. POWER ON/OFF
Press to turn the heating pod on. When the heating pod is attached to a container, press
to start or pause. Long press for 3s to enter the standby mode when the heating pod is
working.
2. MODE SWITCH
Press the MODE button and select from the following five modes:
- ROAST: Give food crispiness and crunch at high temperatures with little or no oil.
- REROAST: To make the surface of the food more golden and more flavorful (Usually after
the ROAST function has been already used).
- DEEP ROAST: Deep fry your food with high heat for the ultimate crisp. Best for prepack-
aged frozen foods.
Applicable for: The 3 modes are applicable for cakes, chicken, duck, pre-made food
(e.g, dumplings), potatoes and other vegetables.
- BROIL: Lock in more juice and the original taste of the food.
Applicable for: Grilled meat, fish, shrimp, steak, etc.
- KEEP WARM: Keep food warm for a period of time after using other modes, retaining its
flavour.
Applicable for: Anything that can be air-fried.
3. TIME DISPLAY
The screen will show the countdown of the remaining working time of this cycle.
4. TIME ADJUSTMENT
Click or long press to adjust the cook time after a specific mode is selected. The time
adjustment range is 1-60 minutes. The appliance will start with the default time of the
mode if time adjustment is not activated.
5. LIGHT INDICATOR
Once the appliance is operating, the light indicator will light up until the cooking process
is completed.
340
13
15
15
15
20
350
140
355
365
1.
Remove any packaging material and tape from the unit.
1.
Place the air fryer on a flat and even surface.
DO NOT PLACE THE GLASSWARE ON A SURFACE THAT IS NOT HEAT RESISTANT.
2.
Check all the parts and accessories and read this manual carefully. Please pay
particular attention to operational instructions, warnings, and safety instructions to
avoid any injury or property damage.
2.
Place the crisper plate inside the glass container. Be careful to avoid bending the plate.
Then place the food on the crisper plate.
DO NOT COAT THE PLATE WITH OIL OR ANY OTHER LIQUID.
DO NOT FRY FOOD IN A GLASSWARE WITHOUT A CRISPER PLATE.
NOTE: For the best cooking effect, do not mix raw, frozen or pre-cooked ingredients.
Please cook only one type of food at a time.
3.
Wash the containers, crisper plates, and lids in hot, soapy water, then rinse and dry
thoroughly. Never clean the heating pod in the dishwasher.
3.
Make sure both handles are aligned with the sides of the heating pod, not front or back.
4.
Plug in and press the power button to enter standby mode. Press the " " on the control
panel to select the desired mode and adjust the time by pressing " " or " ", then press
the power button. The appliance buzzes once and starts operating, the light indicator
will light up until the cooking process is completed.
NOTE: Product temperature can not be adjusted, each mode has its own program
default temperature.
5.
You can remove the heating pod directly to flip the food when cooking, the air fryer will
automatically pause. Or you can firstly press the power button to pause the working.
After flipping the food, put the pod back and it will resume the last working mode. Rapid
Air Fryer Technology reheats the air inside the fryer instantly, so remove the heating
pod of the fryer for a brief period of time will not interrupt the cooking process.
6.
When the cooking time has ended, the machine buzzes once and the display will stop
showing the countdown and enter the standby state, and the motor will continue to
work for 30 seconds to cool the machine.
7.
If you would like to prepare more, you can instantly use the air fryer once another batch
of food is ready.
1.
The KEEP WARM function is only used to keep warm the prepared food, please do not
use this function for raw food and frozen food in the refrigerator.
2.
Frozen foods can only be cooked with DEEP ROAST function in order to get the best
cooking results.
5
3.
In order to achieve the best cooking effect of food, please do not use ROAST, REROAST
and BROlL function for frozen food.
6
1.
NEVER use the heating pod on any container or utensils other than those equipped with
glassware.
2.
When placing heating pod on the glass container, always ensure the side handles
are aligned with the sides of the pod, not the front and back.
3.
All items should be kept 5 inches away from the heating pod vent when the unit is in
use.
1.
The heat-proof base and two sides handles are permanently fixed to the glass
container and must not be removed.
2.
Be careful with glassware. They may break if dropped, slammed against a surface, or
struck with a hard instrument.
3.
Do not use if the glass container is broken, cracked or deeply scratched, as the
strength of the container may be affected and the container may crack or crumble.
4.
The glass container CANNOT be heated in the oven or microwave.
1.
Lid is freezer safe and dishwasher safe(top rack only).
2.
Do not seal lid on the container directly after cooking.
3.
NEVER place heating pod, glass container, or crisper plate directly on lid after cooking.
NOTE: Please keep in mind that because ingredients differ in size, shape, brand, and origin,
we cannot guarantee that the setting is best for your ingredients.
1.
Crisper plate can be cleaned in the dishwasher.

7
・Small ingredients usually have a shorter cooking time than larger ingredients.
・Shaking smaller ingredients halfway during the cooking time gives you a better
end result.
・Adding a very little amount of oil to fresh potatoes and frying will give a crispy result.
・The recommended amount of cut potatoes to prepare crispy fries is 350 grams.
・Pre-made dough requires shorter cooking time than home-made dough.
・The parchment paper (the exact measurements of the crisper plate are about 7.68*7.68
inch)can be purchased by yourself for better cooking experience.
8
Clean heating pod and glass container thoroughly after each use. Be sure to wait at least
30 minutes for heating pot and glass container to cool before cleaning.
1. Wipe the heating pod and control panel surface clean with a wrung out damp cloth or
wipes. Using the dripping cloth may cause water to drip into the inside of the heating pod,
causing damage.
NOTE: Do not immerse the heating pod in water or any other liquid. Never use the
dishwasher to clean the heating pod.
2. The glass container is dishwasher safe. lf washed by hand, air dry thoroughly or towel dry
all components after use.
3. The crisper plate is dishwasher safe. lf washed by hand, air dry thoroughly or towel dry all
components after use.
NOTE: Do not clean the crisper plate with any metal kitchen utensils or abrasive cleaning
materials as this may damage the non-stick coating.
4. The container lid is dishwasher safe (top shelf only). lf washed by hand, air dry thoroughly
or towel dry after use.
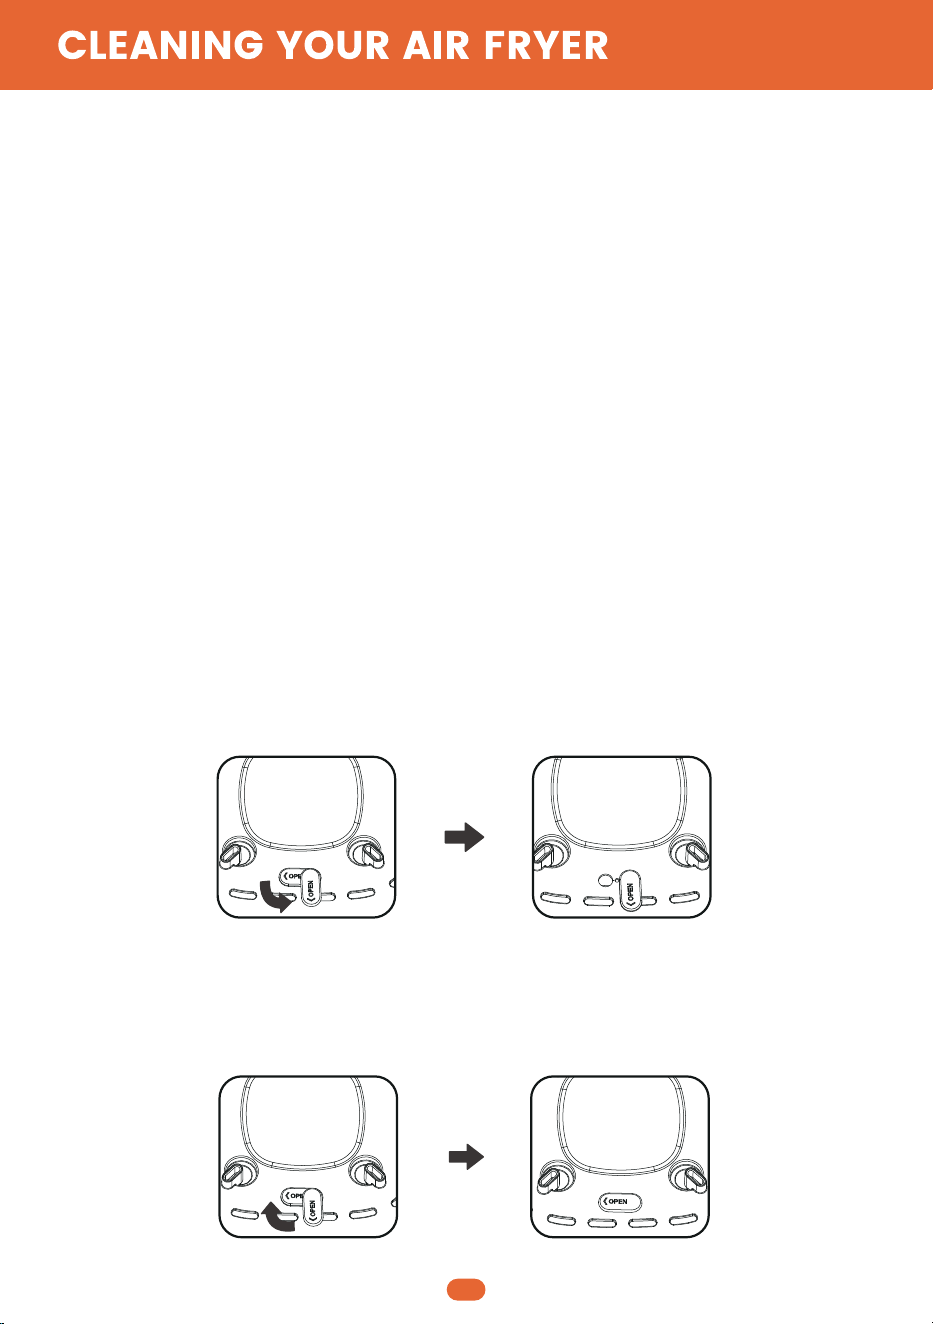
5. Attention, please! After the base is cleaned, if water is found in the glass base: be sure to
open the silicone plug to drain the water in the glass base according to the following figure.
Before cleaning the base, please follow the following instructions to plug the silicone plug
tightly to prevent foreign matter from entering the inside of the glass base.
90°
90°

9
The One Year limited Warranty applies to purchases made from authorized retailers of
KISMILE. Warranty coverage applies only to the original owner and to the original product
and is not transferable.
KISMlLE warrants that, for a period of one year from the date of purchase, the device shall
be free from defects in material and workmanship when used under normal household
conditions and maintained in accordance with the requirements covered by the User
Manual, subject to the following conditions and exclusions:
What is covered by this warranty?
1. The original device and/or non-wearable parts deemed defective will be repaired or
replaced up to one year from the original purchase date in KISMlLE's sole discretion.
2. In the event a replacement unit is issued, the warranty coverage ends 6 months following
the receipt date of the replacement unit or the remainder of the existing warranty, whichev-
er is later. KlSMlLE reserves the right to replace the unit with one of equal or greater value.
What is not covered by this warranty?
1. Normal wear and tear of wearable parts, which require regular maintenance and/or
replacement to ensure the proper functioning, are not covered by this warranty.
Request of replacement parts can be fullfilled by KISMILE Customer Service.
2. Any unit that has been tampered with or used for commercial purposes.
3. Damage caused by misuse, abuse, negligent handling, failure to perform required
maintenance or damage due to mishandling in transit.
4.Consequential and incidental damages.
5. Defects (include damages caused in the process of shipping, altering, or repairing the
product(or any of its parts) when the repair is performed) caused by repair persons not
authorized by KISMILE.
How to get service?
If your appliance fails to operate properly under normal household conditions within the
warranty period, please contact our customer service specialists via 661-435-8826 for
product care and maintenance and warranty service options.
You will need the receipt as proof of purchase. The cost for the customer to send in the unit
for repair or replacement and the fee is subject to change. A customer service specialist will
provide you with return and packing instruction information.

10
The air fryer does
not work.
The ingredients are
under cooked.
Some ingredients
are fried unevenly.
The ingredients are
over cooked.
Some ingredients fly
off.
The power cable is not
securely connected or the
power socket is not turned on.
Reinsert the power cable and
ensure that the power socket is
properly turned on.
Set the mode and adjust the
appropriate time.
Please reduce the ingredients in
the glass container and try to
place them evenly so they are
fried more evenly.
Increase the frying time.
It is recommended to use a crisper
plate during cooking, or turn the
ingredients several times during
cooking when not using a crisper
plate.
Place the ingredients evenly so
they are fried more evenly.
Use toothpicks to secure loose,
lighter food, such as the tooth-
picks inserted into the top of the
sandwich slices.
Check the progress throughout
the cooking process and remove
the food when it reaches the
desired degree of brown color.
Remove food immediately after
cooking time to avoid overcooking
and get the best cooking results.
No cooking time set.
The glass container is too full
or the ingredients are not
placed evenly.
The frying time is too short.
No crisper plate was used.
The ingredients are not
placed evenly.
Cooking time is too long.
When the ingredients are
lighter, the fan of the air
fryer will blow them up.

11
Error code
E1
E2
Fault
Sensor break code
Sensor short circuit code
When a fault is detected, the machine buzzes 10 times and displays the fault code as follows:
If the above or other fault occurs during the use of your equipment, please contact our service
department at the first time.

ROWAN ELECTRIC APPLIANCE LLC
EMAIL: [email protected]
TEL: 661-435-8826
WEB: www.kismile.com
Your satisfaction is our ultimate
goal.
Our customer service department is
always available for you to address
Scan QR code using mobile
device to browse more info.