
Technical Support and E-Warranty Certificate
www.vevor.com/support
LED Par Light Instruction Manual
MODEL: JM-P13
We continue to be committed to provide you tools with competitive price.
"Save Half", "Half Price" or any other similar expressions used by us only represents an
estimate of savings you might benefit from buying certain tools with us compared to the major
top brands and does not necessarily mean to cover all categories of tools offered by us. You
are kindly reminded to verify carefully when you are placing an order with us if you are
actually saving half in comparison with the top major brands.

- 1 -
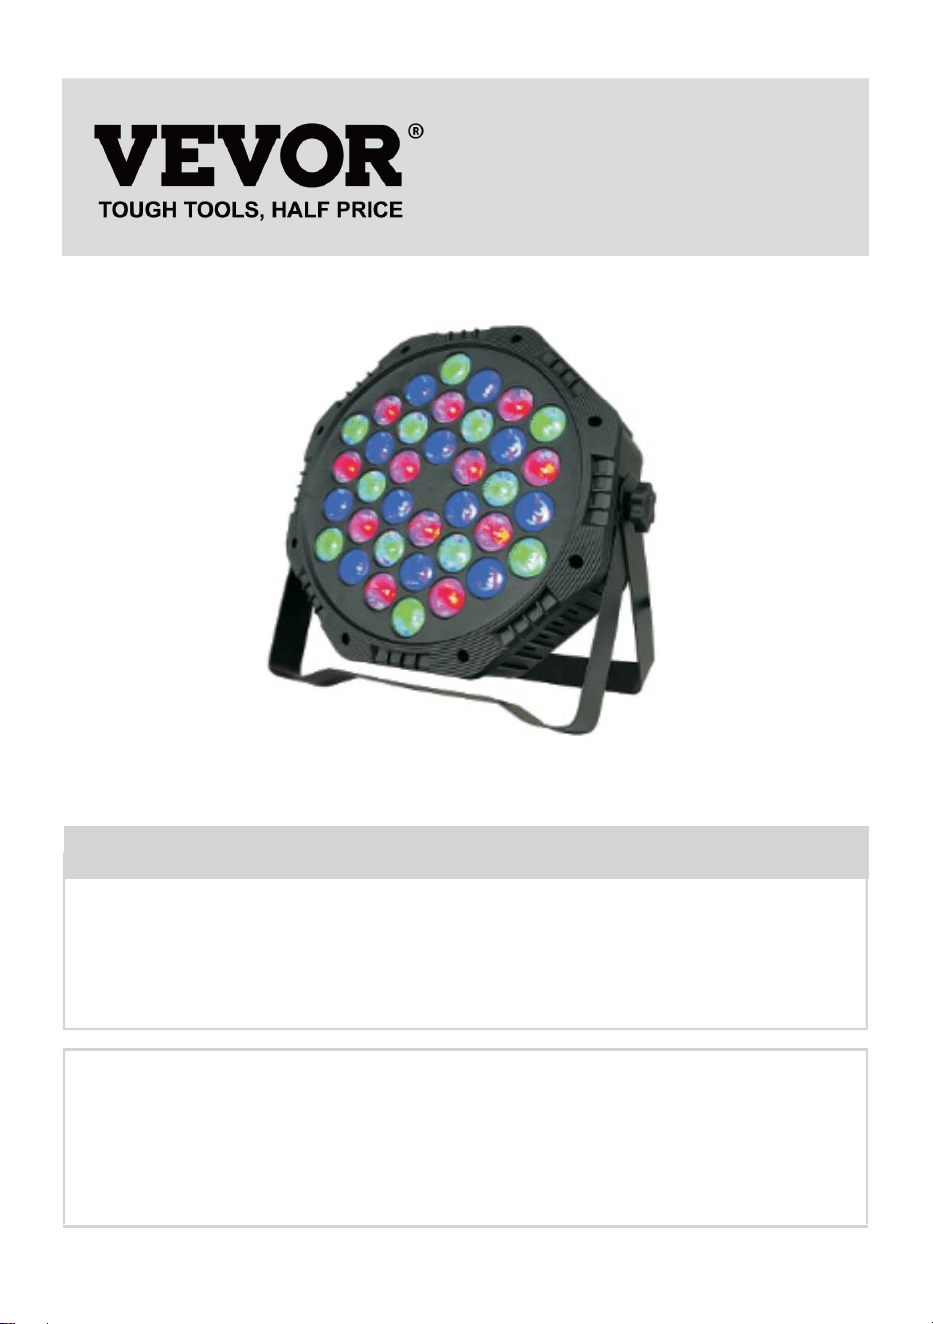
Model: JM-P13
★ The picture is for reference only, please refer to the actual.
Have product questions? Need technical support? Please feel free to
contact us:
Technical Support and E-Warranty Certificate
www.vevor.com/support
NEED HELP? CONTACT US!
This is the original instruction, please read all manual instructions
carefully before operating. VEVOR reserves a clear interpretation of our
user manual. The appearance of the product shall be subject to the
product you received. Please forgive us that we won't inform you again if
there are any technology or software updates on our product.
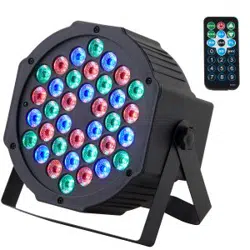
LED Par Light

- 2 -
Warning-To reduce the risk of injury, user must read
instructions manual carefully.
Make sure electric off before installing the fix ture.
The circuit connection must be correct before connecting the wire.
Don’t worry about the heat of the surface of the lamp when it’s
working.It’s normal situation.
The lifespan will be shorter and the light attenuation will be faster if the
lamp works on for 24 hours every day.
Make sure output voltage within the range of rated voltage before
installing the lamp.
Regularly clean the dust on the lamp to maintain good heat dissipation
performance.
If the lamp doesn’t work, don’t inspect it when power is on.The lamp
should be inspected and maintained by professional electrician.
FCC compliance information statement:
This device complies with Part 15 of the FCC Rules. Operation is
subject to the following two conditions:
1) This product may cause harmful interference.
2)This product must accept any interference received, including
interference that may cause undesired operation.
WARNING: Changes or modifications to this product not expressly
approved by the party responsible for compliance could void the user's
authority to operate the product.
- 3 -
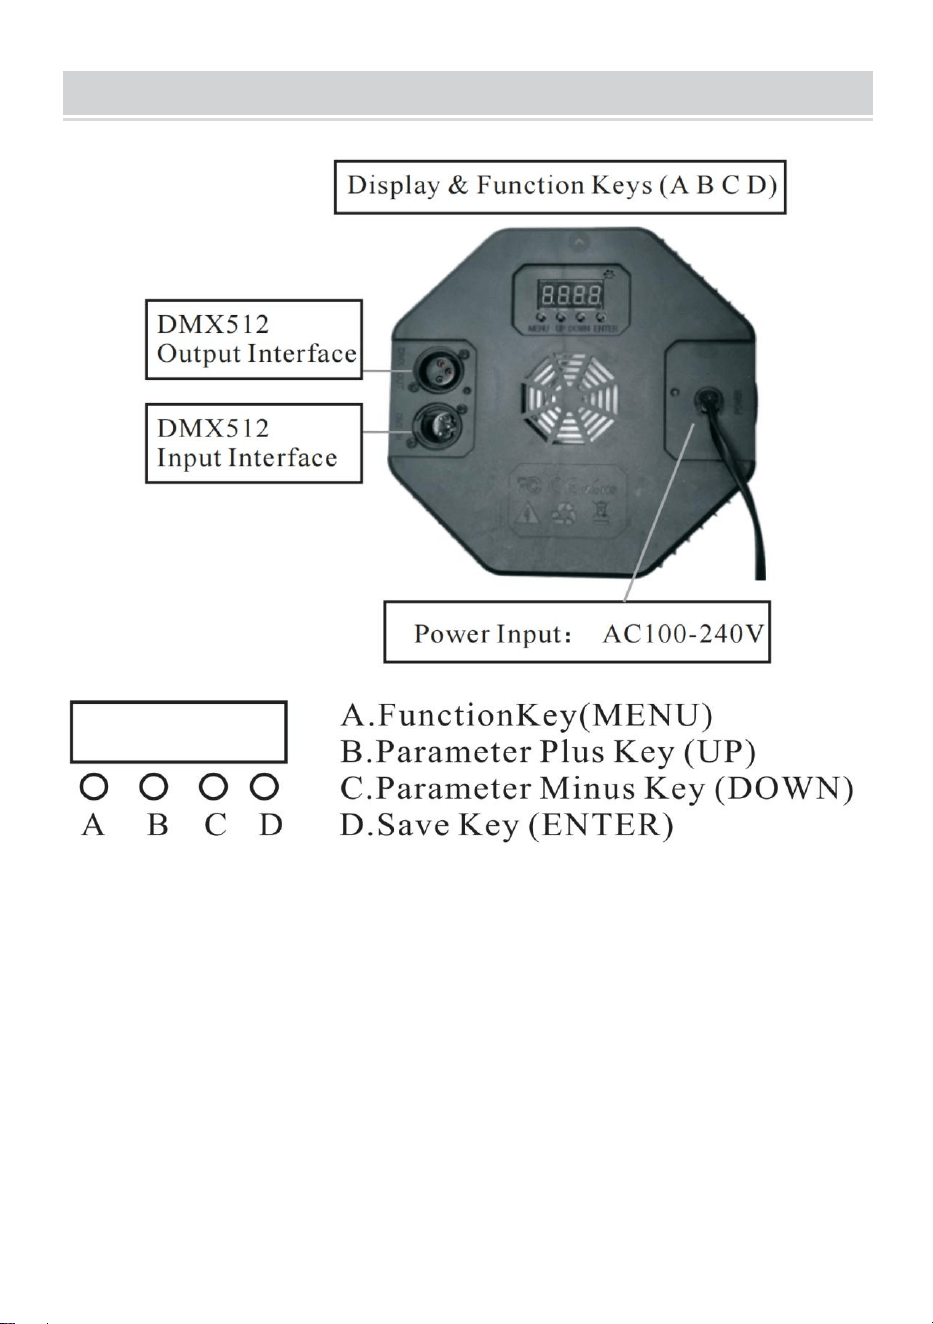
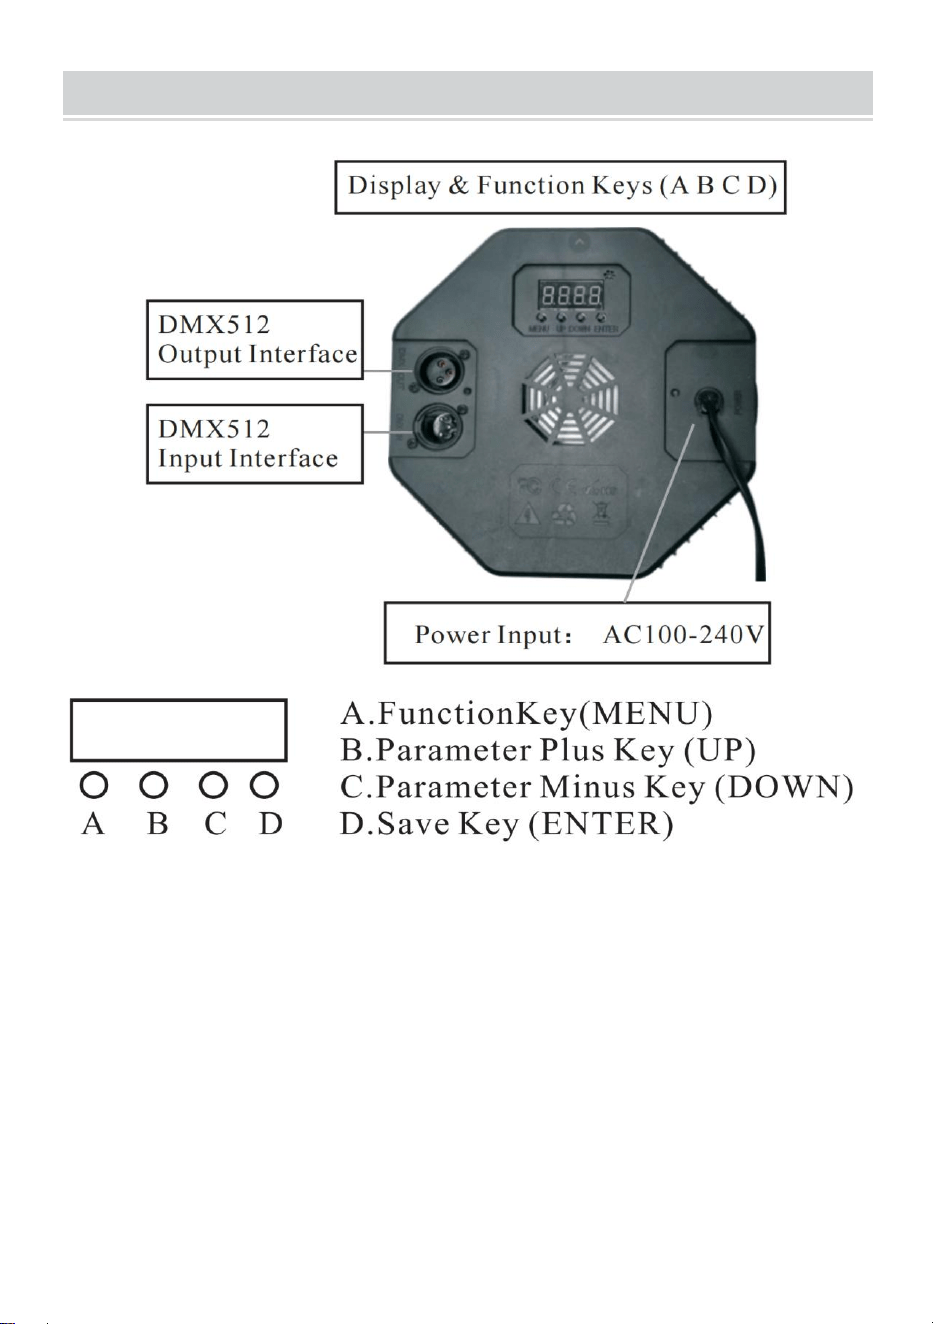
PRODUCT DESCRIPTION
1.1 To restore the factory settings: Press and hold the A key for 3 seconds,
the display will display DEFA, indicating that the factory reset is successful,
and all customer-defined functions are restored to the factory default
parameters.
1.2 Save function: Press the D key once, the corresponding function will
flash three times on the display, indicating that the save is successful.
2. LED display window function comparison table(all functions are
selected and then press D key to save and confirm)

- 4 -
Number
Display
Function Description
1
d001
Address code,(001-512)B,C key plus or minus
address code value(channel7,it is used in
professional stage lighting control system)
2
C001
Address code,(001-512) B, C key plus or minus
address code value (channel 3, apply conventional
colorful lighting control systems, such as outdoor
lighting projects)
3
A001
Color selection,(000-006)B.C key to choose different
colors.
4
P050
Colorful jump,(00-255)B, C keys to modify the jump
speed.
5
L050
Colorful gradient,(00-255) B,C keys to modify the
gradient speed.
6
E050
Colorful pulse change,(00-255) B, C keys to modify
the pulse change speed.
7
sound
The colorful voice control changes,and the lighting
effect changes with the external sound signal.
8
r255
Red color selection,(000-255) B, C keys to modify
the brightness
9
g255
Green color selection,(000-255) B,C keys to modify
the brightness.
10
b255
Blue color selection,(000-255) B, C keys to modify
the brightness.
11
H255
White color selection, (000-255) B, C keys to modify
the brightness (special product optional function)
12
F255
Strobe, (000—255) B, C keys to modify the flicker
frequency.

- 5 -
3. DMX512
Channels
Function
Description
Channel1
Total
Dimming
R,G,B,H total dimming, linear dimming, from
dark to bright.
Channel 2
R Dimming
R dimming,linear dimming, from dark to bright.
Channel 3
G Dimming
G dimming, linear dimming, from dark to bright.
Channel 4
B Dimming
B dimming, linear dimming, from dark to bright.
Channel 5
H Dimming
H(white)dimming, linear dimming, from dark to
bright.
Channel 6
Feature
Selection
0-50: strobe and linear
dimming;51--100:jump;101-150:gradual change;
151-200: pulse change; 201-255: voice control
Channe17
Functional
Speed
The speed corresponding to the 6th channel
function, from slow to fast
Diagram
Current Adjustment (non-professionals are prohibited from using this
function, and there is a risk of damage to the product if used improperly)
The user can easily adjust the output current again:
It can be adjusted through software settings. Press and hold (D save key)
for 5 seconds to enter.
After setting, press (D save key) again to save and exit. The operation
correspondence table is as follows:
Numbe
r
Display
Function Description
1
rL50
Red current,(00—99)B, C keys to modify the current
limit size, the value increases, the current decreases
B, C keys to modify the current limit size, the value
increases, the current decreases
- 6 -
2
gL00
Green current,(00—99) B, C keys to modify the
current limit size, the value increases, the current
decreases B, C keys to modify the current limit size,
the value increases, the current decreases.
3
bL00
Blue current,(00—99)B, C keys to modify the current
limit size, the value increases, the current decreases
B, C keys to modify the current limit size, the value
increases, the current decreases.
4
Hl00
White current,(00—99) B, C keys to modify the
current limit size, the value increases, the current
decreases B, C keys to modify the current limit size,
the value increases, the current decreases.
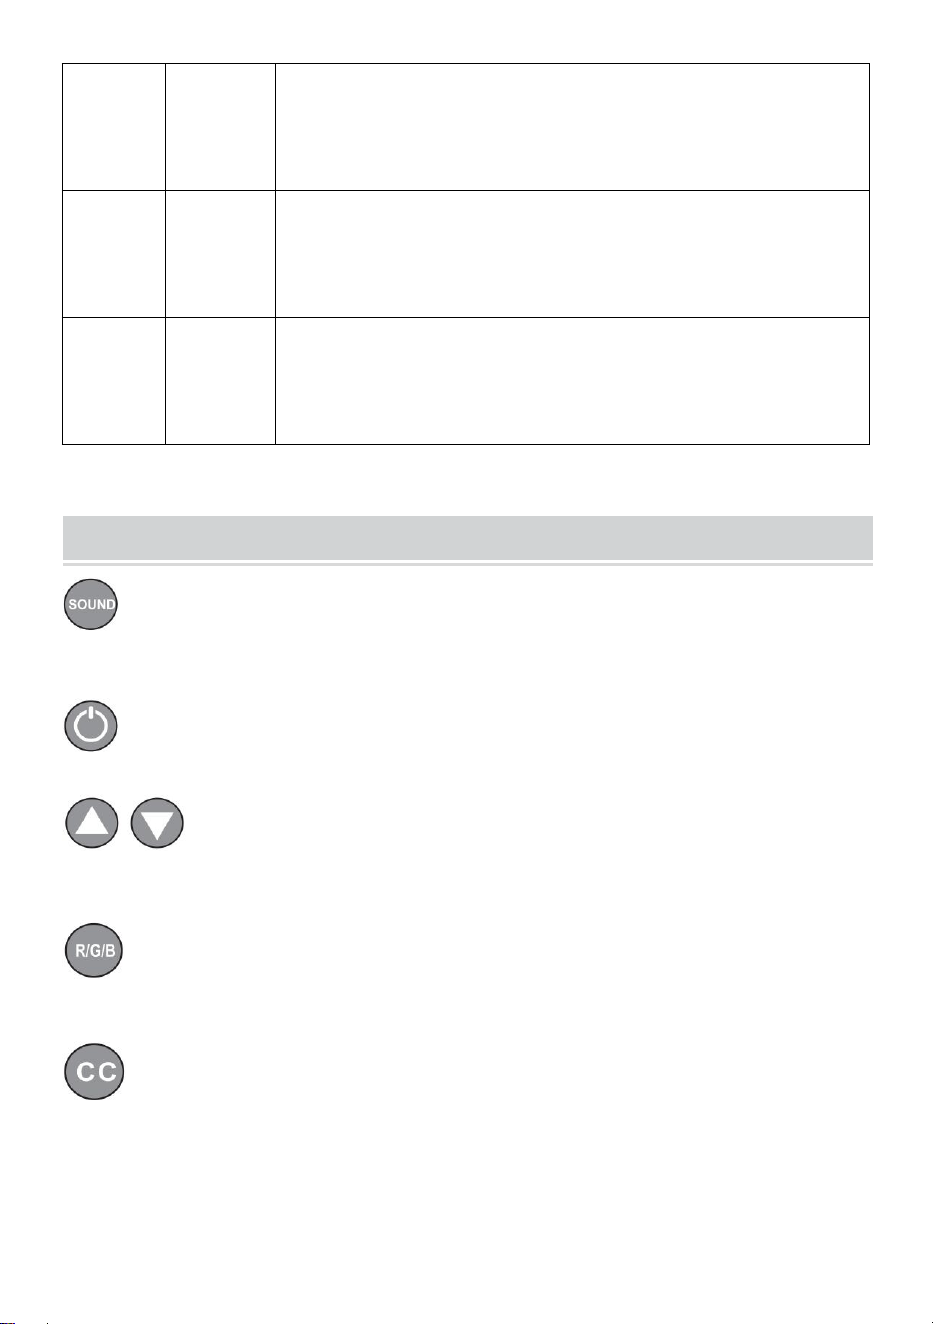
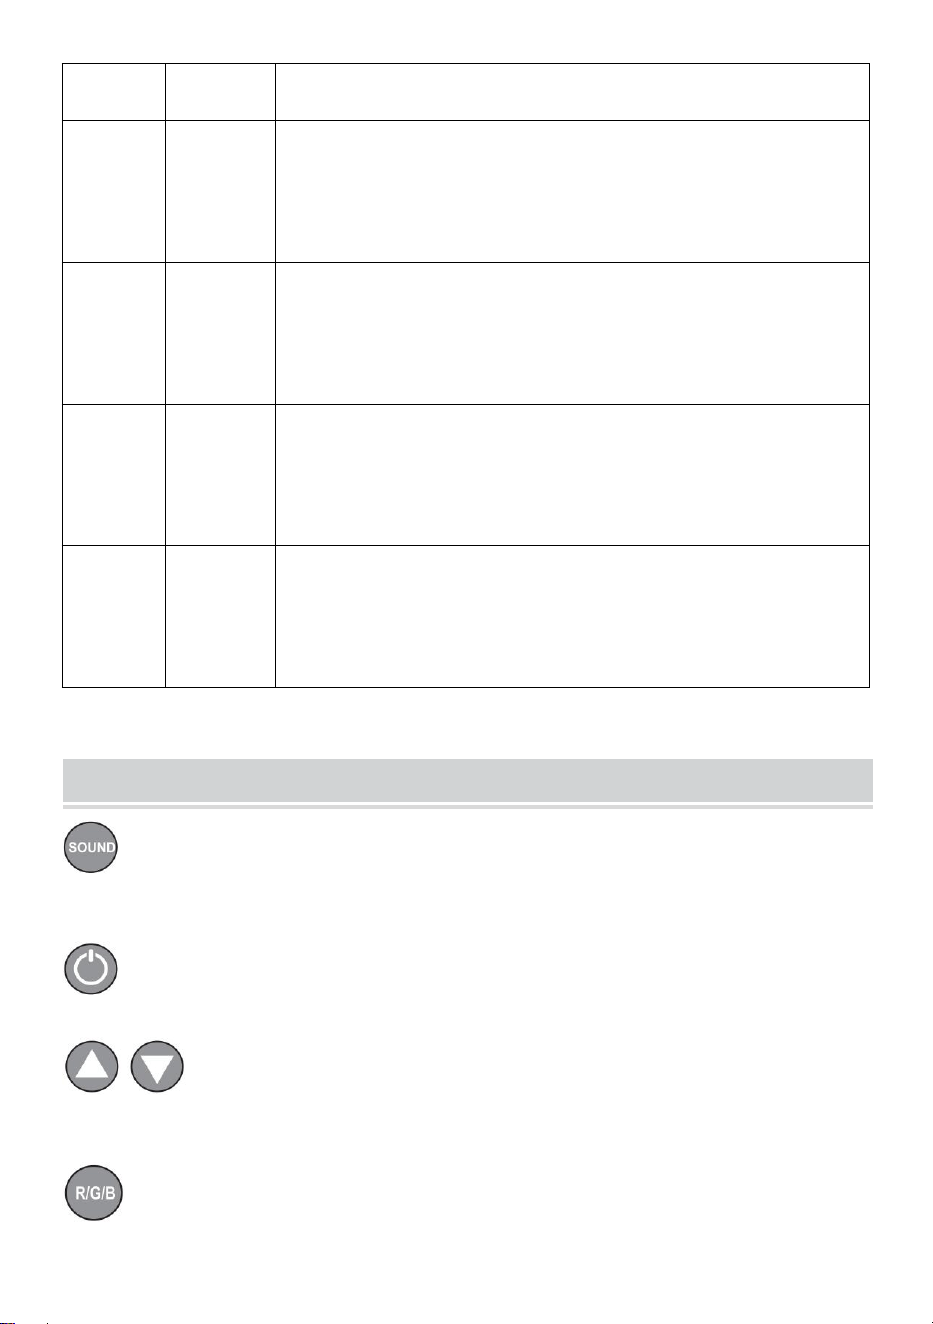
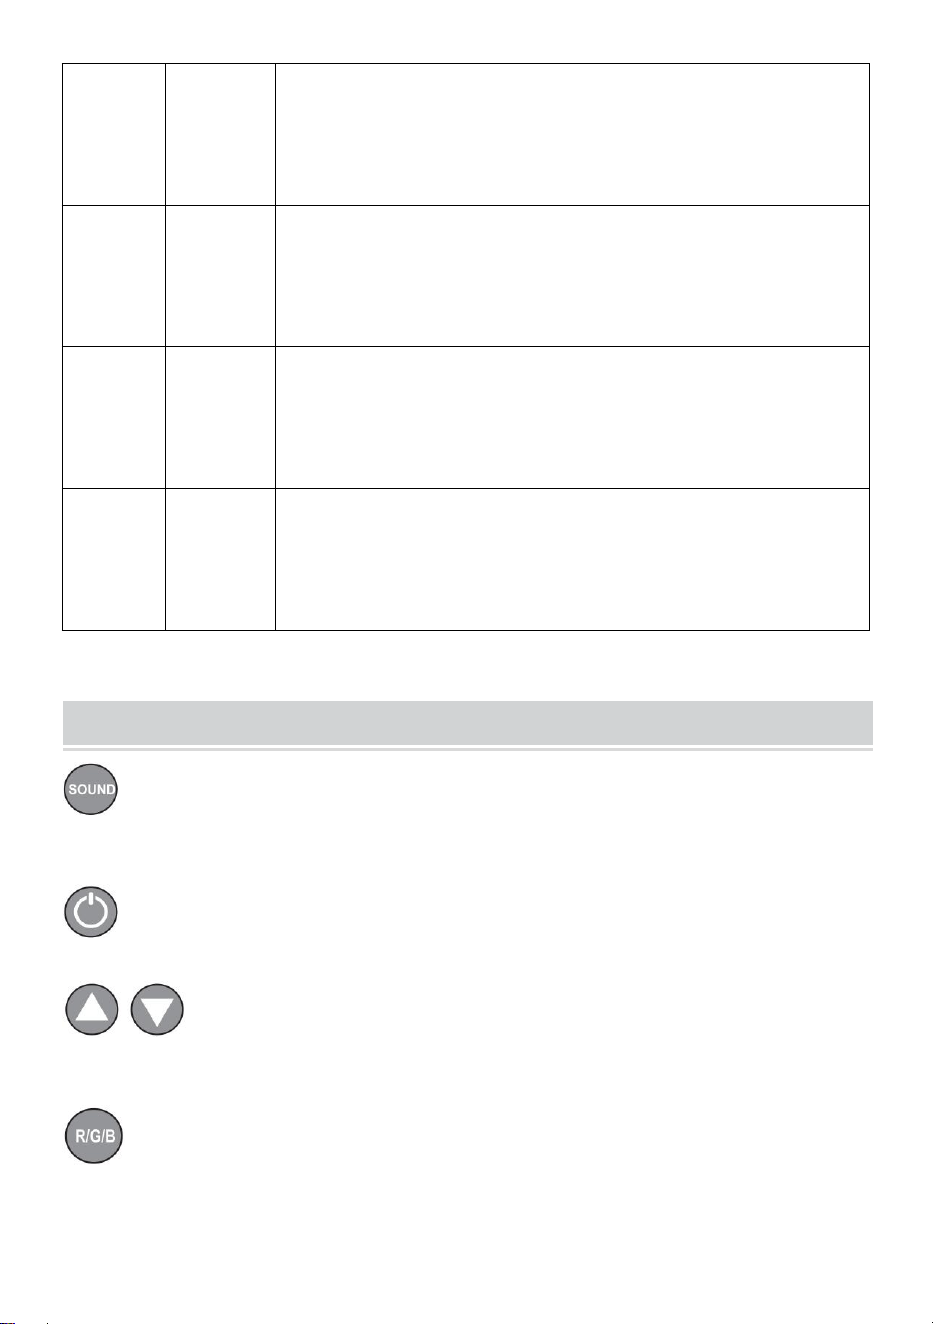
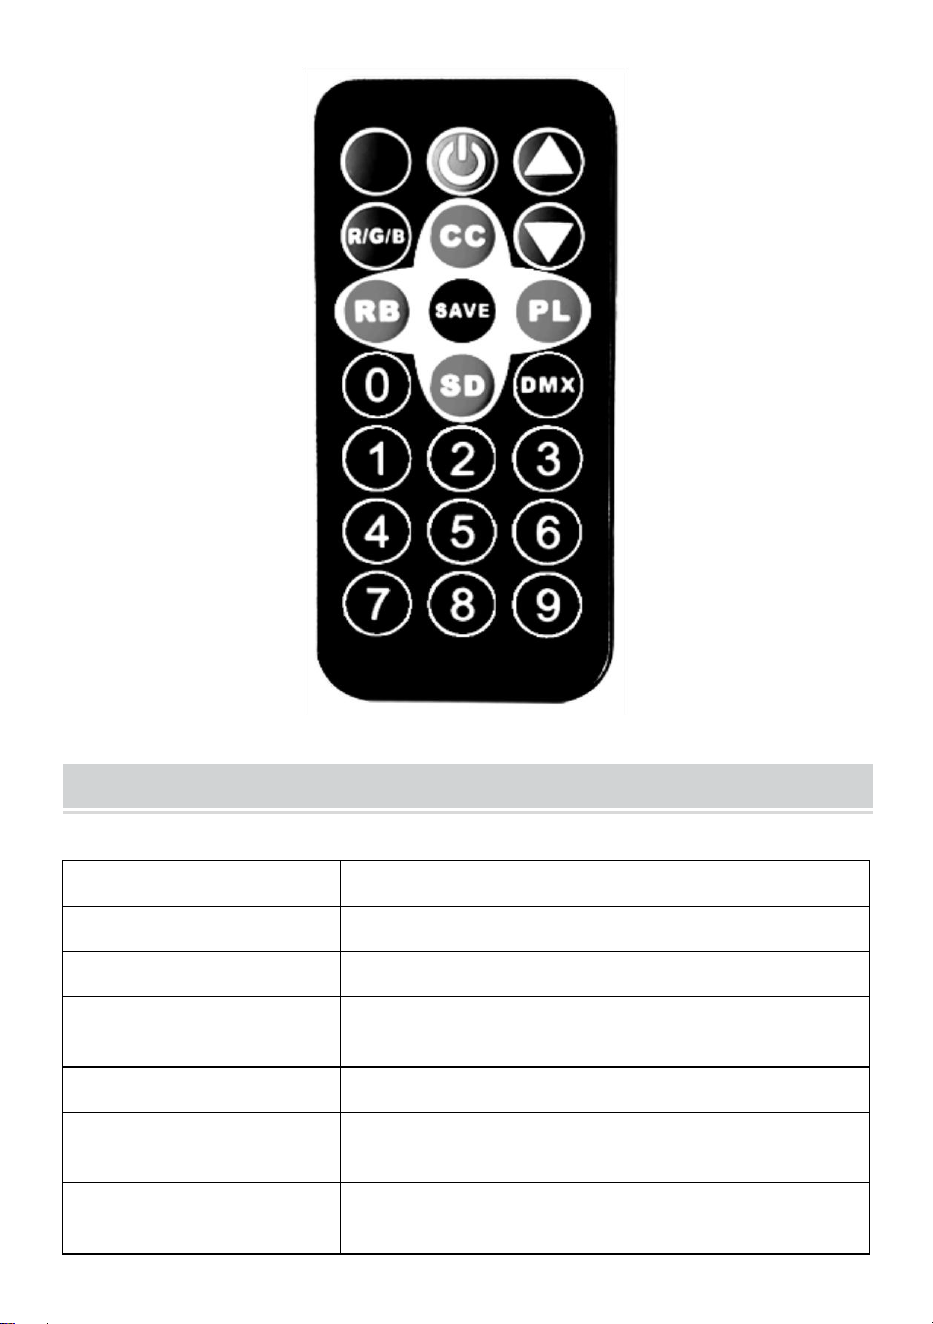
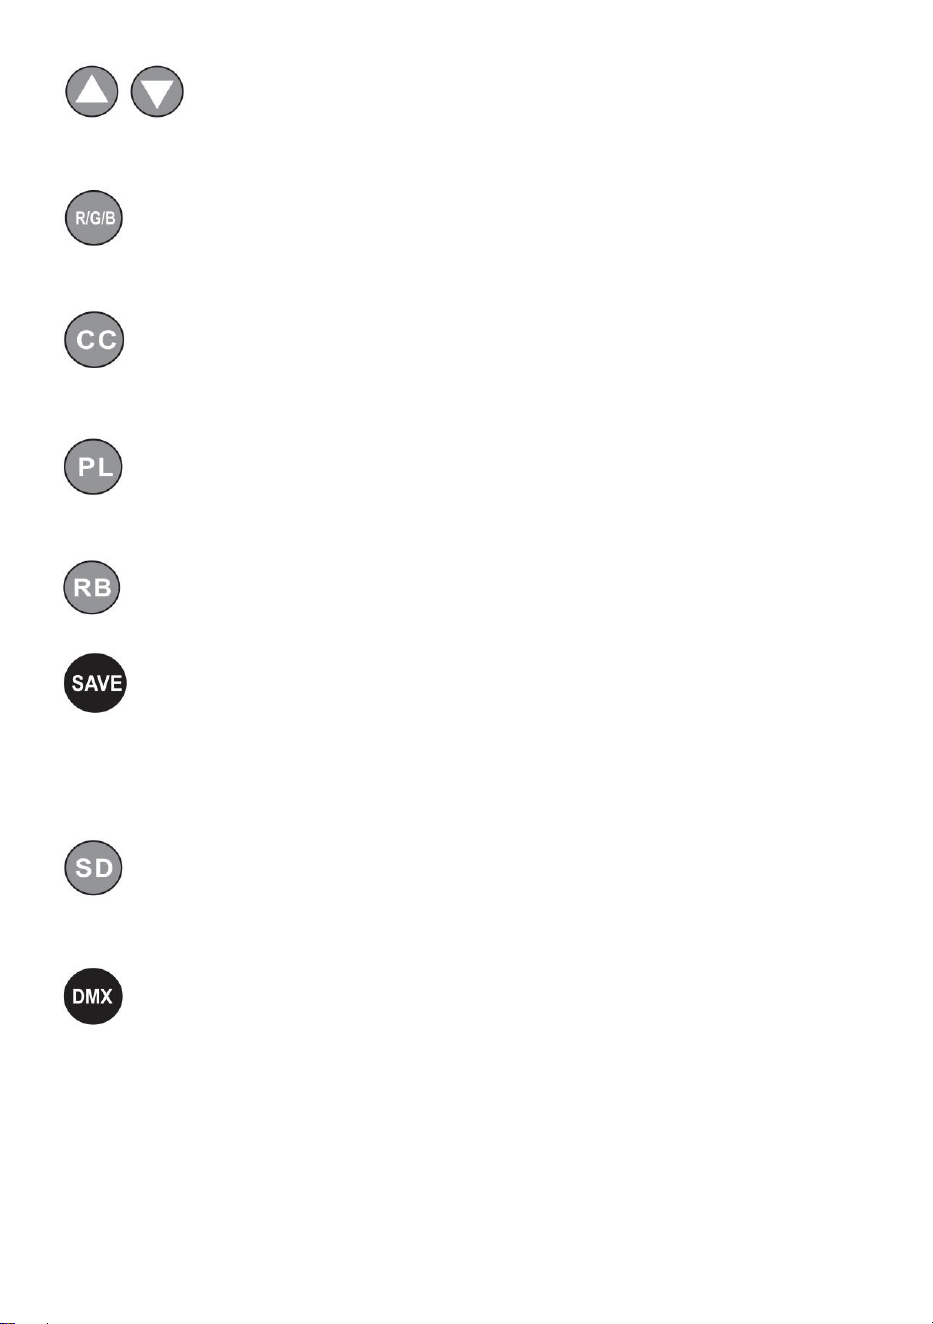
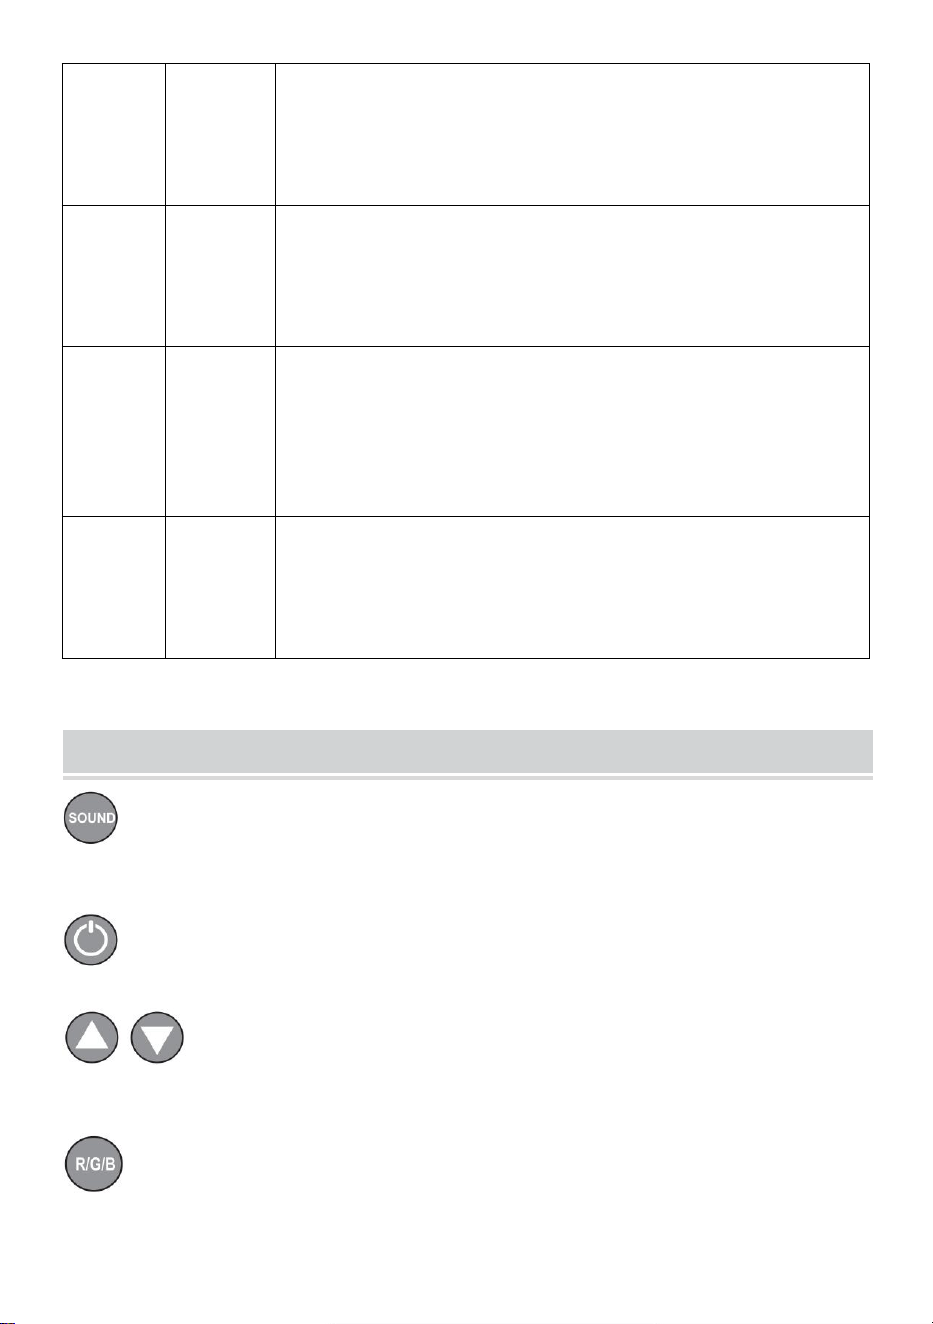
Remote Control Function Description
Voice-activated keys, colorful voice-activated changes, and lighting
effects that change with external sound signals.
Power switch key, remote switch machine.
Add and subtract keys to adjust the value in the corresponding
mode.
Light brightness adjustment key, adjust the light brightness value by
up and down.
Light color selection key, (color 000-006) select different colors by
up and down.

- 7 -
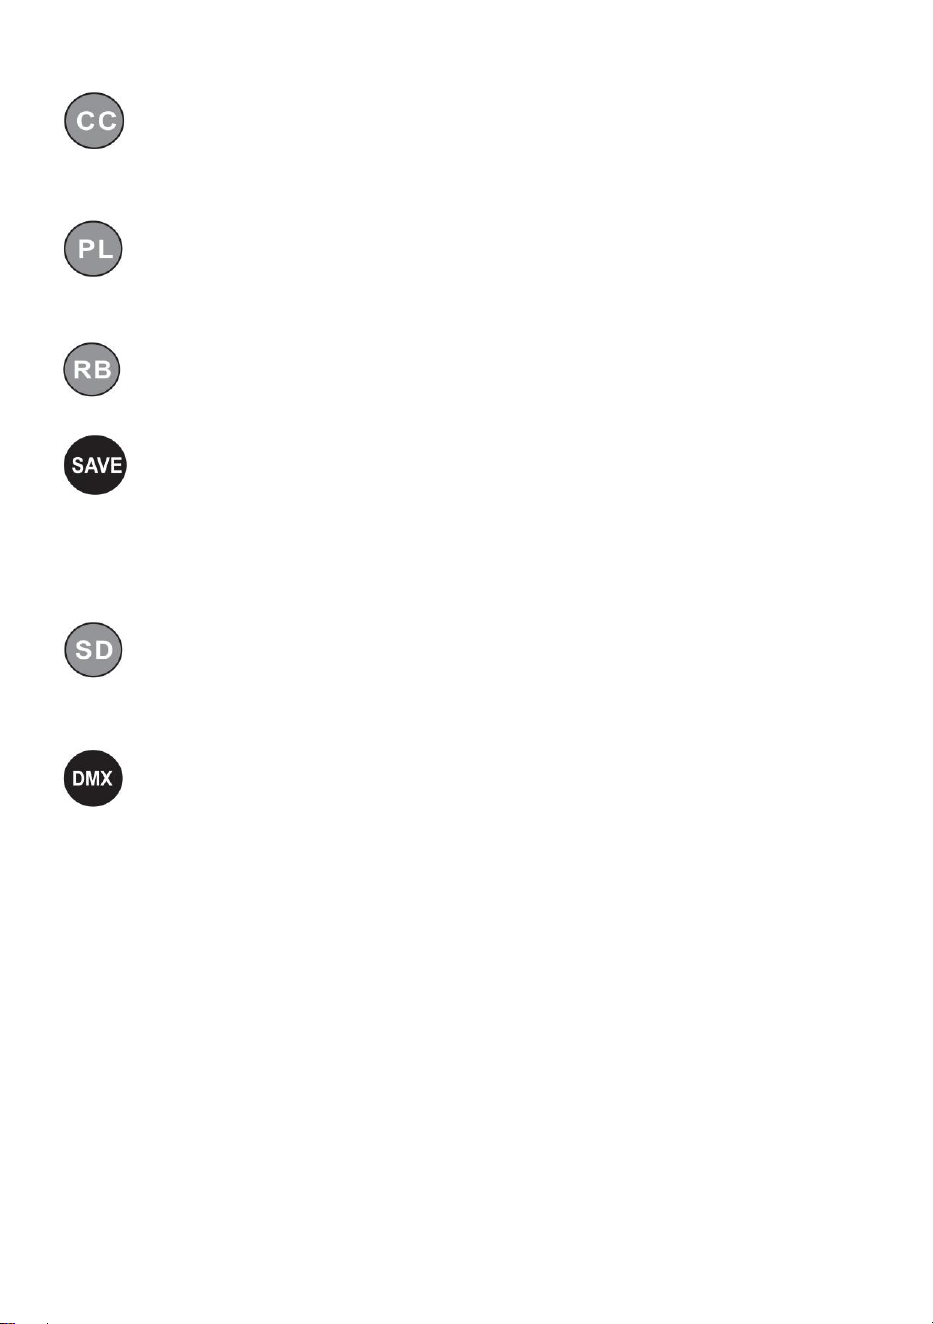
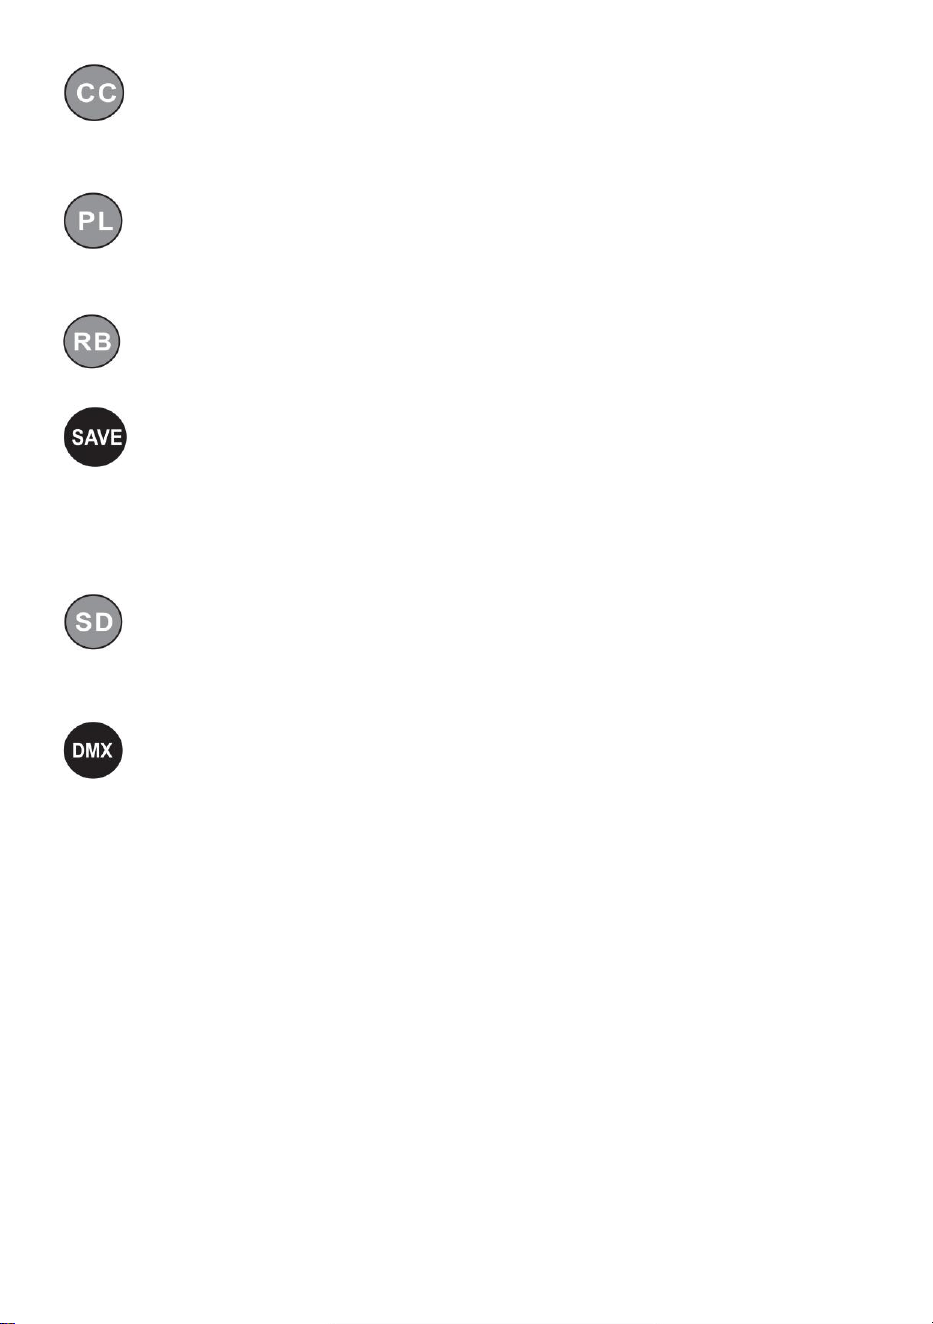
The colorful pulse change key, (speed 00-255) modifies the pulse
change speed by up and down.
Colorful gradient keys, (speed 00-255) modifies the gradient speed
by up and down.
Save function key: Press it once, the corresponding function
flashes three times in the display, indicating that the save is successful,
and every time the power is turned on, it will enter the function of saving
successfully by default.
Colorful jump keys, (speed 00-255) modify jump speed by up and
downs.
DMX512 address code, (address 001-512) set the address code
through the combination of numbers 0-9 on the remote control or add and
subtract the address code value through the plus and minus keys (channel
7, used in professional stage lighting control systems).

- 8 -
Product Parameter
Model
JM-P13
Voltage Frequency
AC120V 60Hz
Power Rating
11 W
Product Light Source
36 RGB light beads, infinite color mixing lamp
beads.
Control Mode
One remote control can control multiple lights.
Waterproofing Grade
/
Operating Mode
Static color, stroboscopic, automatic, voice
control, master-slave, DMX, gradient.

- 9 -
NOTE
Make sure the electricity is off before installing the fix ture.
The circuit connection must be correct before connecting the wire.
Don’t worry about the heat on the lamp's surface when it’s working. It’s
a normal situation.
The lifespan will be shorter, and the light attenuation will be faster if the
lamp works for 24 hours every day.
Ensure the output voltage is within the rated range before installing the
lamp.
Regularly clean the dust on the lamp to maintain good heat dissipation
performance.
If the lamp doesn’t work, don’t inspect it when power is on. The lamp
should be inspected and maintained by a professional electrician.
Fault Analysis
Questions
Analysis of causes
Countermeasure
The light is out.
Whether the plug is
properly inserted.
1、Put the plug in place.
2 、 Check the lights are
plugged in properly.
The lights are
dim.
Whether the voltage is
correct.
Use the right power
source.

- 10 -
Made In China


Assistance technique et certificat de garantie électronique
www.vevor.com/support
DIRIGÉ Par Lumière Instruction Manuel
MODÈLE : JM-P13
We continue to be committed to provide you tools with competitive price.
"Save Half", "Half Price" or any other similar expressions used by us only represents an
estimate of savings you might benefit from buying certain tools with us compared to the major
top brands and does not necessarily mean to cover all categories of tools offered by us. You
are kindly reminded to verify carefully when you are placing an order with us if you are
actually saving half in comparison with the top major brands.

- 1 -
Modèle : JM-P13
★ L'image est à titre de référence uniquement, veuillez vous référer à la
réalité.
Have product questions? Need technical support? Please feel free to
contact us:
Technical Support and E-Warranty Certificate
www.vevor.com/support
NEED HELP? CONTACT US!
LED Par Light

- 2 -
This is the original instruction, please read all manual instructions
carefully before operating. VEVOR reserves a clear interpretation of our
user manual. The appearance of the product shall be subject to the
product you received. Please forgive us that we won't inform you again if
there are any technology or software updates on our product.

- 3 -
Avertissement - Pour réduire le risque de blessure, l'utilisateur
doit lire attentivement le manuel d'instructions.
Assurez-vous que l’électricité est coupée avant d’installer le luminaire.
La connexion du circuit doit être correcte avant de connecter le fil.
Ne vous inquiétez pas de la chaleur de la surface de la lampe
lorsqu'elle fonctionne. C'est une situation normale.
La durée de vie sera plus courte et l'atténuation de la lumière sera plus
rapide si la lampe fonctionne 24 heures sur 24.
Assurez-vous que la tension de sortie se situe dans la plage de
tension nominale avant
installation de la lampe.
Nettoyez régulièrement la poussière sur la lampe pour maintenir de
bonnes performances de dissipation de la chaleur.
Si la lampe ne fonctionne pas, ne l'inspectez pas lorsque l'alimentation
est sous tension. La lampe doit être inspectée et entretenue par un
électricien professionnel.
Déclaration d'informations de conformité FCC :
Cet appareil est conforme à la partie 15 des règles de la FCC. Son
fonctionnement est soumis aux deux conditions suivantes :
1) Ce produit peut provoquer des interférences nuisibles.
2) Ce produit doit accepter toute interférence reçue, y compris celles
qui peuvent provoquer un fonctionnement indésirable.
AVERTISSEMENT : Les changements ou modifications apportés à ce
produit non expressément approuvés par la partie responsable de la
conformité pourraient annuler le droit de l'utilisateur à utiliser le produit.

- 4 -
PRODUCT DESCRIPTION
1.1 Pour restaurer les paramètres d'usine : Appuyez sur la touche A et
maintenez-la enfoncée pendant 3 secondes, l'écran affichera DEFA,
indiquant que la réinitialisation d'usine a réussi, et toutes les fonctions
définies par le client sont restaurées aux paramètres d'usine par défaut.
1.2 Fonction de sauvegarde : Appuyez une fois sur la touche D, la fonction
correspondante clignotera trois fois sur l'écran, indiquant que la
sauvegarde est réussie.
4. Tableau de comparaison des fonctions de la fenêtre d'affichage à
LED (toutes les fonctions sont sélectionnées, puis appuyez sur la
touche D pour enregistrer et confirmer)

- 5 -
Nombre
Afficher
Description de la fonction
1
d001
Code d'adresse (001-512) B, touche C plus ou moins
la valeur du code d'adresse (canal 7, il est utilisé
dans le système de contrôle d'éclairage de scène
professionnel)
2
C001
Code d'adresse (001-512), touche B, C plus ou
moins la valeur du code d'adresse (canal 3,
appliquer des systèmes de contrôle d'éclairage
coloré conventionnels, tels que des projets
d'éclairage extérieur)
3
A001
Sélection des couleurs, (000-006) touche BC pour
choisir différentes couleurs.
4
P050
Saut coloré, (00-255) Touches B, C pour modifier la
vitesse de saut.
5
L050
Dégradé coloré, (00-255) Touches B, C pour modifier
la vitesse du dégradé.
6
E050
Changement d'impulsion coloré, (00-255) Touches
B, C pour modifier la vitesse de changement
d'impulsion.
7
son
La commande vocale colorée change et l'effet
d'éclairage change avec le signal sonore externe.
8
r255
Sélection de la couleur rouge (000-255), touches B,
C pour modifier la luminosité
9
g255
Sélection de la couleur verte (000-255), touches B, C
pour modifier la luminosité.
10
b255
Sélection de la couleur bleue (000-255), touches B,
C pour modifier la luminosité.
11
H255
Sélection de la couleur blanche, (000-255) Touches
B, C pour modifier la luminosité (fonction optionnelle
du produit spécial)

- 6 -
12
F255
Strobe, (000—255) Touches B, C pour modifier la
fréquence de scintillement.
5. DMX512
Chaînes
Fonction
Description
Canal 1
Gradation
totale
Gradation totale R, G, B, H, gradation linéaire,
du sombre au clair.
Canal 2
R Gradation
Gradation R, gradation linéaire, du sombre au
clair.
Canal 3
G Gradation
Gradation G, gradation linéaire, du sombre au
clair.
Canal 4
B Gradation
Gradation B, gradation linéaire, du sombre au
clair.
Canal 5
H Gradation
Gradation H (blanc), gradation linéaire, du
sombre au clair.
Canal 6
Sélection
des
fonctionnalit
és
0-50 : stroboscope et gradation linéaire ;
51--100 : saut ; 101-150 : changement
progressif ; 151-200 : changement d'impulsion ;
201-255 : commande vocale
Channe17
Vitesse
fonctionnell
e
La vitesse correspondant à la fonction du 6ème
canal, de lent à rapide
Diagram
Réglage actuel (il est interdit aux non-professionnels d'utiliser cette
fonction, et il existe un risque d'endommagement du produit en cas
d'utilisation incorrecte)
L'utilisateur peut facilement ajuster à nouveau le courant de sortie :
Il peut être ajusté via les paramètres du logiciel. Appuyez et maintenez la
touche (D Enregistrer) pendant 5 secondes pour entrer.
Après le réglage, appuyez à nouveau sur (touche de sauvegarde D) pour
enregistrer et quitter. Le tableau de correspondance des opérations est le
suivant :
- 7 -
Nombr
e
Afficher
Description de la fonction
1
rL50
Courant rouge, (00—99) Touches B, C pour modifier
la taille limite du courant, la valeur augmente, le
courant diminue Touches B, C pour modifier la taille
limite du courant, la valeur augmente, le courant
diminue
2
gL00
Courant vert, (00—99) Les touches B, C permettent
de modifier la taille limite du courant, la valeur
augmente, le courant diminue. Les touches B, C
permettent de modifier la taille limite du courant, la
valeur augmente, le courant diminue.
3
bL00
Courant bleu, touches (00—99)B, C pour modifier la
taille limite du courant, la valeur augmente, le
courant diminue
Touches B, C pour modifier la taille limite actuelle, la
valeur augmente, le courant diminue.
4
Hl00
Courant blanc, (00—99) Les touches B, C pour
modifier la taille limite du courant, la valeur
augmente, le courant diminue. Les touches B, C
pour modifier la taille limite du courant, la valeur
augmente, le courant diminue.
Remote Control Function Description
Touches activées par la voix, changements colorés activés par la voix
et effets d'éclairage qui changent avec des signaux sonores externes.
Interrupteur à clé, machine de commutation à distance.
Ajoutez et soustrayez les touches pour ajuster la valeur dans le
mode correspondant.
Touche de réglage de la luminosité de la lumière, ajustez la valeur
de luminosité de la lumière de haut en bas.
- 8 -
Touche de sélection de couleur claire (couleur 000-006) pour
sélectionner différentes couleurs de haut en bas.
La touche de changement d'impulsion colorée (vitesse 00-255)
modifie la vitesse de changement d'impulsion de haut en bas.
Touches de dégradé colorées (vitesse 00-255) modifient la vitesse
du dégradé de haut en bas.
Touche de fonction de sauvegarde : appuyez une fois dessus, la
fonction correspondante clignote trois fois sur l'écran, indiquant que la
sauvegarde est réussie, et à chaque mise sous tension, elle entrera dans
la fonction de sauvegarde réussie par défaut.
Touches de saut colorées (vitesse 00-255) modifient la vitesse de
saut par des mouvements de haut en bas.
Code d'adresse DMX512 (adresse 001-512) définissez le code
d'adresse via la combinaison de chiffres 0 à 9 sur la télécommande ou
ajoutez et soustrayez la valeur du code d'adresse via les touches plus et
moins (canal 7, utilisé dans les systèmes de contrôle d'éclairage de scène
professionnels).

- 9 -
Product Parameter
Modèle
JM-P13
Tension Fréquence
CA 120 V 60 Hz
Puissance nominale
11 W
Source de lumière du
produit
36 perles lumineuses RVB, perles de lampe à
mélange de couleurs infini.
Mode de contrôle
Une seule télécommande peut contrôler
plusieurs lumières.
Niveau
d'imperméabilité
/
Mode de
Couleur statique, stroboscopique,

- 10 -
fonctionnement
automatique, commande vocale,
maître-esclave, DMX, dégradé.
NOTE
Assurez-vous que l’électricité est coupée avant d’installer le luminaire.
La connexion du circuit doit être correcte avant de connecter le fil.
Ne vous inquiétez pas de la chaleur sur la surface de la lampe
pendant son fonctionnement. C'est une situation normale.
La durée de vie sera plus courte et l'atténuation de la lumière sera plus
rapide si la lampe fonctionne 24 heures sur 24.
Assurez-vous que la tension de sortie est dans la plage nominale
avant d'installer la lampe.
Nettoyez régulièrement la poussière sur la lampe pour maintenir de
bonnes performances de dissipation de la chaleur.
Si la lampe ne fonctionne pas, ne l'inspectez pas lorsque l'appareil est
sous tension. La lampe doit être inspectée et entretenue par un
électricien professionnel.
Fault Analysis
Questions
Analyse des causes
Contre-mesure
La lumière est
éteinte.
Si la fiche est
correctement insérée.
1. Mettez le bouchon en
place.
2. Vérifiez que les
lumières sont
correctement branchées.

- 11 -
Les lumières
sont tamisées.
Si la tension est
correcte.
Utilisez la bonne source
d’alimentation.
Fabriqué en Chine


Technischer Support und E-Garantie-Zertifikat
www.vevor.com/support
LED Par Licht Anweisung Handbuch
MODELL: JM-P13
We continue to be committed to provide you tools with competitive price.
"Save Half", "Half Price" or any other similar expressions used by us only represents an
estimate of savings you might benefit from buying certain tools with us compared to the major
top brands and does not necessarily mean to cover all categories of tools offered by us. You
are kindly reminded to verify carefully when you are placing an order with us if you are
actually saving half in comparison with the top major brands.

- 1 -
Modell: JM-P13
★ Das Bild dient nur als Referenz. Bitte beachten Sie das tatsächliche Bild.
Have product questions? Need technical support? Please feel free to
contact us:
Technical Support and E-Warranty Certificate
www.vevor.com/support
NEED HELP? CONTACT US!
This is the original instruction, please read all manual instructions
carefully before operating. VEVOR reserves a clear interpretation of our
user manual. The appearance of the product shall be subject to the
product you received. Please forgive us that we won't inform you again if
there are any technology or software updates on our product.
LED Par Light

- 2 -
Warnung: Um das Verletzungsrisiko zu verringern, muss der
Benutzer die Bedienungsanleitung sorgfältig lesen.
Stellen Sie sicher, dass die Stromversorgung ausgeschaltet ist, bevor
Sie die Vorrichtung installieren.
Vor dem Anschließen der Kabel muss der Stromkreisanschluss
korrekt sein.
Machen Sie sich keine Sorgen wegen der Hitze auf der Oberfläche der
Lampe, wenn sie in Betrieb ist. Das ist normal.
Wenn die Lampe täglich 24 Stunden lang eingeschaltet ist, verkürzt
sich die Lebensdauer und die Lichtdämpfung nimmt schneller ab.
Stellen Sie sicher, dass die Ausgangsspannung innerhalb des
Nennspannungsbereichs liegt, bevor
Einbau der Lampe.
Entfernen Sie regelmäßig Staub von der Lampe, um eine gute
Wärmeableitungsleistung aufrechtzuerhalten.
Wenn die Lampe nicht funktioniert, überprüfen Sie sie nicht, wenn sie
eingeschaltet ist. Die Lampe sollte von einem professionellen
Elektriker überprüft und gewartet werden.
Erklärung zur FCC-Konformitätserklärung:
Dieses Gerät entspricht Teil 15 der FCC-Bestimmungen. Der Betrieb
unterliegt den folgenden zwei Bedingungen:
1) Dieses Produkt kann schädliche Störungen verursachen.
2) Dieses Produkt muss alle empfangenen Störungen tolerieren,
einschließlich Störungen, die einen unerwünschten Betrieb verursachen
können.
WARNUNG: Änderungen oder Modifikationen an diesem Produkt, die nicht
ausdrücklich von der für die Konformität verantwortlichen Partei genehmigt
wurden, können zum Erlöschen der Berechtigung des Benutzers zum
Betrieb des Produkts führen.

- 3 -
PRODUCT DESCRIPTION
1.1 So stellen Sie die Werkseinstellungen wieder her: Halten Sie die Taste
A 3 Sekunden lang gedrückt. Auf dem Display wird „DEFA“ angezeigt.
Dies bedeutet, dass das Zurücksetzen auf die Werkseinstellungen
erfolgreich war und alle kundendefinierten Funktionen auf die werkseitigen
Standardparameter zurückgesetzt wurden.
1.2 Speicherfunktion: Drücken Sie einmal die D-Taste, die entsprechende
Funktion blinkt dreimal im Display und zeigt damit an, dass das Speichern
erfolgreich war.

- 4 -
6. Vergleichstabelle der Funktionen des LED-Anzeigefensters (alle
Funktionen werden ausgewählt, dann zum Speichern und Bestätigen
die Taste D drücken)
Nummer
Anzeige
Funktionsbeschreibung
1
d001
Adresscode, (001-512)B,C-Taste plus oder minus
Adresscodewert (Kanal 7, wird in professionellen
Bühnenlicht-Steuerungssystemen verwendet)
2
C001
Adresscode, (001-512) B-, C-Taste plus oder minus
Adresscodewert (Kanal 3, Anwendung
herkömmlicher bunter Lichtsteuerungssysteme, z. B.
für Außenbeleuchtungsprojekte)
3
A001
Farbauswahl, (000-006) BC-Taste zum Auswählen
verschiedener Farben.
4
P050
Bunter Sprung, Tasten (00-255)B, C zum Ändern der
Sprunggeschwindigkeit.
5
L050
Bunter Farbverlauf, Tasten (00-255) B, C zum
Ändern der Farbverlaufsgeschwindigkeit.
6
E050
Bunter Pulswechsel, (00-255) B-, C-Tasten zum
Ändern der Pulswechselgeschwindigkeit.
7
Klang
Die farbenfrohe Sprachsteuerung ändert sich und
der Lichteffekt ändert sich mit dem externen
Tonsignal.
8
r255
Rote Farbauswahl, (000-255) B-, C-Tasten zum
Ändern der Helligkeit
9
g255
Grüne Farbauswahl, (000-255) B-, C-Tasten zum
Ändern der Helligkeit.
10
b255
Blaue Farbauswahl, (000-255) B-, C-Tasten zum
Ändern der Helligkeit.

- 5 -
11
H255
Auswahl der weißen Farbe, (000-255) B- und
C-Tasten zum Ändern der Helligkeit (optionale
Spezialproduktfunktion)
12
F255
Stroboskop, Tasten B und C zum Ändern der
Flackerfrequenz.
7. DMX512
Kanäle
Funktion
Beschreibung
Kanal1
Vollständige
Dimmfunkti
on
R, G, B, H-Gesamtdimmung, lineares Dimmen,
von dunkel nach hell.
Kanal 2
R Dimmen
R-Dimmen, lineares Dimmen, von dunkel nach
hell.
Kanal 3
G Dimmen
G-Dimmen, lineares Dimmen, von dunkel nach
hell.
Kanal 4
B Dimmen
B-Dimmen, lineares Dimmen, von dunkel nach
hell.
Kanal 5
H Dimmen
H(Weiß)Dimmen, lineares Dimmen, von dunkel
nach hell.
Kanal 6
Funktionsau
swahl
0-50: Stroboskop und lineares Dimmen; 51-100:
Sprung; 101-150: allmähliche Änderung;
151-200: Impulsänderung; 201-255:
Sprachsteuerung
Kanal 17
Funktionale
Geschwindi
gkeit
Die Geschwindigkeit entspricht der 6.
Kanalfunktion, von langsam bis schnell
Diagram
Stromeinstellung (die Nutzung dieser Funktion ist Laien untersagt und es
besteht die Gefahr einer Beschädigung des Produkts bei unsachgemäßer
Anwendung)
Der Benutzer kann den Ausgangsstrom einfach neu einstellen:
Es kann über die Softwareeinstellungen angepasst werden. Zum Eingeben
die Taste (Speichern-Taste D) 5 Sekunden lang gedrückt halten.

- 6 -
Drücken Sie nach dem Einstellen erneut (Speichertaste D), um zu
speichern und zu beenden. Die Vorgangskorrespondenztabelle lautet wie
folgt:
Numm
er
Anzeig
e
Funktionsbeschreibung
1
rL50
Roter Strom, (00—99)B, C-Tasten zum Ändern der
Strombegrenzungsgröße, der Wert erhöht sich, der
Strom verringert sich B, C-Tasten zum Ändern der
Strombegrenzungsgröße, der Wert erhöht sich, der
Strom verringert sich
2
gL00
Grüner Strom, (00–99) Tasten B, C zum Ändern der
Stromgrenzgröße, der Wert erhöht sich, der Strom
verringert sich. Tasten B, C zum Ändern der
Stromgrenzgröße, der Wert erhöht sich, der Strom
verringert sich.
3
bL00
Blauer Strom, (00—99)B, C-Tasten zum Ändern der
Strombegrenzungsgröße, der Wert erhöht sich, der
Strom verringert sich
Mit den Tasten B und C können Sie die
Strombegrenzungsgröße ändern. Der Wert wird
erhöht und der Strom verringert.
4
Hl00
Weißer Strom, (00–99) Tasten B und C zum Ändern
der Stromgrenzgröße, der Wert erhöht sich, der
Strom verringert sich. Tasten B und C zum Ändern
der Stromgrenzgröße, der Wert erhöht sich, der
Strom verringert sich.
Remote Control Function Description
Sprachaktivierte Tasten, farbenfrohe sprachaktivierte Änderungen
und Lichteffekte, die sich bei externen Tonsignalen ändern.
Netzschalterschlüssel, Fernschalter der Maschine.

- 7 -
Mit den Additions- und Subtraktionstasten können Sie den Wert
im entsprechenden Modus anpassen.
Mit der Taste zur Einstellung der Lichthelligkeit können Sie den
Helligkeitswert nach oben und unten einstellen.
Lichtfarbauswahltaste (Farbe 000-006) – mit der Auf- und Ab-Taste
können Sie unterschiedliche Farben auswählen.
Die bunte Pulsänderungstaste (Geschwindigkeit 00-255) verändert
die Pulsänderungsgeschwindigkeit nach oben und unten.
Bunte Verlaufstasten (Geschwindigkeit 00–255) ändern die
Verlaufsgeschwindigkeit nach oben und unten.
Speicherfunktionstaste: Drücken Sie diese einmal. Die
entsprechende Funktion blinkt dreimal im Display, um anzuzeigen, dass
das Speichern erfolgreich war. Bei jedem Einschalten wird standardmäßig
die Funktion zum erfolgreichen Speichern aufgerufen.
Bunte Sprungtasten (Geschwindigkeit 00-255) ändern die
Sprunggeschwindigkeit durch Hoch- und Runterschalten.
DMX512-Adresscode (Adresse 001-512). Stellen Sie den
Adresscode über die Zahlenkombination 0-9 auf der Fernbedienung ein
oder addieren und subtrahieren Sie den Adresscodewert über die Plus-
und Minustasten (Kanal 7, wird in professionellen
Bühnenlichtsteuerungssystemen verwendet).

- 8 -
Product Parameter
Modell
JM-P13
Spannung Frequenz
Wechselstrom 120 V, 60 Hz
Nennleistung
11 W
Produktlichtquelle
36 RGB-Lichtperlen, Lampenperlen mit
unendlicher Farbmischung.
Steuerungsmodus
Mit einer Fernbedienung lassen sich mehrere
Lichter steuern.
Wasserdichtigkeitsgrad
/
Betriebsart
Statische Farbe, Stroboskop, Automatik,
Sprachsteuerung, Master-Slave, DMX,

- 9 -
Farbverlauf.
NOTE
Stellen Sie sicher, dass der Strom abgeschaltet ist, bevor Sie die
Vorrichtung installieren.
Vor dem Anschließen der Kabel muss der Stromkreisanschluss
korrekt sein.
Machen Sie sich keine Sorgen über die Hitze auf der Oberfläche der
Lampe, wenn sie in Betrieb ist. Das ist ganz normal.
Wenn die Lampe täglich 24 Stunden lang in Betrieb ist, verkürzt sich
die Lebensdauer und die Lichtdämpfung nimmt schneller ab.
Stellen Sie vor der Installation der Lampe sicher, dass die
Ausgangsspannung im Nennbereich liegt.
Entfernen Sie regelmäßig Staub von der Lampe, um eine gute
Wärmeableitungsleistung aufrechtzuerhalten.
Wenn die Lampe nicht funktioniert, überprüfen Sie sie nicht, wenn sie
eingeschaltet ist. Die Lampe sollte von einem professionellen
Elektriker überprüft und gewartet werden.
Fault Analysis
Fragen
Ursachenanalyse
Gegenmaßnahme
Das Licht ist
aus.
Ob der Stecker richtig
eingesteckt ist.
1. Stecken Sie den
Stecker ein.
2. Überprüfen Sie, ob die
Lichter richtig eingesteckt
sind.

- 10 -
Die Lichter sind
schwach.
Ob die Spannung
stimmt.
Verwenden Sie die richtige
Stromquelle.
In China hergestellt


Supporto tecnico e certificato di garanzia elettronica
www.vevor.com/support
GUIDATO Par Leggero Istruzione Manuale
MODELLO: JM-P13
We continue to be committed to provide you tools with competitive price.
"Save Half", "Half Price" or any other similar expressions used by us only represents an
estimate of savings you might benefit from buying certain tools with us compared to the major
top brands and does not necessarily mean to cover all categories of tools offered by us. You
are kindly reminded to verify carefully when you are placing an order with us if you are
actually saving half in comparison with the top major brands.

- 1 -
Modello: JM-P13
★ L'immagine è solo a scopo illustrativo, fare riferimento alla realtà.
Have product questions? Need technical support? Please feel free to
contact us:
Technical Support and E-Warranty Certificate
www.vevor.com/support
NEED HELP? CONTACT US!
This is the original instruction, please read all manual instructions
carefully before operating. VEVOR reserves a clear interpretation of our
user manual. The appearance of the product shall be subject to the
product you received. Please forgive us that we won't inform you again if
there are any technology or software updates on our product.
LED Par Light

- 2 -
Attenzione: per ridurre il rischio di lesioni, l'utente deve
leggere attentamente il manuale di istruzioni.
Assicurarsi che l'alimentazione elettrica sia disattivata prima di
installare l'apparecchio.
Prima di collegare il filo, il collegamento del circuito deve essere
corretto.
Non preoccuparti del calore che si sviluppa sulla superficie della
lampada quando è in funzione. È una situazione normale.
La durata sarà più breve e l'attenuazione della luce sarà più rapida se
la lampada funziona 24 ore al giorno.
Assicurarsi che la tensione di uscita sia compresa nell'intervallo di
tensione nominale prima
installazione della lampada.
Per garantire buone prestazioni di dissipazione del calore, pulire
regolarmente la polvere dalla lampada.
Se la lampada non funziona, non ispezionarla quando è accesa. La
lampada deve essere ispezionata e sottoposta a manutenzione da un
elettricista professionista.
Dichiarazione informativa sulla conformità FCC:
Questo dispositivo è conforme alla Parte 15 delle Norme FCC. Il
funzionamento è soggetto alle seguenti due condizioni:
1) Questo prodotto può causare interferenze dannose.
2) Questo prodotto deve accettare qualsiasi interferenza ricevuta,
comprese quelle che potrebbero causare un funzionamento indesiderato.
ATTENZIONE: modifiche o alterazioni apportate al prodotto non
espressamente approvate dalla parte responsabile della conformità
potrebbero invalidare il diritto dell'utente a utilizzare il prodotto.

- 3 -
PRODUCT DESCRIPTION
1.1 Per ripristinare le impostazioni di fabbrica: tenere premuto il tasto A per
3 secondi, il display visualizzerà DEFA, a indicare che il ripristino delle
impostazioni di fabbrica è riuscito e tutte le funzioni definite dal cliente sono
state ripristinate ai parametri predefiniti di fabbrica.
1.2 Funzione di salvataggio: premere una volta il tasto D, la funzione
corrispondente lampeggerà tre volte sul display, indicando che il
salvataggio è riuscito.
8. Tabella di confronto delle funzioni della finestra di visualizzazione
LED (selezionare tutte le funzioni, quindi premere il tasto D per
salvare e confermare)

- 4 -
Numero
Display
Descrizione della funzione
1
d001
Codice indirizzo, (001-512) tasto B, C più o meno
valore codice indirizzo (canale 7, è utilizzato nel
sistema di controllo dell'illuminazione professionale)
2
C001
Codice indirizzo, (001-512) Tasto B, C più o meno
valore codice indirizzo (canale 3, applica sistemi di
controllo dell'illuminazione colorata convenzionali,
come progetti di illuminazione esterna)
3
A001
Selezione del colore, (000-006) tasto BC per
scegliere colori diversi.
4
P050
Salto colorato, (00-255) tasti B, C per modificare la
velocità del salto.
5
L050
Gradiente colorato, (00-255) tasti B,C per modificare
la velocità del gradiente.
6
E050
Cambio impulso colorato, (00-255) Tasti B, C per
modificare la velocità di cambio impulso.
7
suono
Il controllo vocale colorato cambia e l'effetto
luminoso cambia in base al segnale sonoro esterno.
8
r255
Selezione del colore rosso, (000-255) Tasti B, C per
modificare la luminosità
9
g255
Selezione del colore verde (000-255), tasti B, C per
modificare la luminosità.
10
b255
Selezione del colore blu (000-255), tasti B, C per
modificare la luminosità.
11
H255
Selezione del colore bianco, (000-255) Tasti B, C per
modificare la luminosità (funzione opzionale del
prodotto speciale)
12
F255
Strobo, (000—255) Tasti B, C per modificare la
frequenza di sfarfallio.

- 5 -
9. Controllo DMX512
Canali
Funzione
Descrizione
Canale1
Oscurament
o totale
Oscuramento totale R, G, B, H, oscuramento
lineare, da scuro a chiaro.
Canale 2
R
Oscurament
o
R dimming, dimming lineare, da scuro a chiaro.
Canale 3
G
Oscurament
o
G dimming, dimming lineare, da scuro a chiaro.
Canale 4
B
Oscurament
o
B dimming, dimming lineare, da scuro a chiaro.
Canale 5
H
Oscurament
o
H(white)dimming, dimming lineare, da scuro a
chiaro.
Canale 6
Selezione
delle
funzionalità
0-50: strobo e oscuramento lineare; 51-100:
salto; 101-150: cambiamento graduale;
151-200: cambiamento di impulso; 201-255:
controllo vocale
Canale17
Velocità
funzionale
La velocità corrispondente alla funzione del 6°
canale, da lenta a veloce
Diagram
Regolazione della corrente (l'uso di questa funzione è vietato ai non
professionisti e sussiste il rischio di danni al prodotto se utilizzato in modo
improprio)
L'utente può facilmente regolare nuovamente la corrente di uscita:
Può essere regolato tramite le impostazioni software. Premere e tenere
premuto (tasto D save) per 5 secondi per entrare.
Dopo l'impostazione, premere nuovamente (tasto D salva) per salvare e
uscire. La tabella delle corrispondenze delle operazioni è la seguente:
Numer
o
Display
Descrizione della funzione
- 6 -
1
rL50
Corrente rossa, (00—99) Tasti B, C per modificare la
dimensione del limite corrente, il valore aumenta, la
corrente diminuisce Tasti B, C per modificare la
dimensione del limite corrente, il valore aumenta, la
corrente diminuisce
2
gL00
Corrente verde, (00—99) Tasti B, C per modificare la
dimensione del limite corrente, il valore aumenta, la
corrente diminuisce Tasti B, C per modificare la
dimensione del limite corrente, il valore aumenta, la
corrente diminuisce.
3
bL00
Corrente blu, (00—99) Tasti B, C per modificare la
dimensione del limite corrente, il valore aumenta, la
corrente diminuisce
Tasti B, C per modificare la dimensione del limite
corrente, il valore aumenta, la corrente diminuisce.
4
HL00
Corrente bianca, (00—99) Tasti B, C per modificare
la dimensione del limite corrente, il valore aumenta,
la corrente diminuisce Tasti B, C per modificare la
dimensione del limite corrente, il valore aumenta, la
corrente diminuisce.
Remote Control Function Description
Tasti attivati vocalmente, modifiche colorate attivate vocalmente ed
effetti luminosi che cambiano con segnali sonori esterni.
Chiave di accensione, interruttore remoto.
Tasti di aggiunta e sottrazione per regolare il valore nella
modalità corrispondente.
Tasto di regolazione della luminosità della luce, regola il valore della
luminosità della luce verso l'alto e verso il basso.

- 7 -
Tasto di selezione del colore della luce (colore 000-006): seleziona
colori diversi spostando verso l'alto o verso il basso.
Il tasto colorato per cambiare impulso (velocità 00-255) modifica la
velocità di cambio impulso verso l'alto o verso il basso.
Tasti sfumati colorati (velocità 00-255): modificano la velocità della
sfumatura verso l'alto o verso il basso.
Tasto funzione Salva: premerlo una volta, la funzione
corrispondente lampeggia tre volte sul display, indicando che il salvataggio
è riuscito e ogni volta che si accende l'alimentazione, per impostazione
predefinita verrà attivata la funzione di salvataggio riuscito.
Tasti di salto colorati (velocità 00-255): modificano la velocità di
salto verso l'alto e verso il basso.
Codice indirizzo DMX512 (indirizzo 001-512): impostare il codice
indirizzo tramite la combinazione di numeri da 0 a 9 sul telecomando
oppure aggiungere e sottrarre il valore del codice indirizzo tramite i tasti più
e meno (canale 7, utilizzato nei sistemi di controllo dell'illuminazione
professionale per palcoscenici).
- 8 -
Product Parameter
Modello
Modello JM-P13
Frequenza di tensione
AC120V 60Hz
Potenza nominale
11 settimane
Sorgente luminosa del
prodotto
36 perle luminose RGB, perle luminose con
miscelazione infinita dei colori.
Modalità di controllo
Un unico telecomando può controllare più luci.
Grado di
impermeabilizzazione
/
Modalità operativa
Colore statico, stroboscopico, automatico,
controllo vocale, master-slave, DMX,

- 9 -
gradiente.
NOTE
Prima di installare l'apparecchio, assicurarsi che la corrente elettrica
sia interrotta.
Prima di collegare il filo, il collegamento del circuito deve essere
corretto.
Non preoccuparti del calore sulla superficie della lampada quando è in
funzione. È una situazione normale.
Se la lampada funziona 24 ore al giorno, la durata sarà più breve e
l'attenuazione della luce sarà più rapida.
Prima di installare la lampada, assicurarsi che la tensione di uscita
rientri nell'intervallo nominale.
Per garantire buone prestazioni di dissipazione del calore, pulire
regolarmente la polvere dalla lampada.
Se la lampada non funziona, non ispezionarla quando è accesa. La
lampada deve essere ispezionata e sottoposta a manutenzione da un
elettricista professionista.
Fault Analysis
Domande
Analisi delle cause
Contromisura
La luce è
spenta.
Se la spina è inserita
correttamente.
1. Inserire la spina.
2. Controllare che le luci
siano collegate
correttamente.

- 10 -
Le luci sono
fioche.
Se la tensione è
corretta.
Utilizzare la giusta fonte di
energia.
Made in China


Soporte técnico y certificado de garantía electrónica
www.vevor.com/support
CONDUJO Par Luz Instrucción Manual
MODELO: JM-P13
We continue to be committed to provide you tools with competitive price.
"Save Half", "Half Price" or any other similar expressions used by us only represents an
estimate of savings you might benefit from buying certain tools with us compared to the major
top brands and does not necessarily mean to cover all categories of tools offered by us. You
are kindly reminded to verify carefully when you are placing an order with us if you are
actually saving half in comparison with the top major brands.
- 1 -
Modelo: JM-P13
★ La imagen es solo de referencia, consulte la real.
Have product questions? Need technical support? Please feel free to
contact us:
Technical Support and E-Warranty Certificate
www.vevor.com/support
NEED HELP? CONTACT US!
This is the original instruction, please read all manual instructions
carefully before operating. VEVOR reserves a clear interpretation of our
user manual. The appearance of the product shall be subject to the
product you received. Please forgive us that we won't inform you again if
there are any technology or software updates on our product.
LED Par Light

- 2 -
Advertencia: Para reducir el riesgo de lesiones, el usuario
debe leer atentamente el manual de instrucciones.
Asegúrese de que la electricidad esté apagada antes de instalar el
artefacto.
La conexión del circuito debe ser correcta antes de conectar el cable.
No te preocupes por el calor de la superficie de la lámpara cuando
esté funcionando. Es una situación normal.
La vida útil será más corta y la atenuación de la luz será más rápida si
la lámpara funciona encendida durante 24 horas todos los días.
Asegúrese de que el voltaje de salida esté dentro del rango de voltaje
nominal antes
Instalación de la lámpara.
Limpie periódicamente el polvo de la lámpara para mantener un buen
rendimiento de disipación de calor.
Si la lámpara no funciona, no la inspeccione cuando esté encendida.
La lámpara debe ser inspeccionada y mantenida por un electricista
profesional.
Declaración de información de cumplimiento de la FCC:
Este dispositivo cumple con la Parte 15 de las Normas de la FCC. Su
funcionamiento está sujeto a las dos condiciones siguientes:
1) Este producto puede causar interferencias dañinas.
2) Este producto debe aceptar cualquier interferencia recibida,
incluida aquella que pueda provocar un funcionamiento no deseado.
ADVERTENCIA: Los cambios o modificaciones a este producto no
aprobados expresamente por la parte responsable del cumplimiento
podrían anular la autoridad del usuario para operar el producto.

- 3 -
PRODUCT DESCRIPTION
1.1 Para restaurar la configuración de fábrica: Mantenga presionada la
tecla A durante 3 segundos, la pantalla mostrará DEFA, indicando que el
restablecimiento de fábrica fue exitoso y todas las funciones definidas por
el cliente se restauraron a los parámetros predeterminados de fábrica.
1.2 Función de guardado: Presione la tecla D una vez, la función
correspondiente parpadeará tres veces en la pantalla, indicando que el
guardado fue exitoso.
10. Tabla de comparación de funciones de la ventana de
visualización LED (se seleccionan todas las funciones y luego se
presiona la tecla D para guardar y confirmar)

- 4 -
Número
Mostrar
Descripción de la función
1
d001
Código de dirección, (001-512) Tecla B, C más o
menos valor del código de dirección (canal 7, se
utiliza en el sistema de control de iluminación de
escenario profesional)
2
C001
Código de dirección, (001-512) Tecla B, C más o
menos el valor del código de dirección (canal 3,
aplicar sistemas de control de iluminación de colores
convencionales, como proyectos de iluminación
exterior)
3
A001
Selección de color, tecla (000-006)BC para elegir
diferentes colores.
4
P050
Salto colorido, teclas (00-255)B, C para modificar la
velocidad del salto.
5
L050
Gradiente de colores, teclas (00-255) B, C para
modificar la velocidad del gradiente.
6
E050
Cambio de pulso colorido, (00-255) Teclas B, C para
modificar la velocidad de cambio de pulso.
7
sonido
El control de voz colorido cambia y el efecto de
iluminación cambia con la señal de sonido externa.
8
R255
Selección de color rojo, (000-255) Teclas B, C para
modificar el brillo
9
g255
Selección de color verde, (000-255) teclas B, C para
modificar el brillo.
10
b255
Selección de color azul, (000-255) Teclas B, C para
modificar el brillo.
11
H255
Selección de color blanco, (000-255) Teclas B, C
para modificar el brillo (función opcional especial del
producto)
- 5 -
12
F255
Estroboscopio, (000—255) Teclas B, C para
modificar la frecuencia de parpadeo.
11. DMX512
Canales
Función
Descripción
Canal 1
Atenuación
total
Atenuación total R,G,B,H, atenuación lineal, de
oscuro a brillante.
Canal 2
Atenuación
R
Atenuación R, atenuación lineal, de oscuro a
brillante.
Canal 3
G
Atenuación
Atenuación G, atenuación lineal, de oscuro a
brillante.
Canal 4
B
Atenuación
Atenuación B, atenuación lineal, de oscuro a
brillante.
Canal 5
Atenuación
H
Atenuación H(blanco), atenuación lineal, de
oscuro a brillante.
Canal 6
Selección
de
funciones
0-50: luz estroboscópica y atenuación lineal;
51-100: salto; 101-150: cambio gradual;
151-200: cambio de pulso; 201-255: control de
voz
canal17
Velocidad
funcional
La velocidad correspondiente a la función del
canal 6, de lenta a rápida
Diagram
Ajuste actual (esta función está prohibida a personas no profesionales y
existe el riesgo de dañar el producto si se utiliza de forma incorrecta)
El usuario puede volver a ajustar fácilmente la corriente de salida:
Se puede ajustar a través de la configuración del software. Mantenga
presionada la tecla (tecla de guardar D) durante 5 segundos para ingresar.
Después de realizar la configuración, presione nuevamente (tecla de
guardar D) para guardar y salir. La tabla de correspondencia de
operaciones es la siguiente:
Númer
o
Mostrar
Descripción de la función

- 6 -
1
rl50
Corriente roja, (00—99) Teclas B, C para modificar
el tamaño del límite actual, el valor aumenta, la
corriente disminuye Teclas B, C para modificar el
tamaño del límite actual, el valor aumenta, la
corriente disminuye
2
gL00
Corriente verde, (00—99) Teclas B, C para modificar
el tamaño del límite de corriente, el valor aumenta, la
corriente disminuye Teclas B, C para modificar el
tamaño del límite de corriente, el valor aumenta, la
corriente disminuye.
3
bL00
Corriente azul, (00—99) Teclas B, C para modificar
el tamaño del límite de corriente, el valor aumenta, la
corriente disminuye
Teclas B, C para modificar el tamaño del límite
actual, el valor aumenta, la corriente disminuye.
4
Hl00
Corriente blanca, (00—99) Teclas B, C para
modificar el tamaño del límite de corriente, el valor
aumenta, la corriente disminuye Teclas B, C para
modificar el tamaño del límite de corriente, el valor
aumenta, la corriente disminuye.
Remote Control Function Description
Teclas activadas por voz, cambios coloridos activados por voz y
efectos de iluminación que cambian con señales de sonido externas.
Llave de interruptor de encendido, máquina de interruptor remoto.
Suma y resta teclas para ajustar el valor en el modo
correspondiente.
Tecla de ajuste de brillo de la luz, ajuste el valor de brillo de la luz
hacia arriba y hacia abajo.

- 7 -
Tecla de selección de color de luz, (color 000-006) selecciona
diferentes colores hacia arriba y hacia abajo.
La colorida tecla de cambio de pulso (velocidad 00-255) modifica la
velocidad de cambio de pulso hacia arriba y hacia abajo.
Las teclas de degradado de colores (velocidad 00-255) modifican la
velocidad del degradado hacia arriba y hacia abajo.
Tecla de función de guardado: Presiónela una vez, la función
correspondiente parpadeará tres veces en la pantalla, lo que indica que el
guardado fue exitoso y cada vez que se encienda, ingresará a la función
de guardado exitoso de manera predeterminada.
Teclas de salto coloridas (velocidad 00-255) modifican la velocidad
del salto hacia arriba y hacia abajo.
Código de dirección DMX512, (dirección 001-512) configure el
código de dirección a través de la combinación de números 0-9 en el
control remoto o agregue y reste el valor del código de dirección a través
de las teclas más y menos (canal 7, utilizado en sistemas de control de
iluminación de escenarios profesionales).

- 8 -
Product Parameter
Modelo
JM-P13
Frecuencia de voltaje
CA 120 V 60 Hz
Potencia nominal
11 W
Fuente de luz del
producto
36 cuentas de luz RGB, cuentas de lámpara
con mezcla de colores infinitos.
Modo de control
Un control remoto puede controlar varias
luces.
Grado de
impermeabilización
/
Modo de
Color estático, estroboscópico, automático,

- 9 -
funcionamiento
control por voz, maestro-esclavo, DMX,
gradiente.
NOTE
Asegúrese de que la electricidad esté cortada antes de instalar el
artefacto.
La conexión del circuito debe ser correcta antes de conectar el cable.
No te preocupes por el calor que se genera en la superficie de la
lámpara cuando está en funcionamiento. Es una situación normal.
La vida útil será más corta y la atenuación de la luz será más rápida si
la lámpara funciona durante 24 horas todos los días.
Asegúrese de que el voltaje de salida esté dentro del rango nominal
antes de instalar la lámpara.
Limpie periódicamente el polvo de la lámpara para mantener un buen
rendimiento de disipación de calor.
Si la lámpara no funciona, no la inspeccione cuando esté encendida.
La inspección y el mantenimiento de la lámpara deben estar a cargo
de un electricista profesional.
Fault Analysis
Preguntas
Análisis de causas
Contramedida
La luz está
apagada.
Si el enchufe está
insertado
correctamente.
1、Coloque el enchufe en
su lugar.
2 、 Compruebe que las
luces estén enchufadas

- 10 -
correctamente.
Las luces están
tenues.
Si el voltaje es correcto.
Utilice la fuente de
alimentación adecuada.
Hecho en china


Wsparcie techniczne i certyfikat e-gwarancji
www.vevor.com/support
PROWADZONY Par Światło Instrukcja Podręcznik
MODELE: JM-P13
We continue to be committed to provide you tools with competitive price.
"Save Half", "Half Price" or any other similar expressions used by us only represents an
estimate of savings you might benefit from buying certain tools with us compared to the major
top brands and does not necessarily mean to cover all categories of tools offered by us. You
are kindly reminded to verify carefully when you are placing an order with us if you are
actually saving half in comparison with the top major brands.

- 1 -
Modele: JM-P13
★ Zdjęcie ma charakter poglądowy, proszę odnieść się do stanu
faktycznego.
Have product questions? Need technical support? Please feel free to
contact us:
Technical Support and E-Warranty Certificate
www.vevor.com/support
NEED HELP? CONTACT US!
LED Par Light

- 2 -
This is the original instruction, please read all manual instructions
carefully before operating. VEVOR reserves a clear interpretation of our
user manual. The appearance of the product shall be subject to the
product you received. Please forgive us that we won't inform you again if
there are any technology or software updates on our product.

- 3 -
Ostrzeżenie: Aby zminimalizować ryzyko obrażeń, użytkownik
powinien uważnie przeczytać instrukcję obsługi.
Przed montażem urządzenia upewnij się, że zasilanie jest wyłączone.
Przed podłączeniem przewodu należy wykonać prawidłowe
połączenia obwodowe.
Nie martw się ciepłem powierzchni lampy podczas jej pracy. To
normalna sytuacja.
Żywotność lampy będzie krótsza, a tłumienie światła szybsze, jeśli
lampa będzie działać przez 24 godziny na dobę.
Przed podłączeniem upewnij się, że napięcie wyjściowe mieści się w
zakresie napięcia znamionowego.
instalowanie lampy.
Regularnie usuwaj kurz z lampy, aby zapewnić dobre odprowadzanie
ciepła.
Jeżeli lampa nie działa, nie należy jej sprawdzać, gdy jest włączona.
Lampę powinien sprawdzać i konserwować profesjonalny elektryk.
Oświadczenie dotyczące zgodności z przepisami FCC:
To urządzenie jest zgodne z częścią 15 przepisów FCC. Jego
działanie podlega następującym dwóm warunkom:
1) Produkt ten może powodować szkodliwe zakłócenia.
2) Produkt ten musi być odporny na wszelkie zakłócenia, w tym
zakłócenia mogące powodować niepożądane działanie.
OSTRZEŻENIE: Wszelkie zmiany lub modyfikacje tego produktu, które nie
zostały wyraźnie zatwierdzone przez stronę odpowiedzialną za zgodność,
mogą spowodować unieważnienie prawa użytkownika do korzystania z
produktu.
- 4 -
PRODUCT DESCRIPTION
1.1 Aby przywrócić ustawienia fabryczne: Naciśnij i przytrzymaj przycisk A
przez 3 sekundy, na wyświetlaczu pojawi się komunikat DEFA, co oznacza,
że przywrócenie ustawień fabrycznych zakończyło się powodzeniem, a
wszystkie funkcje zdefiniowane przez użytkownika zostały przywrócone do
domyślnych parametrów fabrycznych.
1.2 Funkcja zapisu: Naciśnij klawisz D jeden raz, a odpowiednia funkcja
zamiga na wyświetlaczu trzy razy, wskazując, że zapis zakończył się
powodzeniem.

- 5 -
12. Tabela porównawcza funkcji okna wyświetlacza LED (po
wybraniu wszystkich funkcji naciśnij przycisk D, aby zapisać i
potwierdzić)
Numer
Wyświetl
acz
Opis funkcji
1
d001
Kod adresu, (001-512)B, C klawisz plus lub minus
wartość kodu adresu (kanał 7, używany w
profesjonalnym systemie sterowania oświetleniem
scenicznym)
2
C001
Kod adresu, (001-512) klawisz B, C plus lub minus
wartość kodu adresu (kanał 3, stosuje się
konwencjonalne systemy sterowania oświetleniem
kolorowym, takie jak projekty oświetlenia
zewnętrznego)
3
A001
Wybór koloru, klawisz (000-006)BC umożliwia wybór
różnych kolorów.
4
P050
Kolorowy skok, klawisze (00-255)B, C służą do
zmiany prędkości skoku.
5
L050
Kolorowy gradient, klawisze (00-255) B, C służą do
modyfikowania prędkości gradientu.
6
E050
Kolorowa zmiana impulsu, (00-255) klawisze B, C
służą do modyfikacji szybkości zmiany impulsu.
7
dźwięk
Kolorowe sterowanie głosem zmienia się, a efekty
świetlne zmieniają się w zależności od zewnętrznego
sygnału dźwiękowego.
8
r255
Wybór koloru czerwonego, (000-255) klawisze B, C
do zmiany jasności
9
g255
Wybór koloru zielonego, (000-255) klawisze B, C
służą do zmiany jasności.

- 6 -
10
b255
Wybór koloru niebieskiego, (000-255) Klawisze B, C
służą do zmiany jasności.
11
H255
Wybór koloru białego, (000-255) B, C klawisze do
zmiany jasności (specjalna opcjonalna funkcja
produktu)
12
F255
Stroboskop, klawisze B, C (000—255) służące do
zmiany częstotliwości migotania.
13. DMX512
Kanały
Funkcjonow
ać
Opis
Kanał 1
Całkowite
przyciemnie
nie
Całkowite przyciemnianie R, G, B, H,
przyciemnianie liniowe, od ciemnego do
jasnego.
Kanał 2
R
Ściemnianie
Ściemnianie R, ściemnianie liniowe, od
ciemnego do jasnego.
Kanał 3
G
Ściemnianie
Ściemnianie G, ściemnianie liniowe, od
ciemnego do jasnego.
Kanał 4
B
Ściemnianie
Ściemnianie B, ściemnianie liniowe, od
ciemnego do jasnego.
Kanał 5
H
Ściemnianie
Ściemnianie H(białe), ściemnianie liniowe, od
ciemnego do jasnego.
Kanał 6
Wybór
funkcji
0-50: stroboskop i ściemnianie liniowe; 51--100:
skok; 101-150: stopniowa zmiana; 151-200:
zmiana impulsowa; 201-255: sterowanie
głosowe
Kanał 17
Prędkość
funkcjonaln
a
Prędkość odpowiadająca funkcji 6 kanału, od
wolnej do szybkiej
Diagram
Regulacja prądu (funkcja ta nie jest przeznaczona dla osób
nieprofesjonalnych, a w przypadku niewłaściwego użycia istnieje ryzyko
uszkodzenia produktu)
Użytkownik może łatwo ponownie dostosować prąd wyjściowy:

- 7 -
Można to dostosować za pomocą ustawień oprogramowania. Naciśnij i
przytrzymaj (klawisz D save) przez 5 sekund, aby wejść.
Po ustawieniu naciśnij ponownie (klawisz D save), aby zapisać i wyjść.
Tabela korespondencji operacji jest następująca:
Numer
Wyświe
tlacz
Opis funkcji
1
rL50
Prąd czerwony, (00—99) Klawisze B, C służą do
modyfikowania rozmiaru limitu prądu, wartość
wzrasta, prąd maleje Klawisze B, C służą do
modyfikowania rozmiaru limitu prądu, wartość
wzrasta, prąd maleje
2
gl00
Prąd zielony, (00—99) Klawisze B, C służą do
modyfikowania rozmiaru limitu prądu, wartość
wzrasta, prąd maleje. Klawisze B, C służą do
modyfikowania rozmiaru limitu prądu, wartość
wzrasta, prąd maleje.
3
bL00
Prąd niebieski, klawisze (00—99)B, C do
modyfikowania rozmiaru limitu prądu, wartość
wzrasta, prąd maleje
Klawisze B, C służą do modyfikowania rozmiaru
limitu prądu, wartość wzrasta, prąd maleje.
4
Hl00
Prąd biały, (00—99) Klawisze B, C służą do
modyfikowania rozmiaru limitu prądu, wartość
wzrasta, prąd maleje. Klawisze B, C służą do
modyfikowania rozmiaru limitu prądu, wartość
wzrasta, prąd maleje.
Remote Control Function Description
Klawisze aktywowane głosem, kolorowe zmiany aktywowane głosem
i efekty świetlne, które zmieniają się wraz z zewnętrznymi sygnałami
dźwiękowymi.
Kluczyk do wyłącznika zasilania, zdalne sterowanie maszyną.
- 8 -
Za pomocą klawiszy dodawania i odejmowania można
dostosować wartość w odpowiednim trybie.
Przycisk regulacji jasności światła. Regulacja jasności światła
poprzez ruch w górę i w dół.
Klawisz wyboru koloru światła (kolor 000-006), wybierz różne kolory,
naciskając przyciski w górę i w dół.
Kolorowy klawisz zmiany pulsu (prędkość 00-255) zmienia prędkość
zmiany pulsu w górę i w dół.
Kolorowe klawisze gradientowe (prędkość 00-255) zmieniają
prędkość gradientu w górę i w dół.
Klawisz funkcji zapisu: Naciśnij go raz, a odpowiednia funkcja
zamiga na wyświetlaczu trzy razy, wskazując, że zapisanie zakończyło się
pomyślnie. Po każdym włączeniu zasilania funkcja zapisu będzie
domyślnie włączona.
Kolorowe klawisze skoku (prędkość 00-255) zmieniają prędkość
skoku w górę i w dół.
Kod adresowy DMX512 (adres 001-512) – ustaw kod adresowy za
pomocą kombinacji cyfr 0-9 na pilocie lub dodaj lub odejmij wartość kodu
adresowego za pomocą przycisków plus i minus (kanał 7, używany w
profesjonalnych systemach sterowania oświetleniem scenicznym).

- 9 -
Product Parameter
Model
JM-P13
Częstotliwość napięcia
Prąd zmienny 120 V 60 Hz
Moc znamionowa
11 W
Źródło światła produktu
36 koralików świetlnych RGB, nieskończona
liczba koralików lampowych umożliwiających
mieszanie kolorów.
Tryb sterowania
Jeden pilot może sterować wieloma światłami.
Stopień
wodoodporności
/

- 10 -
Tryb pracy
Kolor statyczny, stroboskopowy,
automatyczny, sterowanie głosowe,
master-slave, DMX, gradient.
NOTE
Przed montażem oprawy upewnij się, że zasilanie jest wyłączone.
Przed podłączeniem przewodu należy wykonać prawidłowe
połączenia obwodowe.
Nie martw się ciepłem na powierzchni lampy, gdy pracuje. To
normalna sytuacja.
Żywotność lampy będzie krótsza, a tłumienie światła szybsze, jeżeli
lampa będzie pracować 24 godziny na dobę.
Przed zainstalowaniem lampy należy upewnić się, że napięcie
wyjściowe mieści się w zakresie znamionowym.
Regularnie usuwaj kurz z lampy, aby zapewnić dobre odprowadzanie
ciepła.
Jeśli lampa nie działa, nie sprawdzaj jej, gdy jest włączona. Lampa
powinna być sprawdzana i konserwowana przez profesjonalnego
elektryka.
Fault Analysis
Pytania
Analiza przyczyn
Przeciwdziałanie
Zgasło światło.
Czy wtyczka jest
prawidłowo włożona.
1. Włóż wtyczkę na
miejsce.
2 、 Sprawdź, czy
oświetlenie jest

- 11 -
prawidłowo podłączone.
Światła są
przyćmione.
Czy napięcie jest
prawidłowe.
Użyj właściwego źródła
zasilania.
Wyprodukowano w Chinach


Technische ondersteuning en e-garantiecertificaat
www.vevor.com/support
LED Par Licht Instructie Handmatig
MODEL: JM-P13
We continue to be committed to provide you tools with competitive price.
"Save Half", "Half Price" or any other similar expressions used by us only represents an
estimate of savings you might benefit from buying certain tools with us compared to the major
top brands and does not necessarily mean to cover all categories of tools offered by us. You
are kindly reminded to verify carefully when you are placing an order with us if you are
actually saving half in comparison with the top major brands.

- 1 -
Model: JM-P13
★ De afbeelding is alleen ter referentie, raadpleeg de werkelijke versie.
Have product questions? Need technical support? Please feel free to
contact us:
Technical Support and E-Warranty Certificate
www.vevor.com/support
NEED HELP? CONTACT US!
This is the original instruction, please read all manual instructions
carefully before operating. VEVOR reserves a clear interpretation of our
user manual. The appearance of the product shall be subject to the
product you received. Please forgive us that we won't inform you again if
there are any technology or software updates on our product.
LED Par Light

- 2 -
Waarschuwing: om het risico op letsel te verkleinen, moet de
gebruiker de gebruiksaanwijzing zorgvuldig lezen.
Zorg ervoor dat de elektriciteit is uitgeschakeld voordat u het armatuur
installeert.
De aansluiting van het circuit moet correct zijn voordat u de draad
aansluit.
U hoeft zich geen zorgen te maken over de hitte van het oppervlak van
de lamp als deze aan staat. Dit is normaal.
De levensduur is korter en de lichtafname is sneller als de lamp 24 uur
per dag brandt.
Zorg ervoor dat de uitgangsspanning binnen het bereik van de
nominale spanning ligt voordat u
De lamp installeren.
Maak de lamp regelmatig stofvrij om een goede warmteafvoer te
behouden.
Als de lamp niet werkt, controleer deze dan niet terwijl de stroom
aanstaat. Laat de lamp inspecteren en onderhouden door een
professionele elektricien.
FCC-nalevingsinformatieverklaring:
Dit apparaat voldoet aan Deel 15 van de FCC-regels. De werking is
onderworpen aan de volgende twee voorwaarden:
1) Dit product kan schadelijke interferentie veroorzaken.
2) Dit product moet alle ontvangen interferentie accepteren, inclusief
interferentie die ongewenste werking kan veroorzaken.
WAARSCHUWING: Wijzigingen of aanpassingen aan dit product die niet
uitdrukkelijk zijn goedgekeurd door de partij die verantwoordelijk is voor de
naleving, kunnen de bevoegdheid van de gebruiker om het product te
bedienen ongeldig maken.

- 3 -
PRODUCT DESCRIPTION
1.1 Om de fabrieksinstellingen te herstellen: Houd de A-toets 3 seconden
ingedrukt. Op het display verschijnt DEFA, wat aangeeft dat de
fabrieksinstellingen zijn hersteld en dat alle door de klant gedefinieerde
functies zijn hersteld naar de fabrieksinstellingen.
1.2 Opslagfunctie: Druk eenmaal op de D-toets, de overeenkomstige
functie knippert driemaal op het display, wat aangeeft dat het opslaan is
gelukt.
14. Vergelijkingstabel van de functies van het LED-displayvenster
(selecteer alle functies en druk vervolgens op de D-toets om op te
slaan en te bevestigen)

- 4 -
Nummer
Weergav
e
Functiebeschrijving
1
d001
Adrescode (001-512) B, C-toets plus of min
adrescodewaarde (kanaal 7, wordt gebruikt in
professionele verlichtingssystemen voor podia)
2
C001
Adrescode, (001-512) B, C-toets plus of min
adrescodewaarde (kanaal 3, conventionele kleurrijke
verlichtingsregelsystemen toepassen, zoals
buitenverlichtingsprojecten)
3
A001
Kleurselectie, (000-006) BC-toets om verschillende
kleuren te kiezen.
4
P050
Kleurrijke sprong, (00-255) B, C-toetsen om de
sprongsnelheid te wijzigen.
5
L050
Kleurrijke gradiënt, (00-255) B,C toetsen om de
gradiëntsnelheid te wijzigen.
6
E050
Kleurrijke pulsverandering, (00-255) B, C-toetsen om
de pulsveranderingssnelheid te wijzigen.
7
geluid
De kleurrijke stembesturing verandert en het
lichteffect verandert met het externe geluidssignaal.
8
r255
Selectie van de rode kleur, (000-255) B, C-toetsen
om de helderheid te wijzigen
9
g255
Selectie van de groene kleur, (000-255) B,C toetsen
om de helderheid te wijzigen.
10
b255
Selectie van de blauwe kleur (000-255) B, C-toetsen
om de helderheid te wijzigen.
11
H255
Selectie van de witte kleur, (000-255) B, C-toetsen
om de helderheid te wijzigen (speciale optionele
productfunctie)
12
F255
Stroboscoop, (000—255) B, C toetsen om de
flikkerfrequentie te wijzigen.

- 5 -
15. DMX512
Kanalen
Functie
Beschrijving
Kanaal1
Totale
Dimming
R,G,B,H totale dimfunctie, lineair dimmen, van
donker naar licht.
Kanaal 2
R Dimmen
R-dimmen, lineair dimmen, van donker naar
licht.
Kanaal 3
G Dimmen
G-dimmen, lineair dimmen, van donker naar
licht.
Kanaal 4
B Dimmen
B-dimming, lineair dimmen, van donker naar
licht.
Kanaal 5
H Dimmen
H(wit)dimmen, lineair dimmen, van donker naar
licht.
Kanaal 6
Functiesele
ctie
0-50: stroboscoop en lineaire dimmen; 51--100:
sprong; 101-150: geleidelijke verandering;
151-200: pulsverandering; 201-255:
spraakbesturing
Kanaal17
Functionele
snelheid
De snelheid die overeenkomt met de 6e
kanaalfunctie, van langzaam naar snel
Diagram
Huidige aanpassing (niet-professionals mogen deze functie niet gebruiken
en er bestaat een risico op schade aan het product als het verkeerd wordt
gebruikt)
De gebruiker kan de uitgangsstroom eenvoudig opnieuw aanpassen:
Het kan worden aangepast via software-instellingen. Houd (D save-toets)
5 seconden ingedrukt om te openen.
Na het instellen, druk nogmaals op (D save-toets) om op te slaan en af te
sluiten. De tabel met de correspondentie van de bewerking is als volgt:
Numm
er
Weerga
ve
Functiebeschrijving
- 6 -
1
rL50
Rode stroom, (00—99) B, C-toetsen om de huidige
limietgrootte te wijzigen, de waarde neemt toe, de
stroom neemt af B, C-toetsen om de huidige
limietgrootte te wijzigen, de waarde neemt toe, de
stroom neemt af
2
gL00
Groene stroom, (00—99) B, C-toetsen om de huidige
limietgrootte te wijzigen, de waarde neemt toe, de
stroom neemt af B, C-toetsen om de huidige
limietgrootte te wijzigen, de waarde neemt toe, de
stroom neemt af.
3
bL00
Blauwe stroom, (00—99)B, C-toetsen om de huidige
limietgrootte te wijzigen, de waarde neemt toe, de
stroom neemt af
Met de toetsen B en C wijzigt u de huidige
limietgrootte. De waarde neemt toe en de stroom
neemt af.
4
Hl00
Witte stroom, (00—99) B, C-toetsen om de huidige
limietgrootte te wijzigen, de waarde neemt toe, de
stroom neemt af B, C-toetsen om de huidige
limietgrootte te wijzigen, de waarde neemt toe, de
stroom neemt af.
Remote Control Function Description
Spraakgestuurde toetsen, kleurrijke spraakgestuurde veranderingen
en lichteffecten die veranderen met externe geluidssignalen.
Sleutel voor aan-/uitschakelaar, afstandsbediening voor machine.
Gebruik de toetsen Optellen en Aftrekken om de waarde in de
overeenkomstige modus aan te passen.
Knop voor het aanpassen van de helderheid van het licht. Pas de
helderheid van het licht aan door omhoog of omlaag te gaan.
- 7 -
Selectietoets voor de lichte kleur (kleur 000-006) waarmee u
verschillende kleuren kunt selecteren door omhoog en omlaag te gaan.
de kleurrijke pulsveranderingstoets (snelheid 00-255) kunt u de
pulsveranderingssnelheid omhoog en omlaag wijzigen.
Met de kleurrijke gradiënttoetsen (snelheid 00-255) kunt u de
gradiëntsnelheid omhoog en omlaag aanpassen.
Functietoets Opslaan: Druk er eenmaal op, de bijbehorende
functie knippert drie keer op het display, wat aangeeft dat het opslaan is
gelukt. Elke keer dat de stroom wordt ingeschakeld, wordt de
standaardfunctie voor het opslaan gestart.
Met de kleurrijke springtoetsen (snelheid 00-255) kun je de
springsnelheid aanpassen door omhoog en omlaag te gaan.
DMX512-adrescode (adres 001-512): stel de adrescode in met de
cijfercombinatie 0-9 op de afstandsbediening of tel de adrescodewaarde
op en trek deze af met de plus- en mintoetsen (kanaal 7, gebruikt in
professionele besturingssystemen voor podiumverlichting).

- 8 -
Product Parameter
Model
JM-P13
Spanning Frequentie
AC120V 60Hz
Vermogensclassificatie
11 W
Productlichtbron
36 RGB-lichtkralen, lampkralen met oneindige
kleurmenging.
Controlemodus
Met één afstandsbediening kunt u meerdere
lampen bedienen.
Waterdichtheidsgraad
/
Bedrijfsmodus
Statische kleur, stroboscopisch, automatisch,
spraakbesturing, master-slave, DMX, gradiënt.

- 9 -
NOTE
Zorg ervoor dat de elektriciteit is uitgeschakeld voordat u het armatuur
installeert.
De aansluiting van het circuit moet correct zijn voordat u de draad
aansluit.
Maak je geen zorgen over de hitte op het oppervlak van de lamp als
deze werkt. Dat is een normale situatie.
De levensduur is korter en de lichtverzwakking is sneller als de lamp
24 uur per dag brandt.
Zorg ervoor dat de uitgangsspanning binnen het nominale bereik ligt
voordat u de lamp installeert.
Maak de lamp regelmatig stofvrij om een goede warmteafvoer te
behouden.
Als de lamp niet werkt, controleer hem dan niet als de stroom aan
staat. De lamp moet worden geïnspecteerd en onderhouden door een
professionele elektricien.
Fault Analysis
Vragen
Analyse van oorzaken
Tegenmaatregel
Het licht is uit.
Of de stekker goed is
ingestoken.
1. Plaats de stekker.
2. Controleer of de lampen
goed zijn aangesloten.
Het licht is
zwak.
Of de spanning correct
is.
Gebruik de juiste
energiebron.

- 10 -
Gemaakt in China


Teknisk support och e-garanticertifikat
www.vevor.com/support
LED Par Ljus Instruktion Manuell
MODELL: JM-P13
We continue to be committed to provide you tools with competitive price.
"Save Half", "Half Price" or any other similar expressions used by us only represents an
estimate of savings you might benefit from buying certain tools with us compared to the major
top brands and does not necessarily mean to cover all categories of tools offered by us. You
are kindly reminded to verify carefully when you are placing an order with us if you are
actually saving half in comparison with the top major brands.

- 1 -
Modell: JM-P13
★ Bilden är endast för referens, se den faktiska.
Have product questions? Need technical support? Please feel free to
contact us:
Technical Support and E-Warranty Certificate
www.vevor.com/support
NEED HELP? CONTACT US!
This is the original instruction, please read all manual instructions
carefully before operating. VEVOR reserves a clear interpretation of our
user manual. The appearance of the product shall be subject to the
product you received. Please forgive us that we won't inform you again if
there are any technology or software updates on our product.
LED Par Light

- 2 -
Varning - För att minska risken för skada måste användaren
läsa instruktionerna noggrant.
Se till att strömmen är avstängd innan du installerar fixturen.
Kretsanslutningen måste vara korrekt innan kabeln ansluts.
Oroa dig inte för värmen på lampans yta när den fungerar. Det är en
normal situation.
Livslängden blir kortare och ljusdämpningen blir snabbare om lampan
lyser 24 timmar varje dag.
Se till att utspänningen ligger inom området för märkspänningen innan
installation av lampan.
Rengör regelbundet dammet på lampan för att bibehålla god
värmeavledningsprestanda.
Om lampan inte fungerar, inspektera den inte när strömmen är på.
Lampan bör inspekteras och underhållas av en professionell
elektriker.
FCC-kompatibilitetsinformation:
Denna enhet uppfyller del 15 av FCC-reglerna. Driften är föremål för
följande två villkor:
1) Denna produkt kan orsaka skadliga störningar.
2) Denna produkt måste acceptera alla mottagna störningar, inklusive
störningar som kan orsaka oönskad funktion.
VARNING: Ändringar eller modifieringar av denna produkt som inte
uttryckligen godkänts av den part som ansvarar för efterlevnaden kan
ogiltigförklara användarens behörighet att använda produkten.

- 3 -
PRODUCT DESCRIPTION
1.1 För att återställa fabriksinställningarna: Tryck och håll ned A-tangenten
i 3 sekunder, displayen visar DEFA, vilket indikerar att
fabriksåterställningen har lyckats, och alla kunddefinierade funktioner
återställs till fabriksinställningarna.
1.2 Spara funktion: Tryck på D-knappen en gång, motsvarande funktion
kommer att blinka tre gånger på displayen, vilket indikerar att lagringen
lyckades.
16. Jämförelsetabell för LED-displayfönsterfunktioner (alla
funktioner är valda och tryck sedan på D-knappen för att spara och
bekräfta)

- 4 -
Antal
Visa
Funktionsbeskrivning
1
d001
Adresskod, (001-512) B, C-nyckel plus eller minus
adresskodvärde (kanal7, den används i
professionellt styrsystem för scenbelysning)
2
C001
Adresskod,(001-512) B-, C-tangenten plus eller
minus adresskodvärde (kanal 3, använd
konventionella färgglada ljusstyrningssystem, såsom
utomhusbelysningsprojekt)
3
A001
Färgval, (000-006) BC-knapp för att välja olika färger.
4
P050
Färgglada hopp,(00-255)B, C-knappar för att ändra
hopphastigheten.
5
L050
Färgglad gradient,(00-255) B,C-tangenter för att
ändra gradienthastigheten.
6
E050
Färgglad pulsändring,(00-255) B, C-knappar för att
ändra pulsändringshastigheten.
7
sou n d
Den färgglada röstkontrollen ändras, och ljuseffekten
ändras med den externa ljudsignalen.
8
r255
Röd färgval, (000-255) B, C-knappar för att ändra
ljusstyrkan
9
g255
Grön färgval,(000-255) B,C-knappar för att ändra
ljusstyrkan.
10
b255
Blå färgval, (000-255) B, C-knappar för att ändra
ljusstyrkan.
11
H255
Val av vit färg, (000-255) B, C-knappar för att ändra
ljusstyrkan (tillvalsfunktion för specialprodukter)
12
F255
Strobe, (000—255) B, C-tangenter för att ändra
flimmerfrekvensen.

- 5 -
17. DMX512
Kanaler
Fungera
Beskrivning
Kanal 1
Total
dimming
R,G,B,H total nedbländning, linjär nedbländning,
från mörkt till ljust.
Kanal 2
R Dimning
R-bländning, linjär dimmer, från mörkt till ljust.
Kanal 3
G Dimning
G dimning, linjär dimning, från mörkt till ljust.
Kanal 4
B Dimning
B dimning, linjär dimning, från mörkt till ljust.
Kanal 5
H Dimning
H(vit)dimmer, linjär nedbländning, från mörkt till
ljust.
Kanal 6
Funktionsva
l
0-50: stroboskop och linjär
dimning;51--100:hopp;101-150:gradvis
förändring; 151-200: pulsändring; 201-255:
röststyrning
Kanal 17
Funktionell
hastighet
Hastigheten som motsvarar den 6:e
kanalfunktionen, från långsam till snabb
Diagram
Aktuell justering (icke-professionella är förbjudna att använda denna
funktion, och det finns risk för skador på produkten om den används
felaktigt)
Användaren kan enkelt justera utströmmen igen:
Det kan justeras genom mjukvaruinställningar. Tryck och håll ned (D
spara-knappen) i 5 sekunder för att gå in.
Efter inställningen, tryck på (D spara-knappen) igen för att spara och
avsluta. Driftöverensstämmelsetabellen är som följer:
Antal
Visa
Funktionsbeskrivning
1
rL50
Röd ström,(00—99)B, C-tangenter för att ändra den
nuvarande gränsstorleken, värdet ökar, strömmen
minskar B, C-tangenterna för att ändra den
nuvarande gränsstorleken, värdet ökar, strömmen
minskar

- 6 -
2
gL00
Grön ström,(00—99) B, C-knappar för att ändra den
nuvarande gränsstorleken, värdet ökar, strömmen
minskar B, C-knappar för att ändra den nuvarande
gränsstorleken, värdet ökar, strömmen minskar.
3
bL00
Blå ström,(00—99)B, C-knappar för att ändra
strömgränsstorleken, värdet ökar, strömmen minskar
B, C-tangenterna för att ändra den nuvarande
gränsstorleken, värdet ökar, strömmen minskar.
4
Hl00
Vit ström,(00—99) B, C-knappar för att modifiera den
nuvarande gränsstorleken, värdet ökar, strömmen
minskar B, C-knappar för att ändra den nuvarande
gränsstorleken, värdet ökar, strömmen minskar.
Remote Control Function Description
Röstaktiverade tangenter, färgglada röstaktiverade ändringar och
ljuseffekter som ändras med externa ljudsignaler.
Strömbrytarnyckel, fjärrbrytarmaskin.
Lägg till och subtrahera nycklar för att justera värdet i
motsvarande läge.
Justeringsknapp för ljusstyrka, justera ljusets ljusstyrka upp och
ner.
Ljus färgvalstangent, (färg 000-006) välj olika färger med upp och
ner.
- 7 -
Den färgstarka pulsändringsknappen (hastighet 00-255) ändrar
pulsändringshastigheten med upp och ner.
Färgglada gradientknappar (hastighet 00-255) ändrar
gradienthastigheten med upp och ner.
Spara funktionstangent: Tryck på den en gång, motsvarande
funktion blinkar tre gånger i displayen, vilket indikerar att lagringen
lyckades, och varje gång strömmen slås på kommer den att gå in i
funktionen att spara framgångsrikt som standard.
Färgglada hopptangenter, (hastighet 00-255) ändrar
hopphastigheten med upp och ner.
DMX512 adresskod, (adress 001-512) ställ in adresskoden genom
kombinationen av siffrorna 0-9 på fjärrkontrollen eller addera och
subtrahera adresskodens värde genom plus- och minustangenterna (kanal
7, används i professionell scenbelysningskontroll system).

- 8 -
Product Parameter
Modell
JM-P13
Spänning Frekvens
AC120V 60Hz
Effektvärde
11 W
Produktens ljuskälla
36 RGB ljuspärlor, oändliga
färgblandningslampa pärlor.
Kontrollläge
En fjärrkontroll kan styra flera lampor.
Vattentätningsgrad
/
Driftläge
Statisk färg, stroboskopisk, automatisk,
röststyrning, master-slave, DMX, gradient.

- 9 -
NOTE
Se till att strömmen är avstängd innan du installerar fixturen.
Kretsanslutningen måste vara korrekt innan kabeln ansluts.
Oroa dig inte för värmen på lampans yta när den fungerar. Det är en
normal situation.
Livslängden blir kortare, och ljusdämpningen blir snabbare om lampan
fungerar 24 timmar varje dag.
Se till att utspänningen ligger inom märkområdet innan du installerar
lampan.
Rengör regelbundet dammet på lampan för att bibehålla god
värmeavledningsprestanda.
Om lampan inte fungerar, inspektera den inte när strömmen är på.
Lampan bör inspekteras och underhållas av en professionell
elektriker.
Fault Analysis
Frågor
Analys av orsaker
Motåtgärd
Ljuset är släckt.
Om kontakten är korrekt
isatt.
1 、 Sätt i kontakten på
plats.
2、Kontrollera att lamporna
är ordentligt anslutna.
Ljusen är
svaga.
Om spänningen är
korrekt.
Använd rätt strömkälla.

- 10 -
Tillverkad i Kina