5-IN-1 SMART GRILL & AIR FRYER
INSTRUCTION MANUAL
ITEM NO: 8070-BLACK
Model
: AF7001-UL
THANK YOU FOR CHOOSING OUR MACHINE
PLEASE READ THE MANUAL CAREFULLY BEFORE OPERATING

1
IMPORTANT SAFEGUARDS
Before using the electrical appliance, the following basic
precautions should always be followed including the
following:
1. Read all instructions.
2. Before using check that the voltage of wall outlet correspond to the
one shown on the rating plate.
3. Do not operate any appliance with a damaged cord or plug or after
the appliance malfunctions, or is dropped or damaged in any manner.
Return appliance to the nearest authorized service facility for
examination, repair or electrical or mechanical adjustment.
4. Do not leave the appliance unattended when it is being operated.
5. The appliance must not be immersed into the water or other liquid
to avoid electric shock.
6. To disconnect, turn any control to "off", then remove plug from
wall outlet.
7. Unplug from outlet when not in use and before cleaning. Allow to
cool down before putting on or taking off parts, and before cleaning
the appliance.
8. Use special gloves when moving the frying basket or inner pot.
9. Do not let the cord hang over the edge of a table or counter or
touch a hot surface.
10. Do not touch the hot surface. Use the handle or the button.
11. The use of accessory not recommended by the manufacturer may
cause injuries to persons.
12. Do not use the appliance for other than intended use.
13. Do not place on or near a hot gas or electric burner or in a heated
oven.

2
14. Before use, always ensure that the frying basket or inner pot is
positioned correctly.
15. To prevent fire, do not place the appliance close to flammable
materials such as curtains, and do not place anything above the
appliance.
16. Make sure all papers, cardboard or plastic have been removed
before frying food.
17. The appliance can not be used for storing things, especially papers,
cardboard or plastic.
18. Extreme caution must be used when moving an appliance
containing hot oil or other hot liquids.
19. WARNING: Keep the appliance out of reach of young children,
particularly during using and cooling down.
20. This appliance is not intended for used by persons (including
children) with reduced physical, sensory or mental capabilities, or lack
of experience and knowledge, unless they have been given
supervision or instruction concerning use of the appliances by a
person responsible for their safety.
21. Close supervision is necessary when any appliance is used by or
near children.
22. Children should be supervised to ensure that they do not play
with the appliance.
23. Do not use outdoors.
24. Use extreme caution when removing tray or disposing of hot
grease.
25. Do not clean with metal scouring pads. Pieces can break off the
pad and touch electrical parts, creating a risk of electric shock.

3
SAVE THESE INSTRUCTIONS
HOUSEHOLD USE ONLY
NOTES ON THE CORD PLUG
This appliance has a polarized plug, To reduce the risk of electric shock, this plug is
intended to fit into a polarized outlet only one way, If the plug does not fit fully into the
outlet, reverse the plug, If it still does not fit, contact a qualified electrician, Do not
attempt to modify the plug in any way.
NOTES ON THE CORD
A short power-supply cord (or detachable power-supply cord) is to be provided to reduce
the risk resulting from becoming entangled in or tripping over a longer cord.
CAUTION: DO NOT USE WITH AN EXTENSION CORD
.
4
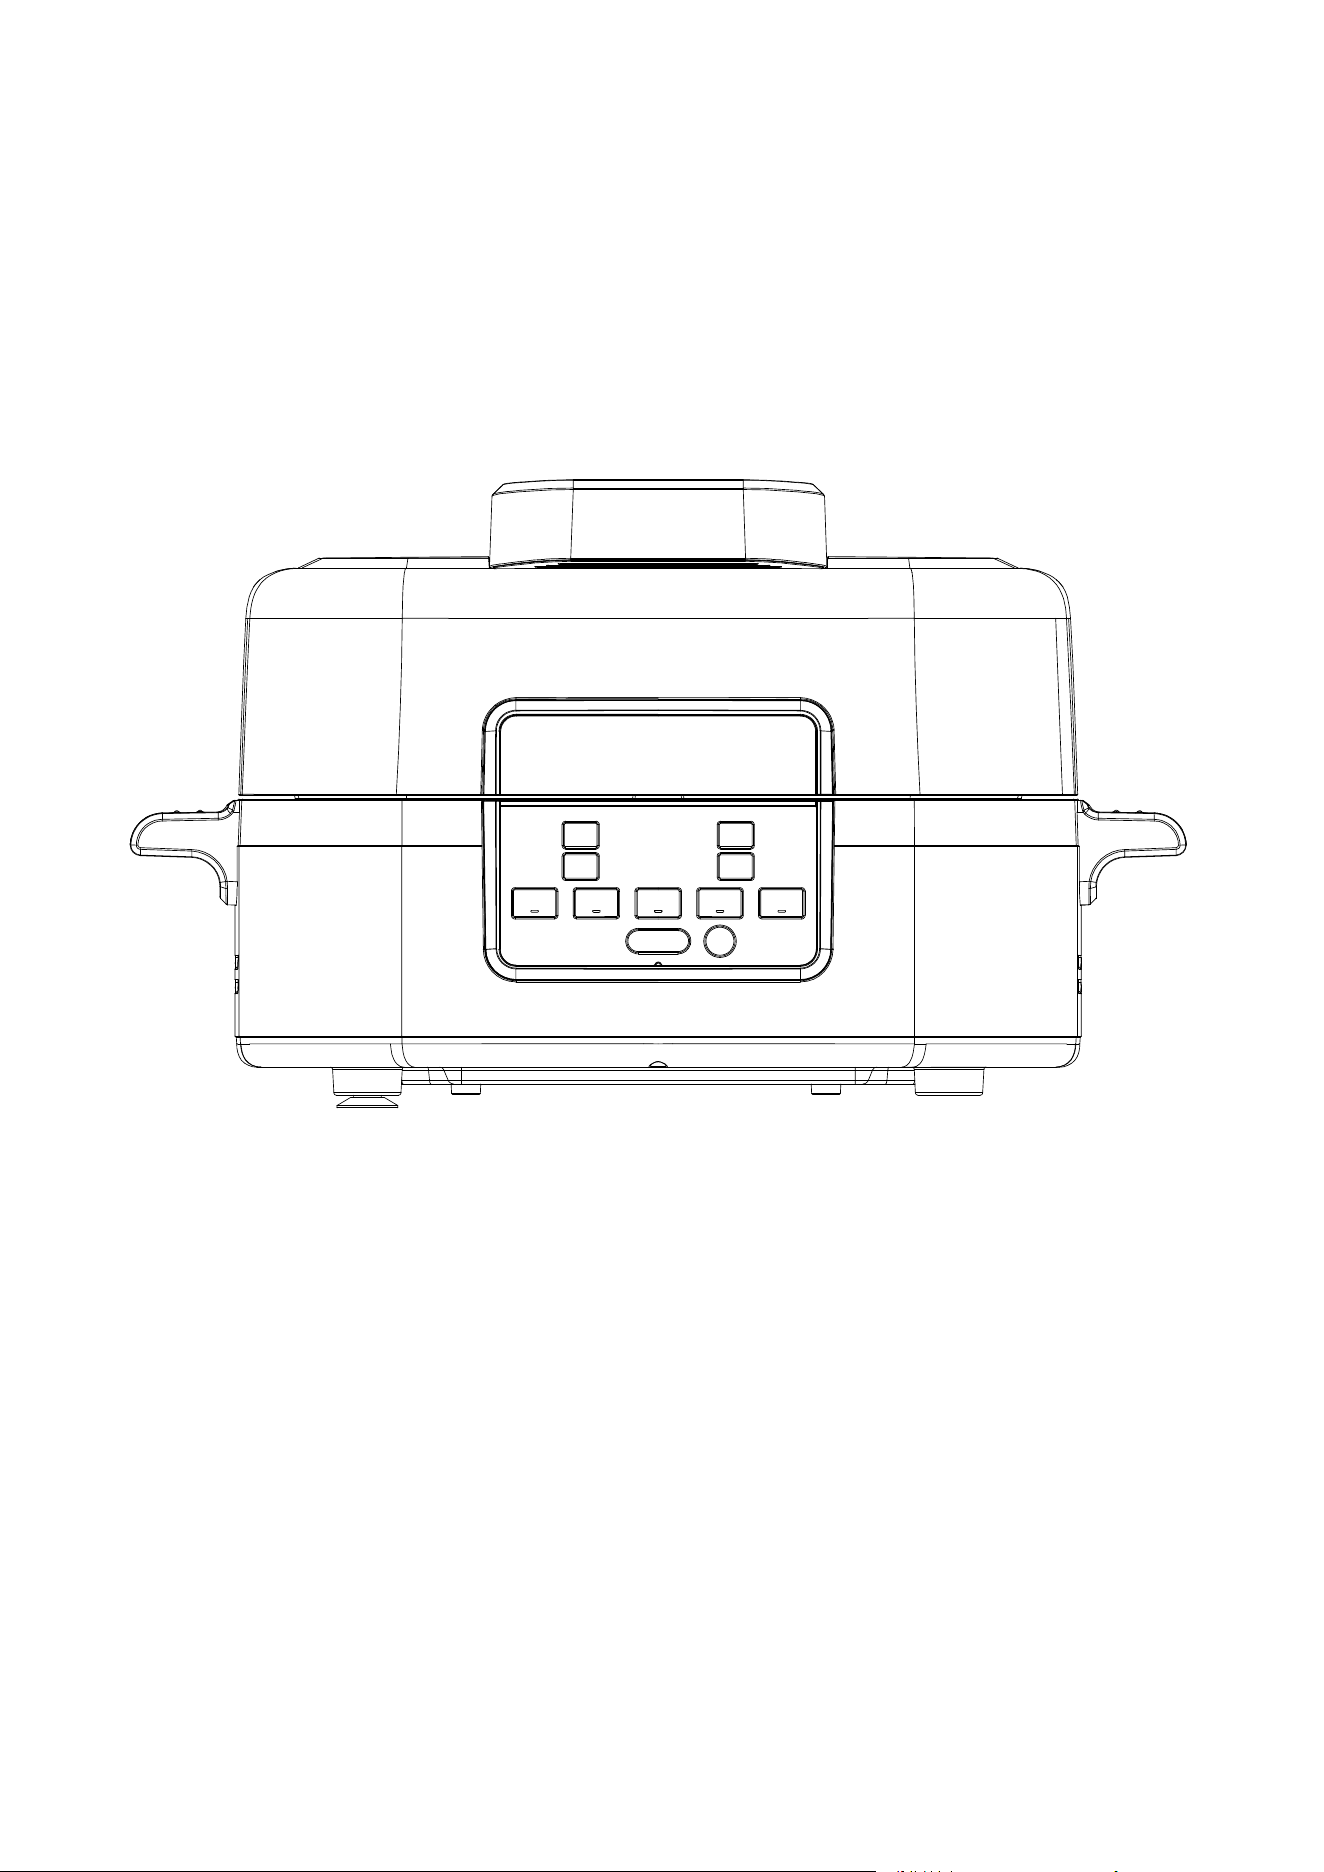
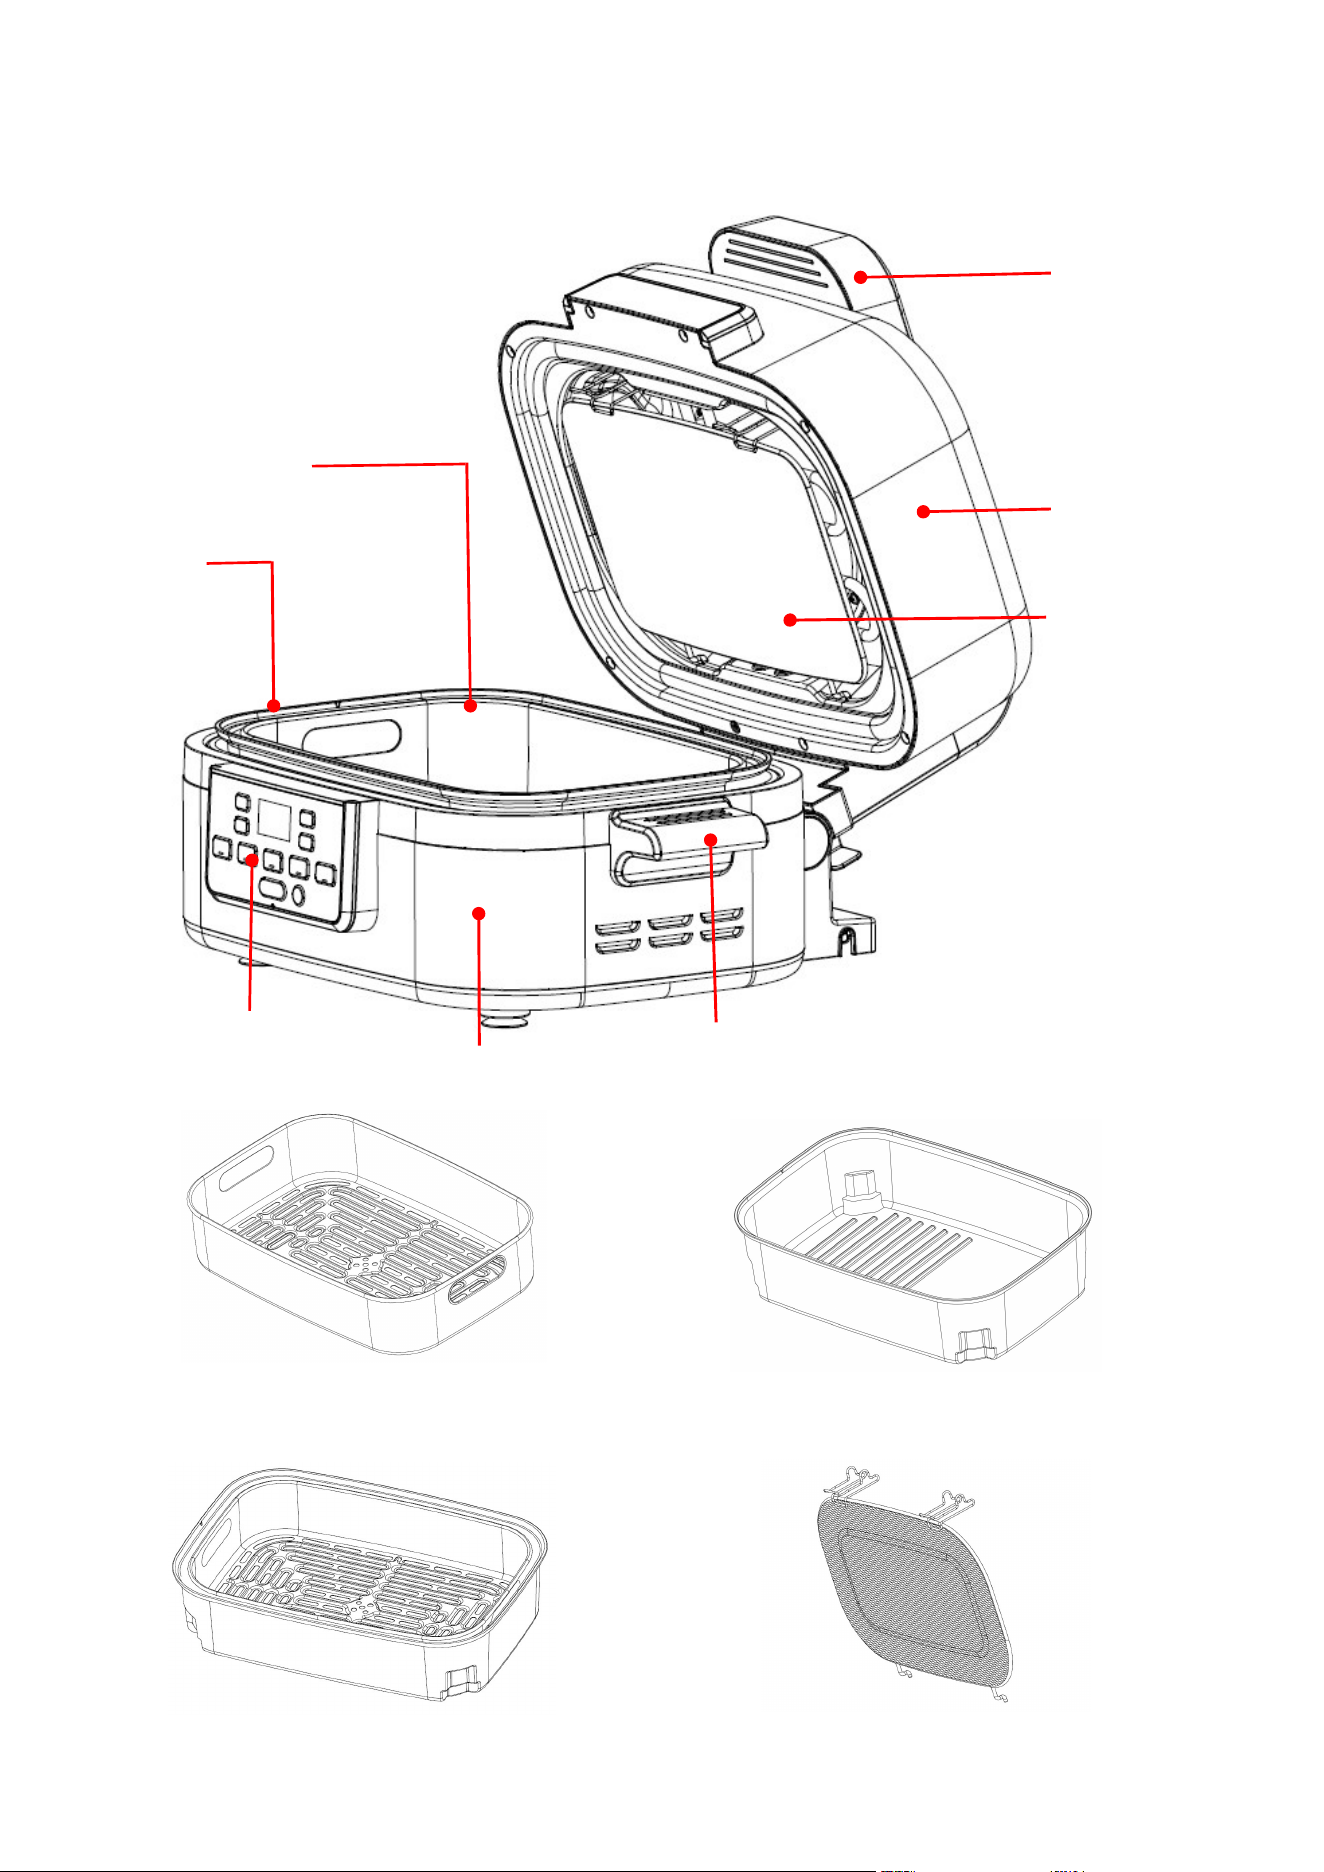
KNOW YOUR AIR FRYER
Control
panel
Top lid
Main body
Lid handle
Frying basket
Carrying handle
Inner pot
Frying basket
Inner pot
Frying basket+Inner pot
Oil separator
Oil separator
5
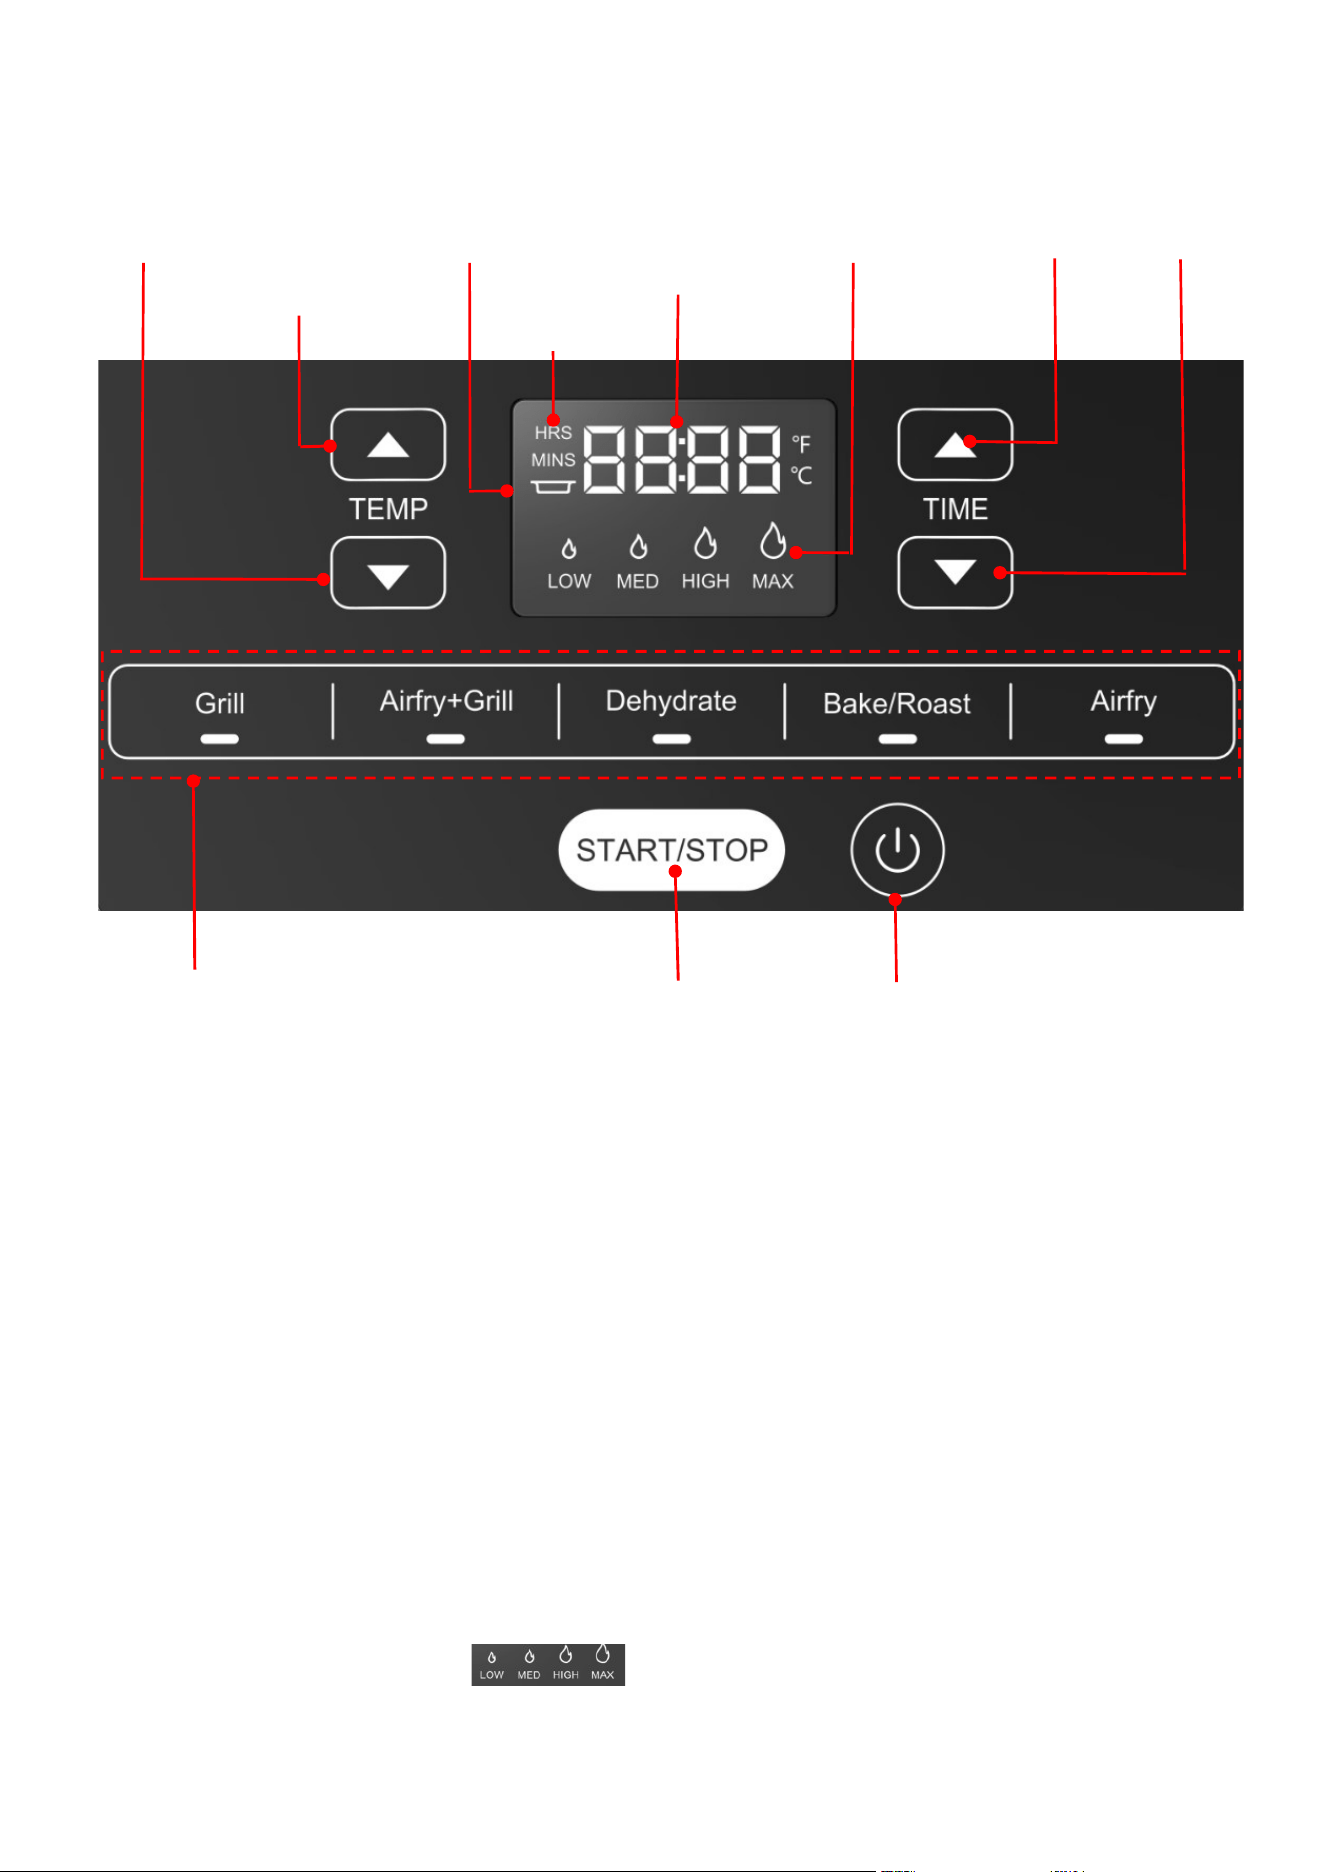
CONTROL PANEL
INTRODUCTION FOR CONTROL PANEL
Power key: To turn on or turn off the power source of appliance.
START/STOP key: Press the
“
START/STOP
”
key, the appliance can be activated. And the
appliance will pause working at any time when the “START/STOP” key is pressed at any
working status. To go back to the current menu under the preheating status, shortly press
the
“
START/STOP
”
key. To go back to the current menu under the working status, hold and
press the “START/STOP” key .
No pot indicator: For all the functions except the “Grill” function, if there is no pot
installed and the lid is not closed, the
“
No pot indicator
”
will flash.
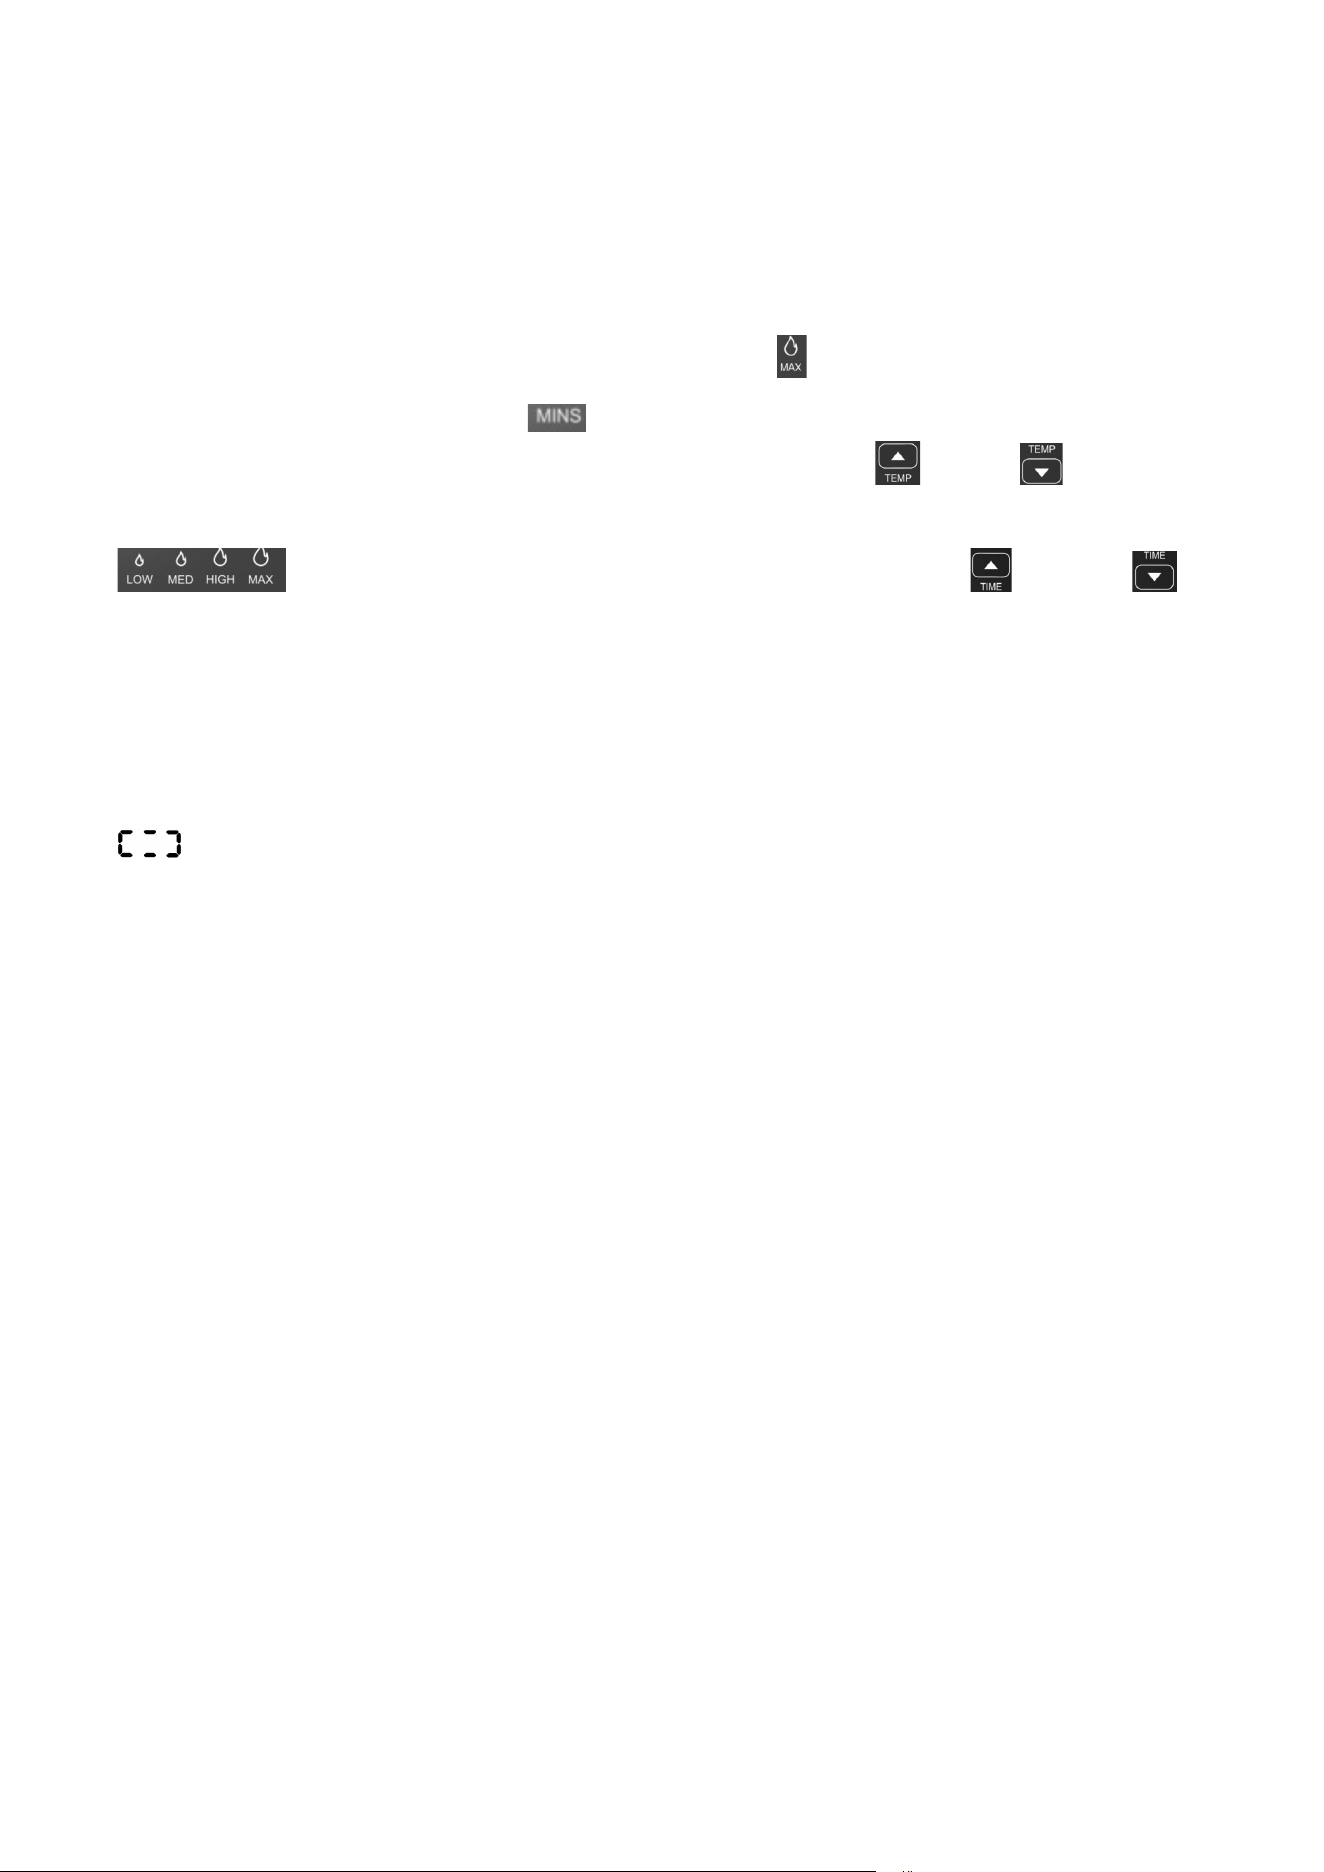
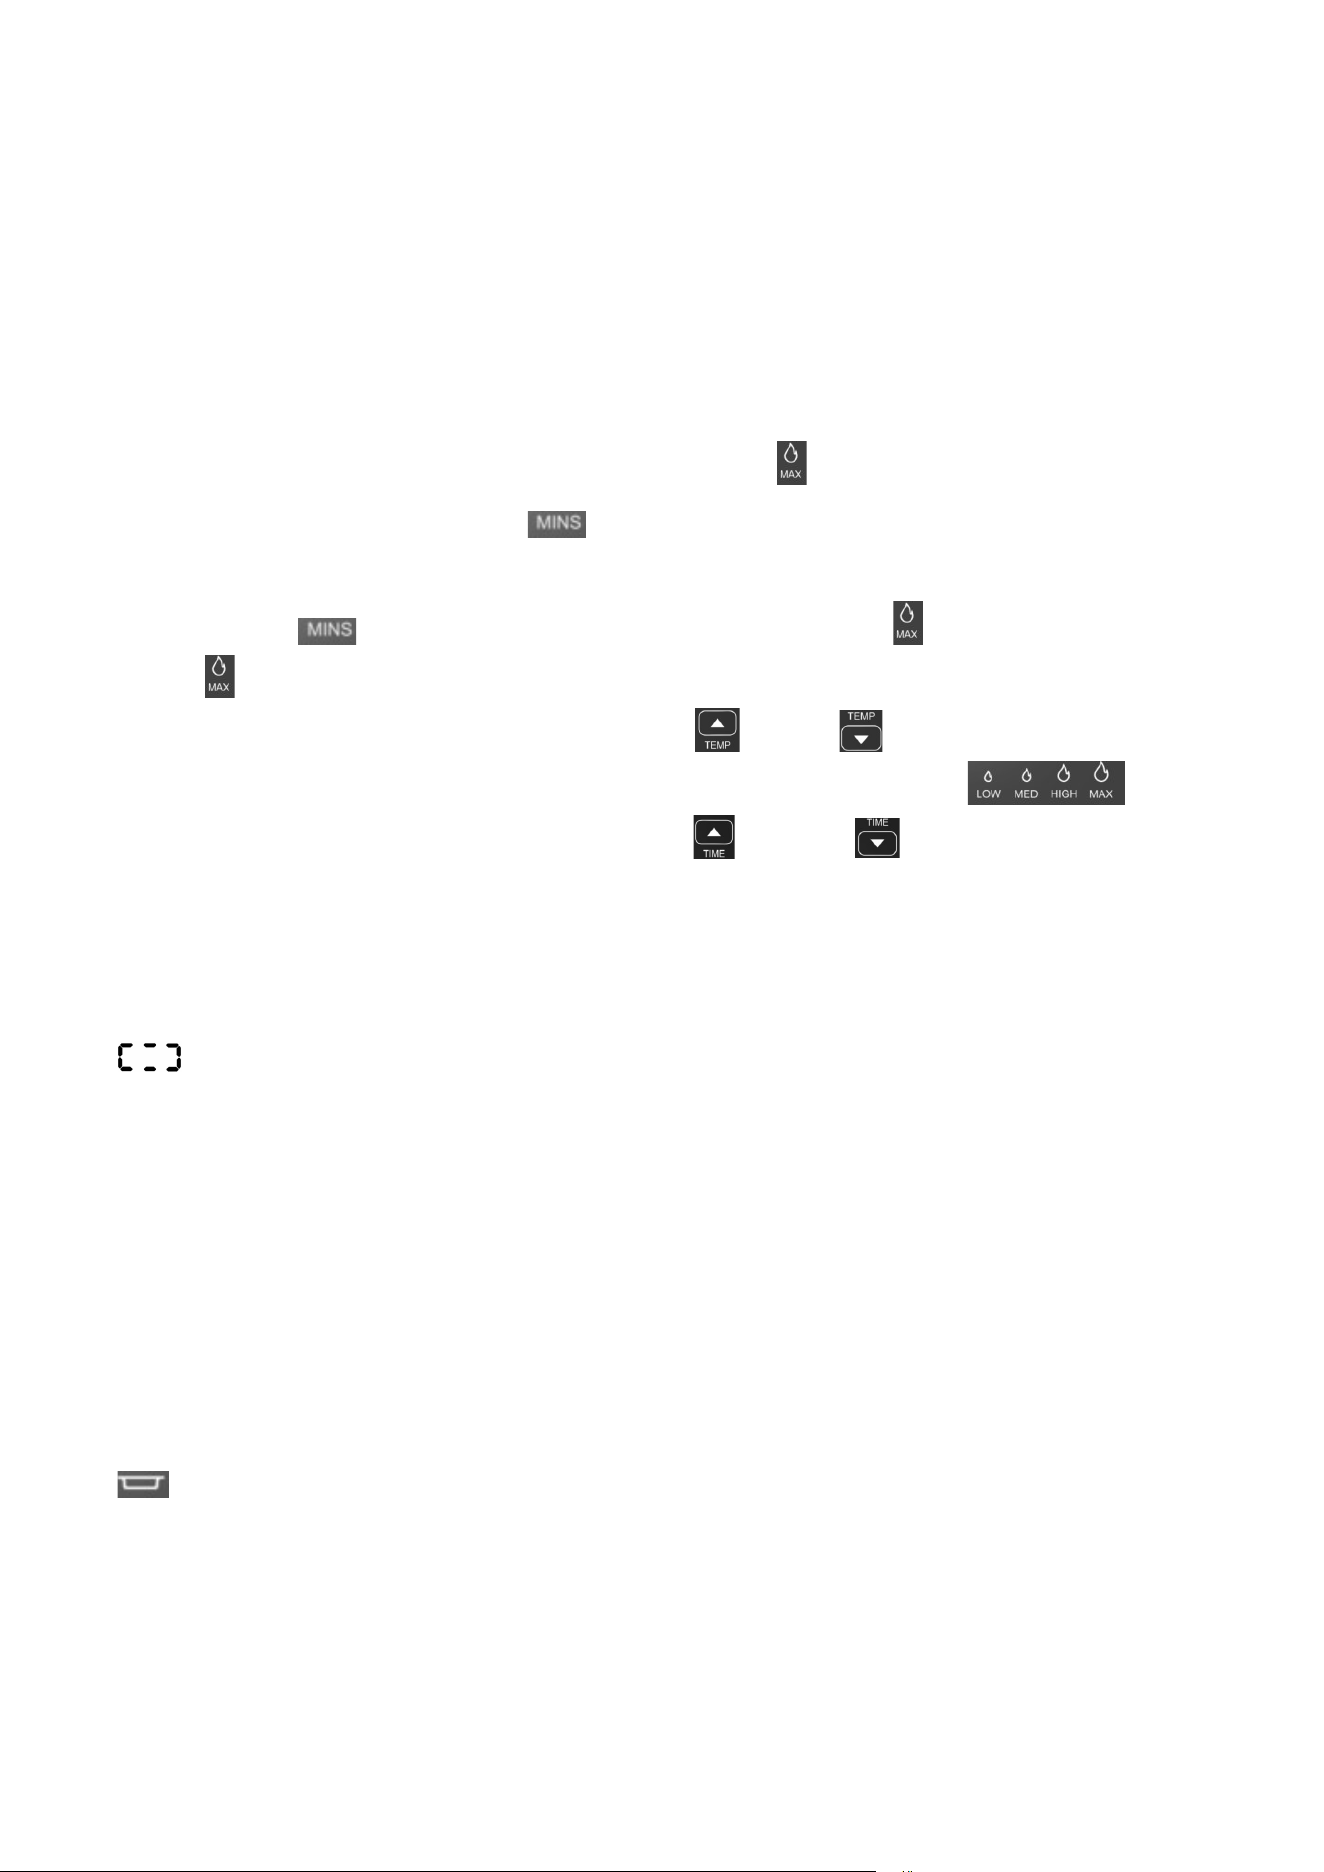
Preset temperature settings: There are four preset temperature settings including “LOW”,
“MED”, “HIGH” and “MAX” “
”
for the functions of “Grill” and “Airfry+Grill”
only.
Hour/
Minute
Power key
Menus
(with indicator)
START/STOP key
Temperature
“
-
”
Time
“
+
”
Preset
temperature
settings
Time “-”
No pot
indicator
Temperature
“
+
”
LED
display

6
Temperature
“
+
”
: For the functions of
“
Grill
”
and
“
Airfry+Grill
”
, the four preset
temperature settings “
”
can be selected by operating the Temperature “+”
key. While for the other functions, the temperature can be increased by operating the
Temperature
“
+
”
key. You can hold and press the Temperature
“
+
”
key to adjust the
temperature fast. The temperature can not be adjusted when the appliance starts
working.
Temperature
“
-
”
: For the functions of
“
Grill
”
and
“
Airfry+Grill
”
, the four preset
temperature settings “
”
can be selected by operating the Temperature “-” key.
While for the other functions, the temperature can be decreased by operating the
Temperature
“
-
”
key. You can hold and press the Temperature
“
-
”
key to adjust the
temperature fast. The temperature can not be adjusted when the appliance starts
working.
Time
“
+
”
: The working time can be increased by operating the Time
“
+
”
key. You can hold
and press the Time “+” key to adjust the time fast. The time can not be adjusted when the
appliance starts working.
Time
“
-
”
: The working time can be increased by operating the Time
“
-
”
key. You can hold
and press the Time “-” key to adjust the time fast. The time can not be adjusted when the
appliance starts working.
Menus: There are five (5) menus for fulfilling the different demands of users. After the
desired menu is selected, its corresponding indicator will light solidly.
7
INTRODUCTION FOR MENUS
Time and Temperature for Menus
Functional menu Default time
Range of
adjustable time
Default
temperature
Range of adjustable time Preheating Suggested food
Grill 20mins 1min-1h Max Low\Med\High\Max Yes 3CM Beefsteak
Airfry+Grill 20mins 1min-1h Max Low\Med\High\Max Yes 3CM Beefsteak
Dehydrate 6H 30mins-48h
120
℉
85-120
℉
No Sliced apple
Bake/Roast 20mins 1min-1h
400
℉
210-450
℉
No Chicken wings
Airfry 18mins 1min-45mins
400
℉
210-450
℉
Yes 400g French fries
BEFORE INITIAL USE
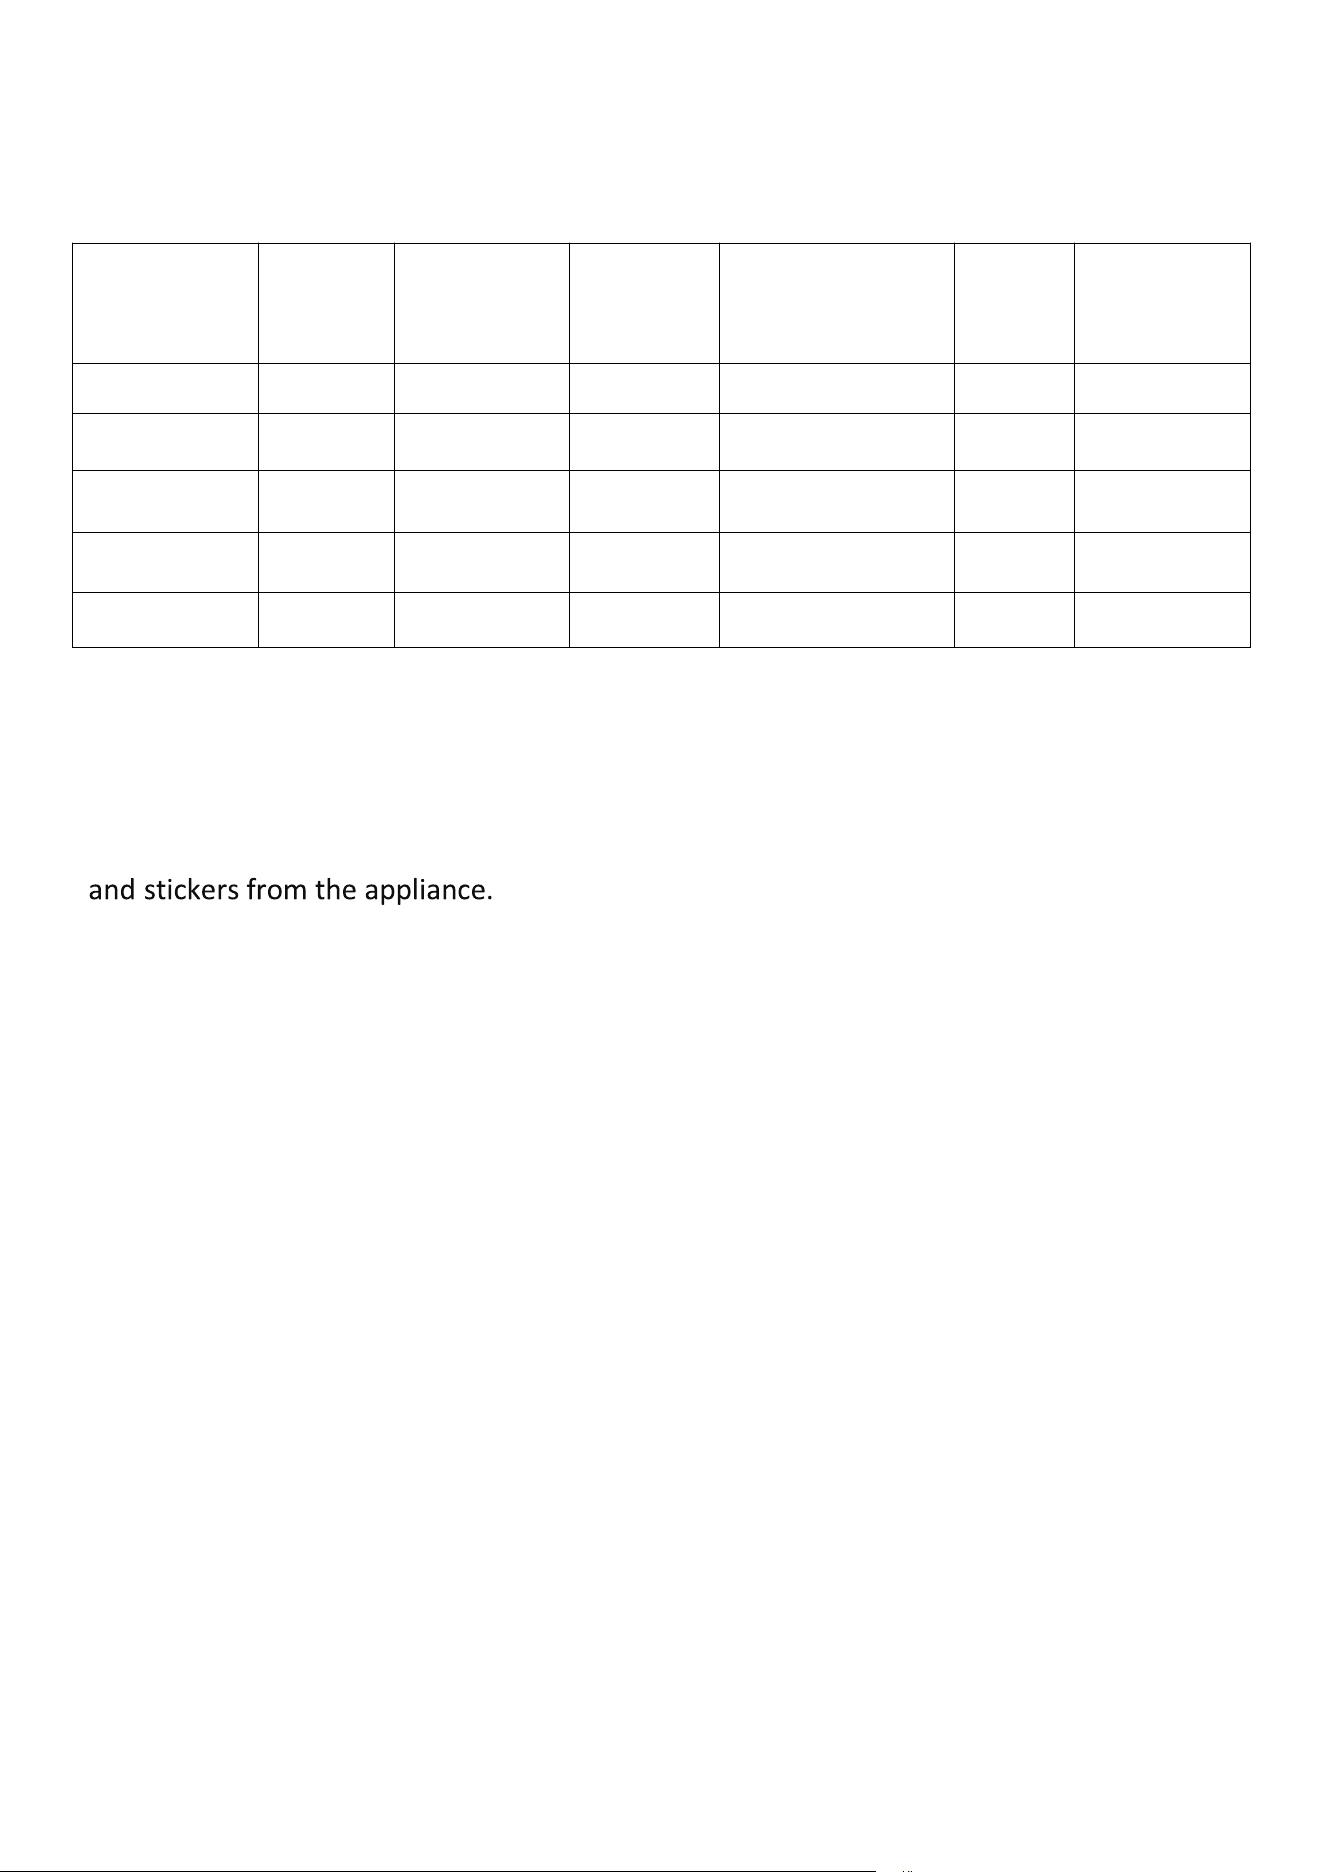
1. Before using the appliance for the first time, remove all the packaging materials, labels
and/or stickers from the appliance.
2. Remove all the detachable parts and wash them in soapy water, and then rinse them
with clean water and dry them with a clean cloth or paper towel.
3. Assemble all the parts of the appliance well in position and place the appliance on a
suitable position. Do not put the appliance in the closet or at a place which is close to the
wall. A certain space must be reserved to allow heat dissipation.
4. When the appliance is used for the first time, odor or smoke will occur, which is caused
by the protective film on the heating element. This is normal. So it is recommended that
the appliance should work without load under the “Air fry+Grill” mode for about 15
minutes to remove the odor. Please open the door and window and make the room be
ventilated when the appliance is used for the first time.
175
8
OPERATION INSTRUCTION
NOTES:
1.
All the plastics and packaging materials should be removed before adding food. The
food which has been defrosted should be cooked immediately.
2. Do not place the food on the heating plate for cooking directly.
3. Do not use the appliance for boiling water.
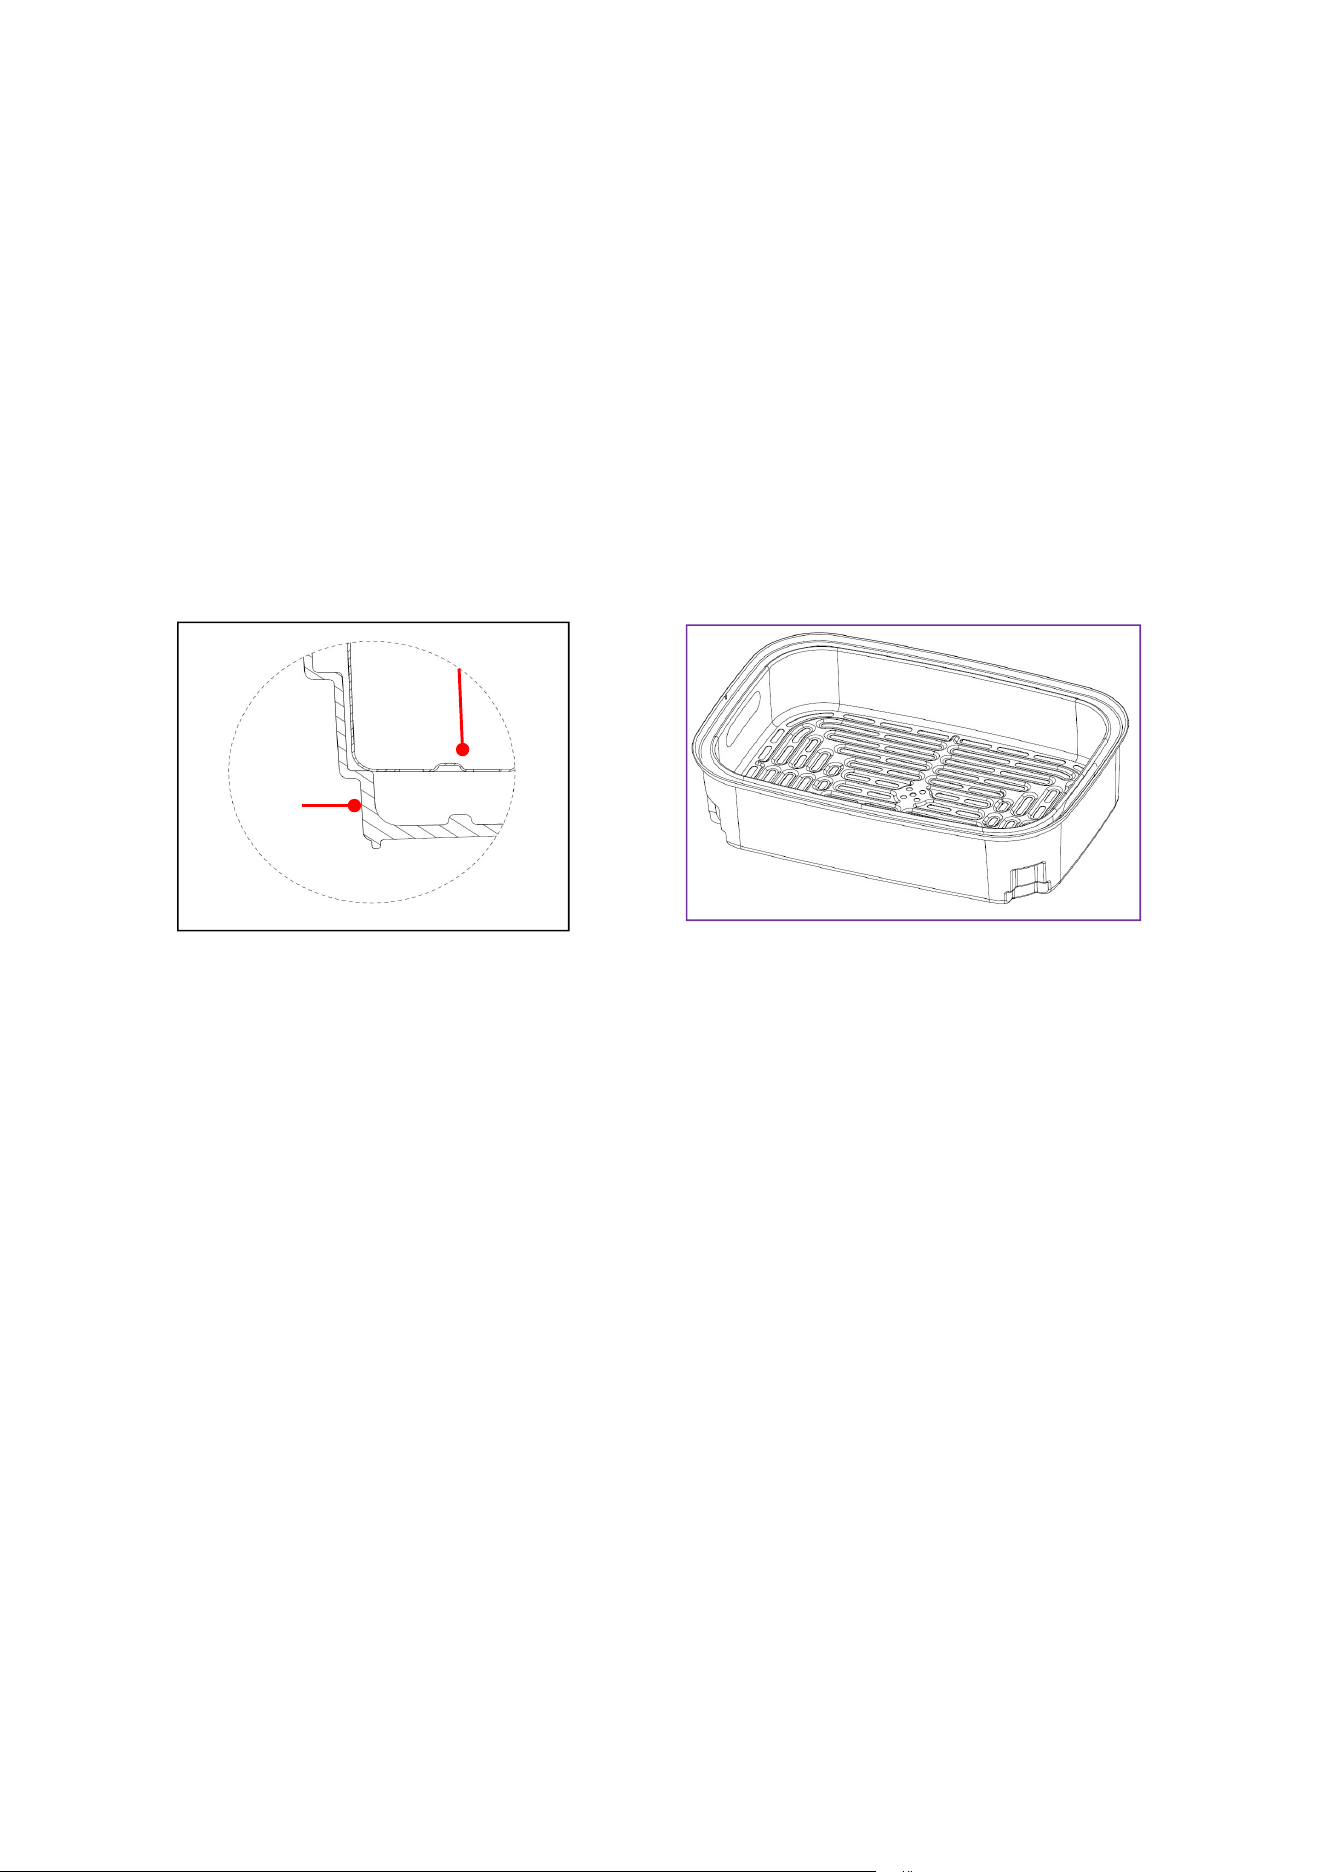
4. When need to use the frying basket, the frying basket must be operated with the inner
pot together. There are four support feet at the bottom of the inner pot for supporting
the frying basket installed in the inner pot (see Fig.1).
Frying basket
Inner pot
Fig.1
Frying basket+Inner pot
9
Grill
For the “Grill” function, only the inner pot can be used for grilling food such as beefsteak.
1. Open the top lid and place the inner pot into the body well in position.
2. Connect the appliance with power source and press “Power key”. The indicator of
“Grill” lights solidly, the default temperature setting “ ” shown in the LED display
illuminates and the default time “ 20:00” is shown in the LED display.
3. You can select the desired preset temperature setting by “ ” or “ ”. There are
four preset temperature settings including “LOW”, “MED”, “HIGH” and “MAX”
“ ” for selection. And you adjust the desired time by “ ” and “ ”.
Refer to “Time and Temperature for Menus” for the specific information of the adjustable
and time.
NOTE: The temperature and time can not be adjusted after the appliance starts working.
4. Press “START/STOP key”, the appliance starts to preheat, the LED display shows
“ ” dynamically.
5. When the preheating is completed, three beeps can be heard. Then put the food and
the required seasonings into the inner pot for cooking. The time shown in the LED display
starts to count down.
CAUTION: The top lid must be opened when perform the “Grill” function, otherwise, the
appliance will not work. If the top lid is closed during cooking, the countdown will suspend
running, the appliance will suspend cooking and the buzzer will keep beeping, after 5
minutes, the LED will turn off, the appliance will stop working and shut off automatically.
6. When the countdown is complete, five beeps can be heard and the appliance stops
cooking the food automatically.
NOTE: After the food is cooked well, the cooling fans will continue to keep working for 5
minutes and then stop running.
7. Remove the food for serving now.
8. Remove the inner pot and perform cleaning by following the operation of “CLEANING
AND MAINTENANCE”.
NOTE: Please be careful when removing the food and inner pot to prevent from being
burnt.
10
Airfry+Grill
For the “Airfry+Grill” function, the inner pot or frying basket+inner pot can be used for
grilling and frying food.
1. Open the top lid and place the inner pot into the body well in position.
2. Connect the appliance with power source and press “Power key”. The indicator of
“Grill” lights solidly, the default temperature setting “ ” shown in the LED display
illuminates and the default time “ 20:00” is shown in the LED display.
3. Press the “Airfry+Grill” key and its corresponding indicator illuminates. And the LED
display shows “ 20:00”, the preset temperature setting “ ” shown in the LED
display“ ” illuminates.
4. You can select the desired temperature by “ ” or “ ”. There are four preset
temperature settings including “LOW”, “MED”, “HIGH” and “MAX” “ ” for
selection. And you adjust the desired time by “ ” and “ ”. Refer to “Time and
Temperature for Menus” for the specific information of the adjustable and time.
NOTE: The temperature and time can not be adjusted after the appliance starts working.
5. Press “START/STOP key”, the appliance starts to preheat, the LED display shows
“
”
dynamically.
6. When the preheating is completed, three beeps can be heard. The LED display shows
“Add food” , then open the top lid and put the food and the required seasonings into the
inner pot for cooking, and then close the top lid.
7. Press “START/STOP key”,one beep can be heard, the appliance starts to work, the time
shown in the LED display starts to count down.
CAUTION: The top lid must be closed when performing the “Airfry+Grill” function,
otherwise, the appliance will not work. If the top lid is opened during cooking, the
“ ” will flash, the countdown will suspend running, the appliance will suspend
cooking and the buzzer will keep beeping, after 5 minutes, the LED will turn off, the
appliance will stop working and shut off automatically.
8. When the countdown is completed, five beeps can be heard and the appliance stops
cooking the food automatically.

11
NOTE: After the food is cooked well, the cooling fans will continue to keep working for 5
minutes and then stop running.
9. Open the top lid and remove the food for serving now.
10. Remove the inner pot and perform cleaning by following the operation of “CLEANING
AND MAINTENANCE”.
NOTE: Please be careful when removing the food and inner pot to prevent from being
burnt.
Dehydrate
For the “Dehydrate” function, only the frying basket+inner pot can be used for
dehydrating the food such as apple slices.
1. Open the top lid and place the inner pot well and frying basket in position.
2. Put the food and the required seasonings into the frying basket for cooking.
3. Connect the appliance with power source and press “Power key”. The indicator of
“Grill” lights solidly, the default temperature setting “ ” shown in the LED display
illuminates and the default time “ 20:00” is shown in the LED display.
4. Press the “Dehydrate” key and its corresponding indicator illuminates. And the default
time and temperature for “Dehydrate” function are 6 hours and 120
℉
respectively. The
LED display shows “120
℉
”.
5. You can adjust the desired temperature by “ ” or “ ” and adjust the desired
time by “ ” and “ ”. Refer to “Time and Temperature for Menus” for the specific
information of the adjustable temperature and time.
NOTE: The temperature and time can not be adjusted after the appliance starts working.
6. Press “START/STOP key”, the appliance starts to work and the time is shown in the LED
display starts to count down.
CAUTION: The top lid must be closed when performing the “Dehydrate” function,
otherwise, the appliance will not work. If the top lid is opened during cooking, the
“ ” will flash, the countdown will suspend running, the appliance will suspend
cooking and the buzzer will keep beeping, after 5 minutes, the LED will turn off, the
appliance will stop working and shut off automatically.

12
7. When the countdown is completed, five beeps can be heard and the appliance stops
working automatically.
8. Open the top lid and remove the food for serving now.
9. Remove the inner pot+frying basket and perform cleaning by following the operation of
“CLEANING AND MAINTENANCE”.
NOTE: Please be careful when removing the food and inner pot to prevent from being
burnt.
Bake/Roast
For the “Bake/Roast” function, only the frying basket+inner pot can be used for baking or
roasting the food such as potato and cake and Chicken wings etc.
1. Open the top lid and place the inner pot well and frying basket in position.
2. Put the food and the required seasonings into the frying basket for cooking.
3. Connect the appliance with power source and press “Power key”. The indicator of
“Grill” lights solidly, the default temperature setting “ ” shown in the LED display
illuminates and the default time “ 20:00” is shown in the LED display.
4. Press the “Bake/Roast” key and its corresponding indicator illuminates. And the default
time and temperature for “Bake/Roast” function are 20 minutes and 400
℉
respectively.
The LED display shows “400
℉
”.
5. You can adjust the desired temperature by “ ” or “ ” and adjust the desired
time by “ ” and “ ”. Refer to “Time and Temperature for Menus” for the specific
information of the adjustable temperature and time.
NOTE: The temperature and time can not be adjusted after the appliance starts working.
6. Press “START/STOP key”, the appliance starts to work and the time shown in the LED
display starts to count down.
CAUTION: The top lid must be closed when performing the “Bake/Roast” function,
otherwise, the appliance will not work. If the top lid is opened during cooking, the
“ ” will flash, the countdown will suspend running, the appliance will suspend
cooking and the buzzer will keep beeping, after 5 minutes, the LED will turn off, the
appliance will stop working and shut off automatically.

13
7. When the countdown is completed, five beeps can be heard and the appliance stops
cooking the food automatically.
NOTE: After the food is cooked well, the cooling fans will continue to keep working for 5
minutes and then stop running.
8. Open the top lid and remove the food for serving now.
9. Remove the inner pot+frying basket and perform cleaning by following the operation of
“CLEANING AND MAINTENANCE”.
NOTE: Please be careful when removing the food and inner pot to prevent from being
burnt.
Airfry
For the “Airfry” function, only the inner pot+frying basket for frying food such as French
fries etc.
NOTE: It is suggested that the oil separator shall be removed when frying French fries
under “Airfry” mode, which will make the color of French fries be better.
1. Open the top lid and place the inner pot and frying basket well in position.
2. Put the food and the required seasonings into the frying basket for cooking.
3. Connect the appliance with power source and press “Power key”. The indicator of
“Grill” lights solidly, the default temperature setting “ ” shown in the LED display
illuminates and the default time “ 20:00” is shown in the LED display.
4. Press the “Airfry” key and its corresponding indicator illuminates. And the default time
and temperature for “Airfry” function are 18 minutes and 400℉ respectively. The LED
display shows “400℉”.
5. You can adjust the desired temperature by “ ” or “ ” and adjust the desired
time by “ ” and “ ”. Refer to “Time and Temperature for Menus” for the specific
information of the adjustable temperature and time.
NOTE: The temperature and time can not be adjusted after the appliance starts working.
6. Press “START/STOP key”, the appliance starts to preheat, the LED display shows
“
”
dynamically
.
7. When the preheating is completed, three beeps can be heard. The time shown in the

14
LED display starts to count down.
CAUTION: The top lid must be closed when performing the “Airfry” function, otherwise,
the appliance will not work. If the top lid is opened during cooking, the “ ” will flash,
the countdown will suspend running, the appliance will suspend cooking and the buzzer
will keep beeping, after 5 minutes, the LED will turn off, the appliance will stop working
and shut off automatically.
8. When the countdown is completed, five beeps can be heard and the appliance stops
cooking the food automatically.
NOTE: After the food is cooked well, the cooling fans will continue to keep working for 5
minutes and then stop running.
9. Open the top lid and remove the food for serving now.
10. Remove the inner pot+frying basket and perform cleaning by following the operation
of “CLEANING AND MAINTENANCE”.
NOTE: Please be careful when removing the food and inner pot to prevent from being
burnt.
Power-off memory function
The appliance is no less than 15-minute power-off memory function. If the appliance is
powered off, the current working mode will be saved, and the appliance will start cooking
automatically after it is powered on again.
CLEANING AND MAINTENANCE
1. Unplug the appliance and allow it to cool down thoroughly before cleaning. Clean all
accessories such as frying basket, inner pot and oil separator by hot water with detergent.
2. Remove the frying basket and inner pot and then immerse them into the water for
cleaning thoroughly. Do not use an abrasive cleaning tool to clean, otherwise, the coating
on the surface will easily fall off.
3. Clean the inner wall of the body regularly. Gently wipe off the oil with a warm cotton
cloth, then dry it with a dry cloth.
4. Clean the reflecting plate on the top lid with a piece of hot cloth soaked with detergent.
5. Never immerse the appliance into water for cleaning.
6. Do not use brush to clean the appliance.

15
7. Do not clean the appliance with any metal tool to avoid its surface coating being
damaged.
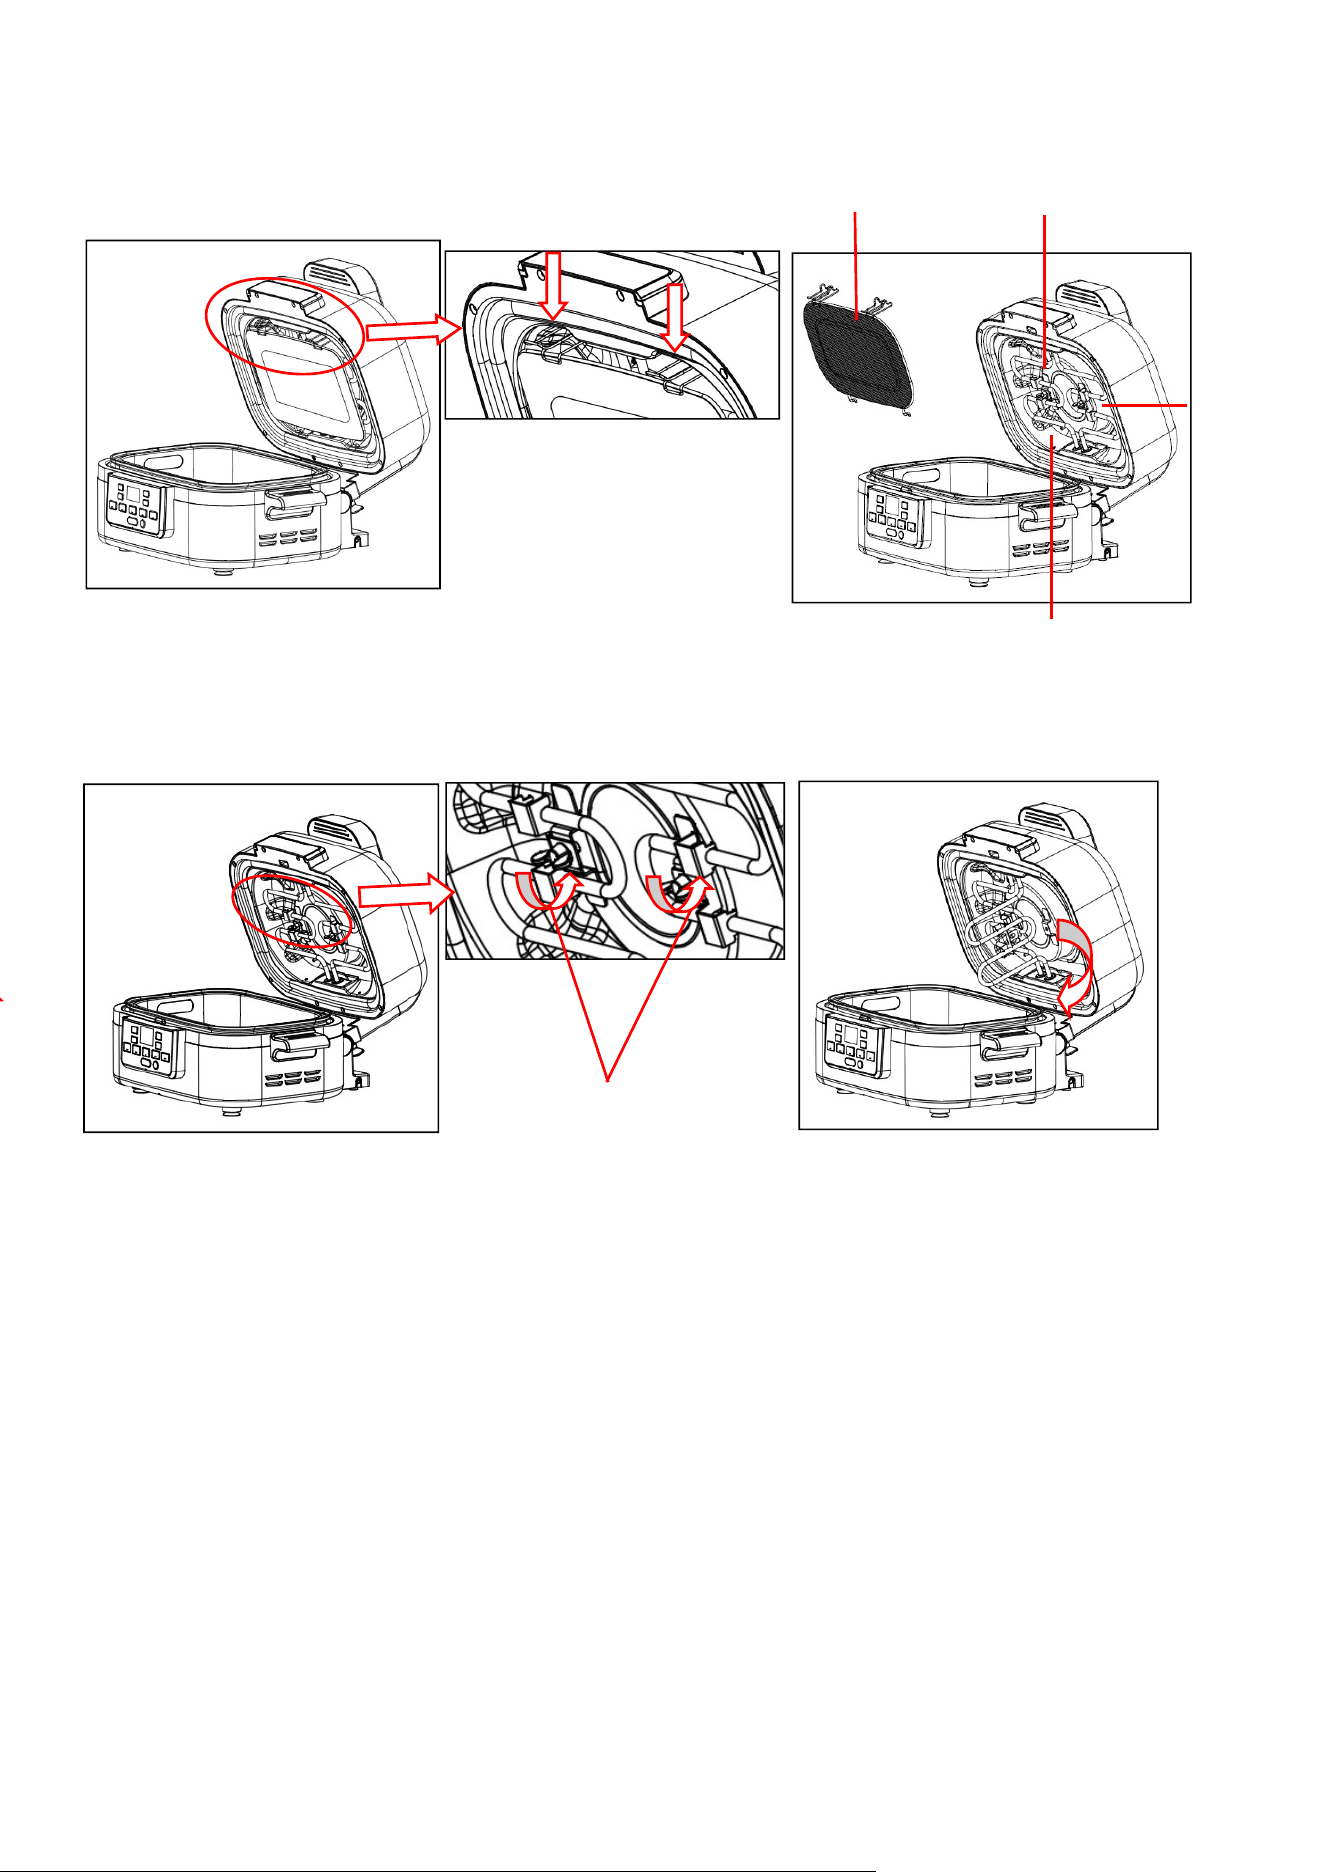
8. Please clean the oil separator after use. Press the fasteners of oil separator to remove it
(See Fig.2 and Fig.3) . And the oil separator must be installed well in position after cleaning
to avoid bad cooking result.
9. To clean the reflecting plate on the top lid, firstly open the top lid and remove the oil
separator, rotate the butterfly-shaped screw anticlockwise to remove it, and then unlock
the upper heating element by following the arrow direction shown, then you can clean the
reflecting plate with a clean and hot cloth. After cleaning, fix the upper heating element on
the bracket of protection cover, and then turn the butterfly-shaped screw clockwise to
fasten with the upper heating element (see Fig.4, Fig.5, Fig.6 and Fig.7).
10. After cleaning the reflecting plate, the upper heating element must be fixed with the
protection cover. The appliance can not be operated unless the protection cover is fixed by
the butterfly-shaped screw.
16
TROUBLE SHOOTING
The NTC (top temperature sensor) of the pot cover is open and displays E11.
Short circuit alarm E12 for the NTC (top temperature sensor) of the pot cover.
The NTC (bottom temperature sensor) of the disc temperature is open and displays E21.
Disk temperature NTC (bottom temperature sensor) short circuit alarm E22.
Cooling Fan Fault Code E40.
Butterfly-shaped screw
Oil separator
R
eflecting
plate
Heating element
Protection
cover
Fig.3
Fig.4
Fig.6
Fig.7
Fig.2
Fig.5
Thank you for purchasing this product! If you have any questions about the
product, such as missing parts, damaged products, product
assembling, and operation, please contact us via Amazon Message or
customer service number: 213-4467172 or 661-4358826
IMPORTANT
Please call our customer service department for any consulting:
213-4467172
661-4358826
(8:30am - 5:30pm P.S.T.)
DATED PROOF OF PURCHASE IS REQUIRED FOR WARRANTY SERVICE.
AVIS
Veuillez appeler le service à la clientèle pour toutes questions au:
213-4467172
661-4358826
(8:30am - 5:30pm P.S.T.)
PREUVE D’ACHAT ORIGINALE REQUISE POUR SERVICE DE GARANTIE.
IMPORTANTE
Sólo hay que llamar nuestro departamento de servicio
al cliente en caso de tener preguntas o inquietudes:
213-4467172
661-4358826
(8:30am - 5:30pm P.S.T.)
SE REQUIERE PRUEBA DE COMPRA CON FECHA PARA SERVICIO BAJO
GARANTÍA.
Phone: 213-4467172 or 661-4358826