
Technical Support and E-Warranty Certificate www.vevor.com/support
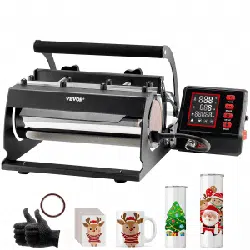
HEAT PRESS MACHINE
PRODUCT MANUAL
MODEL:TLK2730OZ-2S
We continue to be committed to provide you tools with competitive price.
"Save Half", "Half Price" or any other similar expressions used by us only represents an
estimate of savings you might benefit from buying certain tools with us compared to the major
top brands and does not necessarily mean to cover all categories of tools offered by us. You
are kindly reminded to verify carefully when you are placing an order with us if you are
actually saving half in comparison with the top major brands.

- 1 -
Model:TLK2730OZ-2S
Have product questions? Need technical support? Please feel free to
contact us:
Technical Support and E-Warranty Certificate
www.vevor.com/support
NEED HELP? CONTACT US!
This is the original instruction, please read all manual instructions
carefully before operating. VEVOR reserves a clear interpretation of our
user manual. The appearance of the product shall be subject to the
product you received. Please forgive us that we won't inform you again if
there are any technology or software updates on our product.
HEAT PRESS MACHINE

- 2 -
Symbol
Symbol Description
Warning: To reduce the risk of injury, the user must read the
instructions manual carefully.
This symbol, placed before a safety comment, indicates a kind of
precaution, warning, or danger. Ignoring this warning may lead to an
accident. To reduce the risk of injury, fire, or electrocution, please
always follow the recommendation shown below.
CORRECT DISPOSAL:
This product is subject to the provision of European Directive
2012/ 19/EC. The symbol showing a wheelie bin crossed through
indicates that the product requires separate refuse collection in
the European Union. This applies to the product and all
accessories marked with this symbol. Products marked as such
may not be discarded with normal domestic waste, but must be
taken to a collection point for recycling electrical and electronic
devices.
FCC INFORMATION
CAUTION: Changes or modifications not expressly approved by the party
responsible for compliance could void the user's authority to operate the
equipment!
This device complies with Part 15 of the FCC Rules. Operation is subject to
the following two conditions:
1) This product may cause harmful interference.
2)This product must accept any interference received, including interference
that may cause undesired operation.
WARNING: Changes or modifications to this product not expressly approved
by the party.responsible for compliance could void the user's authority to
operate the product.
Note: This product has been tested and found to comply with the limits for a
Class B digital device pursuant to Part 15 of the FCC Rules, These limits are

- 3 -
designed to provide reasonable protection against harmful interference in a
residential installation.
This product generates, uses and can radiate radio frequency energy, and if
not installed and used in accordance with the instructions, may cause harmful
interference to radio communications. However, there is no guarantee that
interference will not occur in a particular installation. If this product does
cause harmful interference to radio or television reception,which can be
determined by turning the product off and on, the user is encouraged to try to
correct the interference by one or more of the following measures.
· Reorient or relocate the receiving antenna.
· Increase the distance between the product and receiver.
· Connect the product to an outlet on a circuit different from that to which the
receiver is connected.
· Consult the dealer or an experienced radio/TV technician for assistance.
WARNING
1.Warnings must be followed carefully to avoid body injury, improper use may result
in electric shock , fire, personal injury and other damage:
1)Keep unplug when moving the machine.
2)Keep unplug when installing accessories
3)Place on a f at and stable platform and operate under ventilated conditions
4)Wear special protective equipment when operating the machine
5)Do not use this machine in a hazardous-location.
6)Do not use when the machine is not working properly.
7)Do not disassemble and repair this machine.
8)Do not use an unsuitable AC Outlet.
9)Do not touch the heating plate when the machine is heating
10)Do not use in humid environment or contact with water Do not infiltrate liquid in
the machine to prevent fire or electric shock caused by short circuit.
11)Do not use the power supply that does not meet the rated voltage .The power
supply that does not meet the specified voltage may cause fire or electric shock.
12)Ensure that the machine is grounded so as not to cause harm to body.
13)Do not touch the rotating rod or bearing part with y ur fingers during use in case

- 4 -
of injuries.
14)If the machine is not in use for a long time, please unplug the power cord from the
socket.
15) Do not use the machine during thunderstorms or lighting to avoid damage to the
machine.
16)Place the machine smoothly on the flame-retardant table and keep away from
fl
am
mable and explosive items.
17)Please stop using it if the machine smokes, emits a peculiar smell , or becomes
noisy and
in other abnormal conditions.
18)This appliance can be used by children aged from 8 years and above and
persons with reduced physical , sensory or mental capabilities or lack of experience
and knowledge
if they have been given supervision or instruction concerning use of the appliance in
a safe way and understand the hazards involved. Children shall not play with the
appliance.Cleaning and user maintenance shall not be made by children without
supervision
19) Type X attachment: If the supply cord is damaged, it must be replaced by a
special cord or assembly available from the manufacturer or its service agent.
20) In order to avoid a hazard due to inadvertent resetting of the thermal cutout, this
appliance must not be supplied through an external switching device, such as a timer,
or connected to a circuit that is regularly switched on and off by the utility.

- 5 -
PRODUCT PARAMETER
Safety precautions
1. Please select the appropriate power supply and power supply socket
strictly according to the parameter instructions, and connect it to the
ground wire correctly.
2. Place the machine smoothly on the flame-retardant desktop, and stay
away from flammable and explosive items around the machine.
3. Do not use the equipment for a long time, please disconnect the power
supply.
4. Children under the age of 12 and people with mobility disabilities are
prohibited.
5. Do not soak it in water or use it in a wet environment.
Model
TLK2730OZ-2S
Temperature Range
50℃-190℃ / 122
Timer Range
0-999S
Rating(s)
120V~ 60Hz,1150W For US users
230V~ 50Hz,1100W For European users
Max.Temperature
50℃-190℃ /122℉-374℉
Compatible Mug Size
30OZ
Improtant Note:
This product features a long mug wrap (270mm), typically suitable for 30OZ mugs. If it is
temporarily used for shorter mugs (such as 11OZ or 15OZ mugs), two mugs need to be
placed simultaneously to ensure that the entire length of the mug wrap is in contact with
the mugs. This is to ensure even heating and to extend the service life of the mug wrap.
- 6 -
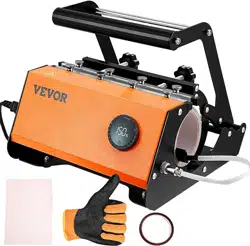
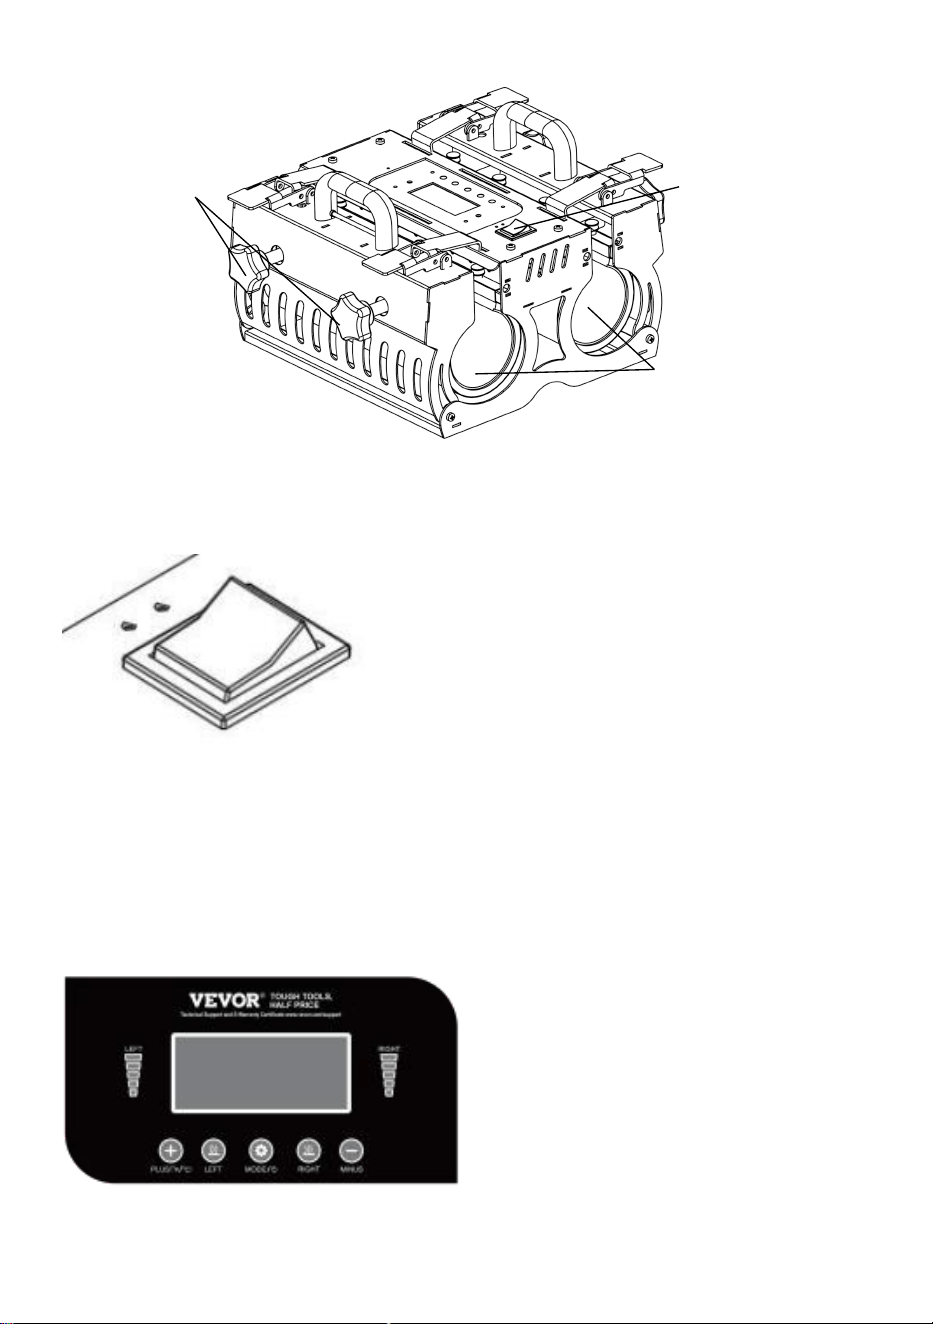
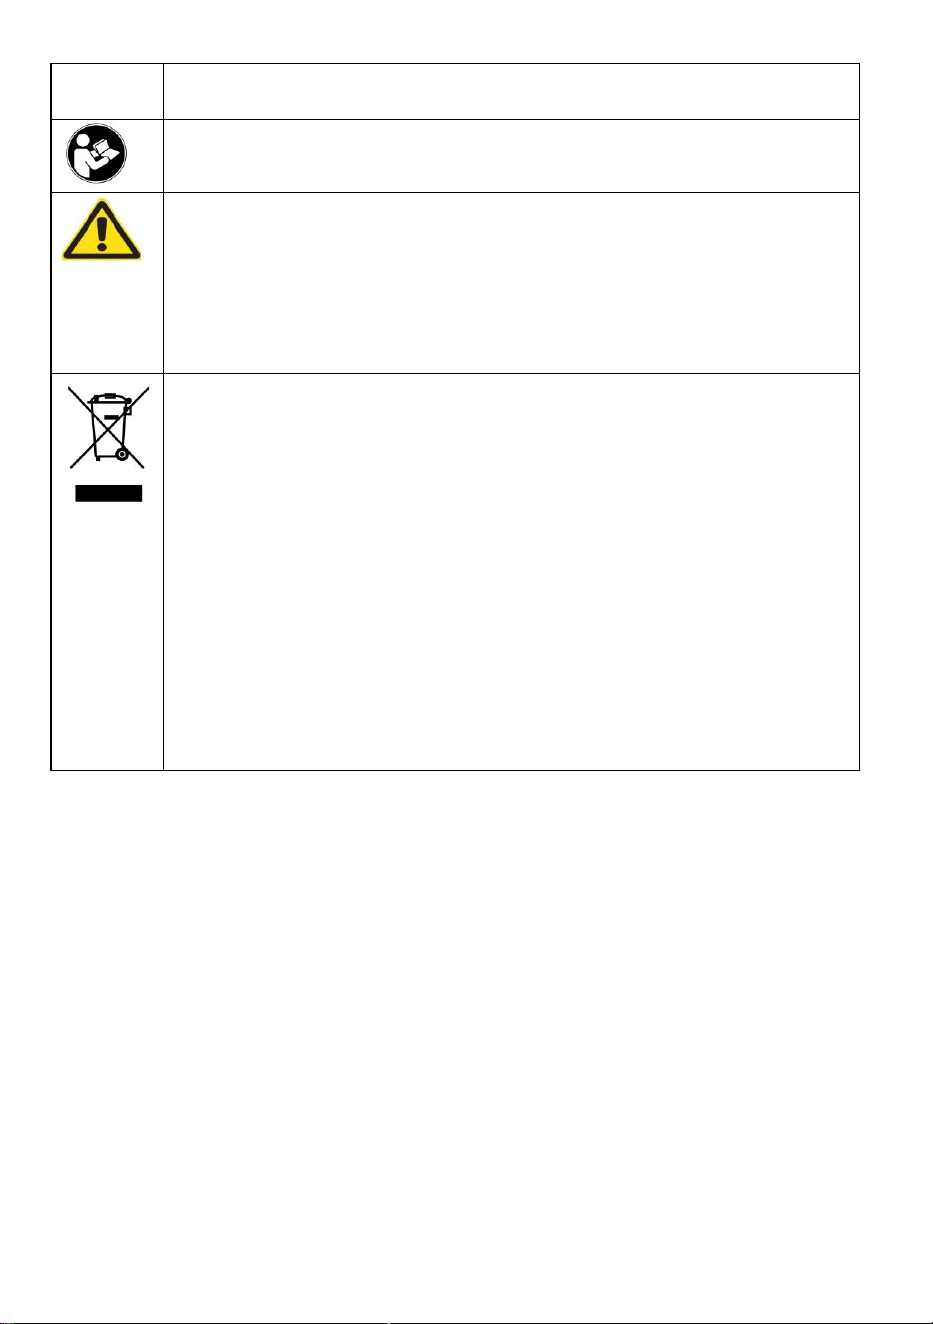
Product structure diagram
Instructions for how to use
1. According to the voltage shown in the equipment package, connect the
machine plug to the 23oV plug and turn on the power supply. Main switch, the
power supply indicator light is on (note that the whole machine must have a strong
protective ground wire).
Heating Plate
Power Switch
Temperature/
Schedule Panel
Pressure
handle
Adjusting
Hand wheel
- 7 -
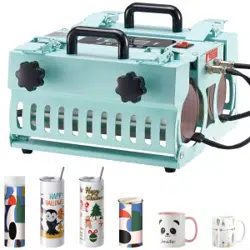
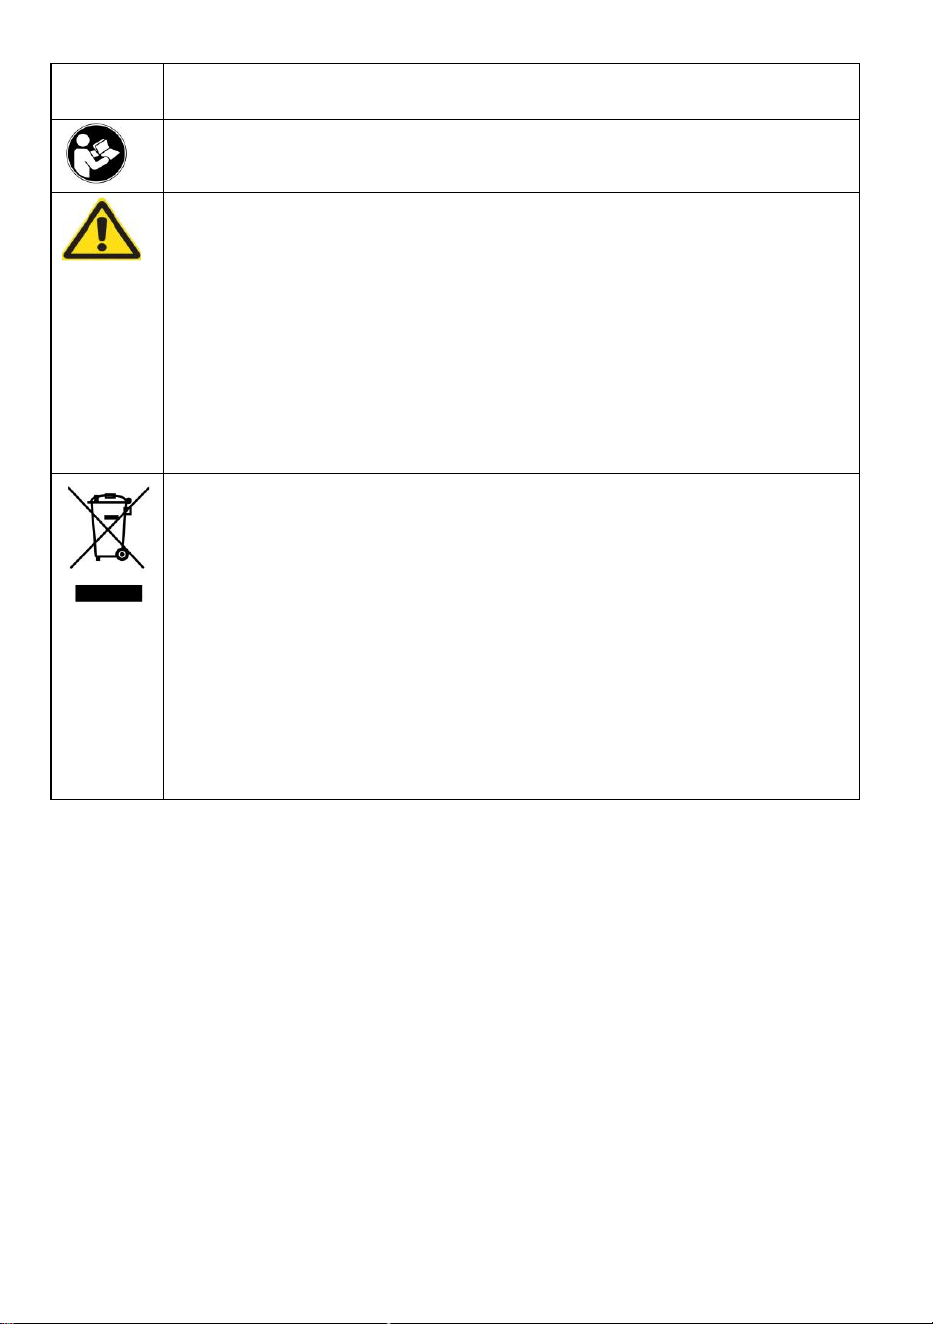
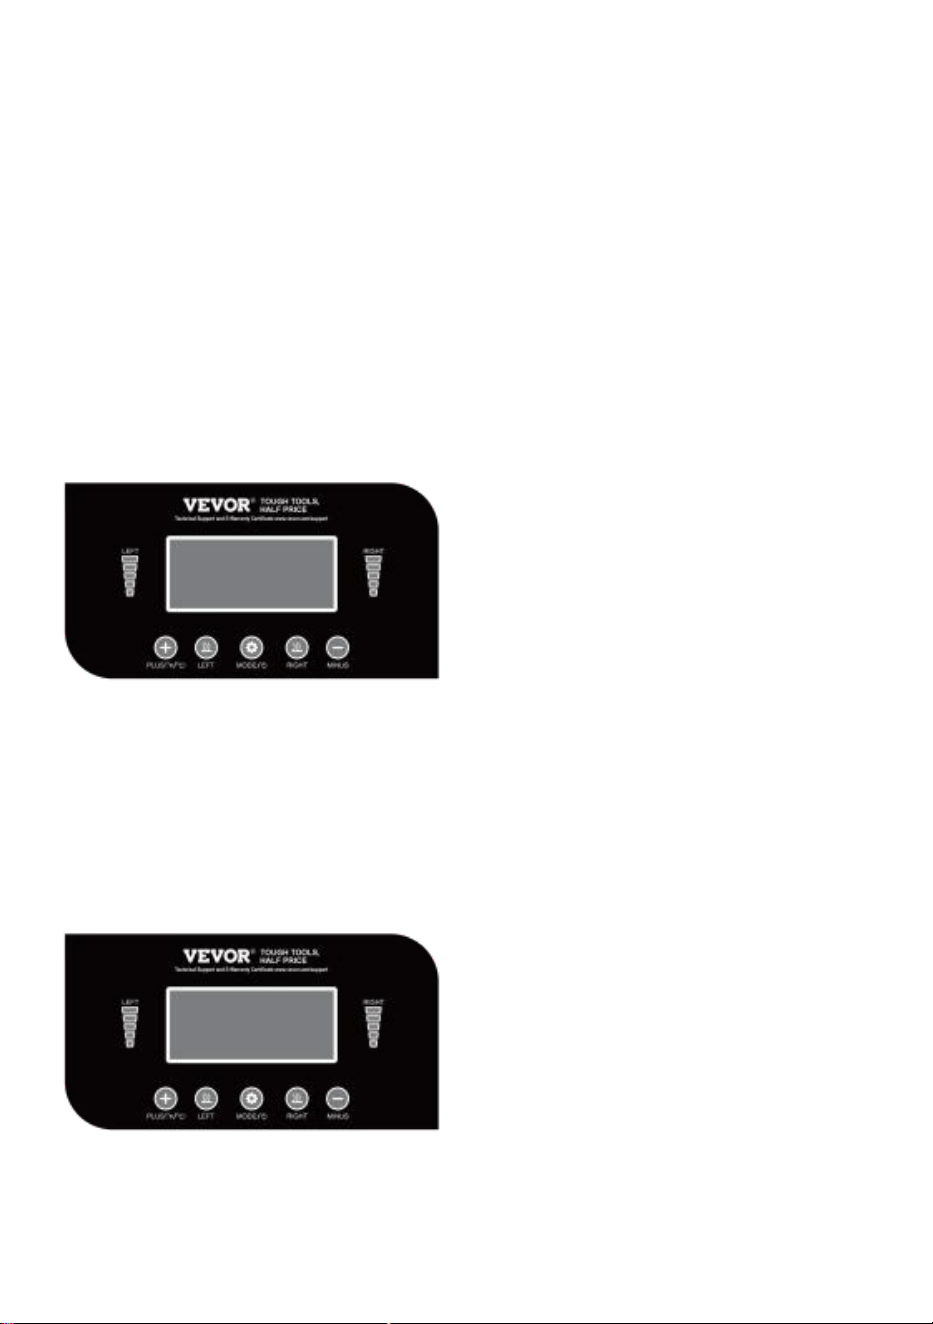
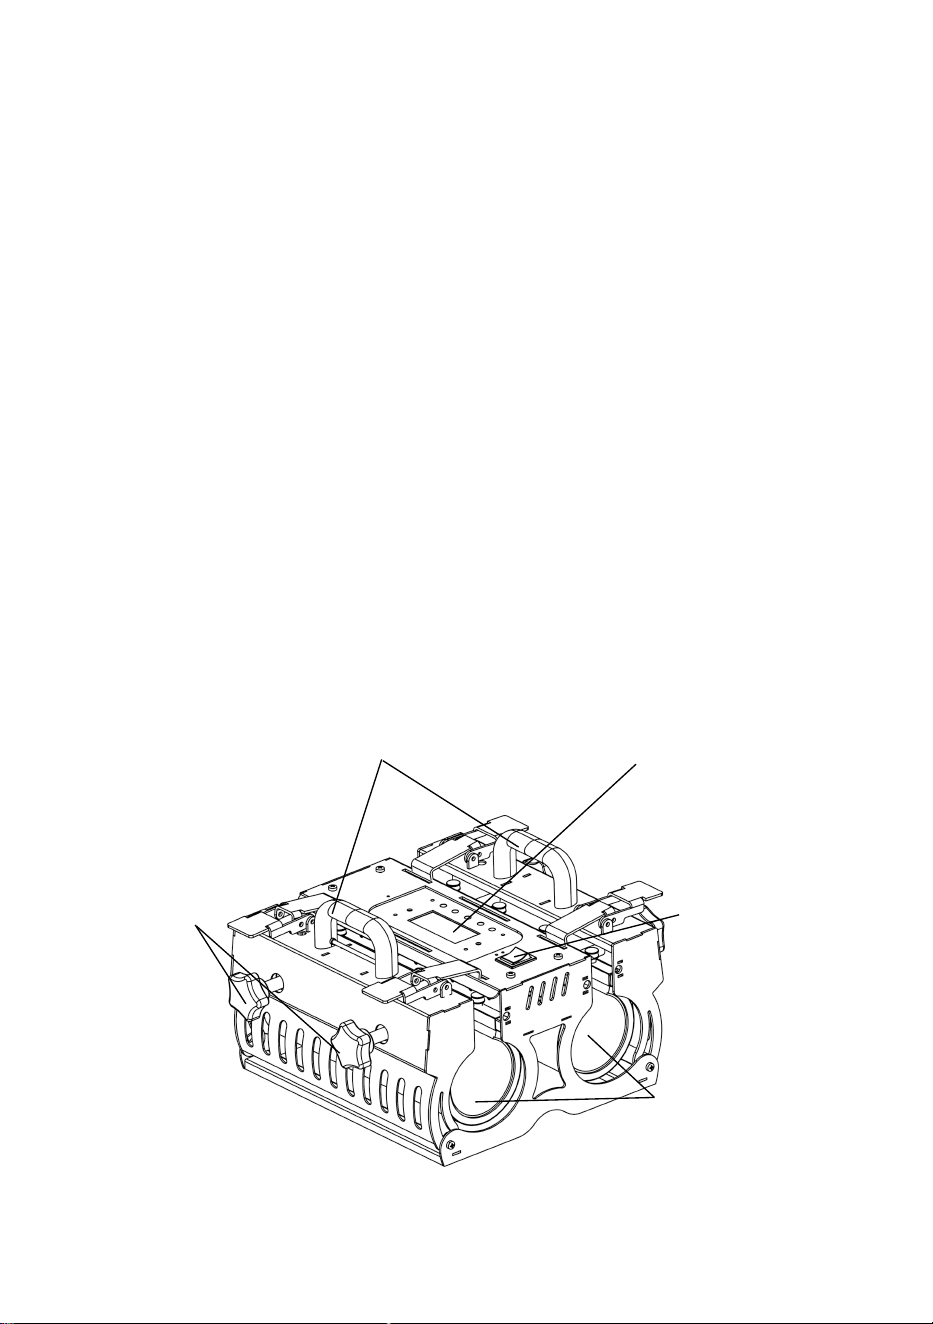
2. Press the Mode key once to set the left emperature, and press the PLUS key
to increase and press M1NUS to reduce; Press the Mode key twice to set the left
time, and press the PLUS key to increase and press M1NUS to reduce; Press the
Mode key three times to set the temperature on the right, and press the PLUS key
to increase and press M1NUS to reduce; Press the Mode key four times to set the
right time, press the PLUS key to increase and press M1NUS to reduce. Press the
fifth time to return to the initial state of boot. Press and hold the PLUS key for 5
seconds, and switch Fahrenheit temperature on the left and right screens.
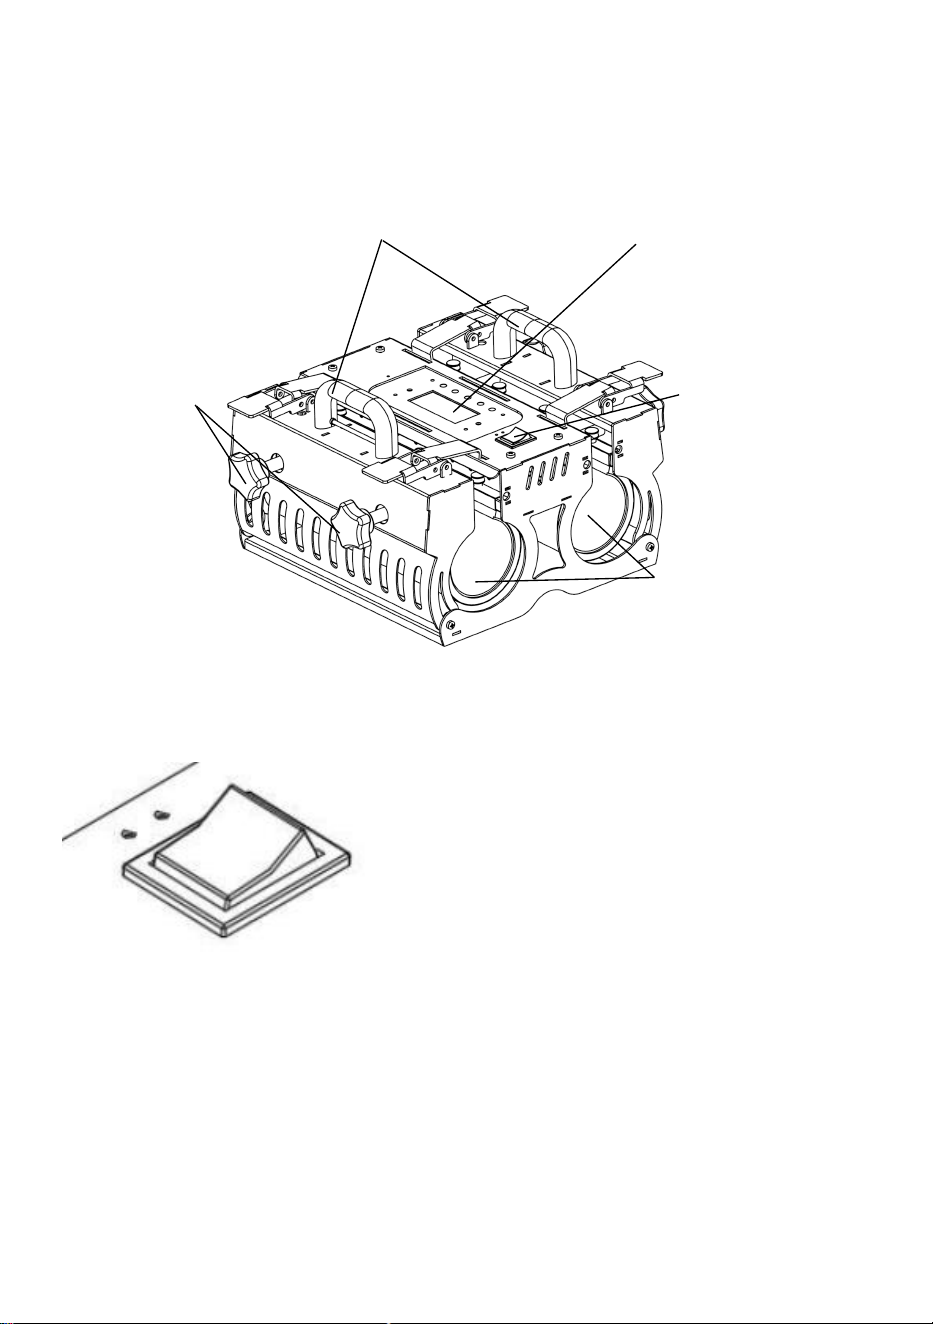
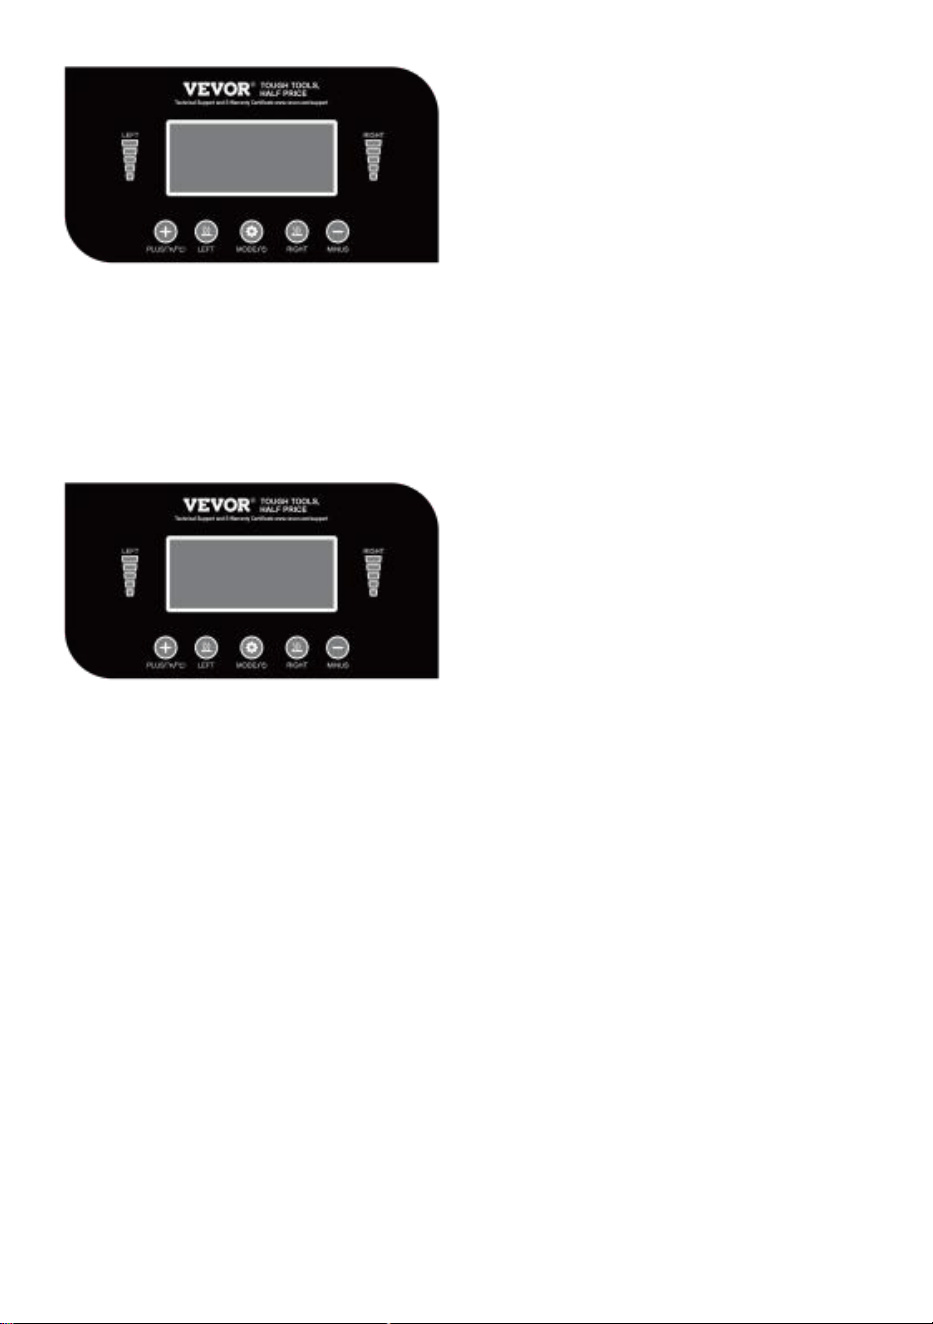
3. Start heating: press the LEFT button, the left heater will be heated, and the left
progress bar will glow; Press the R1GHT button, the heater on the right is heated,
and the progress bar on the right glows; when heating to the set temperature, two
beep alarms are issued, and the LEFT or R1GHT key is pressed again to urgently
terminate the heating.
- 8 -
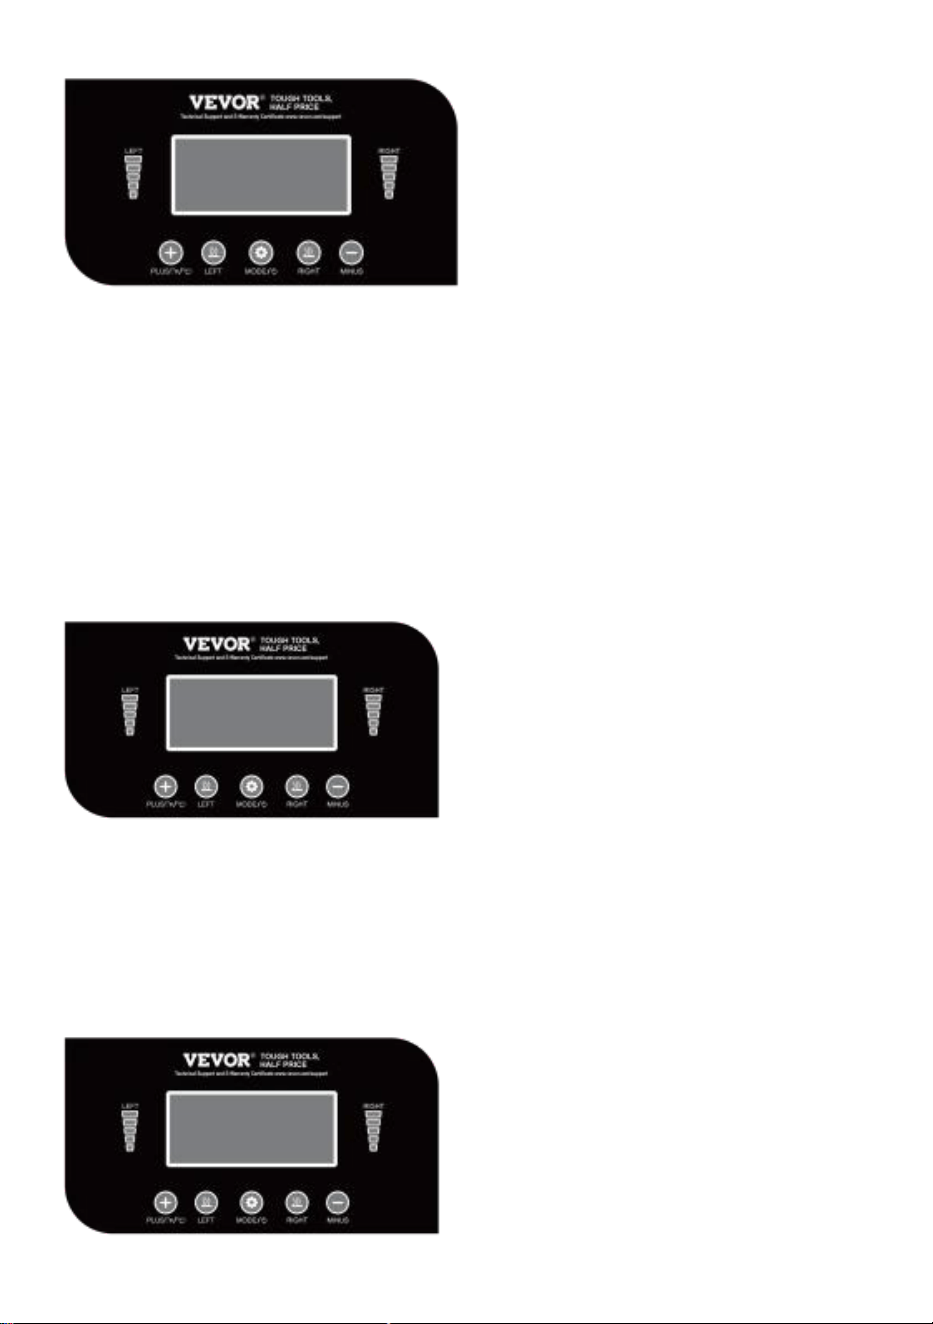
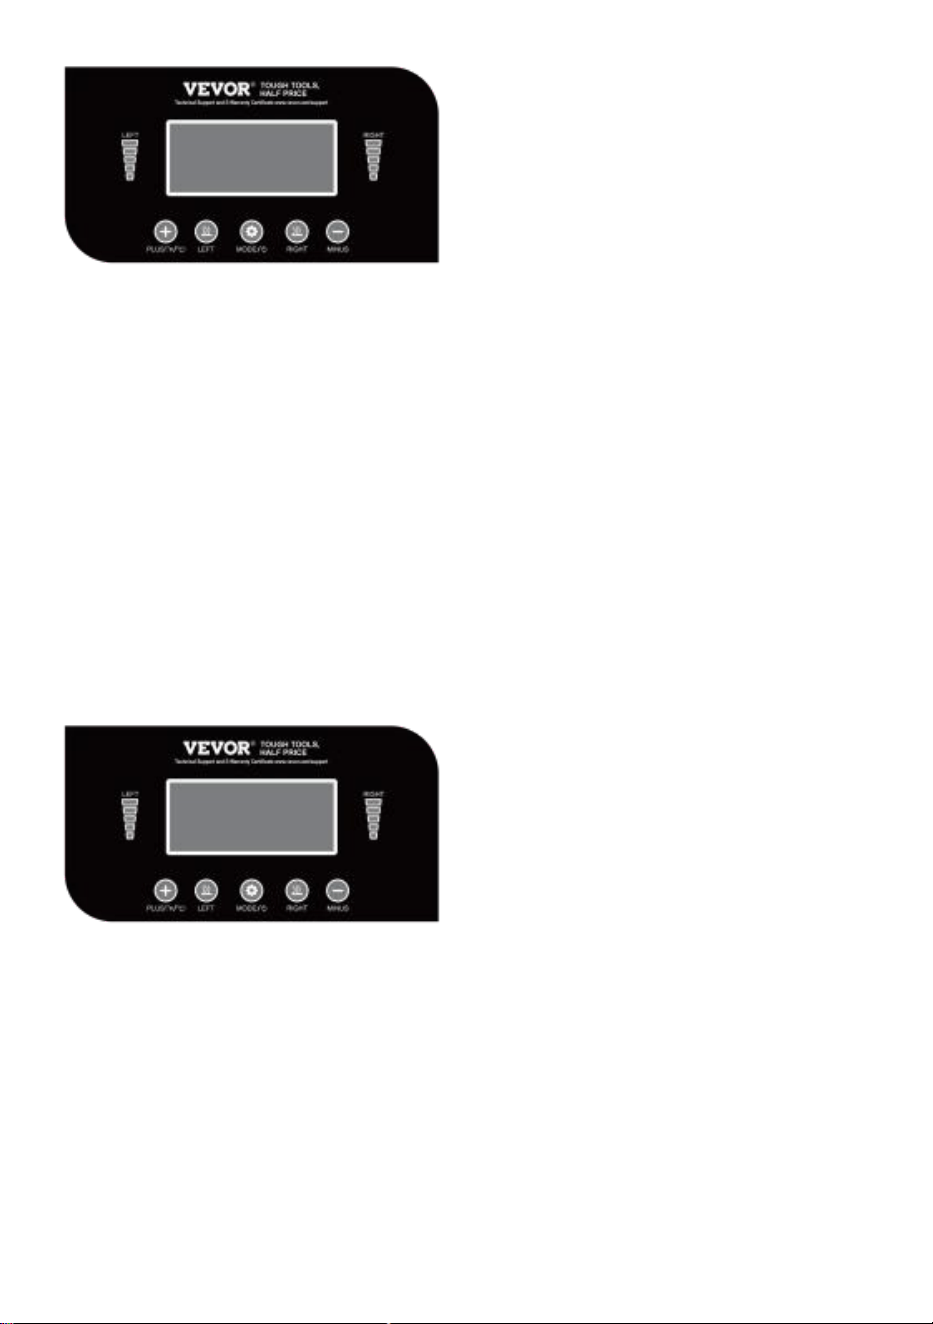
4.When heated to the set temperature, press the PLUS key once, the total running
time on the left begins to be positive, the total moving line flashing light begins to
flash, the left transfer time waits for the temperature to reach the set temperature
to count down, and the running indicator light begins to flash; at the state of
heating to the set temperature, press the M1NUS key once, the total running time
on the right begins to be count, the total running line flashing light begins to flash,
the righttransfer time waits for the temperature to ight begins to flash, the right
transfer time waits for the temperature to reach the set temperature to start
countdown, and the running indicator light begins to flash; in the transfer operation,
there are two alarm mechanisms of the total running time:
a. After the countdown, the buzzer rings for 5 seconds, and the screen countdown
indicator light flashes (which ends on theleft and right side flickers, and both sides
flashes at the same time). The total operation collects the signal and continues to
time forward after 2o seconds (set up) No operation, automatically stop heating
with the setting temperature as the reference, and transfer it to protect the
temperature [regularly 1oo degrees Celsius (setable)] as the reference. Test the
constant temperature. The buzzer alarms at intervals of 3 seconds. The screen
shows that the countdown indicator light and the total operation indicator light flash
at the same time (which side of the alarm on the left and right side flashes, and
both sides flashes at the same time). Press PLUS or M1NUS to lift the alarm once,
and (which side of the alarm presses the alarm) returns to normal; in the alarm
state, the rest of the keys are disabled.
- 9 -
b. The total start-up running time of one operation shall not exceed 5 minutes (set
up), and those who exceed 5 minutes shall be deemed to be improper operation or
equipment. if it fails, the device immediately cuts of the heating body power supply,
the system enters the standby state, and presses the Mode key to turn it back on
again.
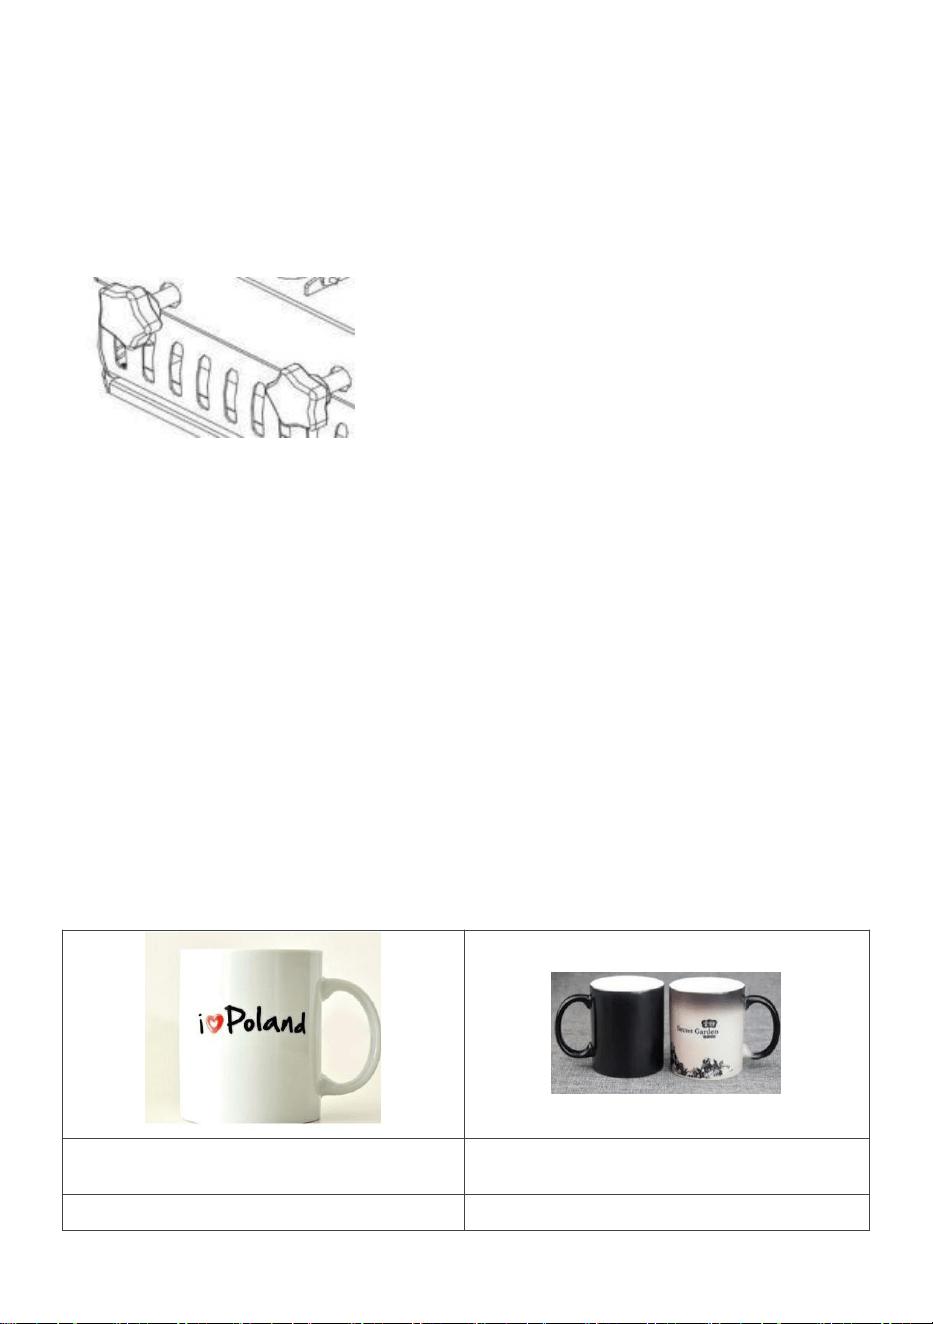
5.Adjust the knob and hand wheel, try to close the device several times, adjust to
the appropriate pressure, and turn clock wise Hand wheel can increase the
equipment pressure; turning the hand wheel counterclockwise can reduce the
equipment pressure until appropriate pressure.
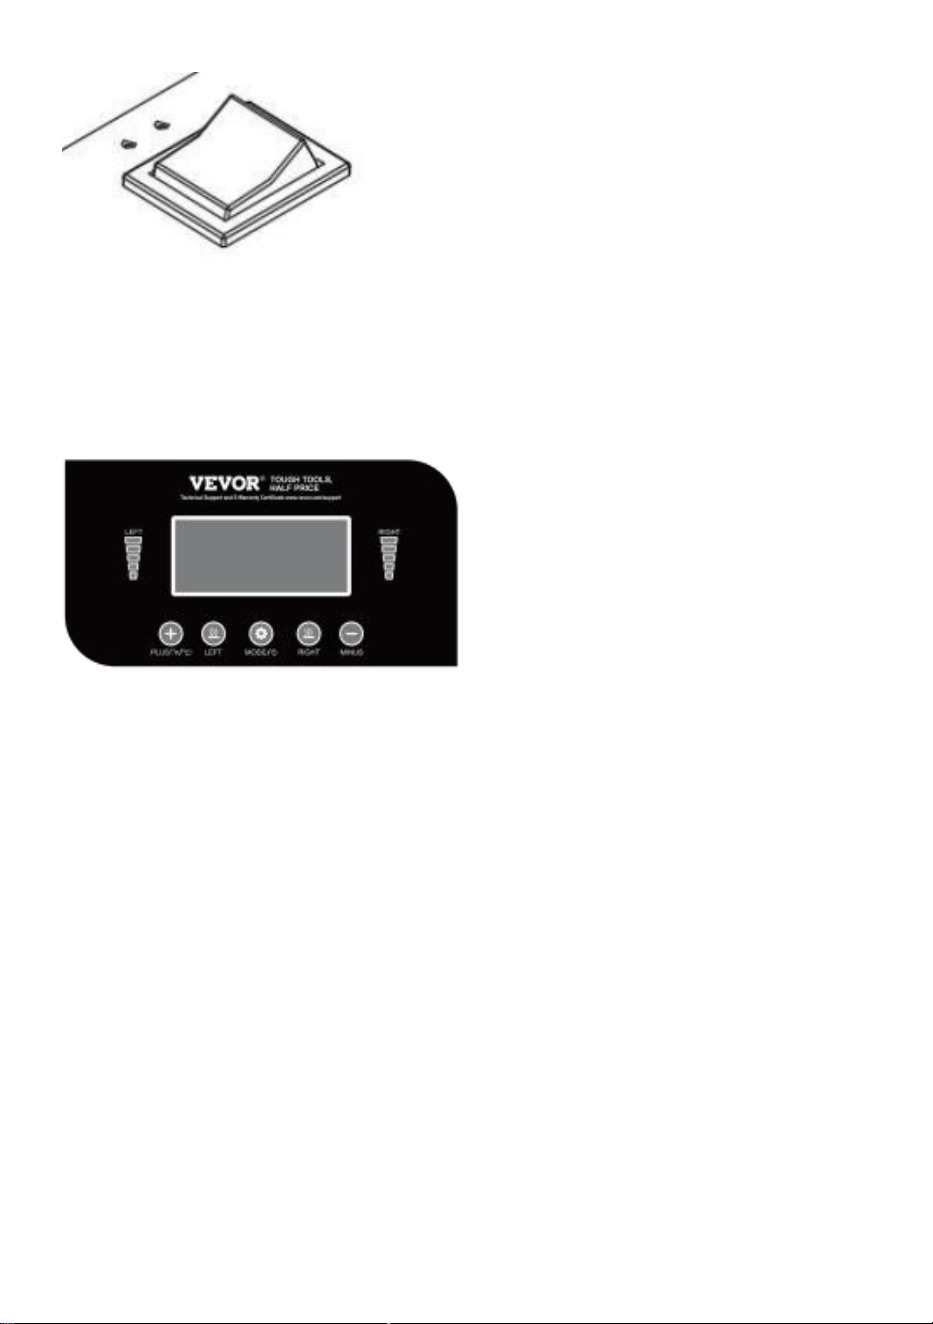
6. Place the cup flat on the sponge pad, fold the hot paper (the side of the
pattern is facing it, the part of the cup to be transferred), press the handle down
until it is completely turned of, then the time light flashes, and the time begins to
count down. After the countdown, the light went out, and the buzzer turned of the
"down" sound, which means that the hot painting has been completed. At this time,
the handle should be lifted as soon as possible.
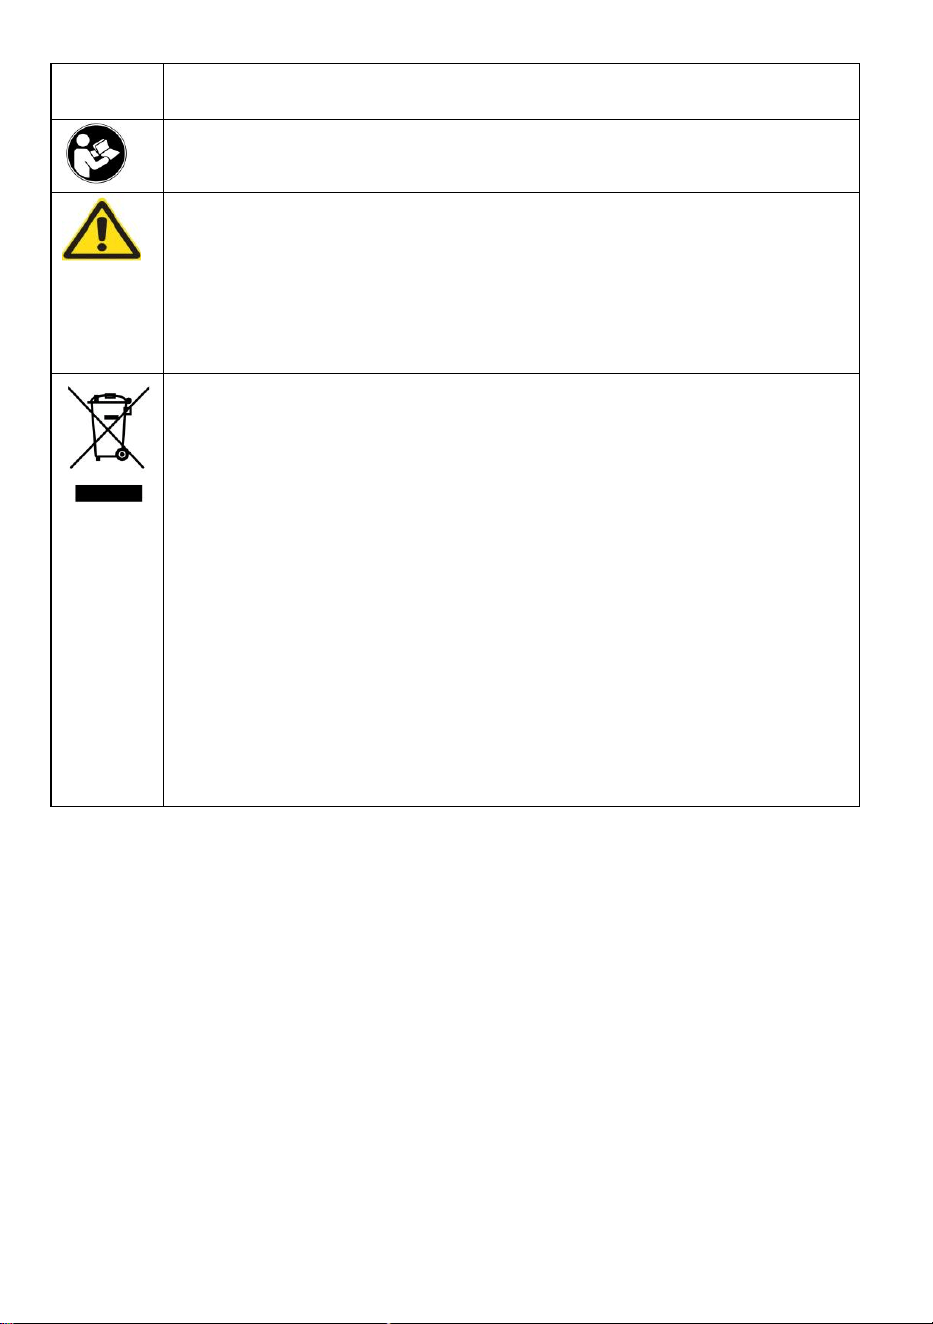
Scope of application
Mug
Color-changing cup
392°F (200°C) 60s
365°F (185°C) 50s

- 10 -
Common fault analysis
Failure phenomenon
Causes of failure
Resolutions
It can't be heated, but
it shows well.
Damaged heating plate or
relay
Check the heating plate
or relay for damage.
Insufficient color and
image discoloration
Insufficient temperature
And/or
insufficient heating time.
Adjust the temperature
and/or increase the
heating time.
Dark color; blurred
images.
Press the time is too long,
and the temperature is too
high
Adjust the temperature
and the heating time
No action after boot
Whether the plug is touched
well
Whether the fuse is burning
Check that the plug is
well touched
Check the fuse for
combustion
The actual
temperature exceeds
the set temperature
Relay disconnected
Disconnect the relay and
replace the relay.
Manufacturer:Shanghaimuxinmuyeyouxiangongsi
Address: Shuangchenglu 803nong11hao1602A-1609shi, baoshanqu,
shanghai 200000 CN.
Imported to AUS: SIHAO PTY LTD. 1 ROKEVA STREETEASTWOOD
NSW 2122 Australia
Imported to USA: Sanven Technology Ltd. Suite 250, 9166 Anaheim
Place, Rancho Cucamonga, CA 91730


- 2 -
Tecnico Supporto e certificato di garanzia elettronica www.vevor.com/support
MACCHINA PER PRESSA DI CALORE
MANUALE DEL PRODOTTO
MODELLO: TLK2730OZ-2S
We continue to be committed to provide you tools with competitive price.
"Save Half", "Half Price" or any other similar expressions used by us only represents an
estimate of savings you might benefit from buying certain tools with us compared to the major
top brands and does not necessarily mean to cover all categories of tools offered by us. You
are kindly reminded to verify carefully when you are placing an order with us if you are
actually saving half in comparison with the top major brands.

- 1 -
Modello :TLK2730OZ-2S
Have product questions? Need technical support? Please feel free to
contact us:
Technical Support and E-Warranty Certificate
www.vevor.com/support
NEED HELP? CONTACT US!
This is the original instruction, please read all manual instructions
carefully before operating. VEVOR reserves a clear interpretation of our
user manual. The appearance of the product shall be subject to the
product you received. Please forgive us that we won't inform you again if
there are any technology or software updates on our product.
HEAT PRESS MACHINE

- 2 -
Simbolo
Descrizione del simbolo
Avvertenza: Per ridurre il rischio di lesioni, l'utente deve leggere
attentamente il manuale di istruzioni.
Questo simbolo, posto prima di un commento sulla sicurezza, indica
un tipo di precauzione, avvertenza o pericolo. Ignorare questo
avvertimento potrebbe provocare un incidente. Per ridurre il rischio di
lesioni, incendio o elettrocuzione, seguire sempre le raccomandazioni
riportate di seguito.
CORRETTO SMALTIMENTO:
Questo prodotto è soggetto alle disposizioni della Direttiva
Europea
2012/19/CE. Il simbolo del bidone della spazzatura barrato
indica che nell'Unione Europea il prodotto richiede la raccolta
differenziata dei rifiuti. Ciò vale per il prodotto e tutti gli
accessori contrassegnati da questo simbolo. I prodotti
contrassegnati come tali potrebbero non esserlo smaltiti con i
normali rifiuti domestici, ma devono essere portati in un punto di
raccolta per il riciclaggio di dispositivi elettrici ed elettronici.
FCC IN FORMAZIONE
ATTENZIONE: Cambiamenti o modifiche non espressamente approvati dalla
parte responsabile della conformità potrebbero invalidare il diritto dell'utente
a utilizzare l'apparecchiatura!
Questo dispositivo è conforme alla Parte 15 delle norme FCC. Il
funzionamento è soggetto alle seguenti due condizioni:
1) Questo prodotto può causare interferenze dannose.
2)Questo prodotto deve accettare qualsiasi interferenza ricevuta, comprese
le interferenze che potrebbero causare un funzionamento indesiderato.
AVVERTIMENTO: Cambiamenti o modifiche a questo prodotto non
espressamente approvati dalla parte responsabile della conformità
potrebbero annullare l'autorità dell'utente a utilizzare il prodotto.

- 3 -
Nota: Questo prodotto è stato testato ed è risultato conforme ai limiti di un
dispositivo digitale di Classe B ai sensi della Parte 15 delle norme FCC.
Questi limiti sono progettati per fornire una protezione ragionevole contro
interferenze dannose in un'installazione residenziale.
Questo prodotto genera, utilizza e può irradiare energia a radiofrequenza e,
in caso contrario installato e utilizzato secondo le istruzioni, può causare
interferenze dannose alle comunicazioni radio. Tuttavia, non vi è alcuna
garanzia che non si verifichino interferenze in una particolare installazione.
Se questo prodotto causa interferenze dannose alla ricezione radiofonica o
televisiva, cosa che può essere determinata spegnendo e accendendo il
prodotto, si consiglia all'utente di provare a correggere l'interferenza
adottando una o più delle seguenti misure.
· Riorientare o riposizionare l'antenna ricevente.
· Aumentare la distanza tra il prodotto e il ricevitore.
· Collegare il prodotto ad una presa su un circuito diverso da quello a cui è
collegato il ricevitore.
· Consultare il rivenditore o un tecnico radio/TV esperto per assistenza.
AVVERTIMENTO
1 .Avvertenze dovere Essere seguito accuratamente A Evitare corpo lesione ,
improprio utilizzo Maggio risultato In scosse elettriche, incendi, lesioni personali e altri
danni:
1 ) Conserva staccare la spina quando spostando il macchina.
2 ) Conserva staccare la spina quando installazione Accessori
3 ) Posizionarlo af a e stabile piattaforma E operare sotto ventilato condizioni
4) Indossa qualcosa di speciale di s p o s i t i v i d i protezione quando operativo IL
macchina
5)Fai non usare questo macchina In UN luogo pericoloso.
6) Fai non utilizzo Quando IL macchina È non lavorando correttamente .
7) Fai non smontare E riparazione Questo macchina .
8) Fai non utilizzo UN inadatto AC Sbocco .
9) Fallo non toccare il riscaldamento piatto quando IL la macchina si sta riscaldando

- 4 -
10) Fallo non usare In umido ambiente o contatto con l'acqua Fare non inf ltrato
liquido In IL macchina a prevenire il fuoco o scossa elettrica causata per
cortocircuito.
11) Fai non utilizzo IL energia fornitura Quello fa non Incontrare IL valutato voltaggio .
IL energia fornitura Che fa non soddisfare la tensione specificata potrebbe
provocare un incendio O elettrico shock.
12) Garantire Quello IL macchina È a terra COSÌ COME non A causa danno A corpo .
13) Fallo non toccare il rotante asta o cuscinetto parte con le dita durante
utilizzo In caso Di lesioni .
14) Se IL macchina È non In utilizzo per UN lungo tempo , Per favore scollegare IL
energia cordone da IL PRESA .
15) Fare non utilizzare il macchina durante i temporali o illuminazione A Evitare
danno a IL macchina .
16) Posizionare il macchina senza problemi sul tavolo ignifugo E stai lontano da
Sono triste e
esplosivo elementi.
17) Per favore fermare utilizzando Esso Se IL macchina fuma , emette UN peculiare
odore , O diventa rumoroso E
In altro anormale condizioni.
18)Questo elettrodomestico Potere Essere usato dai bambini invecchiato da 8 anni
E Sopra E persone con ridotto fisico , sensoriale o mentale capacità o mancanza di
esperienza E conoscenza
se hanno ricevuto supervisione o istruzioni sull'uso dell'apparecchio in una
cassaforte modo e comprendere i rischi connessi. I bambini non devono giocare con
l'apparecchio. La pulizia e la manutenzione da parte dell'utente non devono essere
effettuate da bambini senza supervisione
20) Attacco tipo X: Se il cavo di alimentazione è danneggiato, deve essere sostituito
con un cavo speciale o un gruppo disponibile presso il produttore o il suo agente di
assistenza.
20) Al fine di evitare pericoli dovuti al ripristino involontario della protezione termica,
questo l'apparecchio non deve essere alimentato tramite un dispositivo di
commutazione esterno, come un timer, o collegato ad un circuito che viene
regolarmente acceso e spento dall'utenza.

- 5 -
PRODOTTO PARAMETRO
Misure di sicurezza
1. Selezionare l'alimentatore e la presa di alimentazione appropriati
Modello
TLK2730OZ-2S
Intervallo di temperatura
50℃-190℃ / 122
Intervallo del timer
0-999S
Giudizi)
120 V~ 60 Hz, 1150 W Per gli utenti statunitensi
230 V~ 50 Hz, 1100 W Per utenti europei
Temperatura massima
50℃-190℃/122℉-374℉
Dimensioni tazza compatibili
30 once
Nota importante:
questo prodotto è dotato di un rivestimento per tazza lungo (270 mm), generalmente
adatto per tazze da 30 OZ. Se viene utilizzato temporaneamente per tazze più corte
(come tazze da 11 OZ o 15 OZ), è necessario posizionare due tazze
contemporaneamente per garantire che l'intera lunghezza della pellicola sia a contatto
con le tazze. Questo per garantire un riscaldamento uniforme e prolungare la durata
dell'involucro della tazza.

- 6 -
seguendo rigorosamente le istruzioni dei parametri e collegarli
correttamente al cavo di terra.
2. Posizionare la macchina in modo uniforme sulla scrivania ignifuga e
stare lontano da oggetti infiammabili ed esplosivi attorno alla macchina.
3. Non utilizzare l'apparecchiatura per un lungo periodo, scollegare
l'alimentazione.
4. Sono vietati i bambini di età inferiore ai 12 anni e le persone con
disabilità motorie.
5. Non immergerlo in acqua o utilizzarlo in un ambiente umido.
Diagramma della struttura del prodotto
Istruzioni per l'uso
Heating Plate
Power Switch
Temperature/
Schedule Panel
Pressure
handle
Adjusting
Hand wheel

- 7 -
4. Secondo la tensione indicata nel pacchetto di apparecchiature, collegare il
macchina collegare alla presa da 23oV e accendere Alimentazione elettrica.
Interruttore principale, il indicatore di alimentazione la spia è accesa (notare che
l'intera macchina deve avere un forte filo di terra protettivo).
5. Premere una volta il tasto Mode per impostare la temperatura sinistra, quindi
premere il tasto PIÙ per aumentare e premere M1NUS per ridurre; Premere due
volte il tasto Mode per impostare il tempo rimasto, quindi premere il tasto PIÙ per
aumentare e premere M1NUS per ridurre; Premere tre volte il tasto Mode per
impostare la temperatura sulla destra, premere il tasto PIÙ per aumentare e
premere M1NUS per ridurre; Premere il tasto Mode quattro volte per impostare
l'ora corretta, premere il tasto PIÙ per aumentare e premere M1NUS per ridurre.
Premere una quinta volta per tornare allo stato iniziale di avvio. Tenere premuto il
tasto PIÙ per 5 secondi e cambiare la temperatura Fahrenheit sugli schermi
sinistro e destro.
- 8 -
6. Avviare il riscaldamento: premere il pulsante SINISTRA, il riscaldatore sinistro
verrà riscaldato e la barra di avanzamento sinistra si illuminerà; Premere il
pulsante R1GHT, il riscaldatore si accende il lato destro è riscaldato e la barra di
avanzamento sulla destra si illumina; quando si riscalda alla temperatura
impostata, vengono emessi due segnali acustici di allarme e viene premuto
nuovamente il tasto SINISTRA o R1GHT per terminare urgentemente il
riscaldamento.
4. Quando riscaldato alla temperatura impostata, premere una volta il tasto PIÙ, il
tempo di funzionamento totale a sinistra inizia ad essere positivo, la luce
lampeggiante della linea in movimento totale inizia a lampeggiare, il tempo di
trasferimento a sinistra attende che la temperatura raggiunga la temperatura
impostata la temperatura inizia il conto alla rovescia e la spia di funzionamento
inizia a lampeggiare; nello stato di riscaldamento alla temperatura impostata,
premere una volta il tasto M1NUS, il tempo di funzionamento totale a destra inizia
a essere conteggiato, la luce lampeggiante della linea di funzionamento totale
inizia a lampeggiare, il tempo di trasferimento a destra attende che la temperatura
si accenda inizi a lampeggiare , il tempo di trasferimento corretto attende che la
temperatura raggiunga la temperatura impostata per avviare il conto alla rovescia
e la spia di funzionamento inizia a lampeggiare; nell'operazione di trasferimento
sono presenti due meccanismi di allarme del tempo di esecuzione totale:
- 9 -
b. Dopo il conto alla rovescia, il cicalino suona per 5 secondi e la spia del conto
alla rovescia sullo schermo lampeggia (che termina sui lati sinistro e destro
lampeggia ed entrambi i lati lampeggiano contemporaneamente). L'operazione
totale raccoglie il segnale e continua a far avanzare il tempo dopo 2o secondi
(impostato) Nessuna operazione, interrompe automaticamente il riscaldamento
con la temperatura impostata come riferimento e la trasferisce per proteggere la
temperatura [regolarmente 1oo gradi Celsius (impostabile)] come riferimento.
Testare la temperatura costante. Il cicalino suona ad intervalli di 3 secondi. Lo
schermo mostra che la spia del conto alla rovescia e la spia del funzionamento
totale lampeggiano contemporaneamente (quale lato dell'allarme sul lato sinistro e
destro lampeggia ed entrambi i lati lampeggiano contemporaneamente tempo).
Premere PIÙ o M1NUS per sollevare l'allarme una volta e (quale lato dell'allarme
preme l'allarme) ritorna alla normalità; nello stato di allarme gli altri tasti sono
disabilitati.
B. Il tempo totale di avvio di un'operazione non deve superare i 5 minuti
(impostazione) e quelli che superano i 5 minuti saranno considerati operazioni o
apparecchiature improprie. in caso di guasto il dispositivo interrompe
immediatamente l'alimentazione del corpo scaldante, il sistema si pone nello stato
di stand-by e premendo il tasto Mode si riaccende.

- 10 -
5.Regolare la manopola e il volantino, provare a chiudere il dispositivo più volte,
regolare la pressione appropriata e girare l'orologio saggio Il volantino può
aumentare la pressione dell'attrezzatura; ruotando il volantino in senso antiorario è
possibile ridurre la pressione dell'apparecchiatura fino alla pressione adeguata.
6. Posizionare la tazza piatta sul tampone di spugna, piegare la carta calda (il lato
del disegno è rivolto verso di esso, la parte della tazza da trasferire), premere la
maniglia verso il basso fino a quando non è completamente spenta, quindi si
accende la luce del tempo lampeggia e il tempo inizia il conto alla rovescia. Dopo il
conto alla rovescia, la luce si è spenta e il cicalino ha disattivato il suono "giù", il
che significa che la verniciatura a caldo è stata completata. In questo momento, la
maniglia dovrebbe essere revocato il prima possibile.
Ambito di applicazione
Tazza
Tazza che cambia colore
200 °C (392 °F) 60 secondi
365°F (185°C) 50 secondi
Analisi dei guasti comuni
Fenomeno del
fallimento
Cause di fallimento
Risoluzioni
Non può essere
Piastra riscaldante o relè
Controllare la piastra

- 11 -
riscaldato, ma si vede
bene.
danneggiati
riscaldante o il relè per
eventuali danni.
Colore insufficiente e
scolorimento
dell'immagine
Temperatura insufficiente
E/o
tempo di riscaldamento
insufficiente.
Regolare la temperatura
e/o aumentare il tempo di
riscaldamento.
Colore scuro; immagini
sfocate.
Premere il tempo è troppo
lungo e la temperatura è
troppo alta
Regolare la temperatura
e il tempo di
riscaldamento
Nessuna azione dopo
l'avvio
Se la spina viene toccata
bene
Se il fusibile è acceso
Controllare che la spina
sia ben toccata
Controllare la
combustione del fusibile
La temperatura
effettiva supera la
temperatura impostata
Relè scollegato
Scollegare il relè e
sostituire il relè.
Produttore : Shanghaimuxinmuyeyouxiangongsi
Indirizzo: Shuangchenglu 803nong11hao1602A-1609shi, baoshanqu,
shanghai 200000 CN.
Importato in AUS: SIHAO PTY LTD. 1 ROKEVA STREETEASTWOOD
NSW 2122 Australia
Importato negli Stati Uniti: Sanven Technology Ltd. Suite 250, 9166
Anaheim
Luogo, Rancho Cucamonga, CA 91730


- 3 -
We continue to be committed to provide you tools with competitive price.
"Save Half", "Half Price" or any other similar expressions used by us only represents an
estimate of savings you might benefit from buying certain tools with us compared to the major
top brands and does not necessarily mean to cover all categories of tools offered by us. You
are kindly reminded to verify carefully when you are placing an order with us if you are
actually saving half in comparison with the top major brands.
- 1 -
Modelu : TLK2730OZ-2S
Have product questions? Need technical support? Please feel free to
contact us:
Technical Support and E-Warranty Certificate
www.vevor.com/support
NEED HELP? CONTACT US!
This is the original instruction, please read all manual instructions
carefully before operating. VEVOR reserves a clear interpretation of our
user manual. The appearance of the product shall be subject to the
product you received. Please forgive us that we won't inform you again if
there are any technology or software updates on our product.
HEAT PRESS MACHINE
- 2 -
Symbol
Opis symbolu
Ostrzeżenie: Aby zmniejszyć ryzyko obrażeń, użytkownik musi
uważnie przeczytać instrukcję obsługi.
Ten symbol, umieszczony przed uwagą dotyczącą bezpiecze
ń
stwa,
oznacza rodzaj środka ostrożności, ostrzeżenia lub niebezpiecze
ń
stwa. Zignorowanie tego ostrzeżenia może prowadzić do wypadku.
Aby zmniejszyć ryzyko obrażeń, pożaru lub porażenia prądem, należy
zawsze postępować zgodnie z zaleceniami przedstawionymi poniżej.
PRAWIDŁOWA UTYLIZACJA:
Ten produkt podlega przepisom Dyrektywy Europejskiej
2012/19/WE. Symbol przekreślonego kosza na śmieci oznacza,
że produkt wymaga selektywnej zbiórki śmieci na terenie Unii
Europejskiej. Dotyczy to produktu i wszystkich akcesoriów
oznaczonych tym symbolem. Produkty oznaczone jako takie
mogą nie być wyrzucać razem ze zwykłymi odpadami
domowymi, ale należy je oddać do punktu zbiórki urządzeń
elektrycznych i elektronicznych przeznaczonego do recyklingu.
FCC W FORMACJI
OSTROŻNOŚĆ: Zmiany lub modyfikacje, które nie zostały wyraźnie
zatwierdzone przez stronę odpowiedzialną za zgodność, mogą unieważnić
uprawnienia użytkownika do obsługi urządzenia!
To urządzenie jest zgodne z częścią 15 przepisów FCC. Działanie podlega
następującym dwóm warunkom:
1) Ten produkt może powodować szkodliwe zakłócenia.
2) Ten produkt musi akceptować wszelkie odbierane zakłócenia, w tym
zakłócenia, które mogą powodować niepożądane działanie.
OSTRZEŻENIE: Zmiany lub modyfikacje tego produktu, które nie zostały
wyraźnie zatwierdzone przez stronę odpowiedzialną za zgodność, mogą

- 3 -
unieważnić uprawnienia użytkownika do obsługi produktu.
Notatka: Ten produkt został przetestowany i stwierdzono, że spełnia
ograniczenia dla urządzeń cyfrowych klasy B zgodnie z częścią 15 przepisów
FCC. Ograniczenia te mają na celu zapewnienie rozsądnej ochrony przed
szkodliwymi zakłóceniami w instalacjach domowych.
Ten produkt generuje, wykorzystuje i może emitować energię o częstotliwości
radiowej, a jeśli nie, to zainstalowane i używane zgodnie z instrukcją, może
powodować szkodliwe zakłócenia w komunikacji radiowej. Nie ma jednak
gwarancji, że w konkretnej instalacji nie wystąpią zakłócenia. Jeśli produkt
powoduje szkodliwe zakłócenia w odbiorze radia lub telewizji, co można
stwierdzić poprzez wyłączenie i włączenie produktu, zachęca się użytkownika
do podjęcia próby skorygowania zakłóceń za pomocą jednego lub kilku z
poniższych środków.
· Zmień orientację lub położenie anteny odbiorczej.
· Zwiększ odległość pomiędzy produktem a odbiornikiem.
· Podłącz produkt do gniazdka w innym obwodzie niż ten, do którego
podłączony jest odbiornik.
· Skonsultuj się ze sprzedawcą lub doświadczonym technikiem
radiowo-telewizyjnym w celu uzyskania pomocy.
OSTRZEŻENIE
1. Ostrzeżenia musieć Być podążał ostrożnie Do unikać ciało kontuzja ,
niewłaściwe używać móc wynik W porażenie prądem, pożar, obrażenia ciała i inne
szkody:
1 ) Zachowaj odłącz kiedy przesuwanie maszyna.
2 ) Zachowaj odłącz kiedy instalacja Akcesoria
3 ) Załóż w i stabilny platforma I działać niedostatecznie wentylowany warunki
4) Noś się wyjątkowo sp rz ę t ochronny , kiedy operacyjny the maszyna
5) Zrób nie używaj tego maszyna W A lokalizacja niebezpieczna.
6) Zrób nie używać Kiedy the maszyna Jest nie pracujący odpowiednio .
7) Zrób nie demontować I naprawa Ten maszyna .
8) Zrób nie używać jakiś nieodpowiedni AC Wylot .
9) Zrób nie dotykaj ogrzewanie talerz kiedy the maszyna się nagrzewa

- 4 -
10) Zrób nie używać W wilgotny środowisko lub kontakt z wodą Do nie infiltrować
płyn W the maszyna do zapobiec pożarowi lub porażenie prądem przez
zwarcie.
11) Zrób nie używać the moc dostarczać To robi nie poznać the ocenione Napięcie .
The moc dostarczać to robi nie spełniają określonego napięcia może spowodować
pożar Lub elektryczny zaszokować.
12) Upewnij się To the maszyna Jest uziemiony Więc Jak nie Do przyczyna szkoda
Do ciało .
13) Zrób nie dotykaj ro tawanie pręt lub łożysko rozsuwaj palce podczas używać
W sprawa z urazy .
14) Jeśli the maszyna Jest nie W używać Do A długi czas , Proszę wyjąć wtyczkę the
moc sznur z the gniazdo elektryczne .
15) Do nie używać maszynę podczas burzy lub oświetlenie Do unikać uszkodzenie
the maszyna .
16 ) Umieścić maszynę płynnie na stole trudnopalnym I trzymać z dala od Jestem
zdolny
i materiał wybuchowy rzeczy.
17) P dzierżawa zatrzymywać się za pomocą To Jeśli the maszyna pali , emituje A
osobliwy zapach , Lub staje się hałaśliwy I
W inne nienormalne warunki.
18) To urządzenie Móc Być używany przez dzieci w wieku z 8 lat I powyżej I osoby
z obniżonym fizyczny , sensoryczne lub psychiczne możliwości lub brak
doświadczenia I wiedza
jeżeli znajdują się pod nadzorem lub zostały poinstruowane w zakresie użytkowania
urządzenia w sejfie sposób i zrozumieć związane z tym zagrożenia. Dzieciom nie
wolno bawić się urządzeniem. Dzieci nie mogą czyścić ani konserwować urządzenia
bez nadzoru
21) Mocowanie typu X: W przypadku uszkodzenia przewodu zasilającego należy go
wymienić na przewód specjalny lub montaż dostępny u producenta lub jego
przedstawiciela serwisowego.
20) Aby uniknąć zagrożenia spowodowanego niezamierzonym zresetowaniem
wyłącznika termicznego, należy to zrobić urządzenie nie może być zasilane przez
zewnętrzne urządzenie przełączające, takie jak timer, lub podłączone do obwodu,
który jest regularnie włączany i wyłączany przez zakład energetyczny.

- 5 -
PRODUKT PARAMETR
Środki ostrożności
Model
TLK2730OZ-2S
Zakres temperatury
50℃-190℃ / 122
Zakres timera
0-999S
Ocena(y)
120 V ~ 60 Hz, 1150 W Dla użytkowników w USA
230 V ~ 50 Hz, 1100 W dla Użytkownicy
europejscy
Maksymalna temperatura
50℃-190℃ /122℉-374℉
Zgodny rozmiar kubka
30 uncji
Ważna uwaga:
ten produkt ma długą owijkę na kubek (270 mm), zazwyczaj odpowiednią dla kubków o
pojemności 30 uncji. Jeśli jest tymczasowo używany do krótszych kubków (takich jak
kubki 11 OZ lub 15 OZ), należy umieścić dwa kubki jednocześnie, aby mieć pewność, że
cała długość opakowania kubka styka się z kubkami. Ma to na celu zapewnienie
równomiernego nagrzewania i przedłużenie żywotności folii na kubek.

- 6 -
1. Proszę wybrać odpowiedni zasilacz i gniazdo zasilające ściśle według
instrukcji parametrów i prawidłowo podłączyć je do przewodu
uziemiającego.
2. Umieść maszynę płynnie na ognioodpornym blacie i trzymaj się z dala
od łatwopalnych i wybuchowych przedmiotów w pobliżu maszyny.
3. Nie używaj urządzenia przez dłuższy czas, proszę odłączyć zasilanie.
4. Zabrania się wstępu dzieciom do lat 12 oraz osobom z
niepełnosprawnością ruchową.
5. Nie zanurzaj go w wodzie ani nie używaj w wilgotnym środowisku.
Schemat struktury produktu
Instrukcje użytkowania
Heating Plate
Power Switch
Temperature/
Schedule Panel
Pressure
handle
Adjusting
Hand wheel

- 7 -
7. Zgodnie z napięciem pokazanym na pakiet wyposażenia, podłącz maszyna
podłącz do wtyczki 23oV i włącz zasilacz. Główny wyłącznik, wskaźnik zasilania
lampka jest włączona (należy pamiętać, że cała maszyna musi mieć mocny
przewód uziemiający).
8. Naciśnij raz klawisz Mode, aby ustawić lewą temperaturę, naciśnij klawisz
PLUS, aby zwiększyć i naciśnij M1NUS, aby zmniejszyć; Naciśnij dwukrotnie
klawisz Mode, aby ustawić pozostały czas, naciśnij klawisz PLUS, aby zwiększyć i
naciśnij M1NUS, aby zmniejszyć; Naciśnij trzy razy klawisz Mode, aby ustawić
temperaturę po prawej stronie, naciśnij klawisz PLUS, aby zwiększyć i naciśnij
M1NUS, aby zmniejszyć; Naciśnij klawisz Mode cztery razy, aby ustawić właściwy
czas, naciśnij klawisz PLUS, aby zwiększyć i naciśnij M1NUS, aby zmniejszyć.
Naciśnij piąty raz, aby powrócić do początkowego stanu rozruchu. Naciśnij i
przytrzymaj klawisz PLUS przez 5 sekund, a następnie przełącz temperaturę
Fahrenheita na lewym i prawym ekranie.
- 8 -
9. Rozpoczęcie ogrzewania: naciśnij LEWY przycisk, lewy grzejnik zostanie
nagrzany, a lewy pasek postępu zaświeci się; Naciśnij przycisk R1GHT, grzejnik
włączy się prawy jest podgrzewany, a pasek postępu po prawej świeci; po
nagrzaniu do ustawionej temperatury zabrzmią dwa sygnały dźwiękowe i ponowne
naciśnięcie klawisza LEWY lub R1GHT powoduje pilne zakończenie ogrzewania.
4. Po podgrzaniu do ustawionej temperatury naciśnij jeden raz przycisk PLUS,
całkowity czas działania po lewej stronie zacznie być dodatni, zacznie migać
migająca kontrolka całkowitej ruchomej linii, lewy czas transferu czeka aż
temperatura osiągnie ustawioną wartość temperatura zostanie odliczona, a
kontrolka pracy zacznie migać; w stanie nagrzania do ustawionej temperatury
należy jednokrotnie nacisnąć klawisz M1NUS, zaczyna się odliczanie całkowitego
czasu pracy po prawej stronie, zaczyna migać kontrolka całkowitego przebiegu
linii, zaczyna migać prawy czas oczekiwania na wzrost temperatury , właściwy
czas transferu oczekuje, aż temperatura osiągnie ustawioną temperaturę, aby
rozpocząć odliczanie, a kontrolka pracy zaczyna migać; w operacji przesyłu
występują dwa mechanizmy alarmowe całkowitego czasu pracy:
- 9 -
c. Po odliczeniu, brzęczyk będzie dzwonił przez 5 sekund, a kontrolka odliczania
czasu na ekranie zacznie migać (która zakończy się miganiem po lewej i prawej
stronie, a obie strony będą migać jednocześnie). Całkowita operacja zbiera sygnał
i kontynuuje odliczanie czasu do przodu po 2o sekundach (ustawienie) Brak
operacji, automatycznie zatrzymaj ogrzewanie z ustawioną temperaturą jako
odniesienie i przenieś ją, aby chronić temperaturę [regularnie 1oo stopni Celsjusza
(ustawiane)] jako odniesienie. Przetestuj stałą temperaturę. Brzęczyk włącza
alarm w odstępach co 3 sekundy. Na ekranie widać, że kontrolka odliczania i
kontrolka całkowitego działania migają w tym samym czasie (która strona alarmu
po lewej i prawej stronie miga, a obie strony migają w tym samym czasie) czas).
Naciśnij PLUS lub M1NUS, aby jednokrotnie podnieść alarm i (która strona alarmu
wciśnie alarm) powróci do normalnego stanu; w stanie alarmowym pozostałe
klawisze są wyłączone.
B. Całkowity czas rozruchu jednej operacji nie może przekroczyć 5 minut
(ustawienie), a te, które przekraczają 5 minut, uważa się za nieprawidłową
obsługę lub sprzęt. w przypadku jego awarii urządzenie natychmiast odcina
zasilanie korpusu grzewczego, system przechodzi w stan czuwania i po
naciśnięciu klawisza Mode zostaje ponownie włączony.
- 10 -
5. Wyreguluj pokrętło i pokrętło, spróbuj kilka razy zamknąć urządzenie, ustaw
odpowiednie ciśnienie i przekręć zegar mądry Koło ręczne może zwiększyć
ciśnienie w sprzęcie; obracanie pokrętła w kierunku przeciwnym do ruchu
wskazówek zegara może zmniejszyć ciśnienie w urządzeniu do odpowiedniego
poziomu.
6. Połóż kubek płasko na podkładce z gąbki, złóż gorący papier (stroną wzoru
zwróconą do niego, częścią kubka, która ma zostać przeniesiona), dociśnij uchwyt
w dół, aż do całkowitego wyłączenia, po czym zaświeci się lampka czasu miga i
rozpoczyna się odliczanie czasu. Po odliczeniu lampka zgasła, a brzęczyk
wyłączył dźwięk „w dół”, co oznacza, że malowanie na gorąco zostało zakończone.
W tym momencie uchwyt powinien być podniesione jak najszybciej.
Szereg zastosowań
Kubek
Kubek zmieniający kolor
200°C 60 s
185°C 50 s
Wspólna analiza usterek
Zjawisko porażki
Przyczyny niepowodzeń
Postanowienia
Nie można go
podgrzać, ale dobrze
Uszkodzona płyta grzewcza
lub przekaźnik
Sprawdź płytę grzejną
lub przekaźnik pod kątem

- 11 -
się prezentuje.
uszkodzeń.
Niewystarczające
kolory i odbarwienia
obrazu
Niewystarczająca
temperatura
I/lub
niewystarczający czas
nagrzewania.
Dostosuj temperaturę
i/lub zwiększ czas
ogrzewania.
Ciemny kolor;
niewyraźne obrazy.
Naciśnij, czas jest za długi, a
temperatura za wysoka
Dostosuj temperaturę i
czas ogrzewania
Brak działania po
uruchomieniu
Czy wtyczka jest dobrze
dotknięta
Czy bezpiecznik się pali
Sprawdź, czy wtyczka
jest dobrze dotknięta
Sprawdź bezpiecznik
spalania
Rzeczywista
temperatura
przekracza ustawioną
temperaturę
Przekaźnik odłączony
Odłącz przekaźnik i
wymień przekaźnik.
Producent : Shanghaimuxinmuyeyouxiangongsi
Adres: Shuangchenglu 803nong11hao1602A-1609shi, baoshanqu,
szanghaj 200000 CN.
Import do AUS: SIHAO PTY LTD. 1 ROKEVA STREETEASTWOOD NSW
2122 Australia
Import do USA: Sanven Technology Ltd. Suite 250, 9166 Anaheim
Place, Rancho Cucamonga, Kalifornia 91730


- 2 -
Technisch Support und E-Garantie-Zertifikat www.vevor.com/support
HITZE DRUCK MASCHINE
BEDIENUNGSANLEITUNG
MODELL: TLK2730OZ-2S
We continue to be committed to provide you tools with competitive price.
"Save Half", "Half Price" or any other similar expressions used by us only represents an
estimate of savings you might benefit from buying certain tools with us compared to the major
top brands and does not necessarily mean to cover all categories of tools offered by us. You
are kindly reminded to verify carefully when you are placing an order with us if you are
actually saving half in comparison with the top major brands.

- 1 -
Modell : TLK2730OZ-2S
Have product questions? Need technical support? Please feel free to
contact us:
Technical Support and E-Warranty Certificate
www.vevor.com/support
NEED HELP? CONTACT US!
This is the original instruction, please read all manual instructions
carefully before operating. VEVOR reserves a clear interpretation of our
user manual. The appearance of the product shall be subject to the
product you received. Please forgive us that we won't inform you again if
there are any technology or software updates on our product.
HEAT PRESS MACHINE
- 2 -
Symbol
Symbol Beschreibung
Achtung: Um das Verletzungsrisiko zu verringern, muss der Benutzer
die Bedienungsanleitung sorgfältig lesen.
Dieses Symbol vor einem Sicherheitshinweis weist auf eine
Vorsichtsmaßnahme, Warnung oder Gefahr hin. Das Ignorieren
dieser Warnung kann zu einem Unfall führen. Um das Risiko von
Verletzungen, Bränden oder Stromschlägen zu verringern, befolgen
Sie bitte immer die unten aufgeführte Empfehlung.
KORREKTE ENTSORGUNG:
Dieses Produkt unterliegt den Bestimmungen der
europäischen Richtlinie
2012/19/EG. Das Symbol einer durchgestrichenen Mülltonne
weist darauf hin, dass das Produkt in der Europäischen Union
einer getrennten Müllsammlung bedarf. Dies gilt für das Produkt
und alle Zubehörteile, die mit diesem Symbol gekennzeichnet
sind. Produkte, die als solche gekennzeichnet sind, sind
möglicherweise nicht gekennzeichnet Entsorgen Sie es mit dem
normalen Hausmüll, müssen Sie es aber zu einer Sammelstelle
für das Recycling elektrischer und elektronischer Geräte
bringen.
FCC IN FORMATION
VORSICHT: Änderungen oder Modifikationen, die nicht ausdrücklich von der
für die Einhaltung verantwortlichen Partei genehmigt wurden, können zum
Erlöschen der Berechtigung des Benutzers zum Betrieb des Geräts führen!
Dieses Gerät entspricht Teil 15 der FCC-Bestimmungen. Der Betrieb
unterliegt den folgenden zwei Bedingungen:
1) Dieses Produkt kann schädliche Störungen verursachen.
2) Dieses Produkt muss alle empfangenen Störungen akzeptieren,
einschließlich Störungen, die zu unerwünschtem Betrieb führen können.
WARNUNG: Änderungen oder Modifikationen an diesem Produkt, die nicht

- 3 -
ausdrücklich von der für die Einhaltung verantwortlichen Partei genehmigt
wurden, können zum Erlöschen der Berechtigung des Benutzers zum Betrieb
des Produkts führen.
Notiz: Dieses Produkt wurde getestet und entspricht den Grenzwerten für
ein digitales Gerät der Klasse B gemäß Teil 15 der FCC-Bestimmungen.
Diese Grenzwerte sollen einen angemessenen Schutz vor schädlichen
Störungen in einer Wohnanlage bieten.
Dieses Produkt erzeugt und nutzt Hochfrequenzenergie und kann diese
ausstrahlen Wenn das Gerät gemäß den Anweisungen installiert und
verwendet wird, kann es zu schädlichen Störungen der Funkkommunikation
kommen. Es gibt jedoch keine Garantie dafür, dass bei einer bestimmten
Installation keine Störungen auftreten. Wenn dieses Produkt schädliche
Störungen beim Radio- oder Fernsehempfang verursacht, was durch Aus-
und Einschalten des Produkts festgestellt werden kann, wird dem Benutzer
empfohlen, zu versuchen, die Störung durch eine oder mehrere der folgenden
Maßnahmen zu beheben.
· Richten Sie die Empfangsantenne neu aus oder versetzen Sie sie.
· Erhöhen Sie den Abstand zwischen Produkt und Empfänger.
· Schließen Sie das Produkt an eine Steckdose an, die zu einem anderen
Stromkreis gehört als dem, an den der Empfänger angeschlossen ist.
· Wenden Sie sich für Hilfe an den Händler oder einen erfahrenen
Radio-/TV-Techniker.
WARNUNG
1. Warnungen muss Sei gefolgt sorgfältig Zu vermeiden Körper Verletzung ,
unsachgemäß verwenden Mai Ergebnis In Stromschlag, Feuer, Personenschäden und
andere Schäden:
1 ) Behalten Ziehen Sie den Stecker heraus, wenn Bewegen der Maschine.
2 ) Behalten Ziehen Sie den Stecker heraus, wenn installieren Zubehör
3 ) Anbringen af bei und stabil Plattform Und arbeiten unterbelüftet Bedingungen
4) Tragen Sie etwas Besonderes Schutzausrüstung , wenn Betriebs Die Maschine
5) Tun Sie es Verwenden Sie dies nicht Maschine In A Gefahrenstelle.
6) Tun Sie es nicht verwenden Wann Die Maschine Ist nicht Arbeiten richtig .

- 4 -
7) Tun Sie es nicht zerlegen Und Reparatur Das Maschine .
8) Tun Sie es nicht verwenden ein ungeeignet Wechselstrom Auslauf .
9) Tun Sie es nicht berühren Heizung Platte, wenn Die Maschine heizt
10) Tun Sie es nicht nutzen In feucht Umwelt oder Kontakt mit Wasser Tun nicht
infiltrieren flüssig In Die Maschine zu Feuer verhindern oder Stromschlag
verursacht werden durch Kurzschluss.
11) Tun Sie es nicht verwenden Die Leistung liefern Das tut nicht treffen Die bewertet
Stromspannung . Der Leistung liefern das tut nicht die angegebene Spannung
erreichen kann einen Brand verursachen oder elektrisch Schock.
12) Stellen Sie sicher Das Die Maschine Ist geerdet Also als nicht Zu Ursache
Schaden Zu Körper .
13) Tun Sie es nicht berühren rotierend Stange oder Lager Trennen Sie sich
dabei von Ihren Fingern verwenden In Fall von Verletzungen .
14) Wenn Die Maschine Ist nicht In verwenden für A lang Zeit, Bitte ausstecken Die
Leistung Kabel aus Die Steckdose .
15) Tun nicht verwenden Maschine bei Gewitter oder Beleuchtung Zu vermeiden
Schaden an Die Maschine .
16) Platzieren Sie die Legen Sie die Maschine reibungslos auf den
flammhemmenden Tisch Und Bleib davon weg f l
bin
fähig und explosiv Artikel.
17 ) Pacht stoppen verwenden Es Wenn Die Maschine raucht , strahlt aus A
eigenartig Geruch , oder wird laut Und
In andere anormale Bedingungen.
18)Dieses Gerät dürfen Sei gebraucht von Kindern alt aus 8 Jahre Und über Und
Personen mit reduziert körperlich , sensorisch oder mental Fähigkeiten oder Mangel
von Erfahrung Und Wissen
wenn sie beaufsichtigt oder in die sichere Verwendung des Geräts eingewiesen
wurden Weise und verstehen Sie die damit verbundenen Gefahren. Kinder dürfen
nicht mit dem Gerät spielen. Reinigung und Benutzerwartung dürfen nicht von
Kindern ohne Aufsicht durchgeführt werden
22) Befestigung Typ X: Wenn das Netzkabel beschädigt ist, muss es durch ein
Spezialkabel ersetzt werden oder Montage beim Hersteller oder seinem
Servicepartner erhältlich.
20) Um eine Gefahr durch unbeabsichtigtes Zurücksetzen der Thermosicherung zu
vermeiden, ist dies Das Gerät darf nicht über ein externes Schaltgerät, z. B. eine
Zeitschaltuhr, versorgt werden an einen Stromkreis angeschlossen, der vom

- 5 -
Energieversorger regelmäßig ein- und ausgeschaltet wird.
PRODUKT PARAMETER
Modell
TLK2730OZ-2S
Temperaturbereich
50℃-190℃ / 122
Timer-Bereich
0-999S
Bewertung(en)
120V~ 60Hz, 1150W Für US- Benutzer
230V~ 50Hz, 1100W Für Europäische Benutzer
Max. Temperatur
50℃-190℃ /122℉-374℉
Kompatible Tassengröße
30 Unzen
Wichtiger Hinweis:
Dieses Produkt verfügt über eine lange Becherverpackung (270 mm), die normalerweise
für 30-OZ-Becher geeignet ist. Wenn es vorübergehend für kürzere Tassen verwendet
wird (z. B. 11OZ- oder 15OZ-Tassen), müssen zwei Tassen gleichzeitig platziert werden,
um sicherzustellen, dass die gesamte Länge der Tassenhülle Kontakt mit den Tassen
hat. Dies soll eine gleichmäßige Erwärmung gewährleisten und die Lebensdauer der
Tassenverpackung verlängern .

- 6 -
Sicherheitsvorkehrungen
1. Bitte wählen Sie das entsprechende Netzteil und die entsprechende
Netzteilsteckdose streng gemäß den Parameteranweisungen aus und
schließen Sie diese korrekt an das Erdungskabel an.
2. Stellen Sie die Maschine sanft auf die flammhemmende Tischplatte und
halten Sie sich von brennbaren und explosiven Gegenständen in der Nähe
der Maschine fern.
3. Benutzen Sie das Gerät längere Zeit nicht, trennen Sie es bitte von der
Stromversorgung.
4. Kindern unter 12 Jahren und Personen mit eingeschränkter Mobilität ist
der Zutritt verboten.
5. Weichen Sie es nicht in Wasser ein und verwenden Sie es nicht in einer
nassen Umgebung.
Produktstrukturdiagramm
Temperature/
Schedule Panel
Pressure
handle
- 7 -
Gebrauchsanweisung
10. Entsprechend der in der angezeigten Spannung Ausstattungspaket, schließen
Sie das an Maschine Stecken Sie den Stecker in den 23oV-Stecker und schalten
Sie ihn ein Stromversorgung. Hauptschalter, der Stromversorgungsanzeige Licht
ist an (beachten Sie, dass die gesamte Maschine muss über einen starken
Schutzerdungsdraht verfügen).
11. Drücken Sie einmal die Modustaste, um die linke Temperatur einzustellen, und
Heating Plate
Power Switch
Adjusting
Hand wheel
- 8 -
drücken Sie die PLUS-Taste, um sie zu erhöhen, und drücken Sie M1NUS, um sie
zu verringern. Drücken Sie die Mode-Taste zweimal, um die verbleibende Zeit
einzustellen, drücken Sie die PLUS-Taste, um sie zu erhöhen, und drücken Sie
M1NUS, um sie zu verringern. Drücken Sie dreimal die Modustaste, um die
Temperatur auf der rechten Seite einzustellen, und drücken Sie die PLUS-Taste,
um sie zu erhöhen, und drücken Sie M1NUS, um sie zu verringern. Drücken Sie
die Modustaste viermal, um die richtige Zeit einzustellen, drücken Sie die
PLUS-Taste, um sie zu erhöhen, und drücken Sie M1NUS, um sie zu verringern.
Drücken Sie das fünfte Mal, um zum ursprünglichen Startzustand zurückzukehren.
Halten Sie die PLUS-Taste 5 Sekunden lang gedrückt und wechseln Sie die
Fahrenheit-Temperatur auf dem linken und rechten Bildschirm.
12. Heizen starten: Drücken Sie die LINKE Taste, die linke Heizung wird erhitzt
und der linke Fortschrittsbalken leuchtet; Drücken Sie die R1GHT-Taste, die
Heizung schaltet sich ein rechts wird erhitzt und der Fortschrittsbalken rechts
leuchtet; Beim Erhitzen auf die eingestellte Temperatur werden zwei Alarmtöne
ausgegeben und die LINKS- oder R1GHT-Taste wird erneut gedrückt, um das
Erhitzen dringend zu beenden.
4. Wenn auf die eingestellte Temperatur erhitzt wird, drücken Sie einmal die
PLUS-Taste, die Gesamtlaufzeit auf der linken Seite beginnt positiv zu sein, das
Blinklicht der Gesamtbewegungslinie beginnt zu blinken, die linke

- 9 -
Übertragungszeit wartet darauf, dass die Temperatur die eingestellte Temperatur
erreicht Die Temperatur wird heruntergezählt und die Betriebskontrollleuchte
beginnt zu blinken. Drücken Sie im Zustand des Aufheizens auf die eingestellte
Temperatur einmal die M1NUS-Taste. Die Gesamtlaufzeit auf der rechten Seite
beginnt zu zählen , die richtige Übertragungszeit wartet darauf, dass die
Temperatur die eingestellte Temperatur erreicht, um den Countdown zu starten,
und die laufende Anzeigelampe beginnt zu blinken; Im Transferbetrieb gibt es zwei
Alarmmechanismen der Gesamtlaufzeit:
d. Nach dem Countdown ertönt der Summer 5 Sekunden lang und die
Countdown-Anzeigelampe auf dem Bildschirm blinkt (die auf der linken und
rechten Seite flackert und beide Seiten gleichzeitig blinken). Der Gesamtbetrieb
sammelt das Signal und läuft nach 2o Sekunden weiter (Einrichtung). Kein Betrieb,
das Heizen wird automatisch mit der eingestellten Temperatur als Referenz
gestoppt und zum Schutz der Temperatur übertragen [regelmäßig 1oo Grad
Celsius (einstellbar)] als Referenz. Testen Sie die konstante Temperatur. Der
Summer alarmiert im Abstand von 3 Sekunden. Der Bildschirm zeigt, dass die
Countdown-Anzeigelampe und die Gesamtbetriebsanzeigelampe gleichzeitig
blinken (welche Seite des Alarms auf der linken und rechten Seite blinkt und beide
Seiten gleichzeitig blinken). Zeit). Drücken Sie PLUS oder M1NUS, um den Alarm
einmal anzuheben, und (welche Seite des Alarms drückt den Alarm) kehrt zum
Normalzustand zurück; Im Alarmzustand sind die übrigen Tasten deaktiviert.
B. Die gesamte Startlaufzeit eines Vorgangs darf 5 Minuten (Einrichtung) nicht
- 10 -
überschreiten, und diejenigen, die 5 Minuten überschreiten, gelten als
unsachgemäßer Vorgang oder unsachgemäße Ausrüstung. Wenn dies fehlschlägt,
unterbricht das Gerät sofort die Stromversorgung des Heizkörpers, das System
wechselt in den Standby-Zustand und drückt die Modustaste, um es wieder
einzuschalten.
5.Stellen Sie den Knopf und das Handrad ein, versuchen Sie mehrmals, das Gerät
zu schließen, stellen Sie den entsprechenden Druck ein und drehen Sie die Uhr
weise Das Handrad kann den Gerätedruck erhöhen. Durch Drehen des Handrads
gegen den Uhrzeigersinn kann der Gerätedruck reduziert werden, bis der
entsprechende Druck erreicht ist.
6. Stellen Sie die Tasse flach auf die Schwammunterlage, falten Sie das heiße
Papier (die Seite des Musters zeigt darauf, der Teil der Tasse, der übertragen
werden soll), drücken Sie den Griff nach unten, bis er vollständig ausgeschaltet ist,
dann leuchtet die Zeitanzeige auf blinkt und die Zeit beginnt abzulaufen. Nach
dem Countdown erlischt das Licht und der Summer schaltet den „Down“-Ton aus,
was bedeutet, dass das Heißlackieren abgeschlossen ist. Zu diesem Zeitpunkt
sollte der Griff sein schnellstmöglich aufgehoben.
Geltungsbereich

- 11 -
Becher
Farbwechselbecher
392°F (200°C) 60s
365°F (185°C) 50s
Häufige Fehleranalyse
Ausfallphänomen
Ursachen des Scheiterns
Vorsätze
Es kann nicht erhitzt
werden, aber es zeigt
sich gut.
Heizplatte oder Relais
beschädigt
Überprüfen Sie die
Heizplatte oder das
Relais auf
Beschädigungen.
Unzureichende Farbe
und Bildverfärbung
Unzureichende Temperatur
Und/oder
unzureichende Aufheizzeit.
Passen Sie die
Temperatur an und/oder
verlängern Sie die
Aufheizzeit.
Dunkle Farbe;
verschwommene
Bilder.
Drücken Sie, die Zeit ist zu
lang und die Temperatur ist
zu hoch
Passen Sie die
Temperatur und die
Heizzeit an
Keine Aktion nach dem
Booten
Ob der Stecker gut berührt
wird
Ob die Sicherung
durchbrennt
Überprüfen Sie, ob der
Stecker gut berührt ist
Überprüfen Sie die
Sicherung auf
Verbrennung
Die tatsächliche
Temperatur
überschreitet die
eingestellte
Temperatur
Relais getrennt
Trennen Sie das Relais
und ersetzen Sie das
Relais.
Hersteller : Shanghaimuxinmuyeyouxiangongsi
Adresse: Shuangchenglu 803nong11hao1602A-1609shi, baoshanqu,
Shanghai 200000 CN.
Importiert nach AUS: SIHAO PTY LTD. 1 ROKEVA STREETEASTWOOD
NSW 2122 Australien

- 12 -
In die USA importiert: Sanven Technology Ltd. Suite 250, 9166 Anaheim
Place, Rancho Cucamonga, CA 91730


- 2 -
Technique Assistance et certificat de garantie électronique
www.vevor.com/support
PRESSE À CHAUD
MANUEL DU PRODUIT
MODÈLE : TLK2730OZ-2S
We continue to be committed to provide you tools with competitive price.
"Save Half", "Half Price" or any other similar expressions used by us only represents an
estimate of savings you might benefit from buying certain tools with us compared to the major
top brands and does not necessarily mean to cover all categories of tools offered by us. You
are kindly reminded to verify carefully when you are placing an order with us if you are
actually saving half in comparison with the top major brands.

- 3 -

- 1 -
Modèle :TLK2730OZ-2S
Have product questions? Need technical support? Please feel free to
contact us:
Technical Support and E-Warranty Certificate
www.vevor.com/support
NEED HELP? CONTACT US!
This is the original instruction, please read all manual instructions
carefully before operating. VEVOR reserves a clear interpretation of our
user manual. The appearance of the product shall be subject to the
product you received. Please forgive us that we won't inform you again if
there are any technology or software updates on our product.
HEAT PRESS MACHINE
- 2 -
Symbole
Symbole Description
Attention : Pour réduire le risque de blessure, l'utilisateur doit lire
attentivement le manuel d'instructions.
Ce symbole, placé avant un commentaire de sécurité, indique une
sorte de précaution, d'avertissement ou de danger. Ignorer cet
avertissement peut entraîner un accident. Pour réduire le risque de
blessure, d'incendie ou d'électrocution, veuillez toujours suivre les
recommandations indiquées ci-dessous.
ÉLIMINATION CORRECTE :
Ce produit est soumis aux dispositions de la directive
européenne
2012/19/CE. Le symbole représentant une poubelle barrée
indique que le produit nécessite une collecte sélective des
déchets dans l'Union européenne. Ceci s'applique au produit et
à tous les accessoires marqués de ce symbole. Les produits
marqués comme tels ne peuvent pas être jeté avec les ordures
ménagères normales, mais doit être déposé dans un point de
collecte pour le recyclage des appareils électriques et
électroniques.
FCC EN FORMATION
PRUDENCE: Les changements ou modifications non expressément
approuvés par la partie responsable de la conformité pourraient annuler le
droit de l'utilisateur à utiliser l'équipement !
Cet appareil est conforme à la partie 15 des règles FCC. L’exploitation est
soumise aux deux conditions suivantes :
1) Ce produit peut provoquer des interférences nuisibles.
2) Ce produit doit accepter toute interférence reçue, y compris les
interférences susceptibles de provoquer un fonctionnement indésirable.
AVERTISSEMENT: Les changements ou modifications apportés à ce produit
non expressément approuvés par la partie responsable de la conformité

- 3 -
pourraient annuler le droit de l'utilisateur à utiliser le produit.
Note: Ce produit a été testé et jugé conforme aux limites d'un appareil
numérique de classe B conformément à la partie 15 des règles FCC. Ces
limites sont conçues pour fournir une protection raisonnable contre les
interférences nuisibles dans une installation résidentielle.
Ce produit génère, utilise et peut émettre de l'énergie radiofréquence, et
sinon installé et utilisé conformément aux instructions, peut provoquer des
interférences nuisibles aux communications radio. Cependant, rien ne
garantit que des interférences ne se produiront pas dans une installation
particulière. Si ce produit provoque des interférences nuisibles à la réception
radio ou télé, ce qui peut être déterminé en éteignant et rallumant le produit,
l'utilisateur est encouragé à essayer de corriger les interférences en prenant
une ou plusieurs des mesures suivantes.
· Réorientez ou déplacez l'antenne de réception.
· Augmentez la distance entre le produit et le récepteur.
· Connectez le produit à une prise sur un circuit différent de celui auquel le
récepteur est connecté.
· Consultez le revendeur ou un technicien radio/TV expérimenté pour obtenir
de l'aide.
AVERTISSEMENT
1 .Avertissements doit être suivi soigneusement à éviter corps blessure ,
inappropriée utiliser peut résultat dans choc électrique, incendie, blessures corporelles
et autres dommages :
1 ) Gardez débrancher quand déplacer le machine.
2 ) Gardez débrancher quand installation accessoires
3 ) Placer af à et écurie plate-forme et fonctionner sous ventilé conditions
4) Porter des vêtements spéciaux é qu i p e m e nt de protection lorsque en
fonctionnement le machine
5)Faire ne pas utiliser ça machine dans un emplacement dangereux.
6) Faire pas utiliser quand le machine est pas fonctionnement correctement .
7) Faire pas démonter et réparation ce machine .
8) Faire pas utiliser un inapproprié CA Sortie .

- 4 -
9)Faire ne touche pas le chauffage assiette quand le la machine chauffe
10)Faire Ne pas utiliser dans humide environnement ou contact avec l'eau Faire
pas inf je filtre liquide dans le machine à prévenir les incendies ou un choc
électrique causé par court-circuit.
11) Faire pas utiliser le pouvoir fournir que fait pas rencontrer le noté tension . Le
pouvoir fournir ça fait ne répond pas à la tension spécifiée peut provoquer un
incendie ou électrique choc.
12) Assurez -vous que le machine est fondé donc comme pas à cause nuire à corps .
13)Faire ne touche pas le rotation tige ou portant séparez-vous de vos doigts
pendant utiliser dans cas de blessures .
14) Si le machine est pas dans utiliser pour un long temps , s'il te plaît débrancher le
pouvoir corde depuis le prise .
15) Faire ne pas utiliser le machine pendant les orages ou éclairage à éviter
dommages le machine .
16) Placer le machine en douceur sur la table ignifuge et reste loin de inflammable
et
explosif articles.
17) S'il vous plaît louer arrêt en utilisant il si le machine fume , émet un particulier
odeur , ou devient bruyant et
dans autre anormal conditions.
18)Cet appareil peut être utilisé par les enfants vieilli depuis 8 années et au-dessus
de et personnes avec réduit physique , sensoriel ou mental capacités ou manque
d'expérience et connaissance
s'ils ont reçu une surveillance ou des instructions concernant l'utilisation de l'appareil
dans un environnement sûr. façon et comprendre les dangers encourus. Les enfants
ne doivent pas jouer avec l'appareil. Le nettoyage et l'entretien par l'utilisateur ne
doivent pas être effectués par des enfants sans surveillance.
23) Fixation de type X : Si le cordon d'alimentation est endommagé, il doit être
remplacé par un cordon spécial ou un assemblage disponible auprès du fabricant ou
de son agent de service.
20) Afin d'éviter tout danger dû à un réarmement involontaire du coupe-circuit
thermique, ce L'appareil ne doit pas être alimenté via un dispositif de commutation
externe, tel qu'une minuterie, ou connecté à un circuit qui est régulièrement allumé et
éteint par le service public.

- 5 -
PRODUIT PARAMÈTRE
Modèle
TLK2730OZ-2S
Écart de température
50 ℃-190 ℃ / 122
Plage de minuterie
0-999S
Notation(s)
120 V ~ 60 Hz, 1 150 W Pour les utilisateurs
américains
230 V ~ 50 Hz, 1 100 W pour Utilisateurs
européens
Température maximale
50 ℃-190 ℃ /122 ℉-374 ℉
Taille de tasse compatible
30OZ
Remarque importante :
ce produit comporte un long emballage de tasse (270 mm), généralement adapté aux
tasses de 30 OZ. S'il est temporairement utilisé pour des tasses plus courtes (telles que
des tasses de 11 OZ ou 15 OZ), deux tasses doivent être placées simultanément pour
garantir que toute la longueur de l'emballage de la tasse est en contact avec les tasses.
Ceci permet de garantir un chauffage uniforme et de prolonger la durée de vie de
l'emballage de la tasse.
- 6 -
Précautions de sécurité
1. Veuillez sélectionner l'alimentation et la prise d'alimentation appropriées
strictement selon les instructions des paramètres, et connectez-les
correctement au fil de terre.
2. Placez la machine en douceur sur le bureau ignifuge et restez à l'écart
des objets inflammables et explosifs autour de la machine.
3. N'utilisez pas l'équipement pendant une longue période, veuillez
débrancher l'alimentation électrique.
4. Les enfants de moins de 12 ans et les personnes à mobilité réduite sont
interdits.
5. Ne le trempez pas dans l'eau et ne l'utilisez pas dans un environnement
humide.
Diagramme de structure du produit
Instructions pour l'utilisation
Heating Plate
Power Switch
Temperature/
Schedule Panel
Pressure
handle
Adjusting
Hand wheel
- 7 -
13. Selon la tension indiquée dans le pack d'équipement, connectez le machine
branchez-la à la prise 23oV et allumez le source de courant. Interrupteur principal,
le indicateur d'alimentation le voyant est allumé (notez que toute la machine doit
avoir un fil de terre de protection solide).
14. Appuyez une fois sur la touche Mode pour régler la température gauche, puis
appuyez sur la touche PLUS pour augmenter et appuyez sur M1NUS pour réduire ;
Appuyez deux fois sur la touche Mode pour régler le temps restant, appuyez sur la
touche PLUS pour augmenter et appuyez sur M1NUS pour réduire ; Appuyez trois
fois sur la touche Mode pour régler la température à droite, puis appuyez sur la
touche PLUS pour augmenter et appuyez sur M1NUS pour réduire ; Appuyez
quatre fois sur la touche Mode pour régler l'heure correcte, appuyez sur la touche
PLUS pour augmenter et appuyez sur M1NUS pour réduire. Appuyez une
cinquième fois pour revenir à l'état initial du démarrage. Appuyez et maintenez la
touche PLUS pendant 5 secondes et changez la température Fahrenheit sur les
écrans gauche et droit.

- 8 -
15. Démarrer le chauffage : appuyez sur le bouton GAUCHE, le chauffage gauche
sera chauffé et la barre de progression gauche brillera ; Appuyez sur le bouton
R1GHT, le chauffage du la droite est chauffée et la barre de progression à droite
brille ; lors du chauffage à la température réglée, deux alarmes sonores sont
émises et la touche GAUCHE ou R1GHT est à nouveau enfoncée pour terminer
d'urgence le chauffage.
4. Une fois chauffé à la température réglée, appuyez une fois sur la touche PLUS,
le temps de fonctionnement total à gauche commence à être positif, le voyant
clignotant total de la ligne mobile commence à clignoter, le temps de transfert
gauche attend que la température atteigne la température réglée. la température
compte à rebours et le voyant de fonctionnement commence à clignoter ; à l'état
de chauffage à la température réglée, appuyez une fois sur la touche M1NUS, le
temps de fonctionnement total à droite commence à être compté, le voyant
clignotant total de la ligne de fonctionnement commence à clignoter, le temps de
transfert droit attend que la température monte commence à clignoter , le bon
temps de transfert attend que la température atteigne la température réglée pour
démarrer le compte à rebours, et le voyant de fonctionnement commence à
clignoter ; Dans l'opération de transfert, il existe deux mécanismes d'alarme du
temps total de fonctionnement :
- 9 -
e. Après le compte à rebours, le buzzer sonne pendant 5 secondes et le voyant
du compte à rebours de l'écran clignote (qui se termine sur les côtés gauche et
droit et les deux côtés clignotent en même temps). L'opération totale collecte le
signal et continue d'avancer après 2o secondes (configuration) Aucune opération,
arrêtez automatiquement le chauffage avec la température de réglage comme
référence et transférez-la pour protéger la température [régulièrement 1oo degrés
Celsius (réglable)] comme référence. Testez la température constante. Le buzzer
retentit à intervalles de 3 secondes. L'écran montre que le voyant du compte à
rebours et le voyant du fonctionnement total clignotent en même temps (quel côté
de l'alarme sur les côtés gauche et droit clignote, et les deux côtés clignotent en
même temps). temps). Appuyez sur PLUS ou M1NUS pour déclencher l'alarme
une fois, et (quel côté de l'alarme appuie sur l'alarme) revient à la normale ; en état
d'alarme, les autres touches sont désactivées.
b. La durée totale de démarrage d'une opération ne doit pas dépasser 5 minutes
(mise en place), et celles qui dépassent 5 minutes seront considérées comme une
opération ou un équipement inapproprié. en cas de panne, l'appareil coupe
immédiatement l'alimentation du corps de chauffe, le système entre en état de
veille et appuie sur la touche Mode pour le rallumer.

- 10 -
5. Ajustez le bouton et le volant, essayez de fermer l'appareil plusieurs fois,
ajustez à la pression appropriée et tournez l'horloge. sage Le volant peut
augmenter la pression de l'équipement ; tourner le volant dans le sens inverse des
aiguilles d'une montre peut réduire la pression de l'équipement jusqu'à la pression
appropriée.
6. Placez la tasse à plat sur le tampon éponge, pliez le papier chaud (le côté du
motif lui fait face, la partie de la tasse à transférer), appuyez sur la poignée jusqu'à
ce qu'elle soit complètement éteinte, puis l'heure s'allume. clignote et le compte à
rebours commence. Après le compte à rebours, la lumière s'est éteinte et le
buzzer a émis le son "down", ce qui signifie que la peinture à chaud est terminée.
À ce moment, la poignée doit être levée dans les plus brefs délais.
Champ d'application
Tasse
Tasse qui change de couleur
392 °F (200 °C) 60 s
365 °F (185 °C) 50 s
Analyse des défauts courants
Phénomène d'échec
Causes d'échec
Résolutions
On ne peut pas le
chauffer, mais ça se
Plaque chauffante ou relais
endommagé
Vérifiez la plaque
chauffante ou le relais
- 11 -
voit bien.
pour déceler tout
dommage.
Décoloration
insuffisante des
couleurs et de l’image
Température insuffisante
Et/ou
temps de chauffe insuffisant.
Ajustez la température
et/ou augmentez le
temps de chauffage.
Couleur sombre;
images floues.
Appuyez sur le temps est
trop long et la température
est trop élevée
Régler la température et
le temps de chauffe
Aucune action après le
démarrage
Si la fiche est bien touchée
Si le fusible brûle
Vérifiez que la fiche est
bien touchée
Vérifier le fusible de
combustion
La température réelle
dépasse la
température réglée
Relais déconnecté
Débranchez le relais et
remplacez le relais.
Fabricant : Shanghaimuxinmuyeyouxiangongsi
Adresse : Shuangchenglu 803nong11hao1602A-1609shi, baoshanqu,
Shanghai 200000 CN.
Importé en Australie : SIHAO PTY LTD. 1 ROKEVA STREETASTWOOD
NSW 2122 Australie
Importé aux États-Unis : Sanven Technology Ltd. Suite 250, 9166
Anaheim
Lieu, Rancho Cucamonga, CA 91730


- 2 -
Technisch Ondersteuning en e-garantiecertificaat www.vevor.com/support
WARMTE PERSMACHINE
PRODUCTHANDLEIDING
MODEL: TLK2730OZ-2S
We continue to be committed to provide you tools with competitive price.
"Save Half", "Half Price" or any other similar expressions used by us only represents an
estimate of savings you might benefit from buying certain tools with us compared to the major
top brands and does not necessarily mean to cover all categories of tools offered by us. You
are kindly reminded to verify carefully when you are placing an order with us if you are
actually saving half in comparison with the top major brands.

- 1 -
Model :TLK2730OZ-2S
Have product questions? Need technical support? Please feel free to
contact us:
Technical Support and E-Warranty Certificate
www.vevor.com/support
NEED HELP? CONTACT US!
This is the original instruction, please read all manual instructions
carefully before operating. VEVOR reserves a clear interpretation of our
user manual. The appearance of the product shall be subject to the
product you received. Please forgive us that we won't inform you again if
there are any technology or software updates on our product.
HEAT PRESS MACHINE

- 2 -
Symbool
Symbool Beschrijving
Waarschuwing: Om het risico op letsel te verminderen, moet de
gebruiker de gebruiksaanwijzing zorgvuldig lezen.
Dit symbool, geplaatst vóór een veiligheidsopmerking, duidt op een
soort voorzorgsmaatregel, waarschuwing of gevaar. Het negeren van
deze waarschuwing kan tot een ongeval leiden. Om het risico op
letsel, brand of elektrocutie te verminderen, dient u altijd de
onderstaande aanbeveling op te volgen.
JUISTE VERWIJDERING:
Dit product valt onder de bepalingen van de Europese richtlijn
2012/19/EG. Het symbool met een doorgestreepte
afvalcontainer geeft aan dat het product in de Europese Unie
een aparte afvalinzameling vereist. Dit geldt voor het product en
alle accessoires die met dit symbool zijn gemarkeerd. Producten
die als zodanig zijn gemarkeerd, zijn dat mogelijk niet
weggegooid met het normale huisvuil, maar moet naar een
inzamelpunt voor recycling van elektrische en elektronische
apparaten worden gebracht.
FCC IN FORMA TIE
VOORZICHTIGHEID: Wijzigingen of aanpassingen die niet uitdrukkelijk zijn
goedgekeurd door de partij die verantwoordelijk is voor naleving kunnen de
bevoegdheid van de gebruiker om de apparatuur te bedienen ongeldig
maken!
Dit apparaat voldoet aan Deel 15 van de FCC-regels. De werking is
onderworpen aan de volgende twee voorwaarden:
1) Dit product kan schadelijke interferentie veroorzaken.
2)Dit product moet alle ontvangen interferentie accepteren, inclusief
interferentie die een ongewenste werking kan veroorzaken.
WAARSCHUWING: Wijzigingen of aanpassingen aan dit product die niet
uitdrukkelijk zijn goedgekeurd door de partij die verantwoordelijk is voor

- 3 -
naleving kunnen de bevoegdheid van de gebruiker om het product te
bedienen ongeldig maken.
Opmerking: Dit product is getest en voldoet aan de limieten voor een
digitaal apparaat van Klasse B overeenkomstig Deel 15 van de FCC-regels.
Deze limieten zijn bedoeld om redelijke bescherming te bieden tegen
schadelijke interferentie in een residentiële installatie.
Dit product genereert, gebruikt en kan radiofrequentie-energie uitstralen, en
zo niet geïnstalleerd en gebruikt in overeenstemming met de instructies, kan
schadelijke interferentie aan radiocommunicatie veroorzaken. Er is echter
geen garantie dat er geen interferentie zal optreden in een bepaalde
installatie. Als dit product schadelijke interferentie veroorzaakt aan radio- of
televisieontvangst, wat kan worden vastgesteld door het product uit en weer
in te schakelen, wordt de gebruiker aangeraden te proberen de interferentie
te corrigeren door een of meer van de volgende maatregelen.
· Heroriënteer of verplaats de ontvangstantenne.
· Vergroot de afstand tussen het product en de ontvanger.
· Sluit het product aan op een stopcontact op een ander circuit dan dat
waarop de ontvanger is aangesloten.
· Raadpleeg de dealer of een ervaren radio-/tv-technicus voor hulp.
WAARSCHUWING
1.Waarschuwingen moeten zijn gevolgd voorzichtig naar voorkomen
lichaam letsel , ongepast gebruik kunnen resultaat in elektrische schokken, brand,
persoonlijk letsel en andere schade:
1 ) Bewaren loskoppelen wanneer het verplaatsen van de machine.
2 ) Bewaren loskoppelen wanneer installeren accessoires
3) Plaats het aan af bij en stal platform En bedienen onder geventileerd
voorwaarden
4) Draag speciaal beschermende uitrusting wanneer operationeel de machine
5) Doen gebruik dit niet machine in A gevaarlijke locatie.
6) Doen niet gebruik wanneer de machine is niet werken op de juiste manier .
7) Doen niet demonteren En reparatie dit machine .
8) Doen niet gebruik een ongeschikt AC Uitlaat .

- 4 -
9) Doen niet aanraken verwarming plaat wanneer de machine is aan het opwarmen
10) Doen niet gebruiken in vochtig omgeving of contact met water Doen niet inf ik
ltraat vloeistof in de machine aan brand voorkomen of elektrische schok
veroorzaakt door kortsluiting.
11) Doen niet gebruik de stroom levering Dat doet niet ontmoeten de beoordeeld
Spanning . De stroom levering dat doet niet voldoen aan de gespecificeerde
spanning kan brand veroorzaken of elektrisch schok.
12) Zorg ervoor Dat de machine is gegrond Dus als niet naar oorzaak leed naar
lichaam .
13)Doen niet aanraken roterend hengel of lager neem deel met uw vingers
tijdens gebruik in geval van verwondingen .
14) Als de machine is niet in gebruik voor A lang tijd, Alsjeblieft loskoppelen de
stroom koord van de stopcontact .
15) Doen gebruik de niet machine tijdens onweer of verlichting naar voorkomen
schade aan de machine .
16) Plaats de machine soepel op de vlamvertragende tafel En blijf weg van Ik ben
bekwaam
en explosief artikelen.
17 ) Alsjeblieft stop gebruik makend van Het als de machine rookt , straalt uit A
ongewoon geur , of wordt luidruchtig En
in ander abnormaal voorwaarden.
18)Dit apparaat kan zijn gebruikt door kinderen oud van 8 jaar En boven En
personen met gereduceerd fysiek , sensorisch of mentaal mogelijkheden of gebrek
van ervaring En kennis
als ze onder toezicht staan of instructies hebben gekregen over het gebruik van het
apparaat in een kluis manier en begrijp de gevaren die ermee gepaard gaan.
Kinderen mogen niet met het apparaat spelen. Reiniging en gebruikersonderhoud
mogen niet door kinderen worden uitgevoerd zonder toezicht
24) Type X-bevestiging: Als het netsnoer beschadigd is, moet het worden vervangen
door een speciaal snoer of montage verkrijgbaar bij de fabrikant of zijn serviceagent.
20) Om gevaar als gevolg van het onbedoeld resetten van de thermische beveiliging
te voorkomen, dient u dit te doen apparaat mag niet worden gevoed via een extern
schakelapparaat, zoals een timer, of aangesloten op een circuit dat regelmatig wordt
in- en uitgeschakeld door het nutsbedrijf.

- 5 -
PRODUCT PARAMETER
Model
TLK2730OZ-2S
Temperatuurbereik
50℃-190℃ / 122
Timerbereik
0-999S
Waarderingen)
120V~ 60Hz, 1150W Voor Amerikaanse gebruikers
230V~ 50Hz,1100W tbv Europese gebruikers
Max.temperatuur
50℃-190℃ /122℉-374℉
Compatibele mokgrootte
30OZ
Belangrijke opmerking:
dit product is voorzien van een lange mokkenverpakking (270 mm), doorgaans geschikt
voor mokken van 30 OZ. Als het tijdelijk wordt gebruikt voor kortere mokken (zoals 11OZ
of 15OZ mokken), moeten er twee mokken tegelijk worden geplaatst om ervoor te zorgen
dat de gehele lengte van de mokkenfolie in contact komt met de mokken. Dit is om een
gelijkmatige verwarming te garanderen en de levensduur van de mokverpakking te
verlengen .
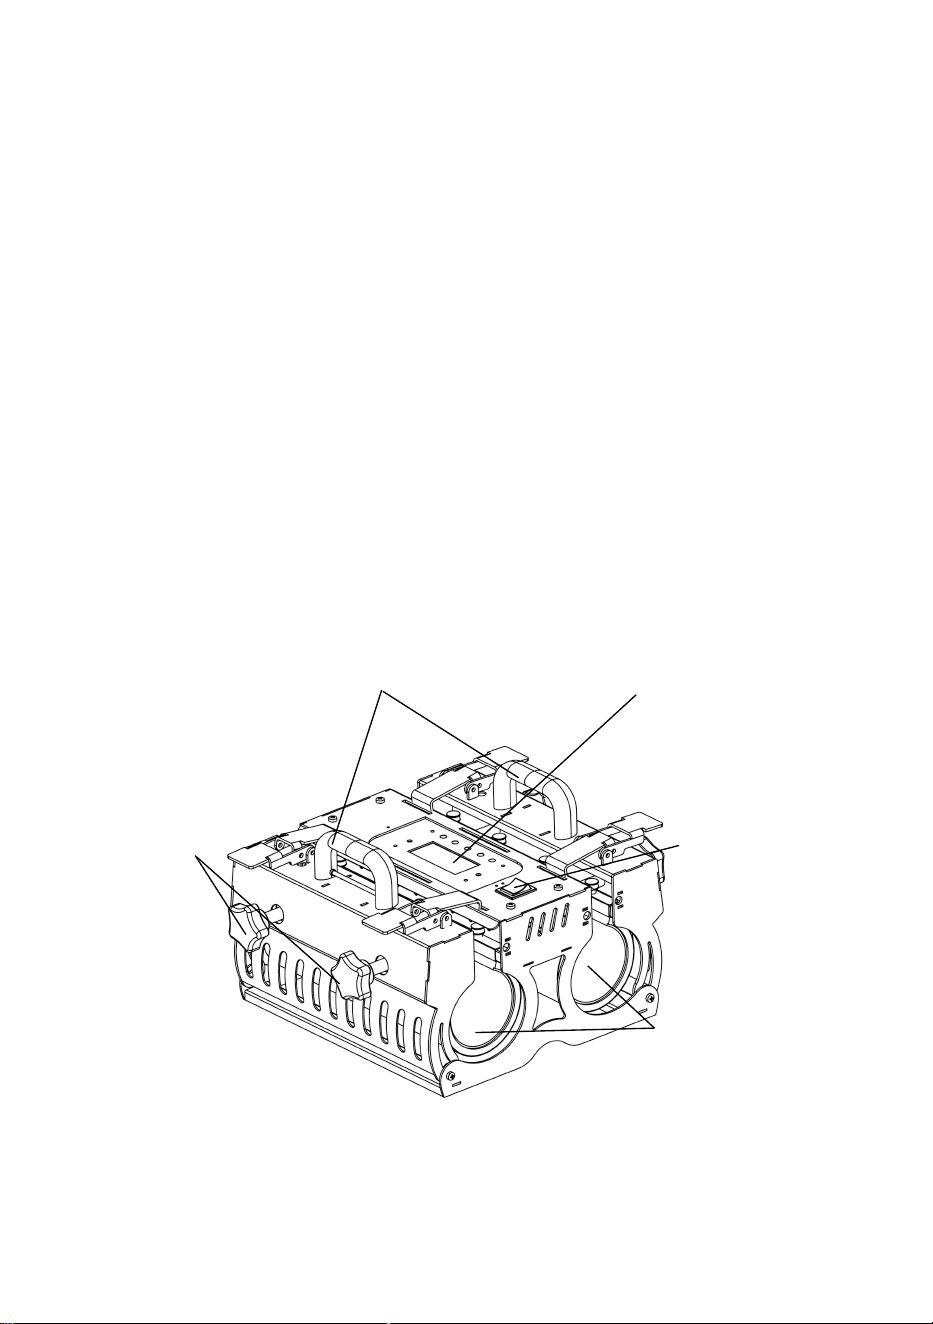
- 6 -
Veiligheidsmaatregelen
1. Selecteer de juiste voeding en stopcontact, strikt volgens de
parameterinstructies, en sluit deze correct aan op de aarddraad.
2. Plaats de machine soepel op het vlamvertragende bureaublad en blijf uit
de buurt van brandbare en explosieve voorwerpen rondom de machine.
3. Gebruik het apparaat niet voor langere tijd. Koppel de voeding los.
4. Kinderen onder de 12 jaar en mensen met een mobiliteitshandicap zijn
verboden.
5. Dompel het niet onder in water en gebruik het niet in een natte
omgeving.
Productstructuurdiagram
Instructies voor gebruik
Heating Plate
Power Switch
Temperature/
Schedule Panel
Pressure
handle
Adjusting
Hand wheel

- 7 -
16. Volgens de spanning weergegeven in de uitrustingspakket, sluit de machine
sluit de stekker aan op de 23oV-stekker en schakel de stroomvoorziening.
Hoofdschakelaar, de voedingsindicator lampje brandt (merk op dat de hele
machine moet een sterke beschermende aardedraad hebben).
17. Druk één keer op de Mode-toets om de linker temperatuur in te stellen, en druk
op de PLUS-toets om te verhogen en druk op M1NUS om te verlagen; Druk twee
keer op de Mode-toets om de linkertijd in te stellen, druk op de PLUS-toets om te
verhogen en druk op M1NUS om te verlagen; Druk drie keer op de Mode-toets om
de temperatuur aan de rechterkant in te stellen, en druk op de PLUS-toets om te
verhogen en druk op M1NUS om te verlagen; Druk vier keer op de Mode-toets om
de juiste tijd in te stellen, druk op de PLUS-toets om te verhogen en druk op
M1NUS om te verlagen. Druk de vijfde keer om terug te keren naar de
oorspronkelijke opstartstatus. Houd de PLUS-toets 5 seconden ingedrukt en
schakel de Fahrenheit-temperatuur op het linker- en rechterscherm.
- 8 -
18. Start het verwarmen: druk op de LINKERknop, de linkerverwarmer wordt
verwarmd en de linkervoortgangsbalk licht op; Druk op de R1GHT-knop, de
verwarming gaat aan rechts wordt verwarmd en de voortgangsbalk aan de
rechterkant gloeit; bij verwarming tot de ingestelde temperatuur klinken er twee
pieptonen en wordt de LINKS- of R1GHT-toets opnieuw ingedrukt om de
verwarming dringend te beëindigen.
4. Druk bij verwarming tot de ingestelde temperatuur één keer op de PLUS-toets.
De totale looptijd aan de linkerkant begint positief te worden, het knipperende licht
van de totale bewegende lijn begint te knipperen, de linker overdrachtstijd wacht
tot de temperatuur de ingestelde temperatuur bereikt. de temperatuur wordt
afgeteld en het bedrijfsindicatielampje begint te knipperen; druk eenmaal op de
M1NUS-toets wanneer de verwarmingsstatus is bereikt tot de ingestelde
temperatuur, de totale looptijd aan de rechterkant begint te tellen, het knipperende
lampje van de totale lopende lijn begint te knipperen, de rechter overdrachtstijd
wacht tot de temperatuur begint te knipperen , de juiste overdrachtstijd wacht tot
de temperatuur de ingestelde temperatuur heeft bereikt om het aftellen te starten,
en het lopende indicatielampje begint te knipperen; bij de overdracht zijn er twee
alarmmechanismen voor de totale looptijd:

- 9 -
f. Na het aftellen klinkt de zoemer gedurende 5 seconden en knippert het
indicatielampje voor het aftellen van het scherm (dat eindigt aan de linker- en
rechterkant en beide zijden knipperen tegelijkertijd). De totale bewerking
verzamelt het signaal en gaat na 2o seconden door met vooruitspoelen (instellen)
Geen werking, stop automatisch met verwarmen met de ingestelde temperatuur
als referentie, en breng deze over om de temperatuur te beschermen [regelmatig
1oo graden Celsius (instelbaar)] als referentie. Test de constante temperatuur. De
zoemer klinkt met tussenpozen van 3 seconden. Het scherm laat zien dat het
aftelindicatielampje en het indicatielampje voor de totale werking tegelijkertijd
knipperen (welke kant van het alarm aan de linker- en rechterkant knippert, en
beide zijden knipperen tegelijkertijd tijd). Druk op PLUS of M1NUS om het alarm
één keer op te heffen, en (aan welke kant van het alarm het alarm wordt ingedrukt)
keert terug naar normaal; in de alarmstatus zijn de overige toetsen uitgeschakeld.
B. De totale opstarttijd van één handeling mag niet meer dan 5 minuten bedragen
(opstelling), en degenen die langer dan 5 minuten duren, worden beschouwd als
een onjuiste handeling of apparatuur. Als dit niet lukt, onderbreekt het apparaat
onmiddellijk de stroomvoorziening van het verwarmingslichaam, gaat het systeem
naar de stand-bymodus en drukt u op de Mode-toets om het weer in te schakelen.

- 10 -
5. Pas de knop en het handwiel aan, probeer het apparaat meerdere keren te
sluiten, pas de juiste druk aan en draai de klok verstandig Handwiel kan de
apparatuurdruk verhogen; door het handwiel tegen de klok in te draaien, kan de
apparatuurdruk worden verlaagd tot de juiste druk.
6. Plaats de beker plat op het sponskussen, vouw het hete papier (de kant van het
patroon is ernaartoe gericht, het deel van de beker dat moet worden overgebracht),
druk de hendel naar beneden totdat deze volledig is uitgeschakeld en vervolgens
gaat het tijdlampje branden knippert en de tijd begint af te tellen. Na het aftellen
ging het licht uit en de zoemer schakelde het "omlaag" -geluid uit, wat betekent dat
het hete schilderij is voltooid. Op dit moment zou het handvat moeten zijn zo
spoedig mogelijk opgeheven.
Toepassingsgebied
Mok
Van kleur veranderende beker
392°F (200°C) 60s
365°F (185°C) 50s
Veelvoorkomende foutanalyse
Faalfenomeen
Oorzaken van falen
Resoluties
Het kan niet worden
verwarmd, maar het is
Beschadigde
verwarmingsplaat of relais
Controleer de
verwarmingsplaat of het

- 11 -
goed te zien.
relais op
beschadigingen.
Onvoldoende kleur en
beeldverkleuring
Onvoldoende temperatuur
En/of
onvoldoende opwarmtijd.
Pas de temperatuur aan
en/of verhoog de
verwarmingstijd.
Donkere kleur; wazige
beelden.
Druk op de tijd is te lang en
de temperatuur is te hoog
Pas de temperatuur en
de verwarmingstijd aan
Geen actie na het
opstarten
Of de stekker goed wordt
aangeraakt
Of de zekering doorbrandt
Controleer of de stekker
goed is aangeraakt
Controleer de zekering
op verbranding
De werkelijke
temperatuur
overschrijdt de
ingestelde
temperatuur
Relais losgekoppeld
Koppel het relais los en
vervang het relais.
Fabrikant : Shanghaimuxinmuyeyouxiangongsi
Adres: Shuangchenglu 803nong11hao1602A-1609shi, baoshanqu,
shanghai 200000 CN.
Geïmporteerd naar AUS: SIHAO PTY LTD. 1 ROKEVA
STREETEASTWOOD NSW 2122 Australië
Geïmporteerd in de VS: Sanven Technology Ltd. Suite 250, 9166
Anaheim
Plaats, Rancho Cucamonga, CA 91730


- 2 -
Teknisk Support och e-garanticertifikat www.vevor.com/support
VÄRMEPRESSMASKIN
PRODUKTMANUAL
MODELL: TLK2730OZ-2S
We continue to be committed to provide you tools with competitive price.
"Save Half", "Half Price" or any other similar expressions used by us only represents an
estimate of savings you might benefit from buying certain tools with us compared to the major
top brands and does not necessarily mean to cover all categories of tools offered by us. You
are kindly reminded to verify carefully when you are placing an order with us if you are
actually saving half in comparison with the top major brands.

- 1 -
Modell : TLK2730OZ-2S
Have product questions? Need technical support? Please feel free to
contact us:
Technical Support and E-Warranty Certificate
www.vevor.com/support
NEED HELP? CONTACT US!
This is the original instruction, please read all manual instructions
carefully before operating. VEVOR reserves a clear interpretation of our
user manual. The appearance of the product shall be subject to the
product you received. Please forgive us that we won't inform you again if
there are any technology or software updates on our product.
HEAT PRESS MACHINE

- 2 -
Symbol
Symbol Beskrivning
Varning: För att minska risken för skada måste användaren läsa
bruksanvisningen noggrant.
Denna symbol, placerad före en säkerhetskommentar, indikerar en
slags försiktighetsåtgärd, varning eller fara. Att ignorera denna
varning kan leda till en olycka. För att minska risken för skada, brand
eller elstöt, följ alltid rekommendationen nedan.
KORREKT AVFALLSHANTERING:
Denna produkt omfattas av bestämmelserna i det europeiska
direktivet
2012/19/EG. Symbolen som visar en soptunna korsad anger att
produkten kräver separat sophämtning i EU. Detta gäller för
produkten och alla tillbehör märkta med denna symbol.
Produkter märkta som sådana kanske inte är det kasseras
tillsammans med vanligt hushållsavfall, men måste lämnas till en
insamlingsplats för återvinning av elektriska och elektroniska
apparater.
FCC INFORMATION
VARNING: Ändringar eller modifieringar som inte uttryckligen godkänts av
den part som ansvarar för överensstämmelse kan ogiltigförklara användarens
behörighet att använda utrustningen!
Denna enhet uppfyller del 15 av FCC-reglerna. Driften är föremål för följande
två villkor:
1) Denna produkt kan orsaka skadliga störningar.
2) Denna produkt måste acceptera alla mottagna störningar, inklusive
störningar som kan orsaka oönskad funktion.
VARNING: Ändringar eller modifieringar av denna produkt som inte
uttryckligen godkänts av den part som är ansvarig för efterlevnaden kan
upphäva användarens behörighet att använda produkten.
Notera: Denna produkt har testats och befunnits överensstämma med

- 3 -
gränserna för en digital enhet av klass B i enlighet med del 15 av
FCC-reglerna. Dessa gränser är utformade för att ge rimligt skydd mot
skadlig störning i en bostadsinstallation.
Denna produkt genererar, använder och kan utstråla radiofrekvensenergi,
och om inte installeras och används i enlighet med instruktionerna, kan
orsaka skadliga störningar på radiokommunikation. Det finns dock ingen
garanti för att störningar inte kommer att inträffa i en viss installation. Om
denna produkt orsakar skadliga störningar på radio- eller tv-mottagning,
vilket kan fastställas genom att stänga av och på produkten, uppmanas
användaren att försöka korrigera störningen med en eller flera av följande
åtgärder.
· Rikta om eller flytta mottagningsantennen.
· Öka avståndet mellan produkten och mottagaren.
· Anslut produkten till ett uttag på en annan krets än den som mottagaren är
ansluten till.
· Kontakta återförsäljaren eller en erfaren radio/TV-tekniker för hjälp.
VARNING
1 .Varningar måste vara följt försiktigt till undvika kropp skada , felaktig
använda sig av Maj resultat i elektriska stötar, brand, personskador och andra skador:
1 ) Behåll koppla ur när flytta på maskin.
2 ) Behåll koppla ur när installera Tillbehör
3) Sätt på af vid och stabil plattform och fungera underventilerat betingelser
4) Bär speciellt skyddsutrustning när fungerar de maskin
5) Gör inte använda detta maskin i a farligt läge.
6) Gör inte använda sig av när de maskin är inte arbetssätt ordentligt .
7) Gör inte plocka isär och reparera detta maskin .
8) Gör inte använda sig av en olämplig AC Utlopp .
9) Gör inte röra uppvärmning tallrik när de maskinen värms upp
10) Gör inte använda i fuktig miljö eller kontakt med vatten Do inte om jag ltrate
flytande i de maskin till förhindra brand eller orsakade elektriska stötar genom
kortslutning.
11) Gör inte använda sig av de kraft tillförsel den där gör inte träffa de betygsatt

- 4 -
Spänning . De kraft tillförsel det gör inte uppfyller den specificerade spänningen kan
orsaka brand eller elektrisk chock.
12) Se till den där de maskin är grundad så som inte till orsak skada till kropp .
13) Gör inte röra roterande stav eller bäring del med fingrarna under använda
sig av i fall av skador .
14) Om de maskin är inte i använda sig av för a lång tid , snälla du dra ur de kraft
sladd från de uttag .
15) Do inte använda maskin under åskväder eller belysning till undvika skada för de
maskin .
16 ) Placera maskin smidigt på det flamskyddade bordet och håll borta från f jag
är
snäll och explosiv föremål.
17) P leasing sluta använder sig av Det om de maskin röker , avger a egendomlig
lukt , eller blir högljudd och
i annat onormalt betingelser.
18)Denna apparat burk vara Begagnade av barn åldrig från 8 år och ovan och
personer med reducerad fysisk , sensoriskt eller mentalt Förmågor eller brist av
erfarenhet och känna till
om de har fått övervakning eller instruktioner angående användning av apparaten i
ett kassaskåp sätt och förstå de risker som är involverade. Barn får inte leka med
apparaten. Rengöring och användarunderhåll får inte utföras av barn utan uppsikt
25) Typ X-tillbehör: Om nätsladden är skadad måste den bytas ut mot en speciell
sladd eller montering tillgänglig från tillverkaren eller dess serviceagent.
20) För att undvika en fara på grund av oavsiktlig återställning av termoskyddet,
apparaten får inte försörjas via en extern omkopplingsanordning, såsom en timer,
eller ansluten till en krets som regelbundet slås på och av av kraftverket.

- 5 -
PRODUKT PARAMETER
Säkerhetsåtgärder
1. Vänligen välj lämplig strömförsörjning och strömförsörjningsuttag strikt
enligt parameterinstruktionerna, och anslut den korrekt till jordledningen.
2. Placera maskinen smidigt på det flamskyddade skrivbordet och håll dig
borta från brandfarliga och explosiva föremål runt maskinen.
3. Använd inte utrustningen under en längre tid, koppla ur
strömförsörjningen.
4. Barn under 12 år och personer med rörelsehinder är förbjudna.
5. Blötlägg den inte i vatten och använd den inte i en våt miljö.
Modell
TLK2730OZ-2S
Temperaturvariation
50℃-190℃ / 122
Timerintervall
0-999S
Betyg(er)
120V~ 60Hz,1150W För amerikanska användare
230V~ 50Hz,1100W För europeiska användare
Max. Temperatur
50℃-190℃ /122℉-374℉
Kompatibel muggstorlek
30 OZ
Viktig anmärkning:
Denna produkt har en lång muggomslag (270 mm), vanligtvis lämplig för 30OZ-muggar.
Om den tillfälligt används för kortare muggar (som 11OZ eller 15OZ muggar), måste två
muggar placeras samtidigt för att säkerställa att hela längden på muggomslaget är i
kontakt med muggarna. Detta för att säkerställa jämn uppvärmning och för att förlänga
livslängden på mugglindningen.
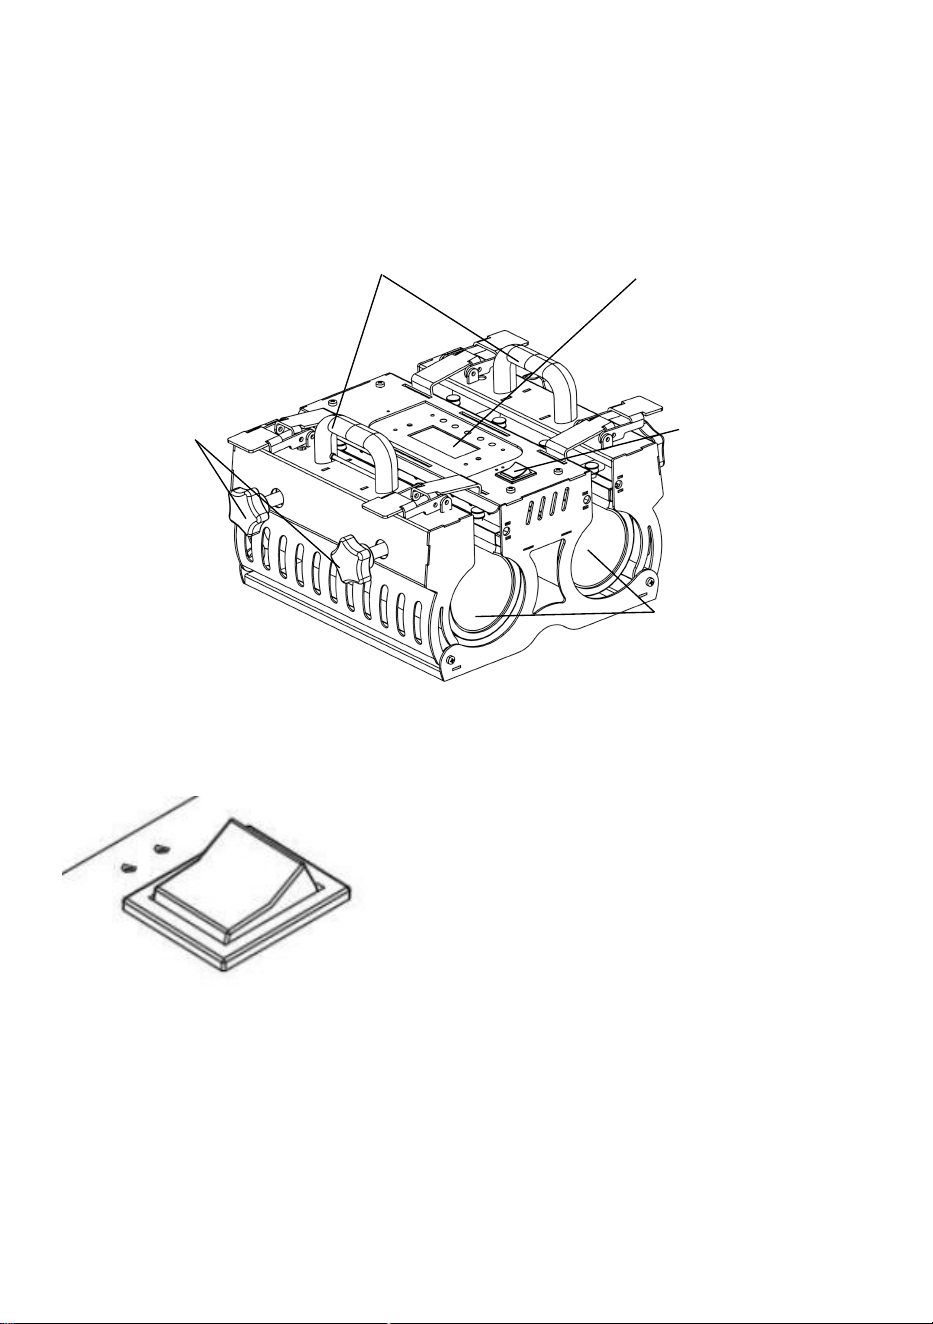
- 6 -
Produktstrukturdiagram
Instruktioner för hur man använder
19. Enligt spänningen som visas i utrustningspaket, anslut maskin anslut till
23oV-kontakten och slå på strömförsörjning. Huvudströmbrytare, den
strömförsörjningsindikator lampan lyser (observera att hela maskinen måste ha en
stark skyddande jordledning).
Heating Plate
Power Switch
Temperature/
Schedule Panel
Pressure
handle
Adjusting
Hand wheel
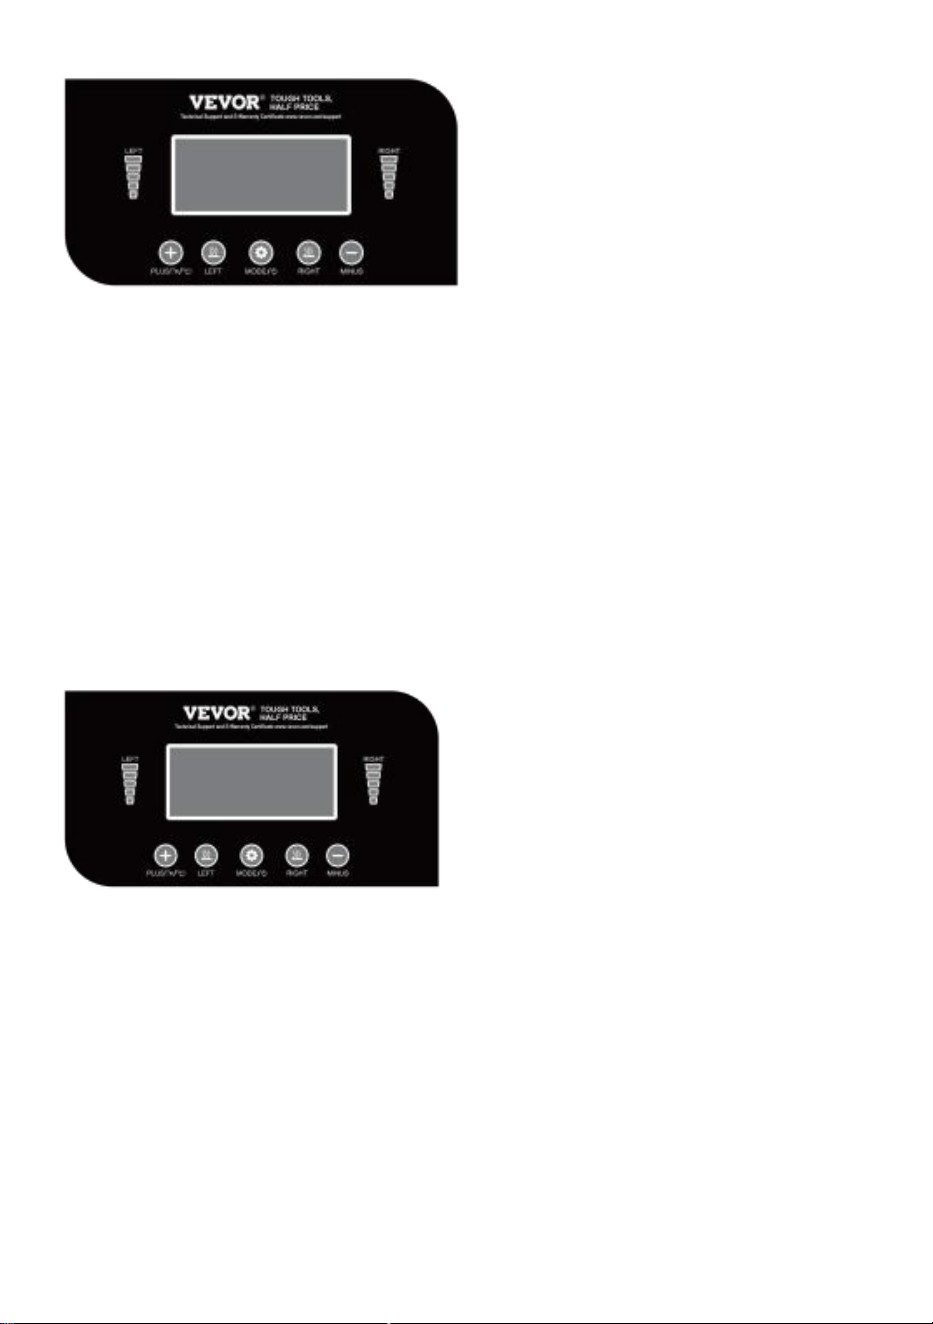
- 7 -
20. Tryck på Mode-knappen en gång för att ställa in den vänstra temperaturen, och
tryck på PLUS-knappen för att öka och tryck på M1NUS för att minska; Tryck på
Mode-knappen två gånger för att ställa in den vänstra tiden, och tryck på
PLUS-tangenten för att öka och tryck på M1NUS för att minska; Tryck på
Mode-knappen tre gånger för att ställa in temperaturen till höger, och tryck på
PLUS-knappen för att öka och tryck på M1NUS för att minska; Tryck på
Mode-knappen fyra gånger för att ställa in rätt tid, tryck på PLUS-knappen för att
öka och tryck på M1NUS för att minska. Tryck femte gången för att återgå till
startläget. Tryck och håll ned PLUS-knappen i 5 sekunder och växla
Fahrenheit-temperatur på vänster och höger skärm.
21. Starta uppvärmning: tryck på VÄNSTER-knappen, den vänstra värmaren
värms upp och den vänstra förloppsindikatorn lyser; Tryck på R1GHT-knappen,
värmaren på höger är uppvärmd och förloppsindikatorn till höger lyser; vid
uppvärmning till den inställda temperaturen avges två piplarm, och VÄNSTER-
eller R1GHT-knappen trycks ned igen för att omedelbart avbryta uppvärmningen.
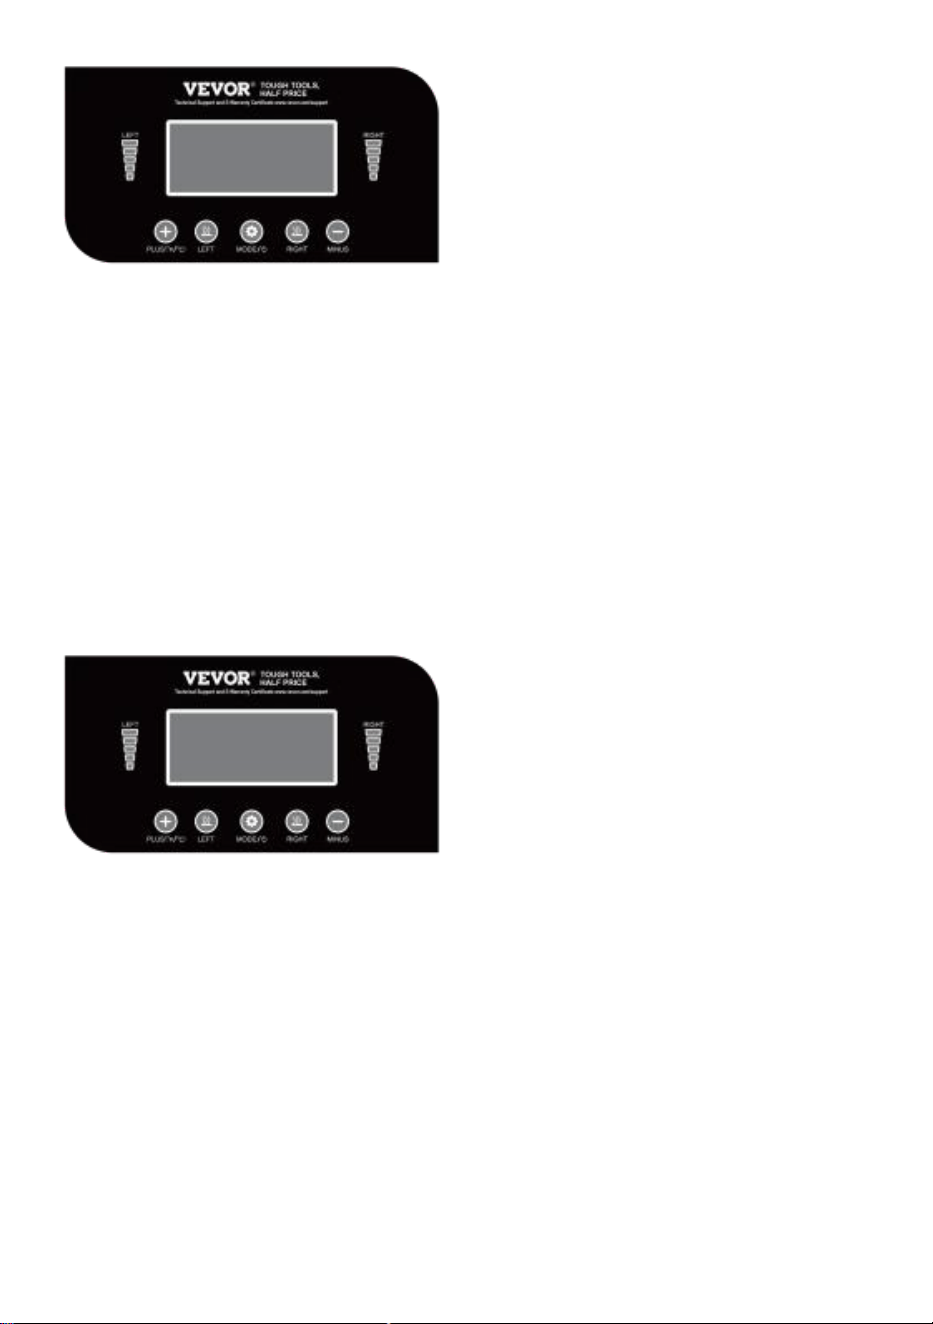
- 8 -
4. När den värms upp till den inställda temperaturen, tryck en gång på
PLUS-knappen, den totala körtiden till vänster börjar bli positiv, den totala
blinkande lampan för rörlig linje börjar blinka, den vänstra överföringstiden väntar
på att temperaturen når inställd temperaturen för att räkna ner, och
körindikatorlampan börjar blinka; vid tillståndet för uppvärmning till den inställda
temperaturen, tryck en gång på M1NUS-tangenten, den totala körtiden till höger
börjar räknas, den totala löplinjens blinkande lampa börjar blinka, den högra
överföringstiden väntar på att temperaturen till höger börjar blinka , den rätta
överföringstiden väntar på att temperaturen når den inställda temperaturen för att
börja nedräkningen, och körindikatorlampan börjar blinka; i överföringsoperationen
finns det två larmmekanismer för den totala körtiden:
g. Efter nedräkningen ringer summern i 5 sekunder och skärmens
nedräkningsindikator blinkar (som slutar på vänster och höger sida flimrar och
båda sidor blinkar samtidigt). Den totala operationen samlar in signalen och
fortsätter att gå framåt efter 2o sekunder (inställning) Ingen funktion, stoppa
uppvärmningen automatiskt med den inställda temperaturen som referens och
överför den för att skydda temperaturen [regelbundet 1oo grader Celsius
(inställbar)] som referens. Testa den konstanta temperaturen. Summern larmar
med 3 sekunders intervall. Skärmen visar att indikatorlampan för nedräkning och
indikatorlampan för total drift blinkar samtidigt (vilken sida av larmet på vänster
och höger sida blinkar, och båda sidorna blinkar samtidigt tid). Tryck på PLUS eller
M1NUS för att häva larmet en gång, och (vilken sida av larmet som trycker på
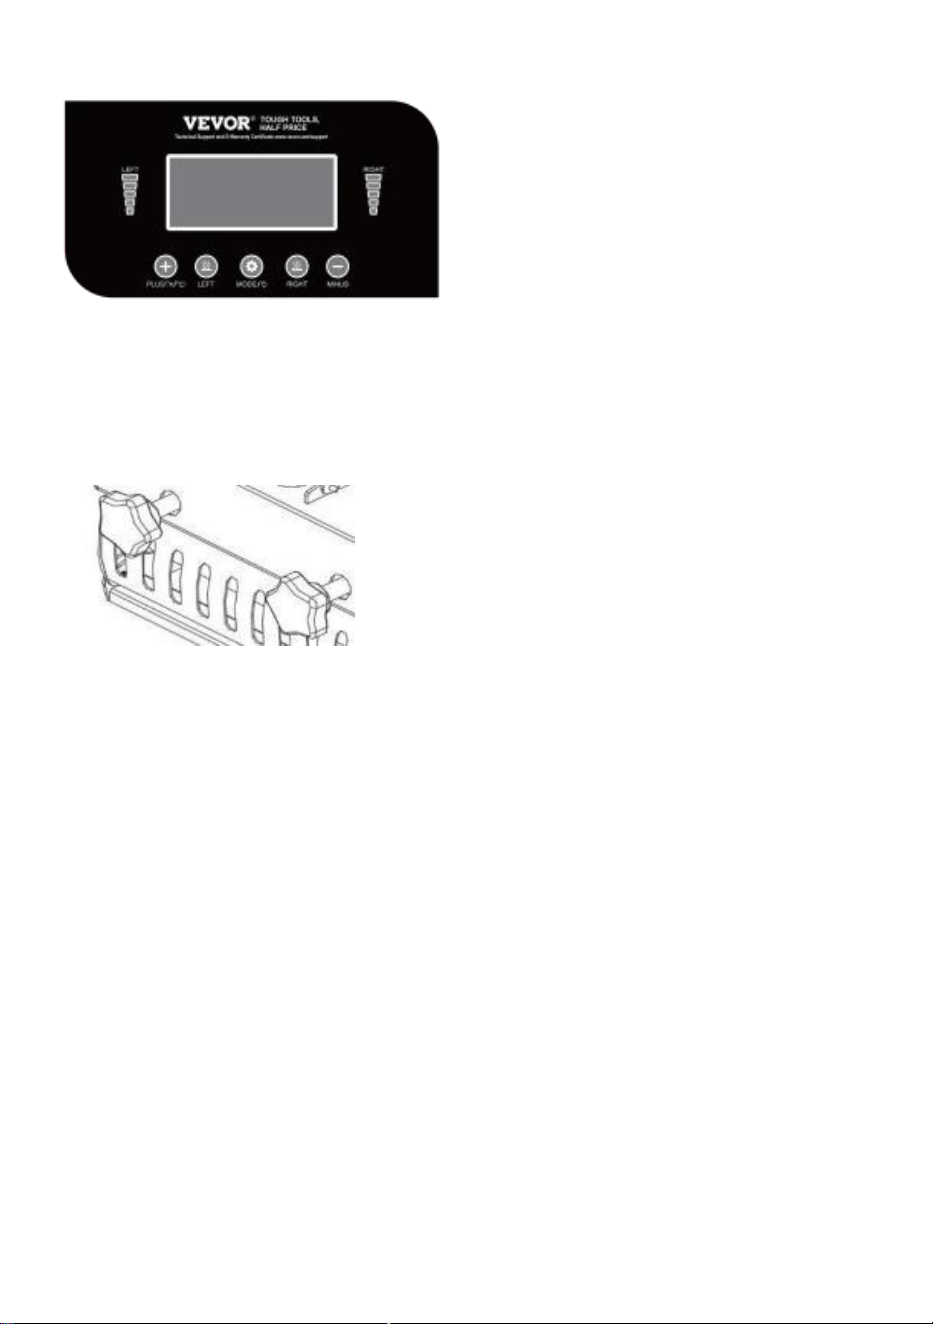
- 9 -
larmet) återgår till det normala; i larmläge är resten av nycklarna inaktiverade.
b. Den totala starttiden för en operation ska inte överstiga 5 minuter (inställning),
och de som överstiger 5 minuter ska anses vara felaktig drift eller utrustning. om
det misslyckas, stänger enheten omedelbart av värmekroppens strömförsörjning,
systemet går in i standbyläge och trycker på Mode-knappen för att slå på det igen.
5. Justera vredet och handratten, försök att stänga enheten flera gånger, justera till
lämpligt tryck och vrid på klockan klok Handhjul kan öka utrustningens tryck;
genom att vrida handratten moturs kan utrustningens tryck minskas tills det är
lämpligt tryck.
6. Placera koppen platt på svampdynan, vik det varma pappret (sidan av mönstret
är vänd mot det, den del av koppen som ska överföras), tryck ner handtaget tills
det är helt avstängt, sedan klockans ljus blinkar och tiden börjar räknas ner. Efter
nedräkningen slocknade ljuset, och summern vände på "ner"-ljudet, vilket betyder
att den heta målningen är klar. Vid denna tidpunkt ska handtaget vara hävs så
snart som möjligt.
Tillämpningsområde
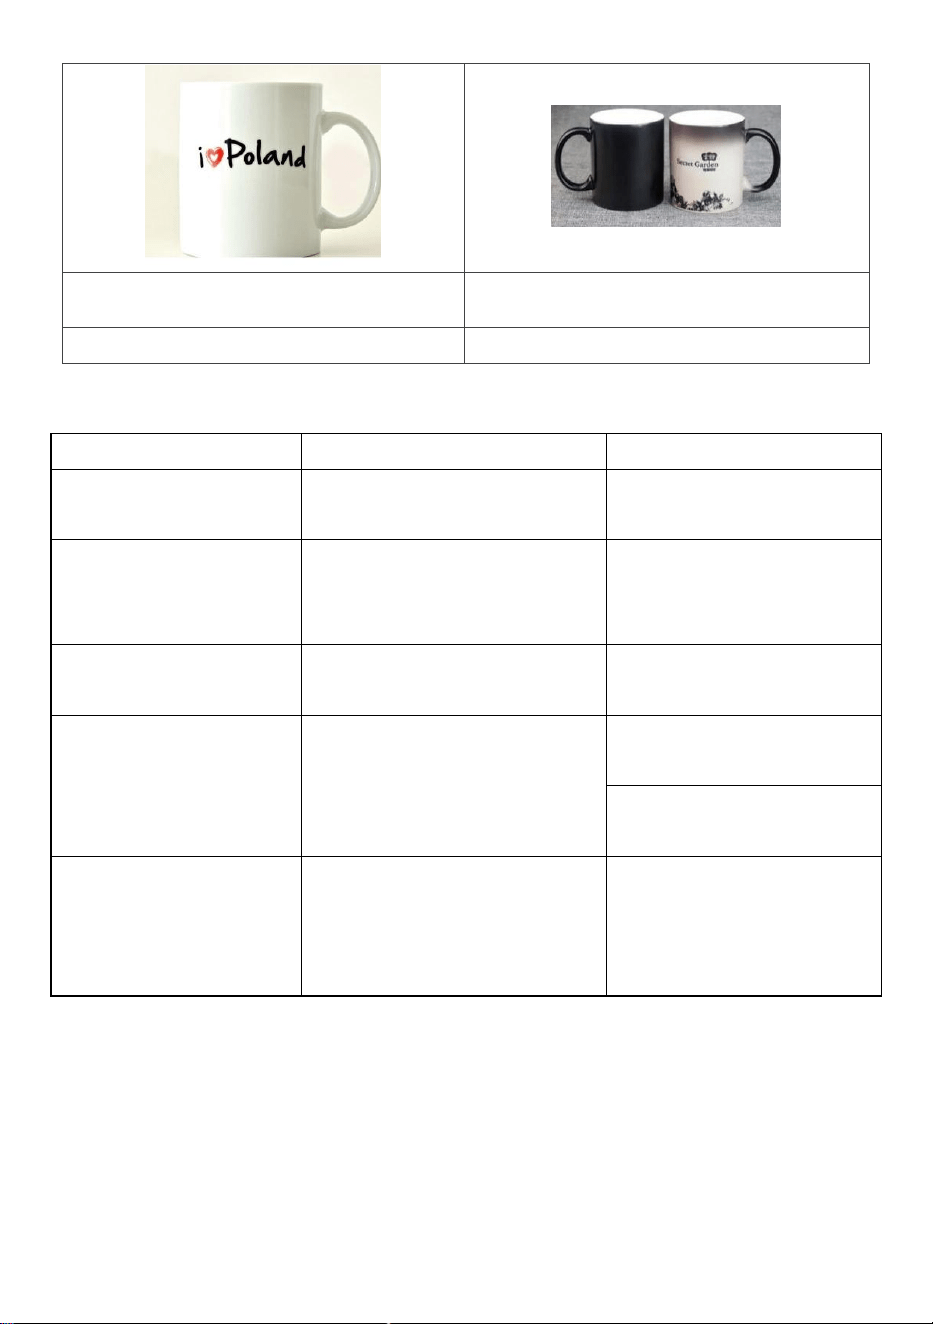
- 10 -
Mugg
Färgskiftande kopp
392°F (200°C) 60s
365°F (185°C) 50s
Vanlig felanalys
Misslyckande fenomen
Orsaker till misslyckande
Upplösningar
Det går inte att värma
upp, men det syns bra.
Skadad värmeplatta eller
relä
Kontrollera värmeplattan
eller reläet för skador.
Otillräcklig färg och
missfärgning av bilden
Otillräcklig temperatur
Och/eller
otillräcklig uppvärmningstid.
Justera temperaturen
och/eller öka
uppvärmningstiden.
Mörk färg; suddiga
bilder.
Tryck på tiden är för lång
och temperaturen är för hög
Justera temperaturen
och uppvärmningstiden
Ingen åtgärd efter start
Huruvida kontakten berörs
väl
Om säkringen brinner
Kontrollera att kontakten
är väl vidrörd
Kontrollera säkringen för
förbränning
Den faktiska
temperaturen
överstiger den
inställda temperaturen
Relä frånkopplat
Koppla bort reläet och
byt ut reläet.
Tillverkare : Shanghaimuxinmuyeyouxiangongsi
Adress: Shuangchenglu 803nong11hao1602A-1609shi, baoshanqu,
shanghai 200000 CN.
Importerad till AUS: SIHAO PTY LTD. 1 ROKEVA STREETEASTWOOD
NSW 2122 Australien

- 11 -
Importerad till USA: Sanven Technology Ltd. Suite 250, 9166 Anaheim
Place, Rancho Cucamonga, CA 91730


- 2 -
Técnico Soporte y certificado de garantía electrónica www.vevor.com/support
MÁQUINA DE PRENSA DE CALOR
MANUAL DEL PRODUCTO
MODELO: TLK2730OZ-2S
We continue to be committed to provide you tools with competitive price.
"Save Half", "Half Price" or any other similar expressions used by us only represents an
estimate of savings you might benefit from buying certain tools with us compared to the major
top brands and does not necessarily mean to cover all categories of tools offered by us. You
are kindly reminded to verify carefully when you are placing an order with us if you are
actually saving half in comparison with the top major brands.

- 1 -
Modelo : TLK2730OZ-2S
Have product questions? Need technical support? Please feel free to
contact us:
Technical Support and E-Warranty Certificate
www.vevor.com/support
NEED HELP? CONTACT US!
This is the original instruction, please read all manual instructions
carefully before operating. VEVOR reserves a clear interpretation of our
user manual. The appearance of the product shall be subject to the
product you received. Please forgive us that we won't inform you again if
there are any technology or software updates on our product.
HEAT PRESS MACHINE
- 2 -
Símbolo
Descripción del símbolo
Advertencia: Para reducir el riesgo de lesiones, el usuario debe leer
atentamente el manual de instrucciones.
Este símbolo, colocado antes de un comentario de seguridad, indica
un tipo de precaución, advertencia o peligro. Ignorar esta advertencia
puede provocar un accidente. Para reducir el riesgo de lesiones,
incendio o electrocución, siga siempre las recomendaciones que se
muestran a continuación.
ELIMINACIÓN CORRECTA:
Este producto está sujeto a las disposiciones de la directiva
europea.
2012/19/CE. El símbolo que muestra un contenedor con ruedas
tachado indica que el producto requiere recogida selectiva de
basura en la Unión Europea. Esto se aplica al producto y a todos
los accesorios marcados con este símbolo. Los productos
marcados como tales no pueden ser desechar con la basura
doméstica normal, pero debe llevarse a un punto de recogida
para el reciclaje de aparatos eléctricos y electrónicos.
FCC EN FORMACIÓN
PRECAUCIÓN: ¡Los cambios o modificaciones no aprobados expresamente
por la parte responsable del cumplimiento podrían anular la autoridad del
usuario para operar el equipo!
Este dispositivo cumple con la Parte 15 de las normas de la FCC. La
operación está sujeta a las dos condiciones siguientes:
1) Este producto puede causar interferencias perjudiciales.
2) Este producto debe aceptar cualquier interferencia recibida, incluidas las
interferencias que puedan causar un funcionamiento no deseado.
ADVERTENCIA: Los cambios o modificaciones a este producto que no
estén aprobados expresamente por la parte responsable del cumplimiento
podrían anular la autoridad del usuario para operar el producto.

- 3 -
Nota: Este producto ha sido probado y cumple con los límites para un
dispositivo digital Clase B de conformidad con la Parte 15 de las reglas de la
FCC. Estos límites están diseñados para brindar una protección razonable
contra interferencias dañinas en una instalación residencial.
Este producto genera, utiliza y puede irradiar energía de radiofrecuencia y,
de no ser así, instalado y utilizado de acuerdo con las instrucciones, puede
causar interferencias dañinas en las comunicaciones por radio. Sin embargo,
no hay garantía de que no se produzcan interferencias en una instalación en
particular. Si este producto causa interferencias dañinas en la recepción de
radio o televisión, lo cual se puede determinar apagando y encendiendo el
producto, se recomienda al usuario que intente corregir la interferencia
mediante una o más de las siguientes medidas.
· Reorientar o reubicar la antena receptora.
· Aumentar la distancia entre el producto y el receptor.
· Conecte el producto a una toma de corriente de un circuito diferente al que
está conectado el receptor.
· Consulte al distribuidor o a un técnico experimentado en radio/TV para
obtener ayuda.
ADVERTENCIA
1 .Advertencias debe ser seguido con cuidado a evitar cuerpo lesión ,
inadecuado usar puede resultado en descarga eléctrica, incendio, lesiones
personales y otros daños:
1 ) Mantener desconectar cuando moviendo el máquina.
2 ) Mantener desconectar cuando instalando accesorios
3 ) Colóquelo af en y estable plataforma y funcionar poco ventilado condiciones
4) Use ropa especial eq ui p o d e protección cuando operando el máquina
5)Hacer no usar esto máquina en a ubicación peligrosa.
6) hacer no usar cuando el máquina es no laboral adecuadamente .
7) hacer no desmontar y reparar este máquina .
8) hacer no usar un inadecuado C.A. Salida .
9)Hacer no tocar el calefacción plato cuando el la máquina se está calentando
10)Hacer No utilice en húmedo medio ambiente o contacto con el agua Hacer no

- 4 -
infiltrado líquido en el máquina para prevenir el fuego o descarga eléctrica
causada por cortocircuito.
11) Hacer no usar el fuerza suministrar eso hace no encontrarse el clasificado
Voltaje . El fuerza suministrar Eso hace no cumple con el voltaje especificado puede
causar incendio o eléctrico choque.
12) Asegurar eso el máquina es conectado a tierra entonces como no a causa dañar
a cuerpo .
13)Hacer no tocar el rotando vara o rodamiento sepárese con los dedos
durante usar en caso de lesiones .
14) Si el máquina es no en usar para a largo tiempo, por favor desenchufar el fuerza
cable de el enchufe .
15) Hacer no usar el máquina durante las tormentas o iluminación a evitar daño a
el máquina .
16) Coloque el máquina suavemente sobre la mesa retardante de llama y
mantenerse alejado de f l
amable
y explosivo elementos.
17) Por favor detener usando él si el máquina fuma , emite a peculiar oler , o se
convierte ruidoso y
en otro anormal condiciones.
18)Este aparato poder ser usado por niños Envejecido de 8 años y arriba y
personas con reducido físico , sensorial o mental capacidades o falta de
experiencia y conocimiento
si han recibido supervisión o instrucciones sobre el uso del aparato en un lugar
seguro manera y comprender los peligros involucrados. Los niños no deben jugar
con el aparato. La limpieza y el mantenimiento del usuario no deben ser realizados
por niños sin supervisión.
26) Accesorio tipo X: Si el cable de alimentación está dañado, debe ser
reemplazado por un cable especial o conjunto disponible del fabricante o su agente
de servicio.
20) Para evitar riesgos debido al reinicio involuntario del interruptor térmico, este El
aparato no debe recibir alimentación a través de un dispositivo de conmutación
externo, como un temporizador, o conectado a un circuito que la empresa de
servicios públicos enciende y apaga regularmente.

- 5 -
PRODUCTO PARÁMETRO
Precauciones de seguridad
1. Seleccione la fuente de alimentación y el enchufe de alimentación
adecuados estrictamente de acuerdo con las instrucciones de los
Modelo
TLK2730OZ-2S
Rango de temperatura
50 ℃ -190 ℃ / 122
Rango del temporizador
0-999S
Calificación(es)
120 V~ 60 Hz, 1150 W Para usuarios de EE. UU.
230V~ 50Hz, 1100W Para usuarios europeos
Temperatura máx.
50 ℃ -190 ℃ /122 ℉ -374 ℉
Tamaño de taza compatible
30 onzas
Nota importante:
Este producto cuenta con un envoltorio largo para taza (270 mm), generalmente
adecuado para tazas de 30 OZ. Si se usa temporalmente para tazas más cortas (como
tazas de 11 OZ o 15 OZ), se deben colocar dos tazas simultáneamente para garantizar
que toda la longitud del envoltorio de la taza esté en contacto con las tazas. Esto es para
asegurar un calentamiento uniforme y extender la vida útil del envoltorio para taza.
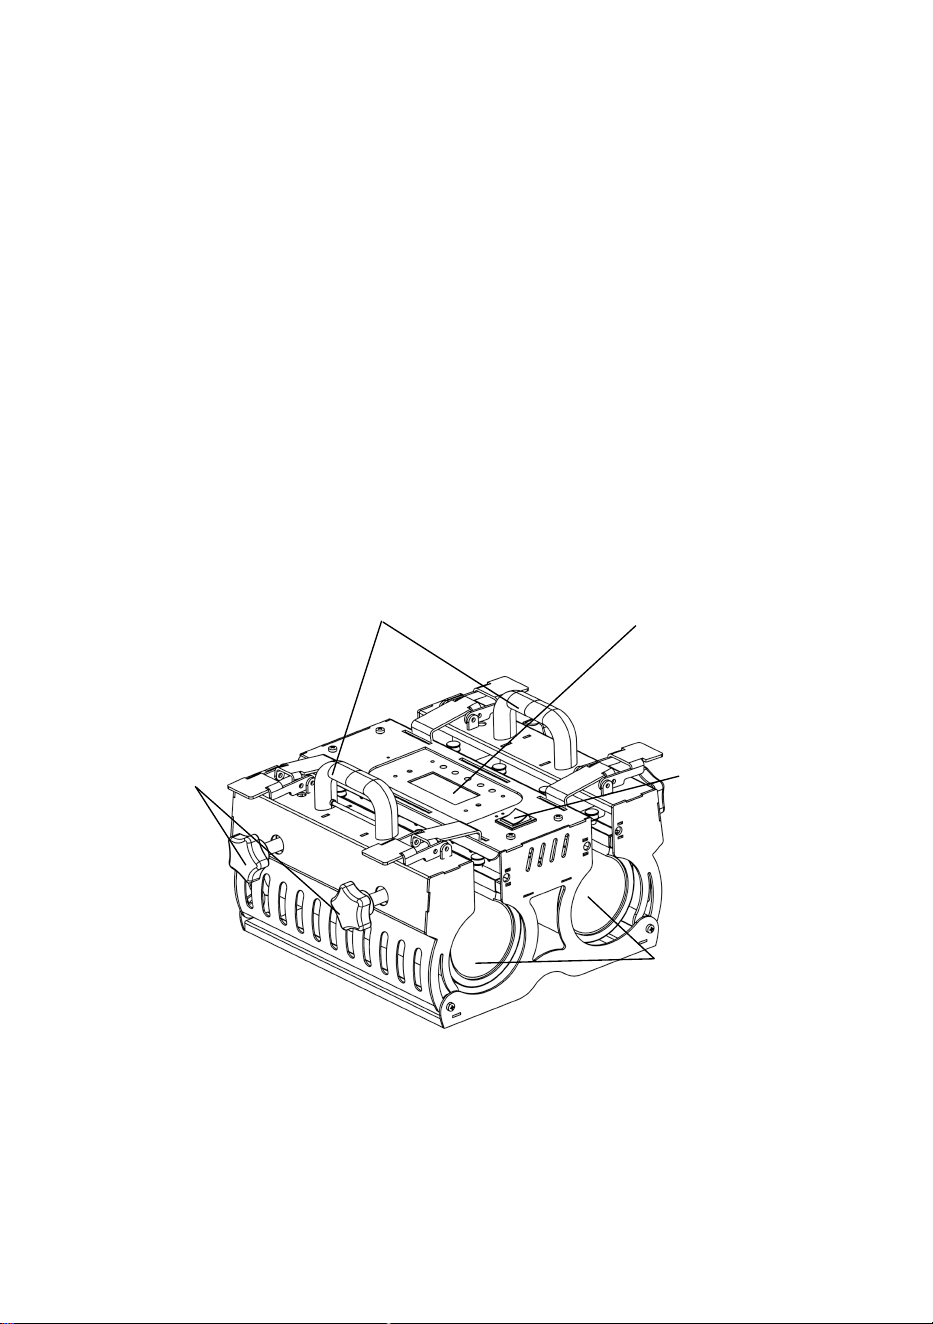
- 6 -
parámetros y conéctelos al cable de tierra correctamente.
2. Coloque la máquina suavemente sobre el escritorio ignífugo y
manténgase alejado de elementos inflamables y explosivos alrededor de
la máquina.
3. No utilice el equipo durante mucho tiempo, desconecte la fuente de
alimentación.
4. Están prohibidos los niños menores de 12 años y las personas con
discapacidad motriz.
5. No lo sumerjas en agua ni lo utilices en un ambiente húmedo.
Diagrama de estructura del producto
Instrucciones de uso
Heating Plate
Power Switch
Temperature/
Schedule Panel
Pressure
handle
Adjusting
Hand wheel

- 7 -
22. Según el voltaje mostrado en la paquete de equipo, conecte el máquina
enchufe al enchufe de 23oV y encienda el fuente de alimentación. interruptor
principal, el indicador de suministro de energía La luz está encendida (tenga en
cuenta que toda la máquina debe tener un cable de tierra protector fuerte).
23. Presione la tecla Modo una vez para configurar la temperatura izquierda,
presione la tecla MÁS para aumentar y presione M1NUS para reducir; Presione la
tecla Modo dos veces para configurar el tiempo restante, presione la tecla MÁS
para aumentar y presione M1NUS para reducir; Presione la tecla Modo tres veces
para configurar la temperatura a la derecha, presione la tecla MÁS para aumentar
y presione M1NUS para reducir; Presione la tecla Modo cuatro veces para
configurar el tiempo correcto, presione la tecla MÁS para aumentar y presione
M1NUS para reducir. Presione por quinta vez para volver al estado inicial de
arranque. Mantenga presionada la tecla MÁS durante 5 segundos y cambie la
temperatura Fahrenheit en las pantallas izquierda y derecha.
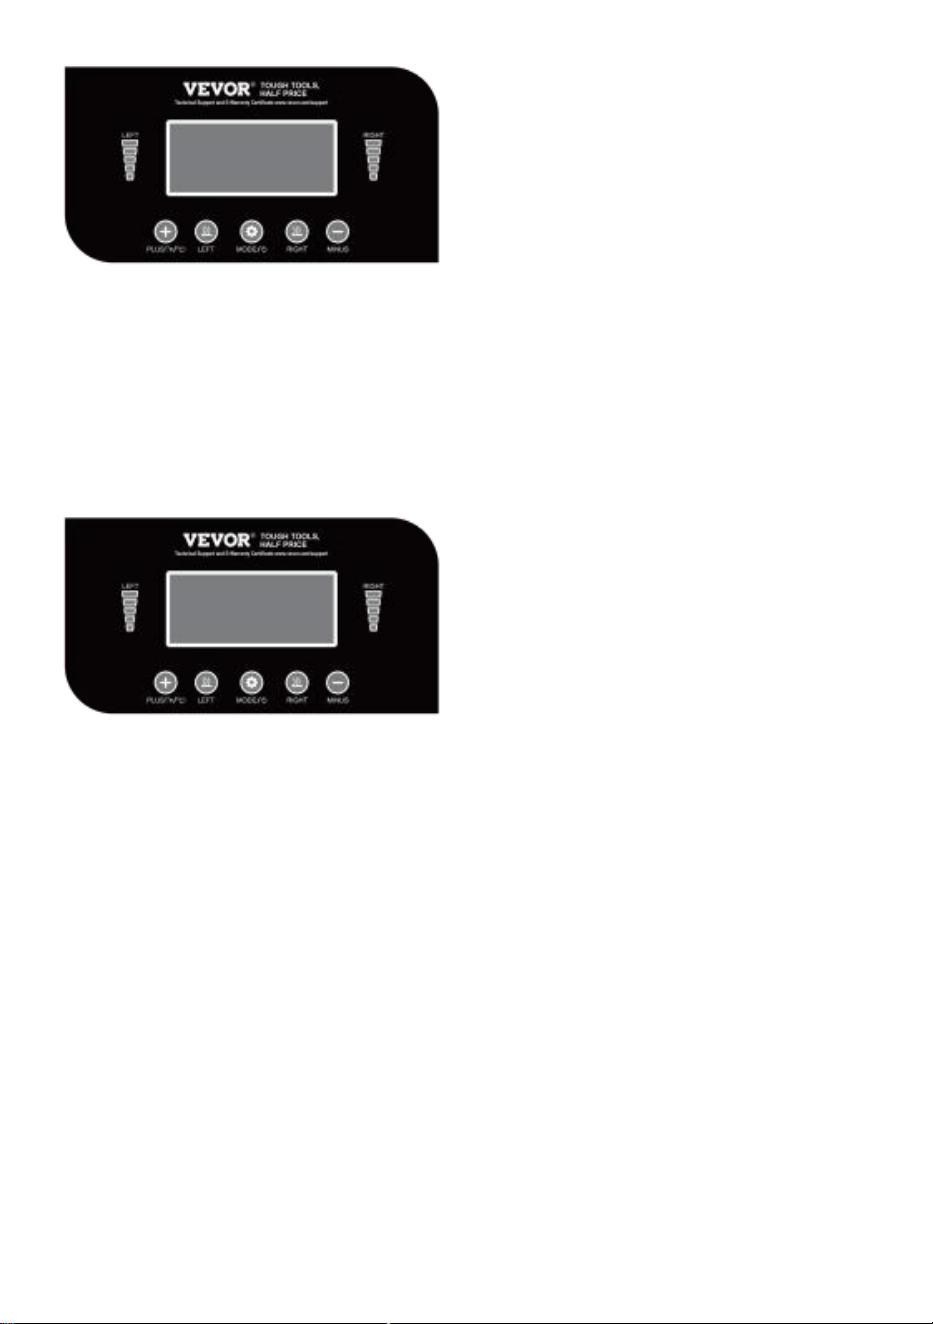
- 8 -
24. Comience a calentar: presione el botón IZQUIERDO, el calentador izquierdo
se calentará y la barra de progreso izquierda se iluminará; Presione el botón
R1GHT, el calentador en el la derecha se calienta y la barra de progreso de la
derecha se ilumina; cuando se calienta a la temperatura establecida, se emiten
dos pitidos de alarma y se presiona nuevamente la tecla IZQUIERDA o R1GHT
para finalizar urgentemente el calentamiento.
4. Cuando se caliente a la temperatura establecida, presione la tecla MÁS una vez,
el tiempo total de funcionamiento a la izquierda comienza a ser positivo, la luz
intermitente de la línea móvil total comienza a parpadear, el tiempo de
transferencia izquierdo espera a que la temperatura alcance la temperatura
establecida. la temperatura comienza a contar regresivamente y la luz indicadora
de funcionamiento comienza a parpadear; en el estado de calentamiento a la
temperatura establecida, presione la tecla M1NUS una vez, el tiempo total de
funcionamiento a la derecha comienza a contarse, la luz intermitente de la línea
total de funcionamiento comienza a parpadear, el tiempo de transferencia derecho
espera a que la temperatura suba comienza a parpadear , el tiempo de
transferencia correcto espera a que la temperatura alcance la temperatura
establecida para comenzar la cuenta regresiva y la luz indicadora de
funcionamiento comienza a parpadear; En la operación de transferencia existen
dos mecanismos de alarma del tiempo total de ejecución:
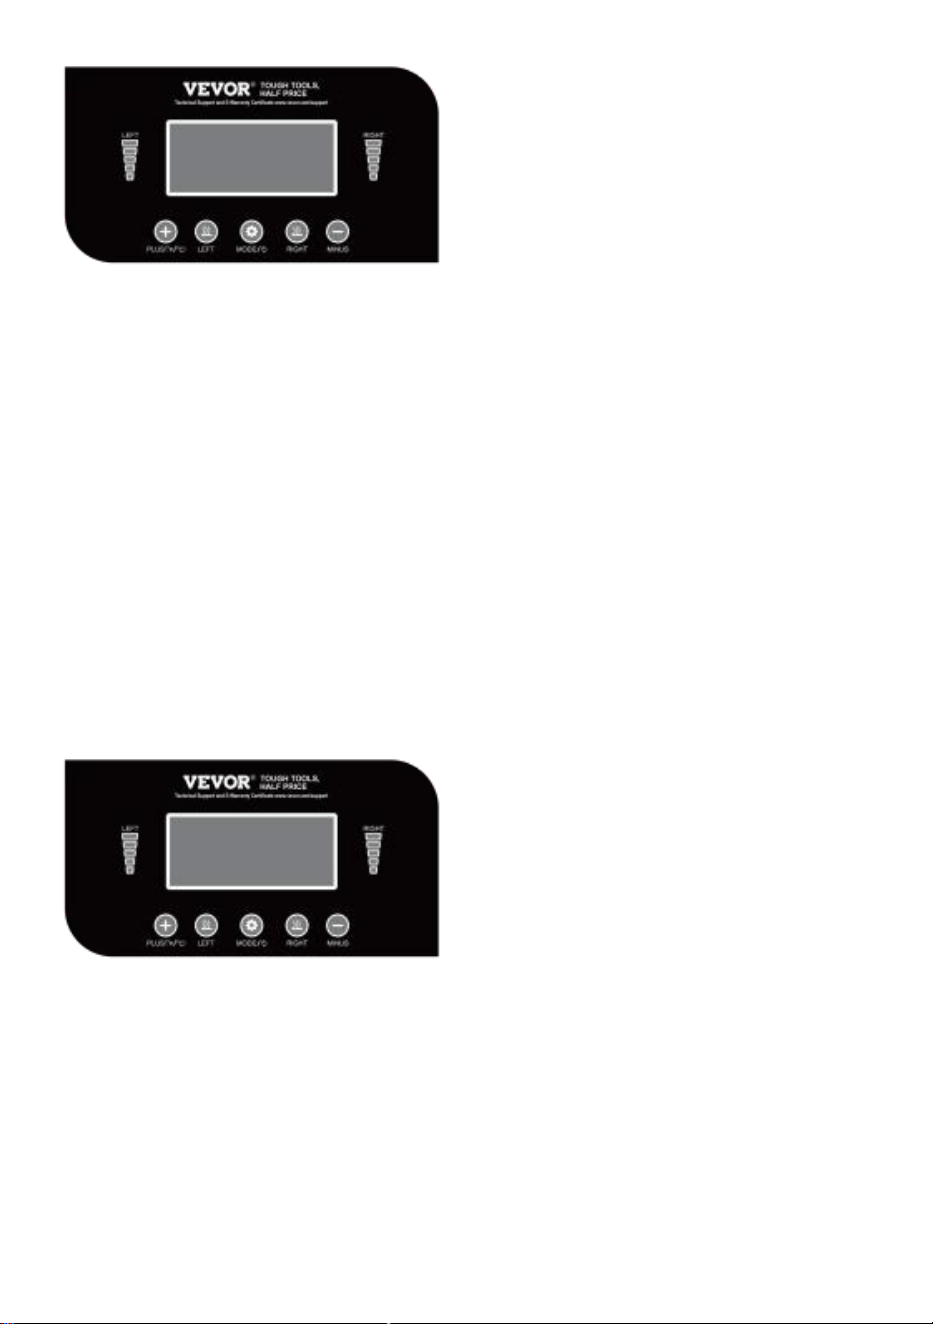
- 9 -
h. Después de la cuenta regresiva, el timbre suena durante 5 segundos y la luz
indicadora de cuenta regresiva de la pantalla parpadea (que termina en los lados
izquierdo y derecho parpadea, y ambos lados parpadean al mismo tiempo). La
operación total recoge la señal y continúa adelantando el tiempo después de 20
segundos (configuración) Sin operación, detiene automáticamente el
calentamiento con la temperatura configurada como referencia y transfiérala para
proteger la temperatura [regularmente 1oo grados Celsius (configurables)] como
referencia. Pruebe la temperatura constante. El timbre suena a intervalos de 3
segundos. La pantalla muestra que la luz indicadora de cuenta regresiva y la luz
indicadora de operación total parpadean al mismo tiempo (qué lado de la alarma
en el lado izquierdo y derecho parpadea, y ambos lados parpadean al mismo
tiempo). tiempo). Presione PLUS o M1NUS para levantar la alarma una vez y (qué
lado de la alarma presiona la alarma) vuelve a la normalidad; en estado de alarma
el resto de teclas quedan inhabilitadas.
b. El tiempo total de puesta en marcha de una operación no deberá exceder los 5
minutos (montaje), y aquellos que excedan los 5 minutos se considerarán
operación o equipo inadecuado. si falla, el dispositivo corta inmediatamente la
alimentación del cuerpo calefactor, el sistema entra en estado de espera y pulsa la
tecla Modo para volver a encenderlo.
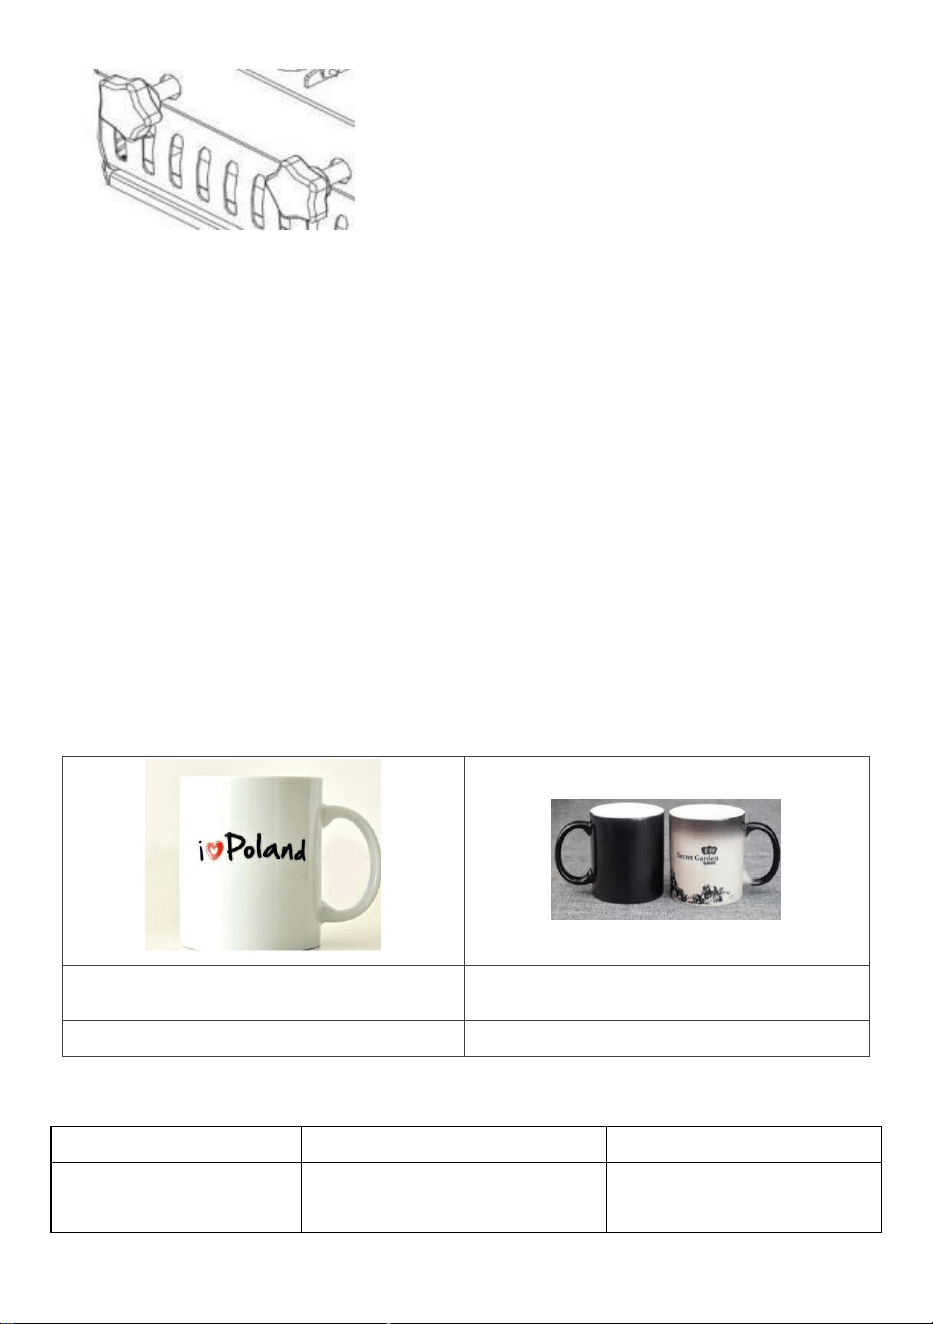
- 10 -
5.Ajuste la perilla y el volante, intente cerrar el dispositivo varias veces, ajústelo a
la presión adecuada y gire el reloj. inteligente El volante puede aumentar la
presión del equipo; Girar el volante en sentido antihorario puede reducir la presión
del equipo hasta alcanzar la presión adecuada.
6. Coloque la taza plana sobre la esponja, doble el papel caliente (el lado del
patrón mira hacia él, la parte de la taza que se va a transferir), presione el mango
hacia abajo hasta que se apague por completo, luego se enciende la luz del
tiempo. parpadea y el tiempo comienza a contar atrás. Después de la cuenta
regresiva, la luz se apagó y el timbre dejó de sonar "abajo", lo que significa que la
pintura en caliente se completó. En este momento, el mango debe estar levantado
lo antes posible.
Ámbito de aplicación
Taza
Taza que cambia de color
392°F (200°C) 60s
365°F (185°C) 50s
Análisis de fallas comunes
Fenómeno del fracaso
Causas del fracaso
Resoluciones
No se puede calentar,
pero se nota bien.
Placa calefactora o relé
dañado
Compruebe si la placa
calefactora o el relé
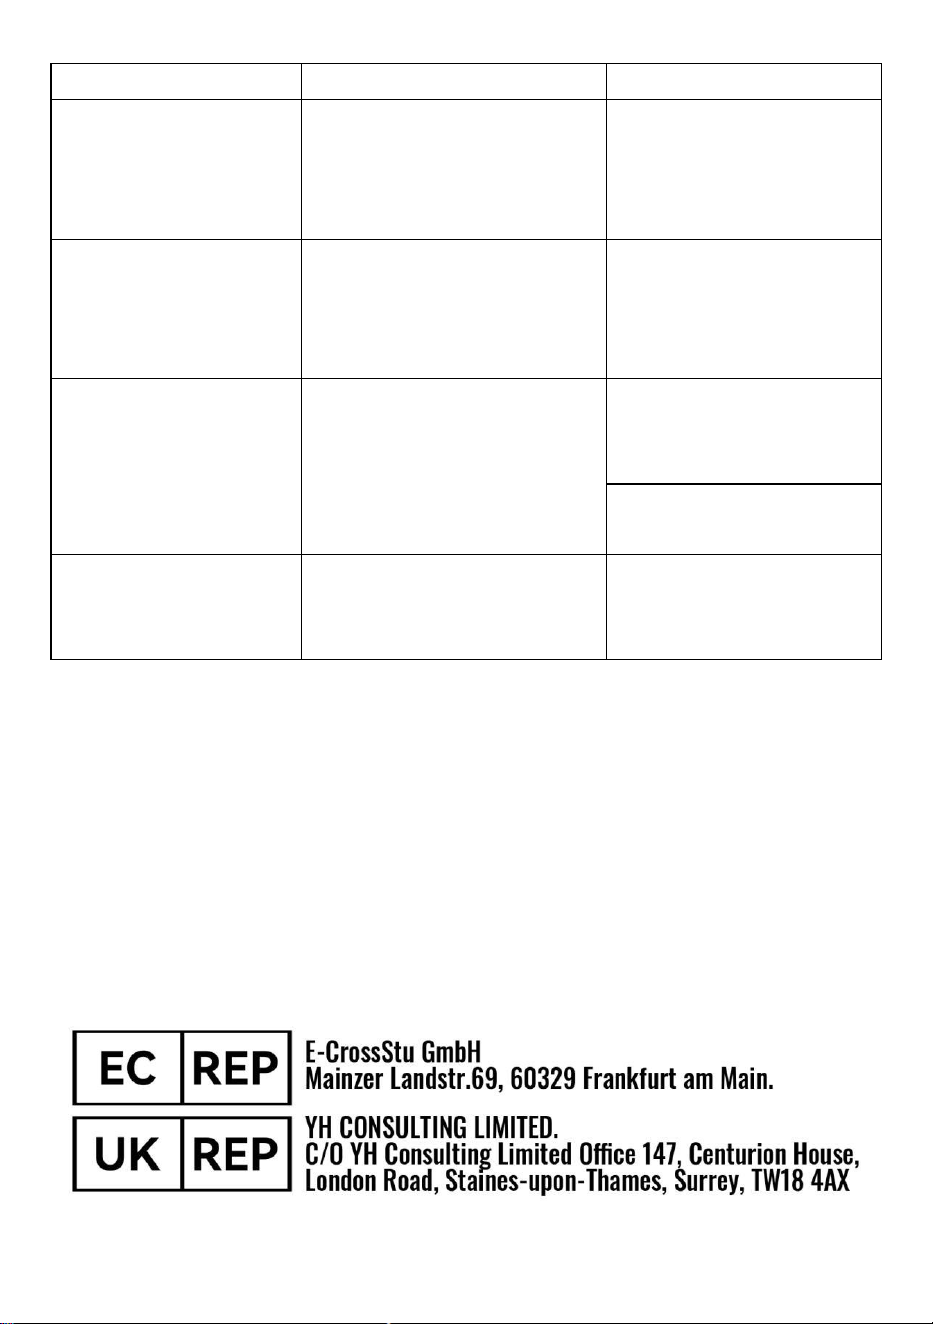
- 11 -
están dañados.
Color insuficiente y
decoloración de la
imagen.
Temperatura insuficiente
y/o
tiempo de calentamiento
insuficiente.
Ajuste la temperatura y/o
aumente el tiempo de
calentamiento.
Color oscuro;
imágenes borrosas.
Presione el tiempo es
demasiado largo y la
temperatura es demasiado
alta
Ajustar la temperatura y
el tiempo de
calentamiento.
Ninguna acción
después del arranque
Si se toca bien el enchufe
Si el fusible está quemado
Comprobar que el
enchufe esté bien
tocado.
Compruebe el fusible de
combustión.
La temperatura real
excede la temperatura
establecida.
Relé desconectado
Desconecte el relé y
reemplace el relé.
Fabricante : Shanghaimuxinmuyeyouxiangongsi
Dirección: Shuangchenglu 803nong11hao1602A-1609shi, baoshanqu,
shanghai 200000 CN.
Importado a AUS: SIHAO PTY LTD. 1 ROKEVA STREETASTWOOD
NSW 2122 Australia
Importado a EE. UU.: Sanven Technology Ltd. Suite 250, 9166 Anaheim
Lugar, Rancho Cucamonga, CA 91730