(Save the Instructions for Future Reference)
CO2 Detector
Newentor CO2 detector is a functional product. If there are any questions about the use or
functions, contact us through any of the above methods to get support.
Search: Newentor
Facebook
NEWENTOR
Telegram
+8617512038920
WhatsApp
Email

1
1. CO2 DETECTOR FEATURES ··························
1.1 Package List ···················································
1.2 CO2 Detector Appearance ····································
1.3 Operating Buttons Function ····································
2. SWITCH ON ···············································
3. CO2 VALUE INTRODUCTION ··························
3.1 CO2 Index ······················································
3.2 CO2 Concentration Factor Indicator ···························
4. CO2 ALERT FUNCTION ·································
5. TIME AND CALENDAR SETTEING ···················
6. ALARM SETTING ·········································
6.1 Alarm Function ·················································
6.2 Switching the Alarm On and Off ·······························
6.3 Snooze Function and Stopping the Alarm ······················
7. TEMPERATURE AND HUMIDITY ·····················
8. MAX/MIN CO2/TEMPERATURE/HUMIDITY VALUES
9. DISPLAY IN ℃ OR ℉ ·····································
10. BACKLIGHT ··············································
11. LOW BATTERY INDICATOR ··························
12. CALIBRATION ············································
12.1 Calibration Way ···············································
12.2 Calibration Environment ······································
13. PRODUCT SPECIFICATION ··························
14. PRECAUTIONS ··········································
15. WARRANTY ···············································
TABLE OF CONTENTS
2
2
3
5
6
7
7
7
8
9
9
9
10
10
11
11
12
12
12
13
13
14
14
15
16
2
CO2 DETECTOR FEATURES
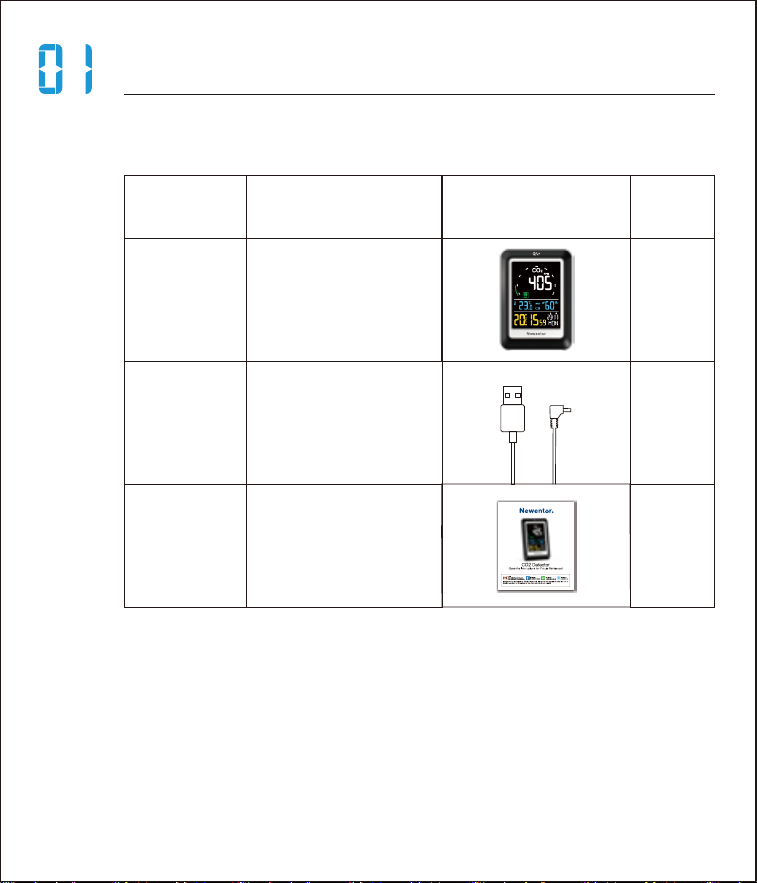
1.1 Package List
ITEM NO.
1
2
3
1
1
1
PART NAME FIGURE QTY
CO2 detector
User manual
Charger cable
3
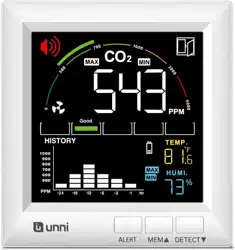
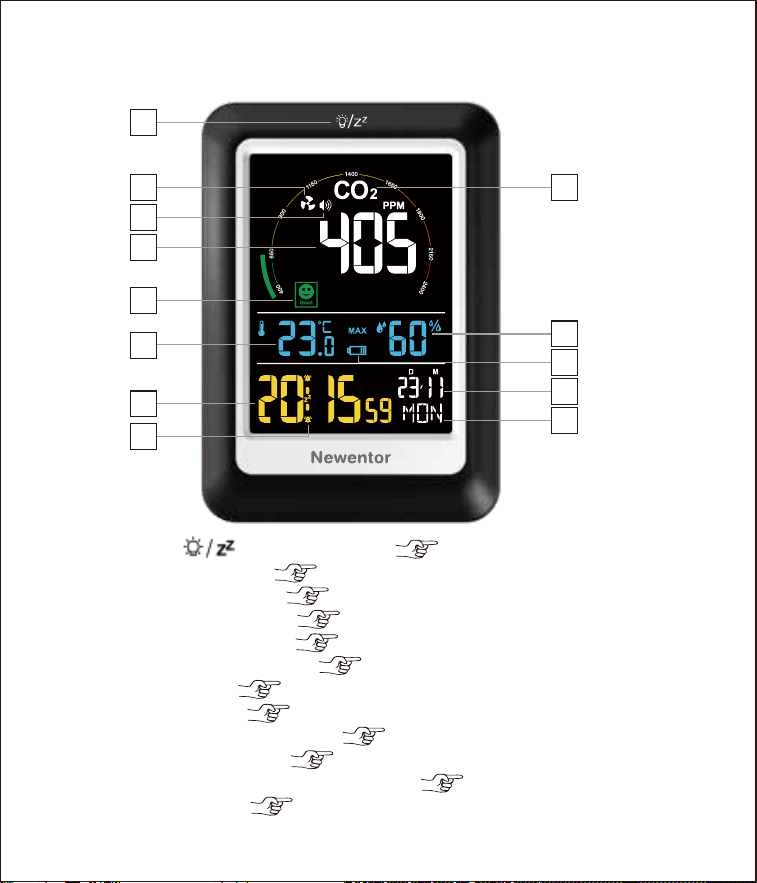
1.2 CO2 Detector Appearance
Front of the Main Unit
A1. “ ”Light Button ( 12th page)
A2. Fan Icon ( 8th page)
A3. Alert Icon ( 8th page)
A4. CO2 Value ( 7th page)
A5. CO2 Index ( 7th page)
A6. Temperature ( 11th page)
A7. Time ( 9th page)
A8. Alarm ( 9th page)
A9. CO2 Character ( 8th page)
A10. Humidity ( 11th page)
A11. Low Battery Indicator ( 12th page)
A12. Date ( 9th page)
A13. Day of Week
A4
A2
A3
A1
A5
A10
A9
A11
A12
A13
A6
A7
A8
4
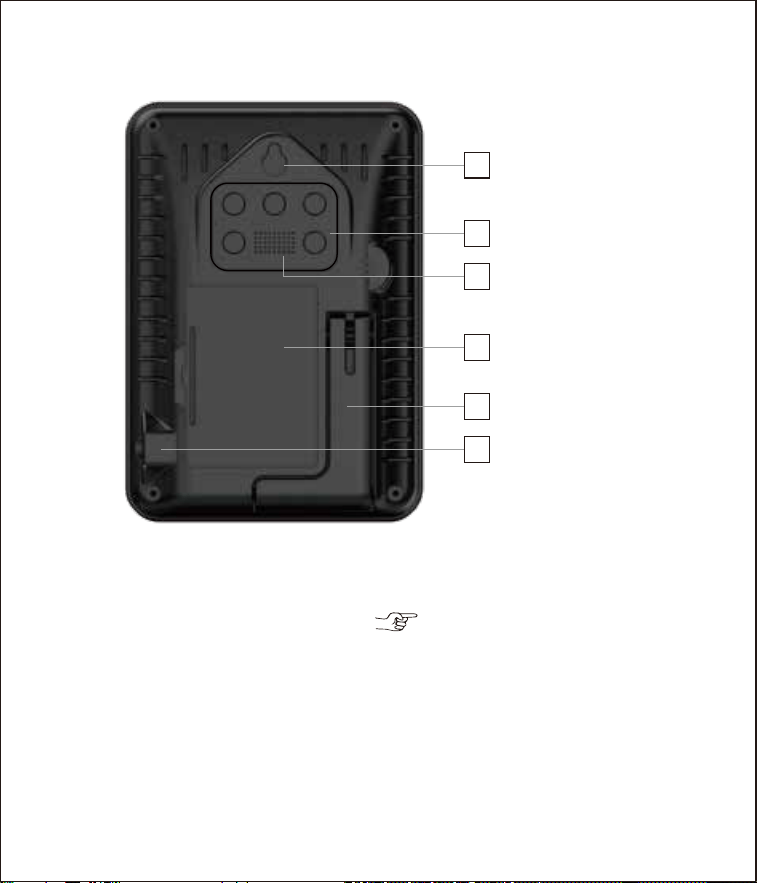
B1. Wall Mount Hole
B2. Operating Buttons ( 5th page)
B3. CO2 Detection Port
B4. 3×AAA Batteries (not included)
B5. Fold-out Stand
B6. DC Interface (5V 0.5A)
Back of the Main Unit
TIME
UP
DOWN
ALARM ALER
T
B1
B4
B6
B3
B2
B5
5
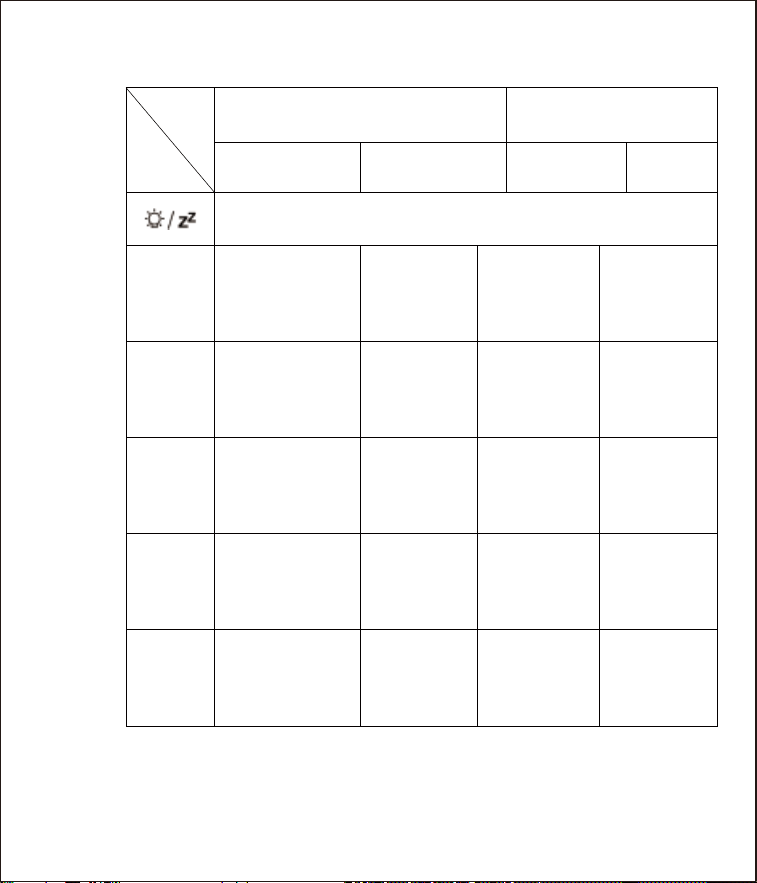
1.3 Operating Buttons Function
Function
UP
Hold
DOWN
Press
Press
Display alarm time
Light&Snooze
Max / Min data
Manual real-time
detection (In
battery mode)
Activate/
Deactivate alarm
Activate/Deacti-
vate CO2 alert
setting
Setting
alarm time
Delete
max/min data
℃/℉ switch
CO2 alert
setting
Save change
to setting
Adjust values
(Increase
continually)
Adjust values
(Decrease
continually)
NORMAL MODE SETTING MODE
Hold
ALARM
ALERT
/
/
//
/
Button
TIME
Adjust values
(Increase)
Adjust values
(Decrease)
Activate time
calendar
settings mode

6
SWITCH ON
• When switched on, the LCD full graphical display is
shown for 2 seconds, followed by a “BI”sound, then the
machine get to work, detecting room
temperature, humidity and CO2 value.
With Power Supply:
• Using an adapter higher than 5V 0.5A (package only
with charger cable).
• Plug the charger cable into the DC interface (B6).
• The device enters 60s countdown and then displays
the current value.
• It detects and updates CO2 value every 6 seconds.
With Battery:
• After inserting the batteries, the device enters 30s
countdown and updates CO2 value 5 times.The CO2
value are updated 5 times in every 20 minutes.
• When using the battery alone, press the “DOWN”
button to enter 30s countdown immediately, followed
by re-testing and updating CO2 value 5 times.
Note:
· The countdown process mentioned above is a state
of self-regulation of the CO2 sensor (The original
sensor manufacturer: Sensirion) in order to make the
detection data more accurate.
· The detection port (B3) must never be covered. If the
air circulation is poor, it may result in inaccurate CO2,
temperature and humidity measurements.
· It is recommended to use both batteries and power
supply to avoid losing data in the event of a power
outage.
7
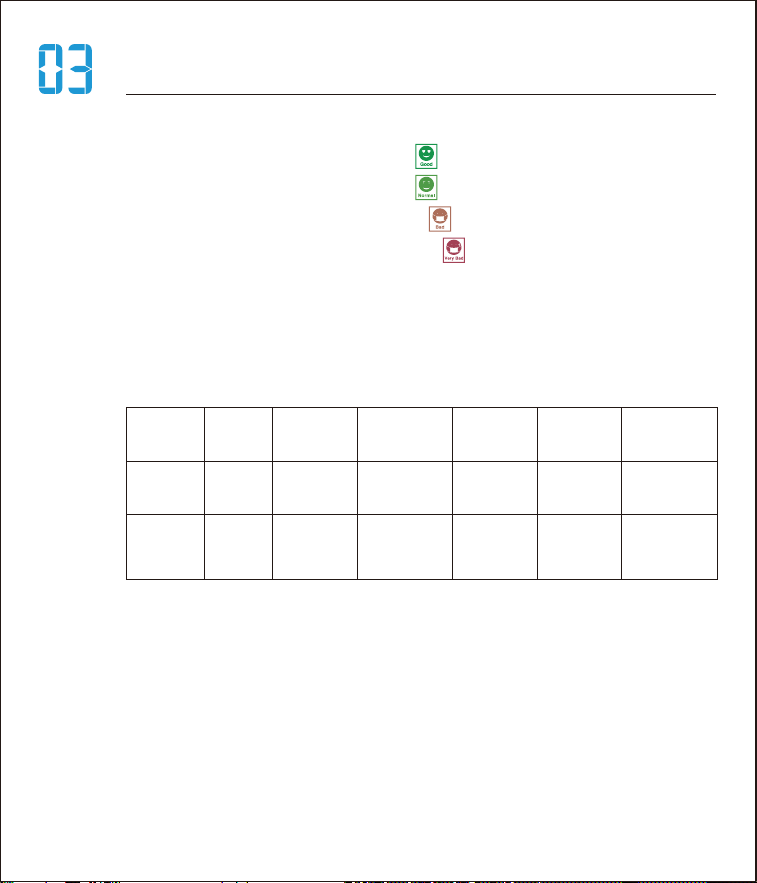
CO2 VALUE INTRODUCTION
3.1 CO2 Index(A3)
• From 400 to 650 ppm, “ ” lights up dark green.
• From 651 to 900 ppm, “ ” lights up light green.
• From 901 to 1650 ppm, “ ” lights up red.
• From 1651 to 2400 ppm, “ ” lights up dark red.
• Measuring range 400-5000 ppm, below 400 display
400 ppm, above 5000 display 5000 ppm.
3.2 CO2 Concentration Factor Indicator
CO2 ppm
CO2 measured value: carbon dioxide concentration in
ppm (parts per million = 1 millionth = 1 ppm = 10-6
-equivalent to 0.001‰). The Federal Environment
Agency recommends do not stay in an environment
where the CO2 value exceeds 1000 ppm for a long
time.
AQI 01
Good Moderate
Unhealthy
for sensitive
people
02 03 04 05 06
0~450 451~1000 1001~1500 1501~2000 2001~3000 3001~5000
Unhealthy
Very
unhealthy
Endangering
health

8
CO2 ALERT FUNCTION
• Press and hold the “ALERT” button for 3 seconds to
enter the CO2 alert setting and press “UP” and “DOWN”
button to adjust the alert value.
• Press the “ALERT” button to switch on/off the alert
“ ” (A3).
When the alert is not on but the CO2 value has reached
the alert preset value (default 1000 ppm), the icon “ ”
(A2) for ventilation is displayed fixed and the CO2
character (A9) flash.
When the alert is on and the value has reached the
preset value, the alert tone lasts for 1 minute, while the
icon “ ” is displayed fixed and the CO2 character
flash. After one minute the alert is switched off and if
the value still exceeds the preset value, the alert does
not sound again, only the icon “ ” remains fixed and
the CO2 character flashes as a warning.

9
-Year
-DM/MD
-Month
-Day
-12/24 Hour Format
-Hour
-Minute
• Power on default display: ℃, 24H, 1st January 2022,
0:00.
TIME AND CALENDAR SETTEING
• Press and hold the “TIME” button for 3 seconds to
enter time/date setting mode. Press the “UP” and
“DOWN” buttons to change the values, press the
“TIME”button to confirm and go to the next steps. The
sequence steps are as follows:
ALARM SETTING
6.1 Alarm Function
• Press the “TIME” button to select the desired alarm
time (ALARM 1 or ALARM 2).
• Press and hold the “TIME” button for 3 seconds
once you have chosen the desired alarm time. The hour
indicator of the alarm time (AL 1 or AL 2) will flash.
• Set the desired hour for the alarm with the “UP” and
“DOWN” buttons.
10
• Press the “TIME” button to store the setting. The
minute indicator will flash on the display.
• Set the desired minute for the alarm with the “UP”
and “DOWN” buttons.
• Press the “TIME” button to store the setting. The
alarm time is set.
• AL1 default 7:00, AL2 default 13:00.
6.3 Snooze Function and Stopping the Alarm
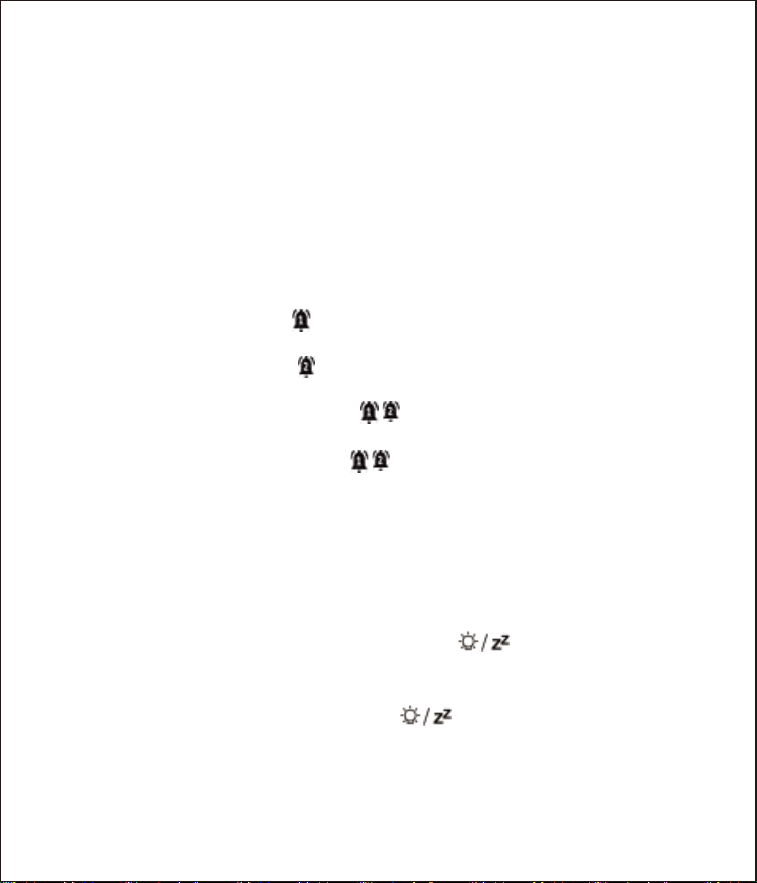
6.2 Switching the Alarm On and Off
Press the “ALARM” button to switch the alarm on and
off.
• press once: “ ” appears on the display, AL 1 is
activated
• press twice: “ ” appears on the display, AL 2 is
activated
• press three times: “ ” appear on the display, AL 1
and AL 2 are activated
• press four times: “ ” disappear on the display, AL
1 and AL 2 are deactivated
You will be woken by the alarm at the set time, and the
sound will become more and more intense as the alarm
continues.
• Snooze function - Press the “ ” button (A1) to
stop the alarm for approx. 5 minutes.
• Switch off the alarm completely - Press any button on
the main unit (apart from “ ” ) to stop the alarm. The
alarm will go off again after 24 hours.
• Automatic stop function- If you do not press any
buttons, the alarm will automatically switch off after 2
minutes. The alarm will go off again after 24 hours.

11
TEMPERATURE AND HUMIDITY
Temperature measuring range: -9.9℃ — 60℃
/14.18℉ — 122℉
Temperature accuracy: ±1℃(0~40℃); ±2℃ (others)
Humidity measuring range: 20% to 95% relative
humidity
Humidity accuracy: ±5% with a measuring range of
40% to 80%, ±8% with measuring range of 20% to
39% and 81% to 95%.
Detection cycle: 30 seconds
• When alarm goes on, temperature detection is
suspended.
• Press the “UP” button to display maximum/minimum
CO2 temperature and humidity values.
• When you query the maximum and minimum values,
press and hold the “UP” button for about 2 seconds
to clear and re-record the maximum/minimum CO2
temperature and humidity.
• Maximum and minimum values are automatically
cleared every 0:00.
MAX/MIN CO2/TEMPERATURE
/HUMIDITY VALUES
12
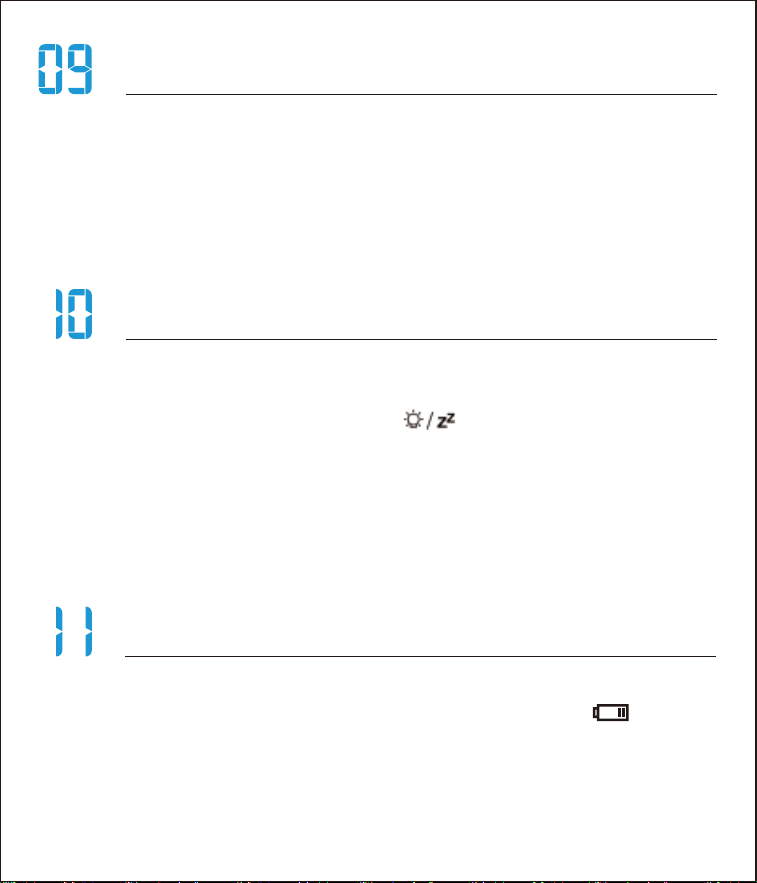
LOW BATTERY INDICATOR
• This indication does not exist in power suply mode.
• In battery mode, the low voltage symbol “ ”(A11)
appears when the battery is below 3.6V. When the low
voltage symbol appears, the CO2 does not work anymore
and the CO2 value position shows “LO" to indicate a
battery change or a power supply connection.
DISPLAY IN ℃ OR ℉
• Press and hold the “DOWN” button for 3 seconds to
select the temperature unit to display in ℃ or ℉.
BACKLIGHT
• In power suply mode, the brightness can be adjusted
“high - low - off”.
• In battery mode, press “ ” to light up the backlight
for 10 seconds.

13
CALIBRATION
Note:
· When you replace the batteries all the settings will be
lost.
· Always exchange all batteries and only use those listed
in the “Technical Data”.
· Even if the base unit is being powered by the power
source, you should still remove all empty batteries
present from the main unit.
· Make sure that the poles of the batteries are correct
(+/-) when inserting.
· Clean the battery and device contacts if necessary
before inserting.
· Dispose of the old batteries in an environmentally
manner.
12.1 Calibration Way
• With no power, press and hold the “TIME” and
“DOWN” buttons at the same time (Don’t let go of your
hand), followed by plugging in the charger or insert
batteries and hold for 3 seconds, then the device enter
calibration mode after the “BI” sound. The CO2 position
displays the “CAL” character and the calibration time is
4 minutes.
• If the calibration is successful, “PASS" is displayed.
After the calibration is completed, please unplug the
charger and remove the battery, and then plug in the
charger or insert the battery again to use the device.
• If the calibration fails, “Err” is displayed. After the
calibration fails, please re-calibrate.

14
PRODUCT SPECIFICATION
Model: C1
Power Supply: 5V 0.5A (package only with charger
cable)
Battery: 3 x AAA / 1.5V (not included)
CO2 display range: 400 to approx. 5000 ppm
Measurement error: CO2 accuracy ±(50 ppm +5%
value)
Resolution: 1 ppm
12.2 Calibration Environment
• It should be in an environment with good air flow,
such as a ventilated window (CO2 concentration is
about 400 to 450 ppm).
• Please ensure that there is no CO2 source in the
immediate vicinity.
• Avoid direct sunlight and rain.
• CO2 is detected after calibration. Please try to avoid
perfumes, paints, air fresheners, cigarette smoke,
alcohol, chemical substances and so on while carrying
out measurements since these can lead to incorrect
measuring results.
Note:
• When you feel that the CO2 value is displayed
abnormally, please calibrate the device.

15
PRECAUTIONS
• Protect the product from dust and use it indoors only.
• Do not use the product in the immediate vicinity of
heaters, other heat sources or in direct sunlight.
• Do not use the product in a damp environment and
avoid splashing water.
• This device should be kept out of the reach of
children.
• Do not operate the product outside the power limits
specified in the technical data.
• Do not use the product in areas in which electronic
products are not permitted.
• Do not place the product near interference fields,
metal frames, computers, TVs, etc. Electronic devices
and window frames can negatively affect the product’s
functionality.
• Do not drop the product and do not expose it to any
major shocks.
• Do not modify the product in any way. Doing so voids
the warranty.
• Route all cables so that there is no risk of tripping.
• Do not bend or crush the cable.
• Do not incinerate the battery or the product.
16
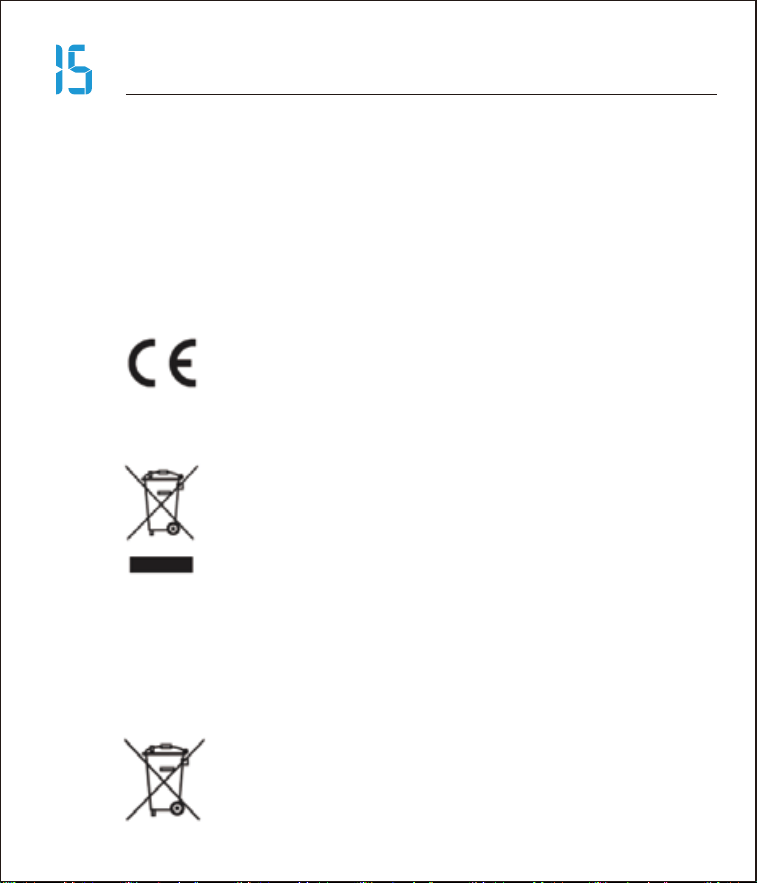
This CO2 detectorr complies with the basic requirements
and the others relevant regulations of Directive EN55032.
Products marked with this symbol meet all applicable
community regulations of the European Economic Area.
DECLARATION OF CONFORMITY
DISPOSAL
Batteries and accumulators that contain harmful
substances are marked with this symbol and chemical
symbols (Pb for lead). For more information, contact your
local waste disposal company or your local authority.
Dispose of the packaging according to type. Old devices
must not be disposed of with normal household waste.
According to Directive 2012/19 / EU, the device must be
disposed of properly at the end of its service life. Valuables
contained in the device are recycled and to avoid pollution
of the environment. Take the old device to a collection point
for electronic scrap or a recycling center.
Before disposal, remove the batteries from the device and
dispose of them separately.
Batteries do not belong in household waste. Every consumer
is legally obliged to dispose of batteries and rechargeable
batteries at a collection point in their community, district or
in retail. This means that all batteries and accumulators can
be disposed of in an environmentally friendly manner.
WARRANTY
• The device has been manufactured in accordance
with strict quality guidelines and has been inspected
carefully before delivery.
• Newentor guarantees that the warranty period of the
device is 1 year from the date of purchase.

17
Manufacturer reserves the right to change specifications of the
product.
Manufacturer and supplier are not responsible for malfunction where
interference occurs.
DISCLAIMERS
Dispose of the packaging according to type. Dispose of
cardboard and cardboard as waste paper and foils in the
recyclable waste collection.
This device complies with Part 15 of the FCC Rules. Operation is
subject to the following two conditions: (1) this device may not cause
harmful interference, and (2) this device must accept any interference
received, including interference that may cause undesired operation.
This device has been tested and found to comply with the limits for a
Class B digital device, pursuant to Part 15 of the FCC Rules. These
limits are designed to provide reasonable protection against harmful
interference in a residential installation. This device generates, uses
and can radiate radio frequency energy and, if not installed and used
in accordance with the instructions, may cause harmful interference
to radio communications.
However, there is no guarantee that interference will not occur in a
particular installation. If this device does cause harmful interference
to radio or television reception, which can be determined by turning
the device off and on, the user is encouraged to try to correct the
interference by one or more of the following measures:
--Reorient or relocate the receiving antenna.
--Increase the separation between the device and receiver.
--Connect the device into an outlet on a circuit different from that to
which the receiver is connected.
--Consult the dealer or an experienced radio/TV technician for help.
Changes or modifications not expressly approved by the party
responsible for compliance could void the user's authority to operate
the equipment.