

AXIS A4612 Network Bluetooth® Reader
T able of Contents
Installation . . . . . . . . . . . . . . . . . . . . . . . . . . . . . . . . . . . . . . . . . . . . . . . . 3
Get started . . . . . . . . . . . . . . . . . . . . . . . . . . . . . . . . . . . . . . . . . . . . . . . . 4
Find the device on the network . . . . . . . . . . . . . . . . . . . . . . . . . . . . . . . . . . . . 4
Open the device's web interface . . . . . . . . . . . . . . . . . . . . . . . . . . . . . . . . . . . . 4
Congure your device . . . . . . . . . . . . . . . . . . . . . . . . . . . . . . . . . . . . . . . . 5
Congure the IP address . . . . . . . . . . . . . . . . . . . . . . . . . . . . . . . . . . . . . . . . . . 5
Upgrade the device rmware . . . . . . . . . . . . . . . . . . . . . . . . . . . . . . . . . . . . . . 5
Upload CA and user certicates . . . . . . . . . . . . . . . . . . . . . . . . . . . . . . . . . . . . 5
The web interface . . . . . . . . . . . . . . . . . . . . . . . . . . . . . . . . . . . . . . . . . . . 7
Dashboard . . . . . . . . . . . . . . . . . . . . . . . . . . . . . . . . . . . . . . . . . . . . . . . . . . . . . 7
Modules . . . . . . . . . . . . . . . . . . . . . . . . . . . . . . . . . . . . . . . . . . . . . . . . . . . . . . . 7
Customization . . . . . . . . . . . . . . . . . . . . . . . . . . . . . . . . . . . . . . . . . . . . . . . . . . 8
System . . . . . . . . . . . . . . . . . . . . . . . . . . . . . . . . . . . . . . . . . . . . . . . . . . . . . . . . 8
T roubleshooting . . . . . . . . . . . . . . . . . . . . . . . . . . . . . . . . . . . . . . . . . . . . 12
Reset to factory default settings . . . . . . . . . . . . . . . . . . . . . . . . . . . . . . . . . . . 12
Check the current rmware version . . . . . . . . . . . . . . . . . . . . . . . . . . . . . . . . . 12
Upgrade rmware . . . . . . . . . . . . . . . . . . . . . . . . . . . . . . . . . . . . . . . . . . . . . . . 12
T echnical issues, clues, and solutions . . . . . . . . . . . . . . . . . . . . . . . . . . . . . . . . 13
P erformance considerations . . . . . . . . . . . . . . . . . . . . . . . . . . . . . . . . . . . . . . . 13
Contact support . . . . . . . . . . . . . . . . . . . . . . . . . . . . . . . . . . . . . . . . . . . . . . . . . 13
Specications . . . . . . . . . . . . . . . . . . . . . . . . . . . . . . . . . . . . . . . . . . . . . . 14
Product overview . . . . . . . . . . . . . . . . . . . . . . . . . . . . . . . . . . . . . . . . . . . . . . . . 14
Buttons . . . . . . . . . . . . . . . . . . . . . . . . . . . . . . . . . . . . . . . . . . . . . . . . . . . . . . . 15
Cables . . . . . . . . . . . . . . . . . . . . . . . . . . . . . . . . . . . . . . . . . . . . . . . . . . . . . . . . 15
Clean your device . . . . . . . . . . . . . . . . . . . . . . . . . . . . . . . . . . . . . . . . . . . 17
T rademark attribution . . . . . . . . . . . . . . . . . . . . . . . . . . . . . . . . . . . . . . . 18
2

AXIS A4612 Network Bluetooth® Reader
Installation
Installation
The following video shows an example of how you can install an AXIS A46 12 Network Bluetooth Reader .
For complete instructions on all installation scenarios and important safety information, see the installation guide on
axis.com/products/axis - a46 12/support
T o watch this video, go to the web version of this document.
help.axis.com/?&piaId=96728§ion=install
3

AXIS A4612 Network Bluetooth® Reader
Get started
Get started
Find the device on the network
T o nd Axis devices on the network and assign them IP addresses in Windows®, use AXIS IP Utility . The application is free and can be
downloaded from axis.com/support .
Note
The computer running AXIS IP Utility must be on the same network segment (physical subnet) as the Axis device.
1. Connect power and network to the Axis device.
2. Start AXIS IP Utility . All available devices on the network show up in the list automatically .
3. T o access the device from a browser , double - click the name in the list.
Browser support
Y ou can use the device with the following browsers:
Chrome
T M
Firefox
®
Edge
T M
Safari
®
Windows
®
recommended
recommended
macOS
®
recommended recommended
Linux
®
recommended recommended
Other operating systems *
Open the device's web interface
1. Open a browser and type the IP address or host name of the Axis device.
If you do not know the IP address, use AXIS IP Utility to nd the device on the network.
2. T ype the default username admin and password pass . If you access the device for the rst time, you must change
the password. See .
For descriptions of all the controls and options in the device’s web interface, see .
4

AXIS A4612 Network Bluetooth® Reader
Configur e your device
Configur e your device
The device works as a standard Bluetooth reader out - of - the - box.This section covers all the important congurations that an installer
needs to do to get the product up and running after the hardware installation has been completed.
Congure the IP address
The device is connected to the LAN and must be assigned a valid IP address or obtain the IP address from the LAN DCHP server .
Congure the IP address and DHCP in the web interface.
T o manually congure the IP address:
1. Go to System > Network connection > Basic conguration
2. Under IP address settings , turn on Use DHCP Server to automatically get the IP address from the LAN DHCP server .
3. Enter the IP address , Network mask and Default gateway .
4. T urn on Always use manual DNS settings to use manual DNS settings.
5. Enter the Primary DNS and Secondary DNS .
6. Enter the Hostname and V endor Class Identier to identify the device.
7. Select an option for Required port mode .
T o nd your current IP address:
Note
• The conguration remains the same when you restart your device.
• LED indicators are located on the device backside.
1. Open your device and press the control button for approximately 15 seconds until the LED indicators turn red and green
simultaneously and you hear one short beep. See .
2. Release the control button and the device announces the current IP address through the speaker .
Upgrade the device rmware
W e recommend that you upgrade the device rmware when you login to the device for the rst time. Download the latest version for
your device from axis.com/support . T o upload the new version:
1. Go to System > Maintenance .
2. Click Firmware upload to upload the rmware version you downloaded.
3. Click Upload .
Note
The device restarts after the upload to complete the upgrade.
5

AXIS A4612 Network Bluetooth® Reader
Configur e your device
Upload CA and user certicates
Note
• The certicate ID shouldn’t be longer than 40 characters and should contain only small and capital letters, numbers,
and the _ and – characters.
• If a certicate with a private RSA key longer than 2048 bits is rejected, the following message displays:
“The private key le/password was not accepted by the device!”
• For certicates based on elliptic curves, use only secp256r1 (also called prime256v1 and NIST P - 256) and secp384r1 (also
called NIST P - 384) curves.
T o upload a CA certicate :
1. Go to System > Certicates > CA Certicates .
2. Click to upload a certicate.
3. Enter a Certicate ID .
4. Click Select le to upload a CA certicate.
5. Click Upload .
T o upload a user certicate :
1. Go to System > Certicates > User Certicates .
2. Click to upload a certicate or private key .
3. Enter a Certicate ID .
4. Click Select le to upload a user certicate and a private key ..
5. If you upload a private key , enter the Default K ey P assword if there is one.
6. Click Upload .
6
AXIS A4612 Network Bluetooth® Reader
The web inter face
The web inter face
T o reach the device’s web interface, type the device’s IP address in a web browser .
Note
Y ou need to connect the reader in the door controller’s web interface. Consult the door controller’s user manual.
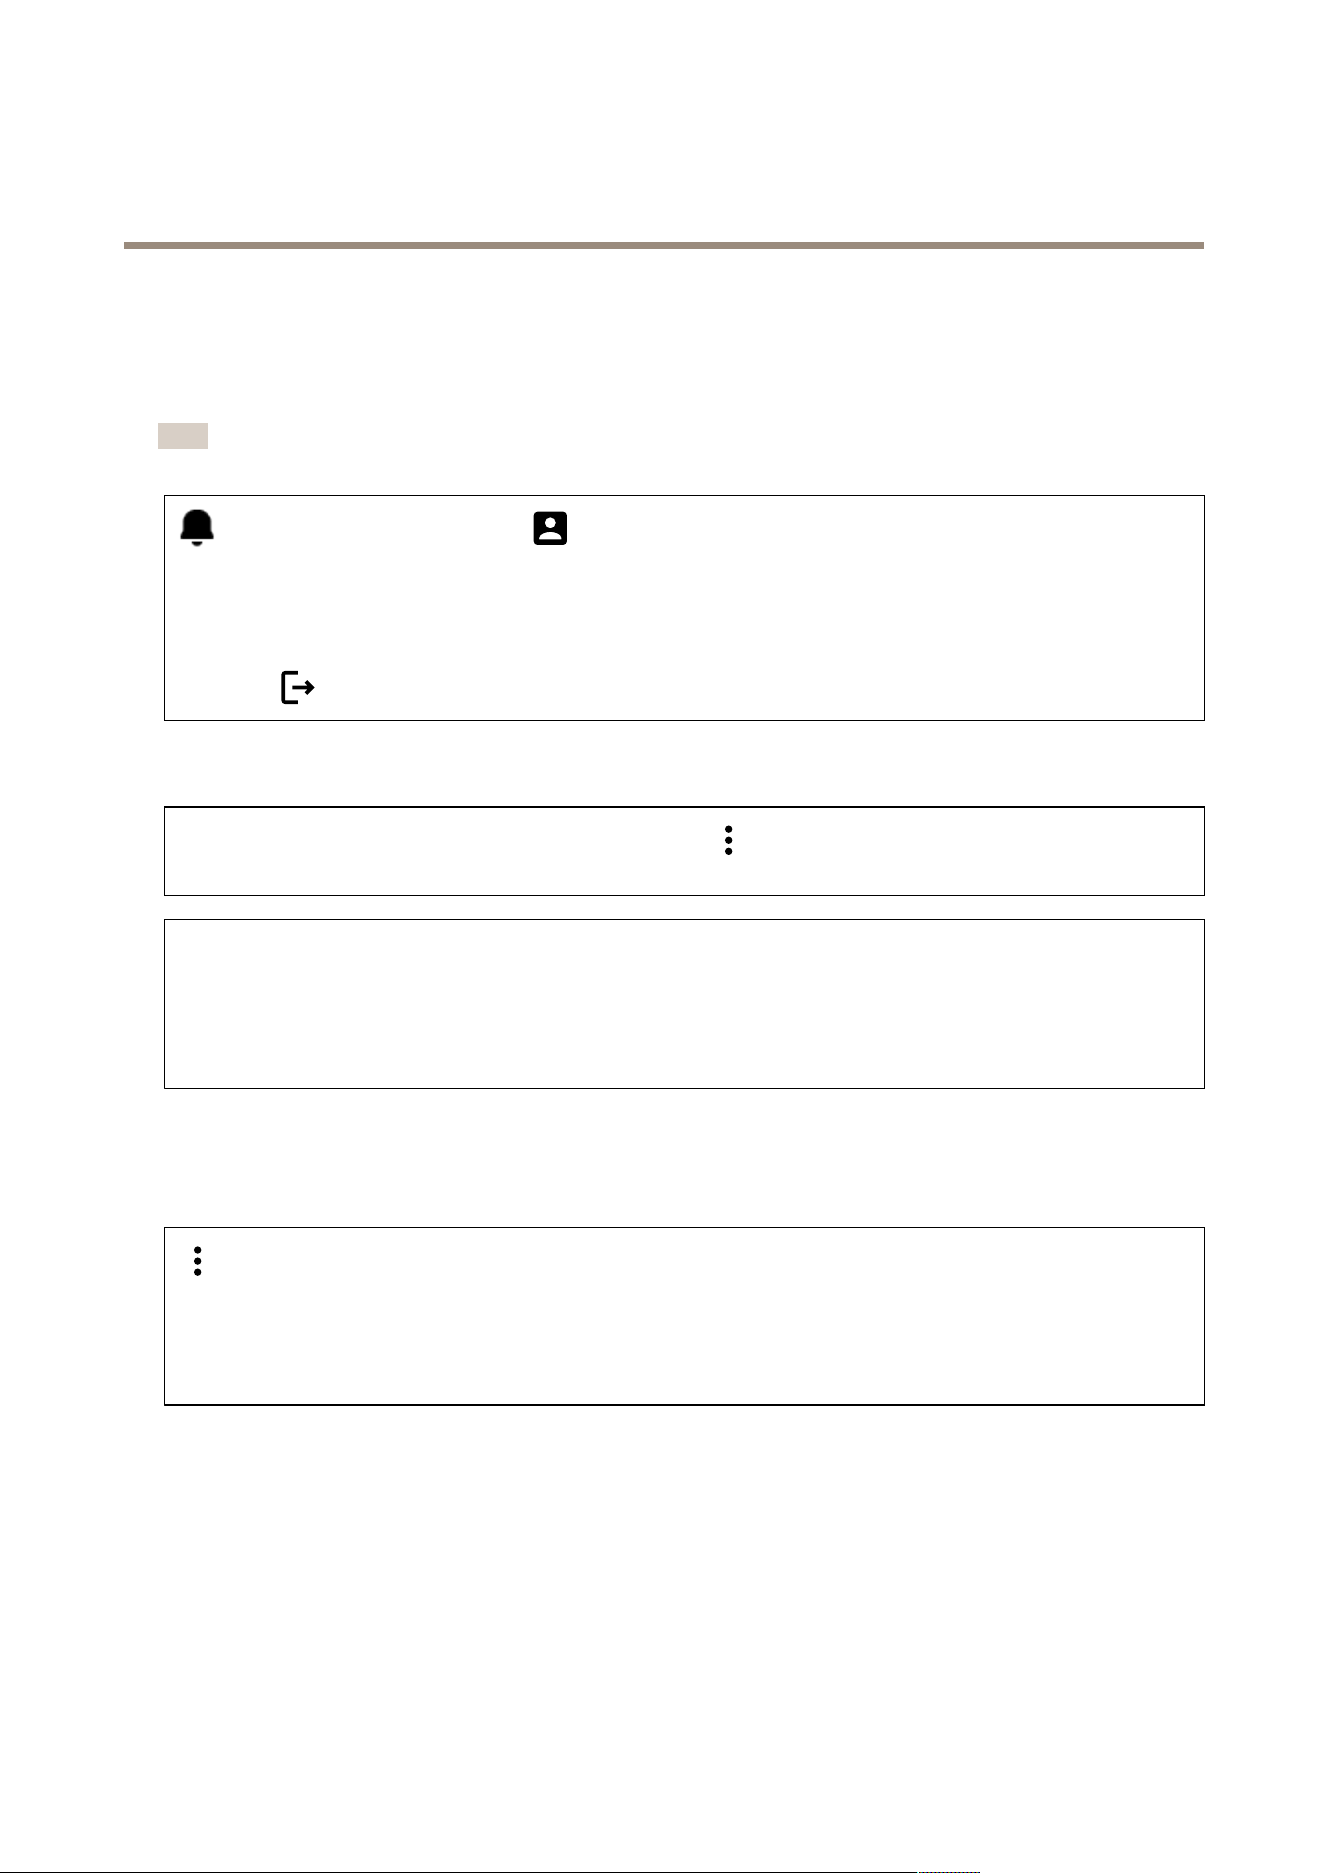
Access the device’s new notications. The user menu contains:
• Current time on the device.
• Change language : Select a language from the drop - down list.
• Change password : Change the password required to log in to the device.
• Help : Access the product help.
• About : View product information, including rmware version and serial number .
• Log out : Log out from the current account.
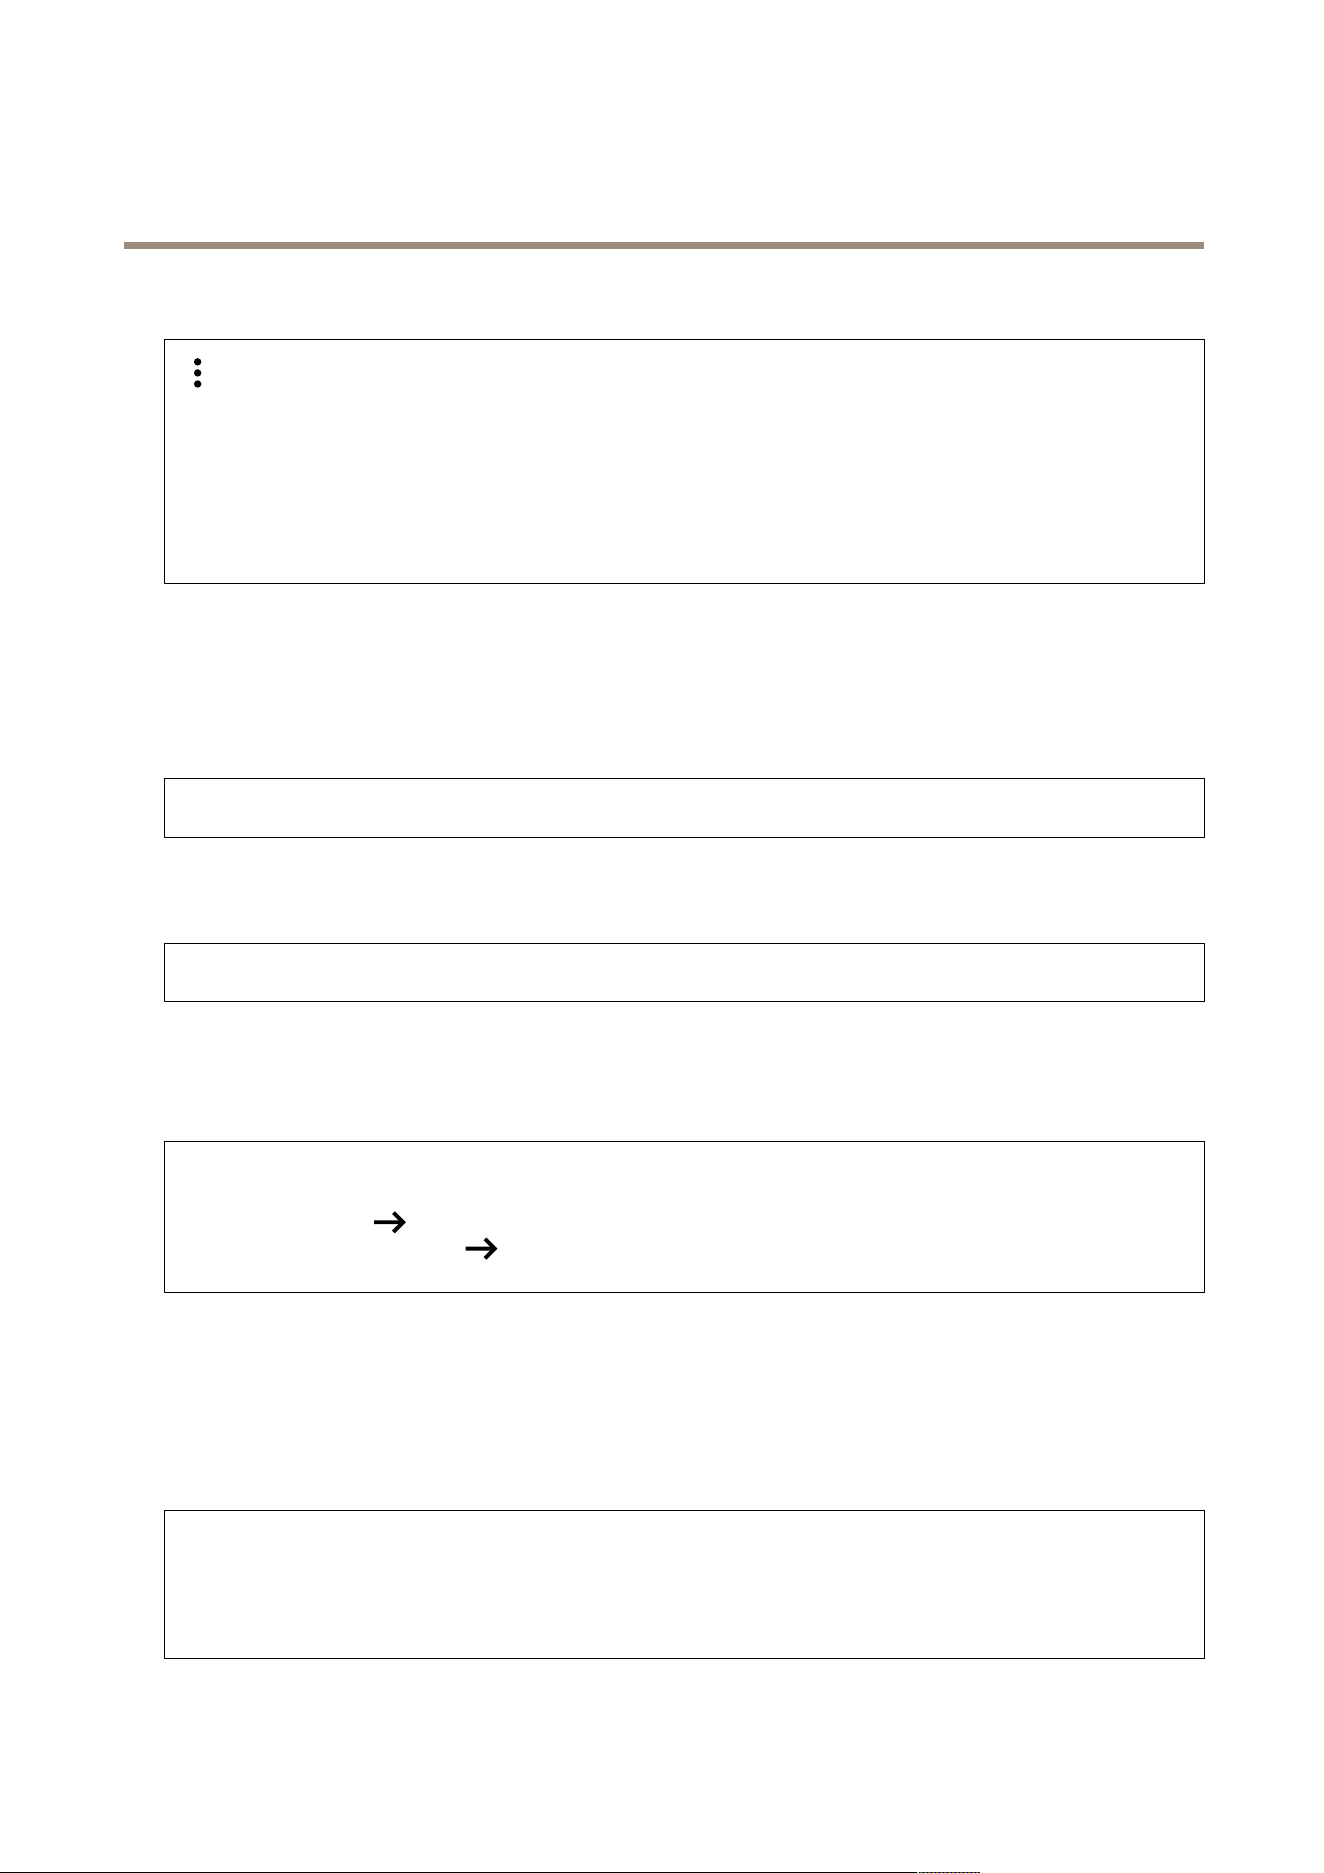
Dashboard
Locate : Plays a sound that helps you identify the Bluetooth reader . The context menu contains:
• Rename device : Change the device name.
• Serial number : Device serial number .
• Firmware version : The software version currently running on the device.
• MAC address : Device unique identier number .
• Uptime : Shows how long the device has been working.
• Hardware version : The hardware version currently running on the device.
• P ower source : The current power source.
Modules : Click to go to Modules where you can view and update module information for your card and Bluetooth reader .
Modules
13.56 MHz Card Reader
The context menu contains:
• Module information : Shows the card reader name, module type, board type, assembly version, application version,
and bootloader version.
• Locate : Click to search for connected modules.
Module name : Enter a module name for the input and output specication. Allowed card types : Select the card types the
card reader should accept.
7
AXIS A4612 Network Bluetooth® Reader
The web inter face
Bluetooth
The context menu contains:
• Module information : Shows the Bluetooth reader name, module type, board type, assembly version, application
version, and bootloader version.
• Locate : Click to search for connected modules.
Module name : Enter a module name for the input and output specication. Signal strength : Select the distance for Bluetooth
module communication with mobile phones. Launch authentication by : Select one or more authentication methods for mobile
phones.
• T ap in app : Select to enable authentication when user taps the application icon running on their mobile phone.
• Interacting with the device : Select to enable authentication when users touch the capacitive touch button, see .
Customization
Signaling volume
Signaling volume is the level of sound the device produces when there is a form of communication within the access control system,
for example, the beep the device makes when it reads a card or grants access.
K ey beep volume : Set the volume of the beep. W arning tone volume : Set the volume for warnings and signals when the device
operational status switches, for example, from power on to cable connection.
Backlight
Backlight illuminates the reader indicator stripe, LED indicators, and touch button.
Signaling LEDs intensity : Set the level of brightness for the LEDs.. Backlight enabled : T urn on to enable backlight. Intensity : Set
the level on intensity for the backlight.
System
System dashboard
• Network settings : Shows the settings that are currently congured on the device. This includes IP address, network
mask, default gateway , primary DNS, and secondary DNS.
• Date and time : Shows the current date and time on the device.
Network settings : Click to update the network settings. T akes you to the Network connection page where you can edit
network settings. Date & time : Click to update the date and time. T akes you to the Date & time page where you can
edit date and time.
Network connection
Local network
The device can connect to a local area network with the Ethernet cable.
Basic conguration
Use DHCP server : T urn on to automatically get the IP address from the LAN DHCP server . W e recommend automatic DNS (DHCP)
for most networks. IP address : Enter a unique IP address for the device. Static IP addresses can be assigned at random within
isolated networks, provided that each address is unique. T o avoid conicts, we recommend you contact your network administrator
before you assign a static IP address. Network mask : Enter the network mask to dene what addresses are inside the local area
network. Default gateway : Enter the address of the default gateway , which provides communication with off - LAN equipment.
• Current IP address settings : Shows the IP address settings you currently have on the device.
8
AXIS A4612 Network Bluetooth® Reader
The web inter face
DNS settings
Always use manual DNS settings : T urn on to set DNS settings manually . Primary DNS : Enter the primary DNS server address
for translating domain names to IP addresses. The primary DNS value is 8.8.8.8 after a factory reset. Secondary DNS : Enter the
secondary DNS server address, as an alternative when the primary DNS is inaccessible. The secondary DNS value is 8.8.4.4
after factory reset.
• Current DNS settings : Shows the DNS settings you currently have on the device.
Advanced conguration
Hostname : Enter the IP network identication. Allowed characters are A–Z, a–z, 0–9 and -. V endor class identier : Enter the
vendor class identier as a string of characters for DHCP Option 60. Required port mode : Select the preferred network interface
port mode: Automatic or Half Duplex – 1 0 mbps. The lower bit rate of 1 0 mbps may be necessary if the used network cabling is
not reliable for the 1 00 mbps trafc. Current port state : Shows the current network interface port state (Half or Full Duplex – 1 0
mbps or 1 00 mbps).
W eb server
Y ou can congure your device in a standard web browser with access to the integrated web server . The HTTPS protocol enables
secured communication between the device and the web browser .
HTTP port : Enter the HTTP port to use. HTTPS port : Enter the HTTPS port to use. Minimum allowed TLS version : Select the lowest
TLS version to connect to the device. HTTPS user certicate : Select the user certicate and private key for the HTTP server . If
there is no selection, the device uses the self - signed certicate. Enable remote access : T urn on to enable remote access to the
intercom web server from off - LAN IP addresses.
Date and time
Note
W e recommend that you synchronize the device’s date and time with an NTP server .
Date & Time
Synchronize with browser : Click to synchronize the time on your device with the time on your computer . Use time from NTP
or internet : T urn on to synchronize time on your device with the NTP server or internet. NTP server address : Enter the NTP
server address for time synchronization.
Manual settings :
Manual selection : Select a time zone for your device. Custom rule : Enter a display format for time.
Certicates
Certicates are used to authenticate devices on a network. The device supports these certicate and private key formats:
• PEM
• CER
• PFX
• DER
CA Certicates : Y ou can use CA certicate to authenticate peer certicate. It validates the identity of an authentication server
when a device connects to the network.
9
AXIS A4612 Network Bluetooth® Reader
The web inter face
Important
If you reset the device to factory default, all certicates are deleted.
CA certicates : Select a certicate for device identity verication. Upload : Click to upload a CA certicate and enter the
certicate ID. Search : Enter a certicate ID to nd it in the list of CA certicates. : Click to delete the certicate from the
device. : Click to view the certicate information.
User certicates : A user certicate validates users’ identity . It can be self - signed or issued by a Certicate Authority (CA). A
self - signed certicate offers limited protection which you can use before obtaining a CA - issued certicate.
User certicates : Select the certicate and private key to use for identity verication. Upload : Click to upload a user
certicate and private key and enter the key password if there is one. Search : Enter a certicate ID to nd it in the list of user
certicates. : Click to delete the certicate from the device. : Click to view the certicate information.
Diagnostics
The diagnostic logs help to identify and solve reported problems. Y ou can use diagnostics to capture diagnostic logs for subsequent
download and for technical support.
Ping : T o send test data to the IP address:
• Click Ping
• Enter an IP address or URL.
• Click Ping .
Close : Click to close the dialogue.
Diagnostics package
Diagnostics package is a ZIP le that includes network packets and syslog messages. It contains information about the device, its
conguration, network trafc, crash log, and memory statistics. It also shows the number of network packets and the size of
syslog messages captured by the device.
Restart capture : Click to restart packet capturing. Download : Click to download the diagnostics package as a le.
On - device network packet capture
Download : Click to download the captured network packets. Start : Click to start capturing incoming and outgoing packets on
the network.
Note
Previously captured packets will be deleted when you click start.
Stop : Click to stop capturing incoming and outgoing packets on the network.
Syslog capture : Syslog is a standard for message logging. It allows separation of the software that generates messages, the system
that stores them, and the software that reports and analyzes them. Each message is labeled with a facility code, which indicates the
software type generating the message, and assigned a severity level.
The context menu contains:
• Delete captured messages : Click to delete syslog messages.
Download : Click to download syslog messages. Start : Click to start capturing data. Stop : Click to stop capturing data.
1 0

AXIS A4612 Network Bluetooth® Reader
The web inter face
Network packet capture download
With this, you can capture and download incoming and outgoing packets on the device network interface to your computer .
Start : Click to start capturing data. Time to capture : Set a duration for the capture. Stop : Click to stop capturing data.
Sending syslog to remote server : Use the toggle to enable or disable syslog. This allows you to send syslog messages to a syslog
server for record keeping and for further device analysis. Server address : Enter the IP or MAC address of the server on which syslog
application is running. Severity level : Select the severity of messages to send when triggered.
Maintenance
Conguration
Restart device : Click to restart the device. The context menu contains:
• Reset to factory default : Click to reset the device to its factory default conguration.
- Select K eep network settings and certicates to keep the settings you congured for the network and
certicates.
- Select Reset everything to reset all the device settings.
- Reset : Click to reset.
Download backup : Click to download the device conguration le to your computer . Restore conguration : Click to upload a
conguration le and select import settings in the dialogue.
Firmware : Shows an overview of the software version currently running on your device, the minimum software version available for
the device, bootloader version, software build type, build date, and time.
Firmware upload : Click to upload a software le and upgrade the device software.
1 1

AXIS A4612 Network Bluetooth® Reader
T r oubleshooting
T r oubleshooting
Reset to factory default settings
Note
• A reset to factory default changes all settings back to the factory default values.
• LED indicators are located on the device backside.
1. Open your device.
2. Press and hold the button for approximately 24 seconds until the red and green LED indicators turn on and off.
Note
Y ou will hear one beep, two beeps, three beeps, and then four beeps at different intervals.
3. Release the control button after the fourth beep. The process is complete and the product has been reset to the factory
default settings.
4. Use the installation and management software tools, assign an IP address, set the password, and access the product.
The installation and management software tools are available from the support pages on axis.com/support .
Y ou can also reset parameters to factory default through the device’s web interface. Go to System > Maintenance > and click
Reset to factory defaults .
Check the current rmware version
The device rmware determines the device functionality . When you troubleshoot a problem, we recommend that you to start by
checking the current rmware version. The latest version might contain a correction that xes your particular problem.
T o check the current rmware version:
1. Go to the device’s web interface > Dashboard .
2. Under AXIS A46 12 , see the rmware version.
Upgrade rmware
Important
• Precongured and customized settings are saved when you upgrade the device software (provided that the features are
available in the new rmware version) although this is not guaranteed by Axis Communications AB .
• Make sure the device remains connected to the power source throughout the upgrade process.
Note
When you upgrade the device with the latest rmware version, the product receives the latest functionality available. Always
read the upgrade instructions and release notes available with each new release before you upgrade. T o nd the latest
rmware version and the release notes, go to axis.com/support/device - software .
1. Download the rmware le to your computer , available free of charge at axis.com/support/device - software .
2. Log in to the device as an administrator .
3. Go to System > Maintenance and click Firmware upload .
4. Select the rmware le and click Upload .
12

AXIS A4612 Network Bluetooth® Reader
T r oubleshooting
When the upgrade has nished, the product restarts automatically .
T echnical issues , clues , and solutions
If you can’t nd what you’re looking for here, try the troubleshooting section at axis.com/support .
Problems setting the IP address
The device is located on a
different subnet
If the IP address intended for the device and the IP address of the computer used to access the
device are located on different subnets, you cannot set the IP address. Contact your network
administrator to obtain an IP address.
The IP address is being used
by another device
Disconnect the Axis device from the network. Run the ping command (in a Command/DOS window ,
type ping and the IP address of the device):
• If you receive: Reply from <IP address>: bytes=32; time=10...
this means that the IP address may already be in use by another device on the network.
Obtain a new IP address from the network administrator and reinstall the device.
• If you receive: Request timed out , this means that the IP address is available
for use with the Axis device. Check all cabling and reinstall the device.
The device can’t be accessed from a browser
Can’t log in
When HTTPS is enabled, ensure that the correct protocol (HTTP or HTTPS) is used when attempting
to log in. Y ou may need to manually type http or https in the browser’s address eld.If the
password for the root account is lost, the device must be reset to the factory default settings. See .
The IP address has been
changed by DHCP
IP addresses obtained from a DHCP server are dynamic and may change. If the IP address has been
changed, use AXIS IP Utility to locate the device on the network. Identify the device using its model
or serial number , or by the DNS name (if the name has been congured).
Certicate warning
NET::ERR_CERT_AUT-
HORITY_INVALID
The certicate warning is a standard procedure for OS devices. Click Advanced and then click
Proceed to *IP address* (unsafe) to access the device login webpage. There are few options:
• Use a different browser or device.
• Click anywhere on the certicate warning page and type thisisunsafe .
When you get to the webpage, go to System > Maintenance > Firmware upload to update to
the latest device software.
P erformance considerations
The following factors are the most important to consider:
• Heavy network utilization due to poor infrastructure affects the bandwidth.
Contact support
If you need more help, go to axis.com/support .
13
AXIS A4612 Network Bluetooth® Reader
Specifications
Specifications
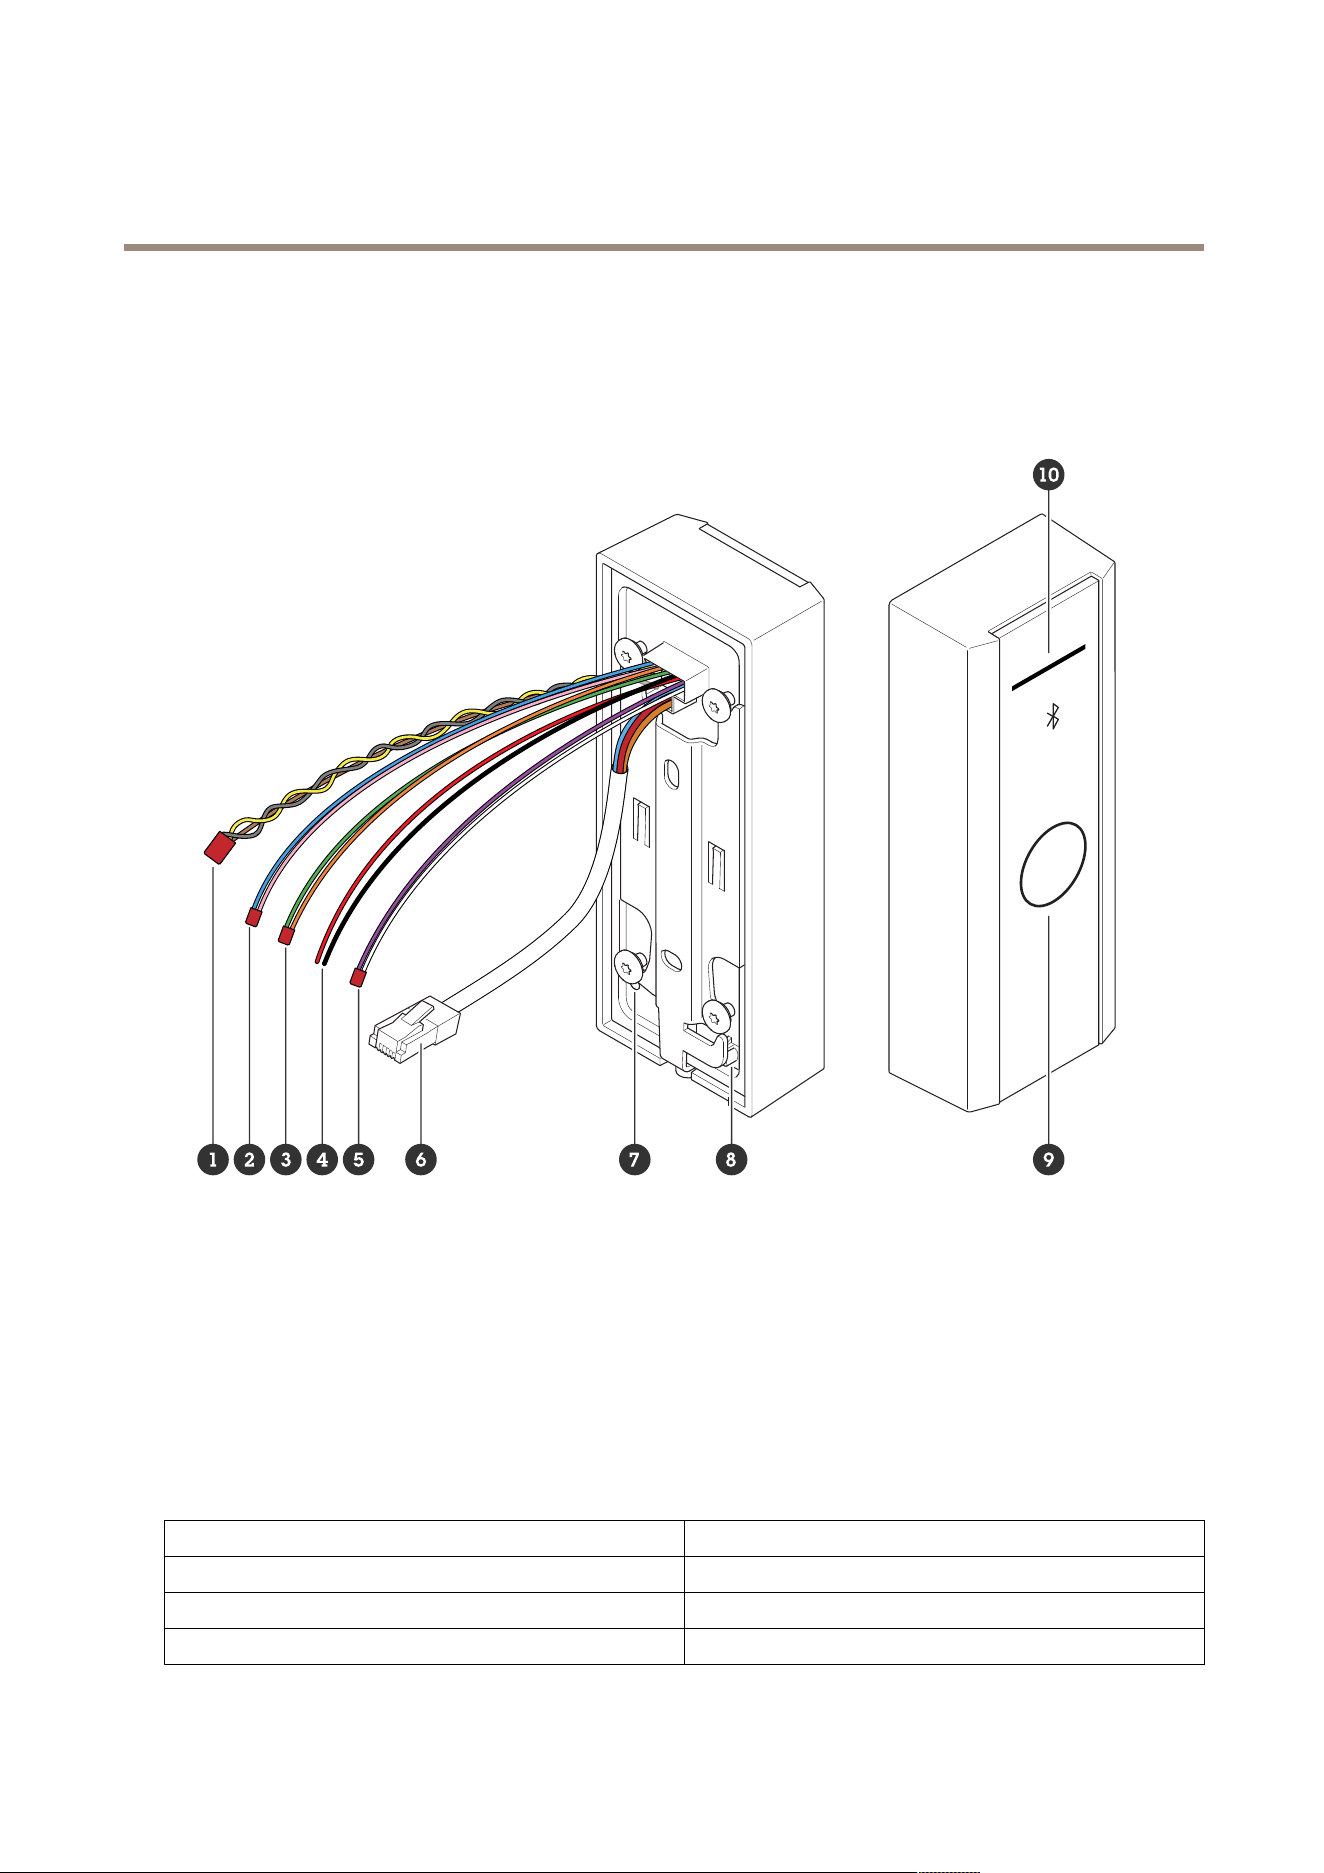
Product overview
1
Relay cable
2
Input cable 1
3
Input cable 2
4
External power
5
Active output
6
Network connector (P oE)
7
Control button
8
T amper switch
9
Capacitive touch button
1 0
Reader indicator stripe
Reader indicator stripe
Status
Indication
White
Connection and normal operation.
Green
Flashes for valid authentication.
Red Flashes for Invalid authentication.
14

AXIS A4612 Network Bluetooth® Reader
Specifications
Note
T o set the backlight and brightness level, see .
Buttons
Control button
The control button is used for:
• Resetting the product to factory default settings. See .
• Restarting the device. Press the button for less than 1 second to restart the device.
• Finding current IP address. See .
• Switching to a static IP address (192.168.1.1 00):
- Press and hold the button for approximately 15 seconds until the LED indicators turn red and green
simultaneously and you hear a beep.
- Release the button after the red LED goes off and you hear two beeps.
• Switching to a DHCP server:
- Press and hold the button for 15 seconds until the LED indicators turn red and green simultaneously and
you hear a beep.
- K eep the button pressed for 3 seconds while the red LED goes off and you hear two beeps.
- Release the button after the green LED goes off, red LED goes on again and you hear three beeps.
Capacitive touch button
The capacitive touch button enables Bluetooth authentication for entry and exit request. Users can activate authentication by
pressing the button. Y ou need to congure this button on the device webpage, see .
Cables
Active output
The active output connector is used to connect to a critical device such as re detectors, alarms, locks, or a security relay .
Function
Color Specications
DC +
White
DC -
Violet
8 to 12 V DC, max 600 mA
External power
The device has a cable to connect to external power .
Function
Color Specications
DC +
Red +
DC -
Black -
12 V DC, max 12.0 W
15

AXIS A4612 Network Bluetooth® Reader
Specifications
Input cable
The input cable is used for connecting to an external input device while enabling good communication between the device control
panel and the input device. The device has 2 input connectors, input 1 and input 2 which you can use to connect a door position
sensor and REX button.
Function
Cable Color Specications
DC +
Input 1 Pink +Blue -
DC -
Input 2
Orange +Green -
- 30 to +30 V DC
Network connector
RJ45 Ethernet connector with P ower over Ethernet (P oE).
P ower priority
This device can be powered by either P oE or DC input. See .
• When P oE and DC are both connected, DC is used for powering.
• P oE and DC are both connected and DC is currently powering. When DC is lost, the device uses P oE for powering.
• When P oE is used during startup and DC is connected after the device has started, DC is used for powering.
Relay cable
A relay cable to manage access locks and sensors.
Function
Color
Note
Specications
NO
Y ellow Normally , open for fail secure lock.
COM Grey Common
NC
Brown Normally closed, for fail secure lock.
max 1 A 30 V DC
16

AXIS A4612 Network Bluetooth® Reader
Clean your device
Clean your device
Note
• Harsh chemicals can damage the device. Don’t use chemicals such as window cleaner or acetone to clean your device.
• Avoid cleaning in direct sunlight or elevated temperatures, since this can cause stains.
1. Use a can of compressed air to remove dust and loose dirt from the device.
2. If necessary , clean the device with a soft microber cloth dampened with lukewarm water .
3. T o avoid stains, dry the device with a clean, nonabrasive cloth.
17

AXIS A4612 Network Bluetooth® Reader
T rademark attribution
T rademark attribution
The Bluetooth® word mark and logos are registered trademarks owned by Bluetooth SIG, Inc. and any use of such marks by Axis
Communications AB is under license. Other trademarks and trade names are those of their respective owners.
18

User manual V er . M1.25
AXIS A46 12 Network Bluetooth® Reader Date: October 20 24
© Axis Communications AB, 20 24
P art no. T1 0 20 7283