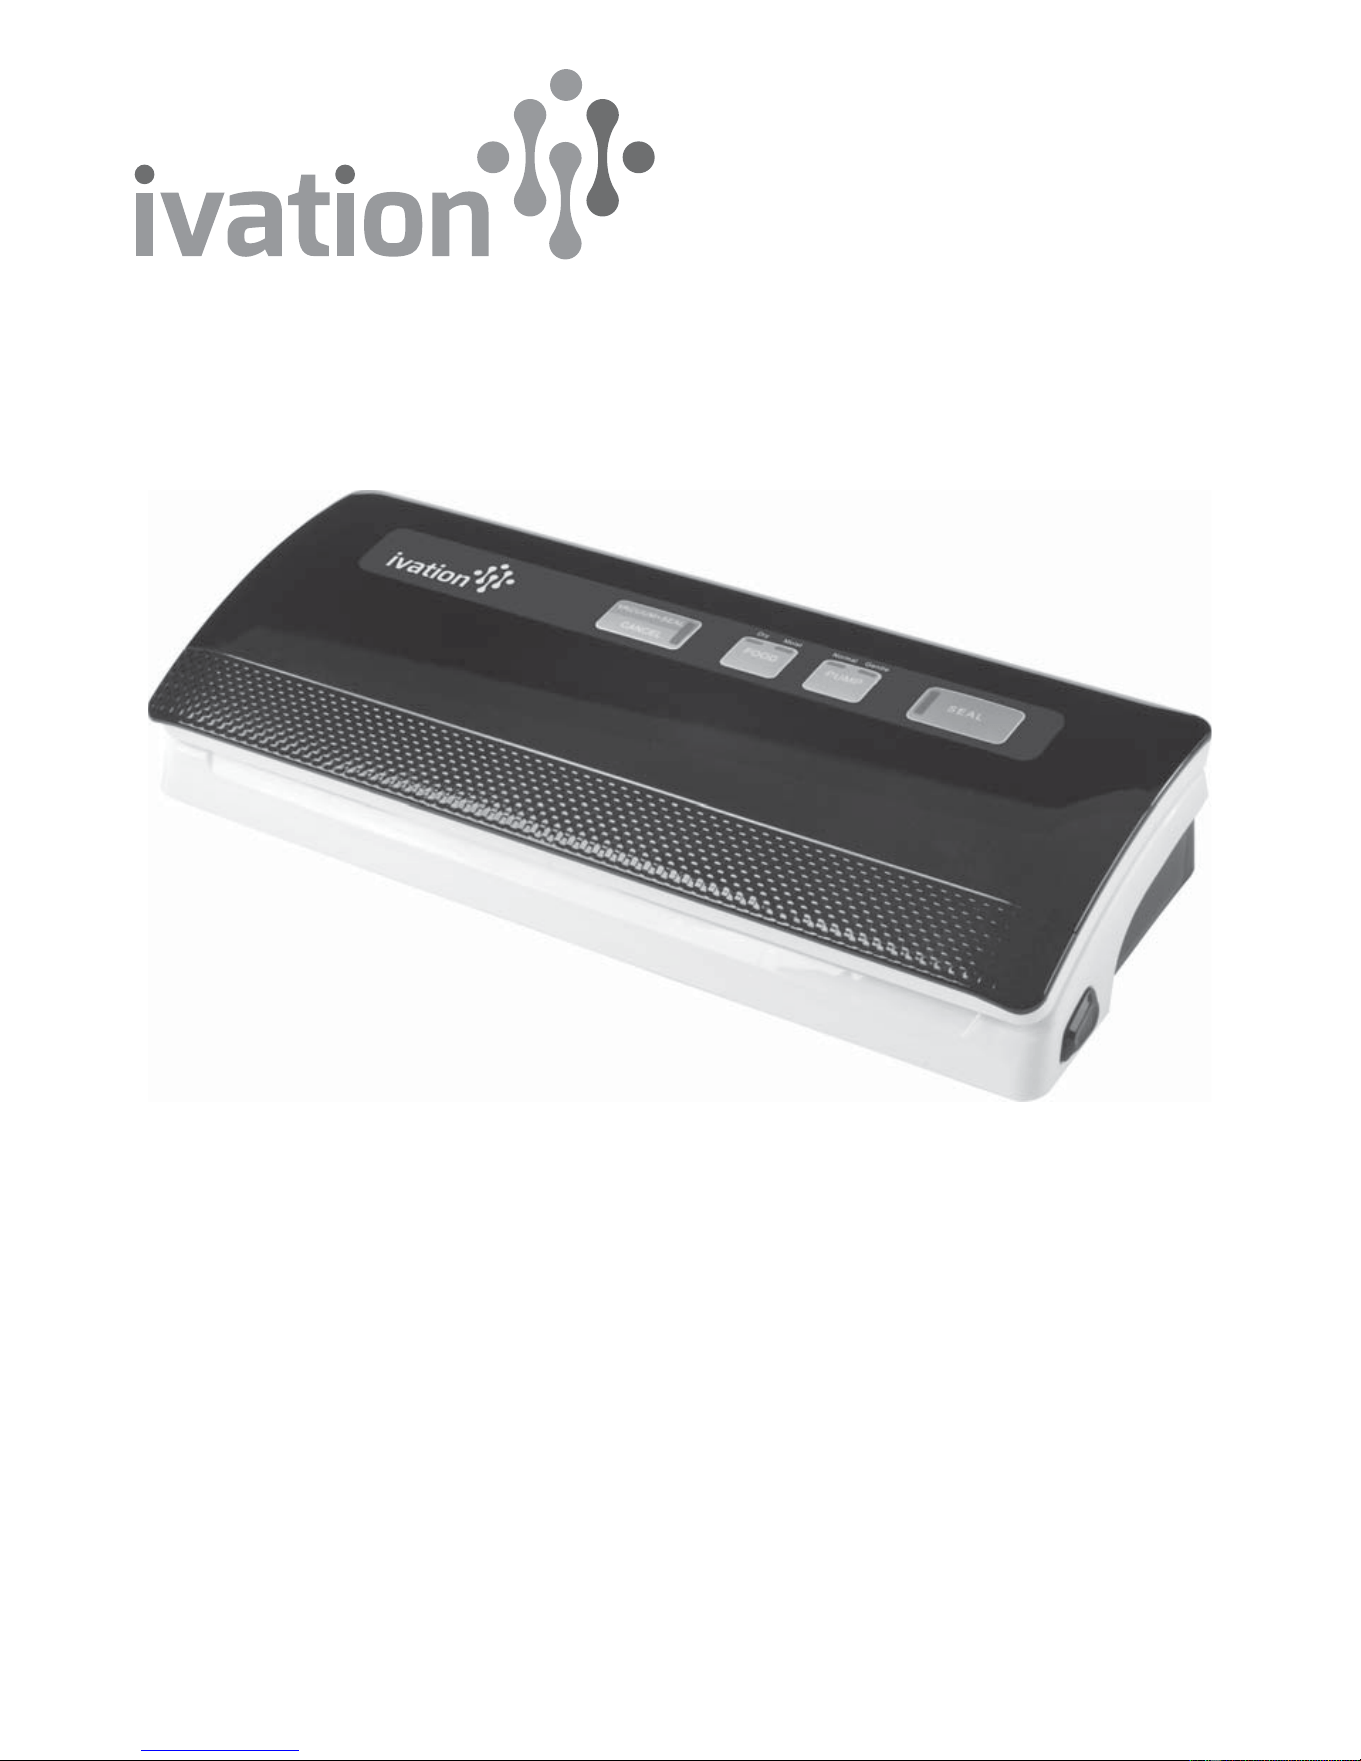
Vacuum Sealer
User Guide
Thank you for purchasing the Ivation Vacuum Sealer. This User Guide is intended to provide
you with guidelines to ensure that operation of this product is safe and does not pose risk to
the user. Any use that does not conform to the guidelines described in this User Guide may
void the limited warranty.
Please read all directions before using the product and retain this guide for reference. This
product is intended for household use only.
This product is covered by a limited one-year warranty. Coverage is subject to limits and
exclusions. See warranty for details.
In the Box:
Vacuum sealer
Starter kit: 5 (quart) + 5 (gallon) bags
User guide

CONTENTS
IMPORTANT SAFEGUARDS ..........................................................................................................3
FUNCTIONS......................................................................................................................................4
OPERATING INSTRUCTIONS ......................................................................................................5
CLEANING AND MAINTENANCE.................................................................................................7
PRODUCT USE TIPS........................................................................................................................7
IMPORTANT FOOD STORAGE AND SAFETY INFORMATION ...............................................9
TROUBLESHOOTING ................................................................................................................... 10
FOOD PRESERVATION GUIDELINES....................................................................................... 11
2

IMPORTANT SAFEGUARDS
When using this electrical appliance, safety precautions should always be observed, including
the following:
READ ALL INSTRUCTIONS
1. Carefully read all of the instructions before using this appliance and save for
future reference.
2. Before plugging cord into wall outlet, or disconnecting, make sure that the cover of the
machine is unlocked. Unplug unit from outlet when not in use or before cleaning.
3. This appliance is not a toy. Close supervision is required when this product is used near
children. Store the unit in a safe place, out of the reach of children.
4. Do not use bags or attachments not recommended by the manufacturer.
5. Do not use the machine if the cord is damaged.
6. Keep away from moving parts.
7. Do not contact the hot sealing element located on edge of the top cover of the machine.
8. Use this product only for its intended purpose.
9. Use this product on a flat, level surface.
10. Do not expose the product to direct sunlight, heat sources, or open flames. Do not use on
a wet surface.
11. Do not attempt to disassemble the unit.
12. Do not use the appliance if it has fallen or appears to be damaged.
13. Do not operate appliance if the cord or plug is wet.
14. Only use an extension cord if necessary. If one is used, it must have a rating equal to or
exceeding the rating of this appliance.
15. When disconnecting, always grasp the plug, not the cord.
16. Before plugging in and using the appliance, make sure your hands are dry.
17. Do not use lubricants, oils or water on this appliance.
18. Do not immerse any part of this appliance, power cord or plug in water or any other liquid.
19. Do not use this appliance outdoors or on a wet surface.
20. This appliance is not intended for use by persons (including children) with reduced
physical, sensory or mental capabilities, or lack of experience and knowledge, unless
they have been given supervision or instruction concerning use of the appliance by a
person responsible for their safety.
21. To reduce the risk of electric shock, this product has a polarized plug (one blade is wider
than the other). This plug is intended to fit in a polarized outlet only one way. When the
plug does not fit fully in the outlet, reverse the plug. When it still does not fit, contact a
qualified electrician to install the proper outlet. Do not change the plug in any way.
22. Put the power cord into the storage compartment in the back of the machine when the
unit is not in use. Do not wrap the cord around the appliance.
3
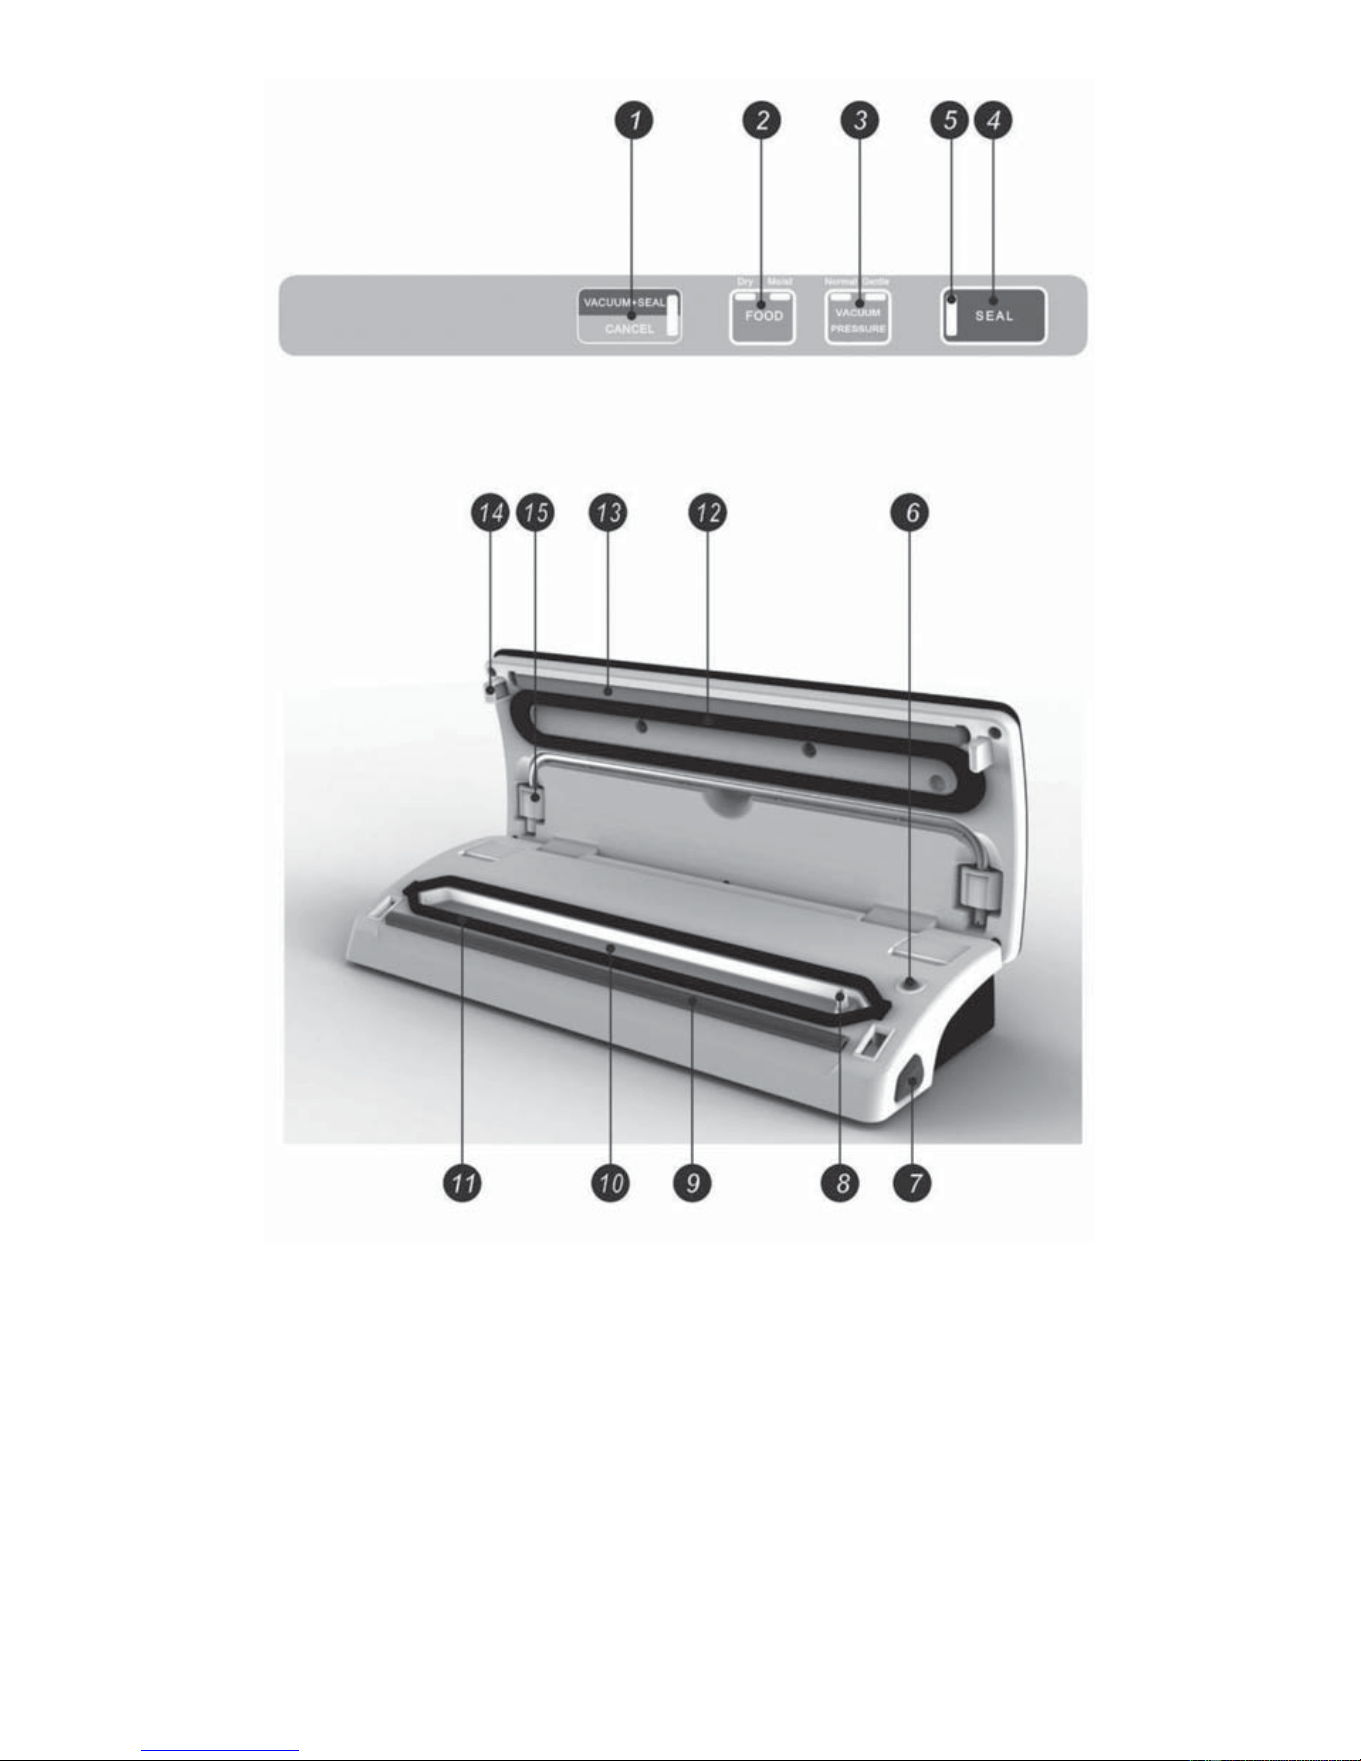
FUNCTIONS
1. Vacuum + Seal / Cancel
This button has two functions:
1. In stand-by mode, it starts the automatic operation of extracting air from the bag
and then sealing the bag.
2. When in the operating mode, it stops the machine (Cancel).
2. Food Settings: Dry and Moist
Choose the DRY setting for foods containing little or no moisture. The bags require a
shorter heat sealing time.
Choose MOIST for liquids or moist foods. The bags will take a little longer to seal.
The default setting is for dry bags and normal sealing time.
4

3. Vacuum Pressure
Choose the NORMAL setting for food items to be sealed with normal vacuum pressure.
Choose GENTLE setting for soft, delicate or crushable items when less vacuum pressure
is desired.
The default setting is for normal vacuum pressure.
4. Seal
This button provides two functions:
1. Manually seals the open end of a bag without suction. Use this function to make a
bag from a roll.
2. When in the automatic Vacuum + Seal function, pressing this button stops the motor
pump and immediately starts to seal the bag, letting the user control how much air is
extracted and to avoid crushing delicate contents.
5. LED Indicators: Indicates vacuuming or sealing process, and the status of the
machine setting.
6. Safety switch: Shuts off the heating circuit.
7. Release Buttons: Press both sides to open the cover and release the vacuum pressure
inside the machine.
8. Air intake: Air intake connecting vacuum chamber and pump. (When sealing optional
containers, a hose is placed into this intake.)
9. Sealing strip: Place the bag to be sealed over this strip.
10. Vacuum chamber: Position the open end of the bag inside the chamber to draw air out
of the bag and catch any liquid overflow.
11. Lower gasket: Forms the vacuum chamber.
12. Upper gasket: Forms the vacuum chamber.
13. Sealing element: Teflon-coated heating element which seals the bag.
14. Hook: Locks the cover onto the base.
15. Hose storage: For optional hose.
OPERATING INSTRUCTIONS
Vacuum Sealing a Bag
1. Put the items inside the bag. Use only the specially
designed vacuum bags with vacuum channels supplied
by the manufacturer.
2. Clean and straighten the open end of the bag, clearing
away any dust and smoothing out wrinkles or ripples.
3. Place the open end of the bag within the vacuum chamber
area. Make sure the air intake is not covered by the bag.
Fig. 1
4. Press the cover down on both sides using both hands until
you hear both sides click. Fig. 2
Fig. 1
Fig. 2
5

5. Check the LED status of the FOOD button and the
VACUUM PRESSURE button to confirm sealing
time depending on the moisture content of food (moist
or dry) and desired vacuum pressure (Normal/Gentle).
6. Press the VACUUM + SEAL button to begin automatic
extraction of air and sealing. Fig. 3
NOTE: This product provides very high vacuum pressure.
To avoid crushing delicate items, observe the bag as it’s
being sealed and press the SEAL button immediately
when the desired air extraction has been achieved. The
machine will then stop the pump and automatically
heat-seal the bag.
7. When packaging is complete, press the release buttons
on both sides of the machine simultaneously to open the
cover and remove the bag. Fig. 4
Note: After vacuum-sealing, always keep the machine
cover open. Failure to do so will damage the gaskets.
8. Put the power cord into the storage compartment in the back of the machine when the
unit is not in use. Do not wrap the cord around the appliance.
NOTE: For optimal performance, let the appliance cool down for 1 minute before using it
again. Wipe out any excess liquid or food residue in the vacuum chamber after each bag
is sealed.
Do not seal one after another continuously to avoid overheating of the sealing element.
The machine will reject the command if the SEAL button is pressed within 15 seconds of
the last activation.
Your appliance can work only on the specific bags provided by the manufacturer. Do not
attempt to use other bags not intended for vacuum packaging.
To open a sealed bag, cut straight across the top with scissors.
Sealing an Optional Canister
1. Make sure the canister base and cover are clean and dry.
2. Put the items into the canister and leave at least one inch
of space between food and cover rim. Clean the cover rim
of the canister and bottom seal gasket of the canister cover.
3. Open the appliance cove. Insert one end of the hose into
the air intake post in the vacuum chamber area, and the
other end of the hose into the center hole of the canister
cover. Make sure the knob of the canister cover is turned to
the SEAL position. Figs. 1 & 2
4. At the beginning of the vacuum process, press down
slightly on the canister cover or on the hose adaptor to
ensure that the hose is not loose and to avoid air leaking
through the gap between the cover and the canister
top rim.
Fig. 3
Fig. 4
Fig. 1
Fig. 2
6

5. Press the VACUUM + SEAL button to start extracting air from the canister. Make there
is no air leaking between the cover and the canister. You can use your hand to push down
the cover knob. The machine will stop automatically when enough vacuum pressure
is achieved.
6. Hold down the canister cover when you pull off the hose to avoid spills. Press the release
button to open the cover.
Opening the Canister after Vacuum Packing
To open the canister, you need to remove the airtight seal first by turning the knob switch
from SEAL to OPEN
CLEANING AND MAINTENANCE
Vacuum Sealer
1. Always unplug the unit before cleaning.
2. Do not immerse in water or any other liquid.
3. Avoid using abrasive products or material to clean the unit.
4. Use a mild dishwashing soap and a warm, damp cloth to wipe away food residue
around components.
5. Dry thoroughly before using again.
Note: The foam gaskets around the vacuum chamber should be dried thoroughly before
reinstalling. Carefully reinstall gaskets in their original positions to prevent leaking
when sealing.
Vacuum Bags
You can reuse bags if you follow these instructions:
1. Wash bags in warm water with a mild dishwashing soap.
2. If washing bags in dishwasher, turn bags inside out and spread them over top rack of
dishwasher so entire surface is exposed for washing.
3. Dry thoroughly before reusing.
IMPORTANT: To avoid possible illness, do not reuse bags after storing raw meats, raw
fish or greasy foods. Do not reuse bags that have been microwaved or boiled.
Storing Your Vacuum Sealer:
1. Make sure the cover of appliance is unlocked when not in use. Keeping the cover locked
will distort the foam gaskets and cause leaking.
2. Store the unit in a clean, dry area and on a flat surface. Keep out of the reach of children.
PRODUCT USE TIPS
1. Do not overstuff the bag. Leave enough empty space at the open end of the bag so that
the bag can be placed in the vacuum chamber area without wrinkling or bulging.
2. Do not wet the open end of the bag. If the food contains moisture, or the bag is wet, you
can choose the MOIST function. This setting is designed for a longer sealing time.
7

3. Clean and straighten the open end of the bag before sealing. Make sure nothing is left on
the open area of the bag. No wrinkles or creased lines should appear on the open panel.
Foreign objects or creases may cause difficulty when sealing.
4. Before the vacuum process begins, press the bag to allow extra air to escape. Too much
air inside the bag increases the vacuum pump load and may result in insufficient motor
power to draw away all the air inside the bag.
5. Do not vacuum-package items with sharp points like bones and hard shells which may
penetrate the bag. Wrap pointy or hard items with a paper towel first.
6. Let the machine rest for 1 minute between sealing jobs.
7. If the required vacuum power is not achieved, the machine will shut automatically after
60 seconds. Please check the bag for improper placement or any leaks.
8. Make sure the foam gaskets around the vacuum chamber are clean and free of any
obstructions, cracks, or deformities. When this happens, take it out and wash and dry it
thoroughly, or replace it with a new one.
9. During the vacuum packaging process, small amounts of liquids, crumbs or food particles
can inadvertently be pull into the vacuum chamber, clogging the pump and damaging your
appliance. To avoid this, freeze moist and juicy foods first before sealing bags, or place
a folded paper towel near the inside top of the bag. For powdery or fine-grained foods,
avoid overfilling bags. You may also place a coffee filter inside before vacuum packaging.
10. Refrigerate or freeze perishable foods properly, and consume them immediately
after heating.
11. Pre-freeze fruits and blanch vegetables before vacuum packaging for best results.
12. Liquids need to be cooled before vacuum packing.
13. Store perishable foods in the freezer or refrigerator.
14. Fill a bag about 2/3 with water. Seal the bag (don't vacuum). Freeze the bag and use it in
a cooler, or for ice packs for sports injuries.
15. Many foods, such as cheese and deli meats, are sold pre-packed in commercial vacuum
bags. Now you can maintain the taste and freshness of these foods by re-packaging
them with vacuum-sealed bags after the original food packaging has been opened.
16. Panty items such as flour, rice, mixes for cakes and pancakes, all stay fresher longer
when vacuum packed. Nuts and condiments maintain their flavor while rancidity is
kept out.
17. Do not put a sealed bag into a microwave oven or into hot water to heat.
18. Cook foods in advance for parties, picnics or camping trips and vacuum-seal individual
portions or entire meals.
19. Package dry foods, such as beans, nuts, and cereals, to last longer.
20. The vacuum sealer can also be used to store and protect other items such as photos,
important documents, stamp collections, jewelry, cards, and medicines. Keep small
clothing items, bandages, and first aid items dry and clean.
Note: After vacuum-sealing, always keep the machine cover open. Failure to do will
damage the gaskets.
8

IMPORTANT FOOD STORAGE AND SAFETY INFORMATION
This vacuum sealer will change the way you purchase and store foods. Once you are
accustomed to vacuum packing, it will become an indispensable part of your food
preparation. When preparing and vacuum-packing foods using your vacuum sealer, there
are certain procedures that must be followed to ensure food quality and safety. Review this
section carefully for you protection:
1. In foods, chemical reactions to air, temperature, moisture, enzyme action,
microorganisms, or contamination from insects will cause food spoilage.
2. The main reason foods lose nutritive value, texture, flavor, and overall quality is oxygen.
Most microorganism growth relies on air which carries moisture into and out of foods
unless they are protected with moisture-proof packing. Frozen foods being exposed to
freezer air will result in freezer burn.
3. Vacuum-seal packing removes up to 90% of the air from the package, inhibiting
microorganism growth.
4. In general, there have three main categories of microorganisms: mold, yeast and
bacteria. They are present everywhere, but only under certain conditions can they
cause problems.
5. In a low oxygen environment or in the absence of moisture, mold can’t grow. With
moisture, sugar and a moderate temperature, yeast can grow with or without air.
Refrigeration will slow the growth of yeast, and freezing stops it completely. Bacteria
can grow with or without air.
6. An extremely dangerous type of bacteria is clostridium botulinum, which can grow under
the right conditions without air in the temperature range of 40˚F to 115˚F (4˚to 46˚C).
Conditions that promote growth in foods are low acid, low oxygen environment, and
temperatures greater than 40˚F (4˚C) for extended time periods.
7. Frozen and dried foods, foods high in acid, salt, and sugar are more resistant to
botulinum. Non-acid foods include meats, seafood, lye-cured olives, poultry, fish, eggs
and mushrooms. Low-acid foods are mostly vegetables. Medium-acid foods include
overripe tomatoes, onions, chili peppers, figs and cucumbers; these are easily susceptible
to botulinum.
8. Refrigerate or freeze perishable foods properly, and consume them immediately
after heating.
9. Some dried foods such as flour and cereals may contain insect larvae. If not vacuum-
sealed, larvae may hatch during storage and contaminate the foods. To prevent weevils
and other insects from hatching, store these foods in vacuum-sealed packaging.
10. Refrigerator temperatures greater than 40˚F (4˚C), especially for extended periods of
time, it will support the growth of harmful microorganisms. Keep the temperature at
40˚F (4˚C) or below.
11. Freezer temperatures of 0˚F (-17˚C) or lower are suitable for storing foods. Although
freezing does not kill microorganisms, it inhibits their growth.
12. The vacuum-sealed storage temperature will affect dried foods. Their shelf life can be
extended 3 - 4 times for every 18˚F (10˚C) drop in temperature.
9

13. Make sure to properly clean your hands, all utensils and surfaces used to prepare and
pack foods.
14. Once you've packed perishable foods, refrigerate or freeze them immediately.
15. Vacuum packing will increase the shelf life of dry foods. Foods that have high fat content
develop rancidity due to oxygen and warm temperatures. Vacuum packaging extends the
shelf life of foods such as nuts and legumes. Store them in a cool, dark place.
16. Vacuum packing will not extend the shelf life of fruits and vegetables such as apples,
bananas, potatoes, and other root vegetables unless peeled before vacuum packing.
17. Fresh vegetables such as broccoli, cauliflower and cabbage emit gases when vacuum
packed. To prepare these foods for vacuum packing, blanch and freeze them.
TROUBLESHOOTING GUIDE
Nothing happens when I try to vacuum package
1. Check power cord to see if it is firmly plugged into electrical outlet.
2. Examine power cord for any damages.
3. See if electrical outlet is operative by plugging in another appliance.
4. If your appliance has a mode switch, make sure it is set to the correct mode. Refer to
the above operating instructions
5. Make sure bag is placed correctly inside vacuum chamber and beneath the air intake.
Air is not completely removed from the bag:
1. To seal properly, the open end of bag should be resting entirely inside vacuum
chamber area.
2. Check sealing strip and the foam gasket beneath the lid for debris and position. Make
sure the foam seal gaskets on both the cover and on the base around the vacuum
chamber are clean and in the proper position.
3. Vacuum bag may have a leak. To test, seal the bag with some air in it, submerge in
water, and apply pressure. Bubbles indicate a leak. Reseal or use another bag.
4. Use only the specific vacuum bag with vacuum channels provided by the manufacturer.
5. Leaks along the seal can be caused by wrinkles, debris, crumbs, grease or liquids.
Reopen bag, wipe the top inside of the bag and smooth it out along the sealing strip
before resealing.
The machine does not seal after vacuuming:
1. There is a vacuum pressure sensor built into this machine. The machine will not seal
automatically if the vacuum pressure inside the bag is not able to reach the
predetermined vacuum pressure. Check sealing strip and the foam gasket beneath the
lid for debris and correct position. Wipe clean and smooth them back into place, and
try again.
2. Make sure the foam seal gaskets on both the cover and on the base around the vacuum
chamber are clean and undamaged. Take it out from the groove, wash and dry it
thoroughly; or replace with a new foam gasket from the manufacturer’s service center.
3. Vacuum bag may have a leak. To test, seal the bag with some air in it, submerge in water,
and apply pressure. Bubbles indicate a leak. Reseal or use another bag.
10

4. Leaks along the seal which can be caused by wrinkles, debris crumbs, grease or liquids
from the bag. Reopen bag, wipe the top inside of the bag and smooth it out along the
sealing strip before resealing.
Air has re-entered into the bag after being sealed.
1. Leaks along the seal can be caused by wrinkles, debris crumbs, grease or liquids. Reopen
bag, wipe the top inside of the bag and smooth it out along the sealing strip before resealing.
2. The release of natural gases or fermentation from foods (such as fresh fruits and
vegetables) may occur. Discard any food you think has begun to spoil.
3. Check the bag for punctures.
The bag melts:
1. Should sealing strip or sealing element overheat and melt the bag, it may be necessary
to lift the lid and allow sealing strip or heating element to cool for a few minutes.
FOOD PRESERVATION GUIDELINES
Storage Food Item
Normal
Preservation
Vacuum Sealed
Refrigerator
38° - 40° F
3° - 4° C
Fresh Raw
Meat
2 – 3 days 8 – 9 days
Fresh Fish/ Sea
Food
1 – 3 days 4 – 5 days
Cooked Meat 4 – 6 days 10 – 14 days
Vegetables 3 – 5 days 7 – 10 days
Fruit 5 – 7 days 14 – 20 days
Eggs 10 – 15 days 30 – 50 days
Freezer
0° F
-17° C
Meat 3 – 5 months
>
1 year
Fish 3 – 5 months
>
1 year
Sea Food 3 – 5 months
>
1 year
Pantry
Cool and Dry
Bread 1 – 2 days 6 – 8 days
Biscuit 4 – 6 months
>
1 year
Rice/ Flour 3 – 5 months
>
1 year
Nuts/Legumes 3 – 6 months
>
1 year
Tea 5 – 6 months
>
1 year
This product is covered by a limited one-year warranty. Coverage is subject to limits and
exclusions. See warranty for details.
Customer Service:
info@myivation.com
866-849-3049
Distributed by C & A Marketing
2 Bergen Turnpike
Ridgefield Park, NJ 07660
Made in China
Ivation is a trademark of C&A IP Holdings, LLC
©2015 All rights reserved
11