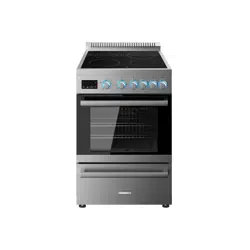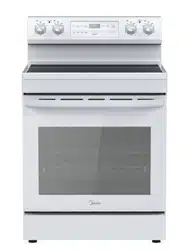
EER204MSCW
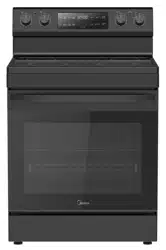
EER204MSCB
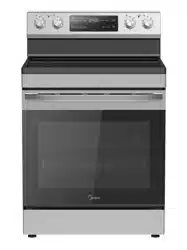
EER204MSCS
EN
20-Inch Electric Range

CONTENTS
1.IMPORTANT SAFETY INSTRUCTIONS ........................................................................... 4
1.1 Important Instructions For Unpacking And Installation
................................................... 5
1.2 Grounding Instructions
................................................................................................... 6
1.3 Using Your Radiant Cooktop ......................................................................................... 9
1.4 Glass And Ceramic Cooktops........................................................................................11
1.5 Using Your Oven............................................................................................................11
1.6 Cleaning Y
our Appliance............................................................................................... 12
1.7 Service And Maintenance ............................................................................................. 13
2.INSTALLATION AND PREPARATION FOR USE ............................................................ 14
2.1 Instructions for the Installer
.......................................................................................... 14
2.2 Anti-tilting kit
................................................................................................................. 16
2.3 Adjusting the feet
.......................................................................................................... 17
3.PRODUCT FEATURES
................................................................................................... 18
4.USE OF PRODUCT
........................................................................................................ 19
4.1 Hob controls
................................................................................................................. 19
4.2 Oven Controls............................................................................................................... 20
4.3 SLOW COOKING CHART
............................................................................................ 21
4.4 Use of the Mechanical Timer
........................................................................................ 22
4.5 Accessories
.................................................................................................................. 22
5.CLEANING AND MAINTENANCE................................................................................... 23
5.1 Cleaning
....................................................................................................................... 23
5.2 Maintenance
................................................................................................................. 26
6.
TROUBLESHOOTING &
TRANSPORT .......................................................................... 27
6.1 Troubleshooting ............................................................................................................ 27
6.2 Transport
...................................................................................................................... 27
Warranty & page ................................................................................................................ 28
3
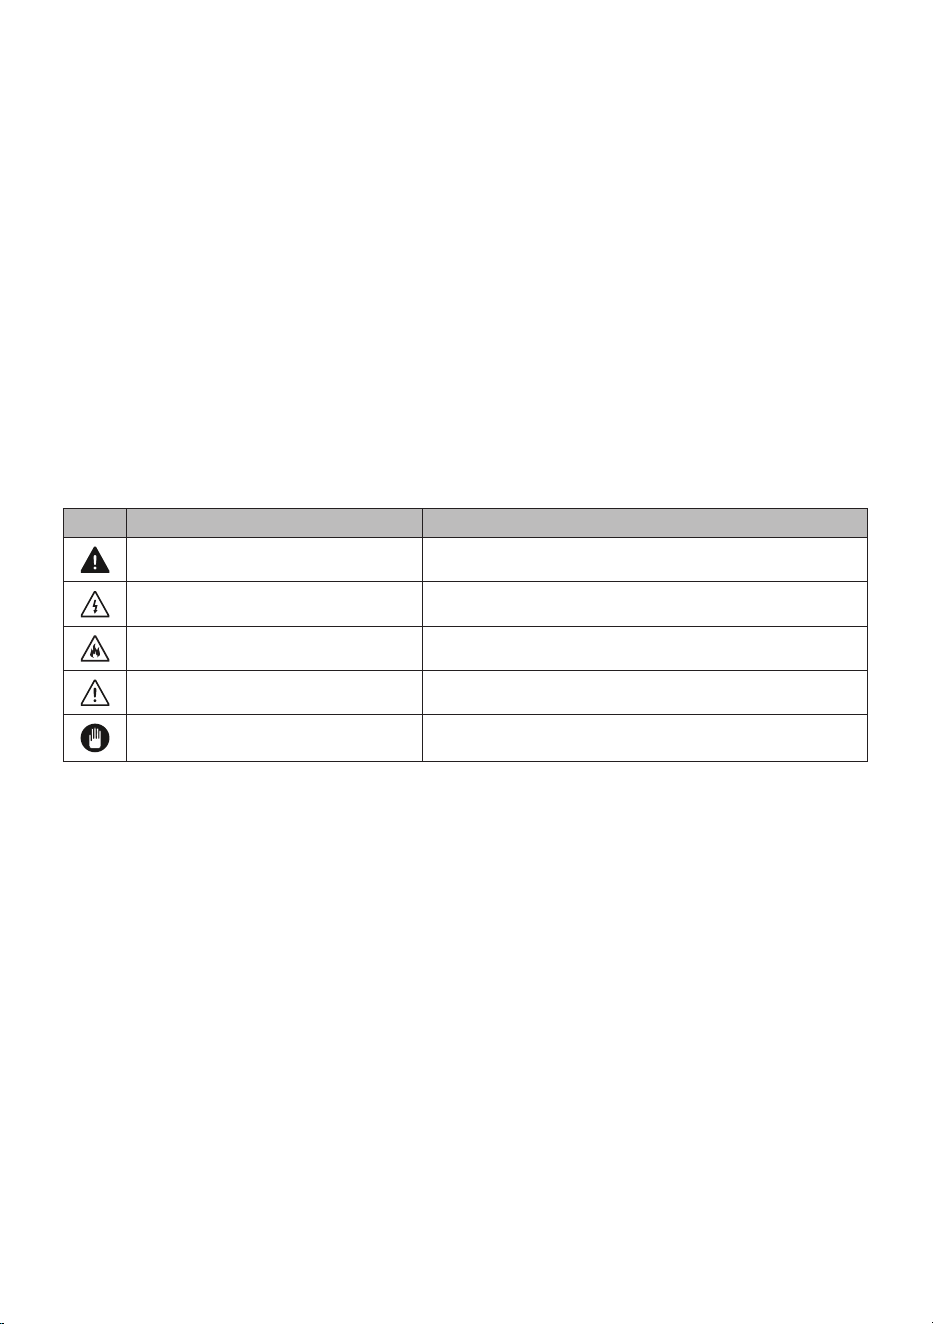
Icon Type Meaning
WARNING Serious injury or death risk
RISK OF ELECTRIC SHOCK Dangerous voltage risk
FIRE
Warning: Risk of fire / flammable materials
CAUTION Injury or property damage risk
IMPORTANT / NOTE Operating the system correctly
Thank you for choosing this product.
This User Manual contains important safety information and instructions on the operation
and maintenance of your appliance.
Please take the time to read this User Manual before using your appliance and keep this
book for future reference.
4
1. IMPORTANT SAFETY INSTRUCTIONS
• Read all instructions before using this appliance.
• This manual contains important safety symbols and
instructions. Please pay attention to these symbols
and follow all instructions given.
• Do not attempt to install or operate your appliance
until you have read the safety precautions in this
manual. Safety items throughout this manual are
labeled with a WARNING or CAUTION statement
based on the risk type.
• Warnings and important instructions appearing
in this guide are not meant to cover all possible
conditions and situations that may occur. Common
sense, caution, and care must be exercised with
installing, maintaining, or operating your appliance.
DEFINITIONS
WARNING: This is the safety alert symbol. It is
used to alert you to potential personal injury hazards.
Obey all safety messages that follow this symbol to
avoid possible injury or death.
WARNING: Indicates a potentially hazardous
situation which, if not avoided, may result in death or
serious injury.
CAUTION: Indicates a potentially hazardous
situation which, if not avoided, may result in minor or
moderate injury.
IMPORTANT: Indicates installation, operation,
maintenance, or valuable information that is not
hazard related.
NOTE: Indicates a short, informal reference
something written down to assist the memory or for
future reference
5
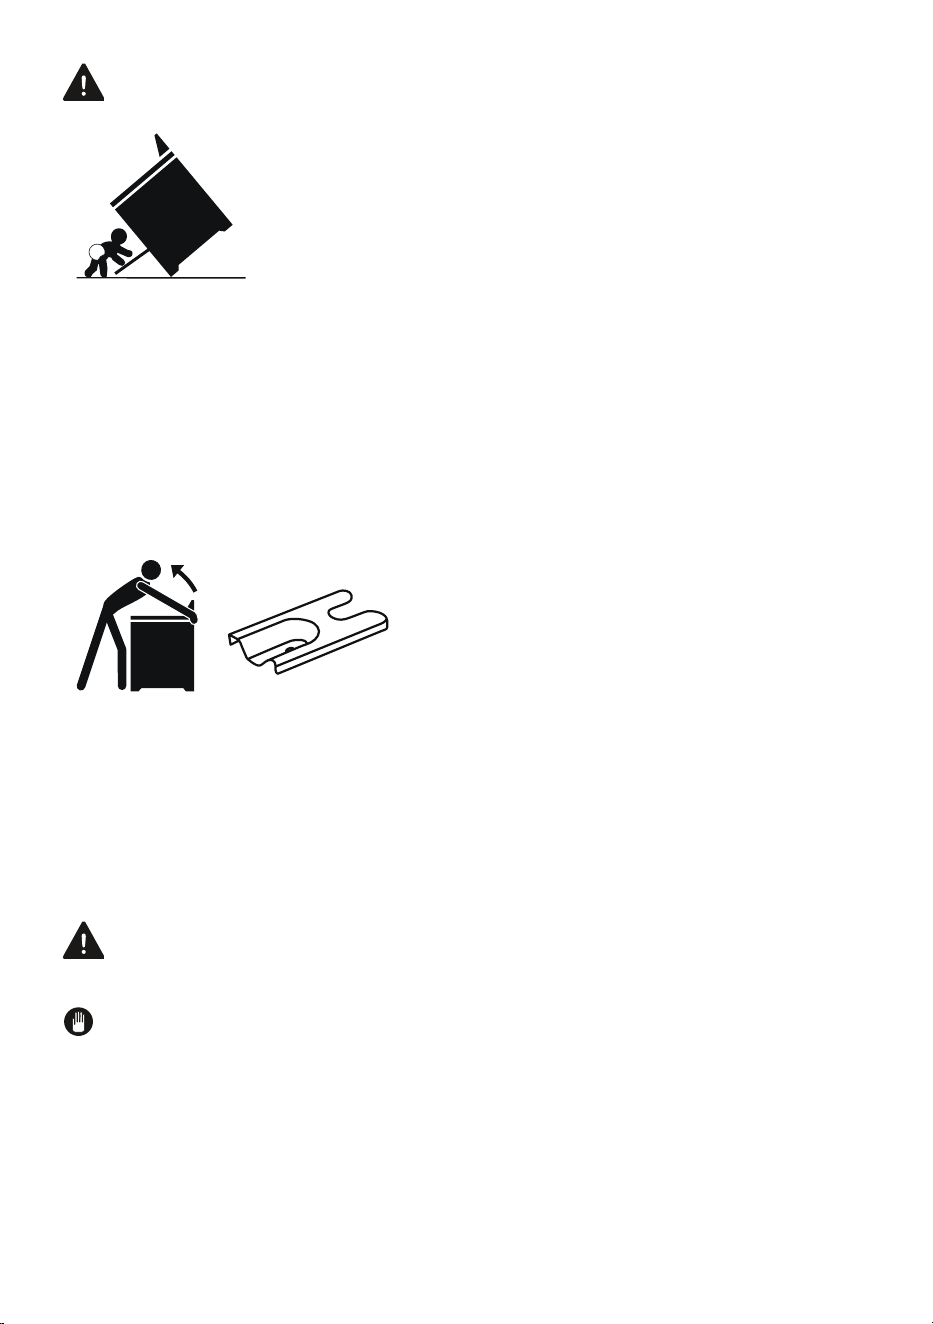
WARNING:
Tip Over Hazard
•A child or adult can tip the range and be
killed.
•Verify the anti-tip device has been
installed to floor or wall.
• Ensure the anti-tip device is re-engaged to floor or
wall when the range is moved.
• Do not operate the range without the anti-tip device
in place and engaged.
• Failure to follow these instructions can result in
death or serious burns to children and adults.
•
To check if the anti-tip bracket
is installed properly, use both
arms to grasp the rear edge
of the range back. Carefully
attempt to tilt range forward.
• When properly installed, the range should not tilt
forward.
• Refer to the anti-tip bracket installation instructions
supplied with your range for proper installation.
1.1 UNPACKING AND INSTALLATION
WARNING: Product label is on the front of the
oven
IMPORTANT: Read and follow the below instruc-
tions and precautions for unpacking, installing, and
servicing your appliance:
• Remove all tape and packaging before using the
appliance. Destroy the carton and plastic bags after
unpacking the appliance.

6
Never allow children to play with packaging
material. Do not remove the wiring label and
other literature attached to the appliance. Do not
remove model/serial number plate.
• Cold temperatures can damage the electronic
control. When using this appliance for the first time,
or when the appliance has not been used for an
extended period of time, be sure the appliance has
been in temperatures above 32ºF (0ºC) for at least 3
hours before turning on the power to the appliance.
• Never modify or alter the construction of the
appliance by removing the leveling legs, panels, wire
covers, anti-tip brackets/screws, or any other part of
the appliance.
• Be sure to have an appropriate foam-type fire
extinguisher available, visible, and easily acces-sible
located near the appliance.
1.2 GROUNDING INSTRUCTIONS
WARNING: Avoid fire hazard or electrical shock.
Failure to follow this warning may cause serious injury,
fire, or death.
• Do not use an adapter plug, use an extension cord,
or remove grounding prong from the power cord.
Failure to follow this warning may cause serious
injury, fire, or death.
• Proper Installation—Be sure your appliance is
properly installed and grounded by a qualified
technician. In the United States, install in accor-
dance with the National Fuel Gas Code ANSI
Z223.1/NPFA No. 54, latest edition and National
Electrical Code NFPA No. 70 latest edition, and
local electrical code requirements. In Canada,
install in accordance with CAN/CGA B149.1 and

7
CAN/CGA B149.2 and CSA Standard C22.1,
Canadian Electrical code, Part 1-latest editions and
local electrical code requirements. Install only per
installation instructions provided in the litera-ture
package for this appliance.
• For personal safety, this appliance must be properly
grounded. For maximum safety, the power cord must
be securely connected to an electrical outlet or
junction box that is the correct voltage, is correctly
polarized and properly grounded, and protected by a
circuit breaker in accordance with local codes.
• It is the personal responsibility of the consumer to
have the appropriate outlet or junction box with the
correct, properly grounded wall receptacle installed
by a qualified electrician. It is the responsibility and
obligation of the consumer to contact a qualified
installer to assure that the electrical installation is
adequate and is in conformance with all local codes
and ordinances.
• See the installation instructions packaged with this
appliance for complete installation and grounding
instructions.
WARNING: Storage in or on the appliance:
flammable materials should not be stored in an oven
or microwave, near surface burners or elements, or in
the storage or warmer drawer (if equipped). This
includes paper, plastic, and cloth items, such as
cookbooks, plastic ware, and towels, as well as
flammable liquids. Do not store explosives, such as
aerosol cans, on or near the appliance.
• Do not leave children alone - Children should
not be left alone or unattended in the area where
appliance is in use. They should never be allowed
to sit or stand on any part of the appliance, including
the storage drawer, lower broiler drawer, warmer

8
drawer, or lower double oven.
• Do not store items of interest to children in the
cabinets above the appliance or on the back-
guards of ranges. Children climbing on or near the
appliance to reach items could be seriously injured.
• Do not allow children to climb or play around the
appliance. The weight of a child on an open over
door may cause the appliance to tip, resulting in
serious burns or other injury. An open drawer when
hot may cause burns.
• Stepping, leaning, or sitting on the door or drawers
of this appliance can result in serious injuries and
also cause damage to the appliance.
• Never cover any slots, holes or passages in the
oven bottom or cover and entire rack with materials
such as aluminum foil. Doing so blocks air flow
through the oven and may cause carbon monoxide
poisoning. Aluminum foil linings may also trap heat,
causing a fire hazard.
WARNING: Do not use oven or warmer drawer (if
equipped) for storage.
• Never use your appliance as a space heater to heat
or warm the room. Doing so may result in carbon
monoxide poisoning and overheating of the appliance.
CAUTION: When heating fat or grease, watch it
closely. Grease may catch fire if it becomes too hot.
Do not use water or flour on grease fires. Smother fire
or flame or use dry chemical or foam-type
extinguisher. Cover the fire with a pan lid or use
baking soda.
• Use dry potholders. Moist or damp potholders on
hot surfaces may result in burns from steam.
• Do not let potholders touch hot cooking areas. Do
not use towels or other bulky cloths.

9
• Do not heat unopened food containers - Build-up
of pressure may cause container to burst and
result in injury.
• Wear proper apparel - Loose-fitting or hanging
garments should never be worn while using the
appliance. Do not let clothing or other flammable
materials contact hot surfaces.
CAUTION: Do not touch surface burners or
elements, areas near these burners or elements,
interior surfaces of the oven, or the warmer drawer (if
equipped). Surface burners and elements may be hot
even though they appear cool. Areas near surface
burners and elements may become hot enough to
cause burns.
• During and after use, do not touch, or let clothing or
other flammable materials touch these areas until
they are cool. These areas may include the cooktop,
surfaces facing the cooktop, oven vent areas, oven
door, and oven window.
Do not attempt to operate the appliance during a
power failure. If the power fails, always turn off the
appliance. If the appliance is not turned off and
the power resumes, electric surface elements may
resume operation when power is restored. Once
the power resumes, reset the clock and the oven
function.
1.3 USING YOUR RADIANT COOKTOP
• Know which knob or key controls each surface
heating area. Place cookware with food on the
cooking area before turning it on. Turn the cooking
area off before removing the cookware.
• Cookware handles should be turned inward and not
extend over adjacent surface elements — To reduce

10
the risk of burns, ignition of flammable materials,
and spillage due to unintentional contact with the
utensil, the handle of the cookware should be
positioned so that it is turned inward, and does not
extend over other cooking areas.
• Use proper pan size - This appliance is equipped
with one or more surface units of different sizes.
Select cookware with flat bottoms that match the
surface unit size. Using the proper cookware on the
cooking area will improve efficiency.
• Make sure reflector pans or drip bowl are in place
— Absence of these pans or bowls during cooking
may subject wiring or components underneath to
damage.
• Glazed cooking utensils - Only certain types of
glass, glass/ceramic, ceramic, earthenware, or
other glazed utensils are suitable for cooktop
service without breaking due to the sudden change
in temperature. Check the manufacturers
recommendations for cooktop use.
• Improper cookware may break due to sudden
changes in temperature. Check the cookware
manufacturer’s recommendations for cooktop use.
Never leave surface elements unattended. Boil-
overs may cause smoking and greasy spills that
may ignite. A pan that has boiled dry could be
damaged and may damage the cooktop.
• The searing grill is not designed for use on the
cooktop. Doing so may result in a fire.
• When you are flaming foods under a ventilating
hood, turn on the fan.

11
1.4 GLASS AND CERAMIC COOKTOPS
• Do not clean or operate a broken cooktop. If cooktop
should break, cleaning solutions and spillovers may
penetrate the broken cooktop and create a risk of
electric shock. Contact a qualified technician
immediately.
• Clean cooktop glass with caution. If a wet sponge or
cloth is used to wipe spills on a hot cooking area, be
careful to avoid a steam burn. Some cleaners can
produce harmful fumes if applied to a hot surface.
Avoid scratching the cooktop glass with sharp
objects.
1.5 USING YOUR OVEN
• Protective liners - Do not use aluminum foil, after-
market oven liners, or any other materials or devices
to line oven bottom, oven racks, or any other part of
the appliance. Only use aluminum as recommended
for baking, such as lining cookware or as a cover
placed on food. Any other use of protective liners or
aluminum foil may result in a risk of electric shock or
fire or a short circuit.
• Use care when opening oven door, lower oven door,
or warmer drawer (some models). Stand to the side
of the appliance when opening the door of a hot
oven. Let hot air or steam escape before you remove
or replace food in the oven.
• Keep oven vent ducts unobstructed. T
ouching
surfaces in this area when the oven is on may cause
severe burns. Do not place plastic or heat-sensitive
items on or near the oven vent. These items can
melt or ignite.
• Placement of oven racks - Always place oven racks
in desired location while oven is cool. If rack must
12
be moved while oven is hot, do not let potholder
contact hot burner or element in oven. Use
potholders and grasp the rack with both hands to
reposition. Remove all cookware and utensils
before moving the rack. Do not use a broiler pan
without its insert. Broiler pans and inserts allow
dripping fat to drain away from the high heat of the
broiler. Do not cover the broiler insert with aluminum
• Do not cook food on the oven bottom. Always
cook in proper cookware and always use the oven
racks.
1.6 CLEANING YOUR APPLIANCE
CAUTION:
Before manually cleaning any part of
the appli-ance, be sure all controls are turned off
and the appliance, is cool. Cleaning a hot appliance
can cause burns.
• Clean the appliance regularly to keep all parts free
of grease that could catch fire. Do not allow
grease to accumulate. Greasy deposits in the fan
could catch fire.
• Always follow the manufacturer’s recommended
directions for use of kitchen cleaners and
aerosols. Be aware that excess residue from
cleaners and aerosols may ignite causing damage
and injury.
• Clean ventilating hoods frequently - Grease should
not be allowed to accumulate on hood or filter.
Follow the manufacturer’s instructions for cleaning
vent hoods.
•

13
1.7 SERVICE AND MAINTENANCE
• Do not repair or replace any part of the appliance
unless specifically recommended in the manuals. All
other servicing should be done only by a qualified
technician. This reduces the risk of personal injury
and damage to the appliance.
• Always contact your dealer, distributor, service
agent, or manufacturer about problems or condi-
tions you do not understand.
• Ask your dealer to recommend a qualified techni-
cian and an authorized repair service. Know how to
disconnect the power to the appliance at the circuit
breaker or fuse box in case of an emergency.
• Remove the oven door from any unused oven if it is
to be stored or discarded.
• Do not touch a hot oven light bulb with a damp cloth.
Doing so could cause the bulb to break. Handle
halogen lights (if equipped) with paper towels or soft
gloves. Disconnect the appliance or shut off the
power to the appliance before removing and
replacing the bulb.
14
2. INSTALLATION AND
PREPARATION FOR USE
IMPORTANT: Save for the local
electrical inspector's use.
WARNING : This appliance must be
installed by an authorised service
person or qualified technician,
according to the instructions in this guide
and in compliance with the current local
regulations.
• Incorrect installation may cause harm
and damage, for which the manufacturer
accepts no responsibility and the
warranty will not be valid.
• Prior to installation, ensure that the local
distribution conditions (electricity voltage
and frequency and/or nature of the gas
and gas pressure) and the adjustments
of the appliance are compatible. The
adjustment conditions for this appliance
are stated on the label.
• The laws, ordinances, directives and
standards in force in the country of use
are to be followed (safety regulations,
proper recycling in accordance with the
regulations, etc.).
• If the product contains removable shelf
guides (wire racks) and the user manual
includes recipes like yoghurt, the wire
racks shall be removed and the oven
operated in the defined cooking mode.
Removal of the Wire Shelf information
is included in the CLEANING AND
MAINTENANCE section.
2.1
INSTRUCTIONS FOR ThE INSTALLER
General Instructions
• After removing the packaging material
from the appliance and its accessories,
ensure that the appliance is not
damaged. If you suspect any damage,
do not use it and contact an authorized
service person or qualified technician
immediately.
• Make sure that there are no flammable
or combustible materials in the close
vicinity, such as curtains, oil, cloth etc.
which may catch fire.
• The worktop and furniture surrounding
the appliance must be made of
materials resistant to temperatures
above 215°F.
•
• The appliance should not be installed
directly above a dishwasher, fridge,
freezer, washing machine or clothes
dryer
• The appliance can be placed close to
other furniture on condition that, in the
area where the appliance is set up, the
furniture’s height does not exceed the
height of the cooktop.
• To eliminate the risk of burns or fire
when reaching over hot surface
elements, cabinet storage space above
the cooktop should be avoided. If
cabinet storage space is to be provided
above cooktop, the risk can be reduced
by installing a range hood that protrudes
at least 5" (127 mm) beyond the front of
the cabinets. Cabinets installed above
a cooktop may be no deeper than 13"
(330 mm).
Installation of the Cooker
• If the kitchen furniture is higher than the
cooktop, the kitchen furniture must be
at least 10 cm away from the sides of
appliance for air circulation.
• If a cooker hood or cupboard is to be
installed above the appliance, the safety
distance between cooktop and any
cupboard/cooker hood should be as
shown below.
A (inch) Cupboard 16,5
B (inch) Cooker Hood 25,5
/27,5
C (inch) Product Width
D (inch) 1,9
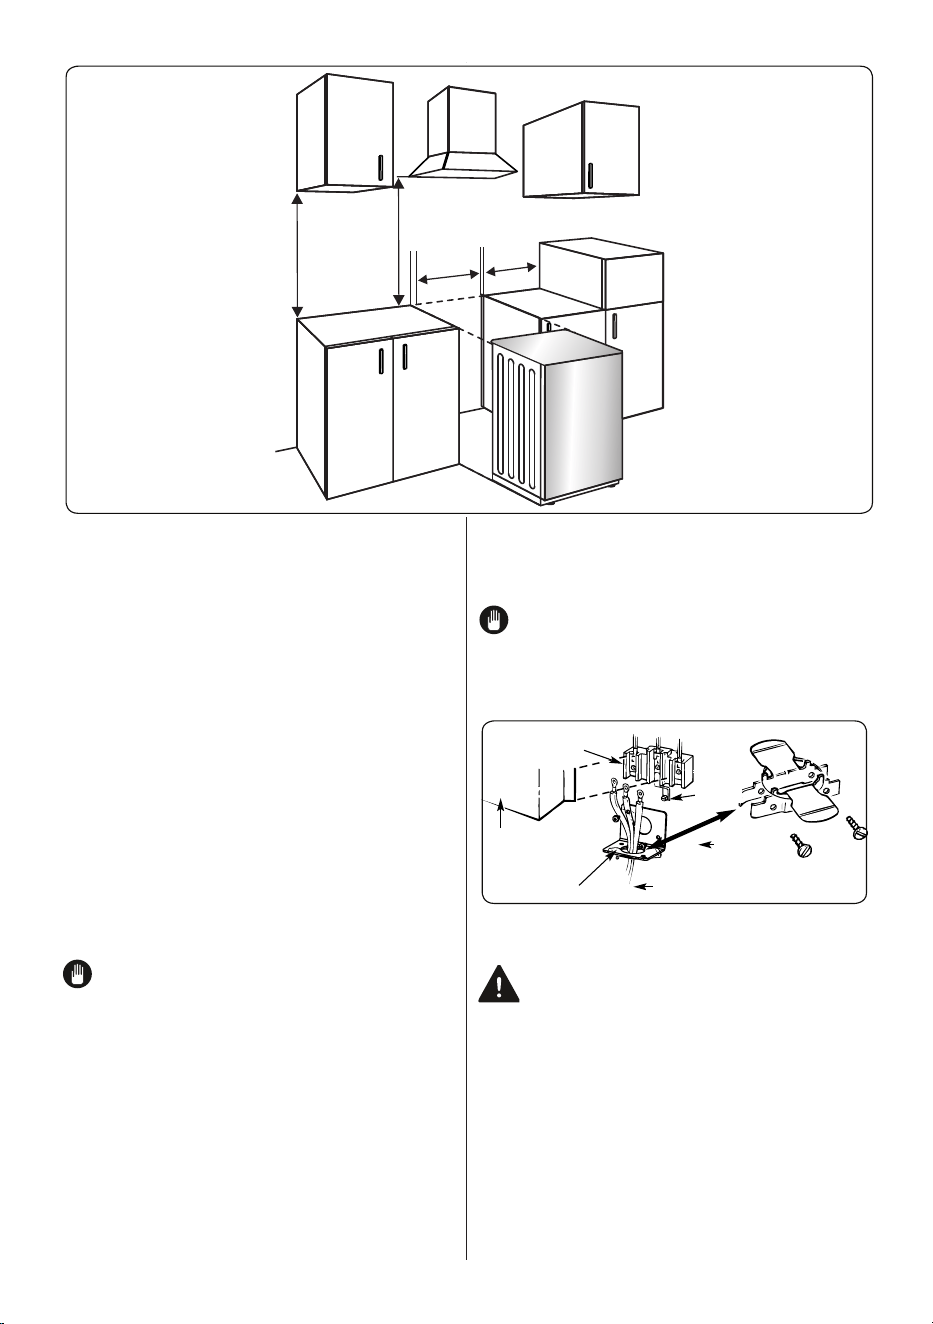
15
A
B
C
D
Prepare for Electrical Connection
• Effective January 1, 1996 the National
Electric Code requires that
new construction (not existing) utilize a
4-conductor connection to an electric range.
When installing an electric range in new
construction follow Steps 3 and 5 for 4-wire
connection.
• Use only a 3-conductor or a 4-conductor
UL-listed range cord. These cords may be
provided with ring terminals on wire and a
strain relief device.
• A range cord rated at 40 amps with
125/250 minimum volt range is required. A
50 amp range cord is not recommended but
if used, it should be marked for use with
nominal 13⁄8″ diameter connection
openings. Care should be taken to
center the cable and strain relief within the
knockout hole to keep the edge from
damaging the cable.
NOTE: A 4-conductor cord is to be used
when the appliance is installed in a mobile
home or when local codes do not permit
grounding through the neutral. If conduit is
being used, go to Step 6 or 7.
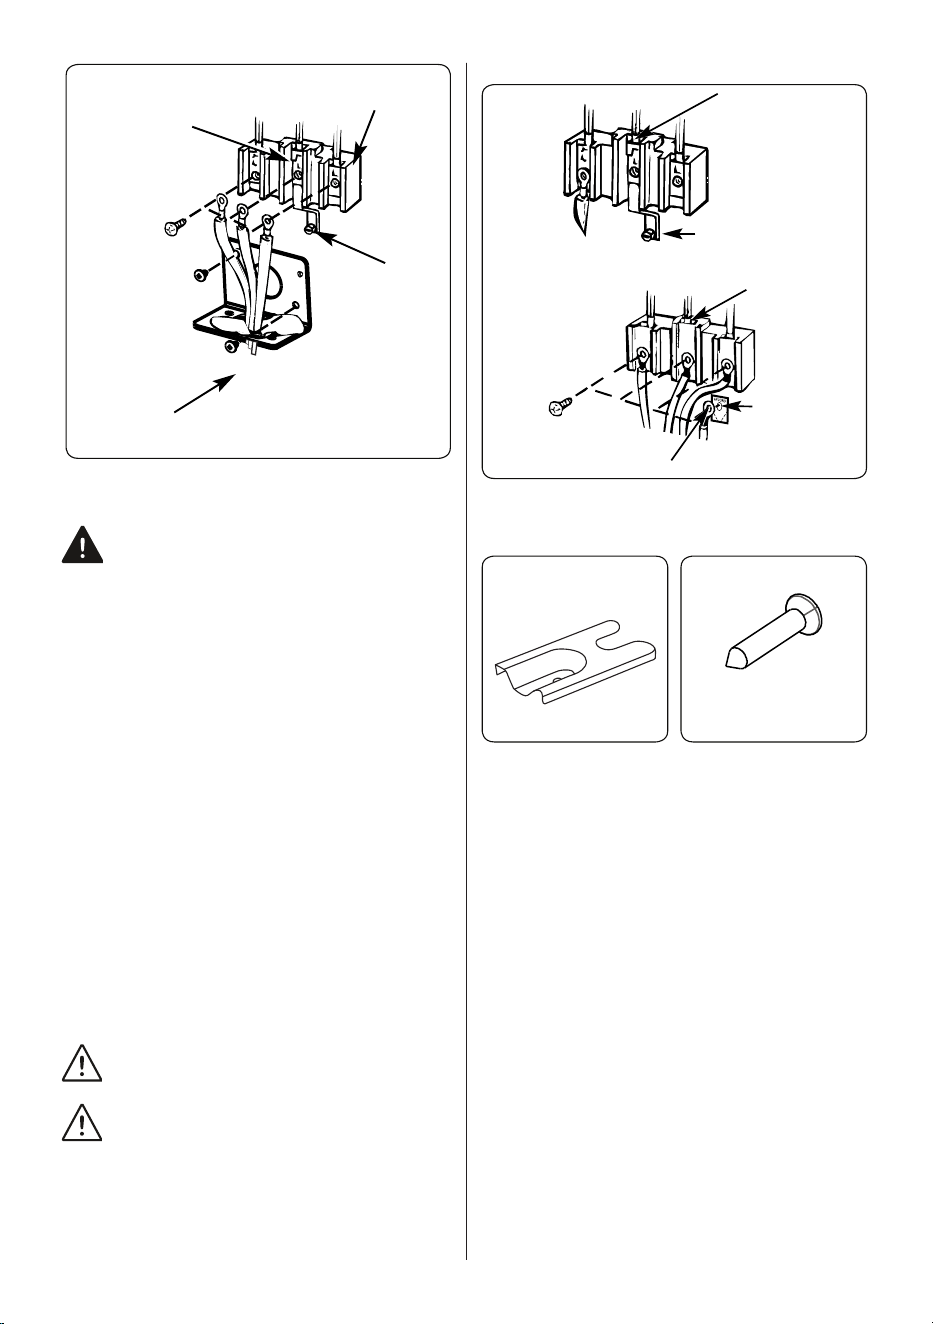
Power Cord Strain Relief Installation
• Only a 4-conductor power-supply cord kit
rated 240 volts, 40 amperes and marked
for use with ranges must be used.
• Assemble the strain relief in the hole.
Insert the power cord through the strain
relief and tighten. Allow enough slack to
easily attach
the cord terminals to the connector block.
If tabs are present at the end of the winged
strain relief, they can be removed for better
fit.
NOTE: Do not install the power
cord without a strain relief. The strain
relief bracket should be installed before
reinstalling the rear range wiring cover.
Connector box
Strain relief
Power cord
Bracket
Strain relief bracket
(Provided with range
cord. Not part of range.)
Ground
strap
Wiring cover
(shown
removed)
3-Wire Power Cord Installation
WARNING: The neutral or ground wire
of the power cord must be connected
to the neutral terminal located in the
center of the connector block. The power
leads must be connected to the outside
(brass colored) terminals.
• Remove the 3 wire terminal screws from
the connector block. Insert screws through
each power cord terminal ring and into the
connector block until the screws engage
the nuts. Be certain that the center wire
is connected to the center screw of the
connector block. Tighten screws securely.
• Do NOT remove ground strap
connection.
16
Neutral terminal
Connector block
Ground strap
Power cord
4-Wire Power Cord Installation
WARNING: The neutral wire of the
supply circuit
is connected to the neutral terminal
located in the center of the
connector block. The power leads must be
connected to the outside (brass colored)
terminals. The 4th grounding lead must be
connected to the frame of the range with
the grounding plate and grounding screw.
a) Remove the 3 screws from the connector
block.
b) Remove the grounding screw and strap
from the connector block middle location
and the screw connection to the frame of
the range.
c) Insert screws through each power cord
terminal ring and into connector block until
screw engages nut. Be certain that the
center wire is connected to the center screw
of the connector block. Tighten screws
securely.
d) Attach ground wire to the frame of the
range.
CAUTION: The product label is on the
front of the oven
CAUTION: Risk of Electric Shock. If
the cord or plug becomes damaged,
disconnect the appliance from the power
supply and replace only with a cord or plug
of the same type.
EN - 18
Remove the 3 wre termnal screws from the
connector block. Insert screws through each
power cord termnal rng and nto the connector
block untl the screws engage the nuts. Be
certan that the center wre s connected to the
center screw of the connector block. Tghten
screws securely.
Do NOT remove ground strap connecton.
Neutral termnal
Connector block
Ground strap
Power cord
4-Wre Power Cord Installaton
WARNING: The neutral wre of the supply
crcut
s connected to the neutral termnal located n
the center of the
connector block. The power leads must be
connected to the outsde
(brass colored) termnals. The 4th groundng
lead must be connected to the frame of the
range wth the groundng plate and groundng
screw.
a) Remove the 3 screws from the
connector block.
b) Remove the groundng screw and
strap from the connector block mddle
locaton and the screw connecton to
the frame of the range.
c) Insert screws through each power
cord termnal rng and nto connector
block untl screw engages nut. Be
certan that the center wre s
connected to the center screw of the
connector block. Tghten screws
securely.
d) Attach ground wre to the frame of the
range.
The product label s on the front of the oven
Neutral terminal
Neutral terminal
Grounding
plate
Grounding to range
Ground Strap
(grounding to range)
Before
After
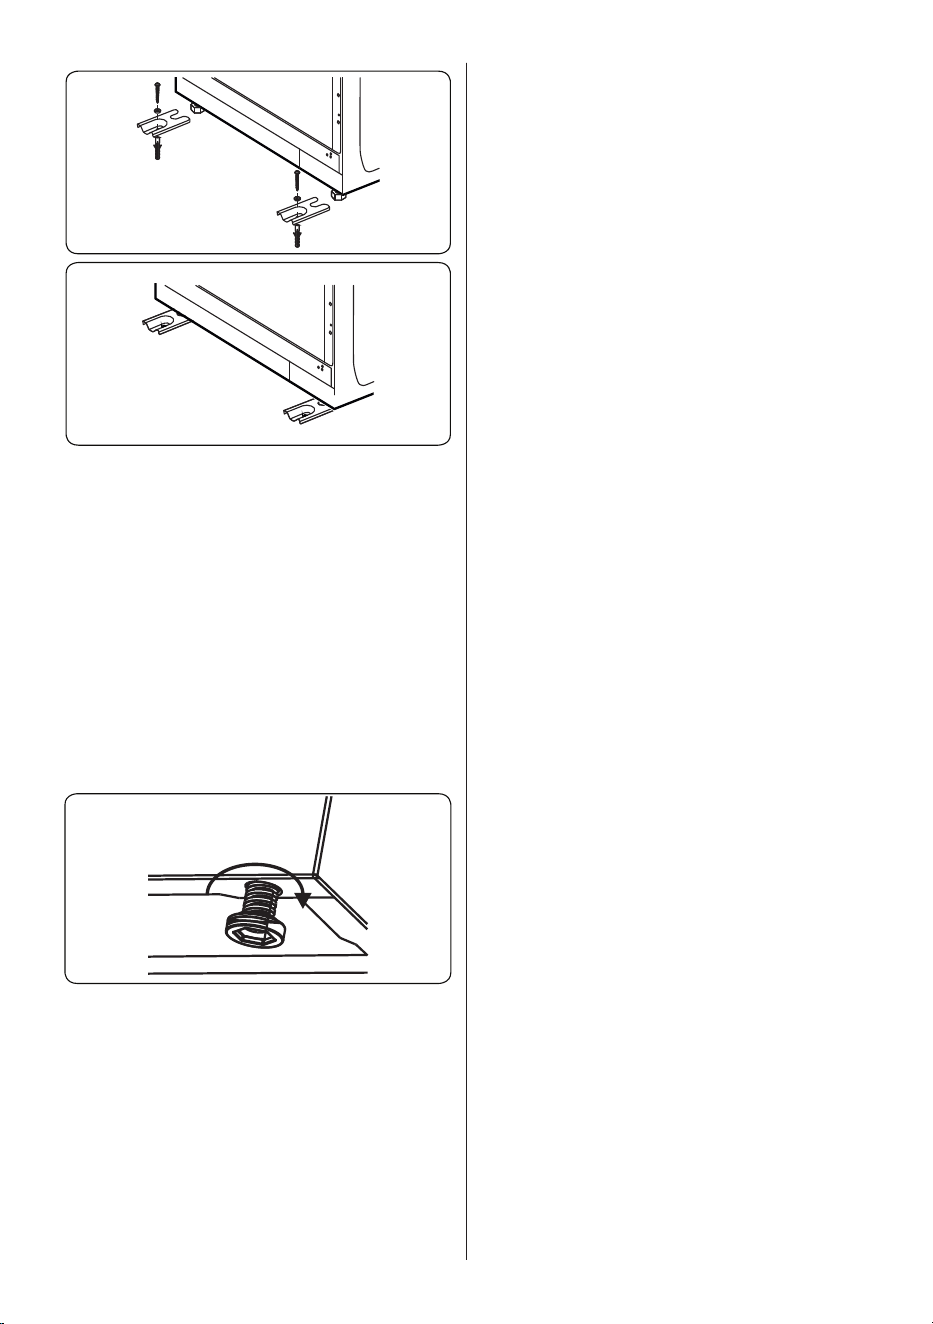
2.2 ANTI-TILTING KIT
1 2
The document bag contains an anti-tilting
kit. Loosely attach the anti-tilting bracket (1)
to the ground using the screw (2) and wall
plug (3) as shown in the figure below. Push
the appliance towards the bracket making
sure that the anti-tilting bracket is inserted
into the foot on the appliance.
17
2.3 ADjUSTING ThE FEET
• Your product stands on four adjustable
feet. For safe operation, it is important that
your appliance is correctly balanced. Make
sure the appliance is level prior to cooking.
To increase the height of the appliance,
turn the feet counterclockwise. To
decrease the height of the appliance, turn
the feet clockwise.
• It is possible to raise the height of the
appliance up to 30 mm by adjusting the
feet. The appliance is heavy and we
recommend that a minimum of 2 people
lift it. Never drag the appliance.

18
3. PRODUCT FEATURES
Important: Specifications for the product vary and the appearance of your appliance
may differ from that shown in the figures below.
List of Components
1
2
3
4
5
1. Cooktop
2. Control Panel
3. Oven Door Handle
4. Oven Door
5. Adjustable Feet
Control Panel
6. Timer
7. Oven Function Control Knob
8. Oven Thermostat Knob
9. Hob Control Knob
10.Button (Sabbath Mode)
7
8
6 9
10
19
4. USE OF PRODUCT
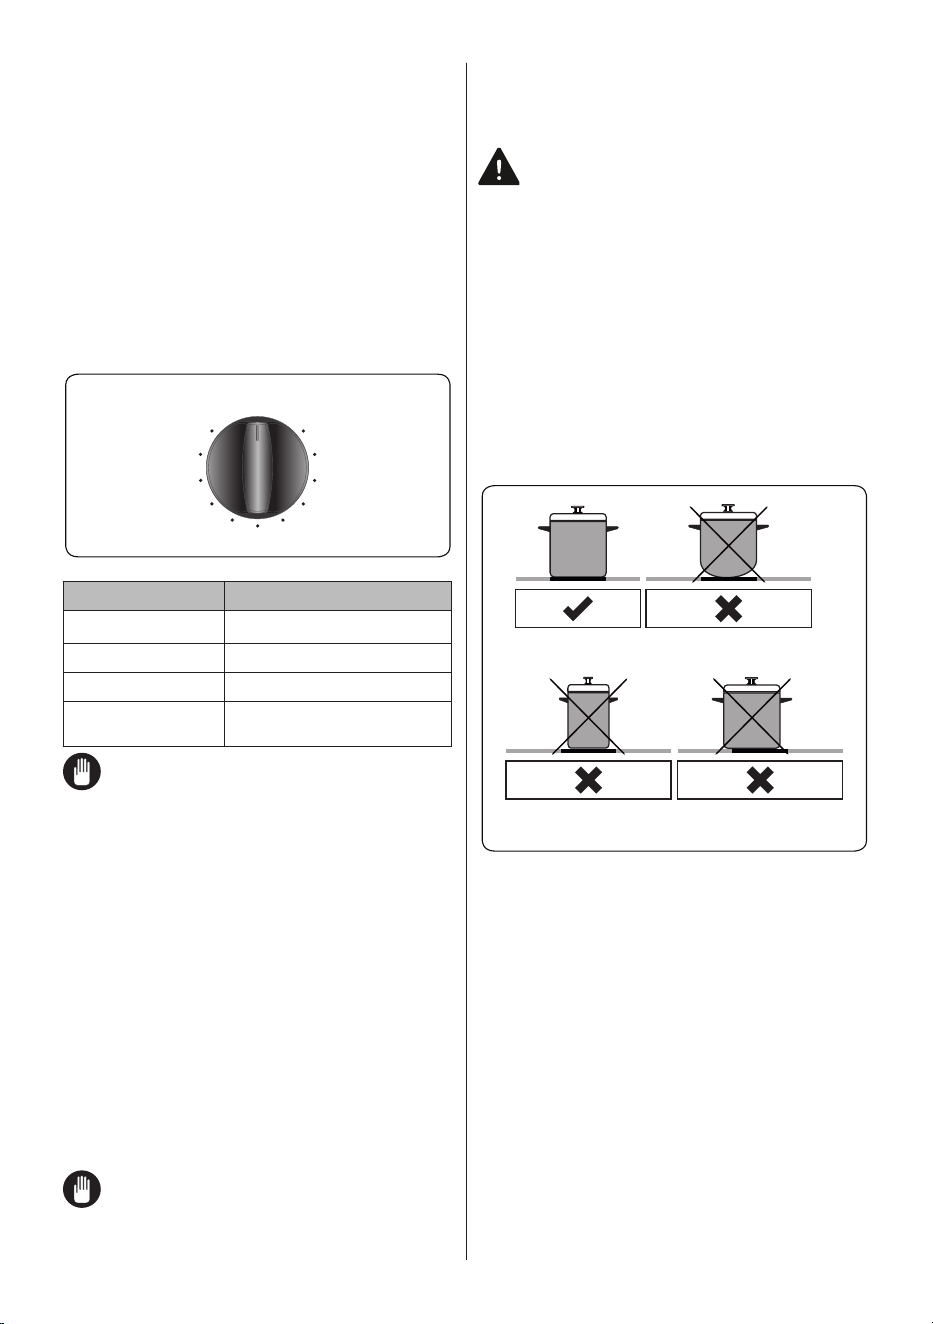
4.1 hOb CONTROLS
Ceramic Heater
• The ceramic heater is controlled by a 6
position knob.
• The ceramic heater is operated by
turning the control knob to the required
setting. Near each control knob is a
symbol which indicates the heater that is
controlled by that knob. The on/off light
on the control panel will show if any of
the ceramic heaters are in use.
3
OFF
LOHI
5
7
9
Knob Position Function
0
Off position
LO Keep warm position
3-5 Heating position at low heat
7-9 HI
Cooking, roasting and boiling
position
Important: The knob rotation
direction may differ according to the
product specification.
Residual Heat Indicator (if available)
• After using the hob there will be heat
stored in the vitroceramic glass called
residual heat. If the residual heat level is
greater than +140ºF, the residual heat
indicator will be active for the cooking zone
which is above this temperature.
• If the power supply to the hob is
disconnected while the residual heat
indicator is on, the warning light will flash
when the power is reconnected. The
display will flash until the residual heat has
decreased or until one of the cooking zones
is activated.
Hints and Tips
Important: When ceramic heaters are
operated in higher heat settings, the
heated areas may be seen switching
on and off. This is due to a safety device
which prevents the glass from overheating.
This is normal at high temperatures,
causing no damage to the hob and little
delay in cooking times.
WARNING:
• Never operate the hob without
pans on the cooking zone.
• Use only flat saucepans with a
sufficiently thick base.
• Make sure the bottom of the pan is dry
before placing it on the hob.
• While the cooking zone is in operation,
it is important to ensure that the pan is
centred correctly above the zone.
• In order to conserve energy, never use
a pan with a different diameter to the
hotplate being used.
Circular Saucepan
Base
Small Saucepan
Diameter
Saucepan Base
that has Not Settled
• Do not use pans with rough bottoms
since these can scratch the glass
ceramic surface.
• If possible, always place lids on the
pans.
• The temperature of accessible parts
may become high while the appliance is
operating. Keep children and animals
well away from the hob during operation
and until it has fully cooled after
operation.
• If you notice a crack on the cooktop,
it must be switched off immediately and
replaced by authorized service
personnel.

20
4.2 OVEN CONTROLS
Oven Function Control Knob
Turn the knob to the corresponding symbol
of the desired cooking function. For the
details of different functions see ´Oven
Functions`.
Oven Thermostat Knob
After selecting a cooking function, turn
this knob to set the desired temperature.
The oven thermostat light will illuminate
whenever the thermostat is in operation
to heat up the oven or maintain the
temperature.
Oven Functions
* The functions of your oven may be
different due to the model of your product.
Bake: The oven’s
thermostat and
warning lights will
switch on, and the
lower and upper
heating elements will
start operating. The
static cooking function
emits heat, ensuring even cooking of food.
This is ideal for making pastries, cakes,
baked pasta, lasagne and pizza. Preheating
the oven for 10 minutes is recommended
and it is best to use only one shelf at a time
in this function.
Broil Low: The oven’s
thermostat and
warning lights will
switch on, and the grill
heating element will
start operating. This
function is used for
grilling and toasting food on the upper
shelves of the oven. Lightly brush the wire
grid with oil to stop food sticking and place
food in the centre of the grid. Always place
a tray beneath the food to catch any drips
of oil or fat. It is recommended that you
preheat the oven for about 10 minutes.
Broil High: The oven’s
thermostat and
warning lights will
switch on, and the grill
and upper heating
elements will start
operating. This function
is used for faster grilling and for grilling food
with a larger surface area, such as meat.
Use the upper shelves of the oven. Lightly
brush the wire grid with oil to stop food
sticking and place food in the centre of the
grid. Always place a tray beneath the food
to catch any drips of oil or fat. It is
recommended that you preheat the oven for
about 10 minutes.
21
4.3 SLOW COOKING ChART
Red Meat Portion of Food Low Temperature (200 °F)
Beef Brisket 1800-2200 g 8-10 Hour
Beef Shank 1000-1500 g 7-8 Hour
Asado Beef Ribs 1350-1800 g 8-9 Hour
Bone-in Lamb Rump 2000 g 6-8 Hour
Lamb Shank 1350- 1800 g 6-8 Hour
Lamb Chops 1350- 1800 g 4-6 Hour
Poultry meat
Whole Chicken 1350- 1800 g 4-5 Hour
Chicken Breast 900-1200 g 2-3 Hour
Bone-in Chicken Rump 1350- 1800 g 4-5 Hour
Duck Breast 900-1200 g 6-8 Hour
Whole Duck 1800-2200 g 8-10 Hour
Seafood
Salmon 600-900 g 1 Hour
Flounder 600-900 g 1 Hour
Vegetables
Artichoke Unsliced 4-5 Hour
Broccoli Sliced 2-3 Hour
Cauliflower Sliced 4-5 Hour
Zucchini Sliced 4-5 Hour
Sweet Patato Unsliced 6-8 Hour
Legumes
Chickpeas 10-12 Hour
Beans 10-12 Hour
Shell Beans 10-12 Hour
Kinoa 2-3 Hour
Cooking times may vary depending on the slow cooking equipment used.
22
4.4 USE OF ThE MEChANICAL TIMER
Function Description
M Manual operation
0..........100 Operating by adjusting the
timer
Manual operation
When you set the timer button to the “M”
position, you will be able to continuously run
your oven. When you set the timer button to
the “0” position, the oven will not operate.
Operating by adjusting the timer
Set the desired cooking time by turning the
timer knob to between 0 and 100 minutes.
When the timer reaches zero, the oven
will automatically switch off and an audible
warning will sound.
4.5
ACCESSORIES
The EasyFix Wire Rack
Clean the accessories thoroughly with
warm water, detergent and a soft clean
cloth on first use.
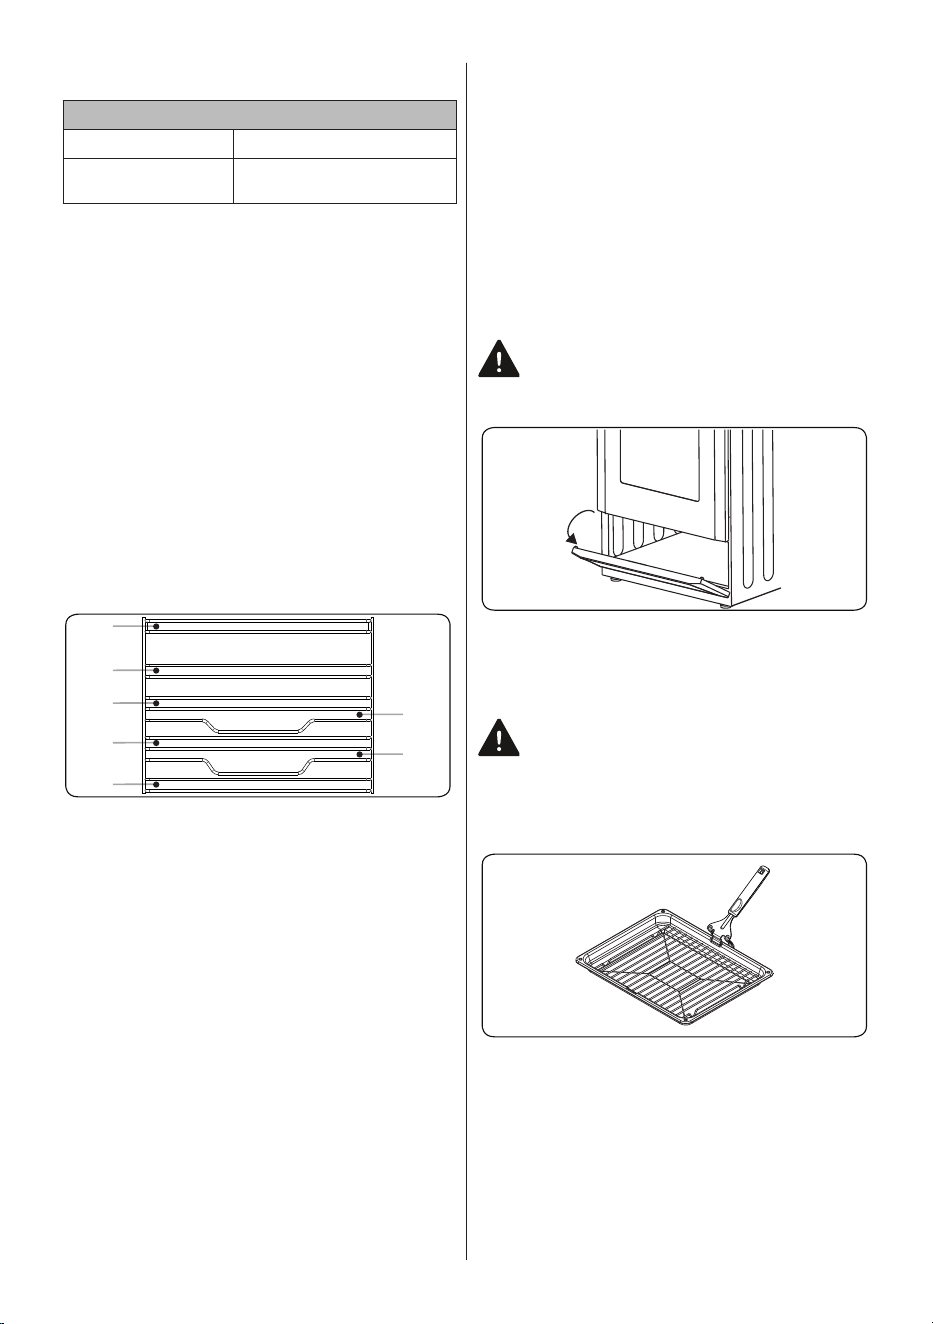
T2
5
4
3
2
1
T1
• Insert the accessory to the correct
position inside the oven.
• Allow at least a 1 cm space between the
fan cover and accessories.
• Take care removing cookware and/or
accessories out of the oven. Hot meals
or accessories can cause burns.
• The accessories may deform with heat.
Once they have cooled down, they will
recover their original appearance and
performance.
• Trays and wire grids can be positioned
on any level from 1 to 5.
• Telescopic rails can be positioned on
levels T1, T2, 3, 4, 5.
• Level 3 is recommended for single level
cooking.
• Level T2 is recommended for single
level cooking with the telescopic rails.
• The turnspit wire grid must be
positioned on Level 3.
• Level T2 is used for the turnspit wire
grid positioning with telescopic rails.
****Accessories may vary depending on the
model purchased.
The Flap Drawer
Your appliance includes a drawer for storing
accessories such as trays, shelves, grids,
or small pots and pans.
WARNING: The inner surface of the
drawer may become hot during use.
Do not store any food, plastic or
flammable materials in the drawer.
The Broil Pan and Handle Set
The broil pan set is best used for broiling
steaks and similar foods.
WARNING: The broil pan has a
detachable handle. Make sure when
using the broil pan handle that it is
centralized and secure, as shown in the
figure. Do not leave the handle in
position while broiling is in operation.
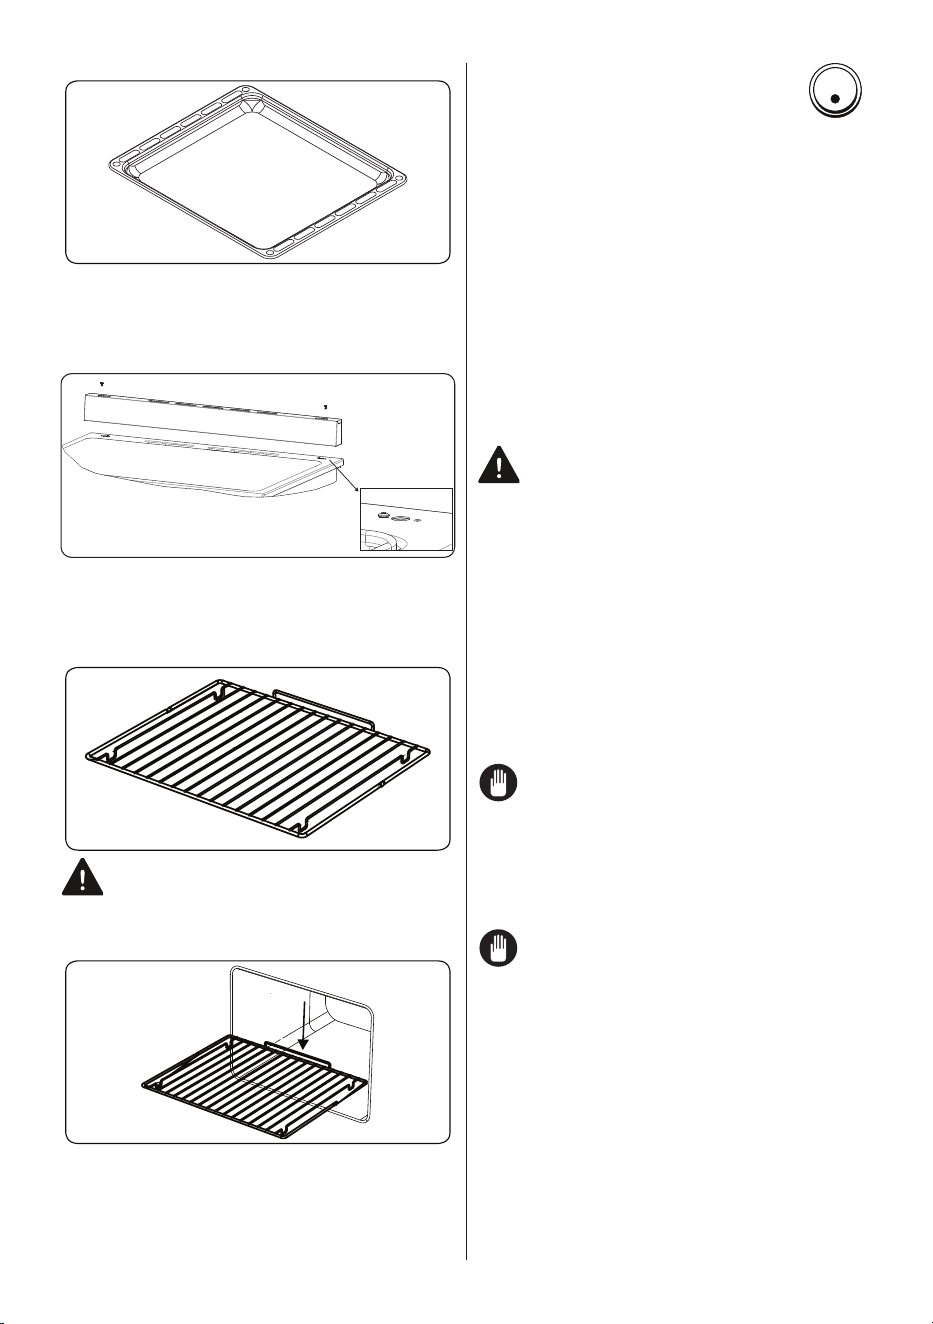
The Shallow Tray
• The shallow tray is best used for baking
pastries.
• Put the tray into any rack and push it to
the end to make sure it is correctly placed.
23
The Splashback
The splashback is attached to the cooktop
with two screws.
The Wire Grid
The wire grid is best used for grilling or for
processing food in oven-friendly containers.
WARNING
Place the grid to any corresponding
rack in the oven cavity correctly and push it
to the end.
Sabbath Function
SABBATH
The Sabbath function is designed
for use during sacred Sabbath
days. There is one Sabbath heating
element in the oven cavity.This function is
controlled using the Sabbath buttons on the
control panel. When you start the Sabbath
function, the relevant button will illuminate
as a red light. When this function is in
operation, the central oven temperature will
be around 200 °F. The oven lamp will not be
operable when this function is in use.
5. CLEANING AND
MAINTENANCE
5.1 CLEANING
WARNING: Switch off the appliance
and allow it to cool before cleaning is
to be carried out.
General Instructions
• Check whether the cleaning materials
are appropriate and recommended by
the manufacturer before use on your
appliance.
• Use cream cleaners or liquid cleaners
that do not contain particles. Do not use
caustic (corrosive) creams, abrasive
cleaning powders, rough wire wool or
hard tools as they may damage the
cooker surfaces.
Do not use cleaners that contain
particles, as they may scratch the
glass, enamelled and/or painted parts
of your appliance.
• Should any liquids overflow, clean them
immediately to avoid parts becoming
damaged.
Do not use steam cleaners for
cleaning any part of the appliance.
Cleaning the Inside of the Oven
• The inside of enamelled ovens are best
cleaned while the oven is warm.
• Wipe the oven with a soft cloth soaked
in soapy water after each use. Then,
wipe the oven over again with a wet
cloth and dry it.
• You may need to use a liquid cleaning
material occasionally to completely
clean the oven.
24
Cleaning the Ceramic Glass
Ceramic glass can hold heavy utensils but
may be broken if it is hit with a sharp object.
WARNING : Ceramic Cooktops - if the
surface is cracked, to avoid the
possibility of an electric shock, switch
off the appliance and call for service.
• Use a cream or liquid cleaner to clean
the vitroceramic glass. Then, rinse and
dry the glass thoroughly with a dry cloth.
Do not use cleaning materials meant
for steel as they may damage the
glass.
• If substances with a low melting point
are used in the cookware’s base or
coatings, they can damage the glass-
ceramic cooktop.If plastic, tin foil, sugar
or sugary foods have fallen on the hot
glass-ceramic cooktop, please scrape it
off the hot surface as quickly and as
safely as possible. If these substances
melt, they can damage the glass-
ceramic cooktop. When you cook very
sugary items like jam, apply a layer of a
suitable protective agent beforehand if it
is possible.
• Dust on the surface must be cleaned
with a wet cloth.
• Any changes in color to the ceramic
glass will not affect the structure or
durability of the ceramic and is not due
to a change in the material.
Color changes to the ceramic glass may
be for a number of reasons:
1. Spilt food has not been cleaned off the
surface.
2. Using incorrect dishes on the hob will
erode the surface.
3. Using the wrong cleaning materials.
Cleaning the Glass Parts
• Clean the glass parts of your appliance
on a regular basis.
• Use a glass cleaner to clean the inside
and outside of the glass parts. Then,
rinse and dry them thoroughly with a dry
cloth.
Cleaning the Enamelled Parts
• Clean the enamelled parts of your
appliance on a regular basis.
• Wipe the enamelled parts with a soft
cloth soaked in soapy water. Then,
wipe them over again with a wet cloth
and dry them.
Do not clean the enamelled parts while
they are still hot from cooking.
Do not leave vinegar, coffee, milk, salt,
water, lemon or tomato juice on the
enamel for a long time.
Cleaning the Stainless Steel Parts (if
available)
• Clean the stainless steel parts of your
appliance on a regular basis.
• Wipe the stainless steel parts with a soft
cloth soaked in only water. Then, dry
them thoroughly with a dry cloth.
Do not clean the stainless steel parts
while they are still hot from cooking.
Do not leave vinegar, coffee, milk, salt,
water, lemon or tomato juice on the
stainless steel for a long time.
Cleaning Painted Surfaces (if available)
• Spots of tomato, tomato paste, ketchup,
lemon, oil derivatives, milk, sugary
foods, sugary drinks and coffee should
be cleaned with a cloth dipped in warm
water immediately. If these stains are
not cleaned and allowed to dry on the
surfaces they are on, they should NOT
be rubbed with hard objects (pointed
objects, steel and plastic scouring wires,
surface-damaging dish sponge) or
cleaning agents containing high levels of
alcohol, stain removers, degreasers,
surface abrasive chemicals. Otherwise,
corrosion may occur on the powder
painted surfaces, and stains may occur.
25
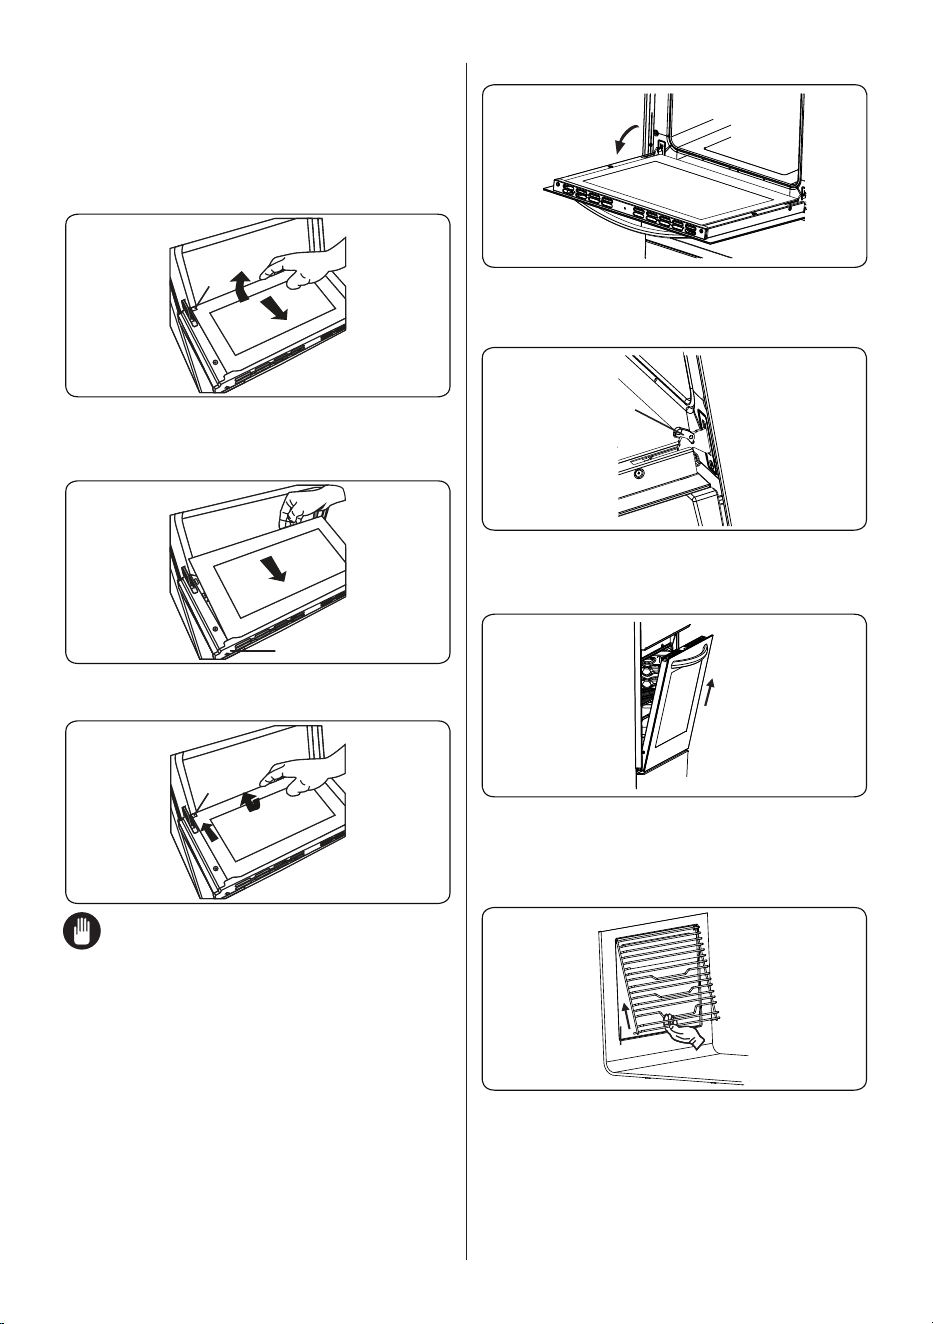
Removal of the Inner Glass
You must remove the oven door glass
before cleaning, as shown below.
1. Push the glass in the direction of B and
release from the location bracket (x). Pull
the glass out in the direction of A.
x
A
B
To replace the inner glass:
2. Push the glass towards and under the
location bracket (y), in the direction of B.
y
B
3. Place the glass under the location
bracket (x) in the direction of C.
x
C
If the oven door is a triple glass oven
door, the third glass layer can be
removed the same way as the second
glass layer.
Removal of the Oven Door
Before cleaning the oven door glass, you
must remove the oven door, as shown
below.
1. Open the oven door.
2. Open the locking catch (a) (with the aid
of a screwdriver) up to the end position.
a
3. Close the door until it almost reaches the
fully closed position and remove the door
by pulling it towards you.
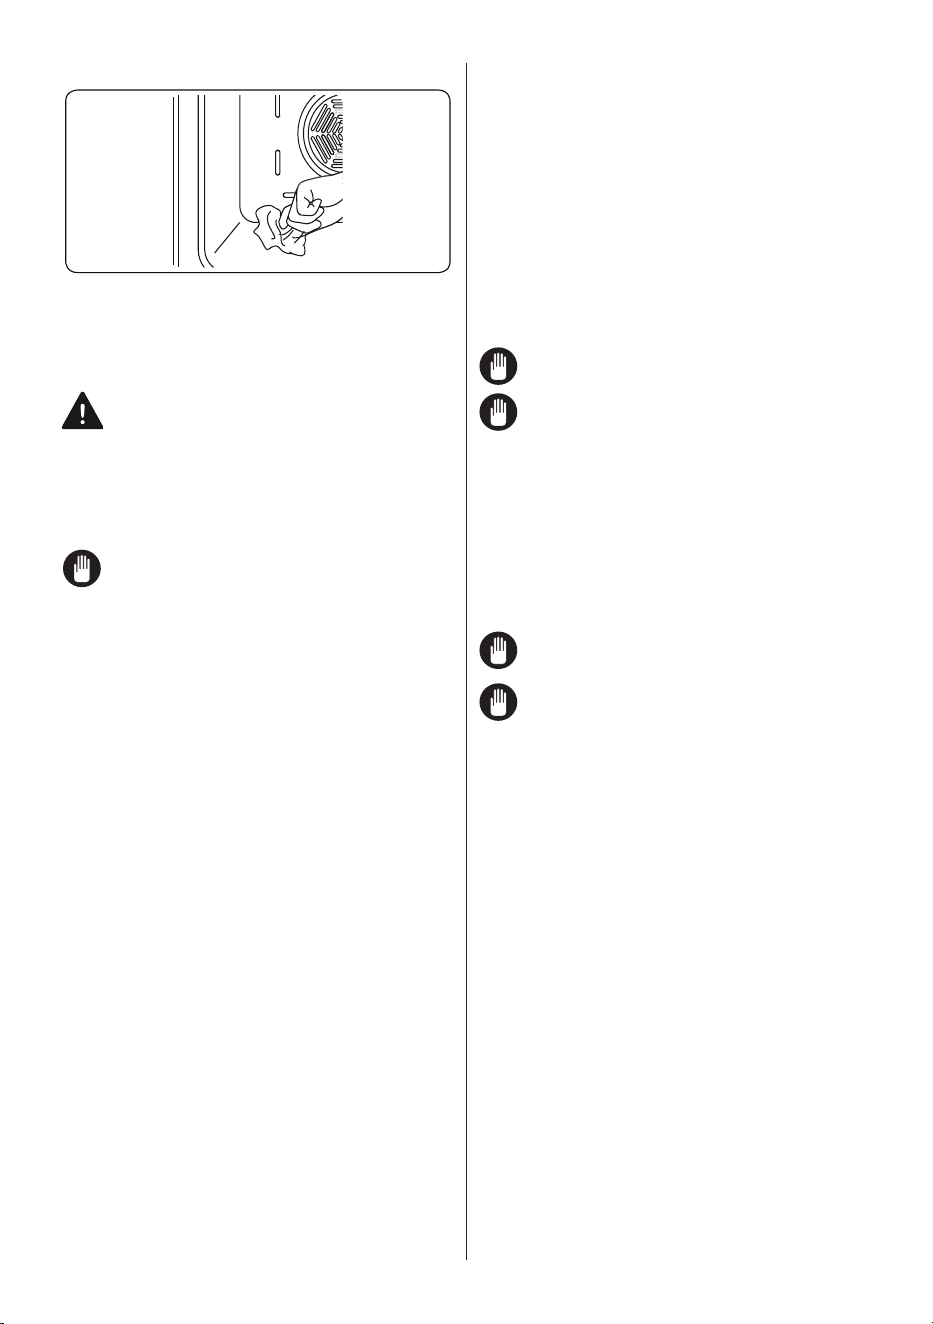
Removal of the Wire Shelf
To remove the wire rack, pull the wire rack
as shown in the figure. After releasing it
from the clips (a), lift it up.
a

26
5.2 MAINTENANCE
WARNING: The maintenance of this
appliance should be carried out by an
authorized service person or qualified
technician only.
Changing the Oven Lamp
WARNING: Switch off the appliance
and allow it to cool before cleaning
your appliance.
• Remove the glass lens, then remove the
bulb.
• Insert the new bulb (resistant to 600°F)
to replace the bulb that you removed
(240 V, 15-25 Watt, Type E14).
• Replace the glass lens, and your oven
is ready for use.
• The product contains a light source of
energy efficiency class G.
• Light source can not be replaced by end
user. After sales service is needed.
• The included light source is not intended
for use in other applications.
Replaceable light source by a
professional
The lamp is designed specifically for
use in household cooking appliances.
It is not suitable for household room
illumination.
27
6. TROUBLESHOOTING & TRANSPORT
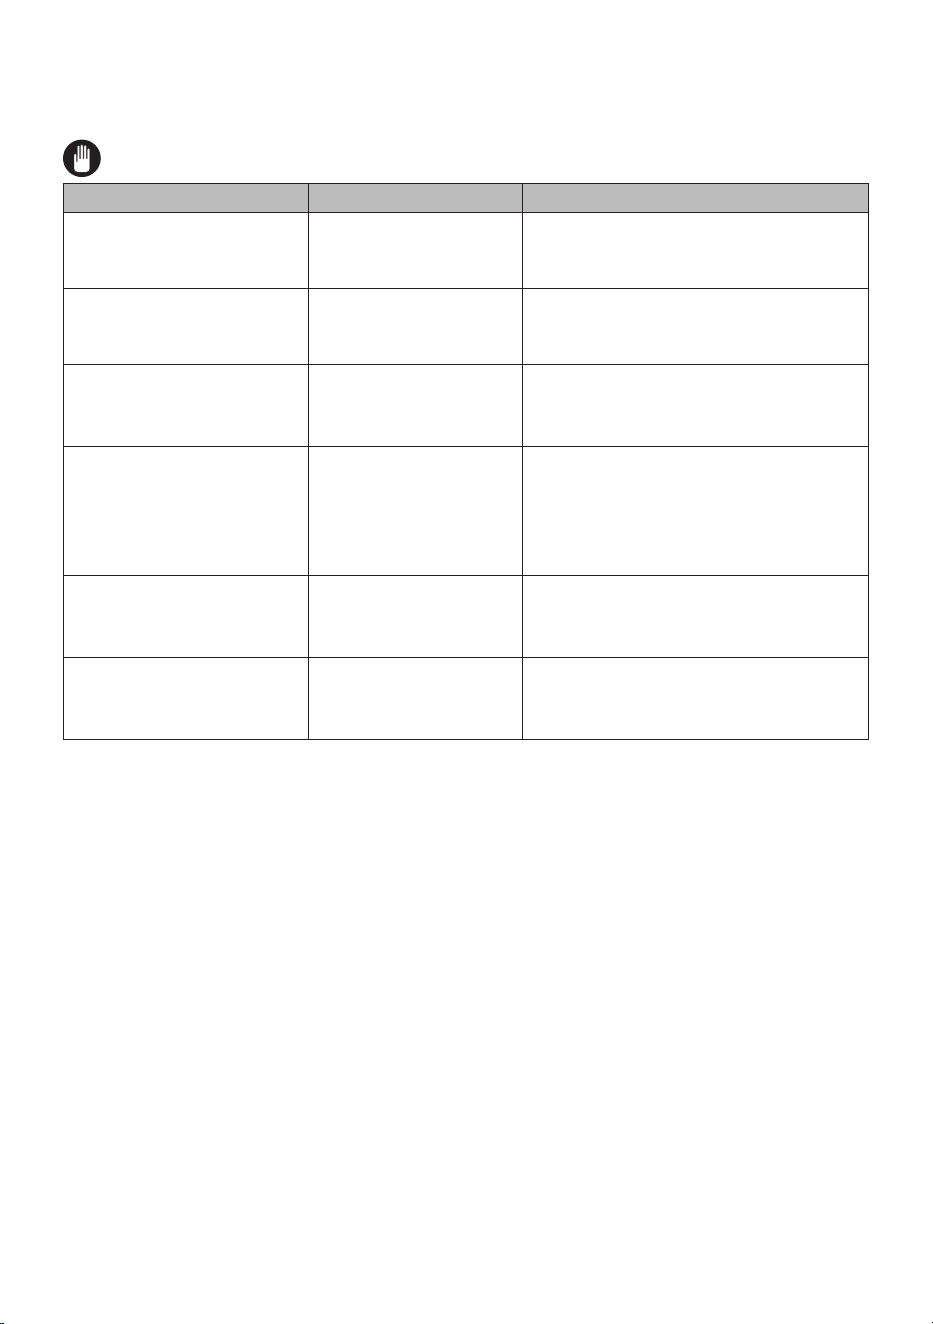
6.1 TROUbLEShOOTING
If you still have a problem with your appliance after checking these basic troubleshooting
steps, please contact an authorised service person or qualified technician.
Problem Possible Cause Solution
The hob or cooking zones
cannot be switched on.
There is no power supply.
Check the household fuse for the appliance.
Check whether there is a power cut by trying
other electronic appliances.
Oven does not switch on. Power is switched off.
Check whether there is power supplied.
Also check that other kitchen appliances are
working.
No heat or oven does not warm
up.
Oven temperature control is
incorrectly set.
Oven door has been left
open.
Check that the oven temperature control knob
is set correctly.
Cooking is uneven within the
oven.
Oven shelves are incorrectly
positioned.
Check that the recommended temperatures
and shelf positions are being used.
Do not frequently open the door unless you are
cooking things that need to be turned. If you
open the door often, the interior temperature
will be lower and this may affect the results of
your cooking.
Oven light (if available) does not
operate.
Lamp has failed.
Electrical supply is
disconnected or switched
off.
Replace lamp according to the instructions.
Make sure the electrical supply is switched on
at the wall socket outlet.
The oven fan (if available) is
noisy.
Oven shelves are vibrating.
Check that the oven is level.
Check that the shelves and any bake ware are
not vibrating or in contact with the oven back
panel.
6.2 TRANSPORT
• If you need to transport the product, use the original product packaging and carry it using
its original case. Follow the transport signs on the packaging. Tape all independent parts to
the product to prevent damaging the product during transport.
• If you do not have the original packaging, prepare a carriage box so that the appliance,
especially the external surfaces of the product, is protected against external threats.

Element Appliance Limited Warranty
(the “Products” or “Product” when referencing a singular product herein)
This Product (including any accessories included in the original packaging) as supplied and distributed in
new condition, is warranted by Element Appliance Company, LLC ("Element") to the original customer
who purchases the Product from an authorized Element retailer (the “Original Customer” or “you”)
against defects in material and workmanship under proper use, maintenance, and care according to the
owner’s manual, warnings, and instructions accompanying the Product (“Warranty”) as follows:
* PLEASE NOTE – Proof of purchase evidencing the date of purchase by the Original Purchaser from an
authorized Element retailer (“Valid Proof of Purchase”) is required for all Warranty service. The express
Warranty set forth herein is subject to all terms and conditions set forth below.
1. WARRANTY SERVICE:
A. ONE-YEAR WARRANTY: Except as provided in subpart 1.B below, for a period of one (1)
year from the date of purchase by the Original Customer (the “Warranty Period”), if the parts or
components covered by this Warranty are determined by Element or Element’s authorized service
provider to be defective in material or workmanship, Element will, at its sole and absolute discretion and
option: (i) repair the defective part or component at no charge to the Original Customer, (ii) replace the
defective Product with a new Product of similar or better quality, at no charge to the Original Customer,
or (iii) refund the documented purchase price paid by the Original Customer (excluding tax) to the Original
Customer upon return of the defective Product as directed by Element. After the Warranty Period expires,
the Original Customer must pay for all parts, components, shipping and handling, labor, and replacement
costs associated with the Product or any part or component thereof, regardless of any defects in the
Product or any part or component thereof.
B. LIMITED EXTENDED WARRANTY THROUGH PRODUCT REGISTRATION: If and only if the
Original Customer registers the Product at www.elementelectronics.com within ninety (90) days of the
date of purchase by the Original Customer, then the Warranty Period discussed in subpart 1.A. above shall
be extended an additional one (1) year to a new Warranty Period equaling two (2) years from the date of
purchase by the Original Customer. If the Product is not registered as provided for in this subpart 1.B,
then the standard one-year Warranty Period set forth in subpart 1.A shall apply.
C. TIMING AND PROCEDURE: Before Warranty service can commence, the Original
Customer must contact either (i) the retailer from whom the Original Customer purchased the Product,
or (ii) Element directly, in either case for problem determination and service procedures. Valid Proof of
Purchase evidencing that the Product is within the Warranty Period MUST be presented by Original
Customer in order to obtain the requested Warranty service. Please have your model and serial number
available, along with your date of purchase of the Product. To remain eligible for Warranty service,
Original Customer may not return the Product or any part or component thereof to the retailer or Element
without Element’s prior written consent.
28

2. EXCLUSIONS AND LIMITATIONS TO WARRANTY SERVICE
The Warranty covers manufacturing defects in materials and workmanship of the Product encountered in
the normal, non-commercial use of the Product, and does not cover (a) damages or malfunctions resulting
from improper or unreasonable use or maintenance, abuse, negligence, failure to follow instructions
contained in any written materials that accompany the Product, deterioration by reason of excess
moisture, corrosive atmosphere, lightning, power surges, connections to improper voltage supply,
unauthorized alteration, or other external causes such as extremes in temperature or humidity,
modifications, scratches or discoloration; (b) any damage caused by using non-authorized parts or service
facilities for repair of Products (however, for avoidance of doubt, using non-authorized parts or service
facilities will not, in and of itself, void the Warranty); (c) transportation, shipping, delivery, pickup,
insurance, installation, or set-up costs; (d) ordinary wear and tear, cosmetic damage, or damage due to
acts of nature, including but not limited to, water, floods, wind, storm, tornado, earthquake, or fire, or
due to damage caused by extraordinary impact events, such as dropping, crushing, demolition or other
extraordinary damage; (e) commercial use of the Product, or use of the Product for anything other than
single-family household or residential use; or (f) modification of the Product or any part of the Product.
This Warranty is made to the Original Customer only and does not cover Products sold AS IS or WITH ALL
FAULTS. The Warranty is invalid if the factory-applied serial number has been altered or removed from
the Product. This Warranty is valid only in the United States, and only applies to Product if it was purchased
and serviced in the United States. The addition of equipment or features to the Product that are not
manufactured or recommended by Element could affect the intended function of the Product, and
therefore may void the Warranty. Furthermore, the exposure of the Product to chemicals, heat, cold,
humidity, or other elements can affect the Product components, and therefore, the Warranty does not
cover discoloration, fading, cosmetic changes, rust, or any damages or failure related to any such items.
The Warranty is contingent upon the proper use, maintenance, and care of the Product. The Warranty
may be void if the Product has been used in a manner contradictory to, or in violation of, the terms of the
user’s manual, warnings, or instructions accompanying the Product.
THIS WARRANTY IS MADE IN LIEU OF AND SUPERSEDES ALL OTHER WARRANTIES OR CONDITIONS OF
MERCHANTABILITY OR FITNESS FOR A PARTICULAR PURPOSE OR GENERAL USE, WHETHER EXPRESS,
IMPLIED, COLLATERAL, STATUTORY, OR PROVIDED BY COMMON LAW, THE UNIFORM COMMERCIAL
CODE, OR OTHERWISE. ELEMENT FURTHER DISCLAIMS ALL WARRANTIES AFTER THE END OF THE
WARRANTY TERM DEFINED ABOVE. NO OTHER EXPRESS WARRANTY OR GUARANTY GIVEN BY ANY
OTHER PERSON, FIRM, OR ENTITY WITH RESPECT TO THE PRODUCT SHALL BE BINDING ON ELEMENT.
REPAIR, REPLACEMENT, OR REFUND OF THE ORIGINAL PURCHASE PRICE, AT ELEMENT’S SOLE
DISCRETION, ARE THE EXCLUSIVE REMEDIES OF THE CUSTOMER.
ELEMENT SHALL NOT BE LIABLE FOR ANY INCIDENTAL OR CONSEQUENTIAL DAMAGES CAUSED BY THE
USE, MISUSE, OR INABILITY TO USE THE PRODUCT. THESE INCLUDE, BUT ARE NOT LIMITED TO, ANY
DAMAGES IN THE FORM OF LOST PROFITS, LOSS OF USE, LEGAL FEES, ECONOMIC LOSS, PERSONAL
INJURIES, OR ANY OTHER DAMAGES CAUSED BY CIRCUMSTANCES BEYOND THE CONTROL OF ELEMENT.
NOTWITHSTANDING THE FOREGOING, ELEMENT’S AGGREGATE LIABILITY TO ANY CUSTOMER SHALL
NOT EXCEED THE ORIGINAL PURCHASE PRICE OF THE PRODUCT. THIS WARRANTY SHALL NOT EXTEND
TO ANYONE OTHER THAN THE ORIGINAL CUSTOMER WHO PURCHASED THE PRODUCT, AND IS NOT
29

TRANSFERRABLE. NO PERSON IS AUTHORIZED TO ALTER, EXTEND, OR WAIVE THIS WARRANTY OR ANY
OF ITS TERMS OR CONDITIONS.
Some states do not allow the exclusion or limitation of incidental or consequential damages, or allow
limitations on warranties, so the above limitations or exclusions may not apply to you. This Warranty gives
you specific rights, and you may have other rights, which vary from state to state. The exclusions and
limitations to the Warranty apply to the maximum extent permitted by law and unless restricted or
prohibited by law. Where any term of this Warranty is prohibited by applicable law, it shall be null and
void, but the remainder of this Warranty shall remain in effect.
PLEASE DIRECT ALL CORRESPONDENCE TO:
Element Appliance Company, LLC
customerservice@elementelectronics.com
(888) 842-3577
https://elementelectronics.com
30

Element Trademark & Disclaimers (for appliance cartons) - last update January 2024:
Element, the Element Logo, and Bring it home are trademarks of Element Brand Holding, LLC. All other
trademarks are the property of their respective owner, who has not sponsored, endorsed, or approved
this product. ©2024 Element Appliance Company, LLC. All rights reserved.
Distributed by Element Appliance Company, LLC
Augusta, GA 30909
For service, support and warranty information:
Call 888.842.3577, email us at customerservice@elementelectronics.com or visit
www.elementelectronics.com
31

52202020