USER GUIDE
MODEL JJ-SC-016A
COMPLETE STEAM CLEANING SYSTEM
https://manual-hub.com/

https://manual-hub.com/

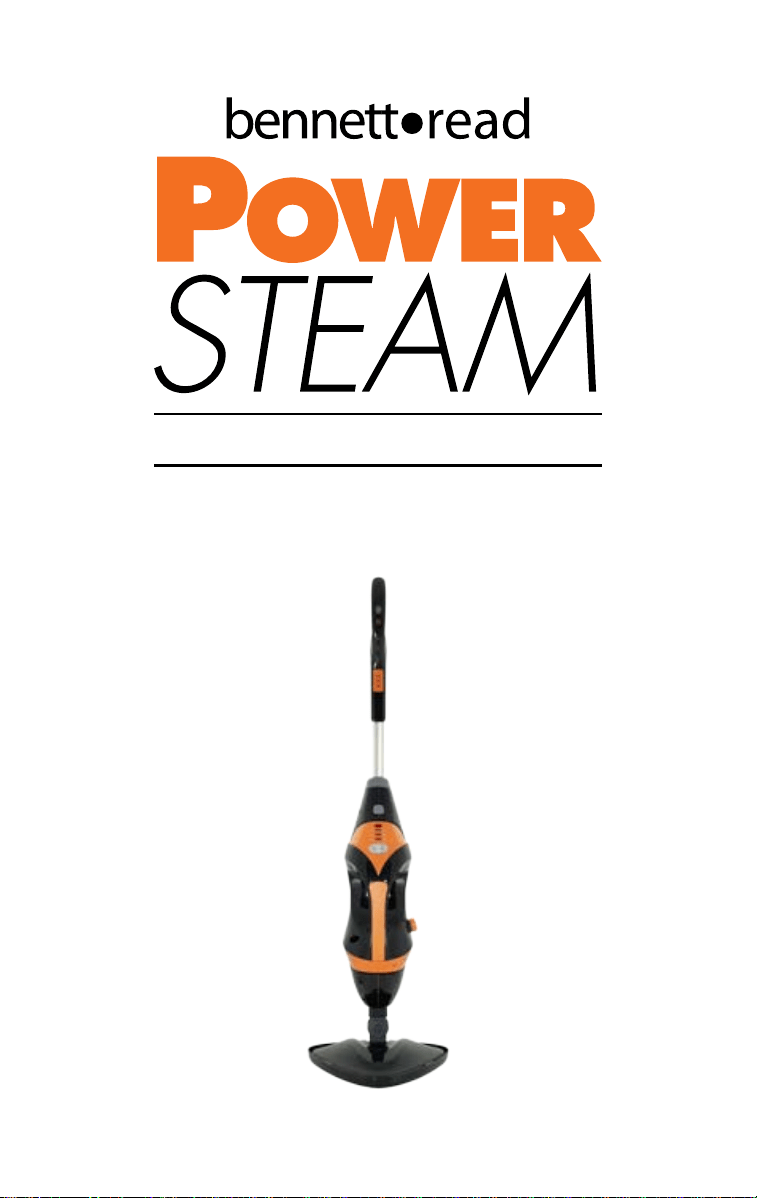
Thank you for purchasing a BENNETT READ
POWER STEAM.
Your POWER STEAM incorporates the latest technological advances
in home cleaning systems. It imitates the most powerful forces of
nature in a sleek, elegant, cleaning system to ensure that your home
is easily and properly cleaned.
Your new POWER STEAM is manufactured to a high standard of
quality and is backed up by a 12 month guarantee by Tevo.
Should you need any support from us, please visit
www.tevo.co.za or call 0861 77 88 88.
PLEASE KEEP THIS USER GUIDE IN A SAFE PLACE AND
READ IT CAREFULLY BEFORE USING YOUR BENNETT READ
POWER STEAM FOR THE FIRST TIME.
1
https://manual-hub.com/

SAFETY GUIDELINES-DEFINITIONS
2
It is important for you to read and understand this manual. The information it contains relates
to YOUR SAFETY and PREVENTING DAMAGE OR SERIOUS INJURY. The symbols below are
used to help you recognize this information.
Indicates an imminently hazardous situation which, if not avoided,
will result in death or serious injury.
Indicates a potentially hazardous situation which, if not avoided,
could result in death or serious injury.
Read all safety warnings and all instructions. Failure to
follow the warnings and instructions listed below may
result in electric shock, fire and/or serious injury.
When using electrical appliances, basic safety
precautions, including the following, should always
be followed to reduce the risk of fire, electric shock,
personal injury and material damage.
Indicates a potentially hazardous situation which, if not avoided,
may result in minor or moderate injury.
Indicates a potentially hazardous situation which, if not avoided,
may result in property damage.
DANGER:
WARNING:
WARNING:
WARNING:
CAUTION:
NOTICE:
!
!
!
!
!
!
RESIDUAL RISKS
SAFETY INSTRUCTIONS
Additional residual risks may arise when using the accessories which may not be included
in the enclosed safety warnings. These risks can arise from misuse, prolonged use etc.
Even with the application of the relevant safety regulations and the implementation
of safety devices, certain residual risks cannot be avoided. These include, but are not
limited too:
• Injuries caused by touching any moving parts
• Injuries caused by touching any hot parts or accessories
• Injuries caused when changing any parts or accessories
• Injuries caused by prolonged use of the appliance. When using any appliance
for prolonged periods ensure you take regular breaks
Read the entire manual carefully
before using the appliance.
The intended use is described in this
manual. The use of any accessory
or attachment or the performance of
any operation with this appliance
other than those recommended in this
instruction manual may present a risk
of personal injury.
Keep this manual in a safe place for
future reference.
https://manual-hub.com/

3
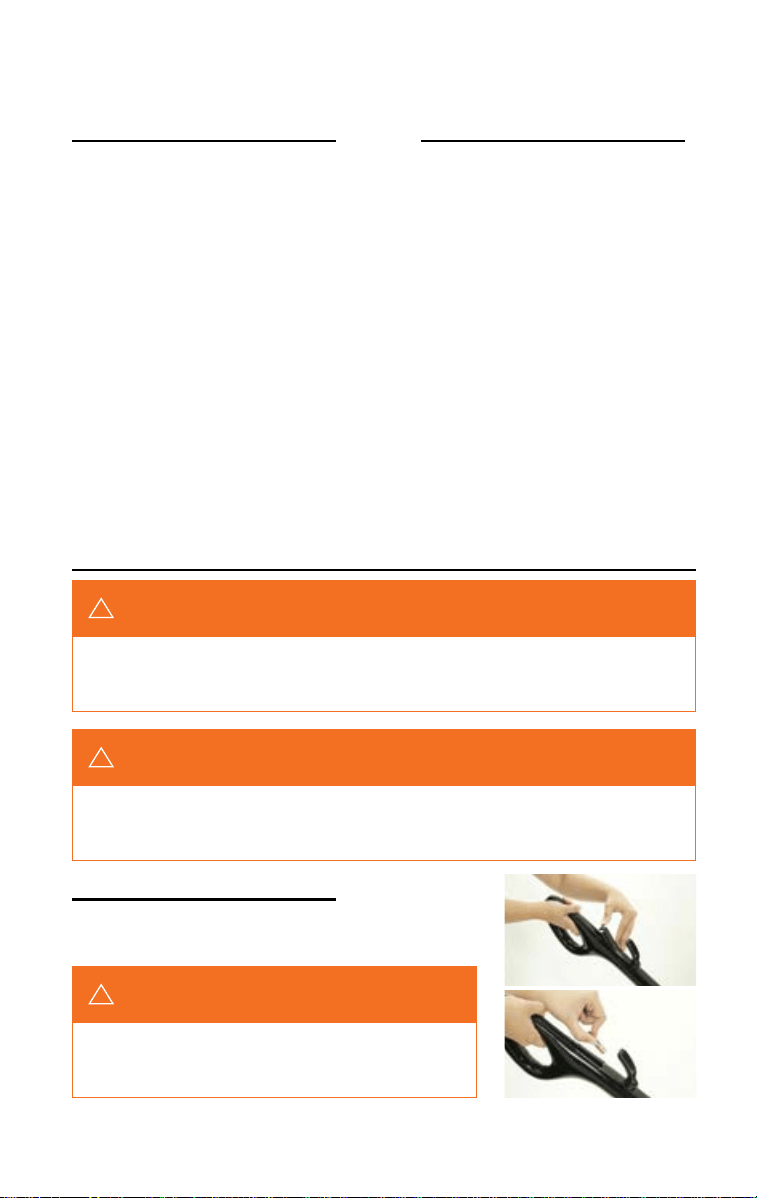
Always wear suitable shoes when using your steam mop and when changing
the accessories on your steam mop. Do not wear open-toed footwear.
CAUTION:
!
USING YOUR APPLIANCE
• Do not direct steam at people, animals,
electrical appliances or electrical outlets
• Do not immerse the appliance in water
• Do not leave the appliance unattended.
Keep children away from unit while
in use
• Do not leave the appliance connected to
an electrical outlet when not in use
• Never pull the power cord to disconnect
the appliance from the socket. Keep the
appliance cord away from heat, oil and
sharp edges
• Do not handle steam cleaner with
wet hands
• Do not pull or carry by cord, use cord
as a handle, close door on cord, pull
cord around sharp corners or expose
cord to heated surfaces
• Do not use appliance in an enclosed
space filled with vapor given off by
oil-based paint thinner, flammable
substances, or other explosive or
toxic vapors
• Do not use on leather, wax polished
furniture or floors, synthetic fabrics,
velvet or other delicate,
steam-sensitive materials
• Do not use on any unsealed hard floor
surfaces or on surfaces that have been
treated with wax or “no-wax” floors, the
sheen may be removed by the heat and
steam action. It is recommended
to test an isolated area of the surface
to be cleaned before proceeding.
We also recommend that you check
the use and care instructions from the
floor manufacturer
• Never put de-scaling, aromatic,
alcoholic or detergent products into the
steam mop, as this may cause damage
to your POWER STEAM and/or make it
unsafe for use
• If the circuit breaker trips while using
the steam function, discontinue product
use immediately and contact the
customer support center
(Beware of the risk of electrical shock
• The appliance emits very hot steam to
sanitize the area of use. This results
in the steam head and cleaning pads
getting very hot during use
• Care should be taken when using this
appliance. DO NOT touch any parts
which may become hot during use
• Do not use when microfibre cleaning
pad is not installed correctly
• This appliance is not intended for use
by persons with reduced physical,
sensory or mental capabilities, or lack
of experience and knowledge, unless
they have been given supervision or
instruction concerning the use of the
appliance by a person responsible for
their safety
• This appliance is not a toy and children
should be supervised to ensure that they
do not play with the appliance
https://manual-hub.com/

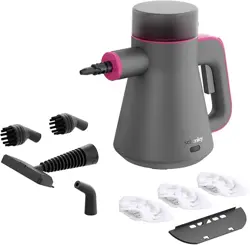
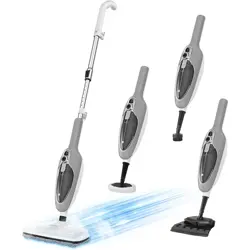
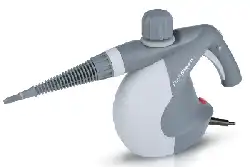
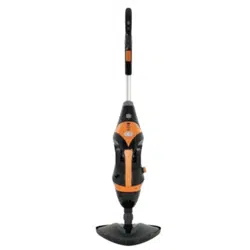
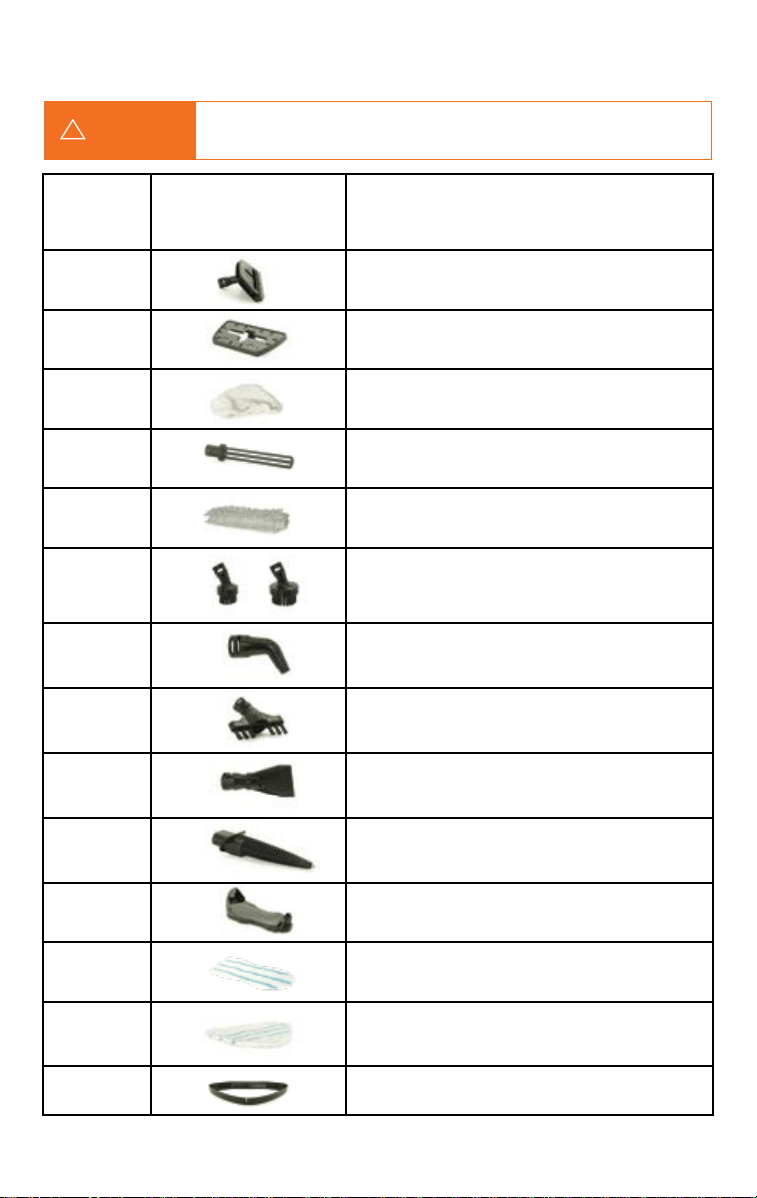
A. Handle
B. Hand-Held Detachable Steam Pod
C. Steam Pod Cradle
D. Floor Steam Head
E. Microfibre Pad x2
F. Carpet Glider
G. Window Squeegee
H. Small Brush
I. Big Brush
J. Angle Nozzle
K. Grout Cleaning Tool
L. Scraping Tool
M. High Pressure Steam Nozzle
N. Measuring Cup
O. Microfibre Mitt For Fabric Steaming Attachment
P. Fabric Steaming Attachment
Q. Dusting Attachment
R. Chenille Dusting Mitt
S. Universal Adapter
T. Steam Extension Hose
U. Counter Top Steam Pod
V. Counter Top Steam Pod Microfibre Pad
A B C
PRODUCT VIEW
4
1. Handle
2. Remote Steam Control Switch
3. Remote On/Off Switch
4. Signal Transmitting Port
5. Power Cable Winding Hook
6. Steam Power Indicator Light (Handle)
7. Metal Tube
8. Steam Pod Release Button
9. Signal Receiving Port
10. Steam Power Indicator (Steam Pod)
11. Steam Pod Indicator Button
12. Main On/Off Button
13. Steam Control Button
14. Water Tank Cap
15. Water Tank
16. Steam Pod Housing
17. Power Cord
18. Multi-Directional Connecting Axle
19. Floor Steam Head
PRODUCT COMPONENTS:
D
E
F
G
L
O
S
U
T
V
P Q R
M N
H I J K
1
2
3
4
5
6
7
8
9
10
11
14
15
16
18
19
13
12
https://manual-hub.com/
FUNCTIONS AND SPECIFICATIONS
5
FUNCTIONS
ATTACHING THE HANDLE
SPECIFICATIONS
• Three adjustable steam settings
• Steam output time: 10-18 minutes
• Red and blue light, warm-up and
ready function
• Pressure release valve, keeping the
pressure in the heating unit constant
• The floor steam head has a multi-
directional axle, designed to clean
around corners and small spaces
• Remote control handle, allowing the
user to control steam settings on the
main Steam Pod
• Steam power indicators on the remote
handle and the Steam Pod indicates
the amount of steam being emitted
from the unit
• Open the battery cover in the back part of handle, install
in 4 x AAA, 1.5v batteries. Close the battery cover
*Batteries not included
• Rated Voltage: 220 - 240V
• Rated Frequency: 50Hz
• Output Power: 1500W
• Water Tank Capacity: 320ml
• Waterproof Level: IPX4
Each steam mop is tested in the factory prior to packaging to ensure product performance and safety.
When assembling your new steam mop for the first time you may notice water residue inside the unit.
It is advisable to remove the batteries from the handle
if your BENNETT READ POWER STEAM will be un-used
for a long period of time.
Before attempting any of the following operations, make sure that the appliance is switched off
and unplugged and that the appliance is cold and contains minimal or no water.
NOTE:
NOTICE:
WARNING:
!
!
!
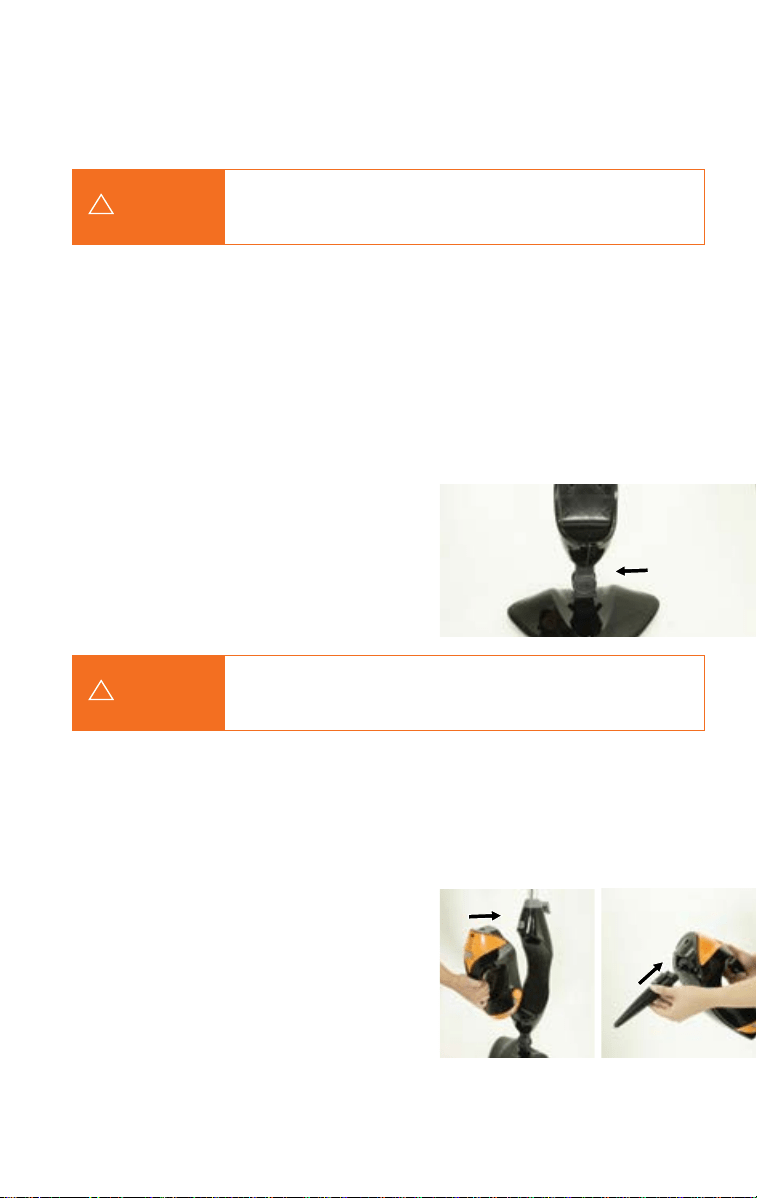
ASSEMBLY:
https://manual-hub.com/
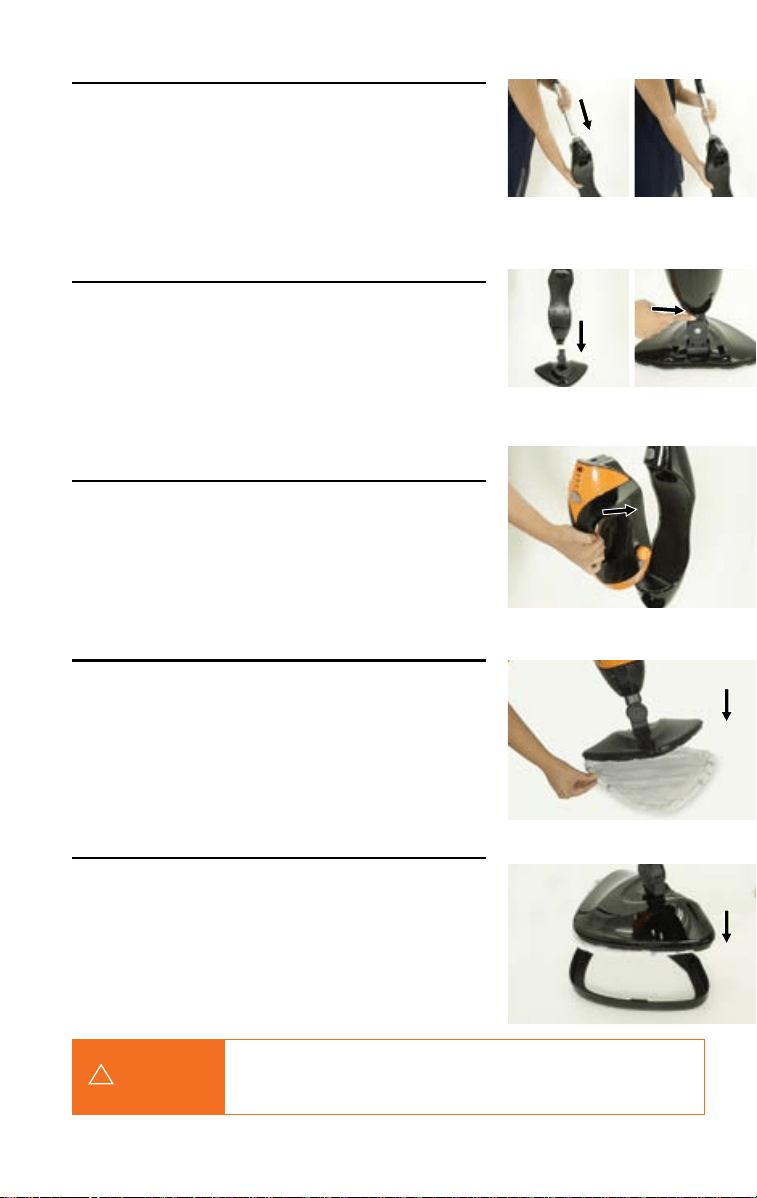
6
• Slide the bottom end of the Handle tube (A) into the top
end of the Handheld Steamer Housing (C) until it clicks
into place (fig.2)
• Secure the assembled handle and pole by using the large
screw provided (screwdriver not included)
• Slide the bottom end of Steam Mop Cradle (C) into the
Floor steam head (D) until Steam Head Axle (18) clicks
into place
• The Floor Steam Head (D) can be removed from the Steam
Mop Cradle (C) by pressing the button on the Floor Steam
Head (D) axle
• Push the hand held detachable Steam Pod (B) firmly
into the Steam Pod Cradle (C) until it clicks into place.
Insert bottom part of the Steam Pod into the cradle first
and then push the top to secure in place
• Press the assembled Floor Steam Head (D) with
Microfibre Cleaning Pad (E) onto the Carpet
Glider (F) until it clips into place
• To remove, step with the front of your shoe onto
the Cleaning Pad removal tab and press down
firmly, the Carpet Glider will detach from the
Steam Head
• The Floor Steam Head (D) is fitted with Velcro at
the bottom which can be easily attached to the
back of the Microfibre Pad (E).
• To remove, place the front of your shoe onto the
cleaning pad removal tab and press down firmly
while lifting the POWER STEAM away from the
Microfiber Pad.
ATTACHING THE STEAM HEAD (FIG.3)
ASSEMBLY CONTINUED...
FIG.2
FIG.3
FIG.4
FIG.5
FIG.6
ATTACHING THE HAND-HELD STEAM POD (FIG.4)
ATTACHING CARPET GLIDER (FIG.6)
ATTACHING AND REMOVING THE MICROFIBRE
CLEANING PAD (FIG.5)
Only attach carpet glider when using BENNETT READ POWER STEAM
to steam and refresh carpets. DO NOT use on hard floors.
NOTICE:
!
https://manual-hub.com/
7
FIG.2
FIG.7
FIG.9
FIG.8
FIG.4
FIG.5
FIG.6
OPERATION
USING YOUR POWER STEAM AS A FLOOR STEAM-CLEANER
1. Filling the water tank:
• Turn the water tank cap (14)
anticlockwise and remove from the
tank (fig.7)
• Use the Measuring Cup to pour
water into the tank. Do not overfill
(fig.8)
• Always use clean, cold tap water
• Replace the cap on the water tank
3. Turning the POWERSTEAM on:
• When plugged in, the Steam Pod
Indicator Light (10) will start to flash
• Press remote on/off switch (3) on
handle once to turn on
• The Steam Pod Indicator Light will
glow red
• Steam Power indicator lights (6) on
the handle and on the Steam Pod (B)
will all illuminate simultaneously
• After about 25 seconds, the Steam
Pod Indicator Light on the Steam
Pod (B) will change from red to blue
and steam will be release from the
bottom of the Floor Steam Head (D)
(fig.9)
4. Press the Remote Steam Control switch
(2) repeatedly for the desired steam
level suitable for the application.
You can adjust the steam intensity
according to different objects
• We recommend you use level 1 for
general cleaning and only increase
the steam level for high-traffic areas
or stubborn dirt
• When increasing the steam intensity, LED 1, 2 and 3 will turn on depending on the
setting you choose
2. Unwind the Power Cord (17) completely, plug your POWER STEAM into the nearest
power outlet and switch on
The higher the steam intensity the longer
the drying time will be on your floors.
NOTICE:
!
https://manual-hub.com/
8
FIG.10
FIG.11 FIG.12
USING YOUR POWER STEAM AS A HAND-HELD STEAM
CLEANER WITH HIGH-PRESSURE STEAM NOZZLE
5. Should you wish to turn the steam off and only use the Microfibre Pad, press the Remote
Control Switch (2) until none of the LED indicators are showing
6. Your POWER STEAM will automatically go into standby mode if you do not select a steam
setting for longer than 6 minutes. The Steam Pod Indicator will start to flash
7. Cleaning your floors:
• Always start in the furthest corner of the room, moving towards the exit door to allow the
floor to properly dry before walking on it
• Adjust steam setting as explained above
• Move the unit in a slow forward and backward motion ensuring you cover the entire
area, continuing until you are satisfied at the section of the floor is clean before moving
onto the next section. You can adjust the steam intensity as and when needed
• When finished, press the Remote on/off switch (3) on the Handle to power down the unit
1. Unwind the Power Cord (17) completely
2. Press the Steam Pod Release Button (8) and
pull the hand-held detachable steam pod
(B) away from the Steam Mop Cradle (C)
(fig.11)
3. Fill the water tank as explained in previous
section under point 1
4. Attach the High Pressure Steam Nozzle (M)
onto the Hand-Held Steam Cleaner until it
clicks into place (fig.12)
5. Plug in the POWER STEAM into the
power outlet
8. Your POWER STEAM is equipped with a
multi-directional axle to aid in cleaning
difficult corners or low spaces (fig.10)
9. When switching on your POWER STEAM,
the red indicator light (11) on the Steam Pod
(B) will flash to indicate pre-heating. If the
lights does not illuminate, please check the
“troubleshooting” section for more details
In order to reduce the power consumption of the batteries in the handle,
the LED’s will automatically switch off if the unit is not in use for longer than
6 minutes, press any button to continue working.
If power failure occurs while the unit is in warm-up mode or after the
warm-up is complete, the unit might go back into warm-up / re-heat mode
once the power returns.
NOTICE:
NOTICE:
!
!
https://manual-hub.com/

9
FIG.13
FIG.14
FIG.15
USING YOUR HAND-HELD STEAM POD WITH COUNTER
TOP STEAM POD (T)
6. Press main on/off switch (12) once
and the Indicator Light will glow red,
after about 30 seconds, the Indicator
Light will change to blue
7. To change modes press the Steam
Control Button (13) to select either
Dust, Mop or Scrub mode. You can
change the steam mode while the
Hand-Held Steam Cleaner is in standby
or in use. Press the Steam Trigger to
start steaming (fig.13)
8. To remove the High Pressure Steam
Nozzle, press and hold down the
Release Button at the top of the nozzle
with one hand and pull the nozzle
outward with your other hand (fig.14)
1. Attach Counter Top steam Pod Microfibre
Pad to the bottom of the pod by lining
the velcro tabs up and pressing firmly
2. Insert Steam Pod (B) into Counter Top
steam Pod (U) as shown (fig 15)
3. To remove Counter Top Steam Pod,
follow instructions as shown in
fig 14 above
Do not press the Steam Trigger until the Direct Steam Nozzle is
connected to the main nozzle of your Hand Held Steam Cleaner.
CAUTION:
!
The Hand Held Steam Pod may continue to
emit steam for a few seconds after the trigger
is released. DON’T remove the high pressure
nozzle until steam has stopped completely!
NOTE:
!
https://manual-hub.com/

10
FIG.16
FIG.17
FIG.18
Do not press the steam trigger while attaching or removing
the accessory hose.
Do not use the Accessory Hose without the cleaning tools attached.
CAUTION:
CAUTION:
!
!
USING YOUR HAND-HELD STEAM POD
WITH STEAM EXTENSION HOSE
1. Attach the Steam Extension Hose (T) to the Hand-Held Steam Pod (B) until it clicks into
place (fig.16)
2. Attach the Universal Adapter to the Steam Extension hose (S) (fig.17)
3. Select the desired cleaning accessory for use. Follow the cleaning tool sub-assembly
instructions for the selected tool
Attach relevant cleaning accessory to the open end of the Universal Adapter (S) (fig.18)
4. To remove the Steam Extension hose, press and hold down the Release Button at the top
of the hose with one hand and pull the hose outward with your other hand. (fig.14).
https://manual-hub.com/
11
When using your POWER STEAM to clean any other electrical appliance,
check and follow manufacture’s cleaning guidelines.
CAUTION:
!
ACCESSORIES CHART
ACCESSORY REQUIRED
ACCESSORIES THAT MUST
BE CONNECTED TO THE
UNIVERSAL ADAPTOR
SUGGESTED USE
Window
Squeegee
Attachment
Shower doors, mirrors, windows, removing
soap scum and grime
Fabric
Steaming
Attachment
Garment tool for taking wrinkles out of garments,
steaming draperies, tablecloths and more. To be
clipped into Window Squeegee above before use
Garment
Steamer Cloth
(Washable)
Use for steaming garments, draperies, tablecloths,
etc. To be used with Fabric Steaming Attachment
Dusting
Attachment
Armchairs, Sofas, cushions, mattresses, car interiors, blinds,
vertical walls, garden furniture, garden umbrellas etc. Must
be used with Chenille Dusting Mitt below
Chenille
Dusting Mitt
(Washable)
Must be used with Dusting Attachment above.
Small and
Medium
Scrubbing
Brushes
Ovens, microwaves, stove tops, showers, bathtubs,
faucet fixtures, tiles, grout, toys, refrigerators, etc
Angle
Nozzle
Toilets, stove tops, around faucet edges, grout,
microwaves, sinks, hard to reach areas, etc
Grout
Cleaning
Tool
Ideal for cleaning grout lines
Scraping
Tool
Cleaning baked on food, grime, and grease.
Removing residue or other stubborn substances
from surfaces, such as stove tops and ovens
Direct
Steam
Nozzle
Loosen and dislodge compact dirt found in
corners and other small spaces
Countertop
cleaner
For cleaning and disinfecting tabletops and countertops
or other smooth large surface. See special
notes on disinfecting at the end of this guide
Countertop
Steam pod
Microfibre Pad
For use with Countertop Cleaner
Microfibre Pad
(Washable)
For general cleaning of hard floors and refreshing
carpets. Only use with Floor Steam Head (D)
Carpet Glider For refreshing and neutralising odours from carpets
https://manual-hub.com/

12
Drain the remaining water in the tank after every use
CLEANING AND MAINTENANCE:
Ensure that the unit is disconnected from the power outlet when cleaning.
Don’t leave the steamer unattended during the limescale
removal process and/or while in use.
Preform a test clean on a suitable isolated area after each limescale
removal to ensure that there is no residue left in the system.
CAUTION:
WARNING:
NOTICE:
!
!
!
• To clean calcium deposits that build up inside the Water Tank, add one or
two tablespoons of white vinegar to a full Water Tank. Close the Water Tank
Cap and then shake the contents. DO NOT TURN THE STEAMER ON
• Rinse tank several times with clean water before using again
If your Steam Mop begins to produce less steam than usual or stops producing steam, you
may need to remove limescale. Limescale can develop over time on the metal parts and
greatly affect your POWER STEAM’s performance.
It is necessary to remove limescale on a regular basis; every 25-30 times you use a full tank
of water or at least once a month, especially in areas with hard water.
The frequency of limescale removal depends upon the hardness of your tap water and how
often you use the POWER STEAM.
This product contains no serviceable parts. Do not try to repair it yourself.
Any servicing that requires disassembly other than cleaning must be performed
by a qualified TEVO repair technician.
ALL servicing should be done by an authorized service representative.
1. Prepare a solution of 1/3 white
vinegar and 2/3 tap water and
add to the Water Tank
2. Secure and position the unit to ensure
steam is aimed away from the floor
or surrounding objects and surfaces
3. Plug the unit in and turn ON by
pressing the power button and allow
the unit to produce steam until the
vinegar/water solution in used up
4. Repeat the above procedure as many
times as necessary until a normal
steam flow rate is achieved
5. Fill the Water Tank with fresh water
and rinse out
6. Fill the Water Tank with fresh water,
attach to the unit and release steam
through the system until the water
tank is empty
Follow this procedure to remove limescale:
HOW TO DECALCIFY THE WATER TANK INTERIOR
CLEANING PROCEDURE TO REMOVE LIMESCALE
https://manual-hub.com/

13
STORAGE:
Allow the steamer to fully cool down before performing
any maintenance or troubleshooting checks.
Never use bleach or fabric softener when washing
the microfibre cleaning pad.
When done cleaning, empty any residual water from the tank and
then run the machine at full steam over a basin or bucket to ensure all
remaining water is used up, keep running the machine for a few seconds
after steam has stopped to empty all water in the system and pipes.
CAUTION:
IMPORTANT:
NOTICE:
!
!
!
• Machine washable on “warm” setting. Always use a mild detergent
• For best care results, lay flat to dry
• Turn power off and unplug the Power Cord
• Wait until the POWER STEAM has completely cooled before cleaning
• Remove the Cleaning Pad and wash as per instructions above
• Rinse all (used) accessories, under running tap water until clean,
allow to dry completely before storing
• Store product in a protected, dry area. Keep measuring cup for future use
• Keep out of reach of children
CLEANING MICROFIBRE PAD(S)
https://manual-hub.com/

14
USE THIS TROUBLESHOOTING GUIDE AS A FIRST STEP TO RESOLVE ANY
PROBLEMS YOU MAY BE EXPERIENCING
Any faults not covered in the below table should be resolved by an authorized
service representative
TROUBLESHOOTING:
To reduce risk of personal injury, unplug powersteam before
servicing and allow to cool.
WARNING:
!
PROBLEM POSSIBLE CAUSES REMEDIES
Reduced steam or
no steam
1. Water tank may
be empty
2. Steam Nozzle may
be blocked
3. Unit still in warm up
mode
1. Add water to the Water Tank
2. Clean Steam Nozzle
3. Wait 30 to 60 seconds
Unit will not turn on 1. Blown
fuse
2. There is no power
to the unit
3. Didn’t press
Power Button
1. Book in for repair at your nearest
TEVO service center
2. Check cord and plug cord into a
working electrical outlet.
Make sure unit is plugged in
3. Press Power Button
https://manual-hub.com/
15
REPLACEMENTS PARTS
The items below are available for purchase as accessories for your BENNETT READ
POWER STEAM multi-function steam cleaning system. To purchase contact TEVO customer
care in your area.
ITEM PART NO. PART NAME
1. HVC301C01 Microfibre Pad (2 pack)
2. ZHVC301-02 Countertop Steam Mop Pad (2 pack)
3. ZHVC301-03 Microfibre Mitt
4. ZHVC301-04 Window Squeegee
5. ZHVC301-05 Chenille Dusting Mitt
6. ZHVC301-06 Attachment Set (Includes H, I, J, K, L)
1
5
2
6
3 4
https://manual-hub.com/

16
CONSUMER GUARANTEE:
Your BENNETT READ POWER STEAM multi-function steam cleaning system has
a 12 month product guarantee from TEVO (PTY) Ltd.
TEVO will replace or repair, at TEVO’s option, any defective or malfunctioning
part due to manufacturing defect, free of charge from the date of purchase by
the original purchaser for 12 months.
This guarantee applies to product used for personal or domestic use only, and
specifically excludes any malfunction or defect arising from commercial use.
This guarantee does not apply to routine maintenance components such as
filters and brushes. Damage or malfunction caused by negligence, abuse,
neglect, unauthorized repair, or use not in accordance with the user guide is
not covered.
TEVO is not liable for incidental or consequential damages of any nature
associated with the use of this product. TEVO’s liability will not exceed the
purchase price of this product.
Guarantee and service enquiries can be made by contacting:
TEVO (Pty) Ltd
Gauteng 086 111 8386 or 012 740 5000
Durban (031) 570 5900
Cape Town (021) 380 0038/9
Customer Service Help Line 0861 77 88 88
www.tevo.co.za
https://manual-hub.com/

17
https://manual-hub.com/

Brought to you by:
0861 77 88 88
www.tevo.co.za | info@tevo.co.za
COMPLETE STEAM CLEANING SYSTEM
https://manual-hub.com/