Instruction Booklet
Model: RC2104
automatic
rice cooker

IMPORTANT SAFEGUARDS
When using electrical appliances, basic safety precautions should always
be followed including the following:
1. Read all instructions.
2. Do not touch hot surfaces. Use handles or knobs.
3. To protect against electrical hazards, do not immerse cord, plugs, or
the appliance in water or other liquid.
4. Close supervision is necessary when any appliance is used by or near
children. Children should be supervised to ensure that they do not
play with the appliance.
5. This appliance is not intended for use by persons (including children)
with reduced physical, sensory or mental capabilities or lack
of experience and knowledge, unless they have been given
supervision or instruction concerning the use of the appliance by a
person responsible for their safety.
6. Unplug from outlet when not in use and before cleaning. Allow to
cool before putting on or taking off parts, and before cleaning the
appliance.
7. DO NOT operate any appliance with a damaged cord or plug or
after the appliance malfunctions, or is dropped or damaged in any
manner. Return appliance to the manufacturer for examination,
repair or electrical or mechanical adjustment. All servicing, other
than cleaning, should be performed by an authorized service
representative. See Warranty section.
8. The use of accessories or attachments not recommended by Salton
may cause hazards.
9. Do not use outdoors.
10.Do not let cord hang over edge of table or counter, or touch hot
surfaces.
11.Do not place on or near a hot gas or electric burner, or in a heated
oven.
12.Extreme caution must be used when moving an appliance containing
hot liquids.
outlet. To disconnect, turn any control to ‘OFF’, then remove
plug from wall outlet.
14.CAUTION: This appliance generates heat and escaping steam during
use. Proper precautions must be taken to prevent the risk of burns,
15.DO NOT exceed rice and water proportions that would make more
than 6 cups of cooked rice.
2

16.This appliance generates steam. Do not operate uncovered.
17.Do not block Steam Vent Hole.
18.Do not leave unit unattended while in use.
19.This appliance is for Household Use Only. Do not use appliance for
other than intended use.
20.Do not place the Rice Bowl on other heat sources (e.g. cooking
stove). It may become deformed.
21.During or immediately after cooking, the area near the Steam Vent
Hole is at a high temperature. To avoid burns do not touch this area.
22.To reduce the risk of electric shock, ONLY cook in the removable rice/
cooking bowl.
23.DO NOT use for deep frying.
SAVE THESE INSTRUCTIONS
HOUSEHOLD USE ONLY
POLARIZED PLUG
This appliance has a polarized plug (one blade is wider than the other).
plug in any way.
A short supply cord is provided to reduce the hazards of becoming
entangled in or tripping over a long cord. Extension cords may be used
if care is exercised in their use. If an extension cord is used, the marked
electrical rating of the detachable power-supply cord or extension cord
should be at least as great as the electrical rating of the appliance. If
the appliance is of the grounded type, the extension cord should be a
grounded 3-wire cord. The extension cord should be arranged so that it
will not drape over the counter top or table top, where it can be pulled on
by children or tripped over.
3
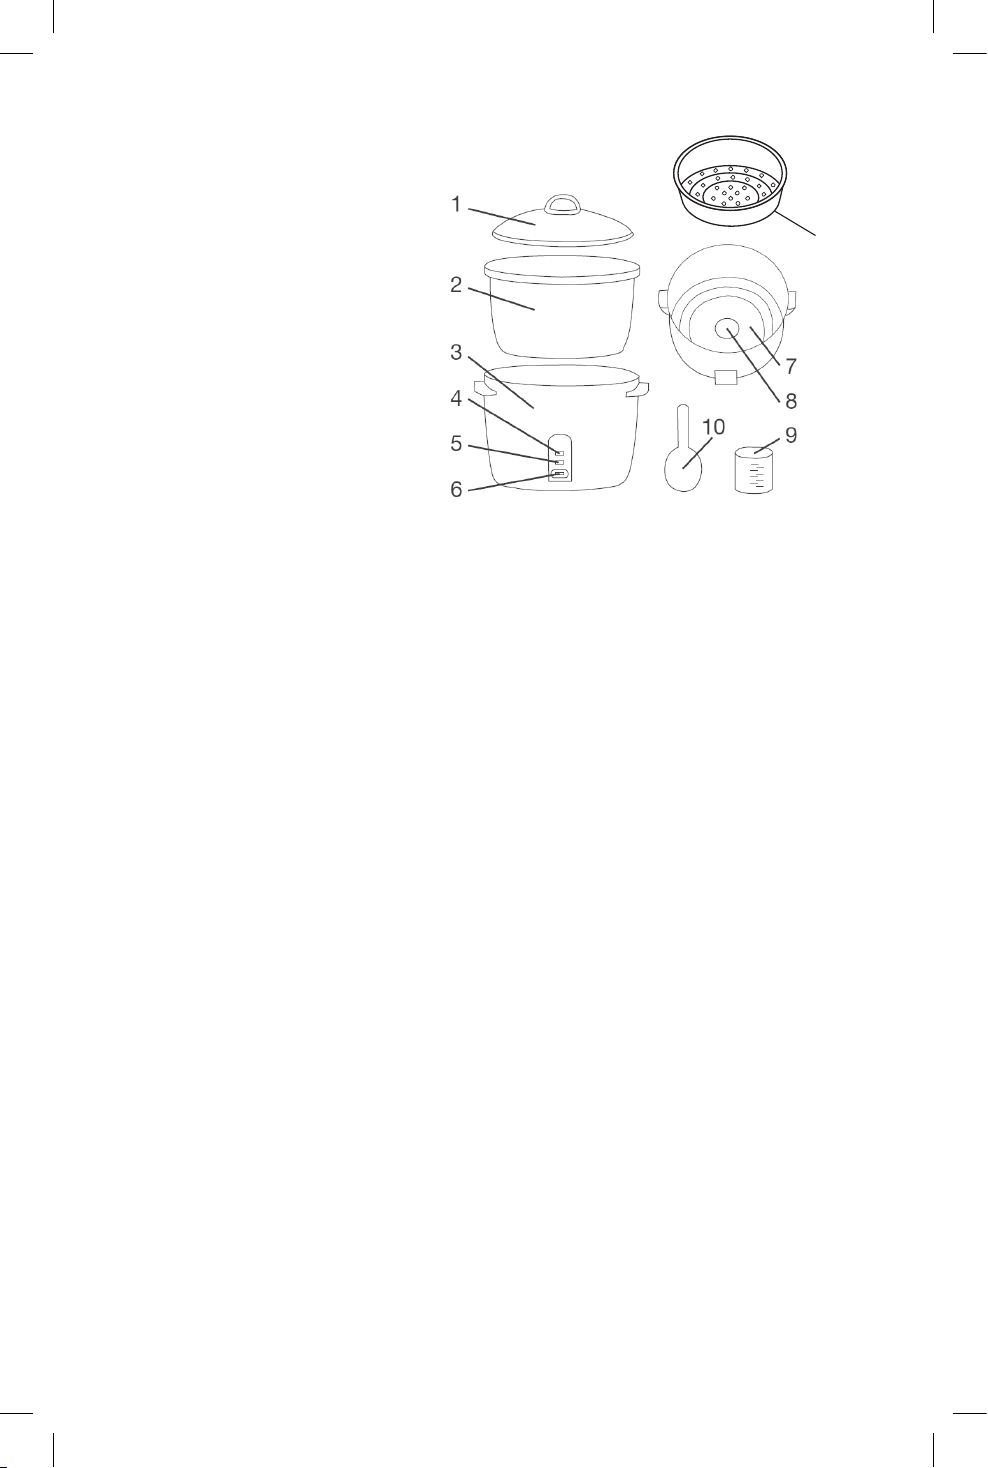
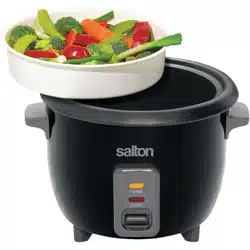
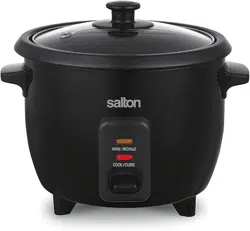
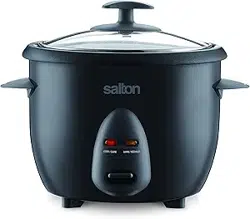
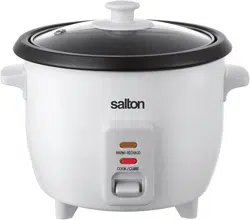
DESCRIPTION OF PARTS
1. Lid
2. Rice/Cooking Bowl
3. Rice Cooker Base
4. ‘Warm’ Indicator Light
5. ‘Cook’ Indicator Light
6. Switch
7. Heating Plate
8. Heat Sensor
9. Measuring Cup
10. Spatula
11. Steaming Basket
BEFORE FIRST USE
Wash the Rice/Cooking Bowl, Lid, Measuring Cup, Spatula and
Steaming Basket in warm soapy water. Rinse and dry. Wipe the Base
with a clean, damp cloth.
Do not use harsh detergents or abrasive cleansers on any part of the
appliance. NEVER immerse the Base in water or any other liquid.
NOTE: Handle the Rice/Cooking Bowl carefully. Scratching or denting
the Rice/Cooking Bowl may result in unsatisfactory performance.
HOW TO COOK RICE
1. Lift out the Rice/Cooking Bowl and make sure that the outside of the
Bowl is clean and dry and that the Heat Sensor in the center, on the
inside of the Base, is clean, dry and cool.
2. Measure rice and cold water and place evenly in Rice Bowl. Many
types of rice use 2 measures of liquid to 1 measure of rice but see
package directions for correct proportions. DO NOT exceed rice and
water proportions that would make more than 6 cups of cooked rice.
IMPORTANT: NEVER PUT ANY WATER INTO THE RICE COOKER
BASE
3. Place the Rice/Cooking Bowl back in the Rice Cooker Base. Make
sure that the Rice Bowl is seated correctly by turning the Bowl slightly
from side to side.
4. Put the Lid on the Rice Cooker.
5. Plug Rice Cooker into a 120 volt AC outlet.
4
11
HOW TO USE THE STEAMING BASKET
1. Lift out the Rice/Cooking Bowl and make sure that the outside of the Bowl is clean and dry and that
the Heat Sensor in the center, on the inside of the Base, is clean, dry and cool.
2. Place the Rice Bowl back in the Rice Cooker Base. Make sure that the Rice/Cooking
correctly by turning the Bowl slightly from side to side.
3. Add water or other liquid to the Rice/Cooking Bowl.
IMPORTANT: NEVER ADD ANY WATER OR LIQUID TO THE RICE COOKER BASE
4. Place vegetables, meat, poultry, etc. in the Steaming Basket. Place the
Steaming Basket onto the
inner rim of the Rice/Cooking Bowl.
5. Replace the Lid.
6. Plug unit into the wall outlet.
7. Depress the switch to start the cooking cycle. The red ‘COOK’ Indicator Light will light up.
6. Depress the switch to start the cooking cycle. The red ‘COOK’
Indicator Light will light up.
NOTE:
DO NOT press the ‘COOK’ button before placing the Rice/
Cooking Bowl containing the ingredients into the Cooker.
DO NOT block the Steam Vent while Rice Cooker is operating.
7. When cooking is complete the red ‘Cook’ Light will go out and the
amber ‘Warm’ cycle light will light up.
8. When the ‘Warm’ light comes on, take off the Lid, be careful of
immediately or close the Lid and leave the rice in the Rice Cooker.
NOTE: It is not recommended to use the ‘Warm’ cycle for longer than
2 hours.
IMPORTANT NOTES:
• Before removing the Rice/Cooking Bowl from the Rice Cooker,
always unplug the power cord from the wall outlet.
• Always remember to unplug from the wall outlet when you are
HINTS:
1. Handle the Rice/Cooking Bowl carefully. Scratching or denting the
Rice/Cooking Bowl may result in unsatisfactory performance.
2. DO NOT lift the Lid more than once during any cycle. This releases
an excessive amount of steam, lowers the temperature and affects
both the timing and the end result.
3. DO NOT switch on without liquid or food in the Rice/Cooking Bowl.
If this accidentally happens, the thermostat will automatically cycle on
and off. You must unplug from the wall outlet and allow to cool before
using again.
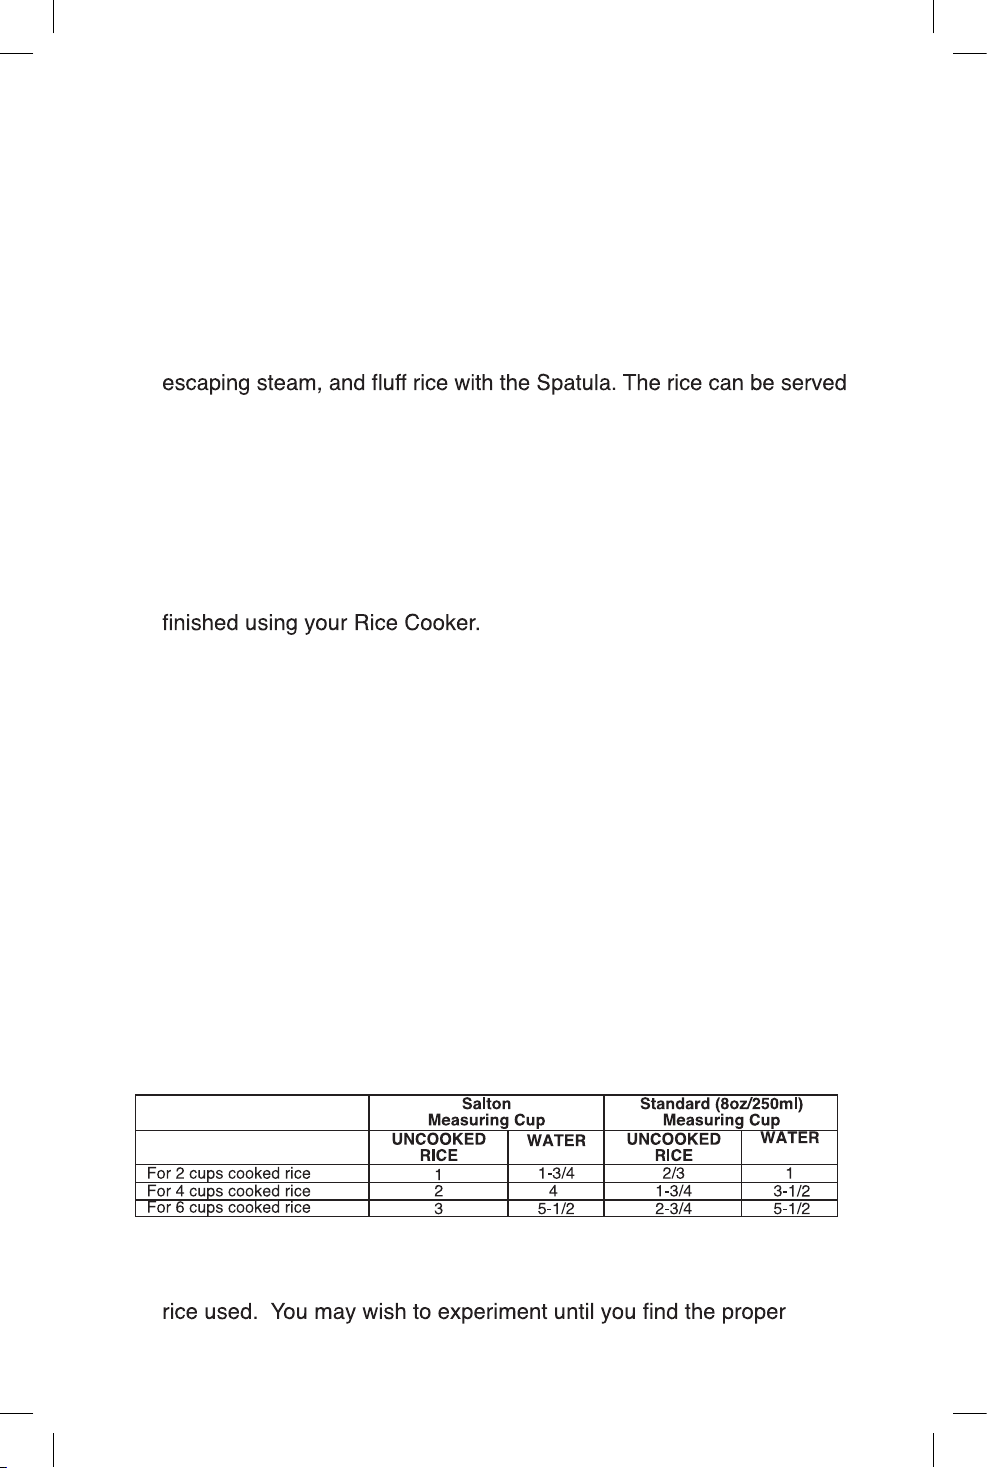
RICE COOKING CHART
The following chart should be used only as a guide. The ratio of rice
to water may need to be adjusted according to the kind of rice you are
using. Please check the package directions.
NOTE:
1. The volume of cooked rice will vary depending on the type of
proportions to suit your taste and needs.
5

2.
3. The one cup level in the Salton measuring cup is at the top rim.
FLAVORED RICE
• Chicken or beef stock
• Orange juice
• Pineapple juice (1/2 juice, 1/2 water)
• Tomato juice (2/3 juice, 1/3 water)
• Milk
• Vegetable soup
• Mixed herbs
• Saffron – 3 ml (1/4 tsp) per 225g (8 oz.) of rice
• Parmesan cheese
• Sautéed chopped onions
NOTE: If ingredients, other than liquids, have been added to the rice,
the ‘Warm’ cycle should be on for no longer than 1 hour. This will keep
HINTS:
1. There are differing opinions about whether rice should be washed
before cooking. Those in favor argue that this washes away the
starch content and ensures non-sticky grains. Those against feel
obtained by pre-washing rice. To pre-wash rice, rinse uncooked rice
in Rice/Cooking Bowl with cold water and drain thoroughly.
2. Brown rice may be cooked using the same instructions as for
white rice. (Note: For best results we suggest washing the brown
rice thoroughly before cooking.) It is important to leave the rice in the
‘WARM’ cycle for a minimum of 30 minutes, as brown rice takes
slightly longer to prepare.
3. As a general guide allow 2 oz. (56g) of uncooked rice per person.
When cooked, rice will usually double its volume and weight.
4. Ensure that the rice is level in the Rice/Cooking Bowl so that it cooks
evenly and properly.
5. If desired, add a little butter or oil (15 ml/1 tbsp. per cup of rice) at the
start of cooking to moisten the grains of rice.
6. Fluff up the rice at least once during the ‘WARM’ cycle.
6

Keep Warm Setting
The Rice Cooker automatically switches itself to ‘Warm’ at the end of the
‘Cook’ cycle.
At any time if you want to stop the ‘Cook’ cycle and start the ‘Warm’
cycle, press the switch upwards to stop the cooking process.
You may also use the ‘Warm’ cycle to reheat or warm cooked foods that
you haven’t cooked in your Rice Cooker. Add food to the Rice/Cooking
Bowl. Press the switch to the ‘Warm’ setting. To stop the ‘WARM’ cycle
simply unplug the unit from the wall outlet.
HOW TO USE THE STEAMING BASKET
1. Lift out the Rice/Cooking Bowl and make sure that the outside of the
Bowl is clean and dry and that the Heat Sensor in the center, on the
inside of the Base, is clean, dry and cool.
2. Place the Rice Bowl back in the Rice Cooker Base. Make sure that
the Rice/Cooking Bowl is seated correctly by turning the Bowl slightly
from side to side.
3. Add water or other liquid to the Rice/Cooking Bowl.
IMPORTANT: NEVER ADD ANY WATER OR LIQUID TO THE RICE
COOKER BASE
4. Place vegetables, meat, poultry, etc. in the Steaming Basket. Place
the Steaming Basket onto the inner rim of the Rice/Cooking Bowl.
5. Replace the Lid.
6. Plug unit into the wall outlet.
7. Depress the switch to start the cooking cycle. The red ‘COOK’
Indicator Light will light up.
DO NOT press the ‘COOK’ button before placing the
Rice/Cooking Bowl containing the ingredients into the Cooker.
DO NOT block the Steam Vent while Rice Cooker is operating.
8. Steam until done to taste. The following charts can be used as a
guide.
HINT: You can cook and steam different foods at the same time. Cook
Steaming Basket at the same time. Use foods with similar cooking times.
7
CARE AND CLEANING
1. Unplug the Rice Cooker from the wall outlet.
2. NEVER immerse the Rice Cooker Base in water or any other liquid.
NEVER add any liquid into the Rice Cooker Base.
3. The Rice/Cooking Bowl and Lid may be washed in warm soapy water.
Dry. NOTE: Never use harsh cleansers or scouring pads that may
hole
in the Lid is clean so steam can escape during cooking.
4. The Rice Cooker Base should be wiped with a soft damp cloth.
5. The Heating Plate should be wiped clean. NOTE: DO NOT depress
the Heat Sensor in the middle of the Heating Plate.
6. All servicing, other than cleaning, should be performed by an
authorized service representative. See Warranty section.
8
HINT: You can cook and steam different foods at the same time. Cook rice in the Rice/Cooking Bowl and
steam fish, vegetables or poultry in the Steaming Basket at the same time. Use foods with similar cooking
times.
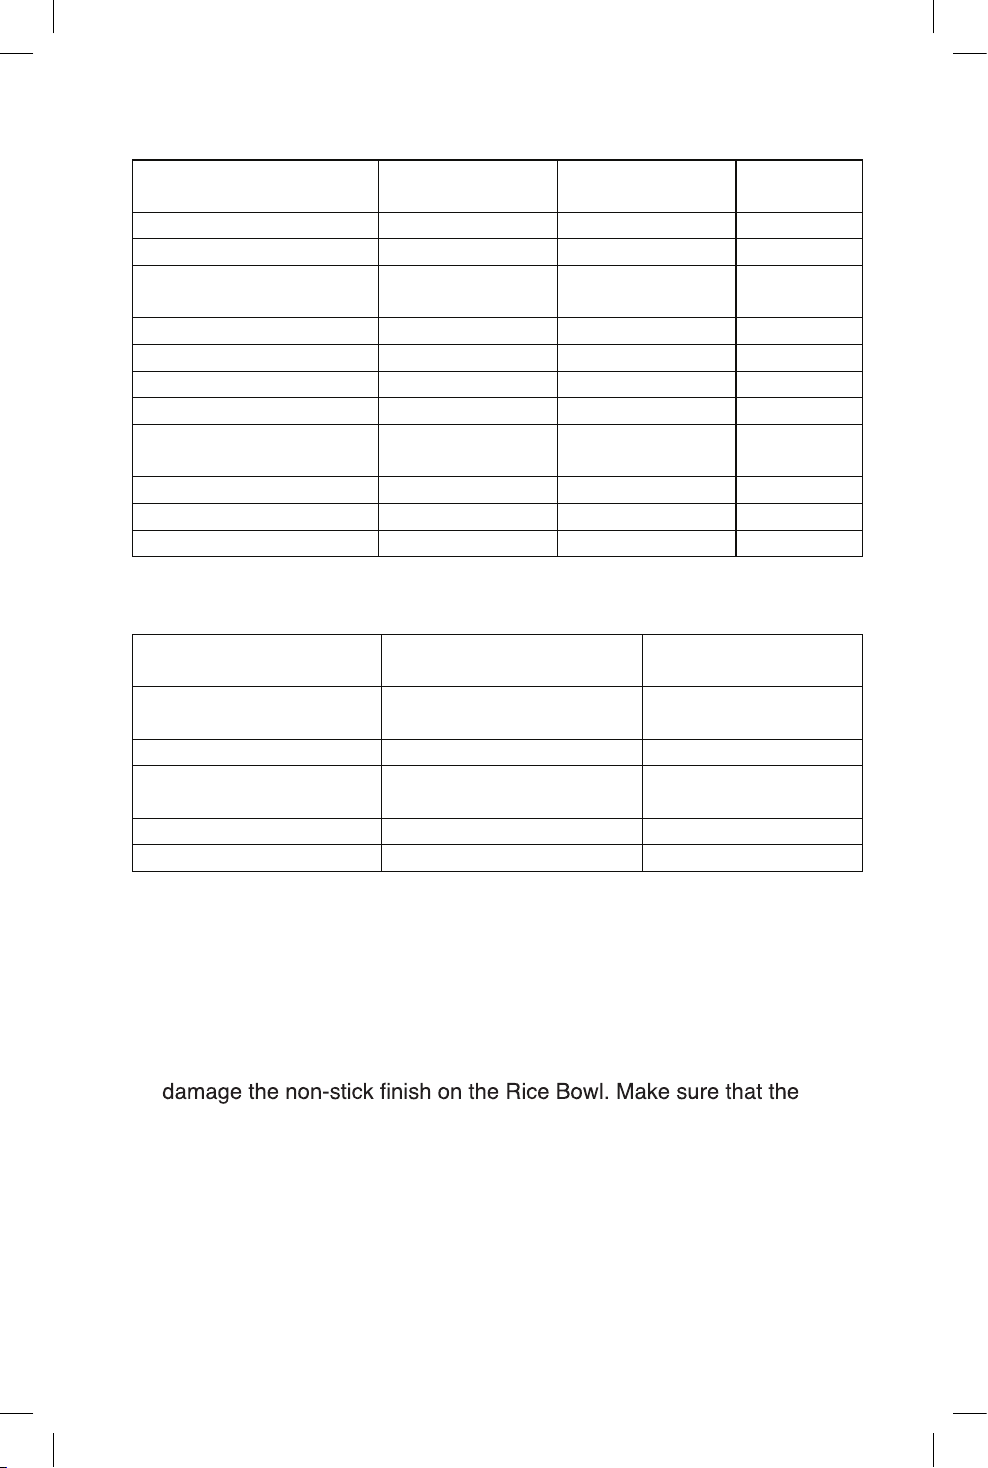
VEGETABLE COOKING CHART
Quantity
WATER
Cups (ml)
TIME
minutes
Asparagus
1 lb. 450g
1 (250)
10
Bean Sprouts
3 cups (750 ml)
1 (250)
5
Broccoli – spears
florets
3 cups (750 ml)
3 cups (750 ml)
1-1/2 (375)
1-1/2 (375)
15
10 - 12
Cabbage – shredded
2 cups (500 ml)
1 (250)
10
Carrots – sliced
2 cups (500 ml)
1 (250)
10 -12
Cauliflower – florets
3/4 lb. (340 g)
1-1/2 (375)
15
Green, yellow beans
1/2 lb. (225 g)
1-1/2 (375)
12
Potatoes, medium
size, quartered
2 lbs. (950g)
2 (500)
20 - 22
Spinach
1/4 lb. (115 g)
1 (250)
7
Squash, sliced
1 lb.(450 g)
1 (250)
10
Summer squash
1 lb. (450 g)
250 (1)
10
MEAT AND FISH STEAMING CHART
LIQUID
Cups (ml)
TIME
minutes
Beef - ¼” (.6mm)
slices
2 (500)
12
Chicken breasts
2 (500)
15 – 20
Salmon 1” (2.5 cm)
thick
2 (500)
12
Shrimps
2 (500)
12 – 15

RECIPES
Curried Rice
2 measures or
1-1/2 cups (375 ml) long grain rice
1 tbsp. (15 ml) margarine or butter
1 tbsp. (15 ml)
1/2 - 1 tsp. (3 – 5 ml) curry powder
1/4 tsp. (1.5 ml) salt
1/4 tsp. (1.5 ml) pepper
1/4 cup (60 ml) slivered almonds, toasted*
Cook rice in Rice Cooker. Heat margarine in 1 quart (1L) saucepan,
until melted. Cook onion in margarine, stirring occasionally, until tender.
Stir in curry powder, salt and pepper. Stir into cooked rice. Sprinkle with
almonds. Serve immediately.
Makes 4 servings.
To toast almonds, heat oven to 350°F (175°C). Bake uncovered in
ungreased, shallow pan, about 10 minutes, stirring occasionally, until
golden brown.
Rice Pilaf
1/2 green pepper, small dice
1/2 red pepper, small dice
1 small onion, diced
1/2 tsp (3 ml) thyme, dried
¼ tsp (1.5 ml) salt
to taste pepper
1 tbsp. (15 ml) olive oil
2 measures or 1-3/4 cups (435 ml) long grain rice
4 measures or 3 cups (750ml) chicken broth
Add olive oil to the rice bowl. Switch the Rice Cooker to ‘Cook’. Add
green and red pepper, onion, thyme, salt and pepper. Cook for 2 – 3
minutes. Add raw rice and stir to mix ingredients. Add chicken broth.
Cook as per directions in the ‘How to Cook Rice` section.
Note: Do not leave rice on warm cycle longer than 1 hour to keep
Makes 6 - 8 servings
9

Fried Rice
2 measures or 1-3/4 cups (435 ml) long grain rice
1 tbsp. (15 ml) vegetable oil
1 small onion, chopped
1/2 green pepper, chopped
1 cup (250 ml) sliced water chestnuts, drained
1 tbsp. (30 ml) soy sauce
4 eggs, beaten
Cook rice in Rice Cooker.
Heat oil in 10” (25 cm) skillet until hot. Cook onion and pepper in oil
about 3 minutes, stirring occasionally, until onion is tender. Stir in cooked
rice, water chestnuts, mushrooms, Soya sauce and eggs. Cook over low
heat 5 to 7 minutes, stirring occasionally, until eggs are set.
Makes 5 or 6 servings
Paella
1 tbsp. (15 ml) butter
2 small
1 clove garlic, crushed
½ cup (125 ml) mushrooms, sliced
1 red pepper, diced
1 green pepper, diced
1 cup (250 ml) cooked chicken, diced
¼ lb. (120 g) shrimp
1-1/2 cups (375 ml) long grain rice
Pinch saffron
1 tsp. (5 ml) salt
3 cups (750 ml) chicken broth
Heat butter in Rice Cooking Bowl. Add onions and garlic and cook until
onions are soft. Add mushrooms and cook 2 minutes longer.
Add all other ingredients. Cook, as directed, until switch goes to Keep
Warm cycle. Allow to stay in Keep Warm Cycle for about 15 minutes
before serving.
Makes 4 servings
10

Oriental Chicken and Vegetables
1/2 lb. (225 g) boneless, skinless chicken breasts, cut into 1”
(2.5cm) pieces
1/4 cup (60 ml) sweet-and-sour sauce
2 green onions, cut into 1” (2.5 cm) pieces
1/2 medium green pepper, cut into 1” (2.5 cm)
pieces
2 oz. (56 g) fresh Chinese pea pods
1 cup (250 ml) bean sprouts
1/4 cup (60 ml) sweet-and-sour sauce
2 tbsp. (30 ml) sesame seeds, toasted*
2 cups (500 ml) chicken broth for steaming
Stir chicken and 1/4 cup (60 ml) sweet-and-sour sauce in a bowl until
evenly mixed. Cover and refrigerate 30 minutes.
Drain chicken; arrange in single layer in Steaming Basket. Top with
green onions, pepper and pea pods.
Follow directions in the ‘How to Use the Steaming Basket’ section.
Steam for approximately 12 - 14 minutes or until chicken is no longer
pink in center.
In a serving bowl, toss chicken mixture, bean sprouts and 1/4 cup (60 ml)
sweet-and-sour sauce, until evenly coated. Sprinkle with sesame seeds.
*To toast sesame seeds, heat in ungreased skillet over medium heat
about 2 minutes. Stir occasionally, until golden brown.
Makes 4 servings
Lemon Shrimp
3 tbsp. (30 ml) soy sauce
3 tbsp. (30 ml) lemon juice
1 tbsp. (15 ml) sugar
2 tbsp. (30 ml) dry white wine
1/4 tsp. 1.5 ml) ground ginger
1 lb. (500 g) raw medium shrimps, peeled and deveined
1/2 cup (125 ml) water
2 tsp. (10 ml) cornstarch
2 tsp. (10 ml) water
11

2 cups (500 ml) water or broth for steaming
Mix soy sauce, lemon juice, sugar, wine and ginger in a bowl. Add
shrimps. Cover bowl and refrigerate at least 30 minutes.
Drain shrimps, reserving ¼ - 1/2 cup (60 - 125 ml) marinade. Arrange
shrimps in single layer in Steaming Basket.
Follow directions in the ‘How to Use the Steaming Basket’ section.
Steam for approximately 12 to 15 minutes or until shrimps are pink.
Mix reserved marinade and 1/2 cup (125 ml) water in 1-quart (1 litre)
saucepan. Mix cornstarch in 2 tsp. (10 ml) water; stir into marinade
mixture. Heat to boiling over medium heat, stirring constantly, and
boil for 1 minute. Serve with shrimps and, if desired, hot cooked rice.
Garnish with green onion tops if desired.
Makes 3 - 4 servings
Salmon Steaks with Dill
2 salmon steaks 4 – 5 oz. (110 – 140 g) each
2 tsp. (10 ml) fresh dill
salt and pepper
lemon wedges for garnish
2 cups (500ml) water or vegetable broth for steaming
Season salmon steaks with salt, pepper and dill. Place in the steaming
basket.
Follow directions in the ‘How to Use the Steaming Basket’ section.
Steam for approximately 12 minutes. Serve with lemon wedge.
Makes 2 servings
12
Steamed Fish
8 oz (225g)
4 mushrooms, sliced
2 green onions cut in 1” (2.5 cm) pieces
1/2 stalk celery, sliced
1/2 tsp. (3 ml) ground ginger
1 tbsp. (15 ml) white wine
1 tsp. (5 ml) soya sauce
1 tsp. (5 ml) Worchestershire sauce
Dash hot pepper sauce
2 cups (500 ml) water or broth for steaming
Combine, ginger, wine, soy sauce, Worcestershire sauce and hot pepper
Place plate inside steaming basket. Follow directions in the ‘How to Use
the Steaming Basket’ section. Steam for approximately 20 minutes.
Makes 2 servings
13

14
A short supply cord is provided to reduce the hazards of becoming
entangled in or tripping over a long cord. Extension cords may be used
if care is exercised in their use. If an extension cord is used, the marked
electrical rating of the detachable power-supply cord or extension cord
should be at least as great as the electrical rating of the appliance. If
the appliance is of the grounded type, the extension cord should be a
grounded 3-wire cord. The extension cord should be arranged so that
it will not drape over the counter top or table top, where it can be pulled
on by children or tripped over.
This warranty does not include the cost of shipping, which is to be borne by the
customer.
LIMITED WARRANTY
**The original sales receipt is the only acceptable proof of purchase**
Salton Appliances (1985) Corp. warrants that this appliance shall be free from
defects in material and workmanship for a period of five (5) year from the date of
original purchase. Salton Appliances (1985) Corp. at its sole discretion during this
warranty period, will repair or replace a defective product or issue a refund. Any
refund to the purchaser will be at a pro-rated value based on the remaining
period of the warranty. All liability is limited to the amount of the purchase price.
This warranty covers normal domestic usage and does not cover damage which
occurs in shipment or failure which results from alteration, accident, misuse,
abuse, glass breakage, neglect, improper maintenance, use contrary to the
operating instructions or commercial use. This warranty is not available to retailers
or other commercial purchasers or owners.

Contact one of our many Service Centers found on our website
www.salton.com/customer-care
For added protection, we suggest that you use an insured delivery service with
tracking information when returning your product. Salton Appliances (1985) Corp.
will not be held responsible for in-transit damage or for packages that are not
received.
This warranty does not include the cost of shipping, which is to be borne by the
customer.
To contact our Customer Service Department:
Salton Appliances (1985) Corp.
81A Brunswick,
Dollard-des-Ormeaux, Quebec H9B 2J5
Canada
Telephone: 514-685-3660
E-mail: [email protected]
Fax: 514-685-8300
www.salton.com
Securely package and return the appliance to us. Please enclose:
• Original proof of purchase
• The completed form below with a $12.50 Return Shipping & Handling fee –
either a cheque, money order or credit card (A personal cheque will delay return
shipping by 2-3 weeks)
TO OBTAIN PROMPT WARRANTY SERVICE:
or
Name
Address
City Prov/State Postal/Zip Code
Daytime Phone No. Email
Product defect:
Type of payment Cheque/Money Order Visa MasterCard
Name on card Expiry Date CSV No
Card No.
□ □ □