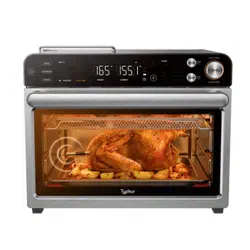

Typhur Sync Oven
User Manual
v1.0

Contents
Important Safety Instructions
Parts
Before First Use
Using The Control Panel
Using Oven Functions
Using The Wireless Probe
App Controls
Cleaning & Maintenance
Technical Specifications
Troubleshooting & FAQ
Certifications
Support
01
04
04
05
08
13
17
17
19
19
22
23

1.
2.
3.
•
•
•
•
4.
5.
6.
7.
Important Safety Instructions
WARNING
Indoor Household Use Only
When using electrical appliances, basic safety precautions should always be
followed, including the following:
Read all instructions prior to using the oven and its accessories.
This appliance can be used by persons with reduced physical, sensory or mental
capabilities or lack of experience and knowledge if they have been given supervision
or instruction concerning use of the appliance in a safe way and understand the
hazards involved.
If food contents were to catch fire during cooking, DO NOT open the oven door.
If you can safely do so, unplug the oven immediately.
DO NOT throw water onto the fire. Food contents may contain grease and water
may cause fire growth.
If fire were to emit from the oven door, call the fire department immediately.
DO NOT use the oven after it has experienced a fire, it may have been damaged and
present a risk of fire or shock.
To eliminate a choking hazard for young children, discard all packaging materials
immediately upon unpacking.
To r e d u c e t h e r i s k of fi re, DO NOT place appliance on stovetops or other hot surfaces
or in a heated oven.
Take inventory of all contents to ensure you have all parts needed to properly and
safely operate your oven.
Extension cord:
A short power-supply cord is provided to reduce the risk resulting from becom
ing entangled or tripping over a longer cord.
Longer detachable power-supply cords or extension cords are available and may
be used if care is exercised in their use.
If a longer detachable power-supply cord or extension cord is used:
The marked electrical rating of the cord set or extension cord should be at least
as great as the electrical rating of the appliance;
The cord should be arranged so that it will not drape over the countertop or
tabletop where it can be pulled on by children or tripped over unintentionally;
If the appliance is of the grounded type, the cord set or extension cord should be
a grounding-type 3-wire cord.
Read and review instructions to understand operation and use of product.
Avoid contact with hot surface. Always use hand protection to avoid burns.
For indoor and household use only.
Indicates the presence of a hazard that can cause personal injury, death or substantial
property damage if the warning included with this symbol is ignored.
a.
b.
c.
01

8.
9.
10.
11.
12.
13.
14.
15.
16.
17.
18.
19.
20.
21.
22.
23.
24.
25.
26.
27.
28.
29.
NEVER use outlet below counter level.
Keep the appliance and its cord out of reach of children. DO NOT allow the appliance
to be used by children. Close supervision is necessary when used near children.
DO NOT let cord hang over edges of tables or counters or touch hot surfaces,
including stoves and other heating ovens.
NEVER leave the oven unattended while in use.
DO NOT place any object directly onto the heating elements and DO NOT cover
crumb tray or any part of the oven with aluminum foil. This will cause the oven to
overheat or cause a fire.
DO NOT use the oven with the crumb tray incorrectly installed. Crumb tray MUST be
placed below lower heating elements.
To protect against electrical shock DO NOT immerse cord, plugs, or main unit
housing in water or other liquid.
DO NOT use the oven with damage to the power cord or plug. Regularly inspect the
oven and power cord. If the oven malfunctions or has been damaged in any way,
immediately stop use and call Customer Service.
DO NOT cover the air intake vents or air outlet vents while unit is operating. Doing so
will prevent even cooking and may damage the unit or cause it to overheat.
DO NOT insert anything in the ventilation slots and do not obstruct them.
DO NOT place items on top of surface while unit is operating except for authorized
recommended Typhur accessories. Placing items on top of the oven may mark or
scratch the surface.
Before placing any accessories into the oven ensure they are clean and dry.
Intended for countertop use only. DO NOT place the oven near the edge of a counter-
top, or on or near a hot gas or electric burner. Ensure the surface is level, clean and dry.
This oven is for household use only. DO NOT use this oven for anything other than its
intended use. Misuse may cause injury.
DO NOT store any materials, other than supplied accessories, in this oven when not
in use.
DO NOT use outdoors. DO NOT use in moving vehicles or boats.
DO NOT use accessory and attachments not recommended or sold by Typhur.
When using this oven, provide adequate space (at least 1 inch above and on all sides)
for air circulation.
A fire may occur if the oven is covered or touching flammable material, including
curtains, draperies, walls, or the like when in operation. DO NOT place anything on
the oven during operation.
This oven has a tempered glass door and is more resistant to breakage. Avoid
scratching door surface or nicking edges.
DO NOT place anything directly on heating elements and DO NOT use the oven
without a wire rack or air fry basket installed.
DO NOT spray any type of aerosol spray or flavoring inside the oven while cooking.
02

Use caution when inserting and removing anything from the oven, especially when hot.
Outlet voltages can vary, affecting the performance of your product. To prevent
possible illness, use a probe to check that your food is cooked to the temperatures
recommended.
Prevent food contact with heating elements. Excessive food loads may cause
personal injury or property damage or affect the safe use of the oven.
Oversize foods or metal utensils MUST NOT be inserted in a toaster oven, as they
may create a fire or risk of electric shock.
With the exception of parchment paper, DO NOT place any of the following materi-
als in the oven: paper, cardboard, plastic, roasting bags and the like.
Extreme caution should be exercised when using containers constructed of any
materials other than metal or glass.
DO NOT touch hot surfaces. Oven surfaces and glass door are hot during and after
operation. To prevent burns or personal injury, ALWAYS use protective hot pads or
insulated oven mitts and use available handles.
Appliances are not intended to be operated by means of an external timer or sepa-
rate remote-control system.
Spilled food can cause serious burns. Extreme caution must be used when the oven
contains hot food. Improper use could result in personal injury.
Please refer to the Cleaning & Maintenance section for regular maintenance of the oven.
Cleaning and user maintenance shall not be done by children.
Allow to cool completely before cleaning and moving for storage.
When not in use, press the power button to “off”, then unplug. Grasp the plug by the
body and pull from the outlet. NEVER unplug by grasping and pulling flexible cord.
DO NOT clean with metal scouring pads. Pieces can break off the pad and touch
electrical parts, causing a risk of electrical shock.
DO NOT use the oven as a source of heat or for drying.
This appliance has important markings on the plug blade. The entire supply cord is
not suitable for replacement. If damaged, please contact Typhur for service.
To prevent possible illness, ALWAYS use an external food probe to check that your
food is cooked to the recommended temperatures.
DO NOT place hands near probe when in use to prevent burning or scalding. Probe
will be hot. Use oven mitts or tongs to safely remove the probe from the food.
The probe DOES NOT replace an external food probe. Use external food probe to
check that food is cooked to recommended temperatures.
Always attach plug to appliance first, then plug cord into the wall outlet. To discon-
nect, turn any control to “off”, then remove plug from wall outlet.
The probe contains batteries that are non-replaceable. When the battery is at end of
life, the appliance shall be properly disposed of.
SAVE THESE INSTRUCTIONS
30.
31.
32.
33.
34.
35.
36.
37.
38.
39.
40.
41.
42.
43.
44.
45.
46.
47.
48.
49.
50.
03

Parts
Main Unit
Oven Mitt
(attached power cord not shown)
Air Fry Basket
(Install when using the Air Fry function.
Hand-wash recommended)
Wire Rack
Roasting Pan
Crumb Tray
Probe Case
Wireless Probe
Common-Sense Practices/Good Habits
DO NOT leave your toaster oven unattended while making food. If possible, unplug the
oven while not in use to eliminate the possibility of accidents occurring.
Have a fire extinguisher or fire containment blanket handy in a safe, known location. If you
don’t have a fire extinguisher, douse the flames with baking soda until they are put out.
If a fire occurs and the food in the oven is not greasy, immediately unplug the unit and
douse the flames with water until the fire is extinguished. DO NOT use water if grease is
present, since it could make the fire worse. Use baking soda instead.
Remove and discard any packaging material, tape, and stickers, from the unit.
Remove all accessories from their packaging and wash them in warm, soapy water or
in the dishwasher, except for the Probe case. NEVER submerge the main unit in water.
•
•
•
1.
2.
Before First Use
04

Ensure that the voltage applied to the appliance matches your local or home voltage.
Scan the QR code to download the free Typhur app for IOS or Android to control your
device remotely.
Using The Control Panel
Probe Mode Controls Oven Mode Controls
Temperature & Time Display
Control Knobs
Oven Mode Controls
3.
4.
NOTE:
While most of the accessories are dishwasher-safe, the Probe case is not. Hand
washing is recommended. Frequent dishwasher cleaning may lead to premature wear.
We recommend placing all accessories inside the oven and running it on AIR FRY at
450°F for 20 minutes without adding food. This removes any residues. This is
completely safe and not detrimental to the performance of the oven.
1.
2.
10
9432
1
8765 12 13
11
05

NOTE: The light will automatically turn on when door is open while cooking. Press and
hold the ' ' button for 3 seconds to switch between °F and °C.
7
8
PREHEAT: Blinking during preheating, the indicator self-extinguishes automatically
upon completion of preheating.
SHADE: Illuminates when using the TOAST or BAGEL function to designate desired
shade.
SLICES: Illuminates when using the TOAST or BAGEL function to designate number
of slices.
WI-FI ICON: Blink the Wi-Fi icon to pair; a solid light means connected.
Temperature display: Shows the cook temperature.
Control Panel Display
Time display: Shows the cook time. The time will count down when cooking is in
progress.
°F/°C: Press and hold the ' ' button for 3 seconds to switch the temperature unit.
RACK LEVEL: Depending on the function you choose, the illuminated rack level(s)
will indicate where your accessory should be placed in the unit.
PREHEAT button: To skip preheating in modes with default preheating, press the
'PREHEAT' button.
(Light) button: Press to turn the oven’s interior light on and off while cooking.
TEMP/SHADE knob: To adjust temperature, rotate the TEMP/SHADE knob. When
using the TOAST or BAGEL function, the knob will adjust the shade level (1–7 from
lightest to darkest) instead of the temperature. Temperature will increase in 5-degree
increments.
TIME/SLICES knob: To select a cook time, rotate the TIME/SLICES knob. Time
adjusts in 1-minute increments (0–1 hour), 5-minute increments (1–4 hour), and
30-minute increments (4–6 hour). When using the TOAST or BAGEL function, the
knob will adjust the number of slices/bagel halves instead of the time.
FUNCTION/START/PAUSE: Rotate the knob to select a cooking function, press to
start or stop cooking.
Operating Knobs & Buttons
NOTE: Time and temperature will always return to the settings used the last time the
oven was in operation.
NOTE: As you move through functions, you’ll notice the rack level recommendations
change for best results.
1
2
3
4
5
6
9
10
11
12
13
06

Probe Mode Controls
PRESET button: Press the PRESET button repeatedly to cycle through the probe
mode presets and exit options.
DONENESS button: Press the DONENESS button to set the desired internal cook
level (Rare to Well Done). Default doneness levels vary by food type.
MANUAL button: Press MANUAL to enter probe manual mode. Subsequent presses
will alternate between exiting probe mode and re-entering manual mode.
NOTE: Press and hold the power button for 3 seconds to enter pairing mode. Press
and hold the power button for 10 seconds to restore factory settings.
Operating Knobs & Buttons
Control Panel Display
(Power) button: Press to turn the unit on and off.
Charging: Illuminates when the probe is charging.
Low battery: Illuminates when the probe battery is low, please charge soon.
Probe icon: Illuminates when the probe is connected to the device.
Fully charged: Illuminates when the probe is fully charged.
Charging anomaly: Illuminates when the probe is in contact with the charging
points but not charging.
OVERHEAT: Illuminates when the probe internal temperature exceeds 221°F (105°C).
21
NOTE: If the battery is low during cooking, you can still use the probe to finish cooking.
Please charge it as soon as cooking is complete.
NOTE: Blinks when the probe is connecting.
14
14
15
15
16
17
18
19
20
21
22
23
16 17
18 19
20 21 22
23 24 25 26 27
07

DISCONNECT: Illuminates when the probe signal disconnected from the oven.
RARE/MEDIUM RARE/MEDIUM/ MEDIUM WELL/WELL: Probe mode presets
include recommended doneness levels, which are not displayed in manual mode.
TARGET: Illuminates when using probe to show target temperature.
CURRENT: Illuminates when using probe to show current temperature of Probe.
The oven has 3 available rack positions where your accessories can slide into the unit
(see image above). When you select a function, the corresponding rack number(s) will
illuminate on the control panel. The numbers on the control panel (see Fig. 1) will coin-
cide with those on the interior of the unit.
Fig.1
Rack level 1/2/3
Using Oven Functions
NOTE: During Probe Mode cooking, if an overheat condition is detected, the oven will
automatically shut down and activate an alarm. The alarm will continue until the
temperature drops to a safe level or you press any button to silence it.
NOTE: CURRENT and TARGET temperatures are shown only in Probe Mode.
24
25
26
27
08

NOTE: Some modes have preheating enabled by default. When preheating is
complete, the oven will beep and start cooking automatically. Depending on the initial
temperature, preheating typically takes 5-10 minutes. To skip preheating, press the
PREHEAT button to disable it.
Cooking
Press the button to turn the unit on.
Rotate the FUNCTION/START/PAUSE knob to select a cooking function.
Adjust the settings if desired, then press FUNCTION/START/PAUSE to begin.
1
2 & 3
1.
2.
3.
Cooking Chart
FUNCTION PRESETS PREHEAT TEMP/SHADE TIME/SLICE PROBE
RACK
LEVEL
ACCESSORIES
ROAST
375°F/190°C
30 min
Ye s
210°F–450°F/
100°C–230°C
1 min–4 hr Ye s 1 Roasting pan
AIR FRY
360°F/180°C
18 min
Ye s
210°F–450°F/
100°C–230°C
1 min–4 hr Ye s 2
Air fry basket or
Roasting pan
BROIL
HIGH
10 min
Ye s LOW, HIGH 1–30 min Ye s 3 Roasting pan
BAKE
320°F/160°C
30 min
Ye s
210°F–450°F/
100°C–230°C
1 min–4 hr Ye s 2
Wire rack or
Roasting pan
TOAST
Shade 4
Slices 4
No Shade 1-7 Slices 1-6 No 2 Wire rack
BAGEL
Shade 4
Slices 4
No Shade 1-7 Slices 1-6 No 2 Wire rack
COOKIES
350°F/175°C
16 min
Ye s
210°F–450°F/
100°C–230°C
1 min–4 hr No 2 Roasting pan
PIZZA
365°F/185°C
14 min
Ye s
210°F–450°F/
100°C–230°C
1 min–4 hr No 2 Wire rack
PROOF
95°F/35°C
1 hr
No
85°F–170°F/
30°C–75°C
1 min–24 hr No 1 Wire rack
REHEAT
325°F/165°C
15 min
No
210°F–450°F/
100°C–230°C
1 min–4 hr No 2 Roasting pan
DEHYDRATE
150°F/65°C
6 hr
No
85°F–200°F/
30°C–95°C
1 min–24 hr No 2 Air fry basket
KEEP WARM
160°F/70°C
1 hr
No
110°F–200°F/
45°C–95°C
1 min–4 hr No 2 Roasting pan
09

Cooking Functions
ROAST
The ROAST function is ideal for cooking a variety of meats and poultry. Even heat plus
fan circulation renders fat and crisps the exterior while keeping the center juicy.
Fan Speed: High
Heating Elements: Top and bottom.
Rack and Accessories: Level 1 or 2 with roasting pan, depending on food size.
PROBE: The Probe Mode can be used.
For Best Results: For extended cooking periods, cover with foil to prevent surface
sauces from excessive browning. Keep foil secure and clear of heating elements.
AIR FRY
The AIR FRY function is designed for crisping foods such as French fries, chicken wings,
and frozen snacks, delivering a fried-like texture with minimal oil.
Fan Speed: High
Heating Elements: Top and bottom.
Rack and Accessories: Level 2 with air fry basket, optional roasting pan underneath for
wings or skin on thighs to catch drips.
PROBE: The Probe Mode can be used.
For Best Results: When preparing a larger amount of food, shake or stir the content in
the basket in order to achieve a consistent result.
BROIL
The BROIL function is ideal for searing open-faced sandwiches, meats, poultry, fish, and
vegetables, or for browning the tops of casseroles and baked dishes.
Fan Speed: Low
Heating Elements: Primarily top heating.
Rack and Accessories: Level 2 or 3 with roasting pan, depending on food size.
Temperature: LOW: 400°F/205°C; HIGH: 450°F/230°C
PROBE: The Probe Mode can be used.
For Best Results: High-fat foods near the upper heating element may produce smoke.
Pat surface dry before cooking or use rack level 2 to reduce smoke.
BAKE
The BAKE function provides gentle, even heat, making it ideal for cakes, muffins, pastries,
and other baked goods, as well as for cooking meats, fish, and casseroles that require
consistent, thorough heating.
Fan Speed: Medium
10

Heating Elements: Top and bottom.
Rack and Accessories: Level 2 with wire rack or roasting pan.
PROBE: The Probe Mode can be used.
For Best Results: Use foil with care. Always secure it firmly and ensure it does not touch
the heating elements to prevent overheating or fire hazards.
TOAST
The TOAST function is ideal for creating a crisp, golden exterior while keeping the inside
of your bread soft and tender.
Fan Speed: Low
Heating Elements: Top and bottom.
Rack and Accessories: Level 2 with wire rack.
Time/Temp: Toasting times auto-adjust by slice count, shade level, and oven tempera-
ture. Temperature is set to 450°F/230°C.
For Best Results:
1. Use shade 1–2 for light, 3–5 for medium, 6–7 for dark toast.
2. Place slices at center of rack for best results. Add up to 6 slices of bread.
3. You may need to adjust the shade level based on the bread’s type, thickness, and
freshness.
4. Use lighter settings for raisin bread, white bread, and thin or dry slices. Use darker
settings for whole wheat, rye, dense, or freshly baked bread.
BAGEL
The BAGEL function toasts bagels by giving the cut side a golden, crispy finish while
leaving the outer crust pleasantly crunchy.
Fan Speed: Low
Heating Elements: Top and bottom.
Rack and Accessories: Level 2 with wire rack.
Time/Temp: Toasting times auto-adjust by slice count, shade level, and oven tempera-
ture. Temperature is set to 450°F (230°C).
For Best Results:
1. Always place bagels cut side up.
2. Use shade 1–2 for light, 3–5 for medium, 6–7 for dark.
3. Place slices at center of rack for best results. Add up to 6 slices of bagel.
4. You may need to adjust the shade level based on the bagel’s type, thickness, and
freshness.
11

PIZZA
The PIZZA function is designed to create a crisp crust while thoroughly melting and
browning the cheese and toppings.
Fan Speed: Low
Heating Elements: Primarily bottom.
Rack and Accessories: Level 2 with wire rack.
For Best Results: Preheat recommended for best results.
COOKIES
The COOKIES function is designed for baking scratch made or ready to bake cookies
and related pastries.
Fan Speed: Low
Heating Elements: Top and bottom.
Rack and Accessories: Level 2 with roasting pan.
For Best Results: Line pan with parchment paper for easy cleanup and best results.
PROOF
The PROOF function gently maintains low, stable temperatures, ideal for proofing dough
for bread, rolls, and pizza. Also suitable for yogurt.
Fan Speed: Off
Heating Elements: Top heating.
Rack and Accessories: Level 1 with wire rack.
For Best Results: Place dough or yogurt in an oven-proof vessel, cover and place on
center of wire rack.
REHEAT
The REHEAT function is designed to reheat leftovers.
Fan Speed: Medium
Heating Elements: Top and bottom.
Rack and Accessories: Level 1 or 2 with roasting pan, depending on food size.
For Best Results: Ensure you reheat your leftovers to an internal temperature of 165°F
(74°C).
DEHYDRATE
The DEHYDRATE function uses low, consistent heat and gentle airflow to dehydrate
foods evenly without cooking them. Ideal for making dried fruits, vegetable chips, and
similar snacks.
Fan Speed: Low
12

Heating Elements: Top and bottom.
Rack and Accessories: Level 2 with air fry basket.
For Best Results:
1. Use parchment paper to prevent staining from strongly colored foods.
2. Place a roasting pan underneath to catch drips from items like marinated jerky.
KEEP WARM
The KEEP WARM function keeps cooked food at a safe serving temperature of 160°F
(71°C) or higher to inhibit bacterial growth.
Fan Speed: Low
Heating Elements: Top and bottom.
Rack and Accessories: Level 1 or 2 with roasting pan, depending on food size.
For Best Results:
1. Use Keep Warm only for foods that are already fully cooked
2. Cover food to retain moisture and prevent drying during extended holding.
Using The Wireless Probe
124 3
5 Internal Temperature Sensors (Internal Max 221°F/105°C)
Safety Notch
Stainless Steel
High-density Ceramic Handle
Safety Notch
Fully insert the probe into the meat, ensuring it passes through the safety notch, does
not extend beyond the ceramic handle, and positions the internal sensors in the center
of the meat.
4
3
2
1
13

NOTE: When the oven is powered on, the probe charges continuously if correctly
placed in the charging dock. If unplugged for extended periods, recharge the probe
fully before use.
NOTE:
Avoid exposing the area below the probe’s safety notch to temperatures above
212°F (100°C).
DO NOT use the probe in ambient temperatures above 572°F/300°C for more than
10 minutes.
1.
2.
Probe Characteristics
Charging the Probe
Charging Contacts
Ensure the probe is fully inserted into the probe case. Align the case magnetically to the
charging area until it clicks securely into place.
Number of Temperature Sensors 5
Temperature Range 32°F-212°F/0-100°C
Accuracy ±0.5°F/0.3°C
Dimensions 5.03”(L)×0.19”dia
Water Resistance IPX8
NOTE: Do not impact or damage the charging contacts with any object. Always clean
the probe after each use to prevent charging issues.
14

1.
Probe Battery Depleted
Charging Time Continuous Usage Time
3min >3.5h
>8h10min
>12h30min
Probe Charging & Usage Time
During cooking
Probe Battery Level Continuous Usage Time
Full Charge Indicator Illuminates ( ) >24h
>4hLow Battery Indicator Illuminates( )
Probe Battery Level & Usage Time
Plug in the oven, remove the probe case from the packaging, and attach it to the device’s
charging contacts. For first-time use, charge for at least 30 minutes.
Plug in and turn on the oven. Remove the probe case and take out the probe. The
probe automatically pairs with the oven. Probe icon blinks when connecting, illuminates
when connected.
2. Press PRESET to cycle food types; press DONENESS to set doneness levels. Default
temperature and doneness settings for each food type are listed in the table below.
Probe Cooking
DONENESS BEEF (Default) PORK POULTRY LAMB FISH
Rare
110-120°F/
43-49°C
- -
120-130°F/
49-54°C
-
Medium Rare
121-126°F/
50-52°C
- -
131-135°F/
55-57°C
-
Medium
(Default)
127-135°F/
53-57°C
143-147°F/
62-64°C
-
136-145°F/
58-63°C
118-126°F/
48-52°C
Medium Well
136-145°F/
58-63°C
148-153°F/
65-67°C
-
146-155°F/
64-68°C
127-141°F/
53-60°C
Well Done
146-157°F/
64-69°C
154-163°F/
68-73°C
164-180°F/
68-82°C
156-167°F/
69-75°C
142-154°F/
61-68°C
NOTE: If the probe battery is low during cooking, you may continue until completion
before recharging. In non-cooking mode, however, low battery will disable probe
settings adjustments. Charge the probe for at least 3 minutes to unlock settings and
initiate cooking.
NOTE: There is no need to set a cook time, as the unit will automatically turn off the
heating element and alert you when your food has finished cooking.
15

Target internal temperatures for BEEF doneness are set lower than standard recom-
mendations, as the meat will carryover cook 10–15°F / 5–8°C.
Refer to USDA guidelines for recommended food-safe internal temperatures.
Transfer meat to a plate and allow the protein to rest for 5 minutes before serving.
The oven defaults to ROAST function when using the probe.
•
•
•
•
When the MANUAL button is selected, the default target temperature is set to 140°F/60°C,
with an adjustable range of 32–212°F (0–100°C).
3. Rotate the FUNCTION/START/PAUSE knob to select the desired cooking function (e.g.,
Roast) and change cook temperature accordingly.
4.
5.
Place the accessory required for your selected cook function in the unit and close the
door. Press FUNCTION/START/PAUSE to begin preheating.
While the unit is preheating, insert the probe horizontally into the center of the thickest
part of the piece of protein.
6.
7.
When the unit has preheated and the unit beeps, open the door, place food with
inserted probe in the unit, and close the door.
The display will show the current probe temperature and target probe temperature to
show progress.
8.
9.
The unit will automatically stop when probe temperature has reached the target.
Display will beep and show “END”.
Transfer protein to a plate and allow to rest for 5 minutes before serving.
NOTE: Press the PRESET button repeatedly to cycle between Preset Probe Mode and
Oven Mode.
NOTE:
1. After adjusting the oven temperature in probe mode, the interface will return to Probe
Mode after 5 seconds of inactivity, or you can press the PRESET button to return manu-
ally.
2. Only the ROAST, AIR FRY, BROIL, and BAKE oven modes support Probe Mode.
NOTE: The probe will be HOT. Wait for the probe to cool before cleaning and storing.
Use oven mitts or tongs to safely remove the probe from the food.
NOTE: In Probe Mode, adjust the probe target temperature with the TEMP/SHADE
knob. To adjust the oven temperature, turn the FUNCTION knob to access the oven
display, then use the TEMP/SHADE knob. The interface will revert to the probe display
after 5 seconds.
16

Before cleaning, ensure the oven is turned off by removing the power plug from
the power outlet.
Allow the oven and all accessories to cool completely before disassembling and
cleaning.
•
•
Wipe the outer body with a soft, damp sponge. A non-abrasive liquid cleanser or mild
spray solution may be used to avoid build-up of stains. Apply the cleanser to the
sponge, not the oven surface, before cleaning.
To clean the glass door, use a glass cleaner or mild detergent and a soft, damp
sponge or soft plastic scouring pad. Do not use an abrasive cleanser or metal scour-
ing pad as these will scratch the oven surface.
Wipe the screen with a soft damp cloth. Apply cleanser to the cloth and not the
surface. Cleaning with dry cloth or abrasive cleaners may scratch the surface.
Let all surfaces dry thoroughly prior to inserting the power plug into a power outlet and
turning the oven on.
21
App Controls
1.
2.
3.
4.
To connect to Wi-Fi, press and hold the Power button for 3 seconds (when not cook-
ing).
The Wi-Fi icon will blink to indicate pairing mode.
Open the Typhur APP, tap Devices, then Add Device. Select Typhur Sync Oven and
follow the on-screen steps.
To reset the Wi-Fi, press and hold the Power button for 10 seconds. This will erase all
user data and settings.
Cleaning & Maintenance
Cleaning the outer body and door
1.
2.
3.
4.
NOTE: Wi-Fi supports 2.4 GHz only. If connection fails despite using this band, reinstall
the app and retry.
17

DO NOT place the Probe case in the dishwasher, the probe is dishwasher safe.
Unplug the unit from the outlet and allow it to cool down before cleaning.
Remove all accessories from the unit, including the crumb tray, and wash separately.
Use a non-abrasive cleaning brush to more thoroughly wash the air fry basket. Acces-
sories are hand-wash recommended. DO NOT place roasting pan and crumb tray in
dishwasher.
Use warm, soapy water and a soft cloth to wash the oven’s interior and glass door. DO
NOT use abrasive cleaners, scrubbing brushes, or chemical cleaners, as they will
damage the oven. CAUTION: NEVER put the main unit in the dishwasher or immerse
it in water or any other liquid.
To remove tough grease, let roasting pan and roast tray soak overnight in warm, soapy
water, then wash with a non-abrasive sponge or brush.
Thoroughly dry all parts before placing them back in the oven.
Cleaning the interior
1.
2.
3.
4.
5.
Unplug the unit from the outlet and allow it to cool down before cleaning.
Empty crumb tray by sliding it out of the oven.
Daily maintenance
1.
2.
After every use, wipe away any food splatter on the interior walls and glass door of the
unit with a soft, damp sponge.
To clean the exterior of the main unit and the control panel, wipe them clean with a
damp cloth. A non-abrasive liquid cleanser or mild spray solution may be used. Apply
the cleanser to the sponge, not the oven surface, before cleaning.
When using accessories, we recommend greasing them with recommended cooking
oil, or covering them with parchment paper or aluminum foil before placing food on
top.
3.
4.
5.
Allow the probe to cool down before cleaning.
The probe is dishwasher safe and can be hand washed. Clean the areas
contacting the charging points thoroughly, ensure it's dry before returning to the case.
The Probe case is handwash only. DO NOT immerse it in water or any other liquid. We
recommend cleaning with a damp cloth only.
Cleaning the probe and the probe case
1.
2.
3.
NOTE: Place crumb tray below lower heating elements. DO NOT slide into any rack
positions.
NOTE: Empty crumb tray frequently. Hand-wash when necessary.
18

Troubleshooting
Problem Possible Cause Solution
Does not
switch on
Outlet supply overload
1. Check if the plug is inserted in
outlet properly.
2. Try a different outlet and
check the fuses.
Technical Specifications
CV03
AC 120V, 60Hz
1750W
85°F~450°F
26L
24lb
17 x 16.7 x 14.5 in
Model
Power Supply
Rated Power
Temperature Range
Capacity
Weight
Dimensions (including handle)
Troubleshooting & FAQ
Smoke
1. Cooking fatty
ingredients
2. Greasy residues
1. Carefully pour off excess oil or
fat before resume cooking.
2. Clean the pan after each use.
Display Screen
does not
respond
Moist or liquid on
display surface
Wipe out any moist or any other
liquid immediately and always
keep the display clean and dry.
Oven
Probe
Probe Icon
Blinking/
Disconnected
1. Probe battery
depleted.
2. Probe head blocked
by metal objects.
3. Probe is too far from
the oven.
1. Charge the probe and try
connecting again.
2. Ensure no metal objects are
covering the probe head.
3. Always keep the probe inside
or near the oven during use.
19

E101, E102,
E104, E116,
E132, E164,
E14, E17
Possible motor,
sensor or
communication failure
Switch off the device, discon-
nect the power supply, wait
briefly, reconnect the power
supply, and proceed to switch
on the device again. Contact
customer service of the error
code persists.
Overheat
Probe internal
temperature exceeds
221°F (105°C)
1. Check if the probe is left
inside the oven.
2. Food is not passed through
the safety notch.
3. Probe tip has pierced through
the food and is exposed.
Charging Error
1. Probe case not
securely aligned with
the charging area.
2. Dirt on probe/charg-
ing contacts.
3. Damage to charging
contacts.
1. Reposition the probe case to
ensure full contact between the
probe and charging contacts.
2. Clean the probe and gently
wipe the charging contacts with
a dry, lint-free cloth.
3. Contact customer support
for further assistance if issues
persist.
Error
Code
FAQ
Why won’t the oven turn on?
Make sure the power cord is securely plugged into the outlet.
Insert the power cord into a different outlet.
Reset the circuit breaker if necessary.
Press the power button.
Can I use the roasting pan instead of the air fry basket with Air Fry function?
Yes, but crispiness results may vary.
Do I need to adjust the cook times and temperatures of traditional oven recipes?
For best results, keep an eye on your food while cooking. Refer to the cooking charts
for more guidance on cook times and temperatures.
Can I restore the unit to its default settings?
The oven will remember the last setting used for each function, even if you unplug it.
To restore the oven’s default settings for each function, press and hold the power
button for 10 seconds to restore factory settings.
Why do the heating elements appear to be turning on and off?
This is normal. The oven is designed to control temperature precisely for every function
by adjusting the heating elements’ power levels.
Why does the oven have a different temperature reading with an external probe?
Convection ovens circulate air differently than traditional ovens, so when the door is
1.
•
•
•
•
2.
•
3.
•
4.
•
5.
•
6.
•
Probe
20

opened, more heat will escape. This may affect any external temperature reading of
the unit’s interior temperature.
Since this is a convection oven, it can cook more quickly than a traditional oven.
Convection cooking includes a fan that helps speed up cook time by circulating hot
air and can affect temperatures within the cavity. The time it takes the unit to heat up
to the set temperature will vary based on the amount of food being cooked, the func
tion being used, and the cook temperature and time. The oven features an algorithm
that ensures temperature and time settings work with most traditional oven recipes.
As a result, the temperature inside the oven may differ from the set temperature. This
does not impact cooking quality. Refer to the Cooking Chart to learn more about
recommended cook times and temperatures.
Why is steam coming out from the oven door?
This is normal. Foods with a high moisture content may release steam around the door.
Why is water dripping onto the counter from under the door?
This is normal. The condensation created by foods with a high moisture content
(such as frozen breads) may run down the inside of the door and drip onto the counter.
Why is the unit generating smoke?
Ensure you are using the roast pan when cooking all greasy foods or when cooking in
Air Fry, Roast, or other modes.
If problem persists, run a Toast cycle on shade 7 with accessories removed; this will
burn off any additional grease on the heating elements that are causing smoke.
Why is my food overcooked or undercooked even though I used the probe?
It is important to insert the probe lengthwise into the thickest part of the ingredient to
get the most accurate reading. Make sure to allow food to rest for 3–5 minutes to
complete cooking. For more information on recommended doneness while using the
Manual function and doneness temperatures while using the Preset function, refer to
the Using the probe section.
Will the probe melt if it touches the heating elements inside the oven?
The probe will not melt, but prolonged contact with the heating element may cause
internal damage.
How can I clean the roasting pan?
For stuck-on food, let the roasting pan soak before cleaning.
Line the roasting pan with aluminum foil or parchment paper when cooking to make
clean-up easier.
Why did a circuit breaker trip while using the unit?
The unit uses 1750 watts of power, so it must be plugged into an outlet on a 15-amp
circuit breaker. It is also important that the unit be the only appliance plugged into an
outlet when in use. To avoid tripping a breaker, make sure the unit is the only appli
ance plugged into an outlet on a 15-amp breaker.
•
7.
•
5.
•
9.
•
•
10.
•
11.
•
12.
•
•
13.
•
21

This equipment has been tested and found to comply with the limits for a Class B digital
device, pursuant to part 15 of the FCC Rules. These limits are designed to provide
reasonable protection against harmful interference in a residential installation.
This equipment generates uses and can radiate radio frequency energy and, if not
installed and used in accordance with the instructions, may cause harmful interference
to radio communications. However, there is no guarantee that interference will not occur
in a particular installation. If this equipment does cause harmful interference to radio or
television reception, which can be determined by turning the equipment off and on, the
user is encouraged to try to correct the interference by one or more of the following
measures:
Reorient or relocate the receiving antenna.
Increase the separation between the equipment and receiver.
Connect the equipment into an outlet on a circuit different from that to which the
receiver is connected.
Consult the dealer or an experienced radio/TV technician for help.
Caution
The user is cautioned that changes or modifications not expressly approved by the party
responsible for compliance could void the user's authority to operate the
equipment.
FCC Radiation Exposure Statement
This equipment complies with FCC radiation exposure limits set forth for an
uncontrolled environment.
This equipment should be installed and operated with minimum distance 20cm between
the radiator & your body.
FCC Supplier’s Declaration of Conformity
Product Name: Typhur Sync Oven
Model Number: CV03
Suppliers Name: Typhur Inc.
Suppliers Address (USA): 2890 Zanker Rd, Suite 120, San Jose, CA 95134
Suppliers Email: allen.f@typhur.com
•
•
•
•
Certifications
ISED statement
This device contains license-exempt transmitter(s)/receiver(s) that comply with Innova-
tion, Science and Economic Development Canada’s license-exempt RSS(s).
Operation is subject to the following two conditions:
1. This device may not cause interference.
2. This device must accept any interference, including interference that may cause
undesired operation of the device.
L’émetteur/récepteur exempt de licence contenu dans le présent appareil est conforme
aux CNR d’Innovation, Sciences et Développement économique Canada applicables
aux appareils radio exempts de licence. L’exploitation est autorisée aux deu conditions
suivantes :
22

ISED Radiation Exposure Statement
This equipment complies with ISED RSS-102 radiation exposure limits set forth for an
uncontrolled environment. This equipment should be installed and operated with a
minimum distance of 20cm between the radiator and any part of your body.
Pour se conformer aux exigences de conformité CNR 102 RF exposition, une distance
de séparation d'au moins 20 cm doit être maintenue entre l'antenne de cet appareil
ettoutes les personnes.
This symbol, affixed to the product or its packaging, indicates that the product
must not be processed with household waste. It must be brought to an electric or
electronic waste collection point for recycling and disposal. By ensuring the
appropriate disposal of this product you also help in preventing potentially negative
consequences for the environment and human health. The recycling of materials helps
preserve our natural resources. For further information regarding the recycling of this
product, please contact your municipality, local waste disposal centre or the store where
the product was purchased.
1. L’appareil ne doit pas produire de brouillage;
2. L’appareil doit accepter tout brouillage radioélectrique subi, même si le brouillage
est susceptible d’en compromettre le fonctionnement.
Please contact our Customer Support Team if you have any questions.
:
1(888) 838-6563(USA)
: support@typhur.com
: www.typhur.com/contact-us
Typhur Privacy Statement
We value your privacy and personal data rights, and we, Typhur Inc. is the entity
responsible for the collection, use, and disclosure of information under our Privacy
Statement. For more details, please visit https://www.typhur.com/privacy-statement.
Terms of Service
For details about Typhur Terms of Service, please visit
https://www.typhur.com/terms-of-service
Refund & Return Policy
Typhur has a 30 calendar day hassle-free return policy. For more details please visit
https://www.typhur.com/refund-and-return
Warranty
Full details are stated in Typhur's warranty policy at https://www.typhur.com/warranty
Support
23

Model: CV03