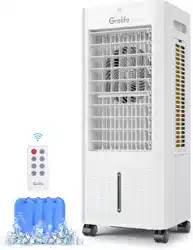
User Manual
Evaporative Air Cooler
READ AND SAVE THESE INSTRUCTIONS
DF-AF1360C

Contents
PACKAGE CONTENTS ................................................................................ 01
SPECIFICATIONS ......................................................................................... 01
GENERAL SAFETY INSTRUCTIONS ............................................................. 02
PRODUCT COMPONENT NAMES AND FUNCTIONS................................. 05
TEST BEFORE USE ......................................................................................... 06
INSTALLATION AND USAGE INSTRUCTIONS .............................................. 06
CLEANING AND MAINTENANCE ............................................................... 14
WARRANTY&CUSTOMER SUPPORT ........................................................... 15
STATEMENT .................................................................................................. 15
- 01 -
PACKAGE CONTENTS
Product Model
Rated Voltage
Rated Frequency
Rated Power
Noise Level (High Speed)
Rated Air Output
Rated Evaporation Rate
Energy Efficiency Ratio
Product Dimensions
Net Weight
Applicable Environment
DF-AF1360C
120V
60Hz
60W
≤52dB
340m³/h
600mL/h
≥7W/W
(L)280mm×(W)230mm×(H)569mm
4±0.5Kg
Relative humidity less than 95% (at 25°C)
SPECIFICATIONS
Thank you for your trust and support! Like many of our customers, you
have chosen our company's latest developed multifunctional, luxury
evaporative air cooler.
To ensure the best use of this product, please read the user manual
carefully before using it to maximize its performance; and keep the
manual in a safe place. Once again, thank you for your support, and
we hope our products bring convenience and enjoyment to your life.
If you need any assistance, please contact our support team
[email protected] with your product model number and order
number.
Evaporative Cooler x1
Ice Boxes x4
Remote Control x1
User Manual x1
Easy-rolling Casters x4

- 02 -
To avoid dangers caused by operational errors and to
facilitate the use of this unit, please read the product
user manual before use.
Please read all instructions carefully before using this product.
WARNING: Unplug or disconnect the appliance from the power
supply before user servicing or cleaning operation.
This appliance has a polarized plug (one blade is wider than the
other). To reduce the risk of electric shock, this plug is intended to fit
in a polarized outlet only one way. If the plug does not fit fully in the
outlet, reverse the plug. If it still does not fit, contact a qualified
electrician. Do not attempt to defeat this safety feature.
WARNING-To Reduce The Risk Of Fire Or Electric Shock, Do Not Use
This Fan With Any Solid-State Speed Control Device.
WARNING:To Reduce The Risk Of Fire, Electric Shock Or lnjury To
Persons, Do Not Use Replacement Parts That Have Not Been
Recommended By The Manufacturer (e.g. Parts Made At Home
Using A 3D Printer).
To reduce the risk of fire or electric shock ,or injury to persons,
Please place the product and connected cord so that the product
is not likely to be upset
Turn off the power and remove the power cord (be sure to unplug
the power cord when cleaning the body, or else it may cause
electric shock and fire or other personal injury).
When cleaning, use ordinary detergent and soft brush. Do not use
chemical agents.
Do not use corrosive detergent or solvent.
Do not excessive clean and load or else it may cause electric
shock.
When the product is not used for a long time, remove the power
plug, package the product and prevent dust from entering the
body, or else it may cause mechanical damage.
Changes or modifications to this unit not expressly approved by the
party responsible for compliance could void the user’s authority to
operate the equipment.
1.
2.
3.
4.
5.
6.
7.
8.
9.
10.
11.
12.
GENERAL SAFETY INSTRUCTIONS

13.
14.
15.
16.
17.
18.
19.
20.
21.
22.
23.
NOTE: This equipment has been tested and found to comply with
the limits for a Class B digital device, pursuant to Part 15 of the FCC
Rules. These limits are designed to provide reasonable protection
against harmful interference in a residential installation. This equip-
ment generates uses and can radiate radio frequency energy
and, if not installed and used in accordance with the instructions,
may cause harmful interference to radio communications.
However, there is no guarantee that interference will not occur in a
particular installation. If this equipment does cause harmful interfer-
ence to radio or television reception, which can be determined by
turning the equipment off and on, the user is encouraged to try to
correct the interference by one or more of the following measures:
● Reorient or relocate the receiving antenna.
● Increase the separation between the equipment and receiver.
● Connect the equipment into an outlet on a circuit different from
that to which the receiver is connected.
● Consult the dealer or an experienced radio/TV technician for help.
This device complies with Part 15 of the FCC Rules. Operation is
subject to the following two conditions: (1) this device may not
cause harmful interference, and (2) this device must accept any
interference received, including interference that may cause
undesired operation.
Remove and immediately recycle or dispose of used batteries
according to local regulations and keep away from children. Do
NOT dispose of batteries in household trash or incinerate
Even used batteries may cause severe injury or death.
Call a local poison control center for treatment information.
Used Battery CR2032, DC3V
Non-rechargeable batteries are not to be recharged.
Do not force discharge, recharge, disassemble, heat above 60℃
or incinerate. Doing so may result in injury due to venting, leakage
or explosion resulting in chemical burns.
Ensure the batteries are installed correctly according to polarity (+
and -).
Do not mix old and new batteries, different brands or types of
batteries, such as alkaline, carbon-zinc, or rechargeable batteries.
- 03 -
24.
25.
- 04 -
Remove and immediately recycle or dispose of batteries from
equipment not used for an extended period of time according to
local regulations
Always completely secure the battery compartment. If the battery
compartment does not close securely, stop using the product,
remove the batteries, and keep them away from children.
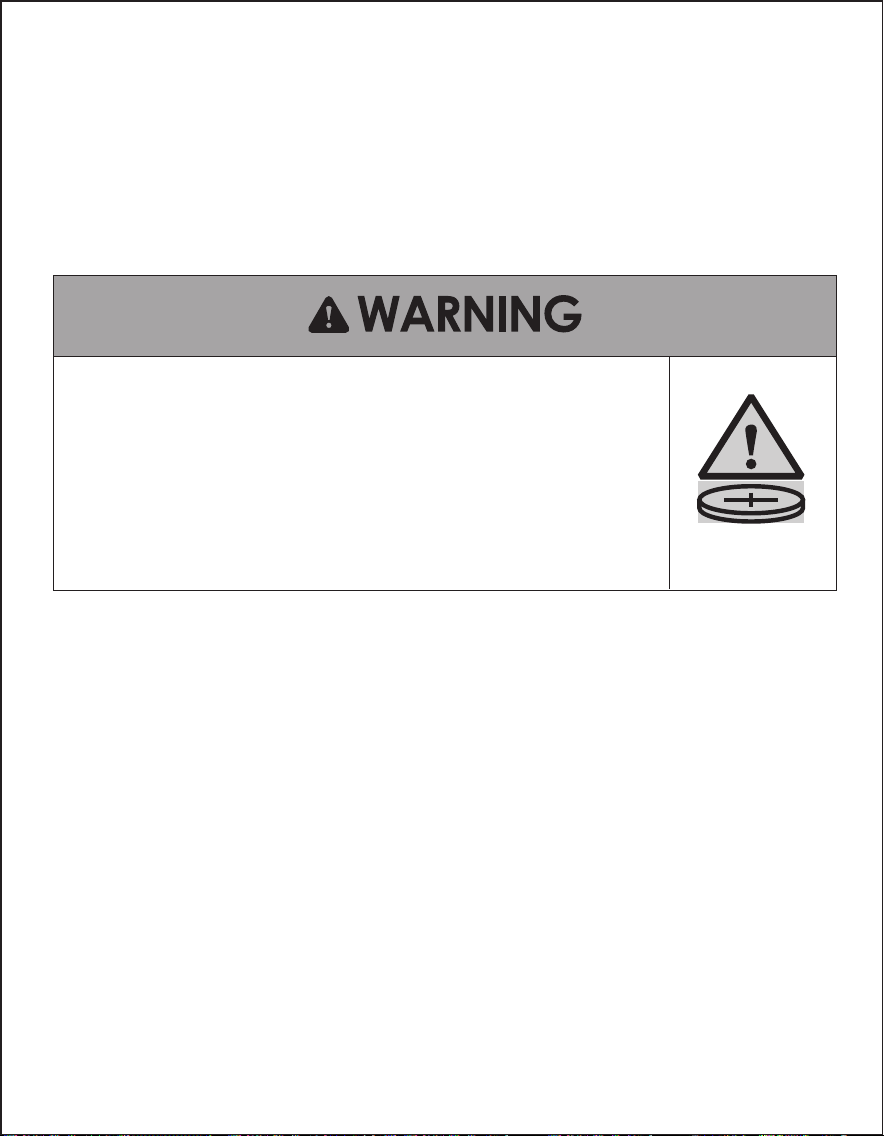
● INGESTION HAZARD: This product contains a button cell or coin battery.
● DEATH or serious injury can occur if ingested.
● A swallowed button cell or coin battery can cause Internal Chemical
Burns
in as little as 2 hours.
● KEEP
new and used batteries OUT OF REACH of CHILDREN
● Seek immediate medical attention
if a battery is suspected to be
swallowed or inserted inside any part of the body.
- 05 -
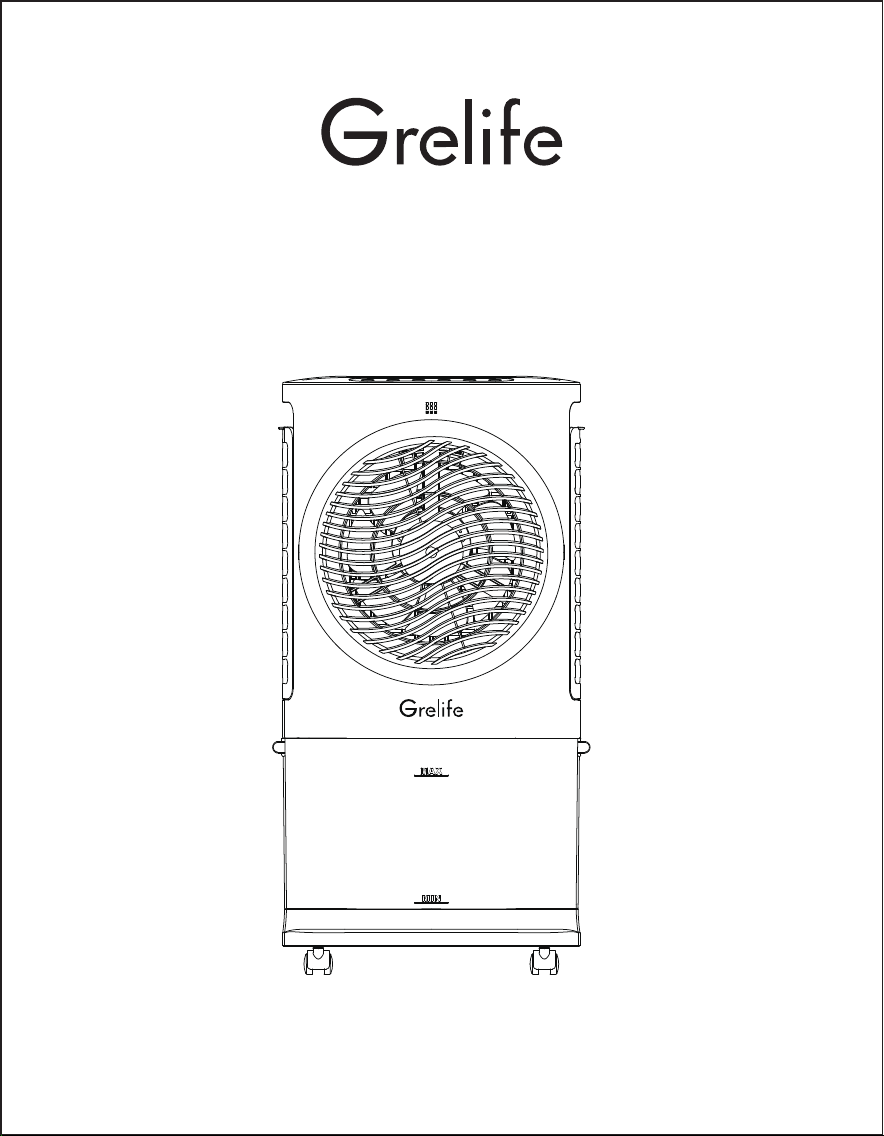
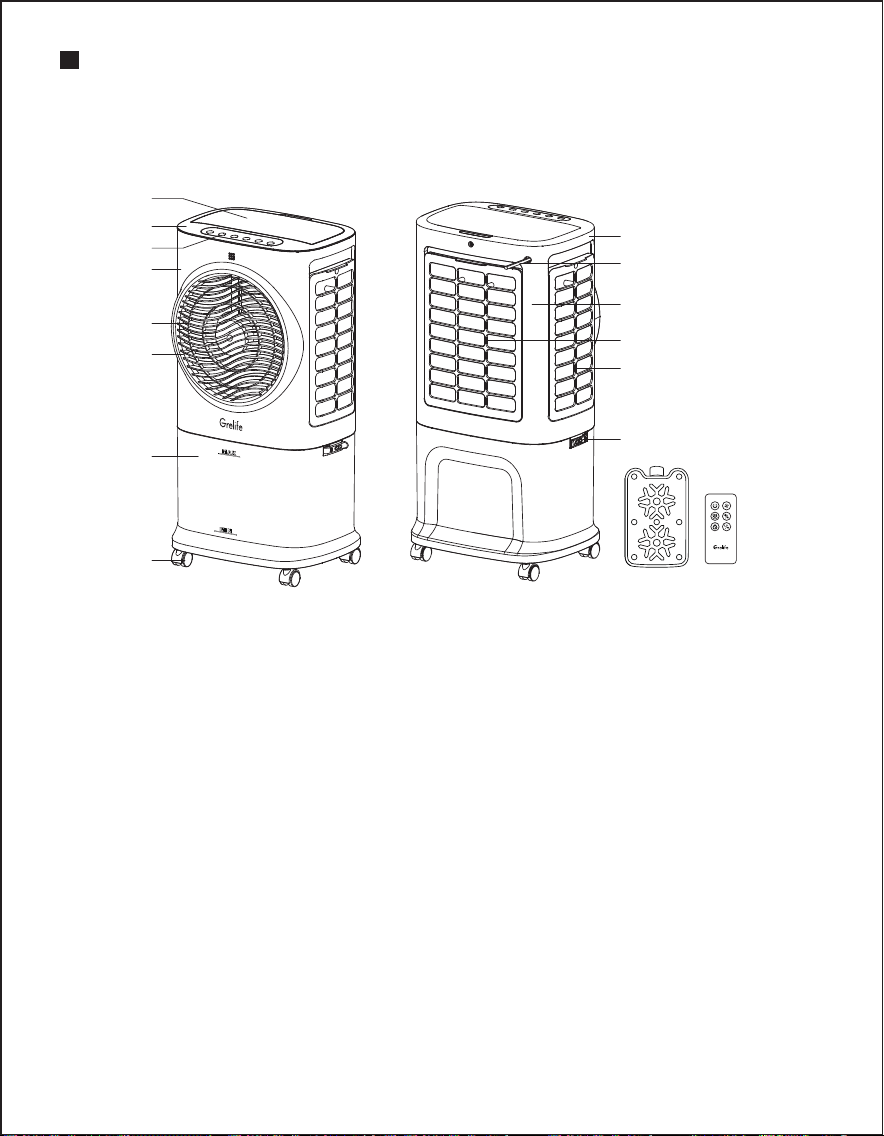
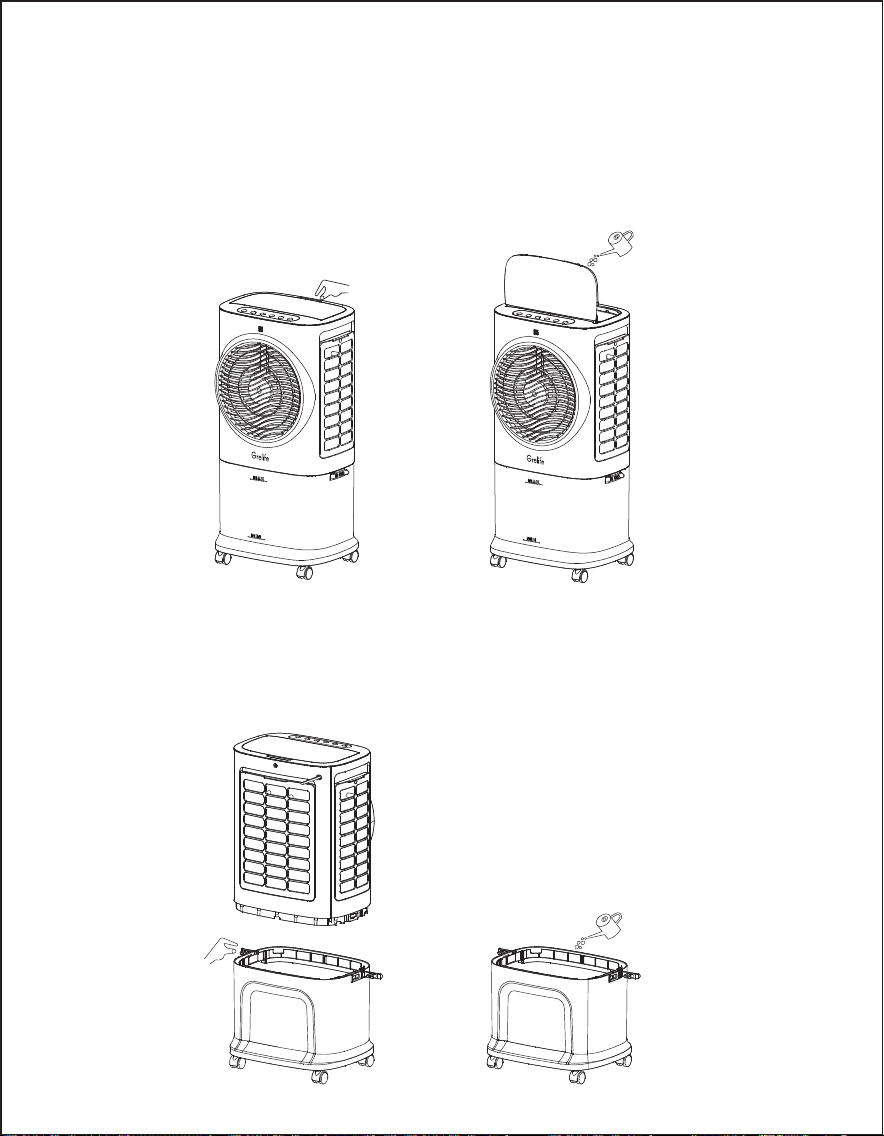
PRODUCT COMPONENT NAMES AND
FUNCTIONS
1. Water filling door
2. Top shell
3. Button PVC (including indicator light)
4. Front shell
5. Fan blades
6. Screw cap
7. Water tank
8. Casters
9. Side shell
10. Power cable
11. Rear shell
12. Rear mesh (with mesh fabric)
13. Side mesh (with mesh fabric)
14. Fastening clip
15. Accessory lce Box
16. Accessory Remote Control
Product Structure Schematic
1
2
3
4
5
6
7
8
9
10
11
12
13
14
15
16
1.
2.
3.
TEST BEFORE USE
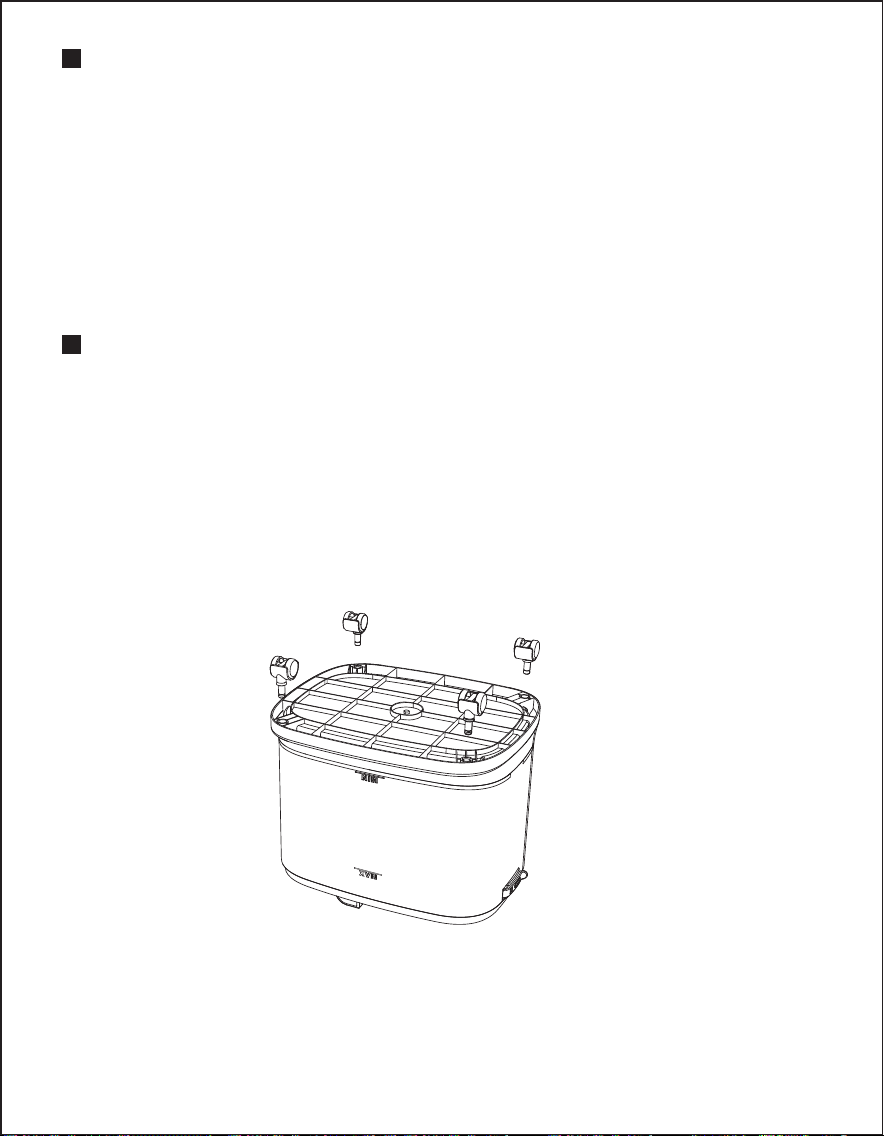
1. Assemble moving wheels
INSTALLATION AND USAGE INSTRUCTIONS
- 06 -
After opening the package,check whether the parts are in good
condition and whether the power cord is damaged. After unpacking,
please keep the packaging materials properly for use when storing
the product.
Check whether the parts in the packing box are consistent with the
packing list in the manual.
Check whether the power supply is consistent with the parameters
on the nameplate of the machine.
The product is equipped with 4 casters, which are placed in the
bubble of the outer packaging box. After opening the product
packaging box, take the air cooler out. You need to put it upside
down on flat ground or table and align the iron shafts of the 4 casters
with it. The 4 caster holes at the bottom are inserted firmly into place,
and then the product with assembled casters can be used normally.
Assemble moving wheels
9. Side shell
10. Power cable
11. Rear shell
12. Rear mesh (with mesh fabric)
13. Side mesh (with mesh fabric)
14. Fastening clip
15. Accessory lce Box
16. Accessory Remote Control
- 07 -
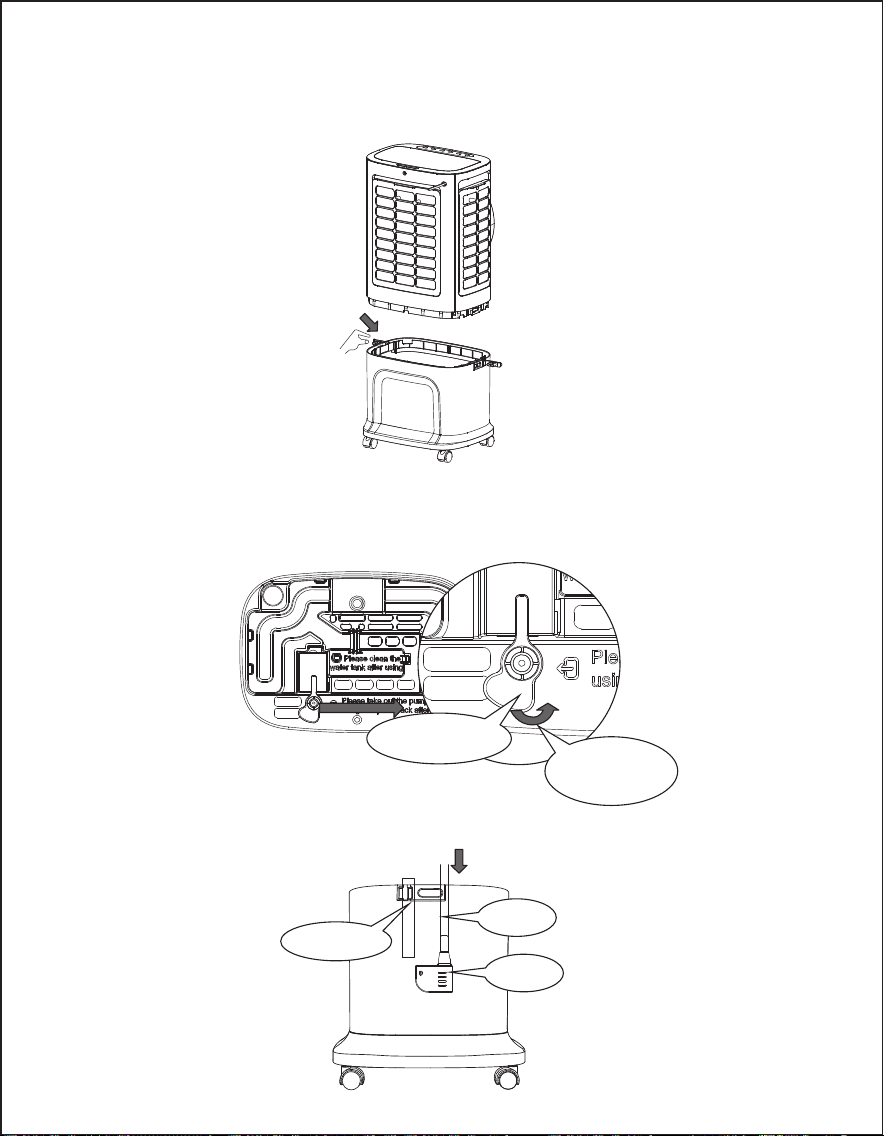
2. Usage of the Water Pump:
Dowmwater Pipe
Upwater Pipe
Water Pump
Please take out the pump when using and put it back after use.
2.1. First, open the 2 fasteners of the water tank to separate the body
from the water tank.
2.2. Please remove the water pump: Rotate the water pump lock
counterclockwise to remove the water pump and water pipe
from the storage slot (the water pipe is secured in place).
2.3. Hang the water pump and downwater pipe naturally at the
bottom of the water tank.
Direction to Open
Water Pump Lock
Water Pump Lock
- 08 -
3. Filling Water
If you need to activate the cooling or humidifying functions, please
add water to the water tank. There are two ways to fill the water:
3.1. Filling Method
First, open the water filling door and slowly pour water into the tank
(see Figure 3, Figure 4). After adding the water, close the water filling
door again.
3.2. Method of adding water
First, open the two fastening clips on the water tank to separate the
unit from the tank. Slowly pour water into the tank (see Figure 5, Figure
6). After filling the tank with water, reattach the unit to the water tank
and secure it with the fastening clips.
Figure 3
Figure 4
Figure 5
Figure 6
- 09 -
4. Use of Ice Crystals:
4.1. Place the ice box in the freezer compartment of the refrigerator until
it is completely frozen.
4.2. Insert one frozen ice box into the water tank through the water
filling opening and return the tank to its original position. After about
ten minutes, the water temperature in the tank will be lower than
the ambient tempera ture.
4.3. This unit comes with four ice boxes to ensure continuous use.
4.4. Do not open the lid of the ice box, and do not ingest it.
The ice box has unique cold storage insulation properties, allowing it
to slowly absorb heat from the water, keeping the water temperature
in the tank several degrees lower than the ambient temperature for
hours, resulting in cooler air from the air conditioning fan.
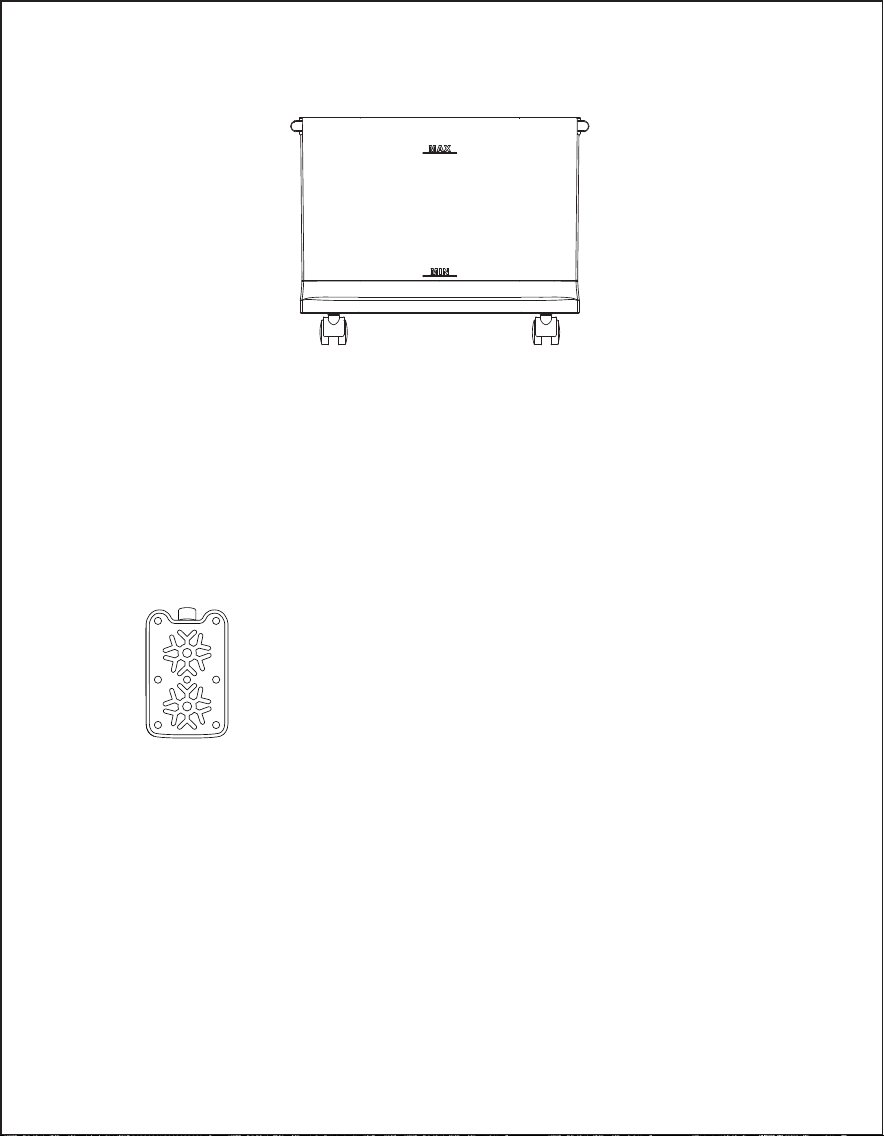
When manually filling the water, please pay attention to the water
level indicator on the front of the air cooler's water tank (see Figure 7).
1.
2.
3.
When filling water, please ensure that you do not exceed the maxi-
mum water level line.
Always use clean tap water.
Friendly Reminder: If there is a slight odor or the water in the tank has
a slight discoloration during the initial use of this unit, this is normal and
harmless; it will not affect your health.
Attention:
Figure 7

5. Instructions for Using Function Buttons
5.1. “ ” Power On/Off Button:
After plugging in the power, a sound “Bi~Bi~” will be emitted,
indicating that the unit has entered standby mode. After power
ing on, pressing the “ ” power button once will turn the unit on.
In working mode, pressing the “ ” button will turn off all functions,
and the machine will enter standby mode.
5.2. “ ” Wind Speed Button:
In the powered-on state, press the “ ” wind speed button to enter
the wind speed adjustment mode. The cycle is: Low speed →
Medium speed → High speed → Low speed...
While powered on, if you long press the “ ” wind speed button for
3 seconds, it will activate the dry air function with the default
setting at high speed, running continuously for 20 minutes before
entering standby mode. The wind speed indicator light in dry air
mode will flash to indicate operation.
During the operation of the dry air function, all function buttons
except for the “ ” power button will be inactive. (Long pressing
the “ ” button for 3 seconds will exit the dry air function.)
5.3. “ ” Mode Button:
Upon first powering on, the unit will operate in normal wind mode.
Pressing the “ ” mode button allows you to switch between wind
modes, with the following sequence: Normal wind → Natural
wind → Sleep wind → Normal wind... The corresponding indicator
lights will display the active function.
Normal Wind:
The product operates at the user-defined wind speed setting, with
three speed levels: high, medium, and low, running at a fixed
rotation speed.
- 10 -

- 11 -
Natural Wind:
The product operates according to the user-defined wind speed
setting but switches automatically between high, medium, and
low speeds following a pre-set pattern. This mode mimics the
natural effect of intermittent breezes, resulting in a gentler and
more comfortable airflow.
Sleep Wind:
The product operates at the user-defined wind speed setting,
following a programmed schedule to gradually reduce the speed
over time. This mode prevents discomfort caused by excessive
airflow while the user is asleep. Below are the operation al modes
for each set speed level when the sleep wind function is activated:
High-Speed Sleep Wind:
30 minutes of high-speed normal wind → 30 minutes of medi
um-speed normal wind → Continues running at low-speed normal
wind.
Medium-Speed Sleep Wind:
30 minutes of medium-speed normal wind → Continues running at
low-speed normal wind.
Low-Speed Sleep Wind:
Continues running at low-speed normal wind.
5.4. “ ” Cooling/Humidifying Button :
In the powered-on state, pressing the “ ” cooling/humidifying
button can turn the cooling/humidifying function on or off.
Cooling/Humidifying Function On: The water pump operates, and
the indicator light is lit.
Cooling/Humidifying Function Off: The water pump stops working,
and the indicator light is off.
Low Water Protection Function: When the cooling function is
activated, if the water pump runs for 45 seconds and detects low
water in the tank continuously within 5 seconds, the protection
switch will open (low water), causing the water pump to stop
working. The indicator light will flash at a frequency of 0.5 seconds
on and 0.5 seconds off, and the buzzer will emit a low water alarm
sound (Bi--) 10 times, shutting down the humidification function.
Press the “ ”cooling/humidifying button again to turn off the
indicator light.
5.5. “ ” Timer Button:
In the power-on state, press the “ ” timer button to enter the
timer mode and set a shutdown timer between 1-8 hours (cumu-
lative timing). The display will show as follows: if you set a 2-hour
shutdown, the timer will take effect 1 hour later with the 2-hour
indicator light turning off and the 1-hour indicator light turning on,
indicating a decrement of the indicator light (as shown in the
table below). When all timer lights are off, the machine will shut
down and enter standby mode.
5.6. “ ”Swing Button:
In the powered-on state, pressing the “ ” swing button can turn
the swinging function on or off.
5.7. Other Functions:
Dim Mode: If no buttons are pressed within 1 minute of any indica-
tor light being lit, the indicator light will dim (to one-third of its
original brightness). If a button is pressed again at this time, the
indicator light will return to normal brightness.
① Power Failure Memory Function: During standby mode (not the first
power-on), pressing the “ ” power button will resume the last state
before shutdown, excluding timer, sleep wind, and dry air functions.
② Screen Off Function: Long press the “ ” swing button for 3 seconds to
turn off the screen, and all indicator lights will turn off. Pressing any
button will restore normal.
- 12 -
Timer Duration(h)
8
7
6
5
4
3
2
1
Indicator Light
8h
1h 2h 4h
2h 4h
1h 4h
4h
1h 2h
2h
1h
- 13 -
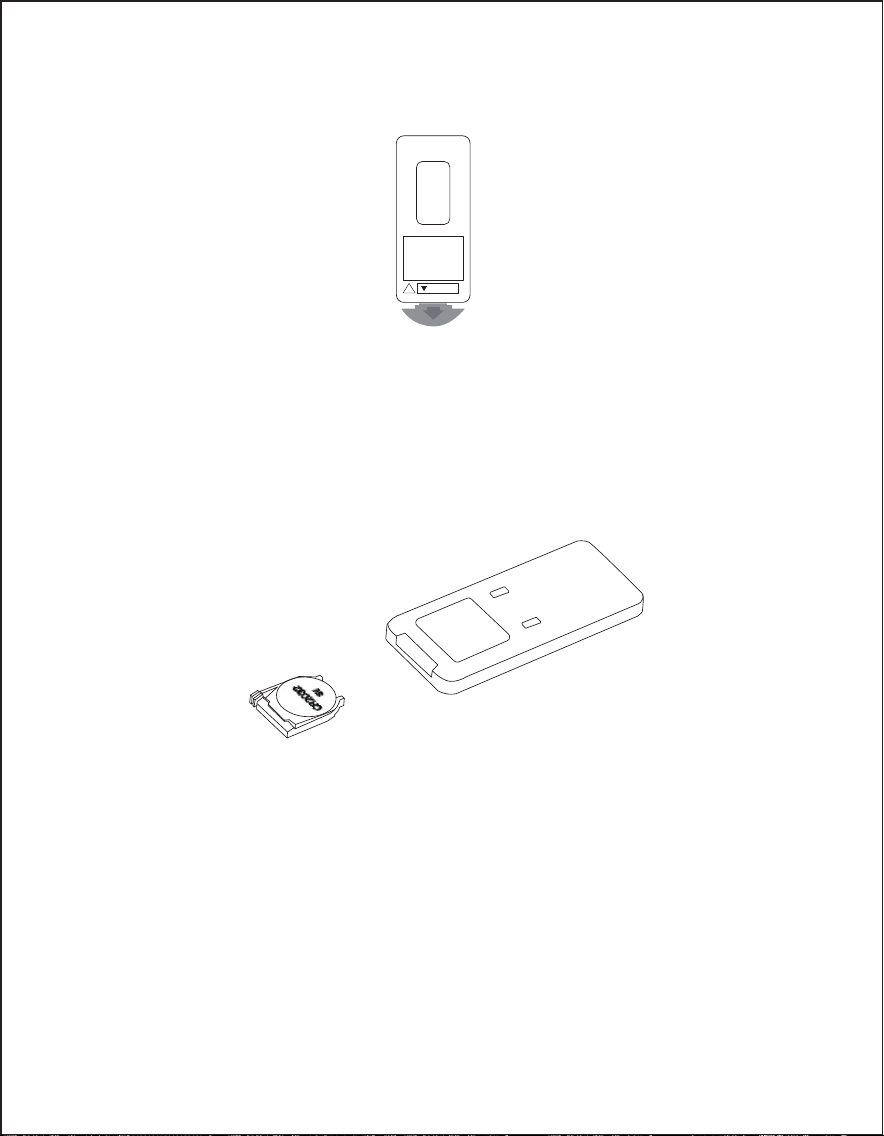
RELEASE
!
6.2. When using, please aim at the receiver position.
6.3. When the battery runs out, you can pull out the battery cover in
the direction shown in the image to replace it with a new battery
(CR2032 3V). Please pay attention to the positive and negative
terminals when replacing the battery; then simply reposition the
battery cover to use it again.
6. Use of remote control:
6.1. Remove the battery insulating film along the indicated arrow
direction to power on the remote.
- 14 -
Cleaning the Water Tank
1. Unplug the power, rotate the fastening clip knob to the horizontal
position, and lift the upper part of the unit to separate the water tank.
2. Use a towel dampened with a small amount of cleaning solution to
wipe away any scale inside the water tank, then rinse it with water
and pour out the dirty water.
CLEANING AND MAINTENANCE
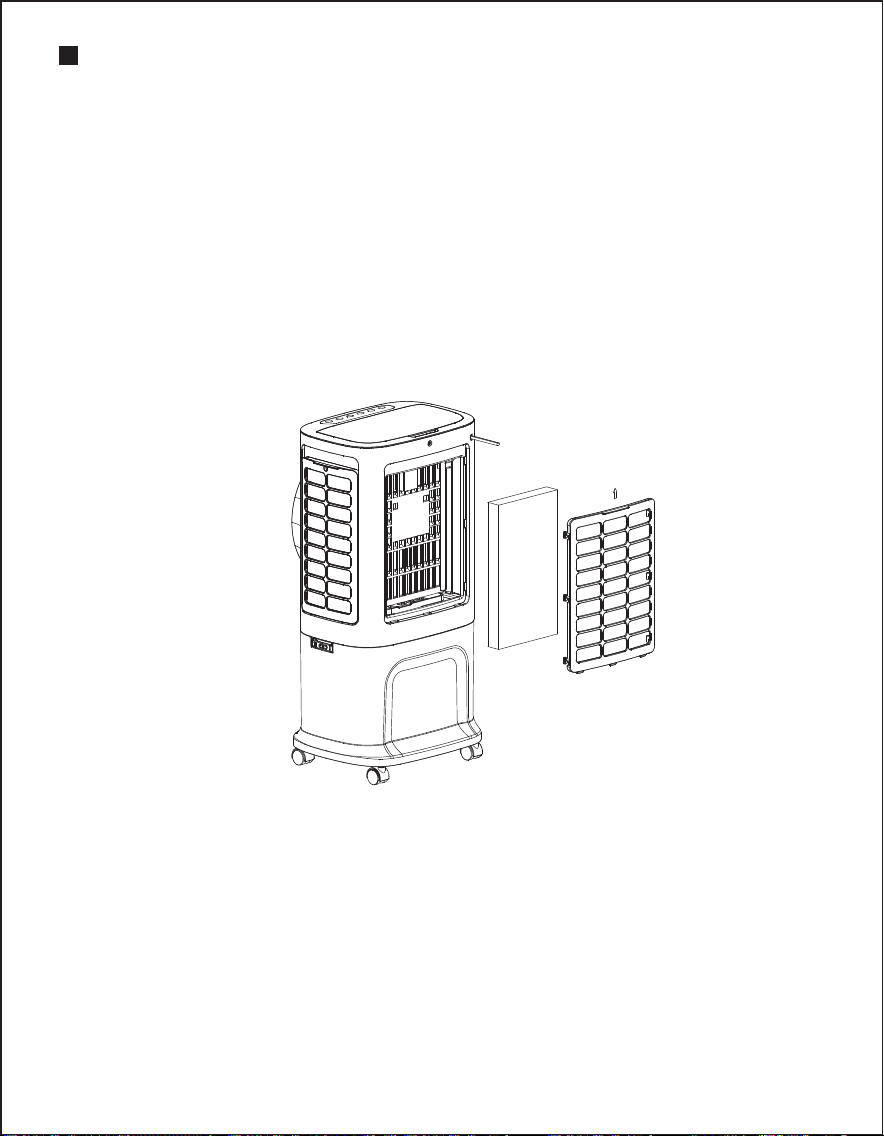
Cleaning the Air Filter and Wet Curtain Component
If there are excessive foreign objects attached to the air filter, it will affect
the airflow performance; therefore, it should be cleaned at least once a
month.
1. Unplug the power.
2. Pull up the rear net and the mesh pull handle to remove the wet
curtain component (see images below for operation).
3. Soak the wet curtain component in a cleaning solution for a few
minutes, then wash and dry it.
- 15 -
WARRANTY&CUSTOMER SUPPORT
This Evaporative Air Cooler is covered with 12 months warranty from the
date of its original purchase from authorized sellers. For questions,
support, or warranty claims, contact us at the email address
[email protected]. Please do include your order number and product
model number.
To prevent possible harm to the environment or human health
from uncontrolled waste disposal, recycle it responsibly to promote
the sustainable reuse of material resources. To return your used
device, please use the return and collection systems or contact
the retailer where the product was purchased. They can take this
product for environmental safe recycling.
Environmental Protection
STATEMENT
We can only provide after-sale services for the products that are sold by
authorized sellers. If you have purchased from an unauthorized seller,
Please contact them directly for service or warranty issues.
Cleaning the Surface of the Unit
1. For surface cleaning, simply wipe with a damp cloth; do not rinse
directly with water.
2. Do not use corrosive detergents or solvents for cleaning.
3. Always turn off the power switch and unplug the power cord when
cleaning the unit to avoid the risk of electric shock.
Reassembly and Use After Cleaning
1. Assemble the water tank in order, ensuring that it is installed correctly.
2. Reconnect the power and confirm that the product is functioning
properly.
Maintenance
1. When the product will not be used for an extended period, unplug
the power cord, pack the unit, and prevent dust from entering the unit.
2. Before packing, ensure that the wet curtain, filter, and other compo-
nents are dry, and that there is no standing water in the water tank.