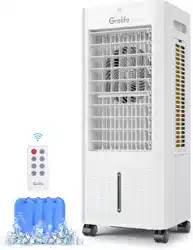
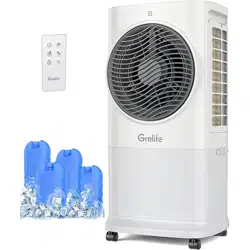
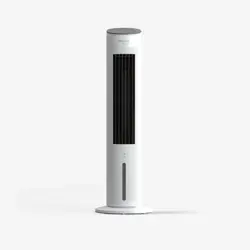
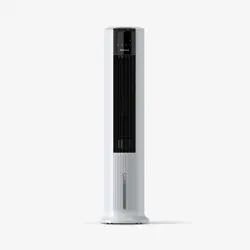
Grelife user manual Evaporative Air Cooler
Important Safety Instructions
Thank you for purchasing the Grelife LE-AC001 Evaporative Air Cooler. Please read this user manual carefully and keep it for future reference. If you need any assistance, please contact our support team [email protected] with your product model number and order number.
Read Guidance for Safe Operation and Instructions Carefully.
When using electrical appliances, basic precautions should always be followed to reduce the risk of fire, electric shock, and injury to persons, including the following:
- This appliance is not intended for use by persons (including children) with reduced physical, sensory or mental capabilities, or lack of experience and knowledge unless they have been given supervision or instruction concerning the use of the appliance by person responsible for their safety.
- Do not allow it to be used as a toy. Close attention is necessary when used by or near children. Children should be supervised to ensure that they do not play with the machine or remote control.
- Do not operate any Evaporative Cooler with a damaged cord or plug or after the Evaporative Cooler, has been damaged in any manner. Please return the Evaporative Cooler to an authorized service facility for examination, electrical or mechanical adjustment or repair.
- Arrange cord away from traffic area and where it will not be tripped over.
- Connect to properly grounded outlets only.
- To prevent a possible fire, do not use with any opening or exhaust blocked, and keep free of dust, lint, hair, and anything that may reduce airflow. Do not put any object into the inlet grill or the exhaust opening as this may cause an electric shock or fire, or damage the appliance.
- Ensure the Evaporative Cooler is on a stable, secure surface to eliminate the potential of tipping it over.
- Be sure that the plug is fully inserted into an appropriate receptacle.
- Please remember that receptacles also deteriorate due to aging and continuous use: check periodically for signs of overheating or deformations evidenced by the plug. Do not use the receptacle and CALL your electrician.
- Do not attempt to modify or repair the product by yourself. Doing so could void the warranty and cause damage or personal injury. Only a repair technician may disassemble or repair this product. Choking hazard - This remote control unit contains a small battery.
- If the machine is not working as it should, has received a sharp blow, has been dropped, damaged, left outdoors, or dropped into water, do not use it and contact Customer Support.
- IMPORTANT- This appliance has a polarized plug (one blade is wider than the other). To reduce the risk of electric shock, this plug is intended to fit in a polarized outlet only one way. If the plug does not fit fully in the outlet, reverse the plug. If it still does not fit, contact a qualified electrician. Do not attempt to rig this safety feature.
FEDERAL COMMUNICATIONS COMMISSION INTERFERENCE STATEMENT
This equipment has been tested and found to comply with the limits for a Class B digital device, pursuant to Part 15 of the FCC Rules. These limits are designed to provide reasonable protection against harmful interference in a residential installation. This equipment generates, uses and can radiate radio frequency energy and, if not installed and used in accordance with the instructions, may cause harmful interference to radio communications. However, there is no guarantee that interference will not occur in a particular installation. If this equipment does cause harmful interference to radio or television reception, which can be determined by turning the equipment off and on, the user is encouraged to try to correct the interference by one or more of the following measures:
- Reorient or relocate the receiving antenna.
- Increase the separation between the equipment and receiver.
- Connect the equipment into an outlet on a circuit different from that to which the receiver is connected.
- Consult the dealer or an experienced radio/TV technician for help.
CAUTION:
To assure continued FCC compliance: Any changes or modifications not expressly approved by the grantee of this device could void the user's authority to operate the equipment.
Features
Air Cooler & Fan & Humidifier
3 Wind Modes & 3 Adjustable Speeds
Strong & Quiet Airflow
Oscillation Left/Right
6L Large Water Tank
12-hour Timer Function
LED Display & Remote Control
Easy to Move and Portable
Product Diagram
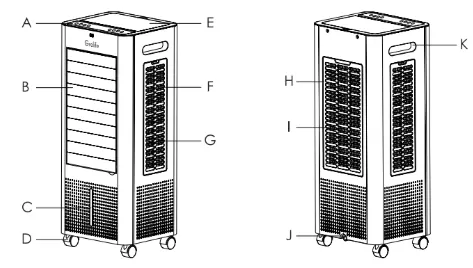
- A. Control Panel
- B. Front Louver
- C. Water Level Display Window
- D. Rolling Casters
- E. Upper Sink Cover
- F. Side Frame
- G. Side Filter Element
- H. Rear Frame
- I. Rear Filter Element
- J. Water Tank Plug
- K. Built-in Handle
Specifications
| Model |
LE-AC001 |
| Input |
120 Volts AC/60Hz |
| Power Consumption |
60W |
| Water Tank Capacity |
6L |
| Timer |
12 Hours |
Test Before Use
- After opening the package, check whether the parts are in good condition and whether the power cord is damaged. After unpacking, please keep the packaging materials properly for use when storing the product.
- Check whether the parts in the packing box are consistent with the packing list in the manual.
- Check whether the power supply is consistent with the parameters on the nameplate of the machine.
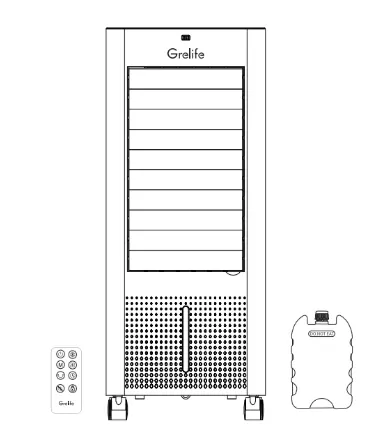
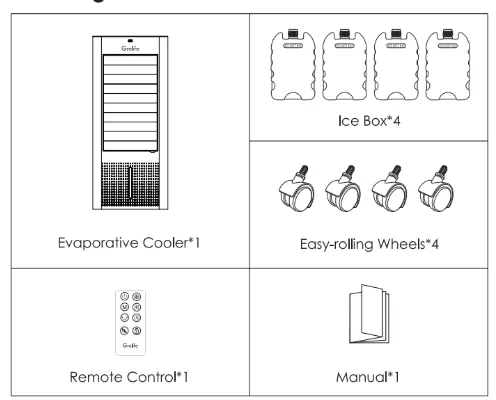
Package Contents
Evaporative Cooler*1
Easy-rolling Wheels*4
Remote Control*1
Manual*1
Product Assembly and Use
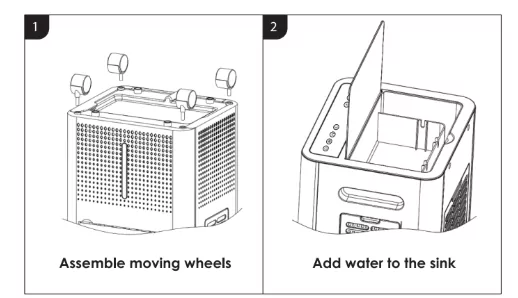
1: Assemble moving wheels
The product is equipped with 4 casters, which are placed in the bubble of the outer packaging box. After opening the product packaging box, take the air cooler out. You need to put it upside down on flat ground or table and align the iron shafts of the 4 casters with it. The 4 caster holes at the bottom are inserted firmly into place, and then the product with assembled casters can be used normally.
2: Add water to the sink
After the product is placed in a flat place, open the upper sink cover, and use a suitable container to slowly pour clean water into the middle of the sink. Note that the water surface should not exceed the square sink area in the middle of the water tank when adding water to avoid overflow. The water tank can hold at most 6 liters of water.
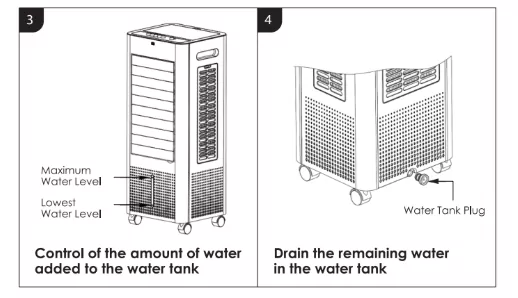
3: Control of the amount of water added to the water tank
When adding water to the tank on the top of the Air Cooler, pay attention to the water volume indicator on the water level window of the water tank at the bottom. The water volume should not exceed the maximum water level to avoid overflow of the bottom water tank. In the process of using the cool air function, pay attention to the decrease of the water tank water volume. When the water volume is reduced to the lowest water level, please add water in time. When adding water, the water volume should not exceed the highest water level. Please do not shake the product violently after filling up with water to prevent the water in the water tank from overflowing.
4: Drain the remaining water in the water tank
When the Air Cooler is not used for a long time, there is a water drain at the bottom in order to prevent water from being stored in the water tank. When water needs to be drained, it needs to be moved to a suitable place, and then the water tank plug is removed. The remaining water in the water tank is from the drain hole outflow.
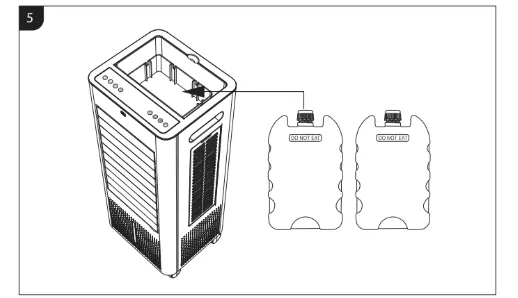
5: Use of Ice Crystals
Open the lid of the ice crystal, add an appropriate amount of water, and freeze it in the refrigerator. Put it in the square trough when turning on the cool air mode (as shown in the picture). Note: ice crystals can be recycled. DO NOT EAT.
Detailed Function and Operation Instructions
Power up:
- After connecting the power cord, the Air Evaporative Cooler is in the standby state. The screen shows the current room temperature.
- When there is no operation within 15 seconds, the brightness of the display will decrease by 50%.
- After another 3 seconds, there is no operation and it will switch to night mode, and the brightness of the display will change to 30% and remain.
Panel Indication:
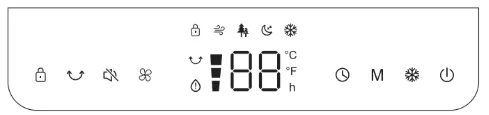
1. "ON/OFF"

Press this key to switch on/switch off the Evaporative Cooler.
2. "SPEED"

When the Evaporative Cooler is started, press this key repeated and the fan will work with "1-2-3" circulatory. Led screen icon synchronization displays.
3. "OSCILLATION"

Press button once, the cooler will begin oscillating from left to right around 75° to get better heat dispersion. Press again to turn the oscillation off. And you can also manual-swing vertically louver.
4. "COOL FUNCTION"

Press this button in the power-on state to start the cold air function and the cold air light is on. Click again to close this function. When using it, make sure that there is enough water and frozen ice crystals in the water tank.
5. "MODE"

Press this key to select mode. The sequence is normal, natural, and sleep when this key is touched repeatedly or continuously. The light indicates the mode state.
"Normal mode"
"Natural wind mode"
"Sleep wind mode"
6. "TIMER"

Press the key to set 01 to 12 hour timer.
Once set, the LED display will show the setting time, then display the current room temperature after flashing for 5 seconds, and the red icon "h" in the display area lights up. When time is up, the unit will automatically stop running.
Cancel timer setting: Press once to show the remaining timing time. You can press twice the timer button on the touch panel or remote control to cancel the setting. And the red icon "h" will light off.
7. "Mute"
After touching the silent mode, all keys will turn off the sound, and then it will be restored after touching it again.
8. "Child lock"

Long press the child lock button for 3s, and the lock icon turns orange, which means the child lock function is activated. When it is activated, there is no response to any function button on the remote or control panel but the lock icon will flash. Long press the button for 3s to deactivate it.
9. "Water shortage" indicator

10. Switchable °C/°F
Press simultaneously the "°C/°F" and "M" button on the product or remote control to convert the temperature unit between Fahrenheit and Celsius.
Other Features
Memory Function
The Evaporative Cooler will always remember your last settings (working mode) once you turn it on again but not include the cool air mode.
15-Hour Auto Shut Off
When the Evaporative Cooler has been working for 15 hours continuously without any other operation, it will shut off automatically.
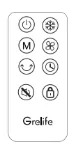
Remote Controller
The buttons on the remote control such as ON/OFF, SPEED, MODE, TIMER, OSCILLATION, COOL, CHILD LOCK and MUTE have the same functions as those of the corresponding keys on the touch panel.
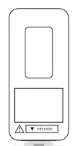
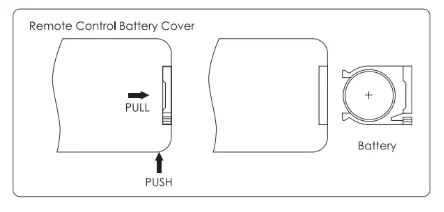
Replacement of Batteries in Remote Control
Remove the battery insulating film along the indicated arrow direction to power on the remote.
To replace battery, unscrew the cover and replace it with 1 CR2025 type lithium battery. Make sure the position is correct. Reinstall the battery box cover.
Caution:
- Replace with new batteries of the same type when replacement is required.
- When not using the remote control for a long time, please take out the battery.
- Do not attempt to dismantle the battery.
- Do not dispose of the battery in fire, the battery may explode or leak.
Replace with a new battery - NOTES
This product contains a lithium button/coin cell battery.
If a new or used lithium button/coin cell battery is swallowed or enters the body, it can cause severe internal burns and can lead to death in as little as 2 hours. Always completely secure the battery compartment. If the battery compartment does not close securely, stop using the product, remove the batteries, and keep it away from children. If you think batteries might have been swallowed or placed inside any part of the body, seek immediate medical attention.
a) The cells shall be disposed of properly, including keeping them away from children; and
b) Even used cells may cause injury.
- Push the button next to the battery cover to release the battery cover.
- Insert 1 x CR2025 type lithium battery, making sure "+" side is facing up as shown in the diagram.
- Once battery is installed, push battery cover closed.
Warranty & Customer Support
This Evaporative Air Cooler is covered with 12 months warranty from the date of its original purchase from authorized sellers. For questions, support, or warranty claims, contact us at the email address [email protected]. Please do include your order number and product model number.
Statement
We can only provide after-sale services for the products that are sold by authorized sellers. If you have purchased from an unauthorized seller, please contact them directly for service or warranty issues.
Model: LE-AC001
Grelife Evaporative Air Cooler
E-mail: [email protected]
MADE IN CHINA