
Technical Support and E-Warranty Certificate
www.vevor.com/support
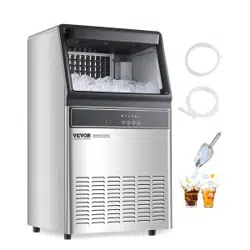
ICE MACHINE
MODEL:IMC9000B-UL IMC9000B-CB
IMC9000A-UL
We continue to be committed to provide you tools with competitive price.
"Save Half", "Half Price" or any other similar expressions used by us only
represents an estimate of savings you might benefit from buying certain tools
with us compared to the major top brands and does not necessarily mean to cover
all categories of tools offered by us. You are kindly reminded to verify carefully
when you are placing an order with us if you are actually Saving
Half in comparison with the top major brands.

- 1 -
MODEL:IMC9000B-UL IMC9000B-CB IMC9000A-UL
NEED HELP? CONTACT US!
Have product questions? Need technical support? Please feel free to
contact us:
Technical Support and E-Warranty Certificate
www.vevor.com/support
This is the original instruction, please read all manual instructions
carefully before operating. VEVOR reserves a clear interpretation of our
user manual. The appearance of the product shall be subject to the
product you received. Please forgive us that we won't inform you again if
there are any technology or software updates on our product.
ICE MACHINE
- 2 -
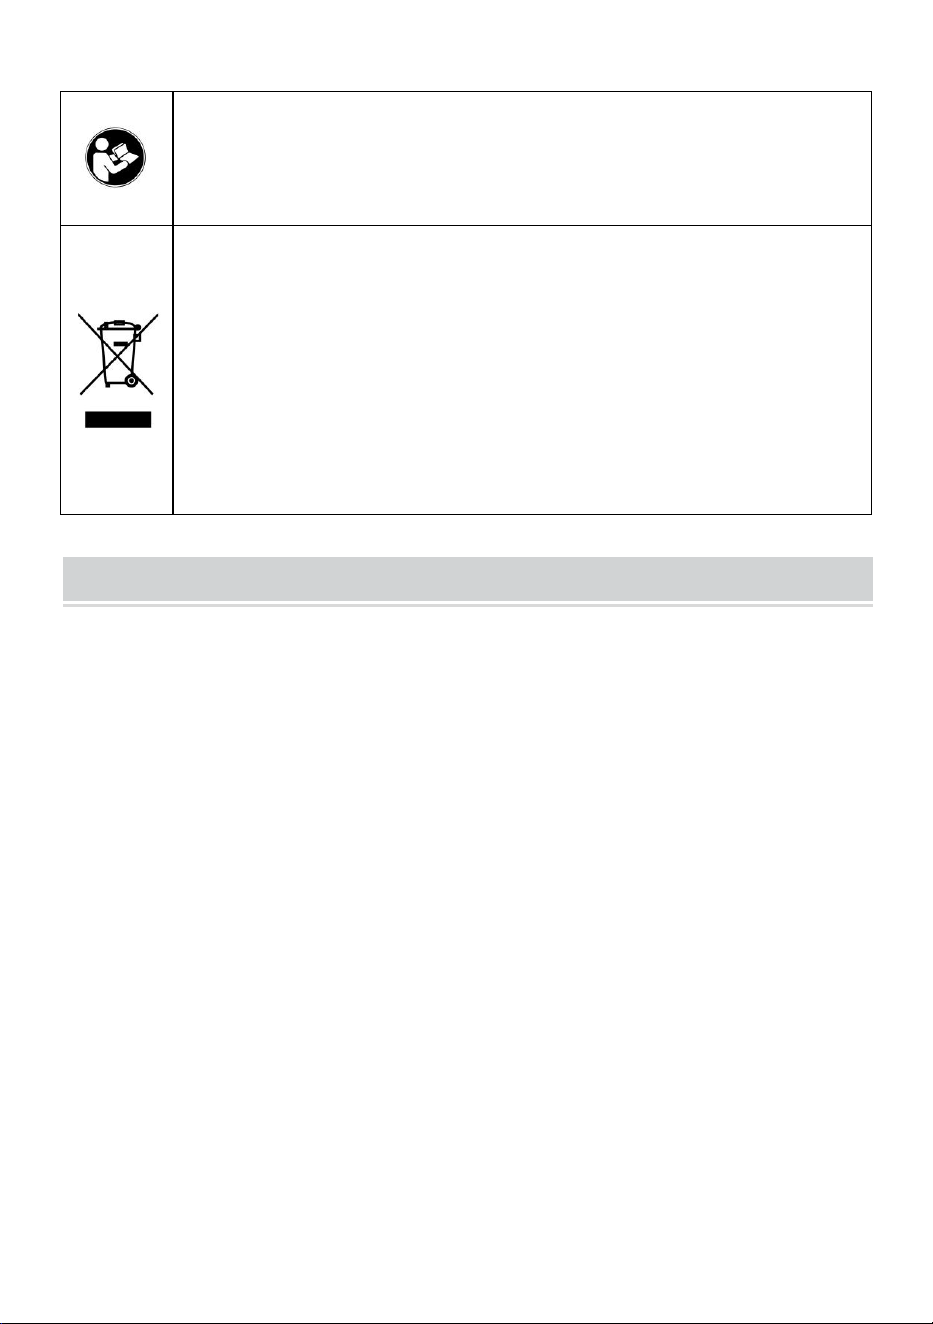
Warning-To reduce the risk of injury, user must read
instructions manual carefully.
This product is subject to the provision of European Directive
2012/19/EC. The symbol showing a wheelie bin crossed
through indicates that the product requires separate refuse
collection in the European Union. This applies to the product
and all accessories marked with this symbol. Products marked
as such may not be discarded with normal domestic waste, but
must be taken to a collection point for recycling electrical and
electronic devices
IMPORTANT SAFETY INSTRUCTIONS
To reduce the risk of fire, explosion, electric shock, or injury when
using your ice maker, follow these important safety instructions:
1.Before using check that the voltage power corresponds to the one shown
on the unit nameplate.
2.Do not remove any safety, warning, or product information labels from
your ice maker.
3.Plug the ice maker into an exclusive grounded power outlet. No other unit
should be plugged into the same outlet. Be sure that the plug is fully
inserted into the receptacle.
4.This unit must be grounded. It is equipped with a power cord having a
grounding plug. The plug must be plugged into an outlet that is properly
installed and grounded.
5.Avoid the use of an extension cord because it may overheat and cause a
risk of fire. However, if it is necessary to use an extension cord:
(1)Use only extension cord with grounding plug.
(2)The marked rating of an extension cord must be equal to or greater than
the rating of this unit.

- 3 -
(3)It should be positioned such that it does not drape over the counter or
tabletop where it can be pulled on by children intentionally.
6.Do not operate any unit with a damage cord or plug or after the unit
malfunction or has been damaged in any manner. Return the unit to the
nearest authorized service facility for examination, repair or adjustment.
7.If the supply cord is damaged, it must be replaced by the manufacturer or
its service agent or a similarly qualified person in order to avoid a
hazard.
8.Do not let cord hang over edge of table or counter.
9.Do not place on or near a hot gas or electric burner, or in a heated oven.
10.Place power cord in such a way it cannot be pulled on by children or
cause a tripping hazard.
11.Place power cord in such a way that it is not in contact with hot surfaces.
12.The use of attachment not recommended or sold by manufacturer may
cause fire, electric shock or injury.
13.Do not touch the evaporator when using the ice maker or making ice to
avoid being suffer from frostbite.
14.Do not immerse any part of the product in water.
15.To disconnect, turn any control to “OFF”, then remove plug from wall
outlet.
16.Do not plug or unplug product with wet hands.
17.Unplug the product before cleaning,maintaining and when not in use.
18.Do not use with water that is micro biologically unsafe or of unknown
quality.
19.Do not clean your ice maker with any flammable fluids. The fumes may
create a fire hazard or explosion.
20.Do not overturn the ice maker. If the ice maker is overturned
accidentally, make it stand steadily for 2 hours before power it on again.
21.If the ice maker is brought in from outside in wintertime, do not use for a
few hours, allowing the unit to warm up to the room temperature before
operating.
22.Never put flammable, explosive and corrosive articles into the ice

- 4 -
maker.
23.Never use the ice maker when there is flammable gas leakage.
24.Never store or use gas and other flammable articles near the ice maker
to avoid any fire.
25.Unplug the ice maker before moving it to avoid damaging the
refrigerating system.
26.Do not attempt to disassemble, repair, modify, or replace any part of
your product.
27.This appliance is not intended for use by persons (including children)
with reduced physical, sensory or mental capabilities, or lack of
experience and knowledge, unless they have been given supervision or
instruction concerning use of the appliance by a person responsible for
their safety.
28.Children should be supervised to ensure that they do not play with the
appliance.
29.Children shall not play with the unit.
30.Cleaning and user maintenance shall not be made by children without
supervision.
31.Close supervision is necessary when any unit is used by or near
children.
32.Do not leave the unit unattended while in use.
33.Do not use outdoors.
34.Do not use the unit for other than intended use.
35.Please abandon the ice maker according to the local regulations as it
uses flammable blowing gas and refrigerant.
36.Please follow the local regulations regarding the disposal of the unit for
its flammable refrigerant and blowing gas.
37.Save these instructions.
1)
DANGER – Risk of fire or explosion. Flammable refrigerant used. To be
repaired only by trained service personnel. Use only
manufacturer-authorized service parts. Any repair equipment used must be
designed for flammable refrigerants. Follow all manufacturer repair
- 5 -
instructions. Do not puncture refrigerant tubing.
2) CAUTION - Risk Of fire or explosion. Dispose of refrigerator properly in
accordance with the applicable federal or local regulations. Flammable
refrigerant used.
3) CAUTION - Risk of fire or explosion due to puncture of refrigerant tubing;
follow handling instructions carefully. Flammable refrigerant Used.
NOTE:
1. WARNING: Keep clear of obstruction all ventilation openings in the
appliance enclosure or in the structure for building-in.
2. WARNING: Do not use mechanical devices or other means to
accelerate the defrosting process, other than those recommended by the
manufacturer.
3. WARNING: Do not damage the refrigerating circuit.
4. WARNING: Do not use electrical appliances inside the food/ice
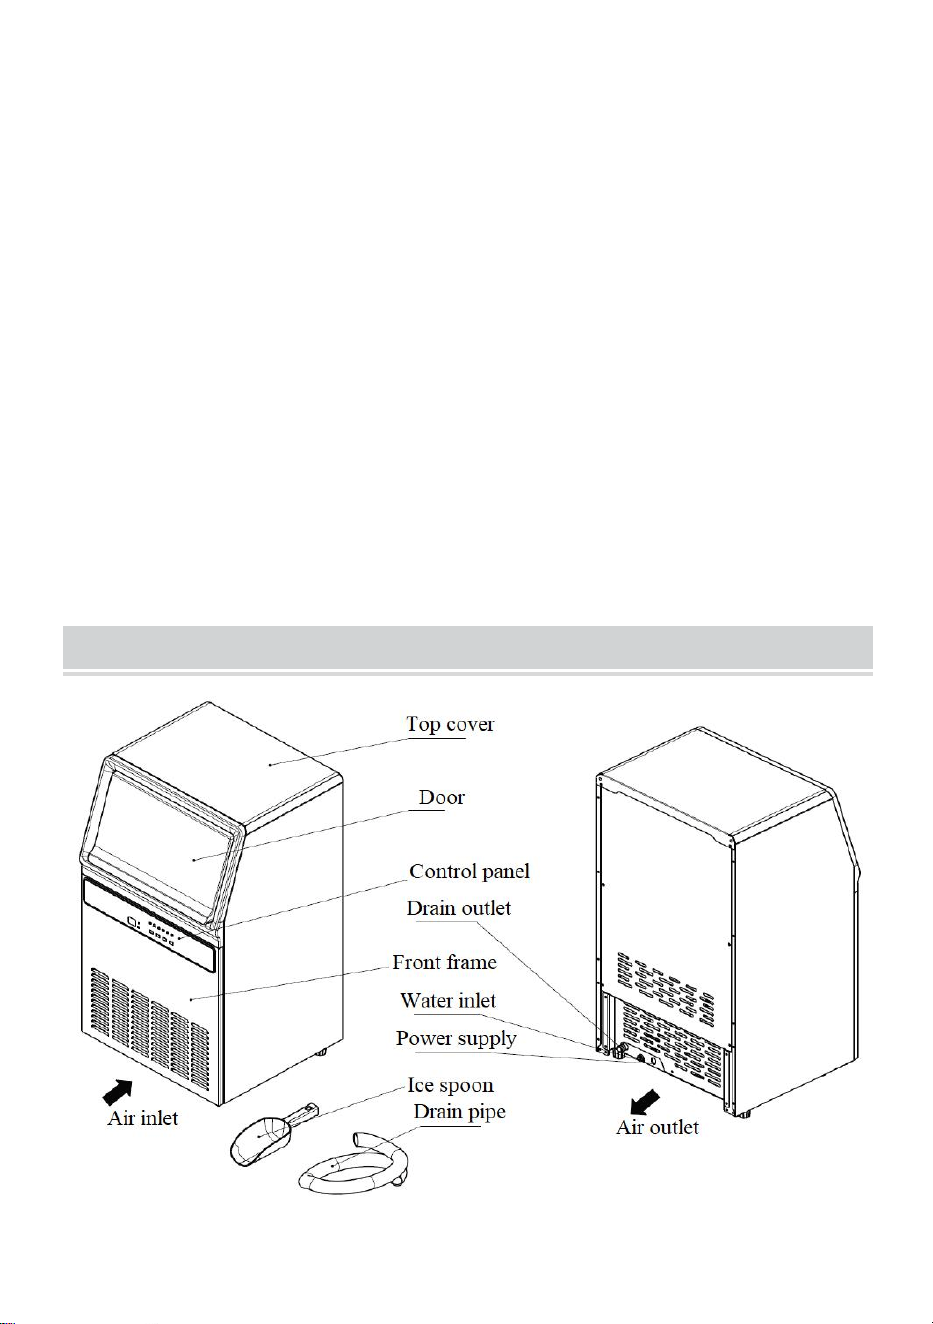
KNOW YOUR ICE MAKER
- 6 -
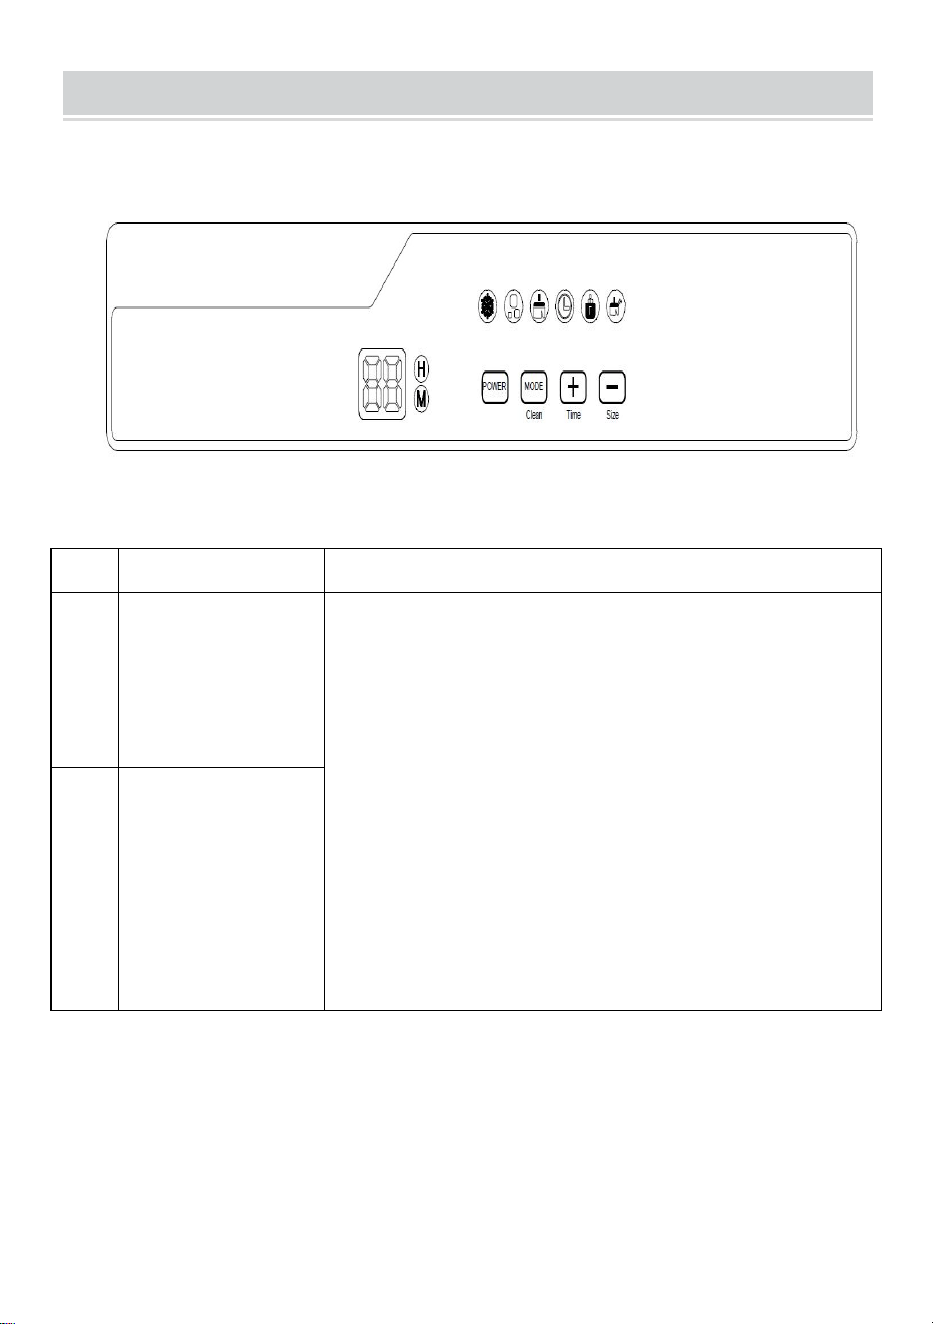
CONTROL PANEL
No.
Key/Icon
Description
1
Power
Standby mode: show “--”
1. Press “Power” : The unit enters into the
ice-making mode.
2. Press “Mode” hold 3 sec : The unit enters into
the clean mode.
Ice making mode:
1. Press “Power” : The unit enters into the
pre-shut off mode.
[ pre-shut off mode: under the mode, if 88 show
a figure ,unit will shut off after the current cycle. in
this state, press “Power” can cancel the mode;
if not, unit shut off right now]
2
Mode
- 7 -
2. Press “Power” hold 3 sec : The unit will be
defrosting.
Clean mode :
1. (Under the mode )Press “Mode” hold 3 sec :
The unit will exit clean mode.
Reservation function:[under standby mode or
ice making mode]
1. Press “+” hold 3 sec: activate the function
2. can adjust the valve by “+”or “-” ;
3. Wait 10sec the setting will be ok ,or press
mode to confirm it;
If the setting is done
1. Press “+” show the set-valve 3sec;
2. Press “+” hold 3 sec : cancel the function
Adjusting ice thickness :
1. Press “-” hold 3 sec: activate the function
2. Can adjust the valve by “+”or “-” ;
3. Wait 10sec the setting will be ok ,or press
mode to confirm it;
If the setting is done
1. Press “-” show the set-valve 3sec;
2. Press “-” hold 3 sec : cancel the function
3
+
4
-
5
It will illuminate solidly under the ice-making mode
It will flash under the pre-shut off status.
6
The ice thickness indicator will illuminate solidly
under the mode of setting ice thickness.
7
The clean indicator will illuminate solidly under
the clean mode.
8
The indicator of timer icon will illuminate solidly
under the mode of setting timer.
- 8 -
9
The ice full indicator will illuminate solidly when
the ice basket is full.
10
The clean indicator will flash if the Ice Maker has
been operated for 3000 cycles or the ice-making
time exceeds 3 month. And the clean indicator
will turn off after the cleaning is performed.
11
88:
1.Ice-making mode
:
the countdown for
ice-shedding will be shown.
2.standby mode
:
show “--”
3.When the unit detects a malfunction, the code
of the malfunction will be shown.
4. Ice thickness
:
1 means bigger ICE
;
0 means
default ICE
;
-1 means smaller ICE
H: “H” icon will illuminate under the mode of
setting timer, which represents the precision for
setting hour.
M: “M” icon will illuminate under the mode of
setting ice thickness and the status of
ice-shedding countdown, which represents the
precision for setting minute.
BEFORE FIRST USE
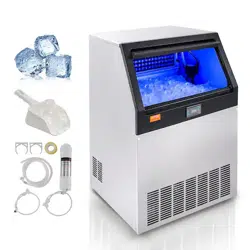
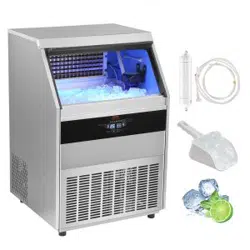
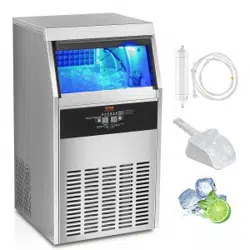
1.Unpack the unit, then check and make sure that all the accessories
including drain pipe and ice scoop etc. are complete. Please contact with
the client service department if some accessories are missed.
2.Please ensure the ice maker is placed on a stable table. Turn the four
black feet at the bottom of unit until the unit is placed stably.

- 9 -
3.The incline angle of the ice maker cabinet should not exceed 45° during
transportation or use. Do not turn the ice maker upside down. Doing so
could cause the compressor or refrigerating system to operate incorrectly.
Please allow time for the fluids in the compressor to settle after the ice
maker is moved or transported. Before using the ice maker for the first time,
please wait for 2 hours after the unit has been leveled and positioned in the
proper place.
4.The unit must be placed on a dry and level surface with sufficient
ventilation and should not be exposed to direct sunlight. Leave a clearance
of 15cm around the air inlet and air outlet of the ice maker.
5.Do not fill the water reservoir with hot water, which may damage the ice
maker.
Maximum inlet water pressure: 827 kPa;
Minimum inlet water pressure: 207 kPa;
6.Do not use the unit at a very cold environment (lower than 8℃).
7.Clean the unit by following the operation of “CLEANING AND
MAINTENANCE” before operating.
USING THE UNIT
1.Connect the drain pipe of the unit well and then fix it with a throat clamp.
2.Connect a PE tube with a size of 1/4 inch with the unit.the new hose-sets
supplied with the appliance are to be used and that old hose-sets should
not be reused.
3.Connect the unit with power source, the section of “88” in the display
shows “--”.
NOTE: The unit that has been moved should rest for 30 minutes before
being powered on.
4.Shortly press “Power” key, the unit starts to work.
5.The ice-shedding time for each ice-making cycle is indicated in a way of
countdown during the ice-making process.
6.The unit keeps making ice until the ice shovel can not reset automatically,

- 10 -
at that time, the ice basket is full and the ice full indicator illuminates
solidly.
7.Remove the ice in the ice basket with a ice spoon. After 15 seconds, the
unit works again.
8.When need to remove the ice, push the door until it is opened fully, and
then remove the ice according to your demand with the ice spoon.
9.When need to adjust the ice thickness, make the unit enter into the mode
of setting ice thickness and then adjust the ice thickness with the keys of
“+” or “-”.
10.When need to make the unit start working at a preset time automatically,
make the unit enter into the mode of setting timer and then set the
auto-start time with the keys of “+” or “-”.
CLEANING AND MAINTENANCE
In order to keep the ice cubes fresh and the ice maker in good condition,
please perform the following cleaning process when the clean indicator
flashes.
NOTE: Please add the prepared detergent in the water tank manually
before cleaning.
1.Under the standby mode, hold and press “Power” key to enter into the
“Clean” mode, and the clean indicator illuminates solidly.
2.The unit starts to be rinsed repeatedly for about 15 minutes.
3.Continue to rinse with water for 4 minutes and then stop working for 1
minute.
4.Repeat Step 3 for 3 cycles.
5.The cleaning process is completed and then the unit goes back to the
standby mode (the cleaning process lasts for about 30 minutes).
6.Unplug the drain plug manually.
7.Rinse the ice basket with warm water.
8.Install the drain plug well in position, then the cleaning is
completed.(STEP 6/7/8 is by consumer)
NOTE: Please empty the water in the unit, wipe it with a clean cloth and
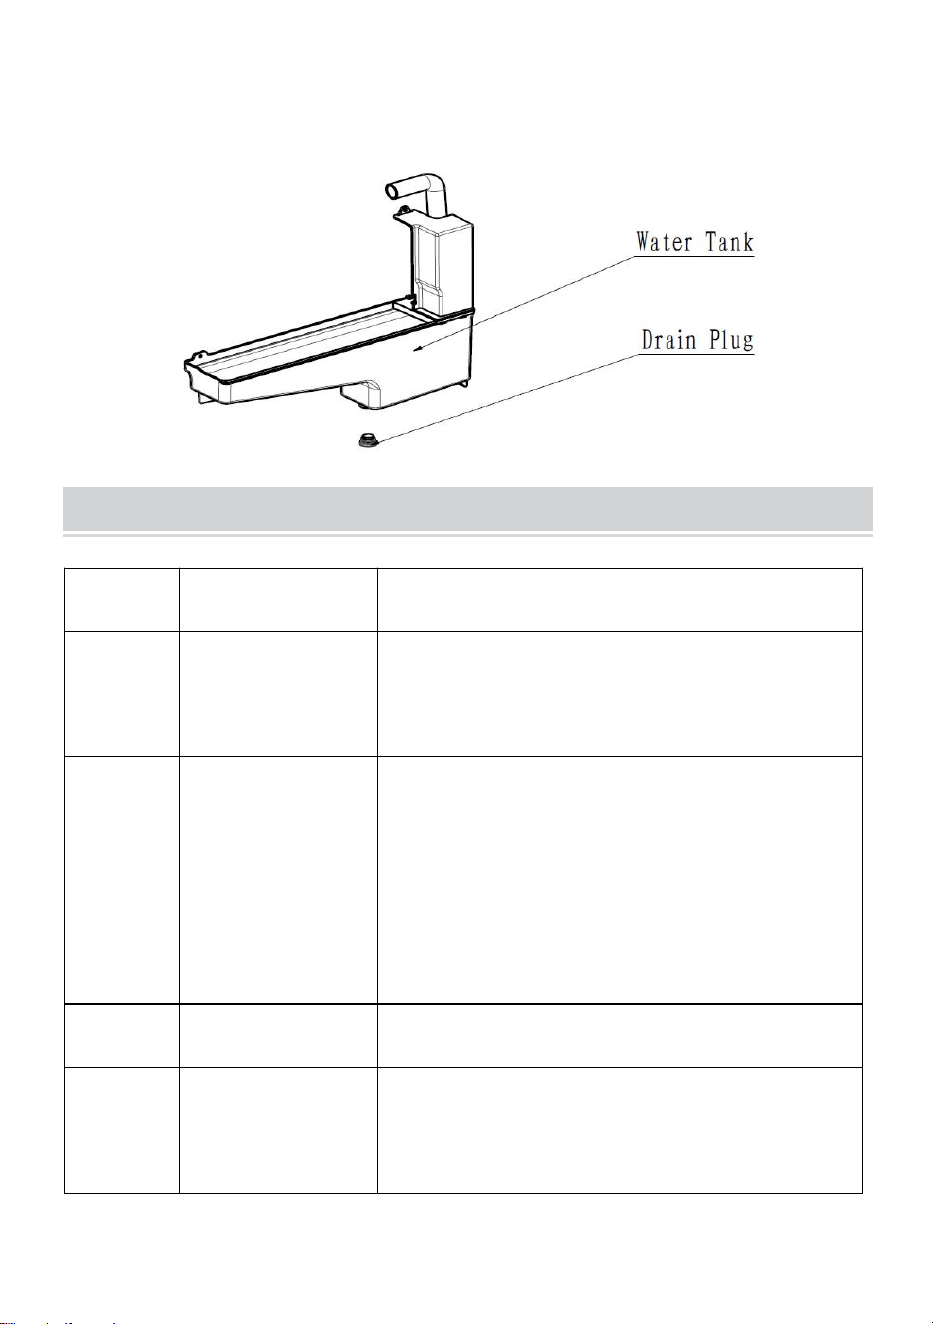
- 11 -
store it well if the unit will not be used for a long time.
TROUBLESHOOTING
Problem
Possible cause
Solution
E1
No water
1. Check the water inlet valve and float.
2. Check the drain plug for any water leakage.
E2
Malfunction of
solenoid valve
1. Check the solenoid valve.
2. Check the water pump.
3. Check the refrigeration system for any
leakage.
E3
NTC malfunction
Replace NTC.
E5
Malfunction of
float switch
Replace the float switch.
- 12 -
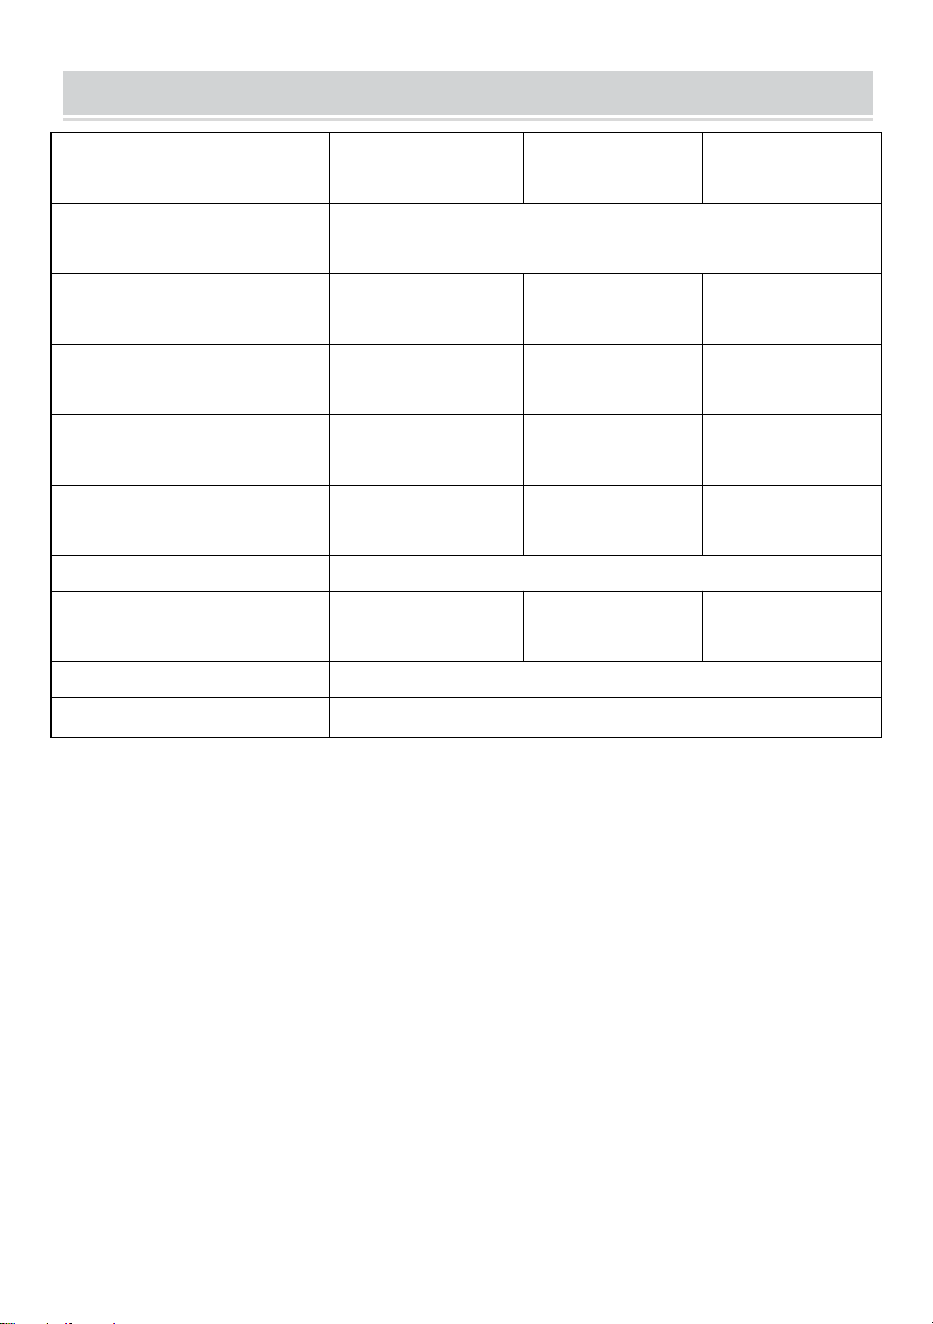
TECHNICAL PARAMETERS
Model
IMC9000B-CB
IMC9000B-UL
IMC9000A-UL
Applicable climate
ST/SN/N
Class
I
I
I
Power source
230V/50Hz
115V/60Hz
115V/60Hz
Rated power
320W
280W
310W
Refrigerant/Refrigerant
amount
R290 / 63g
R290 / 63g
R290 / 66g
Foaming agent
C
5
H
10
Net weight
26.7kg
26.5kg
26.9kg
Housing
SUS430
Unit size (WXDXH)
445*795*405mm