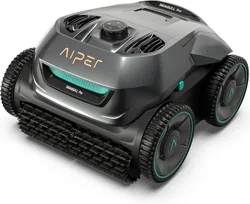
Aiper Scuba X1 Pro
User Manual
CORDLESS ROBOTIC POOL CLEANER
EN
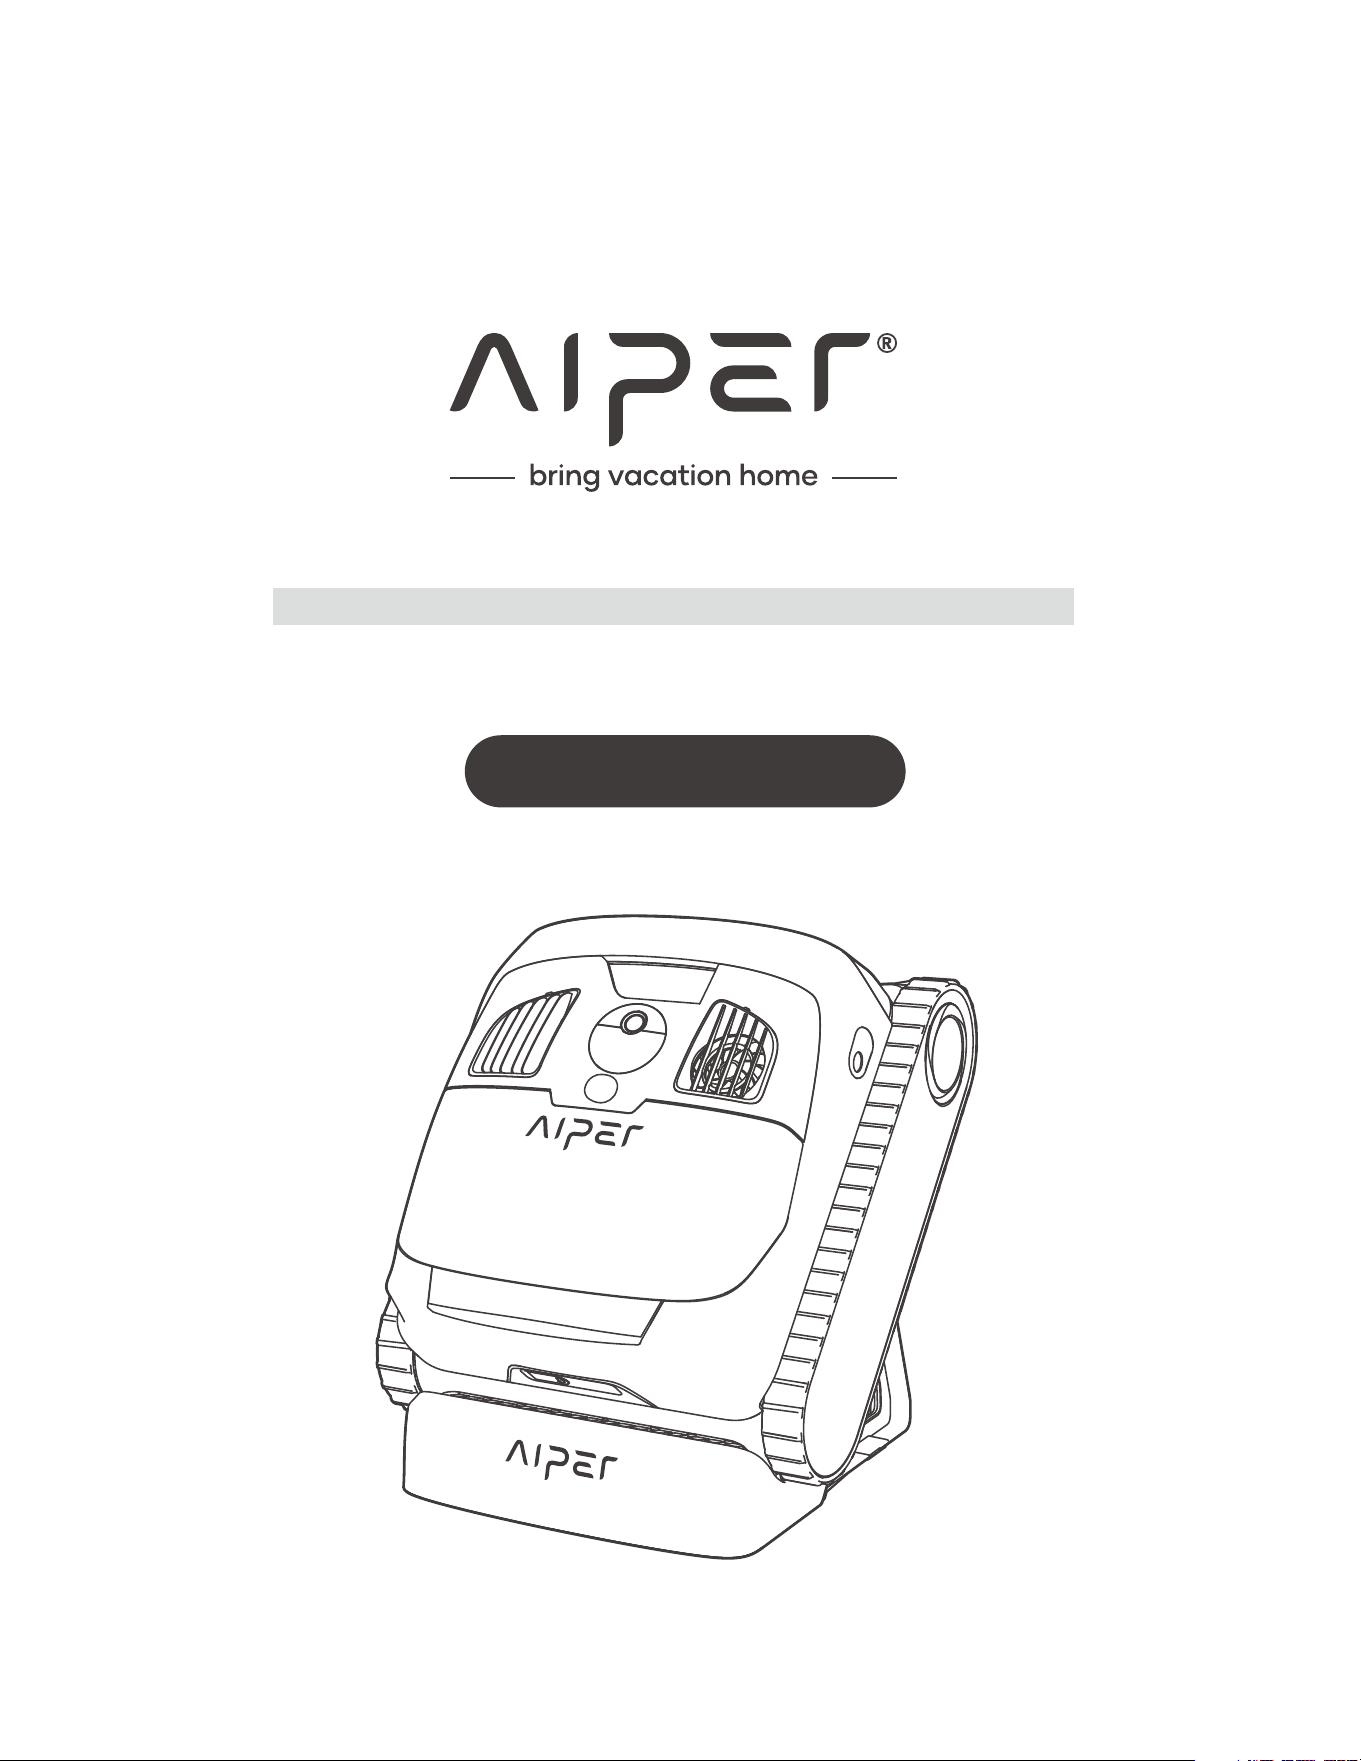
Thank you for choosing Aiper.
You’ve now joined millions who have already trusted Aiper to care for their pools and
are enjoying the convenience of a pristinely clean pool.
This user manual will help you maintain your device and ensure it performs at its
maximum e�ciency for years to come. Please take a moment to read through it.
If you have any questions, please visit our website at www.aiper.com and contact our
customer service team for assistance or more information.
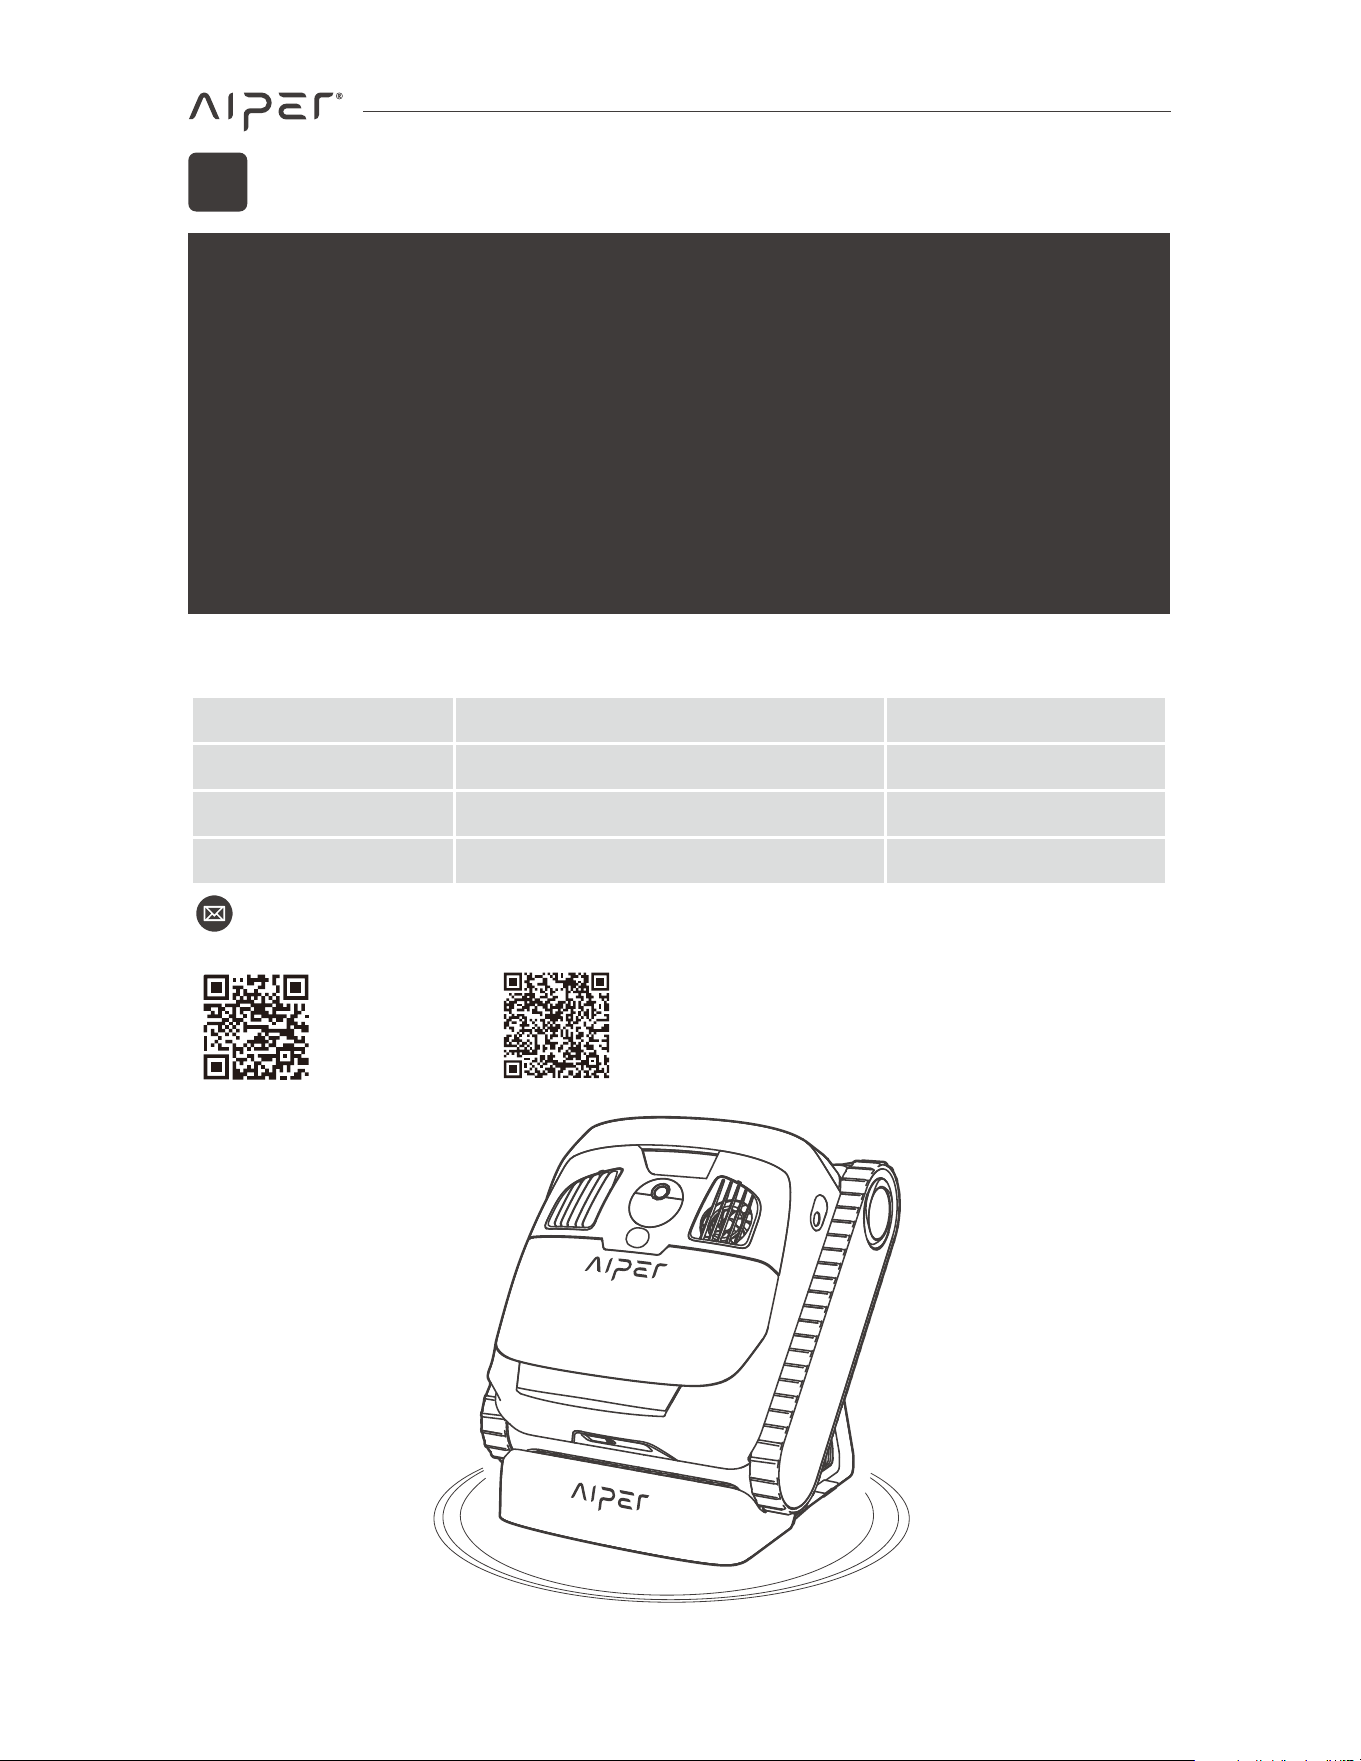
Aiper Customer Service:
Scan for
Video Guide
Scan the QR
Code to Access
Customer Support
Country Toll Free Number
Language
US +1 8668500666
+1 8668500666
+61 1800497023
English
English
English
CA
AU
Email: service@aiper.com
1
Please read this manual carefully and follow all warnings and
instructions when using your Aiper Cordless Robotic Pool Cleaner
(hereinafter referred to as device). Failure to comply may result in
electric shock, fire, or serious injury. Aiper is not liable for any losses
or injuries caused by improper use of this device.
For your safety and the optimal performance of this device, please
read and follow these instructions:
2. This device can be used by children aged from 8 years and above
and persons with reduced physical, sensory or mental capabilities
or lack of experience and knowledge if they have been given
supervision or instruction concerning use of the device in a safe
way and understand the hazards involved.
3. WARNING: To reduce the risk of injury, do not permit children to
use this product unless they are closely supervised at all times.
4. Ensure that children do not attempt to touch the device while it is
operating.
5. Do not allow children to ride the device under any circumstance.
6. Do not operate the device with people or animals in the pool.
7. While operational, do not place your hands into any part of the
device as this may result in injury.
8. Prevent unintentional starting. Ensure the power button is o�
before connecting to the battery pack, picking up, or carrying the
device. Carrying the device with your finger on the power button or
energizing the device with the power button on invites accidents.
9. Do not run your device out of the water as it may lead to
over-heating.
1.
1.
2

10. A charger that is suitable for one type of battery pack may
create a risk of fire when used with another battery pack.
11. This device can only be used with C1264C6 model lithium battery
packs.
12. This device contains batteries that are non-replaceable. When the
battery is at end of life, the device shall be properly disposed of.
13. In the event a damaged device produces an unfamiliar liquid,
avoid contact with the liquid. If coming into contact with a foreign
liquid, especially the eyes or other sensitive parts, immediately
flush with water. Liquid ejected from a damaged battery may
cause skin irritation or burns.
14. Do not use a battery pack or device that is damaged or modified.
Damaged or modified batteries may exhibit unpredictable
behavior resulting in fire, explosion, or risk of injury.
15. Do not expose a battery pack or device to fire or excessive
temperature. Exposure to fire or temperature above 265°F (130°C)
may cause explosion.
16. Follow all charging instructions and do not charge the battery
pack or device outside of the temperature range specified in the
instructions. Charging improperly or at temperatures outside of
the specified range may damage the battery and increase the
risk of fire.
17. WARNING: Risk of Electric Shock. Connect only to a grounding
type receptacle. If replacement of the plug or cord is needed, use
only identical replacement parts.
18. CAUTION: To reduce the risk of electric shock the pool must be
installed no closer than 6 feet (1.8 m) from any electrical outlet. Do
not place portable devices closer than 5 feet (1.5 m) from the pool.
19. Ensure your device is turned o� and the charging port is dry
before charging with the charger. While charging, your device
should be kept in a cool, well-ventilated area. Do not cover your
device while charging, as this may cause components to
overheat.
20. WARNING: To reduce the risk of electric shock, do not use an
extension cord to charge your device and instead only charge is
via a dedicated wall outlet.
3

21. WARNING: To reduce the risk of electric shock, replace damaged
cord immediately.
22. If the power cord is damaged, it must be replaced or repaired by
a qualified electrician or Aiper Customer Care to avoid any
hazards.
23. Only certified professionals should disassemble the sealed drive
kit of your device.
24. Your device should only be serviced by a qualified technican
using o�cal replacement parts.
25. Do not operate your device simultaneously with any other pool
equipment, such as a pool filter, cleaner, or skimmer.
26. When putting your device into the water, the front of the device
must face upwards and should never be placed upside down or
thrown into the swimming pool.
27. Watch your steps and maintain balance when working near the
poolside.
28. Do not drop, pierce the shell, or intentionally damage the device
in any way, as this may void your warranty.
29. Ensure the device is turned o� while not in use or while performing
maintenance.
30. When not in use, store the device indoors, in a cool, well-ventilated
area.
4

31. CAUTION:
• FOR USE WITH SWIMMING POOLS ONLY.
• DO NOT RUN PUMP DRY.
• TO REDUCE THE RISK OR INJURY, USER MUST READ MANUAL.
• FOR USE ONLY WITH AUTHORIZED AIPER CHARGER, MODEL:
GM95-252300-1FGN.
SAVE THESE INSTRUCTIONS
5

FCC Statement
This device complies with Part 15 of the FCC Rules. Operation is
subject to the following two conditions: (1) This device may not
cause harmful interference, and (2) this device must accept any
interference received, including interference that may cause
undesired operation.
Warning: Changes or modifications not expressly approved by the
party responsible for compliance could void the user's authority to
operate the equipment.
Note: This equipment has been tested and found to comply with the
limits for a Class B digital device, pursuant to Part 15 of the FCC
Rules. These limits are designed to provide reasonable protection
against harmful interference in a residential installation.
This equipment generates, uses, and can radiate radio frequency
energy and, if not installed and used in accordance with the
instructions, may cause harmful interference to radio
communications. However, there is no guarantee that interference
will not occur in a particular installation. If this equipment does
cause harmful interference to radio or television reception, which
can be determined by turning the equipment o� and on, the user is
encouraged to try to correct the interference by one or more of the
following measures:
(1) Reorient or relocate the receiving antenna.
(2) Increase the separation between the equipment and receiver.
(3) Connect the equipment into an outlet on a circuit di�erent from
that to which the receiver is connected.
(4) Consult the dealer or an experienced radio/TV technician for
help.
Radiation Exposure Statement:
1. This device complies with FCC radiation exposure limits set forth
for an uncontrolled environment.
2. This device should be installed and operated with minimum
distance 20cm between the radiator & your body.
6

Importer: Aiper Intelligent, LLC.
Address: 8735 Dunwoody Place, STE 6, Atlanta, Georgia 30350, USA.
US Toll-Free: +18668500666
AU Toll-Free: +611800497023
IC Statements
This device contains licence-exempt transmitter(s)/receiver(s) that
comply with Innovation, Science and Economic Development Canada’s
licence-exempt RSS(s). Operation is subject to the following two conditions:
(1) This device may not cause interference, and (2) This device must
accept any interference, including interference that may cause
undesired operation of the device.
CAN ICES-001 (B)/NMB-001(B)
Radiation Exposure Statement:
1. This device complies with IC radiation exposure limits set forth for
an uncontrolled environment.
2. This device should be installed and operated with minimum
distance 20cm between the radiator & your body.
7
User Manual
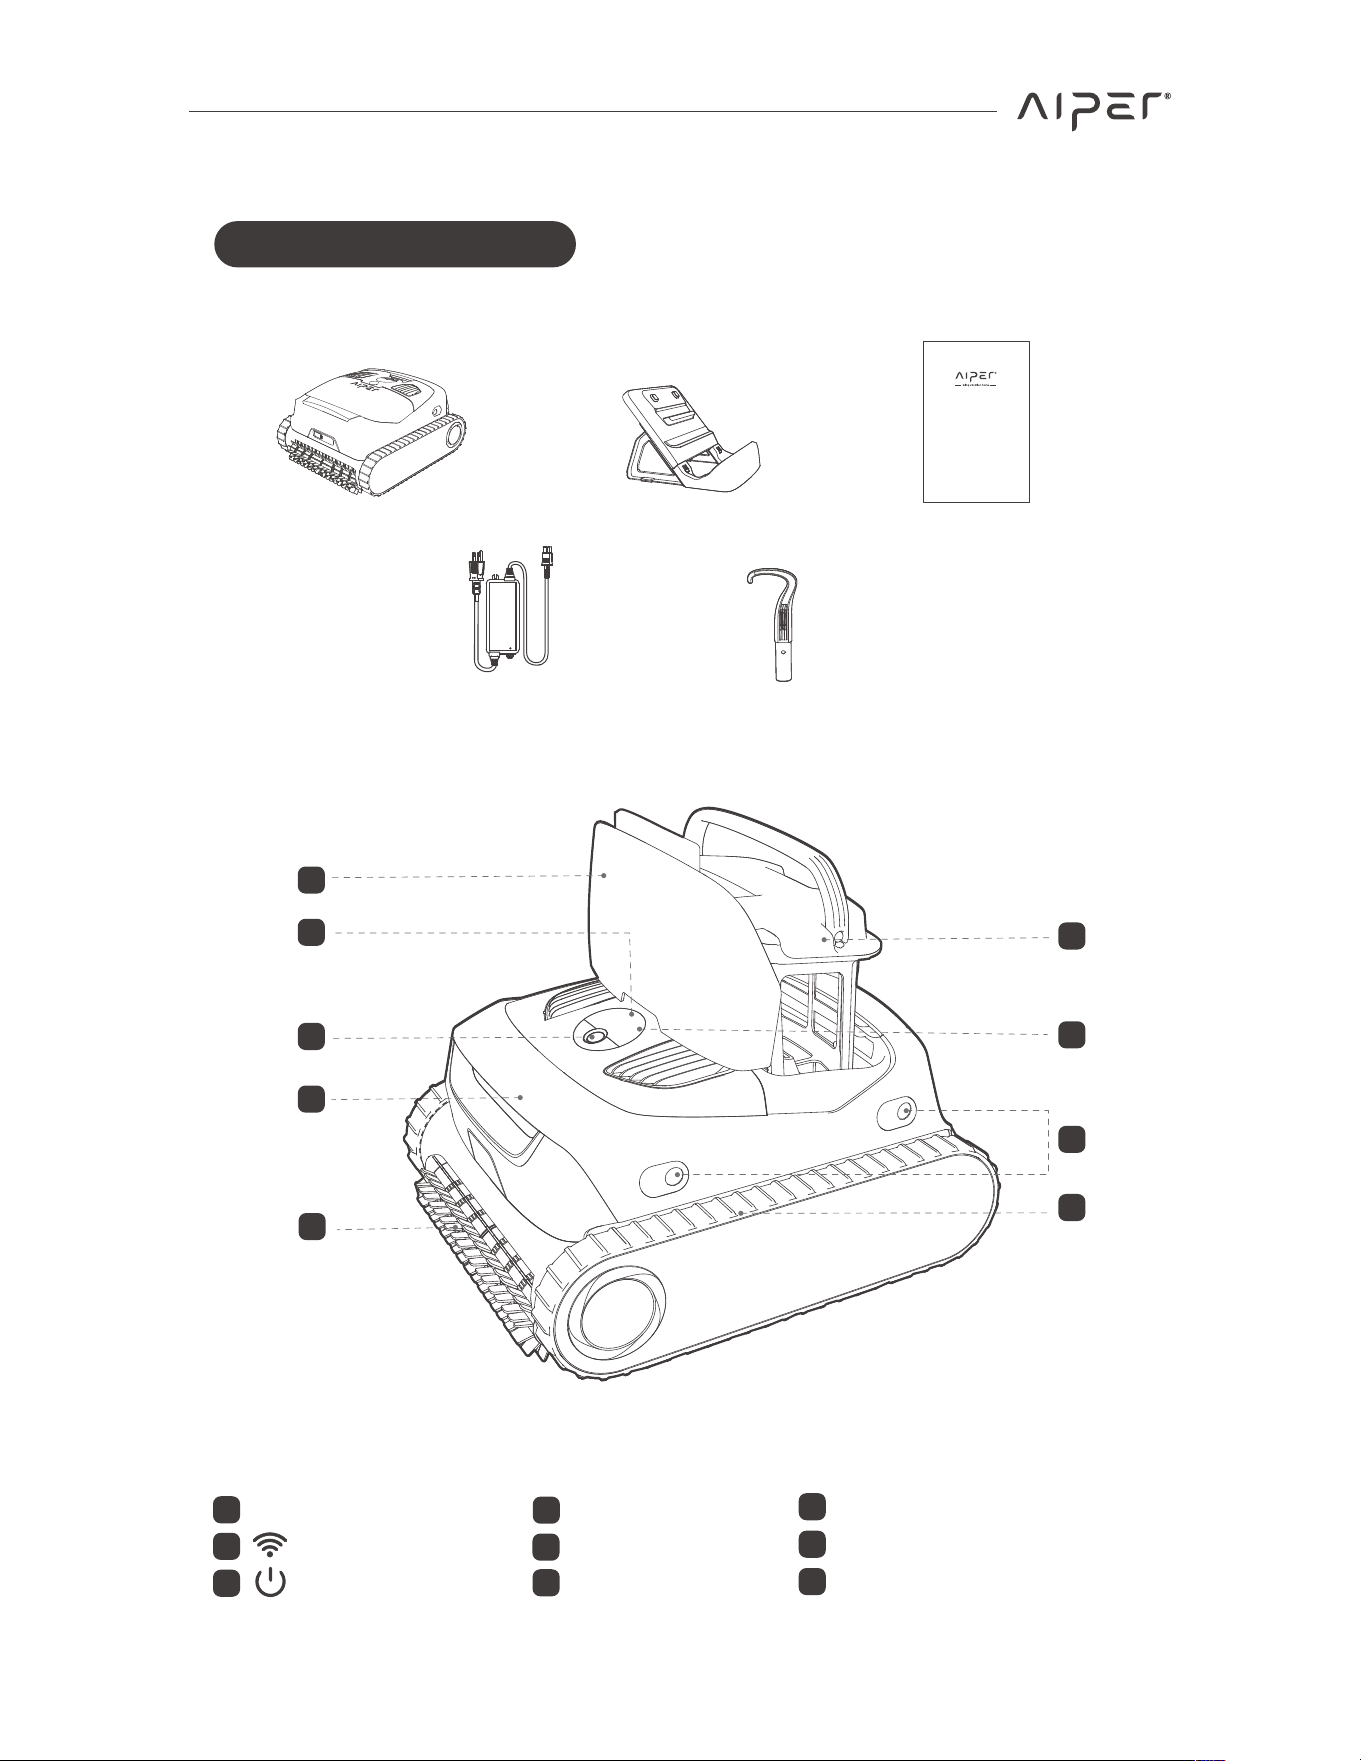
2.1 Package Contents
2.2 Component Overview
Robotic Pool Cleaner (Side View)
Robotic Pool Cleaner *1
Charger *1 Hook *1
Charging Dock *1 User Manual *1
2. Product Components
6
7
8
1
3
4
2
5
9
1
6
7
8
2
3
4
9
Top Shell
OmniSense™ Sensor
Caterpillar Tread
Roller Brush
LED Status Indicator
: Wi-Fi Indicator
: Power Button
Handle
5
Filter Box
8
3. How to Use Your Aiper Scuba X1 Pro
Please ensure the device is only
used within the specified pool
environments. Damage resulting
from use outside these
conditions will not be covered
under warranty.
Notes:
• iOS 12.0 or later, or Android 8.0 or later is required for full App functionality on your
smartphone or device.
• Once installed, follow the App's instructions to complete registration, login, and
network setup.
Once in Network Setup Mode, please select either Bluetooth Setup or QR Code
Setup.
• Bluetooth Setup: Enable Bluetooth on your phone and grant access to the Aiper
App. In the App, tap the [+] symbol in the top right corner, then select Add via
Bluetooth. The App will detect nearby Bluetooth devices. Select your network, enter
the Wi-Fi password, and tap Next to finish network setup.
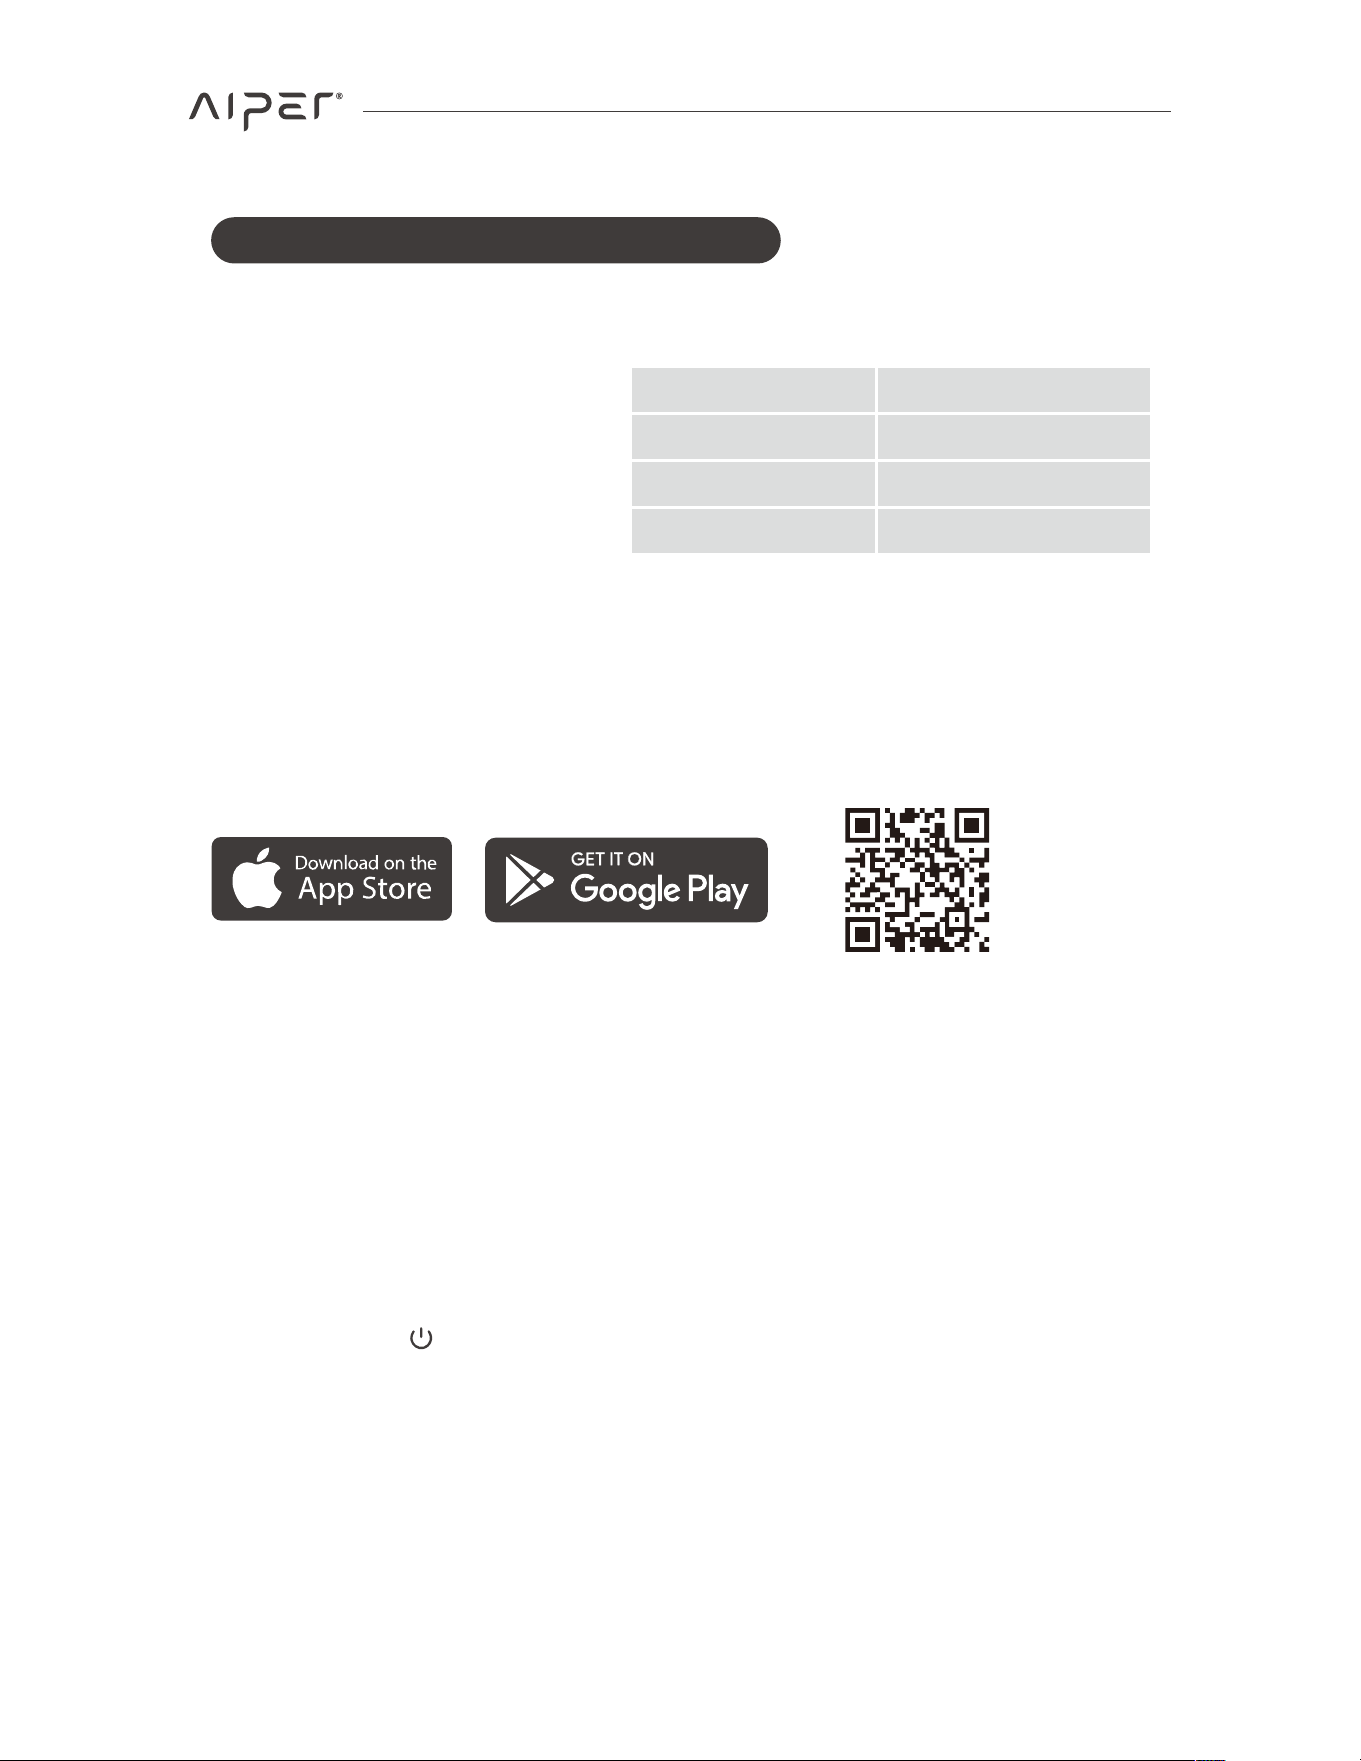
Download the Aiper App to unlock more features for your device:
You can download and install the Aiper App by scanning the QR code below or by
searching for Aiper in your App store.
• pH Value
7.0-7.8
Maximum 4 ppm
Maximum 5000 ppm
• Chlorine
• NaCl
• Water Temperature 50-104°F (10-40°C)
3.1 Operating Conditions
3.2 Downloading App
3.3 Network Setup
When first powering on the device, it will enter Network Setup Mode. If this process is
interrupted, press for 5 seconds to re-enter Network Setup Mode.
9
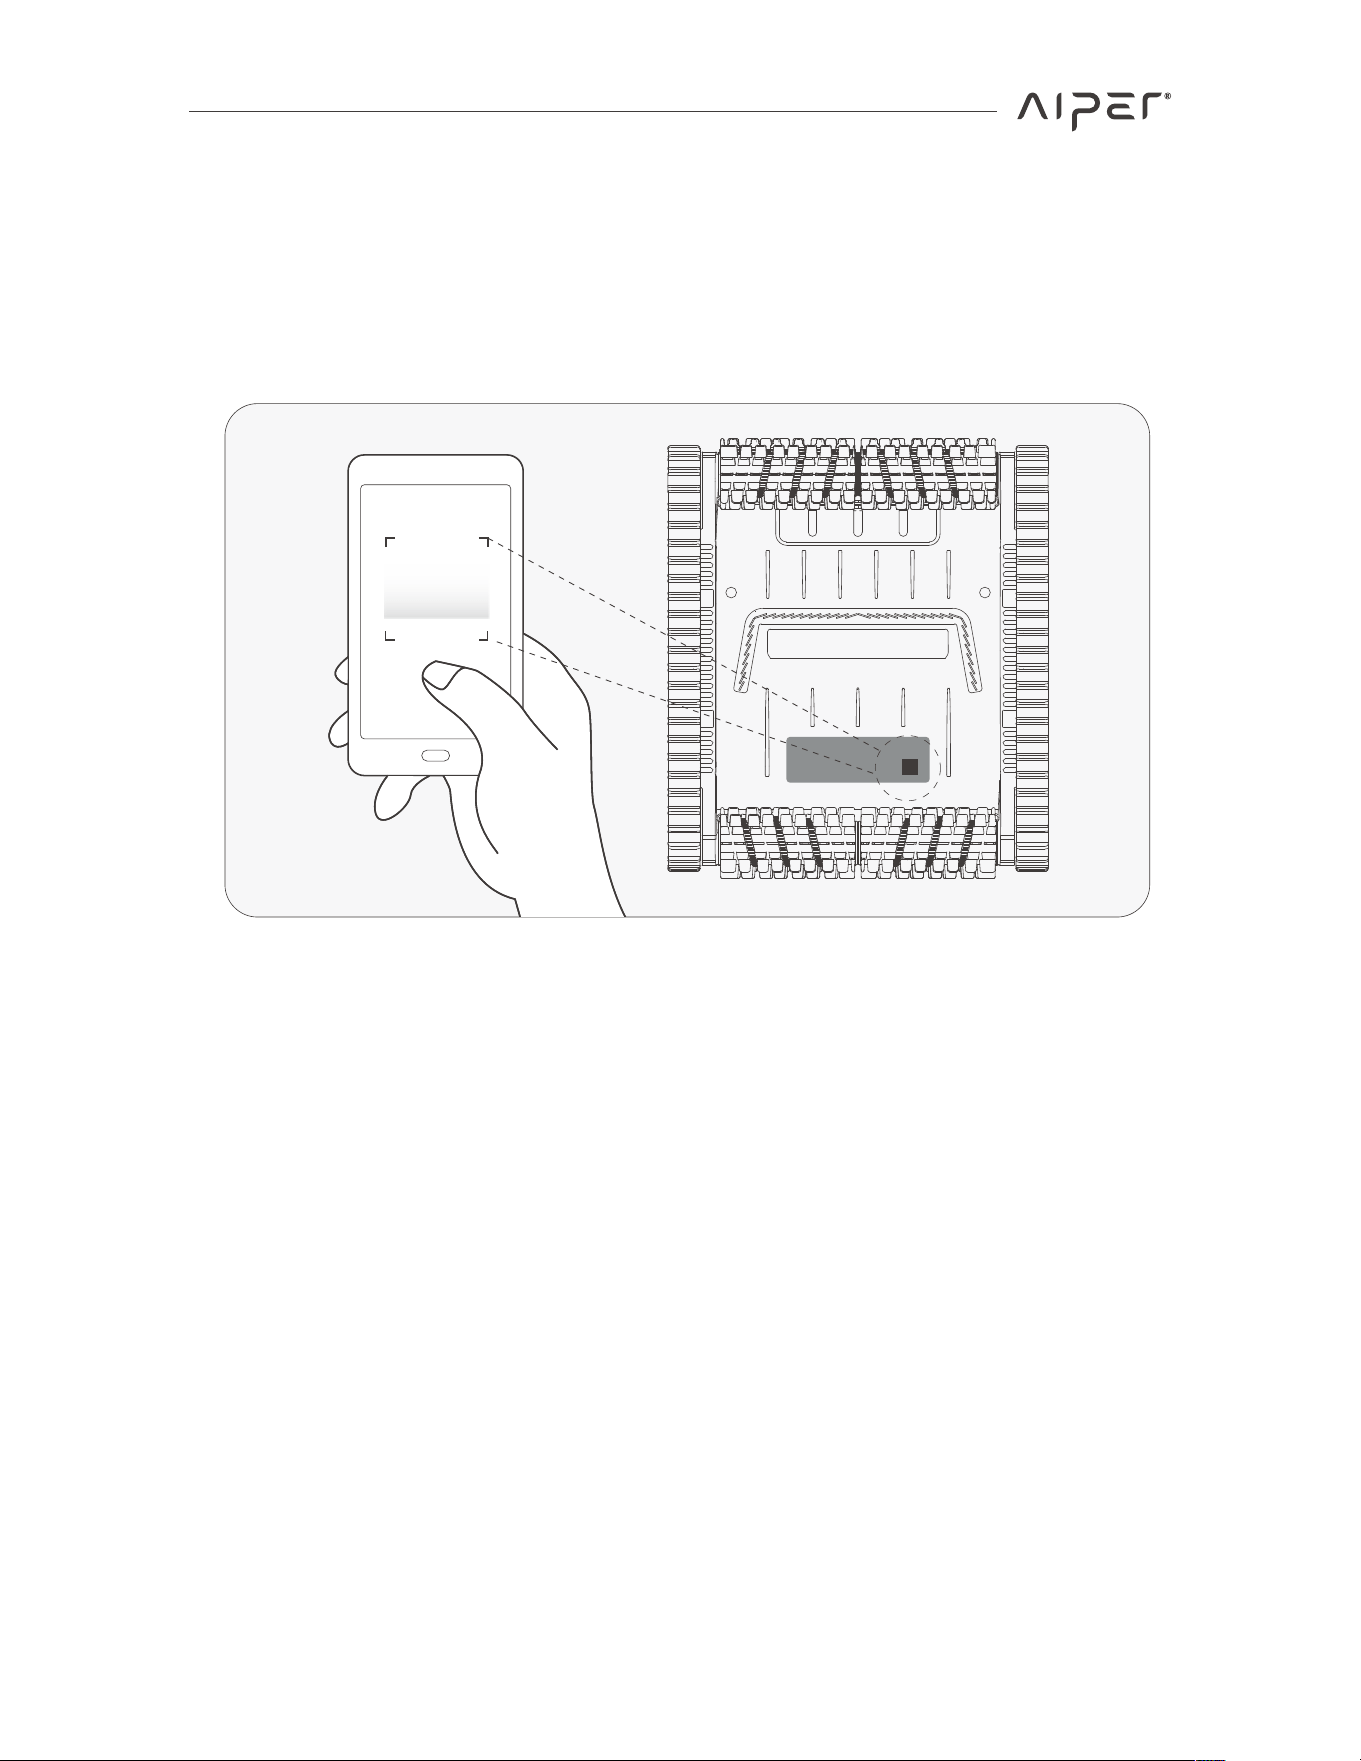
• QR Code Setup: Open the App and tap the [+] in the top right corner, then select
Add via QR Code. Scan the QR Code located on your Aiper device. When the device
is recognized, follow the App’s instructions to connect to the device's Wi-Fi. Once
connected, return to the App and follow the prompts to complete the network setup.
Wi-Fi Network Requirements:
Use a 2.4GHz or 2.4/5GHz mixed network.
10

3.4 Charging
CAUTION:
Please fully charge the device before using it to clean the pool.
Do not charge the device in direct sunlight.
It's advised that a minimum distance of 11.5 ft (3.5m) separates your pool and
charging location. For the best results, your charging location should have Wi-Fi
coverage, as this will expedite OTA updates.
11.5 ft
(3.5m)
Charging Options�
· Charging Dock:
1. Install the Charging Dock: Insert the support leg into the charging panel. Then,
attach the front cover.
2. Before charging, ensure that both the charging dock and the device are dry. Do not
place a wet device on the dock for charging. Use a tissue or dry cloth to thoroughly
dry the metal contacts on the bottom of the device for the best charging quality.
11
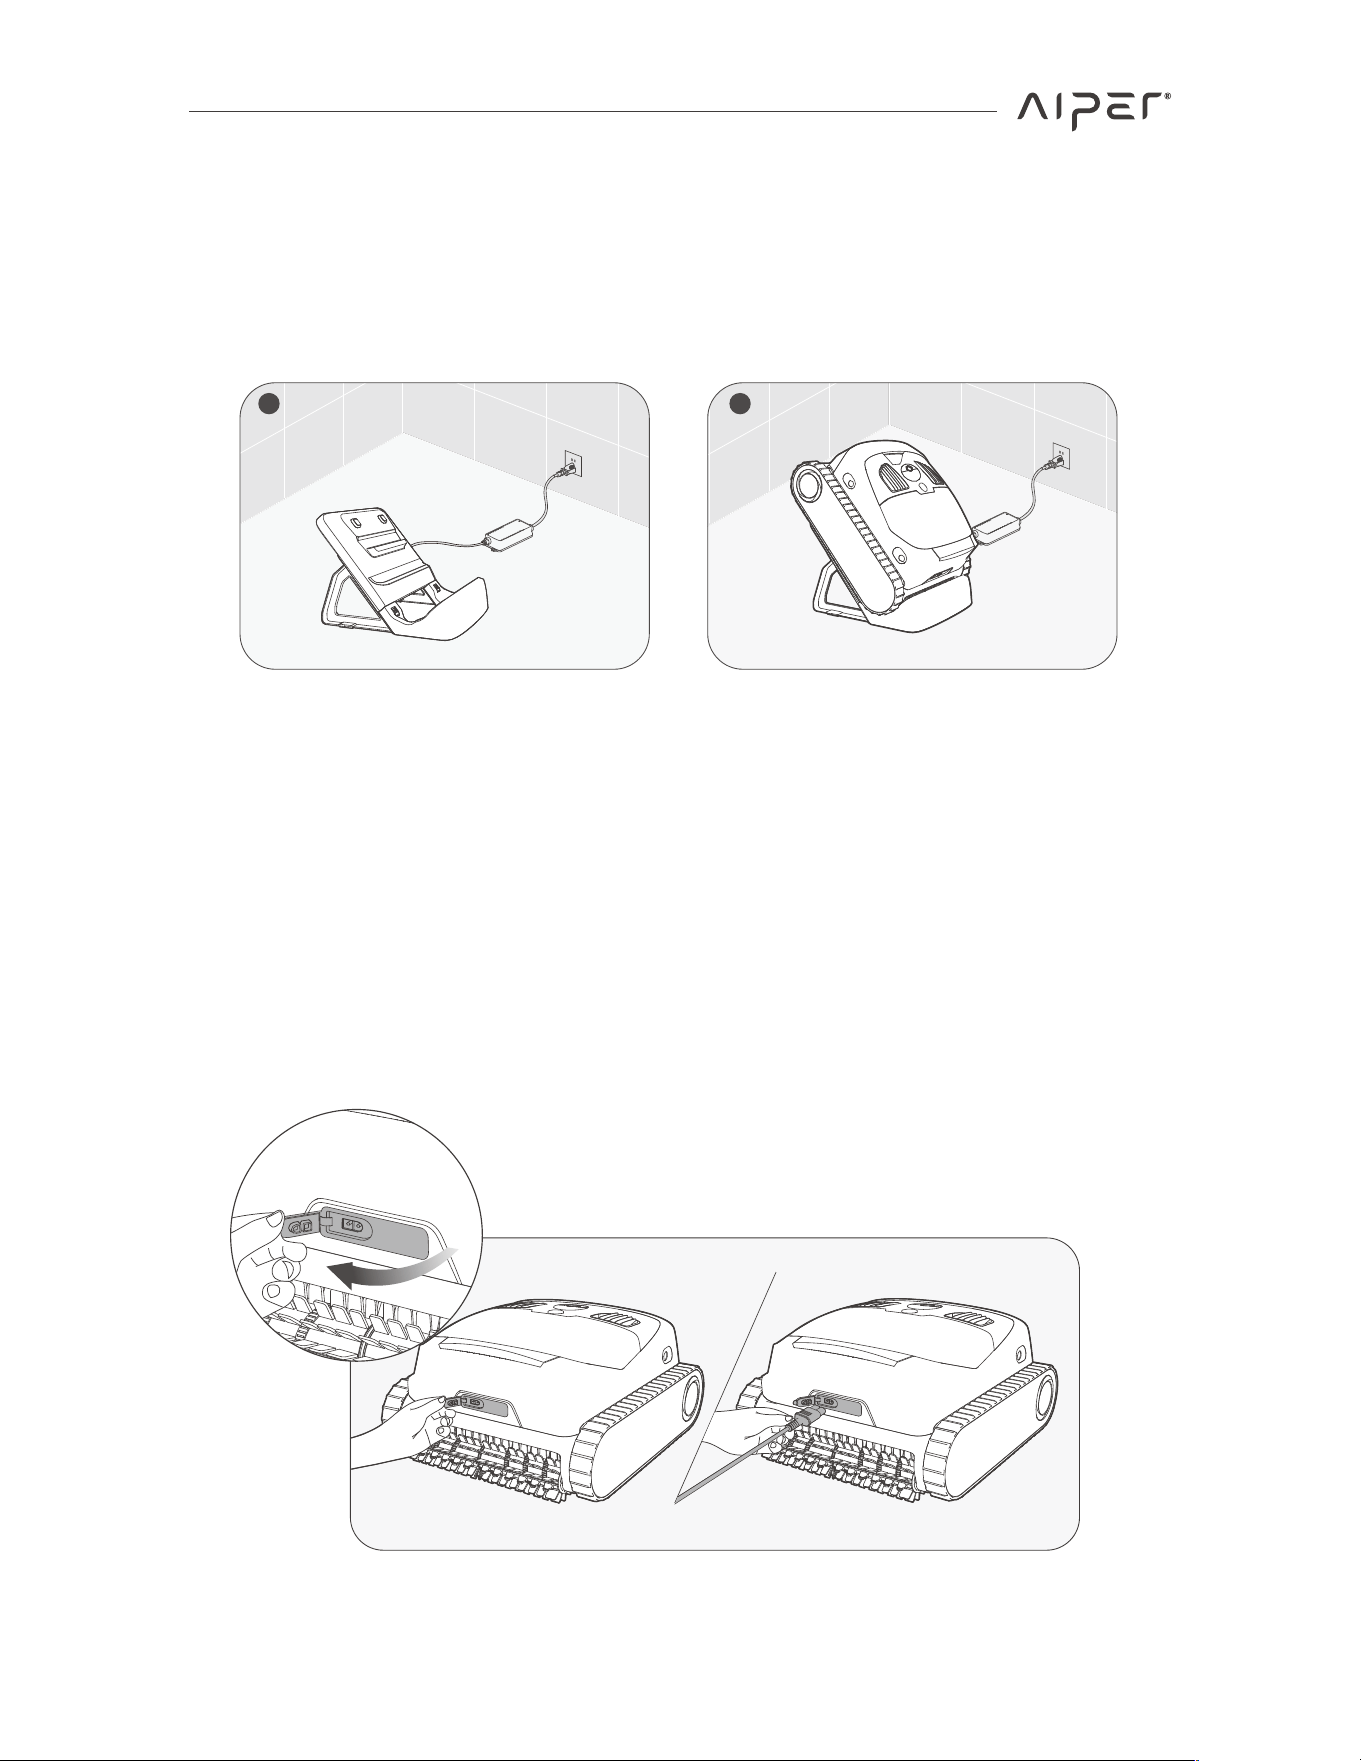
3. Connect the charger's cable to the charging port on the dock, and plug the adapter
into any available outlet. Place the dry device onto the charging dock. The LED
status indicator on the device will pulse while charging and turn solid green when
fully charged.
1 2
· Charging Port�
1. Before charging, remove the charing port cover and ensure the charging port is dry.
If there's any water or dampness in the port, wipe it dry with a clean cloth before
charging your device.
2. Connect the charger to the device's charging port, then plug the charger into any
available outlet. The LED status indicator will pulse while charging and turn solid
green when fully charged.
12
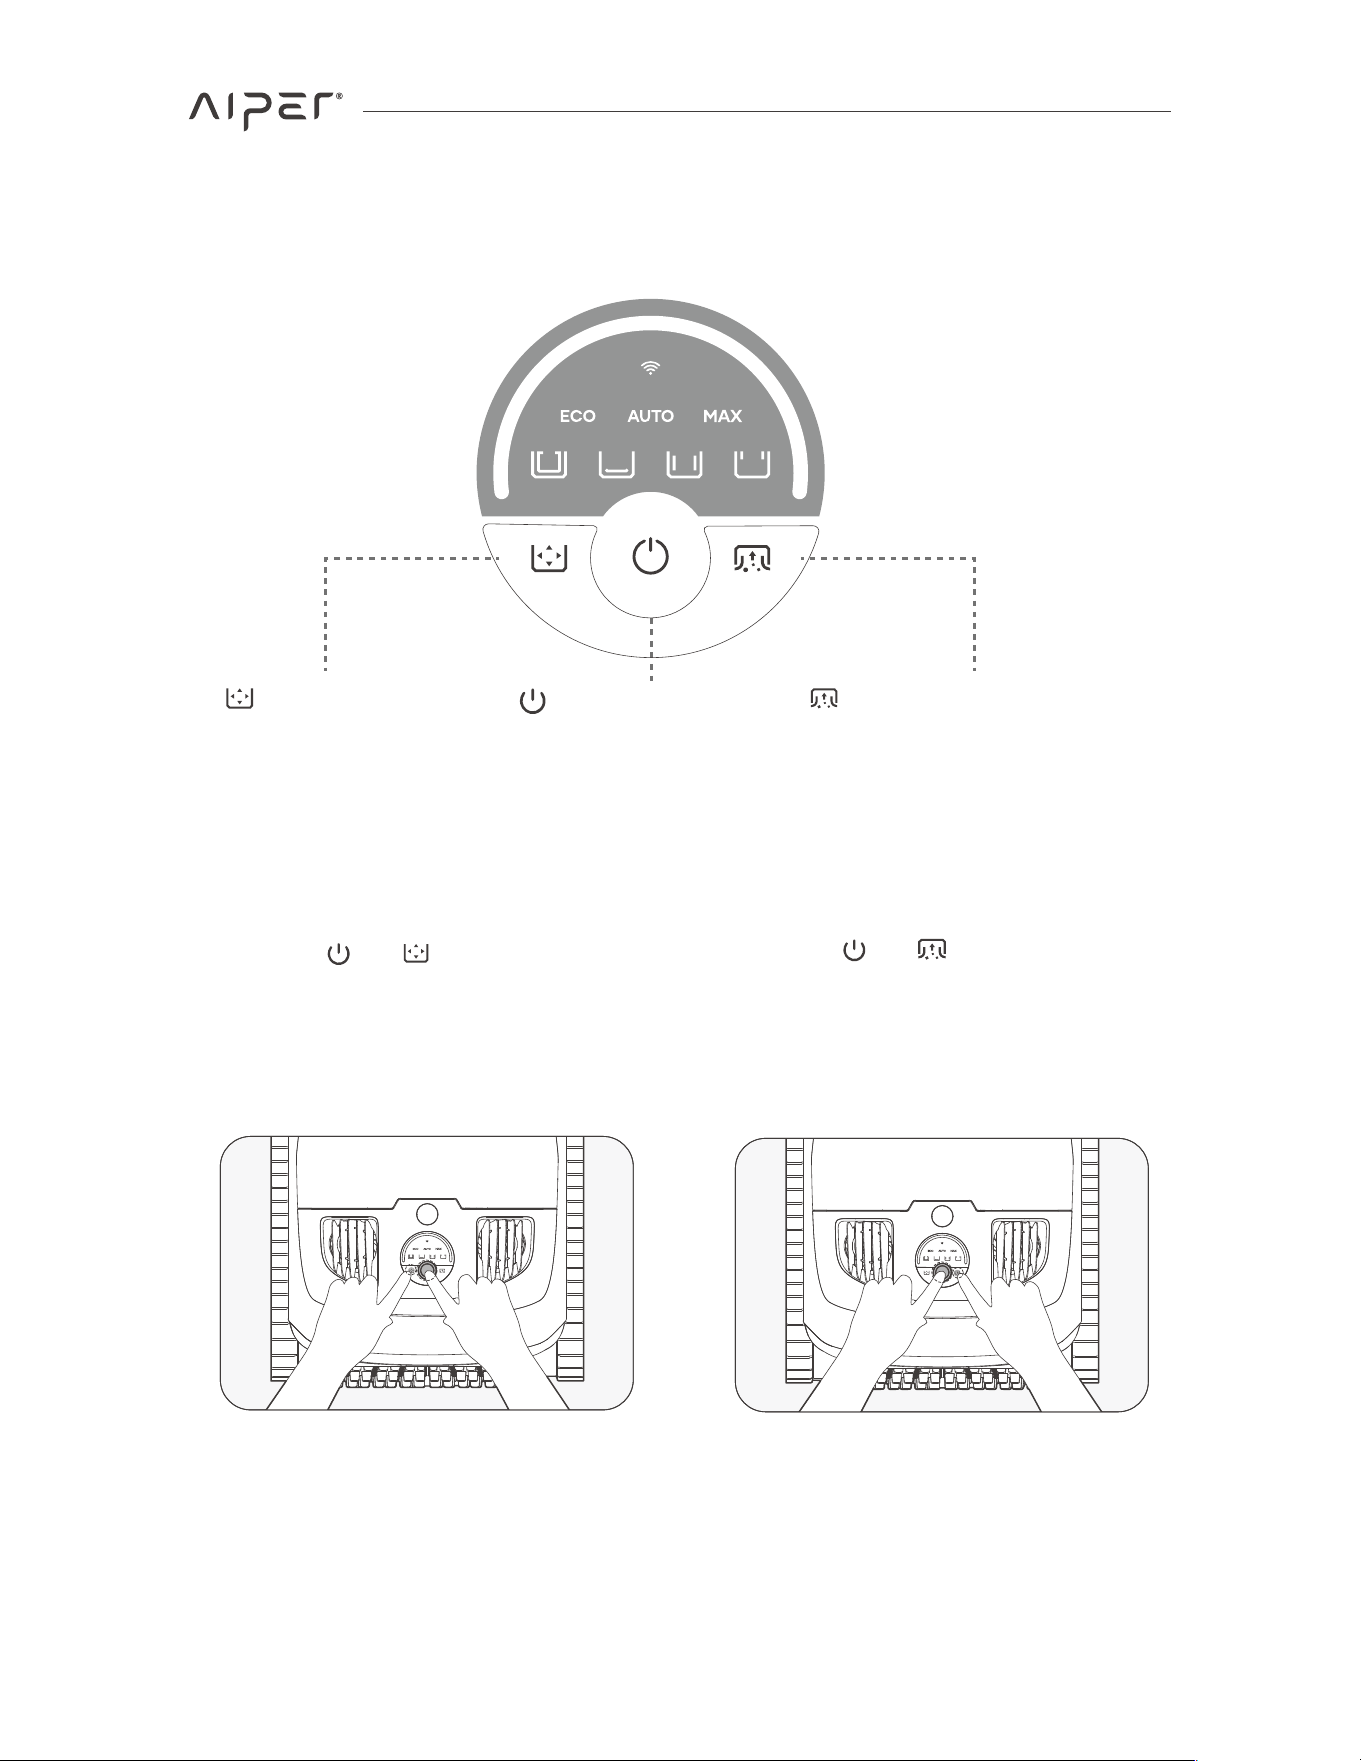
3.5 Button Descriptions
Power Button
Turn device On/O�
Mode Button
Change and select
cleaning mode.
Cleaning Power Button
Increase or decrease
cleaning power.
Aside from the above cleaning modes, if all the LED mode indicators are constantly lit,
it indicates that the device is performing a custom task.
Combination Button Functions:
• Network Setup Mode: Press and hold
buttons and simultaneously for 5
seconds to enter network setup
mode. The device will stay in network
steup mode for 300 seconds, so be
sure to complete the setup quickly.
• Factory Reset: Press and hold
buttons ��� and ����� simultaneously for
5 seconds to reset the device to
factory settings. This will erase all
user settings, cleaning data, and
personalized settings.
13
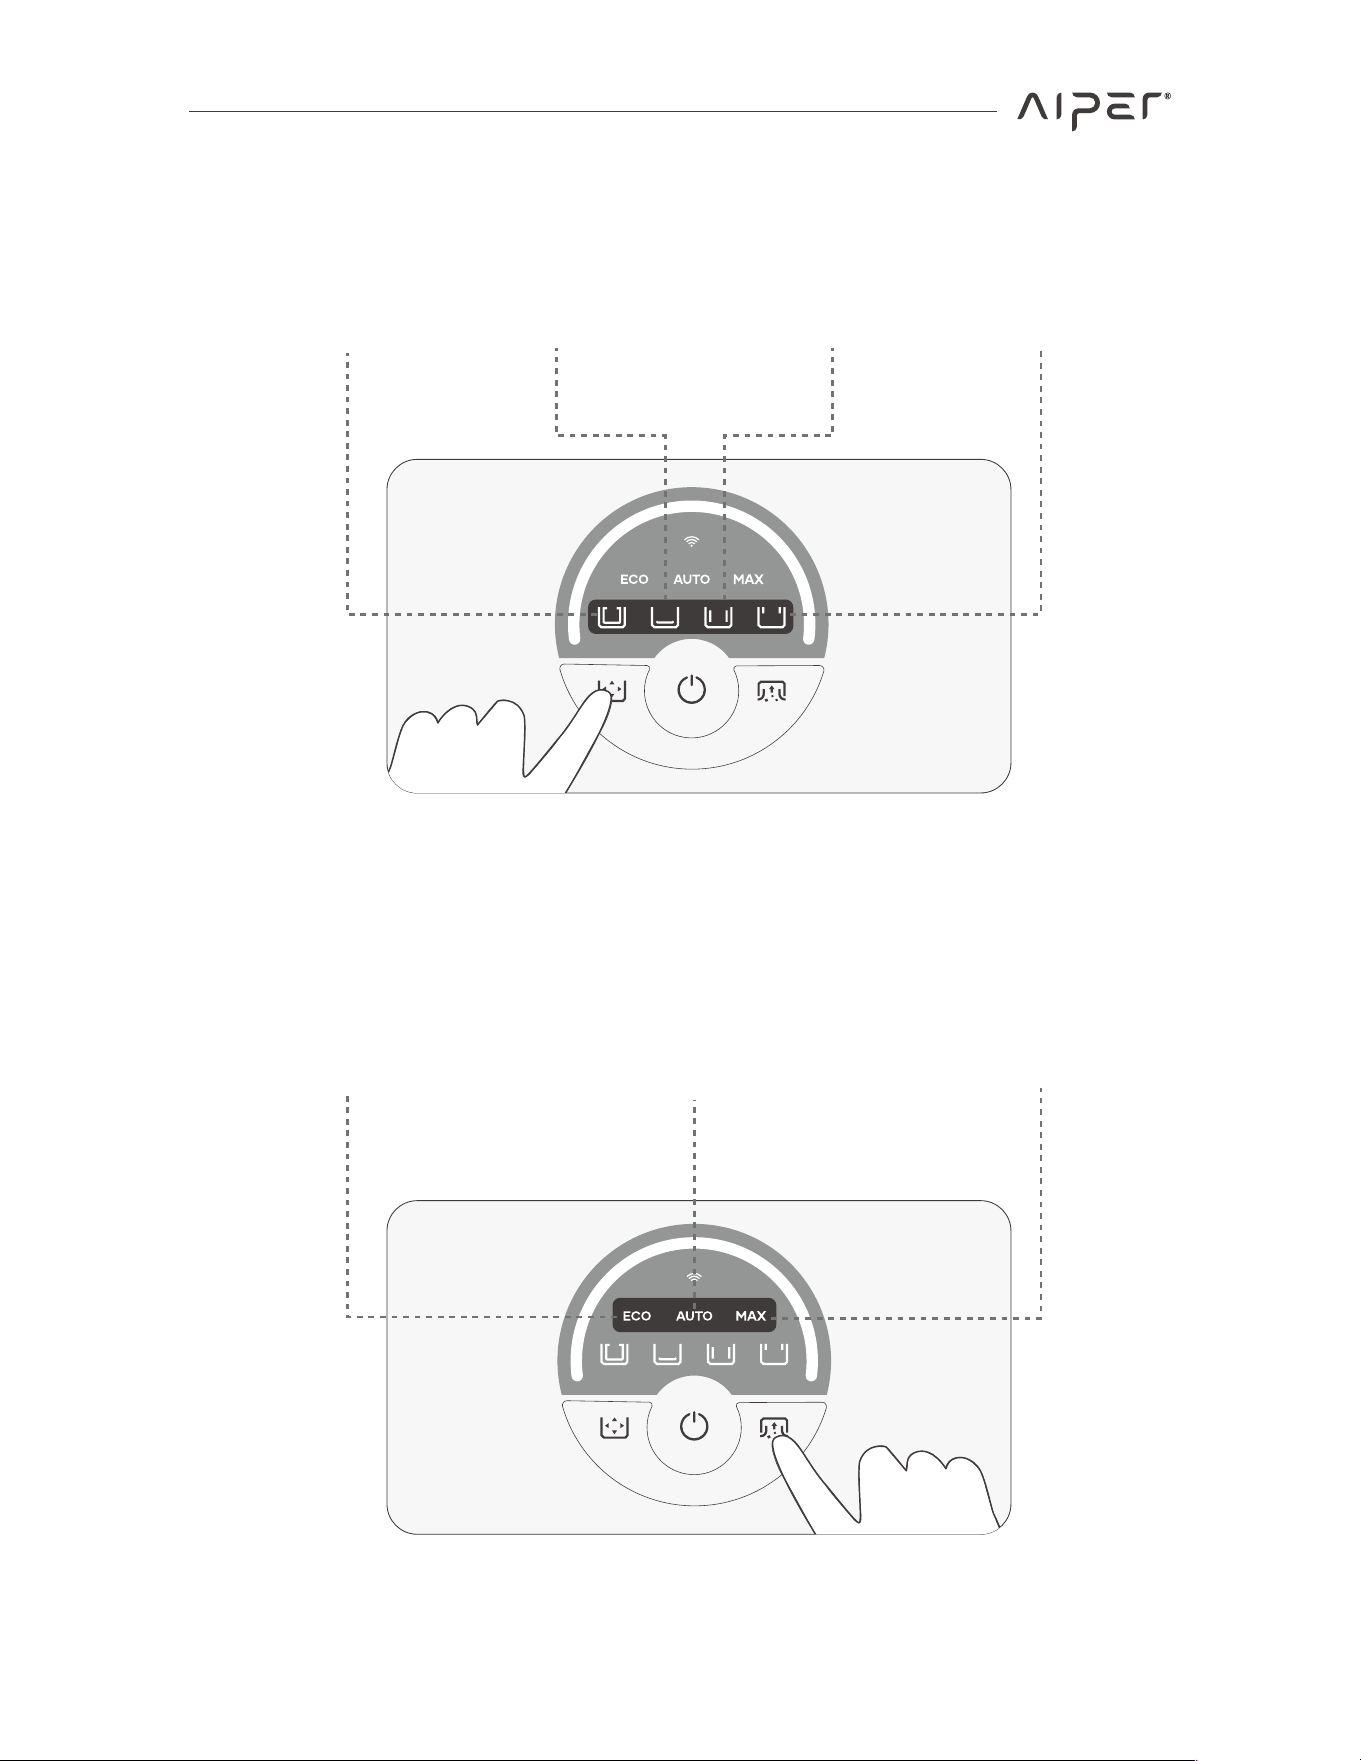
3.6 Cleaning Modes
3.7 Cleaning Intensity
Smart Mode Floor Mode Wall Mode Waterline Mode
Energy-Saving
Cleaning
Adaptive
Cleaning
High-Performance
Cleaning
14
3.9 Cleaning Process
Notes�
• If you’re unsure about the pool’s turbidity, it’s recommended to use the AUTO
cleaning intensity. AUTO mode automatically adjusts the cleaning performance
based on the pool’s condition, ensuring the X1 Pro provides e�ective cleaning while
optimizing battery life.
• If the pool water has high turbidity and there are noticeable flocs or debris, it’s
recommended to use the MAX cleaning intensity. MAX mode enhances cleaning
performance while it increases the X1 Pro’s power consumption, which may shorten
battery life.
• If the pool water has low turbidity and there is minimal visible debris, it’s
recommended to use the ECO cleaning intensity. ECO mode reduces the X1 Pro’s
power consumption, extending battery life.
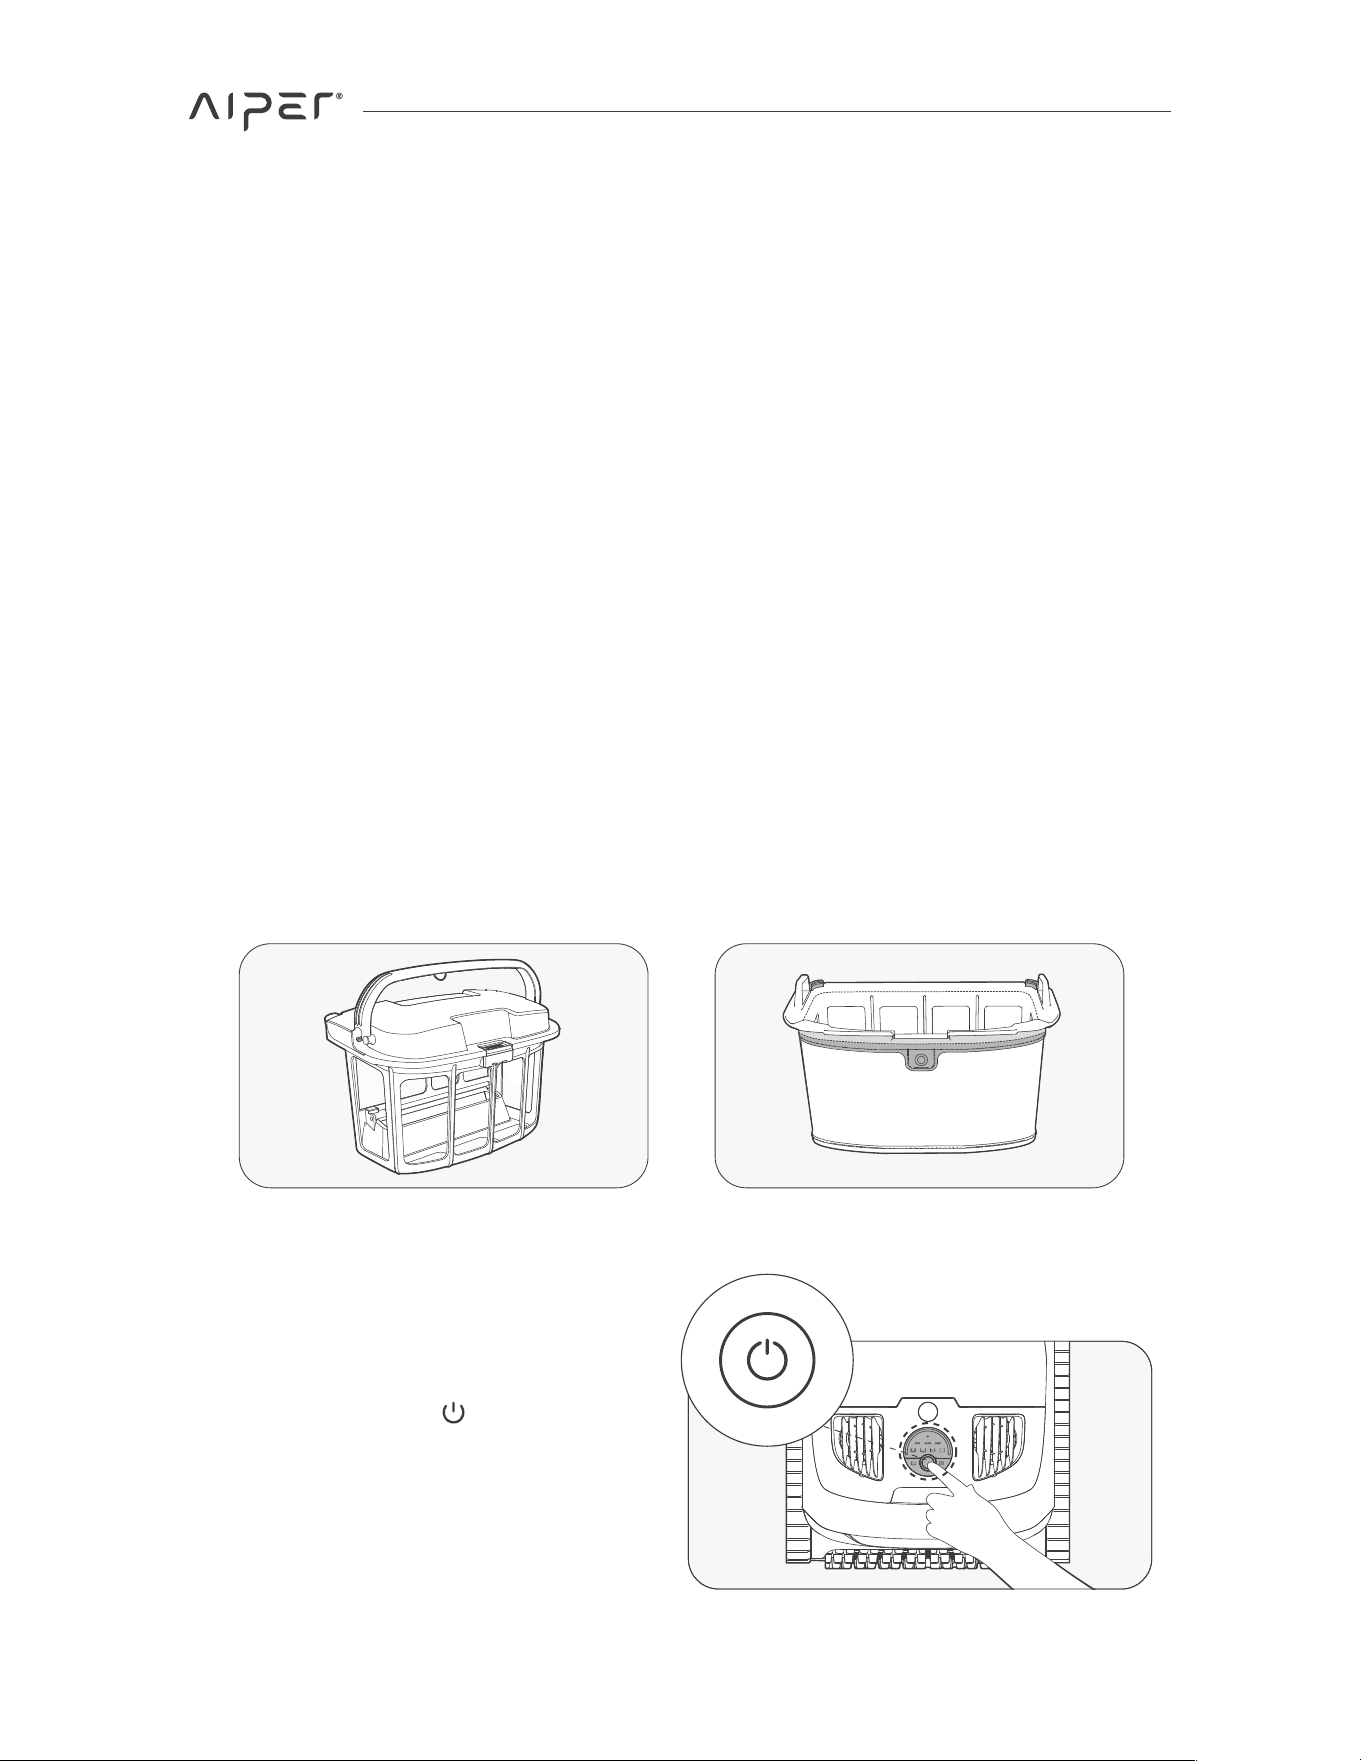
1. Press and hold the Button for 2
seconds to turn on/o� the device.
3.8 Choosing Filter
Two filters of di�erent thickness are provided: replaceable MicroMesh™ ultra-fine filter
and filter box.
The replaceable MicroMesh™ ultra-fine filter can trap particles as small as 3-10μm,
such as silt and some algae. When visible debris is minimal (e.g., stones, leaves, sand,
debris, hair) and the water appears cloudy or some algae, it is recommended to use
both the filter box and the replaceable MicroMesh™ ultra-fine filter.
If there is a significant amount of visible debris, it is recommended to use only the filter
box and not use the replaceable MicroMesh™ ultra-fine filter.
Filter Box Replaceable MicroMesh™
Ultra-fine Filter
15
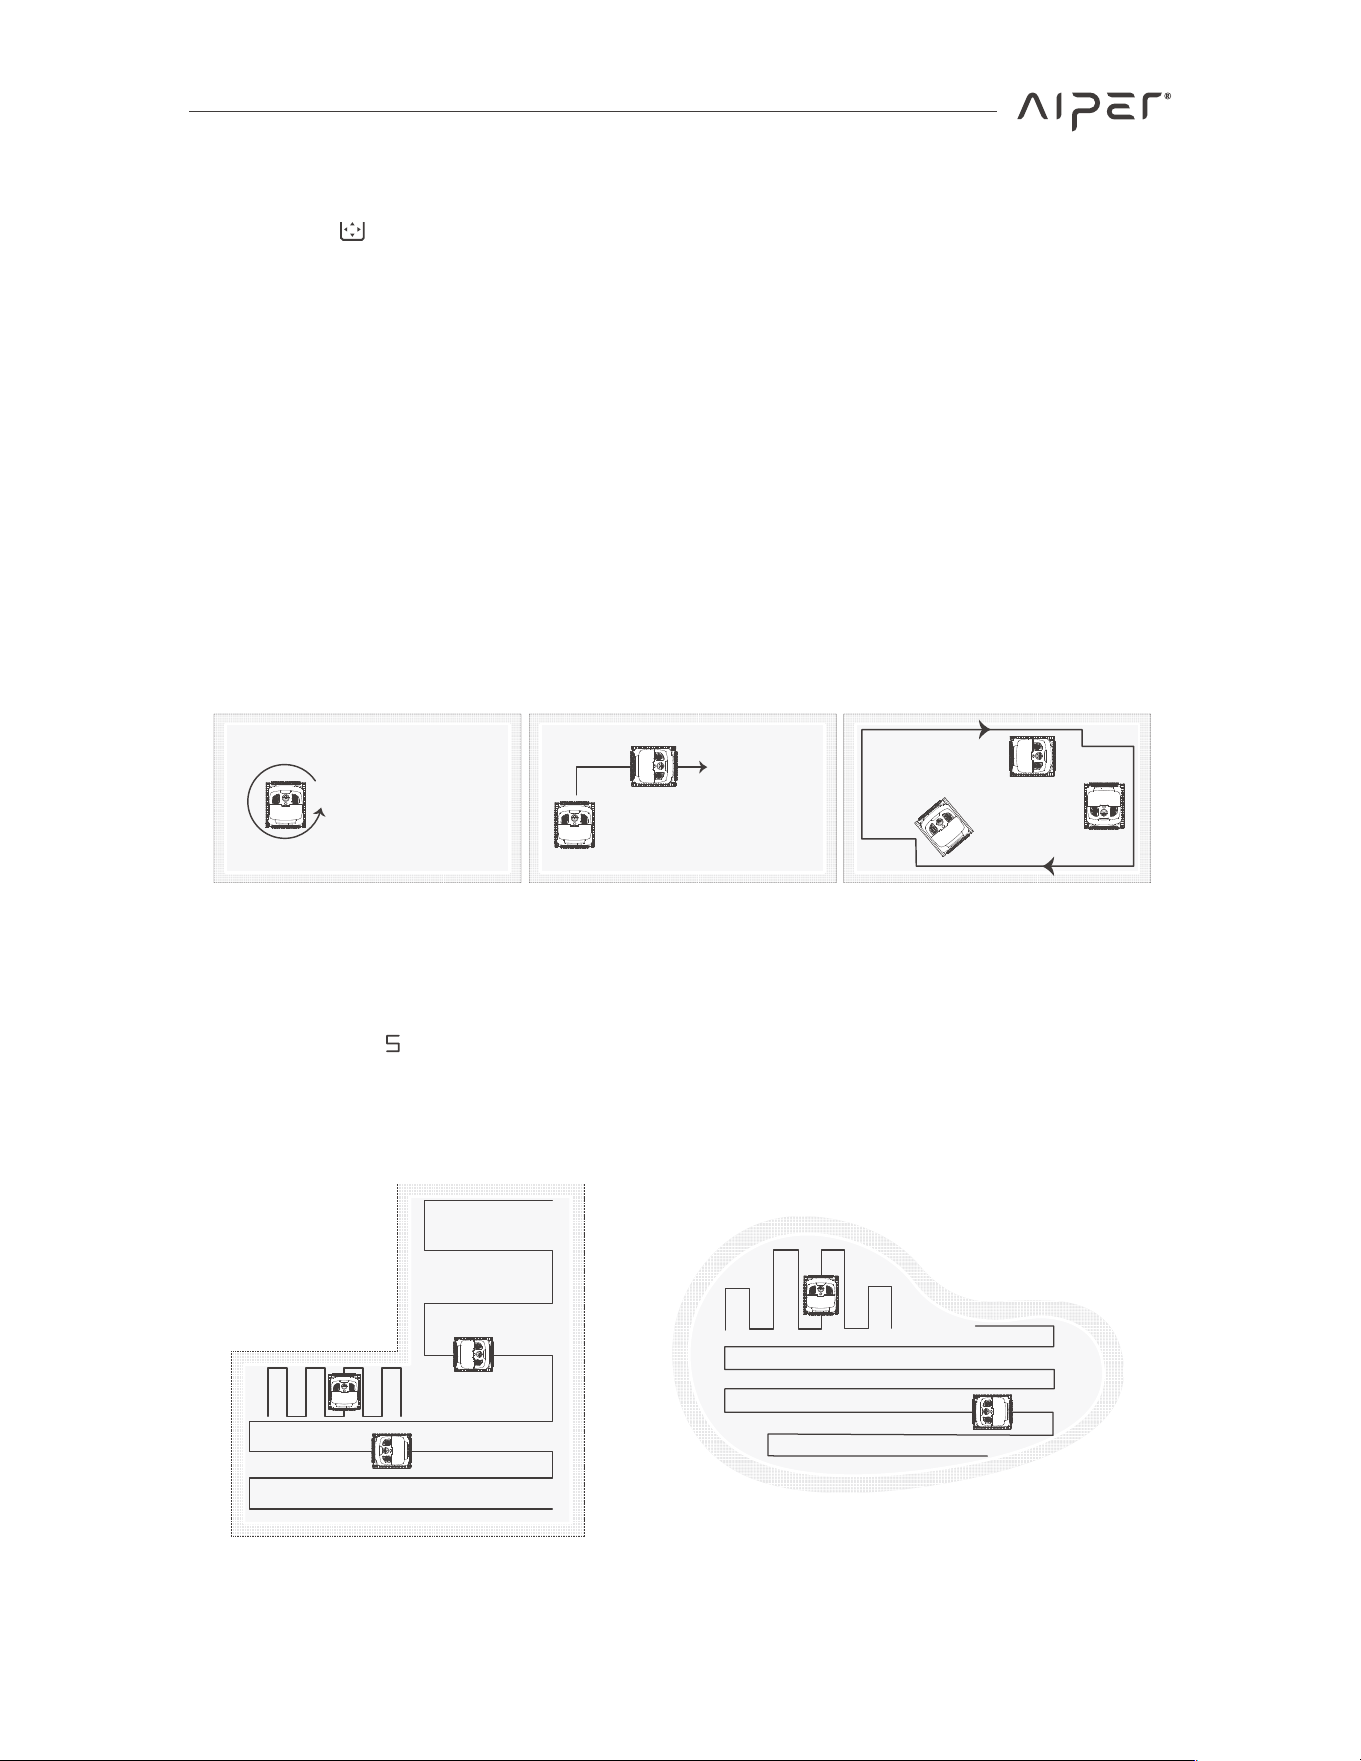
3. When the device is initially submerged, selecting a mode including pool floor
cleaning will trigger the mapping process. The device will clean along the pool’s floor
contour to create an underwater map, without climbing the walls.
After a successful mapping, there's no need to do mapping again for the same pool.
However, before each cleaning, the device need to briefly move around the floor to
relocate.
After the mapping is done, the device will automatically recognize the pool's shape
and initiate the -shaped cleaning route when cleaning the pool floor. Once cleaning
is finished, the device will return to the missed areas.
360°
2. Press the �������button briefly to cycle through and choose one of the four cleaning
modes: Smart Mode, Floor Mode, Wall Mode, and Waterline Mode.
Once you have selected the desired cleaning mode, immediately place the device in
the pool. After being submerged for a short period, the device will initiate the
selected mode's cleaning task.
16
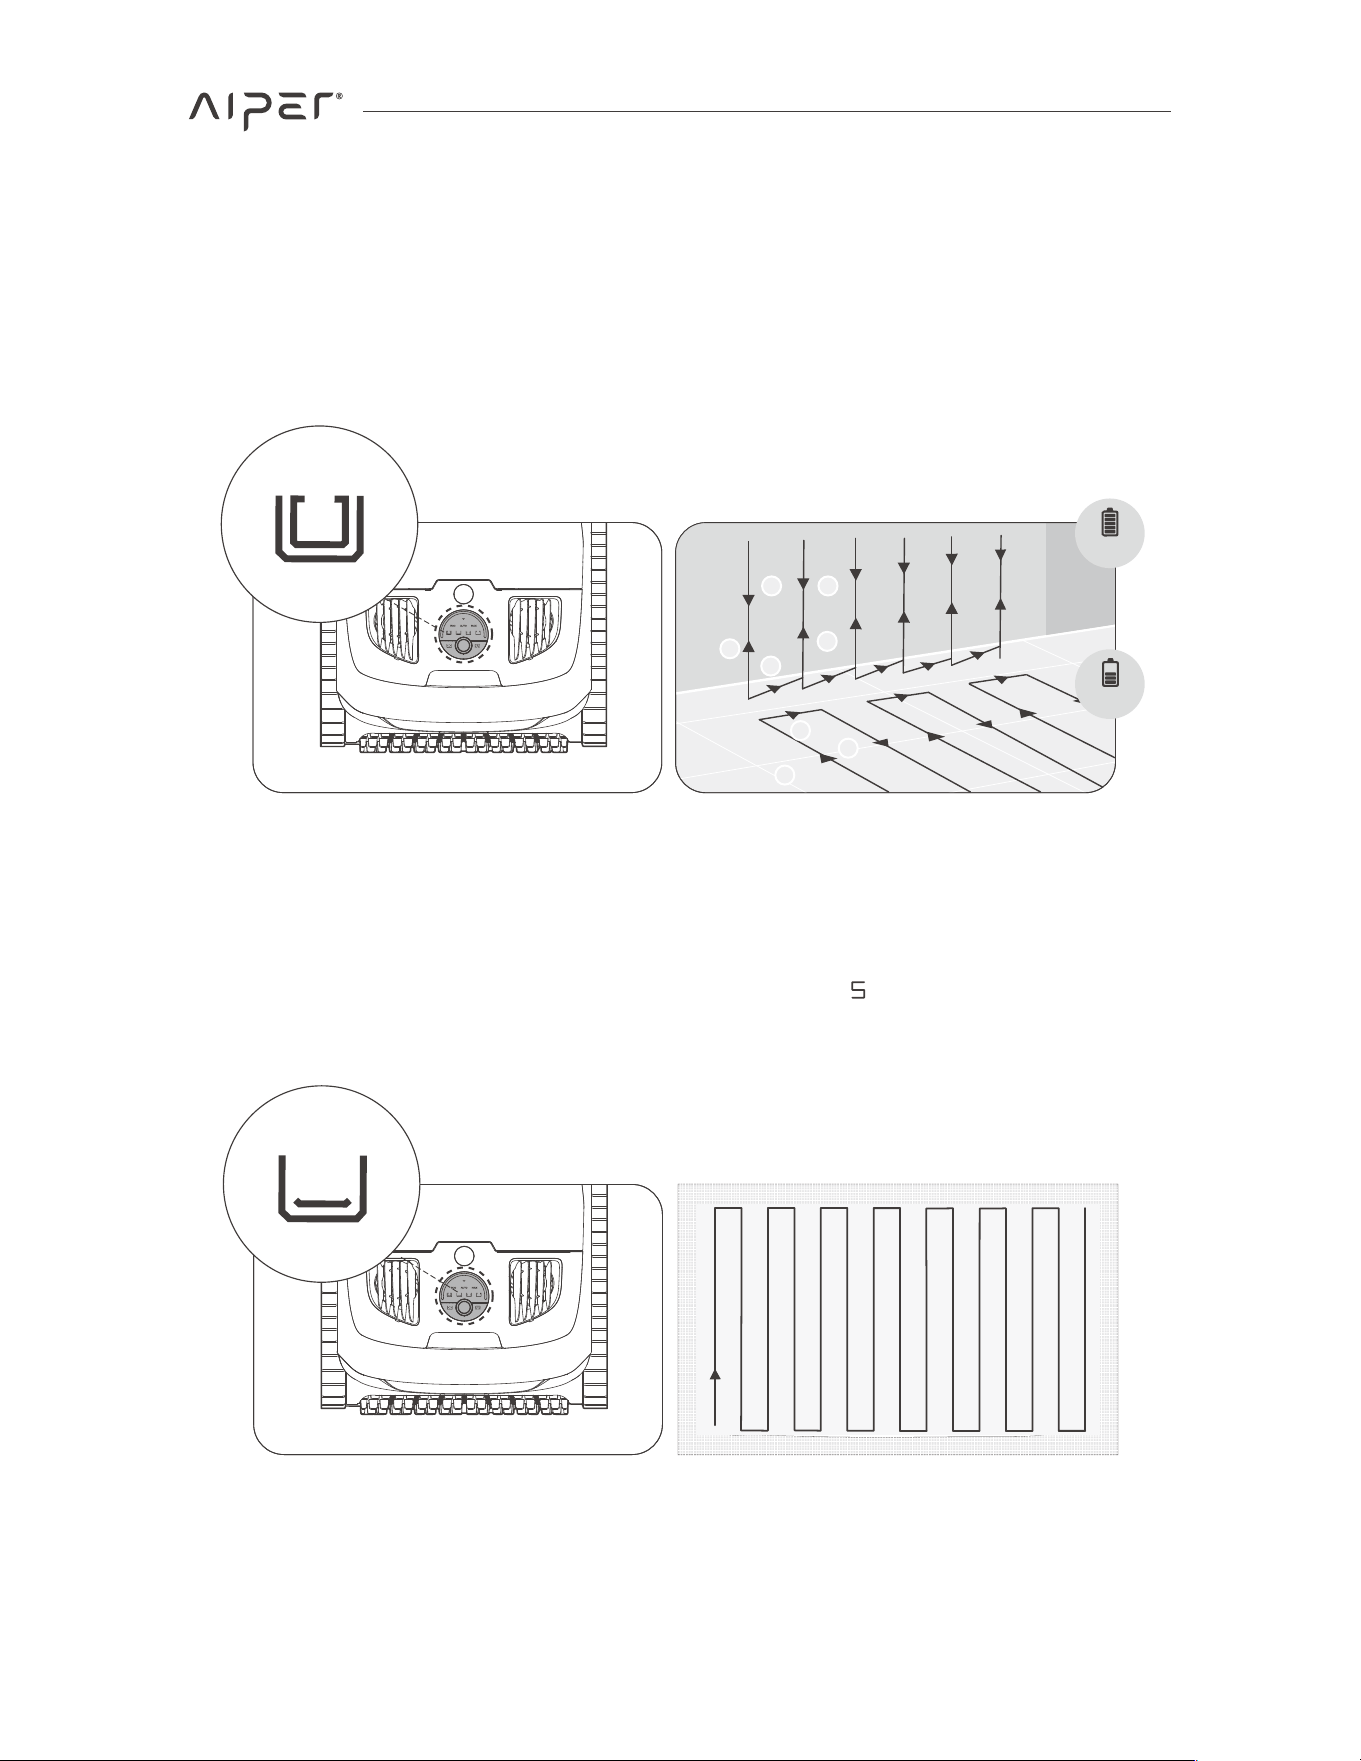
Floor Mode
• Smart Mode: The device will clean the pool floor and pool walls sequentially, while
cleaning the walls, it will clean the waterline at the same time.
• Floor Mode: The device will clean the pool floor utilizing a -shaped route, without
climbing or cleaning pool walls.
Smart Mode
1
2
3
4
3
1
2 5
100%-50%
49%-10%
4. The details of each cleaning mode are described below�
17
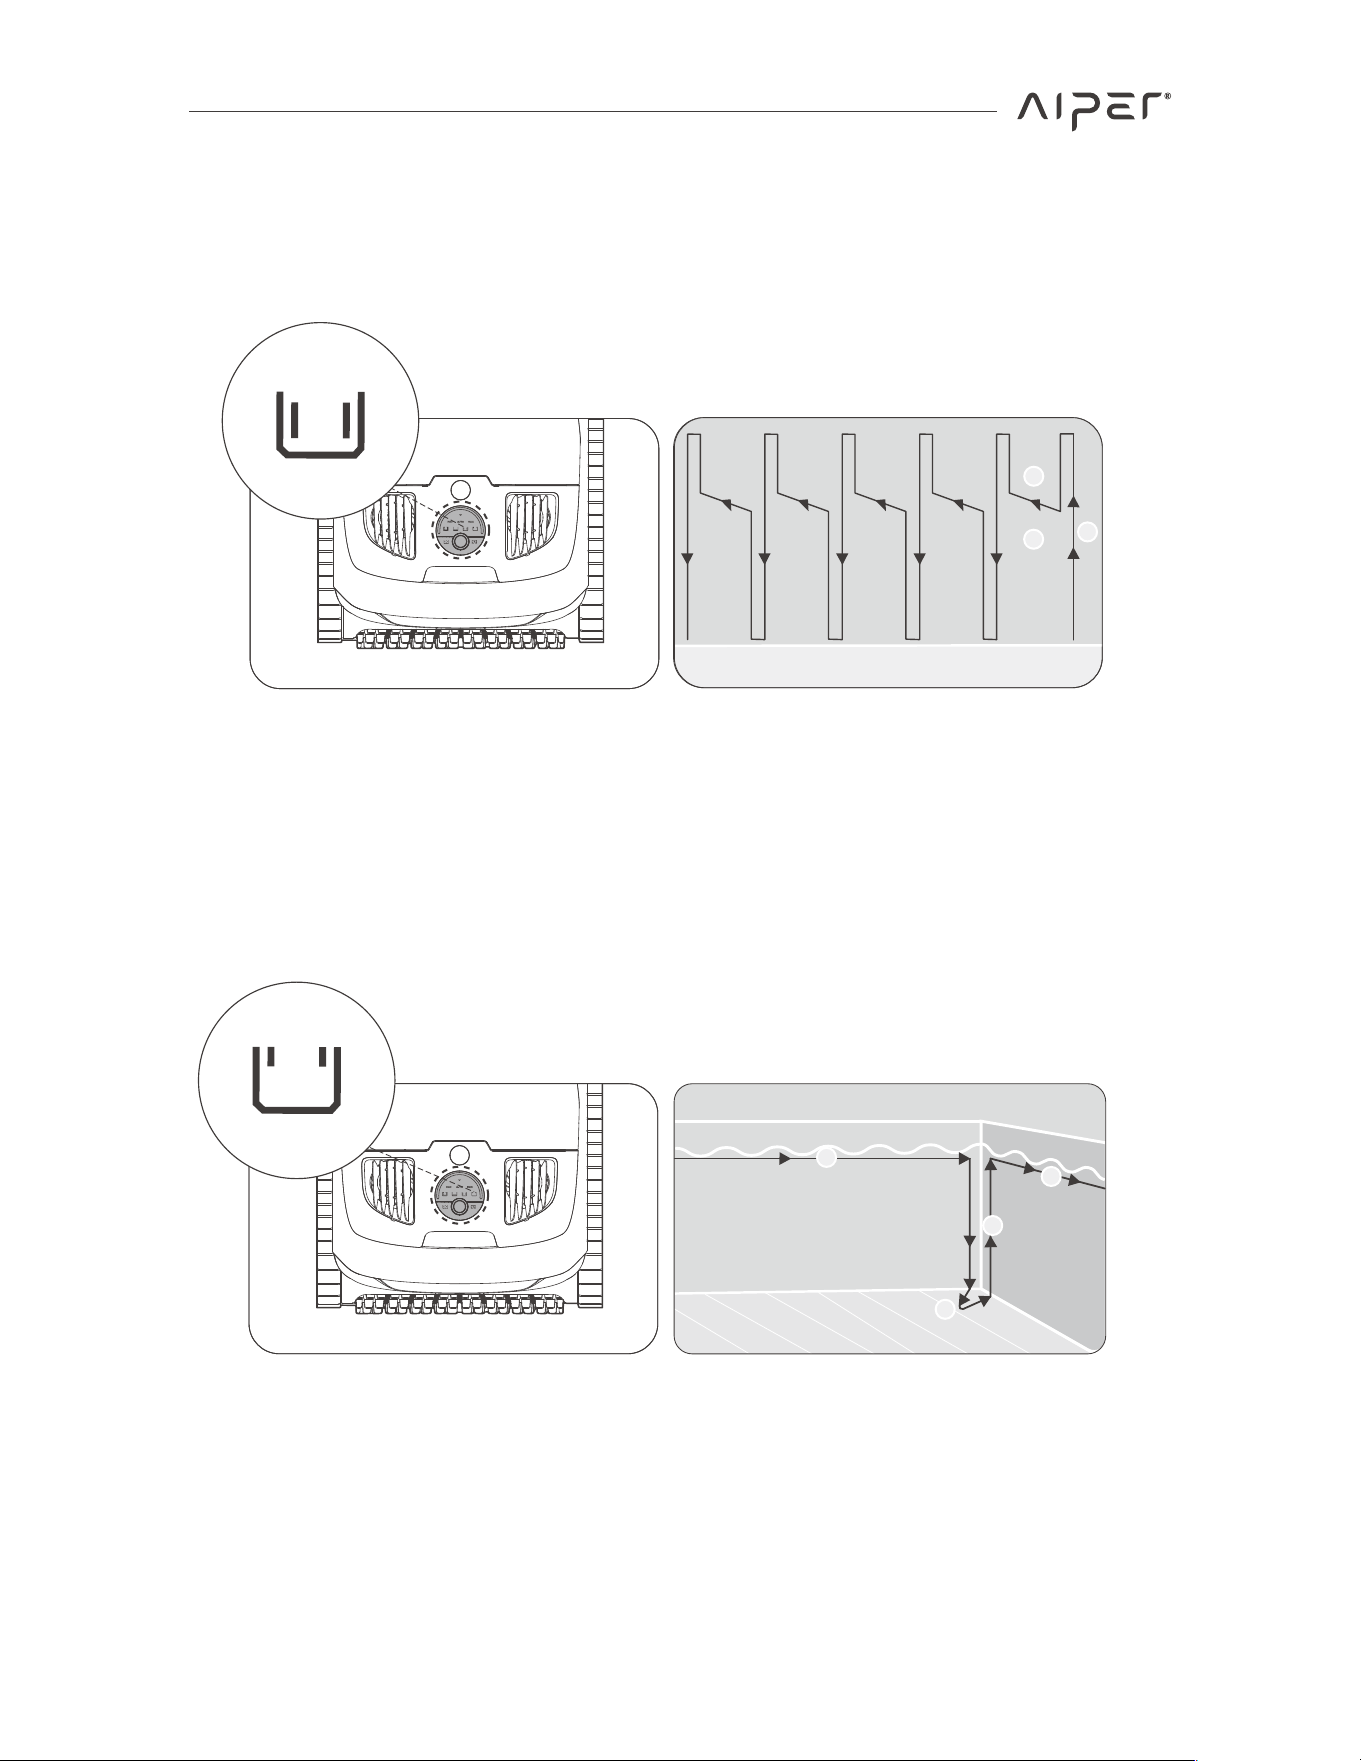
• Wall Mode: The device will clean the pool walls utilizing a Y-shaped route and clean
the waterline at the same time. It will not clean the pool floor in this mode.
• Waterline Mode: The device will move horizontally and clean along the pool
waterline. When running into corners or obstacles along the pool walls, it will
descend from the waterline, switch walls or bypass obstacles, and resume cleaning.
Note: The device's cleaning route may be updated with firmware versions. For the most
accurate information, please refer to the device's actual performance or the latest
o�cial guidance.
Corner
Waterline
1
2
3
4
Wall Mode
Waterline Mode
3
1
2
18