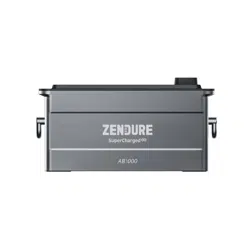
Add-on Battery AB2000X
User Manual / Bedienungsanleitung / Manuel d'utilisation /
Manuale d'uso / Manual de usuario / Gebruikershandleiding

2
EN
Disclaimer
Content
Read all safety guidelines, warnings, and other product information in this manual carefully, and read any
labels or stickers attached to the product before using. Users take full responsibility for the safe usage and
operation of this product. Familiarize yourself with relevant regulations in your area. You are solely responsible
for being aware of all relevant regulations and using Zendure products in a compliant way.
1. Specication .................................................................................................................................................. 3
2. Safety Instruction ........................................................................................................................................3
2.1 Usage .......................................................................................................................................................3
2.2 Disposal Guide .......................................................................................................................................4
2.3 EC DECLARATION OF CONFORMITY .................................................................................................. 5
3. Important Tips .............................................................................................................................................. 5
4. What’s in the Box ........................................................................................................................................6
5. Product Overview ........................................................................................................................................6
5.1 LED Guide ................................................................................................................................................6
6. Getting Started ............................................................................................................................................7
6.1 Choosing an Appropriate Location ....................................................................................................7
6.2 Connecting Your AB2000X ..................................................................................................................7
6.3 Connecting the Solar Inverter ............................................................................................................8
6.3.1 Connnecting the SolarFlow 800/ Hub1200/Hub2000 .................................................................8
6.3.2 Connnecting the Hyper 2000 / ACE 1500 / SolarFlow 800 Pro ................................................8
7. Firmware Update ........................................................................................................................................9
3
EN
1. Please read all current documentation before installing, using, or servicing the product, as documentation
may be updated over time.
2. Please check whether the product is damaged, cracked, leaking liquids, becoming hot, or exhibiting other
abnormalities, and check any cables for damage before operating. If there are any problems, please stop
using the product immediately and contact our customer service.
3. Do not place heavy objects on top of the product.
4. Make sure all cords and plugs are intact and dry before connecting to avoid electric shock.
5. Do not install or operate the system under extreme climatic conditions such as lightning, snow, heavy rain,
strong winds, etc.
6. To reduce the risk of injury, close supervision is necessary when the product is used near children.
7. Keep hands and ngers away from the product's internal components.
8. For safety purposes, please use only the original charger and cables designed for the equipment. We are not
liable for damage caused by third-party equipment, and this may render your warranty invalid.
9. Maintain a minimum clearance of 50mm between the product and any surrounding objects.
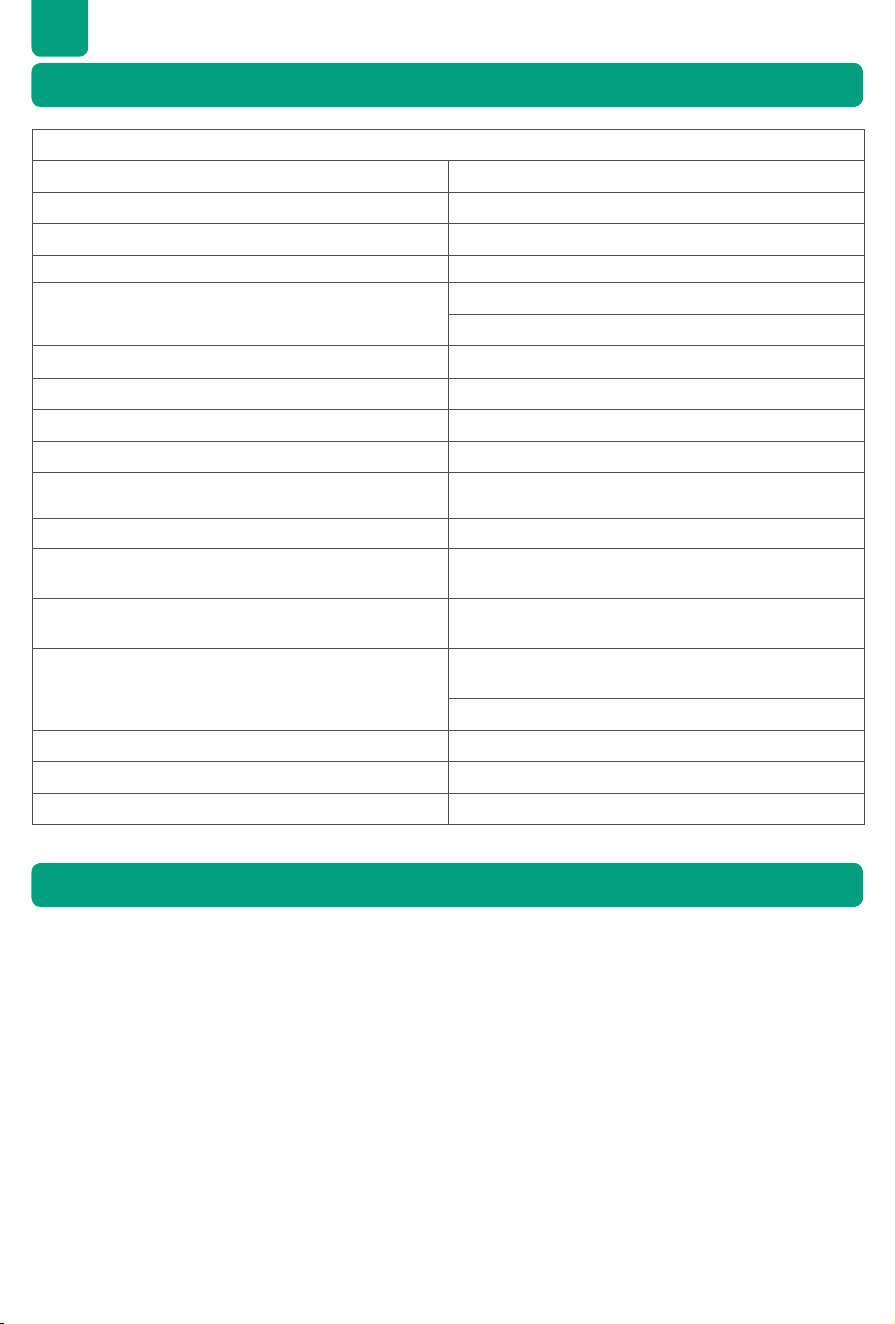
Add-on Battery AB2000X
Battery Rated Voltage 48V d.c.
Battery Life Cycle 6,000 Cycles
Rated Capacity 40Ah/1920Wh
Rechargeable Li-Ion Battery LiFePO ₄
Maximum Input/Output Power
One AB2000X Battery:1,680W
Two or More Batteries:1,920W
Charging Temperature 0° C ~55° C (32° F ~ 131° F)
Discharging Temperature -20° C~60° C (-4° F ~ 140° F)
Self-heating Function Ye s
Automatically Self-heating Function -20℃ ~0℃ (-4° F ~ 32° F)
Storage Temperature
-30℃ to 45℃ (-22° F to 113° F): 1 month
-20℃ to 35℃ (-4° F to 95° F): 6 month
Aerosol Fire Suppression System Ye s
Activation temperature of the Aerosol Fire
Suppression System
170℃ ±10℃ (338° F ±18° F)
Battery Protection
Overvoltage, Overcurrent, Short-circuit, Overheat
Protections
Compatibility
Hub1200, Hub2000, Ace 1500, Hyper 2000, SolarFlow
800 Series
AB1000 Series Battery, AB2000 Series Battery
Dimension 388*224*292mm
Weight 20.3 kg
IP Rating IP65
2.1 Usage
1. Specication
2. Safety Instruction

4
EN
10. During the operation of the solar energy system, avoid direct sunlight to prevent the product from
overheating. Do not place the product near any heat source.
11. Please install the product according to our user manual to avoid damage to the product or injury to other
people.
12. Do not use this product near strong static electricity or strong magnetic elds.
13. Do not place the equipment in an environment with ammable or explosive compounds, gas, or smoke.
Since the product relies on the shell to dissipate heat, exposing the enclosure to excessive heat will lead to
damage.
14. To reduce the risk of damage to the electric cords and connectors, pull the connectors rather than the cord
when disconnecting the product.
15. Do not use the product over its output rating. Overloads may result in a risk of re or injury to persons.
16. Do not use any products or accessories that are damaged or modied. Damaged or modied batteries may
exhibit unpredictable behavior, resulting in re, explosion, or risk of injury.
17. Do not operate the product with a damaged cord or plug, or a damaged output cable.
18. Do not disassemble the product. Take it to a qualied service person when service or repair is required.
Incorrect reassembly may result in a risk of re or electric shock.
19. Do not expose the product to re or high temperatures.
20. Do not attempt to replace the internal components of the equipment by any unauthorized personnel. Have
servicing performed by a qualied repair person using only identical replacement parts. This will ensure that
the safety of the product is maintained.
21. The product cannot be immersed in liquids. If the product accidentally falls into the water during use, please
place it in a safe and open area and stay away from it until it is completely dry. The dried product should
not be used again and should be properly disposed of according to the disposal guidelines in this manual.
22. The product may feel warm when it’s working. This is a normal operating condition and should not be a
cause for concern.
23. To reduce the risk of electric shock, disconnect the solar photovoltaic panels, batteries, and home grid
before attempting any instructed servicing.
24. When charging the battery, work in a well-ventilated area and do not restrict ventilation in any way, as
inadequate ventilation may cause permanent damage to the equipment.
25. Do not clean the product with harmful chemicals or detergents. Only clean it with a dry cloth.
26. Do not move or shake the unit while operating, as vibrations and sudden impacts may lead to poor
connections to the hardware inside.
27. Ensure that the product and the batteries are installed securely to avoid accidents and product damage
caused by falling.
28. In case of a re, only a dry powder re extinguisher is suitable for this product.
29. Servicing of batteries should be performed or supervised by personnel knowledgeable about batteries and
the required precautions.
1. Fully Discharge the Battery (if possible): Before disposal, ensure the battery is fully discharged. This can
reduce potential hazards. Always refer to local laws and guidelines for battery recycling and disposal
procedures.
2. Handling Failed Batteries: If the battery cannot be fully discharged due to malfunction or product failure,
consult a licensed battery recycling facility or professional for proper and safe handling.
3. Segregation of Battery Types: Ensure batteries or cells from different electrochemical systems (e.g., lithium-
ion, nickel-metal hydride) are disposed of separately. Mixing different types of batteries can lead to chemical
reactions or safety risks.
4. Avoid Physical Damage: Do not expose the battery to physical impacts, punctures, or high temperatures
during disposal, as it may lead to leakage, re, or explosion.
5. Follow Local Regulations: Always adhere to local regulations and guidelines for battery disposal, as improper
handling can harm the environment and violate legal requirements.
2.2 Disposal Guide
5
EN
ZENDURE TECHNOLOGY CO., LIMITED declares that the AB2000X complies with the directive
2014/30/EU(EMC), 2011/65/EU(RoHS), 2015/863/EU(RoHS).
The full text of the Declaration of Conformity is available at the following web address: https://zendure.de/
pages/download-center
2.3 EC DECLARATION OF CONFORMITY
Declaration of conformity
The EU Declaration of Conformity can be requested at this address: https://zendure.de/pages/
download-center
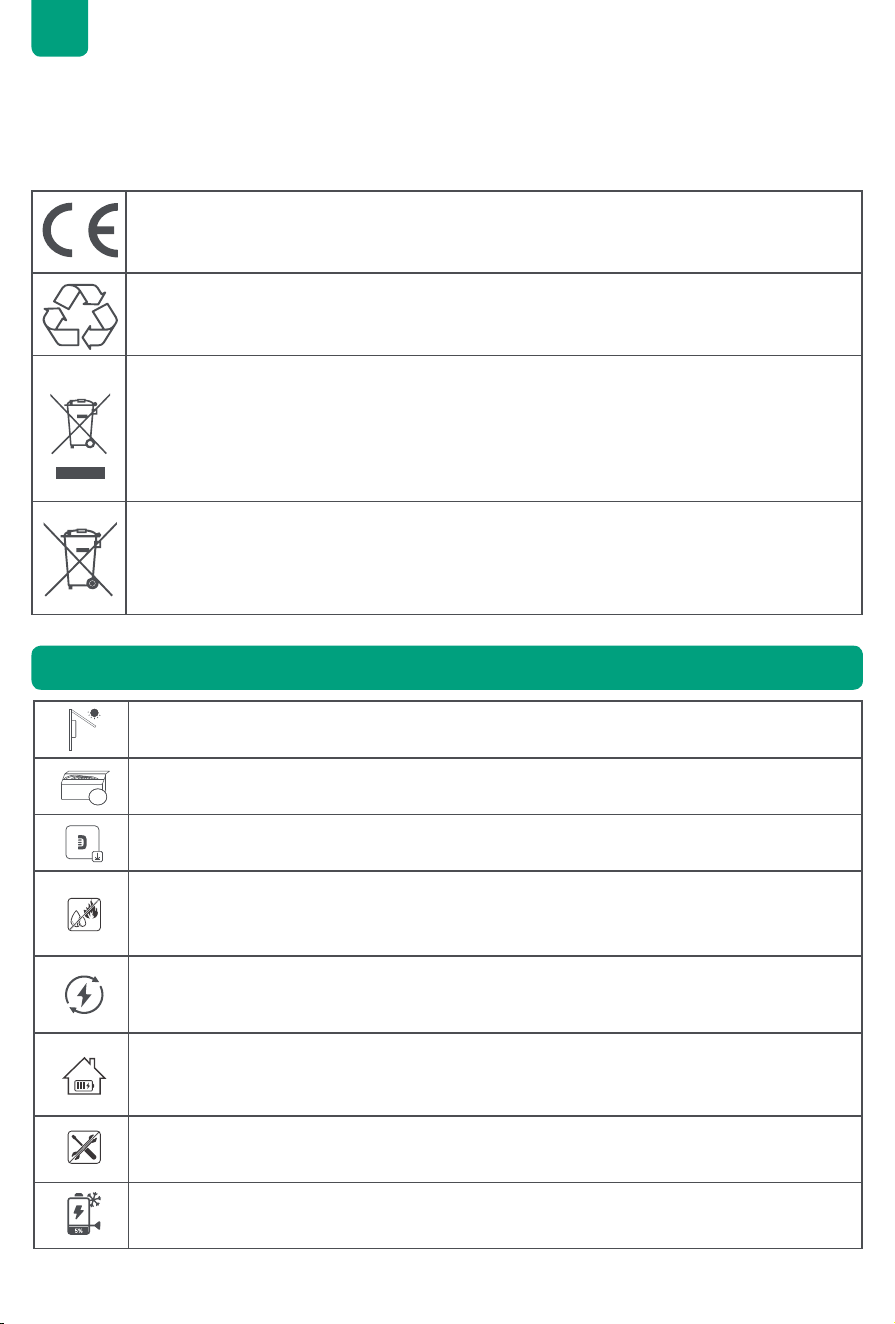
Disposal and Recycling
Disposal of packaging: dispose of the packaging separately by type of material.
Disposal of old equipment (applies in the European Union and other European countries with
separate collection (waste collection) Old equipment must not be disposed of in household waste.
Every consumer is legally obligated to dispose of old equipment that can no longer be used
separately from household waste, for example at a collection point for recyclables.
To ensure proper recycling and avoid negative impact on the environment, electronic devices
must be taken to an appropriate collection site. For this reason, electronic devices are marked
with the symbol shown to the left.
Batteries and accumulators must not be disposed of in household waste. As a consumer, you are
legally obligated to dispose of all batteries and accumulators, regardless of whether they contain
pollutants or not, at a designated collection point.
Marked with: Cd = Cadmium, Hg = Mercury, Pb = Lead. Discharge any built-in or accessory
batteries before disposing.
3. Important Tips
Protect from Direct Sunlight: Ensure that the AB2000X is placed in a shaded area to avoid
rapid temperature increases that could affect performance.
€
Accessory Check: Verify the necessary accessories before installation, as some may need to
be purchased separately.
Download the Zendure App: After installation, download the Zendure app to unlock additional
smart features and remote control options.
Optimal Operating Conditions: It is recommended to use this product in environments ranging
from 15℃ to 30℃, away from water, heat sources, or sharp objects that could cause damage.
Long-Term Storage: For extended storage, discharge the product to 30%, then recharge to
60% every 3 months.
60%
Battery Maintenance:If the power of the AB2000X falls low SOC after use, please charge it to
60% SOC before storing. Allowing the battery to remain discharged for an extended period
can lead to irreversible damage and reduce the service life of the AB2000X.
No Disassembly: Do not attempt to disassemble the product. For repairs or servicing, consult
Zendure support team. Improper handling could pose risks of re or personal injury.
Low-Temperature Protection: The AB2000X will forcibly implement a discharge lower limit of
5%, preventing over-discharging of the AB2000X and extend the battery life.
6
EN
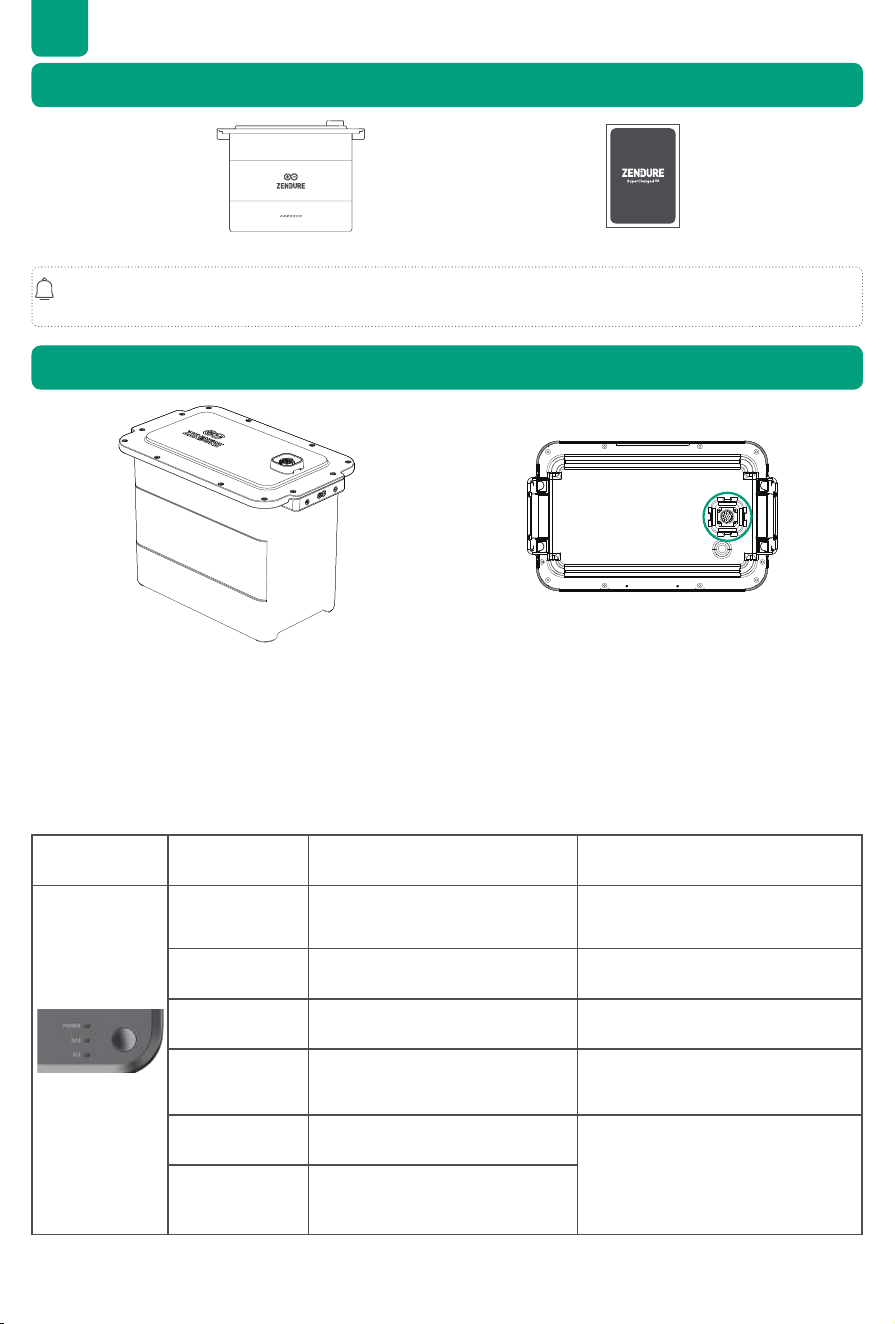
4. What’s in the Box
5. Product Overview
Add-on Battery AB2000X User Manual
Product and component images may differ from actual products. If any parts are missing or defective, please
contact Zendure customer support.
1. Top Battery Port: Connects to SolarFlow 800, Hub 1200, Hub 2000, Ace 1500, Hyper 2000, and Add-on
Batteries.
2. Bottom Battery Port: Connects to additional AB1000 & AB2000 series batteries to expand capacity.
The Add-on Battery does not have an LED indicator. It reads the status of the batteries based on the LED
indicators on inverters, such as the SolarFlow 800, Hyper 2000, and SolarFlow 800 Pro.
LED Indication Indication Battery Status How to do
Slow Flashing
Green
Indicates charging status /
Solid Green Battery connected successfully. /
Flashing Yellow Low battery warning /
Slow Flashing
Yellow
Battery is in self-heating mode
The battery will automatically
resume operation once it stabilizes
at a safe operating temperature.
Solid Yellow BMS protection
Check the app for error codes
and follow the troubleshooting
instructions. If the issue persists
after restart, contact Zendure
support team.
Flashing Red BMS fault detected.
the bottom
5.1 LED Guide
7
EN
Tips:
The battery indicator fails to illuminate under the following circumstances, indicating that the AB2000X may
not be connected successfully. You can take the following steps to address the issue.
• If there is no solar connection or sunlight during installation, the AB2000X might be out of power. Do not
disconnect the battery connection cable. Instead, solar input or open AC input mode, and then check the
battery indicator again.
• If the AB2000X enters protection mode, press and hold the button on the inverter for 6 seconds to turn
off the system. Then, press and hold the button on the inverter for 2 seconds to restart the system. Wait
approximately 5 minutes before checking the battery indicator again.
If the above measures do not resolve the issue, do not unplug any cable connections. Please contact
Zendure support team for further assistance.
6. Getting Started
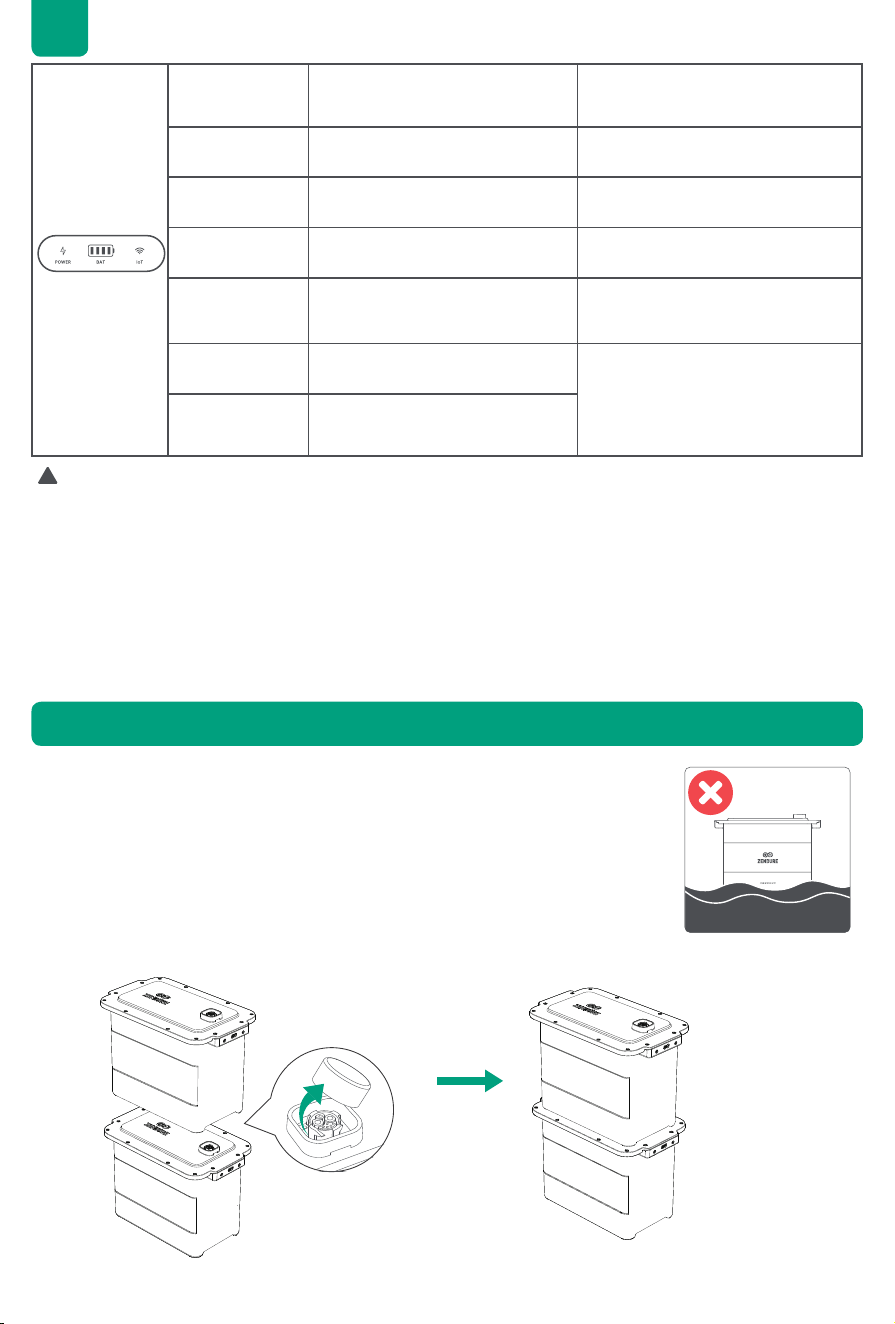
!
1. Place the AB2000X battery on a level surface, ensuring it is ush against the wall.
2. Choose a shaded location with a optimal temperature range of 15℃ to 30℃ to
maintain optimal performance.
3. Position the AB2000X in an area with strong WiFi coverage for seamless app
connectivity.
4. Install the battery in a secure, frost-free location, away from emergency access
areas.
6.1 Choosing an Appropriate Location
6.2 Connecting Your AB2000X
Solid Green Battery connected successfully. /
Battery Level
Display
Each LED segment represents 25%
of battery capacity.
/
Slow Flashing
Green (Last LED)
Indicates charging status /
Flashing Yellow
(First LED)
Low battery warning /
Slow Flashing
Yellow
Battery is in self-heating mode
The battery will automatically
resume operation once it stabilizes
at a safe operating temperature.
Solid Yellow BMS protection
Check the app for error codes
and follow the troubleshooting
instructions. If the issue persists
after restart, contact Zendure
support team.
Flashing Red BMS fault detected.
8
EN
• Remove the plastic protective covers from the connection ports, then align the left side rst.
• Carefully align the AB2000X Battery Ports and gently place them into position. Vertically stacked AB2000X
Batteries do not require a Battery Cable to establish a connection.
Tips:
• Turn off the storage system before making any connections.
• Do not connect the batteries while charging or discharging.
• Avoid touching the metal pins of the ports with your hands or any objects. If necessary, clean them gently with
a dry cloth.
Tips:
Ensure the storage system is off before connecting or disconnecting any cables, including the solar cable, battery
cable, microinverter cable, and AC cable to the outlet.
• Power off the Solar Inverter: press and hold the power button on inverter for 6 seconds to turn it off.
• Unplug AC outlets to the home grid, and then disconnect the solar panel cable.
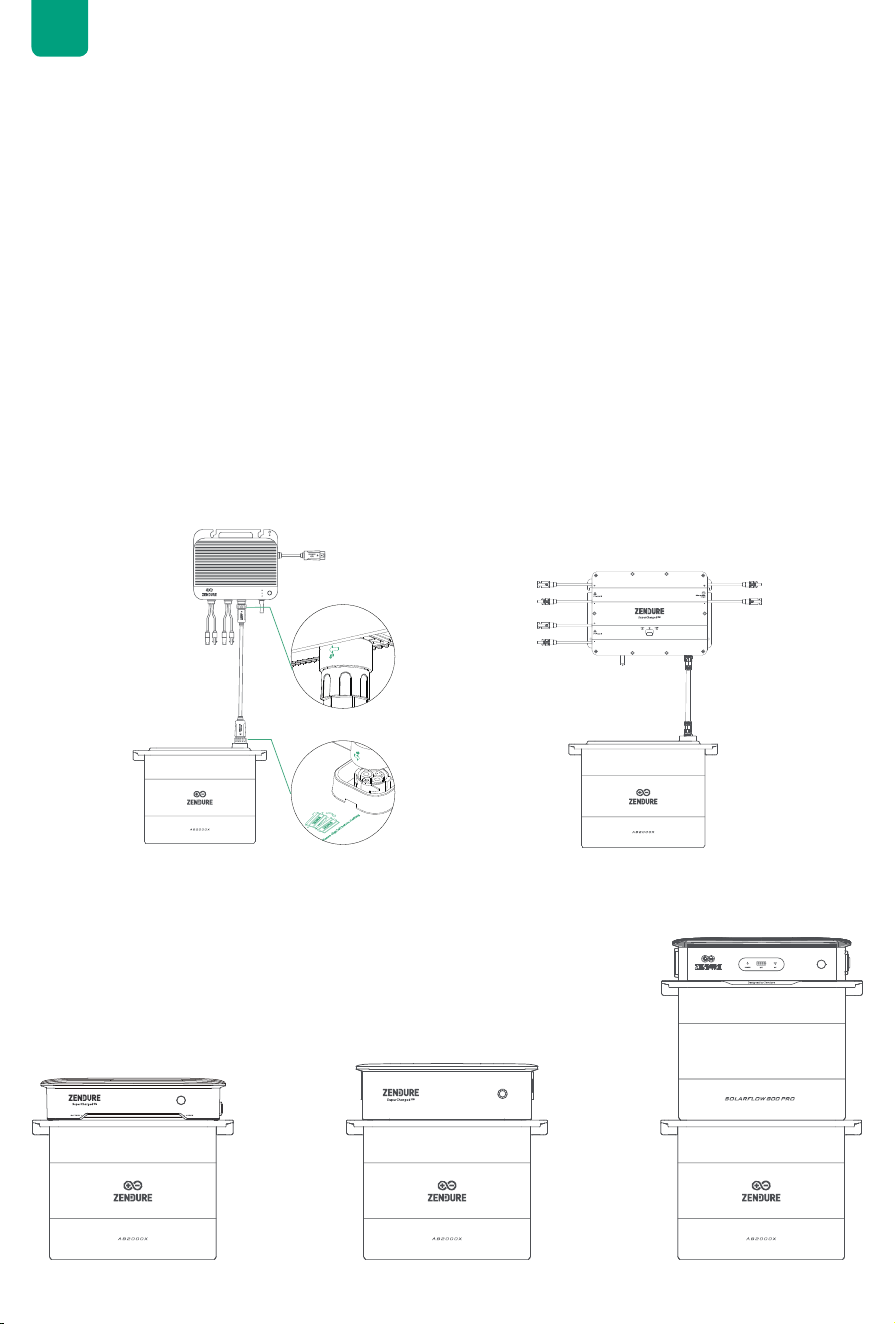
Remove the silicone protective cover from the battery terminal on solar inverter and Add-on batteries.
Connect Add-on Batteries to SolarFlow 800/Hub 1200/Hub 2000 with the battery cable (not included in the
battery package), the terminals of the battery cable can be self locking, when you hear a click, you have inserted
the battery cable well.
1. Remove the battery terminal protective cover at the bottom of the Hyper 2000 /
ACE 1500 / SolarFlow 800 Pro.
1. Place the Hyper 2000/ ACE 1500/ SolarFlow 800 Pro on AB2000X, ensuring the
battery cable terminals lock into place.
A single SolarFlow 800 can be connected up to 6 AB2000X batteries, which can maximally reach to 11.52kWh
capacity. The Hub1200/2000 connect to up to 4 batteries, reach to 7.68kWh.
6.3 Connecting the Solar Inverter
6.3.1 Connnecting the SolarFlow 800/ Hub1200/Hub2000
6.3.2 Connnecting the Hyper 2000 / ACE 1500 / SolarFlow 800 Pro
9
EN
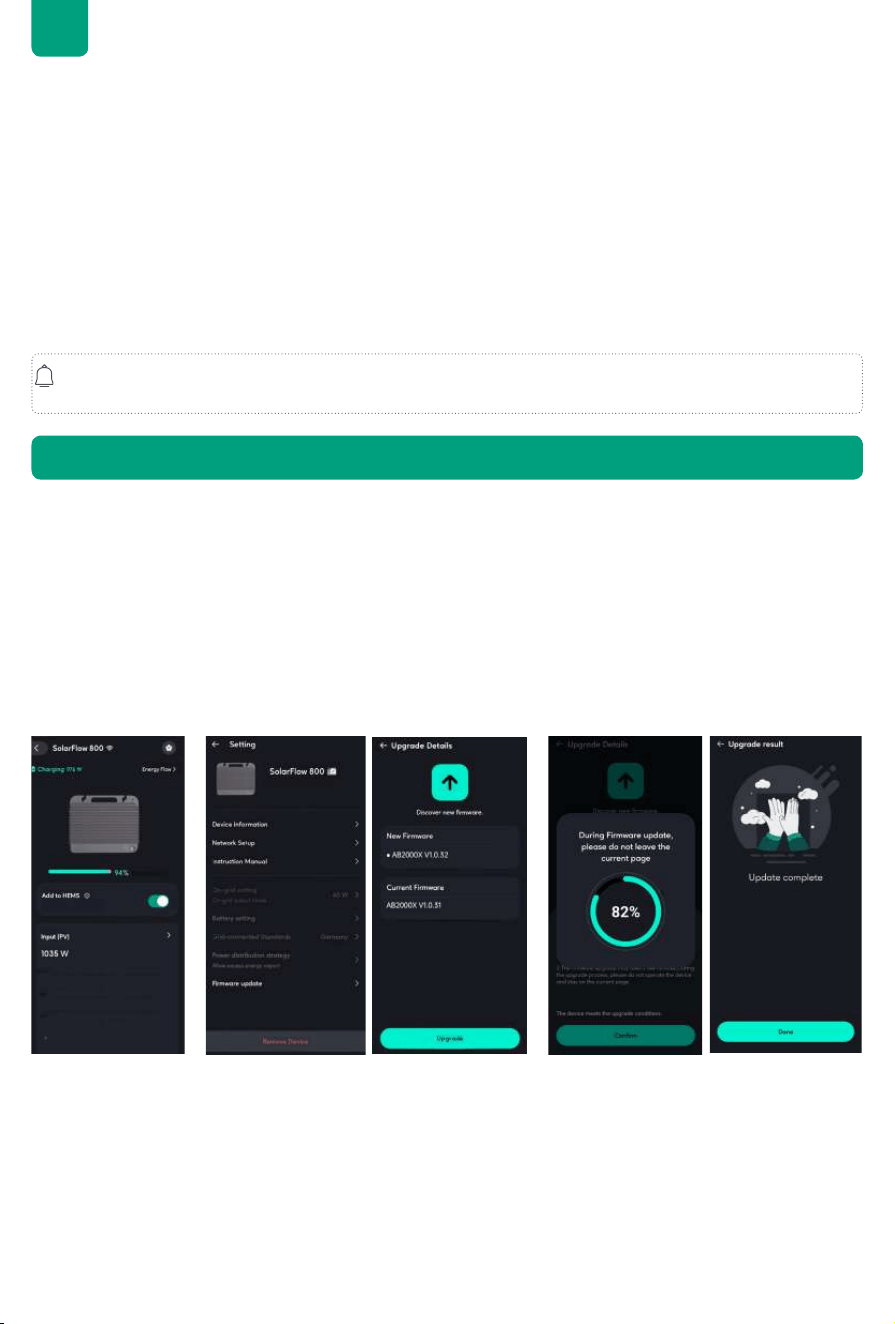
7. Firmware Update
1. Connect to the inverter such as SolarFlow 800
Upon rst use, connect the AB2000X to the SolarFlow 800 to check for and install any available rmware
updates.
2.Access the Settings:
Open the detail page for the SolarFlow 800, tap the Settings icon in the top-right corner to access the Settings
menu.
3.Check for Firmware Updates:
In the Settings menu, select Firmware Update to check the latest available update. If a new update is available,
click Update to begin the process.
4.Wait for the Update to Complete:
Do not navigate away from this page during the update process. The update may take several minutes to
complete.
Tips:
• Do not turn off the device during the rmware update.
• Do not disconnect any cables (including solar cables, battery connection, or the AC cable to the outlet) while
updating.
• Ensure the battery charge level is above 20% before starting the update to allow sufcient time for completion.
• If the update fails, retry the update in the app or contact Zendure Customer Service.
• To perform an over-the-air (OTA) update via the Zendure App, refer to the Zendure App User Guide and access
the download link here: https://zendure.com/pages/download-center.
• Since the battery operates in conjunction with the inverters, please refer to their user manuals for detailed
conguration settings.
A Hyper 2000/ ACE 1500 can be connected to up to 4 AB2000X batteries, reaching a maximum capacity of
7.68kWh. The SolarFlow 800 Pro connect to up to 5 batteries.
Tips:
• Battery Disconnection: Do not disconnect the batteries during the charging or discharging process. If
disconnection is necessary, ensure that the power of the inverter is turned off. To power off your SolarFlow
System, press and hold the button for 6 seconds before removing the batteries.
• Handling Ports: Avoid touching the metal pins of the ports with your hands or other objects. When necessary,
clean them gently with a dry cloth.
• Standby Mode: The product defaults to a 10-minute standby time. If the output power buttons are turned
off and no other load is detected for 10 minutes, the product will automatically shut off. You can adjust the
standby duration in the app.
• Initial Usage: For the rst use, it is recommended to set the battery to the highest charge limit and the lowest
discharge limit. Perform the following cycle once: discharge the battery to 5%, then charge it to 100%.
Refer to the user manual of the Hub 1200/Hub 2000/SolarFlow 800/Hyper 2000/ACE 1500/ SolarFlow 800 Pro
for detailed instructions.

10
EN
In accordance with applicable laws and recreations, Zendure retains the nal right to interpret this document and
all related product documents, including but not limited to warranty periods, eligibility for warranty services, and
other terms. Zendure also reserves the right to modify these documents in response to product updates.
This document is subject to change (including updates, revisions, or discontinuation) without prior notice. For the
latest product information, please visit Zendure's ofcial website:
https://zendure.com/pages/zendure-global-warranty
Zendure USA Inc.
ZENDURE TECHNOLOGY CO., LIMITED
Hours: Mon - Fri 9:00 - 17:00 Pacic
Phone: 001-800-991-6148 (US)
0049-800-627-3067 (DE)
Support / Contact:
https://zendure.de/pages/contact
https://eu.zendure.com/pages/contact-us
https://zendure.com/pages/contact
Website:
https://zendure.de
https://eu.zendure.com
https://zendure.com
Manufacturer: Zendure Technology Co.,Limited
Address: Ofce 92, 15th Floor, Lee Garden Two, 28 Yun Ping Road, Causeway Bay, Hong Kong
© 2025 Zendure USA Inc.All Rights Reserved.Printed on recycled materials. Made in China
EU Importer: Zendure DE GmbH
Address: Rheinallee 1,40549 Düsseldorf
E-mail: [email protected]
Phone: 0049-800-627-3067
60.90.00044 V2.1
Please scan the QR code to access the app.
Scannen Sie bitte den QR-Code, um die App herunterzuladen.
Scannez le code QR pour télécharger l'application.
Scansiona il codice QR per scaricare l'applicazione.
Escanea el codigo QR para descargar la aplicación.
Scan de QR-code om toegang te krijgen tot de app.
EN
DE
FR
IT
ES
NL
Download the Zendure app
EN
DE
FR
IT
ES
NL
Please scan the QR code to visit the Zendure Help Center or claim the
product warranty.
Scannen Sie den QR-Code, um das Help Center zu besuchen oder Ihre
Garantie zu aktivieren.
Scannez le QR code pour accéder au centre d'assistance ou activer la
garantie de votre produit.
Scansiona il QR code per accedere al Centro Assistenza o attivare la
garanzia del tuo prodotto.
Escanee el código QR para acceder al Centro de Ayuda o activar la
garantía de su producto.
Scan de QR-code om het Zendure Helpcentrum te bezoeken of de
productgarantie in te schakelen.
Help Center/Claim the Product Warranty