

FOR SUPPORT, VISIT ELEMENTELECTRONICS.COM/SUPPORT 1
QUICK
START
GUIDE
OUTDOOR TV
QUICK START GUIDE2
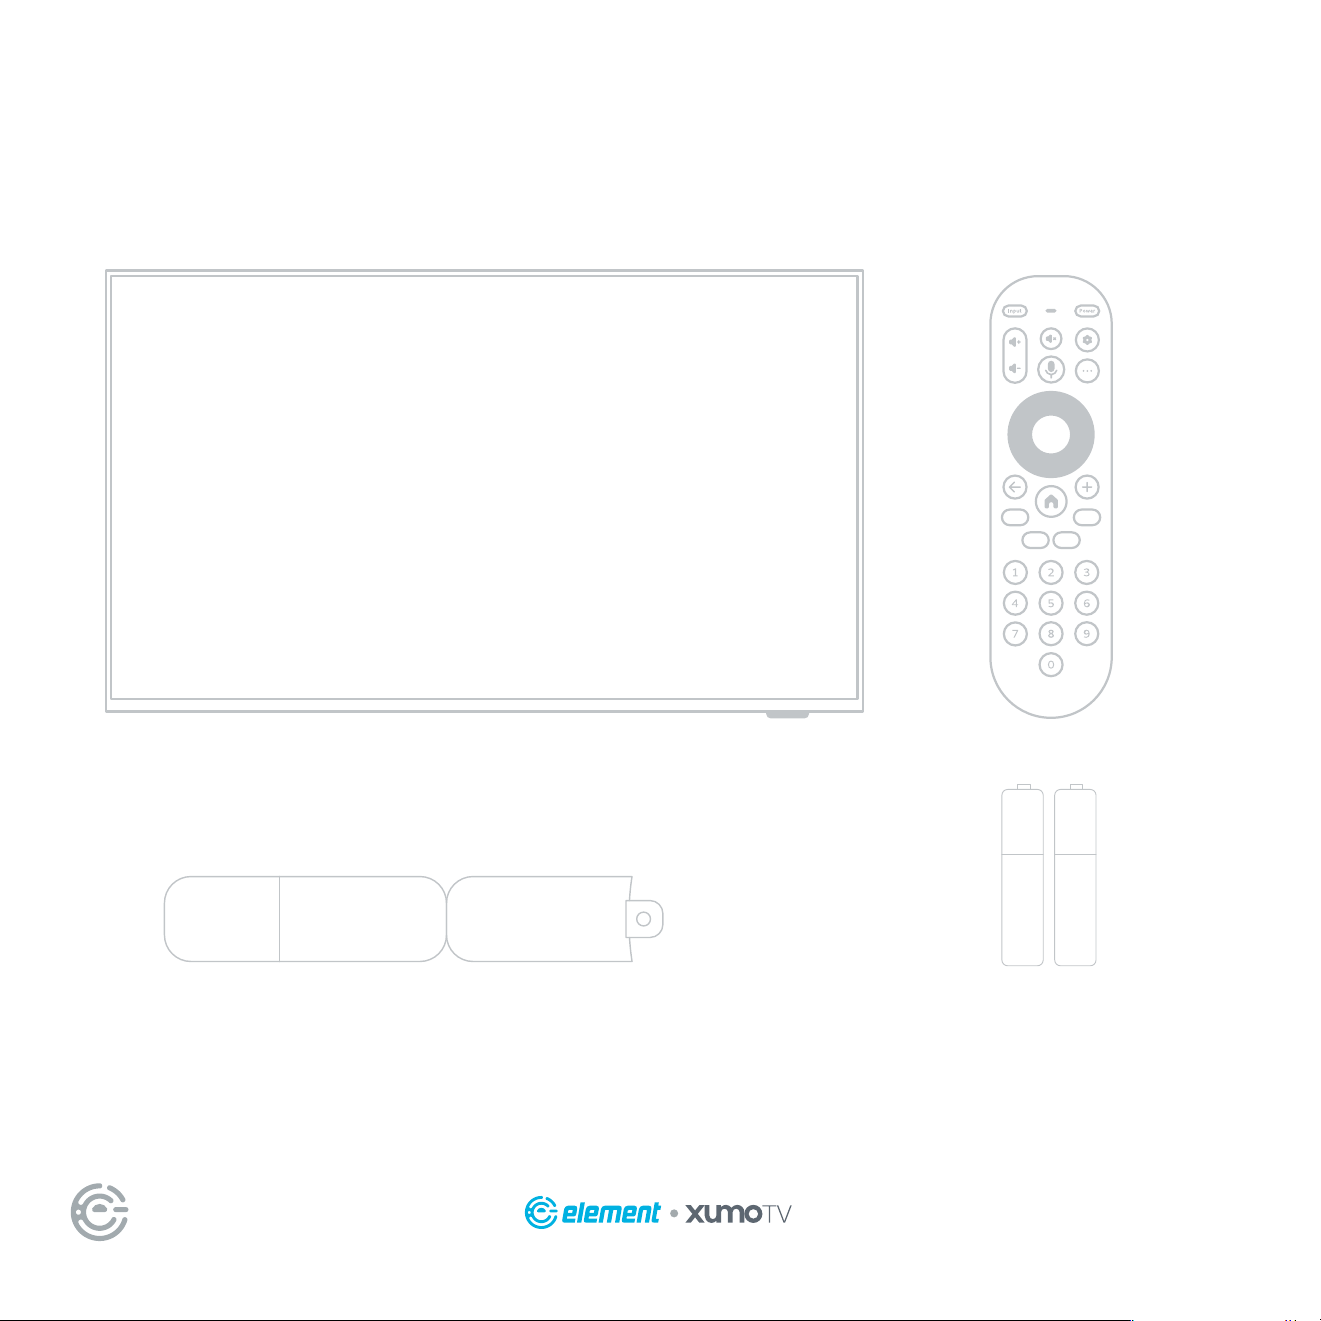
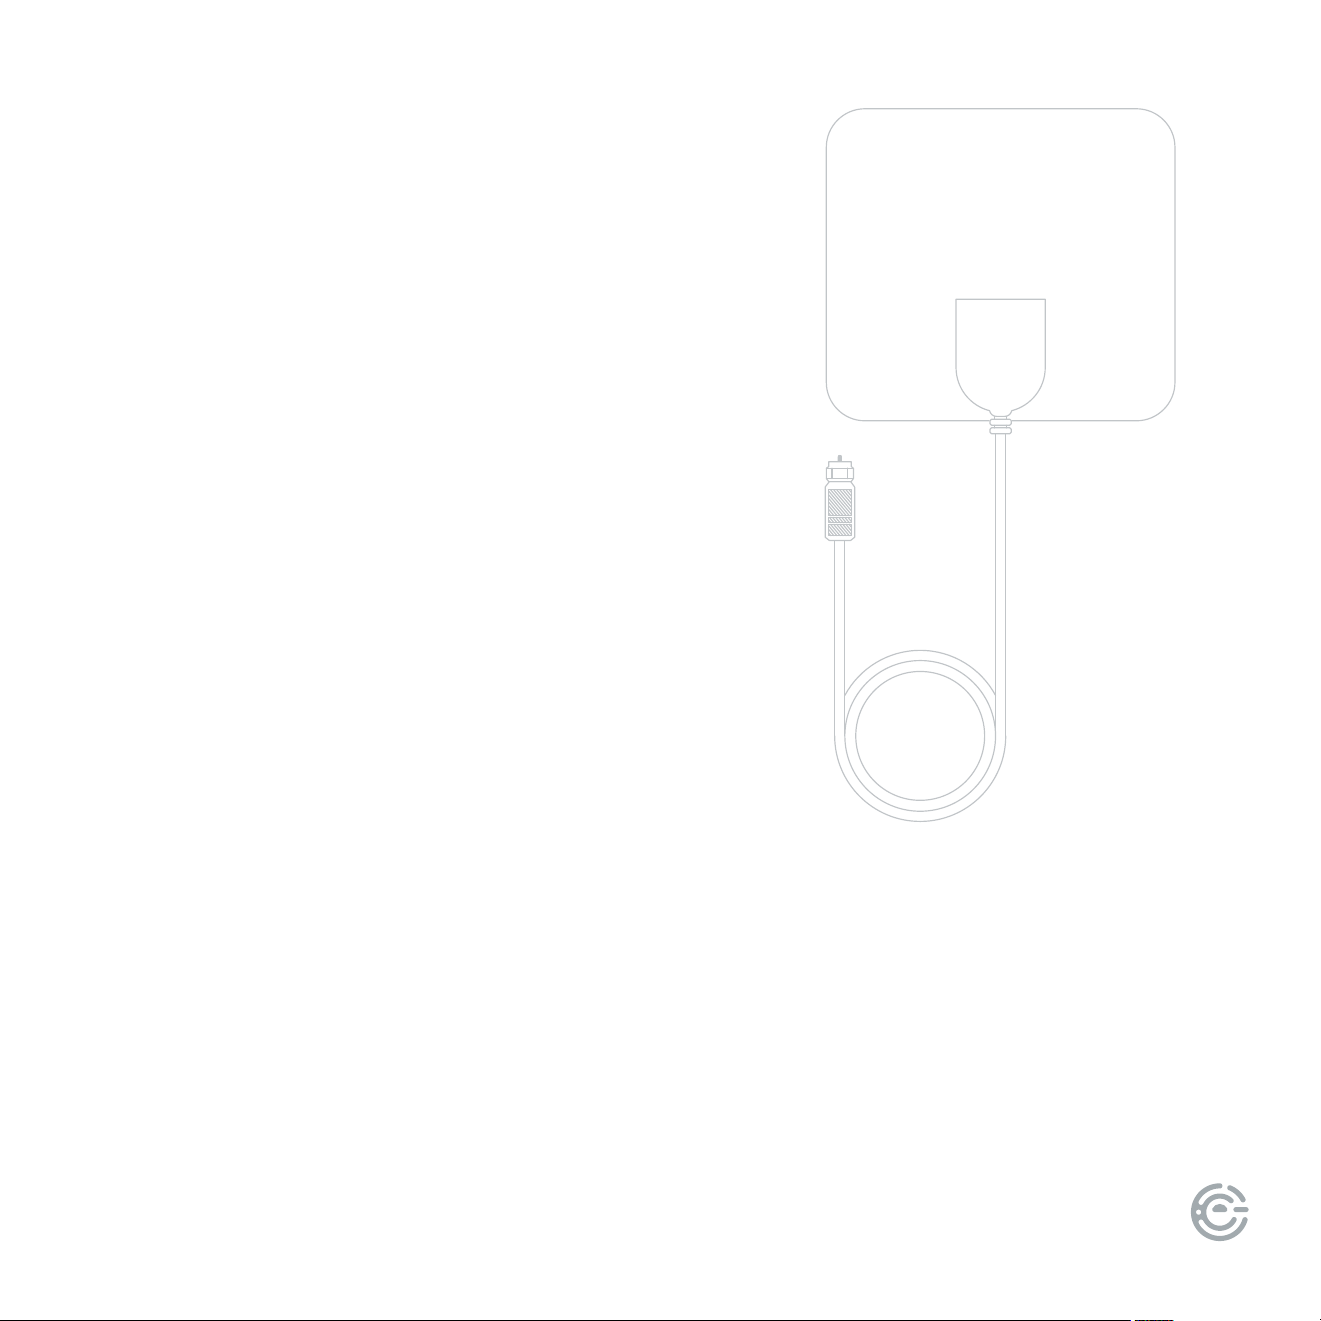
WHAT’S
INCLUDED
+
_
+
_
Your new TV!
Voice Remote
2 AAA
Remote
Batteries
Screwdriver
Phillips head
Protective Remote Sleeve
FOR SUPPORT, VISIT ELEMENTELECTRONICS.COM/SUPPORT 3
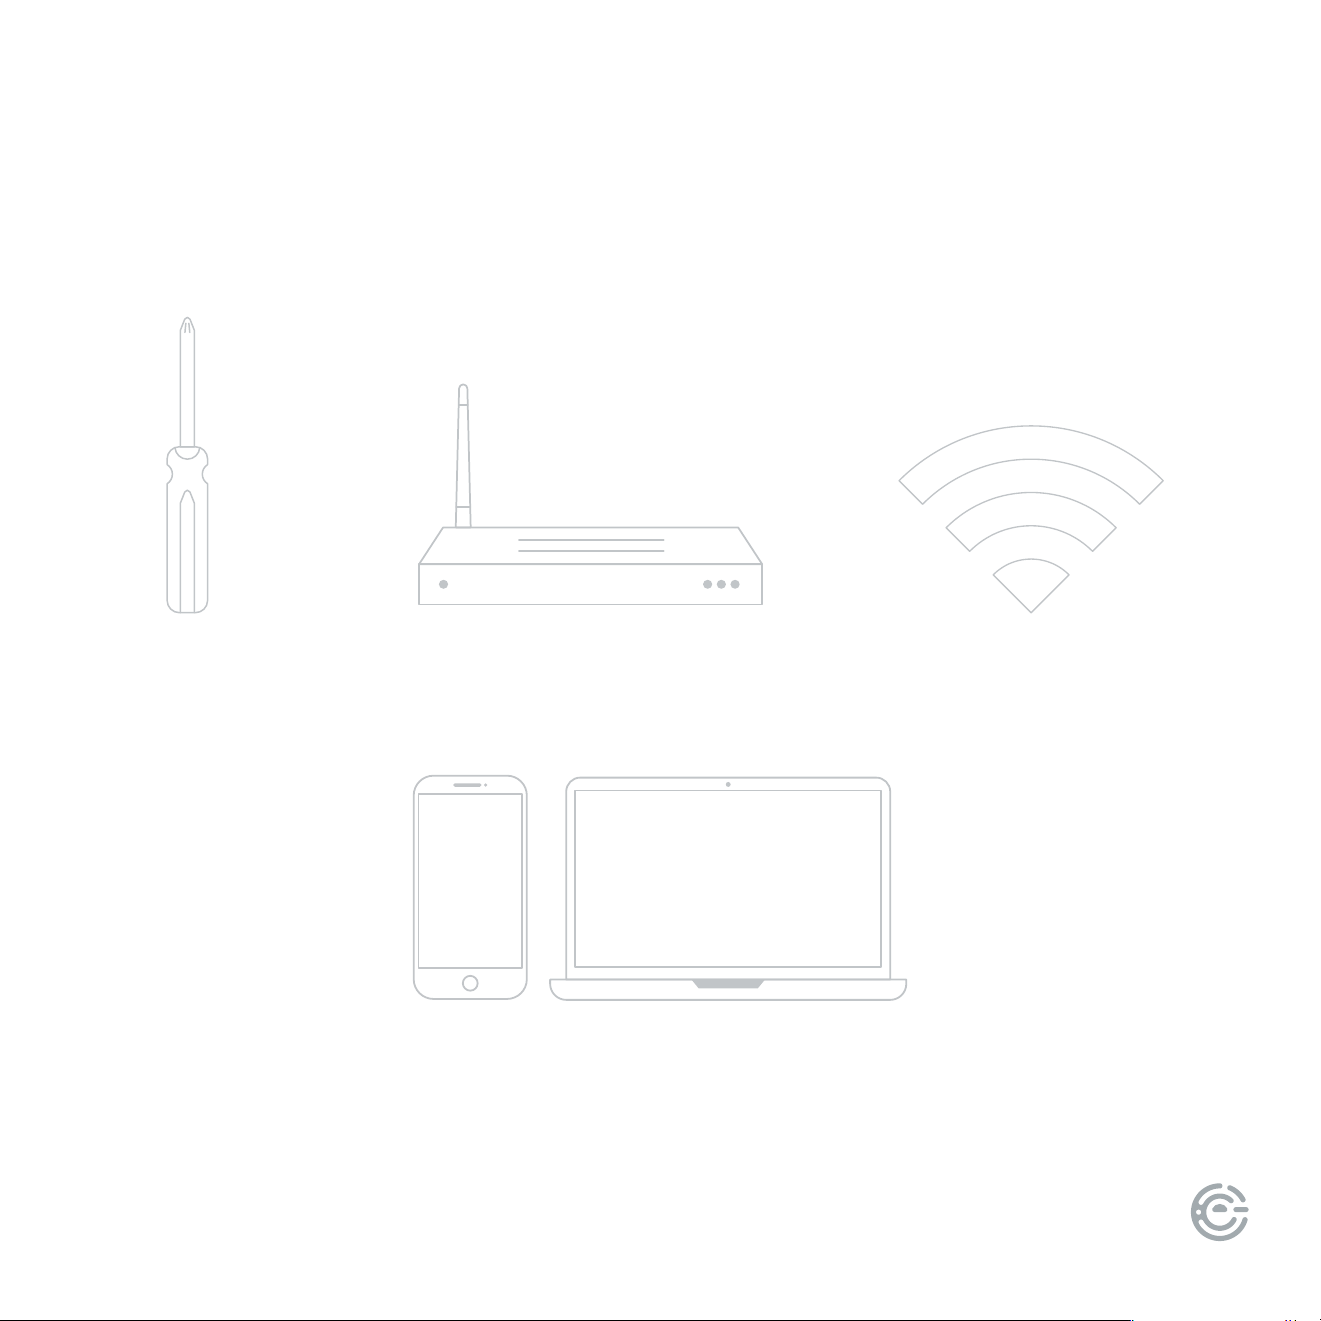
WHAT YOU’LL NEED
(NOT INCLUDED)
Screwdriver
Phillips head
Wireless Router
Needed for streaming
Smartphone, computer or tablet
Needed for setup
Internet connection
Needed for streaming
QUICK START GUIDE4
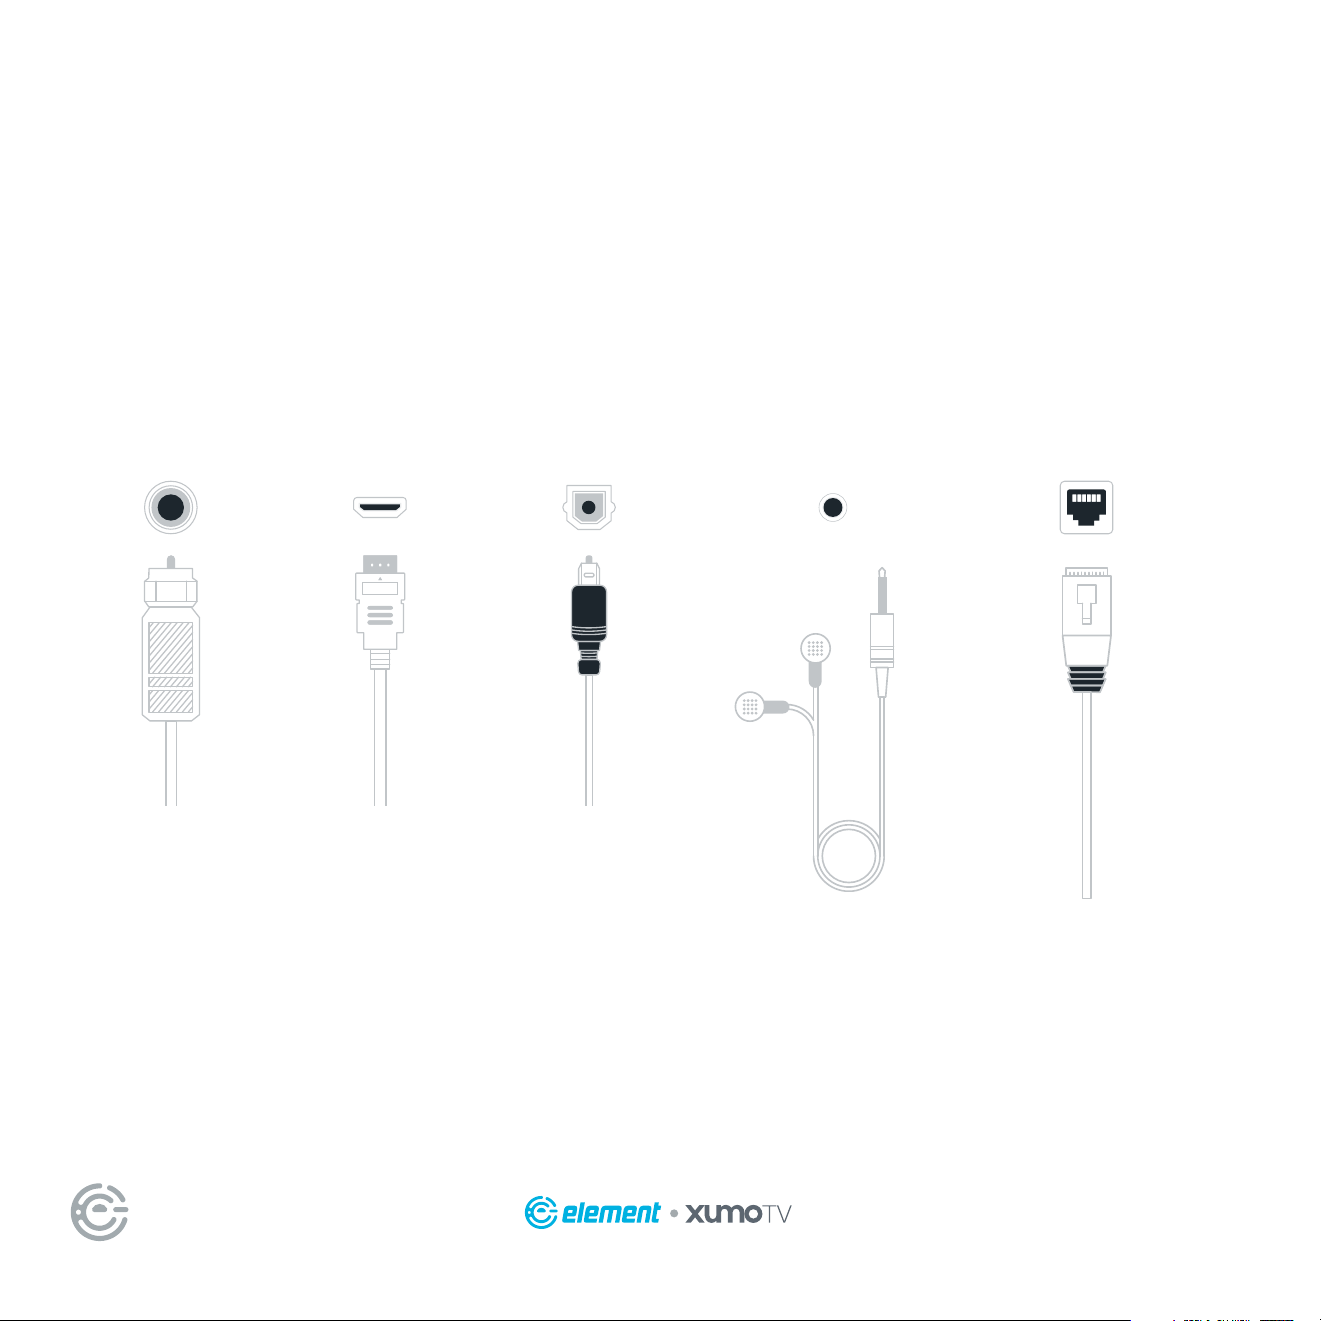
CONNECT DEVICES
TO YOUR TV
Check to ensure that you have selected the right cables for the ports and
that they are connected securely (cables and external devices not included).
Loose connections can aect your picture and audio quality.
ANT HDMI OPTICAL
Connect an
outdoor or
indoor
antenna.
Connect a Blu-ray
or DVD player,
gaming console,
or other external
devices to your TV.
Highest quality
audio/visual
connection.
Connect
an optical
cable from
an external
digital audio
system.
HEADPHONE LAN
Connect
headphones
or external
speakers.
Connect an Ethernet
cable to access
a network or the
Internet. e TV
also has a wireless
connectivity feature.
FOR SUPPORT, VISIT ELEMENTELECTRONICS.COM/SUPPORT 5
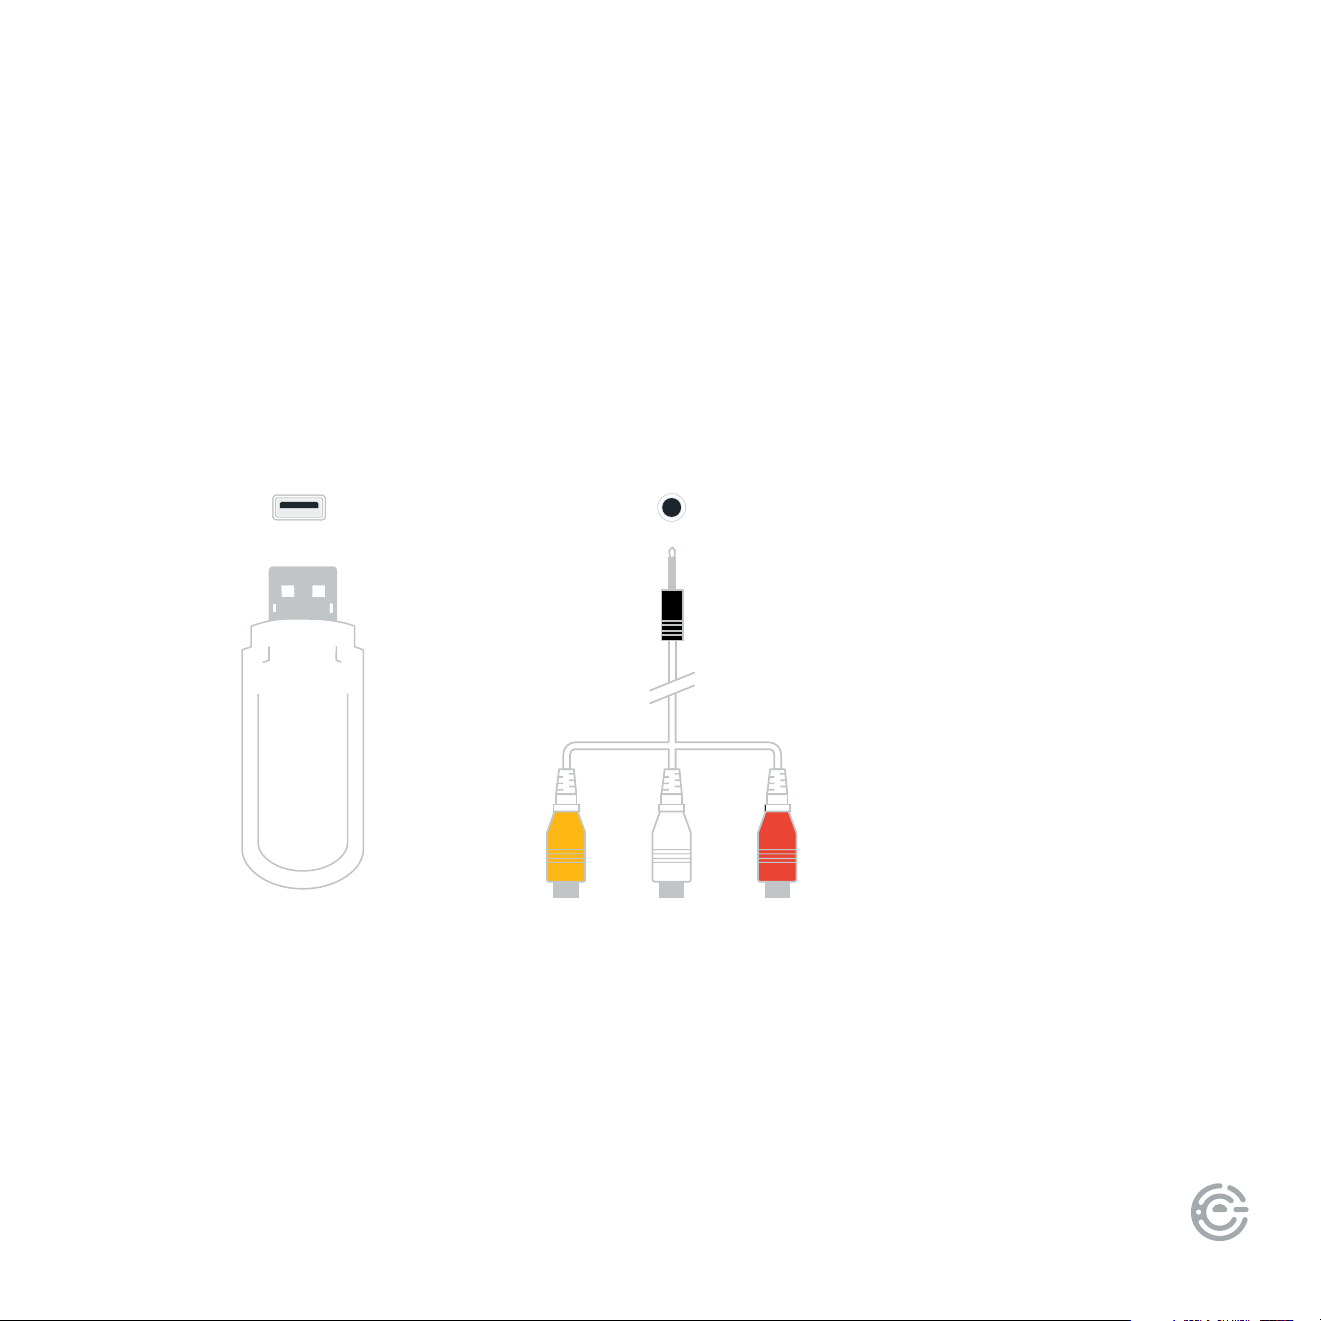
CONNECT DEVICES
TO YOUR TV
USB
Connect a
USB device for
browsing photos,
music, or videos.
(continued)
MINI AV IN
Connect a composite video cable and
le-right audio cables from an external
AV device (AV adapter included).
Actual connections may vary by model. Please refer to the actual product to determine your connection options.

QUICK START GUIDE6
CONNECT DEVICES
TO YOUR TV
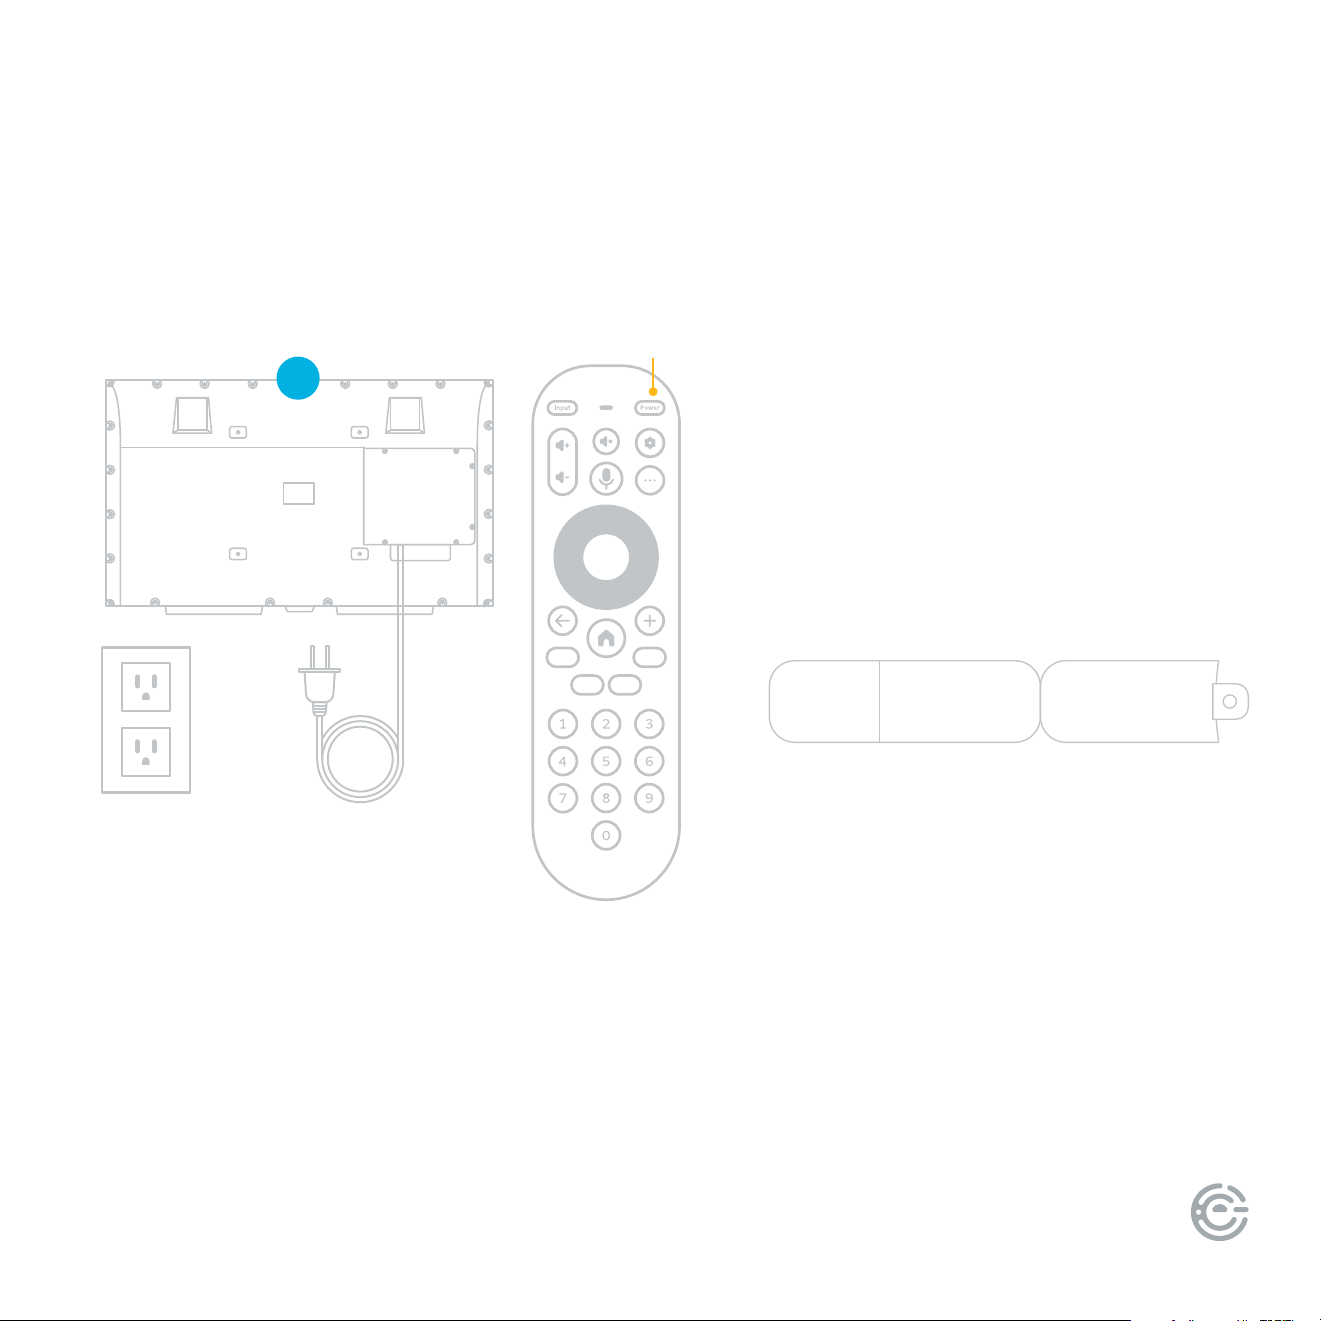
Your TV’s connections are secured behind a panel door on the back of your TV.
is panel is lined with foam to keep dust & moisture out and keep your cords dry and in
place.
To access your TV’s ports and connect devices, complete the following:
1. Place TV screen-down on a clean, at, so surface
(ie: blanket) to prevent scratches or damage to the screen.
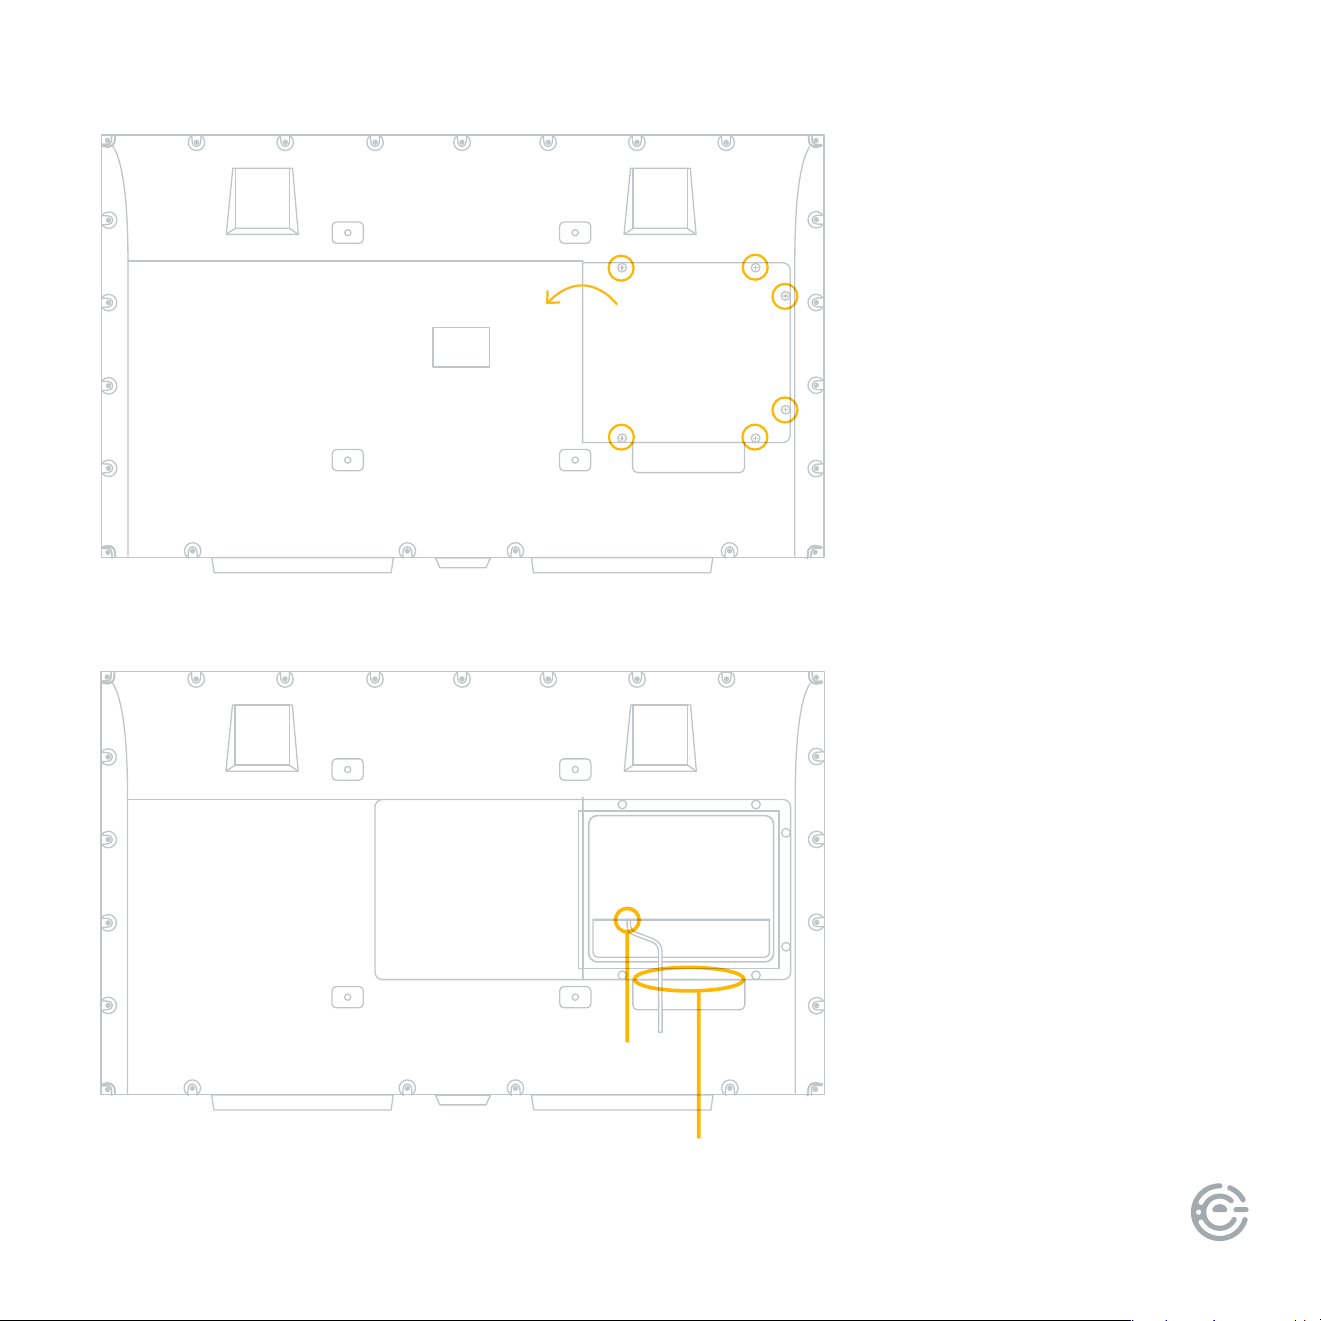
2. Locate the panel door on the back of your TV, remove the six
screws by hand and open panel door. See gure one.
3. Find the power cord (located inside the door) and run the
plug out to the bottom of the panel. Do not connect to power
until all cable connections have been made. See gure two.
4. Plug in any devices and ensure they are securely connected.
Device cords should run at out the bottom of the panel (between
the two bottom screw holes) and not be layered. See gure two.
5. Close the panel door and replace the six screws tightly by hand,
ensuring there are no large gaps between the foam and cords.
Before mounting:
(continued)
FOR SUPPORT, VISIT ELEMENTELECTRONICS.COM/SUPPORT 7
gure one
gure two
power cord
run cords through here
QUICK START GUIDE8
TV PLACEMENT
IMPORTANT: Choose a location for your TV where
it will NOT be in direct sunlight and is partially
shaded (i.e.: near trees, under structures, patio
cover, etc.). Remember that the position of the sun
changes throughout the day, so choose a location
and position based on the time of day you would
use it most oen.
WARNING: e TV must be installed at least ve
feet away from a pool, spa, or other body of water.
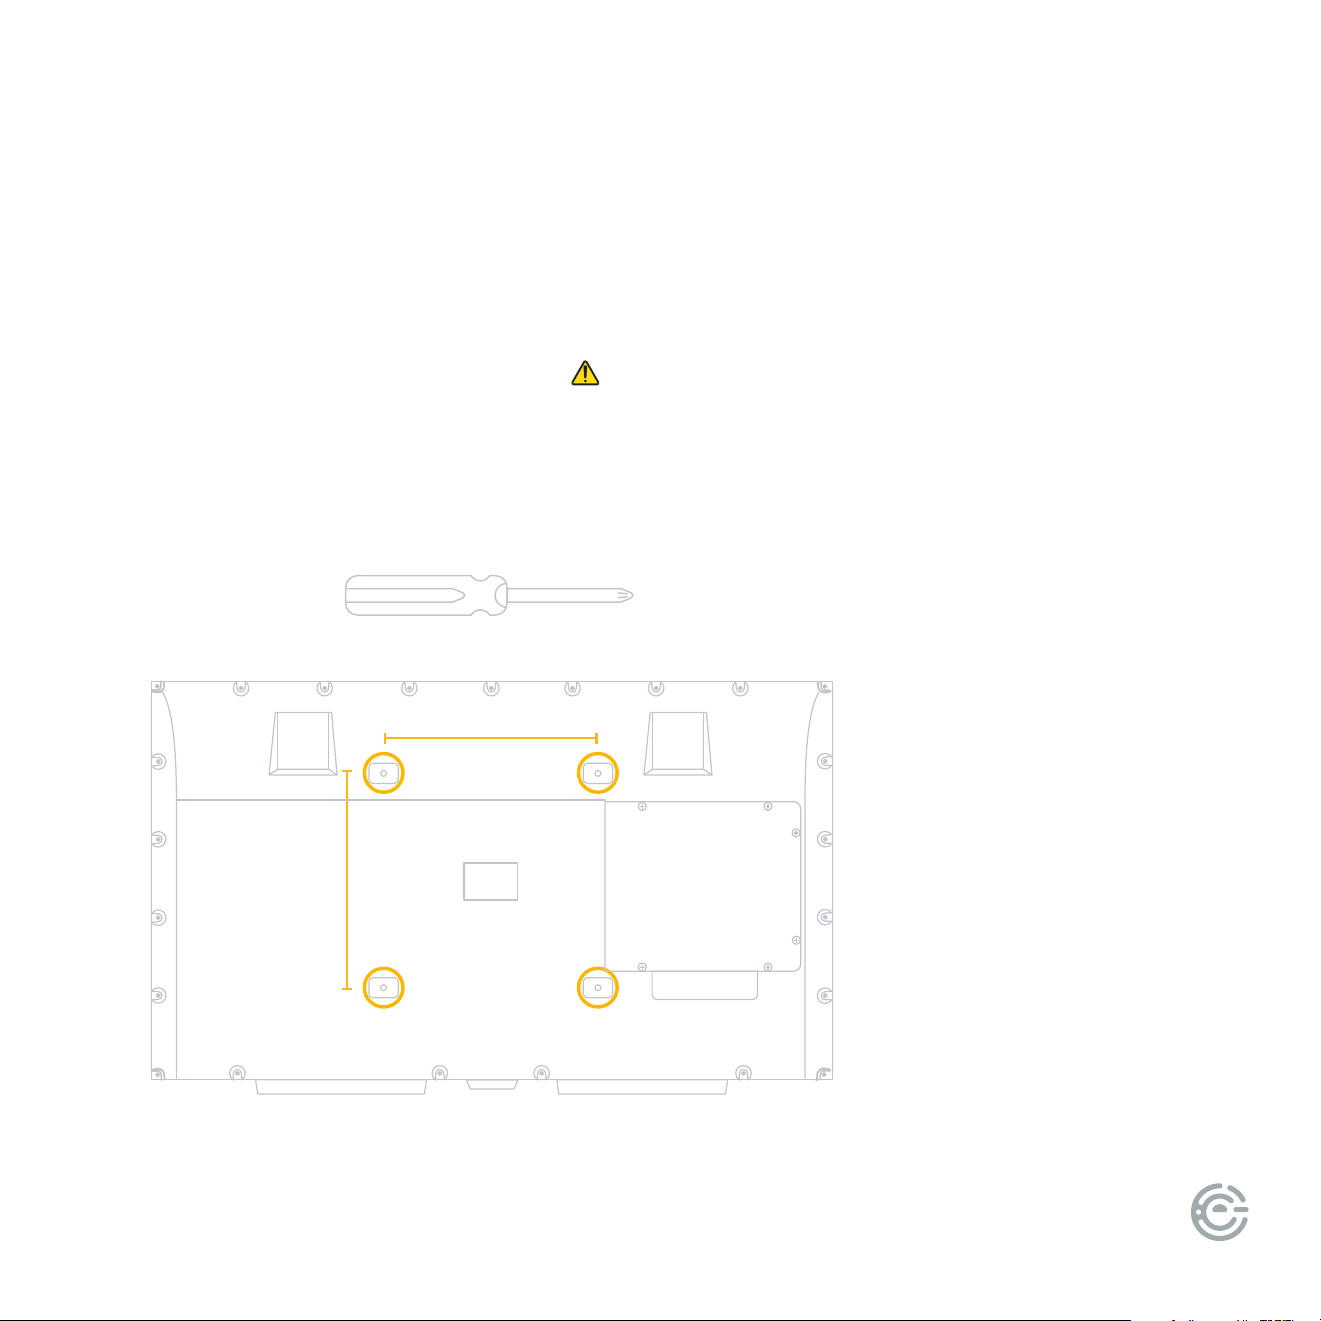
Your TV has four mounting holes for a VESA approved mounting bracket (not included).
Please ensure your wall mount can hold the weight of your TV and is compatible with a
400 x 400 VESA mount pattern. A minimum of two people are required for installation.
CAUTION: Your new TV is heavy! If you have any doubts about your ability
to safely install your TV, please consult a professional installer.
700
nits
MOUNTING YOUR TV
FOR SUPPORT, VISIT ELEMENTELECTRONICS.COM/SUPPORT 9
1. Place TV screen-down on a clean, at, so surface (ie: blanket)
to prevent scratches or damage to the screen.
2. Using a Phillips head screwdriver, remove the four screws located inside
the VESA mount points as shown. WARNING: e included screws are
NOT for use with a wall mount and should be removed before mounting.
3. Mount the VESA bracket using four M8 x 20 mm (max depth) screws (not included)
and follow the mounting instructions provided with your wall mount.
MOUNTING YOUR TV
(continued)
TIP: Please connect all
your devices
prior to mounting
your TV, as the
connections
panel will not be
easily accessible
aer mounting.
400 mm
400 mm
QUICK START GUIDE10
SETTING UP
YOUR TV
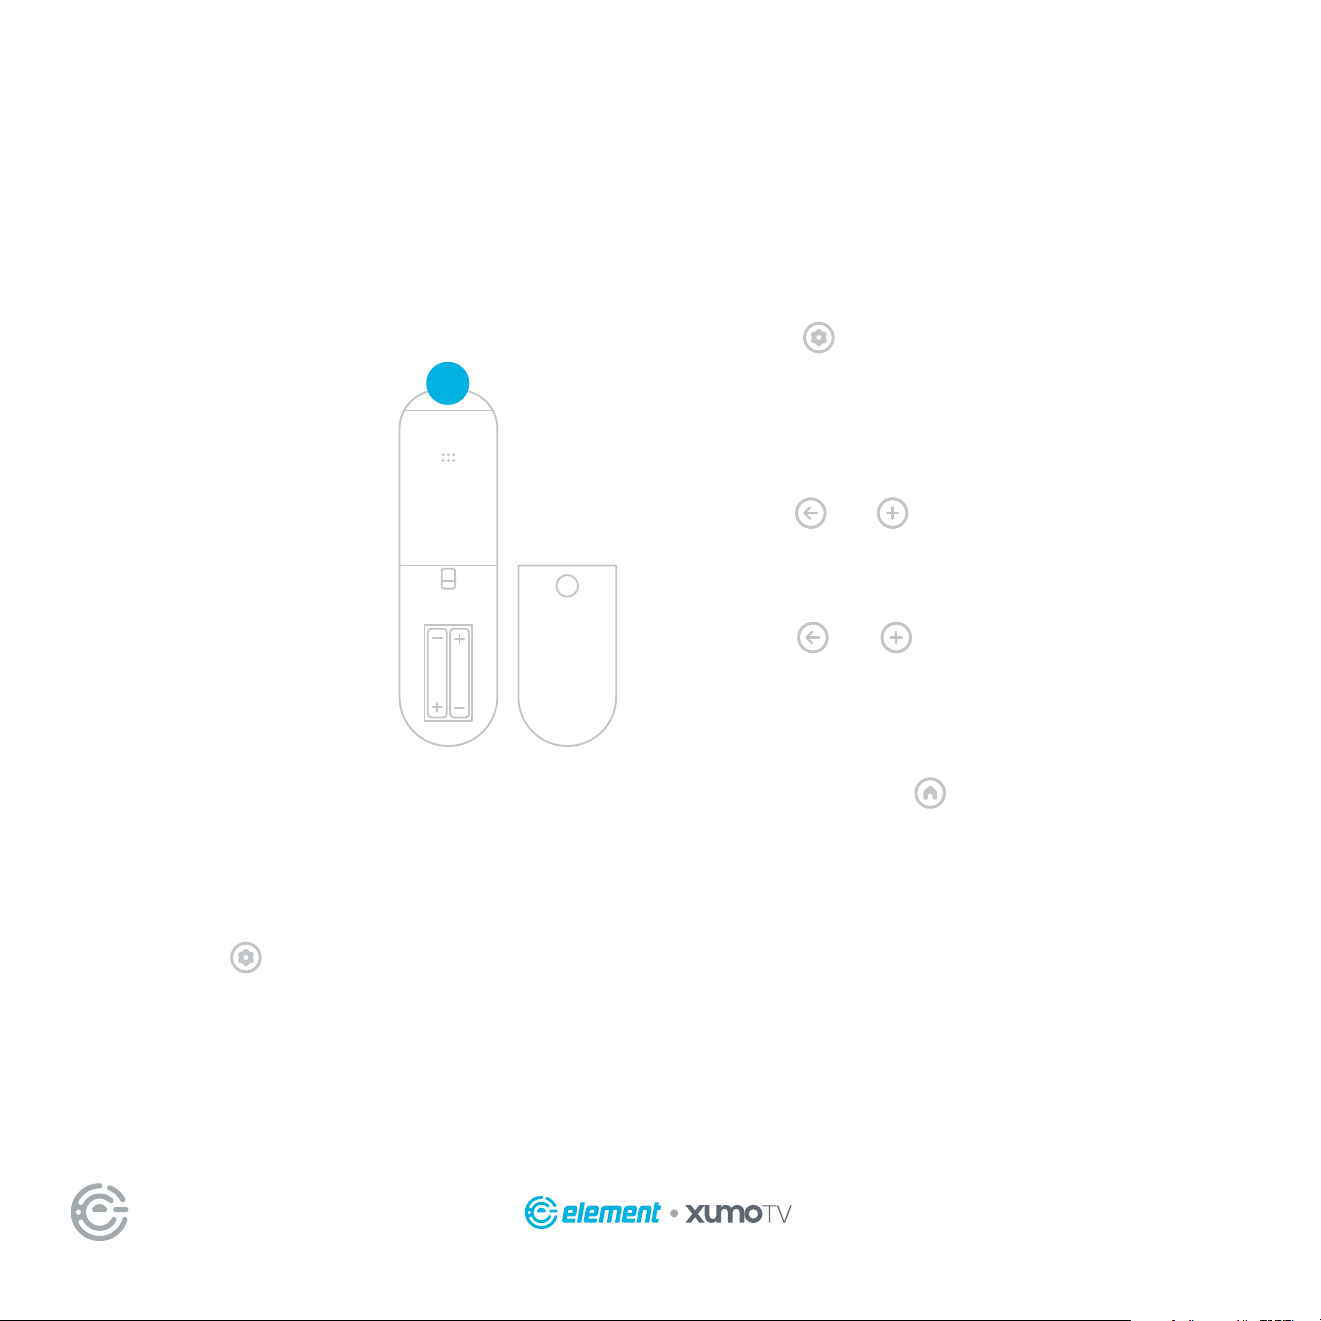
Setting up your remote
Power your TV remote by
inserting the included
batteries carefully
matching (+) and (-)
indicated inside the
battery compartment.
Pairing your remote
to a new Xumo TV
Before using your
remote, you’ll need to
pair it with your TV. If
you put batteries in
your remote within 15
minutes of plugging in
your TV for the rst time, your remote will auto-
matically pair to your TV. Should you experience
any issues, follow the below instructions:
Pairing your remote to an existing Xumo TV
1. Press the button
2. Select Remote > Pair your remote to your TV
3. Follow the on-screen instructions
4. If pairing fails, turn o your TV and unplug from
the power source. Plug TV back in, power on,
and try steps 1-3 again.
Pairing your remote to a sound system
1. Press the
button
2. Select Remote > Pair your remote and sound
system
3. Follow the on-screen instructions.
How to reset your remote
1. Hold the and buttons for 3 seconds until
the light at the top of the remote turns solid green
2. Press 9, then 8, then 4 (the light will blink
red a few times)
3. Hold the and buttons for 3 seconds again
4. Press 9, then 8, then 1
5. Wait for the light at the top of the remote
to ash red again
6. With your remote control pointed towards your
TV, try pressing the button then other keys
to make sure your remote is working properly
Note: Voice control will not work until you pair your
remote. Voice commands only work when your TV is
connected to the internet.
TIP: Always replace dead batteries with two brand
new batteries from the same manufacturer. Never
use damaged batteries.
If your remote gets warm/hot during use, discontinue
use and contact customer support immediately.
(continued)
2
FOR SUPPORT, VISIT ELEMENTELECTRONICS.COM/SUPPORT 11
SETTING UP
YOUR TV
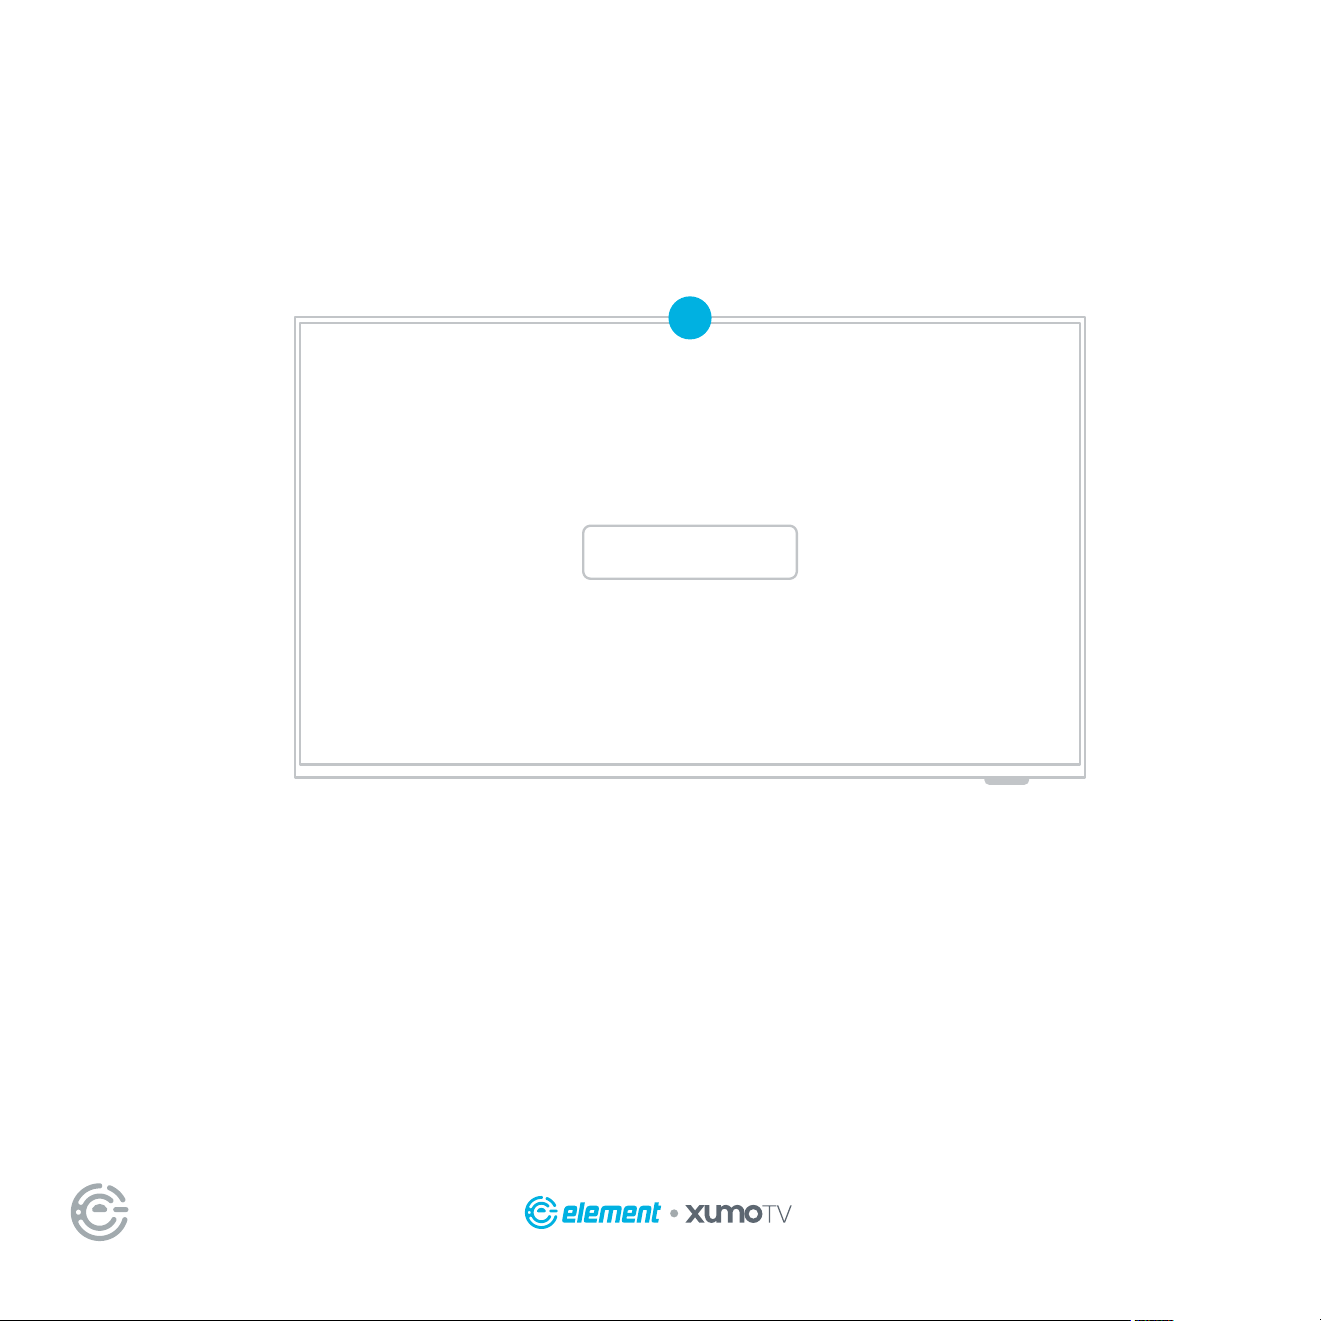
Plug in and turn on TV
Plug your TV into the wall outlet and press the power button on your remote control. Your TV will display a
launch screen showing the Element and Xumo TV logos, followed by the rst setup screen.
(continued)
3
Power
button
Protective remote sleeve
Place remote inside protective sleeve for
added protection against falls or con-
densation. e protective sleeve is not
weather-proof. Please
properly store your remote indoors
when not in use.
QUICK START GUIDE12
Choose your language
To review the Xumo TV privacy policy, visit tv.xumo.com/privacy.
English
Español
4
SETTING UP
YOUR TV
Follow the on-screen instructions
When your TV powers on, follow the easy on-screen instructions for setup.
Connecting your TV to the Internet gives you access to all the things that make your TV smart, including
apps, voice controls, and more. Your TV will automatically detect wireless networks in your area, so have
your network name and password handy. If you aren’t ready to connect to a wireless network you can still
use it as a regular TV and can connect it later within settings.
(continued)
FOR SUPPORT, VISIT ELEMENTELECTRONICS.COM/SUPPORT 13
SETTING UP
YOUR TV
(continued)
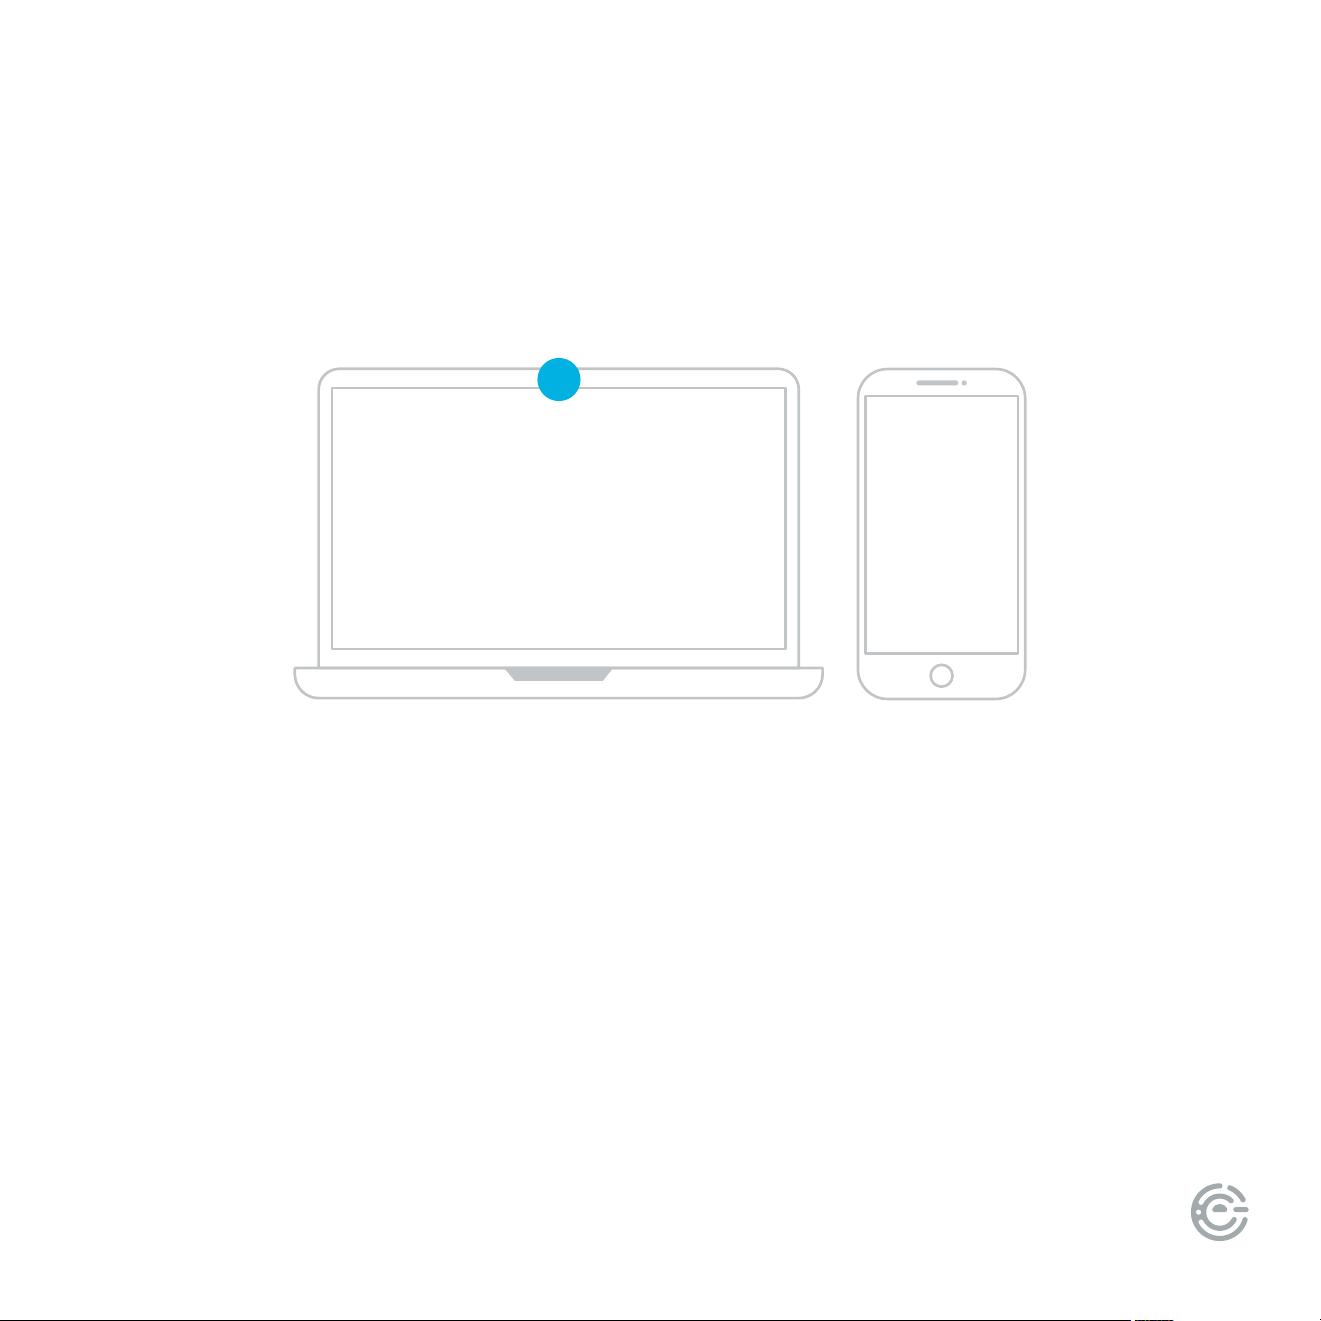
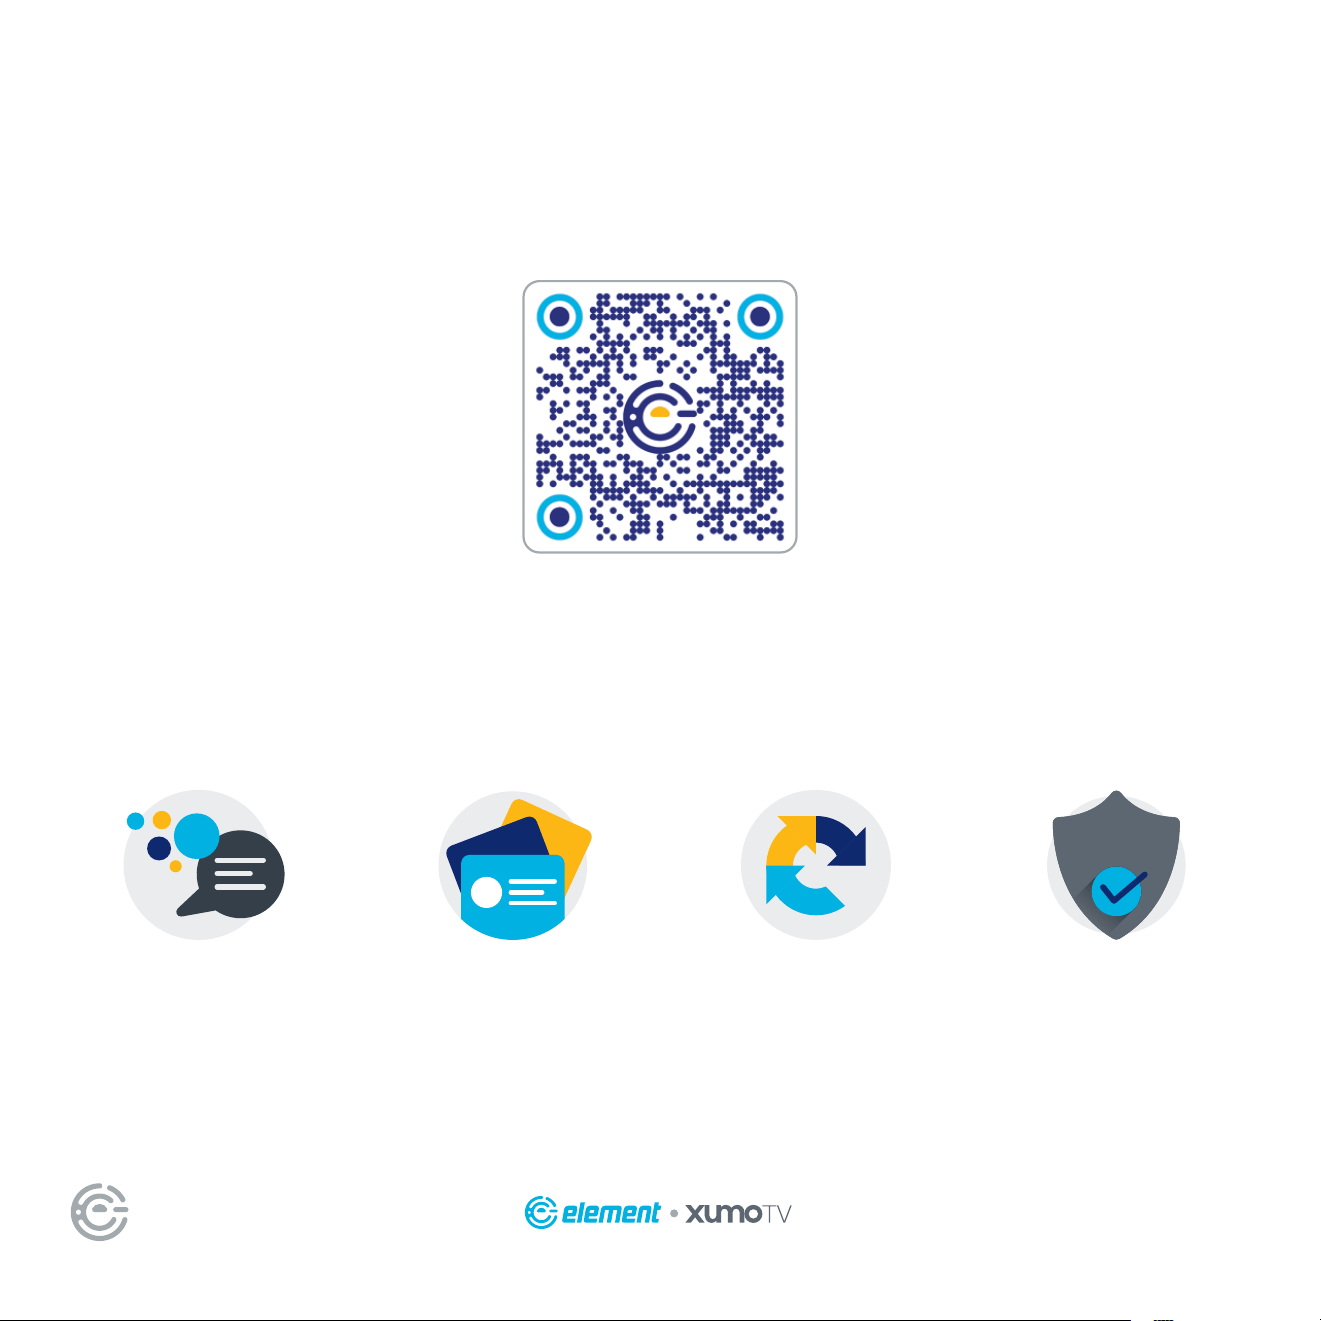
Activate your TV
To activate your TV you’ll need a computer, smartphone or tablet. Once you see the activation code on
the TV screen you can visit xumo.com/activate (or simply scan the QR code on-screen with your smart
device camera) and follow the on-screen instructions to complete registration. You’ll be directed to the
home screen when setup is complete.
You may also create a Xumo account with a payment method if you would like to make purchases on your
TV. Note: Creating a Xumo account and adding payment details is optional and not required to use your TV.
A paid subscription or other payments may be required for some streaming channels.
Channel availability subject to change and varies by country or region.
5
QUICK START GUIDE14
USING YOUR
REMOTE
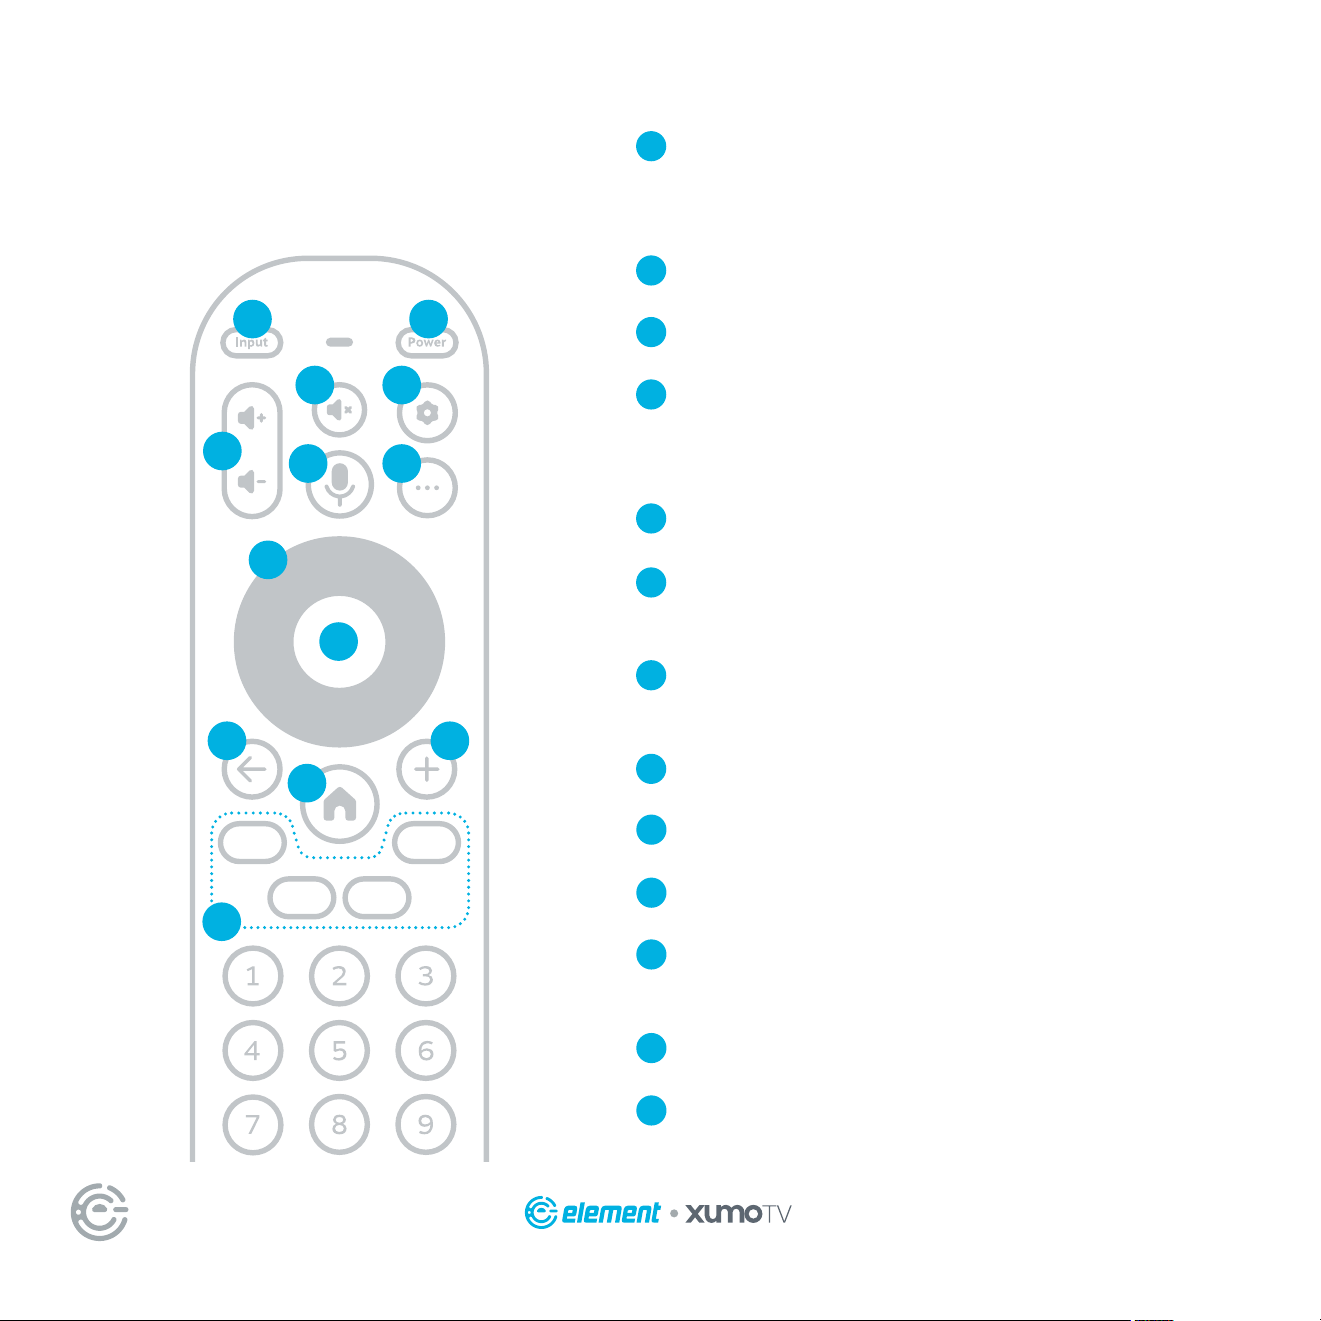
Input Change your TV’s input so that you can use
connected devices like media players, gaming sys-
tems, and sound systems
Power Turn your TV on and o
Volume Make your TV louder or soer
Voice Control Search across your apps and control
your TV with just your voice – just press and hold
the button, say a command, then release it
Mute Turn your TV sound on and o
Settings Press once to open the Settings menu, or
press twice to access your accessibility shortcut
More See more options like program descriptions
depending on which screen you’re on
Navigation Pad Select up, down, le and right
Select Conrm your selection
Last/back Return to the previous screen
Add Add the TV show or movie you’ve selected to
My List
Home Return to the home screen
App shortcuts Launch the labeled app when your
TV is connected to the Internet
A
B
C
D
E
F
G
H
I
J
K
L
M
A B
C
D G
E F
H
I
J K
L
M
FOR SUPPORT, VISIT ELEMENTELECTRONICS.COM/SUPPORT 15
CONNECTING
AN ANTENNA
With the built-in tuner you can connect your TV to
an antenna and enjoy over-the-air entertainment.
1. To connect your TV to an antenna, connect a coax
cable (not included) into your TV’s ANT port and
the other end into your device.
2. Turn your TV on and press the home button
on your remote.
3. Select the Antenna tile, or open Settings >
Antenna and inputs > Antenna > Scan for channels
4. Follow the on-screen instructions.
UNIVERSAL
REMOTE SETUP
If you prefer to use your cable set-top box or satellite receiver remote as a
universal remote, please refer to the manual your cable or satellite service
provided. It includes instructions on how to program your remote to your TV.
QUICK START GUIDE16
LET’S REGISTER
YOUR PRODUCT
It’s super easy, just head on over to
elementelectronics.com/register
BENEFITS OF REGISTERING YOUR PRODUCT:
Updates
Stay current with
important product updates
and notications.
Support
Get assistance quickly
by pre-registering
your product.
News & Oers
Take advantage of the
latest news and special
oers from Element.
2-YEAR
LIMITED WARRANTY*
Warranty
Receive a 2-year
limited warranty with
registration*
*1-year manufacturer’s limited warranty with purchase, or 2-year limited warranty with
product registration within 90 days of purchase. See warranty card for details

FOR SUPPORT, VISIT ELEMENTELECTRONICS.COM/SUPPORT 17
WE’RE HERE
TO HELP
Find resources and get help with product setup, connecting devices, technical issues,
downloading manuals and more!
elementelectronics.com
1.888.842.3577
customerservice@elementelectronics.com
We’re available 24 hours a day, 7 days a week
To download the full Xumo TV User Manual, and review the latest information
on common issues and solutions, visit tv.xumo.com/support
We recommend keeping your TV box for the duration of your warranty.
See your product warranty for details.

QUICK START GUIDE18

Bring it home.
TM
Element, the Element Logo, and Bring it home are trademarks of Element Brand Holding, LLC. ©2024 Element Brand Holding, LLC. All Rights Reserved.
Xumo TV, Xumo Play, the Xumo logos, and all other Xumo product names, logos, slogans or marks are the
trademarks of Xumo or its licensors. ©2024 Xumo. All Rights Reserved.
