TMP72_v1_7/25
USER MANUAL
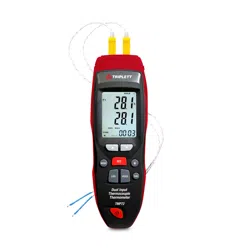
TMP72
Dual Input Thermocouple Thermometer
TMP72_v1_7/25 2
Introduction
Welcome, and congratulations on your purchase of the Triplett TMP72 Dual Input
Thermocouple Thermometer. The TMP72 is a high-precision dual-input thermocouple
thermometer designed for professional temperature monitoring applications. Compatible with
a wide range of thermocouple types (J, K, T, E, S, R, N), this handheld meter offers features
such as data logging, real-time average and differential readings, high/low alarms, and USB
connectivity for PC interface. With user calibration, a large backlit LCD, and intuitive controls,
the TMP72 delivers reliable performance for industrial, laboratory, and field use.
What’s in the box:
▪ TMP72
▪ (2) Type K Thermocouples
▪ (1) 9V Battery
▪ PC Software
▪ USB Cable
▪ Case
Stay updated:
For the most recent version of the user manual, always visit the official Triplett website:
www.triplett.com and search for TMP72.
Description
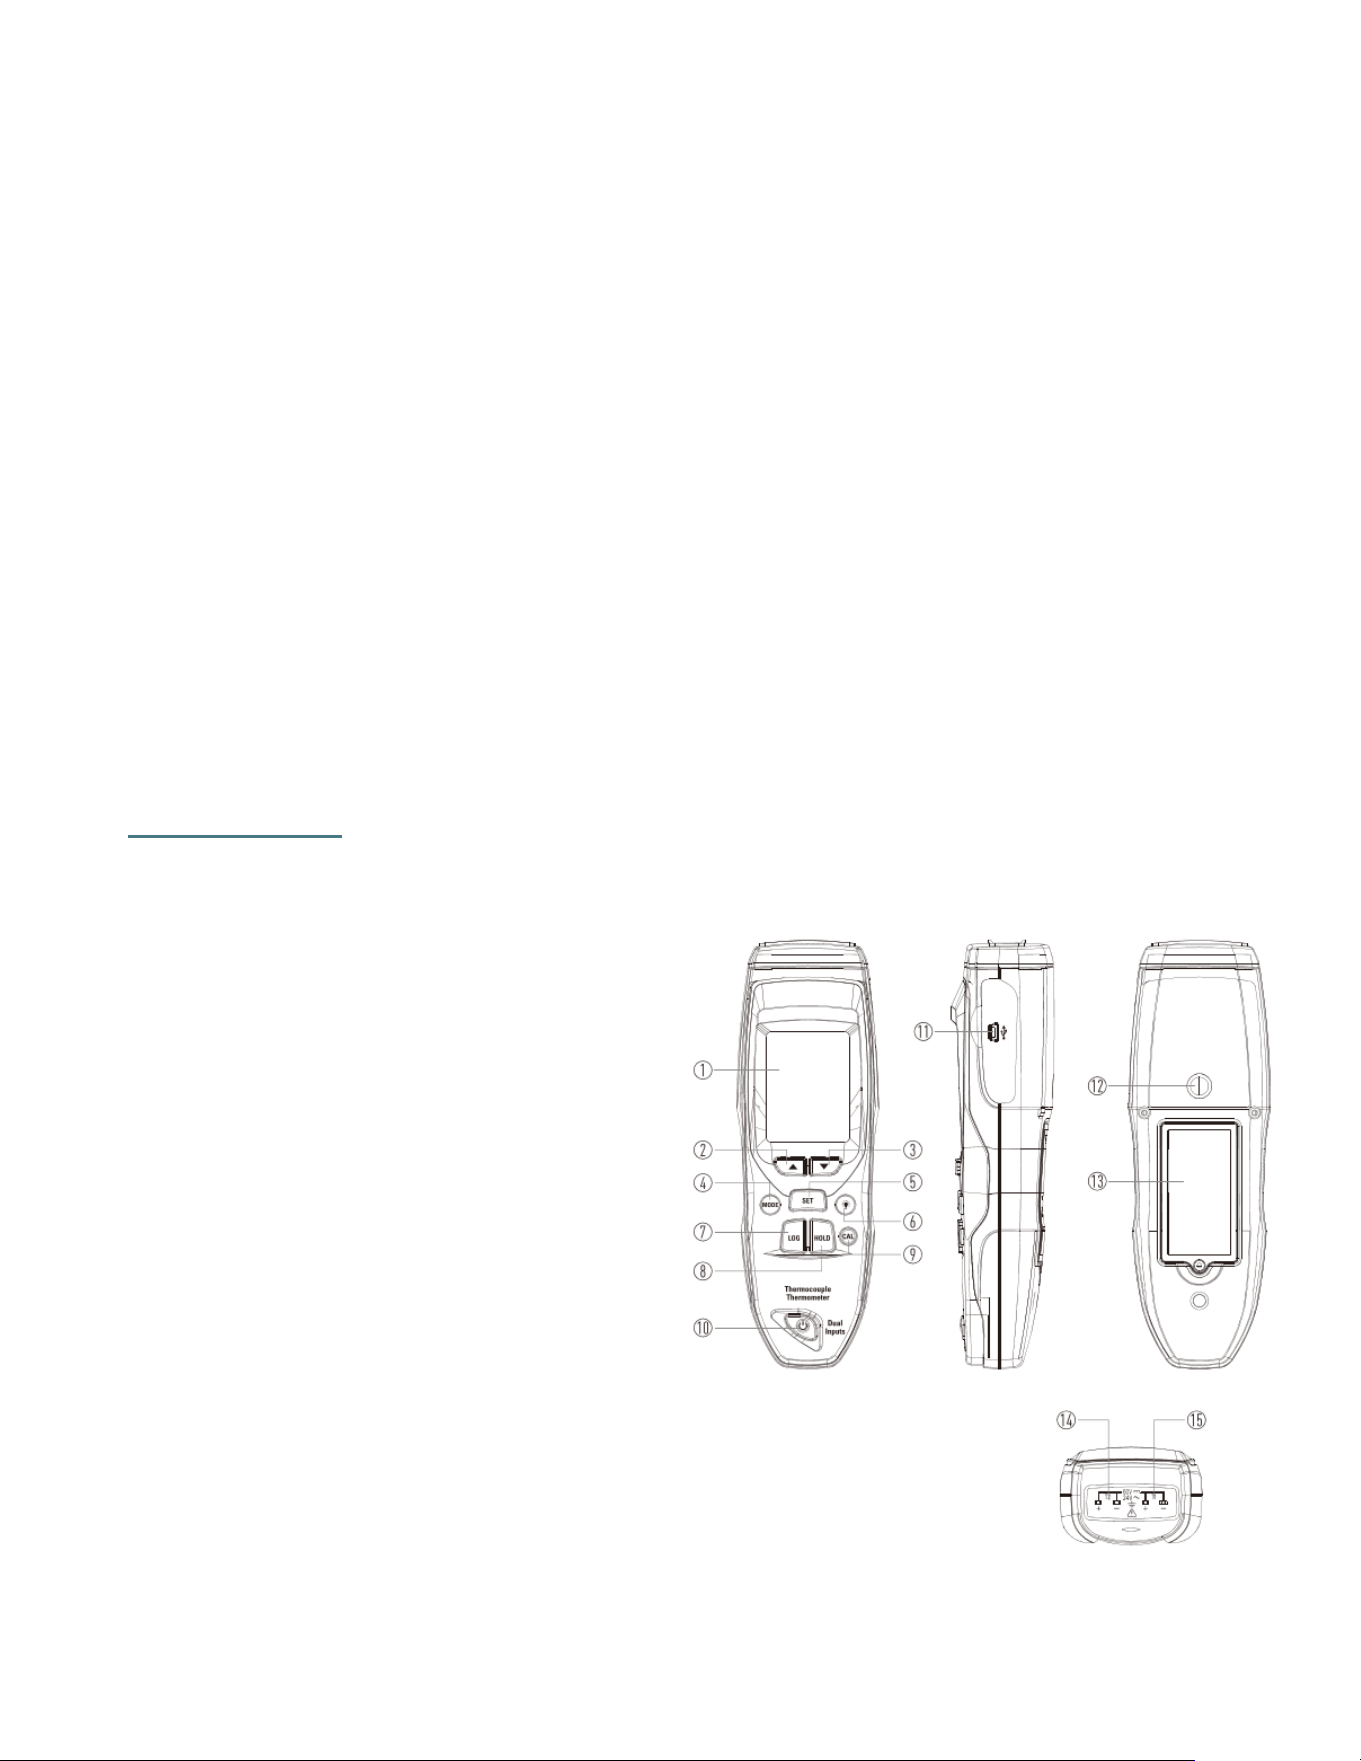
Meter Description
1. LCD Display
2. Up Button
3. Down Button
4. Mode Button
5. Set Button
6. Backlight Button
7. Datalogger Button
8. Data HOLD Button
9. Calibration Button
10. Power Button
11. USB Interface
12. Tripod Mount
13. Battery Cover
14. T2 Input
15. T1 Input
TMP72_v1_7/25 3
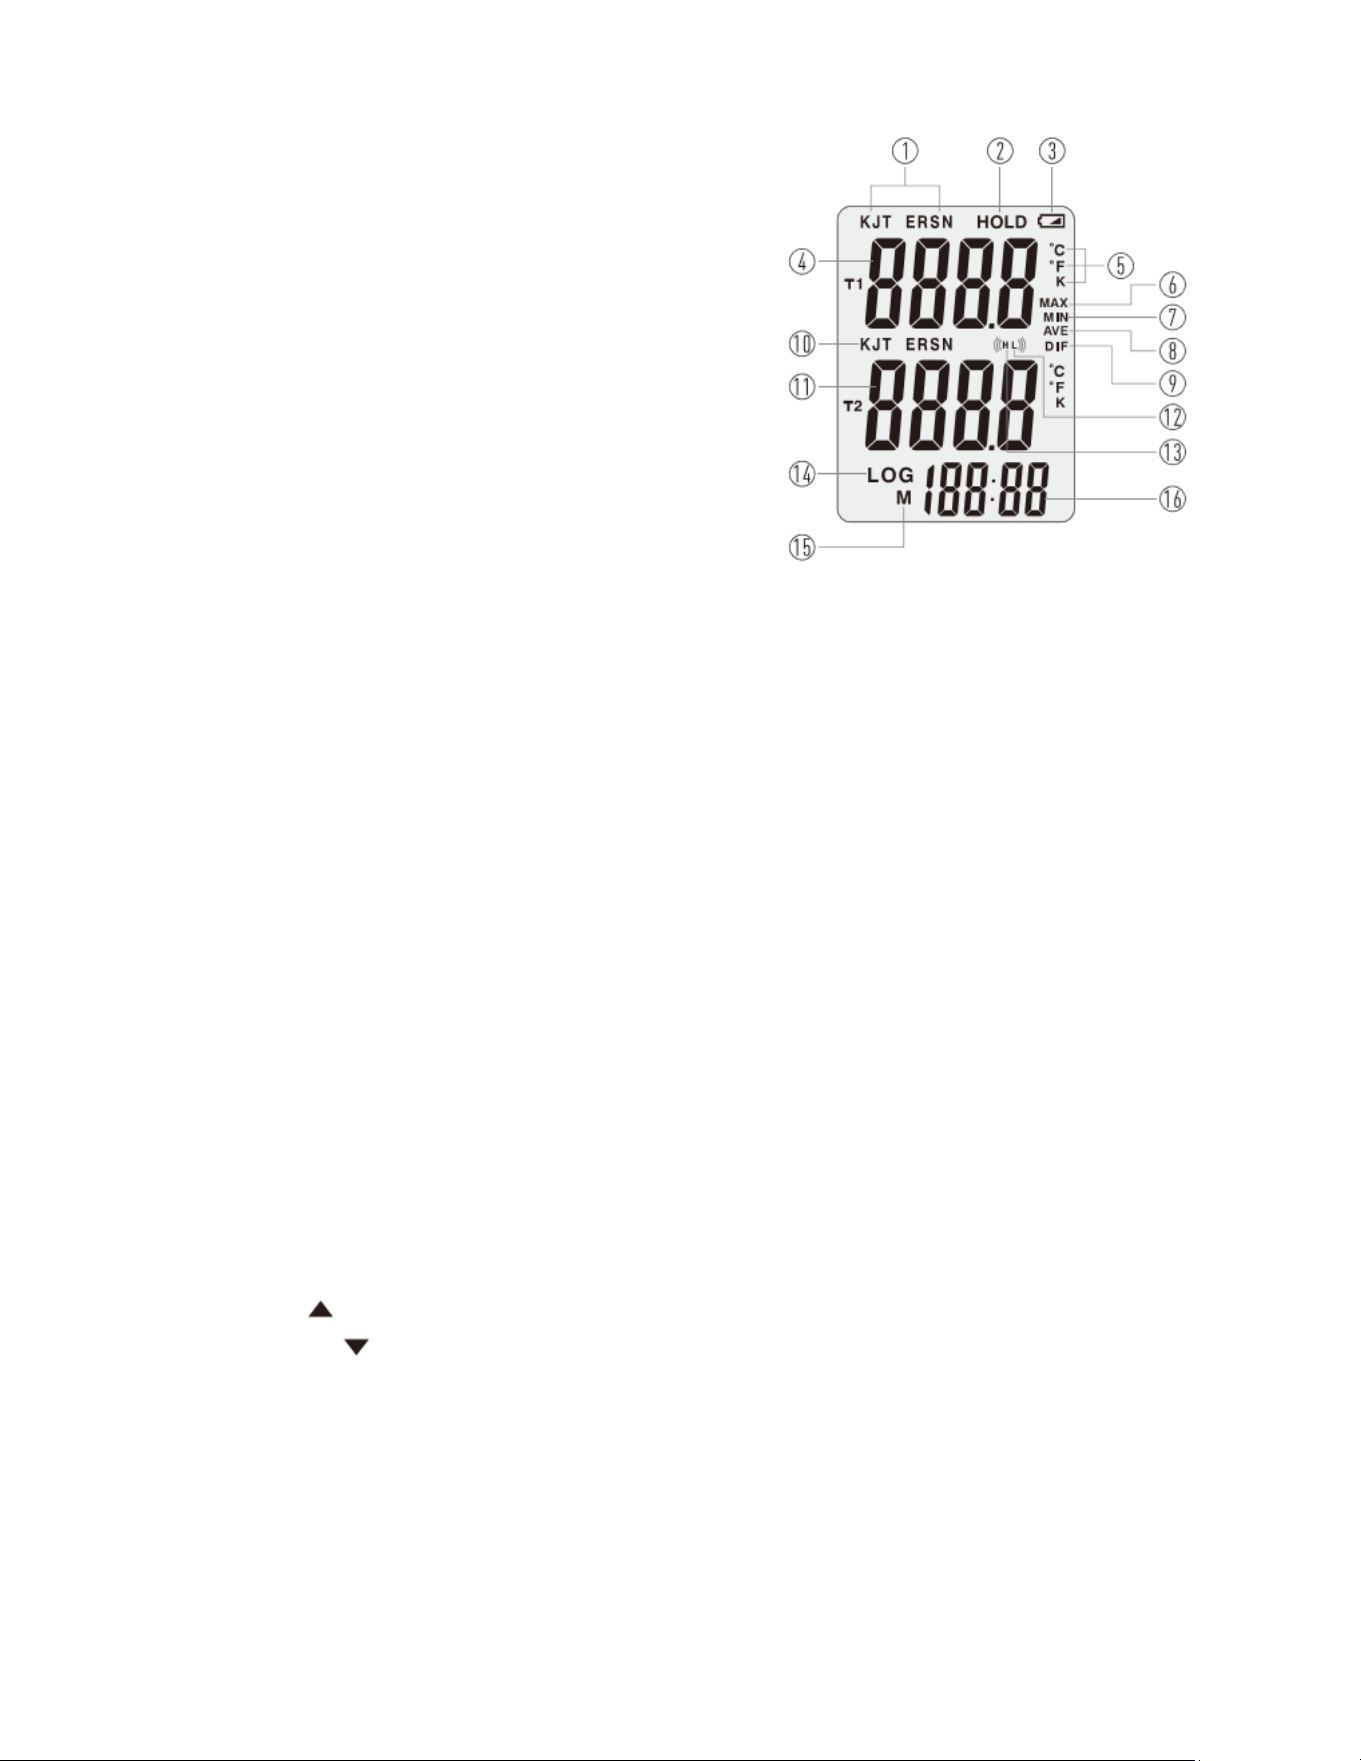
LCD Display
1. Input Type J, K, T, E, R, S, N
2. HOLD and Display Readings
3. Low Battery Indication
4. T1 Temperature Value
5. Temperature Units °F/°C/K
6. MAX Temperature
7. MIN Temperature
8. Average Temperature- Real Time
9. Differential Temperature- Real Time
10. T2 Input Type
11. T2 Temperature Value
12. Low Alarm Icon
13. High Alarm Icon
14. Datalogger Icon
15. Remaining Memory Icon
16. Real Time Clock
Operation
Getting Started
Temperature Measurement
• Insert the temperature probe and press the power button, there is no order.
• The screen will display the current measured value for T1 and T2. not press any buttons
except the Power Button).
• Allow a few minutes for the reading to stabilize when the ambient temperature changes
."NOTE: After measuring high temperatures, do not touch the probe immediately, to avoid
burns.
Button Operation
Up Button
Down Button
MODE Button: MAX/MIN/AVG/DIF Display.
• Continuously press the MODE Button, the screen will appear sequentially
MAX/MIN/AVG/DIF icon.
• When there is MAX/MIN, the screen will show the Maximum/Minimum value for T1 and
T2 Channel.
• When there is AVG/DIF icon, T1 will display real-time temperature for T1 channel, and
T2 will display the average/

TMP72_v1_7/25 4
difference value (the Average/Difference value are based on real-time temperature values
for T1 and T2).
Note: Pressing the MODE Button will not display MAX/MIN/AVG/DIF icon if two probes
are not inserted; Only a
probe is inserted, it can only display MAX/MIN icon and appears Maximum/Minimum
value for the inserted probe,
but cannot show AVG/DIF icon and display Average/Difference value, another channel will
show “----”; Only when
two probes are inserted, the display will completely show MAX/MIN/AVG/DIF icon and the
corresponding value.
Note: Simultaneously press Up and Down Button, and then recalculate the maximum and
minimum values, the maximum and minimum values of the actual measured temperature
will be calculated again when you press the MODE Button.
SET Button: Set up sampling rate, temperature type and temperature units.
• Press the SET Button, and the flashing LOG icon will appear the display section of the
real time clock (RTC) will be
changed to show DataLogger sampling rate, then adjust DataLogger sampling rate (1s-
60min) This is adjusted by pressing the Up Button or Down Button.
• "Press the SET button again to stop the LOG symbol from flashing. The DataLogger
sampling rate is now successfully set."or Down Button.
• Press the SET button again. The LOG symbol next to the T1 channel's temperature
type will stop flashing, indicating that the setting has been successfully saved. The
temperature type for the T2 channel will now begin flashing. Use the Up or Down
button to select the desired temperature type for T2.
• Press the SET button again. The LOG symbol for the T2 channel will stop flashing,
confirming that the setting has been saved. The temperature unit icon (°C / °F / K) will
now flash. Use the Up or Down button to select your preferred temperature unit.
• Press the SET button again to exit the setup mode.
Note: During setup, you may press the LOG button at any time to begin data recording.
However, once recording has started, settings cannot be changed. To modify any settings,
you must first stop the data recording.
TMP72_v1_7/25 5
Backlight Button: Turns the backlight on or off.
• The backlight is enabled by default and will automatically turn off after 30 seconds.
• Press the Backlight button to manually turn the backlight on or off.
• If there is no user activity for 5 minutes, the backlight will automatically turn off.
• Press the Backlight button again to turn it back on if needed.
Datalogger Button
• If the sampling rate is set to 0 seconds or the memory is full, pressing the Datalogger
button will not start data recording. In this case, the LOG symbol will flash briefly (for
about half a second) and then disappear.
• While data recording is in progress, pressing the Datalogger button for 2 seconds will
stop the recording.
• If no operation is performed for 15 minutes during data logging, the meter will enter
sleep mode. Sleep mode does not interrupt or affect the data logging process.
Data Hold Button: Freeze Current Measured Temperature
• Press the Data Hold button to freeze the current measured temperature value on the
display.
• Note: Maximum and minimum values will not be frozen.
• Press the Data Hold button again to return to normal measurement mode.
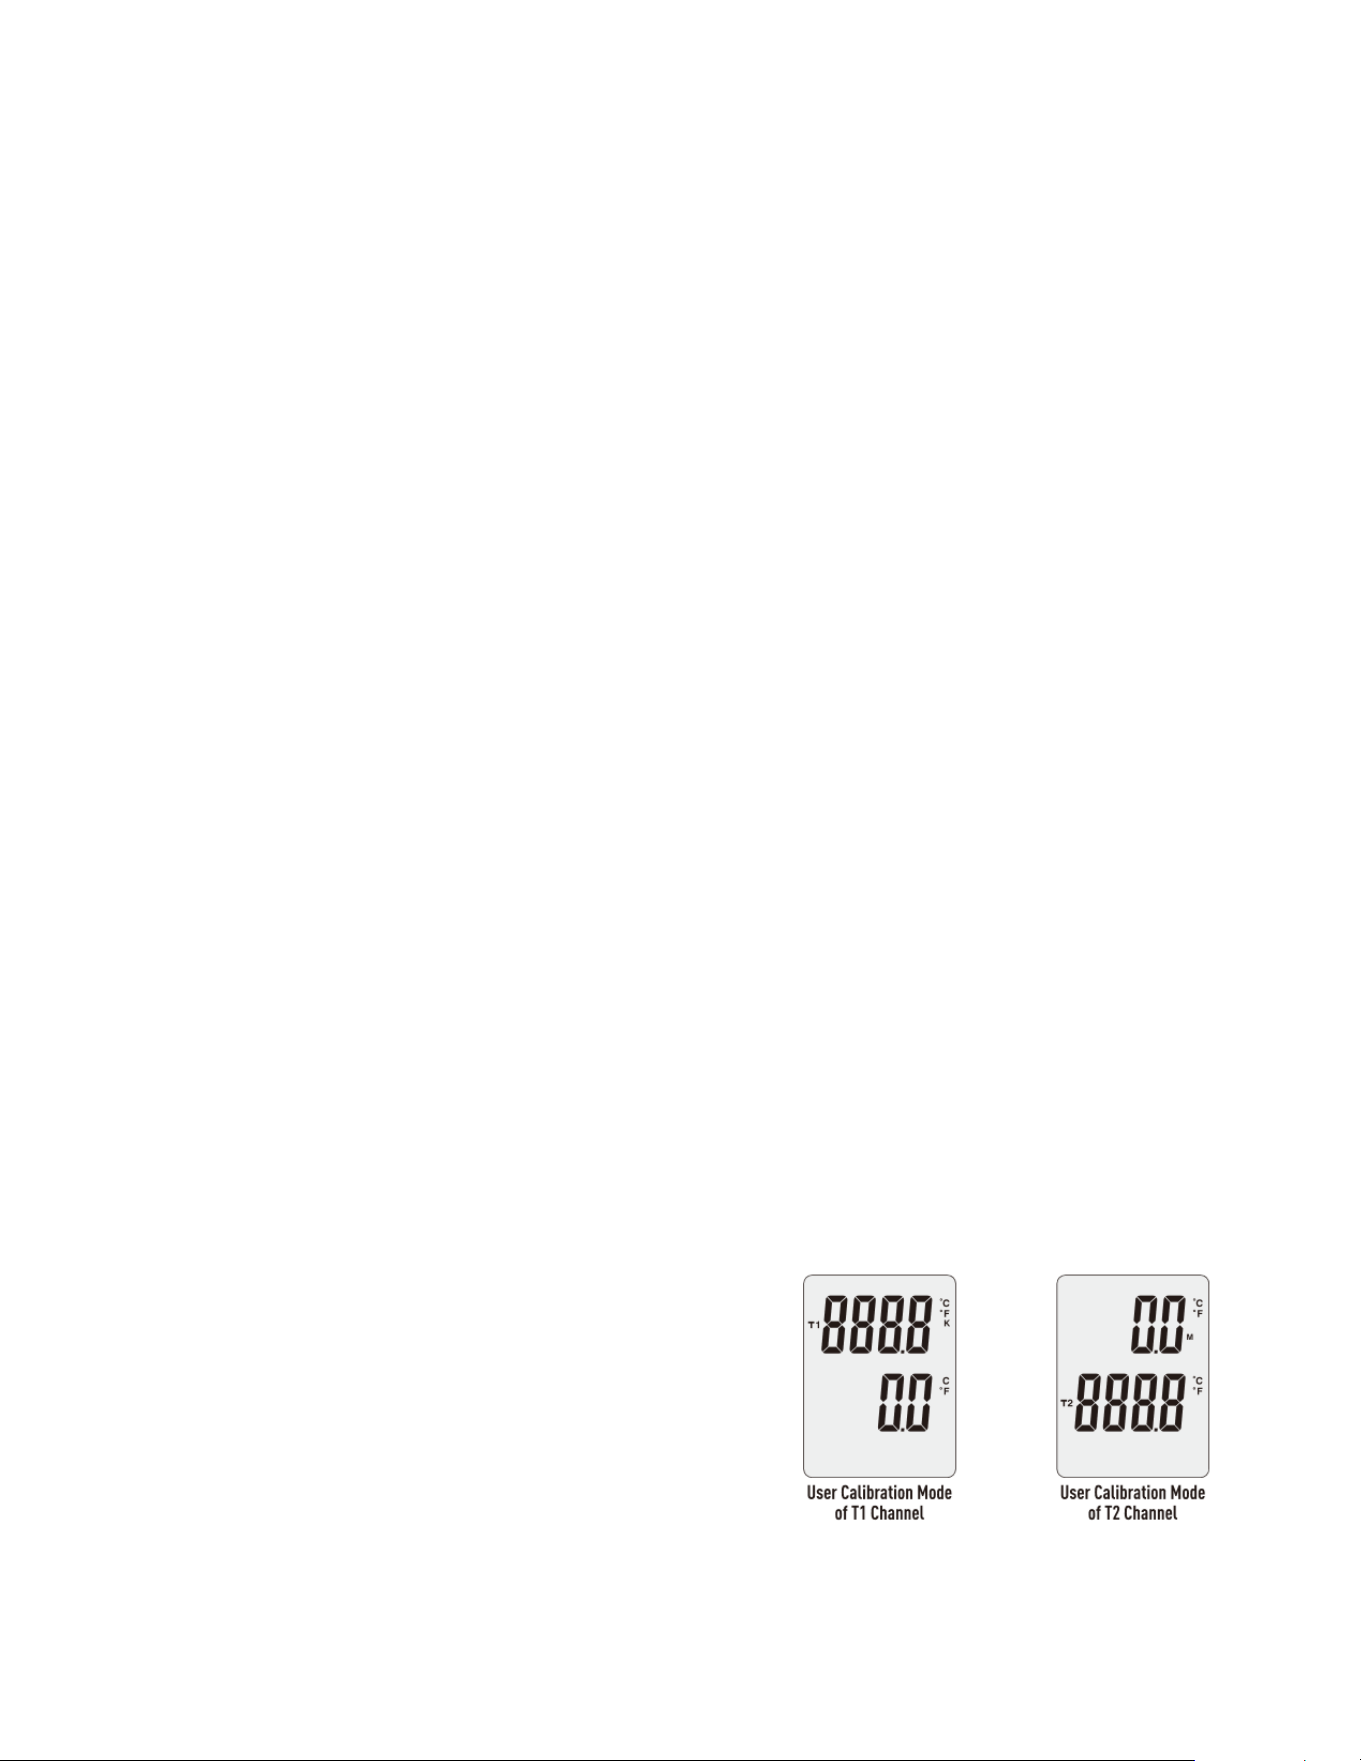
Calibration Button: User Calibration
• Press and hold the CAL button for 3 seconds to enter the user calibration mode for the
T1 channel.
o The upper display will show the current measured temperature of the T1
channel.
o The lower display will show the user calibration offset (positive or negative).
o Use the Up or Down buttons to adjust the calibration value in increments of
0.1°C or °F.
o
• Press and hold the CAL button for another 3 seconds to switch to user calibration
mode for the T2 channel.
o The user calibration value for T1 will be
saved automatically.
o The upper display will now show the
user calibration offset for the T2 channel
(positive or negative), and the lower
display will show the current measured
temperature of T2.
o Again, use the Up or Down buttons to
adjust the value in 0.1°C or °F increments.

TMP72_v1_7/25 6
Note: The unit used in user calibration mode (°C or °F) depends on the unit selected
before entering calibration mode. For example, if the unit was set to °C prior to
calibration, the calibration will also use °C.
Power Button
• Press the Power button to turn the meter ON or OFF.
• If the meter is turned off while data recording is in progress, the current data will be
saved automatically before shutdown. Data logging will stop.
• To resume data logging after shutdown, press the Power button followed by the LOG
button.
High/Low Temperature Alarm
• When the measured temperature exceeds the configured high or low threshold, a
buzzer will sound, and the corresponding high or low temperature icon will appear on
the screen.
• To silence the buzzer, press and hold the HOLD button for 1 second, then press the
Up button. The screen will display "bELL ON" or "bELL OFF" and then return to
showing the current temperature.
Note: This action only turns off the buzzer; the high or low temperature icon will still be
displayed if the alarm condition persists.
• To re-enable the buzzer alarm, press the HOLD button and Up button again.
Delete Datalogger Memory
• To delete stored data, press and hold the HOLD button for 1 second, then press the
Down button. The screen will display “d dAtA CLR,” then return to the current
temperature reading.
• If you press and hold the HOLD button for 4 seconds without pressing the Up or Down
button, the meter will assume you want to freeze the temperature reading. The current
value will be held, and the HOLD icon will appear on the display.
Auto Power Off (APO)
• To enable or disable auto power off, press the Power button, then press the MODE
button for 1 second.
• The display will show APO ON (auto power off enabled) or APO OFF (auto power off
disabled).
APO ON: The meter will automatically power off after 15 minutes of inactivity.
APO OFF: The auto power off function is disabled.
Viewing Remaining Memory Capacity
• To check available memory, press the Backlight button first, then press the MODE
button for 1 second.
TMP72_v1_7/25 7
• The screen will display the number of remaining memory positions. After 2 seconds, it
will return to the temperature display.
Using the PC Software
• Insert the CD into your computer’s CD-ROM drive. The installation program
“setup.exe” will run automatically and guide you through the installation process.
Battery Replacement
• If the low battery icon “ ” appears on the display, replace the battery as soon as
possible.
• Open the battery compartment, remove the old battery, and insert a new 9V battery
(NEDA 1604, 6F22, or equivalent).
• If the thermometer is not used for an extended period, remove the battery to prevent
leakage.
Specifications
Feature
Description
Temperature Range
Type J
-328 to 1832°F (-200 to 1000°C)
Type K
-418 to 2502°F ( -250 to 1372°C)
Type T
-418°F to 752°F (-250° to 400°C)
Type E
-328 to 1814°F (-200 to 990°C)
Type S
32 to 3200°F (0 to 1760°C)
Type R
32 to 3200°F (0 to 1760°C)
Type N
-328 to 2354°F (-200 to 1290°C)
Measurement Accuracy
Type J/K/T: +/- 1% of reading +1.8°F (1°C)
below -148°F (-99.9°C)
Type E/R/S/N: +/1% of reading plus 3.6°F (2°C)
Display Resolution
0.1°F/°C from -148 to 1832°F (-99.9 to 999.9°C)
1°F/°C Outside of this range.
Differential Temperature
Yes (T1-T2)
Alarms
Hi/Lo Audible Alarms
Response Time
<300ms
Datalogger Memory
16,000 readings
Sampling Rate
Adjustable (1 sec to 60min)
Auto Power Off
15 minutes after inactivity
Low Battery Indication
Battery Requirement
(1) 9V Battery
Temperature Unit
°F / °C switchable
Over Range Indication
“OL”
Probe
Disconnected/Poor
Contact
Displays as “- -"
Dimensions
7.3 x 2.6 x 1.8 (185 x 65 x 45 mm)
Weight
8.7oz (248g)

TMP72_v1_7/25 8
Warranty Statement
Triplett Test Equipment offers a two-year warranty to the original purchaser of its products.
We guarantee that our products will be free from defects in workmanship and materials for
two (2) years from the purchase date.
This warranty does not cover:
▪ Products purchased from unauthorized distributors.
▪ Items that have been repaired or altered by unauthorized individuals.
▪ Damage from misuse, abuse, misapplication, negligence, or accidents.
▪ Products with altered, defaced, or removed serial numbers.
▪ Accessories, including batteries.
Copyright © 2025
Triplett www.triplett.com