
Technical Support and E-Warranty Certificate www.vevor.com/support
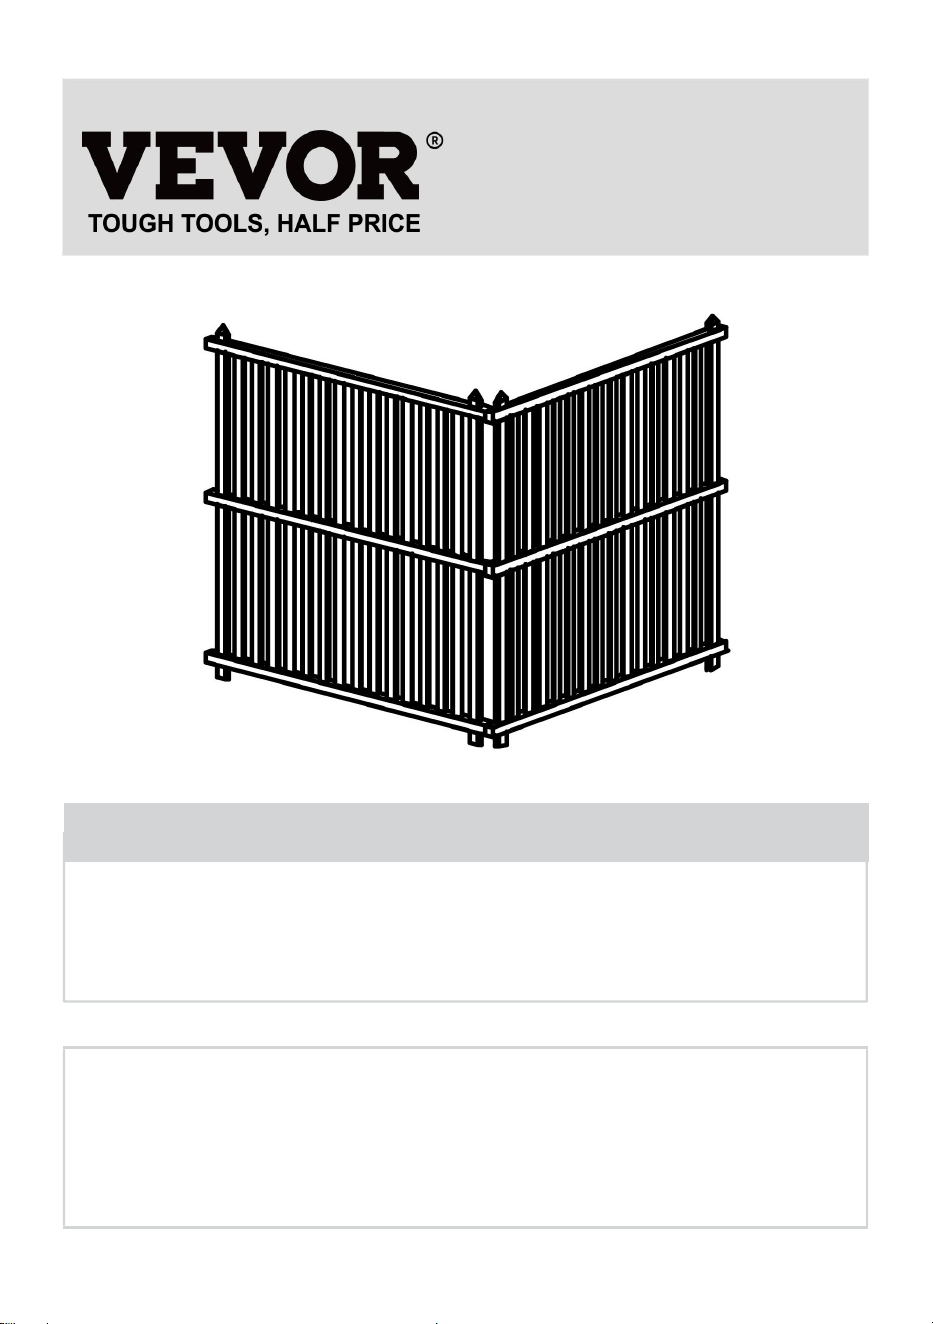
VINYL PRIVACY FENCE USER MANUAL
We continue to be committed to provide you tools with competitive price.
"Save Half", "Half Price" or any other similar expressions used by us only represents an
estimate of savings you might benefit from buying certain tools with us compared to the major
top brands and does not necessarily mean to cover all categories of tools offered by us. You
are kindly reminded to verify carefully when you are placing an order with us if you are
actually saving half in comparison with the top major brands.

1
Model: 12220
Have product questions? Need technical support? Please feel free to
contact us:
Technical Support and E-Warranty Certificate
www.vevor.com/support
NEED HELP? CONTACT US!
This is the original instruction, please read all manual instructions
carefully before operating. VEVOR reserves a clear interpretation of our
user manual. The appearance of the product shall be subject to the
product you received. Please forgive us that we won't inform you again if
there are any technology or software updates on our product.
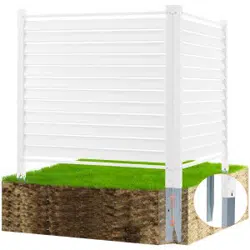
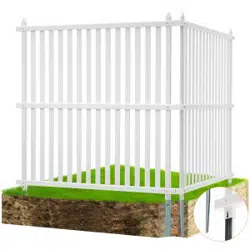
VINYL PRIVACY FENCE
2
SAFETY INFORMATION
In order to ensure your own safety, please make sure to wear gloves
while assembling the fence . The metal parts could have sharp
edges and could be oily because of rust prevention treatment.
Please keep children away from the fence while assembling it to
protect them.
Strong winds may damage the product, fences should be
disassembled in adverse weather conditions.
Make sure to keep sufficient distance to houses as well as gas and
power lines to avoid possible damage. Please check the area for
power cables and gas lines. Ask your local authority for further
information if needed.
SPECIFICATIONS
Model
12220
Size of Single Fence
48×48in
Number of Fence
2
Color
White
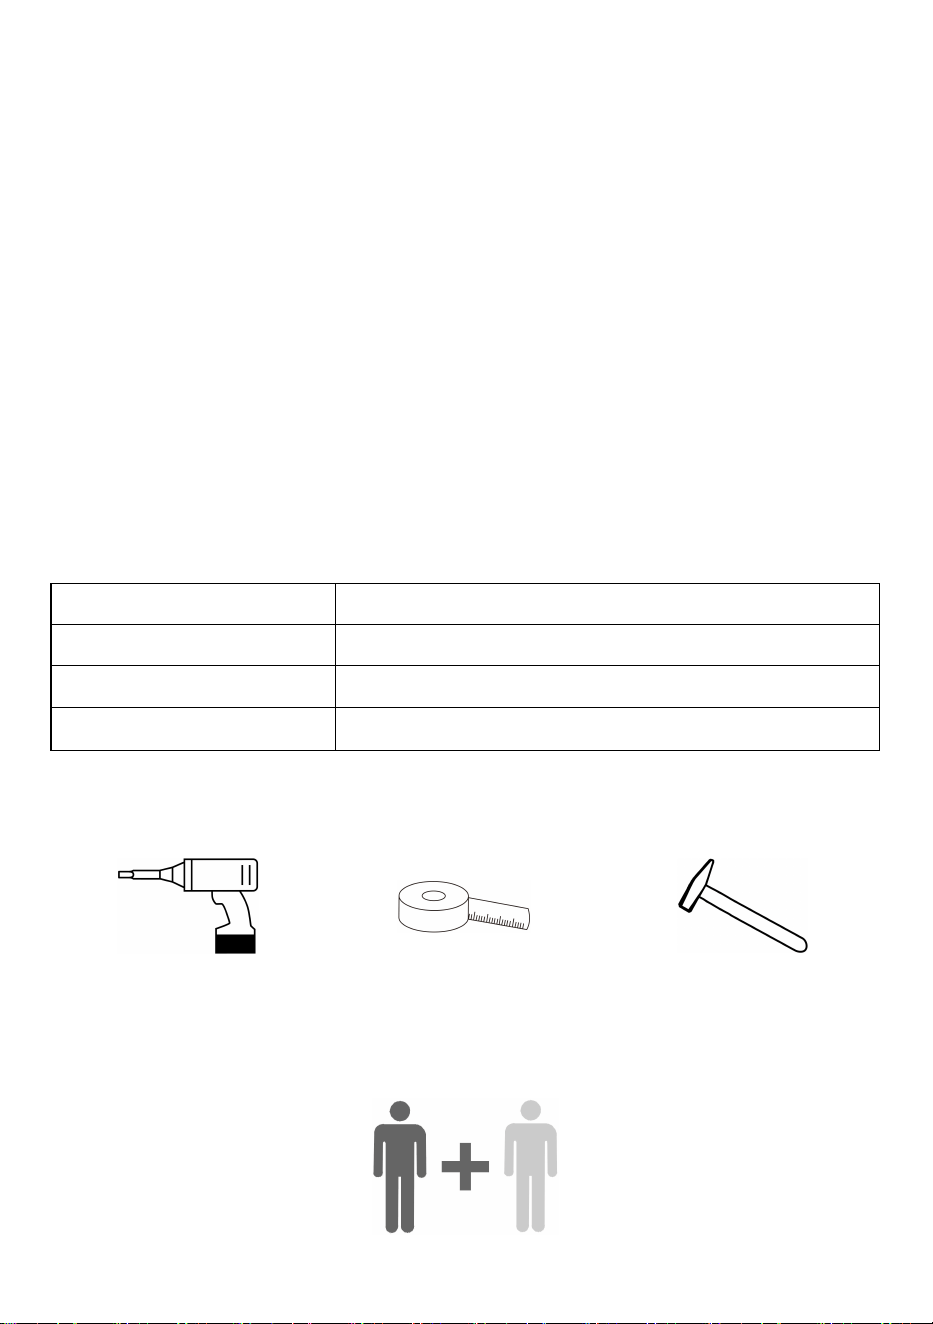
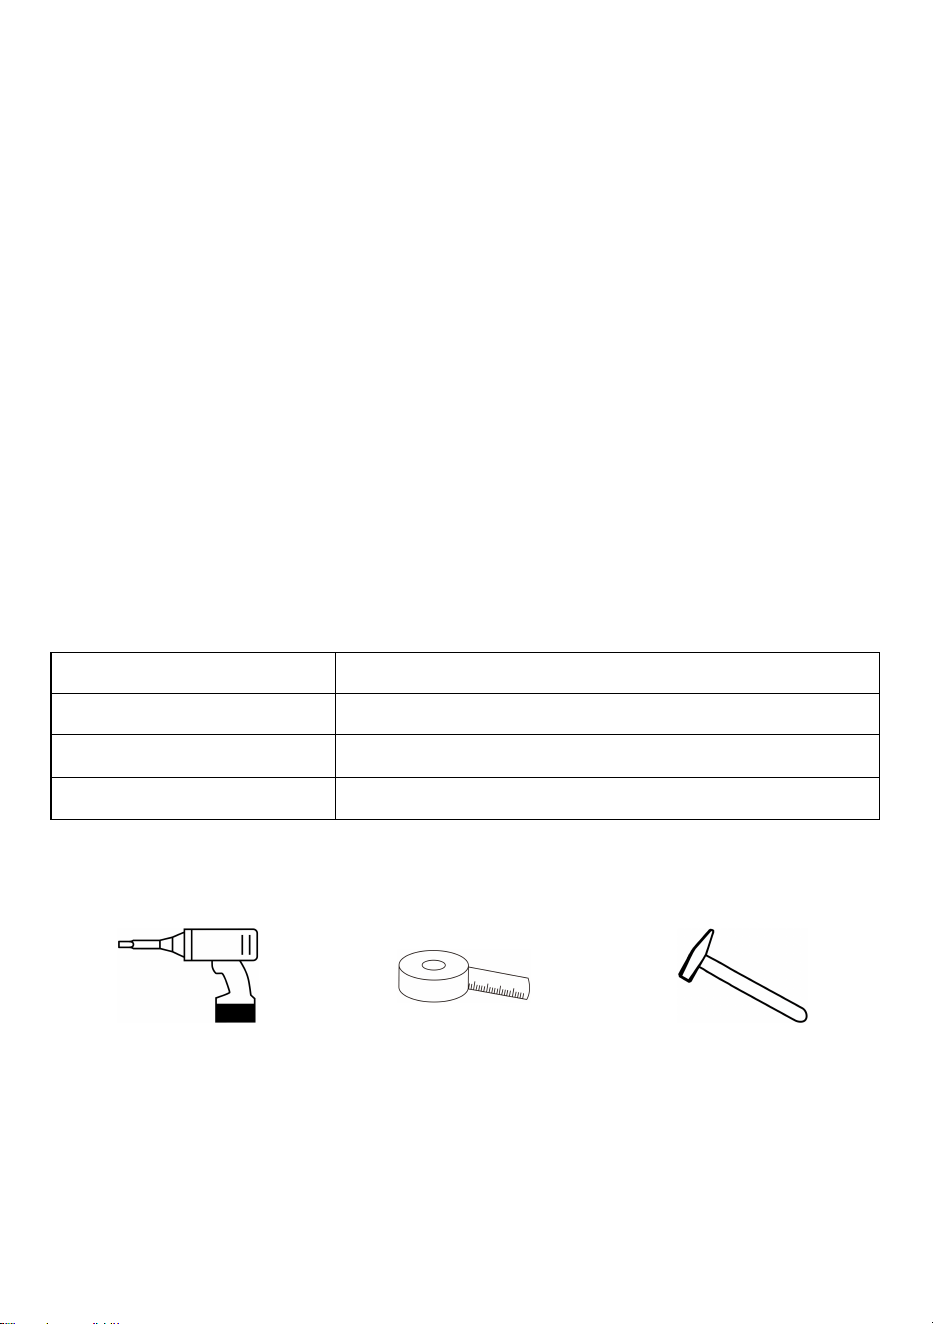
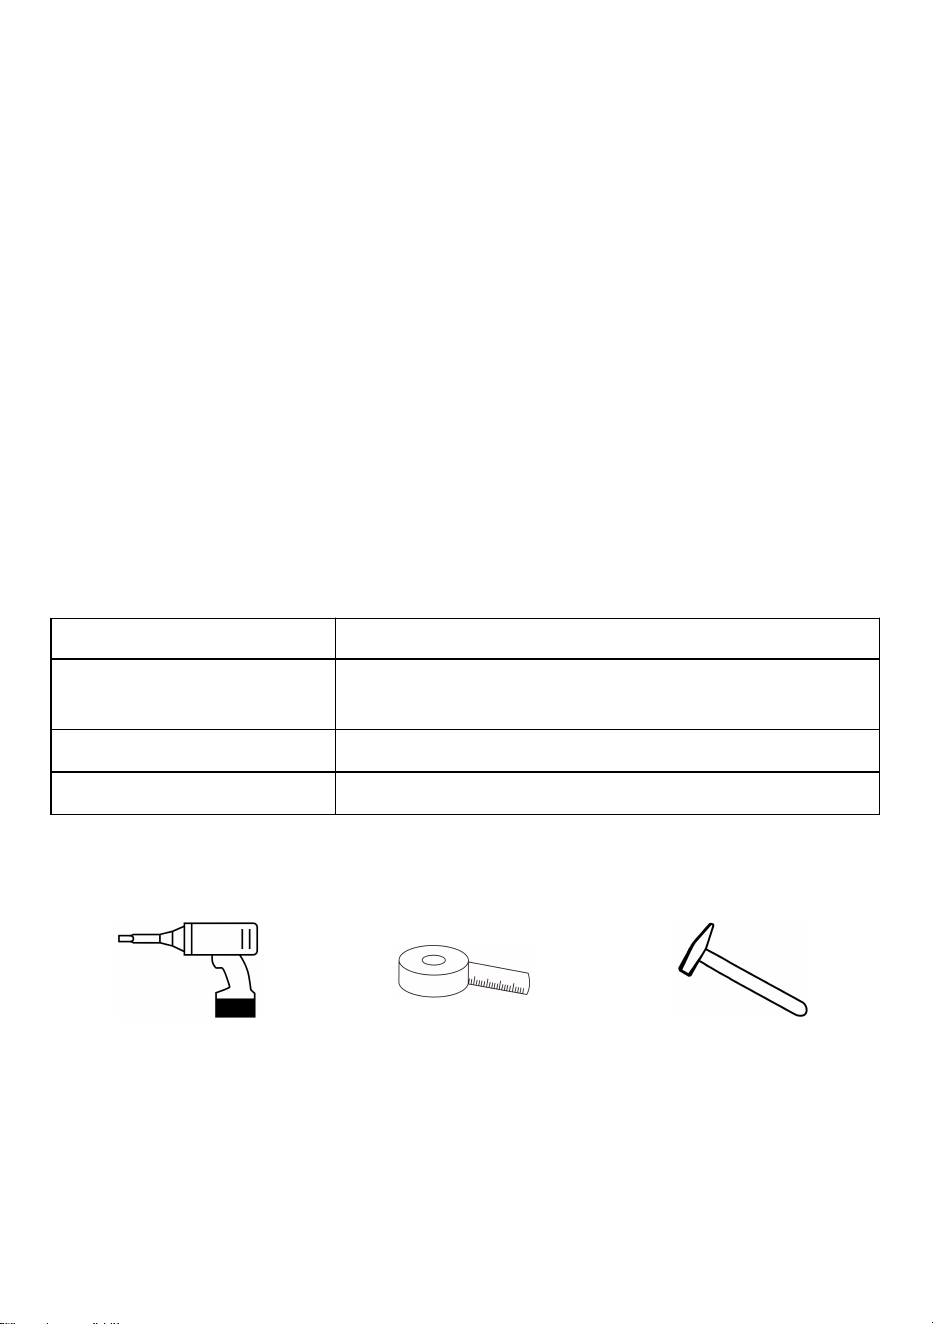
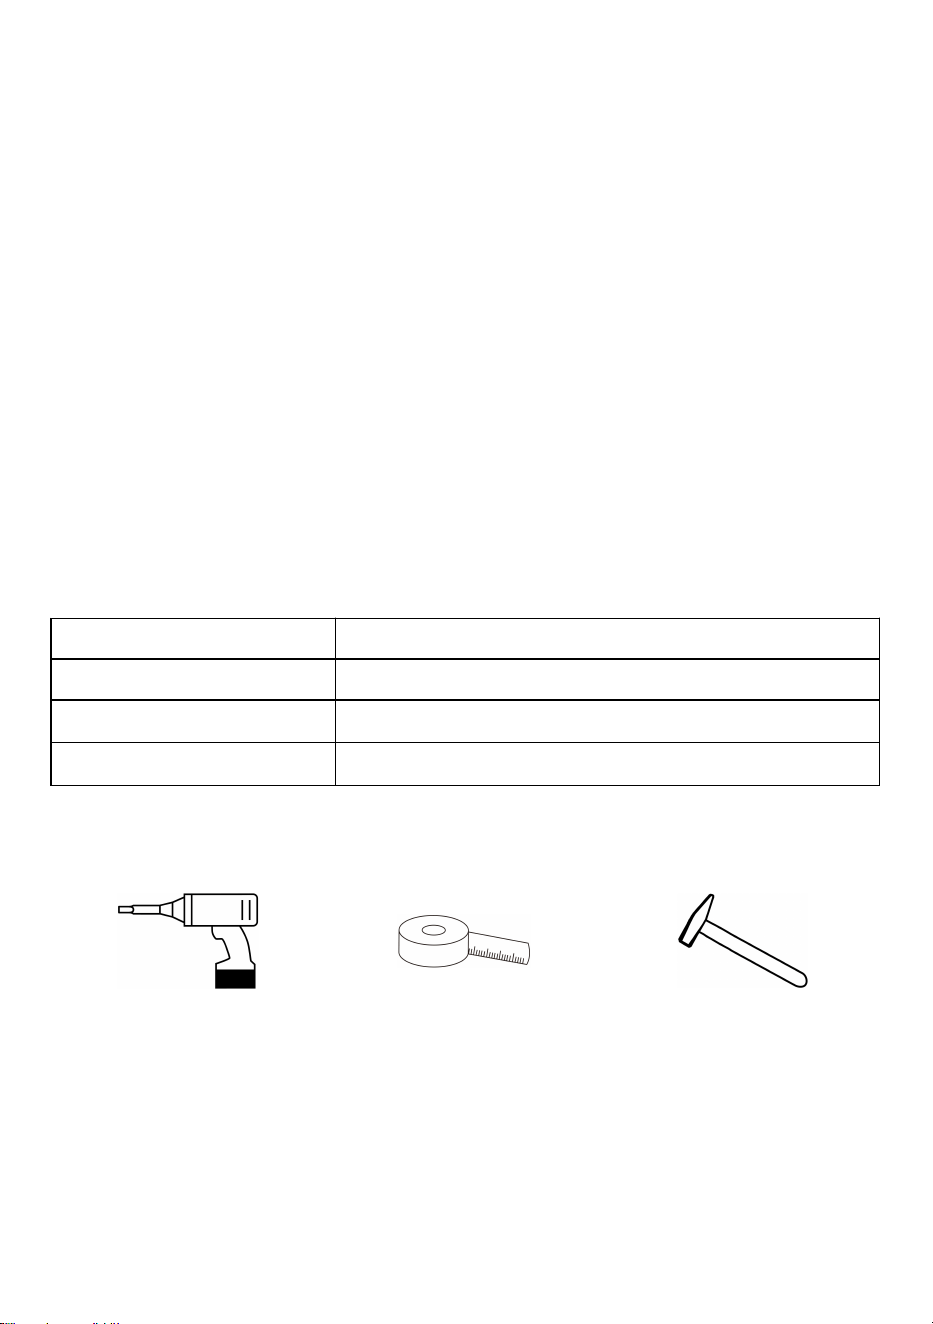
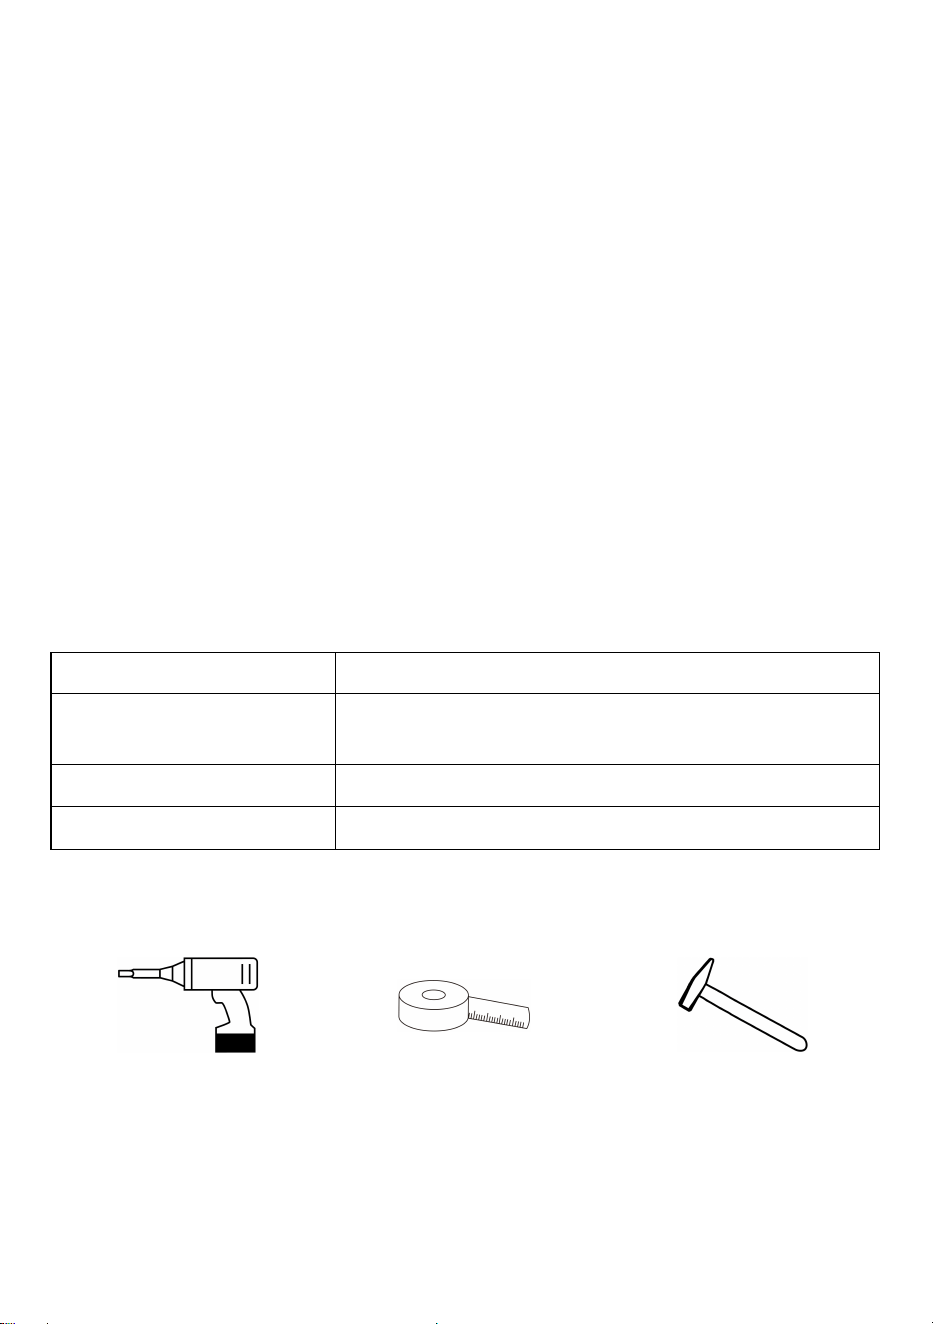
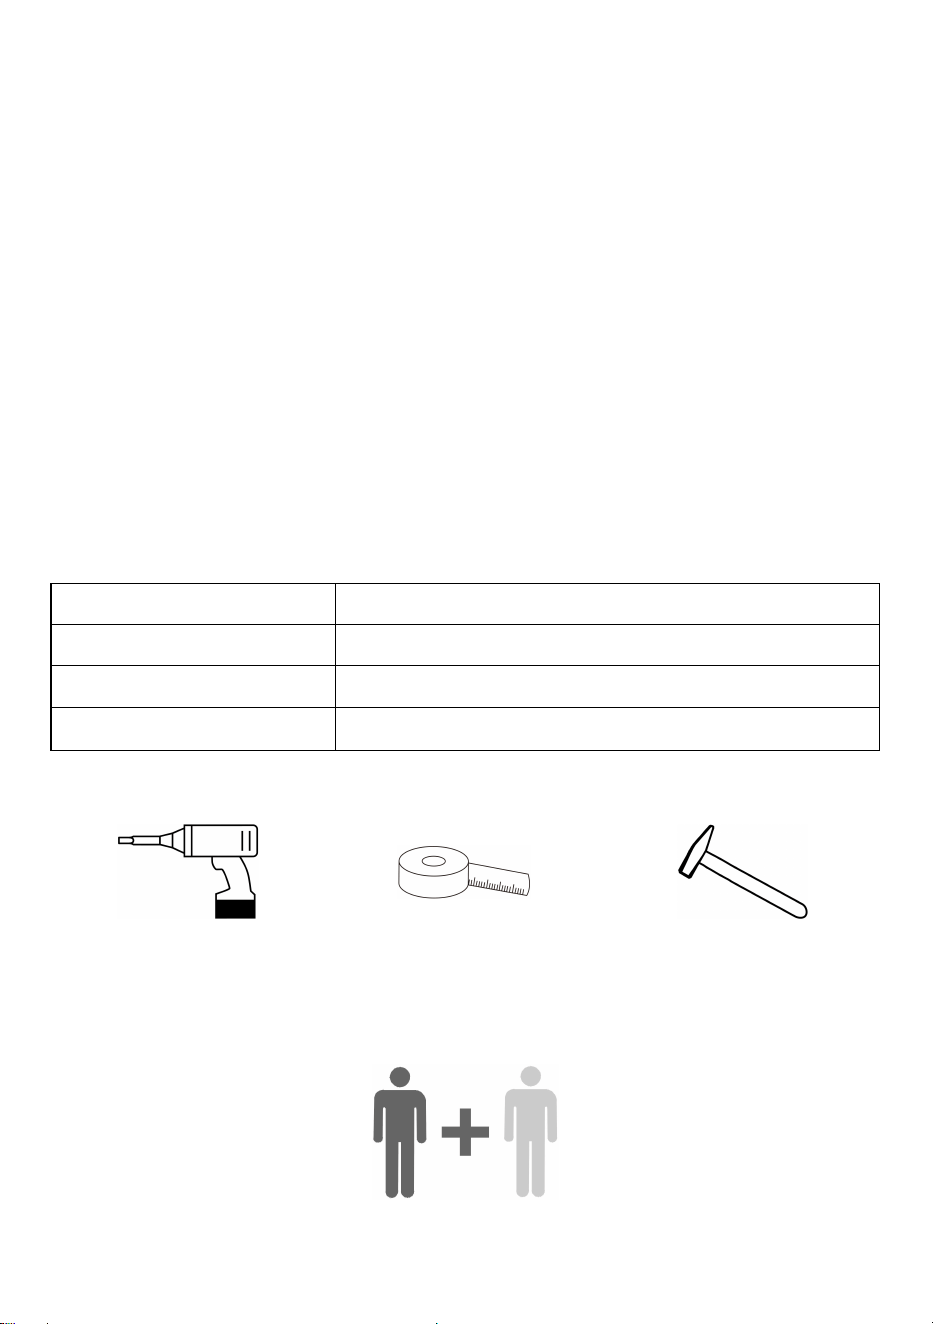
Please prepare the following tools before installation (not included
with the product).
Power screwdriver
Tape
Rubber hammer
/Wooden hammer
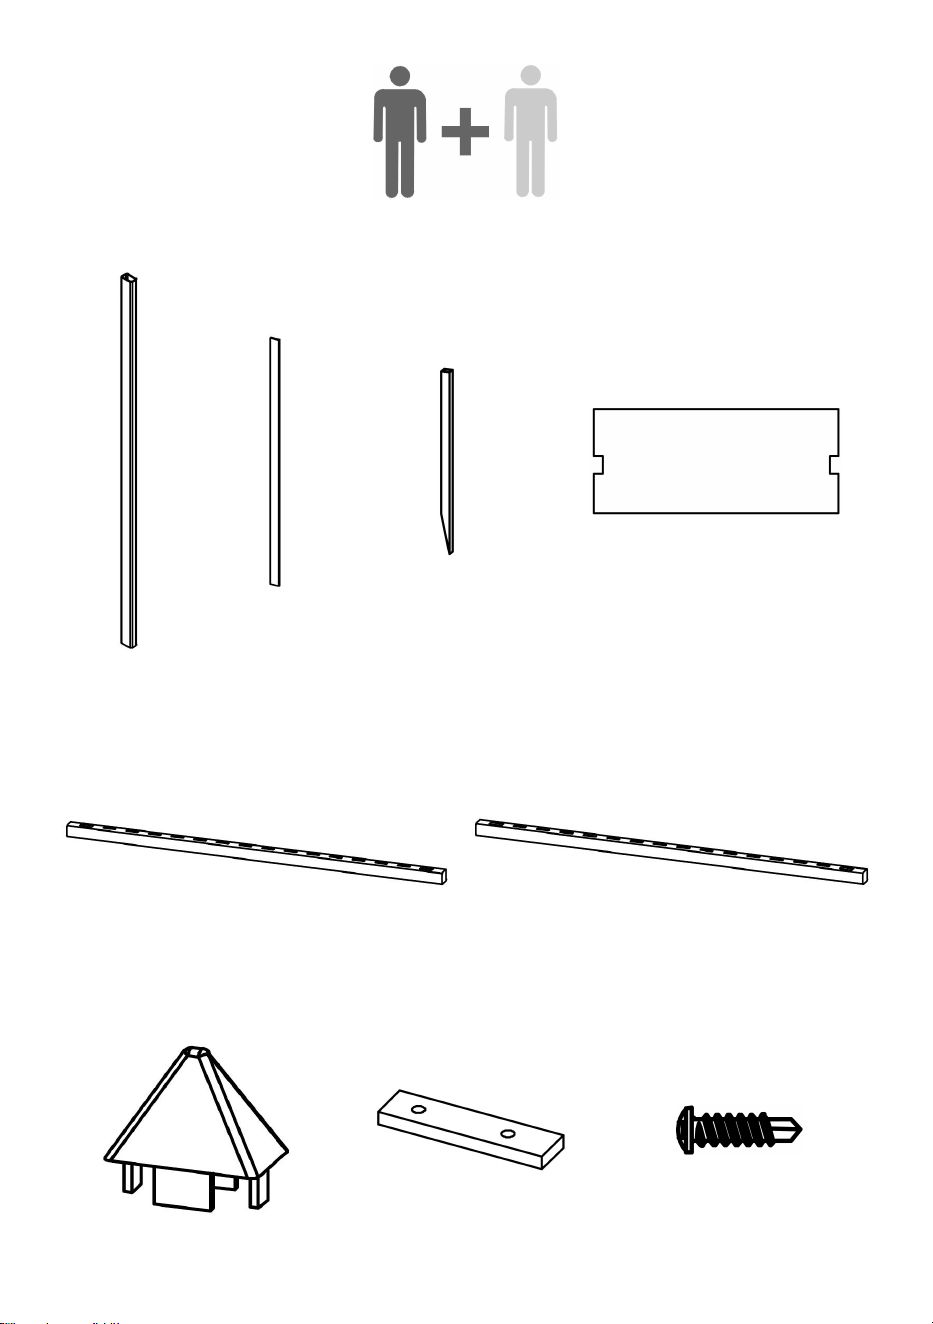
People needed for installation work.
3
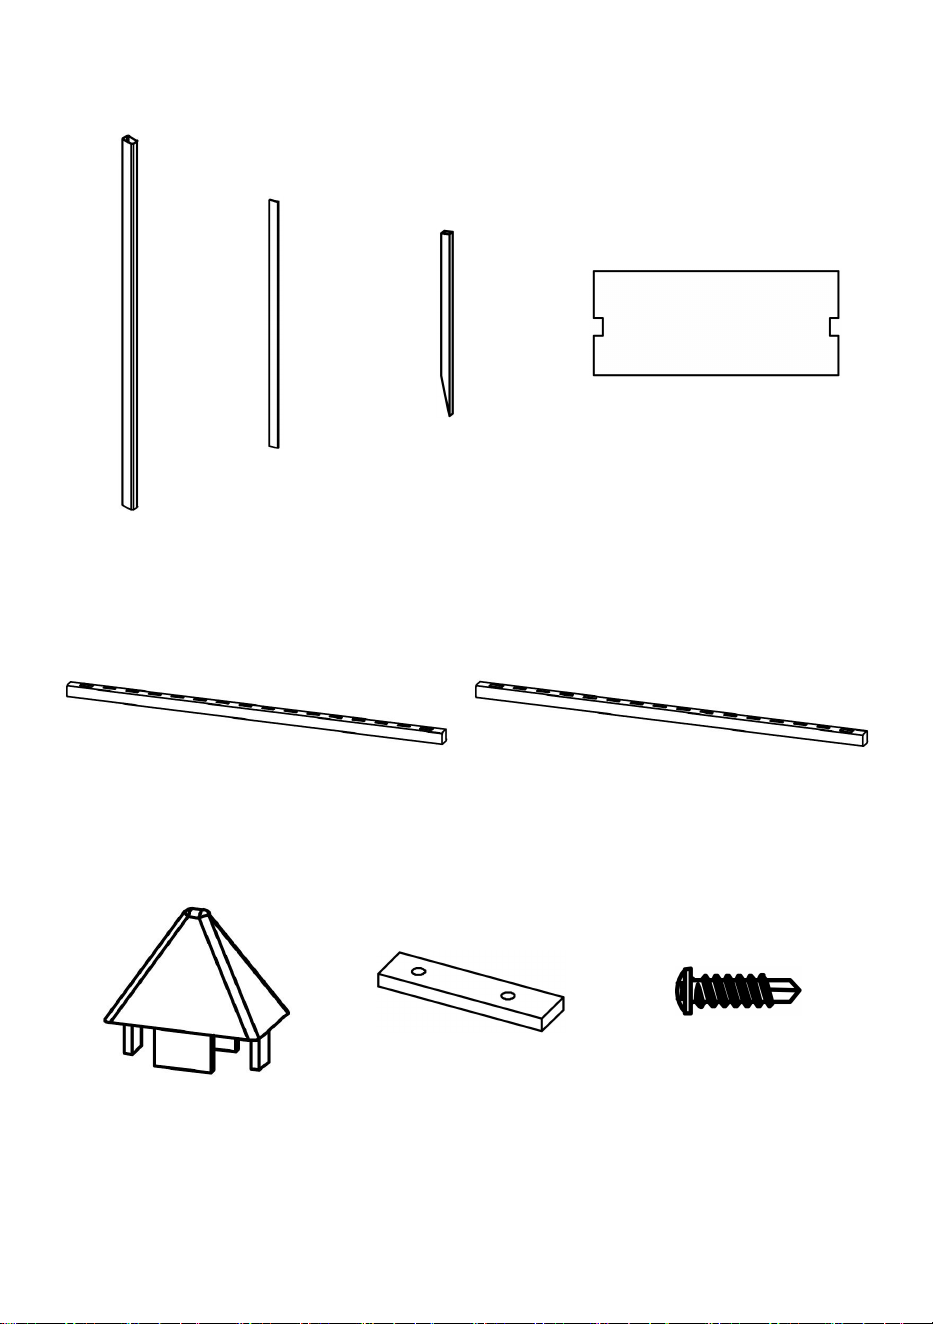
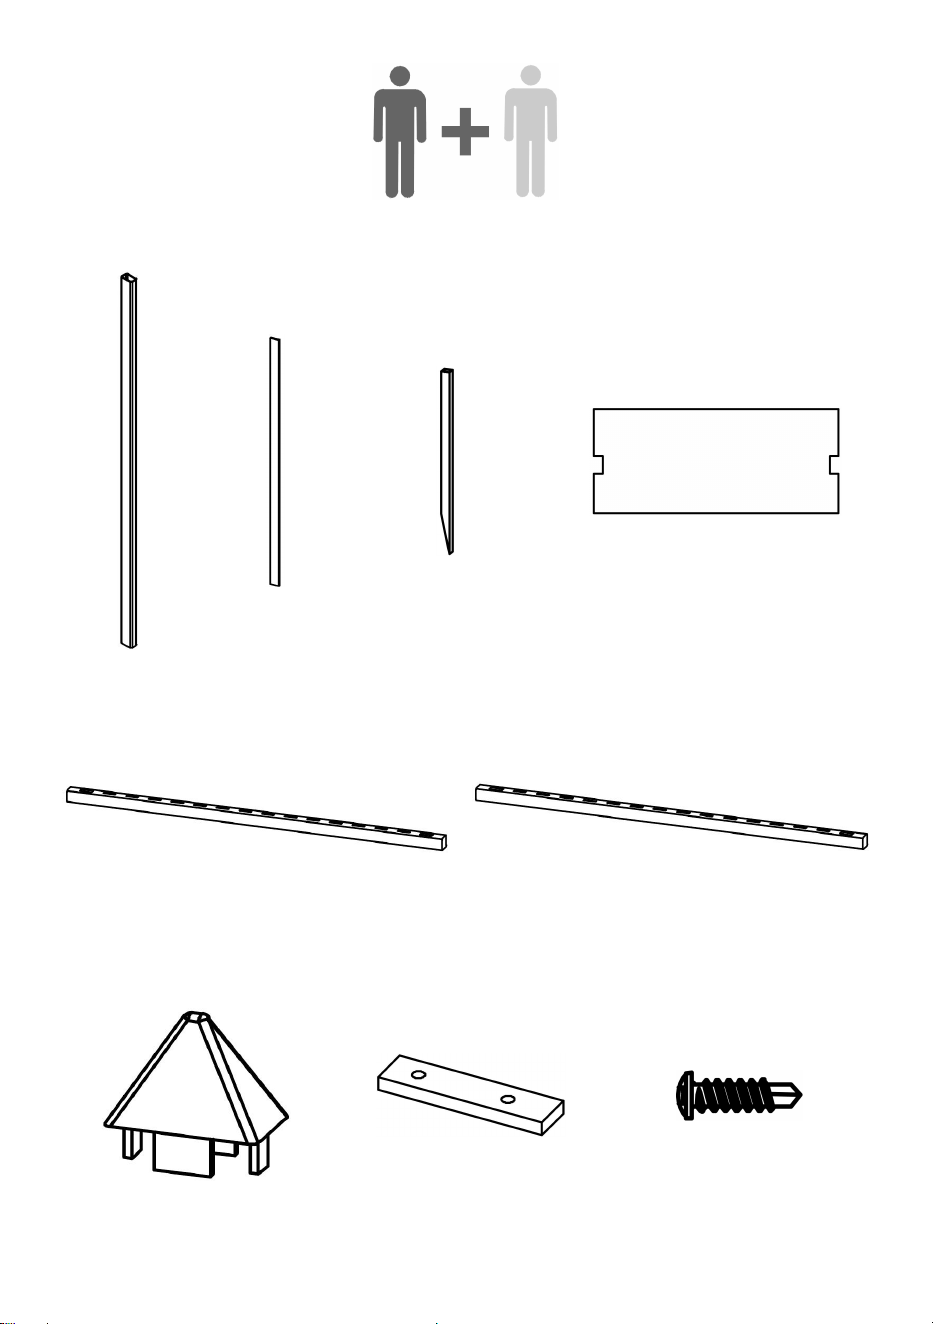
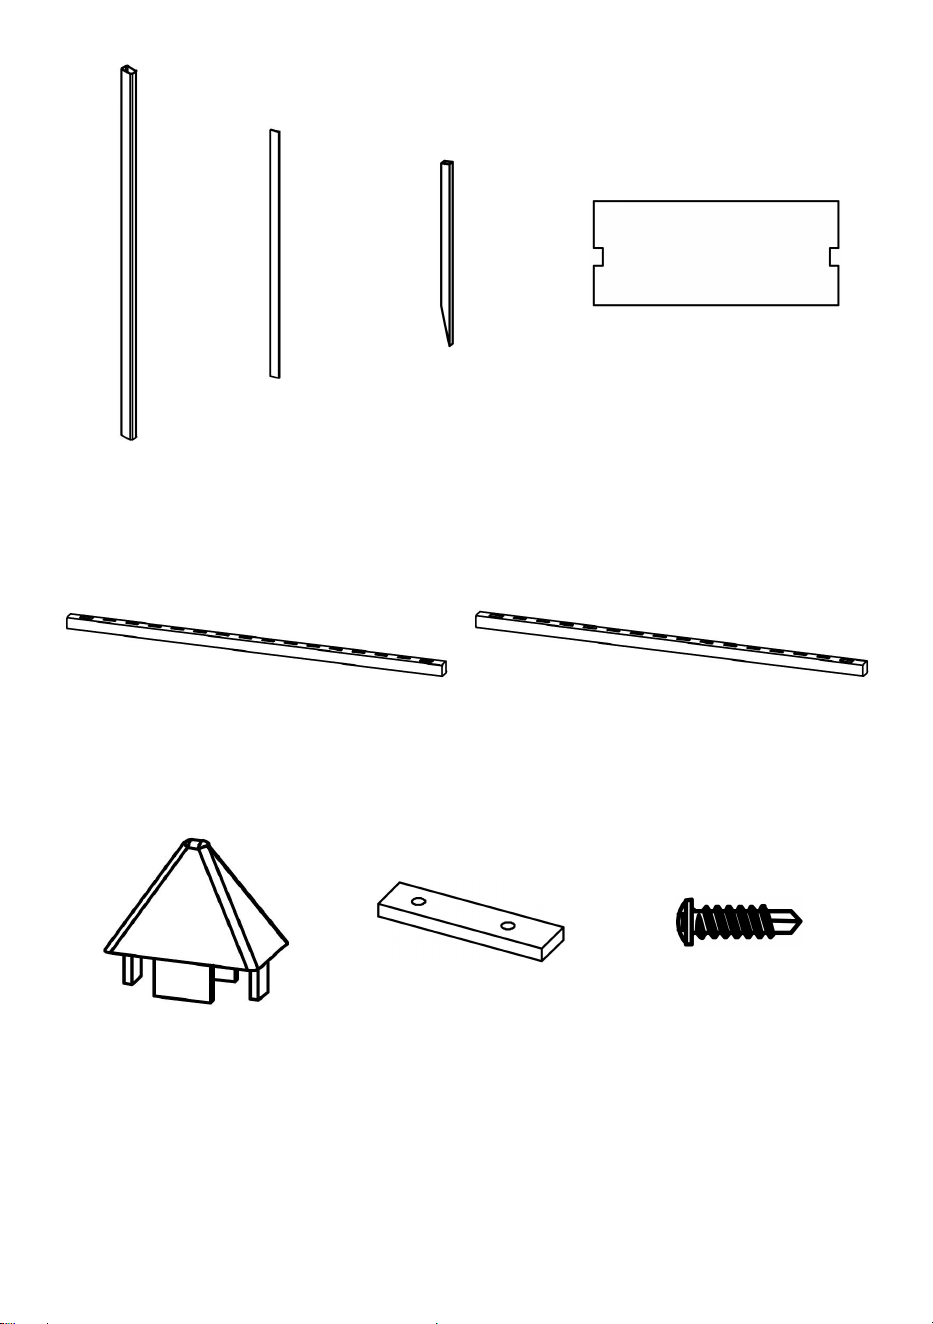
COMPONENTS
○
A
×4
○
B
×28
○
C
×4
○
Y
×1
Post
Spindle
Metal Ground
Stake
Positioned Boards
○
D
×4
○
E
×2
Top&Bottom Rail
Middle Rail
○
F
×4
○
H
×2
○
G
×36
Post Cap
Bracket
Screws
4
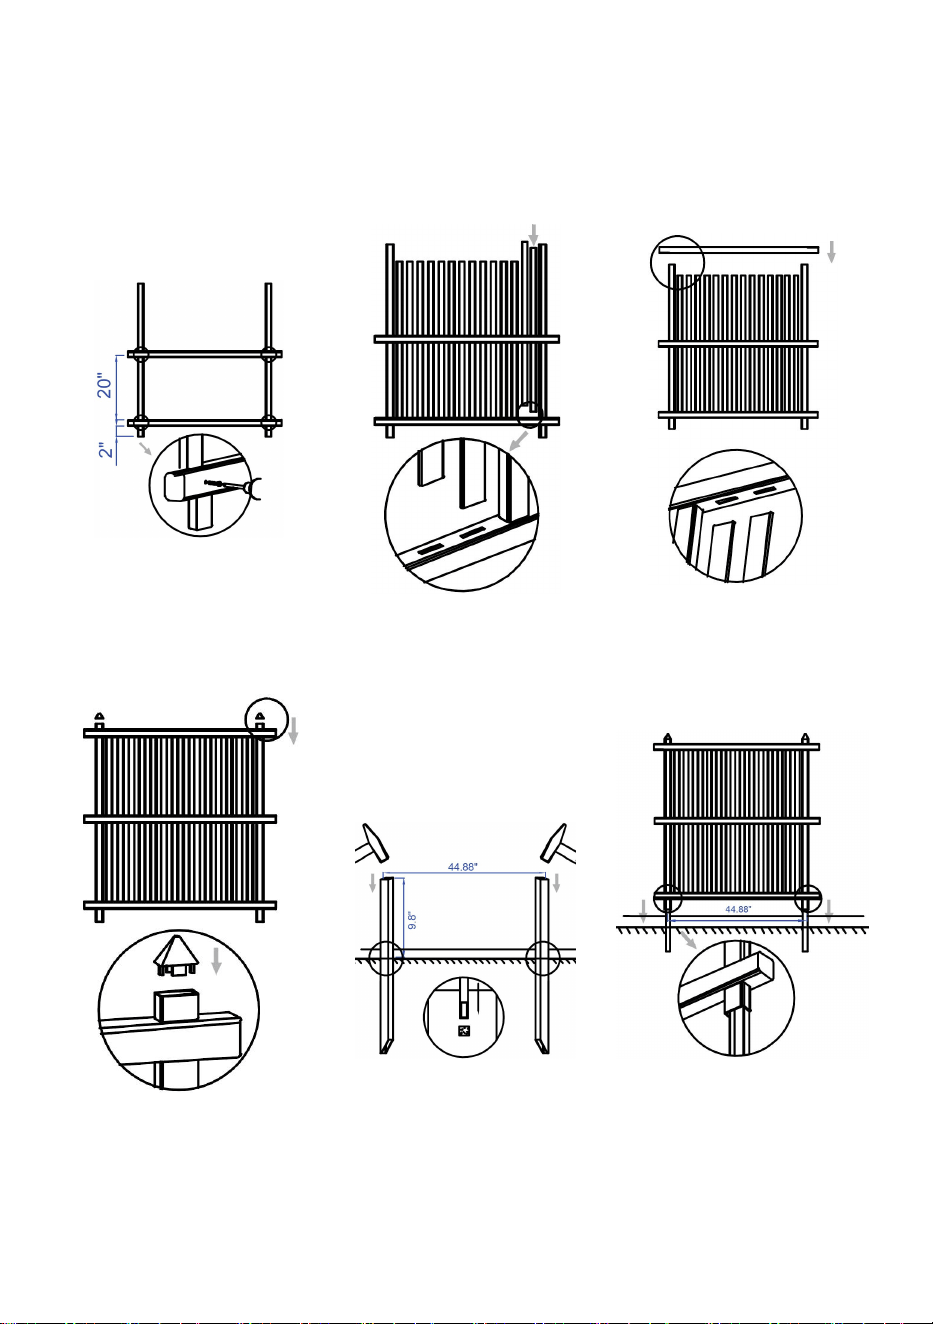
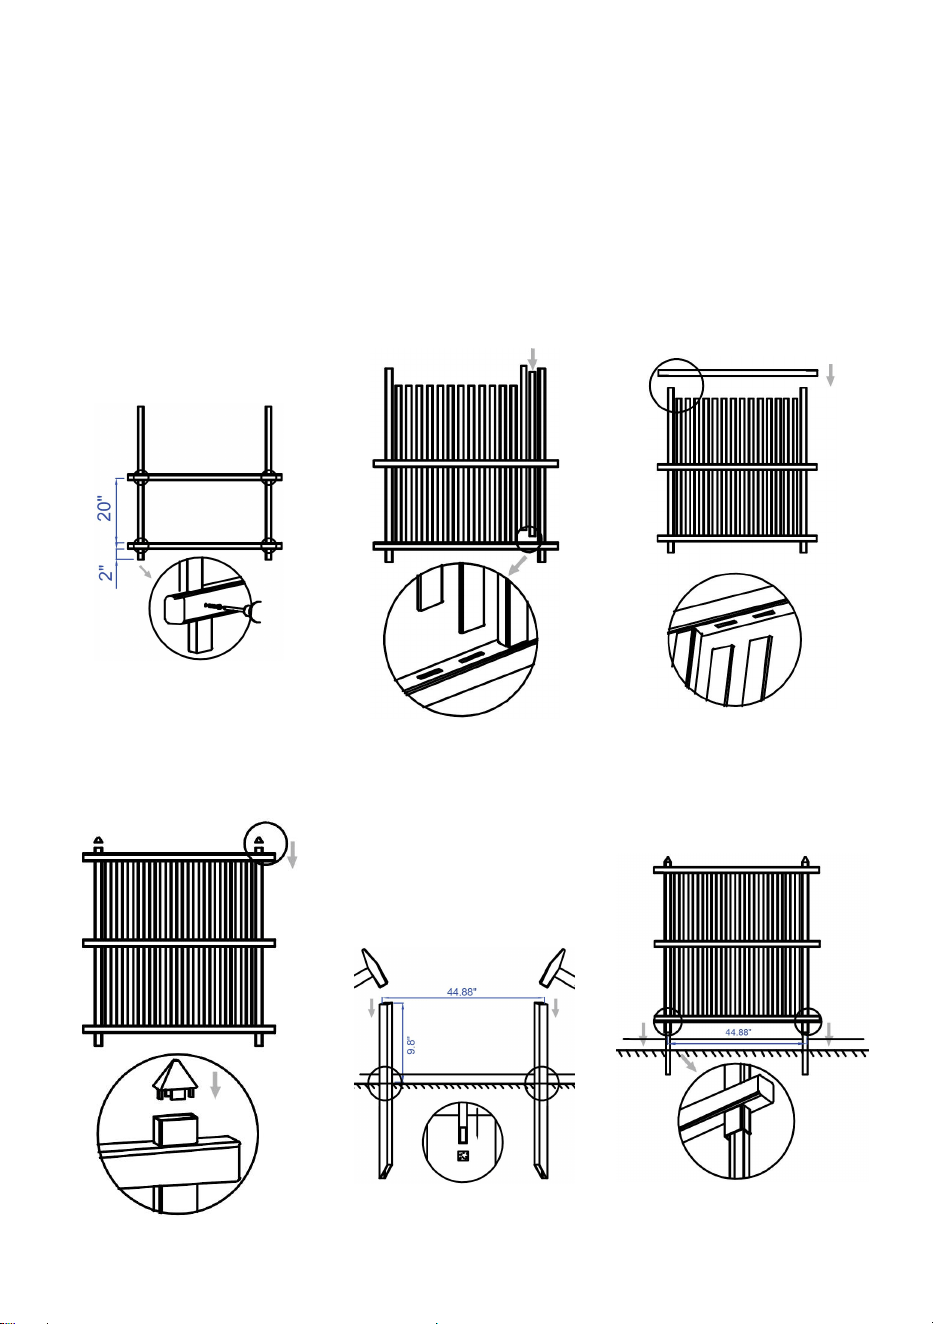
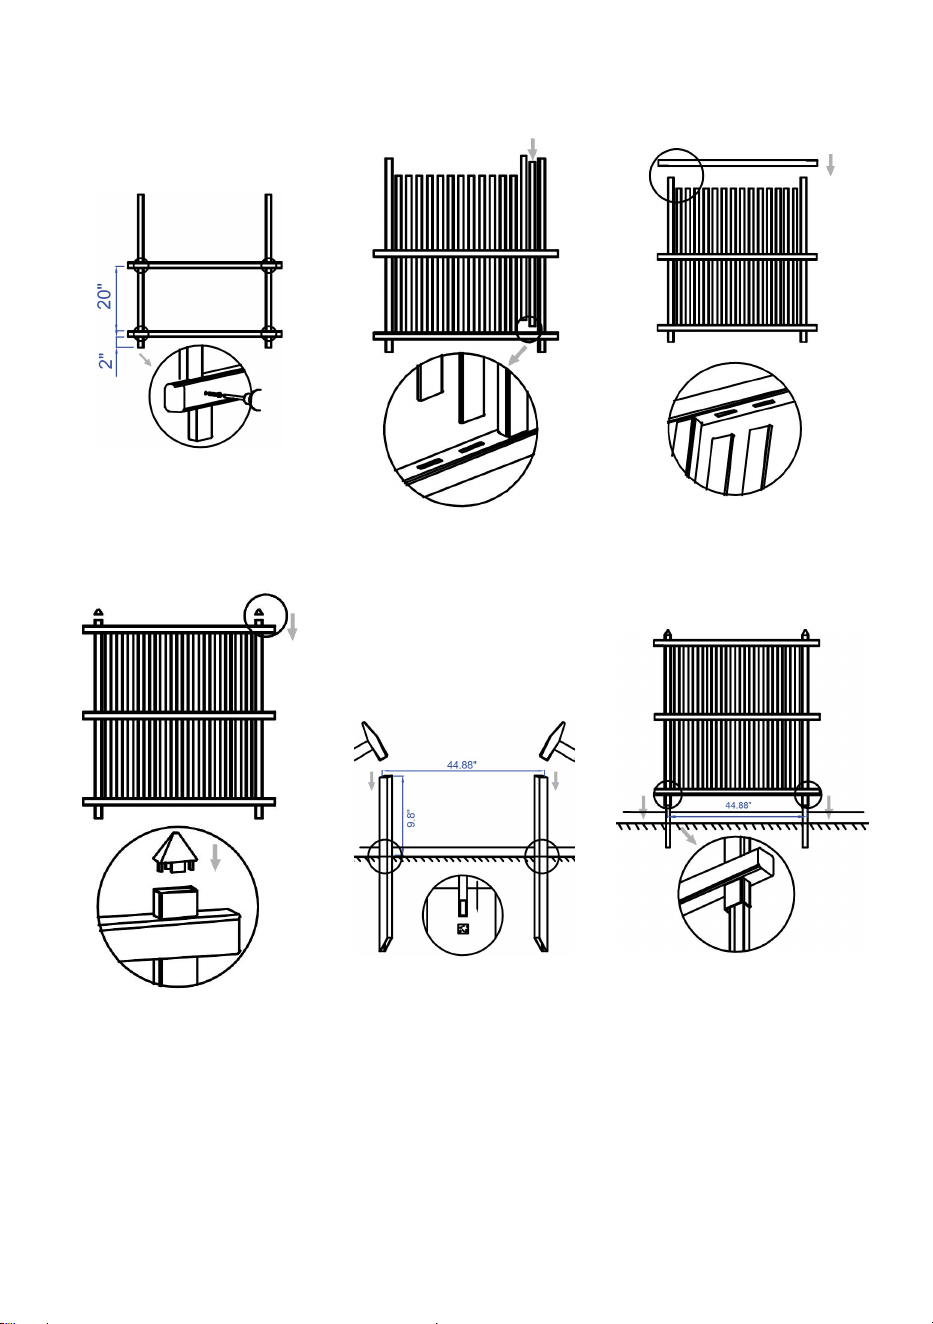
Assembly Instructions :
①
○
A
×2
○
E
×2
○
G
×8
②
○
B
×14
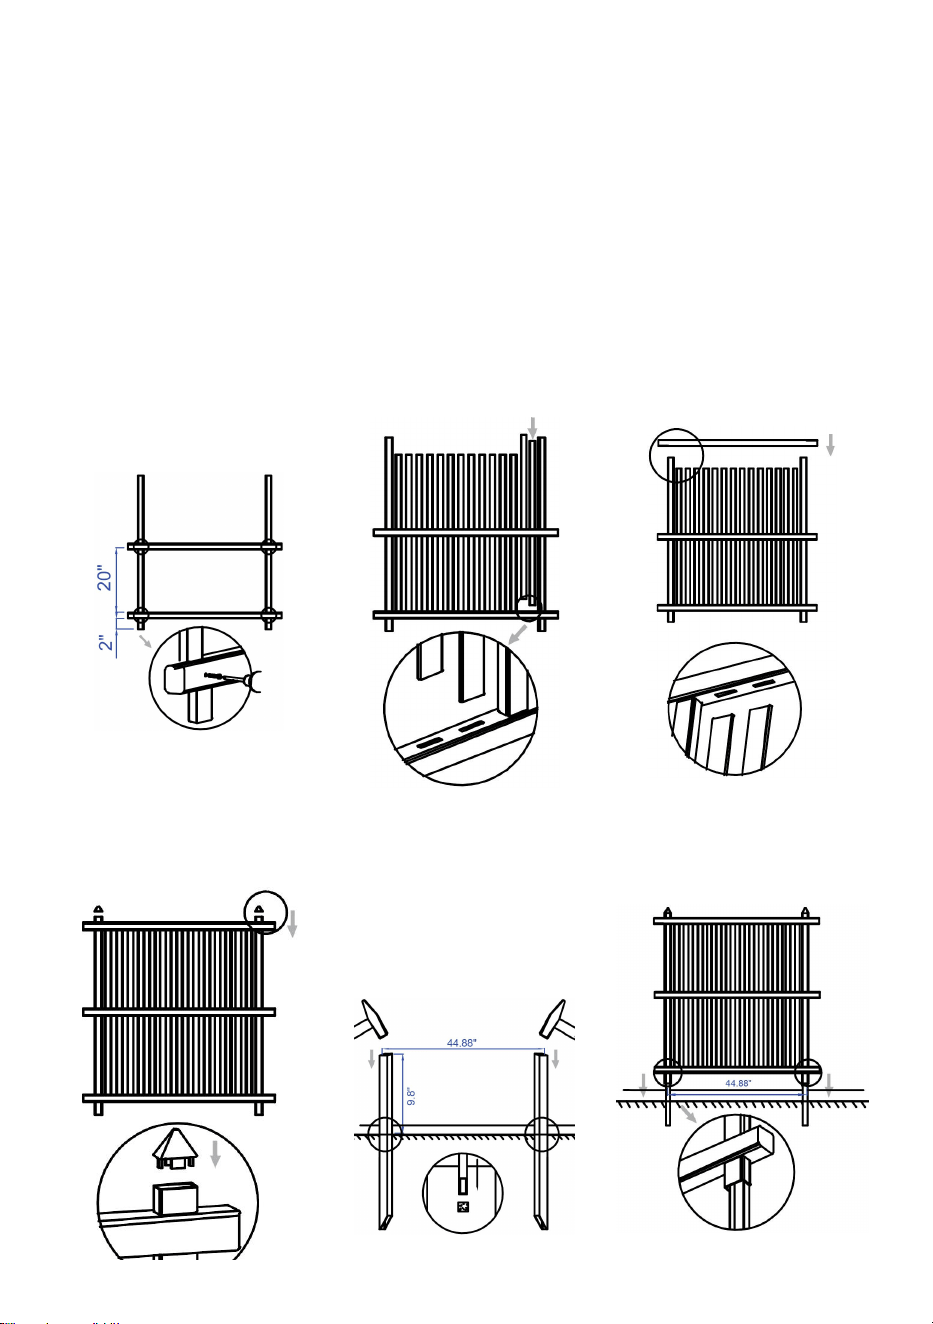
③
○
D
×1
○
G
×4
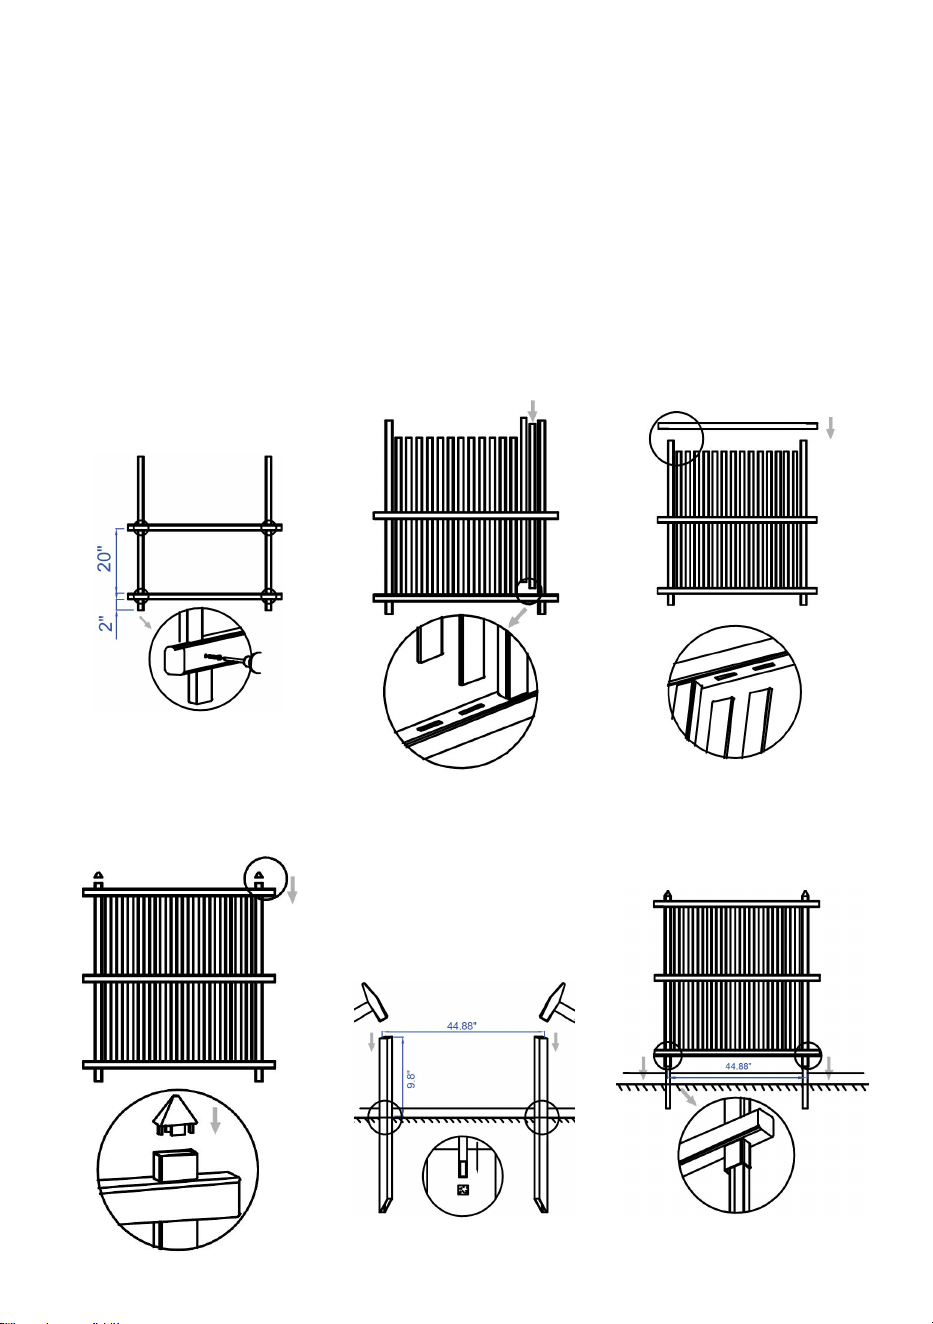
The distance between the
two rails at the bottom is
20".
The distance between the
rail and the post at the
bottom is 2".
④
○
F
×2
⑤
○
C
×2
○
Y
×1
⑥
Length of the metal post
anchors exposed to the
ground is 9.8".
Users can increase the glue
to fixed the post cap to
prevent it from falling.
Interval between metal post
anchors is 44.88",the
interval between metal post
anchors can be determined
with the positioned boards.
5
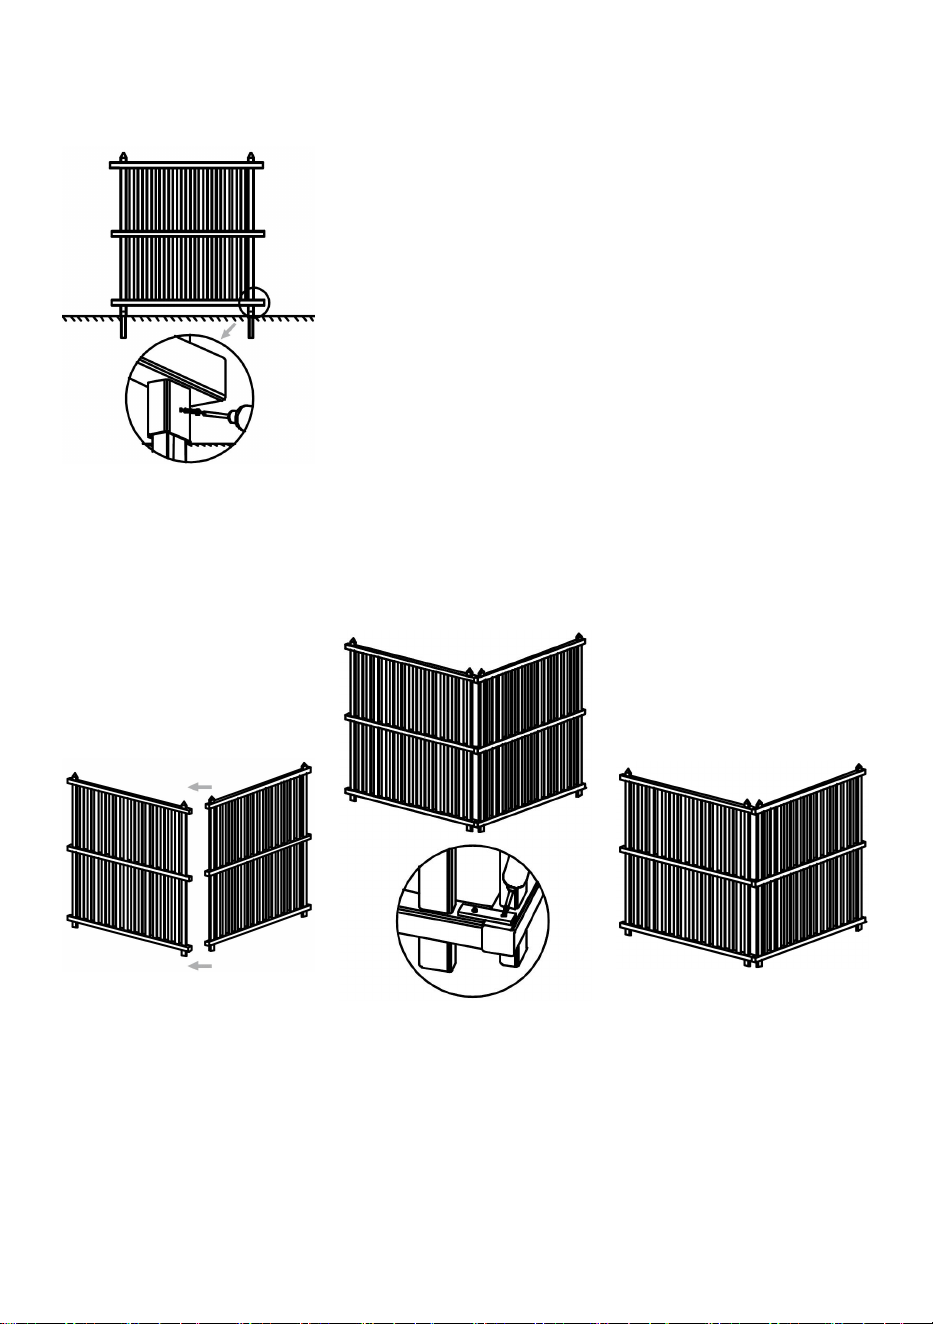
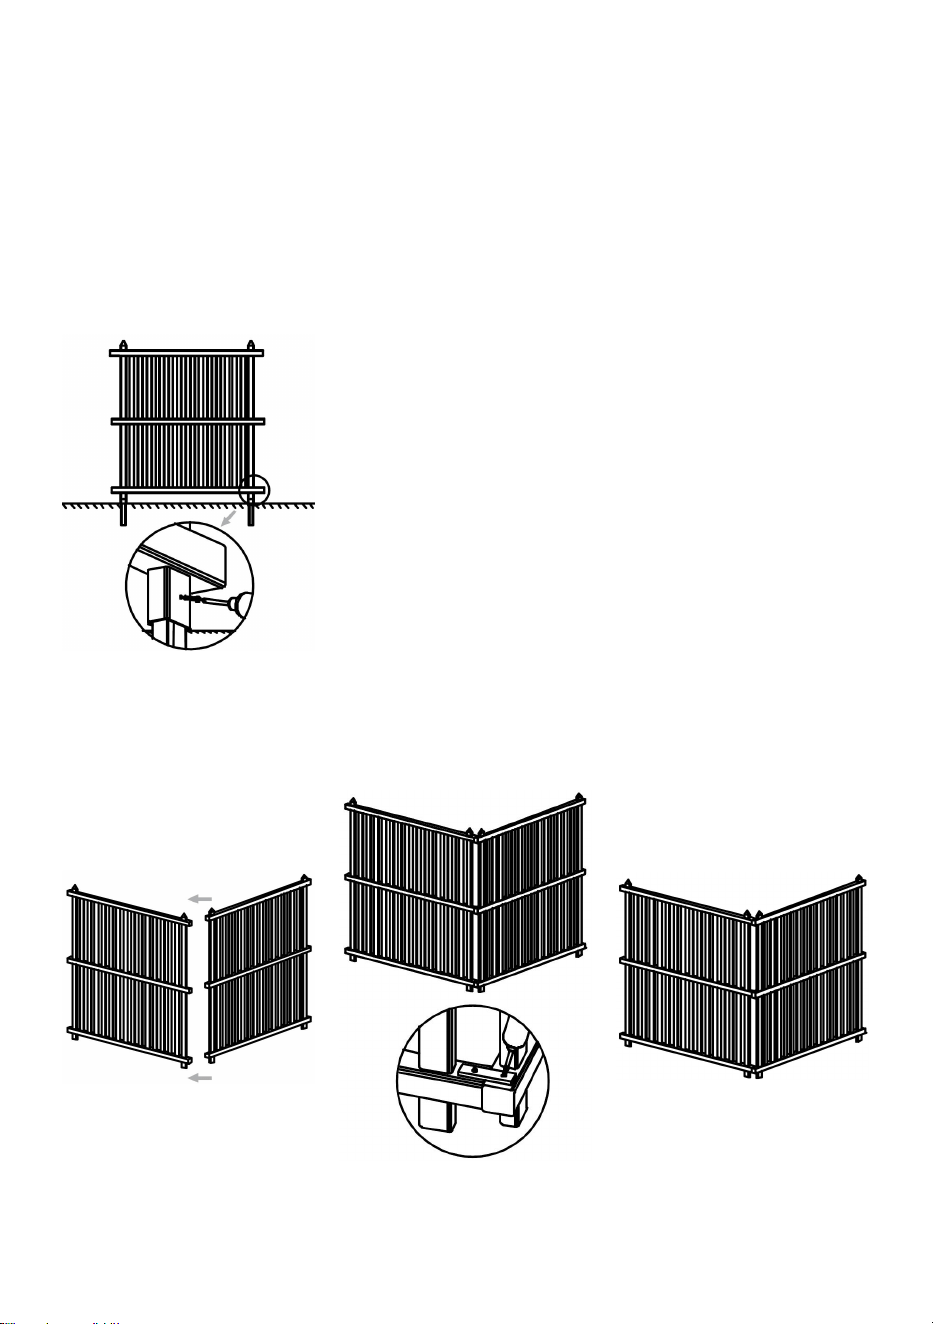
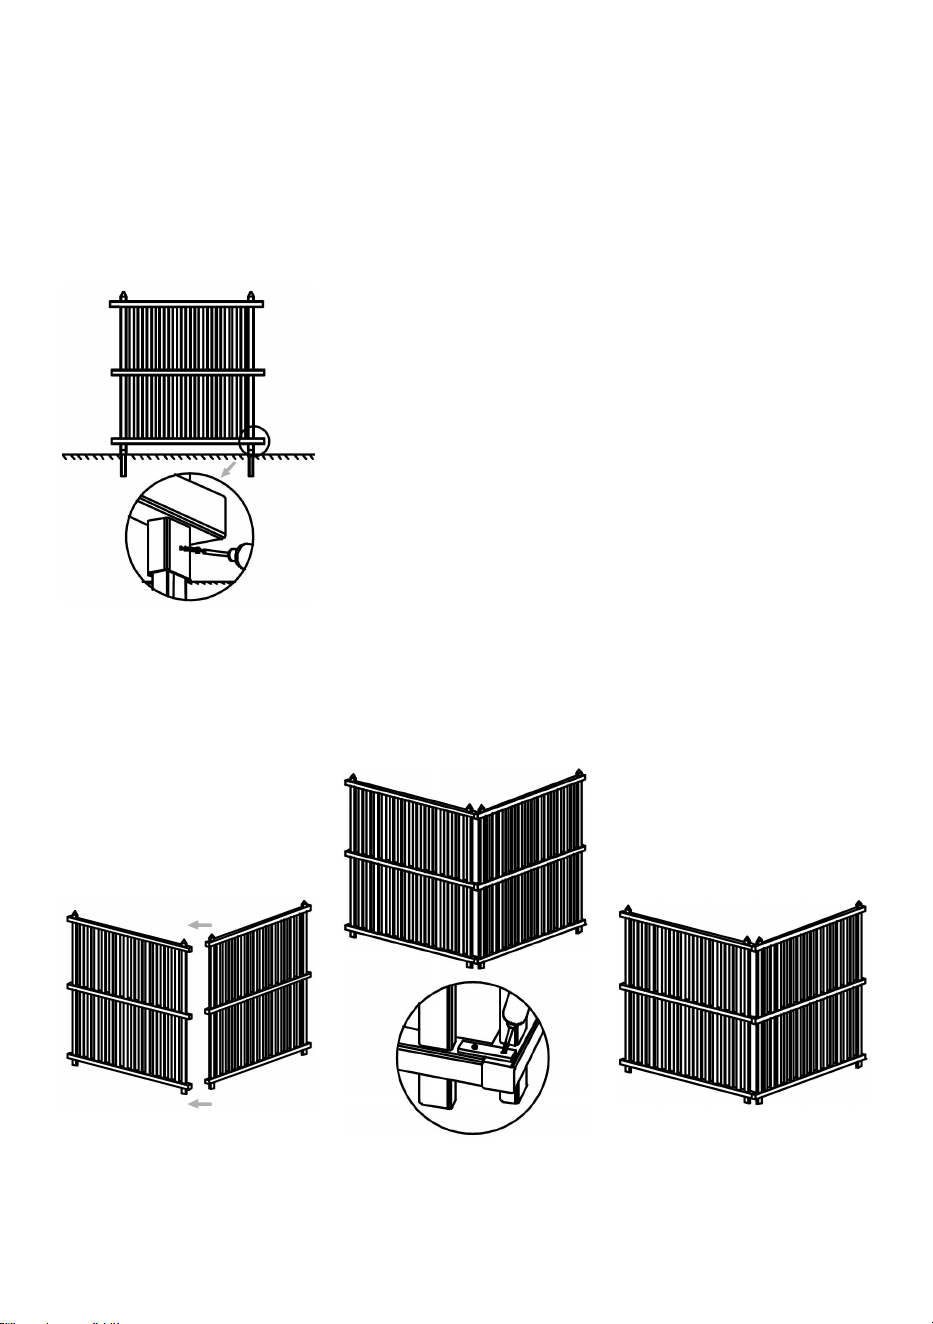
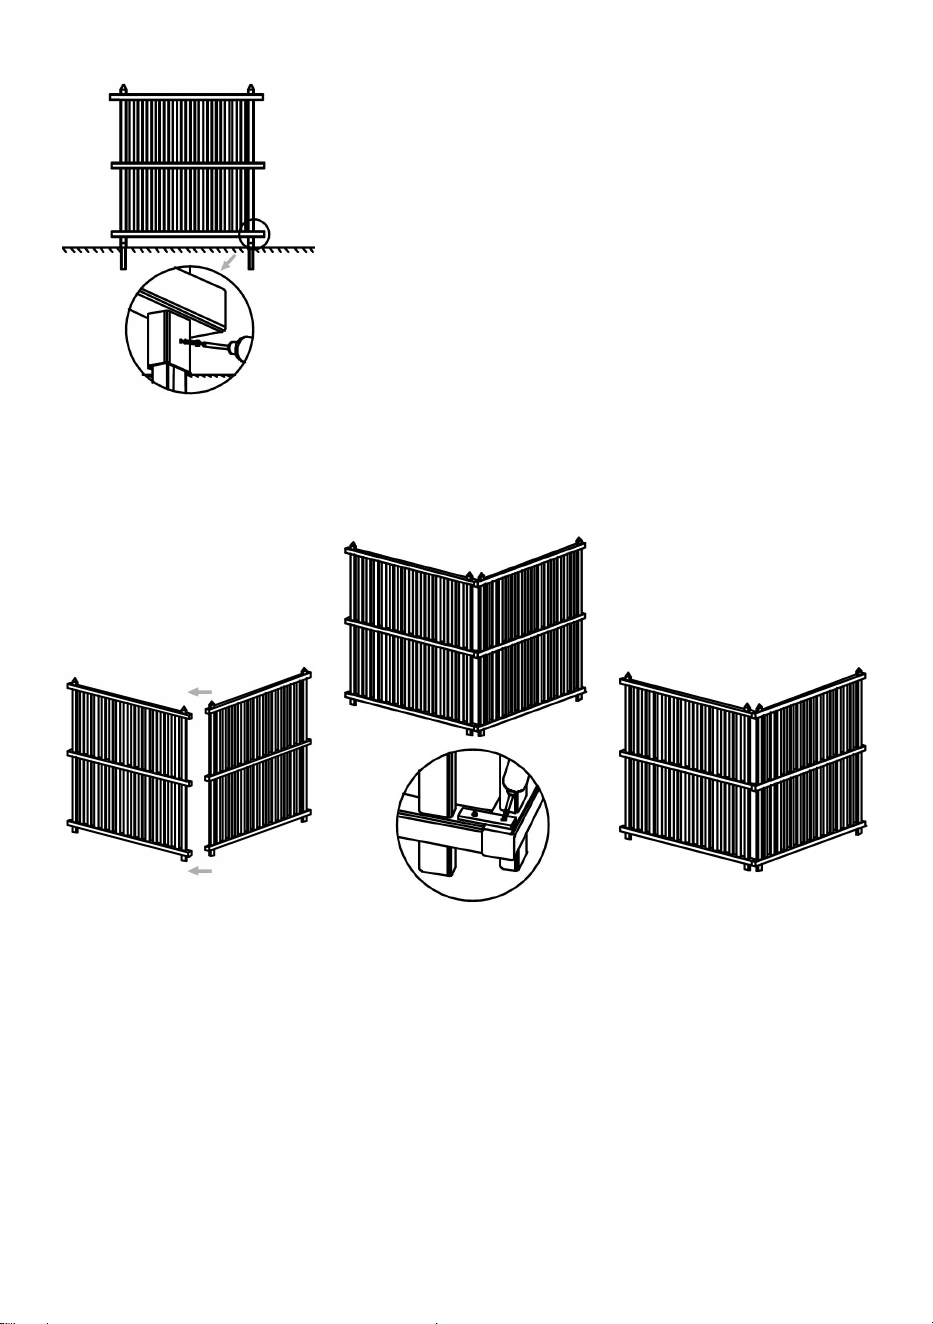
⑦
○
G ×4
Repeat the installation steps of the other fences just
use the provided connecting piece and screw to
connect.
The concave surface of
the ground is facing the
screws.
⑧
⑨
○
H
×2
○
G
×4
Finish installation
Install the brackets on the
top and bottom of the
screen.
6
Address: Baoshanqu Shuangchenglu 803long 11hao 1602A-1609shi Shanghai
Imported to AUS: SIHAO PTY LTD. 1 ROKEVA STREETEASTWOOD NSW 2122 Australia
Imported to USA: Sanven Technology Ltd. Suite 250, 9166 Anaheim Place, Rancho
Cucamonga, CA 91730
Made In China
REP
EC
SHUNSHUN GmbH
Römeräcker 9 Z2021,76351
Linkenheim-Hochstetten,Germany
REP
UK
Pooledas Group Ltd
Unit 5 Albert Edward House, The Pavilions
Preston, United Kingdom


We continue to be committed to provide you tools with competitive price.
"Save Half", "Half Price" or any other similar expressions used by us only represents an
estimate of savings you might benefit from buying certain tools with us compared to the major
top brands and does not necessarily mean to cover all categories of tools offered by us. You
are kindly reminded to verify carefully when you are placing an order with us if you are
actually saving half in comparison with the top major brands.

1
Modèle : 1222 0
Have product questions? Need technical support? Please feel free to
contact us:
Technical Support and E-Warranty Certificate
www.vevor.com/support
NEED HELP? CONTACT US!
This is the original instruction, please read all manual instructions
carefully before operating. VEVOR reserves a clear interpretation of our
user manual. The appearance of the product shall be subject to the
product you received. Please forgive us that we won't inform you again if
there are any technology or software updates on our product.
VINYL PRIVACY FENCE
2
INFORMATION DE SÉCURITÉ
Afin d'assurer votre propre sécurité, veillez à porter des gants
lors de l'assemblage de la clôture . Les pièces métalliques
pourraient avoir des arêtes vives et pourraient être huileuses en
raison du traitement antirouille.
Veuillez garder les enfants éloignés de la clôture lors de son
assemblage pour les protéger.
Des vents forts peuvent endommager le produit, les clôtures doivent
être démontées en cas de conditions météorologiques défavorables.
Assurez-vous de garder une distance suffisante par rapport aux
maisons ainsi qu'aux lignes de gaz et d'électricité pour éviter
d'éventuels dommages. Veuillez vérifier la zone pour les câbles
électriques et les conduites de gaz. Renseignez-vous auprès de
votre autorité locale si nécessaire.
CARACTÉRISTIQUES
Modèle
1222 0
Taille de la clôture simple
48 × 48 pouces
Nombre de clôture
2
Couleur
Blanc
Veuillez préparer les outils suivants avant l'installation (non inclus
avec le produit).
Tournevis électrique
Ruban adhésif
Marteau en caoutchouc
/Marteau en bois
Personnes nécessaires pour les travaux d'installation.

3
COMPOSANTS
○
A
×4
○
B
×28
○
C
×4
○
Y
×1
Poste
Broche
Piquet de terre en
métal
Tableaux positionnés
○
D
×4
○
E
×2
Rail supérieur et inférieur
Rail intermédiaire
4
○
F
×4
○
H
×2
○
G
×36
Capuchon de poteau
Support
Des vis
Instructions de montage :
①
○
A
× 2
○
E
× 2
○
G
× 8
②
○
B
× 14
③
○
D
× 1
○
G
× 4
La distance entre les deux
rails du bas est de 20" .
La distance entre le rail et le
poteau en bas est de 2" .
④
○
F
×2
⑤
○
C
×2
○
Y
×1
⑥
La longueur des ancrages
de poteaux métalliques
exposés au sol est de 9,8" .
5
Les utilisateurs peuvent
augmenter la colle pour fixer
le capuchon du poteau afin
d'éviter qu'il ne tombe.
L'intervalle entre les
ancrages de poteaux
métalliques est de 44,88 " ,
l'intervalle entre les
ancrages de poteaux
métalliques peut être
déterminé avec les planches
positionnées.
⑦
○
G
×4
Répétez les étapes d'installation des autres clôtures,
utilisez simplement la pièce de connexion et la vis
fournies pour vous connecter.
La surface concave du
sol fait face aux vis.
⑧
⑨
○
H
×2
○
G
×4
Terminer l'installation

6
Installez les supports en
haut et en bas de l'écran.
Adresse : Baoshanqu Shuangchenglu 803long 11hao 1602A-1609shi Shanghai
Importé en Australie : SIHAO PTY LTD . 1 ROKEVA STREETASTWOOD NSW 2122
Australie
Importé aux États-Unis : Sanven Technology Ltd. Bureau 250, 9166 Anaheim Place,
Rancho Cucamonga, CA 91730
Fabriqué en Chine
REP
EC
SHUNSHUN GmbH
Römeräcker 9 Z2021,76351
Linkenheim-Hochstetten,Germany
REP
UK
Pooledas Group Ltd
Unit 5 Albert Edward House, The Pavilions
Preston, United Kingdom

7


We continue to be committed to provide you tools with competitive price.
"Save Half", "Half Price" or any other similar expressions used by us only represents an
estimate of savings you might benefit from buying certain tools with us compared to the major
top brands and does not necessarily mean to cover all categories of tools offered by us. You
are kindly reminded to verify carefully when you are placing an order with us if you are
actually saving half in comparison with the top major brands.

1
Modell: 1222 0
Have product questions? Need technical support? Please feel free to
contact us:
Technical Support and E-Warranty Certificate
www.vevor.com/support
NEED HELP? CONTACT US!
This is the original instruction, please read all manual instructions
carefully before operating. VEVOR reserves a clear interpretation of our
user manual. The appearance of the product shall be subject to the
product you received. Please forgive us that we won't inform you again if
there are any technology or software updates on our product.
VINYL PRIVACY FENCE

2
SICHERHEITSINFORMATION
Um Ihre eigene Sicherheit zu gewährleisten, achten Sie bitte darauf,
Handschuhe zu tragen
beim Zusammenbau des Zauns . Die Metallteile könnten scharfe
Kanten haben und aufgrund einer Rostschutzbehandlung ölig sein.
Bitte halten Sie Kinder beim Aufbau vom Zaun fern, um sie zu
schützen.
Starke Winde können das Produkt beschädigen. Zäune sollten bei
ungünstigen Wetterbedingungen abgebaut werden.
Achten Sie darauf, ausreichend Abstand zu Häusern sowie Gas-
und Stromleitungen einzuhalten, um mögliche Schäden zu
vermeiden. Bitte überprüfen Sie den Bereich auf Stromkabel und
Gasleitungen. Fragen Sie bei Bedarf Ihre örtliche Behörde nach
weiteren Informationen.
SPEZIFIKATIONEN
Modell
1222 0
Größe eines einzelnen
Zauns
48×48 Zoll
Anzahl der Zäune
2
Farbe
Weiß
Bitte bereiten Sie vor der Installation die folgenden Werkzeuge vor
(nicht im Produkt enthalten).
Akkuschrauber
Band
Gummihammer
/Holzhammer
Für Montagearbeiten werden Personen benötigt.

3
KOMPONENTEN
○
A
×4
○
B
×28
○
C
×4
○
Y
×1
Post
Spindel
Erdspieß aus
Metall
Positionierte Bretter
○
D
×4
○
E
×2
Obere und untere Schiene
Mittelschiene
4
○
F
×4
○
H
×2
○
G
×36
Beitragskappe
Halterung
Schrauben
Montageanleitung :
①
○
A
× 2
○
E
× 2
○
G
×8
②
○
B
× 14
③
○
D
× 1
○
G
× 4
Der Abstand zwischen den
beiden Schienen unten
beträgt 20 Zoll .
Der Abstand zwischen der
Schiene und dem Pfosten
unten beträgt 2 Zoll .
④
○
F
×2
⑤
○
C
×2
○
Y
×1
⑥
Die Länge der
Metallpfostenanker, die dem
Boden ausgesetzt sind,
beträgt 9,8 Zoll .

5
Benutzer können den Kleber
erhöhen, um die
Pfostenkappe zu fixieren
und ein Herunterfallen zu
verhindern .
Der Abstand zwischen den
Metallpfostenankern beträgt
44,88 Zoll . Der Abstand
zwischen den
Metallpfostenankern kann
anhand der positionierten
Bretter bestimmt werden.
⑦
○
G
×4
Wiederholen Sie die Installationsschritte der anderen
Zäune. Verwenden Sie zum Verbinden einfach das
mitgelieferte Verbindungsstück und die Schraube.
Die konkave Oberfläche
des Bodens ist den
Schrauben zugewandt.
⑧
⑨
○
H
×2
○
G
×4
Beenden Sie die Installation
6
Bringen Sie die
Halterungen oben und
unten am Bildschirm an.
Adresse: Baoshanqu Shuangchenglu 803long 11hao 1602A-1609shi Shanghai
Importiert nach AUS: SIHAO PTY LTD . 1 ROKEVA STREETEASTWOOD NSW 2122
Australien
Importiert in die USA: Sanven Technology Ltd. Suite 250, 9166 Anaheim Place, Rancho
Cucamonga, CA 91730
In China hergestellt
REP
EC
SHUNSHUN GmbH
Römeräcker 9 Z2021,76351
Linkenheim-Hochstetten,Germany
REP
UK
Pooledas Group Ltd
Unit 5 Albert Edward House, The Pavilions
Preston, United Kingdom

7


We continue to be committed to provide you tools with competitive price.
"Save Half", "Half Price" or any other similar expressions used by us only represents an
estimate of savings you might benefit from buying certain tools with us compared to the major
top brands and does not necessarily mean to cover all categories of tools offered by us. You
are kindly reminded to verify carefully when you are placing an order with us if you are
actually saving half in comparison with the top major brands.

1
Modello : 12220
Have product questions? Need technical support? Please feel free to
contact us:
Technical Support and E-Warranty Certificate
www.vevor.com/support
NEED HELP? CONTACT US!
This is the original instruction, please read all manual instructions
carefully before operating. VEVOR reserves a clear interpretation of our
user manual. The appearance of the product shall be subject to the
product you received. Please forgive us that we won't inform you again if
there are any technology or software updates on our product.
VINYL PRIVACY FENCE
2
INFORMAZIONI SULLA SICUREZZA
Per garantire la vostra sicurezza, assicuratevi di indossare i guanti
durante il montaggio della recinzione . Le parti metalliche potrebbero
presentare spigoli vivi e risultare unte a causa del trattamento
antiruggine.
Si prega di tenere i bambini lontani dalla recinzione durante il
montaggio per proteggerli.
Forti venti possono danneggiare il prodotto, le recinzioni devono
essere smontate in condizioni meteorologiche avverse.
Assicurati di mantenere una distanza sufficiente dalle case e dalle
linee del gas e dell'elettricità per evitare possibili danni. Si prega di
controllare l'area per cavi elettrici e linee del gas. Se necessario,
chiedi alla tua autorità locale ulteriori informazioni.
SPECIFICHE
Modello
12220 _
Dimensioni della
recinzione singola
48×48 pollici
Numero di recinzione
2
Colore
Bianco
Si prega di preparare i seguenti strumenti prima dell'installazione
(non inclusi con il prodotto).
Cacciavite elettrico
Nastro
Martello di gomma
/Martello di legno
Persone necessarie per i lavori di installazione.

3
COMPONENTI
○
A
×4
○
B
×28
○
C
×4
○
Y
×1
Inviare
Mandrino
Paletto da terra in
metallo
Schede posizionate
○
D
×4
○
E
×2
Binario superiore e inferiore
Binario centrale

4
○
F
×4
○
H
×2
○
G
×36
Tappo postale
Staffa
Viti
Istruzioni di montaggio :
①
○
A
× 2
○
E
× 2
○
G
×8
②
○
B
× 14
③
○
D
× 1
○
G
× 4
La distanza tra i due binari
nella parte inferiore è di 20
pollici .
La distanza tra il binario e il
palo nella parte inferiore è di
2 pollici .
④
○
F
×2
⑤
○
C
×2
○
Y
×1
⑥
La lunghezza degli
ancoraggi dei pali metallici
esposti al suolo è di 9,8
pollici .
5
Gli utenti possono
aumentare la colla per
fissare il tappo del palo per
evitare che cada.
L'intervallo tra gli ancoraggi
dei pali metallici è 44,88 " ,
l'intervallo tra gli ancoraggi
dei pali metallici può essere
determinato con le tavole
posizionate.
⑦
○
G
×4
Ripetere i passaggi di installazione delle altre
recinzioni, utilizzare semplicemente il pezzo di
collegamento e la vite forniti per collegarli.
La superficie concava del
terreno è rivolta verso le
viti.
⑧
⑨
○
H
×2
○
G
×4
Termina l'installazione
Installare le staffe sulla
parte superiore e inferiore
dello schermo.

6
Indirizzo: Baoshanqu Shuangchenglu 803long 11hao 1602A-1609shi Shanghai
Importato in AUS: SIHAO PTY LTD . 1 ROKEVA STREETEASTWOOD NSW 2122
Australia
Importato negli Stati Uniti: Sanven Technology Ltd. Suite 250, 9166 Anaheim Place,
Rancho Cucamonga, CA 91730
Made in China
REP
EC
SHUNSHUN GmbH
Römeräcker 9 Z2021,76351
Linkenheim-Hochstetten,Germany
REP
UK
Pooledas Group Ltd
Unit 5 Albert Edward House, The Pavilions
Preston, United Kingdom

7


We continue to be committed to provide you tools with competitive price.
"Save Half", "Half Price" or any other similar expressions used by us only represents an
estimate of savings you might benefit from buying certain tools with us compared to the major
top brands and does not necessarily mean to cover all categories of tools offered by us. You
are kindly reminded to verify carefully when you are placing an order with us if you are
actually saving half in comparison with the top major brands.

1
Modelo: 1222 0
Have product questions? Need technical support? Please feel free to
contact us:
Technical Support and E-Warranty Certificate
www.vevor.com/support
NEED HELP? CONTACT US!
This is the original instruction, please read all manual instructions
carefully before operating. VEVOR reserves a clear interpretation of our
user manual. The appearance of the product shall be subject to the
product you received. Please forgive us that we won't inform you again if
there are any technology or software updates on our product.
VINYL PRIVACY FENCE
2
INFORMACIÓN DE SEGURIDAD
Para garantizar su propia seguridad, asegúrese de usar guantes.
mientras monta la cerca . Las piezas metálicas pueden tener bordes
afilados y estar aceitosas debido al tratamiento de prevención de
oxidación.
Mantenga a los niños alejados de la cerca mientras la ensambla
para protegerlos.
Los vientos fuertes pueden dañar el producto; las vallas deben
desmontarse en condiciones climáticas adversas.
Asegúrese de mantener una distancia suficiente con las casas, así
como con las líneas de gas y electricidad para evitar posibles daños.
Verifique el área en busca de cables de alimentación y líneas de gas.
Solicite más información a su autoridad local si es necesario.
ESPECIFICACIONES
Modelo
1222 0
Tamaño de valla única
48×48 pulgadas
Número de valla
2
Color
Blanco
Prepare las siguientes herramientas antes de la instalación (no
incluidas con el producto).
Destornillador eléctrico
Cinta
Martillo de goma
/Martillo de madera
Se necesita gente para trabajos de instalación.

3
COMPONENTES
○
A
×4
○
B
×28
○
C
×4
○
Y
×1
Correo
Huso
Estaca metálica
para el suelo
Tableros posicionados
○
D
×4
○
E
×2
Riel superior e inferior
Riel medio

4
○
F
×4
○
H
×2
○
G
×36
Tapa de poste
Soporte
Tornillos
Instrucciones de montaje :
①
○
A
× 2
○
E
× 2
○
G
×8
②
○
B
× 14
③
○
D
× 1
○
G
× 4
La distancia entre los dos
rieles en la parte inferior es
de 20" .
La distancia entre el riel y el
poste en la parte inferior es
de 2" .
④
○
F
×2
⑤
○
C
×2
○
Y
×1
⑥
La longitud de los anclajes
de los postes metálicos
expuestos al suelo es de
9,8" .

5
Los usuarios pueden
aumentar el pegamento
para fijar la tapa del poste y
evitar que se caiga.
El intervalo entre los
anclajes de los postes
metálicos es de 44,88 " . El
intervalo entre los anclajes
de los postes metálicos se
puede determinar con las
tablas colocadas.
⑦
○
G
×4
Repita los pasos de instalación de las otras cercas,
simplemente use la pieza de conexión y el tornillo
provistos para conectar.
La superficie cóncava del
suelo mira hacia los
tornillos.
⑧
⑨
○
H
×2
○
G
×4
Terminar la instalación

6
Instale los soportes en la
parte superior e inferior
de la pantalla.
Dirección: Baoshanqu Shuangchenglu 803long 11hao 1602A-1609shi Shanghai
Importado a AUS: SIHAO PTY LTD . 1 ROKEVA STREET ASTWOOD NSW 2122 Australia
Importado a EE. UU.: Sanven Technology Ltd. Suite 250, 9166 Anaheim Place, Rancho
Cucamonga, CA 91730
Hecho en china
REP
EC
SHUNSHUN GmbH
Römeräcker 9 Z2021,76351
Linkenheim-Hochstetten,Germany
REP
UK
Pooledas Group Ltd
Unit 5 Albert Edward House, The Pavilions
Preston, United Kingdom

7


We continue to be committed to provide you tools with competitive price.
"Save Half", "Half Price" or any other similar expressions used by us only represents an
estimate of savings you might benefit from buying certain tools with us compared to the major
top brands and does not necessarily mean to cover all categories of tools offered by us. You
are kindly reminded to verify carefully when you are placing an order with us if you are
actually saving half in comparison with the top major brands.

1
Modelka: 1222 0
Have product questions? Need technical support? Please feel free to
contact us:
Technical Support and E-Warranty Certificate
www.vevor.com/support
NEED HELP? CONTACT US!
This is the original instruction, please read all manual instructions
carefully before operating. VEVOR reserves a clear interpretation of our
user manual. The appearance of the product shall be subject to the
product you received. Please forgive us that we won't inform you again if
there are any technology or software updates on our product.
VINYL PRIVACY FENCE

2
INFORMACJE DOTYCZĄCE BEZPIECZEŃSTWA
W trosce o własne bezpieczeństwo prosimy o noszenie rękawiczek
podczas montażu ogrodzenia . Części metalowe mogą mieć ostre
krawędzie i mogą być zaolejone ze względu na zabezpieczenie
przed rdzą.
Podczas montażu należy trzymać dzieci z dala od ogrodzenia, aby
je chronić.
Silny wiatr może uszkodzić produkt, w przypadku niesprzyjających
warunków atmosferycznych płoty należy zdemontować.
Należy zachować odpowiednią odległość od domów oraz linii
gazowych i energetycznych, aby uniknąć ewentualnych uszkodzeń.
Proszę sprawdzić okolicę pod kątem kabli zasilających i gazowych.
W razie potrzeby poproś władze lokalne o dalsze informacje.
SPECYFIKACJE
Model
1222 0
Rozmiar pojedynczego
ogrodzenia
48×48 cali
Numer ogrodzenia
2
Kolor
Biały
Przed instalacją przygotuj następujące narzędzia (nie są dołączone
do produktu).
Wkrętak mocy
Taśma
Gumowy młotek
/Drewniany młotek
Potrzebne osoby do prac instalacyjnych.
3
SKŁADNIKI
○
A
×4
○
B
×28
○
C
×4
○
Y
×1
Post
Wrzeciono
Metalowy kołek
uziemiający
Deski pozycjonowane
○
D
×4
○
E
×2
Górna i dolna szyna
Środkowa szyna

4
○
F
×4
○
H
×2
○
G
×36
Poczta Cap
Nawias
Śruby
Instrukcja montażu :
①
○
A
× 2
○
E
× 2
○
G
× 8
②
○
B
× 14
③
○
D
× 1
○
G
× 4
Odległość między dwiema
szynami na dole wynosi 20
cali .
Odległość między poręczą a
słupkiem na dole wynosi 2
cale .
④
○
F
×2
⑤
○
C
×2
○
Y
×1
⑥
Długość metalowych kotew
słupkowych odsłoniętych do
podłoża wynosi 9,8 cala .

5
Użytkownicy mogą
zwiększyć ilość kleju, aby
przymocować zaślepkę
słupka , aby zapobiec jej
upadkowi.
Odstęp między metalowymi
kotwami słupkowymi wynosi
44,88 cala , odstęp między
metalowymi kotwami
słupkowymi można określić
za pomocą ustawionych
desek.
⑦
○
G
×4
Powtórz kroki instalacji pozostałych ogrodzeń, po
prostu użyj dostarczonego łącznika i śruby, aby
połączyć.
Wklęsła powierzchnia
podłoża skierowana jest
w stronę śrub.
⑧
⑨
○
H
×2
○
G
×4
Zako
ń
cz instalację

6
Zainstaluj wsporniki na
górze i na dole ekranu.
Adres: Baoshanqu Shuangchenglu 803long 11hao 1602A-1609shi Szanghaj
Import do AUS: SIHAO PTY LTD . 1 ROKEVA STREETEASTWOOD NSW 2122 Australia
Import do USA: Sanven Technology Ltd. Apartament 250, 9166 Anaheim Place, Rancho
Cucamonga, Kalifornia 91730
Wyprodukowano w Chinach
REP
EC
SHUNSHUN GmbH
Römeräcker 9 Z2021,76351
Linkenheim-Hochstetten,Germany
REP
UK
Pooledas Group Ltd
Unit 5 Albert Edward House, The Pavilions
Preston, United Kingdom

7


Technisch Ondersteuning en e-garantiecertificaat www.vevor.com/support
VINYL PRIVACYHEK HANDLEIDING
We continue to be committed to provide you tools with competitive price.
"Save Half", "Half Price" or any other similar expressions used by us only represents an
estimate of savings you might benefit from buying certain tools with us compared to the major
top brands and does not necessarily mean to cover all categories of tools offered by us. You
are kindly reminded to verify carefully when you are placing an order with us if you are
actually saving half in comparison with the top major brands.

1
Model: 1222 0
Have product questions? Need technical support? Please feel free to
contact us:
Technical Support and E-Warranty Certificate
www.vevor.com/support
NEED HELP? CONTACT US!
This is the original instruction, please read all manual instructions
carefully before operating. VEVOR reserves a clear interpretation of our
user manual. The appearance of the product shall be subject to the
product you received. Please forgive us that we won't inform you again if
there are any technology or software updates on our product.
VINYL PRIVACY FENCE
2
VEILIGHEIDSINFORMATIE
Om uw eigen veiligheid te garanderen, verzoeken wij u
handschoenen te dragen
tijdens het monteren van het hek . De metalen onderdelen kunnen
scherpe randen hebben en kunnen vettig zijn vanwege de
roestpreventiebehandeling.
Houd kinderen tijdens het monteren uit de buurt van het hek om ze
te beschermen.
Sterke wind kan het product beschadigen. Bij ongunstige
weersomstandigheden moeten hekken worden gedemonteerd.
Zorg ervoor dat u voldoende afstand houdt tot huizen en gas- en
elektriciteitsleidingen om mogelijke schade te voorkomen.
Controleer het gebied op stroomkabels en gasleidingen. Vraag
indien nodig uw plaatselijke overheid om meer informatie.
SPECIFICATIES
Model
1222 0
Grootte van enkele
omheining
48×48in
Aantal hek
2
Kleur
Wit
Zorg ervoor dat u vóór de installatie het volgende gereedschap
gereedmaakt (niet meegeleverd met het product).
Elektrische
schroevendraaier
Plakband
Rubberen hamer
/Houten hamer
Mensen nodig voor installatiewerkzaamheden.
3
COMPONENTEN
○
A
×4
○
B
×28
○
C
×4
○
Y
×1
Na
Spindel
Metalen grondpen
Gepositioneerde borden
○
D
×4
○
E
×2
Boven- en onderrail
Middelste spoor
○
F
×4
○
H
×2
○
G
×36
4
Postkap
Haakje
Schroeven
Montage-instructies :
①
○
A
× 2
○
E
× 2
○
G
× 8
②
○
B
× 14
③
○
D
× 1
○
G
× 4
De afstand tussen de twee
rails aan de onderkant is
20" .
De afstand tussen de rail en
de paal aan de onderkant is
2" .
④
○
F
×2
⑤
○
C
×2
○
Y
×1
⑥
De lengte van de metalen
paalankers die aan de grond
zijn blootgesteld, is 9,8
inch .

5
Gebruikers kunnen de lijm
verhogen om de paaldop
vast te zetten en te
voorkomen dat deze valt.
De afstand tussen de
metalen paalankers is 44,88
inch . De afstand tussen de
metalen paalankers kan
worden bepaald met de
geplaatste planken.
⑦
○
G
×4
Herhaal de installatiestappen van de andere hekken,
gebruik gewoon het meegeleverde verbindingsstuk en
schroef om te verbinden.
Het holle oppervlak van
de grond is naar de
schroeven gericht.
⑧
⑨
○
H
×2
○
G
×4
Voltooi de installatie
Installeer de beugels aan
de boven- en onderkant
van het scherm.
6
Adres: Baoshanqu Shuangchenglu 803long 11hao 1602A-1609shi Shanghai
Geïmporteerd naar AUS: SIHAO PTY LTD . 1 ROKEVA STREETEASTWOOD NSW 2122
Australië
Geïmporteerd naar de VS: Sanven Technology Ltd. Suite 250, 9166 Anaheim Place,
Rancho Cucamonga, CA 91730
Gemaakt in China
REP
EC
SHUNSHUN GmbH
Römeräcker 9 Z2021,76351
Linkenheim-Hochstetten,Germany
REP
UK
Pooledas Group Ltd
Unit 5 Albert Edward House, The Pavilions
Preston, United Kingdom

7


Teknisk Support och e-garanticertifikat www.vevor.com/support
VINYL PRIVACY FENCE ANVÄNDARMANUAL
We continue to be committed to provide you tools with competitive price.
"Save Half", "Half Price" or any other similar expressions used by us only represents an
estimate of savings you might benefit from buying certain tools with us compared to the major
top brands and does not necessarily mean to cover all categories of tools offered by us. You
are kindly reminded to verify carefully when you are placing an order with us if you are
actually saving half in comparison with the top major brands.
1
Modell: 1222 0
Have product questions? Need technical support? Please feel free to
contact us:
Technical Support and E-Warranty Certificate
www.vevor.com/support
NEED HELP? CONTACT US!
This is the original instruction, please read all manual instructions
carefully before operating. VEVOR reserves a clear interpretation of our
user manual. The appearance of the product shall be subject to the
product you received. Please forgive us that we won't inform you again if
there are any technology or software updates on our product.
VINYL PRIVACY FENCE
2
SÄKERHETSINFORMATION
För att garantera din egen säkerhet, se till att bära handskar
medan du monterar staketet . Metalldelarna kan ha vassa kanter och
kan vara oljiga på grund av rostskyddsbehandling.
Håll barn borta från stängslet när du monterar det för att skydda
dem.
Starka vindar kan skada produkten, staket bör tas isär under
ogynnsamma väderförhållanden.
Se till att hålla tillräckligt avstånd till hus samt gas- och kraftledningar
för att undvika eventuella skador. Kontrollera området för elkablar
och gasledningar. Fråga din lokala myndighet om ytterligare
information om det behövs.
SPECIFIKATIONER
Modell
1222 0
Storlek på enstaka staket
48×48 tum
Antal staket
2
Färg
Vit
Förbered följande verktyg före installation (medföljer inte produkten).
Power skruvmejsel
Tejp
Gummi hammare
/Trähammare
Personer som behövs för installationsarbete.
KOMPONENTER
3
○
A
×4
○
B
×28
○
C
×4
○
Y
×1
Posta
Slända
Metall Ground
Stake
Placerade brädor
○
D
×4
○
E
×2
Topp- och bottenskena
Mellanskena
○
F
×4
○
H
×2
○
G
×36
Stolpe Cap
Konsol
Skruvar
Monteringsanvisningar :
4
①
○
A
× 2
○
E
× 2
○
G
× 8
②
○
B
× 14
③
○
D
× 1
○
G
× 4
Avståndet mellan de två
skenorna i botten är 20" .
Avståndet mellan skenan
och stolpen i botten är 2" .
④
○
F
×2
⑤
○
C
×2
○
Y
×1
⑥
Längden på metallstolpens
ankare som är exponerade
mot marken är 9,8" .
Användare kan öka limmet
för att fixera stolplocket för
att förhindra att det faller.
Intervallet mellan
metallstolpar är 44,88 " ,
intervallet mellan
metallstolpar kan
bestämmas med de
placerade brädorna.
⑦
○
G
×4
Upprepa installationsstegen för de andra staketen,
använd bara den medföljande anslutningsdelen och
5
skruven för att ansluta.
Den konkava markytan är
vänd mot skruvarna.
⑧
⑨
○
H
×2
○
G
×4
Avsluta installationen
Installera fästena på
toppen och botten av
skärmen.
Adress: Baoshanqu Shuangchenglu 803long 11hao 1602A-1609shi Shanghai
Importerad till AUS: SIHAO PTY LTD . 1 ROKEVA STREETEASTWOOD NSW 2122
Australien
6
Importerad till USA: Sanven Technology Ltd. Suite 250, 9166 Anaheim Place, Rancho
Cucamonga, CA 91730
Tillverkad i Kina
REP
EC
SHUNSHUN GmbH
Römeräcker 9 Z2021,76351
Linkenheim-Hochstetten,Germany
REP
UK
Pooledas Group Ltd
Unit 5 Albert Edward House, The Pavilions
Preston, United Kingdom