FUSION
®
Panel-Stereo Spacer
WARNING
Failure to follow these warnings and cautions could result in personal injury, damage to the vehicle or vessel, or
poor product performance.
This device must be installed according to these instructions.
Disconnect the vehicle's or vessel's power supply before beginning to install this product.
CAUTION
Continuous exposure to sound pressure levels over 100 dBA may cause permanent hearing loss. The volume is
typically too loud if you cannot hear people speaking around you. Limit the amount of time you listen at high
volume. If you experience ringing in your ears or muffled speech, stop listening and have your hearing checked.
Always wear safety goggles, ear protection, and a dust mask when drilling, cutting, or sanding.
NOTICE
When drilling or cutting, always check what is on the opposite side of the surface.
It is strongly recommended that you have your audio system installed by a professional installer to ensure
optimum performance.
You must read all installation instructions before beginning the installation. If you experience difficulty during
the installation, go to www.fusionentertainment.com for product support.
What's In the Box
• Mounting spacer
• Eight 6-gauge, self-tapping stainless steel screws
• Six M4, self-tapping black screws
Tools Needed
• Electric drill
• Drill bit (size varies based on surface material)
• Screwdriver
• Appropriate saw or utility knife to cut surface material
• Marine sealant (optional)
NOTE: If you use the mounting spacer, you must use the six black screws supplied with the mounting spacer to
mount the stereo to the mounting spacer. Do not use the six stainless steel screws supplied with the FUSION
Panel-Stereo.
NOTE: For customized installations, additional tools and materials may be needed.
FUSION Panel-Stereo Spacer Orientation
You can use the spacer cutout to run the stereo cables over the top of the installation surface or through a hole
in the installation surface.
If you route the cables through a hole in the installation surface, you can rotate the spacer 180 degrees to hide
the spacer cutout from below.
GUID-93B219F6-2955-4A1D-AC32-38DCF1B7E2C6 v1March 2018
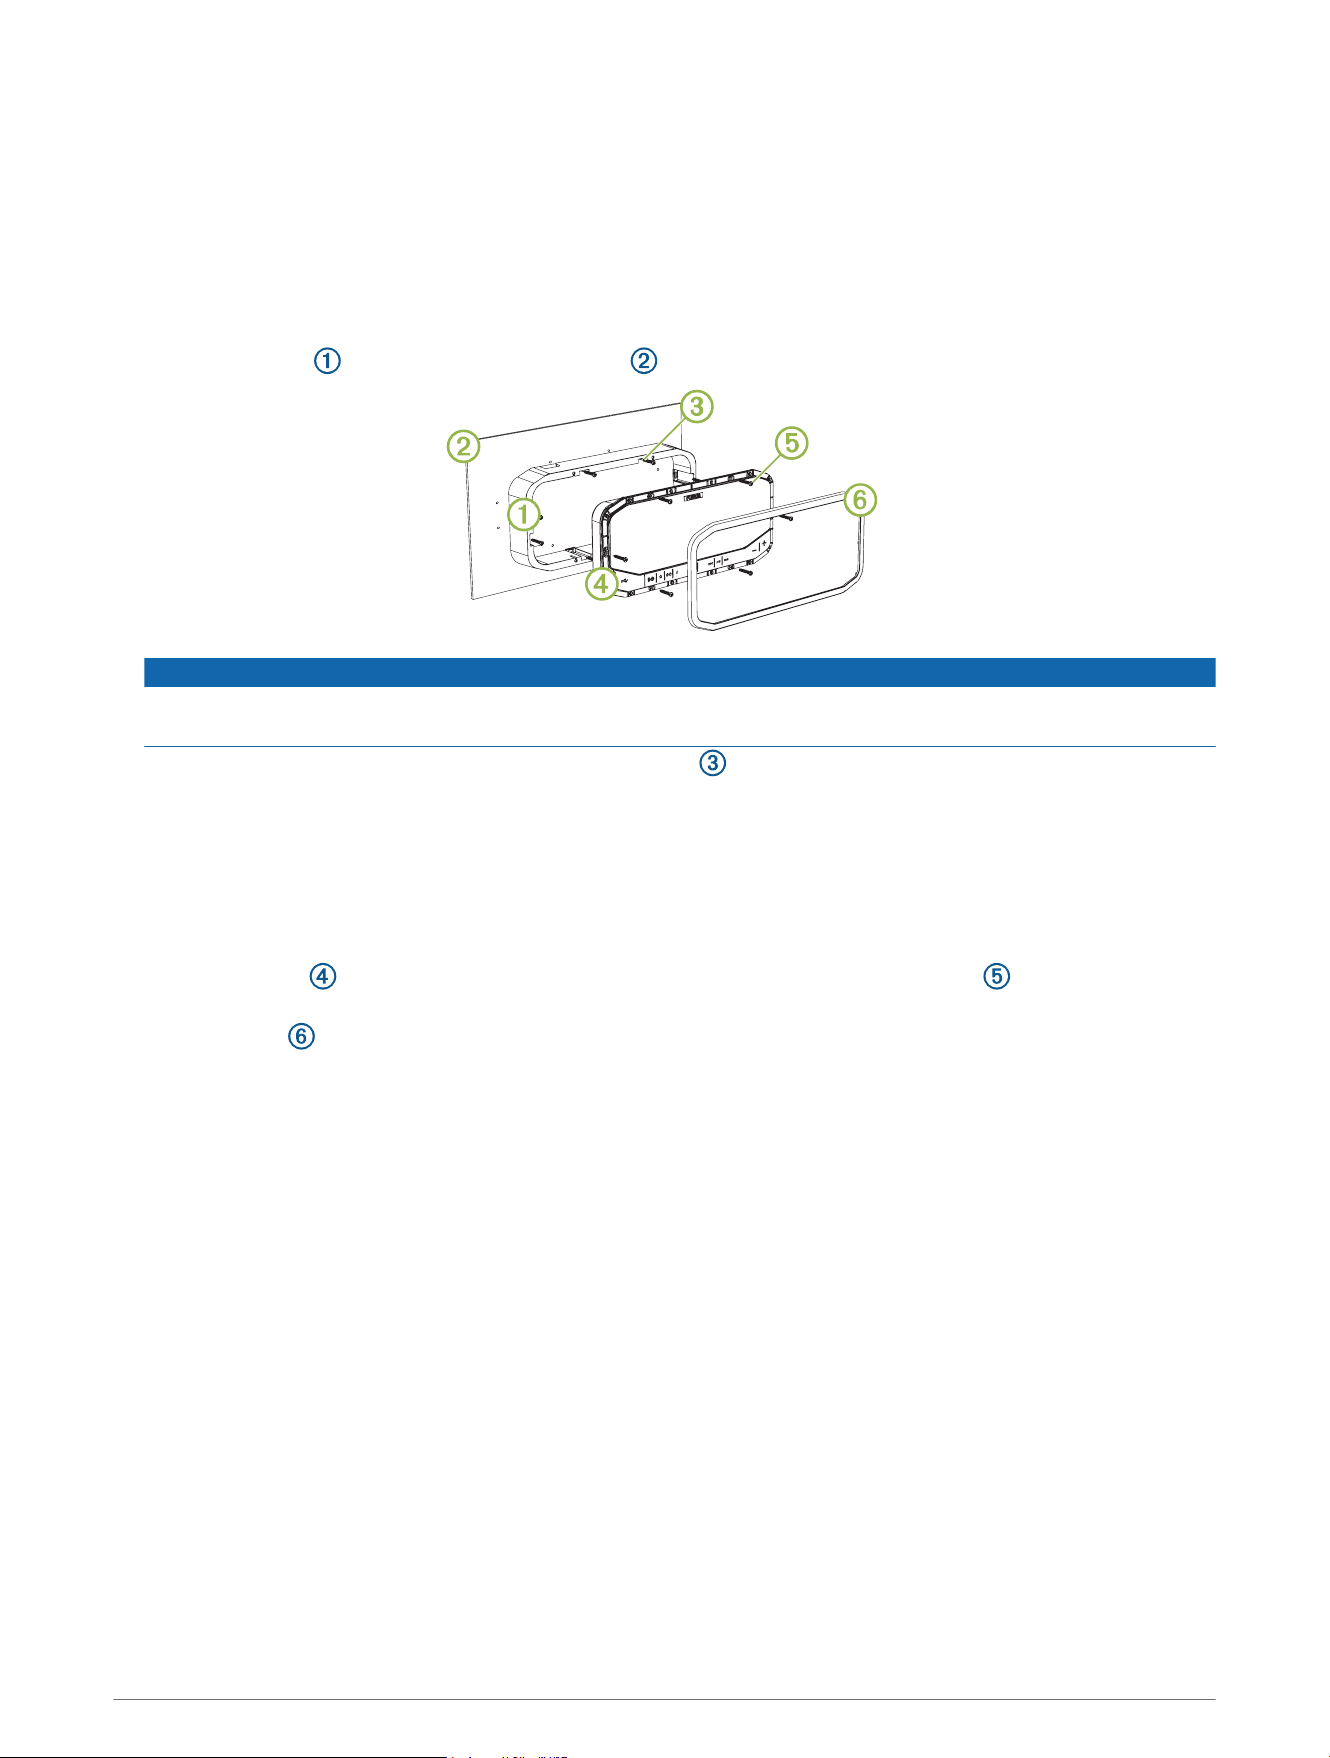
Installing the Spacer
1 Select the mounting surface, and prepare the mounting surface as directed in the FUSION Panel-Stereo
Installation Instructions.
2 Hold or secure the spacer temporarily to the selected mounting location.
3 Using the eight mounting slots on the spacer, mark the locations of the holes.
4 Remove the spacer.
5 Using an appropriate drill bit for the mounting surface and screw type, drill the holes.
6 Place the spacer over the installation location .
NOTICE
Do not apply grease or lubricant to the screws when fastening the spacer to the mounting surface and the
stereo to the spacer. Grease or other lubricants can damage the spacer and the stereo housing.
7 Secure the spacer to the surface using the silver screws included with the spacer or screws appropriate
for the depth of the mounting surface.
8 Make the necessary wiring connections as directed in the FUSION Panel-Stereo Installation Instructions.
NOTE: If you run the cables along the wall, route the cables through the cutout. To route the fuse holder
through the cutout, open the lid of the fuse holder. Close the lid when the fuse holder is in position.
NOTE: If you route the cables through a hole in the installation surface, use a rubber grommet to protect the
stereo wires from sharp edges.
9 Place the stereo on the spacer, and secure it to the spacer using the black screws included with the
spacer.
10 Press the trim firmly onto the stereo, until all of the pins snap into place.
2 Important Safety Information
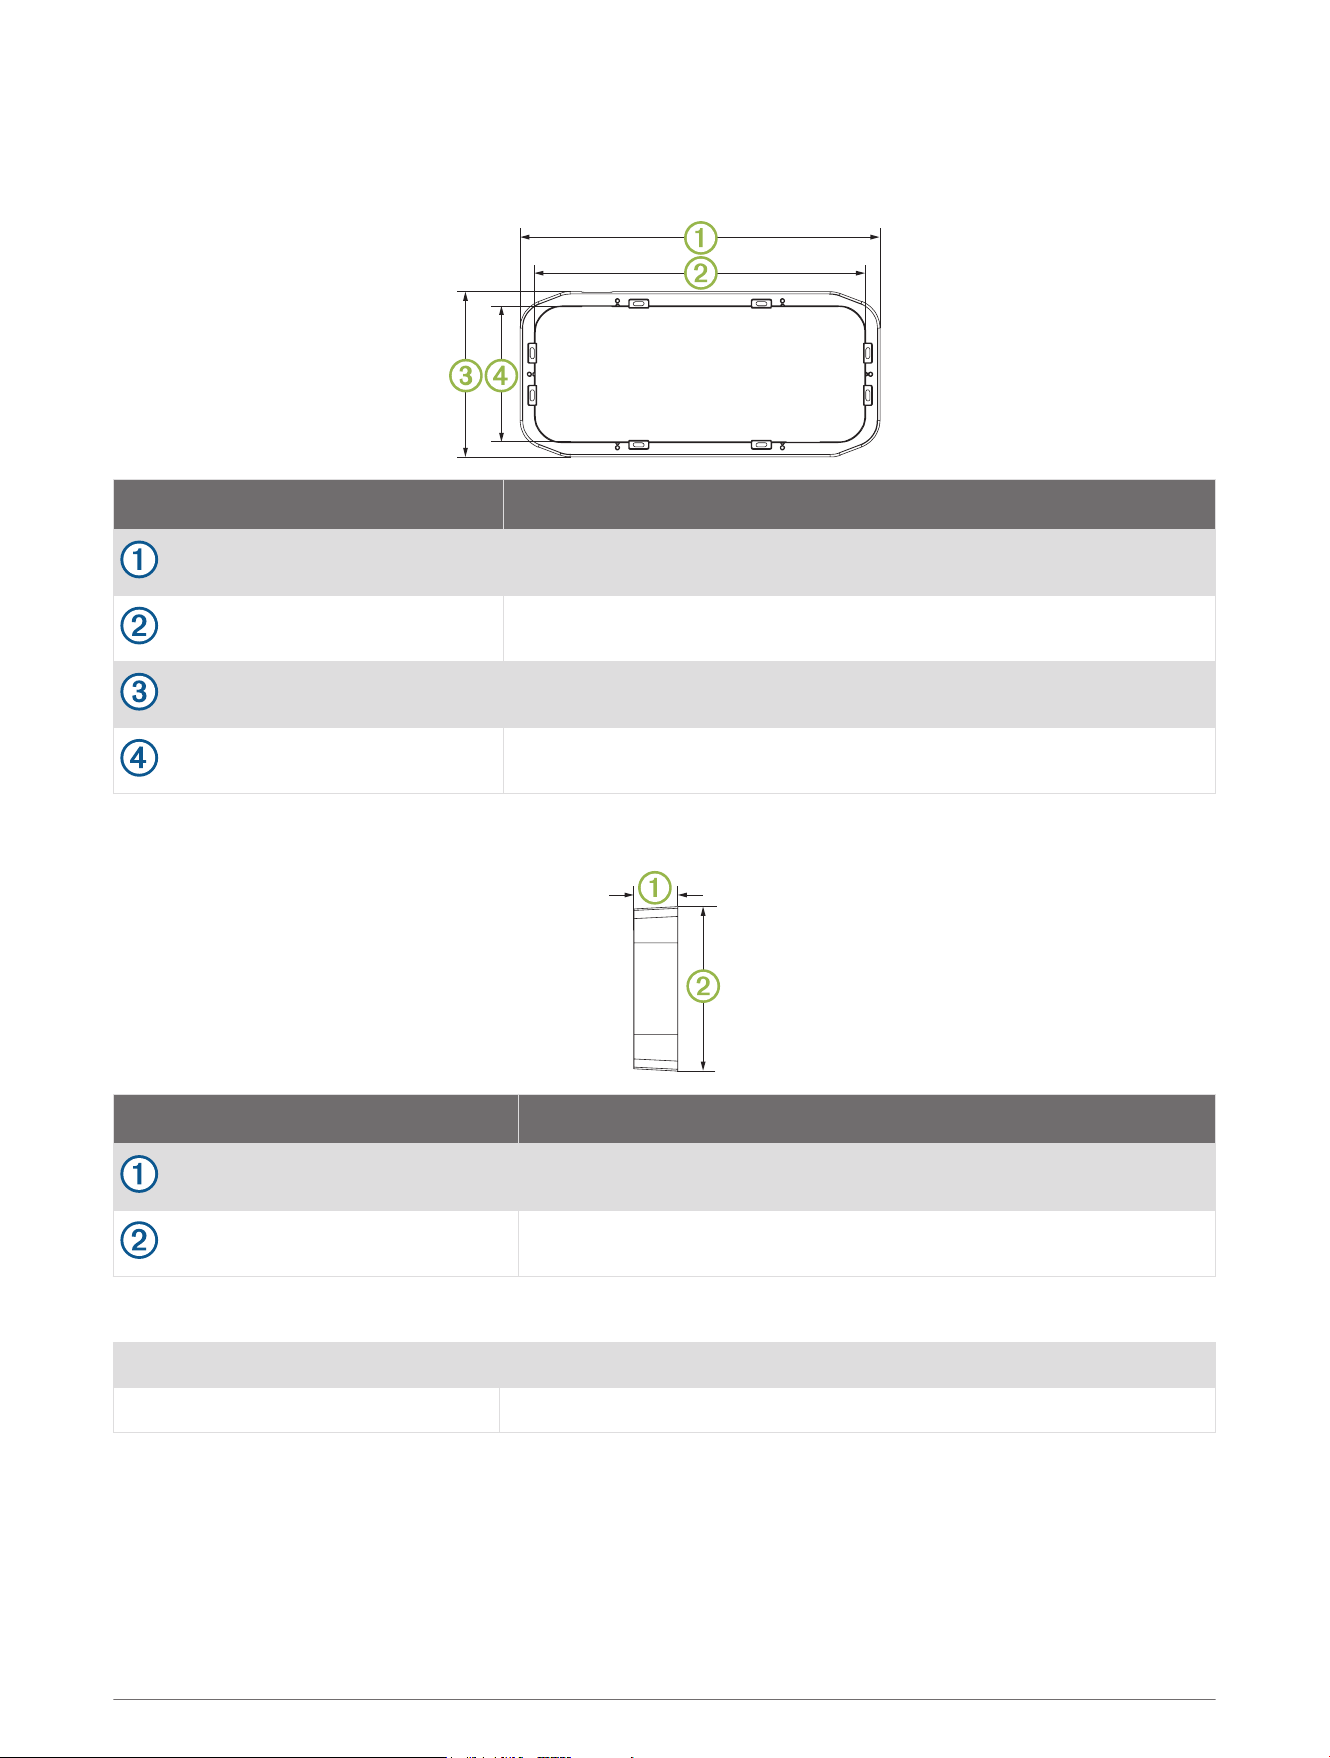
Dimension Drawings
Front View
Dimension Measurement
349 mm (13.74 in.)
319.5 mm (12.58 in.)
160.5 mm (6.32 in.)
131 mm (5.16 in.)
Side View
Dimension Measurement
43 mm (1.68 in.)
160.5 mm (6.32 in.)
Specifications
Dimensions (W x H x D) 349 x 160.5 x 43 mm (13.74 x 6.32 x 1.69 in.)
Weight 257 g (9.1 oz.)
© 2018 Garmin Ltd. or its subsidiaries
Garmin
®
, the Garmin logo, FUSION
®
, and the Fusion logo are trademarks of Garmin Ltd. or its subsidiaries, registered in the USA and other countries. These trademarks
may not be used without the express permission of Garmin.
Important Safety Information 3

© 2018 Garmin Ltd. or its subsidiaries support.garmin.com
