D:\A_Job\PSG\_FY22\SC-PM270\Source\woi\PM270PP_TQBM0945_en.fm
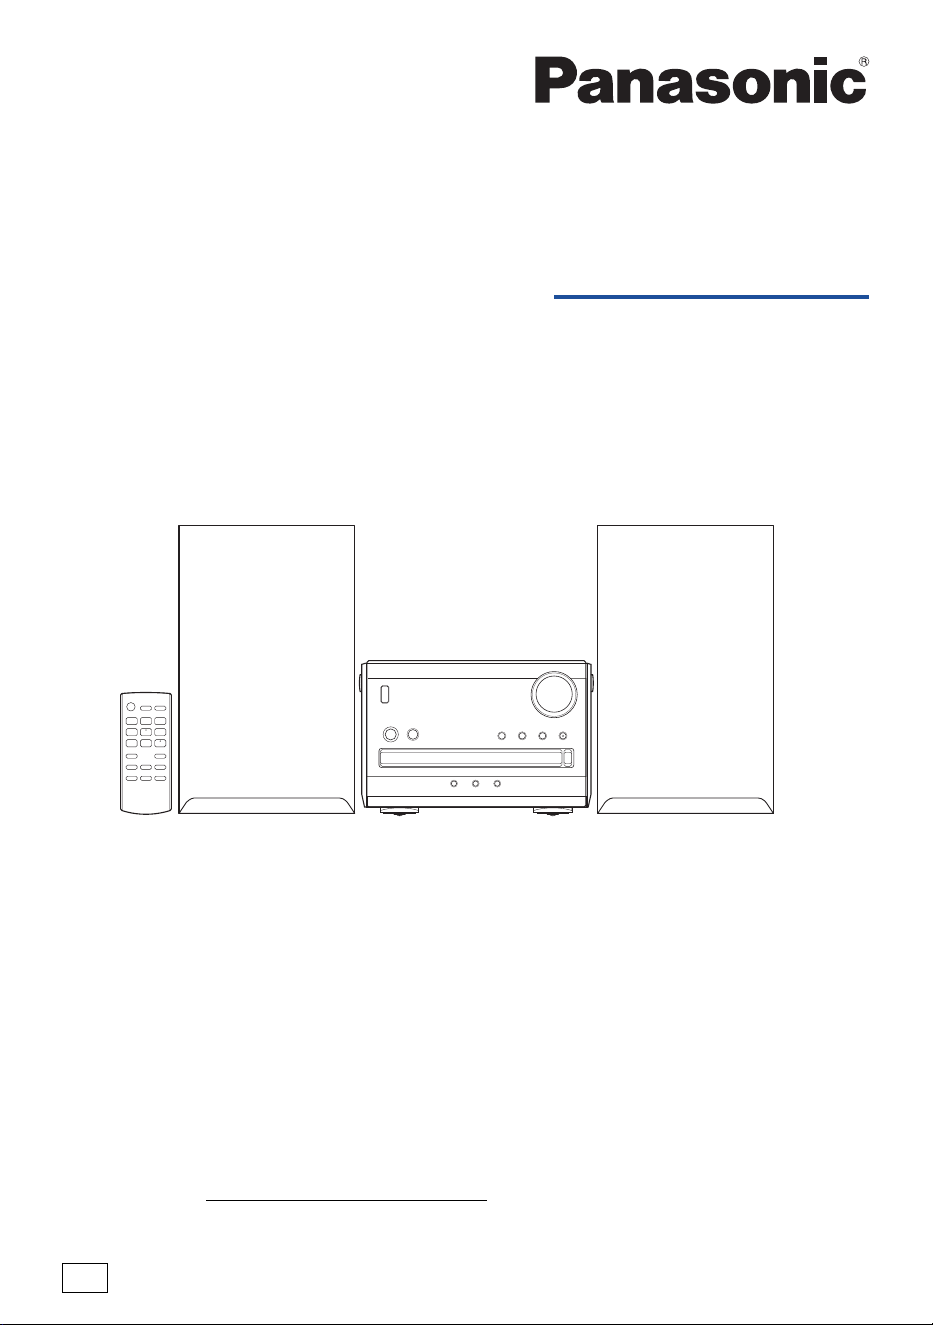
Owner’s Manual
CD Stereo System
Model No. SC-PM270
TQBM0945
Thank you for purchasing this product.
For optimum performance and safety, please read these instructions carefully.
Please keep this manual for future reference.
PP
If you have any questions, visit:
U.S.A.: https://shop.panasonic.com/support
Canada: www.panasonic.ca/english/support
Register online at https://shop.panasonic.com/support
(U.S. customers only)
PM270PP_TQBM0945_en.fm Page 1 Tuesday, October 17, 2023 1:08 PM
2
TQBM0945
D:\A_Job\PSG\_FY22\SC-PM270\Source\woi\PM270PP_TQBM0945_en.fm
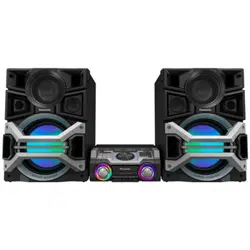
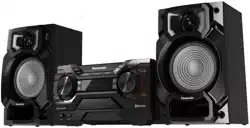
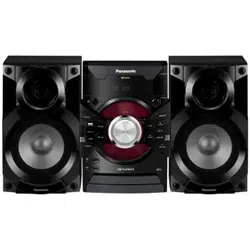
Your system and the illustrations can look differently.
These operating instructions are applicable to the following system.
User memo:
The symbols on this product (including the accessories) represent the following:
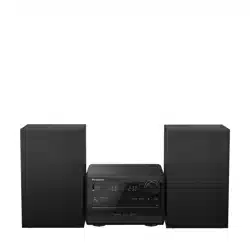
System SC-PM270
Main unit SA-PM270
Speakers SB-PM02
The model number and serial number of this product can be
found on either the back or the bottom of the unit. Please note
them in the space provided below and keep for future reference.
MODEL NUMBER SC-PM270
SERIAL NUMBER
DATE OF PURCHASE
DEALER NAME
DEALER ADDRESS
TELEPHONE NUMBER
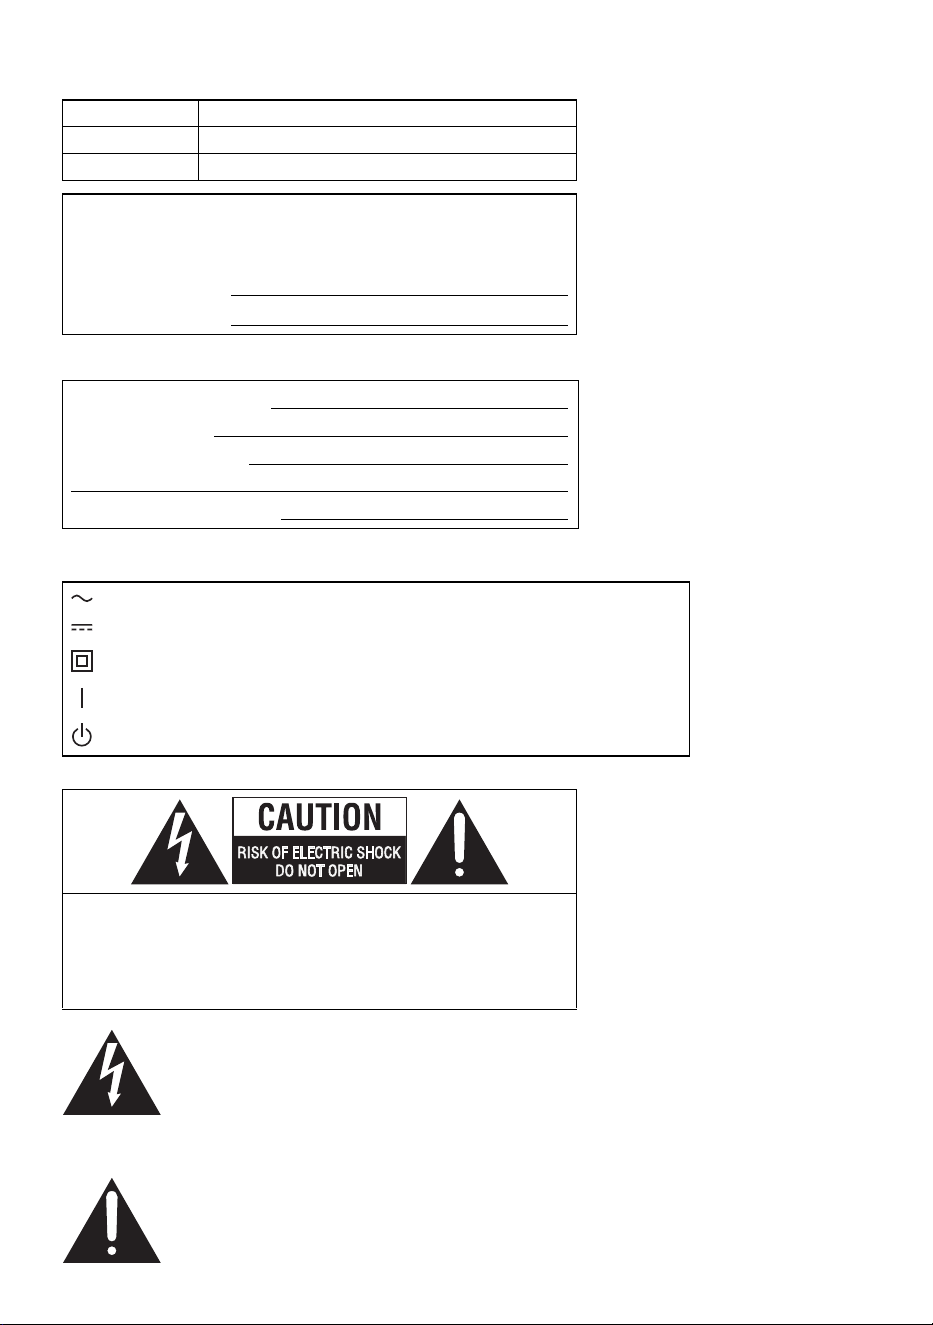
AC
DC
Class II equipment (The construction of the product is double-insulated.)
ON
Standby
CAUTION: TO REDUCE THE RISK OF ELECTRIC SHOCK,
DO NOT REMOVE SCREWS.
NO USER-SERVICEABLE PARTS INSIDE.
REFER SERVICING TO QUALIFIED SERVICE
PERSONNEL.
The lightning flash with arrowhead symbol,
within an equilateral triangle, is intended to alert
the user to the presence of uninsulated
“dangerous voltage” within the product’s
enclosure that may be of sufficient magnitude
to constitute a risk of electric shock to persons.
The exclamation point within an equilateral
triangle is intended to alert the user to the
presence of important operating and
maintenance (servicing) instructions in the
literature accompanying the appliance.
PM270PP_TQBM0945_en.fm Page 2 Tuesday, October 17, 2023 1:08 PM

3
TQBM0945
D:\A_Job\PSG\_FY22\SC-PM270\Source\woi\PM270PP_TQBM0945_en.fm
IMPORTANT SAFETY
INSTRUCTIONS
Read these operating instructions carefully before using the unit. Follow the safety instructions on the
unit and the applicable safety instructions listed below. Keep these operating instructions handy for future
reference.
1. Read these instructions.
2. Keep these instructions.
3. Heed all warnings.
4. Follow all instructions.
5. Do not use this apparatus near water.
6. Clean only with dry cloth.
7. Do not block any ventilation openings. Install in accordance with the manufacturer’s instructions.
8. Do not install near any heat sources such as radiators, heat registers, stoves, or other apparatus
(including amplifiers) that produce heat.
9. Do not defeat the safety purpose of the polarized or grounding-type plug. A polarized plug has two
blades with one wider than the other. A grounding-type plug has two blades and a third grounding
prong. The wide blade or the third prong are provided for your safety. If the provided plug does not fit
into your outlet, consult an electrician for replacement of the obsolete outlet.
10. Protect the power cord from being walked on or pinched particularly at plugs, convenience
receptacles, and the point where they exit from the apparatus.
11. Only use attachments/accessories specified by the manufacturer.
12. Use only with the cart, stand, tripod, bracket, or table specified by the manufacturer, or
sold with the apparatus. When a cart is used, use caution when moving the
cart/apparatus combination to avoid injury from tip-over.
13. Unplug this apparatus during lightning storms or when unused for long periods of time.
14. Refer all servicing to qualified service personnel. Servicing is required when the
apparatus has been damaged in any way, such as power-supply cord or plug is damaged, liquid has
been spilled or objects have fallen into the apparatus, the apparatus has been exposed to rain or
moisture, does not operate normally, or has been dropped.
Safety precautions
WARNING
Unit
• To reduce the risk of fire, electric shock or product damage,
– Do not expose this unit to rain, moisture, dripping or splashing.
– Do not place objects filled with liquids, such as vases, on this unit.
– Use the recommended accessories.
– Do not remove covers.
– Do not repair this unit by yourself. Refer servicing to qualified service personnel.
PM270PP_TQBM0945_en.fm Page 3 Tuesday, October 17, 2023 1:08 PM

4
TQBM0945
D:\A_Job\PSG\_FY22\SC-PM270\Source\woi\PM270PP_TQBM0945_en.fm
CAUTION
Unit
• To reduce the risk of fire, electric shock or product damage,
– Do not install or place this unit in a bookcase, built-in cabinet or in another confined space. Ensure
this unit is well ventilated.
– Do not obstruct this unit’s ventilation openings with newspapers, tablecloths, curtains, and similar
items.
– Do not place sources of naked flames, such as lighted candles, on this unit.
• Set the unit up on an even surface away from direct sunlight, high temperatures, high humidity, and
excessive vibration.
• This unit utilizes a laser. Use of controls or adjustments or performance of procedures other than those
specified herein may result in hazardous radiation exposure.
AC power supply cord
• The power plug is the disconnecting device. Install this unit so that the power plug can be unplugged
from the socket outlet immediately.
Battery
• Danger of explosion if battery is incorrectly replaced. Replace only with the type recommended by the
manufacturer.
• When disposing of the batteries, please contact your local authorities or dealer and ask for the correct
method of disposal.
• Do not heat or expose to flame.
• Do not leave the battery(ies) in a car exposed to direct sunlight for a long period of time with doors and
windows closed.
• Do not break open or short-circuit the battery.
• Do not charge the alkaline or manganese battery.
• Do not use the battery if the cover has peeled off.
• Remove the battery if you do not use the remote control for a long period of time. Keep in a cool, dark
area.
• Avoid the use in the following conditions
– High or low extreme temperatures during use, storage or transportation.
– Replacement of a battery with an incorrect type.
– Disposal of a battery into fire or a hot oven, or mechanically crushing or cutting of a battery, that can
result in an explosion.
– Extremely high temperature and/or extremely low air pressure that can result in an explosion or the
leakage of flammable liquid or gas.
THE FOLLOWING APPLIES ONLY IN THE U.S.A. AND CANADA
This device complies with Part 15 of FCC Rules and Innovation, Science and Economic Development
Canada’s licence-exempt RSS(s).
Operation is subject to the following two conditions:
(1) this device may not cause interference, and (2) this device must accept any interference, including
interference that may cause undesired operation.
Contains FCC ID: ACJ-B42R1801
Contains IC: 216A-B42R1801
This transmitter must not be co-located or operated in conjunction with any other antenna or
transmitter.
This equipment complies with FCC/ISED radiation exposure limits set forth for an uncontrolled
environment and meets the FCC radio frequency (RF) Exposure Guidelines and RSS-102 of the ISED
radio frequency (RF) Exposure rules. This equipment should be installed and operated keeping the
radiator at least 20 cm (7⅞") or more away from person's body.
PM270PP_TQBM0945_en.fm Page 4 Tuesday, October 17, 2023 1:08 PM

5
TQBM0945
D:\A_Job\PSG\_FY22\SC-PM270\Source\woi\PM270PP_TQBM0945_en.fm
THE FOLLOWING APPLIES ONLY IN THE U.S.A.
THE FOLLOWING APPLIES ONLY IN CANADA
Supplied accessories
Check and identify the supplied accessories.
1 AC power supply cord
(K2CB2YY00065)
1 Ferrite core
(J0KG00000037)
1 FM indoor antenna
(RSAX0002)
1 Remote control
(N2QAYB000984)
Note:
• Product numbers correct as of September 2023. These may be subject to change.
• The included Canadian French label sheet corresponds to the English printing on the main unit and remote
control.
FCC Note:
This equipment has been tested and found to comply with the limits for a Class B digital device,
pursuant to Part 15 of the FCC Rules.
These limits are designed to provide reasonable protection against harmful interference in a residential
installation. This equipment generates, uses, and can radiate radio frequency energy and, if not
installed and used in accordance with the instructions, may cause harmful interference to radio
communications. However, there is no guarantee that interference will not occur in a particular
installation. If this equipment does cause harmful interference to radio or television reception, which can
be determined by turning the equipment off and on, the user is encouraged to try to correct the
interference by one or more of the following measures:
• Reorient or relocate the receiving antenna.
• Increase the separation between the equipment and receiver.
• Connect the equipment into an outlet on a circuit different from that to which the receiver is connected.
• Consult the dealer or an experienced radio/TV technician for help.
FCC Caution:
Any unauthorized changes or modifications to this equipment would void the user’s authority to operate
this device.
Supplier's Declaration of Conformity
Trade Name: Panasonic
Model No.: SC-PM270
Responsible Party: Panasonic Corporation of North America
Two Riverfront Plaza, Newark,
NJ 07102-5490
Support Contact: http://shop.panasonic.com/support
CAN ICES-003(B)/NMB-003(B)
PM270PP_TQBM0945_en.fm Page 5 Tuesday, October 17, 2023 1:08 PM

6
TQBM0945
D:\A_Job\PSG\_FY22\SC-PM270\Source\woi\PM270PP_TQBM0945_en.fm
Table of contents
IMPORTANT SAFETY INSTRUCTIONS . . . . . . . . . . . . . . . . . . . . . . . . . . . . . . . . . . . . . . . . . . . . . . . . . 3
Safety precautions . . . . . . . . . . . . . . . . . . . . . . . . . . . . . . . . . . . . . . . . . . . . . . . . . . . . . . . . . . . . . . . . . . 3
Supplied accessories . . . . . . . . . . . . . . . . . . . . . . . . . . . . . . . . . . . . . . . . . . . . . . . . . . . . . . . . . . . . . . . . 5
Placement of speakers . . . . . . . . . . . . . . . . . . . . . . . . . . . . . . . . . . . . . . . . . . . . . . . . . . . . . . . . . . . . . . . 7
Preparing the remote control . . . . . . . . . . . . . . . . . . . . . . . . . . . . . . . . . . . . . . . . . . . . . . . . . . . . . . . . . . 7
Making the connections . . . . . . . . . . . . . . . . . . . . . . . . . . . . . . . . . . . . . . . . . . . . . . . . . . . . . . . . . . . . . . 8
Overview of controls . . . . . . . . . . . . . . . . . . . . . . . . . . . . . . . . . . . . . . . . . . . . . . . . . . . . . . . . . . . . . . . . 10
Preparing media . . . . . . . . . . . . . . . . . . . . . . . . . . . . . . . . . . . . . . . . . . . . . . . . . . . . . . . . . . . . . . . . . . . 12
Media playback. . . . . . . . . . . . . . . . . . . . . . . . . . . . . . . . . . . . . . . . . . . . . . . . . . . . . . . . . . . . . . . . . . . . 14
FM Radio . . . . . . . . . . . . . . . . . . . . . . . . . . . . . . . . . . . . . . . . . . . . . . . . . . . . . . . . . . . . . . . . . . . . . . . . 17
Sound effects . . . . . . . . . . . . . . . . . . . . . . . . . . . . . . . . . . . . . . . . . . . . . . . . . . . . . . . . . . . . . . . . . . . . . 18
Clock and timers . . . . . . . . . . . . . . . . . . . . . . . . . . . . . . . . . . . . . . . . . . . . . . . . . . . . . . . . . . . . . . . . . . . 19
Others . . . . . . . . . . . . . . . . . . . . . . . . . . . . . . . . . . . . . . . . . . . . . . . . . . . . . . . . . . . . . . . . . . . . . . . . . . . 20
Troubleshooting . . . . . . . . . . . . . . . . . . . . . . . . . . . . . . . . . . . . . . . . . . . . . . . . . . . . . . . . . . . . . . . . . . . 21
Maintenance . . . . . . . . . . . . . . . . . . . . . . . . . . . . . . . . . . . . . . . . . . . . . . . . . . . . . . . . . . . . . . . . . . . . . . 24
Specifications . . . . . . . . . . . . . . . . . . . . . . . . . . . . . . . . . . . . . . . . . . . . . . . . . . . . . . . . . . . . . . . . . . . . . 25
References . . . . . . . . . . . . . . . . . . . . . . . . . . . . . . . . . . . . . . . . . . . . . . . . . . . . . . . . . . . . . . . . . . . . . . . 27
PM270PP_TQBM0945_en.fm Page 6 Tuesday, October 17, 2023 1:08 PM
7
TQBM0945
D:\A_Job\PSG\_FY22\SC-PM270\Source\woi\PM270PP_TQBM0945_en.fm
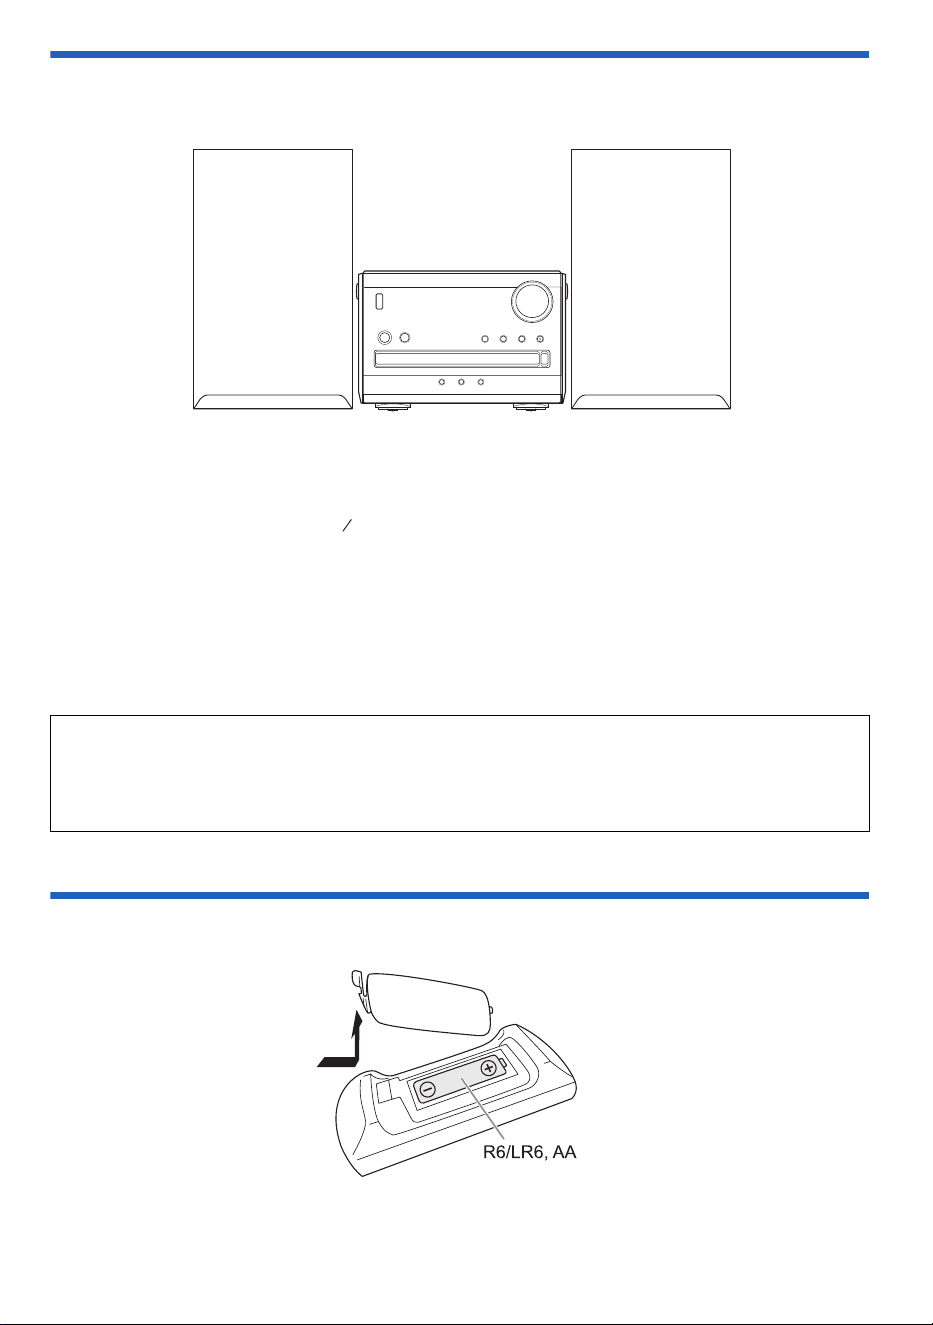
Placement of speakers
The left and right speakers are the same.
Use only the supplied speakers.
You can cause damage to the system and decrease the sound quality if you use other speakers.
Note:
• Keep your speakers at least 10 mm ( ") away from the system for proper ventilation.
• Put the speakers on a flat safe surface.
• These speakers do not have magnetic shielding. Do not put them near TVs, PCs or other equipment easily
influenced by magnetism.
• When you play at high levels for a long period, it can cause damage to the speakers and decrease the life of
the speakers.
• Decrease the volume in these conditions to prevent damage:
– When the sound is distorted.
– When you adjust the sound quality.
Preparing the remote control
Use alkaline or manganese battery.
Install the battery so that the poles (+ and –) align with those in the remote control.
CAUTION!
• Use the speakers only with the recommended system. If not, you can cause damage to the
amplifier and speakers and can cause a fire. Consult an approved service personnel if damage
occurs or if there is a sudden apparent change in performance.
• Do not modify the speaker or speaker wires as this can cause damage to the system.
32
13
(Not supplied)
PM270PP_TQBM0945_en.fm Page 7 Tuesday, October 17, 2023 1:08 PM
8
TQBM0945
D:\A_Job\PSG\_FY22\SC-PM270\Source\woi\PM270PP_TQBM0945_en.fm
Making the connections
Connect the AC power supply cord only after all the other connections have been made.
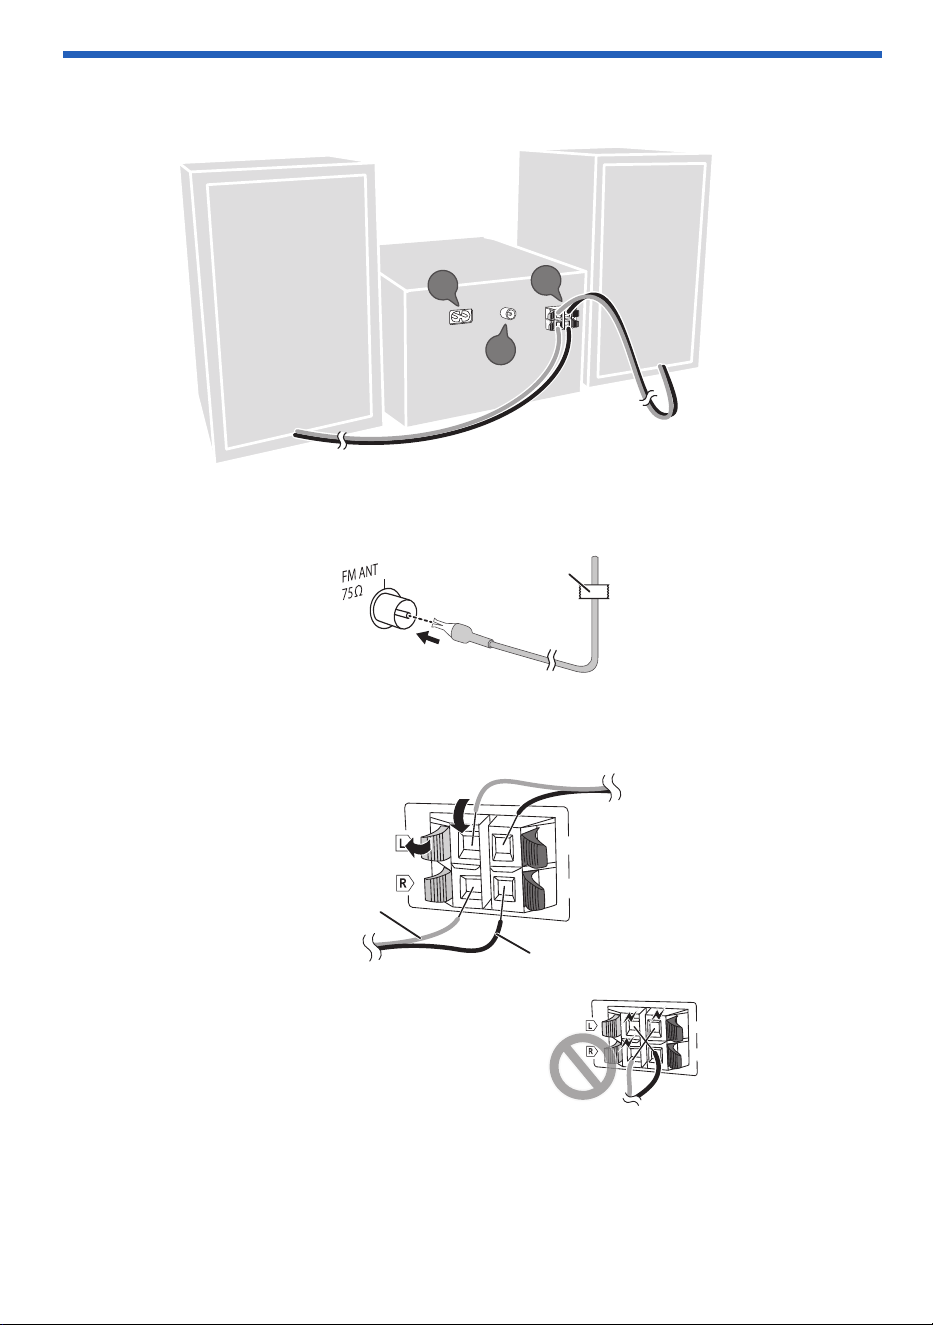
1 Connect the FM indoor antenna.
Put the antenna where reception is best.
2 Connect the speakers.
Connect the speaker cables to the corresponding terminals.
Be careful not to cross (short-circuit)
or reverse the polarity of the speaker
wires as doing so may damage the
speakers.
1
2
3
Adhesive tape
(not supplied)
(6:)
(6:)
B
A
Red
Black
(6:
)
(6:
)
PM270PP_TQBM0945_en.fm Page 8 Tuesday, October 17, 2023 1:08 PM
9
TQBM0945
D:\A_Job\PSG\_FY22\SC-PM270\Source\woi\PM270PP_TQBM0945_en.fm
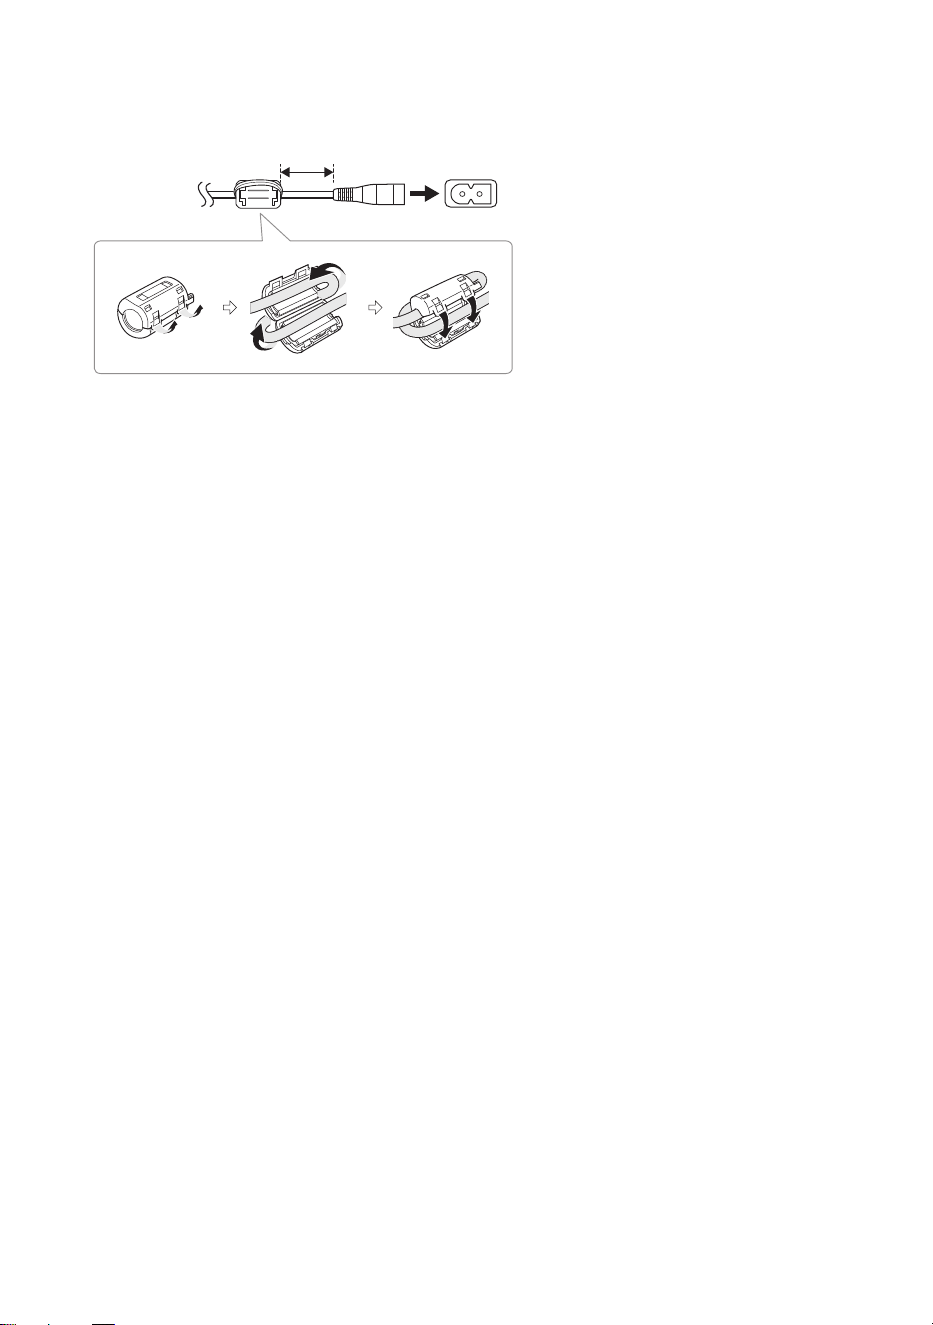
3 Connect the AC power supply cord.
Do not use an AC power supply cord from other equipment.
Conserving power
The system consumes a small amount of power when it is in standby mode. Disconnect the power
supply if you do not use the system.
Some settings will be lost after you disconnect the system. You have to set them again.
Note:
Keep the antennas away from the speaker cables and the AC power supply cord to avoid picking up noise.
Attaching the ferrite core near to the
terminal
A Pull on the tabs (both sides) to open.
B Put the AC power supply cord onto one
of the concave surfaces.
C Coil the AC power supply cord around
the ferrite core and onto the other
concave surface.
D Close the ferrite core until it clicks.
Note:
Failure to attach the ferrite core to the AC
power supply cord may cause interference to
other devices nearby.
To household
AC outlet
5 cm
PM270PP_TQBM0945_en.fm Page 9 Tuesday, October 17, 2023 1:08 PM
10
TQBM0945
D:\A_Job\PSG\_FY22\SC-PM270\Source\woi\PM270PP_TQBM0945_en.fm
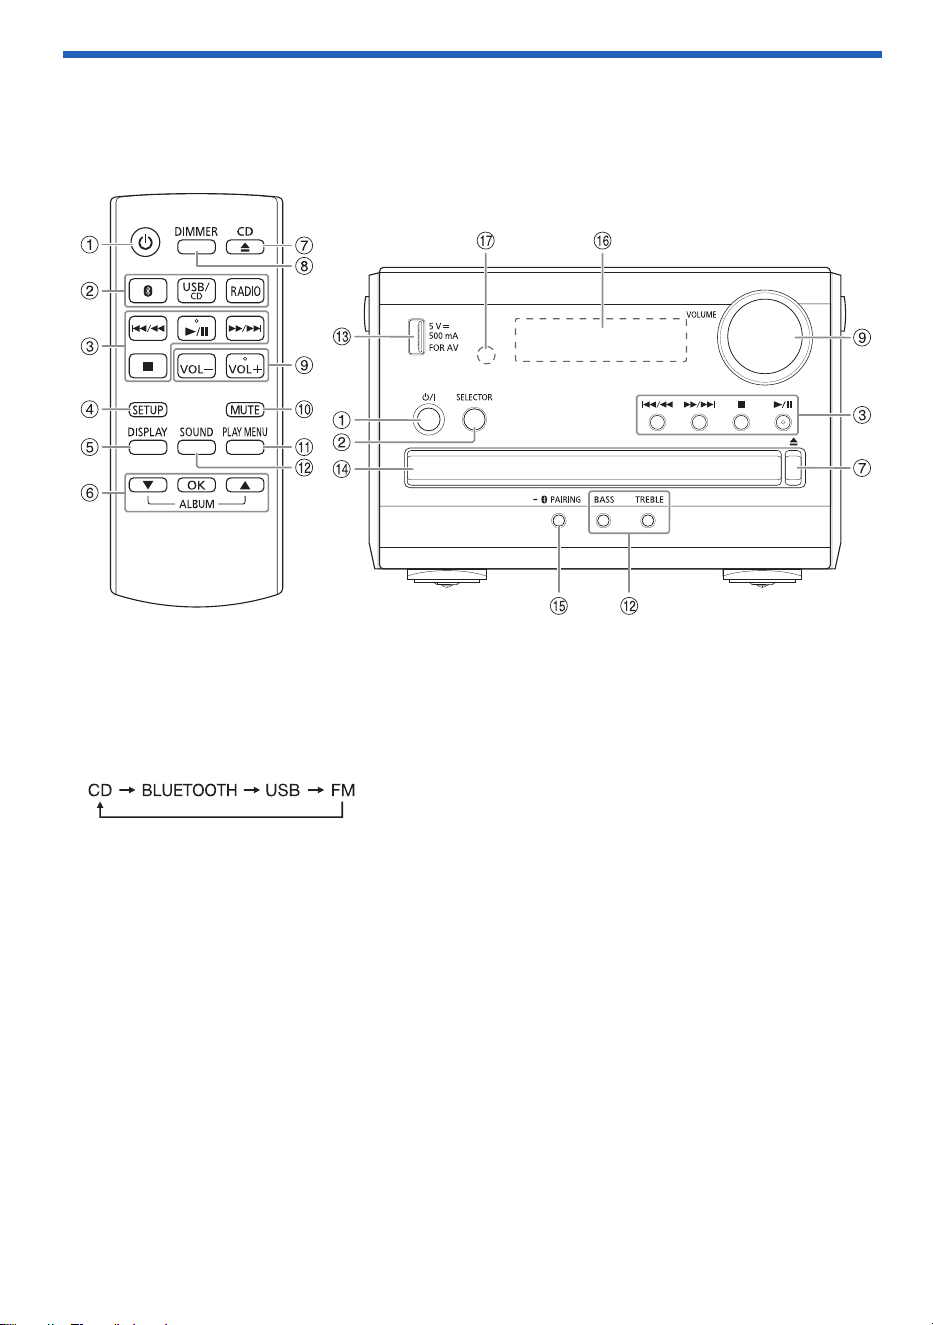
Overview of controls
Do the procedures with the remote control. You can also use the buttons on the main unit if they
are the same.
A Standby/on switch [`], [1]
Press to turn the unit from on to standby mode or vice versa. In standby mode, the unit is still
consuming a small amount of power.
B Select the audio source
On the main unit:
C Basic playback control
D View the setup menu
E View the content information
F Select or confirm the option
Skip MP3 albums
G Open or close the disc tray
H Decrease the brightness of the display panel
To cancel, press the button again.
I Adjust the volume level
J Mute the sound
To cancel, press the button again.
“MUTE” is also canceled when you adjust the volume or when you turn off the system.
K View the play menu
L Select the sound effects
PM270PP_TQBM0945_en.fm Page 10 Tuesday, October 17, 2023 1:08 PM

11
TQBM0945
D:\A_Job\PSG\_FY22\SC-PM270\Source\woi\PM270PP_TQBM0945_en.fm
M USB port (DC 5 V 500 mA, FOR AV)
N Disc tray
O Select “BLUETOOTH” as the audio source
To start Bluetooth
®
pairing, press and hold the button.
P Display panel
Q Remote control sensor
Distance: Within approximately 7 m (23 ft)
Angle: Approximately 10° up and 30° down, 30° left and right
PM270PP_TQBM0945_en.fm Page 11 Tuesday, October 17, 2023 1:08 PM

12
TQBM0945
D:\A_Job\PSG\_FY22\SC-PM270\Source\woi\PM270PP_TQBM0945_en.fm
Preparing media
Disc
1 Press [CD x] (main unit: [x]) to open the disc tray.
Put in a disc with the label facing up.
Press again to close the disc tray.
2 Press [USB/CD] (main unit: [SELECTOR]) repeatedly to select “CD”.
USB
Preparation
Before you connect a USB device to the system, make sure you do a backup of the data.
1 Decrease the volume and connect the USB device to the USB port.
Hold the main unit when connecting or disconnecting the USB device.
2 Press [USB/CD] (main unit: [SELECTOR]) repeatedly to select “USB”.
Note:
Do not use a USB extension cable. The system cannot recognize USB device connected through a cable.
Bluetooth
®
You can connect and play an audio device wirelessly through Bluetooth
®
.
Preparation
• Turn on the main unit.
• Turn on the Bluetooth
®
feature of the device and put the device near the system.
• Read the operating instructions of the device for details.
█
Pairing a device
Preparation
If this system is connected to a Bluetooth
®
device, disconnect it (~13).
1 Press [ ].
If “PAIRING” is shown, continue with step 4.
2 Press [PLAY MENU] to select “PAIRING”.
Or press and hold [– PAIRING] on the main unit until “PAIRING” is shown. Continue with step 4.
3 Press [R, T] to select “OK? YES” and then press [OK].
“PAIRING” is shown.
To cancel, select “OK? NO”.
4 Select “SC-PM270” from the Bluetooth
®
menu of the device.
If prompted for a passkey, input “0000”.
The device connects with this system automatically after pairing is complete.
The name of the connected device is shown for a few seconds.
Note:
You can pair up to 8 devices with this system. If a 9th device is paired, the device that has not been used for the
longest time will be replaced.
PM270PP_TQBM0945_en.fm Page 12 Tuesday, October 17, 2023 1:08 PM

13
TQBM0945
D:\A_Job\PSG\_FY22\SC-PM270\Source\woi\PM270PP_TQBM0945_en.fm
█
Connecting a device
Preparation
If this system is connected to a Bluetooth
®
device, disconnect it (~13).
1 Press [ ].
“BLUETOOTH READY” is shown.
2 Select “SC-PM270” from the Bluetooth
®
menu of the device.
The name of the connected device is shown for a few seconds.
3 Start playback on the device.
Note:
• A device must be paired to connect.
• This system can only connect to one device at a time.
• When “BLUETOOTH” is selected as the source, this system will automatically try to connect to the last
connected device. (“LINKING” is shown during this process.)
█
Disconnecting a device
While a Bluetooth
®
device is connected
1 Press [PLAY MENU] repeatedly to select “DISCONNECT?”.
2 Press [R, T] to select “OK? YES” and then press [OK].
“BLUETOOTH READY” is shown.
To cancel, select “OK? NO”.
Using the main unit
Press and hold [– PAIRING] until “PAIRING” is shown.
Note:
A device is disconnected when you:
– Select a different source.
– Move the device out of the maximum range.
– Disable the Bluetooth
®
transmission of the device.
– Turn off the system or the device.
PM270PP_TQBM0945_en.fm Page 13 Tuesday, October 17, 2023 1:08 PM
14
TQBM0945
D:\A_Job\PSG\_FY22\SC-PM270\Source\woi\PM270PP_TQBM0945_en.fm
Media playback
The following marks indicate the availability of the feature.
Basic playback
CD USB BLUETOOTH
Note:
Depending on the Bluetooth
®
device, some operations may not work.
Viewing available information
CD USB BLUETOOTH
You can view the available information on the display panel.
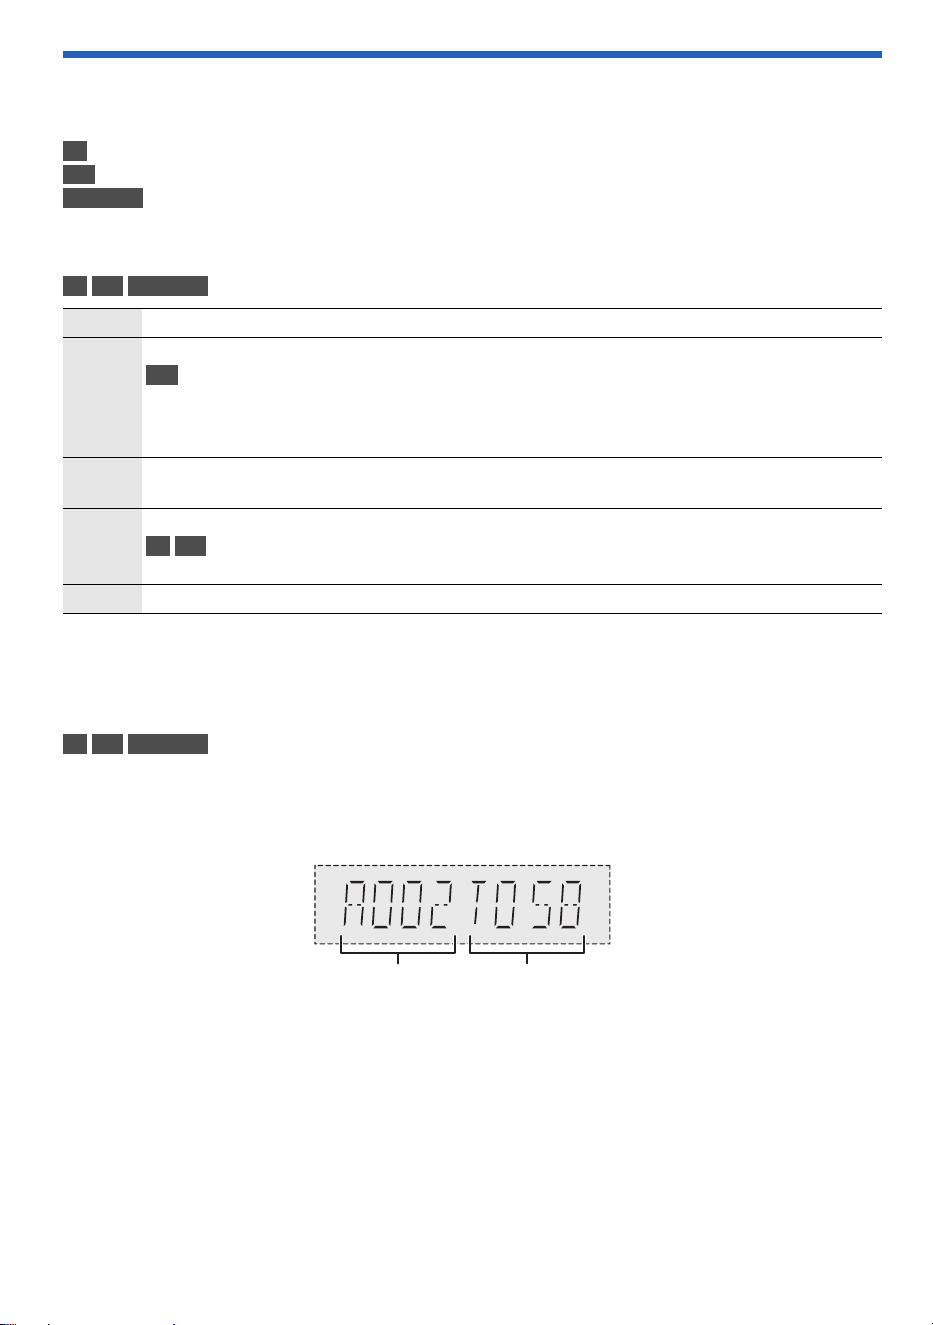
Press [DISPLAY] repeatedly.
Example: MP3 album and track number display.
Note:
• Maximum characters that can be shown: Approximately 32
• This system supports ver. 1.0, 1.1 and 2.3 ID3 tags.
• Text data that the system does not support can show differently.
CD :
USB :
BLUETOOTH :
CD-R/RW in CD-DA format or with MP3 files.
USB device with MP3 files.
Bluetooth
®
device.
Play Press [4/9].
Stop Press [8].
USB
The position is memorized.
“RESUME” is shown.
Press again to stop fully.
Pause Press [4/9].
Press again to continue playback.
Skip Press [2/3] or [5/6] to skip track.
CD USB
Press [R, T] to skip MP3 album.
Search Press and hold [2/3] or [5/6].
Album number Track number
PM270PP_TQBM0945_en.fm Page 14 Tuesday, October 17, 2023 1:08 PM
15
TQBM0945
D:\A_Job\PSG\_FY22\SC-PM270\Source\woi\PM270PP_TQBM0945_en.fm
Play menu
CD USB
1 Press [PLAY MENU] repeatedly to select “PLAYMODE” or “REPEAT”.
2 Press [R, T] to select the setting and then press [OK].
Note:
• During random playback, you cannot skip to tracks which have been played.
• The setting is canceled when you open the disc tray or disconnect the USB device.
Link mode
BLUETOOTH
You can change the link mode to suit the connection type.
Preparation
If this system is connected to a Bluetooth
®
device, disconnect it (~13).
1 Press [PLAY MENU] repeatedly to select “LINK MODE”.
2 Press [R, T] to select the mode and then press [OK].
Note:
• Depending on the device, the playback image and sound may not be synchronized. In this case, select
“MODE 1”.
• Select “MODE 1” if the sound is interrupted.
PLAYMODE
OFF PLAYMODE Cancel the setting.
1-TRACK
1TR
Play one selected track.
Press [2/3] or [5/6] to select the track.
1-ALBUM
1ALBUM
Play one selected MP3 album.
Press [R, T] to select the MP3 album.
RANDOM
RND
Play all tracks randomly.
1-ALBUM RANDOM
1ALBUM RND
Play all tracks in one selected MP3 album randomly.
Press [R, T] to select the MP3 album.
REPEAT
ON REPEAT Repeat playback.
OFF REPEAT Cancel the setting.
MODE 1 Emphasis on connectivity.
MODE 2 (default) Emphasis on sound quality.
PM270PP_TQBM0945_en.fm Page 15 Tuesday, October 17, 2023 1:08 PM

16
TQBM0945
D:\A_Job\PSG\_FY22\SC-PM270\Source\woi\PM270PP_TQBM0945_en.fm
Input level
BLUETOOTH
You can change the input level setting if the sound input level of the Bluetooth
®
transmission is too low.
1 Press [PLAY MENU] repeatedly to select “INPUT LEVEL”.
2 Press [R, T] to select the level and then press [OK].
Note:
Select “LEVEL 0” if the sound is interrupted.
█
Note on disc
• This system can play CD-R/RW with CD-DA or MP3 format content.
• Before playback, finalize the disc on the device it was recorded on.
• Some CD-R/RW cannot be played because of the condition of the recording.
• This system does not guarantee play of all types of discs.
█
Note on USB device
• This system does not guarantee connection with all USB devices.
• This system supports USB 2.0 full-speed.
• This system can support USB devices of up to 32 GB.
• Only FAT 12/16/32 file system is supported.
█
Note on MP3 file
• Files are defined as tracks and folders are defined as albums.
• Tracks must have the extension “.mp3” or “.MP3”.
• Tracks will not necessarily be played in the order you recorded them.
• Some files can fail to work because of the sector size.
• This system does not guarantee play of all MP3s.
MP3 file on disc
• This system can access up to:
– 255 albums (including root folder)
– 999 tracks
– 20 sessions
• Disc must conform to ISO9660 level 1 or 2 (except for extended formats).
MP3 file on USB device
• This system can access up to:
– 800 albums (including root folder)
– 8000 tracks
– 999 tracks in one album
(default)
PM270PP_TQBM0945_en.fm Page 16 Tuesday, October 17, 2023 1:08 PM

17
TQBM0945
D:\A_Job\PSG\_FY22\SC-PM270\Source\woi\PM270PP_TQBM0945_en.fm
FM Radio
Preparation
Press [RADIO] (main unit: [SELECTOR]) repeatedly to select “FM”.
Manual tuning
1 Press [PLAY MENU] repeatedly to select “TUNEMODE”.
2 Press [R, T] to select “MANUAL” and then press [OK].
3 Press [2/3] or [5/6] to tune in to the station.
To tune automatically, press and hold the button until the frequency starts changing quickly.
“STEREO” is shown when a stereo broadcast is being received.
Memory presetting
You can preset up to 30 FM stations.
█
Automatic presetting
1 Press [PLAY MENU] to select “A.PRESET”.
2 Press [R, T] to select “LOWEST” or “CURRENT” and then press [OK].
The tuner presets all the stations it can receive into the channels in ascending order.
To cancel, press [8].
█
Manual presetting
1 Press [PLAY MENU] repeatedly to select “TUNEMODE”.
2 Press [R, T] to select “MANUAL” and then press [OK].
3 Press [2/3] or [5/6] to tune in to the station.
4 Press [OK].
5 Press [R, T] to select a preset number and then press [OK].
Do steps 3 through 5 again to preset more stations.
The new station replaces any station that occupies the same preset number.
█
Selecting a preset station
1 Press [PLAY MENU] repeatedly to select “TUNEMODE”.
2 Press [R, T] to select “PRESET” and then press [OK].
3 Press [2/3] or [5/6] to select the preset station.
LOWEST Tuning begins from the lowest frequency.
CURRENT Tuning begins from the current frequency.
PM270PP_TQBM0945_en.fm Page 17 Tuesday, October 17, 2023 1:08 PM

18
TQBM0945
D:\A_Job\PSG\_FY22\SC-PM270\Source\woi\PM270PP_TQBM0945_en.fm
Improving the sound quality
1 Press [PLAY MENU] repeatedly to select “FM MODE”.
2 Press [R, T] to select “MONO” and then press [OK].
To cancel, select “STEREO”.
“MONO” is also canceled when you change the frequency.
To memorize the setting
Continue with step 4 of “Manual presetting” (~17).
Checking the signal status
Press [DISPLAY].
FM allocation setting
This system can also receive FM broadcasts allocated in 0.1 MHz steps.
1 Press [RADIO].
2 Press and hold [SELECTOR] on the main unit.
After a few seconds, the display panel shows the current minimum radio frequency. Release the button
when the minimum frequency changes.
• To go back to the initial setting, do the above steps again.
• Preset frequencies are erased after you change the setting.
Sound effects
1 Press [SOUND] repeatedly to select the sound effect.
2 Press [R, T] to select the setting and then press [OK].
FM – – – – The FM signal is weak.
The system is not tuned in to a station.
FM ST The FM signal is in stereo.
FM MONO “MONO” is selected as the “FM MODE”. The FM signal is in monaural.
PRESET EQ “HEAVY” (default), “SOFT”, “CLEAR”, “VOCAL” or “FLAT”
BASS –4 to +4 (default: 0)
Using the main unit
1. Press [BASS].
2. Press [2/3] or [5/6].
TREBLE –4 to +4 (default: 0)
Using the main unit
1. Press [TREBLE].
2. Press [2/3] or [5/6].
D.BASS “ON D.BASS” (default) or “OFF D.BASS”
SURROUND “ON SURROUND” or “OFF SURROUND” (default)
PM270PP_TQBM0945_en.fm Page 18 Tuesday, October 17, 2023 1:08 PM

19
TQBM0945
D:\A_Job\PSG\_FY22\SC-PM270\Source\woi\PM270PP_TQBM0945_en.fm
Clock and timers
Setting the clock
This is a 12-hour clock.
1 Press [SETUP] repeatedly to select “CLOCK”.
2 Press [R, T] to set the time and then press [OK].
To check the time
Press [SETUP] repeatedly to select “CLOCK” and then press [OK].
In standby mode, press [DISPLAY].
Note:
Reset the clock regularly to maintain accuracy.
Play timer
(Except for Bluetooth
®
source)
You can set the timer to come on at a certain time to wake you up.
Preparation
Set the clock.
1 Press [SETUP] repeatedly to select “TIMER ADJ”.
2 Press [R, T] to set the start time and then press [OK].
3 Do step 2 again to set the end time.
4 Press [R, T] to select the source you want to play and then press [OK].
To start the timer
1 Prepare the source you want to listen to (disc, USB or radio) and set the volume.
2 Press [SETUP] repeatedly to select “TIMER SET”.
3 Press [R, T] to select “SET” and then press [OK].
“#” is shown.
To cancel, select “OFF”.
The system must be turned off for the timer to operate.
To check the setting
Press [SETUP] repeatedly to select “TIMER ADJ” and then press [OK].
In standby mode, press [DISPLAY] two times.
Note:
• The timer starts at a low volume and increases gradually to the preset level.
• The timer comes on at the set time every day if the timer is on.
• If you turn off the system and then turn on again while a timer is in operation, the timer will not stop at the end
time.
PM270PP_TQBM0945_en.fm Page 19 Tuesday, October 17, 2023 1:08 PM

20
TQBM0945
D:\A_Job\PSG\_FY22\SC-PM270\Source\woi\PM270PP_TQBM0945_en.fm
Sleep timer
The sleep timer turns off the system after the set time.
1 Press [SETUP] repeatedly to select “SLEEP”.
2 Press [R, T] to select the setting (in minutes) and then press [OK].
To cancel, select “OFF”.
Note:
• The remaining time is always shown on the display. The display changes temporarily when you perform other
operations.
• The sleep timer always comes first. Be sure not to set an overlap of timers.
Others
Auto off
This system automatically turns off when you do not use it for approximately 20 minutes.
1 Press [SETUP] repeatedly to select “AUTO OFF”.
2 Press [R, T] to select “ON” and then press [OK].
To cancel, select “OFF”.
Note:
This function does not work when you are in radio source or when a Bluetooth
®
device is connected.
Bluetooth
®
standby
This function automatically turns on the system when you establish a Bluetooth
®
connection from a
paired device.
1 Press [SETUP] repeatedly to select “BLUETOOTH STANDBY”.
2 Press [R, T] to select “ON” and then press [OK].
To cancel, select “OFF”.
Note:
Some devices may take longer to respond. If you are connected to a Bluetooth
®
device before turning off the
system, wait for a minimum of 5 seconds before connecting to this system from your Bluetooth
®
device again.
Software updates
Occasionally, Panasonic may release updated software for this system that may add or improve the way
a feature operates. These updates are available free of charge.
For more details, refer to the following website.
https://panasonic.jp/support/global/cs/
(This site is in English only.)
█
Checking the software version
1 Press [SETUP] repeatedly to select “SW VER.” and then press [OK].
The software version is shown.
2 Press [OK] again to exit.
SLEEP 30 SLEEP 60 SLEEP 90 SLEEP 120
OFF
PM270PP_TQBM0945_en.fm Page 20 Tuesday, October 17, 2023 1:08 PM

21
TQBM0945
D:\A_Job\PSG\_FY22\SC-PM270\Source\woi\PM270PP_TQBM0945_en.fm
Troubleshooting
Before requesting service, make the following checks. If you are in doubt about some of the check points,
or if the solutions indicated do not solve the problem, consult your dealer for instructions.
█
Common problems
The unit does not work.
• The safety device has been activated. Do the following:
1. Press [1] on the main unit to turn the unit to standby mode. If the unit does not turn to standby mode,
disconnect the AC power supply cord and connect it again.
2. Press [1] again to turn on the unit. If the problem persists, consult your dealer.
No operations can be done with the remote control.
• Examine that the battery is installed correctly.
Sound is distorted or no sound.
• Adjust the volume of the system.
• Turn off the system, determine and correct the cause, and then turn on again. It can be caused by straining of
the speakers through excessive volume or power, and when using the system in a hot environment.
A humming sound can be heard during playback.
• An AC power supply cord or fluorescent light is near the cables. Keep other appliances and cords away from
the cables of this system.
█
Disc
Display not shown correctly.
Playback does not start.
• You have not put in the disc correctly. Put it in correctly.
• Disc is dirty. Clean the disc.
• Replace the disc if it is scratched, warped, or non-standard.
• There is condensation. Let the system dry for 1 to 2 hours.
The total number of tracks shown is incorrect.
The disc cannot be read.
Distorted sound is heard.
• You put in a disc that the system cannot play. Change to a playable disc.
• You put in a disc that has not been finalized.
█
USB
The USB device or the contents in it cannot be read.
• The format of the USB device or the contents in it are not compatible with the system.
• USB devices with storage capacity of more than 32 GB cannot work.
• USB devices may not be recognized when connected to this system with a USB extension cable or USB hub.
Slow operation of the USB device.
• Large content size or large memory USB device takes longer time to read.
The elapsed time shown is different from the actual play time.
• Transfer the data to another USB device or backup the data and reformat the USB device.
█
Radio
Sound is distorted.
• Use an optional outdoor antenna. The antenna should be installed by a competent technician.
A beat sound is heard.
• Turn off the TV or move it away from the system.
• Move mobile telephones away from the system if the interference is apparent.
PM270PP_TQBM0945_en.fm Page 21 Tuesday, October 17, 2023 1:08 PM

22
TQBM0945
D:\A_Job\PSG\_FY22\SC-PM270\Source\woi\PM270PP_TQBM0945_en.fm
█
Bluetooth
®
Pairing cannot be done.
• Check the Bluetooth
®
device condition.
• The device is out of the 10 m (33 ft) communication range. Move the device nearer to the system.
The device cannot be connected.
• The pairing of the device was unsuccessful. Do pairing again.
• The pairing of the device has been replaced. Do pairing again.
• This system might be connected to a different device. Disconnect the other device and try connecting the
device again.
• The system may have a problem. Turn off the system and then turn on again.
• If “MODE 2” is selected in “LINK MODE”, select “MODE 1” (~15).
The device is connected but audio cannot be heard through the system.
• For some built-in Bluetooth
®
devices, you have to set the audio output to “SC-PM270” manually. Read the
operating instructions of the device for details.
Sound from the device is interrupted.
• The device is out of the 10 m (33 ft) communication range. Move the device nearer to the system.
• Remove any obstacle between the system and the device.
• Other devices that use the 2.4 GHz frequency band (wireless router, microwaves, cordless phones, etc.) are
interfering. Move the device nearer to the system and distance it from the other devices.
• Select “MODE 1” for stable communication (~15).
Playback image and sound are not synchronized.
• Restart the playback app of the device.
█
Main unit displays
“--:--”
• You connected the AC power supply cord for the first time or there was a power failure recently. Set the clock.
• Track play time is more than 99 minutes.
“ADJUST CLOCK”
• The clock is not set. Adjust the clock.
“ADJUST TIMER”
• The play timer is not set. Adjust the play timer.
“AUTO OFF”
• The system has not been used for 20 minutes and will turn off within a minute. To cancel, press any button.
“ERROR”
• An incorrect operation was done. Read the instructions and try again.
“F61”
“F77”
• Disconnect the AC power supply cord and consult your dealer.
“F70”
• Examine the Bluetooth
®
connection.
• Disconnect the Bluetooth
®
device. Turn off the system and then turn on again.
“F76”
• There is a problem with the power supply.
• Disconnect the AC power supply cord and consult your dealer.
“NODEVICE”
• The USB device is not connected. Examine the connection.
“NO DISC”
• You have not put in a disc.
PM270PP_TQBM0945_en.fm Page 22 Tuesday, October 17, 2023 1:08 PM

23
TQBM0945
D:\A_Job\PSG\_FY22\SC-PM270\Source\woi\PM270PP_TQBM0945_en.fm
“NO PLAY”
• There is no album or track in the USB device.
• Examine the content. You can only play supported format.
• The system may have a problem. Turn off the system and then turn on again.
“PLAYERROR”
• You played an unsupported MP3 file. The system will skip that track and play the next one.
“REMOTE 1”
“REMOTE 2”
• The remote control and the main unit are using different codes. Change the code of the remote control.
– When “REMOTE 1” is shown, press and hold [OK] and [ ] on the remote control for a minimum of
4 seconds.
– When “REMOTE 2” is shown, press and hold [OK] and [USB/CD] for a minimum of 4 seconds.
“USB OVER CURRENT ERROR”
• The USB device is drawing too much power. Disconnect the USB device, turn off the system and then turn on
again.
• Check the connection, it may be caused by a faulty USB cable.
“–VBR–”
• The system cannot show the remaining play time for variable bit rate (VBR) tracks.
Remote control code
When other Panasonic equipment responds to the remote control of this system, change the remote
control code for this system.
Preparation
Press [USB/CD] to select “CD”.
█
To set the code to “REMOTE 2”
1 Press and hold [SELECTOR] on the main unit and [USB/CD] on the remote control until
“REMOTE 2” is shown.
2 Press and hold [OK] and [USB/CD] for a minimum of 4 seconds.
█
To set the code to “REMOTE 1”
1 Press and hold [SELECTOR] on the main unit and [ ] on the remote control until
“REMOTE 1” is shown.
2 Press and hold [OK] and [ ] for a minimum of 4 seconds.
PM270PP_TQBM0945_en.fm Page 23 Tuesday, October 17, 2023 1:08 PM

24
TQBM0945
D:\A_Job\PSG\_FY22\SC-PM270\Source\woi\PM270PP_TQBM0945_en.fm
System memory reset
Reset the memory when the following situations occur:
• There is no response when buttons are pressed.
• You want to clear and reset the memory contents.
1 Disconnect the AC power supply cord.
2 While you press and hold [1] on the main unit, connect the AC power supply cord
again.
Continue to press and hold the button until “––––––––” is shown.
3 Release [1].
All the settings are set back to the factory preset.
It is necessary to set the memory items again.
Maintenance
Disconnect the AC power supply cord before maintenance. Clean this system with a soft, dry
cloth.
• Never use alcohol, paint thinner or benzine to clean this system.
• Before using chemically treated cloth, read the instructions that came with the cloth carefully.
PM270PP_TQBM0945_en.fm Page 24 Tuesday, October 17, 2023 1:08 PM

25
TQBM0945
D:\A_Job\PSG\_FY22\SC-PM270\Source\woi\PM270PP_TQBM0945_en.fm
Specifications
█
General
Dimensions (W x H x D)
SA-PM270 184 mm × 123 mm × 231 mm (7 ″ × 4 ″ × 9 ″)
SB-PM02 139 mm × 224 mm × 136 mm (5 ″ × 8 ″ × 5 ″)
Mass
SA-PM270 1.1 kg (2.4 lbs)
SB-PM02 1.3 kg (2.9 lbs)
Operating temperature range 0°C to +40°C (+32°F to +104°F)
Operating humidity range 35% to 80% RH (no condensation)
█
Amplifier section
RMS output power
Front Ch (both ch driven) 10 W per channel (6 Ω), 1 kHz, 10% THD
Total RMS power 20 W
█
Disc section
Disc played [8 cm (3″) or 12 cm (5″)] CD, CD-R/RW
Pick up
Wavelength 790 nm (CD)
Format CD-DA, MP3
*
1
*
1
MPEG-1 Layer 3, MPEG-2 Layer 3
█
Tuner section
Frequency modulation (FM)
Preset memory 30 stations
Frequency range 87.9 MHz to 107.9 MHz (200 kHz step)
87.5 MHz to 108.0 MHz (100 kHz step)
█
Speaker section
Speaker unit(s)
Full range 10 cm (4″) cone type x 1
Impedance 6 Ω
Power supply AC 120 V, 60 Hz
Power consumption 14 W
Power consumption in standby mode (approximate)
With “BLUETOOTH STANDBY” set to “OFF” 0.2 W
With “BLUETOOTH STANDBY” set to “ON” 0.3 W
PM270PP_TQBM0945_en.fm Page 25 Tuesday, October 17, 2023 1:08 PM

26
TQBM0945
D:\A_Job\PSG\_FY22\SC-PM270\Source\woi\PM270PP_TQBM0945_en.fm
█
Bluetooth
®
section
Bluetooth
®
System Specification Bluetooth
®
Ver. 4.2
Wireless Equipment Classification Class 2 (2.5 mW)
Supported profiles A2DP, AVRCP
Supported codec SBC
Frequency band 2.4 GHz band FH-SS
Operating distance Approx. 10 m (33 ft) Line of sight*
2
*
2
Prospective communication distance
Measurement environment:
Temperature 25 °C (77 °F)/Height 1.0 m (3.3 ft)
Measure in “MODE 1”
█
Terminals section
USB Front, USB Type-A connector
File system FAT12, FAT16, FAT32
USB port power DC OUT 5 V, 500 mA (MAX)
█
Format Section
USB
USB standard USB 2.0 full-speed
USB mass storage class
Format support MP3 (32 kHz, 44.1 kHz, 48 kHz /16 kbps - 320 kbps)
Note:
• Specifications are subject to change without notice.
Mass and dimensions are approximate.
• Total harmonic distortion is measured by the digital spectrum analyzer.
PM270PP_TQBM0945_en.fm Page 26 Tuesday, October 17, 2023 1:08 PM

27
TQBM0945
D:\A_Job\PSG\_FY22\SC-PM270\Source\woi\PM270PP_TQBM0945_en.fm
References
About Bluetooth
®
Frequency band
• This system uses the 2.4 GHz frequency band.
Certification
• This system conforms to the frequency restrictions and has received certification based on frequency
laws. Thus, a wireless permit is not necessary.
• The actions below are punishable by law in some countries:
– Taking apart or modifying the main unit.
– Removing specification indications.
Restrictions of use
• Wireless transmission and/or usage with all Bluetooth
®
equipped devices is not guaranteed.
• All devices must conform to standards set by Bluetooth SIG, Inc.
• Depending on the specifications and settings of a device, it can fail to connect or some operations can
be different.
• This system supports Bluetooth
®
security features. But depending on the operating environment and/or
settings, this security is possibly not sufficient. Transmit data wirelessly to this system with caution.
• This system cannot transmit data to a Bluetooth
®
device.
Range of use
• Use this device at a maximum range of 10 m (33 ft).
• The range can decrease depending on the environment, obstacles or interference.
Interference from other devices
• This system may not function properly and troubles such as noise and sound jumps may arise due to
radio wave interference if this unit is located too close to other Bluetooth
®
devices or the devices that
use the 2.4 GHz band.
• This system may not function properly if radio waves from a nearby broadcasting station, etc. is too
strong.
Intended usage
• This system is for normal, general use only.
• Do not use this system near an equipment or in an environment that is sensitive to radio frequency
interference (example: airports, hospitals, laboratories, etc.).
Licenses
Panasonic cannot be held responsible for data and/or information that can possibly be compromised
during a wireless transmission.
The Bluetooth
®
word mark and logos are registered trademarks owned by Bluetooth SIG, Inc. and any
use of such marks by Panasonic Holdings Corporation is under license. Other trademarks and trade
names are those of their respective owners.
PM270PP_TQBM0945_en.fm Page 27 Tuesday, October 17, 2023 1:08 PM

Panasonic Corporation of North America
Two Riverfront Plaza, Newark, NJ 07102-5490
https://shop.panasonic.com
Panasonic Canada Inc.
5770 Ambler Drive, Mississauga, Ontario L4W 2T3
www.panasonic.com
© Panasonic Entertainment & Communication Co., Ltd. 2023
D:\A_Job\PSG\_FY22\SC-PM270\Source\woi\PM270PP_TQBM0945_en.fm
en
TQBM0945
L0923CH0
PM270PP_TQBM0945_en.fm Page 28 Tuesday, October 17, 2023 1:08 PM