Operating instructions
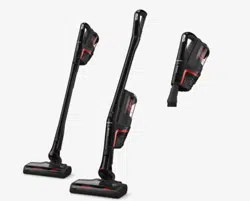
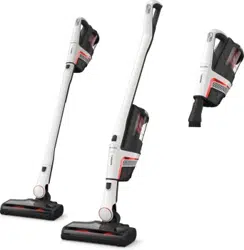
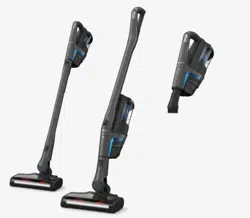
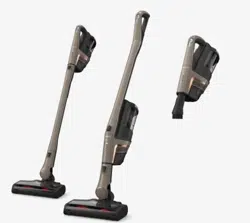
Cordless vacuum cleaner
en-GB
M.-Nr. 12 727 770
HS23

Contents
2
Warning and Safety instructions ............................................................................... 4
Warning and safety notes for the AP10/AP11 battery and LG02 charger .............
8
Guide to the appliance................................................................................................. 12
Sustainability and environmental protection.......................................................... 14
Commissioning.............................................................................................................. 16
Assembling the vacuum cleaner ..................................................................................
16
Connecting the PowerUnit and the suction tube......................................................
16
Connecting the suction tube and the electrobrush ..................................................
17
General battery information..........................................................................................
17
Charging the battery ......................................................................................................
18
Screwing the wall bracket to the wall..........................................................................
18
Battery charging state indicator (while charging)......................................................
19
Battery charging state indicator (while in use) ..........................................................
19
Using the supplied accessories................................................................................. 20
Accessories holder for the suction tube .....................................................................
20
MultiFloor electrobrush (HX-EB20)...........................................................................
21
Electro Compact handheld brush (HX-EC20) ..........................................................
21
AllFloor floorbrush (HX-AF20) ....................................................................................
22
Universal brush (HX-UB)...............................................................................................
22
Extendable flexible XL crevice nozzle (HX-CNXL).....................................................
22
Hose extension (HX-FSH20) ......................................................................................
22
Operation........................................................................................................................ 23
Removing the vacuum cleaner from the wall bracket...............................................
23
Switching on and off ......................................................................................................
23
Increasing the suction power .......................................................................................
24
Using the PowerUnit solo .............................................................................................
24
Cleaning and care ......................................................................................................... 25
Filter system....................................................................................................................
25
Activating the ComfortClean self-cleaning function.................................................
26
Emptying the dust container ........................................................................................
26
Cleaning the dust container and pre-filter..................................................................
27
Cleaning the fine dust filter...........................................................................................
27
Cleaning the electrobrush/handheld brush (depending on the model) .................
28
Removing the roller brush from the electrobrush......................................................
29
Removing the roller brush from the handheld brush (depending on the model)..
30
Replacing the battery.....................................................................................................
30
Caring for the vacuum cleaner and accessories ........................................................
31
Troubleshooting............................................................................................................. 32

Contents
3
Service............................................................................................................................. 35
Contact in case of malfunction ....................................................................................
35
Warranty ..........................................................................................................................
35
Optional accessories.................................................................................................... 36
Purchasing accessories.................................................................................................
36
Electrical connection for the UK................................................................................ 37
Warning and Safety instructions
4
This vacuum cleaner conforms to current safety requirements.
Inappropriate use can lead to personal injury and damage to
property.
Please read the operating instructions before using the vacuum
cleaner for the first time. They contain important information on the
safety, use and maintenance of the vacuum cleaner. This will
prevent both personal injury and damage to the appliance.
In accordance with standard IEC60335-1, Miele expressly and
strongly advises that you read and follow the instructions in the
“Commissioning” section as well as the warning and safety notes.
Miele cannot be held liable for injury or damage caused by non-
compliance with these instructions.
Keep these operating instructions in a safe place and pass them on
to any future owner.
Always disconnect the vacuum cleaner from the power supply
when you have finished using it, before changing any accessories,
as well as for maintenance work, cleaning and troubleshooting. Use
the On/Off switch on the handle to do this.

Warning and Safety instructions
5
Correct application
This vacuum cleaner is intended for cleaning flooring in domestic
households and similar residential environments. This vacuum
cleaner is not suitable for use on construction sites.
This vacuum cleaner is not intended for outdoor use.
This vacuum cleaner can be used for all normal cleaning of carpets,
rugs and robust hard flooring.
This vacuum cleaner is intended for use at altitudes of up to
4000m above sea level.
The vacuum cleaner must only be used to vacuum dry floor
surfaces. Do not vacuum people or animals. Any other types of use,
impermissible modifications or alterations are not permitted.
The vacuum cleaner can only be used by people (including
children) with reduced physical, sensory, or mental capabilities, or
lack of experience or knowledge, if they are supervised whilst using it
or have been shown how to use it in a safe way and understand and
recognise the consequences of incorrect operation.
Safety with children
Children under 8 years of age must be kept away from the vacuum
cleaner unless they are constantly supervised.
Children aged 8 and older may only use the vacuum cleaner
without supervision if they have been shown how to use it in a safe
manner. Children must be able to understand and recognise the
possible dangers caused by incorrect operation.
Children must not be allowed to clean or maintain the vacuum
cleaner unsupervised.
Please supervise children in the vicinity of the vacuum cleaner and
do not let them play with it.
Danger of suffocation. Packaging, e.g. plastic wrappings, must be
kept out of the reach of babies and children. Whilst playing, children
could become entangled in packaging or pull it over their head and
suffocate.

Warning and Safety instructions
6
Technical safety
The vacuum cleaner operates at 25.2V / 25.69V.
It is classified as a class IIappliance and has a classIII design .
This appliance is supplied by a safety extra-low voltage (SELV) power
source where the voltage is low enough to protect users from the risk
of electrical shock. A classII charger is used for supplying power to
charge the vacuum cleaner .
Compare the connection data on the data plate of the charger
(voltage and frequency) with that of the mains electricity supply. This
data must match exactly. Without modifications, the charger is
suitable for 50Hz and 60Hz.
The mains electrical plug must be fitted with an appropriate fuse.
Check both the vacuum cleaner and all accessories supplied with
it for any visible signs of damage before use. Do not use a damaged
vacuum cleaner or damaged accessory.
The MieleMultiFloorelectrobrush and the MieleElectro
Compacthandheldbrush (depending on the model) are additional
motor-driven devices designed specially for this Miele vacuum
cleaner. For safety reasons, the vacuum cleaner must not be used
with a different Miele electrobrush/handheld brush or an
electrobrush/handheld brush produced by another manufacturer.
Before and during use, make sure that no coarse dirt or debris is/
gets trapped in the bottom of the MultiFloorelectrobrush or in the
bottom of the Electro Compacthandheldbrush (supplied depending
on the model).
Store the vacuum cleaner and all accessories at an ambient
temperature between 0°C and 45°C.
Only store the vacuum cleaner in a horizontal position or fit it into
the wall bracket.
While the vacuum cleaner is under warranty, repairs should only be
undertaken by a Miele authorised service technician. Otherwise the
warranty will be invalidated.
Repairs should only be carried out by a Miele authorised service
technician. Repairs and other work by unqualified persons can cause
considerable danger to users.

Warning and Safety instructions
7
Correct use
Do not use the vacuum cleaner without the pre-filter and fine dust
filter fitted.
Keep the vacuum cleaner away from naked flames or other heat
sources. Do not heat the vacuum cleaner. Do not expose the vacuum
cleaner to direct sunlight.
Do not vacuum up anything which has been burning or is still
glowing e.g. cigarettes, ashes or coal, whether glowing or apparently
extinguished.
Do not vacuum up liquid. Allow steam-cleaned or shampooed
carpets and rugs to dry out completely before vacuuming.
Do not use the vacuum cleaner to vacuum toner dust. Toner, such
as that used in printers and photocopiers, can conduct electricity.
Do not vacuum up any inflammable or combustible liquids or
gases and do not vacuum in areas where such substances are stored.
Never touch the roller brush of the MultiFloor electrobrush or
Electro Compact handheld brush (depending on the model) while it is
rotating.
Do not use the MultiFloor electrobrush or the Electro Compact
handheld brush (depending on the model) at head height.
Do not vacuum at head height and do not let the suction get
anywhere near a person's head.
Warning and Safety instructions
8
Warning and safety notes for the AP10/AP11 battery and
LG02 charger
Safety with children
People (including children) with reduced physical, sensory or
mental capabilities, or lack of experience or knowledge, who are
unable to use the LG02 charger safely may only use this vacuum
cleaner if they are supervised whilst using it or have been shown how
to use it in a safe way and understand and recognise the
consequences of incorrect operation.
Keep the AP10/AP11battery out of the reach of children.
Children must be kept away from the LG02 charger unless they
are constantly supervised.
Technical safety
The AP10/AP11 battery, the LG02charger and the wall bracket are
designed for use with the Miele HS23 vacuum cleaner. For safety
reasons, the vacuum cleaner must not be used with another battery,
charger or wall bracket produced by another manufacturer.
If you are using a mains plug adapter, make sure that it is approved
for continuous operation.
Only use the LG02/xx charger supplied for charging the AP10/
AP11 battery.
xx stands for 01, 02, 03, 04, 05, 06 or 07 and therefore the version
of your LG02 charger:
xx
01 AT, BE, BG, CH, CL, CZ, DE, DK, EE, ES, FI, FR, GR, HR, HU, IT, KZ, LT,
LU, LV, NL, NO, PL, PT, RO, RS, RU, SE, SI, SK, TR, UA, ZA
02 AE, HK, MY, SG
03 BR, CA, JP, MX, US
04 AU, NZ
05 CN
06 KR
07 IE, UK

Warning and Safety instructions
9
Temporary or permanent operation on an autonomous power
supply system or a power supply system that is not synchronised
with the mains power supply (e.g. island networks, back-up systems)
is possible. A prerequisite for operation is that the power supply
system complies with the specifications of EN50160 or an
equivalent standard.
The function and operation of the protective measures provided in
the domestic electrical installation and in this Miele product must
also be maintained in isolated operation or in operation that is not
synchronised with the mains power supply, or these measures must
be replaced by equivalent measures in the installation. As described,
for example, in the current version of BS OHSAS 18001–2 ISO
45001.
Charge the AP10/AP11 battery at an ambient temperature
between 10°C and 40°C.
Use the AP10/AP11 battery at an ambient temperature between
0°C and 45°C.
Using the AP10/AP11 battery outside of this ambient temperature
range will limit its performance.
Stop using the AP10/AP11 battery immediately if you notice an
unusual smell from it, if liquid is leaking from it, if it is significantly
overheating or if it is discoloured or deformed. Dispose of the AP10/
AP11 battery immediately (see safety note “Disposing of the AP10/
AP11 battery” at the end of the following section “Correct use”, as
well as “Sustainability and environmental protection – Disposing of
old batteries”).
Batteries will deplete over time. They can then leak corrosive
fluids. Avoid contact with the eyes and skin. In the event of contact,
rinse thoroughly with water and seek medical advice.
The AP10/AP11 lithium-ion battery is subject to the dangerous
goods legislation. The user is permitted to transport the AP10/AP11
battery by road without having to observe any further requirements.
Please contact the Miele Customer Service Department before
sending the AP10/AP11 battery. Only send AP10/AP11 batteries that
are undamaged and have been fully run down. Insulate the metal
contacts with adhesive tape to prevent short circuits. Pack the AP10/
AP11 battery in such a way that it is not able to move around inside
the packaging.

Warning and Safety instructions
10
Correct use
Do not drop or throw the AP10/AP11 battery. For safety reasons,
do not continue to use an AP10/AP11 battery which has been
damaged.
Keep the AP10/AP11 battery away from naked flames or other heat
sources. Do not heat the AP10/AP11 battery. Do not expose the
rechargeable battery to direct sunlight.
Do not dismantle the AP10/AP11 battery.
Do not cause a short circuit by bridging the contacts of the AP10/
AP11 battery, either unintentionally or deliberately.
Do not allow the AP10/AP11 battery to come into contact with
liquids.
Disposing of the AP10/AP11 battery: remove the AP10/AP11
battery from the vacuum cleaner. Insulate the metal contacts with
adhesive tape to prevent short circuits. Dispose of the AP10/AP11
battery in a municipal recycling facility. Do not dispose of the AP10/
AP11 battery with your household waste.

Warning and Safety instructions
11
Cleaning
Do not immerse the vacuum cleaner or any accessories supplied
with it in water. Clean the vacuum cleaner and accessories only with
a dry or slightly damp cloth when disconnected from the power
supply.
The MultiFloor electrobrush and the Electro Compact handheld
brush (depending on the model), the PowerUnit and the suction tube
contain electrical wires. The plug connectors must not come into
contact with water. Danger of electric shock. They should only be
cleaned with a dry cloth.
Accessories and spare parts
Only use genuine accessories with the Miele logo on the
packaging. The manufacturer cannot otherwise guarantee the safety
of the product.
Miele can only guarantee the safety of the appliance when genuine
Miele replacement parts are used. Faulty components must only be
replaced with genuine Miele replacement parts.
Transport
The packaging material protects the vacuum cleaner from
transport damage. We recommend you keep the packaging for
transport purposes.

Guide to the appliance
12

Guide to the appliance
13
a
Screw cap for the ComfortClean self-cleaning function
b
Release catch for removing the fine dust filter
c
Fine dust filter
d
Battery charging state indicator
e
Battery compartment
f
Charging socket (at the bottom)
g
Attachment device for wall bracket
h
Dust container
i
Pre-filter
j
Release catch for dust container flap
k
Dust container flap
l
PowerUnit connector
m
Sliding ring for releasing the PowerUnit
n
Suction tube
o
Suction tube connector
p
Sliding ring for releasing the electrobrush
q
Release catch for opening the electrobrush
r
Removable roller brush
s
MultiFloor electrobrush
t
Cleaning tool
u
PowerUnit
v
Suction power selector
w
On/Off switch
x
Handle
y
Wall bracket
Sustainability and environmental protection
14
Disposing of the packaging
material
The packaging material is used for
handling and protects the appliance
from transport damage. The packaging
material used is selected from materials
which are environmentally friendly for
disposal and can generally be recycled.
Recycling the packaging material
reduces the use of raw materials. Use
material-specific collection points for
valuable materials and take advantage
of return options.
We recommend you keep the packaging
material for transport purposes.
Disposing of your old appliance
Before disposing of your old appliance,
remove the fine dust filter and dispose
of it with your household waste.
Electrical and electronic appliances
contain many valuable materials. They
also contain certain materials,
compounds and components which
were essential for their correct
functioning and safety. These could be
hazardous to human health and to the
environment if disposed of with
household waste or if handled
incorrectly. Please do not, therefore,
dispose of your old appliance with
household waste.
Instead, please make use of officially
designated collection and disposal
points to dispose of and recycle
electrical and electronic appliances in
your local community, with your dealer
or with Miele, free of charge. By law, you
are solely responsible for deleting any
personal data from the old appliance
prior to disposal. You are legally obliged
to remove any old batteries which are
not securely enclosed by the appliance
and to remove any lamps without
destroying them, where this is possible.
These must be taken to a suitable
collection point where they can be
handed in free of charge. Please ensure
that your old appliance poses no risk to
children while being stored for disposal.
Sustainability and environmental protection
15
Disposing of old batteries
In many cases, electrical and electronic
appliances contain batteries which must
not be disposed of with household
waste after use. You are legally obliged
to remove any old batteries which are
not securely enclosed by the appliance
and take them to a suitable collection
point (e.g. retailer) where they can be
handed in free of charge. Insulate the
metal contacts with adhesive tape to
prevent short circuits. Batteries may
contain substances which can be
hazardous to human health and the
environment.
The labelling on the battery will provide
further information. For example,
batteries containing lithium are marked
“Li-ion”. The bin symbol with a cross
through it means that the batteries
must not be disposed of in household
waste. We are also required to inform
you that a bin with a cross through it
which also has one or more chemical
symbols on it indicates that the battery
contains lead (Pb), cadmium (Cd) and/
or mercury (Hg).
3E&G+J
Old batteries contain valuable raw
materials which can be recycled.
Disposing of batteries separately makes
them easier to handle and recycle.
Commissioning
16
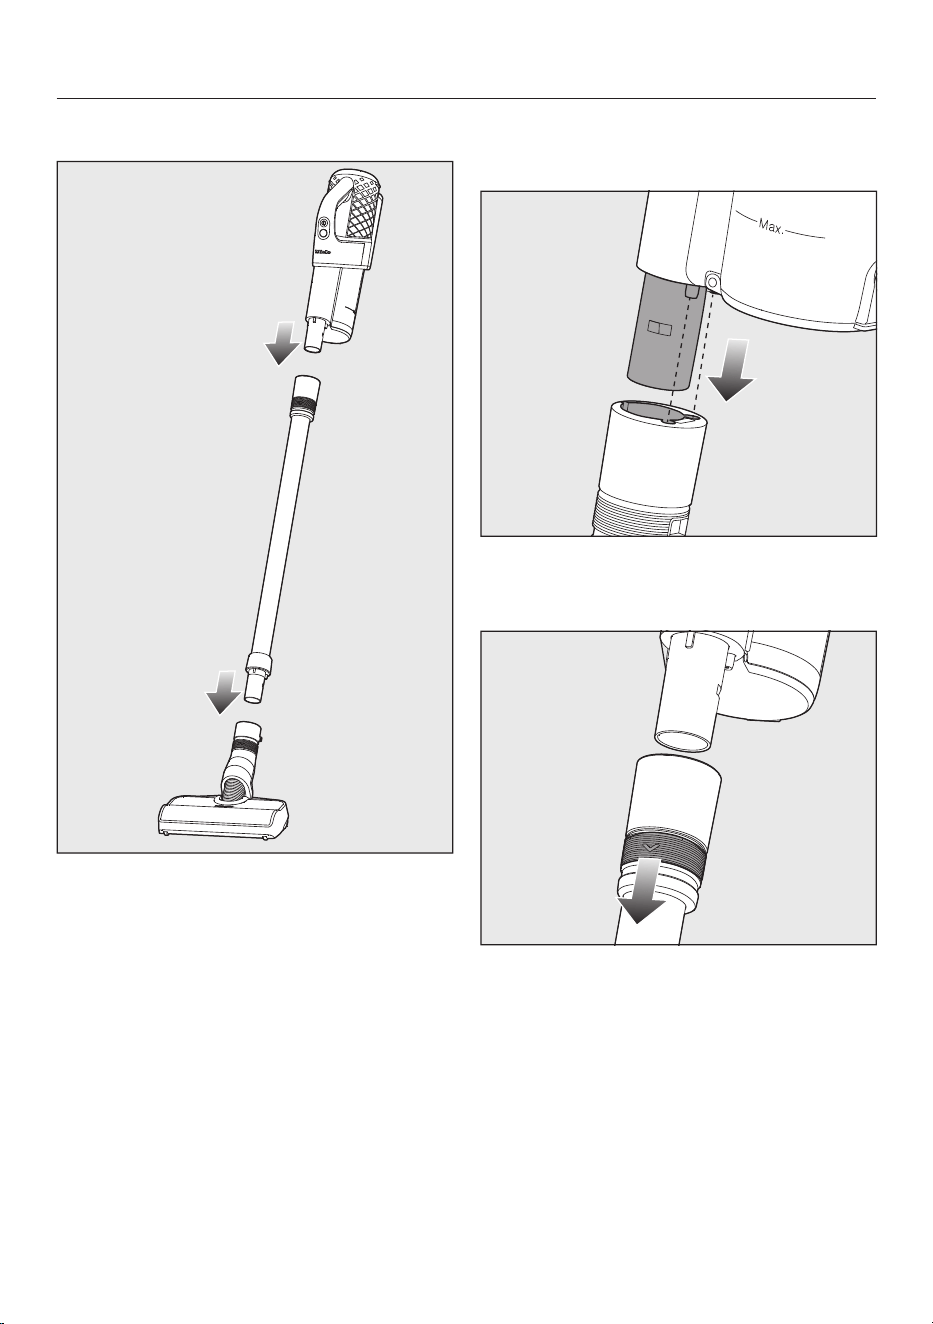
Assembling the vacuum cleaner
Assemble the vacuum cleaner.
Connecting the PowerUnit and
the suction tube
Push the PowerUnit connector into
position in the suction tube until it
audibly clicks into place.
Slide the sliding ring on the suction
tube down to separate the individual
sections from each other.
Commissioning
17
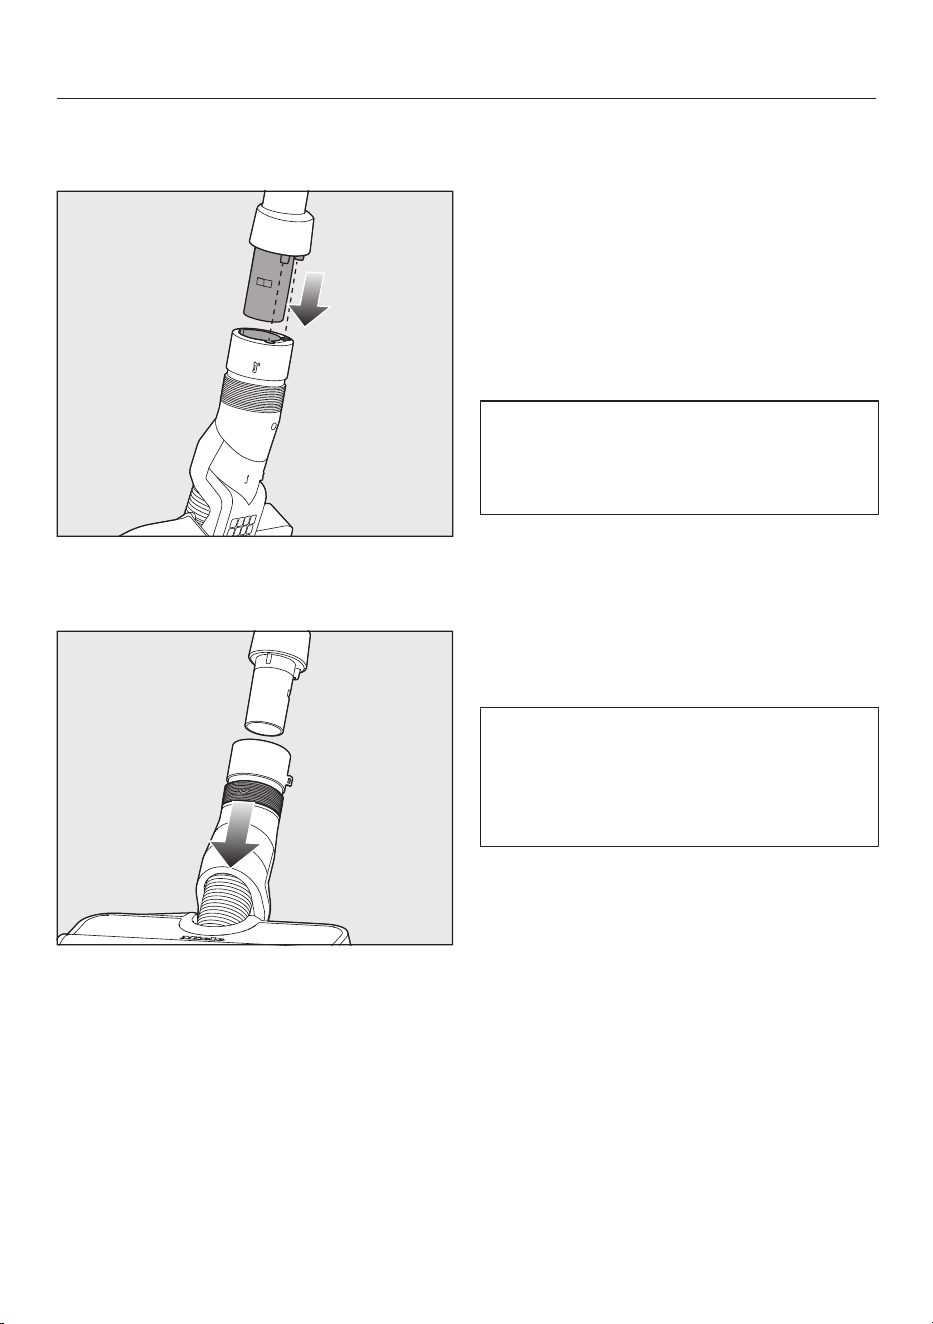
Connecting the suction tube
and the electrobrush
Push the suction tube connector into
the electrobrush from above until it
audibly clicks into place.
Slide the sliding ring on the
electrobrush down to separate the
individual sections from each other.
General battery information
The rechargeable battery is supplied not
fully charged.
Charge the battery completely before
using it for the first time. Allow
approximately 3.5hours for this.
Once the battery is fully charged, the
battery charging state indicator at the
top of the PowerUnit switches off to
conserve energy.
The maximum charging capacity is
only achieved once the battery has
been charged and run down approx.
five times.
A full charge provides enough power for
17minutes if the vacuum cleaner is used
in its fully assembled state.
However, if you use the PowerUnit solo
(see “Operation” – “Using the
PowerUnit solo”), you can vacuum for
up to 55minutes at a time.
The running time depends on the
selected power level, the flooring and
how the vacuum cleaner is used, as
well as on the degree of soiling of the
filter system.
Commissioning
18
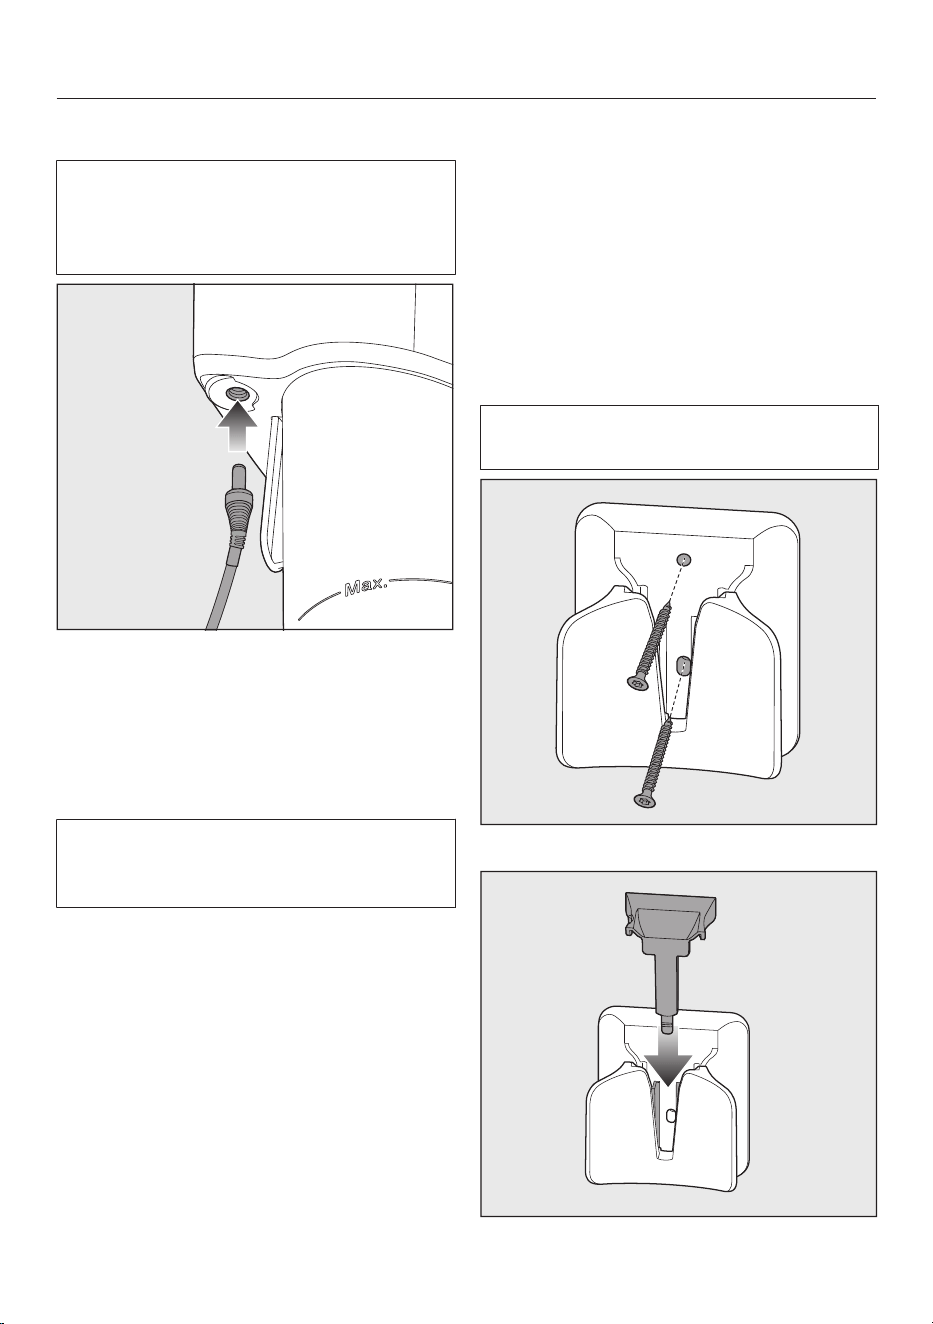
Charging the battery
Before charging the battery for the first
time, you must read the information in
“Commissioning” – “General battery
information”.
Plug the charging plug of the supplied
charging cable into the charging
socket on the bottom at the rear of
the PowerUnit.
Plug the charger into a power socket.
The charging process will start.
You can read more about this in
“Battery charging state indicator (while
charging)”.
Screwing the wall bracket to the
wall
2 plugs and 2 T20TORX screws are
supplied for attaching the wall bracket.
You will also need a battery-operated
screwdriver or a drill (with a drilling
diameter of 6mm).
Select a distance of 106cm between
the bottom edge of the wall bracket and
the floor.
Be careful not to damage any cables
laid in the wall.
Attach the wall bracket to the wall.
Commissioning
19
Slide the cover down into the wall
bracket from above until it audibly
clicks into place.
Place the vacuum cleaner into the
wall bracket from above.
Battery charging state indicator
(while charging)
The battery charging state is displayed
on the top of the PowerUnit.
Charging capacity Display
Minimum
charging capacity
Left indicator
lights up
Increasing
charging capacity
Left indicator
lights up; middle
light flashes
Charging capacity
increasing further
Left and middle
indicators light up;
right indicator
flashes
Charged capacity
approx. 91–99%
Left, middle and
right indicators
light up
100% Switches off
Once the battery is fully charged, the
battery charging state indicator
switches off to conserve energy.
If the battery has not been used for a
long time and has run down, it will
switch to safe mode. As a result, the
battery charging state indicator will
only respond after approximately 30–
60minutes.
Battery charging state indicator
(while in use)
The battery charging state is displayed
on the top of the PowerUnit.
Charging capacity Display
Maximum charging
capacity
All indicators
light up
Decreasing charging
capacity
Two indicators
light up
Charging capacity
decreasing further
One indicator
lights up
Minimum charging
capacity
One indicator
flashes
Using the supplied accessories
20
Miele offers a range of suitable
accessories for many special
applications (see “Optional
accessories”).
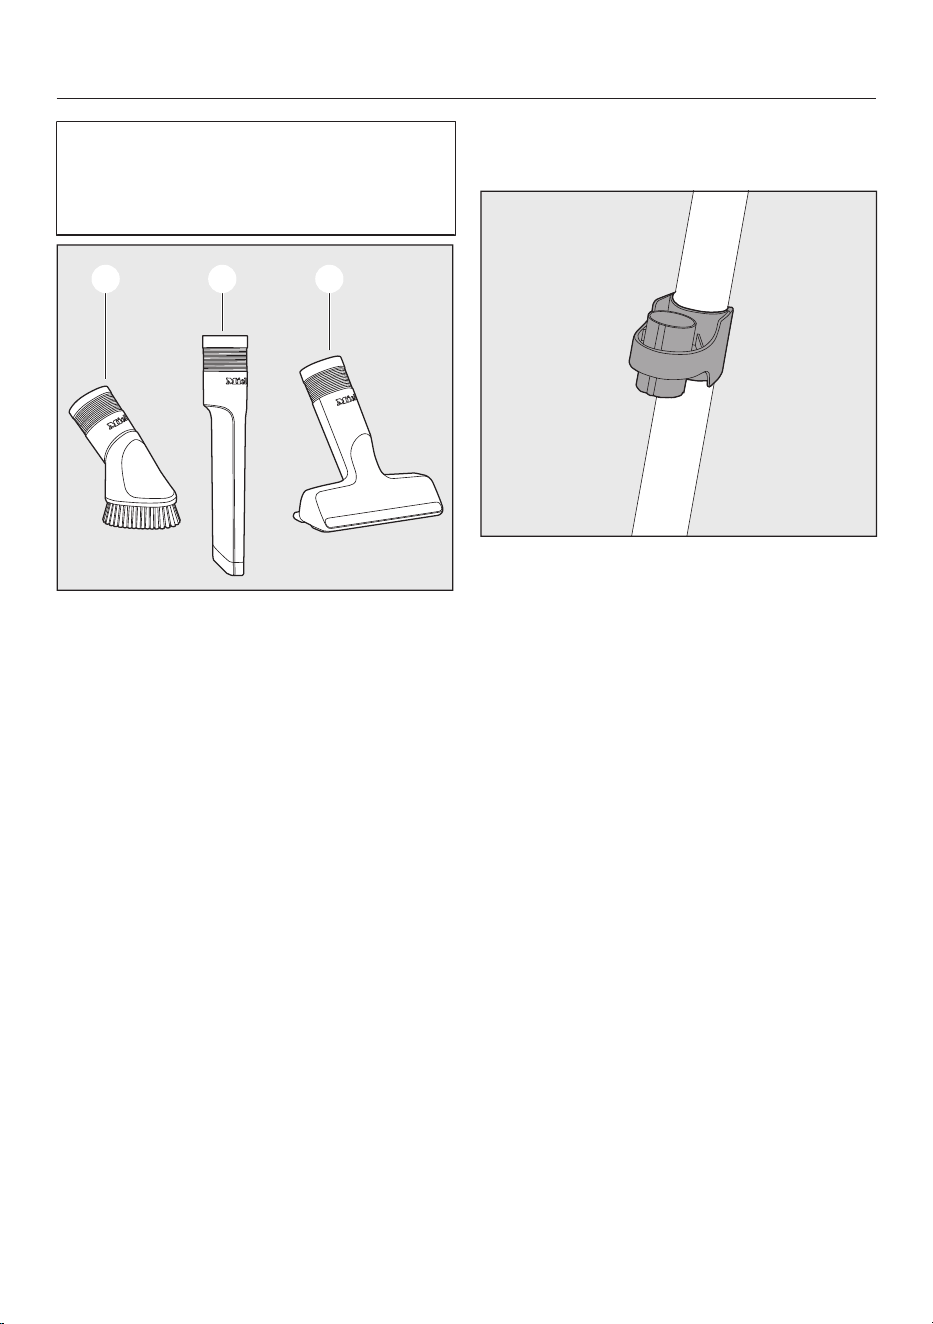
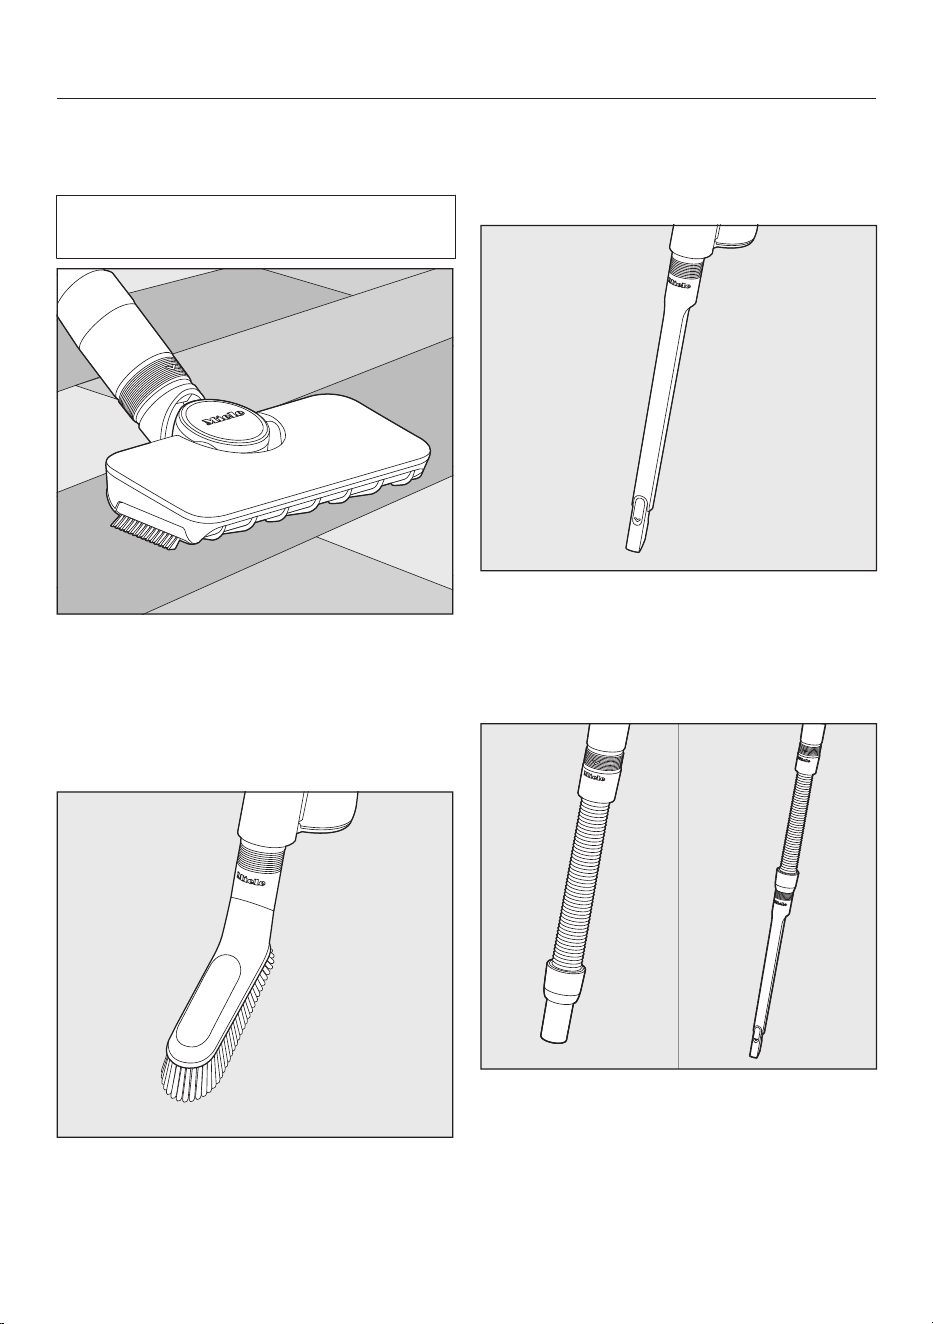
Dusting brush
Accessory for vacuuming skirting
boards, carved furniture or
ornaments.
Crevice nozzle
Accessory for cleaning in folds,
crevices or corners.
Upholstery nozzle
Accessory for cleaning upholstery,
mattresses and cushions.
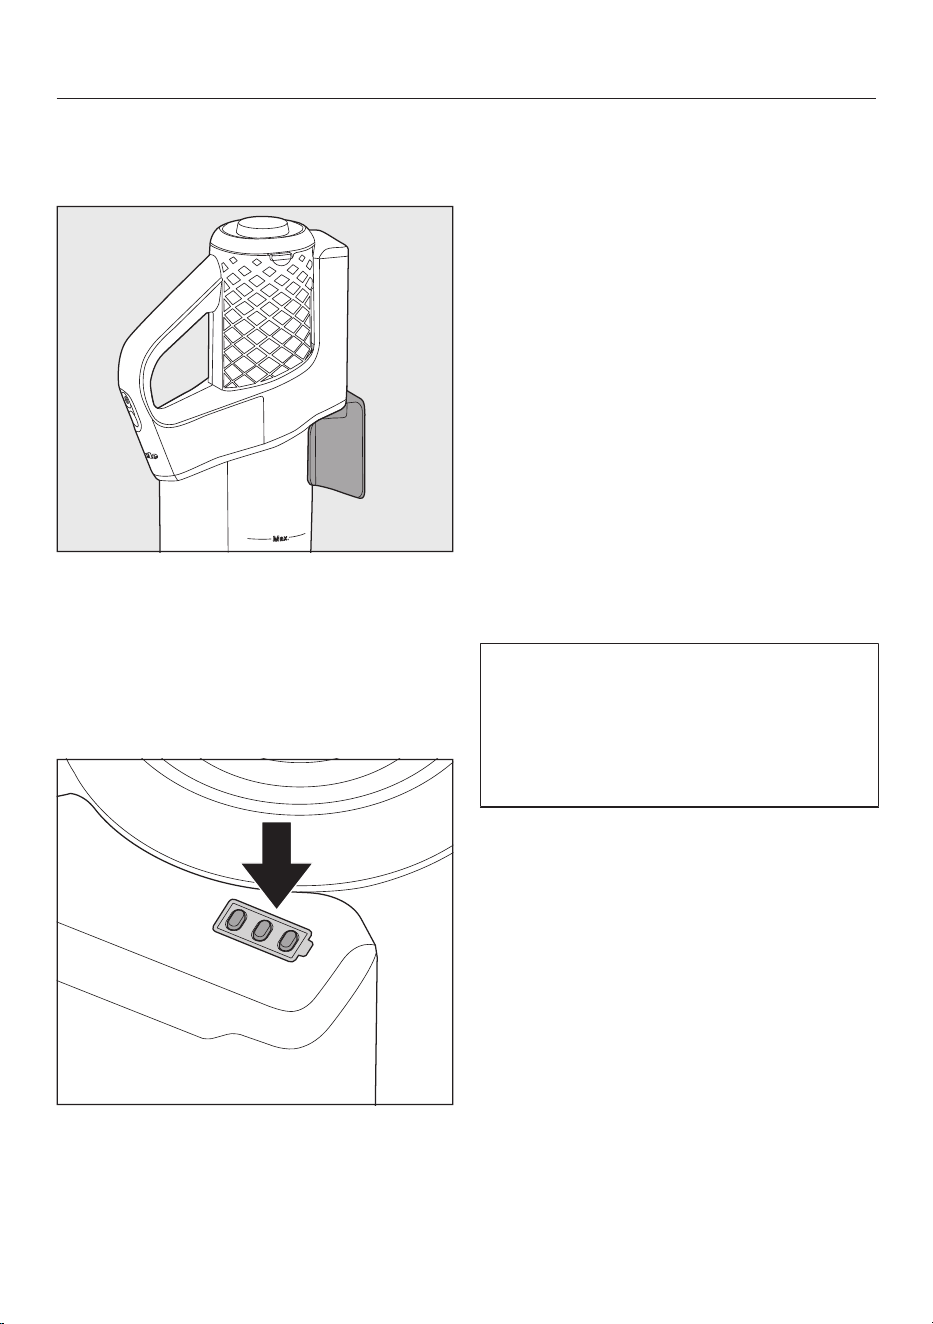
Accessories holder for the
suction tube
This accessories holder allows you to
carry around 2accessories from the
three-piece accessory set while you
vacuum.
Using the supplied accessories
21
Follow the flooring manufacturer’s
cleaning and care instructions.
Damage caused by trapped
material.
Risk of the flooring getting scratched.
Make sure that there is no coarse dirt
or debris trapped in the bottom of
the electrobrush, e.g. shards of glass
or stones.
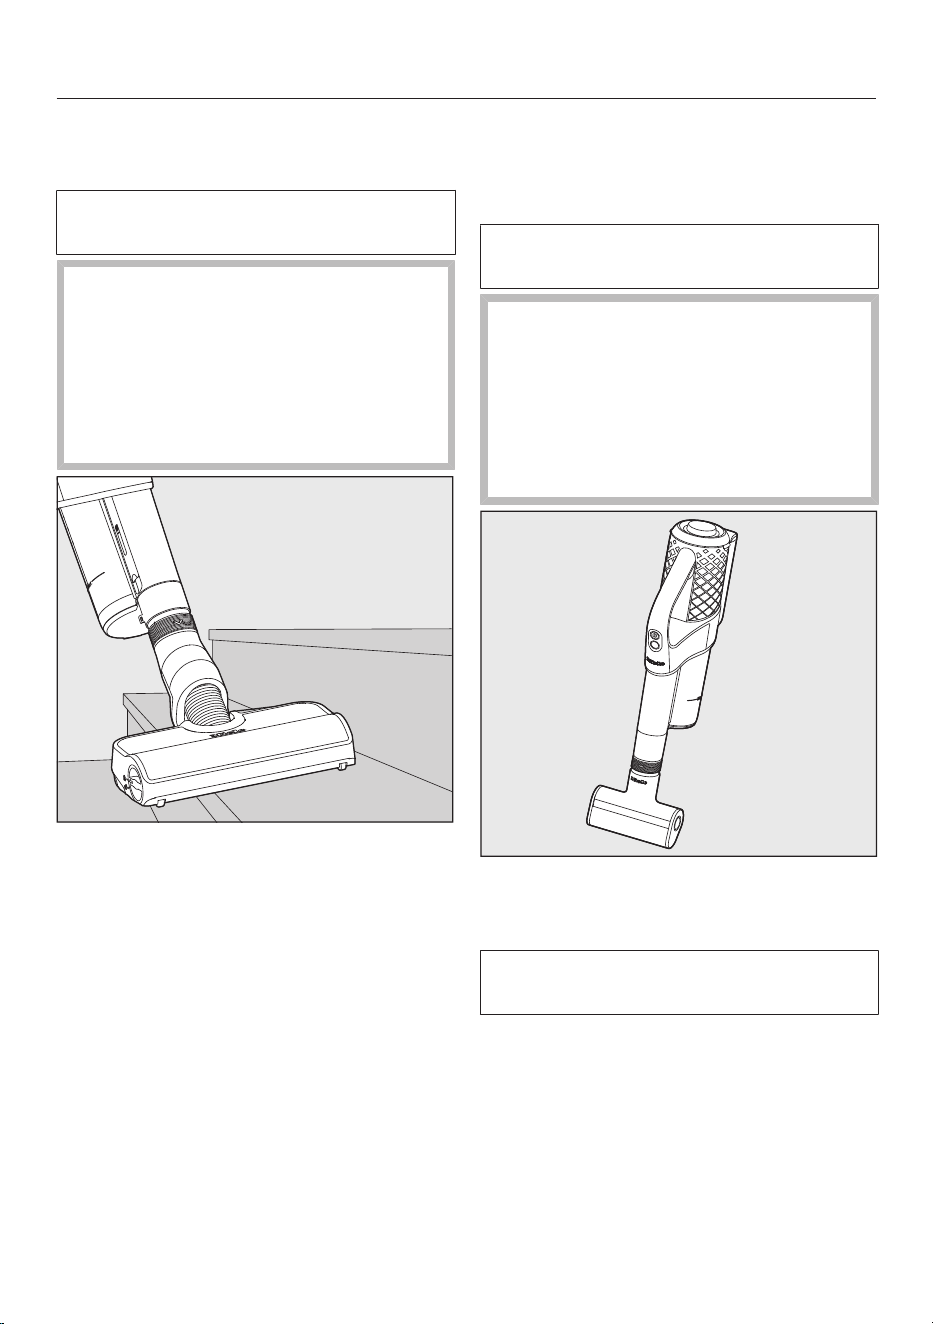
The electrobrush can be used for daily
cleaning of carpets, rugs and hard
floors.
Tip: The suction tube is not a
convenient option for cleaning carpeted
stairs.
Tip: If you ever need to vacuum up
substantial amounts of coarse dirt or
debris, use the PowerUnit solo
configuration concept (see “Operation”
– “Using the PowerUnit solo”).
Electro Compact handheld
brush (HX-EC20)
(depending on the model)
Follow the flooring manufacturer’s
cleaning and care instructions.
Damage caused by trapped
material.
Risk of the flooring getting scratched.
Make sure that there is no coarse dirt
or debris trapped in the bottom of
the handheld brush, e.g. shards of
glass or stones.
The handheld brush is particularly
suitable for intensive cleaning of
upholstery and car seats.
For optimum cleaning results on
upholstery, use the upholstery nozzle.
Tip: The suction tube is not a
convenient option for cleaning
upholstery or car seats.
MultiFloor electrobrush
(HX-EB20)
Using the supplied accessories
22
AllFloor floorbrush (HX-AF20)
(depending on the model)
Follow the flooring manufacturer’s
cleaning and care instructions.
This flat and light floorbrush is
particularly suitable for cleaning
underneath very low furniture.
Universal brush (HX-UB)
(depending on the model)
For gentle vacuuming of books, shelves
or similar.
Extendable flexible XL crevice
nozzle (HX-CNXL)
(depending on the model)
Can reach 60cm for cleaning hard-to-
reach areas.
Hose extension (HX-FSH20)
(depending on the model)
The hose extension can be extended to
a maximum length of 120cm. It can be
extended further using the extendable
flexible crevice nozzle.
Operation
23
Removing the vacuum cleaner
from the wall bracket
Remove the vacuum cleaner from the
wall bracket by pulling it upwards.
Switching on and off
Pull the charging plug out of the
charging socket on the bottom on the
rear of the PowerUnit.
For the best possible cleaning results,
always start the ComfortClean self-
cleaning function before switching on
the vacuum cleaner (see “Cleaning and
care” – “Activating the ComfortClean
self-cleaning function”).
Press the upper button on the
handle.
The vacuum cleaner will switch on using
the lowest power level.
Operation
24
Increasing the suction power
Press the lower button on the handle.
The higher power level is selected and
the LED lights up.
Press the button again to return to the
lower power level.
Using the PowerUnit solo
The PowerUnit can be used on its own
without the suction tube and
electrobrush as a quick way of
vacuuming up crumbs and fluff in
specific areas.
Tip: This configuration is particularly
suitable when using the three-piece
accessory set (see “Using the supplied
accessories”).
Cleaning and care
25
Risk of injury caused by rotating
roller brush.
You can injure yourself on the rotating
roller brush.
Always switch the vacuum cleaner
off before cleaning and caring for it.
Use the On/Off switch on the handle
to do this.
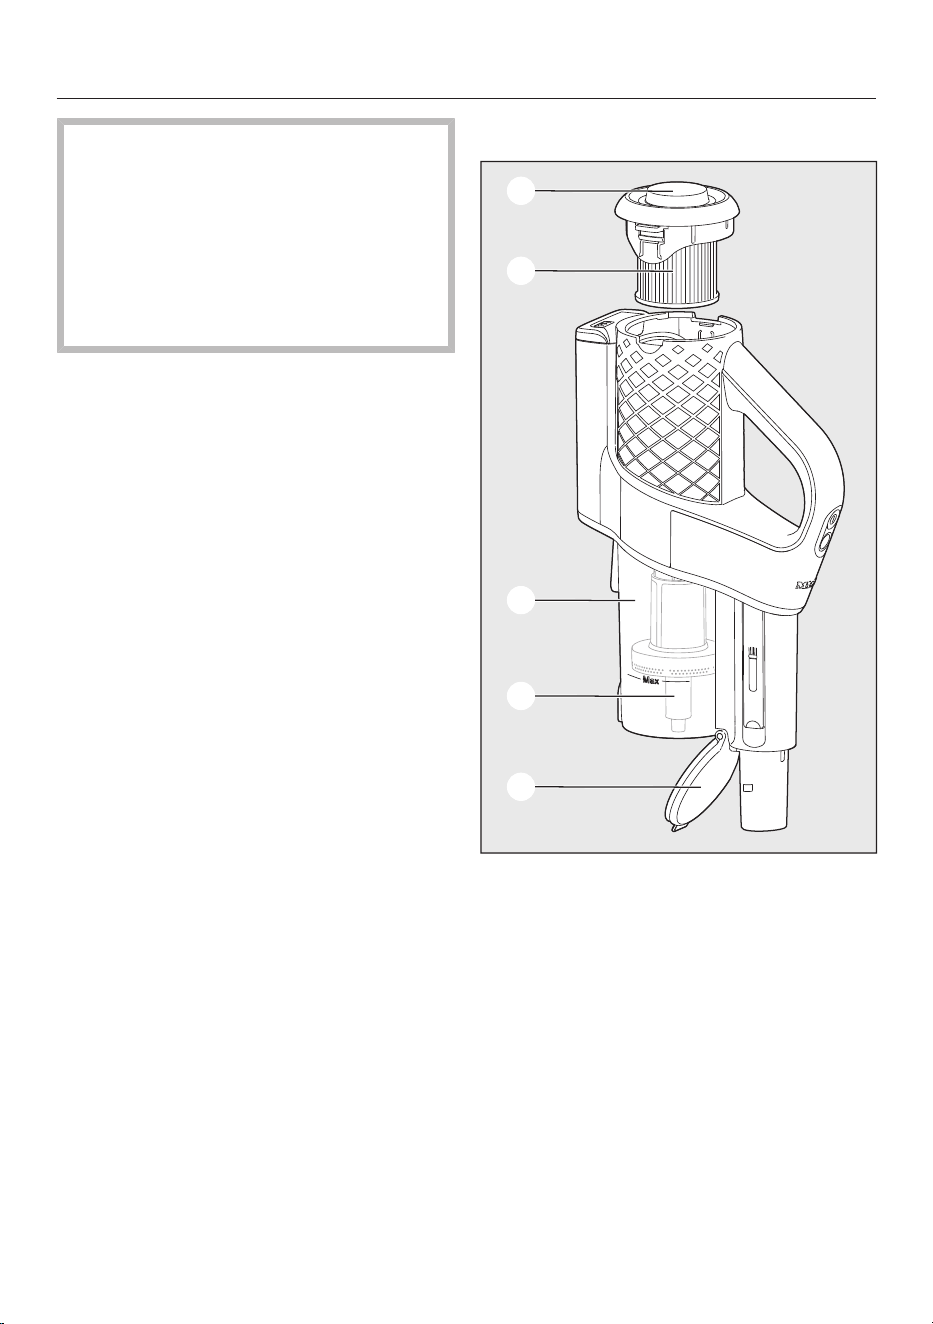
Filter system
Screw cap
Fine dust filter
Dust container
d Pre-filter
e Dust container flap
Cleaning and care
26
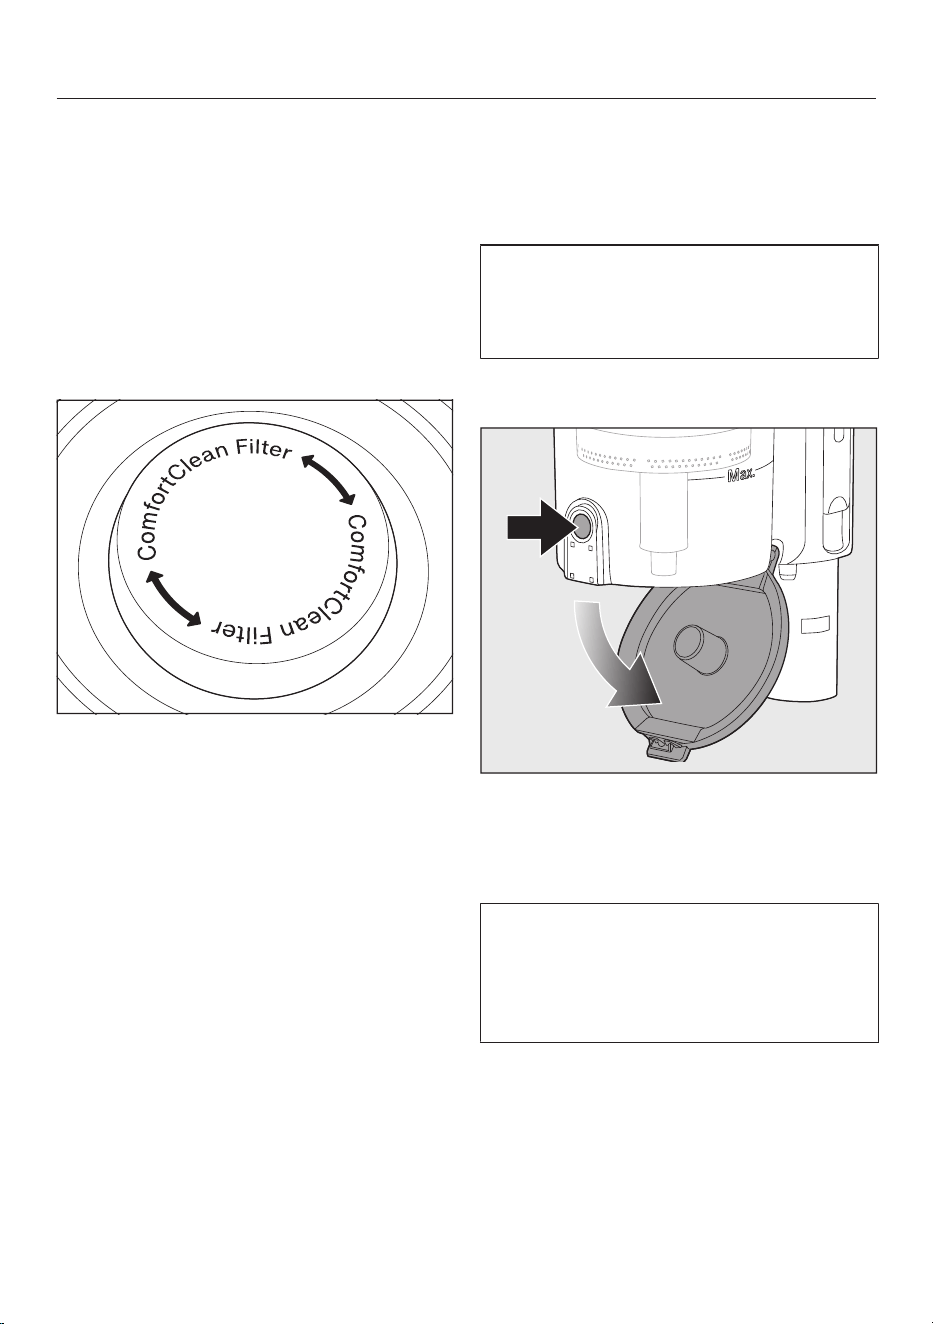
Activating the ComfortClean
self-cleaning function
Always run the interim cleaning function
for the fine dust filter before emptying
the dust container. You should also run
it whenever the suction power begins to
drop.
This enables the vacuum cleaner to
achieve the very best cleaning
performance again straight away.
Turn the screw cap 3times by 180°.
When turning the cap, you will hear a
noise, which is a normal part of how the
ComfortClean self-cleaning function
works.
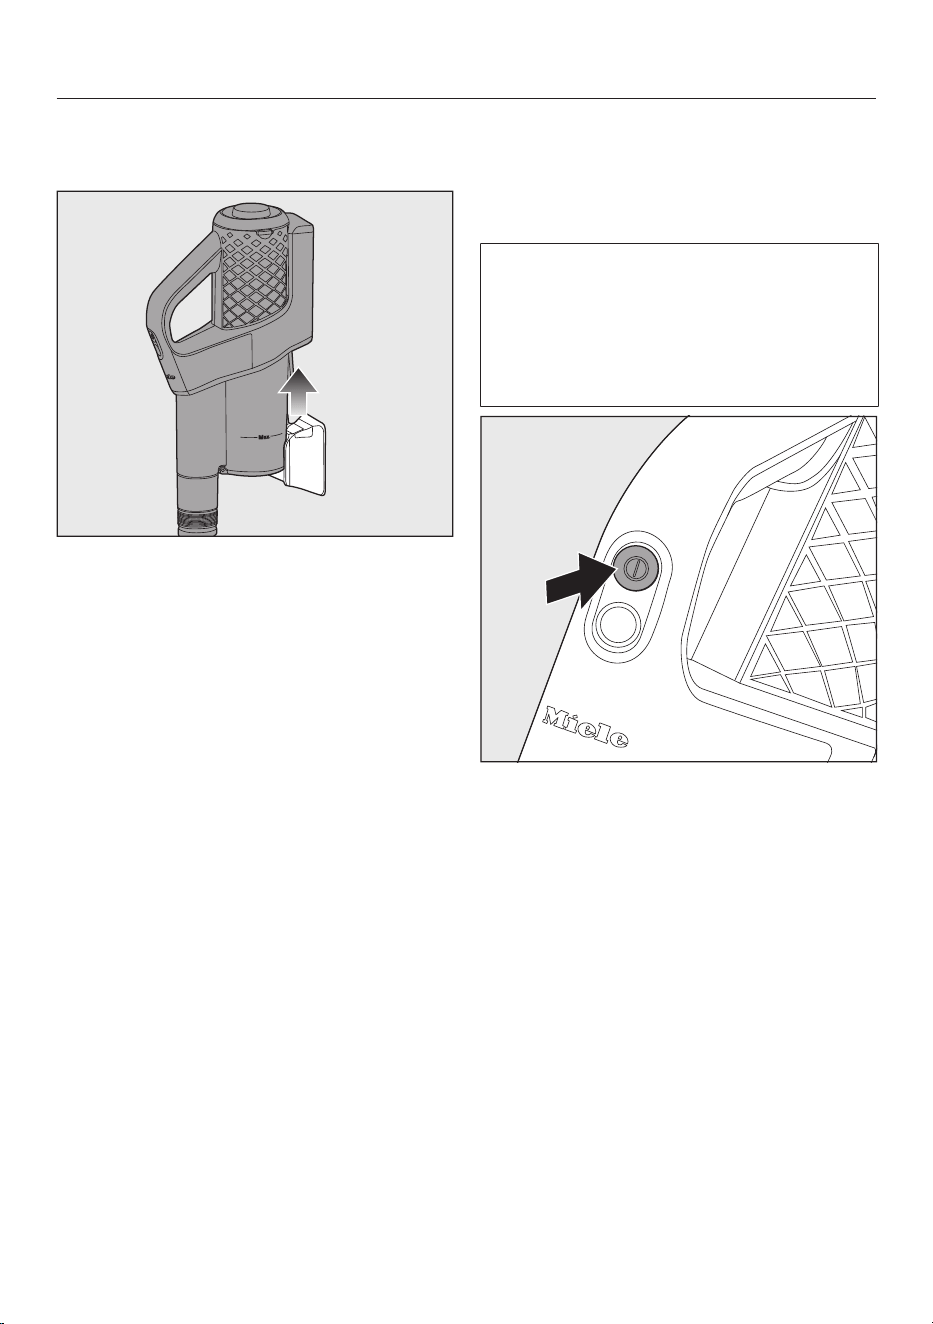
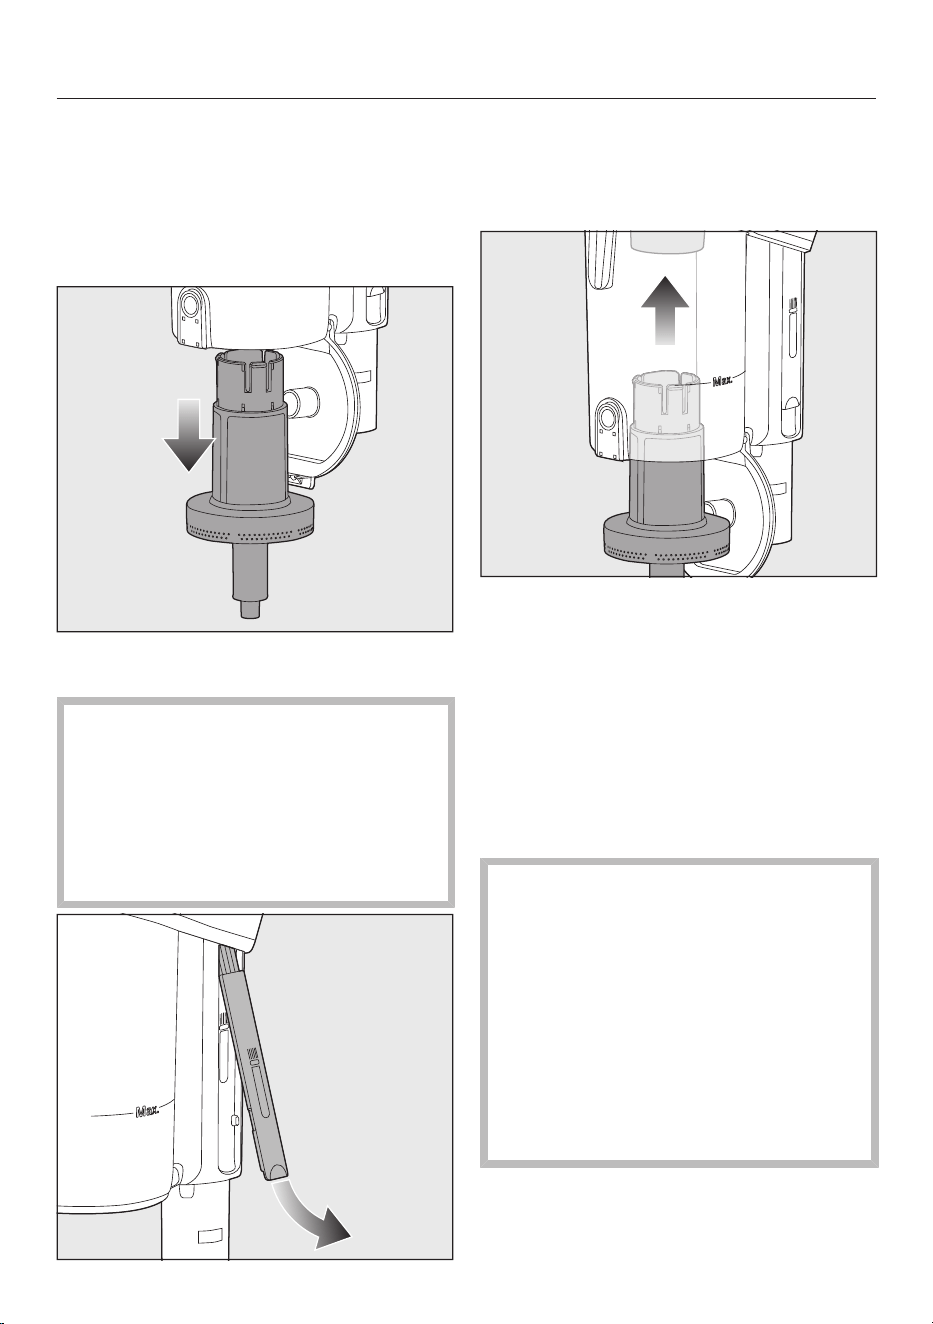
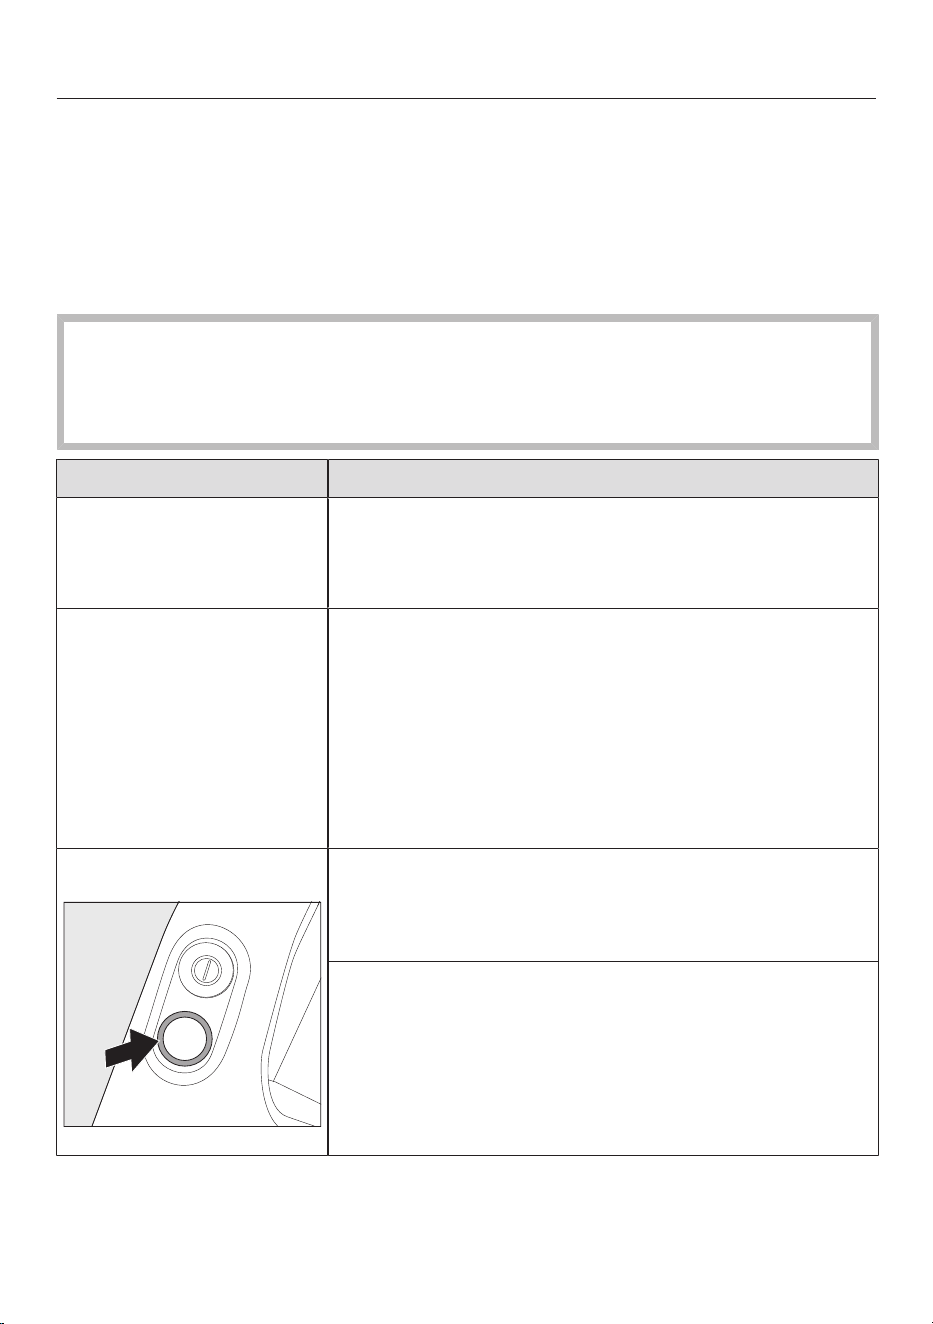
Emptying the dust container
Empty the dust container at the latest
when the dust has reached the Max.
marking on the dust container.
Provided that no prohibited
substances are present, the contents
of the dust container can be disposed
of with normal household waste.
Hold the dust container close to the
bin to prevent dust from billowing out.
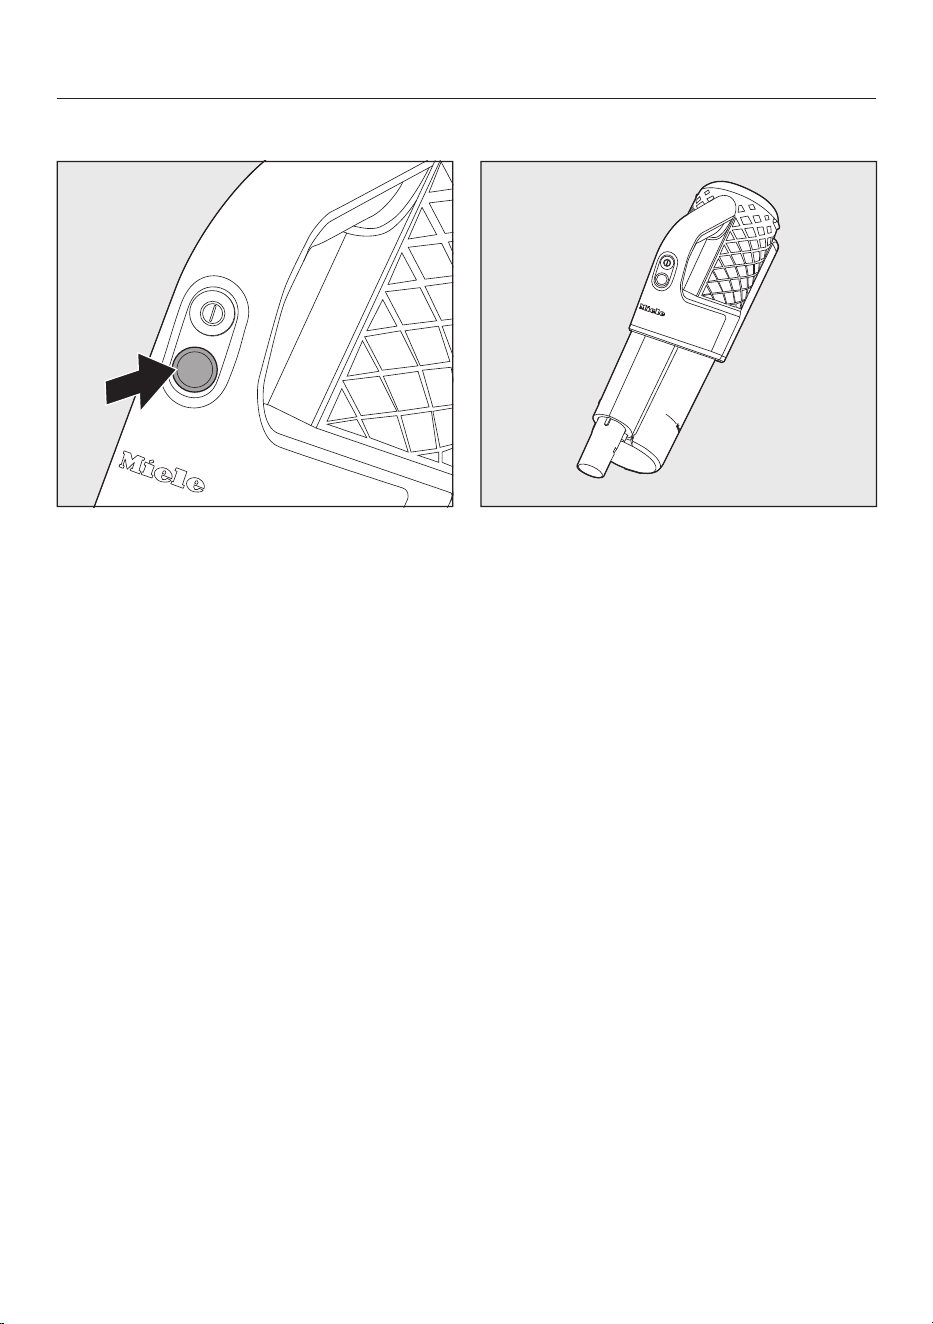
Press the release button on the
bottom of the dust container.
The flap will open and the dust will fall
out.
If dust balls, hair or coarse debris do
not fall out, remove the pre-filter by
pulling it downwards (see the following
section: “Cleaning the dust container
and pre-filter”).
Close the dust container flap, making
sure it clicks into place.
Cleaning and care
27
Cleaning the dust container and
pre-filter
Clean the dust container and pre-filter
as required.
Empty the dust container over a bin.
Remove the pre-filter by pulling it
downwards.
Risk of damage caused by
incorrect cleaning.
The pre-filter can become damaged
and be less effective as a result.
Do not clean the pre-filter with water.
Do not use pointed or sharp-edged
objects to clean the filter.
Clean the dust container and pre-filter
with a dry cloth or with a cleaning tool
which is located on the side of the
PowerUnit.
Reinsert the cleaned pre-filter into the
cleaned dust container as far as it will
go.
Close the dust container flap, making
sure it clicks into place.
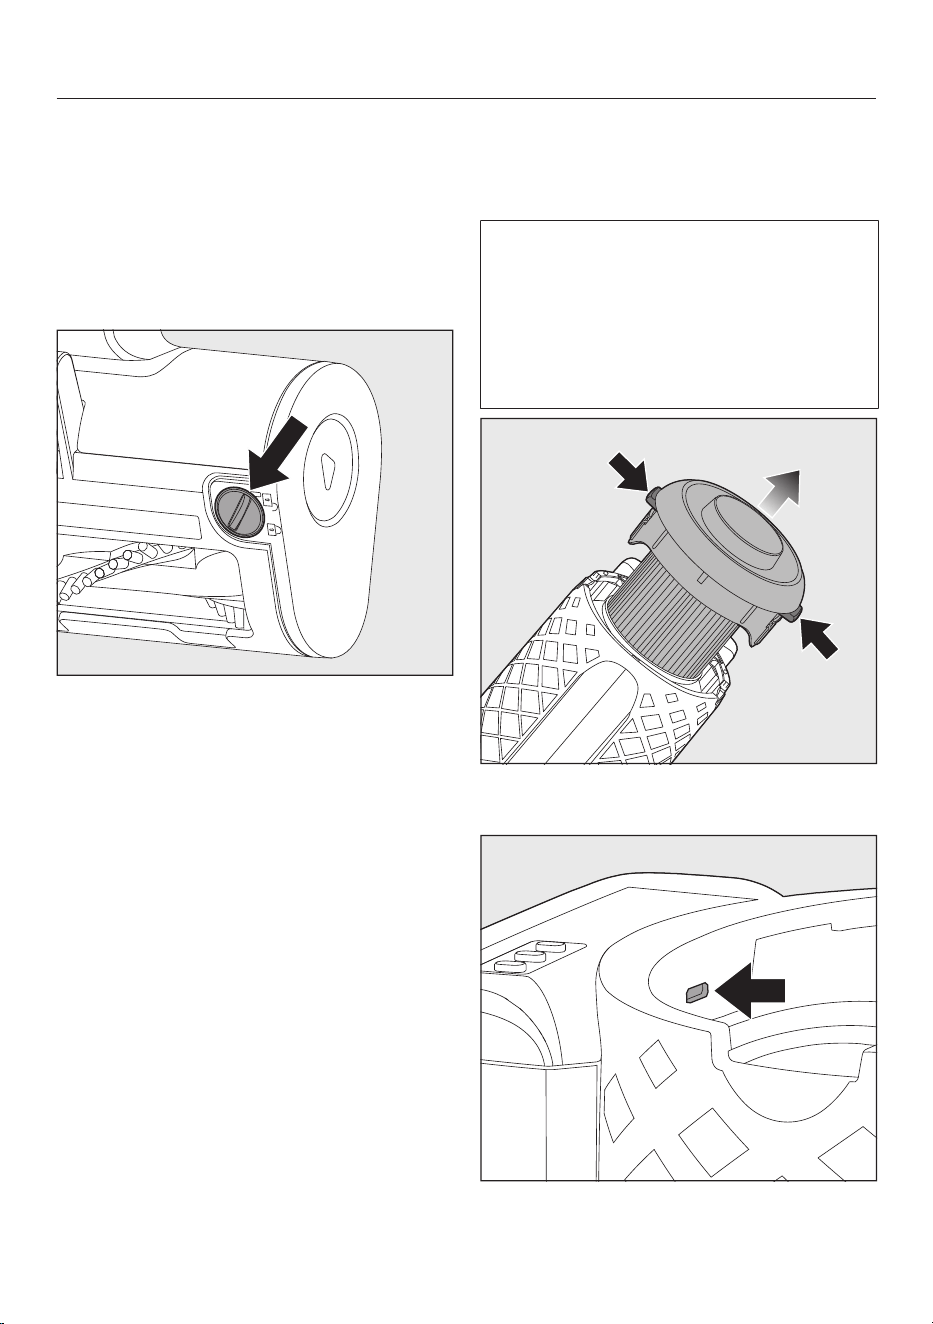
Cleaning the fine dust filter
Clean the fine dust filter thoroughly at
least once every 3months outside the
PowerUnit.
Risk of damage caused by
incorrect cleaning.
The fine dust filter can become
damaged and be less effective as a
result.
Do not clean the fine dust filter with
water and avoid cleaning the inside.
Do not use pointed or sharp-edged
objects to clean the filter. Do not
brush the fine dust filter (not even
with the cleaning tool supplied).
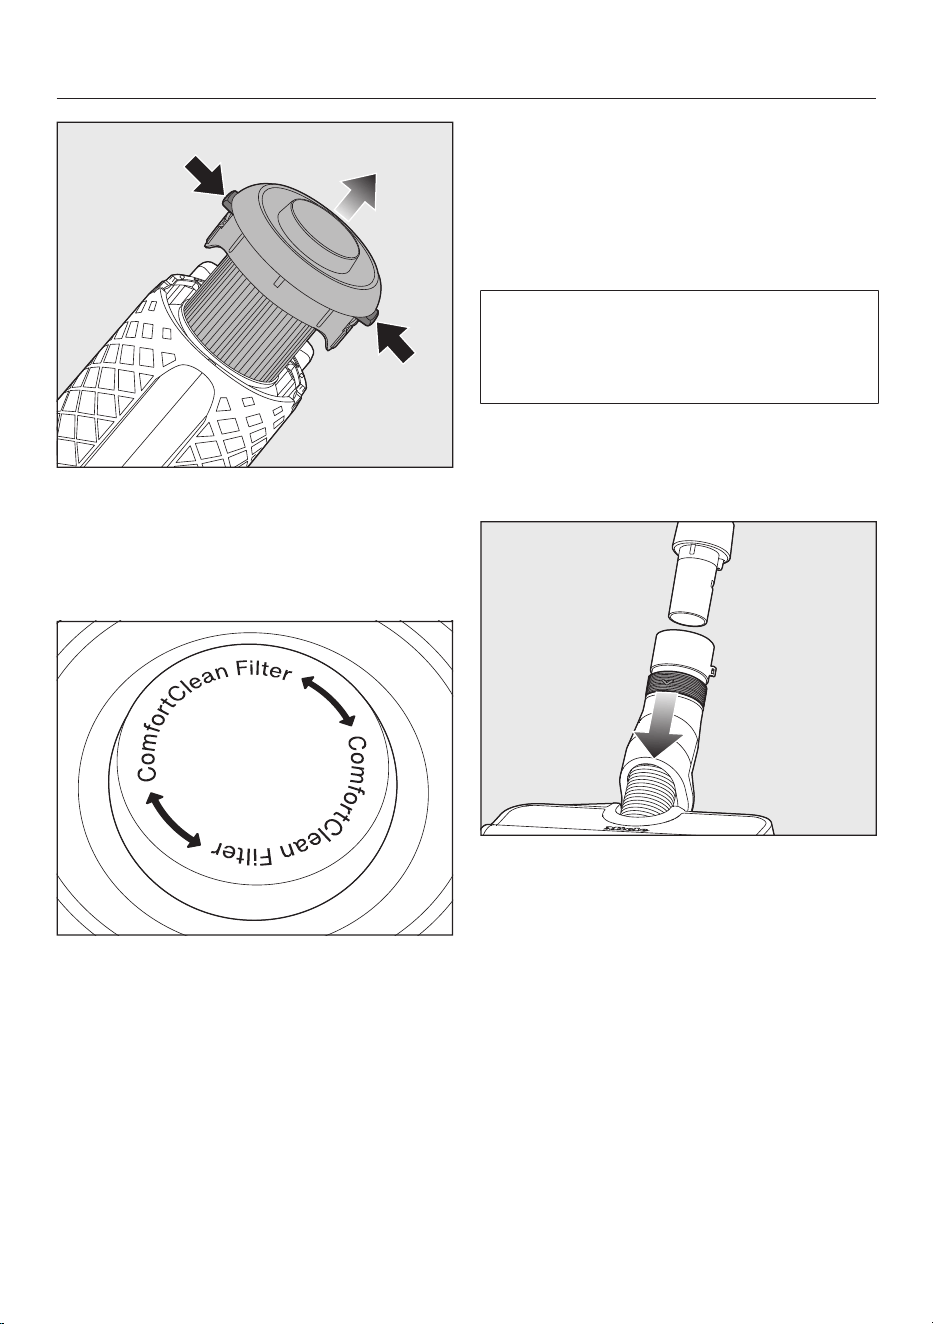
Cleaning and care
28
Press both release buttons at the side
of the fine dust filter lid and remove
the fine dust filter by pulling it
upwards.
Hold the fine dust filter over a bin.
Take hold of the black section of the
fine dust filter underneath the screw
cap and turn the screw cap 10times
through 180°.
When turning the cap, you will hear a
noise, which is a normal part of how the
ComfortClean self-cleaning function
works.
Empty the fine dust filter by carefully
tapping the lower edge.
Turn the fine dust filter slightly while
you do this to free the dirt from all of
the crevices.
Refit the cleaned fine dust filter into
the PowerUnit, making sure it clicks
into position.
To continue achieving the best
possible cleaning results, replace the
fine dust filter (HX-FDF20) with a new
one after approx. 3years.
Cleaning the electrobrush/
handheld brush (depending on
the model)
Disconnect the electrobrush/
handheld brush from the vacuum
cleaner.
Place the electrobrush/handheld
brush upside down on a level, clean
surface.
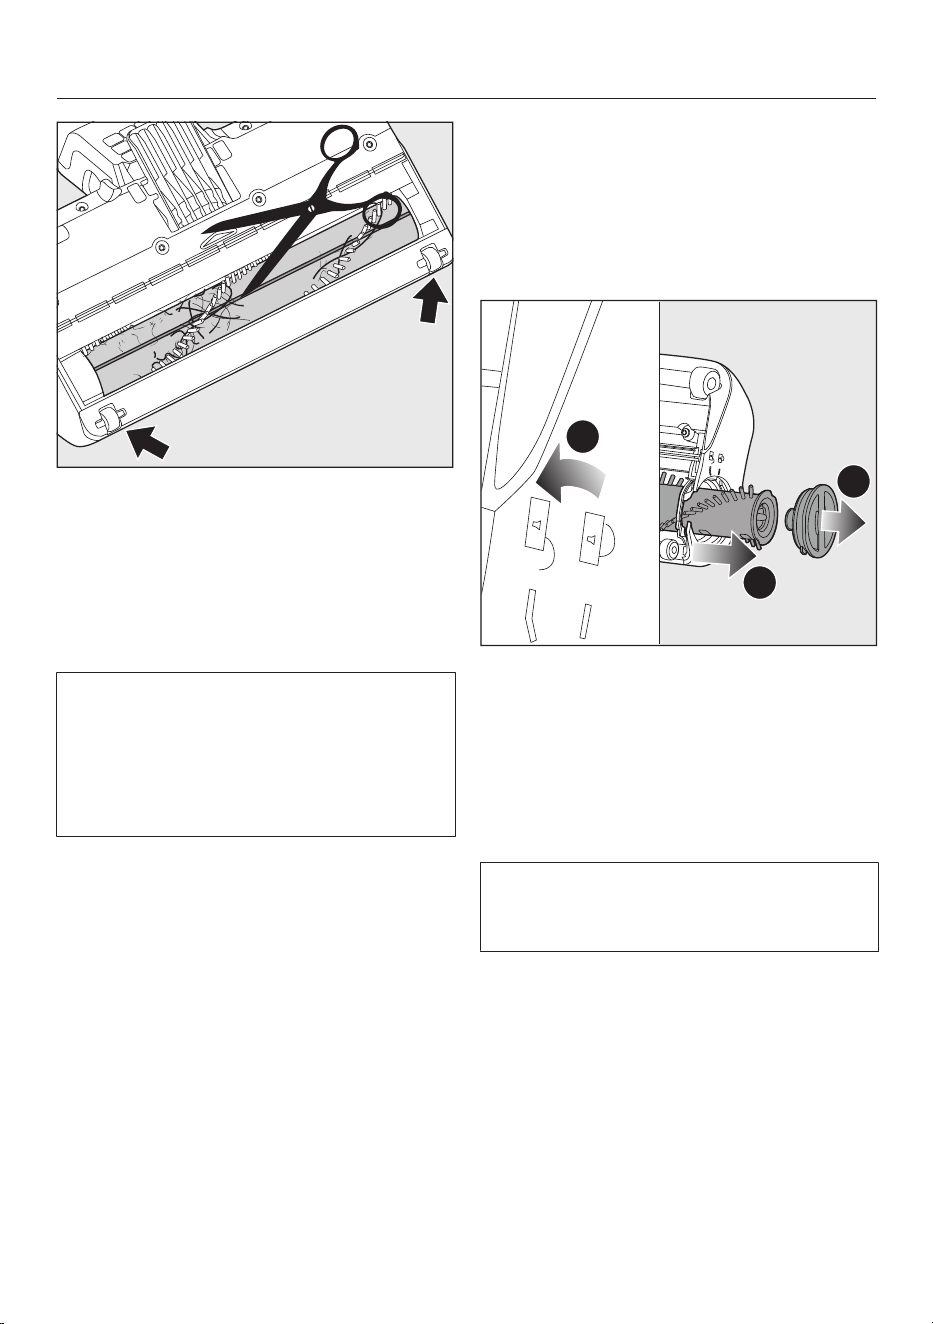
Cleaning and care
29
Cut any threads or hairs that have
wound themselves around the roller
brush with a pair of scissors. To guide
the scissors, there are two guide
tracks on the roller brush.
Then run the vacuum cleaner to vacuum
up the cut threads and hairs.
If the small running wheels are very
heavily soiled or blocked, you can
remove them for easier cleaning (not
possible in the case of the handheld
brush). To remove them, use a flat-
head screwdriver.
Removing the roller brush from
the electrobrush
You can take the roller brush out of the
electrobrush in order to remove
stubborn soiling and clean the inside of
the electrobrush.
1
3
2
A Turn the arrow on the handle on the
side of the electrobrush to the
symbol.
The roller brush is released.
B Remove the roller brush.
Clean the roller brush and remove any
stubborn dirt inside the electrobrush.
If there is heavy soiling between the
handle and the roller brush, you can
release the handle.
C Pull lightly on the handle until it is
released.
Remove the soiling.
Lock the cleaned handle back into the
roller brush.
Push the roller brush as far as it will
go into the electrobrush until it is in
position.
Lock the roller brush.
Cleaning and care
30
Removing the roller brush from
the handheld brush (depending
on the model)
You can take the roller brush out of the
handheld brush in order to remove
stubborn soiling and clean the inside of
the handheld brush.
A Release the roller brush using a coin.
B Remove the roller brush.
Clean the roller brush and remove any
stubborn dirt inside the handheld
brush.
Reassemble the handheld brush in
reverse order.
Replacing the battery
An original Miele AP10/AP11 lithium-ion
rechargeable battery is required.
Follow the instructions regarding the
handling and disposal of rechargeable
batteries found in the following
sections: “Warning and safety notes”,
“Sustainability and environmental
protection” and “Commissioning”
(“General battery information”).
Remove the fine dust filter from the
PowerUnit.
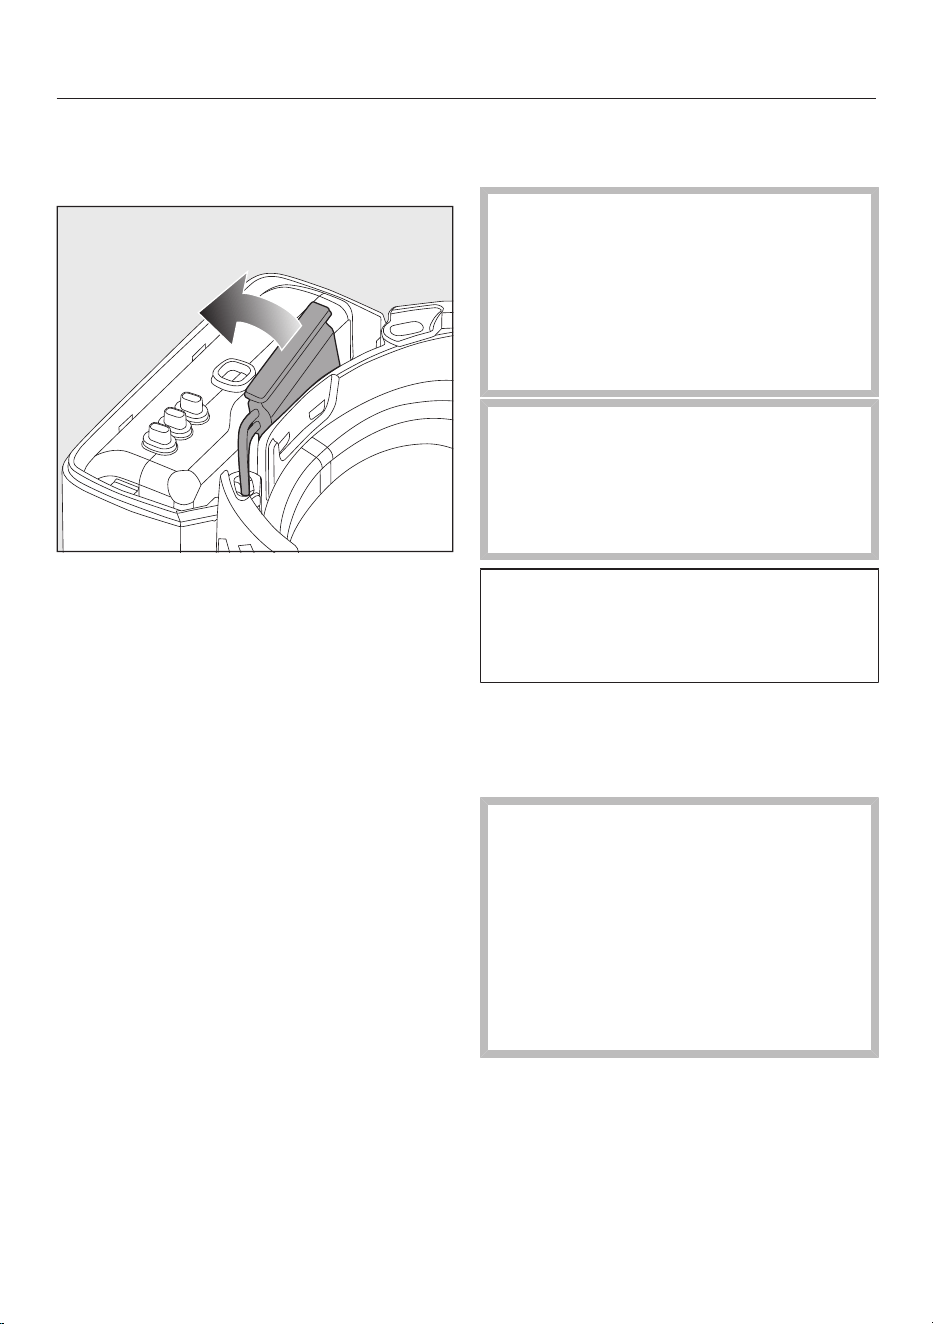
Cleaning and care
31
Use a flat-head screwdriver to
carefully release the battery
compartment cover.
Carefully release the plug and replace
the battery.
Reinsert the plug, making sure that it
fits properly.
Close the battery compartment and
reinsert the fine dust filter into the
PowerUnit, making sure it clicks into
position.
Caring for the vacuum cleaner
and accessories
Risk of injury caused by rotating
roller brush.
You can injure yourself on the rotating
roller brush.
Always switch the vacuum cleaner
off before caring for it. Use the On/
Off switch on the handle to do this.
Risk of electric shock from mains
voltage.
If moisture gets into the charger,
there is a risk of electric shock.
Do not let the charger get wet.
Follow the special cleaning
instructions for the pre-filter, fine dust
filter and dust container in the
“Cleaning and care” section.
The vacuum cleaner and all plastic
accessories should be cleaned with a
commercially available cleaner suitable
for plastic.
Damage due to unsuitable
cleaning agents.
All surfaces are susceptible to
scratching. Contact with unsuitable
cleaning agents can alter or discolour
all surfaces.
Do not use abrasive cleaning agents,
glass cleaning agents, all-purpose
cleaners or oil-based care products.
Troubleshooting
32
Many malfunctions and faults that can occur in daily operation can be easily
remedied. You can save time and money in many cases, as you do not need to call
the Miele Customer Service Department.
Information to help you remedy faults yourself can be found at www.miele.com/
service.
The following tables are designed to help you to find the cause of a malfunction or a
fault and to resolve it.
Risk of injury caused by rotating roller brush.
You can injure yourself on the rotating roller brush.
Switch the vacuum cleaner off before dealing with any problems. Use the On/
Off switch on the handle to do this.
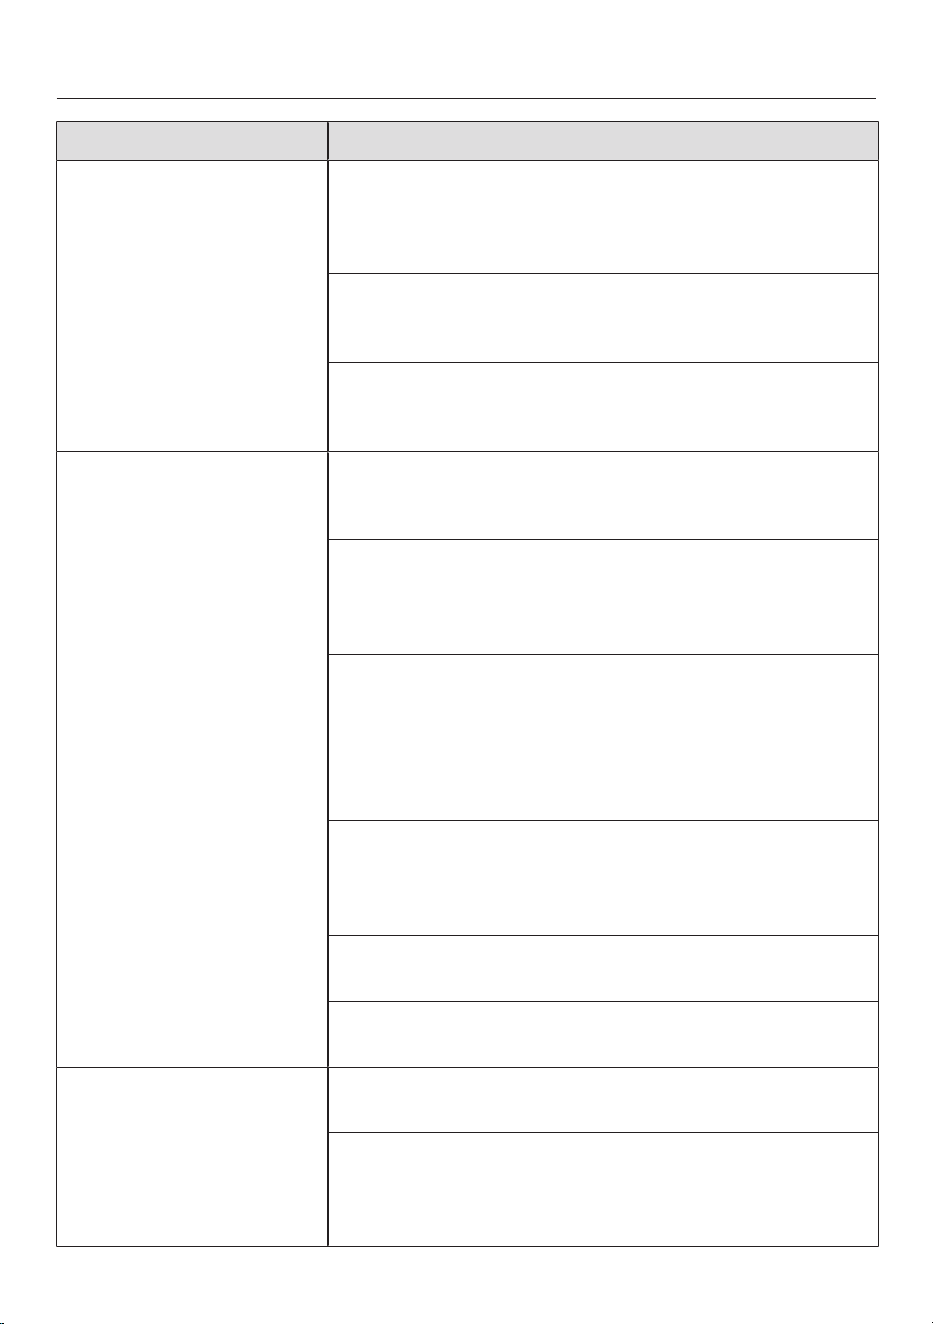
Problem Cause and remedy
Battery charging state
indicator when switch-
ing on: left and middle
indicators flash rapidly.
Temperature fault
Wait for approximately 30minutes before switching
the vacuum cleaner back on again.
Battery charging state
indicator when charging:
right and middle indicat-
ors flash rapidly
Battery errors
Pull the charging plug out of the charging socket on
the rear of the PowerUnit.
Wait approx. 5minutes before continuing to charge
the battery.
It is essential to take prescribed ambient
temperatures into account when charging and
changing the battery; see “Warning and safety
notes”.
LED on the handle is
flashing.
“Battery is discharged” fault
Charge the battery (see “Commissioning” –
“General battery information” and “Charging the
battery”).
Internal system error
Check the vacuum cleaner airways for any
blockages.
Clean the dust container, pre-filter and fine dust
filter (see “Cleaning and care”).
Wait for approximately 30minutes before switching
the vacuum cleaner back on again.
Troubleshooting
33
Problem Cause and remedy
The vacuum cleaner
does not start when it is
switched on.
The rechargeable battery is not sufficiently charged.
Charge the battery (see “Commissioning” –
“General battery information” and “Charging the
battery”).
An original Miele battery has not been inserted.
Insert an original Miele AP10/AP11 lithium-ion
rechargeable battery.
The charging plug is still plugged in.
Pull the charging plug out of the charging socket on
the rear of the PowerUnit.
The cleaning perform-
ance is poor.
The battery life is de-
creasing.
The dust container is full.
Empty the dust container (see “Cleaning and care” –
“Emptying the dust container”).
The dust container/pre-filter is dirty.
Clean the dust container and the pre-filter (see
“Cleaning and care” – “Cleaning the dust container
and pre-filter”).
The fine dust filter is dirty.
Run the interim cleaning function for the fine dust
filter (see “Cleaning and care” – “Activating the
ComfortClean self-cleaning function”).
Clean the fine dust filter (see “Cleaning and care” –
“Cleaning the fine dust filter”).
The electrobrush is dirty/blocked.
Clean the electrobrush (see “Cleaning and care” –
“Cleaning the electrobrush” and “Removing the
roller brush from the electrobrush”).
The airways are blocked.
Clean all the airways.
The fine dust filter is worn.
Insert a new fine dust filter.
The operating noise is
changing during vacu-
uming.
The airways are soiled.
Clean all the airways.
The electrobrush power rating is automatically set to
the optimum level based on the type of flooring.
The noise is not unusual – the vacuum cleaner is
functioning normally.

Troubleshooting
34
Problem Cause and remedy
The electrobrush
switches itself off.
The electrobrush is overloaded – this can happen on
surfaces like deep-pile carpet.
Switch the vacuum cleaner off and on again. Use the
On/Off switch on the handle to do this.
The roller brush is not
rotating.
The roller brush is dirty.
Clean the roller brush (see “Cleaning and care” –
“Cleaning the electrobrush” and “Removing the
roller brush from the electrobrush”).
Service
35
Information to help you rectify faults
yourself and about Miele spare parts
can be found at www.miele.com/
service.
Contact in case of malfunction
In the event of any faults which you
cannot remedy yourself, please contact
your Miele Dealer or Miele Service.
Contact information for Miele Service
can be found at the end of this
document.
Please note that telephone calls may be
monitored and recorded for training
purposes and that a call-out charge will
be applied to service visits where the
problem could have been resolved as
described in this booklet.
Warranty
For information on the appliance
warranty specific to your country please
contact Miele. See back cover for
address.
In the UK, your appliance warranty is
valid for 2 years from the date of
purchase. However, you must activate
your cover by calling 0330 160 6640 or
registering online at www.miele.co.uk.
Optional accessories
36
Follow the flooring manufacturer’s
cleaning and care instructions.
We recommend using only genuine
Miele accessories bearing the Miele
logo on the packaging. Only these will
guarantee the optimum performance
of your vacuum cleaner and the best
possible cleaning results.
Please note that faults and damage
caused by use of accessories which do
not bear the Miele logo on the
packaging are not covered by the
vacuum cleaner warranty.
Purchasing accessories
Original Miele accessories are available
from the Miele webshop, the Miele
Customer Service Department and from
your Miele dealer.
Original Miele accessories are identified
by the Miele logo on the packaging.
With 3D4U, Miele also offers free
accessories to download for your 3D
printer (www.miele.com, Service,
3D4U).
Certain models are supplied with one or
more of the following accessories as
standard.
Electro Compact handheld
brush (HX-EC20)
For intensive cleaning of car seats and
carpeted stairs.
Carpet Care roller brush
(HX-CCT20)
For cleaning delicate carpets and rugs.
Insert the CarpetCarerollerbrush into
the electrobrush instead of the roller
brush fitted as standard (see “Cleaning
and care” – “Removing the roller brush
from the electrobrush”).
Hardfloor Care soft roller
(HX-HCT20)
For cleaning delicate hard floors.
Insert the HardfloorCaresoftroller into
the electrobrush instead of the roller
brush fitted as standard (see “Cleaning
and care” – “Removing the roller brush
from the electrobrush”).
AllFloor floorbrush (HX-AF20)
Flat floorbrush for cleaning underneath
very low furniture. It is also quiet, light
and stands out due to its very good
pick-up of coarse dirt.
Universal brush (HX-UB)
For gentle vacuuming of books, shelves
or similar.
Extendable flexible XL crevice
nozzle (HX-CNXL)
The flexible crevice nozzle can reach
60cm for cleaning hard-to-reach areas.
Hose extension (HX-FSH20)
For increasing the vacuuming radius by
maximum 120cm.

Electrical connection for the UK
37
All electrical work should be carried out
by a suitably qualified and competent
person in strict accordance with current
national and local safety regulations (BS
7671 in the UK). The voltage and
frequency are given on the data plate
located underneath the vacuum cleaner.
Please ensure that these match the
household mains supply. The fuse rating
is quoted on the plug. The appliance is
supplied with a cable and moulded plug
ready for connection to a 230-240 V/
50 Hz a.c. single phase supply.


United Kingdom
Miele Co. Ltd., Fairacres, Marcham Road, Abingdon, Oxon, OX14 1TW
Tel: 0330 160 6600, Internet: www.miele.co.uk, E-mail: [email protected]
Australia
Miele Australia Pty. Ltd.
ACN 005 635 398
ABN 96 005 635 398
Level 4, 141 Camberwell Road
Hawthorn East, VIC 3123
Tel: 1300 464 353
E-mail: [email protected]
Internet: www.miele.com.au
Miele Electrical Appliances Co., Ltd.
1-3 Floor, No. 82 Shi Men Yi Road
Jing' an District
200040 Shanghai, PRC
Tel: +86 21 6157 3500
Fax: +86 21 6157 3511
E-mail: [email protected]
Internet: www.miele.cn
China Mainland
Miele (Hong Kong) Ltd.
41/F - 4101, Manhattan Place
23 Wang Tai Road
Kowloon Bay, Hong Kong
Tel: (852) 2610 1025
Fax: (852) 3579 1404
E-mail:
Website: www.miele.hk
Hong Kong, China
Miele India Pvt. Ltd.
1st Floor, Copia Corporate Suites,
Commercial Plot 9, Mathura Road,
Jasola, New Delhi - 110025
E-mail: customercare@miele.in
Website: www.miele.in
India
Miele Ireland Ltd.
2024 Bianconi Avenue
Citywest Business Campus
Dublin 24
Tel: (01) 461 07 10
Fax: (01) 461 07 97
E-mail: [email protected]
Internet: www.miele.ie
Ireland
Malaysia
Miele Sdn Bhd
Suite 12-2, Level 12
Menara Sapura Kencana
Petroleum
Solaris Dutamas No. 1
Jalan Dutamas 1
50480 Kuala Lumpur, Malaysia
Phone: +603-6209-0288
Fax: +603-6205-3768
Miele New Zealand Limited
IRD 98 463 631
8 College Hill
Freemans Bay, Auckland 1011
Tel: 0800 464 353
Internet: www.miele.co.nz
New Zealand
Miele Pte. Ltd.
29 Media Circle
#11-04 ALICE@Mediapolis
Singapore 138565
Tel: +65 6735 1191
Fax: +65 6735 1161
E-mail: [email protected]
Internet: www.miele.sg
Singapore
Miele (Pty) Ltd.
63 Peter Place, Bryanston 2194
Tel: (011) 875 9000
Fax: (011) 875 9035
E-mail: [email protected]
Internet: www.miele.co.za
South Africa
Miele Appliances Ltd.
Showroom 1, Eiffel 1 Building
P.O. Box 114782 - Dubai
Tel. +971 4 3044 999
Fax. +971 4 3418 852
800-MIELE (64353)
E-mail: [email protected]
Website: www.miele.ae
United Arab Emirates
Manufacturer: Miele & Cie. KG, Carl-Miele-Straße 29, 33332 Gütersloh, Germany
Thailand
Miele Appliances Ltd.
BHIRAJ TOWER at EmQuartier
43rd Floor Unit 4301-4303
689 Sukhumvit Road
North Klongton Sub-District
Vadhana District
Bangkok 10110, Thailand
Sheikh Zayed Road, Umm Al Sheif
E-mail: customercare@miele.co.nz
P.O. Box 69434, Bryanston 2021
SQxxx - 2024 M.-Nr. 12 727 770 / 00