

EE
EE
nn
nn
gg
gg
ll
ll
ii
ii
ss
ss
hh
hh
325HE3 325HE4
Oper
ator
′
s manual
Please r
ead the operator’s manual carefully and make sure you understand the instructions
before using the machine.
KEY
T
O SYMBOLS
2
–
English
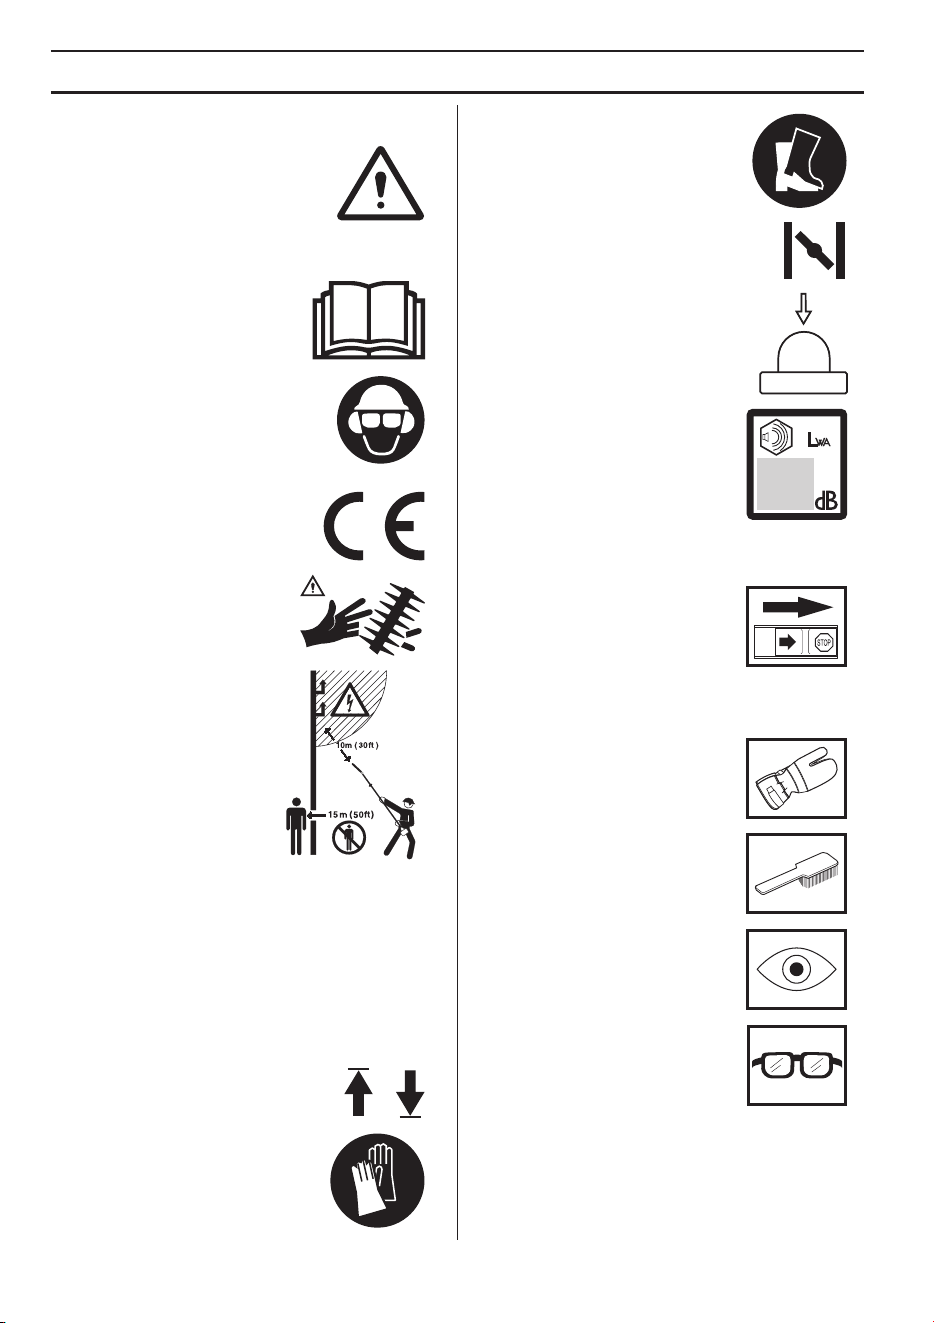
Symbols
W
ARNING! Incorrect or careless use of
a hedge trimmer can turn it into a
dangerous tool that can cause serious
or even fatal injury. It is extremely
important that you read and
understand the contents of this
operator's manual.
Please read the operator’s manual
carefully and make sure you
understand the instructions before
using the machine.
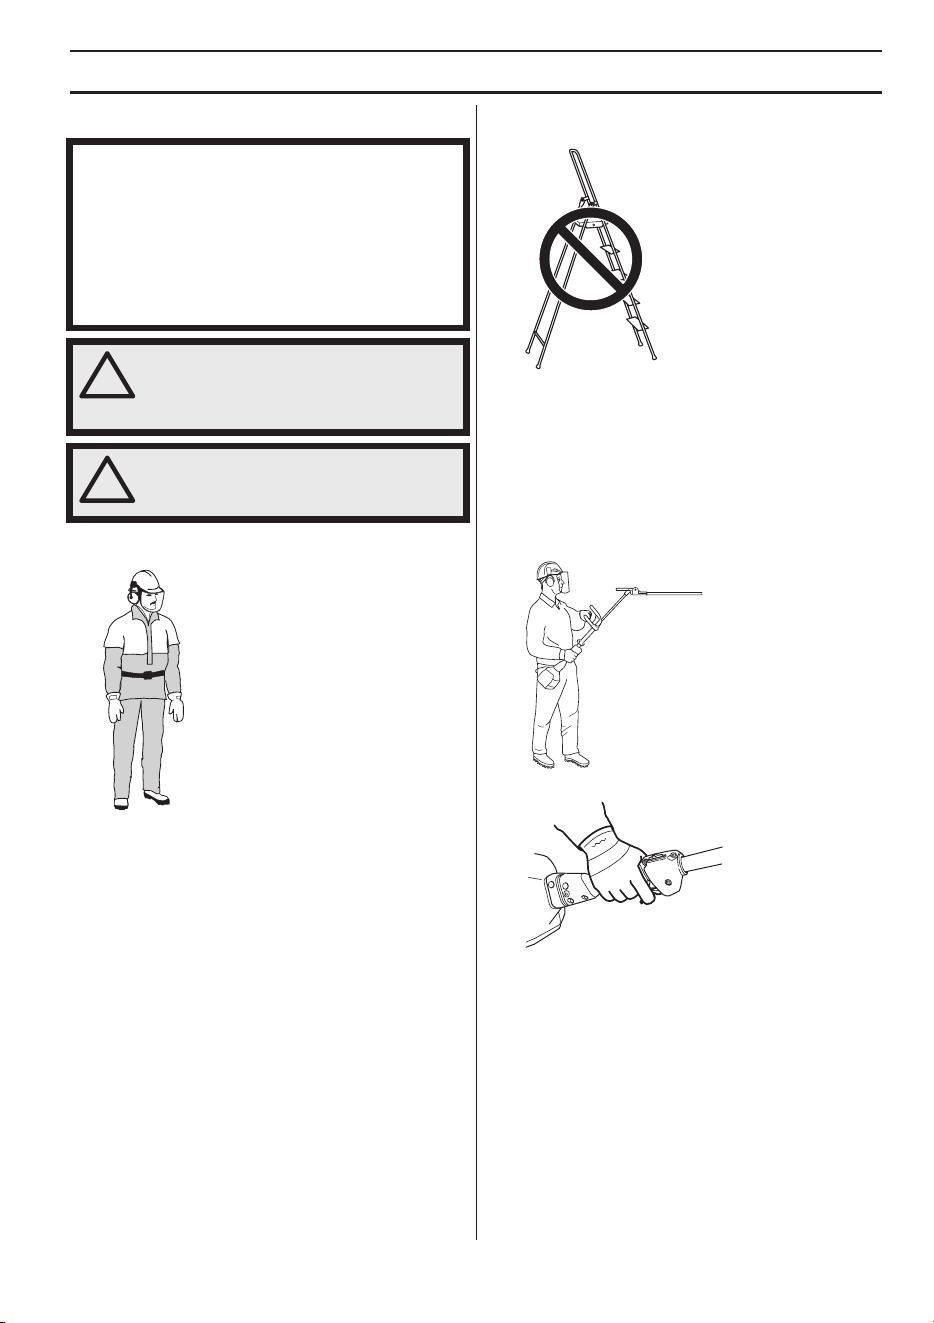
Always wear:
• A protective helmet where there is
a risk of falling objects
• Approved hearing protection
• Approved eye protection
This product is in accordance with
applicable EC directives.
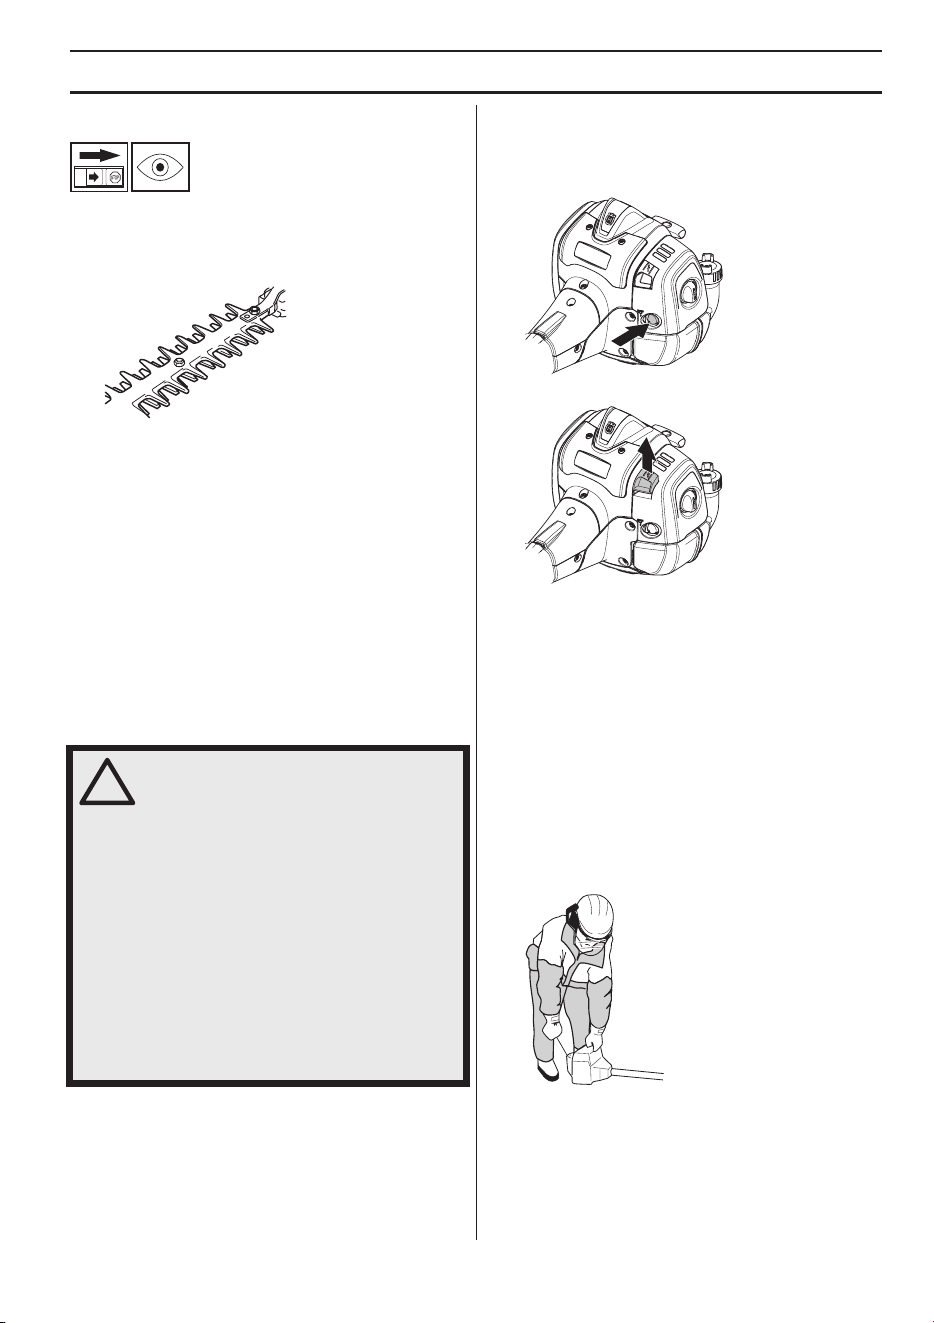
Cutting tool. Do not touch the tool
without first switching off the
engine.
This machine is not electrically
insulated. If the machine
touches or comes close to high-
voltage power lines it could lead
to death or serious bodily injury.
Electricity can jump from one
point to another by arcing. The
higher the voltage, the greater
the distance electricity can
jump. Electricity can also travel
through branches and other
objects, especially if they are
wet. Always keep a distance of at least 10 m between the
machine and high-voltage power lines and/or any objects
that are touching them. If have to work within this safe
distance you should always contact the relevant power
company to make sure the power is switched off before
you start work.
This machine can be dangerous! The operator of the
machine must ensure, while working, that no persons or
animals come closer than 15 meters.
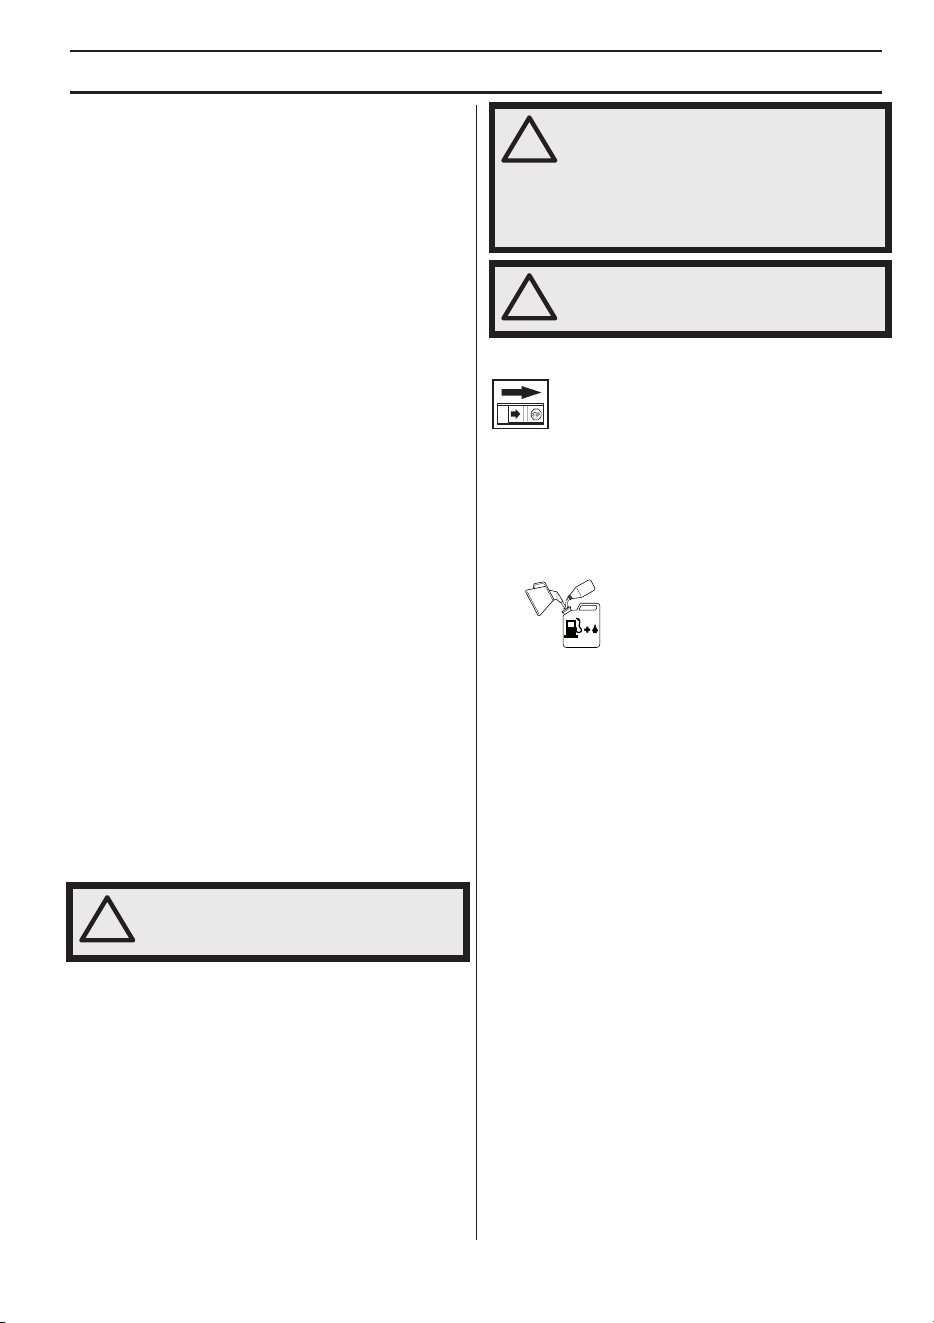
Arrows which show limits for handle
positioning.
Always wear approved protective
gloves.
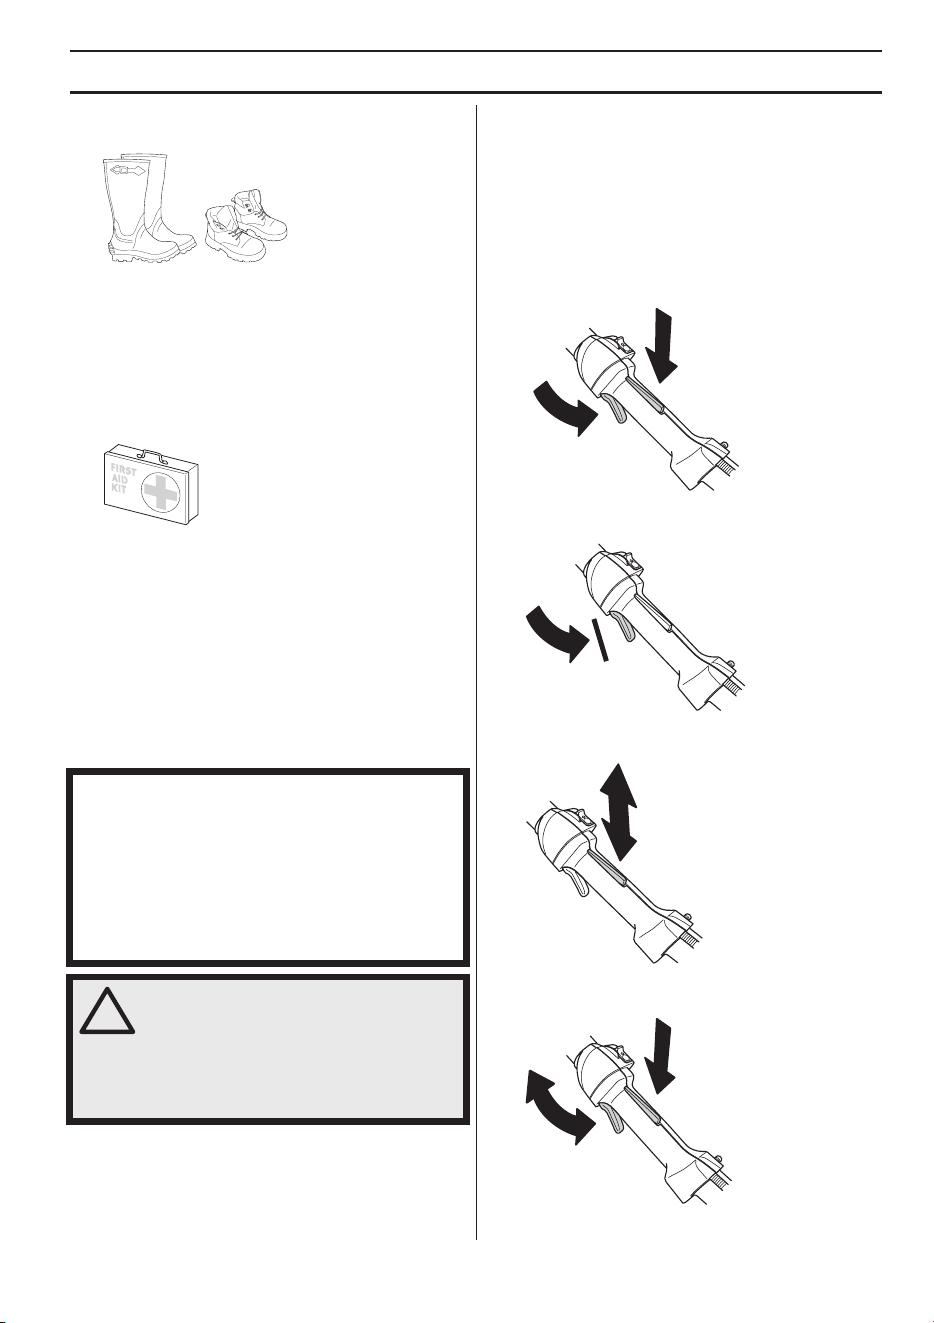
Wear sturdy, non-slip boots or shoes.
Choke control
Primer bulb
Noise emission to the environment
according to the European
Community’s Directive. The
machine’s emission is specified in
the Technical data chapter and on the
label.
Other symbols/decals on the
machine refer to special
certification requirements for certain markets.
The engine is s
witched off by moving
the stop switch to the stop position.
CAUTION! The stop switch
automatically returns to the start
position. In order to prevent
unintentional starting, the spark plug
cap must be removed from the spark plug when
assembling, checking and/or performing maintenance.
Always wear approved protective
gloves.
Regular cleaning is required.
Visual check.
Protective goggles or a visor must be
worn.
CONTENTS
English
–
3
Contents
Note the f
ollowing before starting:
Please read the oper
ator's manual carefully.
KEY
TO SYMBOLS
Symbols
................................................................ 2
CONTENTS
Contents
............................................................... 3
Note the following before starting: ........................ 3
INTR
ODUCTION
Dear Customer
, .................................................... 4
WHA
T IS WHAT?
What is what?
....................................................... 5
GENERAL SAFETY PRECA
UTIONS
Impor
tant .............................................................. 6
Personal protective equipment ............................. 6
Machine
′
s safety equipment ................................. 7
ASSEMBL
Y
Fitting the handle
.................................................. 10
Adjusting the harness ........................................... 10
Fitting the impact guard ........................................ 10
FUEL HANDLING
Fuel saf
ety ............................................................ 11
Fuel ...................................................................... 11
Fueling .................................................................. 12
ST
ARTING AND STOPPING
Chec
k before starting ........................................... 13
Starting and stopping ........................................... 13
W
ORKING TECHNIQUES
Gener
al working instructions ................................ 15
Transport position ................................................. 17
MAINTENANCE
Carb
urettor ........................................................... 18
Muffler .................................................................. 18
Cooling system ..................................................... 18
Spark plug ............................................................ 19
Air filter ................................................................. 19
Gear ..................................................................... 20
Cleaning and lubrication ....................................... 20
Maintenance schedule ......................................... 21
TECHNICAL D
ATA
T
echnical data ...................................................... 22
EC Declaration of Conformity ............................... 23
!
W
ARNING! Long-term exposure to noise
can result in permanent hearing
impairment. So always use approved
hearing protection.
!
W
ARNING! Under no circumstances may
the design of the machine be modified
without the permission of the
manufacturer. Always use original
accessories. Non-authorized
modifications and/or accessories can
result in serious personal injury or the
death of the operator or others.
!
W
ARNING! Incorrect or careless use of a
hedge trimmer can turn it into a
dangerous tool that can cause serious or
even fatal injury. It is extremely important
that you read and understand the
contents of this operator's manual.

4
–
English
INTR
ODUCTION
Dear Customer
,
Cong
ratulations on your choice to buy a Husqvarna product! Husqvarna is based on a tradition that dates back to 1689,
when the Swedish King Karl XI ordered the construction of a factory on the banks of the Husqvarna River, for production
of muskets. The location was logical, since water power was harnessed from the Huskvarna River to create the water-
powered plant. During the more than 300 years in existence, the Husqvarna factory has produced a lot of different
products, from wood stoves to modern kitchen appliances, sewing machines, bicycles, motorcycles etc. In 1956, the first
motor driven lawn mowers appeared, followed by chain saws in 1959, and it is within this area Husqvarna is working
today.
Today Husqvarna is one of the leading manufacturers in the world of forest and garden products, with quality as our
highest priority. The business concept is to develop, manufacture and market motor-driven products for forestry and
gardening, as well as for the building and construction industry. Husqvarna
′
s aim is also to be at the front edge for
ergonomics, usability, security and environmental protection. That is the reason why we have developed many different
features to add to our products within these areas.
We are convinced that you will appreciate with great satisfaction the quality and performance of our product for a very
long time to come. The purchase of one of our products gives you access to professional help with repairs and service
whenever this may be necessary. If the retailer who sells your machine is not one of our authorised dealers, ask for the
address of your nearest service workshop.
It is our wish that you will be satisfied with your product and that it will be your companion for a long time. Think of this
operator
′
s manual as a valuable document. By following its content (usage, service, maintenance, etc), the life span and
the second-hand value of the machine can be extended. If you sell this machine, make sure that the operator
′
s manual
is passed on to the buyer.
Thank you for using a Husqvarna product.
Husqvarna AB has a policy of continuous product development and therefore reserves the right to modify the design and
appearance of products without prior notice.
English
–
5
WHA
T IS
WHA
T?
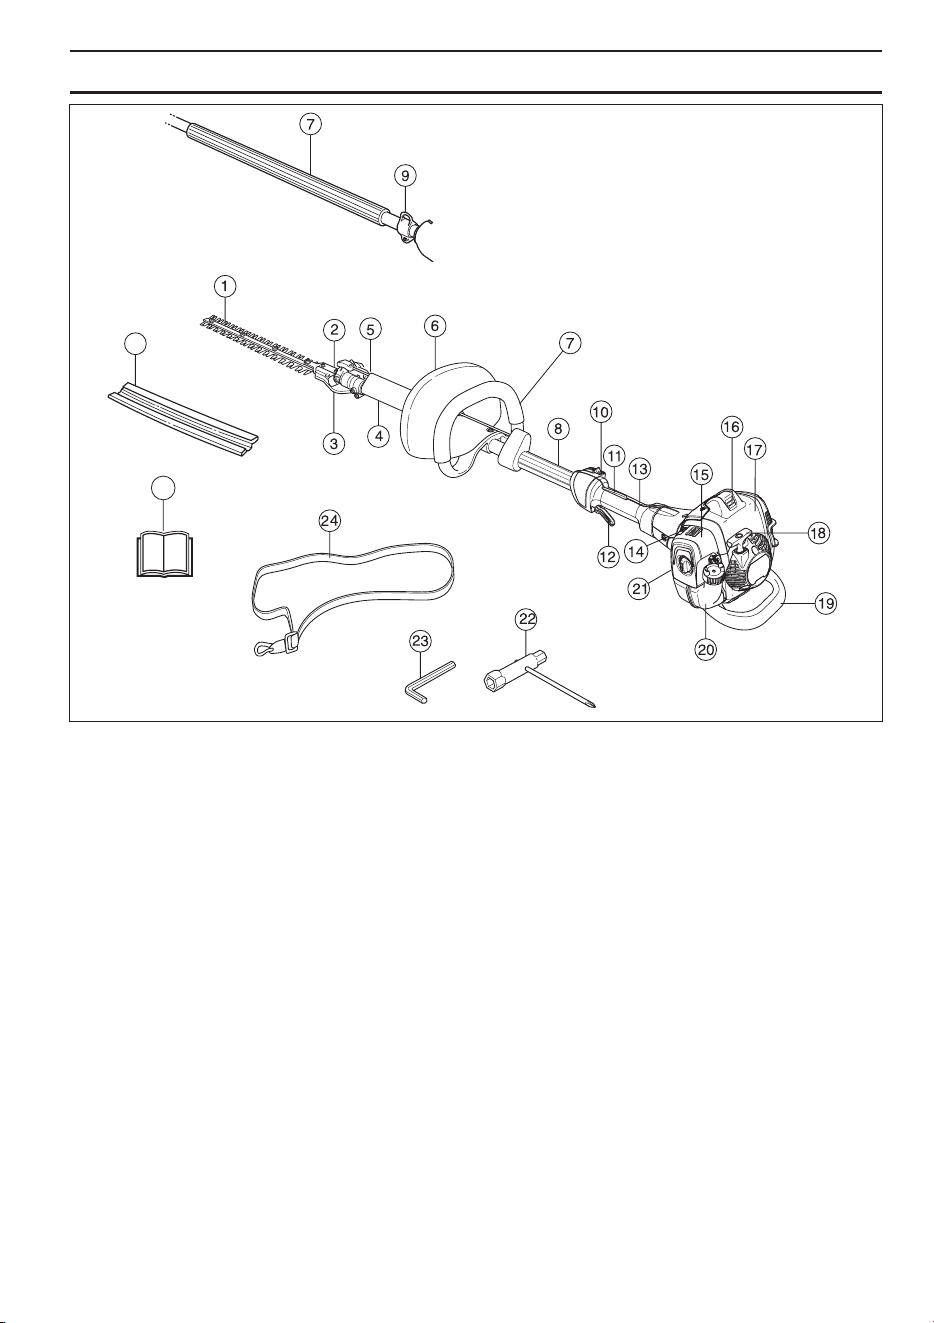
What is what?
HE4
25
26
1
Cutting unit
2 Grease nipple and plug for filling lubricant.
3 Bevel gear
4 Shaft
5 Angle adjustment handle
6 Hand guard
7 Front handle
8 Angle adjustment knob
9 Harness support hook (325HE4)
10 Stop switch
11 Throttle trigger lockout
12 Throttle trigger
13 Rear handle
14 Choke control
15 Air filter cover
16 Spark plug cap and spark plug
17 Cylinder cover
18 Starter handle
19 Impact guard (325HE4)
20 Fuel tank
21 Primer bulb
22 Combination spanner
23 Allen key
24 Harness (325HE4)
25 Operator
′
s manual
26 Transport guard
GENERAL SAFETY PRECA
UTIONS
6
–
English
Impor
tant
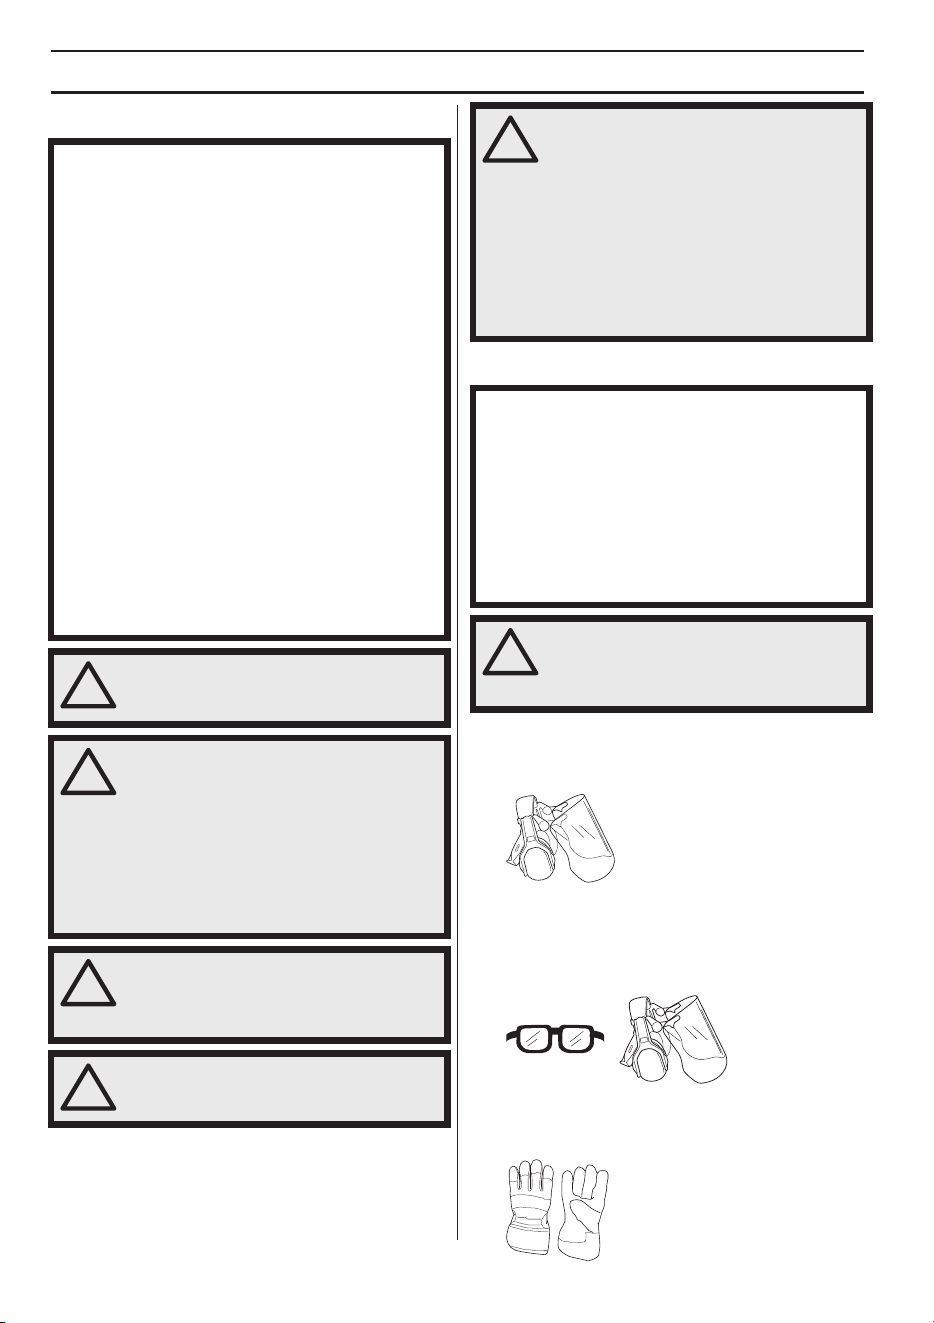
Personal protective equipment
HEARING PR
OTECTION
Wear hearing protection that provides adequate noise
reduction.
EYE PROTECTION
Always wear approved eye protection. If you use a visor
then you must also wear approved protective goggles.
Approved protective goggles must comply with the ANSI
Z87.1 standard in the USA or EN 166 in EU countries.
GLOVES
Gloves should be worn when necessary, e.g. when fitting
cutting attachments.
IMPORTANT!
The hedgetrimmer is only designed for cutting branches
and twigs.
Never use a machine that has been modified in any way
from its original specification.
National or local regulations may regulate the use.
Comply to given regulations.
Never use the machine if you are tired, if you have drunk
alcohol, or if you are taking medication that could affect
your vision, your judgement or your co-ordination.
Wear personal protective equipment. See instructions
under the ”Personal protective equipment” heading.
Never use the machine in extreme weather conditions
such as severe cold, very hot and/or humid climates.
Never use a machine that is faulty. Carry out the safety
checks, maintenance and service instructions
described in this manual. Some maintenance and
service measures must be carried out by trained and
qualified specialists. See instructions under the
Maintenance heading.
All covers and guards must be fitted before starting.
Ensure that the spark plug cap and ignition lead are
undamaged to avoid the risk of electric shock.
!
W
ARNING: Tampering with the engine
voids the EU type-approval of this
product..
!
W
ARNING! This machine produces an
electromagnetic field during operation.
This field may under some
circumstances interfere with active or
passive medical implants. To reduce the
risk of serious or fatal injury, we
recommend persons with medical
implants to consult their physician and
the medical implant manufacturer before
operating this machine.
!
W
ARNING! Running an engine in a
confined or badly ventilated area can
result in death due to asphyxiation or
carbon monoxide poisoning.
!
W
ARNING! Faulty blades can increase
the risk of accidents.
!
W
ARNING! Never allow children to use or
be in the vicinity of the machine. As the
machine is equipped with a spring-
loaded stop switch and can be started by
low speed and force on the starter
handle, even small children under some
circumstances can produce the force
necessary to start the machine. This can
mean a risk of serious personal injury.
Therefore remove the spark plug cap
when the machine is not under close
supervision.
IMPOR
TANT!
Incorrect or careless use of a hedge trimmer can turn it
into a dangerous tool that can cause serious or even
fatal injury. It is extremely important that you read and
understand the contents of this operator's manual.
You must use approved personal protective equipment
whenever you use the machine. Personal protective
equipment cannot eliminate the risk of injury but it will
reduce the degree of injury if an accident does happen.
Ask your dealer for help in choosing the right equipment.
!
W
ARNING! Listen out for warning signals
or shouts when you are wearing hearing
protection. Always remove your hearing
protection as soon as the engine stops.
GENERAL SAFETY PRECA
UTIONS
English
–
7
BOO
TS
Wear sturdy, non-slip boots or shoes.
CLOTHING
Wear clothes made of a strong fabric and avoid loose
clothing that can catch on twigs and branches. Always
wear heavy, long pants. Do not wear jewellery, shorts
sandals or go barefoot. Secure hair so it is above shoulder
level.
FIRST AID KIT
Always have a first aid kit nearby.
Mac
hine
′′
′′
s safety equipment
This section descr
ibes the machine
′
s safety equipment,
its purpose, and how checks and maintenance should be
carried out to ensure that it operates correctly. See the
”What is what?” section to locate where this equipment is
positioned on your machine.
The life span of the machine can be reduced and the risk
of accidents can increase if machine maintenance is not
carried out correctly and if service and/or repairs are not
carried out professionally. If you need further information
please contact your nearest service workshop.
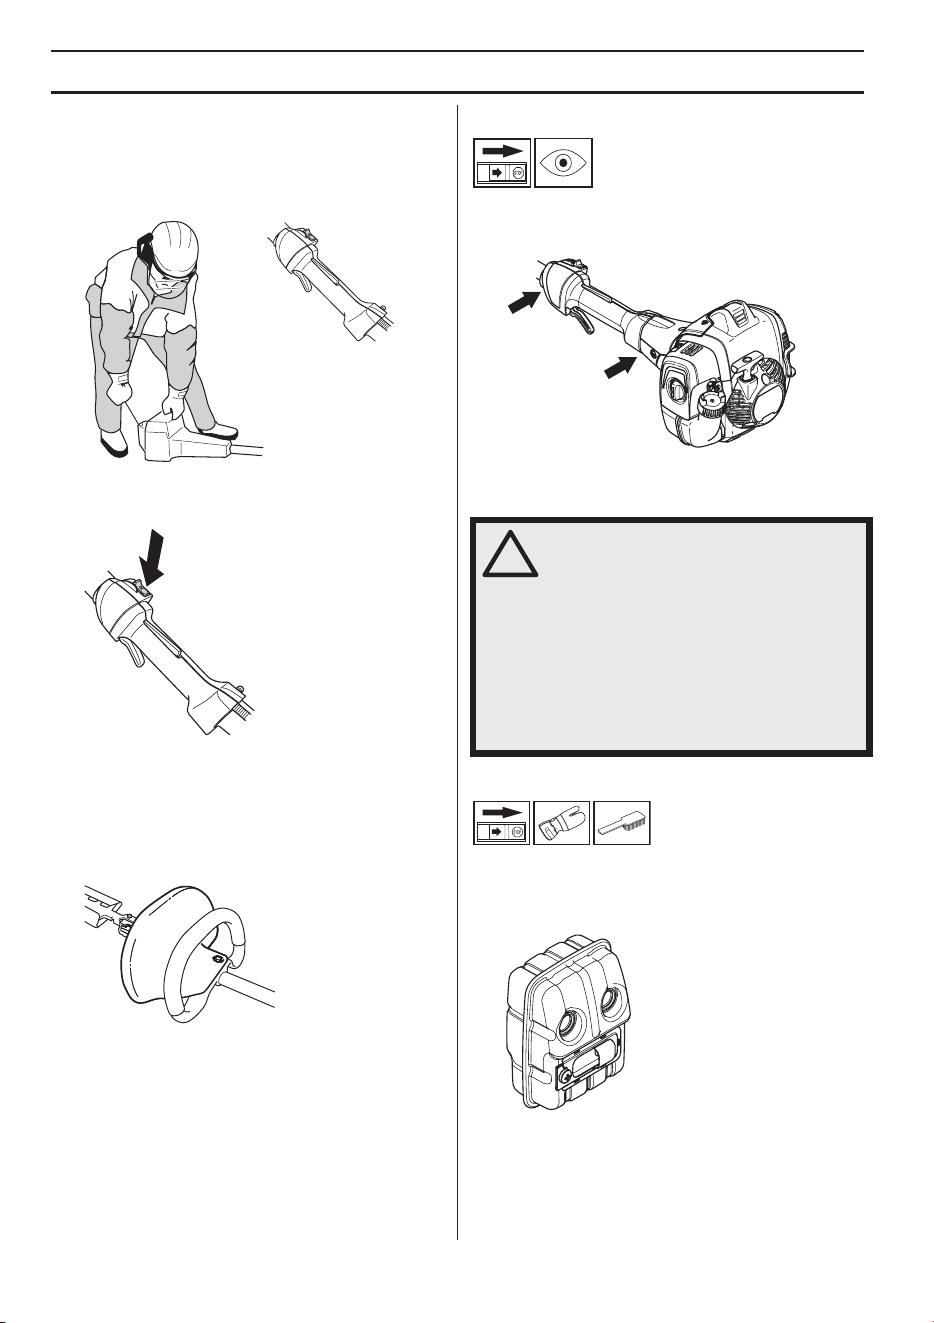
Thr
ottle trigger lockout
The throttle loc
kout is designed to prevent accidental
operation of the throttle control. When you press the lock
(A) (i.e. when you grasp the handle) it releases the throttle
control (B). When you release the handle the throttle
control and the throttle lockout both move back to their
original positions. This movement is controlled by two
independent return springs. This arrangement means that
the throttle control is automatically locked at the idle
setting.
Make sure the throttle control is locked at the idle setting
when the throttle lockout is released.
Press the throttle lockout and make sure it returns to its
original position when you release it.
Check that the throttle trigger and throttle lockout move
freely and that the return springs work properly.
IMPORTANT!
All servicing and repair work on the machine requires
special training. This is especially true of the machine
′
s
safety equipment. If your machine fails any of the
checks described below you must contact your service
agent. When you buy any of our products we guarantee
the availability of professional repairs and service. If the
retailer who sells your machine is not a servicing dealer,
ask him for the address of your nearest service agent.
!
W
ARNING! Never use a machine with
faulty safety equipment. The machine's
safety equipment must be checked and
maintained as described in this section.
If your machine fails any of these checks
contact your service agent to get it
repaired.
A
B
GENERAL SAFETY PRECA
UTIONS
8
–
English
See instr
uctions under the heading Start. Start the hedge
trimmer and apply full throttle. Release the throttle trigger
and check that the blades stop and remain stationary. If
the blades move when the throttle trigger is in the idle
position then the carburettor idle setting must be adjusted.
See instructions under the heading Maintenance.
Stop s
witch
Use the stop switch to switch off the engine.
Start the engine and make sure the engine stops when
you move the stop switch to the stop setting.
Hand guard
The hand guard prevents hands from coming into contact
with the moving blades, for example, if the operator loses
grip on the front handle.
Check that the hand guard is fitted correctly.
Check that the hand guard is undamaged.
Vibration damping system
Your machine is equipped with a vibration damping
system that is designed to minimize vibration and make
operation easier.
The machine′s vibration damping system reduces the
transfer of vibration between the engine unit/cutting
equipment and the machine
′s handle unit.
Muffler
The muffler is designed to keep noise levels to a minimum
and to direct exhaust fumes away from the user. A muffler
fitted with a catalytic converter is also designed to reduce
harmful exhaust gases.
!
WARNING! Overexposure to vibration
can lead to circulatory damage or nerve
damage in people who have impaired
circulation. Contact your doctor if you
experience symptoms of overexposure
to vibration. Such symptoms include
numbness, loss of feeling, tingling,
pricking, pain, loss of strength, changes
in skin colour or condition. These
symptoms normally appear in the
fingers, hands or wrists. The risk
increases at low temperatures.
GENERAL SAFETY PRECAUTIONS
English – 9
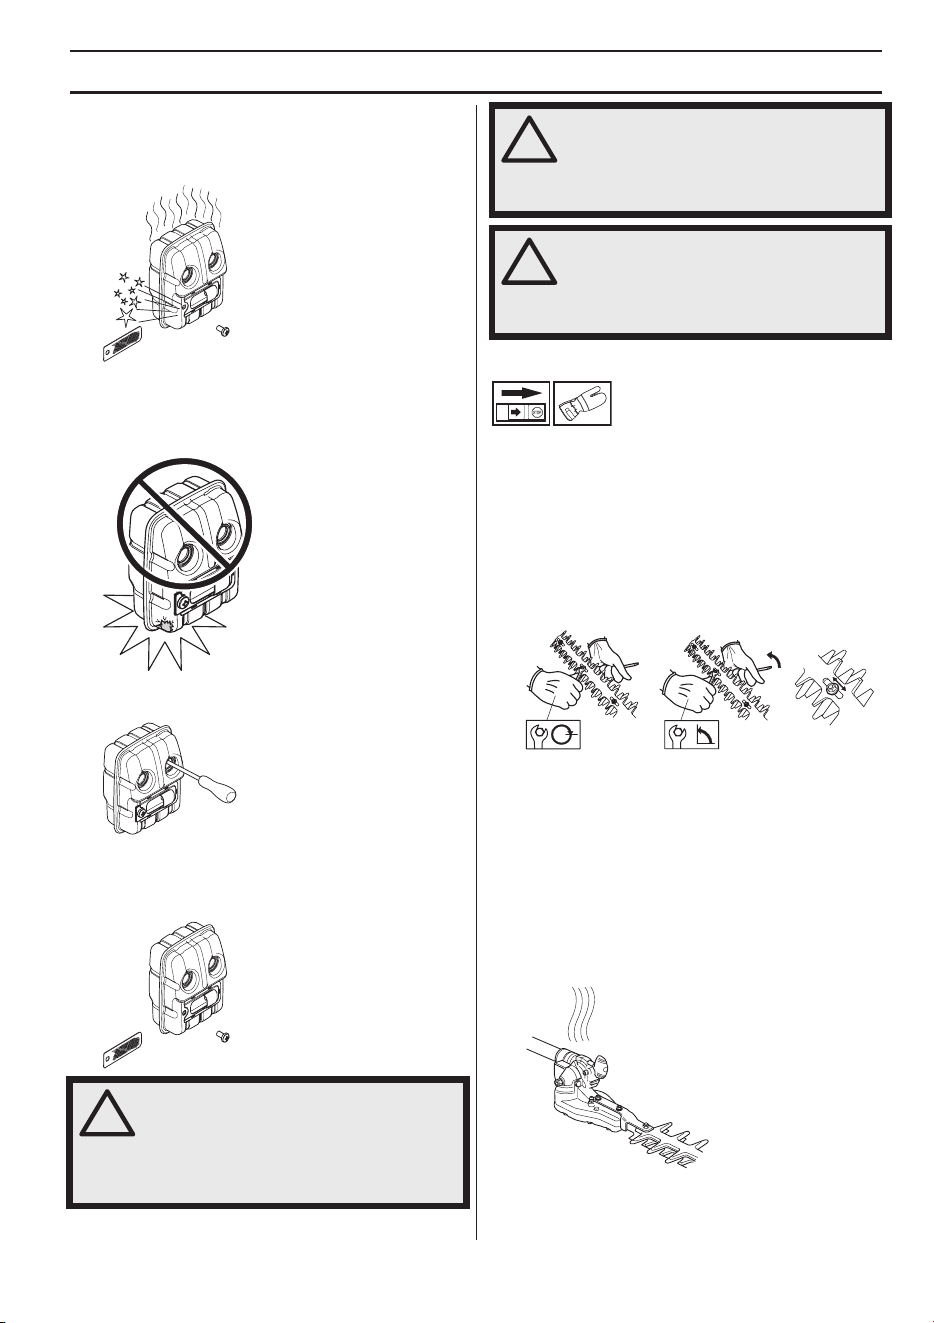
In countries that have a warm and dry climate there is a
significant risk of fire. We therefore fit certain mufflers with
a spark arrestor mesh. Check whether the muffler on your
machine is fitted with this kind of mesh.
For mufflers it is very important that you follow the
instructions on checking, maintaining and servicing your
machine.
Never use a machine that has a faulty muffler.
Regularly check that the muffler is securely attached to
the machine.
If the muffler on your machine is fitted with a spark
arrestor mesh this must be cleaned regularly. A blocked
mesh will cause the engine to overheat and may lead to
serious damage.
Blades
Turn off the motor. Disconnect the HT lead from the spark
plug.
To ensure good cutting results it is important that the
contact pressure between the blades is correct. The
contact pressure is adjusted by turning the screws on the
underside of the bar clockwise as far as they will go. Then
turn the screws anticlockwise a 1/4 turn. Lock the screws
using the locking nut on the top of the bar. Check that the
screws are loose enough to allow the washers under the
screw heads to slide sideways.
When the blades are correctly adjusted the play between
the blades should be 0,2–0,4 mm, measured at the
screws.
The edges of the blades are too hard to be filed. Dull
blades should be sharpened using a grinder.
Replace the blades if they are bent or damaged.
Gear
The gear housing gets hot when the machine has been in
use. To avoid burning yourself do not touch the gear
housing.
!
WARNING! Mufflers fitted with catalytic
converters get very hot during use and
remain so for some time after stopping.
This also applies at idle speed. Contact
can result in burns to the skin.
Remember the risk of fire!
!
WARNING! The inside of the muffler
contain chemicals that may be
carcinogenic. Avoid contact with these
elements in the event of a damaged
muffler.
!
WARNING! The exhaust fumes from the
engine are hot and may contain sparks
which can start a fire. Never start the
machine indoors or near combustible
material!
ASSEMBLY
10 – English
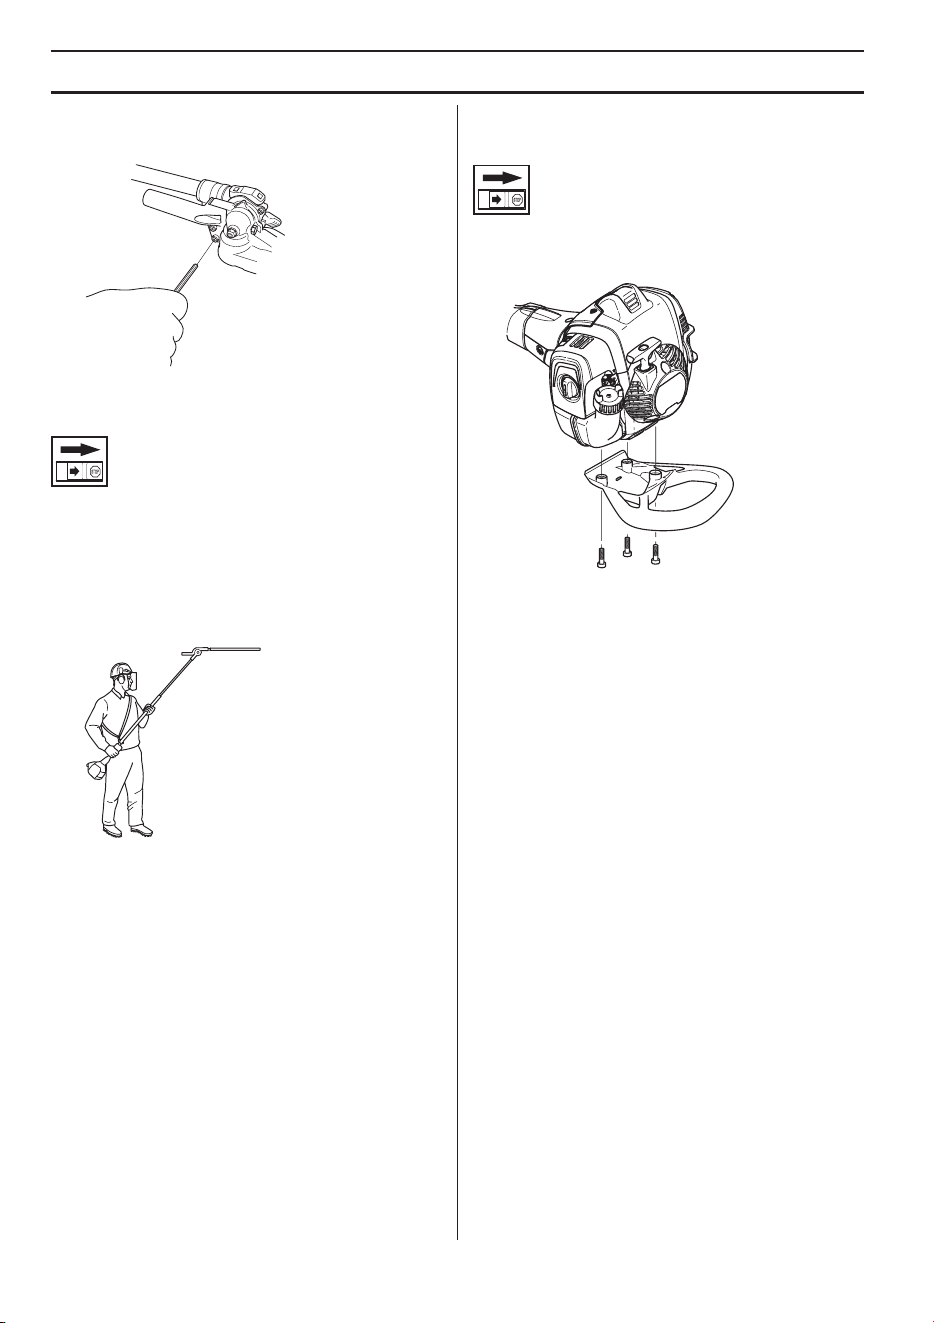
Fitting the handle
Fit the handle using two screws.
Adjusting the harness
(325HE4)
You should always use the harness with the machine to
give maximum control over the machine and reduce the
risk of fatigue in your arms and back.
1 Put on the harness.
2 Hook the machine onto the harness support hook.
3 Adjust the length of the harness so that the support
hook is roughly level with your right hip.
Fitting the impact guard
(325HE4)
Fit the guard with three screws. Tighten the screws to 30
ft/lbs. (4 Nm). After the machine has been in use for
around 20 hours, re-tighten the screws to 4 Nm.
FUEL HANDLING
English – 11
Fuel safety
Never start the machine:
1 If you have spilled fuel on it. Wipe off the spillage and
allow remaining fuel to evaporate.
2 If you have spilled fuel on yourself or your clothes,
change your clothes. Wash any part of your body that
has come in contact with fuel. Use soap and water.
3 If the machine is leaking fuel. Check regularly for
leaks from the fuel cap and fuel lines. In the event of
leakage, contact your service agent.
Transport and storage
• Store and transport the machine and fuel so that there
is no risk of any leakage or fumes coming into contact
with sparks or open flames, for example, from
electrical machinery, electric motors, electrical relays/
switches or boilers.
• When storing and transporting fuel always use
approved containers intended for this purpose.
• When storing the machine for long periods the fuel
tank must be emptied. Contact your local petrol
station to find out where to dispose of excess fuel.
Drain the tank into the appropriate containers and in a
well ventilated area.
• Ensure the machine is cleaned and that a complete
service is carried out before long-term storage.
• The transport guard must always be fitted to the
cutting attachment when the machine is being
transported or in storage.
• Secure the machine during transport.
• In order to prevent unintentional starting of the engine,
the spark plug cap must always be removed during
long-term storage, if the machine is not under close
supervision and when performing all service
measures.
• Allow the hedge trimmer to cool down after use before
putting it away for storage.
Fuel
CAUTION! The machine is equipped with a two-stroke
engine and must always be run using a mixture of petrol
and two-stroke oil. It is important to accurately measure
the amount of oil to be mixed to ensure that the correct
mixture is obtained. When mixing small amounts of fuel,
even small inaccuracies can drastically affect the ratio of
the mixture.
Petrol
CAUTION! Always use a quality petrol/oil mixture at least
90 octane (RON). If your machine is equipped with a
catalytic converter (see chapter on Technical data) always
use a good quality unleaded petrol/oil mixture. Leaded
petrol will destroy the catalytic converter.
Use low-emission petrol, also known as alkylate petrol, if
it is available.
Ethanol blended fuel, E10 may be used (max 10%
ethanol blend). Using ethanol blends higher than E10 will
create lean running condition which can cause engine
damage.
• The lowest octane recommended is 90 (RON). If you
run the engine on a lower octane grade than 90 so-
called knocking can occur. This gives rise to a high
engine temperature, which can result in serious
engine damage.
• When working at continuous high revs a higher octane
rating is recommended.
Two-stroke oil
• For best results and performance use HUSQVARNA
two-stroke engine oil, which is specially formulated for
our air-cooled two-stroke engines.
• Never use two-stroke oil intended for water-cooled
engines, sometimes referred to as outboard oil (rated
TCW).
• Never use oil intended for four-stroke engines.
• A poor oil quality and/or too high oil/fuel ratio may
jeopardise function and decrease the life time of
catalytic converters.
• Mixing ratio
1:50 (2%) with HUSQVARNA two-stroke oil.
1:33 (3%) with oils class JASO FB or ISO EGB
formulated for air-cooled, two-stroke engines.
!
WARNING! Take care when handling fuel.
Bear in mind the risk of fire, explosion
and inhaling fumes.
!
WARNING! Fuel and fuel fumes are
highly inflammable and can cause
serious injury when inhaled or allowed to
come in contact with the skin. For this
reason observe caution when handling
fuel and make sure there is adequate
ventilation.
!
WARNING! Always ensure there is
adequate ventilation when handling fuel.
FUEL HANDLING
12 – English
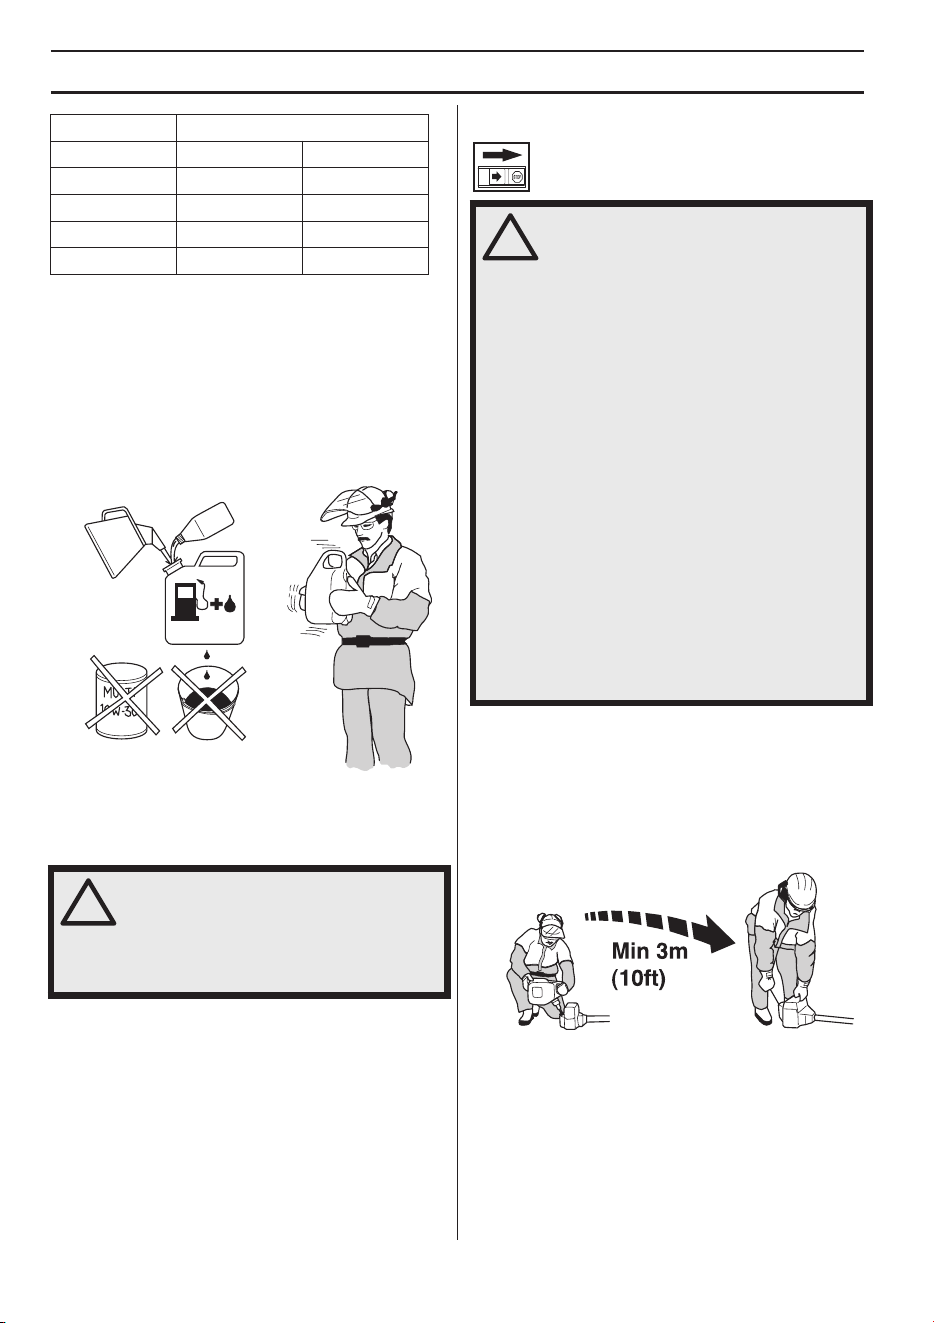
Mixing
• Always mix the petrol and oil in a clean container
intended for fuel.
• Always start by filling half the amount of the petrol to
be used. Then add the entire amount of oil. Mix
(shake) the fuel mixture. Add the remaining amount of
petrol.
• Mix (shake) the fuel mixture thoroughly before filling
the machine’s fuel tank.
• Do not mix more than one month’s supply of fuel at a
time.
• If the machine is not used for some time the fuel tank
should be emptied and cleaned.
Fueling
• Always use a fuel container with an anti-spill valve.
• If you have spilled fuel on it. Wipe off the spillage and
allow remaining fuel to evaporate.
• Clean the area around the fuel cap. Contamination in
the tank can cause operating problems.
• Ensure that the fuel is well mixed by shaking the
container before filling the tank.
Petrol, litre Two-stroke oil, litre
2% (1:50) 3% (1:33)
5 0,10 0,15
10 0,20 0,30
15 0,30 0,45
20 0,40 0,60
!
WARNING! The catalytic converter
muffler gets very hot during and after
use. This also applies during idling. Be
aware of the fire hazard, especially when
working near flammable substances and/
or vapours.
!
WARNING! Taking the following
precautions, will lessen the risk of fire:
Mix and pour fuel outdoors, where there
are no sparks or flames.
Do not smoke or place hot objects near
fuel.
Always shut off the engine before
refuelling.
Always stop the engine and let it cool for
a few minutes before refuelling. Refuel in
a well ventilated area. Never fuel the
machine indoors.
When refuelling, open the fuel cap slowly
so that any excess pressure is released
gently.
Tighten the fuel cap carefully after
refuelling.
Always move the machine away from the
refuelling area and source before
starting.
STARTING AND STOPPING
English – 13
Check before starting
• Inspect the working area. Remove any objects that
could be thrown out.
• Check the cutting attachment. Never use blades that
are dull, cracked or damaged.
• Check that the machine is in perfect working order.
Check that all nuts and screws are tight.
• Make sure the gear housing is lubricated correctly.
See instructions under the heading Gear housing.
• Check that the cutting attachment always stops when
the engine is idling.
• Only use the machine for the purpose it was intended
for.
• Make sure that the handle and safety features are in
good working order. Never use a machine that lacks a
part or has been modified outside its specifications.
• All covers must be correctly fitted and undamaged
before you start the machine.
Starting and stopping
Starting
Primer bulb: Press the air purge repeatedly until fuel
begins to fill the bulb. The bulb need not be completely
filled.
Choke: Set the choke control in the choke position.
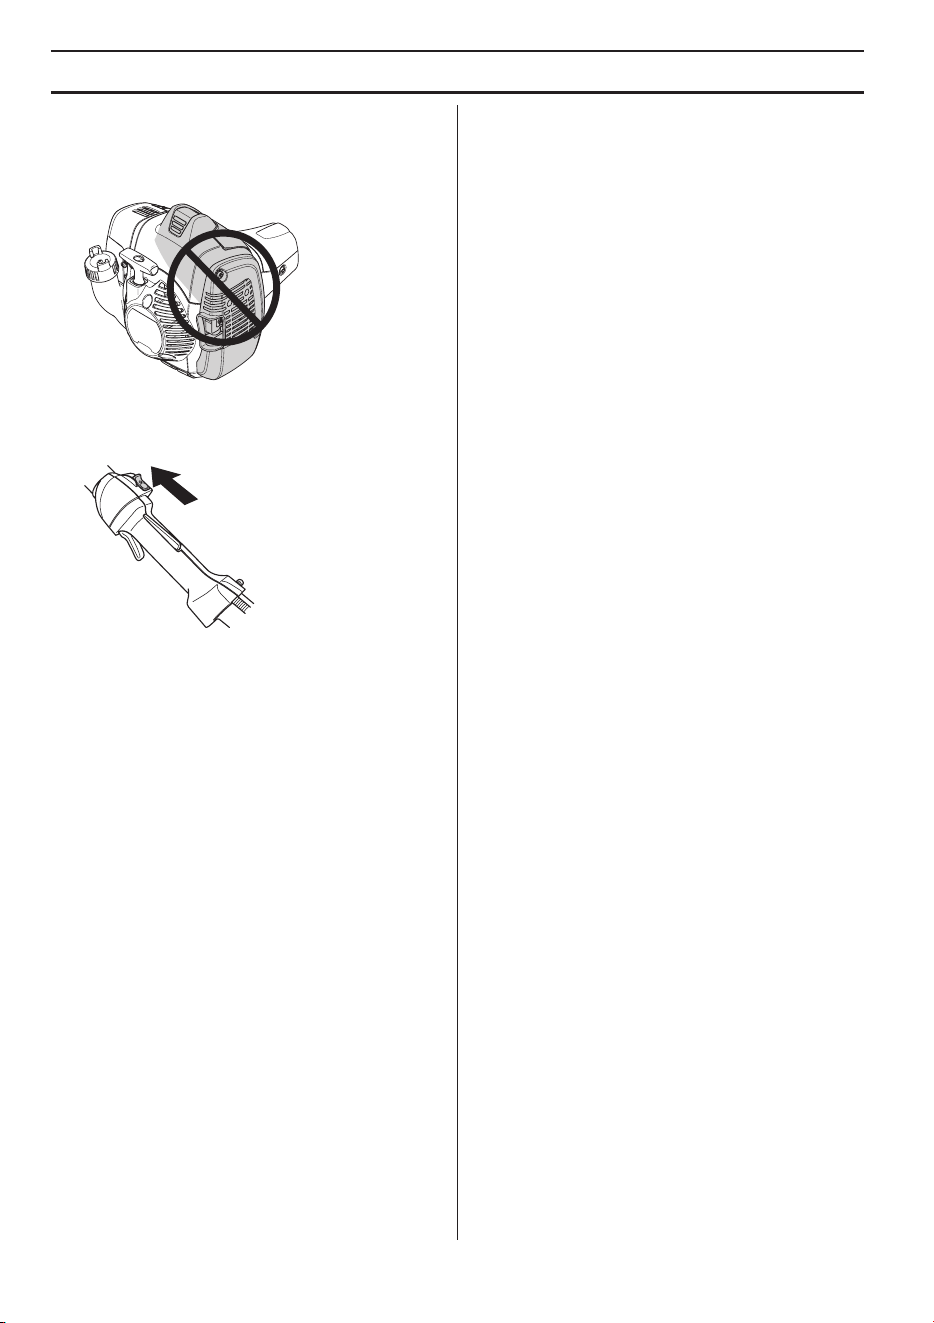
Hold the body of the machine on the ground using your
left hand (CAUTION! Not with your foot!). Grip the starter
handle, slowly pull out the cord with your right hand until
you feel some resistance (the starter pawls grip), now
quickly and powerfully pull the cord.
Never twist the
starter cord around your hand.
Repeat pulling the cord until engine attemps to start (or
maximum 5 pulls).
Pull the cord until engine starts and gradually operate
throttle trigger for increasing engine speed to operate
speed. The throttle will automatically disengage from the
start setting.
CAUTION! Do not pull the starter cord all the way out and
do not let go of the starter handle when the cord is fully
extended. This can damage the machine.
!
WARNING! The complete clutch cover
and shaft must be fitted before the
machine is started, otherwise the clutch
can come loose and cause personal
injury.
Always move the machine about 3
metres from the refuelling position
before starting. Place the machine on a
firm surface. Remember that the blades
may start to move when the engine is
started. Make sure the blades cannot
come into contact with any object. Make
sure that no unauthorised persons are in
the working area, otherwise there is a
risk of serious personal injury.
The safety distance is 15 metres.
STARTING AND STOPPING
14 – English
CAUTION! Do not put any part of your body in marked
area. Contact can result in burns to the skin, or electrical
shock if the spark plug cap has been damaged. Always
use gloves. Do not use a machine with damaged spark
plug cap.
Stopping
The engine is switched off by moving the stop switch to
the stop position.
CAUTION! The stop switch automatically returns to the
start position. In order to prevent unintentional starting,
the spark plug cap must be removed from the spark plug
when assembling, checking and/or performing
maintenance.
WORKING TECHNIQUES
English – 15
General working instructions
Personal protection
• Always wear boots and other equipment described
under the heading Personal protective equipment.
• Always wear working clothes and heavy-duty long
trousers.
• Never wear loose clothing or jewellery.
• Make sure your hair does not hang below shoulder
level.
Safety instructions regarding the
surroundings
• Never allow children to use the machine.
• Ensure that no-one comes closer than 15 metres
while you are working.
• Never allow anyone else to use the machine without
first ensuring that they have read and understood the
contents of the operator’s manual.
• Never work from a ladder, stool or any other raised
position that is not fully secured.
• Keep in mind that the operator is responsible for
accidents or hazards occuring to other people or their
property.
Safety instructions while working
• Always ensure you have a safe and stable working
position.
• Always use both hands to hold the machine. Hold the
machine at the side of your body.
• Use your right hand to control the throttle setting.
• Make sure that your hands and feet do not come near
the cutting attachment when the engine is running.
• When the engine is switched off, keep your hands and
feet away from the cutting attachment until it has
stopped completely.
• Watch out for stumps of branches that can be thrown
out during cutting.
• Always lay the machine on the ground when you are
not using it.
• Do not cut too close to the ground. Stones and other
objects can be thrown out.
• Check the working area for foreign objects such as
electricity cables, insects and animals, etc, or other
objects that could damage the cutting attachment,
such as metal items.
IMPORTANT!
This section takes up the basic safety precautions for
working with a hedge trimmer.
If you encounter a situation where you are uncertain
how to proceed you should ask an expert. Contact your
dealer or your service workshop.
Avoid all usage which you consider to be beyond your
capability.
!
WARNING! The machine can cause
serious personal injury. Read the safety
instructions carefully. Learn how to use
the machine.
!
WARNING! Cutting tool. Do not touch the
tool without first switching off the
engine.
WORKING TECHNIQUES
16 – English
• If any foreign object is hit or if vibrations occur stop the
machine immediately. Disconnect the HT lead from
the spark plug. Check that the machine is not
damaged. Repair any damage.
• If anything jams in the blades while you are working,
switch off the engine and wait until it has stopped
completely before cleaning the blades. Disconnect the
spark plug cap from the spark plug.
• Never put the machine down with the engine running
unless you have it in clear sight.
Safety instructions after completing work
• The transport guard should always be fitted to the
cutting attachment when the machine is not in use.
• Make sure the cutting attachment has stopped before
cleaning, carrying out repairs or an inspection.
Disconnect the spark plug cap from the spark plug.
• Always wear heavy-duty gloves when repairing the
cutting attachment. This is extremely sharp and can
easily cause cuts.
• Store the machine out of reach of children.
• Use only original spare parts for repairs.
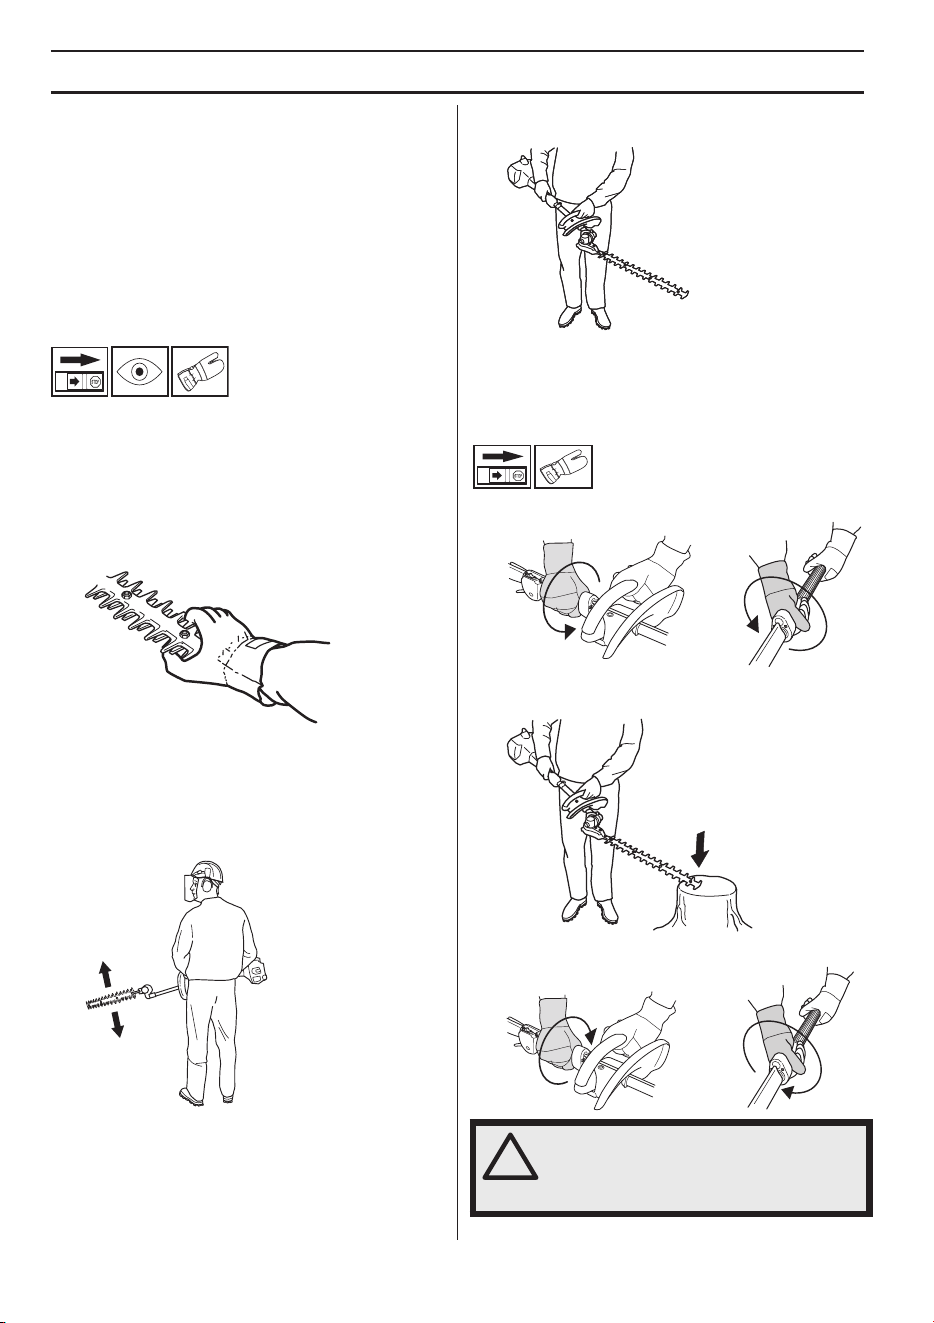
Basic working techniques
• Work with a swinging action from the bottom upwards
when trimming sides.
• Adjust the throttle setting to suit the load.
• When trimming a hedge the engine should always
face away from the hedge.
• Hold the machine as close to your body as possible to
get the best balance.
• Make sure that the tip does not touch the ground.
• Do not rush the work, but work steadily until all the
branches have been cut back cleanly.
Changing the hedge trimmer angle
• Loosen the knob on the shaft (clockwise).
• Press the cutting unit against a firm surface until the
required angle is set.
• Turn the knob (anti-clockwise).
!
WARNING! Do not hold the cutting head
when you adjust the angle. The blades
are sharp and you could easily cut
yourself.
WORKING TECHNIQUES
English – 17
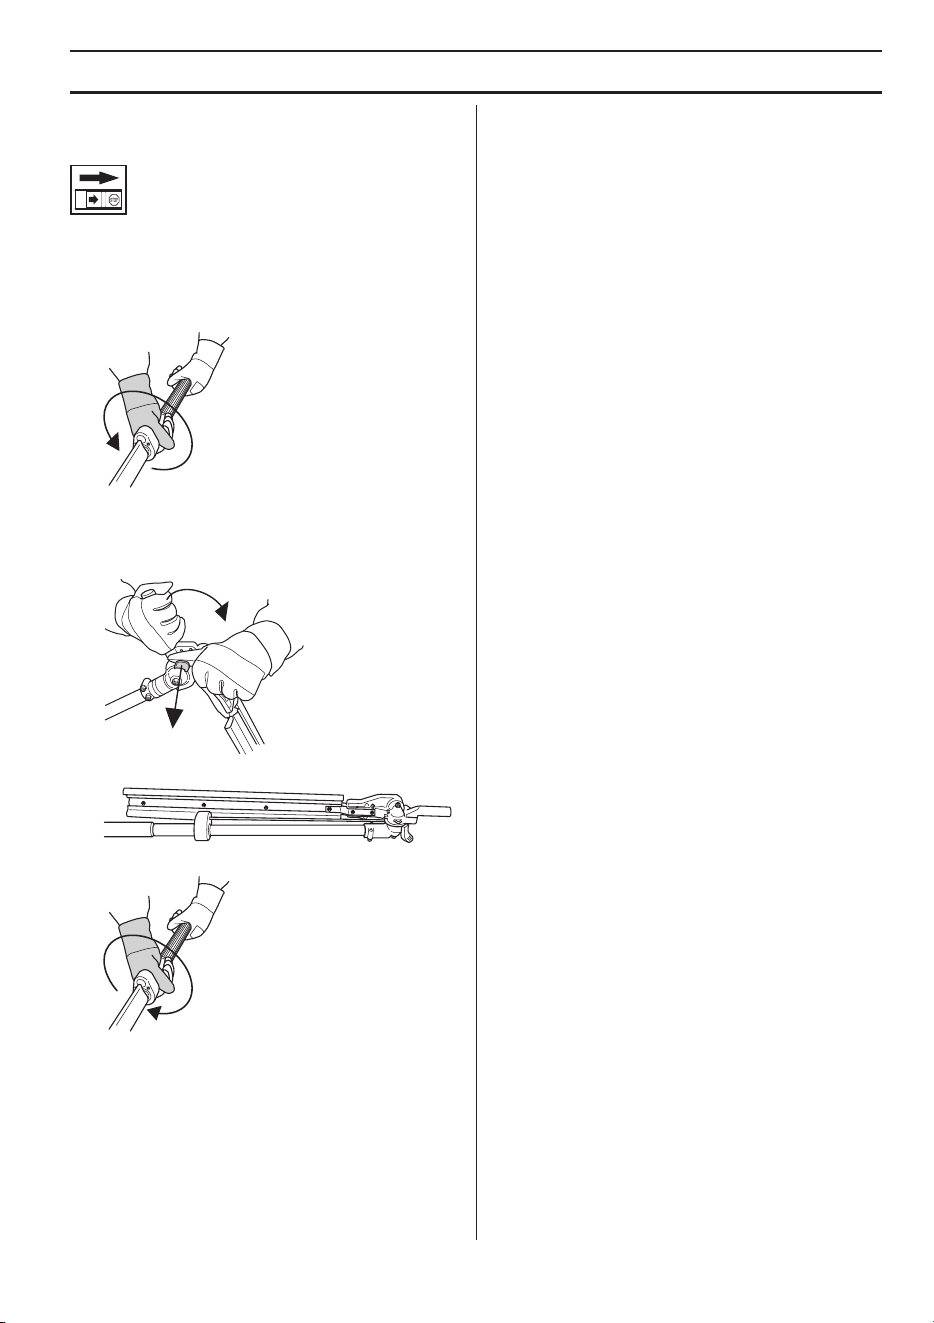
Transport position
(325HE4)
Once the work has been completed fold the cutting unit
back against the shaft to simplify transport and storage of
the hedge trimmer.
1 Turn off the motor.
2 Loosen the knob on the shaft (clockwise).
3 Grip the handle on the cutting unit and angle the
cutting unit upwards. At an angle of 90 degrees there
is a stop position. To pass the stop position, pull out
the lock button.
4 Fold down the cutting unit against the shaft.
5 Turn the knob (anti-clockwise).
CAUTION! When the stop position has been passed the
blades are blocked, do not try to cut with the cutting unit
in this position.
MAINTENANCE
18 – English
Carburettor
Adjustment of the idle speed
Before any adjustments are made, make sure that the air
filter is clean and the air filter cover is fitted.
Adjust the idle speed with the idle adjustment screw T, if
adjustment is necessary. First turn the idle adjustment
screw T clockwise until the blades start to move. Then
turn the idle adjustment screw T anticlockwise until the
blades stop. The idle speed is correctly adjusted when the
engine runs smoothly in every position. There should also
be a clear margin to the speed at which the blades start
to move.
The blades must also remain stationary when the choke
control is in the start throttle position.
Recommended idle speed: See the Technical data
section.
Muffler
CAUTION! Some mufflers are fitted with a catalytic
converter. See chapter on Technical data to see whether
your machine is fitted with a catalytic converter.
The muffler is designed to reduce the noise level and to
direct the exhaust gases away from the operator. The
exhaust gases are hot and can contain sparks, which may
cause fire if directed against dry and combustible
material.
Some mufflers are equipped with a special spark arrestor
mesh. If your machine has this type of muffler, you should
clean the mesh at least once a week. This is best done
with a wire brush.
On mufflers without a catalytic converter the mesh should
be cleaned weekly, or replaced if necessary. On mufflers
fitted with a catalytic converter the mesh should be
checked, and if necessary cleaned, monthly.
If the mesh
is damaged it should be replaced.
If the mesh is
frequently blocked, this can be a sign that the
performance of the catalytic converter is impaired.
Contact your dealer to inspect the muffler. A blocked
mesh will cause the machine to overheat and result in
damage to the cylinder and piston.
CAUTION! Never use a machine with a defective muffler.
Cooling system
To keep the working temperature as low as possible the
machine is equipped with a cooling system.
!
WARNING! If the idle speed cannot be
adjusted so that the cutting attachment
stops, contact your dealer/service
workshop. Do not use the machine until
it has been correctly adjusted or
repaired.
!
WARNING! Mufflers fitted with catalytic
converters get very hot during use and
remain so for some time after stopping.
This also applies at idle speed. Contact
can result in burns to the skin.
Remember the risk of fire!
MAINTENANCE
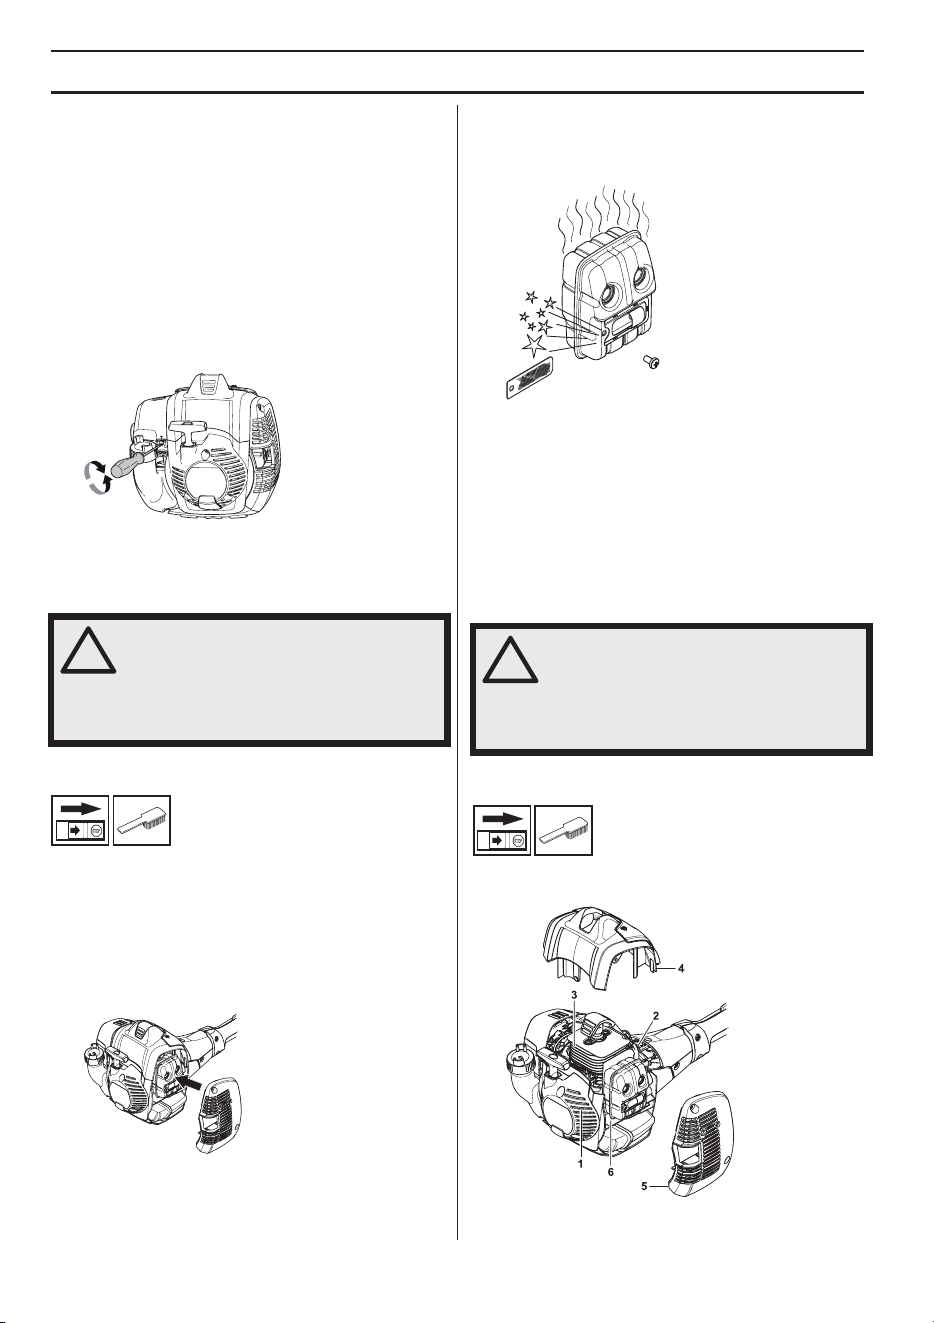
English – 19
The cooling system consists of:
1 Air intake on the starter.
2 Fins on the flywheel.
3 Cooling fins on the cylinder.
4 Cylinder cover (directs cold air over the cylinder).
Clean the cooling system with a brush once a week, more
often in demanding conditions. A dirty or blocked cooling
system results in the machine overheating which causes
damage to the piston and cylinder.
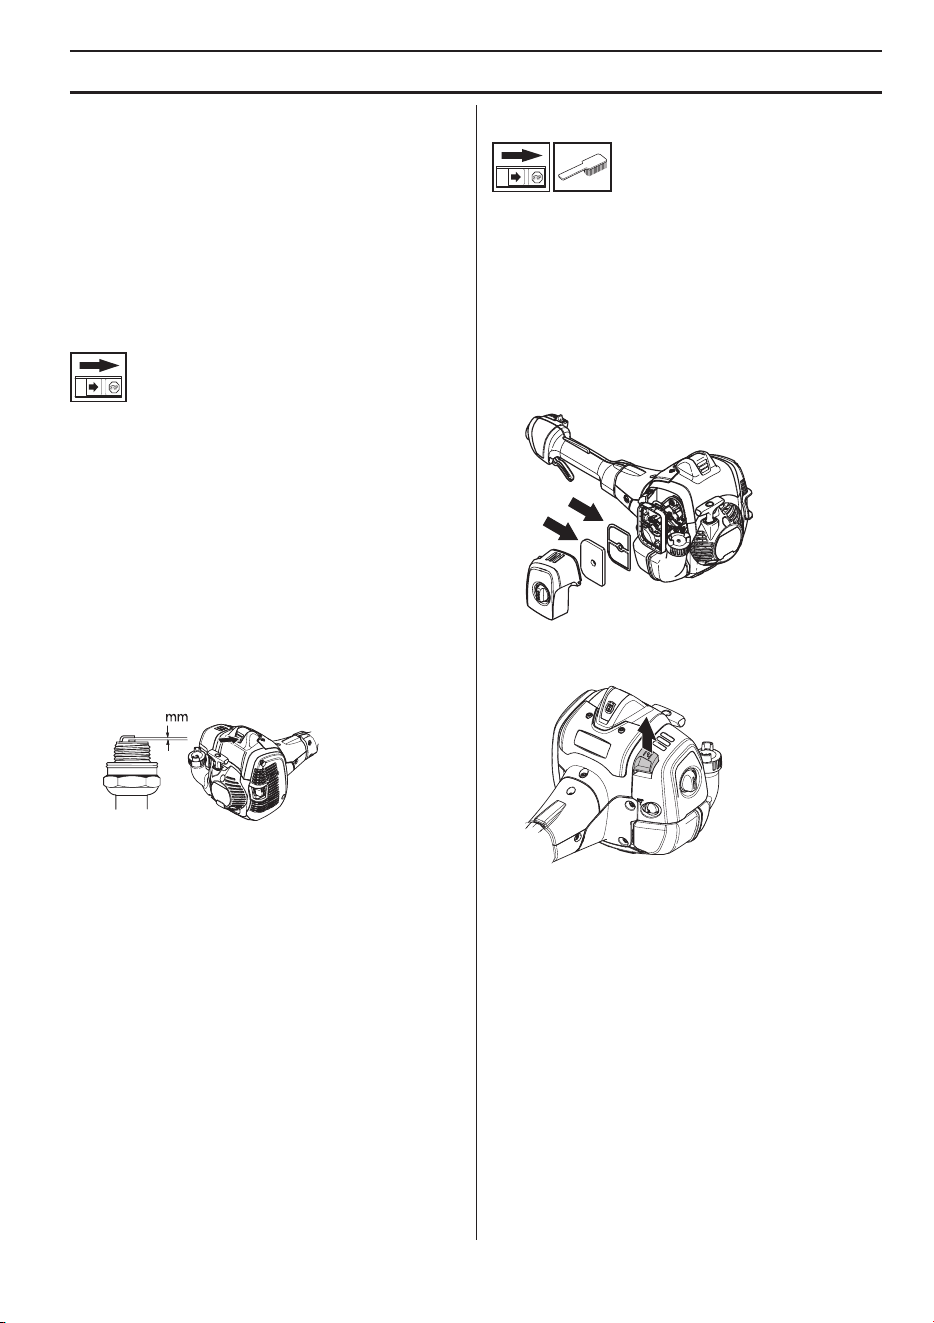
Spark plug
The spark plug condition is influenced by:
• Incorrect carburettor adjustment.
• An incorrect fuel mixture (too much or incorrect type
of oil).
• A dirty air filter.
These factors cause deposits on the spark plug
electrodes, which may result in operating problems and
starting difficulties.
If the machine is low on power, difficult to start or runs
poorly at idle speed: always check the spark plug first
before taking any further action. If the spark plug is dirty,
clean it and check that the electrode gap is 0.65 mm. The
spark plug should be replaced after about a month in
operation or earlier if necessary.
CAUTION! Always use the recommended spark plug
type! Use of the wrong spark plug can damage the piston/
cylinder. Check that the spark plug is fitted with a
suppressor.
Air filter
The air filter must be regularly cleaned to remove dust
and dirt in order to avoid:
• Carburettor malfunctions.
• Starting problems.
• Loss of engine power.
• Unnecessary wear to engine parts.
• Excessive fuel consumption.
Clean the filter every 25 hours, or more regularly if
conditions are exceptionally dusty.
Cleaning the air filter
Close the choke valve by moving the choke control up.
Remove the air filter cover and take out the filter. Wash it
clean in warm, soapy water. Ensure that the filter is dry
before refitting it.
An air filter that has been in use for a long time cannot be
cleaned completely. The filter must therefore be replaced
with a new one at regular intervals.
A damaged air filter
must always be replaced.
If the machine is used in dusty conditions the air filter
should be soaked in oil. See instructions under the
heading Oiling the air filter.
0,65
MAINTENANCE
20 – English
Oiling the air filter
Always use HUSQVARNA filter oil, art. no. 531 00 92-48.
The filter oil contains a solvent to make it spread evenly
through the filter. You should therefore avoid skin contact.
Put the filter in a plastic bag and pour the filter oil over it.
Knead the plastic bag to distribute the oil. Squeeze the
excess oil out of the filter inside the plastic bag and pour
off the excess before fitting the filter to the machine. Never
use common engine oil. This would drain through the filter
quite quickly and collect in the bottom.
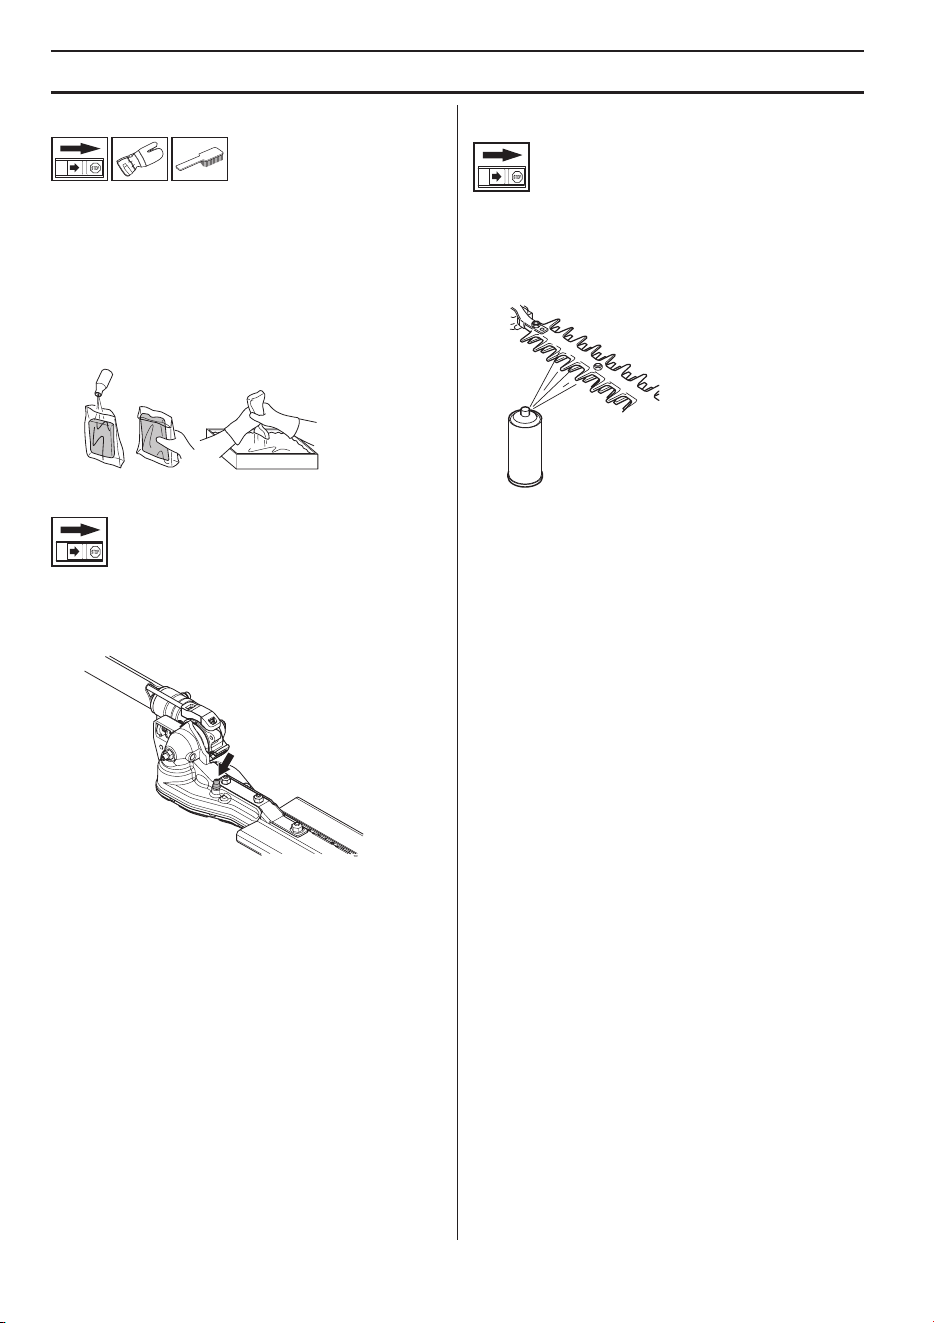
Gear
There is a grease nipple and a plug for filling lubricant on
the gear housing. Use a grease gun to fill with grease.
This should be done after every 60 working hours. Use
Husqvarna’s special grease, no. 503
98 96-04.
CAUTION! The gear housing must not be filled
completely with grease. The grease expands as the
machine heats up during operation. If the gear housing
was completely filled with grease it could damage the
seals and lead to leakage of grease.
The grease in the bevel gear does not normally need to
be changed except if repairs are carried out.
Cleaning and lubrication
Clean any resin and plant residue from the blades using
Husqvarna cleaning agent (UL22) before and after using
the machine.
Lubricate the blade bars with Husqvarna special grease
(UL 21) before long periods of storage.

English – 21
MAINTENANCE
Maintenance schedule
The following is a list of the maintenance steps that must be performed on the machine. Most of the items are described
in the Maintenance section. The user must only carry out the maintenance and service work described in this Operator's
Manual. More extensive work must be carried out by an authorized service workshop.
Maintenance
Daily
maintenance
Weekly
maintenance
Monthly
maintenance
Clean the outside of the machine. X
Make sure the throttle trigger lock and the throttle function
correctly from a safety point of view.
X
Check that the stop switch works correctly. X
Check that the blades do not move when the engine is idling or
when the choke is in the start throttle position.
X
Check that the blades are undamaged and show no signs of
cracking or other damage. Replace the blades if necessary.
X
Clean the air filter. Replace if necessary. X
Check that the hand guard is not damaged. Replace the guard if
damaged.
X
Check that nuts and screws are tight. X
Check that there are no fuel leaks from the engine, tank or fuel
lines.
X
Check the starter and starter cord. X
Check that the vibration damping elements are not damaged. X
Clean the outside of the spark plug. Remove it and check the
electrode gap. Adjust the gap to 0,65 mm or replace the spark
plug. Check that the spark plug is fitted with a suppressor.
X
Clean the machine’s cooling system. X
Clean or replace the spark arrestor mesh on the muffler (only
applies to mufflers without a catalytic converter).
X
Clean the outside of the carburettor and the space around it. X
Fill the gear housing with grease. This should be carried out
approximately every 60 working hours.
X
Check that the screws that hold the blades together are correctly
tightened.
X
Clean the fuel tank. X
Check the fuel filter for contamination and the fuel hose for cracks
or other defects. Replace if necessary.
X
Check all cables and connections. X
Check the clutch, clutch springs and the clutch drum for wear.
Replace if necessary by an autorized service workshop.
X
Replace the spark plug. Check that the spark plug is fitted with a
suppressor.
X
Check and clean the spark arrestor mesh on the muffler (only
applies to mufflers fitted with a catalytic converter).
X
To reduce the fire hazard, clean dirt, leaves and surplus lubricant,
etc from the muffler and engine.
X

22 – English
TECHNICAL DATA
Technical data
Note 1: Noise emissions in the environment measured as sound power (L
WA
) in conformity with EC directive 2000/14/
EC. Reported sound power level for the machine has been measured with the original cutting attachment that gives the
highest level. The difference between guaranteed and measured sound power is that the guaranteed sound power also
includes dispersion in the measurement result and the variations between different machines of the same model
according to Directive 2000/14/EC.
Note 2: Reported data for equivalent sound pressure level for the machine has a typical statistical dispersion (standard
deviation) of 1 dB (A).
Note 3: Reported data for equivalent vibration level has a typical statistical dispersion (standard deviation) of 1 m/s
2
.
325HE3 325HE4
Engine
Cylinder displacement, cm
3
25,4 25,4
Cylinder bore, mm 34 34
Stroke, mm 28 28
Idle speed, rpm 2800-3200 2800-3200
Recommended max. speed, rpm 11000-12000 11000-12000
Max. engine output, acc. to ISO 8893, kW/ rpm 1,0/8500 1,0/8500
Catalytic converter muffler Ye s Ye s
Speed-regulated ignition system Ye s Ye s
Ignition system
Spark plug NGK BPMR8Y NGK BPMR8Y
Electrode gap, mm 0,65 0,65
Fuel and lubrication system
Fuel tank capacity, cm
3
/litre 0,5 0,5
Weight
Weight without fuel, kg 6,3 6,4
Noise emissions
(see note 1)
Sound power level, measured dB (A) 105 105
Sound power level, guaranteed L
WA
dB (A) 106 106
Sound levels
(see note 2)
Equivalent sound pressure level at the operator’s ear,
measured according to EN ISO 10517, dB(A):
96 93
Vibration levels
(see note 3)
Equivalent vibration levels (a
hv,eq
) at handles,
measured according to EN ISO 10517, m/s
2
Front/rear handles: 3,1/4,0 5,4/2,4
Blades
Length, mm 550 550
Blade speed, cuts/min 4300 4300

English – 23
TECHNICAL DATA
EC Declaration of Conformity
Husqvarna AB, SE561 82 Huskvarna, Sweden, tel +4636146500, declares under sole responsibility that the hedge
trimmers
Husqvarna 325HE3 and 325HE4 from 2016’s serial numbers and onwards (the year is clearly stated in plain
text on the rating plate with subsequent serial number), complies with the requirements of the COUNCIL’S DIRECTIVES:
- of May 17, 2006 ”relating to machinery” 2006/42/EC.
- of February 26, 2014 ”relating to electromagnetic compatibility” 2014/30/EU.
- of May 8, 2000 ”relating to the noise emissions in the environment” 2000/14/EC. Conformity assessment according
to Annex V. For information relating to noise emissions, see the Technical data chapter.
- of June 8, 2011 ”on the restriction of the use of certain hazardous substances in electrical and electronic equipment”
2011/65/EU.
The following standards have been applied: EN ISO 12100:2010, CISPR 12:2007/A1:2009, EN ISO 10517:2009/
A1:2013, EN 50581:2012.
SMP Svensk Maskinprovning AB, Box 7035, SE-750 07 Uppsala, Sweden, has carried out voluntary type approval for
Husqvarna AB. The certificates have the numbers:
325HE3, 325HE4 - SEC/15/2434
Huskvarna March 30, 2016
Per Gustafsson, Development manager (Authorized representative for Husqvarna AB and responsible for technical
documentation.)

597653801 Rev A 2019-03-22
EN - The object of the declaration described in the Declaration of
conformity is in conformity with the relevant Union harmonization
legislation:
- of June 8, 2011 ”on the restriction of the use of certain hazardous
substances in electrical and electronic equipment” 2011/65/EU.
The following standards have been applied:
- EN 50581:2012
WARNING: Tampering with the engine voids the EU type-approval of
this product.
SE - Objektet som är föremål för försäkran om överensstämmelse
överensstämmer med relevant harmoniserad unionslagstiftning:
- av den 8 juni 2011 angående ”begränsning av användning av vissa farliga
ämnen i elektrisk och elektronisk utrustning” 2011/65/EU.
Följande standarder har tillämpats:
- EN 50581:2012
VARNING: Manipulering av motorn upphäver EG-typgodkännandet
för den här produkten.
DK - Genstanden for erklæringen, der er beskrevet i
overensstemmelseserklæringen, er i overensstemmelse med den
pågældende EU harmoniseringslovgivning:
- af den 8. juni 2011 “om begrænsning af anvendelsen af visse farlige
stoer i elektrisk og elektronisk udstyr” 2011/65/EU.
Der er anvendt følgende standarder:
- EN 50581:2012
ADVARSEL! Ved manipulation af motoren bortfalder EU-
typegodkendelsen af dette produkt.
NO - Formålet med erklæringen beskrevet i Samsvarserklæringen er i
overensstemmelse med relevante EU-regelverk:
- av 8. juni 2011 “om begrensning i bruk av visse farlige stoer i elektrisk og
elektronisk utstyr” 2011/65/EU.
Følgende standarder er blitt brukt:
- EN 50581:2012
ADVARSEL! Tukling med motoren opphever EU-type-godkjenningen
til dette produktet.
FI - Tässä vaatimustenmukaisuusvakuutuksessa kuvattu kohde on sitä
koskevien EU:n lainsäädäntöä yhdenmukaistavien säännösten mukainen:
- 8. kesäkuuta 2011 annettu direktiivi tiettyjen vaarallisten aineiden käytön
rajoittamisesta sähkö- ja elektroniikkalaitteissa, 2011/65/EU.
Seuraavia standardeja on sovellettu:
- EN 50581:2012
VAROITUS! Moottorin muokkaaminen mitätöi tuotteen
EU-tyyppihyväksynnän.
DE - Die in der Konformitätserklärung beschriebene Erklärung entspricht
der jeweiligen Rechtsangleichung innerhalb der EU:
- Richtlinie „zur Beschränkung der Verwendung bestimmter gefährlicher
Stoe in Elektro- und Elektronikgeräten” 2011/65/EU vom 8. Juni 2011.
Die folgenden Normen werden erfüllt:
- EN 50581:2012
WARNUNG! Bei einem Eingri in den Motor erlischt die EU-
Typgenehmigung für dieses Produkt.
FR - L’objet de la déclaration décrite dans la Déclaration de conformité est
en conformité avec la législation d’harmonisation de l’Union concernée:
- du 8 juin 2011 « relative à la limitation de l’utilisation de certaines
substances dangereuses au sein d’équipements électriques et
électroniques » 2011/65/UE.
Les normes harmonisées suivantes ont été appliquées:
- EN 50581:2012
AVERTISSEMENT! Toute altération du moteur a pour eet d’annuler
l’homologation de type UE de ce produit.
NL - Het object beschreven in de verklaring van overeenstemming is
conform de betreende harmonisatiewetgeving van de Unie:
- van 8 juni 2011 “inzake beperking van het gebruik van bepaalde
gevaarlijke stoen in elektrische en elektronische apparatuur” 2011/65/EU.
De volgende normen zijn van toepassing:
- EN 50581:2012
WAARSCHUWING! De EU-typegoedkeuring van dit product
vervalt als ongeoorloofde wijzigingen aan de motor aangebracht worden.
ES - El objeto de la declaración descrita en la
Declaración de conformidad es la conformidad con la
legislación de armonización pertinente de la Unión:
- de 8 de junio de 2011 “sobre restricciones de utilización de determinadas
sustancias peligrosas en aparatos eléctricos y electrónicos” 2011/65/UE.
Se han aplicado las normas siguientes:
- EN 50581:2012
¡ATENCIÓN! La manipulación del motor anula la homologación de
la UE de este producto.
PT - A declaração descrita na Declaração de conformidade está de acordo
com a legislação de harmonização aplicável da União:
- de 8 de junho de 2011 “relativa à restrição do uso de determinadas
substâncias perigosas em equipamento elétrico e eletrónico” 2011/65/UE.
Foram respeitadas as seguintes normas:
- EN 50581:2012
ATENÇÃO! A adulteração do motor anula a aprovação deste
produto pela UE.
IT - L’oggetto della dichiarazione contenuta nel documento denominato
“Dichiarazione di conformità” è la conformità con la normativa dell’Unione
sull’armonizzazione corrispondente:
- dell’8 giugno 2011 sulla “restrizione dell’uso di determinate sostanze
pericolose nelle apparecchiature elettriche ed elettroniche”. 2011/65/UE.
Sono state applicate le seguenti norme:
- EN 50581:2012
AVVERTENZA! La manomissione del motore rende nulla
l’omologazione UE del prodotto.
JP - 適合性宣言に記載されている宣言の目的は、 関連する欧州連合整合法に
準拠することです。
- 2011 年 6 月 8 日付「電気・電子製品に含まれる特定有害物質の使用制限に
関する」2011/65/EU。
次の標準規格にも適合しています:
- EN 50581:2012
警 告! エンジンを改造すると、この製品の EC 型式認証が無効になりま
す 。
KO - 준수 선언문에 명시된 선언 목표는 다음 관련 연합 조화법을
준수하는 것입니다.
- 2011년 6월 8일 “전기 및 전자 장치의 특정 위험 물질 사용에 관한 제한”
2011/65/EU
다음 표준이 적용되었습니다.
- EN 50581:2012
경고! 엔진을 개조하면 이 제품의 EU 형식 승인이 무효화됩니다.
EE - Vastavusdeklaratsioonis kirjeldatud deklaratsiooni objekt vastab
Euroopa Liidu asjakohastele ühtlustamise õigusaktidele:
- 8. juuni 2011. a., „teatavate ohtlike ainete kasutamise piiramise kohta
elektri- ja elektroonikaseadmetes” 2011/65/EL.
Rakendatud on järgmisi standardeid:
- EN 50581:2012
ETTEVAATUST! Mootori igasugune moditseerimine, muutmine või
rikkumine tühistab toote EL-i tüübikinnituse.
LV - Atbilstības deklarācijā aprakstītais deklarācijas priekšmets atbilst
attiecīgajiem Savienības saskaņošanas tiesību aktiem:
- 2011. gada 8. jūnija Direktīva 2011/65/ES par dažu bīstamu vielu
izmantošanas ierobežošanu elektriskās un elektroniskās iekārtās.
Ir piemēroti šādi standarti:
- EN 50581:2012
BRĪDINĀJUMS! Motora atvēršana anulē šī ķēdes zāģa ES tipa
apstiprinājumu.
LT - Atitikties deklaracijoje apibūdintas deklaracijos objektas atitinka
atitinkamus Sąjungos suderintus įstatymus:
- 2011 m. birželio 8 d. direktyvos 2011/65/ES dėl tam tikrų pavojingų
medžiagų naudojimo.
Pritaikyti tokie standartai:
- EN 50581:2012
PERSPĖJIMAS! Variklio modikavimas panaikina šio produkto ES
tipo patvirtinimą.

597653801 Rev A 2019-03-22
SI - Predmet izjave, opisan v in Izjavi o skladnosti, je skladen z veljavnimi
usklajenimi pravili združenja:
- z dne 8. junija 2011 o omejevanju uporabe nekaterih nevarnih snovi v
električni in elektronski opremi 2011/65/EU.
Uporabljeni so naslednji standardi:
- EN 50581:2012
OPOZORILO! Zaradi predelave motorja se razveljavi EU-
homologacija tega izdelka.
HU - A megfelelőségi nyilatkozatban leírt nyilatkozat tárgya megfelel a
releváns Uniós harmonizációs jogszabályoknak:
- a 2011. június 8-i, „az egyes veszélyes anyagok elektromos és
elektronikus berendezésekben való alkalmazásának korlátozására”
vonatkozó irányelv 2011/65/EU.
A következő szabványok kerültek alkalmazásra:
- EN 50581:2012
VIGYÁZAT! A motor módosítása érvényteleníti a termékre vonatkozó
európai uniós típusjóváhagyást.
PL - Przedmiot opisany w deklaracji zgodności jest zgodny z odpowiednim
unijnym prawodawstwem harmonizacyjnym:
- dyrektywie 2011/65/UE z 8 czerwca 2011 r. dotyczącej ograniczenia
użycia niektórych substancji niebezpiecznych w sprzęcie elektrycznym i
elektronicznym.
Zastosowanie mają następujące normy:
- EN 50581:2012
OSTRZEŻENIE! Ingerencja w silnik powoduje unieważnienie
europejskiego zatwierdzenia typu produktu.
CZ - Předmět prohlášení popsaný v prohlášení o shodě splňuje požadavky
příslušných harmonizačních zákonů Unie.
- ze dne 8. června 2011 „o omezení používání některých nebezpečných
látek v elektrických a elektronických zařízeních“ 2011/65/EU.
Byly uplatněny následující standardní normy:
- EN 50581:2012
VÝSTRAHA! Manipulace s motorem vede k zneplatnění typového
schválení EU tohoto výrobku.
SK - Predmet vyhlásenia opísaný vo Vyhlásení o zhode je v súlade s
relevantnými právnymi predpismi Európskej únie pre zosúlaďovanie:
- z 8. júna 2011 „o obmedzení používania určitých nebezpečných látok v
elektrických a elektronických zariadeniach“, 2011/65/EÚ.
Výrobok vyhovuje nasledujúcim normám:
- EN 50581:2012
VAROVANIE! Nepovolená manipulácia s motorom ruší platnosť
typového schválenia tohto výrobku pre EÚ.
HR - Predmet izjave naveden u izjavi o sukladnosti u skladu je s
mjerodavnim zakonima Unije o harmonizaciji:
- od 8. lipnja 2011. „o ograničenoj upotrebi određenih opasnih tvari u
električnoj i elektroničkoj opremi“ 2011/65/EU.
Primijenjeni su sljedeći standardi:
- EN 50581:2012
UPOZORENJE! Petljanjem po motoru gubite pravo na odobrenje
EU-a ovog proizvoda.
RS - Predmet d eklaracije opisan u Deklaraciji o usklađenosti je usklađen s
relevantnim zakonodavstvom u harmonizaciji u Uniji:
- od 8. juna 2011. „o ograničenju upotrebe određenih opasnih supstanci u
električnoj i elektronskoj opremi“ 2011/65/EU.
Primenjeni su sledeći standardi:
- EN 50581:2012
UPOZORENJE! Neovlašćene prepravke motora poništavaju EU tip
odobrenja za ovaj proizvod.
BA - Predmet deklaracije opisan u Deklaraciji o usklađenosti je usklađen s
relevantnim zakonodavstvom u harmoniziranju u Uniji:
- od 8. juna 2011. “o ograničenju upotrebe određenih opasnih tvari u
električnoj i elektronskoj opremi” 2011/65/EU.
Primijenjeni su sljedeći standardi:
- EN 50581:2012
UPOZORENJE! Neovlaštenim otvaranjem proizvoda poništava se
EU odobrenje tipa ovog proizvoda.
RO - Obiectul declaraţiei, descris în Declaraţia de conformitate, este
conform cu legislaţia de armonizare aplicabilă a Uniunii:
- din 8 iunie 2011 privind „restricțiile de utilizare a anumitor substanțe
periculoase cu echipamente electrice și electronice” 2011/65/UE.
Au fost aplicate următoarele standarde:
- EN 50581:2012
AVERTISMENT! În urma modicării neautorizate a motorului, este
anulată aprobarea de tip UE pentru acest produs.
TR - Uygunluk Beyanı’nda belirtilen beyanın konusu ilgili Avrupa Birliği
uyumluluk yönetmeliğine uygunluktur:
- 8 Haziran 2011 Perşembe tarihinden itibaren ”elektrikli ve elektronik
ekipmanlardaki belirli tehlikeli maddelerin kısıtlanmasına ilişkin olarak”
2011/65/EU.
Aşağıdaki standartlar uygulanmıştır:
- EN 50581:2012
UYARI! Motorun kurcalanması bu ürünün AB tip onayını geçersiz
kılar.
RU - Объект декларации, описанный в Декларации о соответствии,
соответствует применимому законодательству Европейского Совета по
унификации норм:
- от 8 июня 2011 года “об ограничении использования определенных
опасных веществ в электрическом и электронном оборудовании”
2011/65/EU.
Применяются следующие стандарты:
- EN 50581:2012
ПРЕДУПРЕЖДЕНИЕ! В случае вмешательства в работу
двигателя данное изделие перестанет соответствовать нормативам
ЕС.
UA - Об’єкт, описаний у Декларації відповідності, відповідає вимогам
таких уніфікаційних законодавчих документів Євросоюзу:
- Від 8 червня 2011 р. «Про обмеження використання деяких
небезпечних речовин в електричному та електронному обладнанні»
2011/65/EU.
Застосовано такі стандарти:
- EN 50581:2012
УВАГА! Внесення змін у двигун позбавляє чинності сертифікацію
ЄС для цього виробу.
BG - Предметът на декларацията, описан в Декларацията за
съответствие, е в съответствие със свързаното законодателство за
хармонизиране на Съюза:
- от 08 юни 2011 г. “по отношение на ограничението за използване
на определени опасни вещества в електрическо и електронно
оборудване” 2011/65/ЕС.
Приложени са следните стандарти:
- EN 50581:2012
ПРЕДУПРЕЖДЕНИЕ! Намесата в двигателя прави невалидно
ЕС одобрението на тип на този продукт.
GR - Το αντικείμενο της δήλωσης που περιγράφεται στη Δήλωση
Συμμόρφωσης συμμορφώνεται με τη σχετική νομοθεσία εναρμόνισης της
Ένωσης:
- της 8ης Ιουνίου 2011 “σχετικά με τον περιορισμό της χρήσης ορισμένων
επικίνδυνων ουσιών σε είδη ηλεκτρικού και ηλεκτρονικού εξοπλισμού”
2011/65/ΕΕ.
Εφαρμόστηκαν τα ακόλουθα πρότυπα:
- EN 50581:2012
ΠΡΟΗΙΔΟΠΟΙΗΣΗ! Οποιαδήποτε μη εξουσιοδοτημένη παρέμβαση
στον κινητήρα ακυρώνει την έγκριση τύπου ΕΕ αυτού του προϊόντος.


Original instructions
´®z+YJJ¶6=¨
´®z+YJJ¶6=¨
2019-04-17
1157424-26