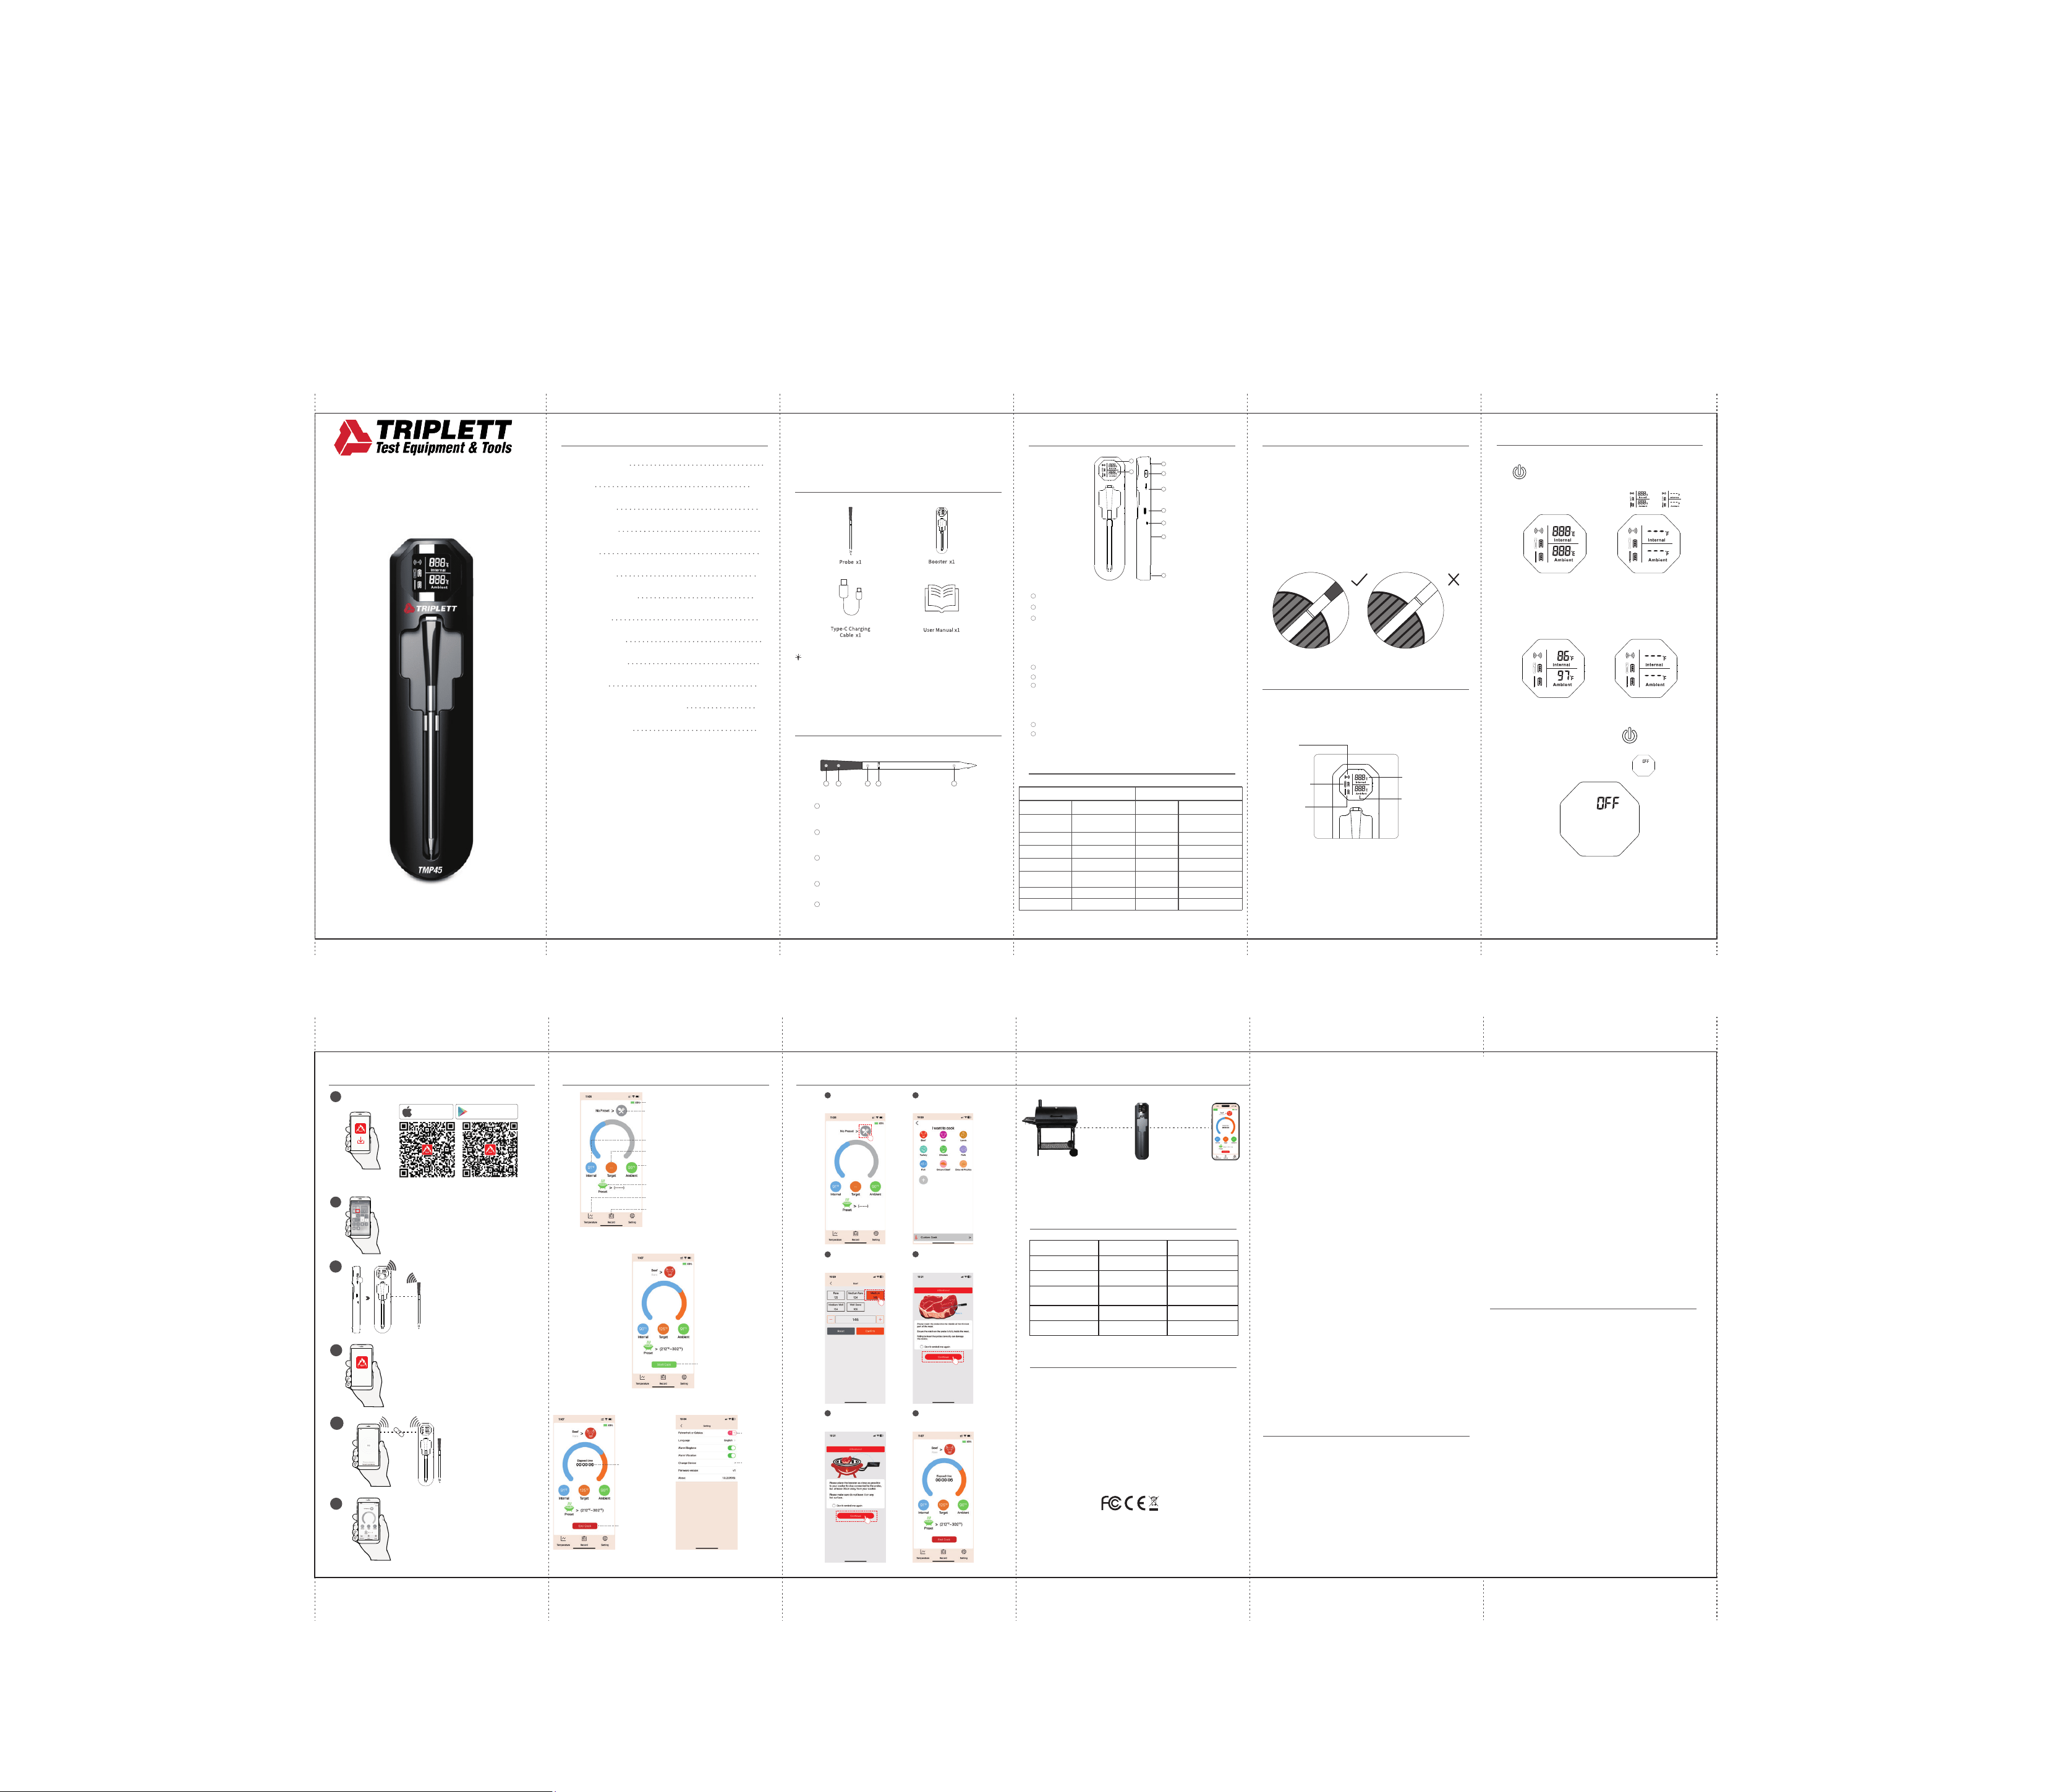
VIII. Connection Settings
1
Download the Temprobe APP
Android SystemiOS System
GET ON
Google Play
Download O n Th e
App Store
2
Turn on Bluetooth
Pairing
3
This step is needed when using
the probe for the first time or
after replacing it. Once paired,
you don't need to do it again for
future use.
4
Turn on the app
Connect
5
Let’s start cooking!
6
X. Cooking Settings
Choose the type of meat
you’re cooking.
2 Step
Tap to enter the preset
meat options.
1 Step
Set the meat temperature
and confirm.
3 Step
Insert the probe as
required and proceed.
4 Step
XI. Trouble Shooting
XII. Certifications
FCC Statement:
This device complies with part 15 of the FCC Rules.
Operation is subject to the following two
conditions:
(1) This device may not cause harmful
Interference, and
(2) This device must accept any interference
received, including interference that may cause
undesired operation.
WARNING: Any changes or modifications not
expressly approved by the party responsible for
compliance could void the user's authority to
operate the equipment.
Let’s start cooking!
6 Step
Position the booster
appropriately and continue.
5 Step
If this equipment does cause harmful
interference to radio or television reception,
which can be determined by turning the
equipment o and on, the user is encouraged to
try to correct the interference by one or more of
the following measures:
IX. APP Interface
Probe Battery
Tap to Access Meat Presets
Real-time Meat Internal Temperature
Meat Cooking Target Temperature
Real-time Oven Temperature
Tap to Access Preset Oven Target Temperature
Tap to View Temperature Trends During Cooking
Tap to View Cooking History Records
Tap to Start Cooking
Record Cooking Time
Tap to End Cooking
°F/°C Switch
Change Device
Search for
Devices
User Manual
I. Package Contents
NOTE:
II. Probe Diagram
5 1 4 3 2
Ambient Temperature Sensor:
Located towards the ceramic end,
it measures the range of 14°F-572°F/-10°C-300°C.
Internal Temperature Sensor:
Located at the tip,
it measures the range of 14°F-212°F/-10°C-100°C.
Safety Notch:
When inserting the probe into meat for measurement,
ensure it goes deep enough to cover this notch.
Stainless Steel:
The probe is made of durable stainless steel.
High-density Zirconia Ceramic Handle:
The handle is made of ceramic for comfortable
and safe handling.
1
2
3
4
5
III. Booster Diagram
3
4
7
1
2
5
6
8
1
2
3
4
5
6
7
IV. Specifications
Probe Booster
Temperature Range
Accuracy
Dimensions
Water Resistance
Bluetooth Output Power
Probe Material
Battery Life
Charging Time
Internal 14°F - 212°F /-10°C-100°C
Ambient: 14°F-572°F/-10°C-300°C
Internal: ±1.8°F/±1°C at
32°F-212°F/0°C-100°C
Ambient: ±5.4°F/±3°C
5.02”(L) × Φ0.23”dia
IP67
+8dBm
Food grade safety
304 Stainless Steel
48h
30 min
0.79” × 0.79” screen
7.09 × 1.75 × 0.75 inches
3.7 volt 550mAh
IPX2
Bluetooth (device only
supports 2.4 GHz)
The display automatically darkens
after 5 minutes of no operation
Display
Dimension
Battery
Water Resistance
Connection
Energy Saving
Mode
Battery Life
Charging Time
1 hour
48h
1. Before using your device, ensure the product
is fully charged and you have reviewed the
important safety information.
2. Download the free Temprobe App for iOS or Android.
3. Insert the probe into the meat.
Ensuring that it passes the Safe Notch and that
the internal sensor is in the center of the meat.
V.
VI. Operation
Panel Instruction
Connection
Indicator
Booster Battery
Indicator
Probe Battery
Indicator
Internal Temperature
Display
Ambient Temperature
Display
VII. Power Control
Power On: To power on the booster, press
the button at the side of booster for 3 seconds.
The booster will activate immediately
and the screen will change from to .
Power o: Press and hold the button for
3 seconds to shut down the screen.
The top right screen will display .
Package Contents I
Diagram II&III
Specifications IV
V
Operation VI
Connection Settings VIII
Cooking Settings
X
Trouble Shooting XI
Certification XII
Maintenance & Safety Guidelines XIII
App Interface IX
CONTENTS
Power Control VII
NOTE: This equipment has been tested and found
to comply with the limits for a Class B digital
device, pursuant to Part 15 of the FCC Rules. These
limits are designed to provide reasonable
protection against harmful interference in a
residential installation. This equipment generates,
uses and can radiate radio frequency energy and,
if not installed and used in accordance with the
instructions, may cause harmful interference to
radio communications. However, there is no
guarantee that interference will not occur in a
particular installation.
XIII. Maintenance & Safety Guidelines
1. Make sure the probe is clean and completely
dry before placing it in the booster’s
charging nest. Clean probes charge better.
Wash with mild soapy water and avoid using
abrasive sponges or cleaners that could
scratch it.
2. Clean the booster by wiping it with a damp
cloth. Remember, the booster is not
dishwasher-safe or waterproof, so don’t
submerge it in water.
Temprobe
100 Meter
Open Fie ld
1 Meter
Open Fie ld
8
8
Booster Prompt
“Probe Battery Low”
The Probe's battery power
is at a low level.
“Booster Battery Low”
“Overheating”
Possible Cause
The Booster's battery power
is at a low level.
The Probe has been exposed
to an overheated environment.
Solution
Plug the Probe into the
Booster to charge it.
Use the included Type-C USB
cable to charge the Booster.
Remove the Probe from the
heat source and allow it to cool
down before using it again.
The Probe and the booster
need to be repaired.
Quickly press the power
button 3 times to repair
“Booster has Power but
Won't Turn On/O”
System Freeze.
Use a pointed object to
press Reset button on the side.
Energy Saving Mode: The display automatically
darkens after 5 minutes of no operation.
Press the button once to restore the screen to
normal brightness.
Remove the probe from the booster—it will
automatically connect. Once connected, the probe's
temperature will display normally. If itfails to auto-
connect,press the power button 3 timesto re-pair.
Connection
successful
Connection
failed
“Probe Not Connecting to
Boosterat Close Range”
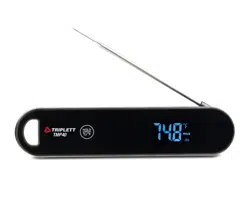
Wireless Smart Food Thermometer
TMP45
Upon receipt of the product, please charge the Booster for one
hour before use. This helps prevent any potential disruption in
functionality due to reduced battery levels during the transport.
Display Screen: Allows you to cook in low-light condition.
Probe Icon: Identify probe through the numbers.
Pair/Silence: Serves 4 functions:
-Press and hold for 3 seconds to turn ON/OFF the booster.
-Tap it 3 times until you hear a “beep” sound to pair the probe.
-Press once to silence the booster’s alarm when reaching the target temp.
-Press once to turn back to bright mode after the screen was dimmed.
Reset: To reset the booster if the function is abnormal or crashes.
Type-C Charging Port: 5V 1500mA minimum required.
Buzzer: Will sound when the internal or ambient temperature
reaches its preset range. If the internal temperature exceeds
100°C/212°F or the ambient temperature exceeds 300°C/572°F, an
over-temperature warning will activate.
Non-slip Mat: Preventing the device from sliding or falling o.
Magnets: Built-in magnets for mounting on metal surfaces.
First-Time Use
Note: For optimal performance, keep the booster within 1 meter from the oven
to maintain signal strength and protect it from high temperatures. If the
booster doesn't display the probe temperature, move it closer to the oven or
align it with the booster. Obstacles between the booster and phone can
significantly reduce connection range.
- Reorient or relocate the receiving antenna.
- Increase the separation between the equipment and
receiver.
- Connect the equipment into an outlet on a circuit
dierent from that to which the receiver is connected.
- Consult the dealer or an experienced radio/TV
technician for help.
- The device has been evaluated to meet general RF
exposure requirement. The device can be used in
portable exposure condition without restriction.
3. Always insert the probe beyond the safety notch to
avoid damage and reduce injury risk. Do not use the
probe in microwave ovens.
4. Keep the booster away from grill covers or hot surfaces.
5. Never remove the probe while it's hot. If exposed to
high heat or flames, wear eye protection when
removing it.
6. If the probe falls into the fire or direct heat, close the
grill or cooking appliance’s lid and turn o the heat.
Let it cool completely before removing.
7. Keep the probe away from hot charcoals. Don't use it
directly above hot coals. Always wear gloves when
removing the probe from meat.
8. After use, clean the probe with a kitchen towel or
rag. Rinse only when it has cooled to a normal
temperature to avoid damage.
9. After cleaning, store the probe in the booster
for charging.
10. The probe has a sharp tip. Please handle it carefully
and keep it out of reach of children.
XIV. Warranty Statement
Warranty Statement
XIV
Triplett Test Equipment oers a one-year warranty to
the original purchaser of its products. We guarantee
that our products will be free from defects in
workmanship and materials for one (1) year from the
purchase date.
This warranty does not cover:
- Products purchased from unauthorized distributors.
- Items that have been repaired or altered by
unauthorized individuals.
- Damage from misuse, abuse, misapplication,
negligence, or accidents.
- Products with altered, defaced, or removed
serial numbers.
- Accessories, including batteries.
Copyright © 2025 Triplett www.triplett.com
Thank you for choosing the Triplett TMP45 Wireless Smart Food
Thermometer. This user manual will guide you through the
setup process, explain the features and functions and provide
tips for optimal use. Please read this manual carefully before
using the device.
First - Time Use