
EXTERNAL GNSS ANTENNA
INSTALLATION INSTRUCTIONS
External Antenna Mounting Considerations
You can install the external antennas on your vehicle to get the most accurate position data for your navigation
device. For best performance, consider these guidelines when selecting the antenna mounting location.
• To ensure the best reception, you should mount the antennas in a location that has a clear, unobstructed
view of the sky in all directions.
• You should not mount the antennas near the engine or other sources of electromagnetic interference (EMI).
• You must mount the antennas at least 5 cm (2 in.) apart from each other.
GUID-8FDBDC1D-805B-4D6A-AF78-21598A5918C8 v1August 2022
Installing the External GNSS Antenna
CAUTION
Always wear safety goggles, ear protection, and a dust mask when drilling, cutting, or sanding.
NOTICE
When drilling or cutting, always check what is on the opposite side of the surface to avoid damaging the vehicle.
This antenna can be installed to provide a stronger GPS signal for your navigation device. This antenna uses a
BNC connector to connect to the dock.
1 Using the included mounting template, mark the three pilot-hole locations and trace the cable hole in the
center of the template.
2 Drill the three 3.2mm (
1
/
8
in.) pilot holes.
3 Use a 25mm (1in.) hole saw to cut the cable hole in the center.
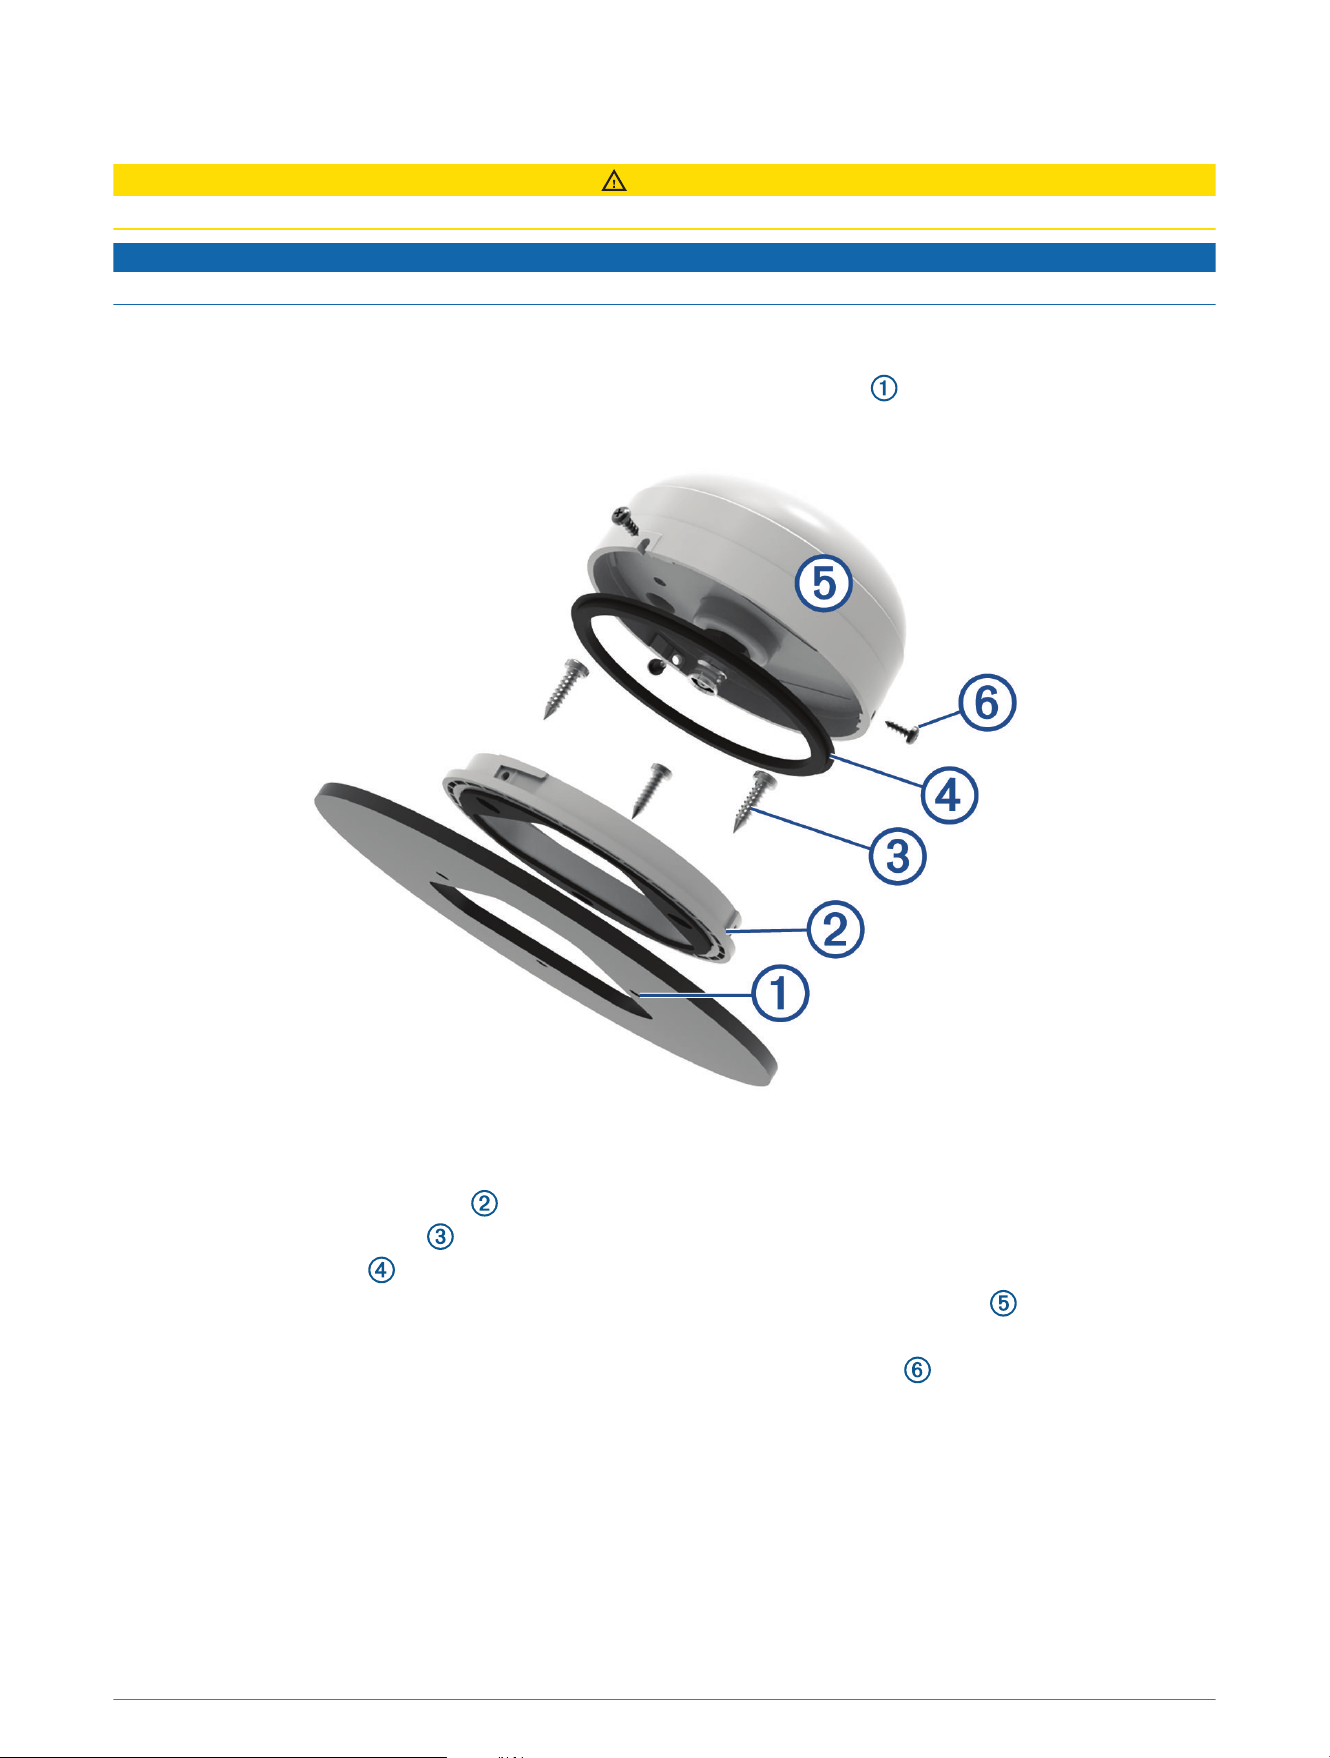
4 Place the surface-mount bracket on the mounting surface, aligning the screw holes.
5 Use the included M4 screws to secure the surface-mount bracket to the mounting surface.
6 Place the large gasket on top of the surface-mount bracket.
7 Route the antenna cable through the 25mm (1in.) hole, and connect it to the antenna .
8 Place the antenna on the surface-mount bracket, and twist it clockwise to lock it in place.
9 Secure the antenna to the mounting bracket with the included M3 set screws .
10 Route the cable into the vehicle and away from sources of electronic interference.
11 Remove the 4 screws, washers, and nuts from the mount.
2
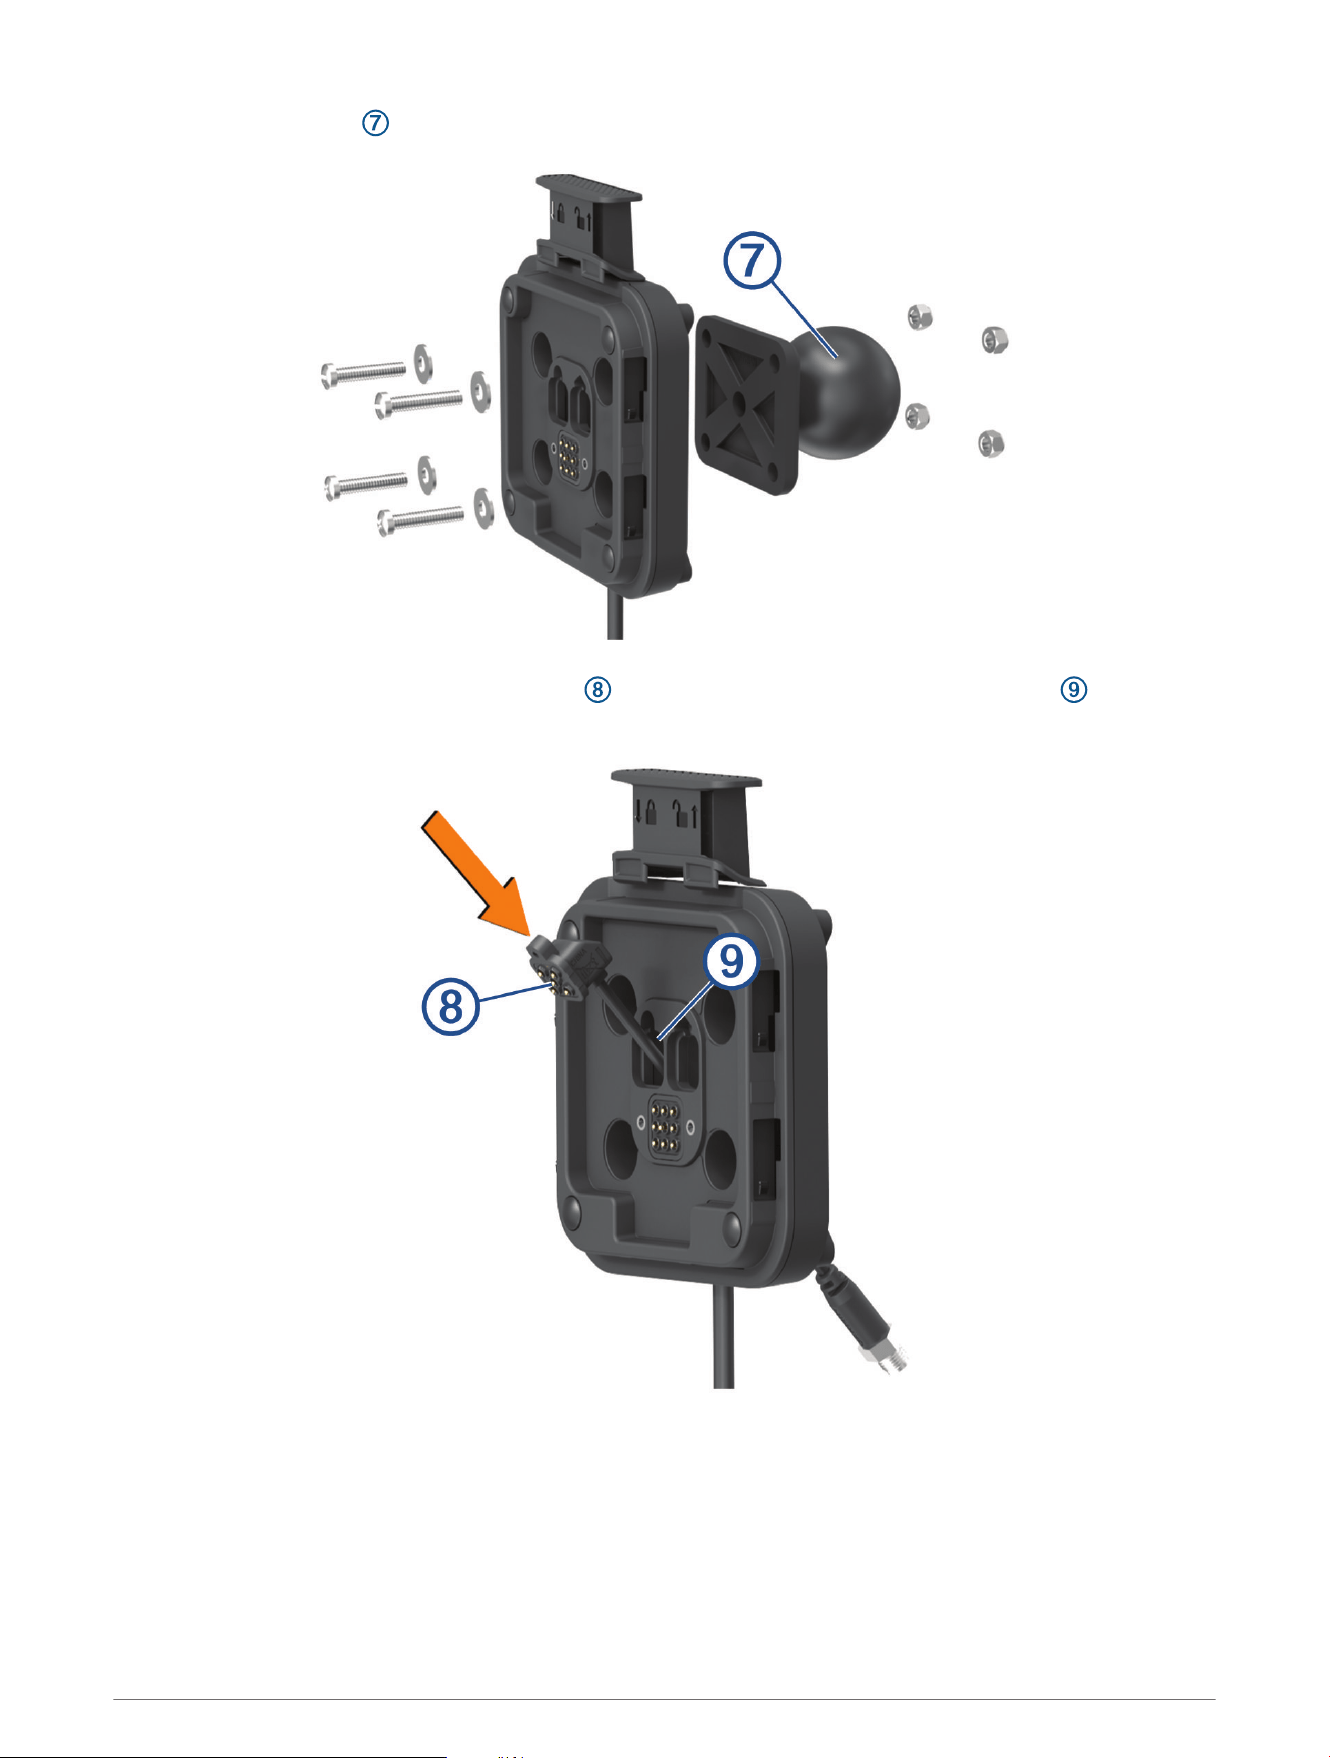
12 Remove the ball plate and Group Ride Radio (if necessary) from the mount.
13 Insert the External GNSS Antenna connector through the corresponding hole in the mount , and press
the adapter to secure it to the mount.
3
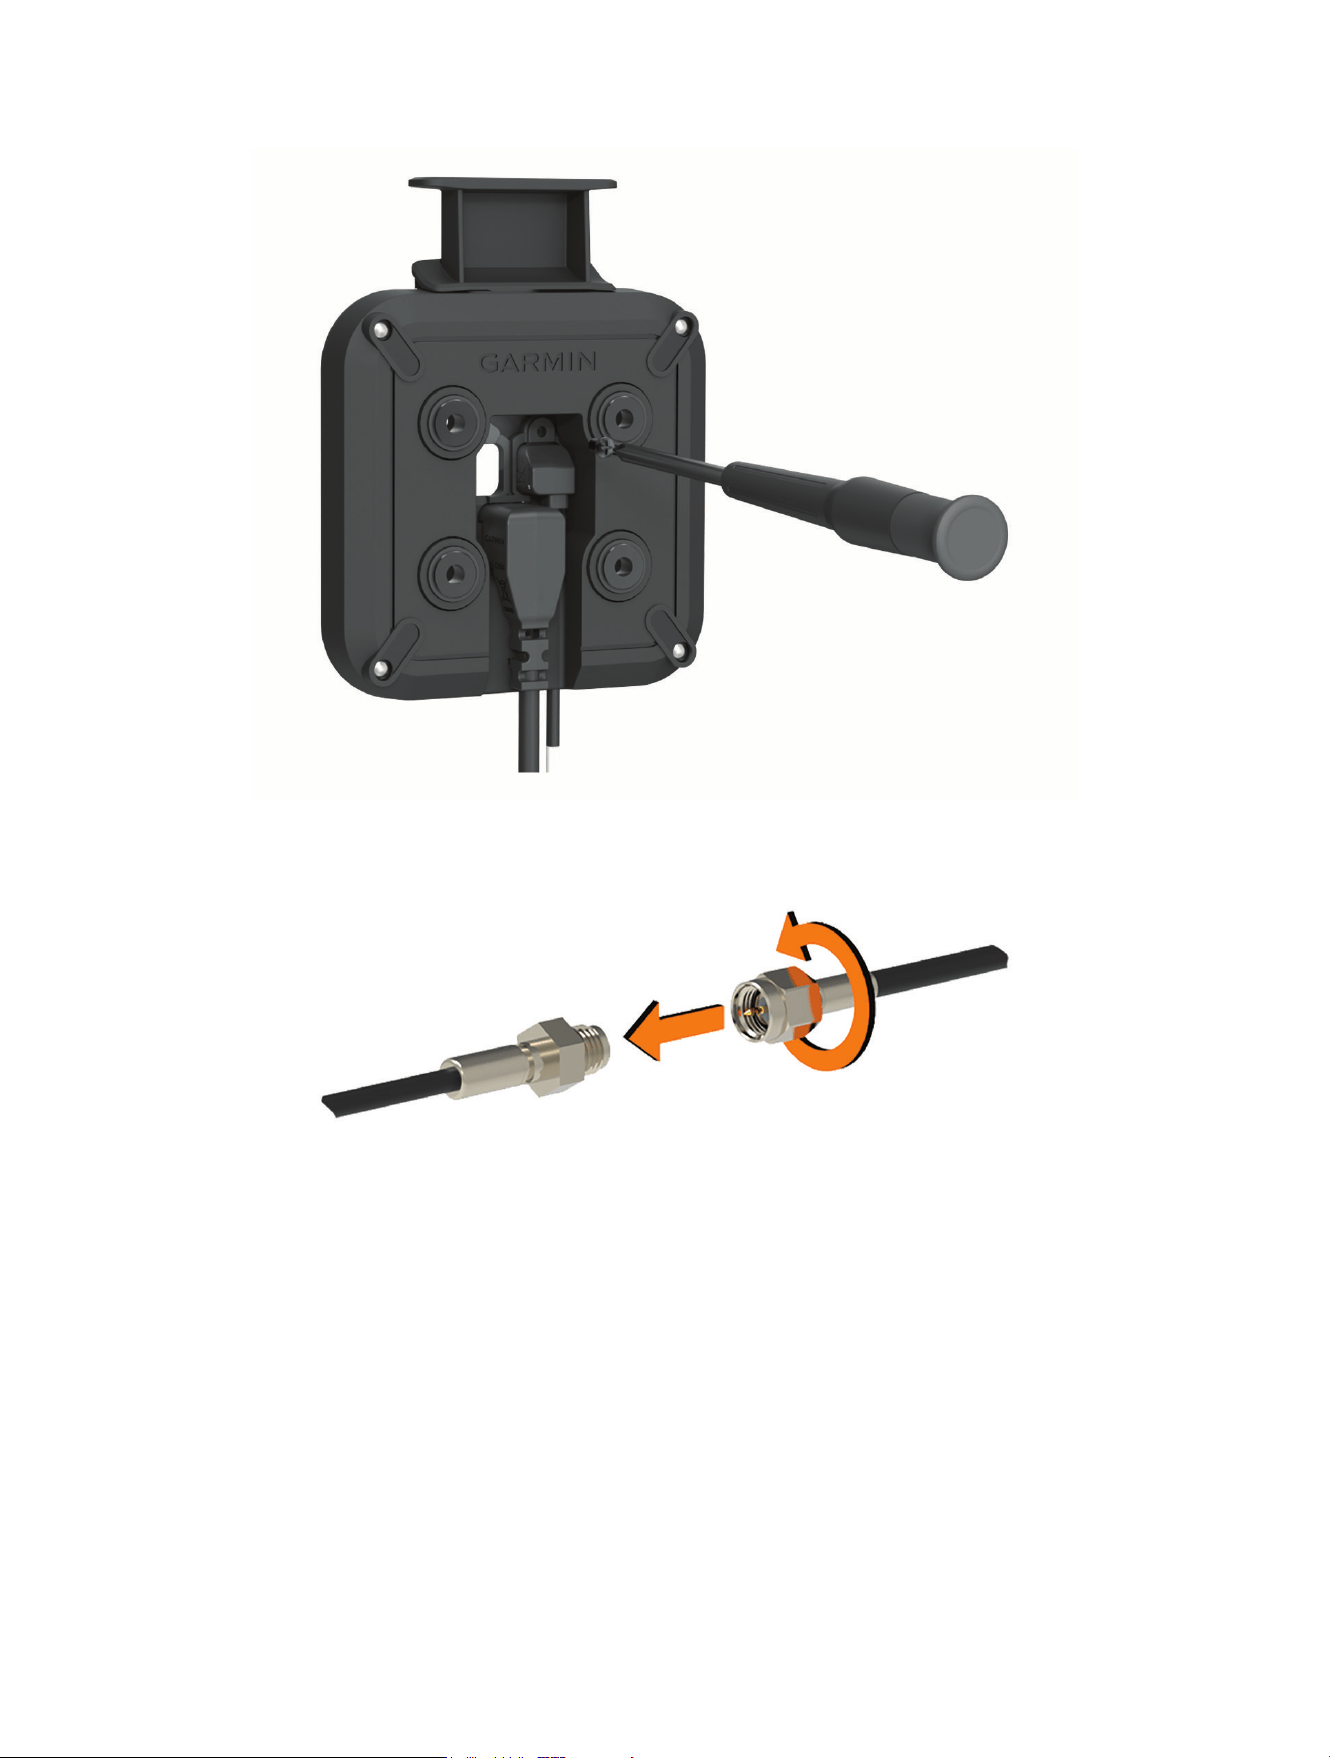
14 Using the included screw, secure the adapter to the mount from the inside of the mount.
15 Replace the mount on the ball plate, and secure the mount using the 4 existing screws, washers, and nuts.
16 Connect the External GNSS Antenna cable to the External GNSS Antenna connector on the mount.
17 Tighten the collar around the connected cables.
© 2022 Garmin Ltd. or its subsidiaries
Garmin
®
and the Garmin logo are trademarks of Garmin Ltd. or its subsidiaries, registered in the USA and other countries.
© 2022 Garmin Ltd. or its subsidiaries
support.garmin.com
